INTRO
There are a few differences in the robot combat scene of Europe compared to the rest of the world, and one of these major differences is the requirement of a removable connector, or link, as a means to turn a robot on or off, compared to a switch. One of the main things I have noticed from the last few years of events in the UK, and especially from commentating at the most recent BBB Brawl event, was how many robots were knocked out as a result of losing this link, either from getting hit directly or, more depressingly, having the link jsut pop out from the impact of a hit. This is by far the main critique links have compared to their switch counterparts, and many will argue for the latter as a result.
This post isn’t going to try and get into this debate, but rather will be a collection of dos and don’ts to maximize the security of your removable link from falling out mid-fight, while also satisfying the relevant safety criteria. I speak from a perspective of having built numerous FW and BW robots, and having next to no link failures since I started competing in 2018. This guide is mainly directed towards Beetleweights, but many of these tips also apply to Featherweights and any other classes in between (except for antweights, which almost all use switches). For this, I have sought after as many photos and stories from other robot builders as I could, and I have especially tried to get permission from any builders who have volunteered their robots as a “don’t” example, which I appreciate (for the record, I don’t intend to insult any builders, rather I want this to be as much of a learning experience as possible).
THE RULES
To start things off, I will quote all of the relevant rules to links for us as set out by the FRA Build Rules 2022, the standard used by almost every competition in the UK, and most in Europe as well:
6.1 Deactivation
Robots must incorporate a way of removing all power to weapons and drive systems
(systems that could cause potential human bodily injury) that can be operated easily
without endangering the person turning it off.
6.1.1 Removable Link
The main power cut-off MUST be an insulated, removable link, which must NOT be in
place unless the robot is in the arena or under the supervision of a technician. The link
must be removable without the use of tools. A key or switch is not allowed.
6.1.2 Accessibility
The link must be positioned in a visible part of the robot’s bodywork, fitted away from
any operating weaponry or drive, and this position must be clearly marked.
6.1.3 Covers
The link may be fitted under a cover, but the cover must be able to be opened without
the use of tools.
This already gives us some relatively clear instructions. In general, you want to have your link clear from any dangerous weapons, have its location relatively visible, and accessible without needing any tools (NOTE: The rules technically don’t stop you from requiring tools to insert the link, just removing it. I’ve only ever seen one robot do it this way, being Rust In Pieces, but honestly I’d recommend ignoring this for the convenience of everyone involved). We also have access to a cover to put over a link, so long as it can be accessed without tools. With all of this mind, let’s look at a few of the factors to consider for a link.
CONNECTOR TYPE
This is a small thing to impement, but it can be significant given how it shapes the actual characteristic of your link so much. In general, at a BW level, you will see 95% of BW links consisting of one of these connectors:
- T
- XT60
- XT30
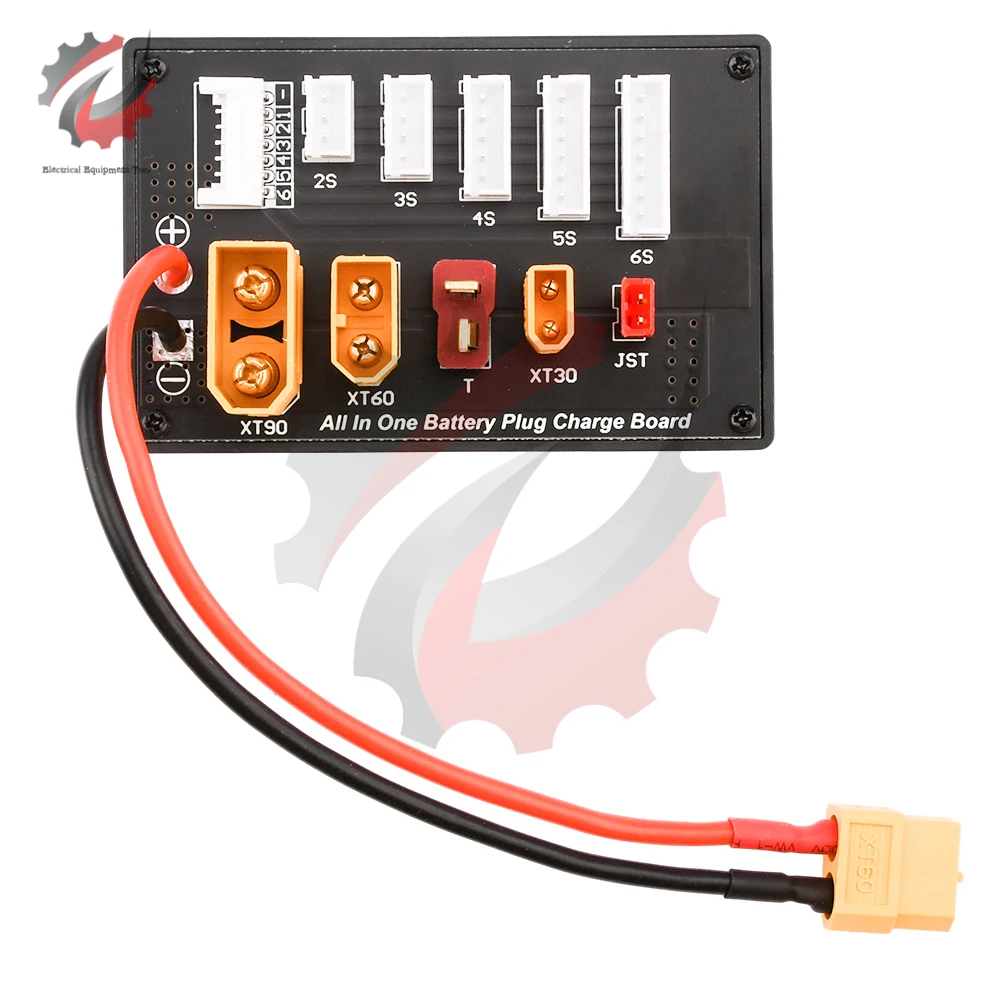
A useful comparison of the sizes of these three common connectors
Of these three, I would instantly write off the T connectors; these have been in use in FW’s and BW’s for years, and the general consensus from the community is that they are incredibly likely to pop out with minimal resistance. From the remaining two, I would highly recommend the XT30’s over the XT60’s. The XT60 is the more common connector to have around, and will see a lot of use in FW’s in particular, but at a BW level, an XT30 is lighter, smaller, and just as likely to maintain connection, and when it comes to keeping a link secure, weight and space are incredibly valuable commodities. If you are concerned with if an XT30 can carry enough current for the task at hand, keep in mind almost all BW-scale LiPo’s use an XT30, so if they can manage that, they’ll be just as good for a power link.
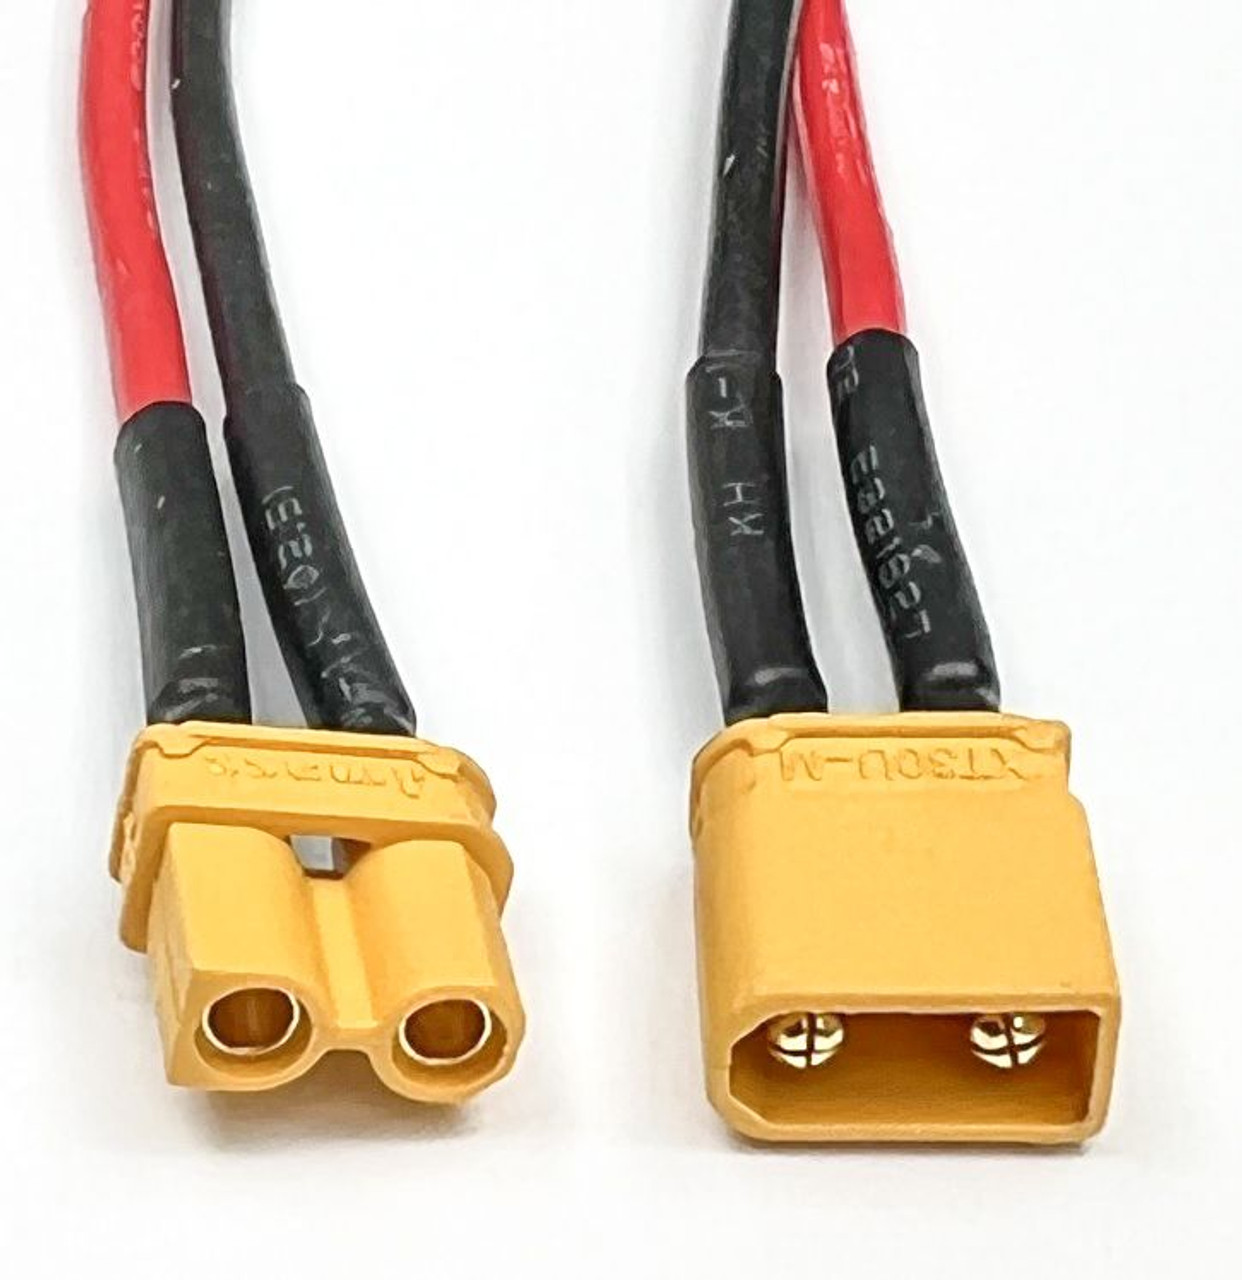
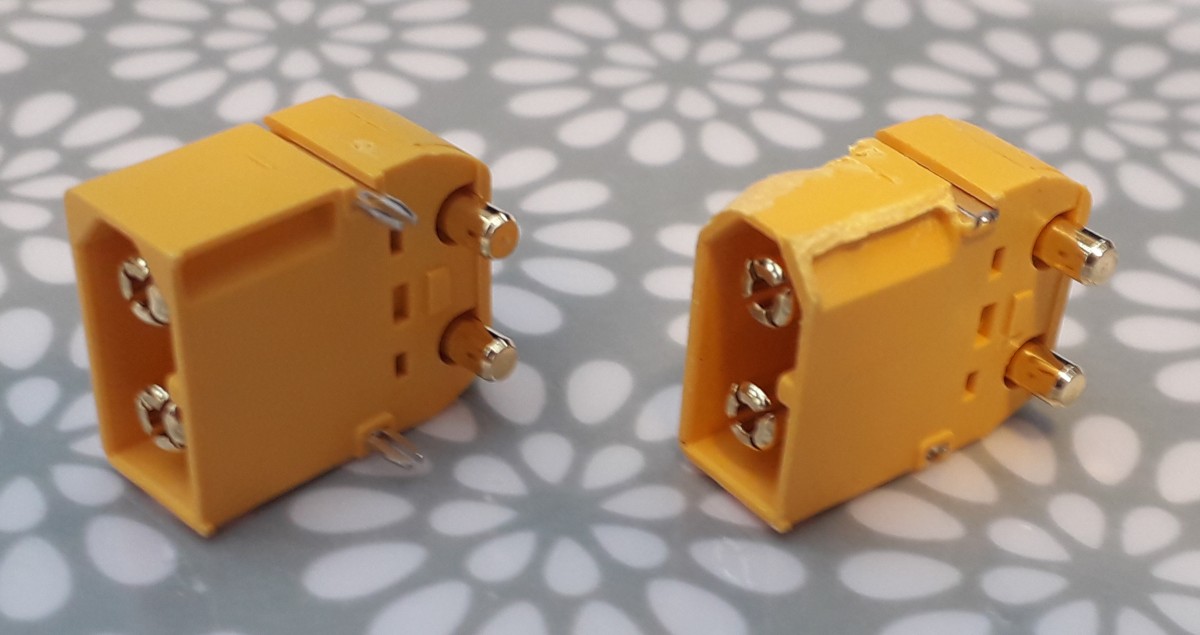
Just to clarify for this guide going forward: the left connector is a female connector, while the right connector is a male connector. If you ever get confused, focus on the (cough) metal contacts.
Bonus Tip Number 1! Not every connector will be the exact same, and you may find that some of your connectors come together and come apart easier than others. In general, you want your connectors to be as tight as possible, to ensure that any forces put through the robot don’t shake anything loose. For most of the connections in your robot, you can do this via zip ties or tape, but since that isn’t possible with a removable link, I would highly suggest sticking a screwdriver into a male connector and trying to widen the pins apart. This will make it harder to insert the link, but also way less likely to fall out in combat.
RECESSING YOUR LINK
Your first priority when it comes to a link is making sure it is positioned as far into your robot as possible. A link that is exposed in any way shape or form is basically equal to putting a flashing sign on your robot saying “Hey, hit me here to win!”. Most spinners will nearly instantly remove a link upon contact, as well as many axes, crushers, and even just a very good shove from an opponent. At their worst, these links can actually affect the mobility of your robot, causing a loss in a situation which may have been entirely preventable. For this, I have a few examples:
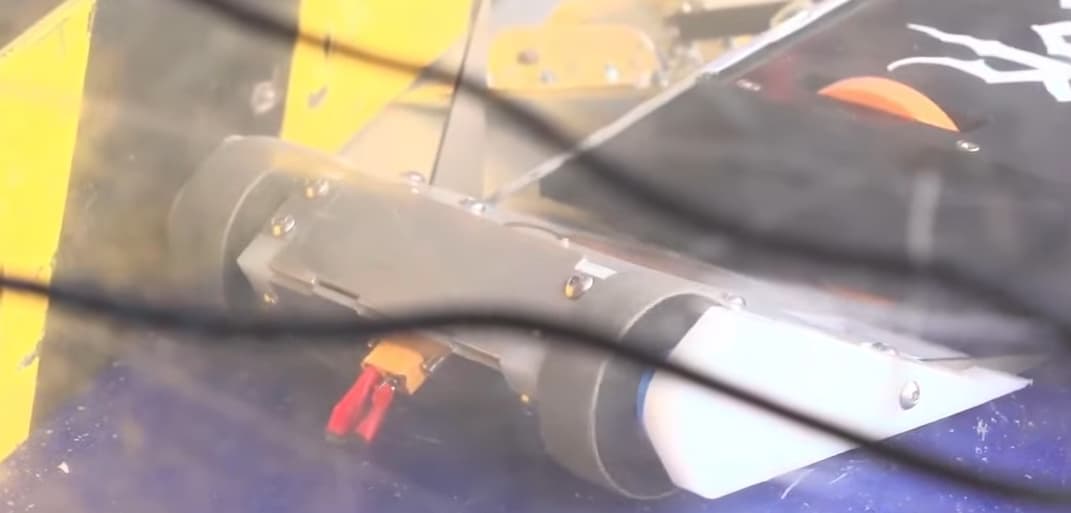
Here we see one half of “The Frenchiest Fry” from Rapture 2021. This link is already very exposed at the back, but with the bot currently running upside down, this link is practically scraping on the ground, vulnerable to even a good undercutter, which would happen later in this tournament.
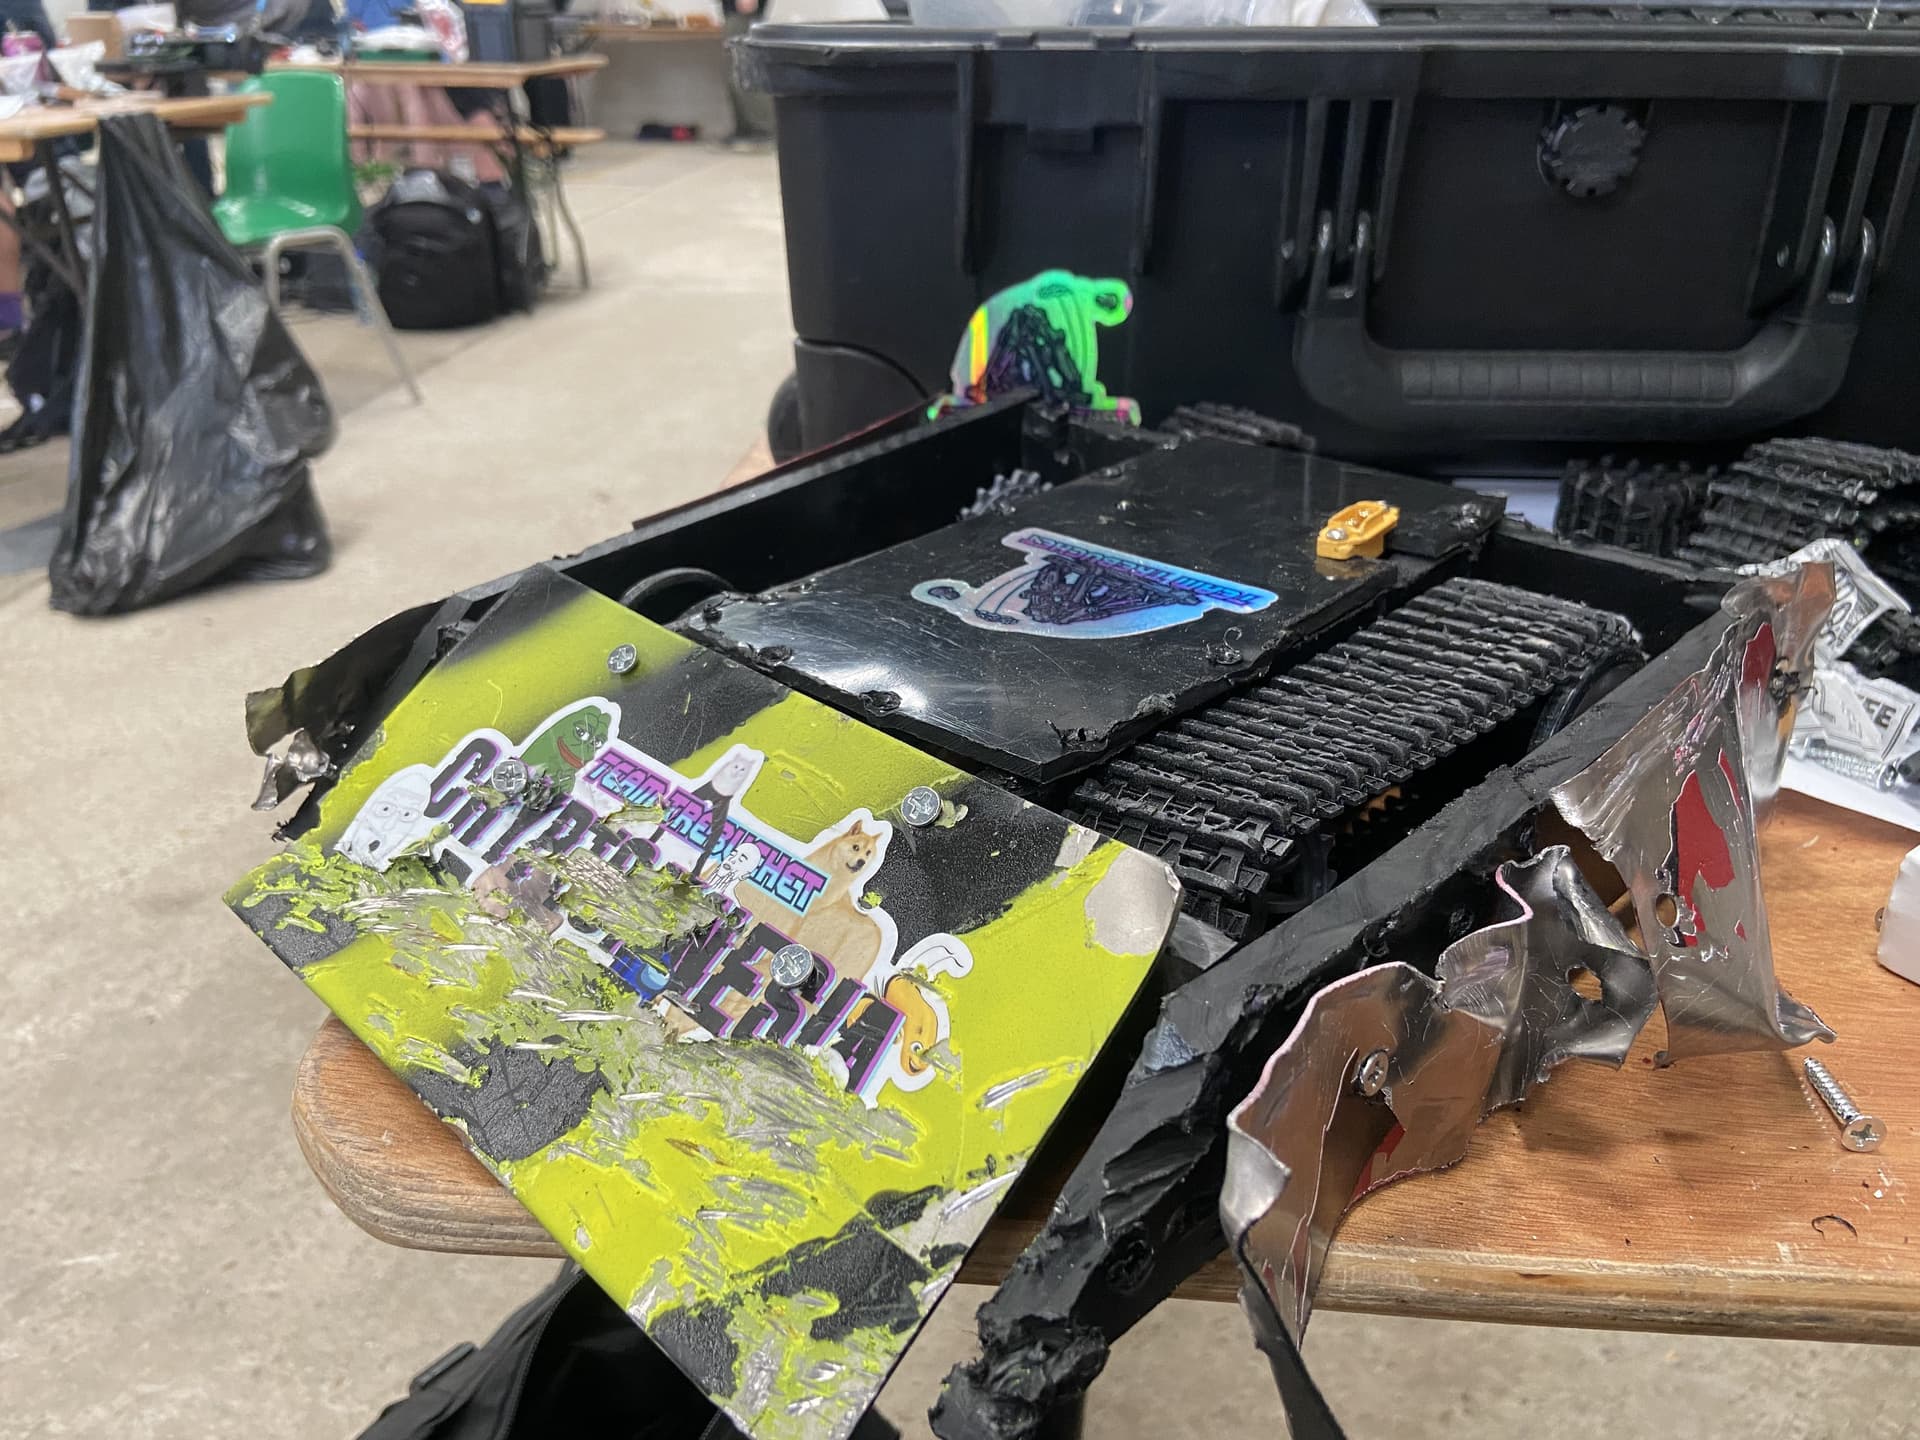
Cryptomnesia is a tracked robot with its link on the top of the design. With the tracks as they are, it’s unlikely to be able to drive upside down, but even if the tracks were higher, the robot would sit entirely on the link were it ever to be flipped.
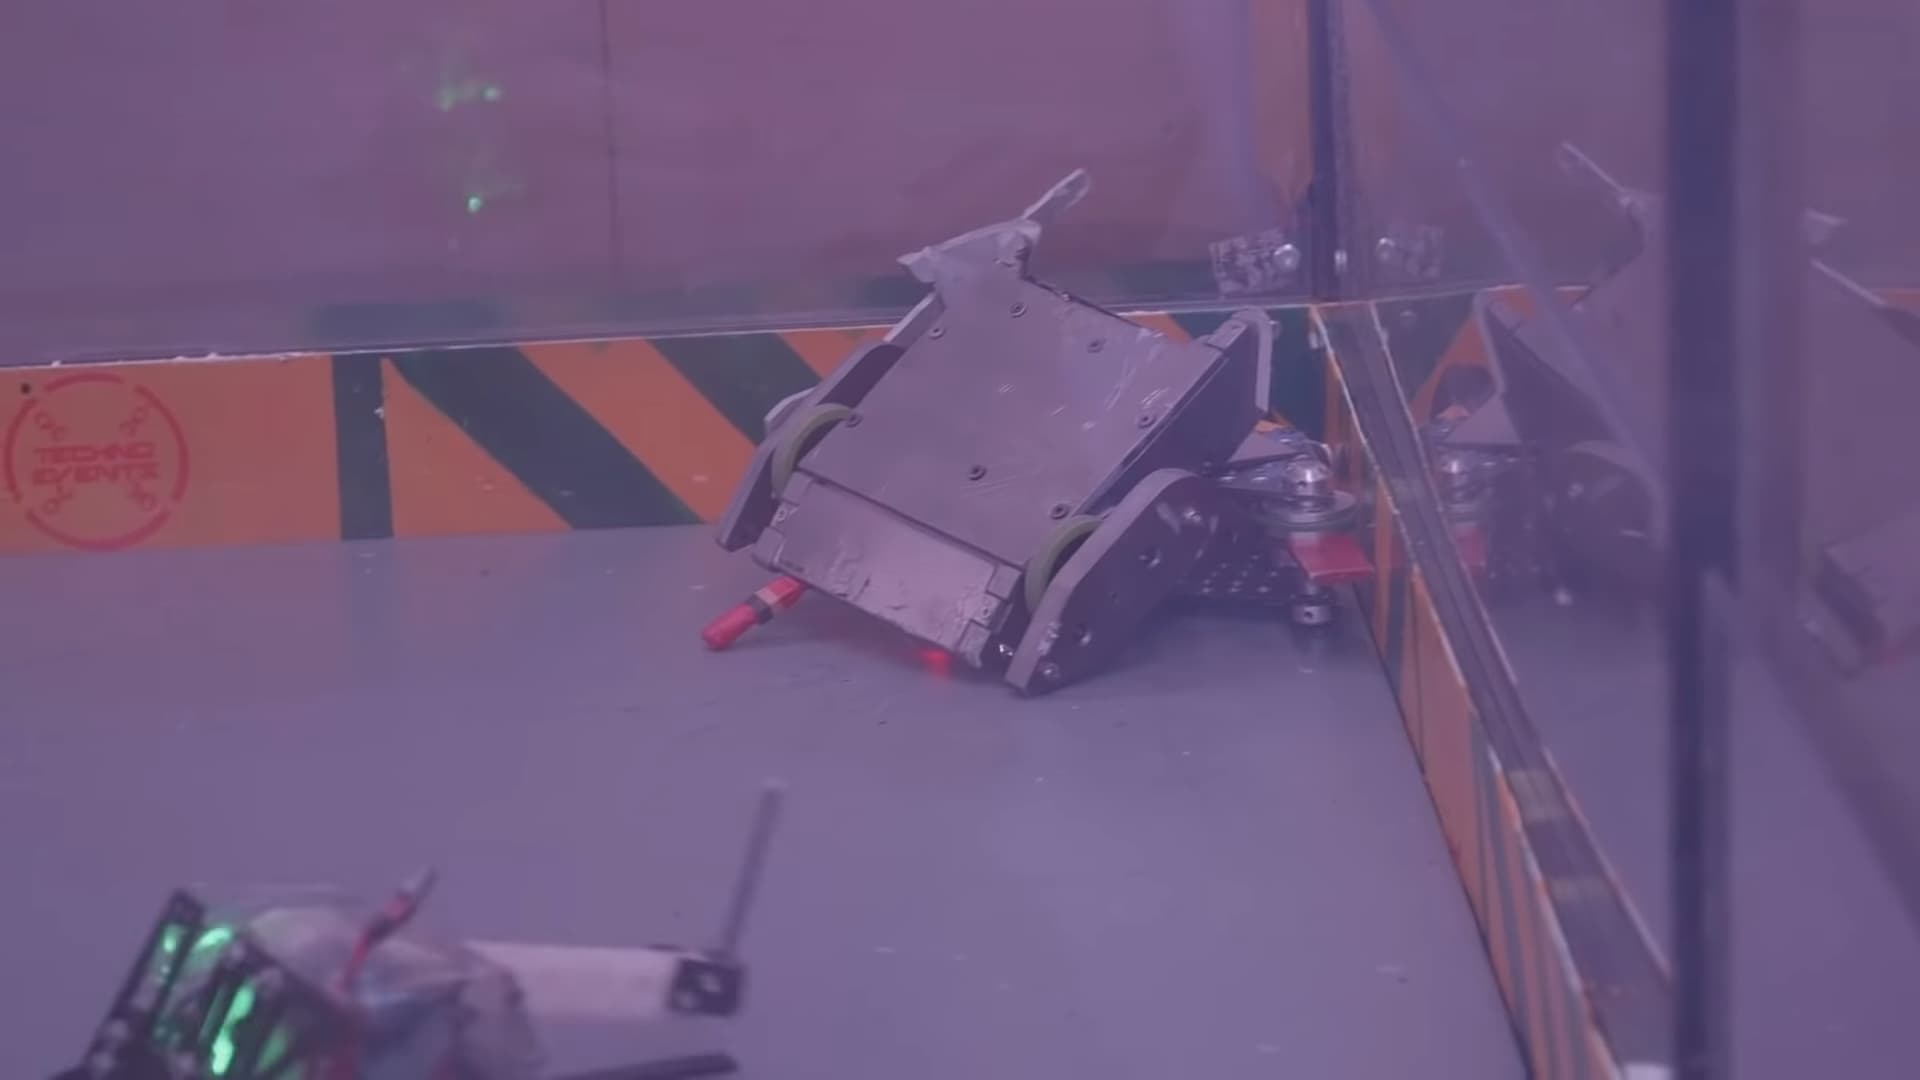
For a rather painful example, we have Sir Lance-A-Frog at Bugglebots 1. Normally, this robot should be invertible, but in this melee, it has been stacked against the wall directly on its link, preventing the wheels from touching the ground, and eliminating the bot as a result.
Bonus Tip Number 2! When you recess a link, it can be a lot harder to access it. A common trick used by builders is to have a zip tie wrapped around the loop of the link, and leaving the zip tie hanging. Due to its looser nature, a hit to it is far less likely to rip the full link out, and you can usually just tape the loose end of it to the bot, allowing for easy removal when the fight is over. Here we can see Befuddle, with a link that is just barely poking out at the top, and an easily grabbable zip tie.
POSITIONING YOUR LINK
Recessing your link is important, but just as noteworthy is your placement of your link. Many robots are designed in such a way that they very much intend to go through whatever armour you have to get at the more valuable parts of your robot, and you can generally design your robot to be better armoured at these points. For this reason, a link should generally be positioned in an area which would be the least likely to be hit by a weapon. Generally speaking, this tends to be away from your front, back, and sides, and as close to the center of the top of your robot as you can (This positioning may not be as safe as it has been previously due to the emergence of more hammer saws, but the logic still generally follows).
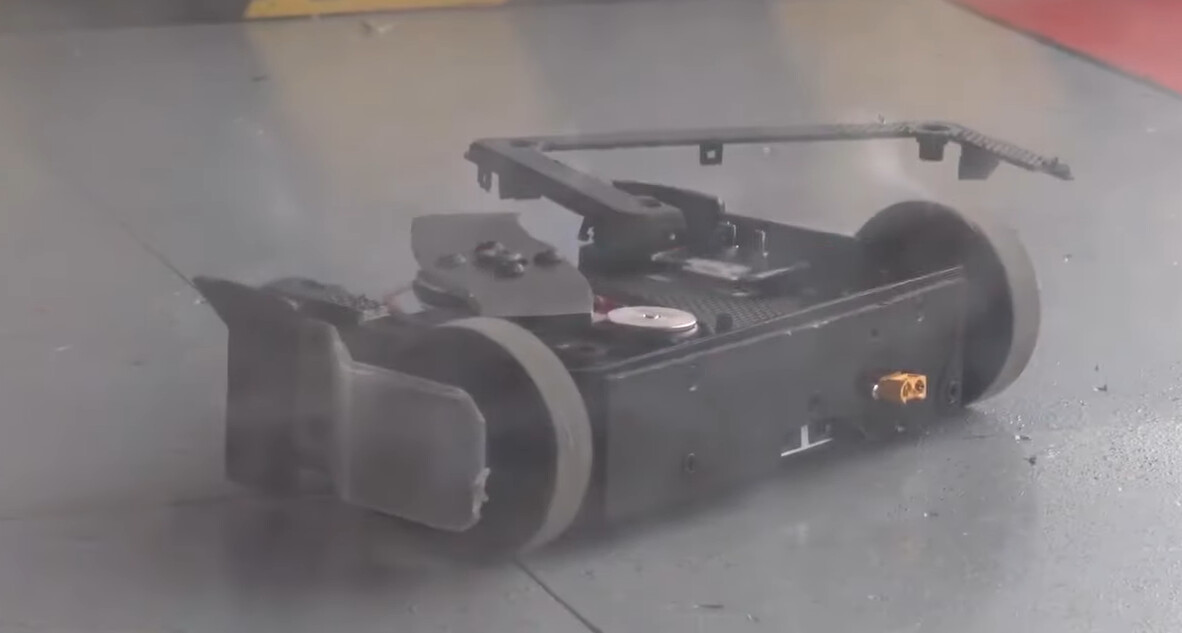
Pain Per View was an undercutter, which kept the removable link at the back of the robot but also exposed, and at a weapon height basically any vertical spinner could hit. This resulted in it losing a fight to Toxin via the link being sniped in one hit.
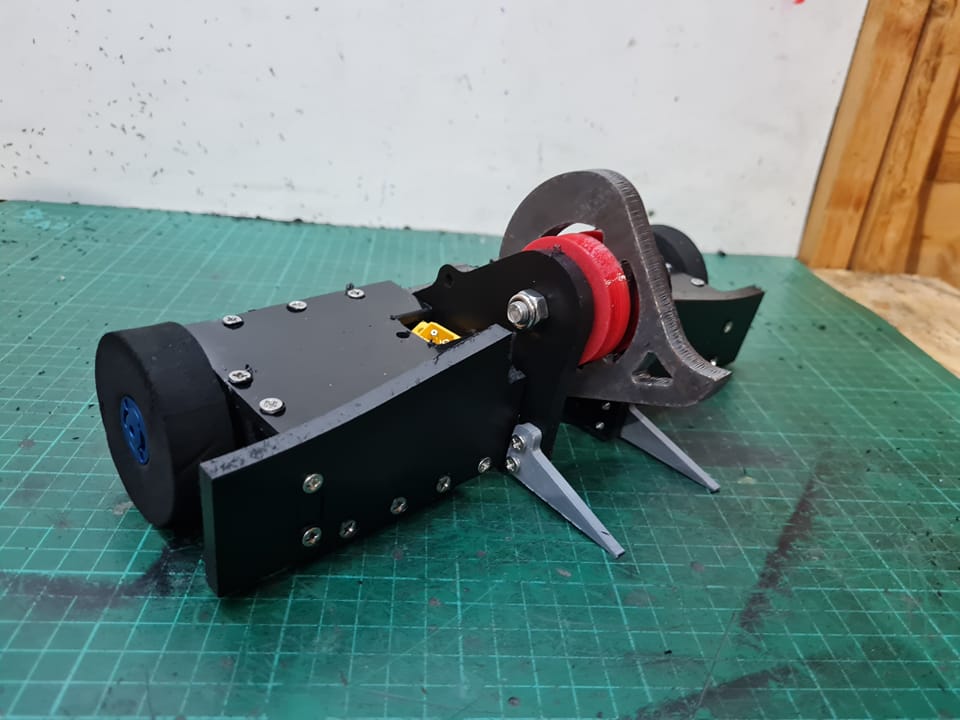
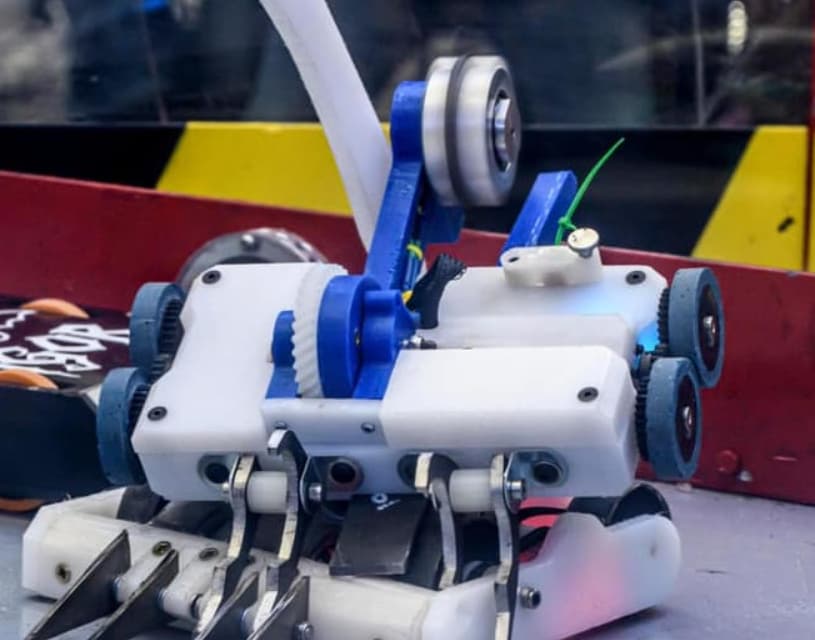
Here we see an older version of Intertia B4. This robot has the link on the top plate, but also relatively close to the main weapon bulkhead. This is meant to discourage any robots from taking aim at the link, for fear of missing and coming into contact with the spinning weaponry instead. Many vertical spinners keep their links in a similar location for this reason.

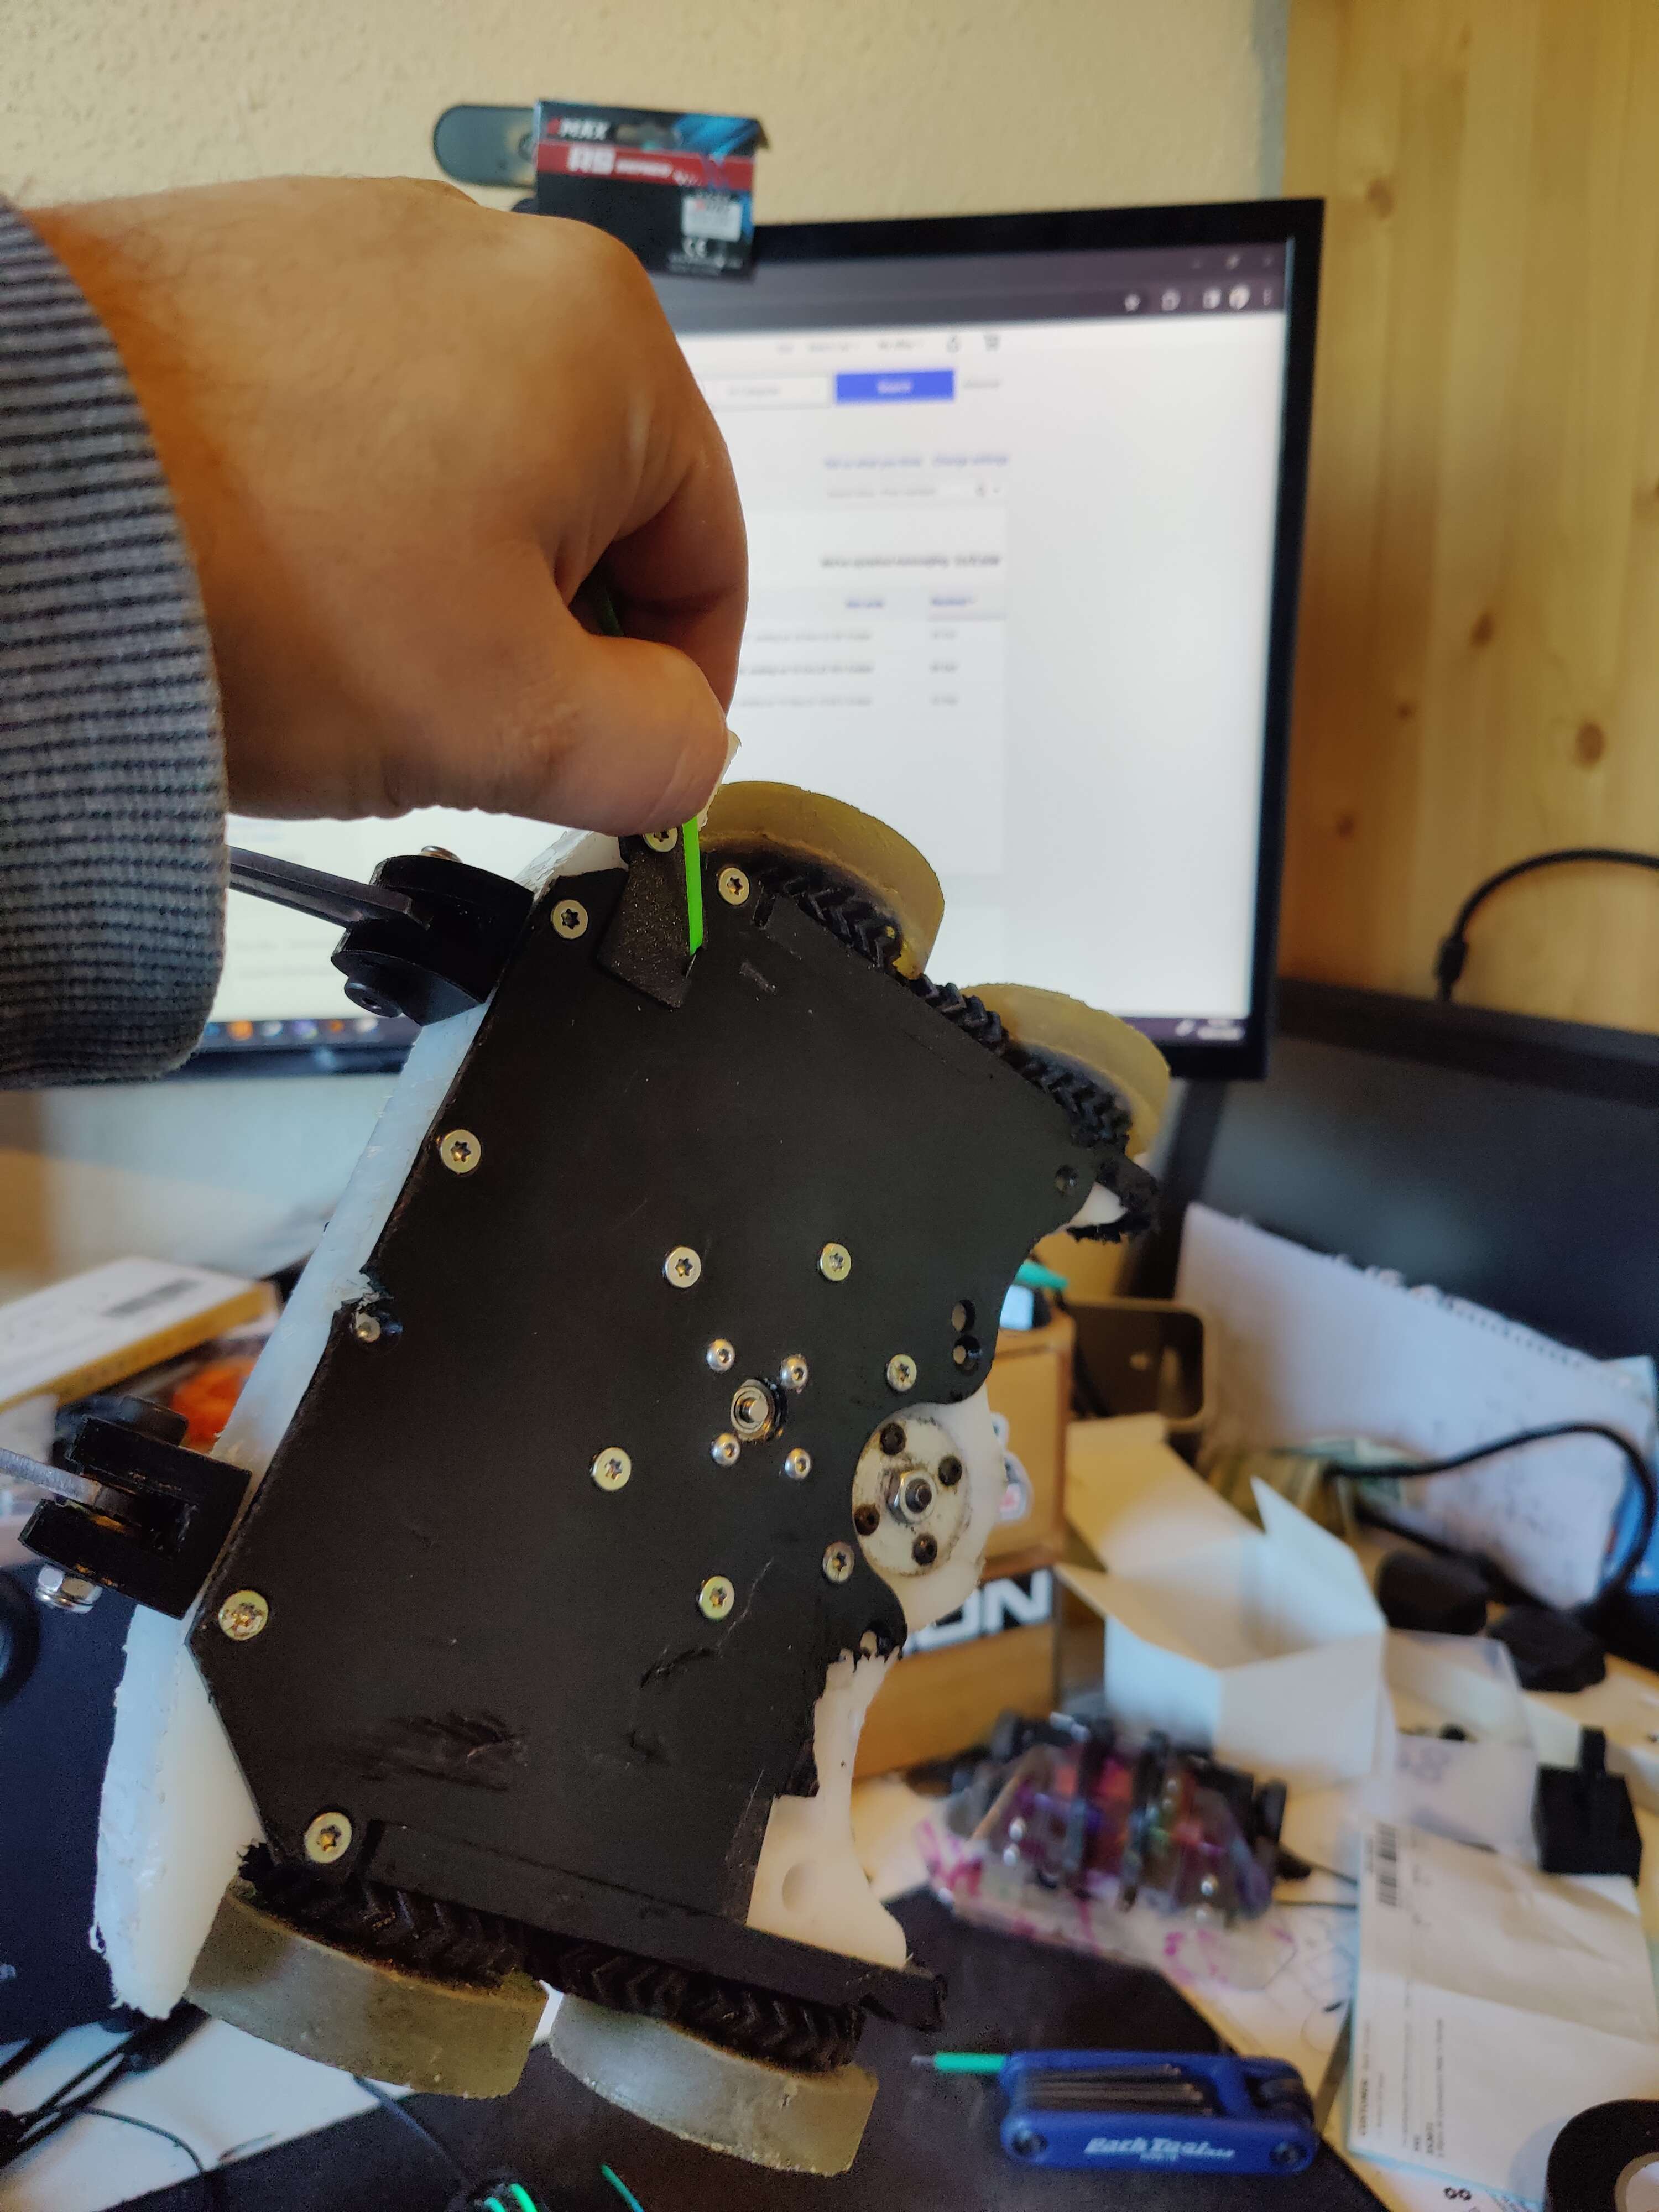
For my own bot Babróg, I have ran the link up high near the back of the robot, but I have also put it close to one of the extending bulkheads on the robot. My theory her being that any weapons that would otherwise come close to the link will hit the bulkheads instead, and there are plenty of hits in that area of the robot which would suggest my theory has some value.
As an example of a time when I messed up, here is Schnake, a robot where the link fit into the back of the design. The link was definitely recessed, but there was still a very large pocket for a weapon to hit into it, and this happened when the robot fought Bby Shrekt at Robot Rebellion 2023 and suffered a KO as a result. If there is anything you should take from this guide, then please, please steer clear from the dreaded “bum link”, there are few other ways to lose a fight in a quicker manner.
PROTECTING YOUR LINK
So, you have your link in a safer position in your robot, and it’s all nice and safely tucked in there. But your link is still vulnerable to the chaos of a fight, wherein an opponent can get all manners of things into that link hole, and the forces of robot combat can still threaten to force your link out in a direction that would remove it.
There are two methods to combat this. The first is some form of tape, applied over the link hole before a fight. This is a quick and easy way to increase the likelihood of a link staying in during a fight, and preventing loose objects from entering the robot via that hole. The more preferable method however would be that of a link door. These are some lightweight pieces of metal, plastic, or 3D printed parts, that usually swivel over the door of the link, tight enough not to come loose in a fight, but loose enough to be turnable by hand (a simple screw held by a nyloc nut is the best way to do this).
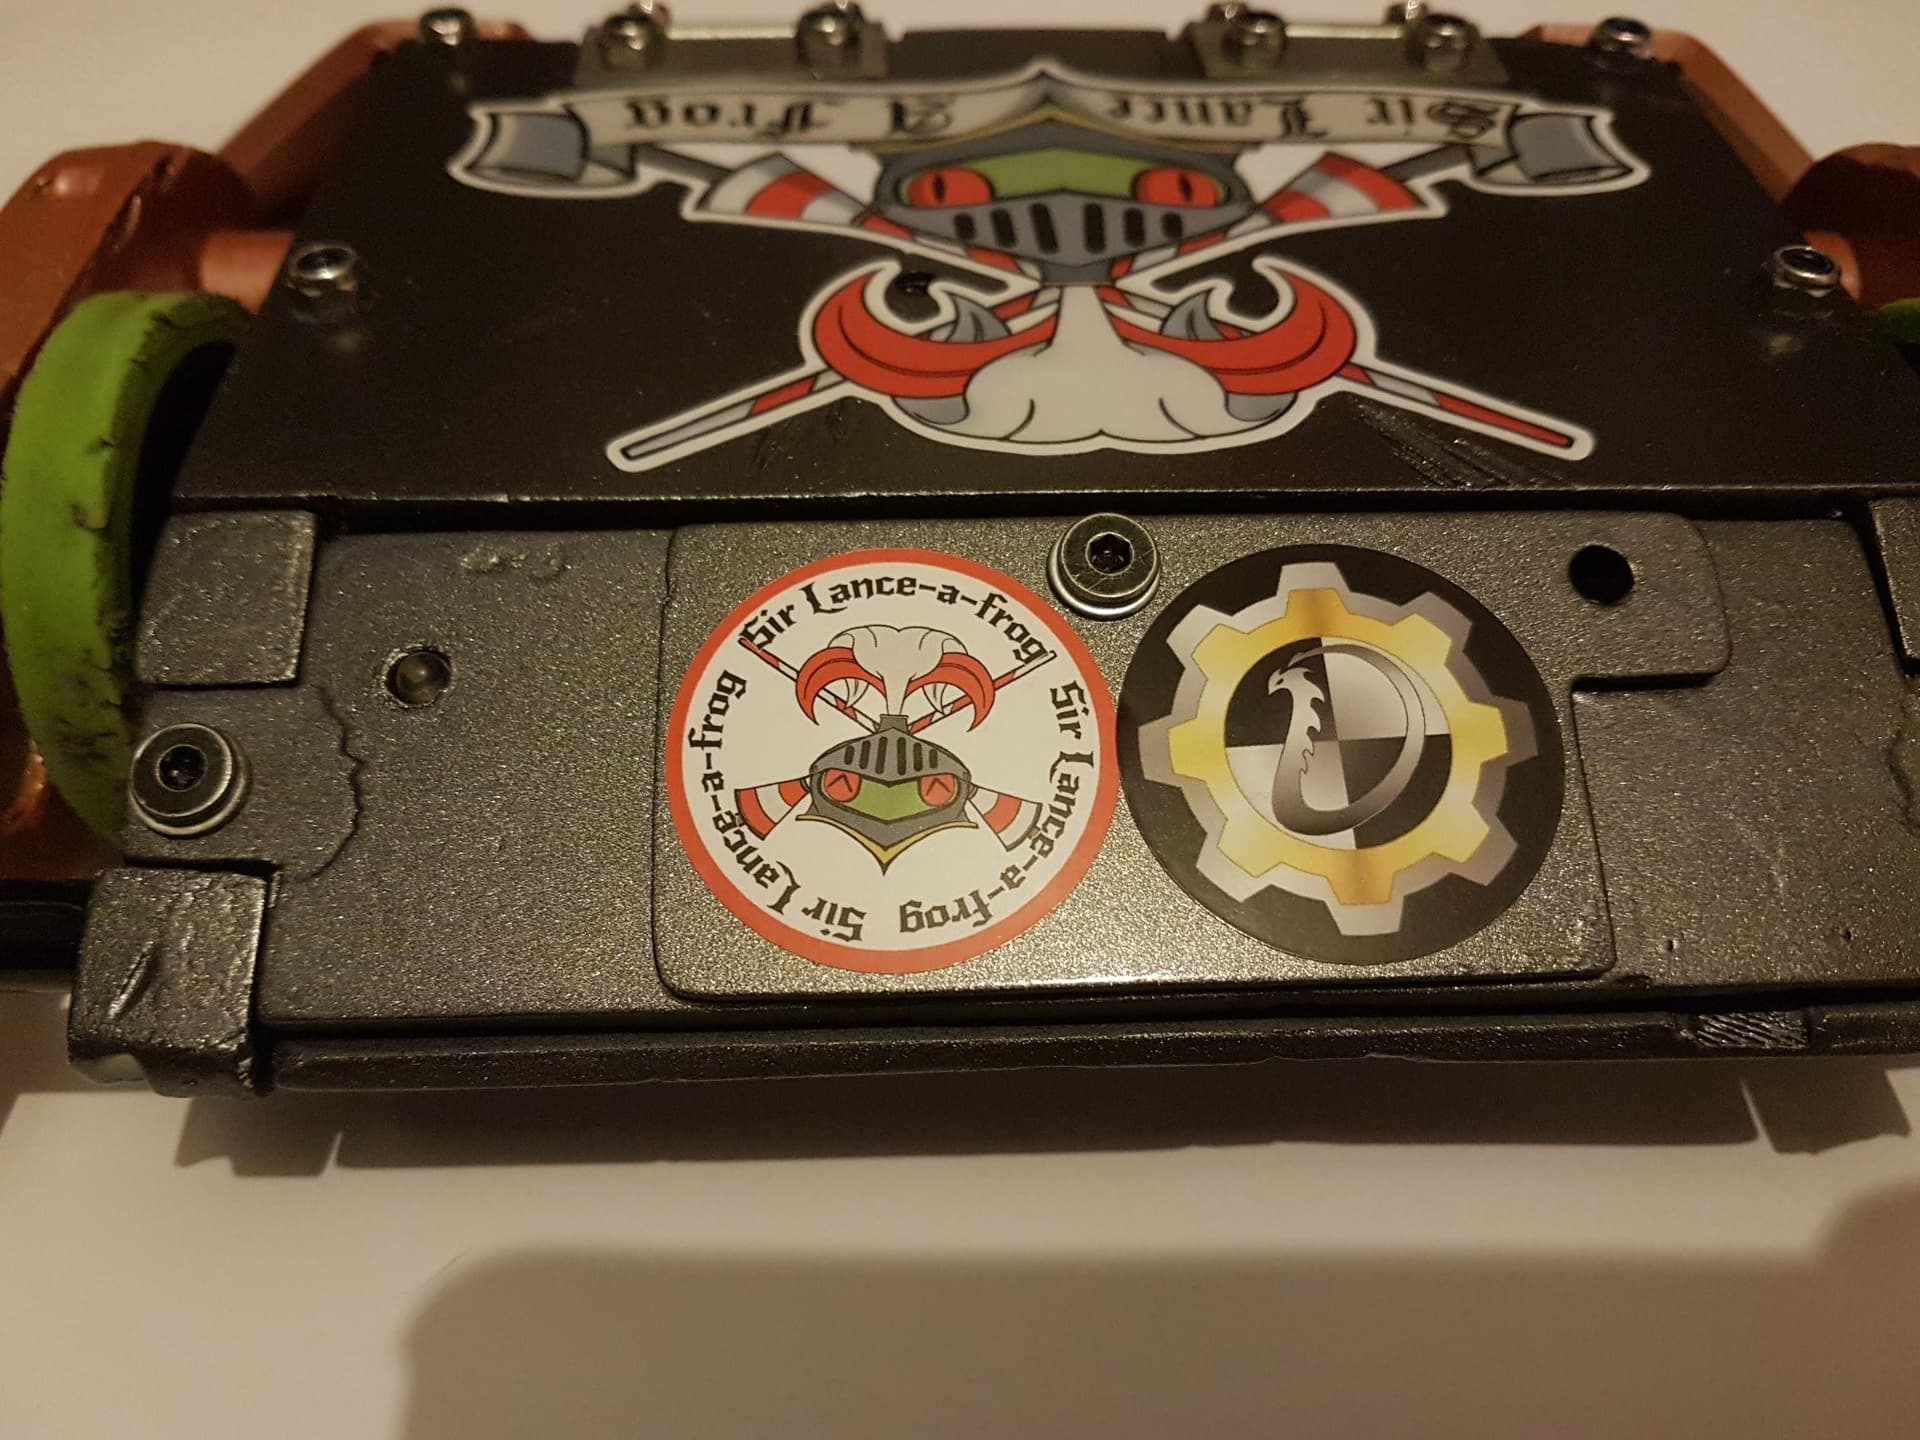
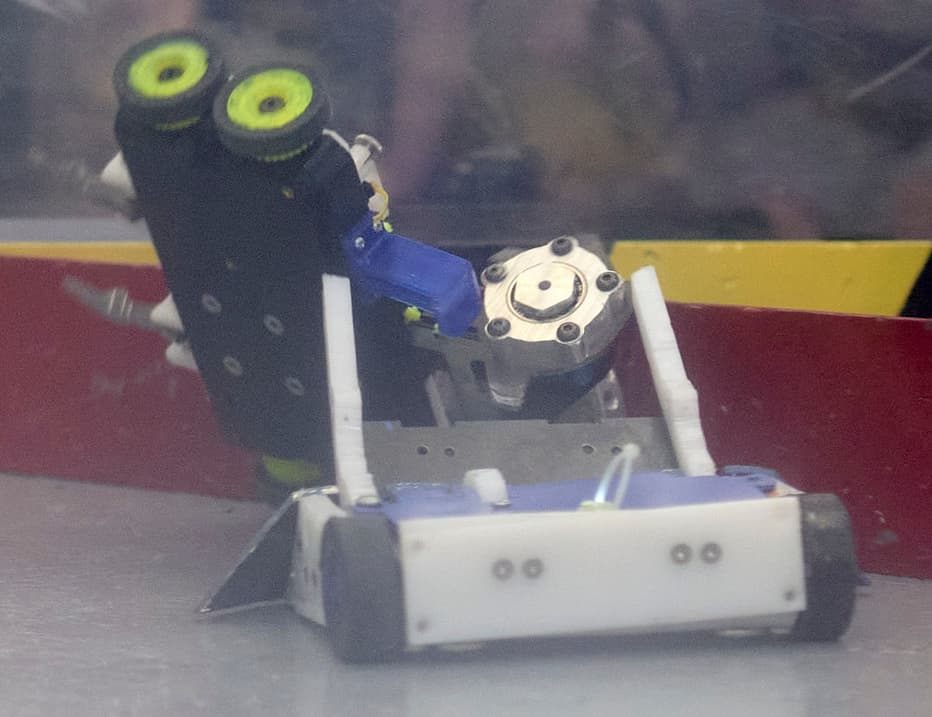
Here we see Sir Lance-A-Frog once more at the event after getting stuck on its own link. The link is roughly in the same position on the robot, but now covered by a swiveling door, improving the bots survivability and invertibility with one simple inclusion.
Saw Loser keeps its link under a swivelling door, but this door is also kept in place by a pin that can be pulled out by hand to open the door, adding another level of security.
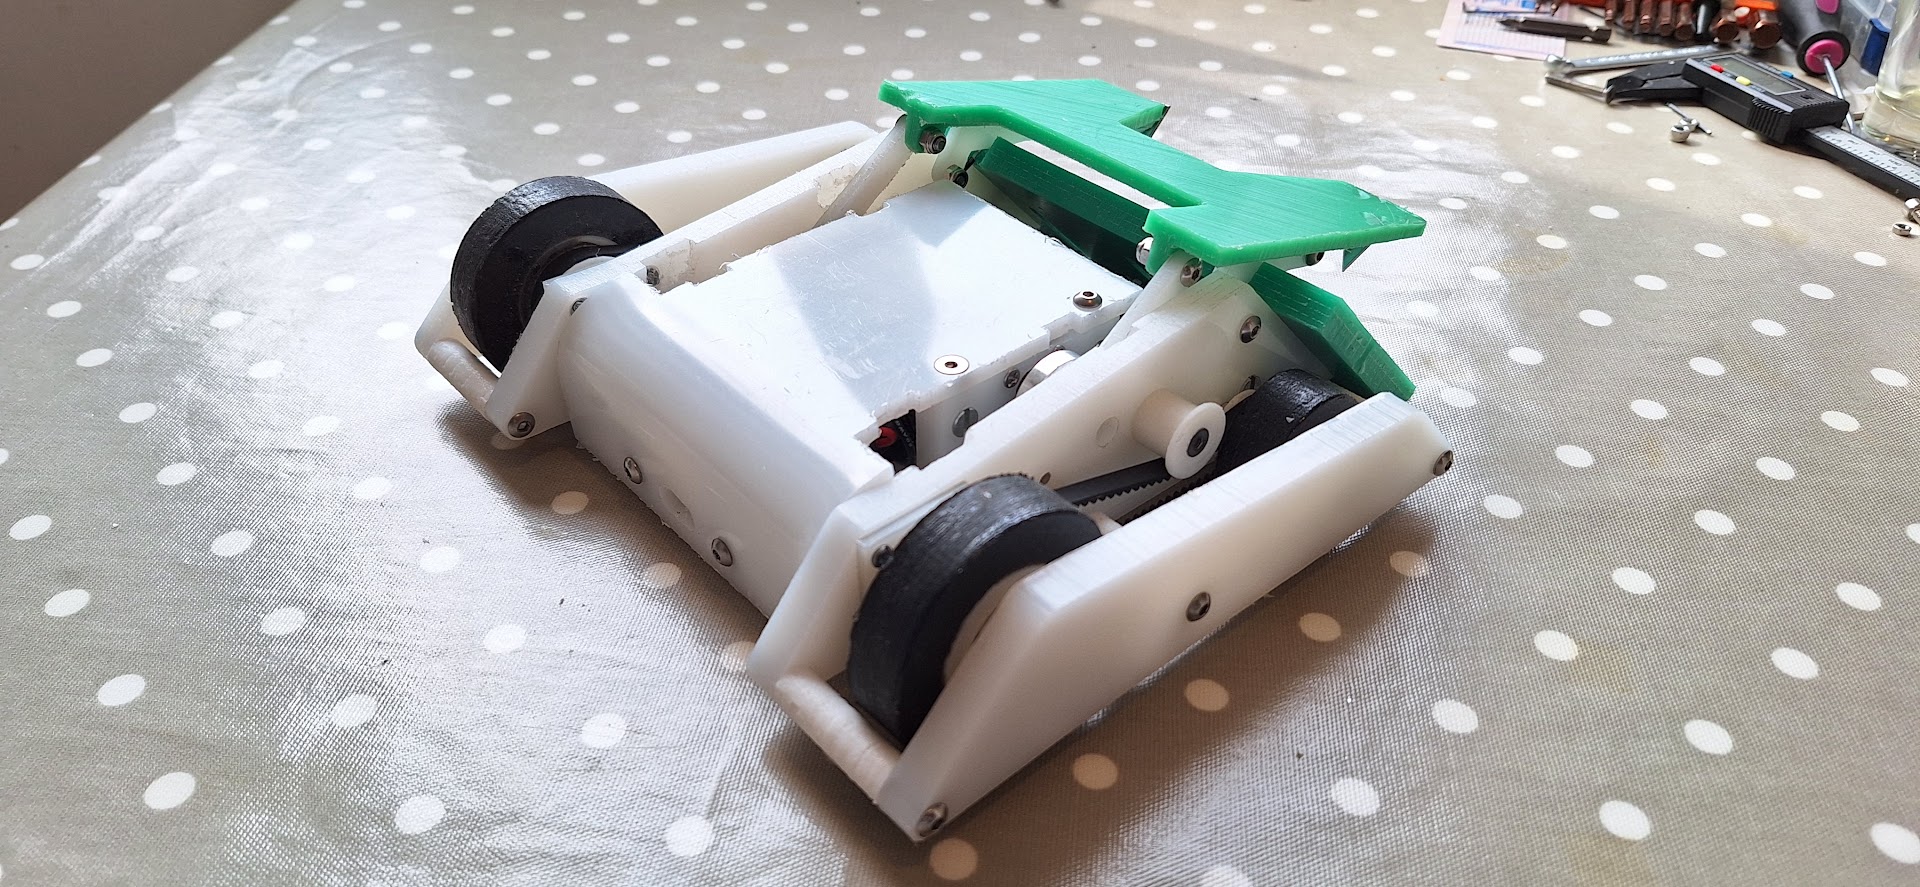
Maybe the most impressive link door I’ve seen, The Chilli Daddy. has a link door printed out of the flexible TPU material, and the door recesses into the chassis. This means that the link can be removed by sharply pulling on a zip tie attached to the link, but in most combat scenarios the link door will remain in position, as shown by the door holding the weight of the robot.
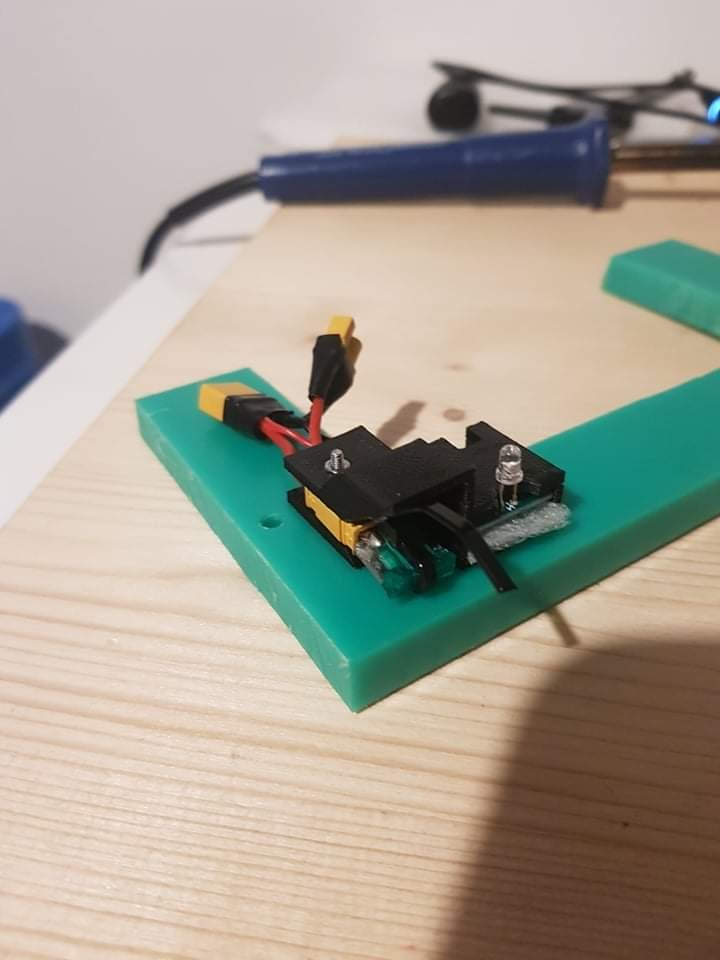
Bonus Tip Number 3! As a space saving measure, many robots will have the required safety fuse on the robot soldered to the two ends of the removable link. This not only combines two required parts into one, but also gives the link a flat plane as its end, which will work even better when pressed against a link door as opposed to a loop of wire. Just be sure to use a zip tie with this method, otherwise you risk ripping the plastic cover from the blade fuse! Above is the link Schnake uses, which is totally recessed into the robot when plugged in.
CONCLUSION
In summary, links can be made reliable in combat robotics, but there is a lot of work required to get them to be near the same reliability of switches. When designing for a link, try to be sure:
-
Your link is a decent connector, that is as stiff as possible when connected
-
Your link is recessed into your robot in such a way where no part of it sticks out, and it doesn’t impact your mobility
-
Your link is in a location which is hard for an opponent to hit, while also safe for a hand to reach towards
-
Your link has a door to protect and prevent it from coming out during a fight, while also operatable by hand
Follow all of these steps, and you are on your way to a robot that is more durable and more competitive, while also safe to operate for everyone involved! Thank you for reading this far, now go out there and get to designing those link doors!
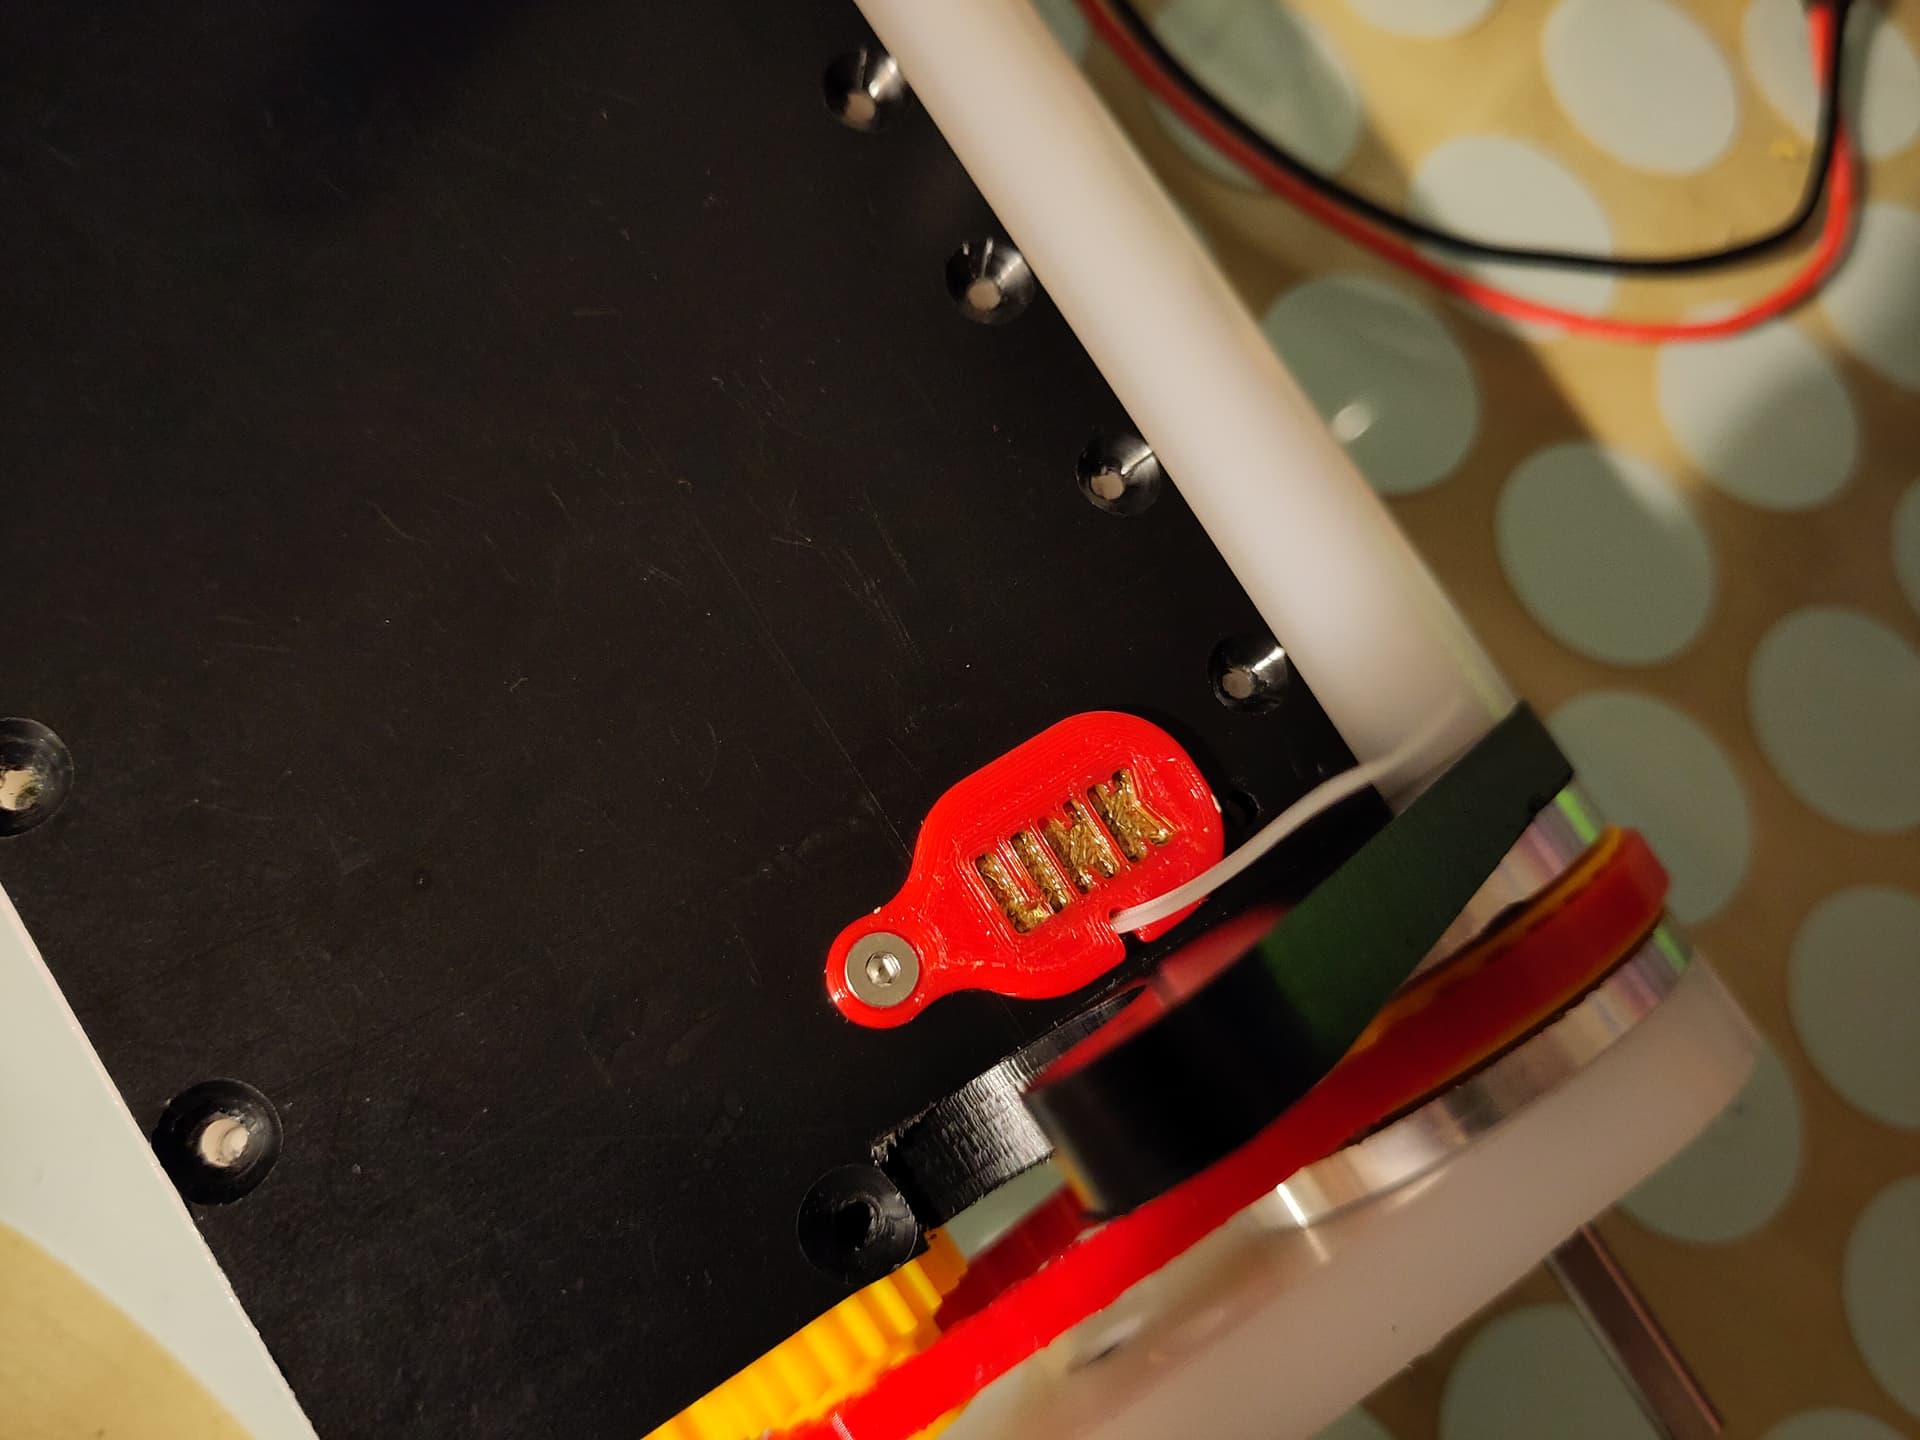
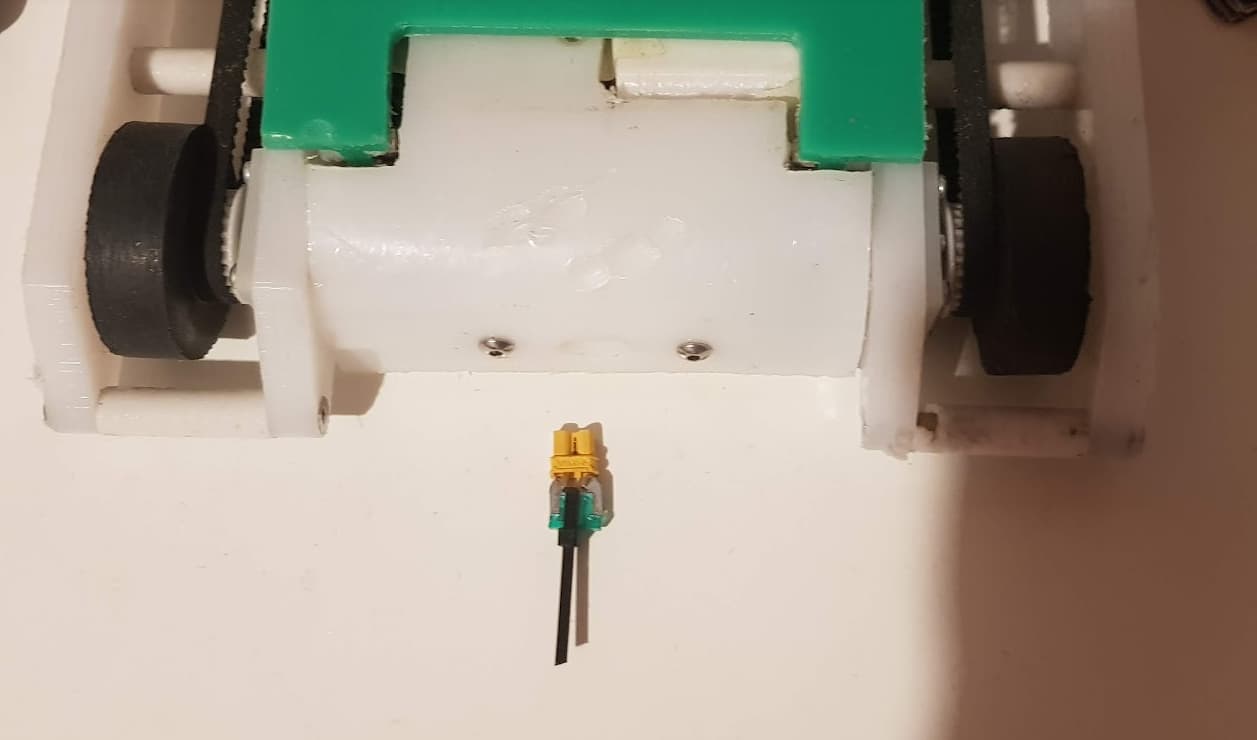
The full link setup on Babróg. Here you see the male XT30 connector screwed onto the top plate, and the female end plugged in with a bladed 30A fuse soldered onto it. The zip tie is there to allow easy removal of the link following a match, and the whole thing is covered by a door.
P.S. This guide has focused on Beetleweights, but I’ve also done quite an amount of work on this topic for the weight classes that use XT60’s, those being Hobbyweights, Raptorweights, and Featherweights. If you’re interested, then feel free to check this link (heh) out on my solution, the “Hattington Link”!: Hattington Link: A more reliable safety link for combat robotics by ShootyMcExplosion - Thingiverse