Ahoy hoy folks! It’s 2-and-a-bit weeks to the BBB Beetle Brawl (abbreviated to the BBBBB or maybe just the BBB, or even just B?), so here’s some kinda BUILD LOG THING for you.
BACKGROUND
A couple of years back Becky and I started working on a Featherweight that was primarily designed for driving and pushing, inspired by robots like Plastic Fantastic (first ever Robodojo FC winner). To avoid tedious things like self-righting or controls reversing when inverted we went for a rotationally symmetric parallelogram, hence Perillelogram, with a full rotation lifter as well (which became more critical when Bevs went active-weapon-compulsory).
At this point the lifter has still never actually worked but the driving aspect is going better and Becky has done pretty well at Dojo. I have never really written up the build (probably should) but here’s some footage of it driving:

MAKING THE SAME ROBOT ONLY A DIFFERENT SIZE, IT’S A THING
I have a bad habit of overcomplicating designs and consequently dooming my ideas, but I reckoned a beetle-sized version of Perillelogram would be hard to make too challenging. I was not completely wrong. “Mild Perillelogram”, by the way, is referencing the BBFC’s film age rating system, and particularly its penchant for peculiar turns of phrase like “sustained peril” or “moderate sex references”.
First up, the drive pretty much had to be brushless, as you can’t really be pushy with 2 brushed 22mm motors and there was no way of fitting in 4 of them. I decided to give Ranglebox Mars a try for this, with HTD3 belts for 4wd. I also got some 50mm Mars wheels. Having chosen motors and wheels, the height and width of the robot are largely fixed, and that then pretty much decides the length as well, and symmetry does the rest, so at that point I had this:
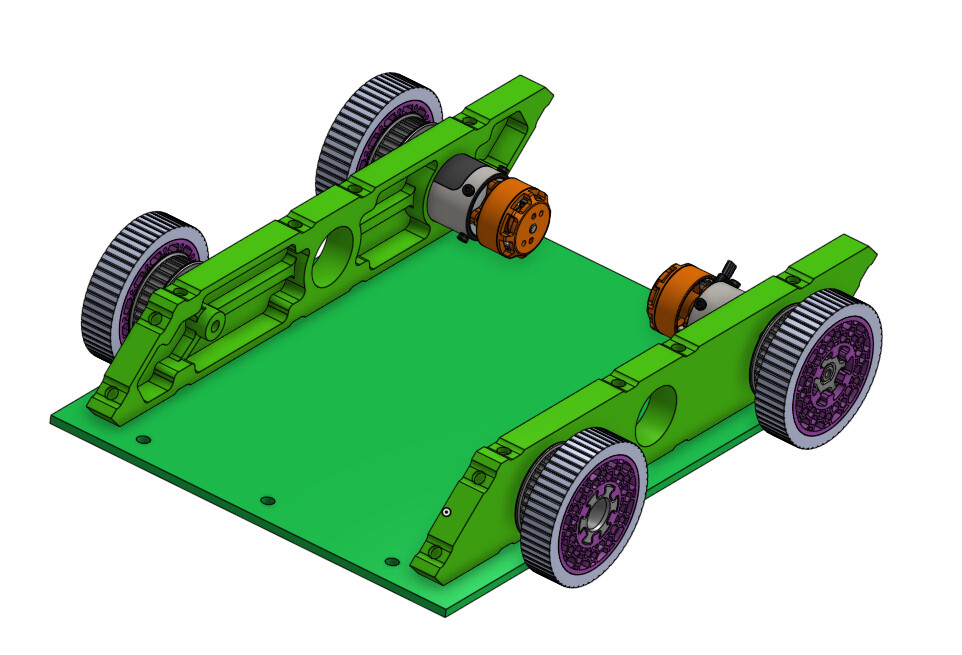
Actually I had this without all the pocketing because this the CAD with all the other stuff removed but you get the idea
Also, this was my first foray into designing a robot in OnShape, rather than Fusion 360. Feelings so far are mixed.
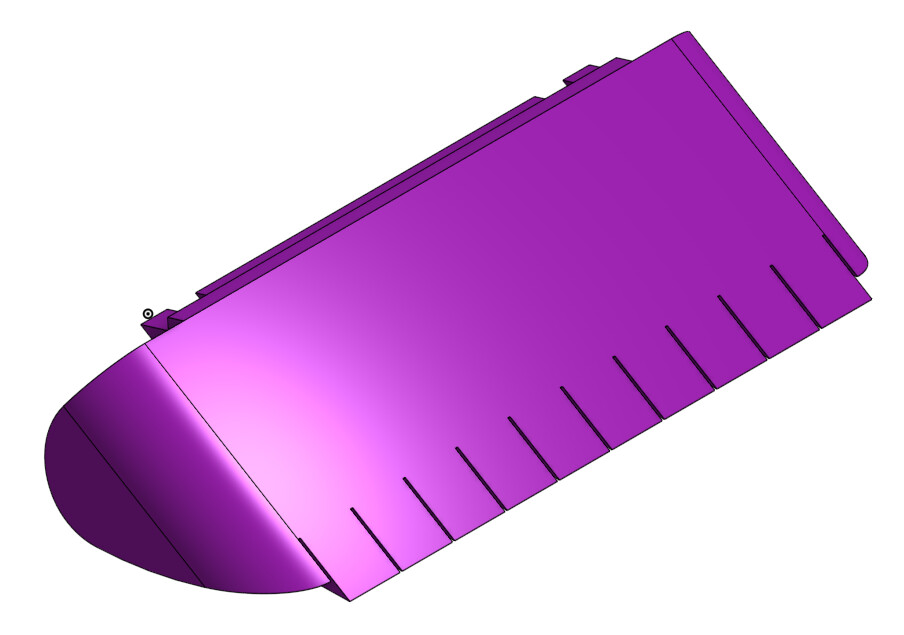
To make the wedges at the front and rear I decided to try printing a flat part then bending around a large radius to make a stylish wraparound wedge:
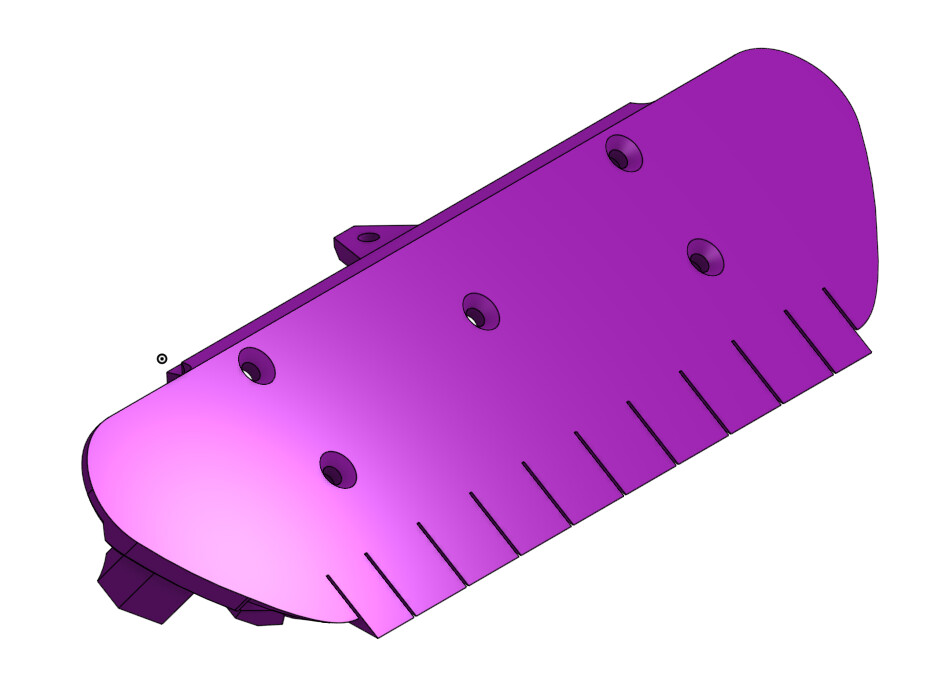
Printing orientation, wedgey orientation
This then folds up and is screwed together to get this:
With the ends folded around and some bolt holes missing because I am lazy at CAD
Hopefully the built-in “piano key” TPU wedgelets will give some semblance of a ground game.
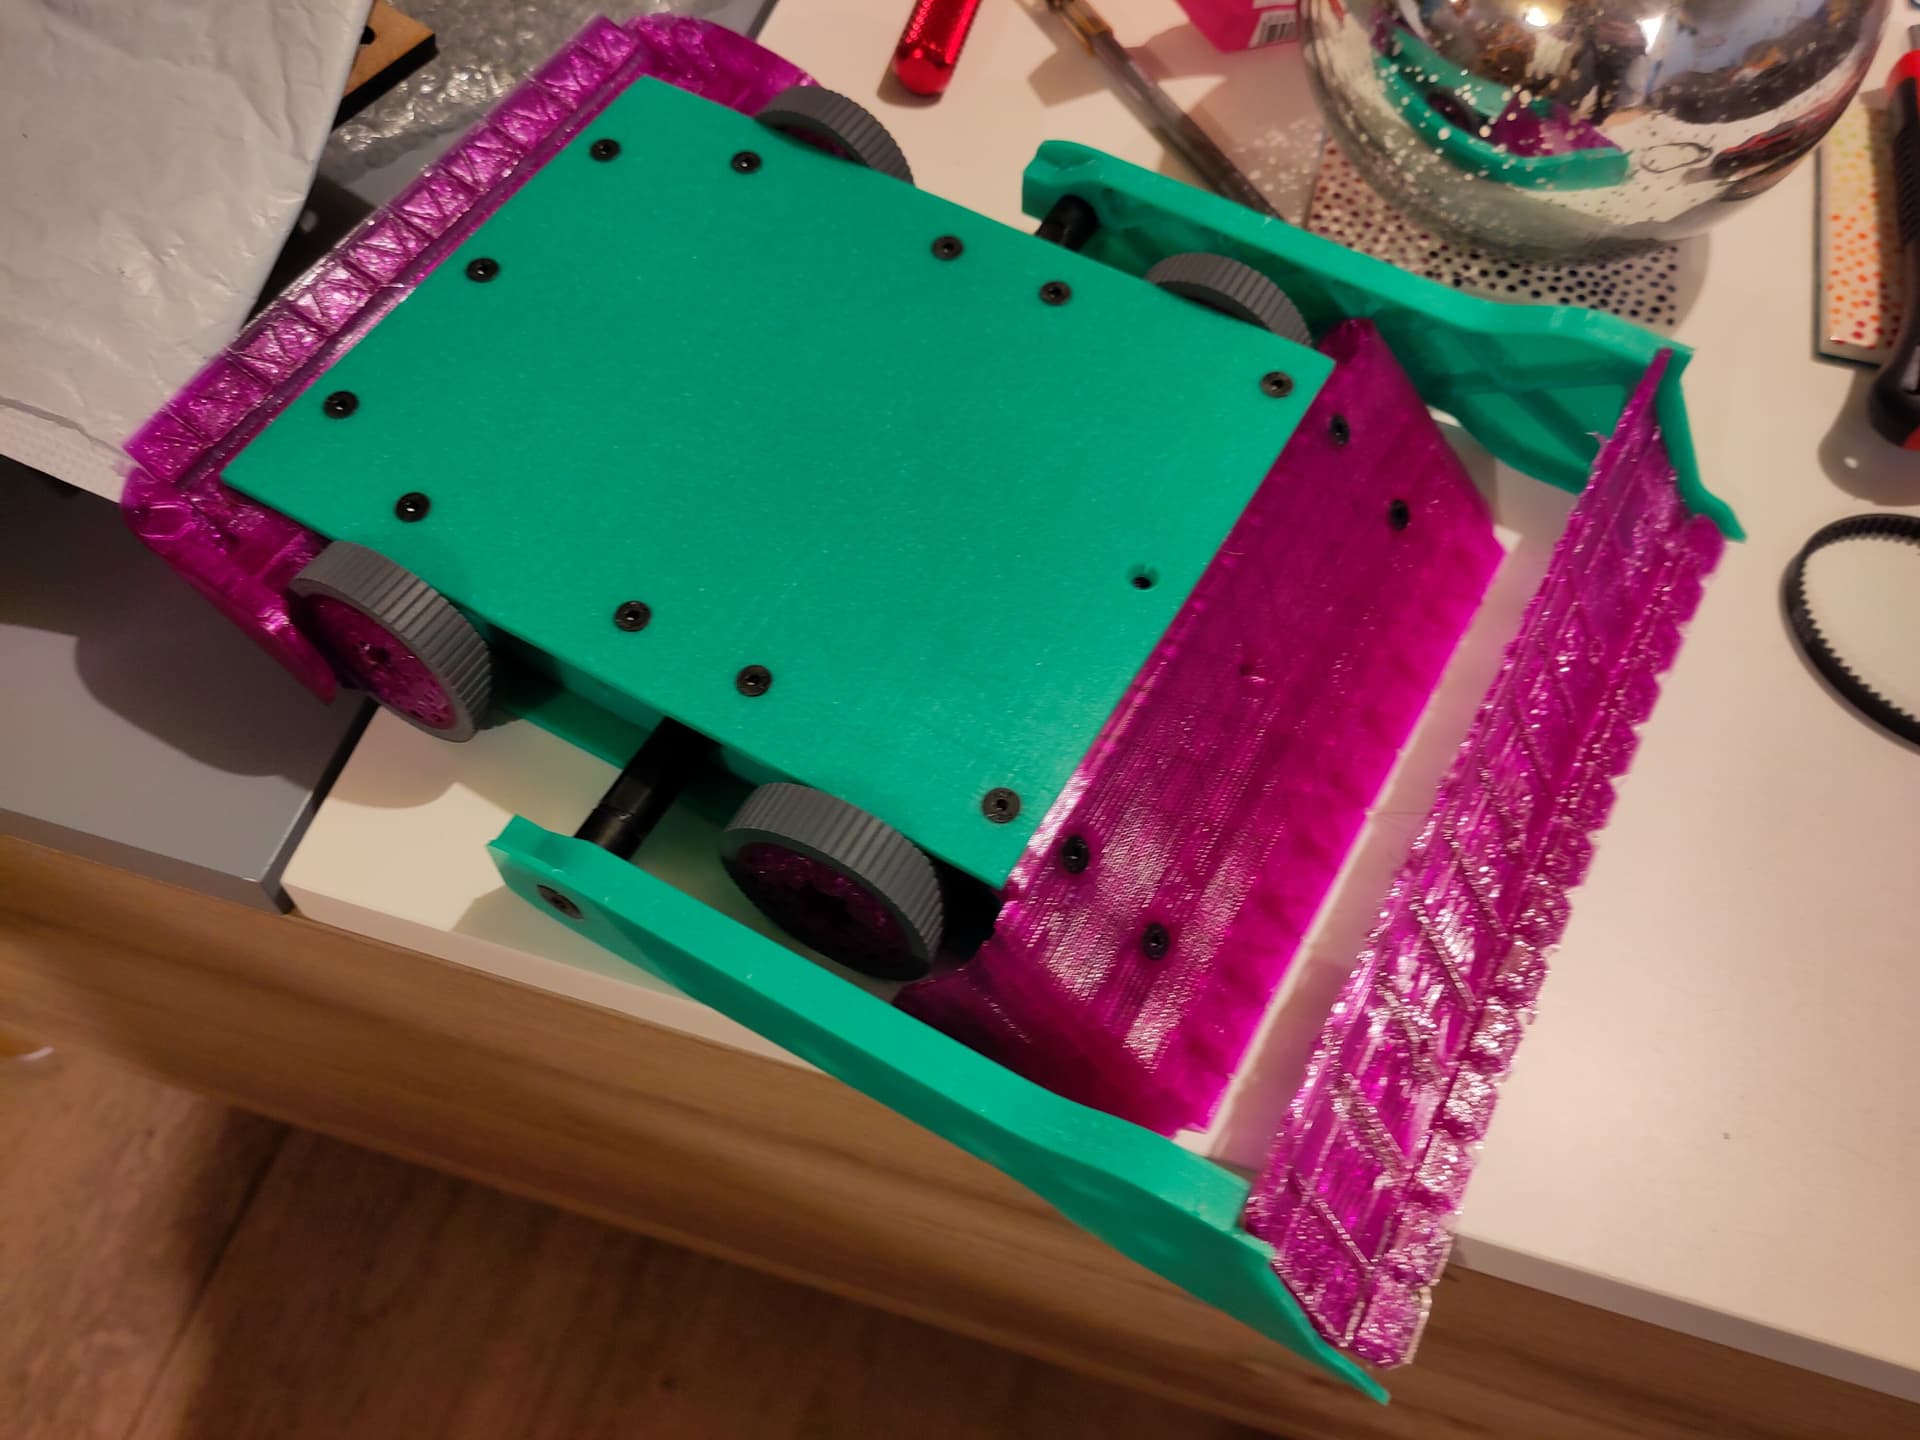
So that’s basically “a robot” at this point:
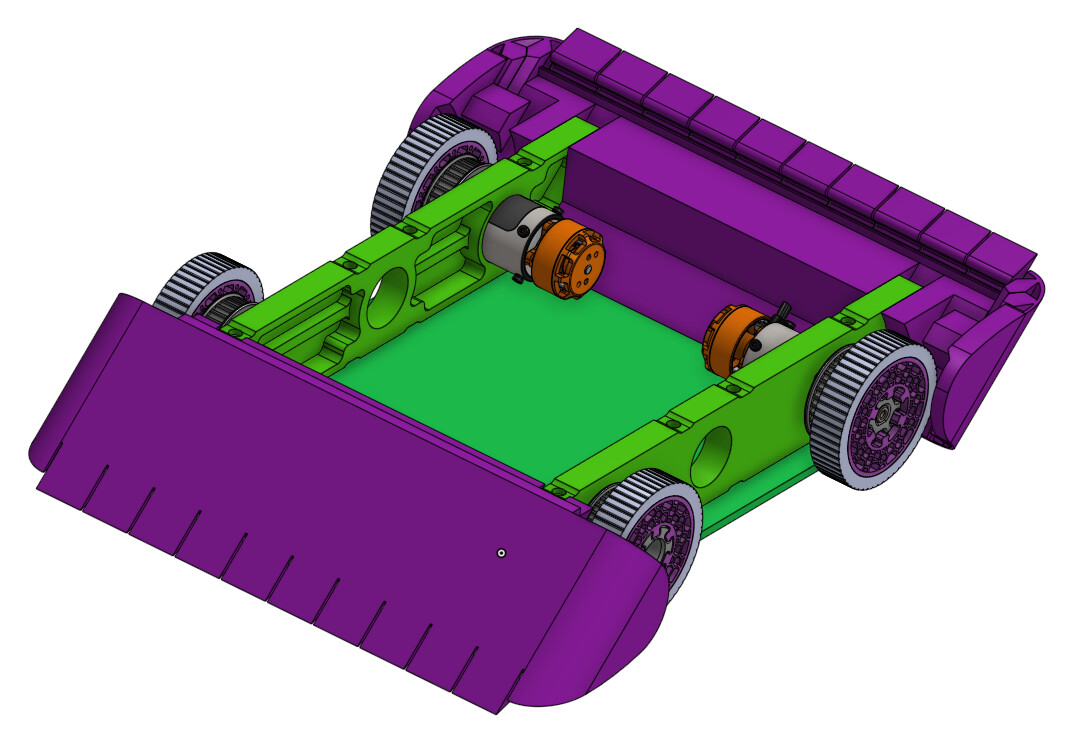
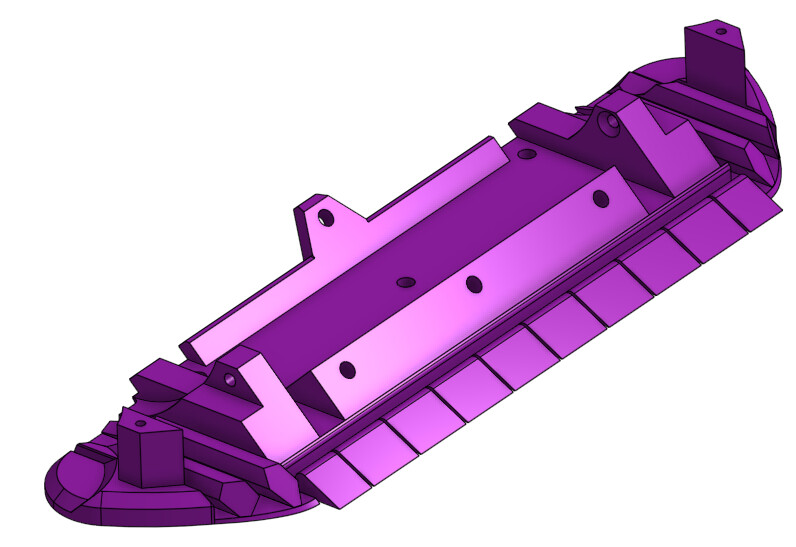
The 360° scoopy lifter again gets sized to just fit around everything else:
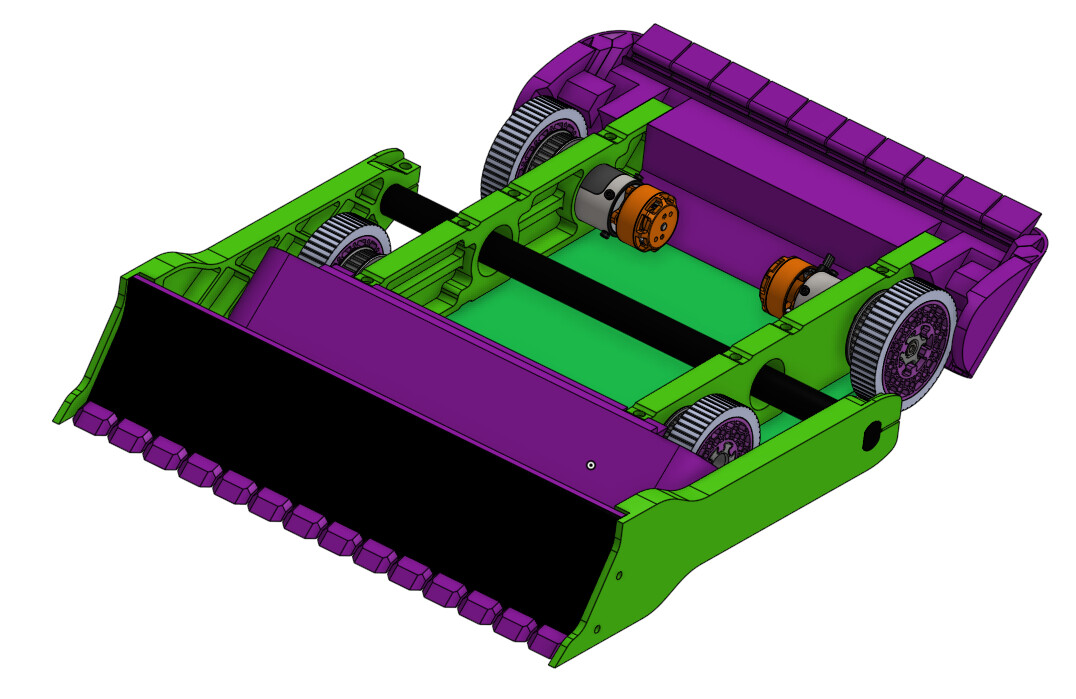
The front/rear wedges on the main chassis are just TPU, but the plan is for the scoop to be HDPE sandwiching a TPU core
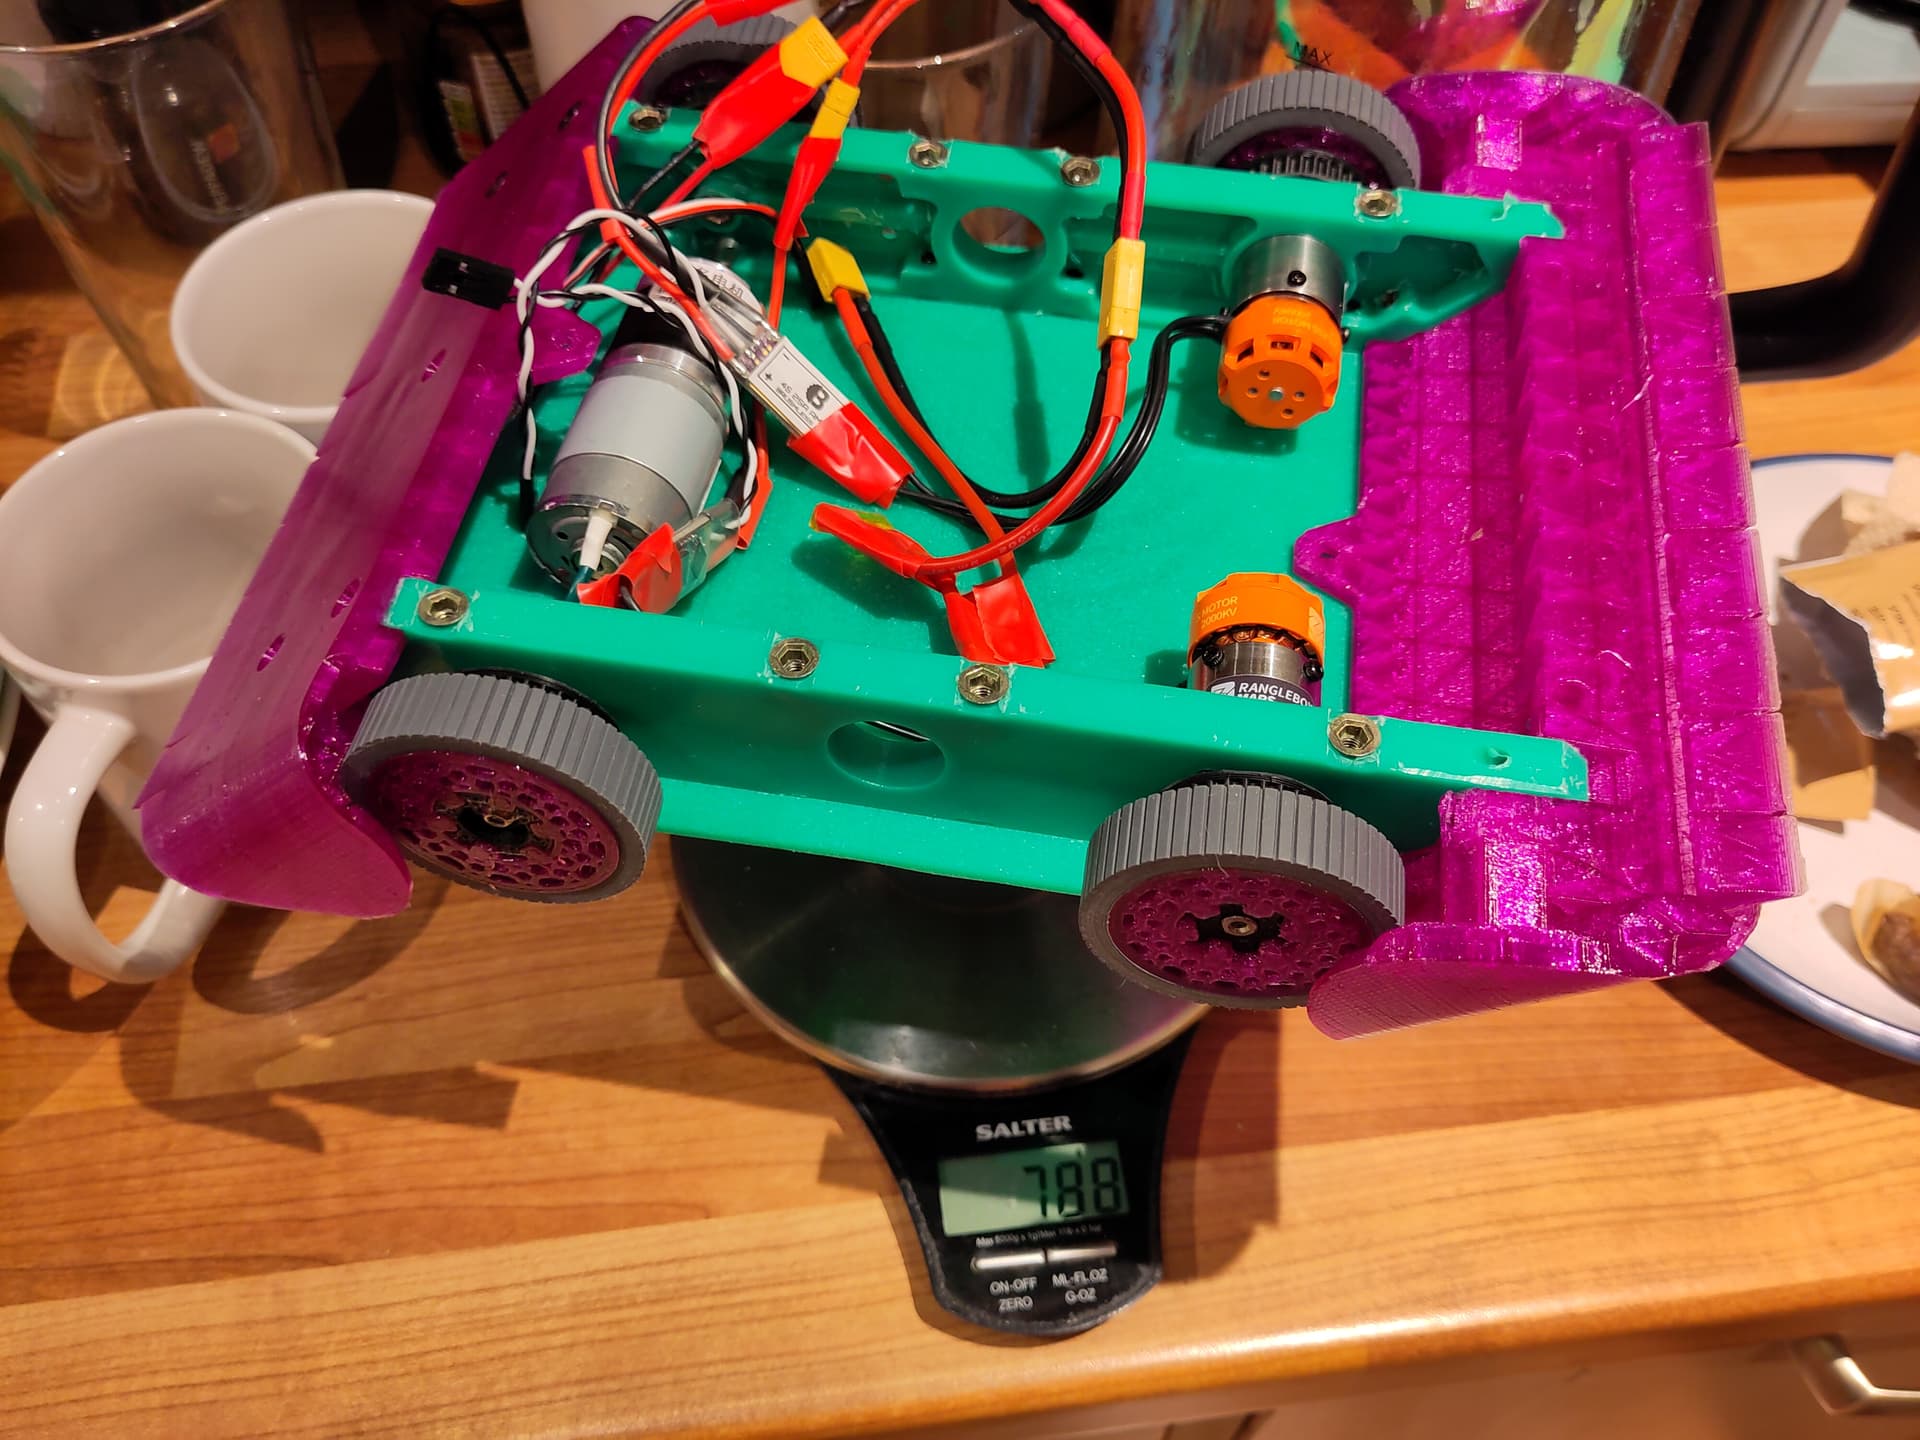
Again, the size of the motor to drive the weapon is constrained by the existing geometry: 50mm wheels, with a bit of ground clearance and 3mm top and bottom leaves about 35mm internal height, so initially I ordered a 32mm gearmotor (planning for ~250RPM, with a bit of reduction inside to limit the torque in the gearbox itself). However, this is about 300g by itself, which made my mass budget spreadsheet groan so I ordered one of these as well, and then finally (after the second one got delayed in customs) this as a backup-backup. The first tow have arrived now, so I’m waiting to see how the weight looks before deciding which to use.
OK YEAH BUT ACTUALLY MAKING THE ROBOT, THAT WAS ALL DESIGN
Yes fair, so proof of movement is in 2 days so I’d better be well along with that! Unusually I am not too far out of bed in that regard.
Machining!
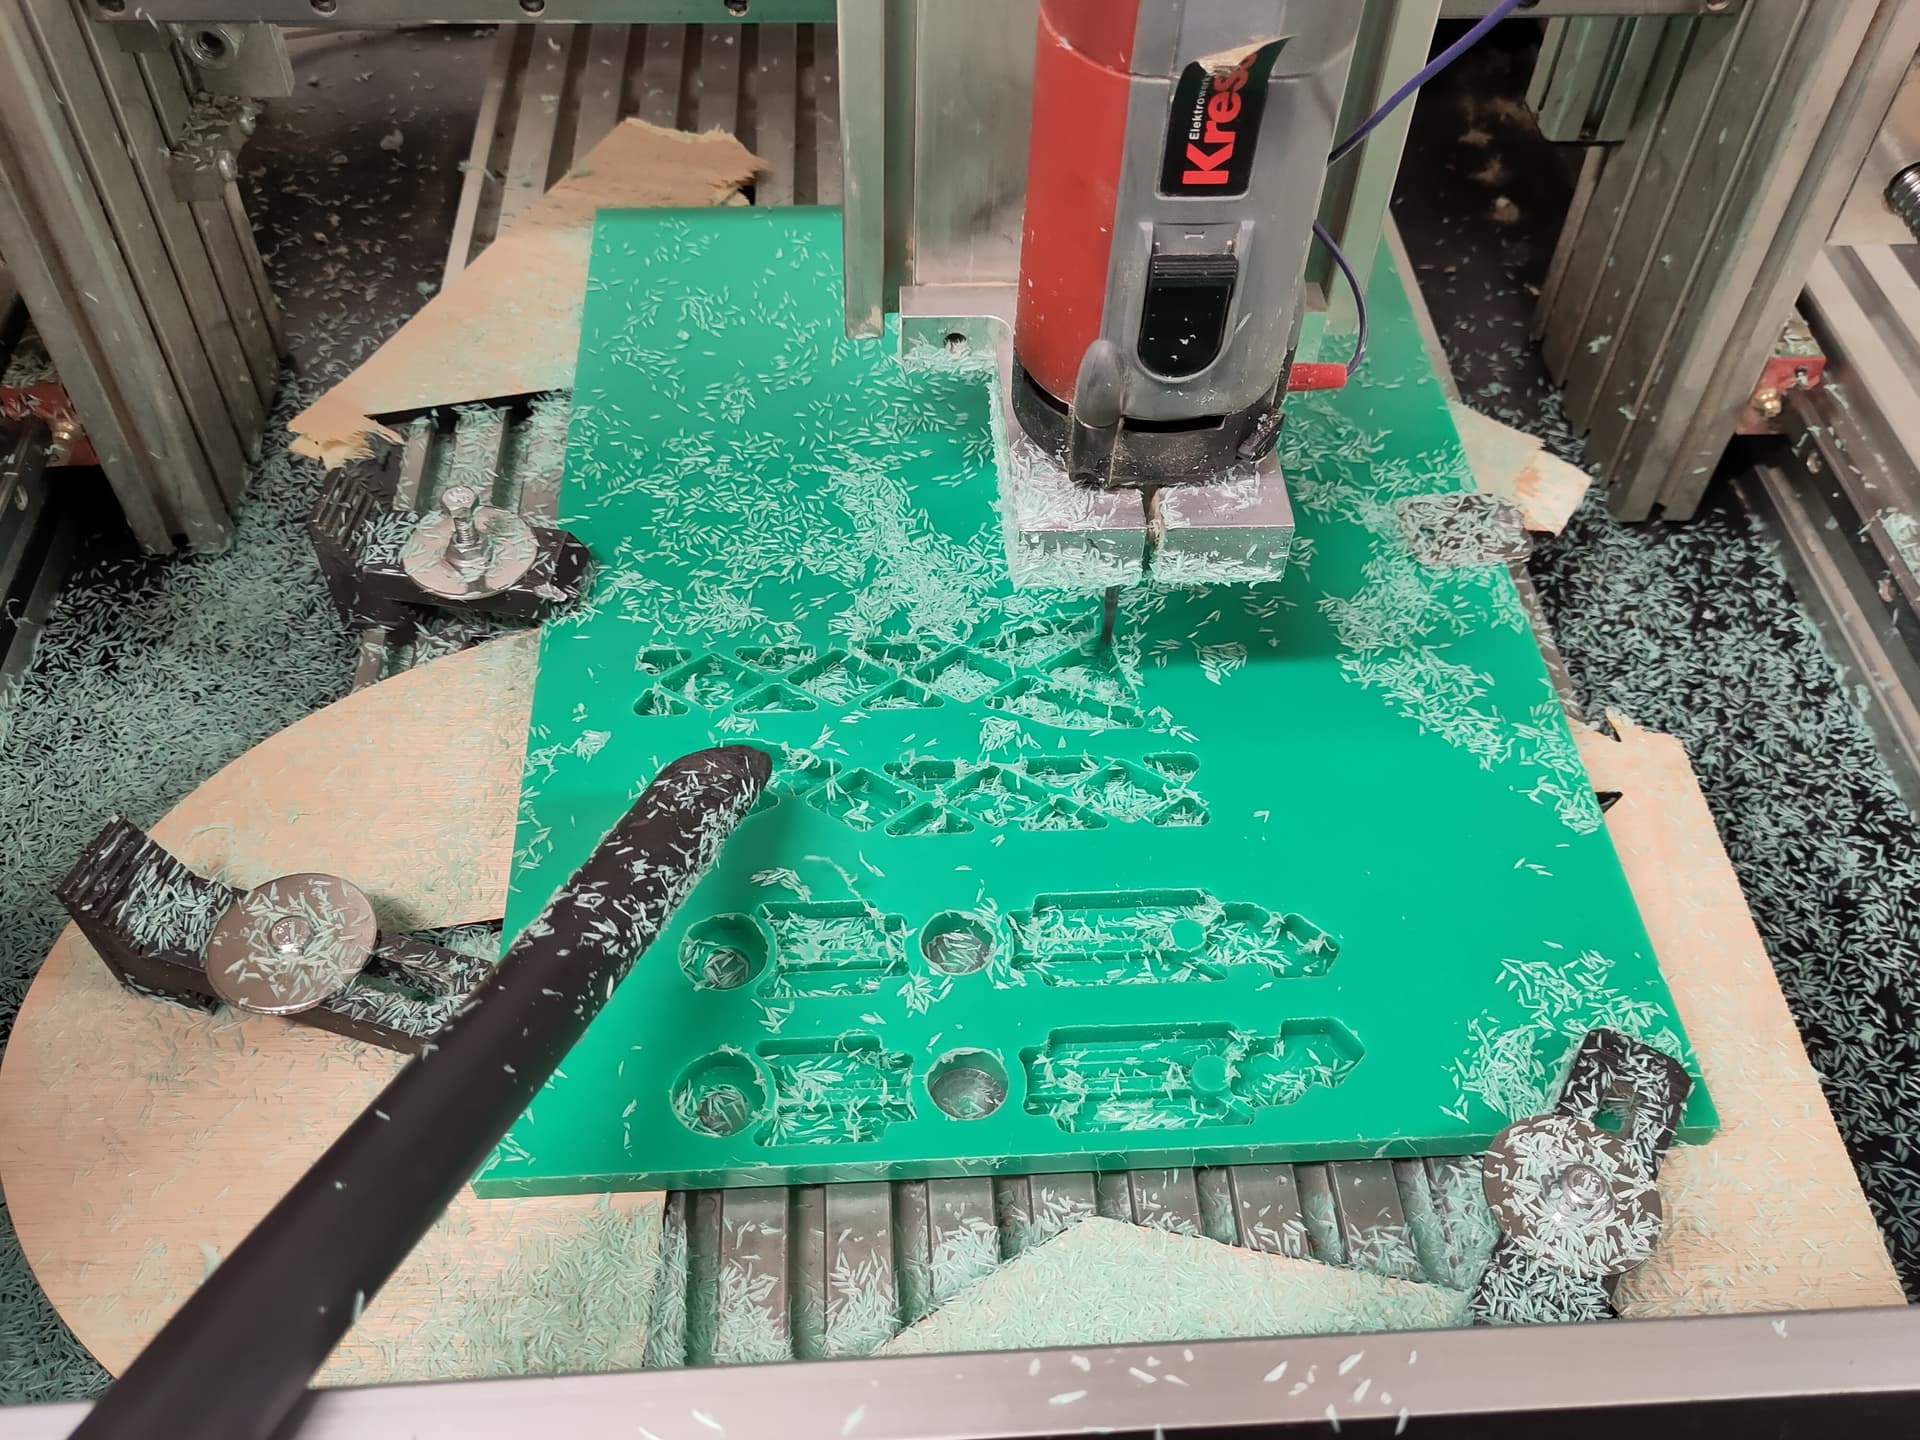
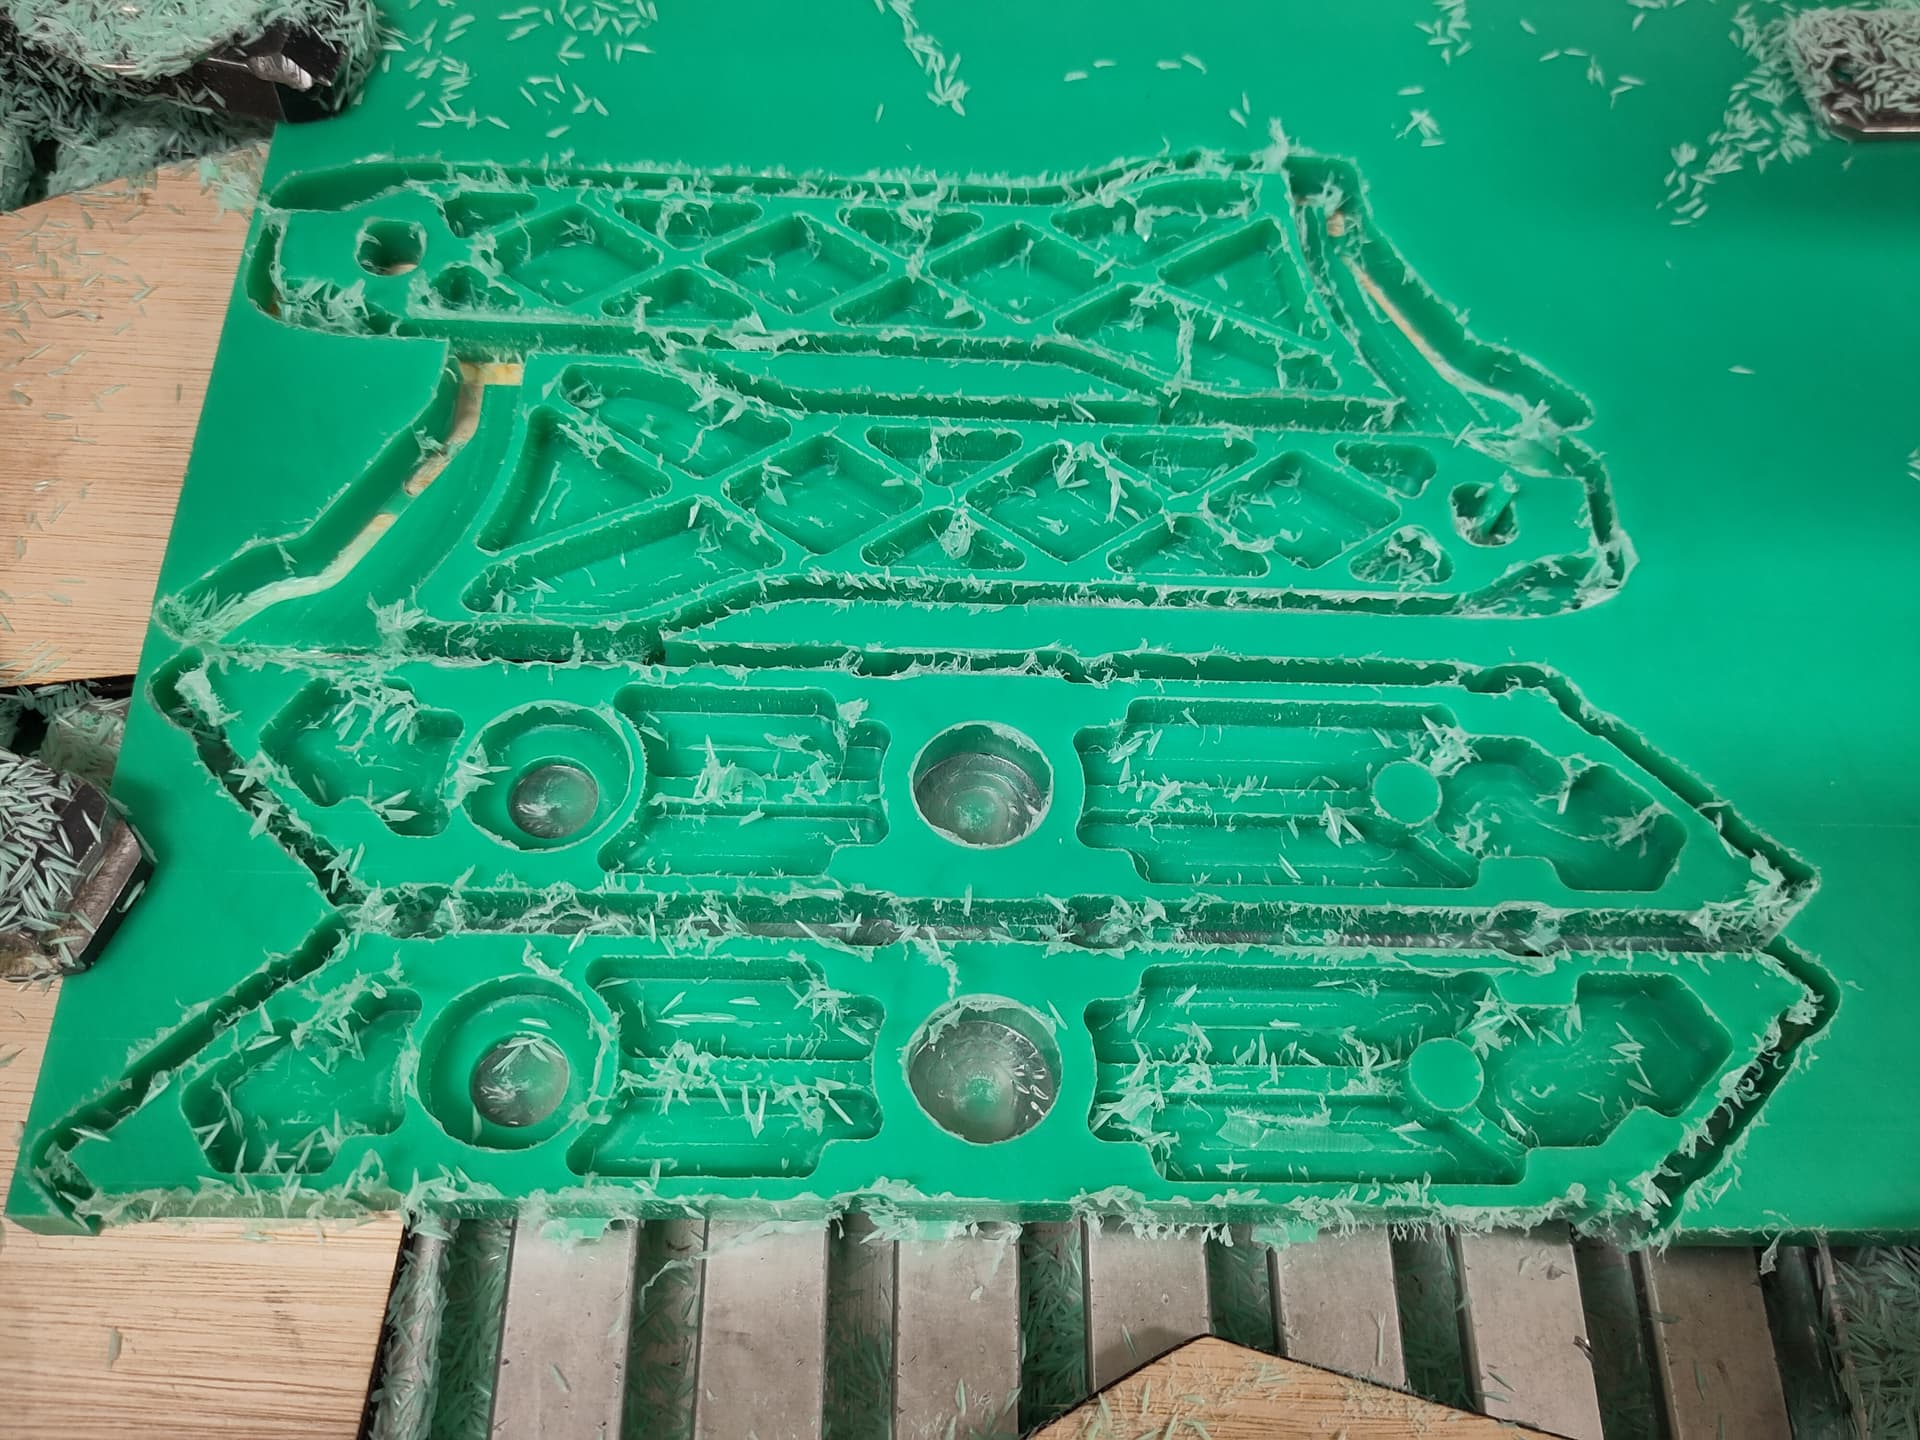
I mean look at this, it almost looks like a finished robot!
It is not finished, this is like one of the cardboard Spitfires the RAF used to decoy the Luftwaffe in WW2. The wheels aren’t even attached.
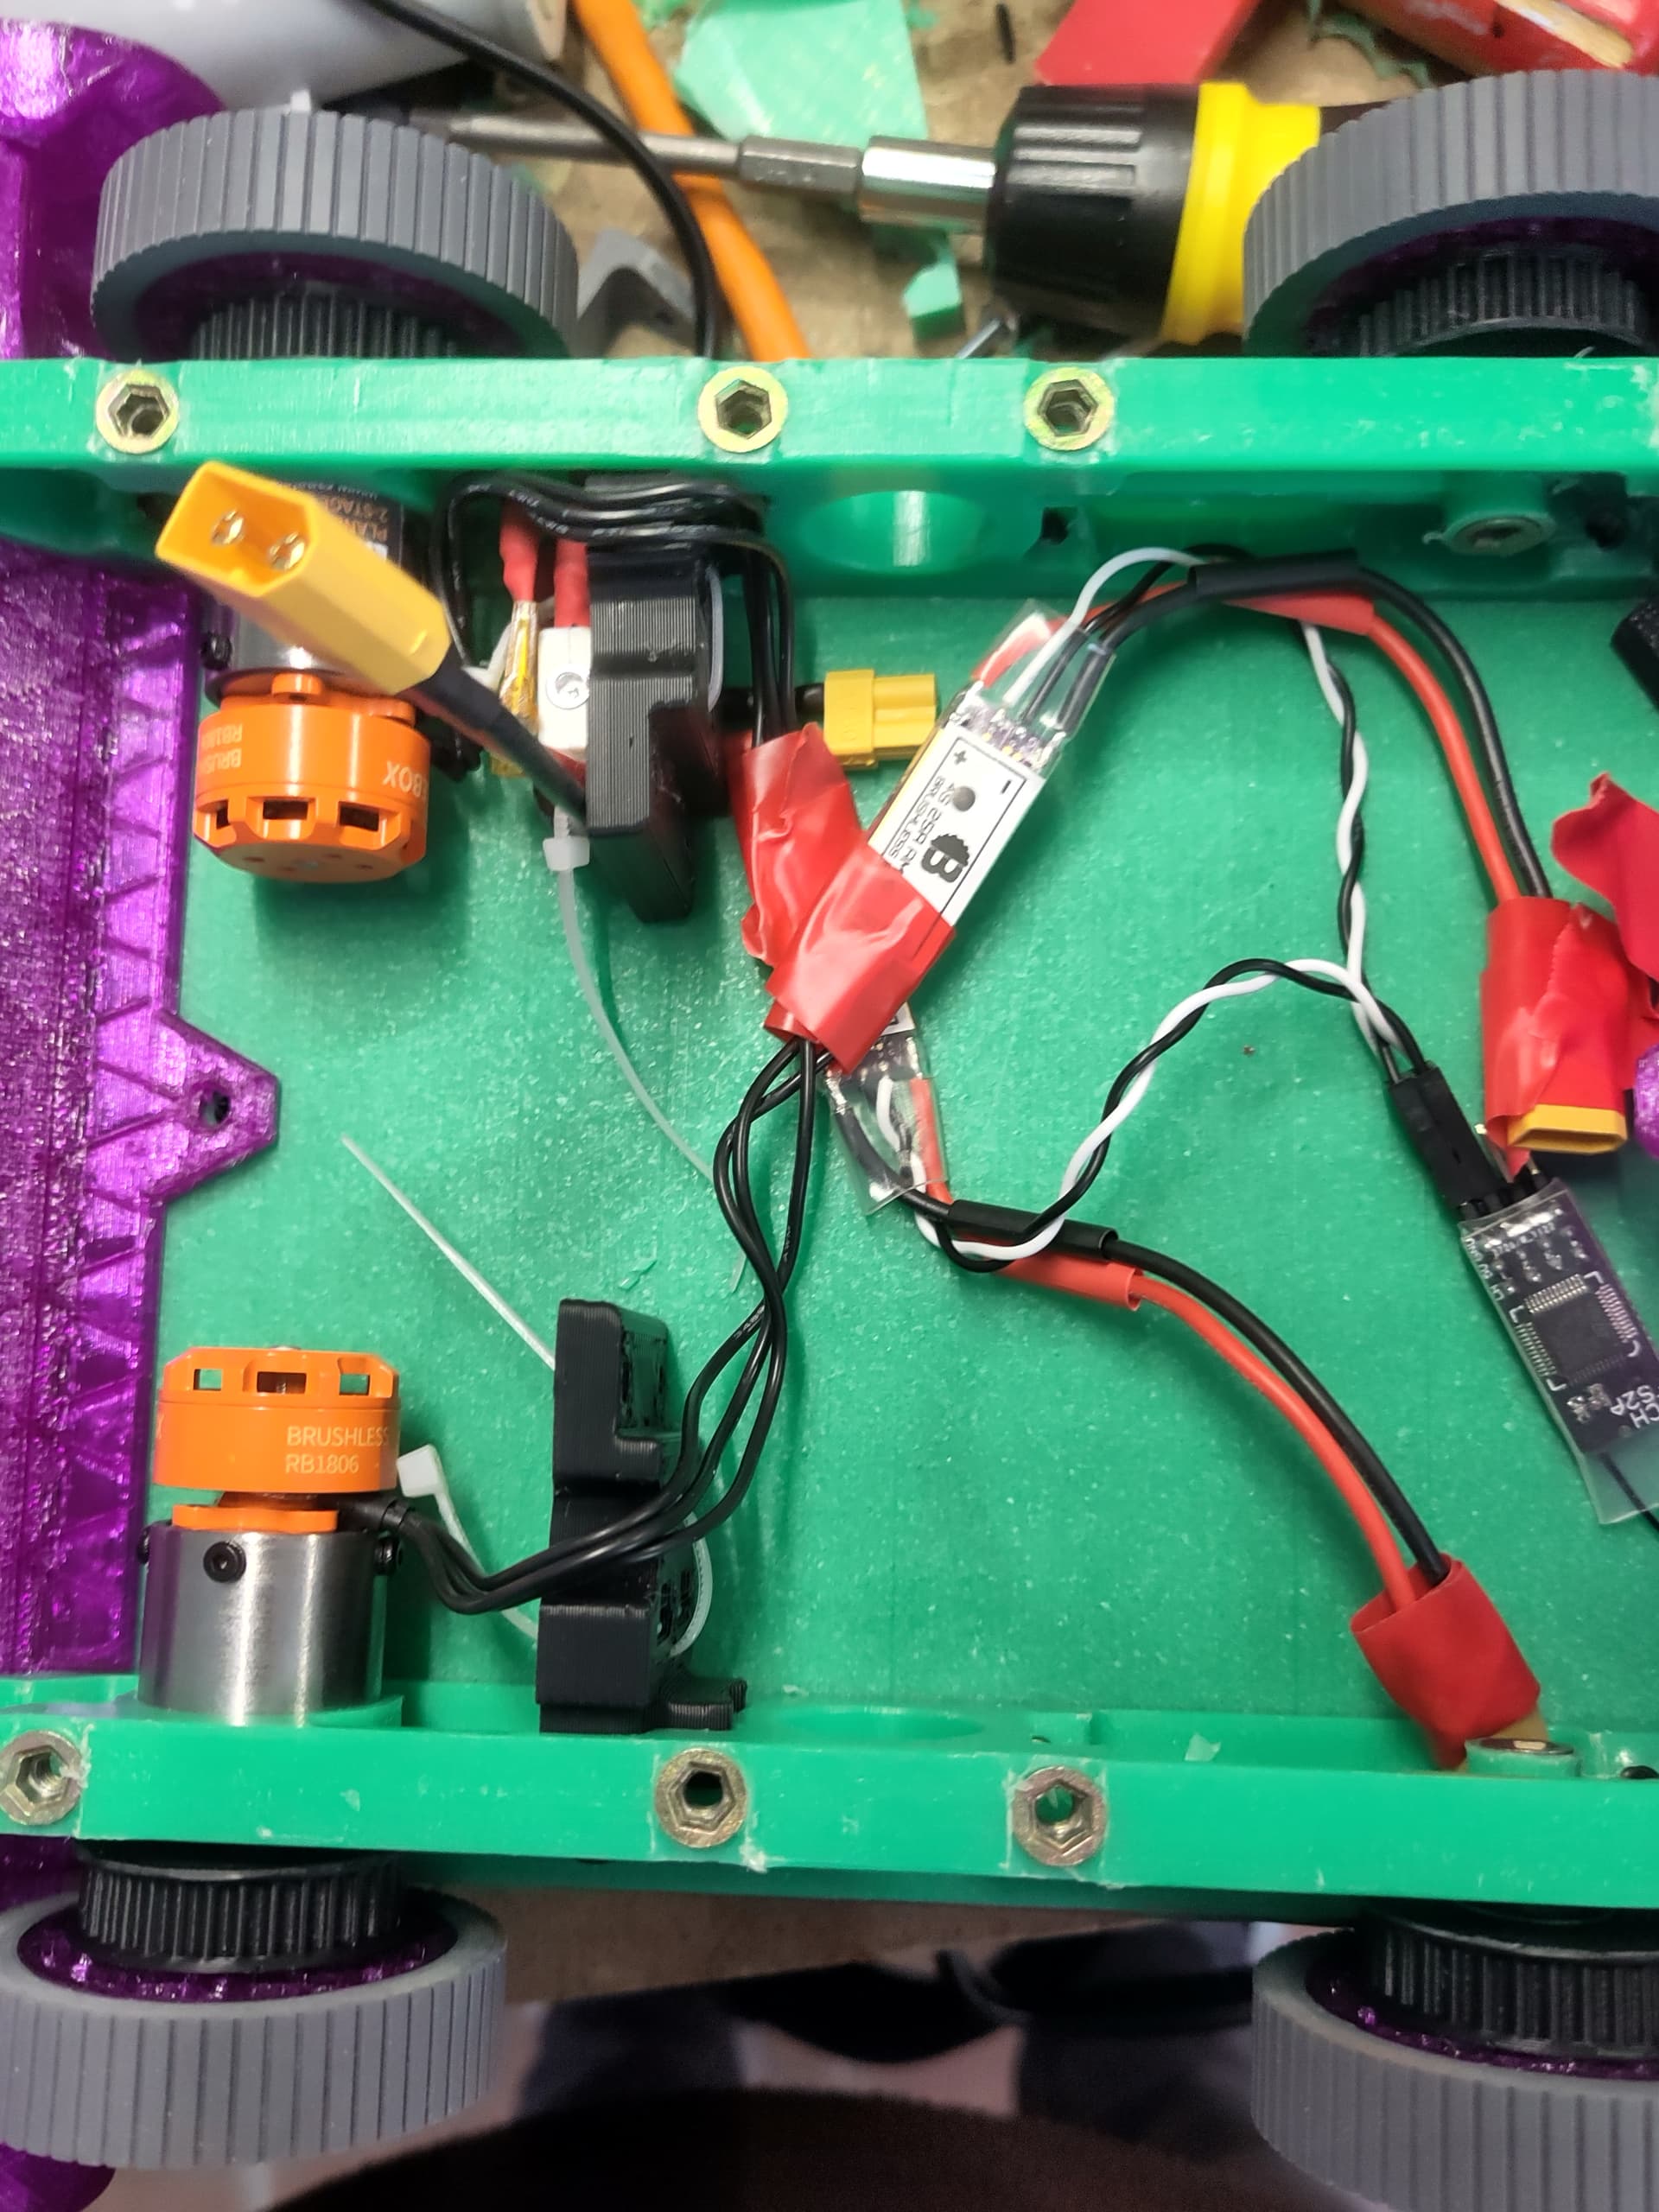
I actually got everything pretty much wired up last night, ready to test drive today, but here’s the note of caution in this build log: beware of Hobbyking batteries with shoddy connectors. I am so used to XT connectors being polarised I would not think to check that I was plugging a battery in the right way around, but if you have cruddy XT30 ripoffs that are made out of cheese you can merrily pop them in the wrong way around without realising (spoiler, you will realise when the three ESCs wired into the robot start making popping noises and emitting smoke). Cue an emergency BBB order and some frantic rewiring today (there are enough odds and sods of spare ESCs around the house to do PoM this weekend, to be followed by swapping out some bits later in the week).
In the meantime, weight with the smaller motor is looking OK so far:
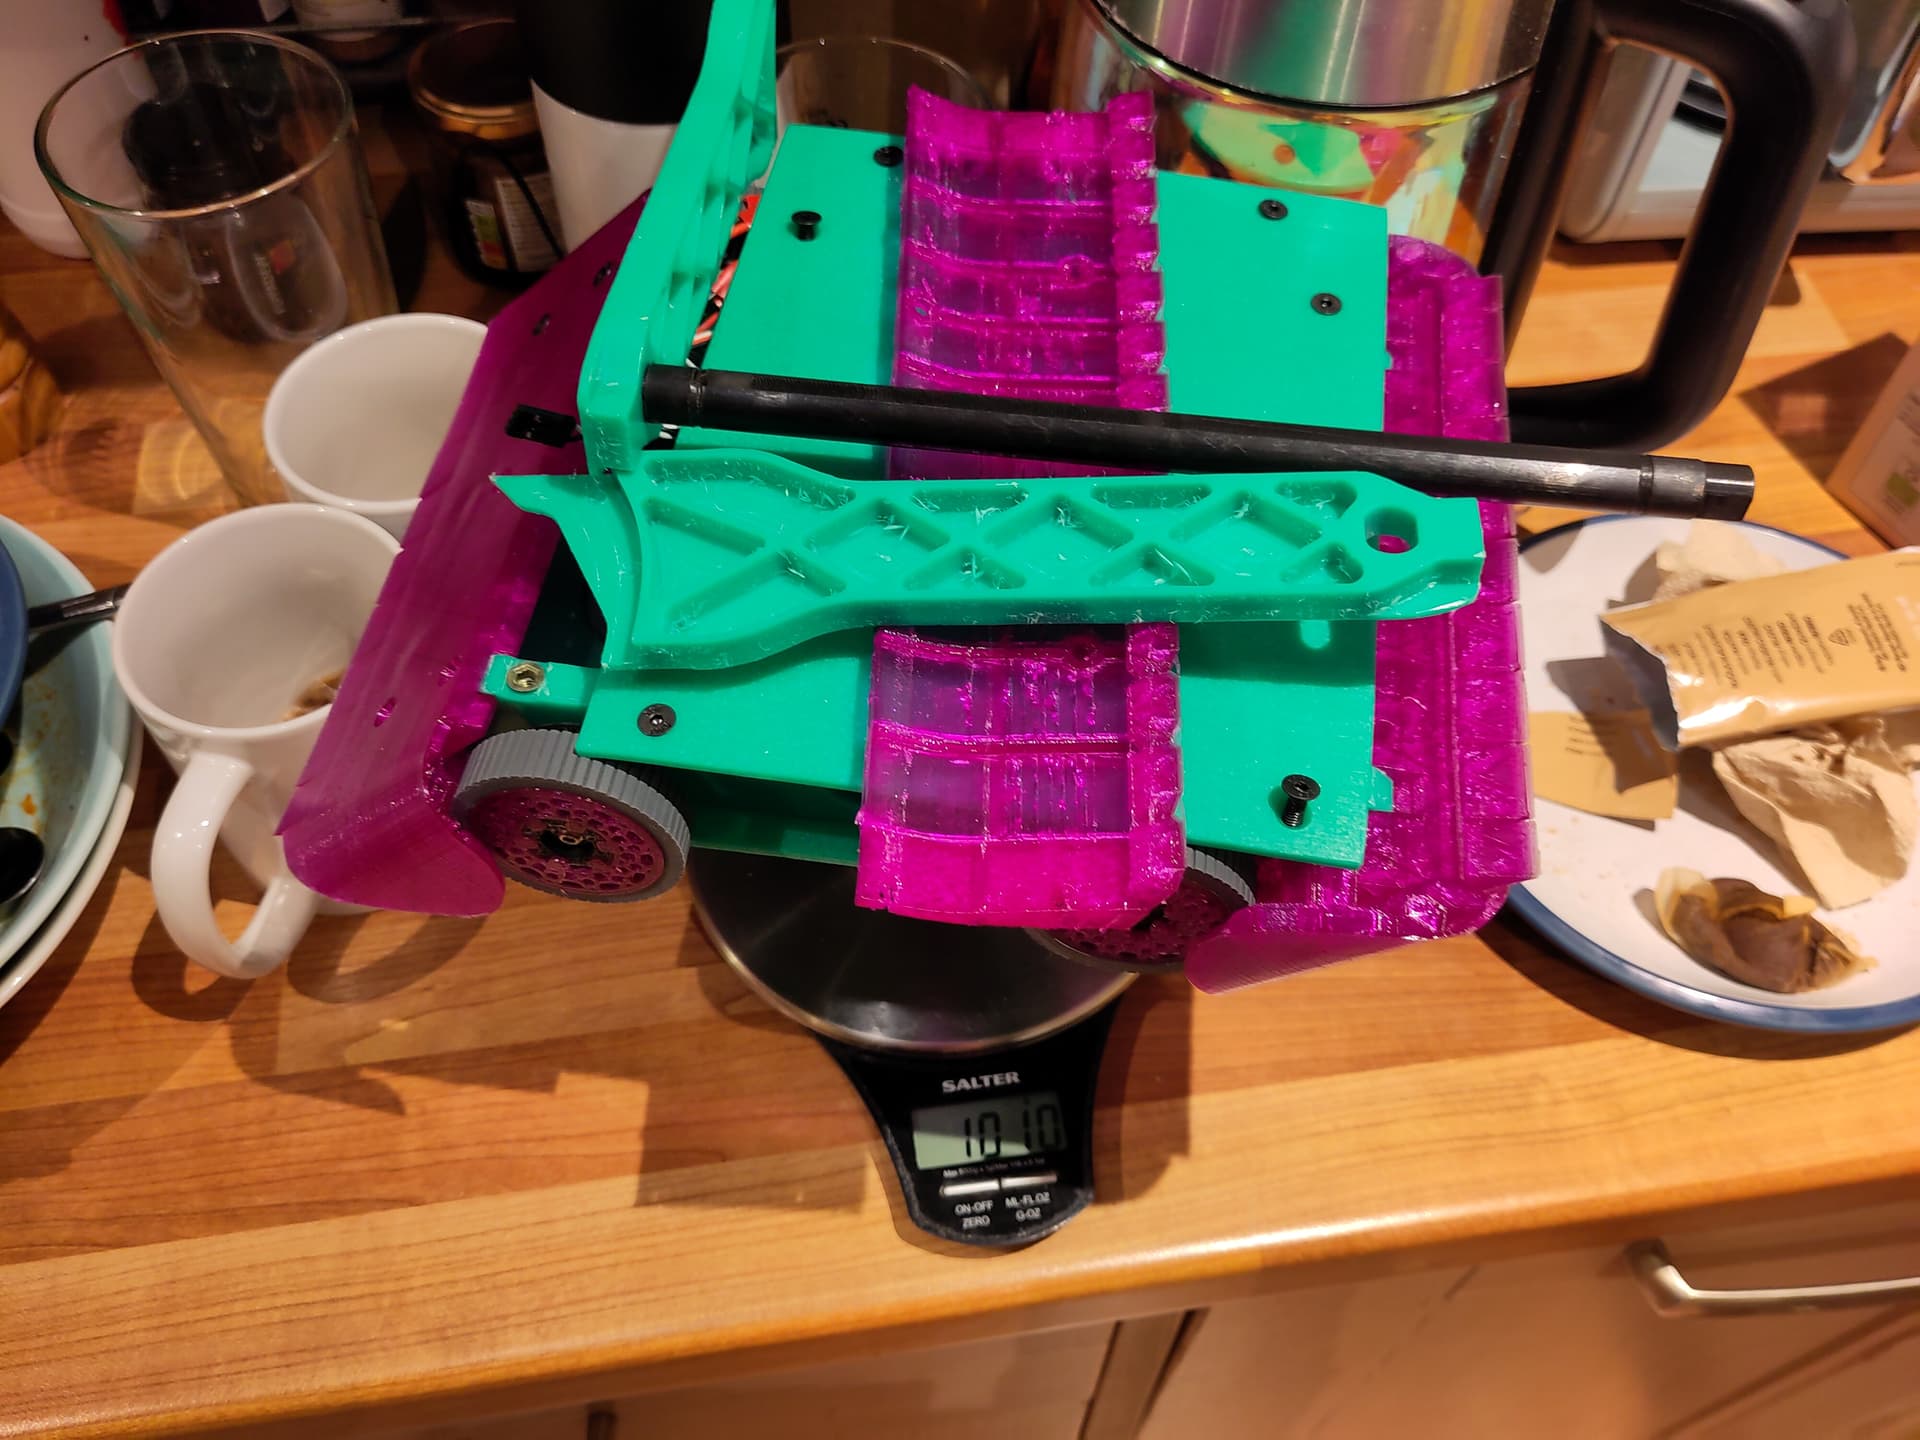
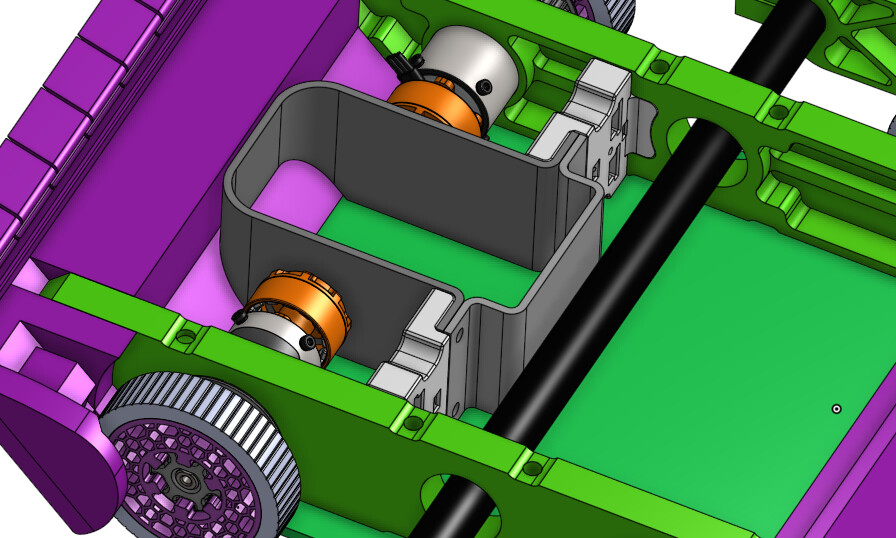
I have also started putting in some proper internals:
TO DO LIST
There is still a fair chunk to get finished on this bot, albeit some of it bodge-at-the-last-minuteable. The main thing is to get the weapon working, which means a roughly 4:1 reduction from the motor to the shaft. The plan is for this to be 2 stages, the first chunky 3D printed (CF PLA) gears, the scond another HTD3 belt to allow a bit of flexibility. It also needs some proper bushings which I’ll turn out of nylon and the aforementioned HDPE for the scoop (2mm front and back is the plan). Plus of course the motor has to be mounted in some way.
Internally there’s a fair bit of tidying to do, especially for the battery. I’m planning on making a heat-bent HDPE box for the battery, which will connect to the 3D printed bits in the last photo.
There will probably also be some TPU or foam here for padding, and maybe even a bit of thin spring steel if there’s enough mass budget left.
The stretch goals include:
- More funky 3D printed bits
- Fitting an encoder to the weapon and using an Rpi Pico or ESP32 to control the position rather than wildly spinning it and hoping it stops somewhere useful (meh)
- Putting in a gyro (using an IMU and microcontroller as above, if it’s there anyway).
Hoping to get this thing driving tomorrow, let’s see…