Hi all!
I’ve been printing my beetle chassis in polypropylene for a while now, thanks to it’s mixture of unique properties that make it pretty well suited to combat robots of that scale:
- It’s semi-flexible while maintaining a higher rigidity than standard TPU filaments (50-55D shore hardness Vs 95A), without being rigid enough to crack or snap like many nylon filaments
- It’s super lightweight; while it varies from brand to brand, PP varies from 0.85 to 0.95g/cm³, providing a substantial weight saving Vs TPU (~1.2g/cm³) and nylon (~1.1g/cm³)
The downside to polypropylene as many have discovered, is that it prints like absolute crap.
Polypropylene only sticks to itself and won’t adhere to any standard build plate materials like glass, PEI or garolite. It also warps like crazy and loves to curl up at the corners, which combined with the poor bed adhesion often results in the print pulling off the bed. So of course I decided to use it to make a robot anyway because I needed a chassis that wouldn’t crack super easily like my rigid nylon chassis, or be too flexible and just flap around like my bendy TPU chassis. I spent around 6 months trying and failing to print a PP chassis that didn’t curl up significantly at the corners, and thanks to a lot of trial and error and some chats with others trying to print the material, I’ve managed to get a setup down that prints reliably straight (enough) prints for the beetle scale:
THE BIT PEOPLE CARE ABOUT
Ok look it’s not perfect. But it’s good enough, and compared to how it was before it’s SO much better. So let’s get into the how-to.
Firstly this guide is mainly for a Bambu P1S (or X1C) printer since that’s what I have, and some of the parts are pretty specific to that printer but the broad strokes should be applicable to other printers too
With that out the way let’s start with the essentials.
PP loves to warp, so realistically you should have a fully enclosed printer. It’s possible to print PP without one but you’ll be at a significant disadvantage while the ambient temperature of the room affects the cooling of the print and causes worse warping.
You want to get the good stuff. I’ve tried a lot of different brands of polypropylene filament, and can tell you which ones are good and which you should avoid.
£10 reels of polypropylene from Amazon etc you should avoid. I’ve tried a couple of these (Yousu, Eryone) and both had the same issue, they printed horribly and were considerably heavier than stated (like nearly 1g/cm³).
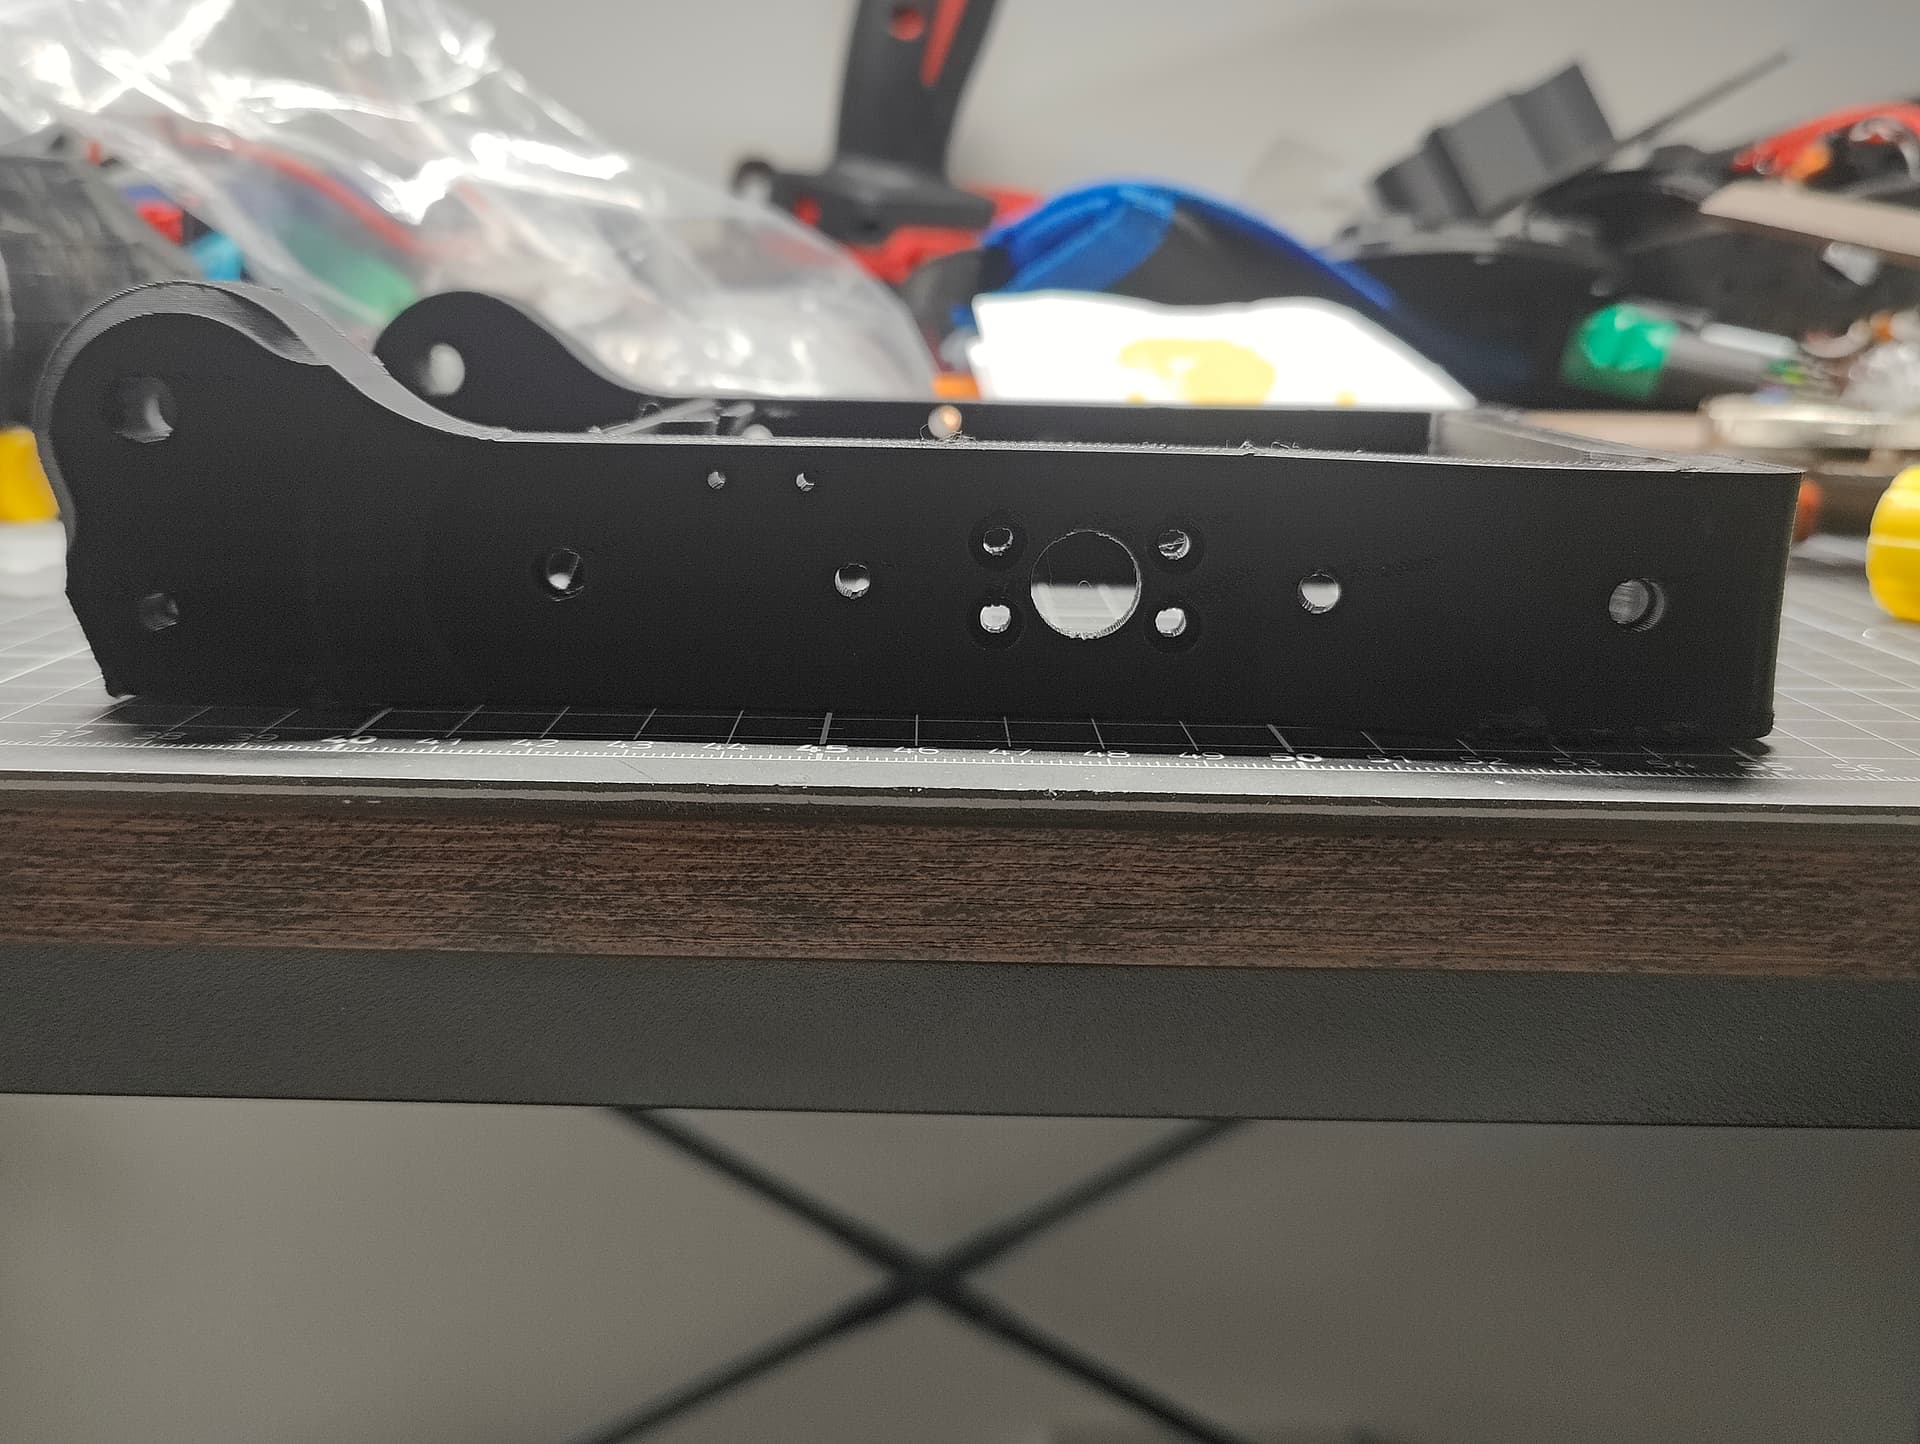
If your priority is just the best option possible for mechanical properties and weight saving what you want is FormFutura Centaur. It’s £35 for a 500g reel, but it’s by far the strongest and lightest polypropylene filament I’ve tested. This is the stuff I use for Frenzy’s main chassis.
The only problem with Centaur is a lack of colours; it only comes in black, white or natural. For most that’s probably fine, but if you absolute MUST have colours (like me for my aggressively orange antweights), there are two options. The best option is PPprint P-filament 721, which is only available from Europe, but comes in a relatively small variety of other colours and has the second lightest density next to Centaur. If this one doesn’t come in the colour you need the only other option is Fiberlogy PP which comes in some more colours, but is again a little heavier than 721.
So now you have the right filament, what next? Well you can’t just print it on your stock plate, it won’t stick. So you need a special adhesive to add to the bed and what I use is Magigoo Pro for PP. This stuff has worked great for me, some use polypropylene packing tape on the print bed so I guess you can try that? But I never had any luck with it, the heat from the bed would melt the glue and the tape would just come loose from the bed
While the standard Bambu textured PEI plate can work decently, I had better results using the Bambu Engineering plate, which is the reverse side of the High Temperature plate. This plate comes stock with the X1C but not the P1S and weirdly Bambu don’t sell it separately themselves, but there are some sellers out there.
The biggest issue with any effort to print PP without warping is that even if you do get perfect bed adhesion, it warps so aggressively it’ll pull the spring steel plate up and has been known to break glass beds. What I ended up doing to help with this was to print some clips to hold the plate down onto the bed, which I got from here and modified slightly, raising them up by 0.2mm to fit the engineering plate, which has an extra layer on it making it thicker, and made one of the tall clips with a thinner back to fit the front left corner of the bed which otherwise fouls on the enclosure:
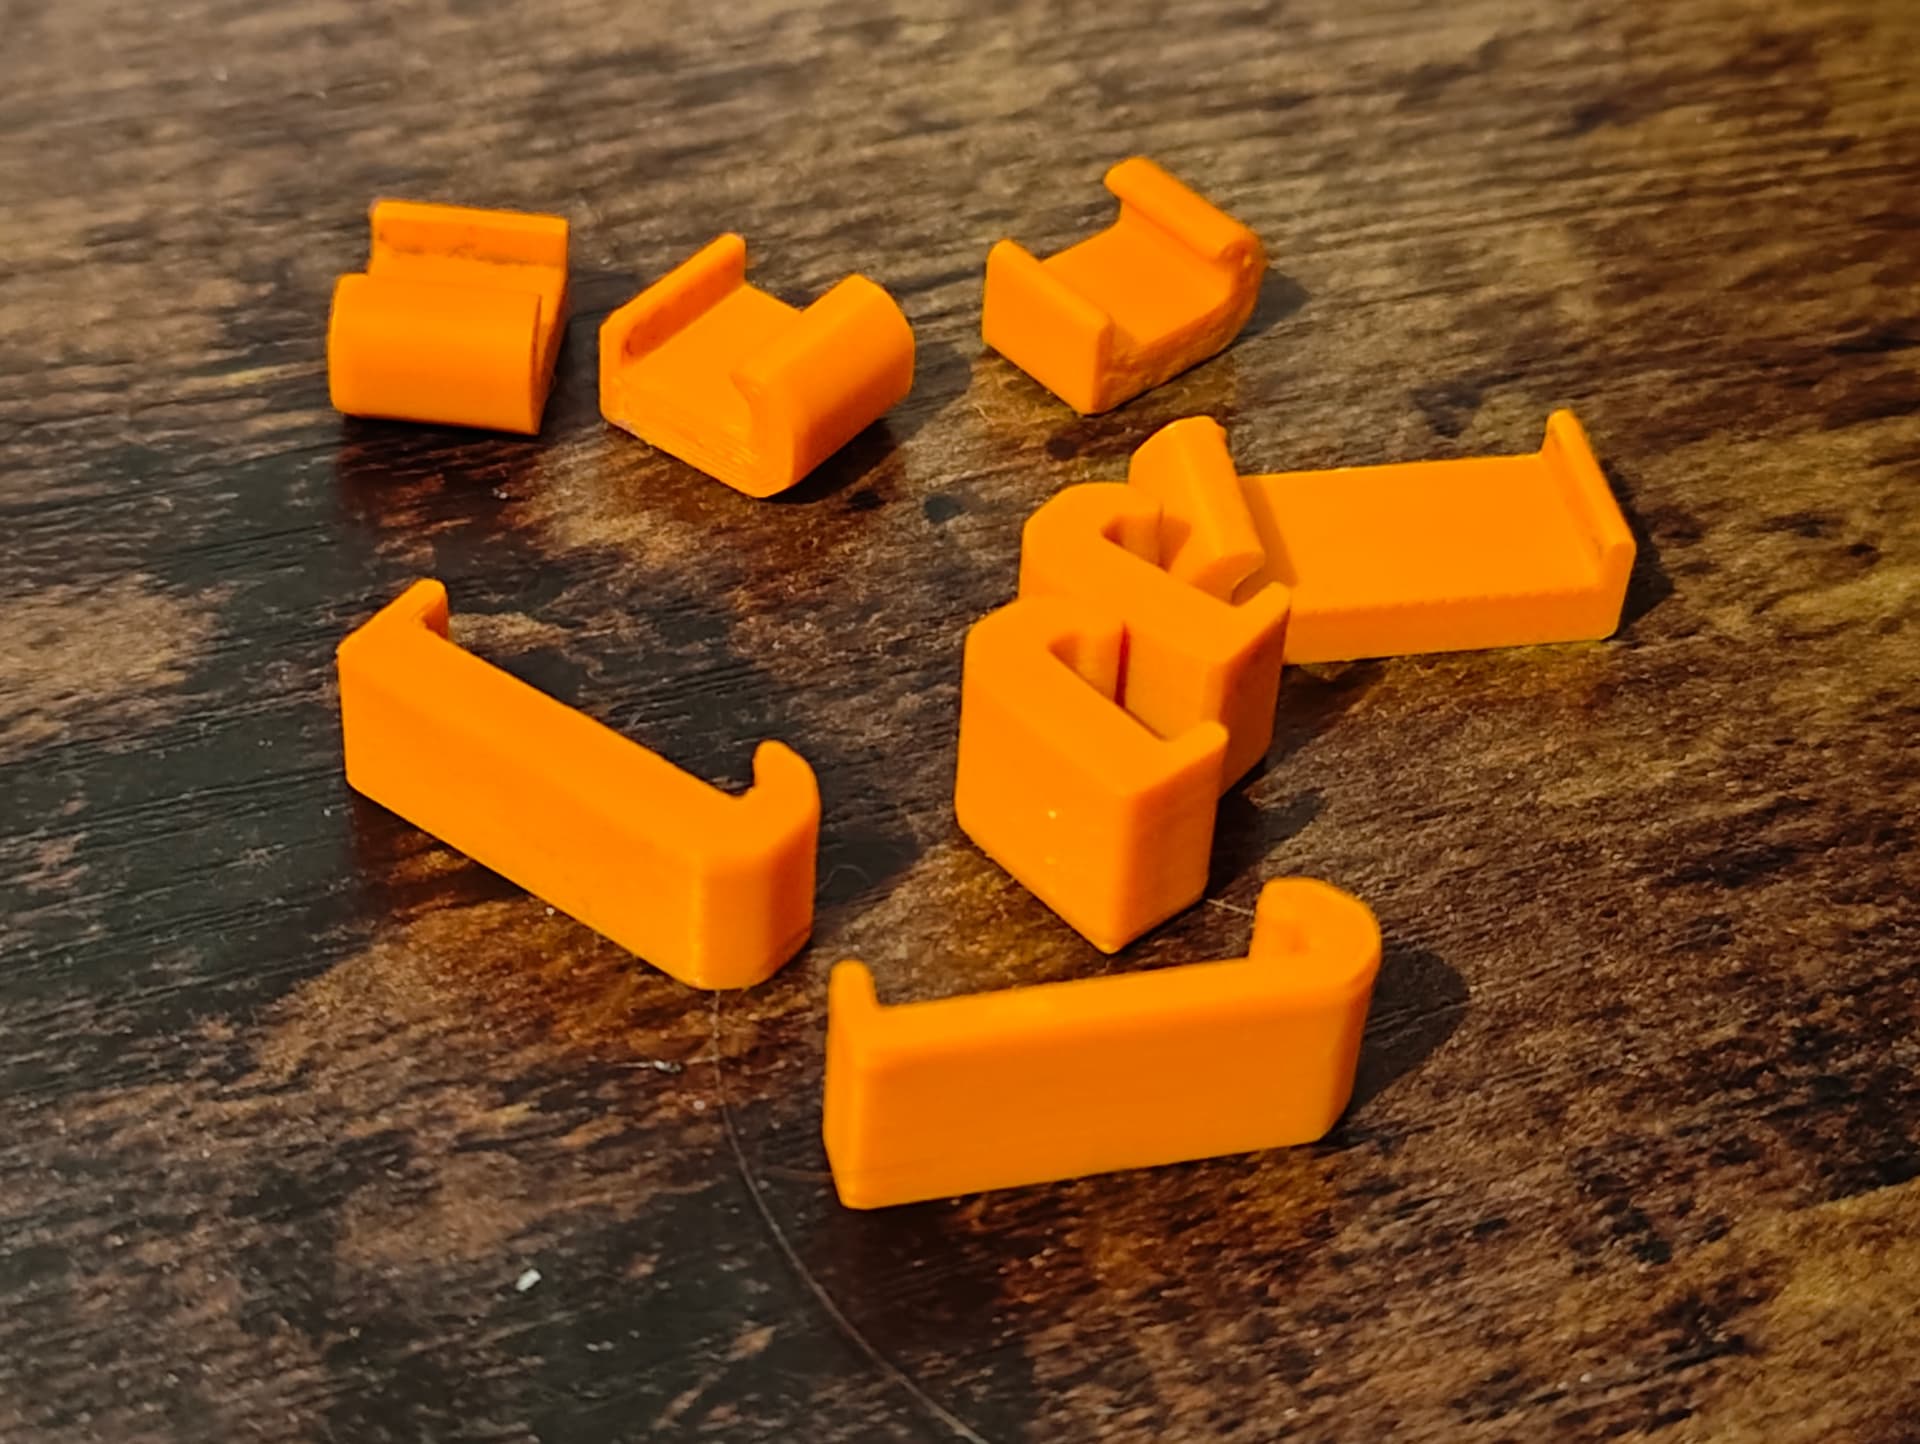
I printed these in a £5 sample of ASA filament I got on eBay, since ASA has a high softening temperature and needs to withstand 100C for the first layer.
SETTING UP THE PRINT
Ok, you have everything you need to get started! So now you have to set the print up to minimise warping. I tried a lot of things, and the key things that make a noticeable difference are:
-
Big brim
Use a brim, and a huge one. I tend to make the brim 20mm, and reduce the brim-object gap to 0. It’s more of a pain to remove, but cut it off with a box cutter or a scalpel rather than pulling it away so you don’t suffer -
Thick first layer
The thicker the first layer goes down, the better it seems to stick. This goes for any material by the way, but for PP it’s basically mandatory. I tend to set it to 0.4mm, but depending on your layer height changing the first layer thickness can cause some weird artifacts on flat parts of a print so if that happens try 0.3 or 0.36mm instead and it should go away -
Hot bed for the first layer
The most important part of the print is getting the first layer down. Once that’s done, if it sticks well that should be the end of any adhesion issues unless the print warps too much. I use a bed temperature of 100C for the first layer, and switch it down to 55C for each layer after that (although others have found that no bed heat at all can work fine for subsequent layers also; I like my setup so I haven’t tried it but it may be irrelevant) -
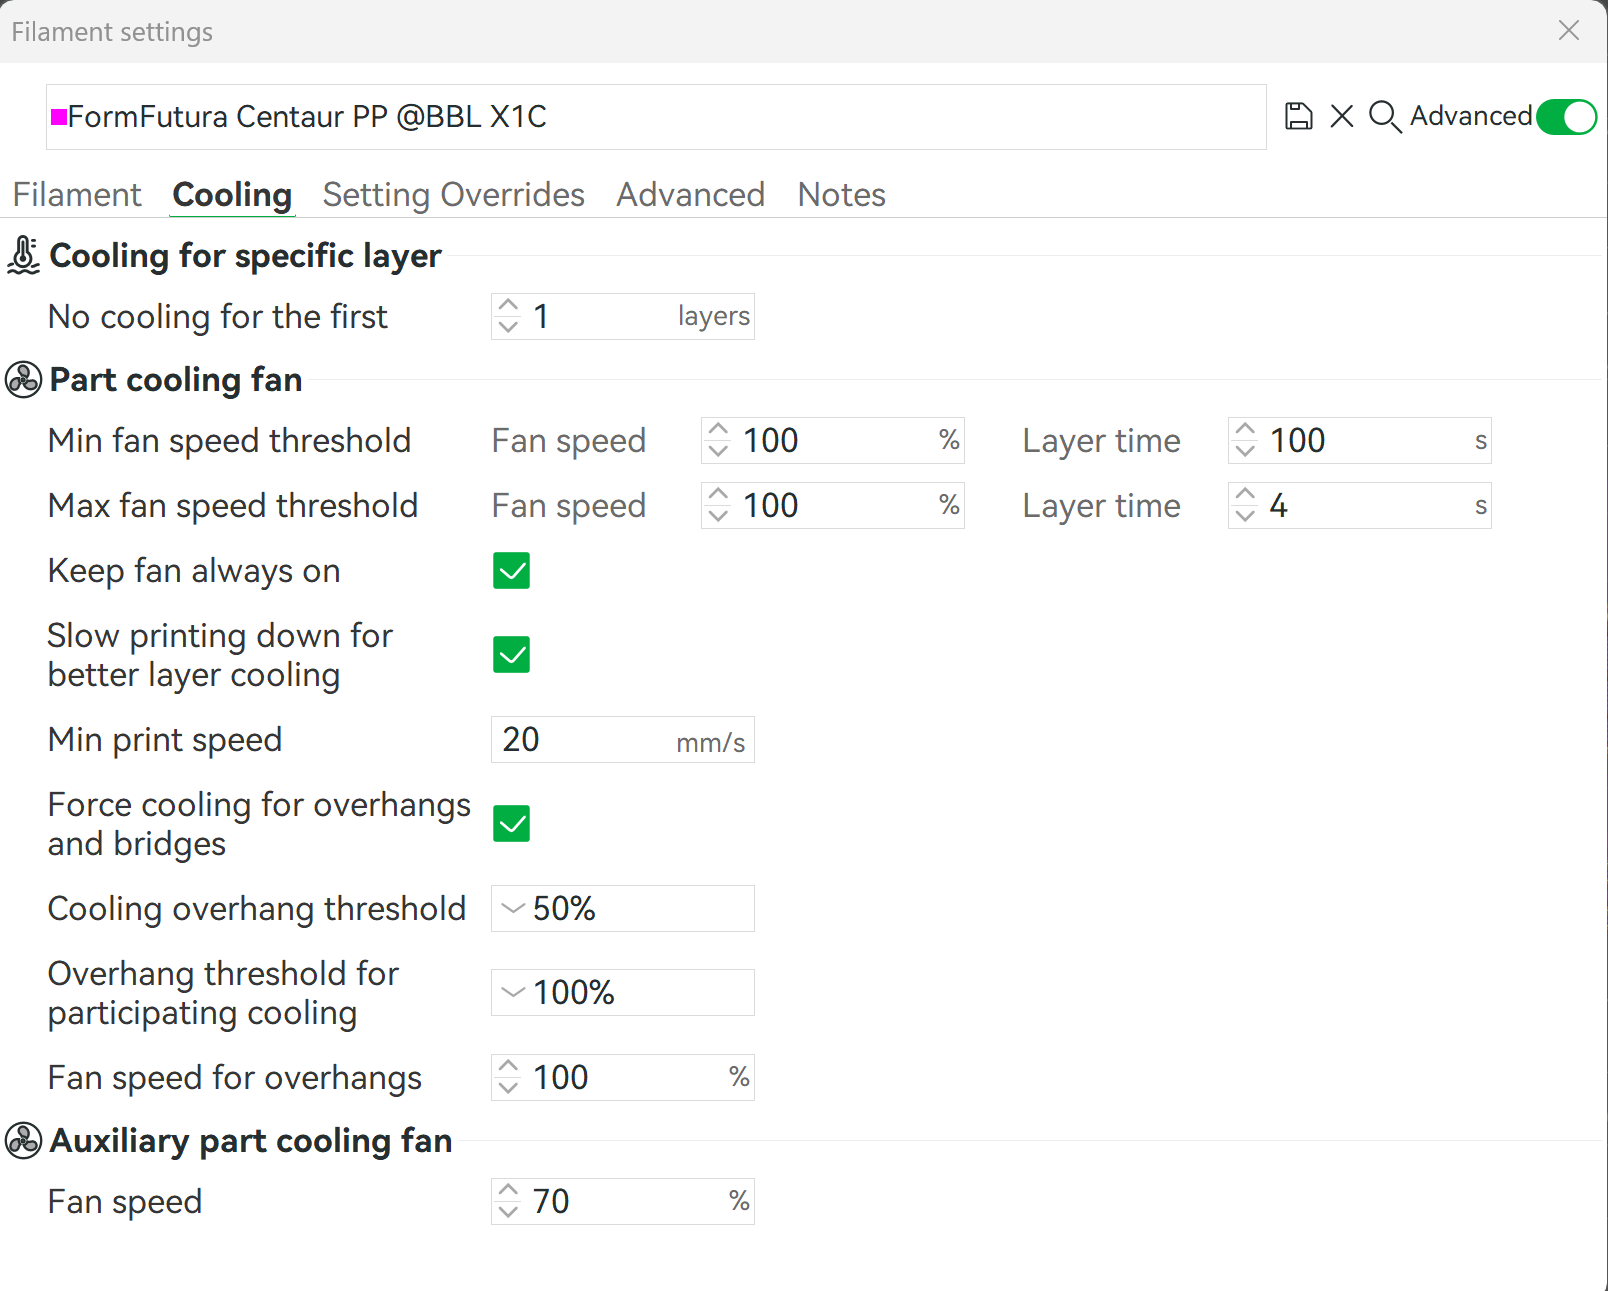
No cooling for the first layer
Following on from the last point, you want the first layer to go down hard. Not cooling this layer seems to help, so only start cooling the print after that first layer.
It’s tempting to disable cooling entirely for the entire print to try and heat the chamber to prevent warping, I did try this, but I advise against it. It didn’t help with the warping, and the print chamber heated up so much the filament often softened in the extruder and jammed up the gears
Here are the print settings I use for the Centaur filament:
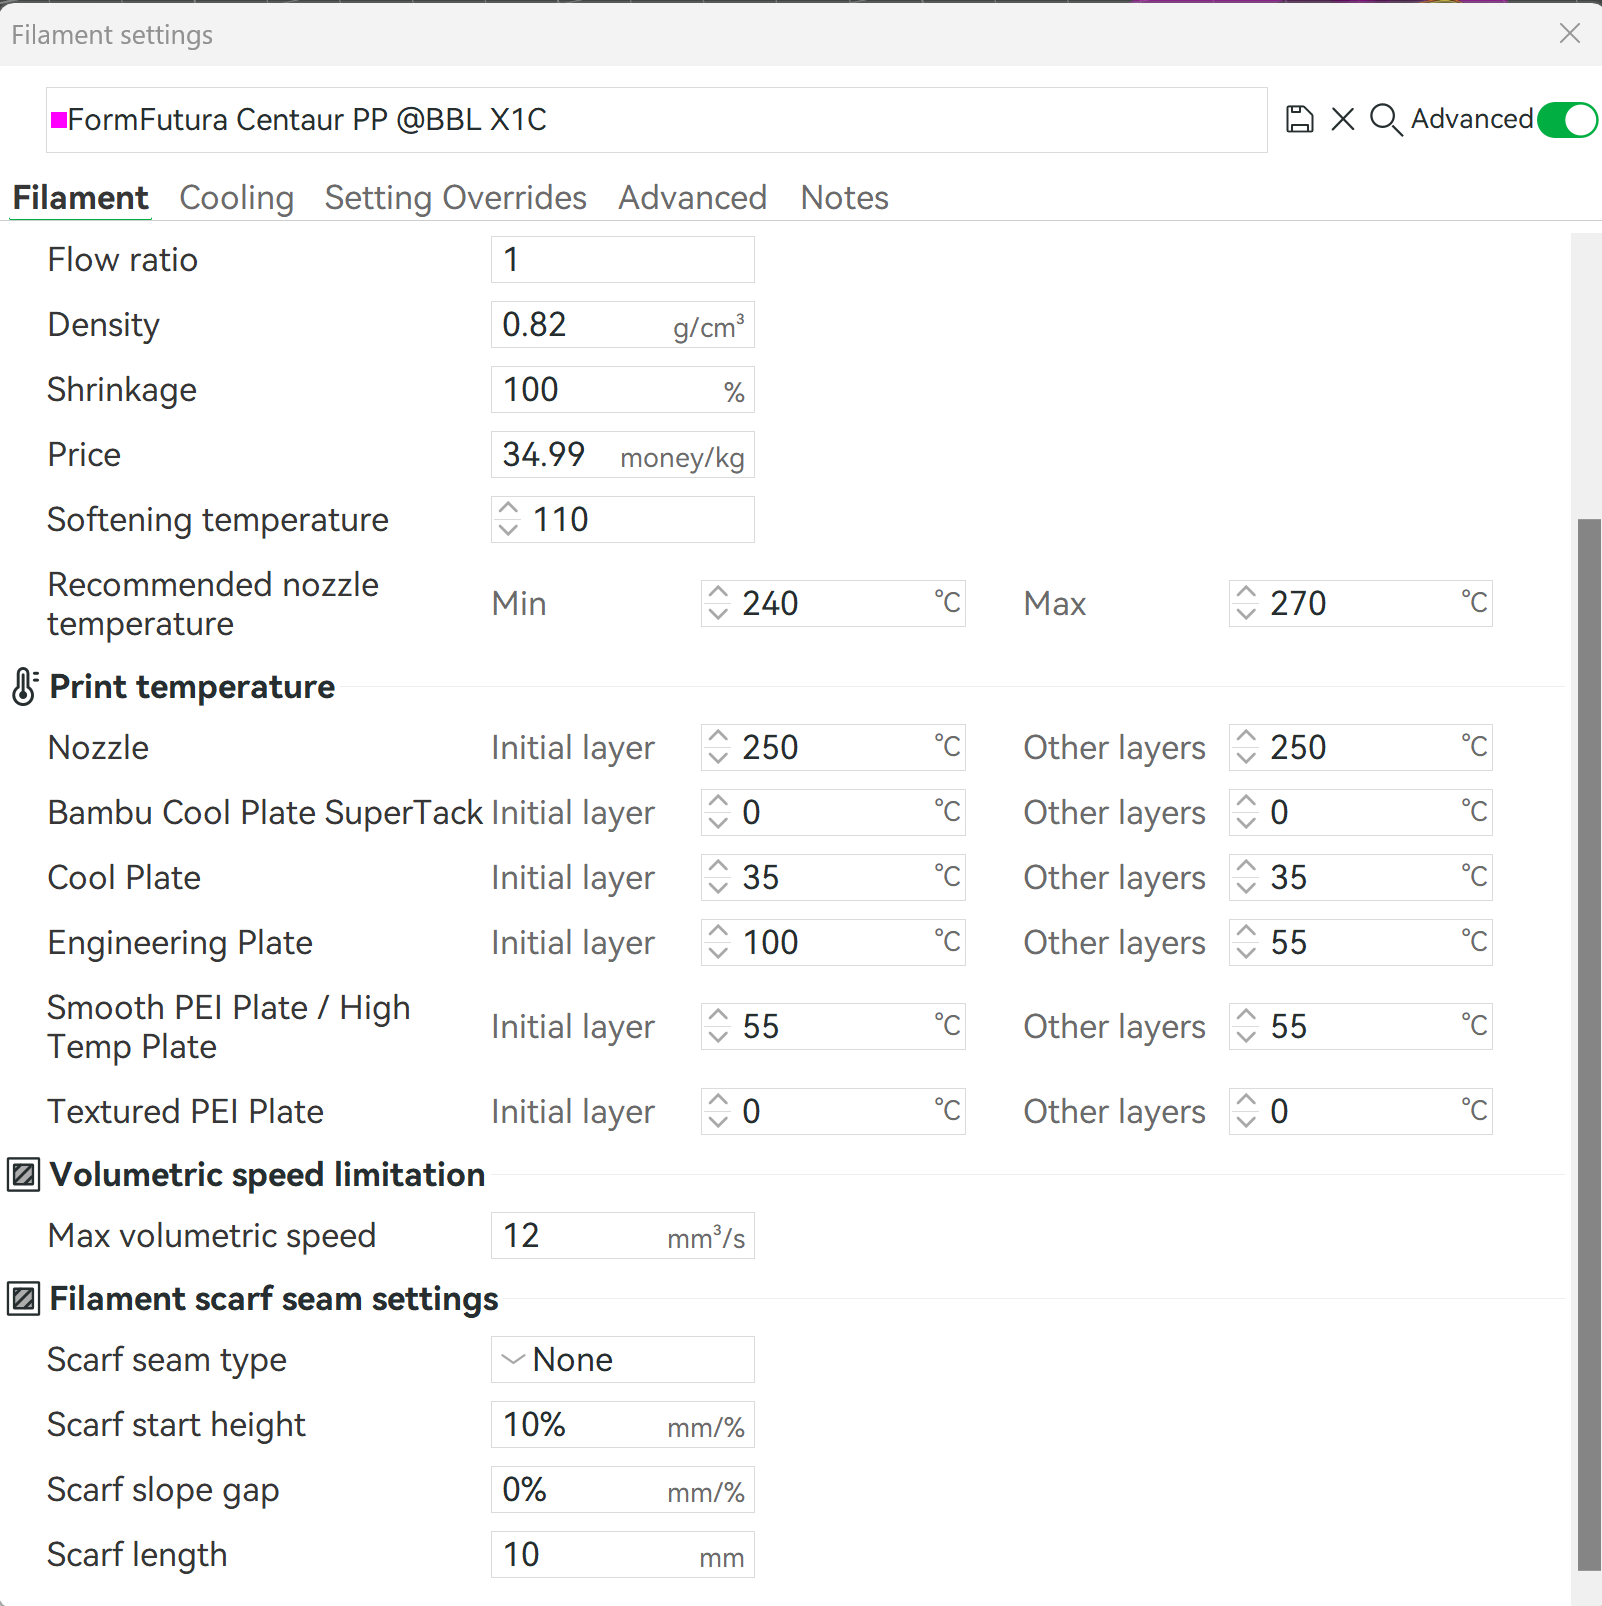
These settings are mostly based on the default PP profile added to Bambu slicer last year, which honestly barely needed much tweaking to work beautifully, but I thought it would be helpful to show so people with other printers so they can set their own profile up. You should also vary the nozzle temperature depending on the filament, 250C is pretty high for polypropylene but Centaur likes it hot. Most other PP filaments I found printed nicest at 235C
If you’re intending to print small parts, up to and including antweight bot chassis and similarly sized parts, this should be enough to overcome the issues and print usable parts, and you can skip the next section straight to the part where I explain setting up the plate! If you’re wanting to do what I’ve done with Frenzy and print a unibody chassis for a beetle, welcome to mouse ear hell
MOUSE EAR HELL
I spent 6 months trying everything I could to try and eliminate the warping. Nothing worked. I kept thinking how great it would be if I could add a super thick brim around the corners that would warp in place of the actual part, but I couldn’t figure out how to do that.
Enter my saviour, the Thicc Mouse Ears
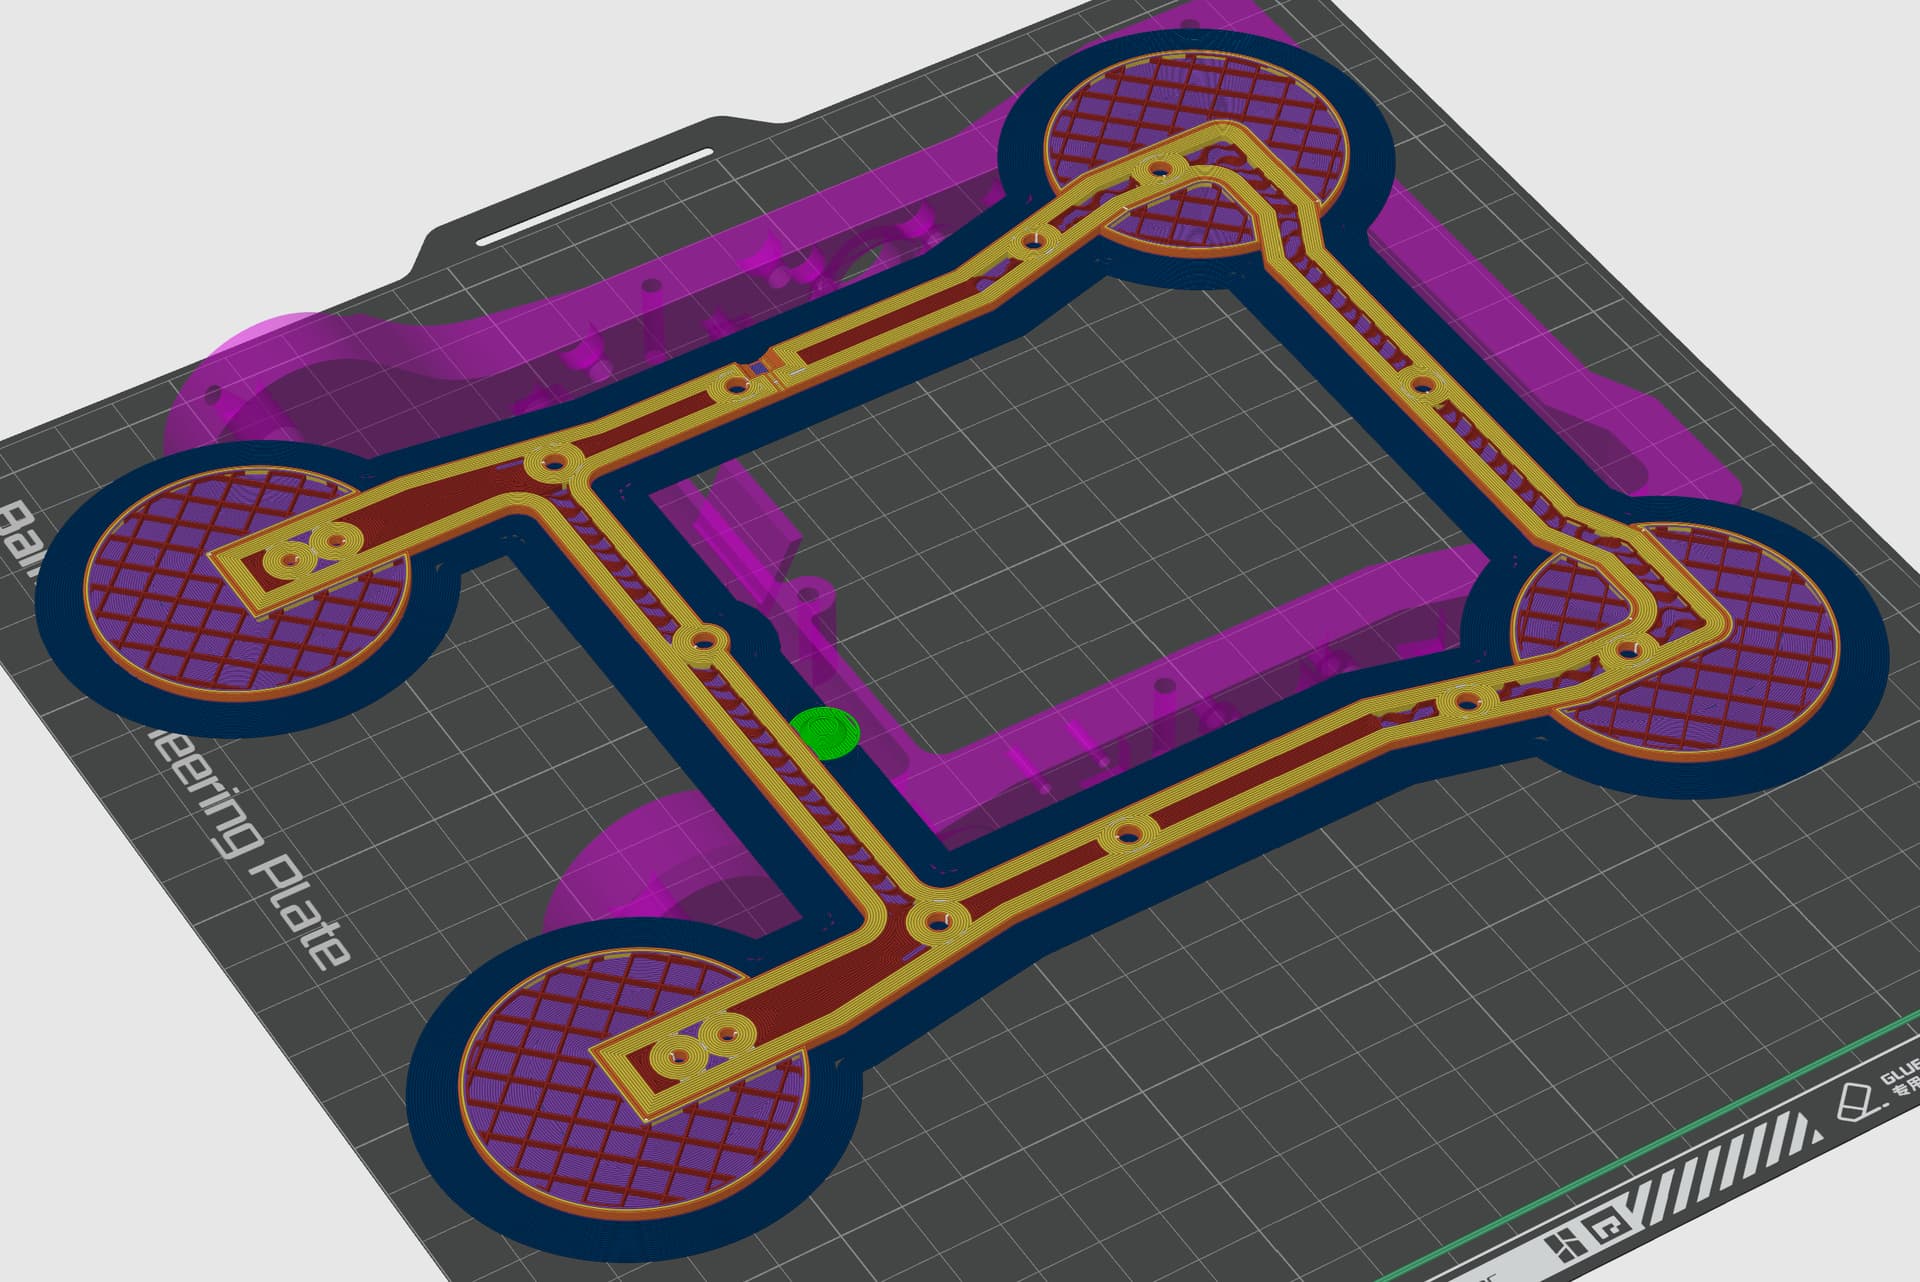
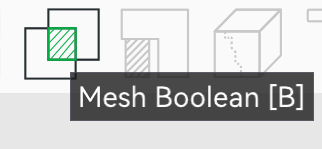
The mouse ears around the problem areas that tended to warp the most stick to the bed so perfectly it will peel the plate up as hard as it can no matter how hard you clamp it down. Even with the clips, the plate still curves slightly between them, although it’s not enough to hurt the functionality of the part. Note how they surround the chassis print but remain separate, allowing the chassis to still have fully continuous walls. To do this you need to use the Mesh Boolean function:
Right click on the part you’re wanting to print in the slicer, go to add part and add a disc. Resize the disc to be ~3mm thick, and large enough to give at least a 20mm radius around the section of the part you want to surround. Ensure both the part and the disc are correctly aligned with the ground, and select the mesh boolean function.
There are three options within this function, but the one you need is ‘Difference’. You can now select two parts, one to subtract from, and one to subtract with. For subtract from, choose the disc mesh, and for subtract with choose the part you want to print, then hit the Difference button to complete the process
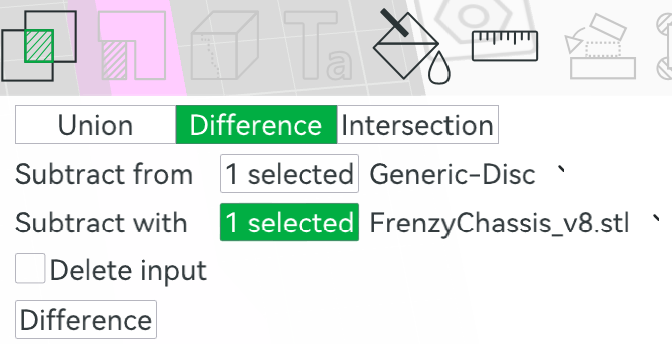
This should remove the part of the disc that intersects with the part, and when sliced should preserve the parts continuous walls. You can set these parts to stock print settings for wall count and infill as it makes no difference. Add these discs around any problem areas, usually any sharp corners 90° or sharper, just ensure that they fit on the plate as they can add quite a bit to the parts footprint!
THE PART WHERE I EXPLAIN SETTING UP THE PLATE
If you were able to skip the last section, hi! If not, I am sorry, but it’s over now
Now all that’s left is to set the plate up. Ensure the plate is clear of any dirt, oil etc first, then I tend to add three or more layers of Magigoo to the plate, slowly and as perpendicular to the plate as I can, ensuring to press down enough to engage the valve on the glue stick. Layer one in one direction, then layer two in the other direction in a crosshatch pattern, then the third layer diagonal. I’ve had my best results with at least three layers, though there could be other factors at play there so two could be fine as well.
Next ensure the plate is centred on the bed correctly. For the P1S there’s a little bit of side to side play, and to ensure the clips hold evenly on both sides I recommend trying to get this centred as close as you can. Then you want to add the clips, one on each corner, one as close to the centre on each side as you can, then one as close to the warping areas as possible. For a rigid plate like glass or thick garolite this is less important, but I would still clamp it down just in case. For a spring steel bed the plate will still bend upwards between the clips

Once this is done, you’re ready to start! The low profile clips don’t interfere with the bed levelling process so you can run that without any worries, and although I would periodically check on the print to make sure it’s all going well you should be able to just let it do it’s thing!
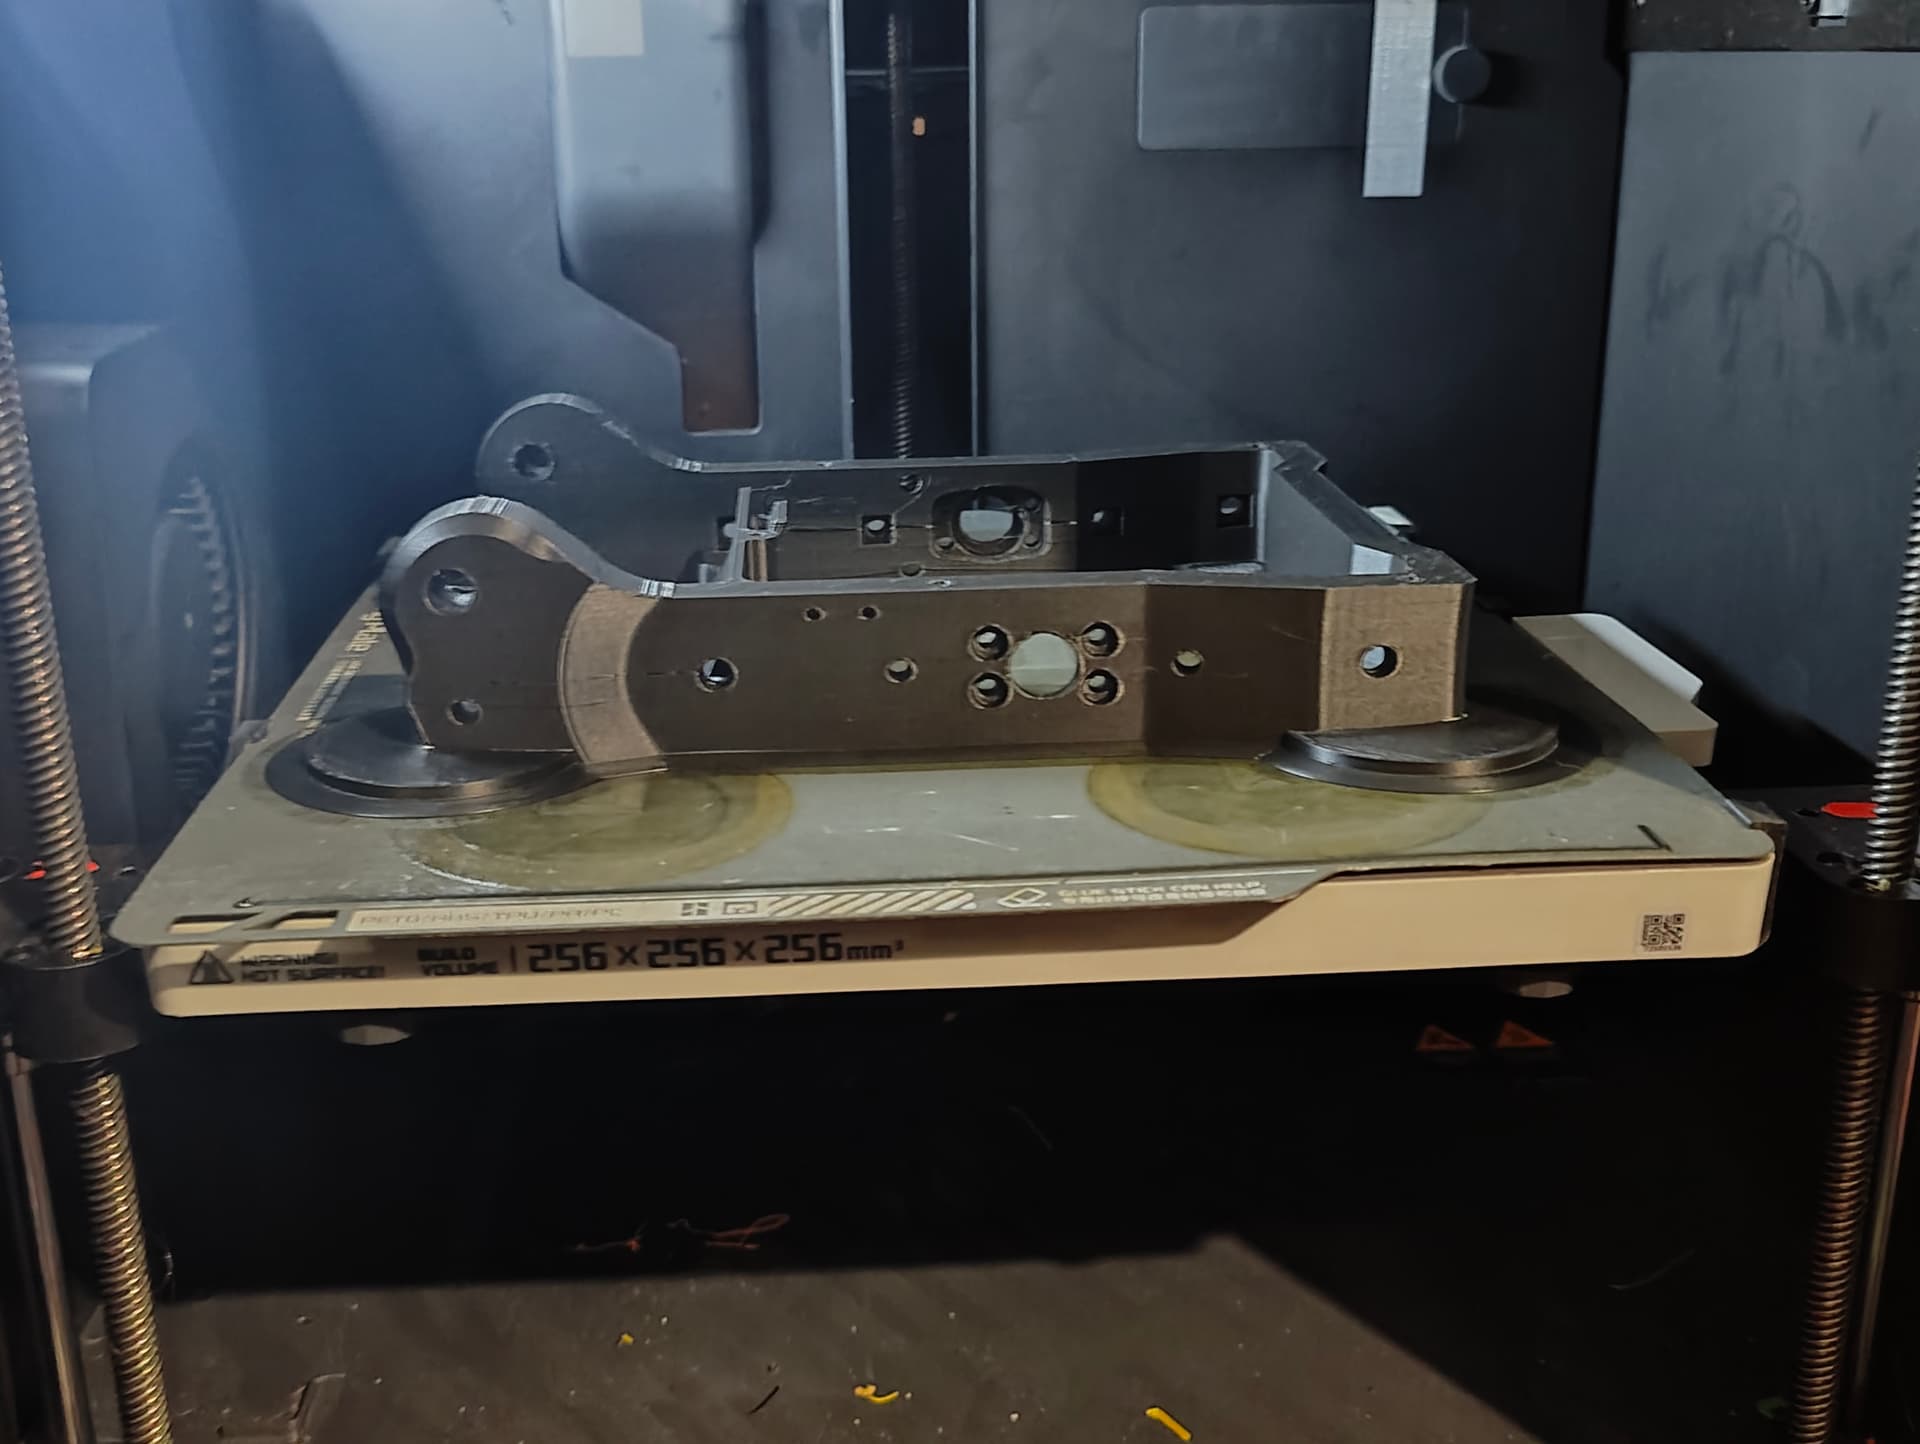
The discs should just snap off with some effort, leaving some mild artifacts behind but nothing that hurts the print functionally.
Polypropylene is still a pain to print, so there will likely be some artifacts on the print, and it’s not super great at unsupported bridges or overhangs, but it can use supports and I don’t actually have much trouble removing them after the fact. I prefer to use tree supports over grid supports, I find them easier to remove.
I hope this guide helps some people who want to try using this very cool material without having to go through all the trials I did to get to this point! And I’m sure everyone will be glad I don’t have to wall of text every time someone asks me about it in a group chat as well ![]()