Moonshot build
How to make a beetleweight compressor powered flipper. With off the shelf parts.
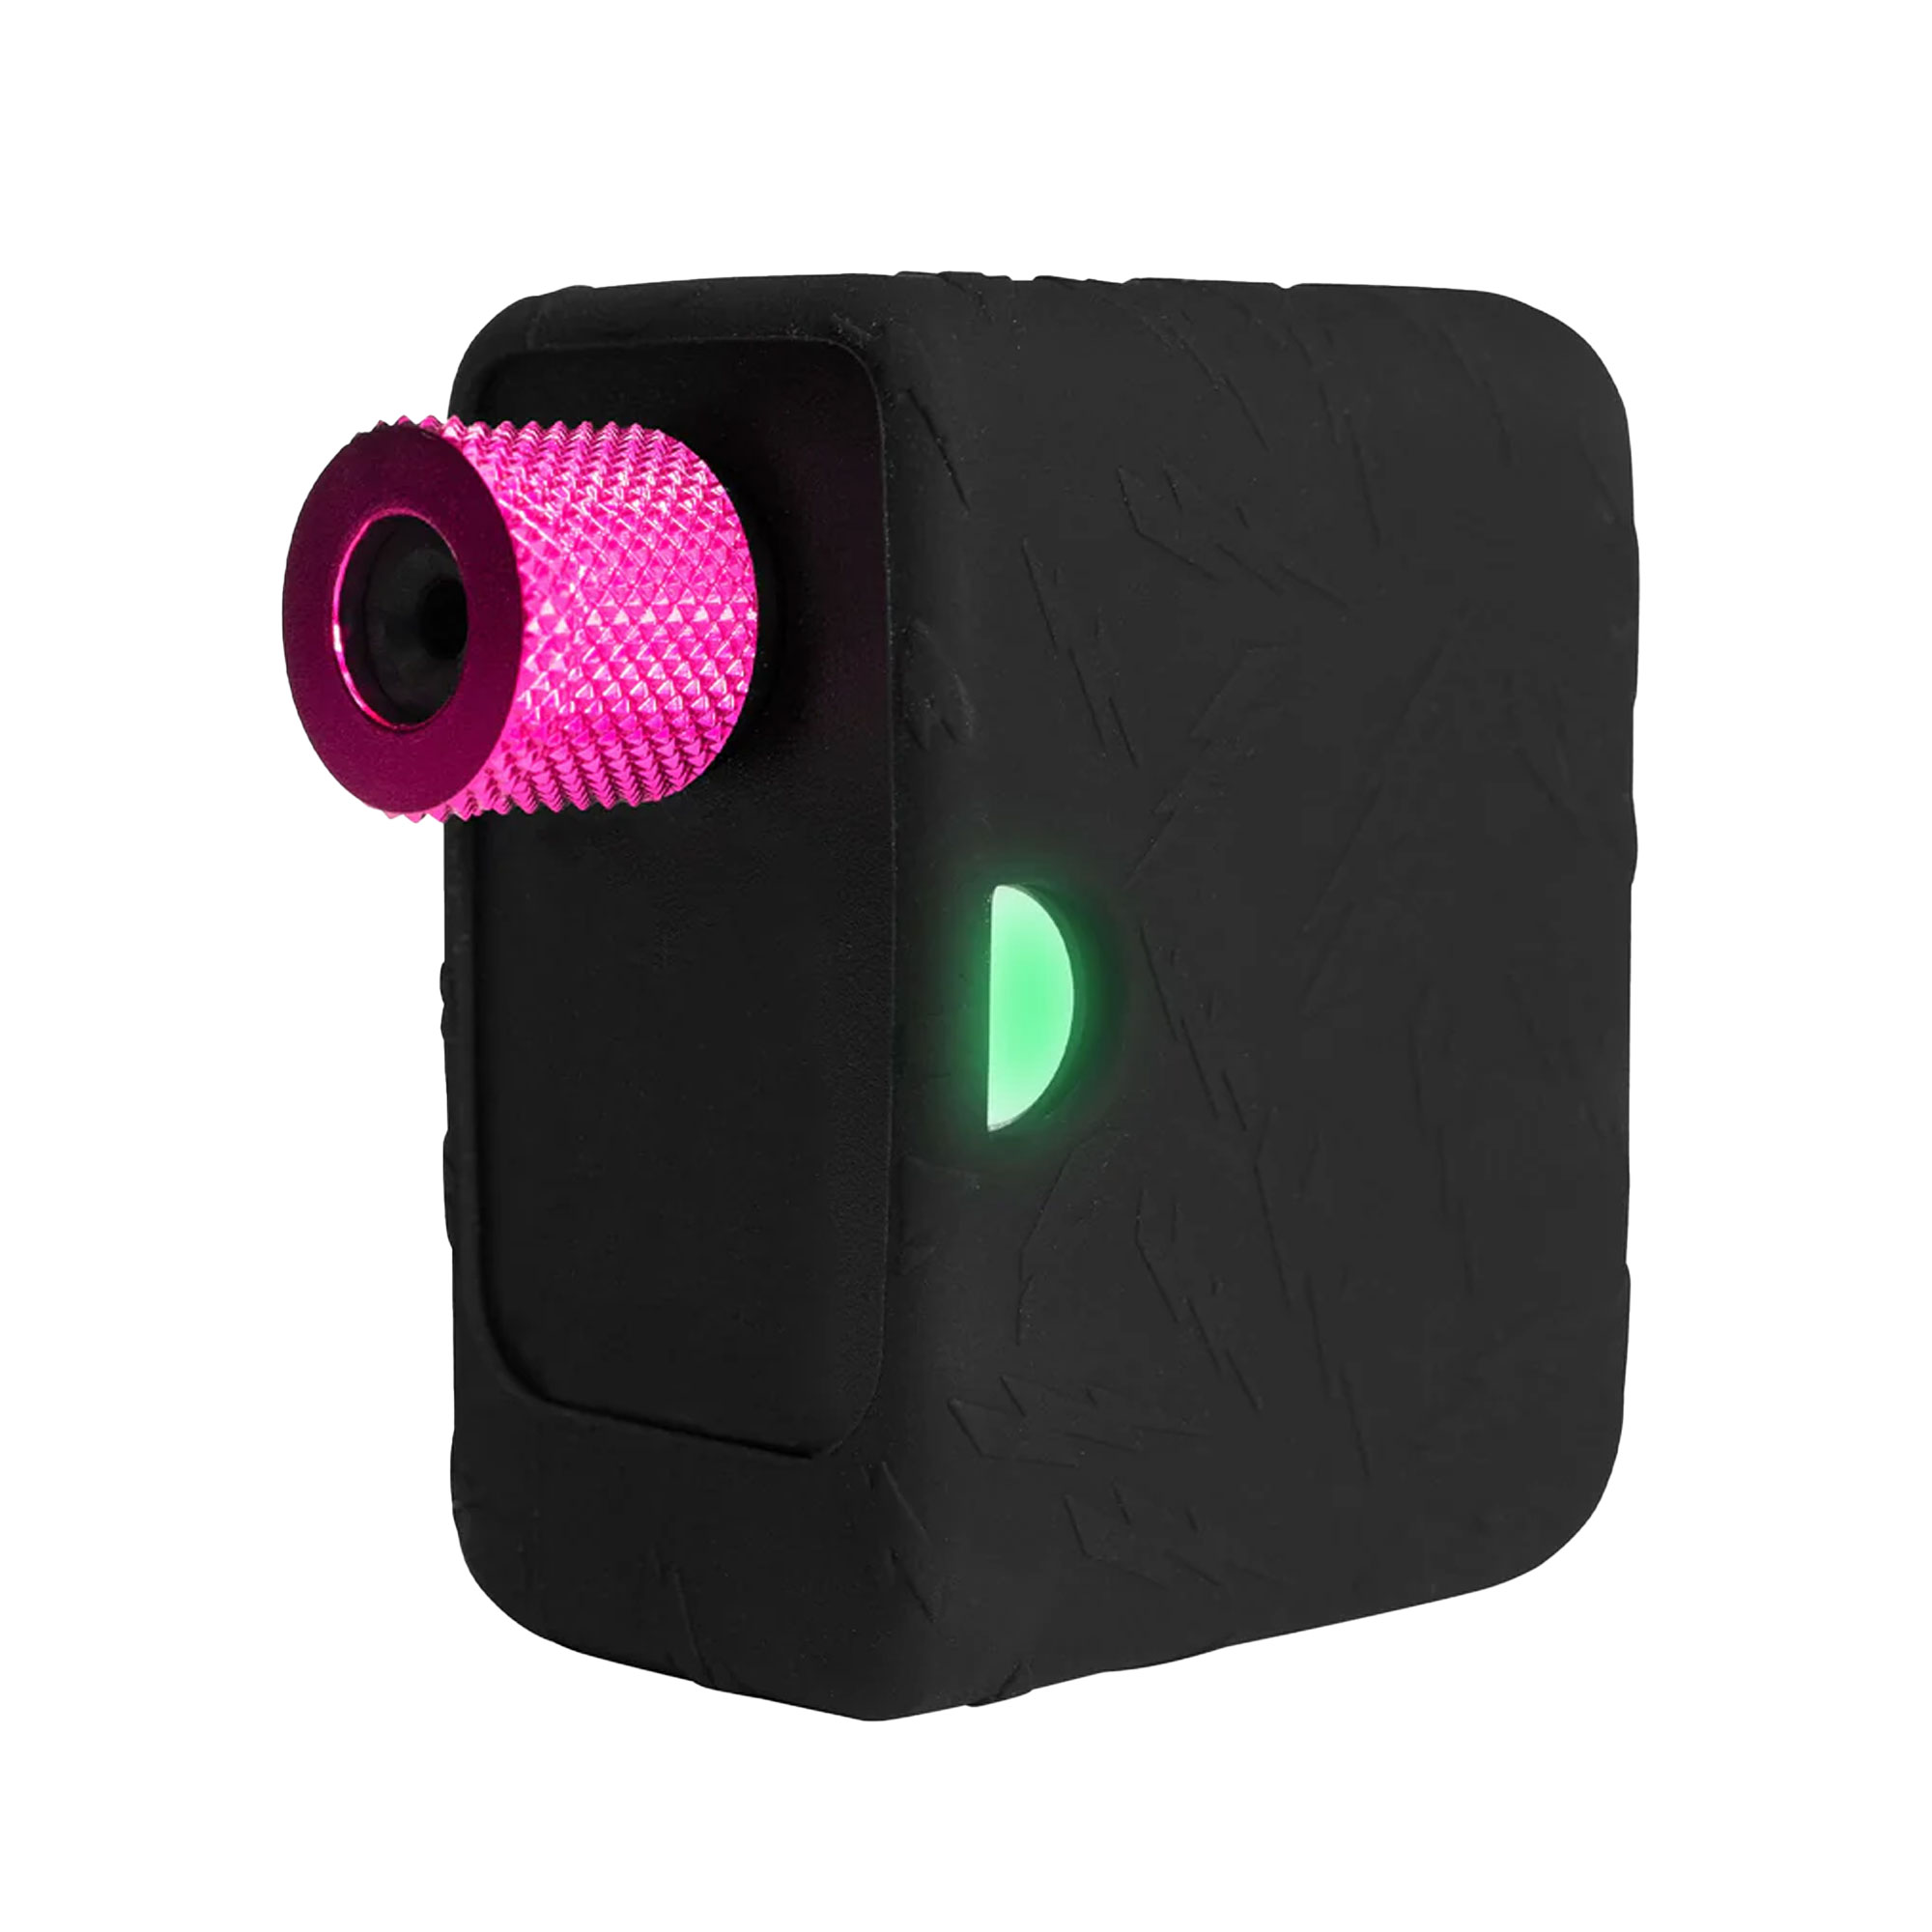
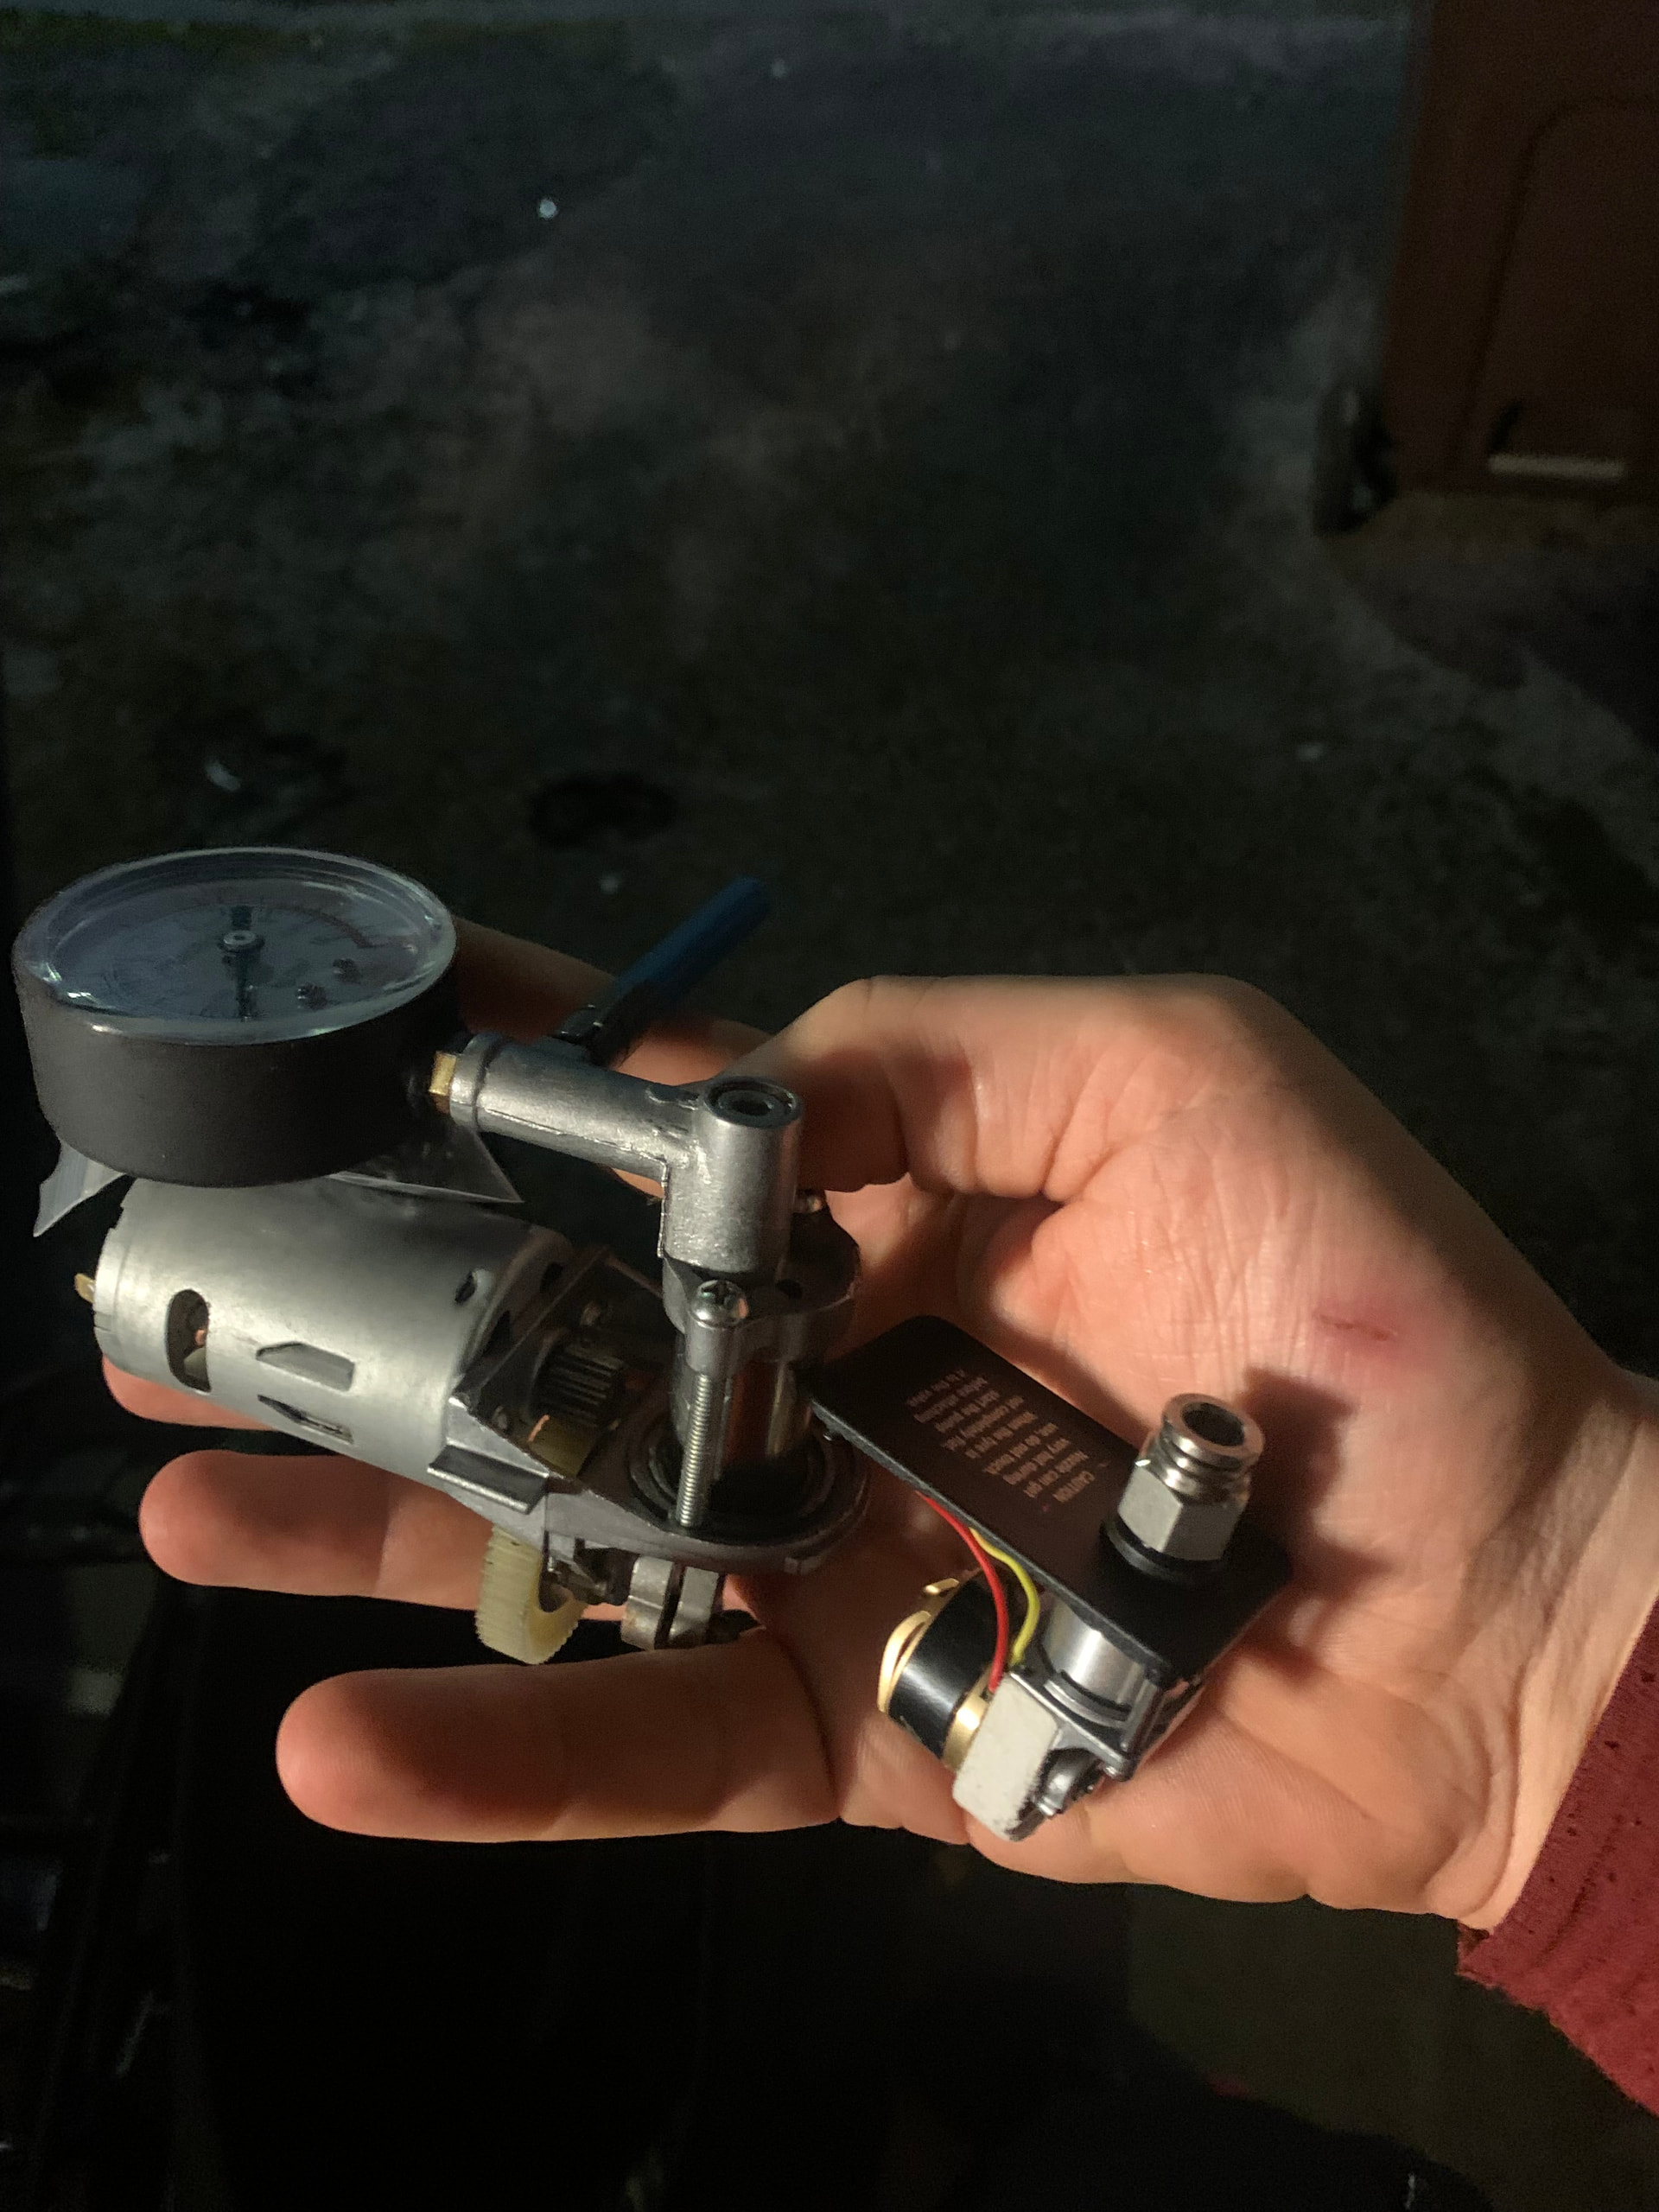
-battery powered mini tyre inflator (Muc-Off AirMach Electric Mini Inflator)
-
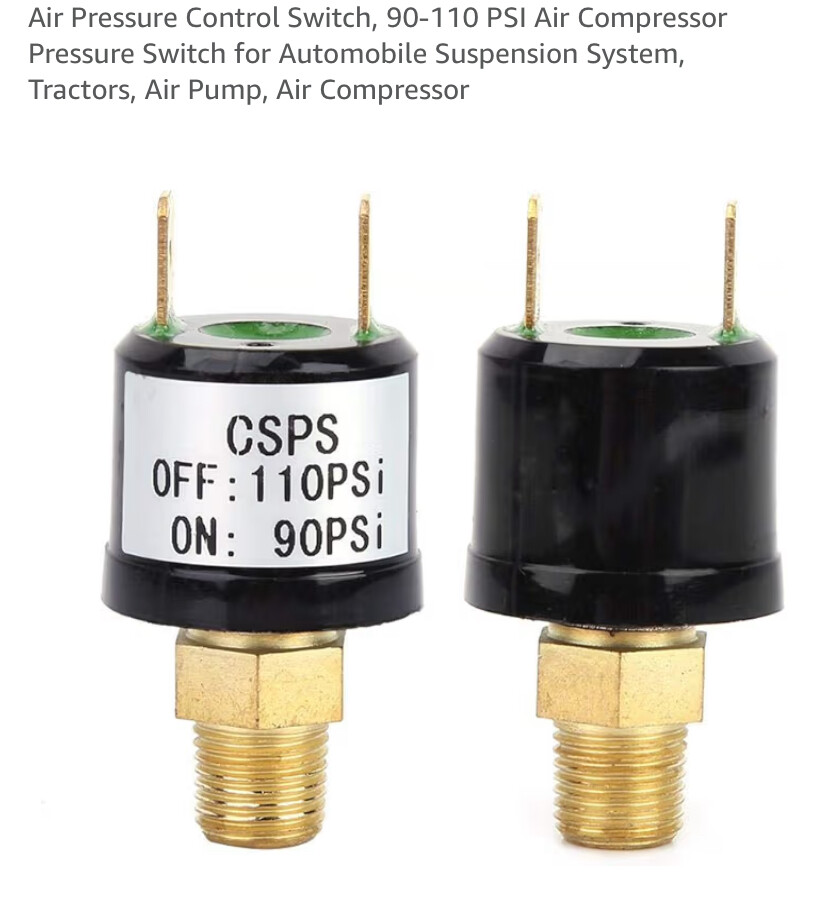
pressure switch 1/8bsp (10Bar max)
-
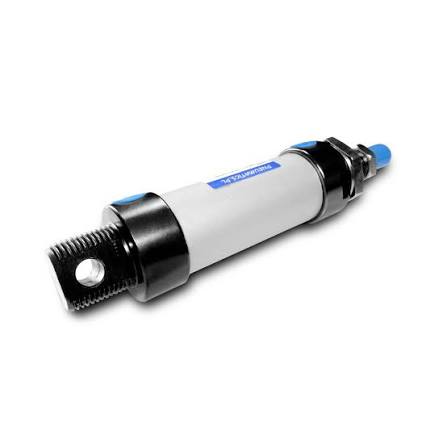
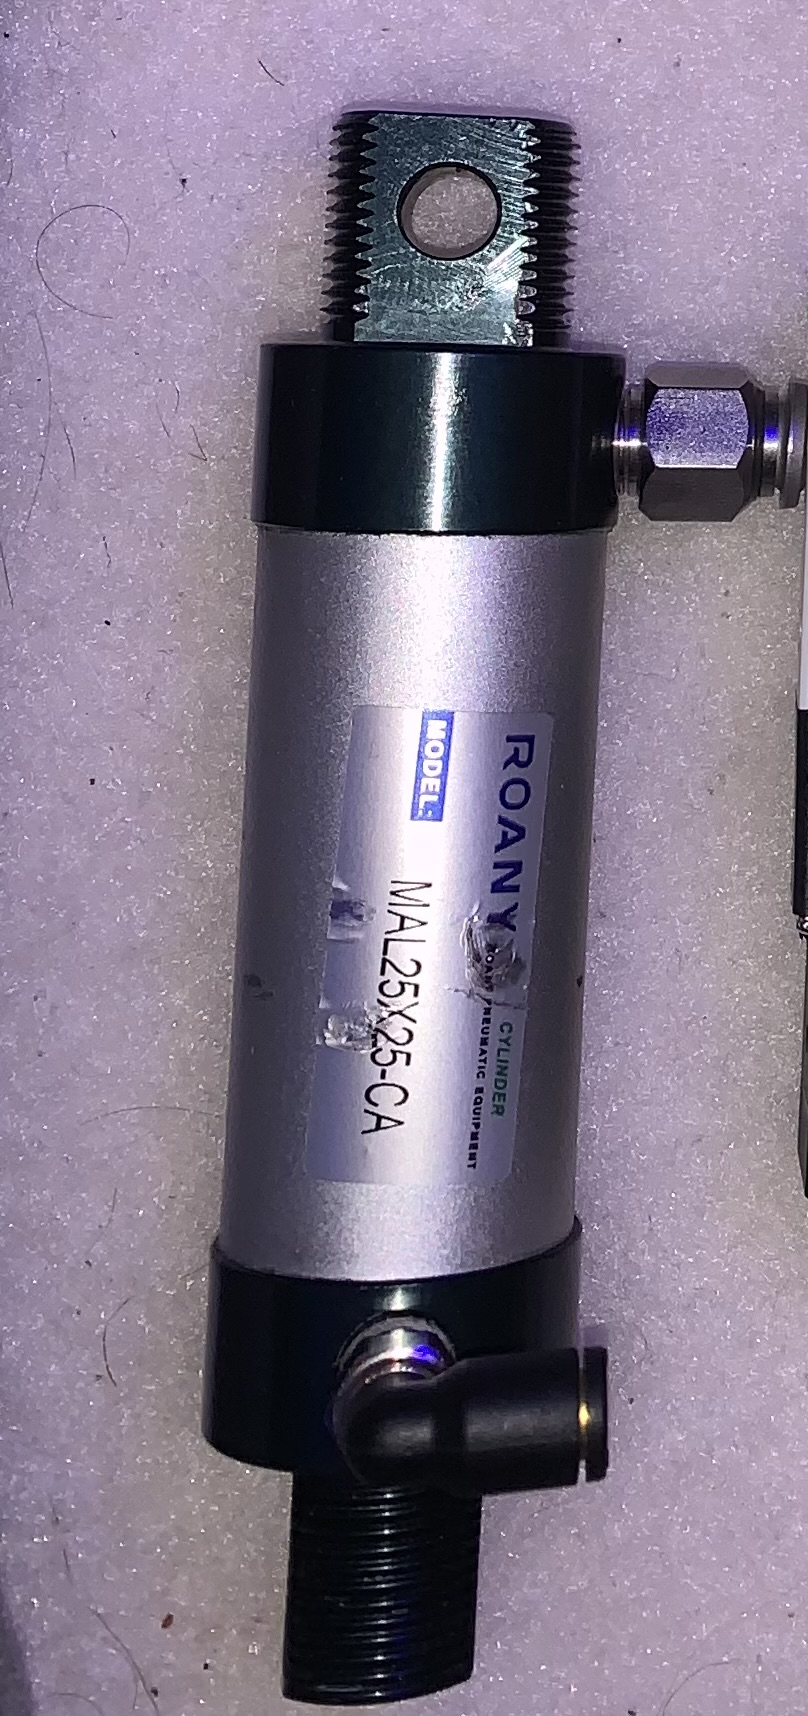
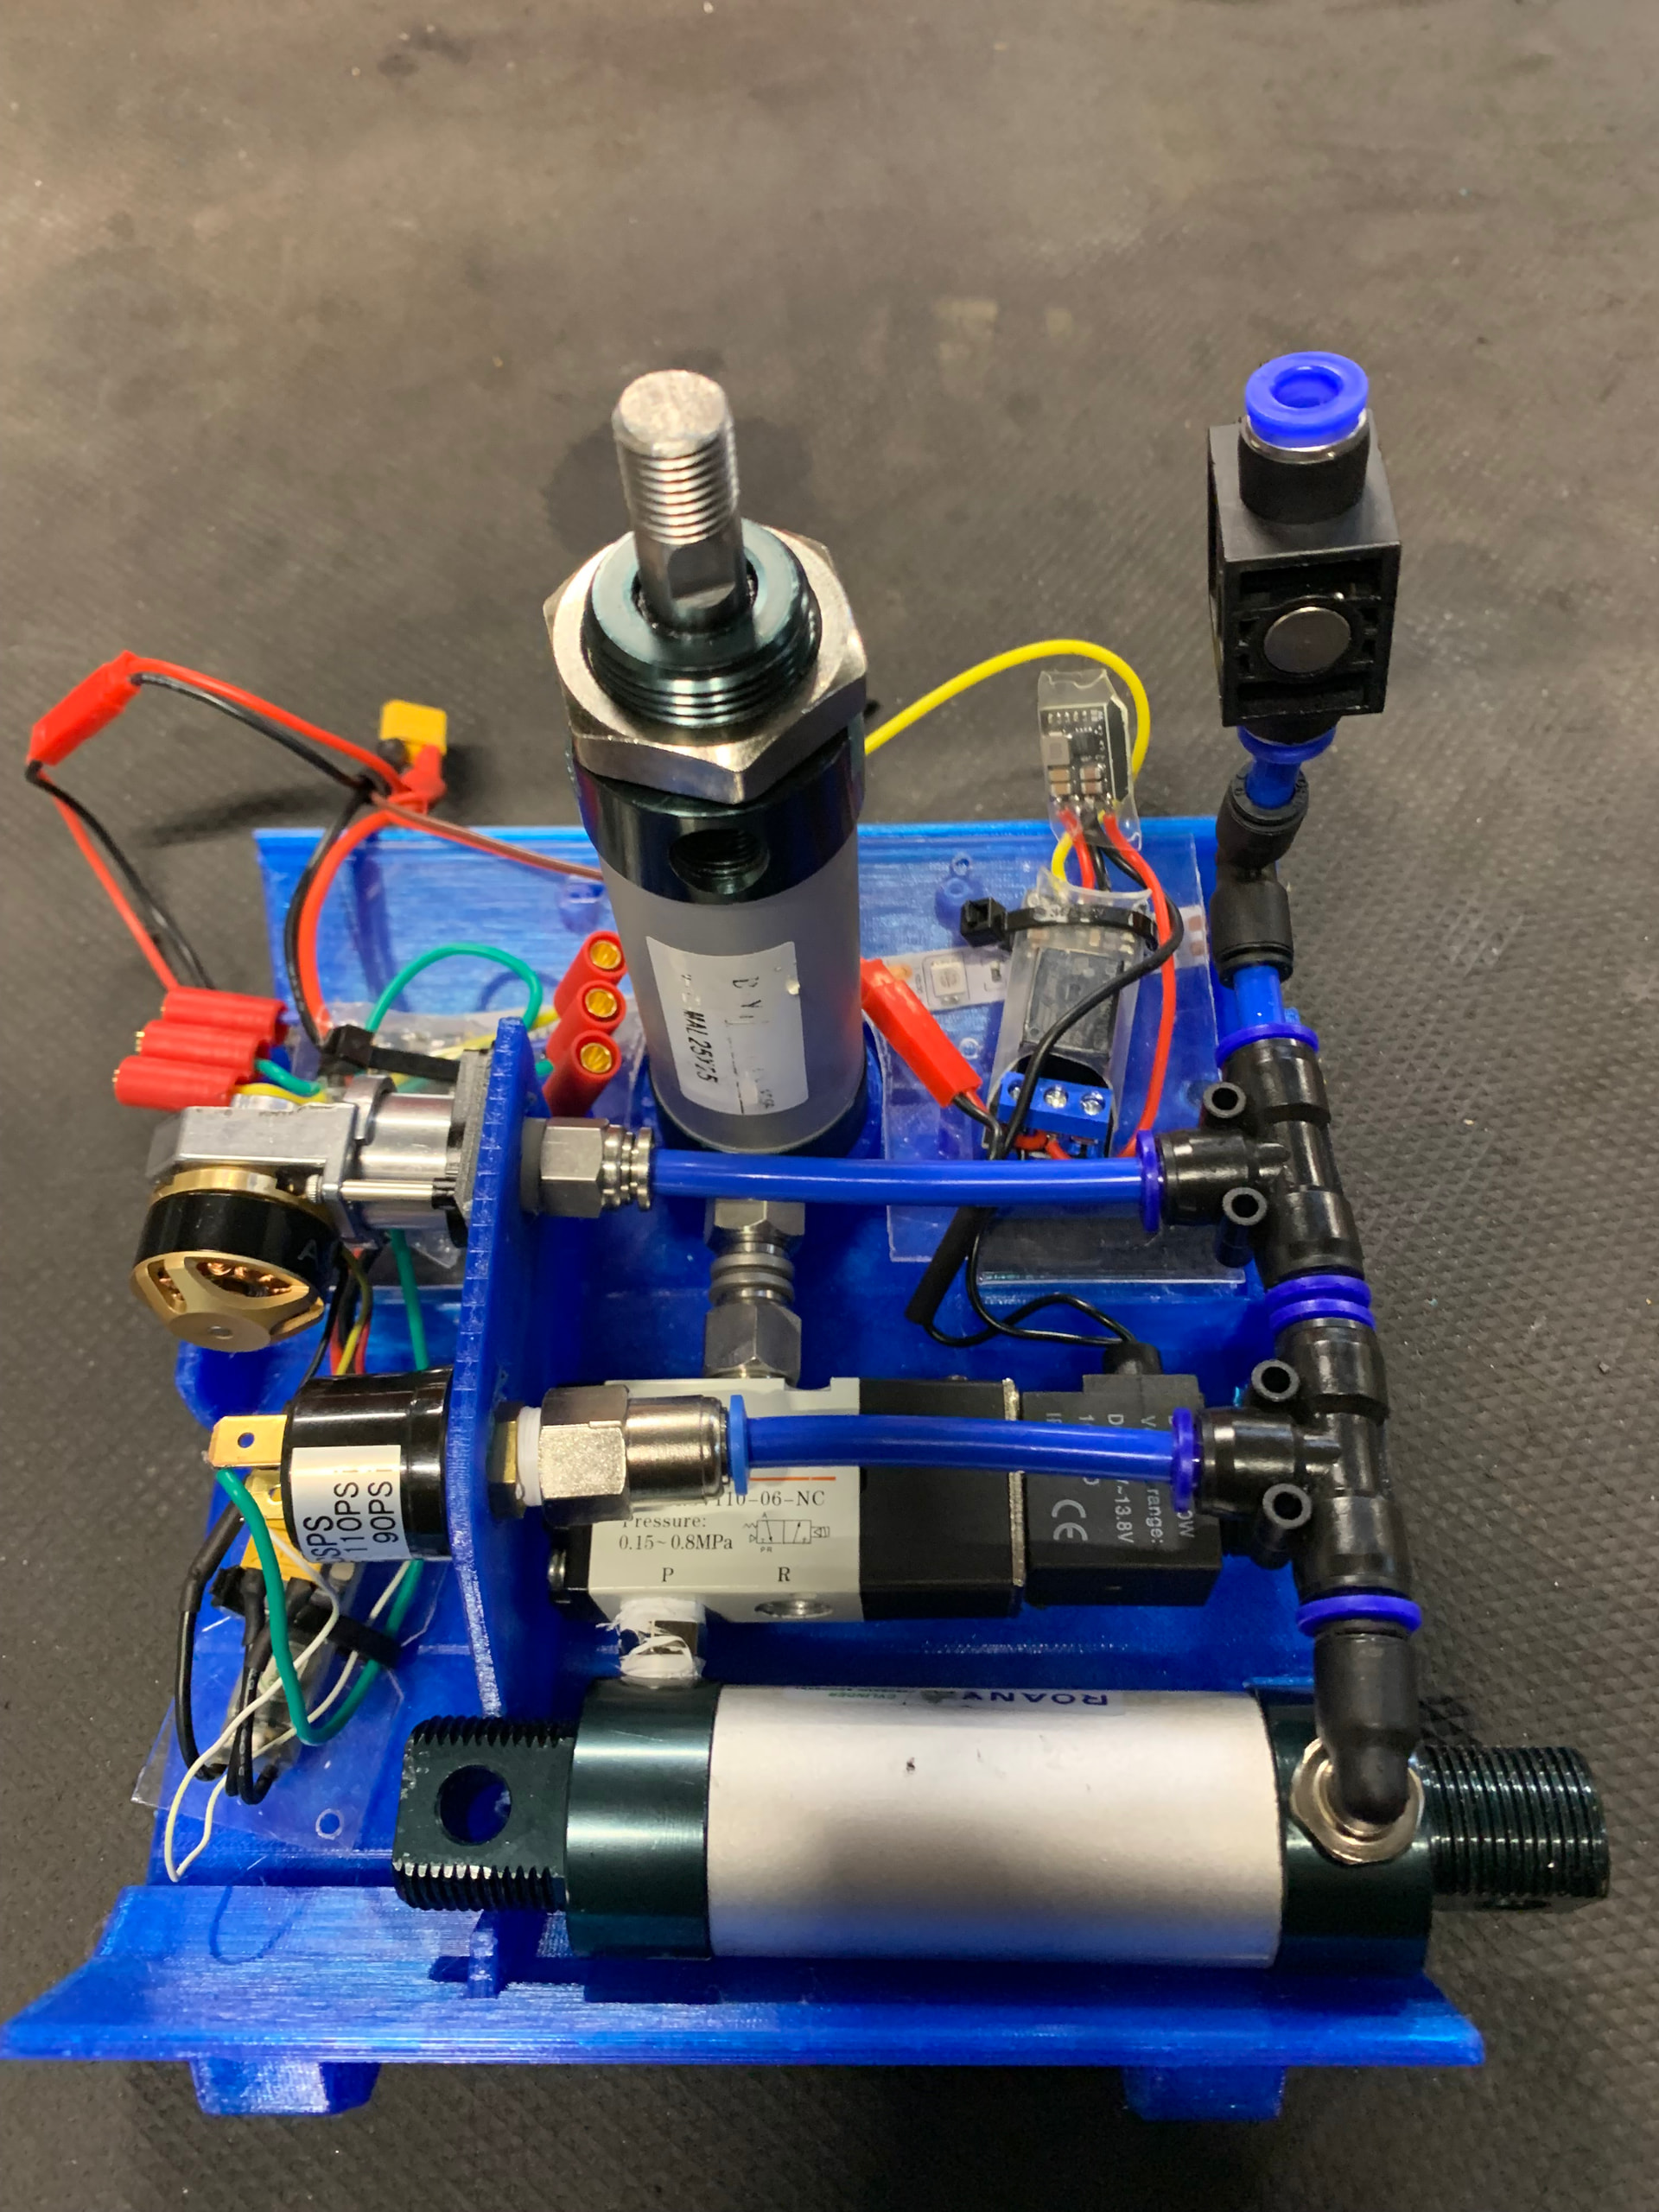
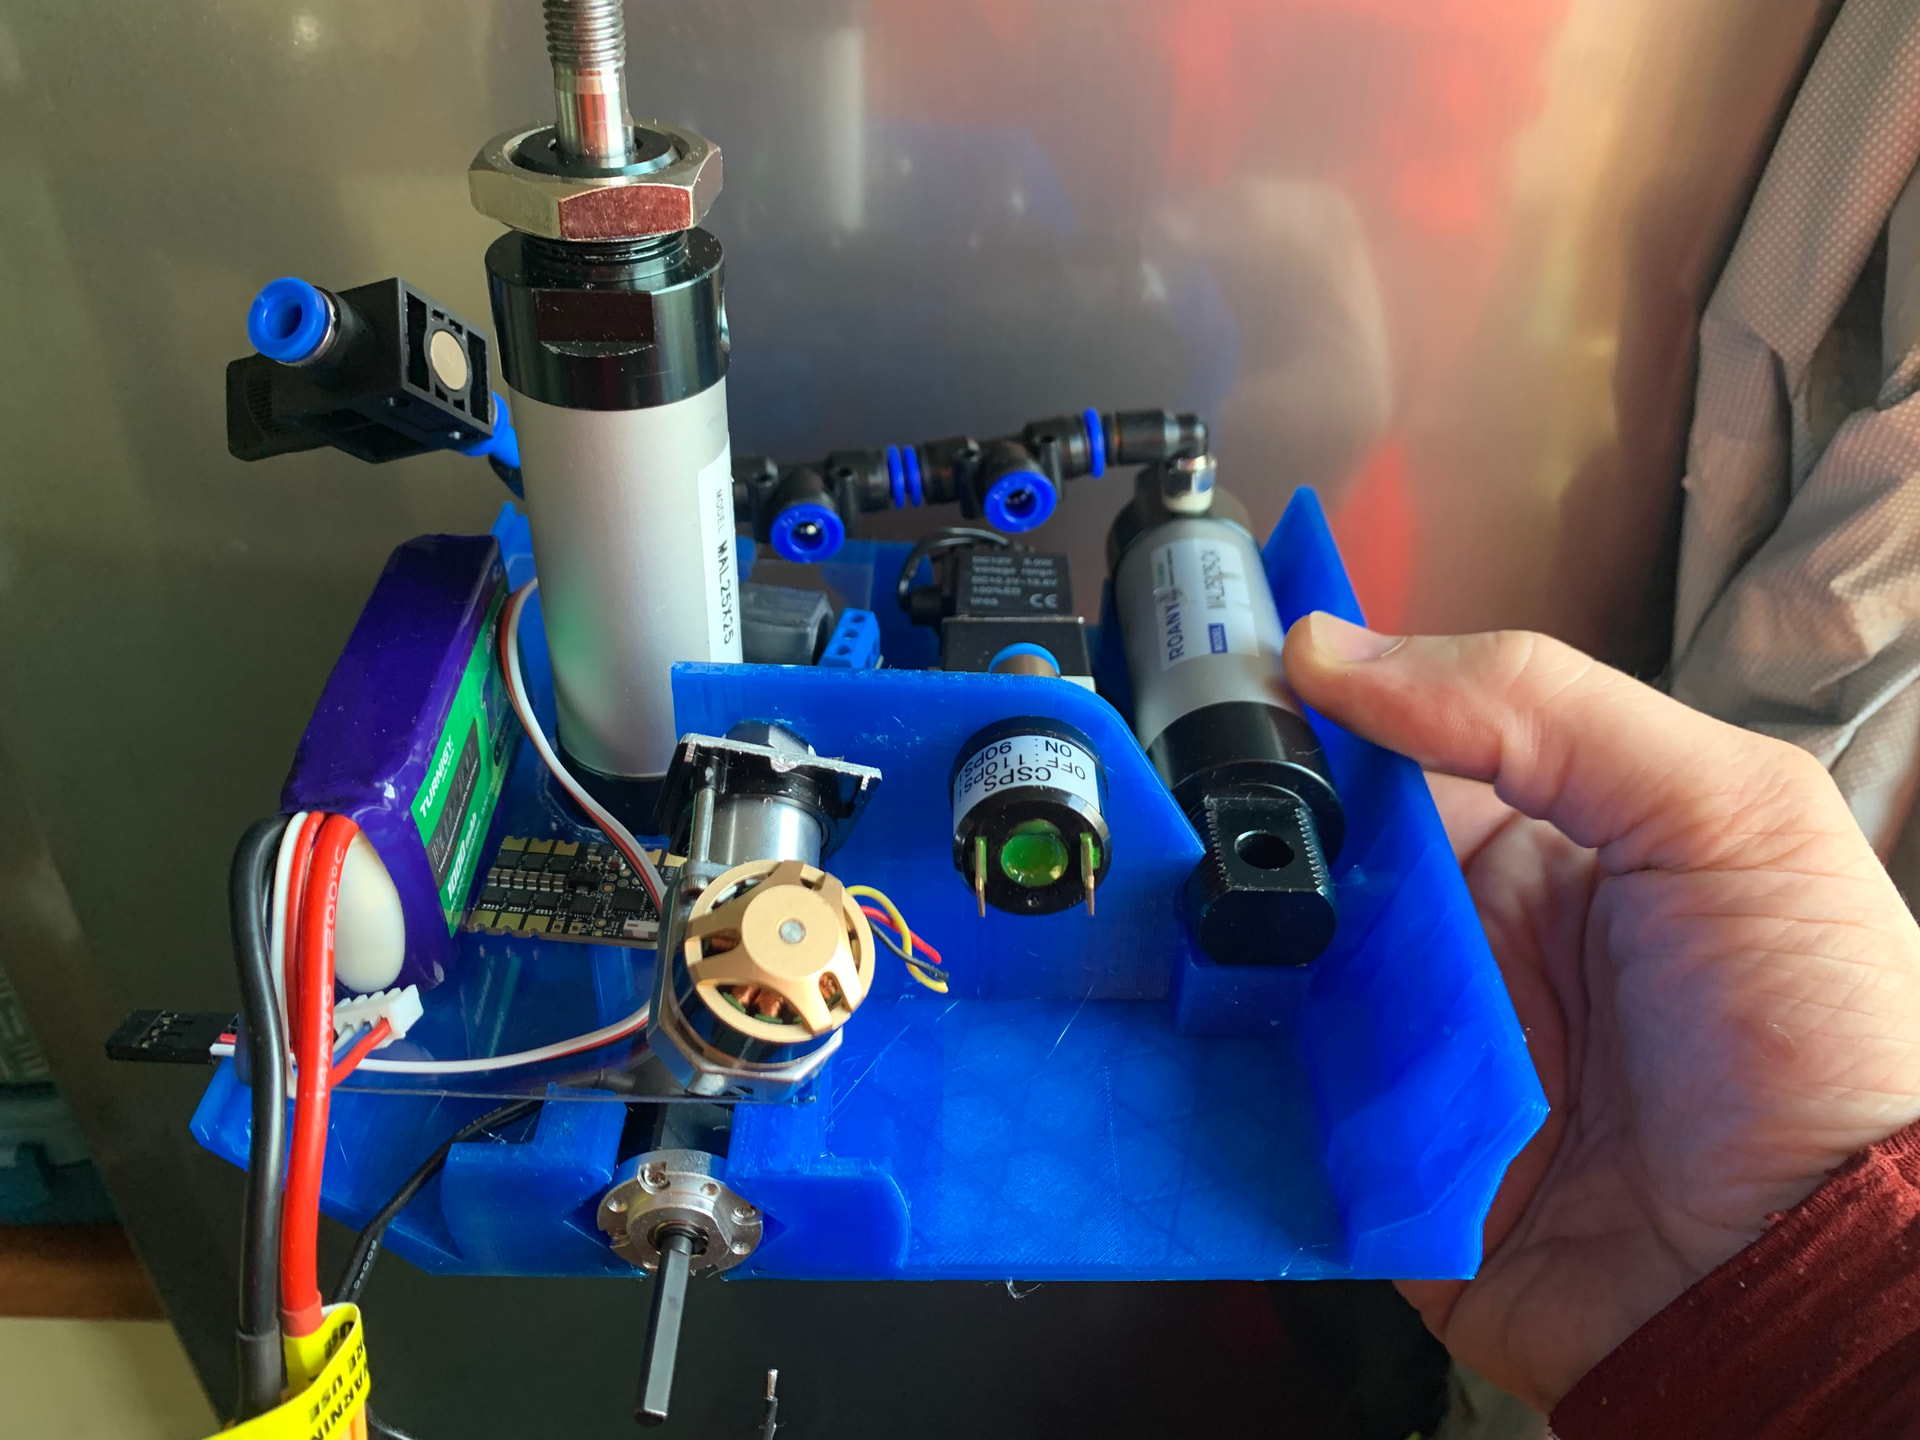
Pneumatic cylinder 25x25mm 1/8bsp. - Three of them.
-
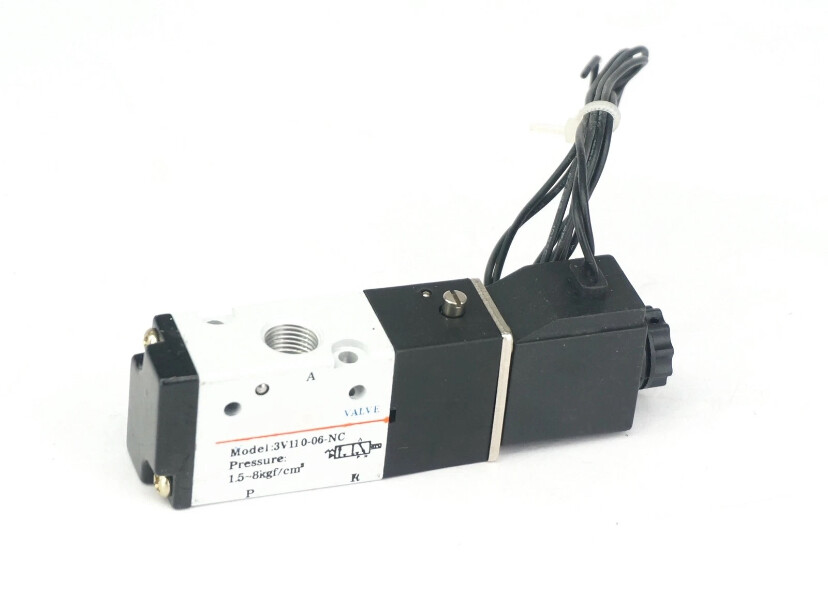
3way/2position 1/8BSP 12V solenoid valve
-
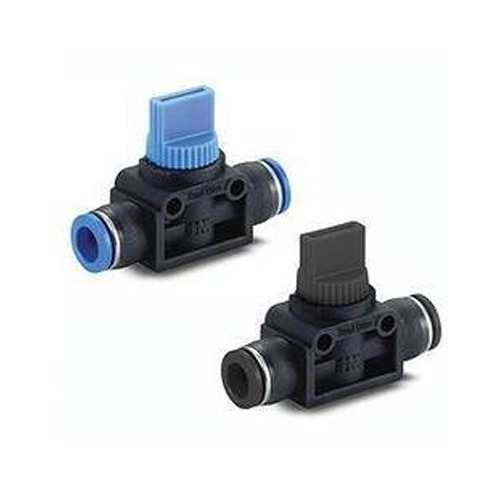
Pneumatic control ball valve
-
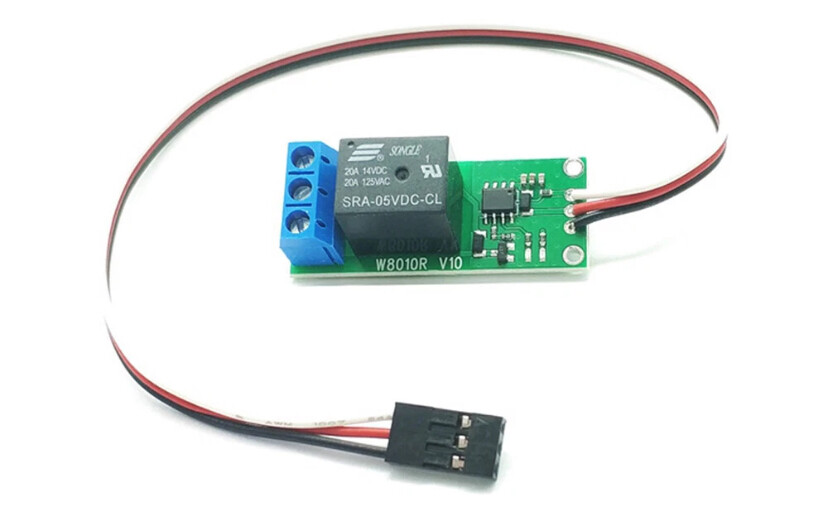
PWM Relay Switch
-
Various pneumatic fittings 1/8bsp & 6mm push in. prioritise nylon over metal where possible.
-
BEC
-
Brushless ESC
-
3S LiPo
-
Receiver
-
Beetleweight drivetrain and beetleweight safety.
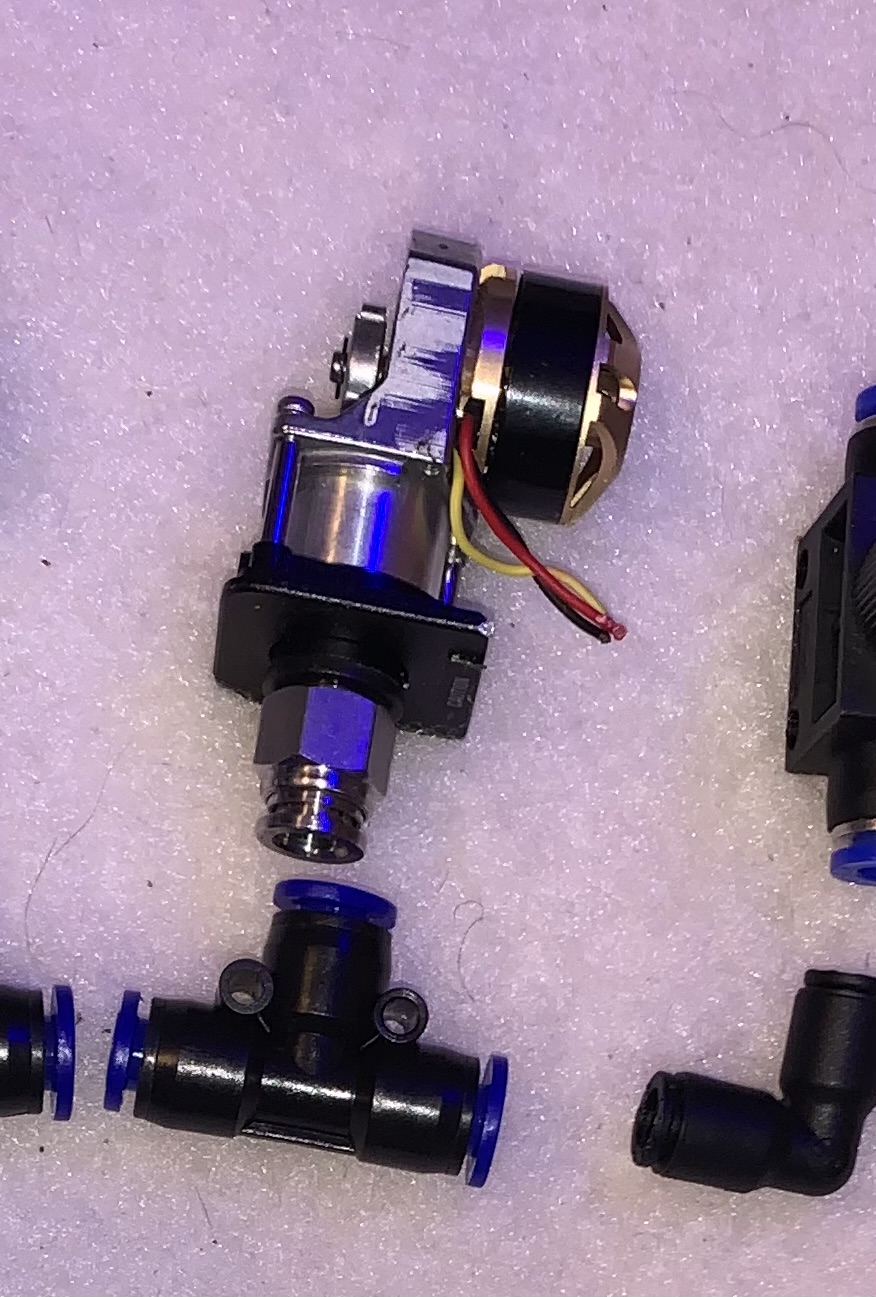
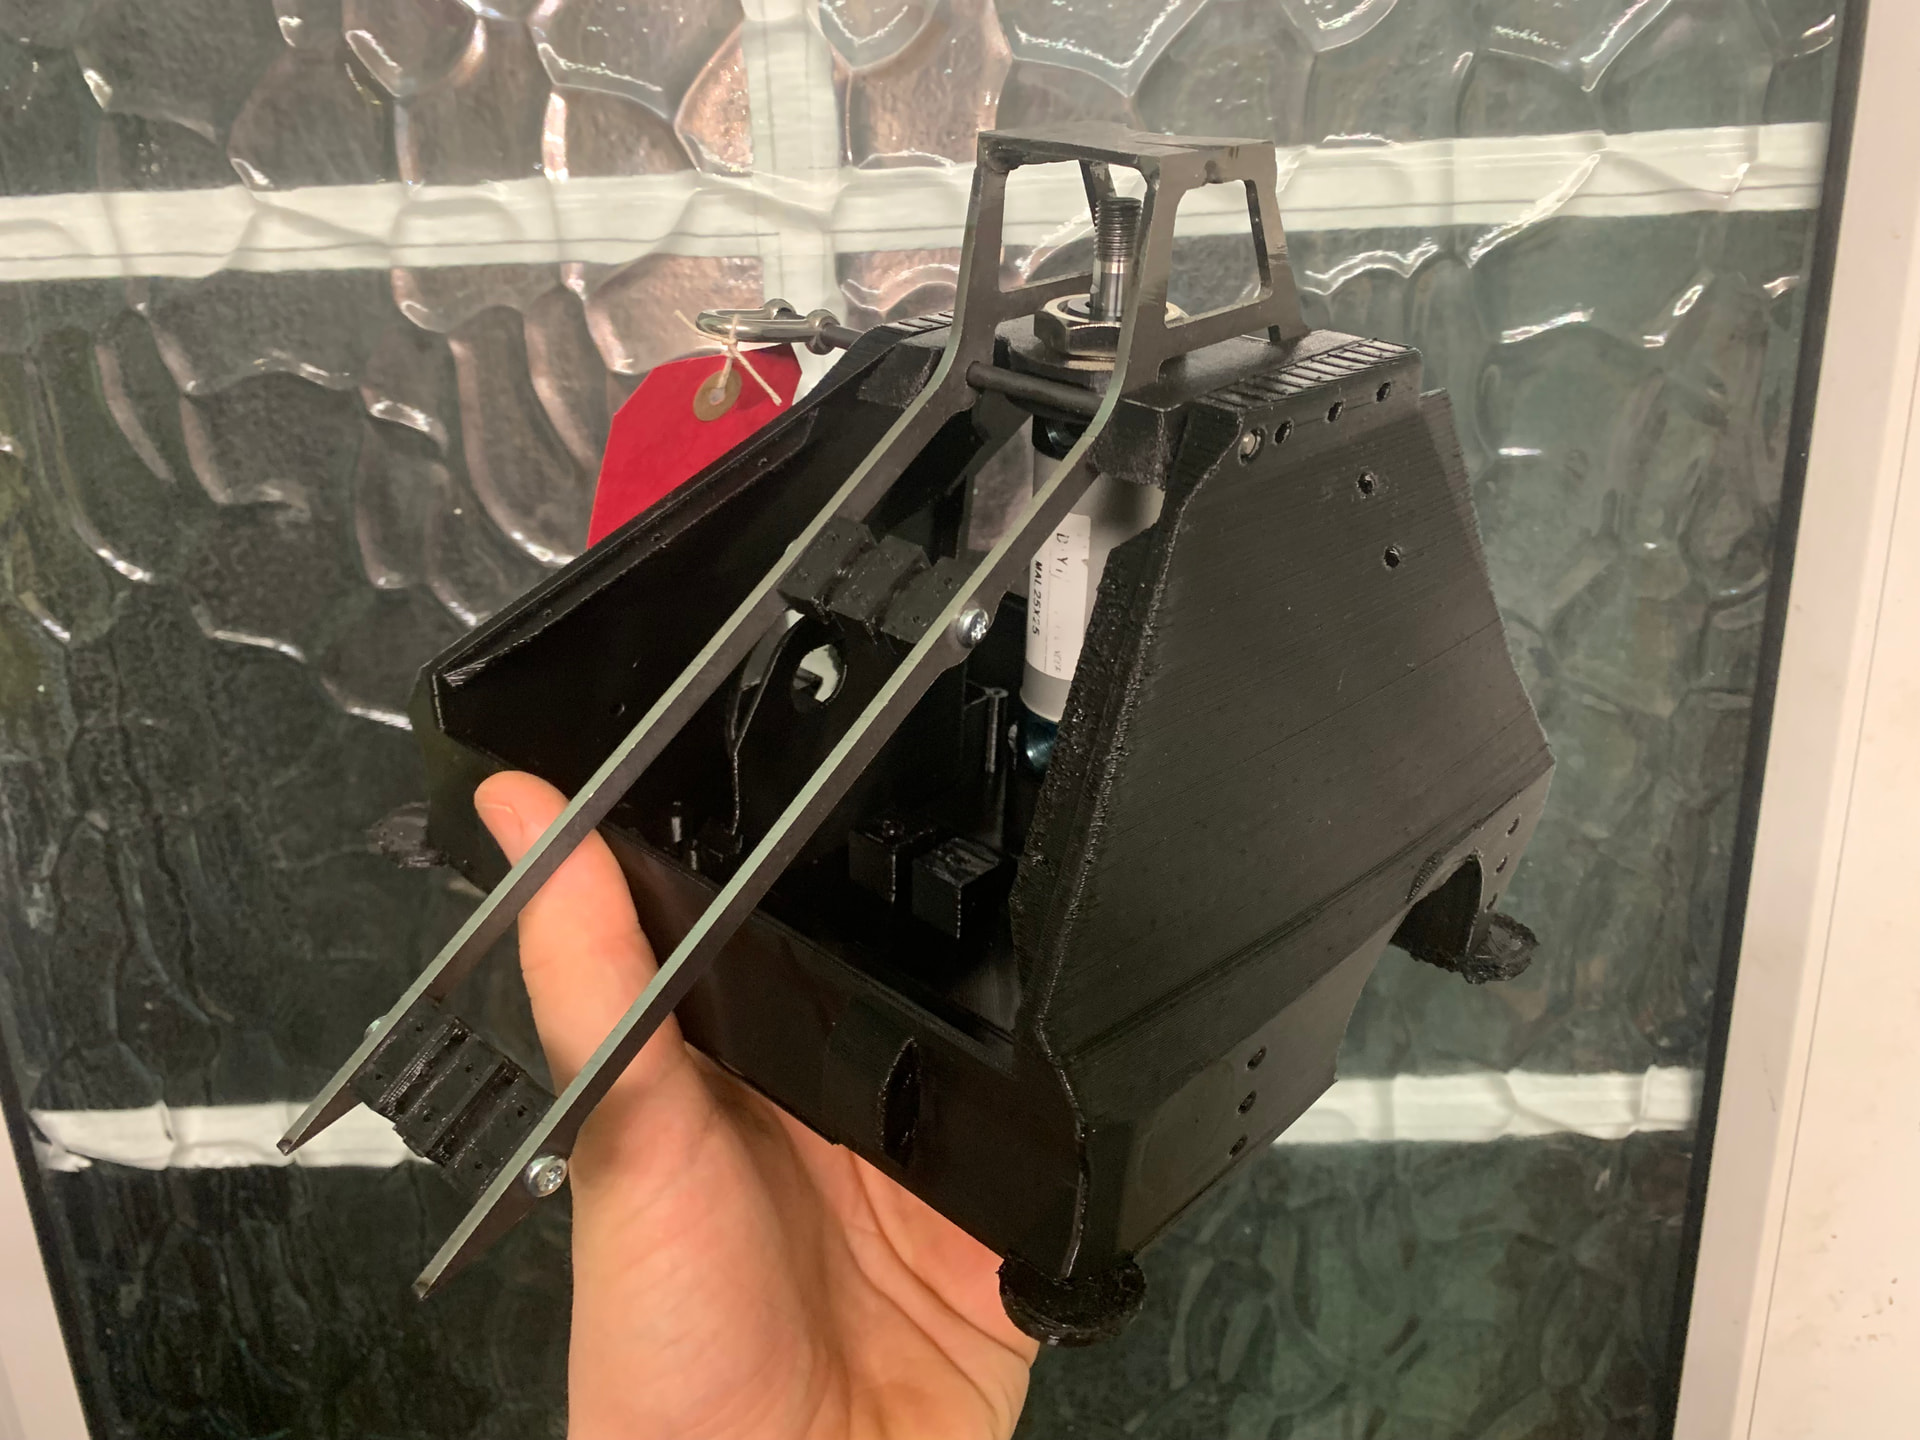
Dismantle the Tyre inflator and you should find a very familiar looking set of components.
A brushless motor, a small LiPo and a control board.
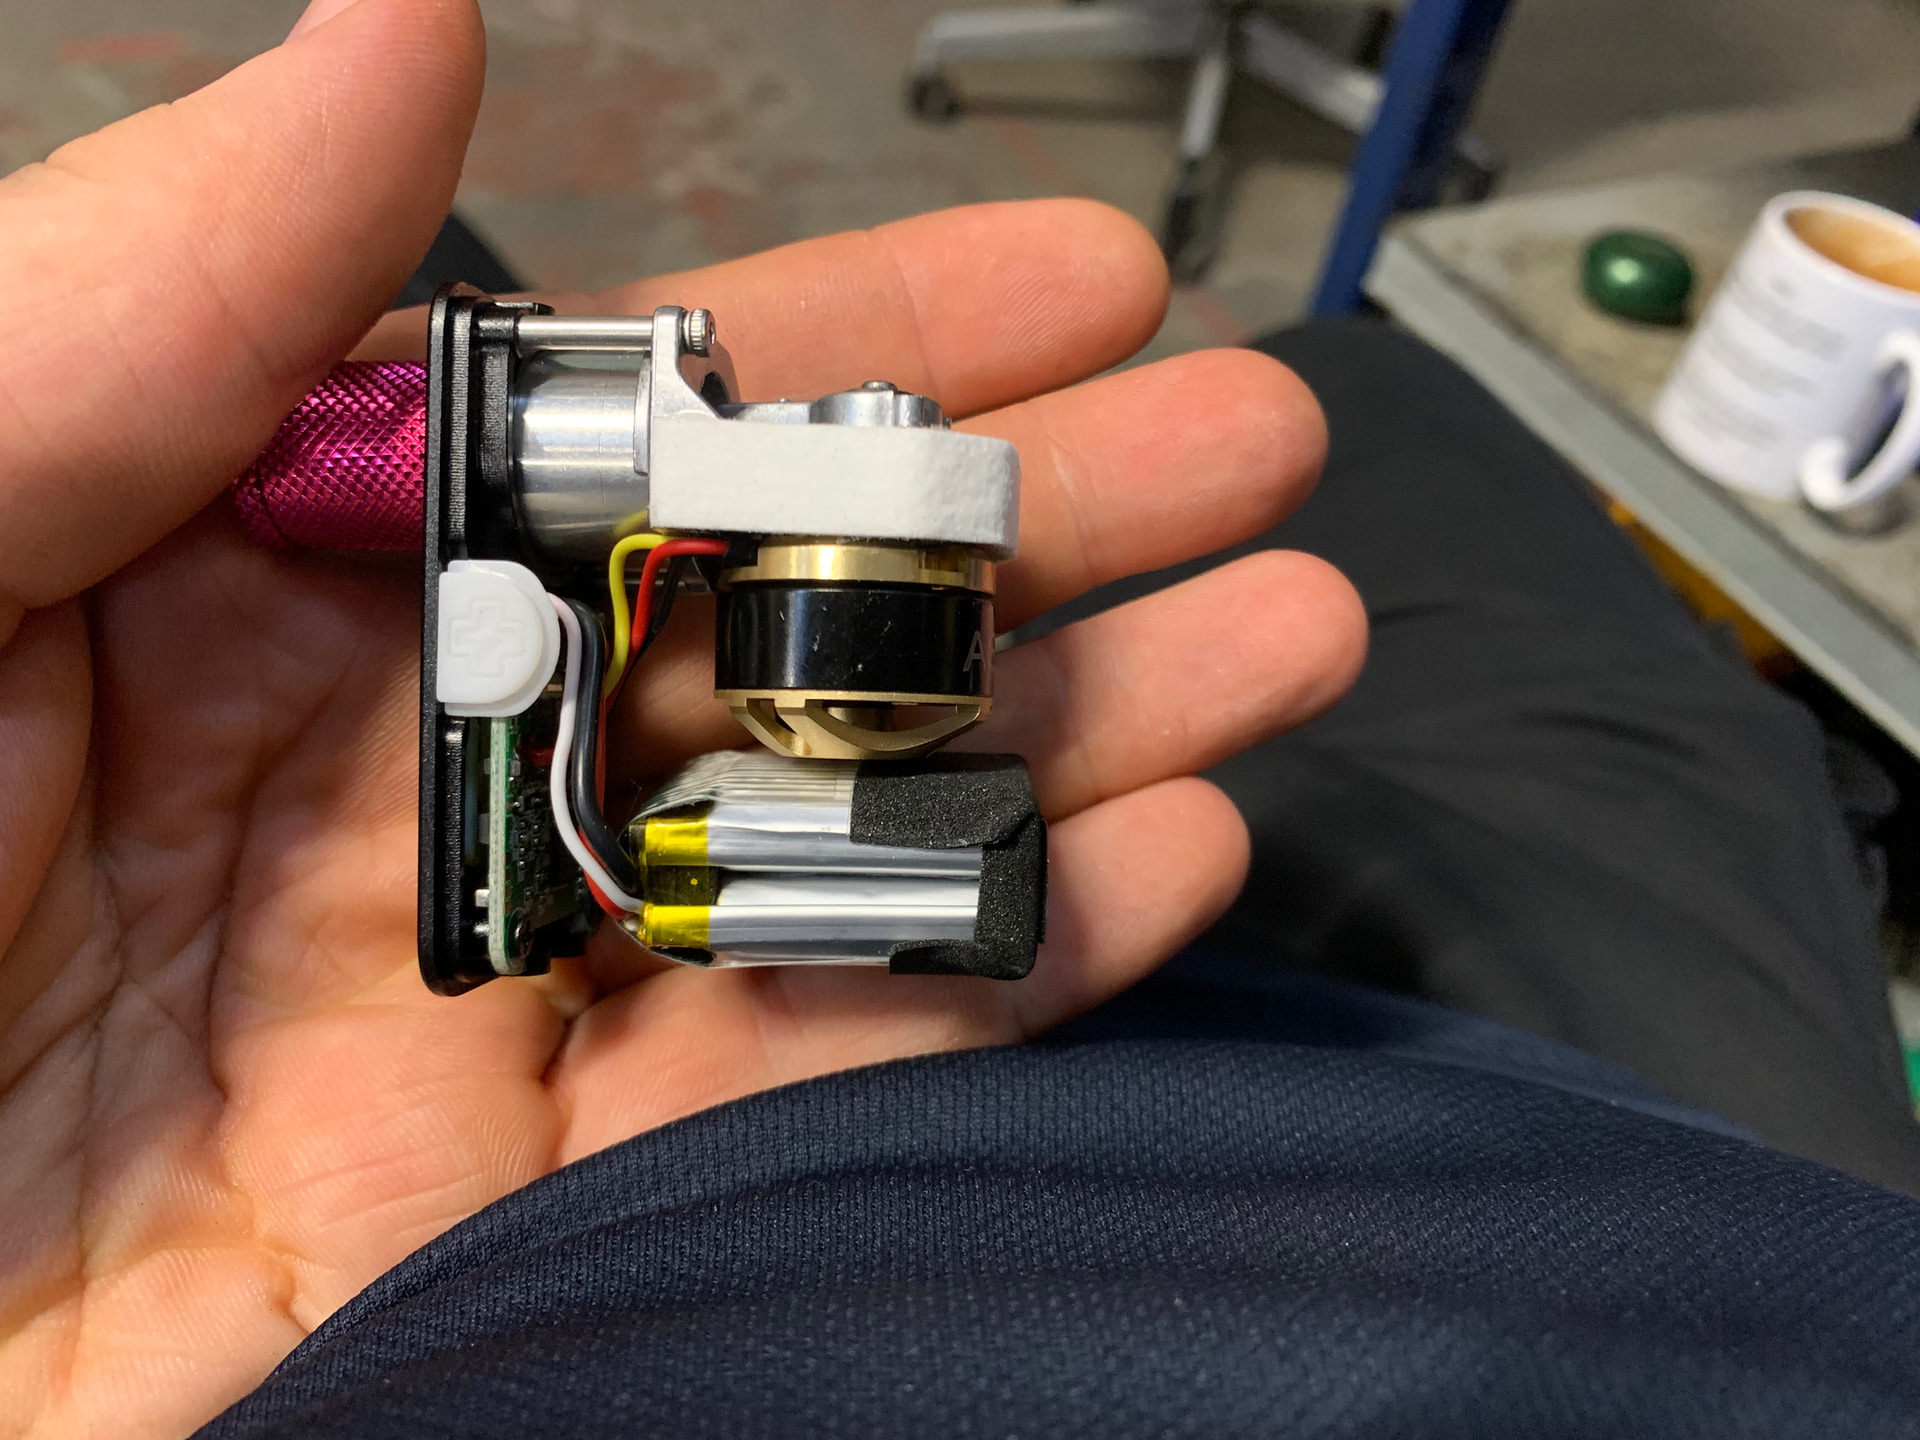
You can remove the small battery and the control board. Unscrew the tyre valve fitting. A 1/8BSP fitting of your choice will screw up to the compressor.
Take 2 cylinders and unscrew the ends.
Put two closed ends together to make a storage/buffer tank.
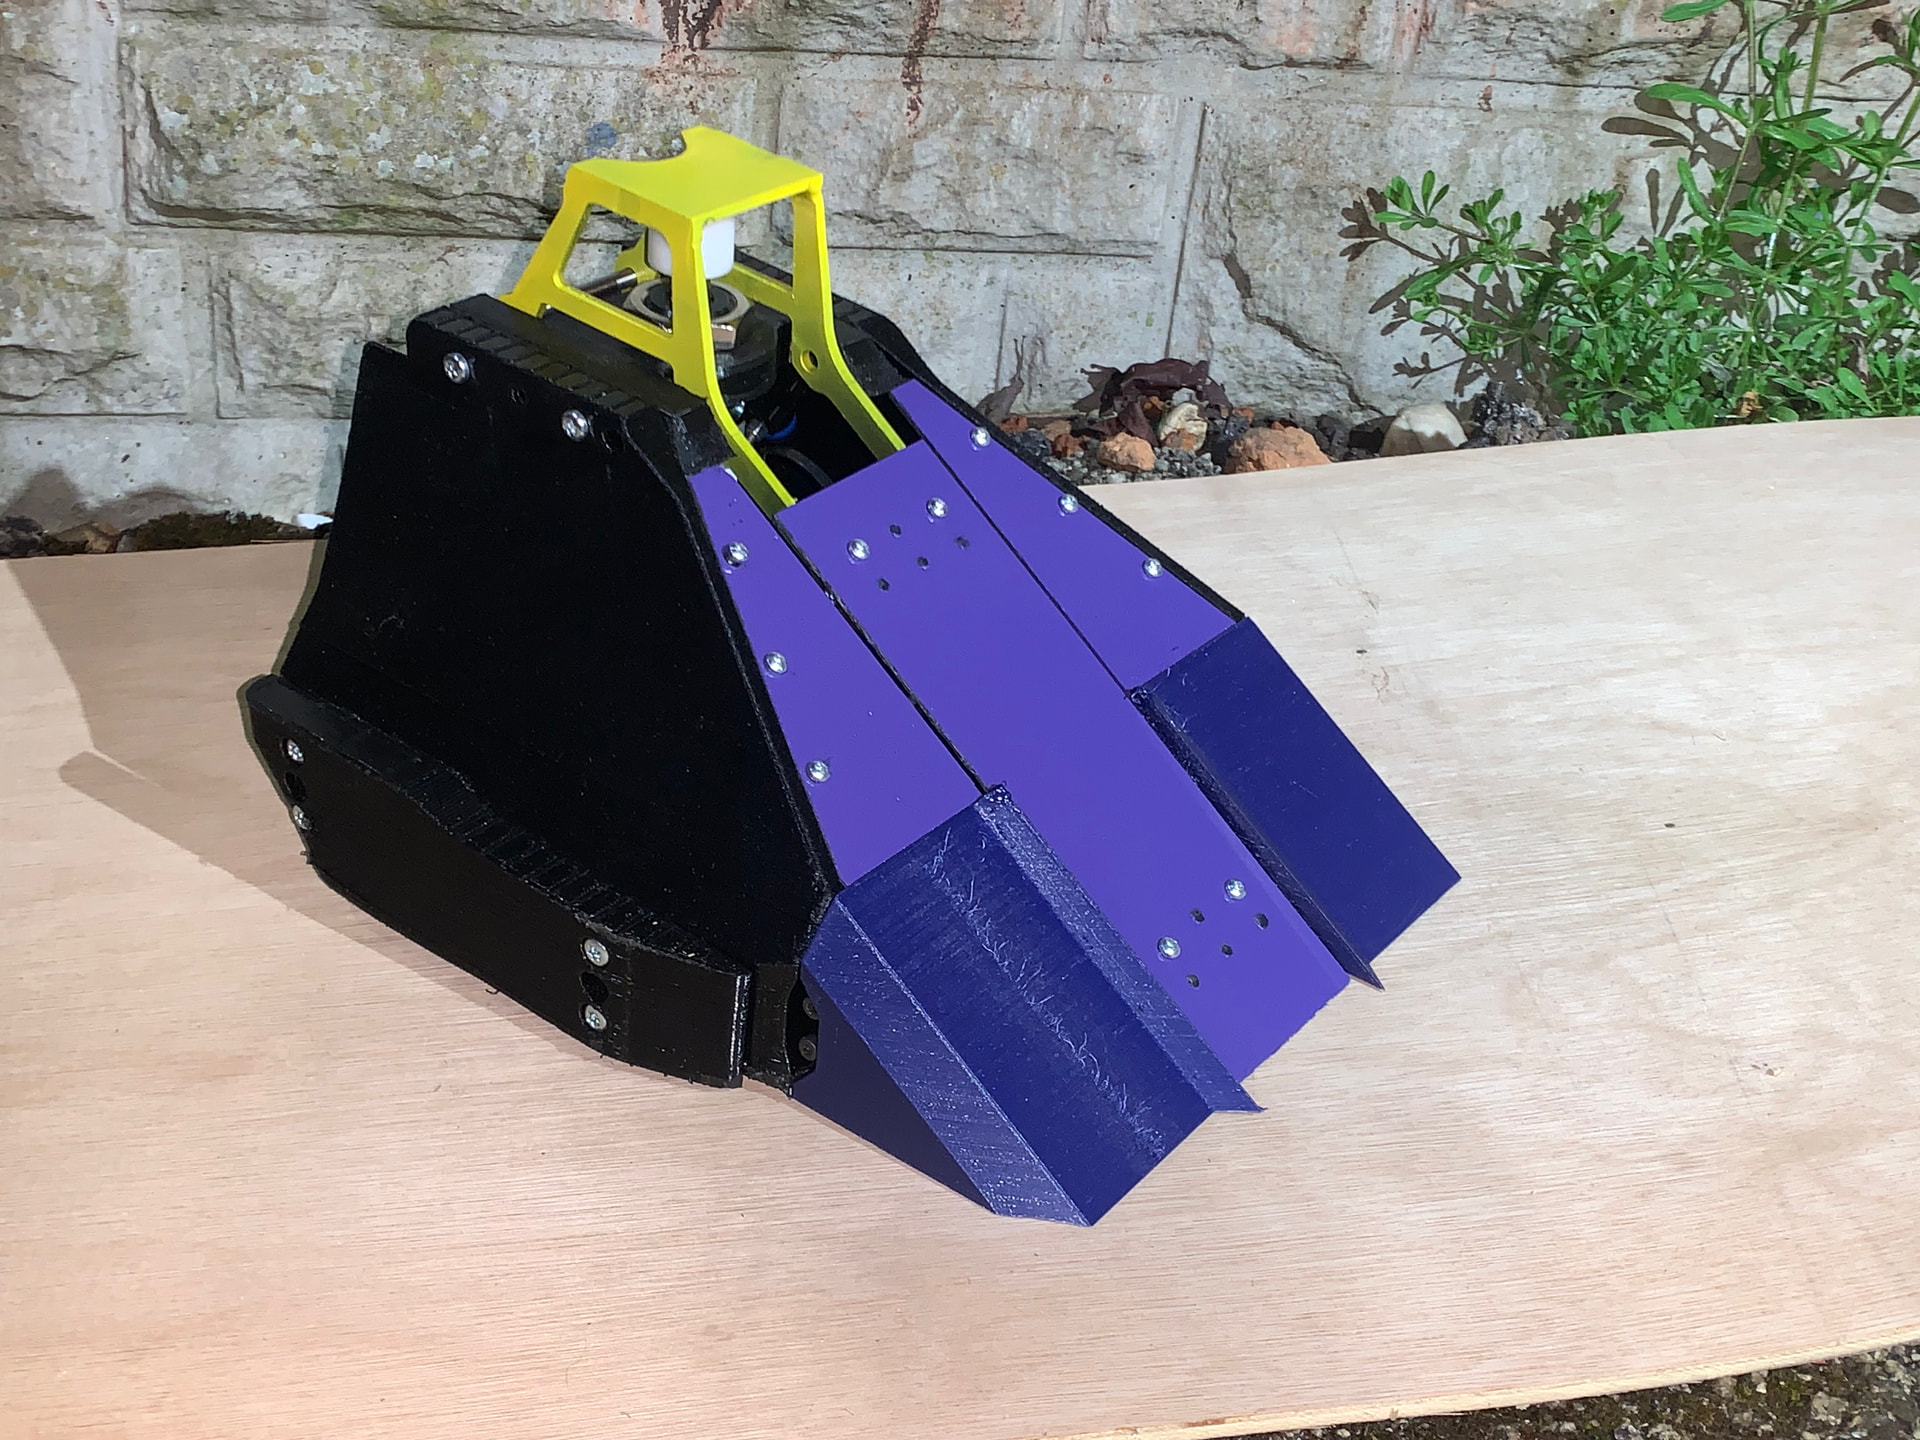
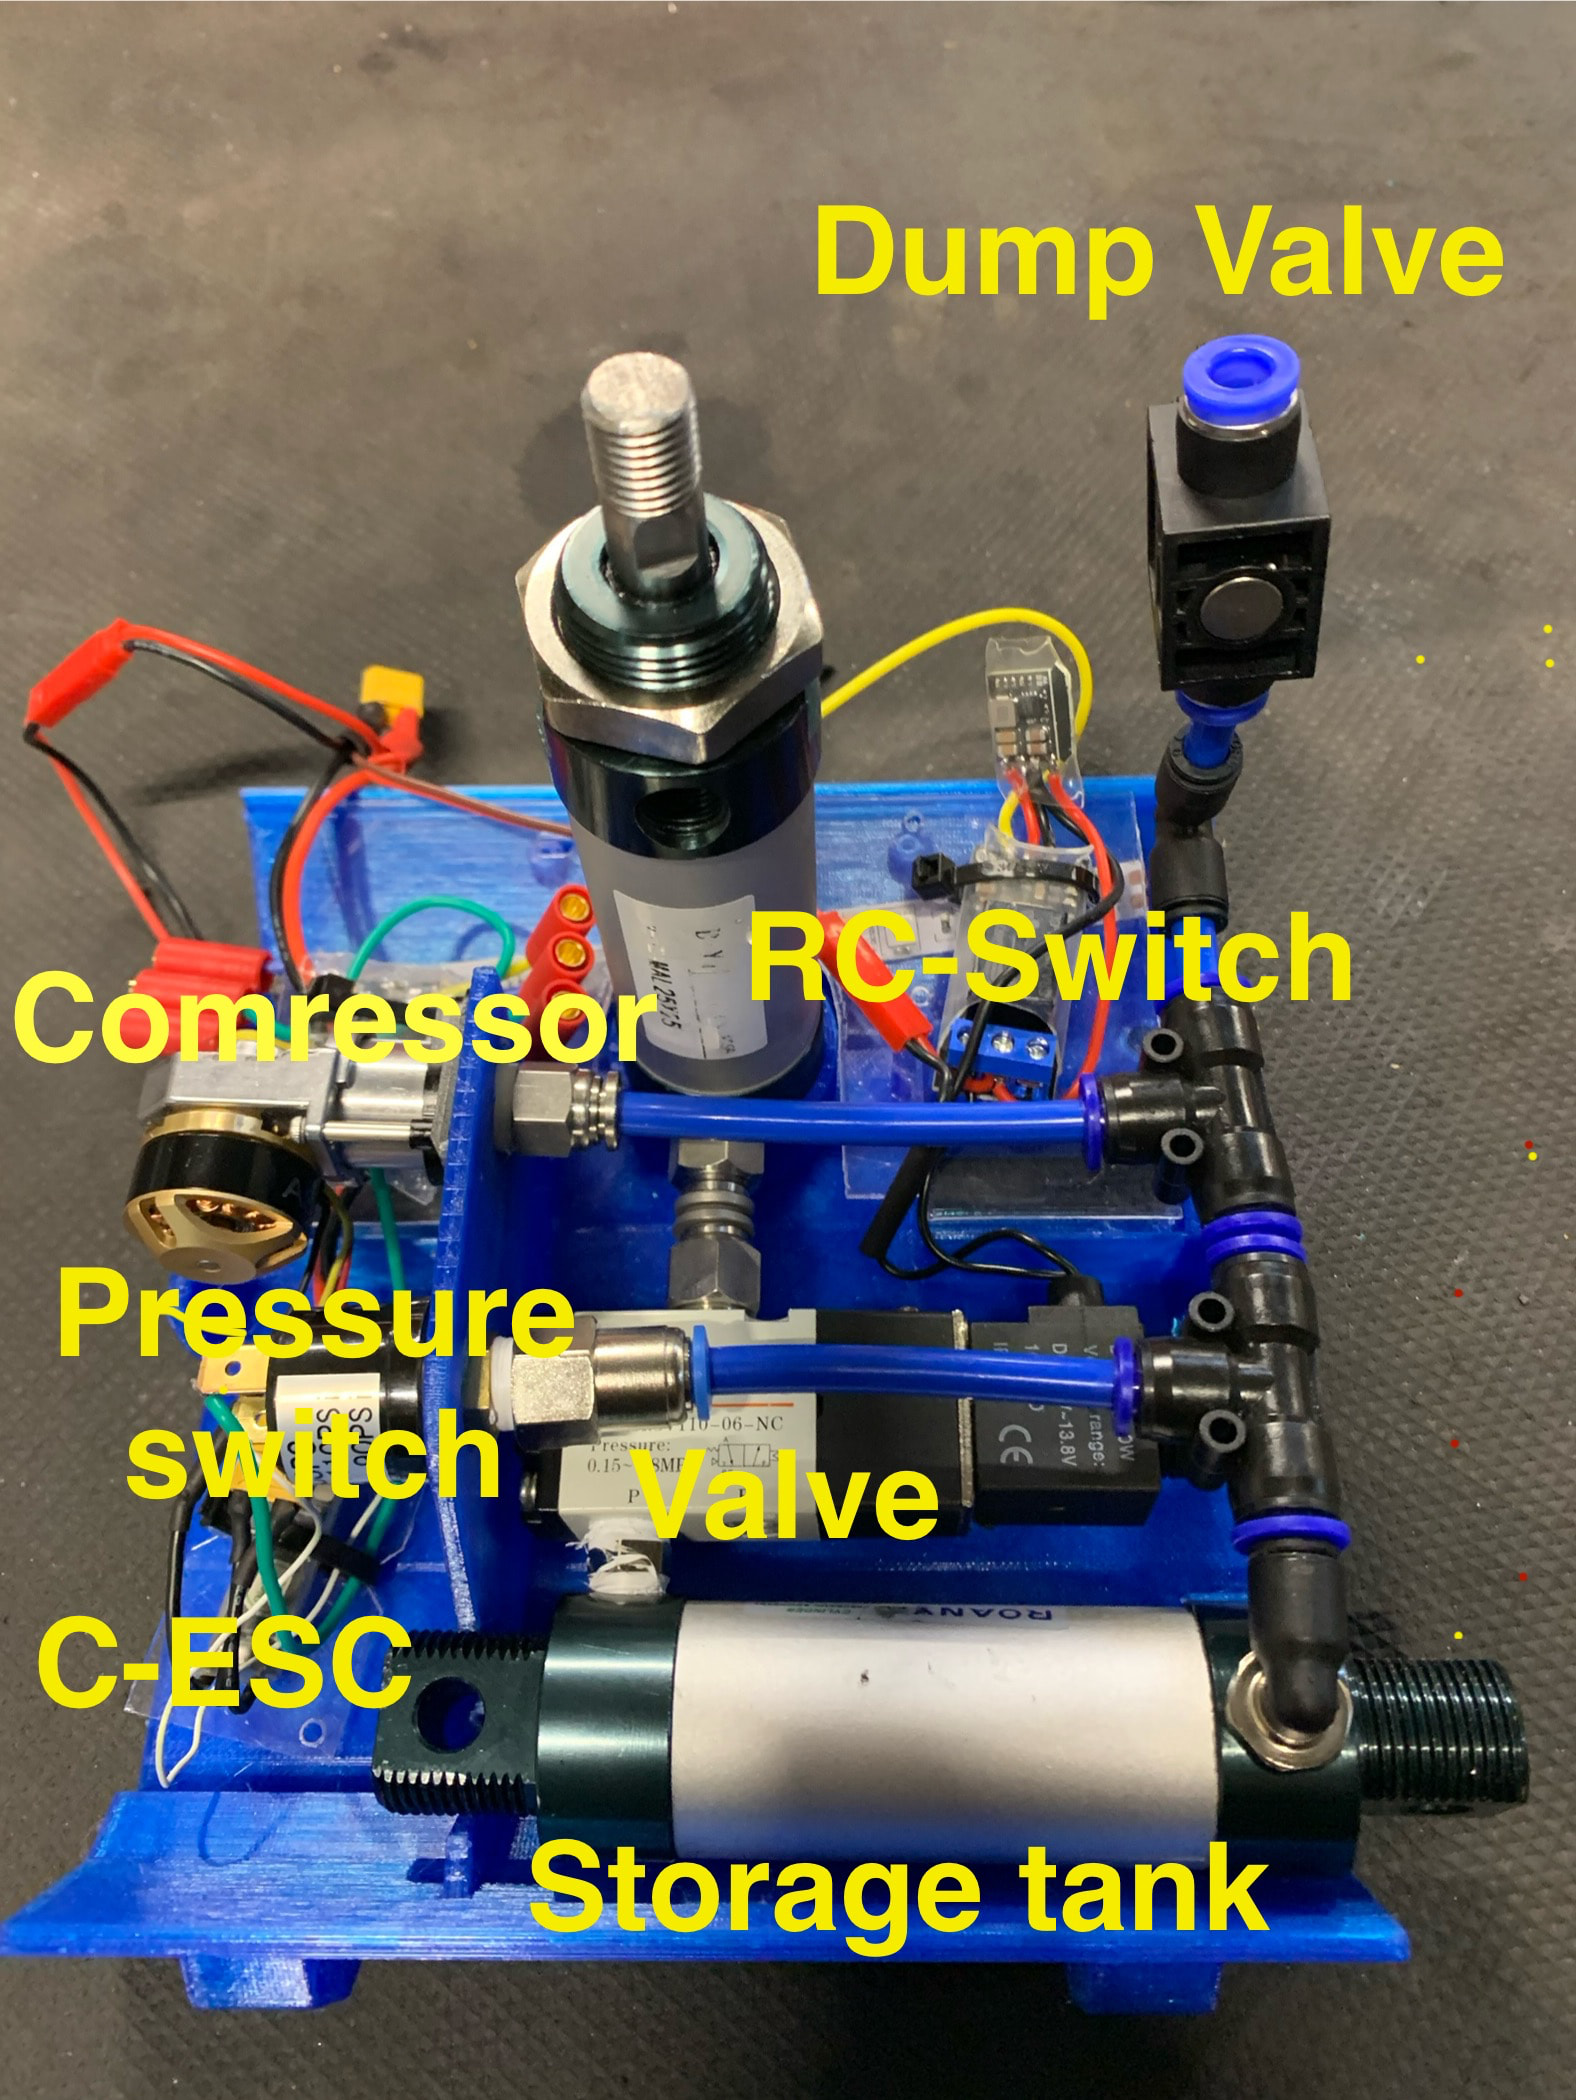
You should now have all the components needed to make a pneumatic weapon system that weighs just under 600g
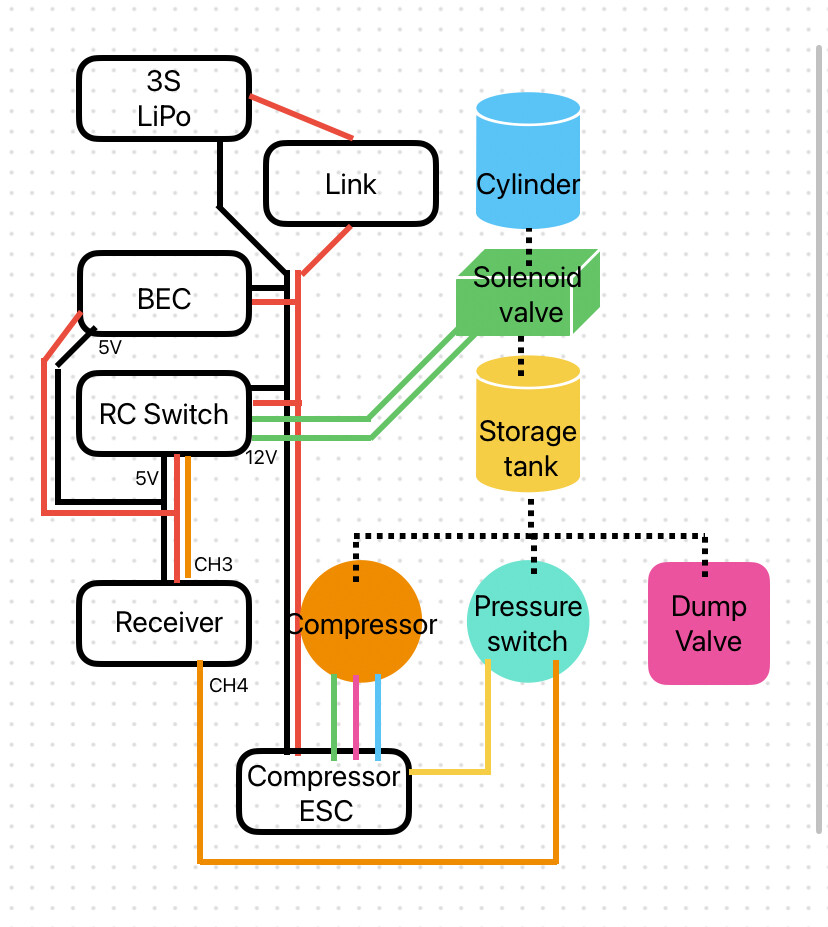
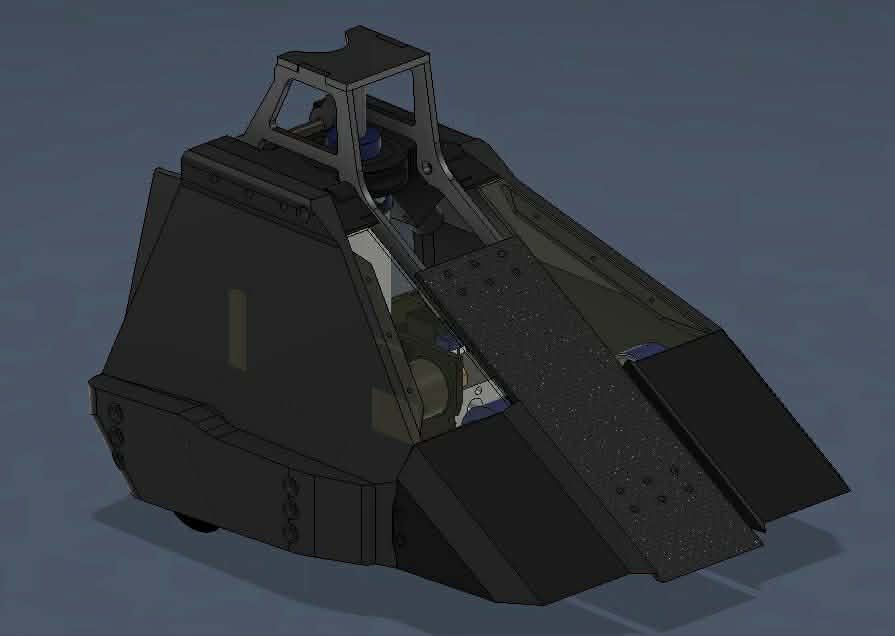
Assembly should follow this diagram.
And look something like this.
The principal.
Turn the robot on. close the dump valve. let the ESC beep and arm.
Set the compressor channel to run. It takes about 4 seconds to pressurise the system.
The pressure switch at about 8bar disables the ESC and stops the compressor.
When the channel to flip goes above 50% it switches the relay. This sends 12 volts to the solenoid. Opens the valve. Fires the flipper.
When the relay returns to off. The valve returns. This vents the cylinder pressure to atmosphere. The flipper requires an elastic band to pull the flipper arm and the piston back down.
After about two flips the system pressure will be low. Now the pressure switch will let the ESC restart.
the ESC likes to see 0% to be re-armed and then set to run again.
After fight. Remove the link and set the dump valve to open.
This concludes the instructions on how to make the pneumatic system.
For a while I have considered the idea of designing a compressor powered flipper for a featherweight. It’s a well proven concept.
Back in March I was getting some cycling gear for my work commute. I saw the tyre inflators were tiny and battery powered. Especially compared to the average featherweight compressor.
I knew most pneumatic components scale down to a good size for beetles so I had the idea floating about.
April came around. BBB announced the New Bloods tournament.
I knew there wouldn’t be a more suitable place to try the idea out. But I had just under 2 months to find components I was happy with. make a CAD I was happy with. Build a robot I was happy with.
But I signed up and took on the challenge.
Step 1 find components.
Initially I got all the pneumatic components I thought I would need. And the pneumatics weighed over 800g. I had made the buffer tank out of a slightly bigger bore cylinder. And I had bought a slightly bigger solenoid valve. I also used a lot of all metal fittings for convenience at the time. But swapped as much as I could to nylon fittings. After some smaller components and refinements it was under 600g
I used the lightest possible drive. Catalyst ESC with repeat compact motors and foam wheels. As well as a reasonably small 550mah 3S battery.
Step 2 make the CAD
Took about 3 attempts. Started out figuring out the most suitable way to arrange the pneumatics.
First CAD was way too big. And my components were also overweight at that point.
Second attempt was better but still a little big. Couldn’t spare weight for wheelguards either. Then I made the valve and buffer tank smaller. As well as changing a few fittings.
Third attempt had to work. Because it made good sense to get the flipper arm made in a group order that was due soon. I Kept refining this version into the final robot.
Step 3 print a robot.
The chassis was being made with FormFutura Centaur PP. Ari Calister had already figured out this filament with Frenzy. And has been kind enough to leave lots of advice for it in Beetle Chat.
But it still took some getting used to. And it’s still easy to mess up. warps or bad overhangs seem to be my struggle.
Started with the small simple parts, then got bigger and more complex adjusting my slicer settings as I figured it out.
I made a PLA chassis, lower base only first. to see how the pneumatics fit. After that adjust the CAD. Next full chassis in PLA. Then full in PP.
This felt really dumb and really nervous the whole time. An error meant buying a new roll of filament that took a week shipping.
It came out. With some warping. But not anywhere that mattered.
Step 4 make a robot that works.
The issues I found were. The Catalyst did not like the compressor ESC. Catalyst would go into a configuration mode. Had to disable that.
I also thought the compressor wasn’t good enough to fill the system. But I found I had not tightened a fitting and it was just dumping pressure out of the system.
Plus I had made an error with the flipper arm. The rod could extend past the top plate as it pivots back. Get stuck extended with no elastic retraction. I made a plastic topper for the rod. So it stays underneath.
The robot has its flaws. The flip is OK. Good enough to self right. Good enough to cause an Oota.
The compressor doesn’t like starting up unless the system pressure is really low. The motor stalls.
So it can take a while to get from a good flip to a re-pressurised system.
It works. But it’s flawed. I hope someone who reads the build log will want to improve upon it.