Boomslang - irrefutable proof that I low key hate myself

BBB new bloods is coming up and I couldn’t pass up the chance to do beetles at a local brewery - so I had to come up with a new beetle to secure my slot!

But what to make!? - I often find the blank canvas moment the hardest part.

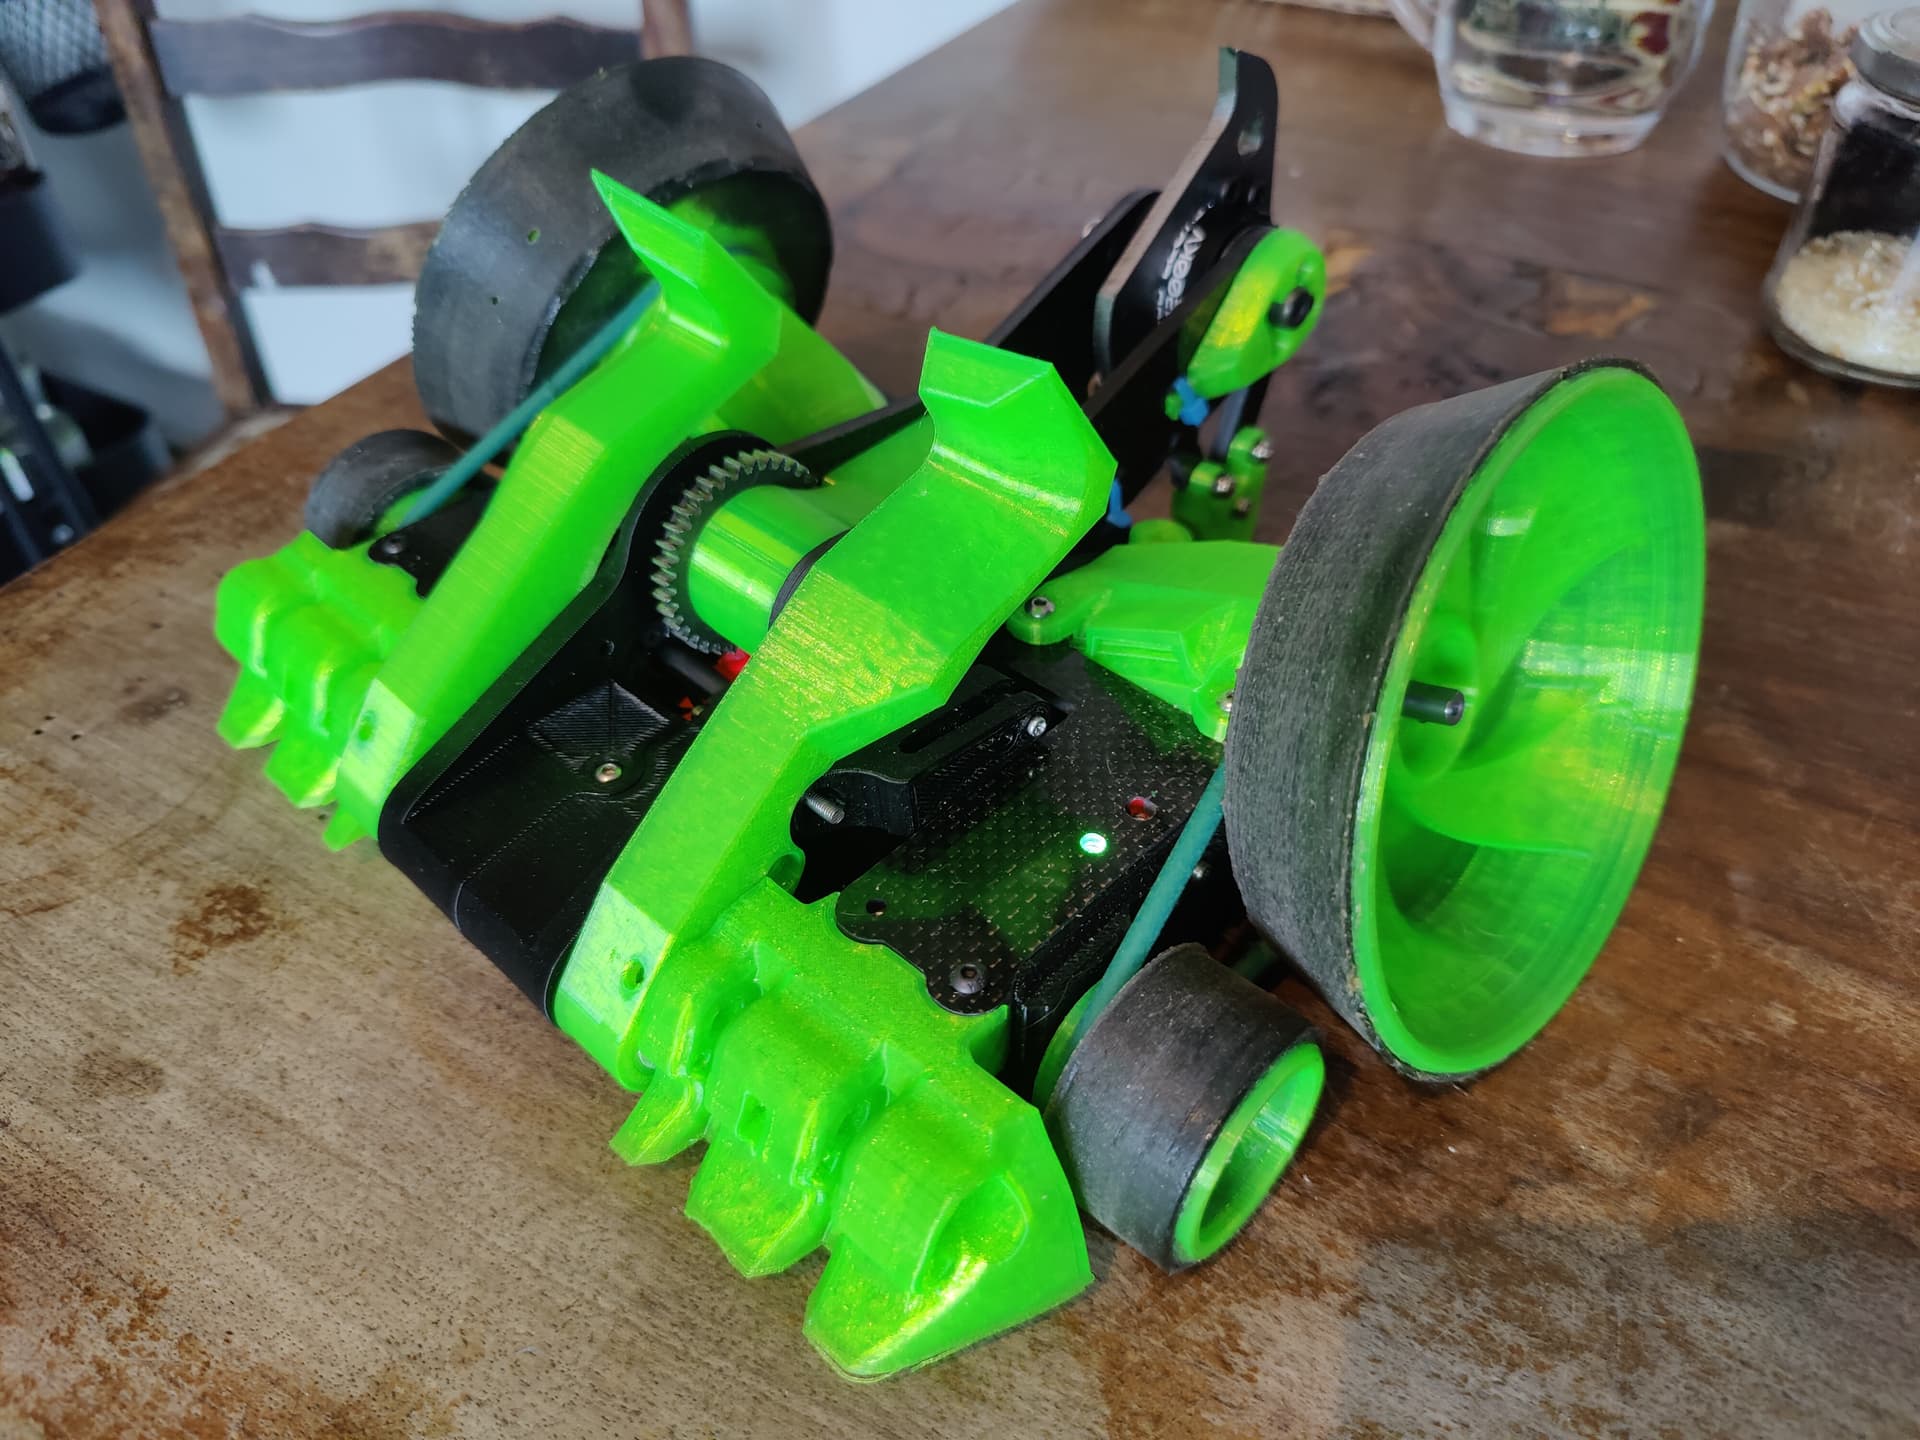
I knew I wanted to make a “Spinner but…” - a bot that incorporates a spinner but has something a bit different or unique going on too. And ever since making my ant drum GetGot I’ve been wanting to try the oversized cambered wheels at beetle scale.

With this in mind I did what I often do and started with a rubbish sketch, and after a few nonstarters I ended up with this:

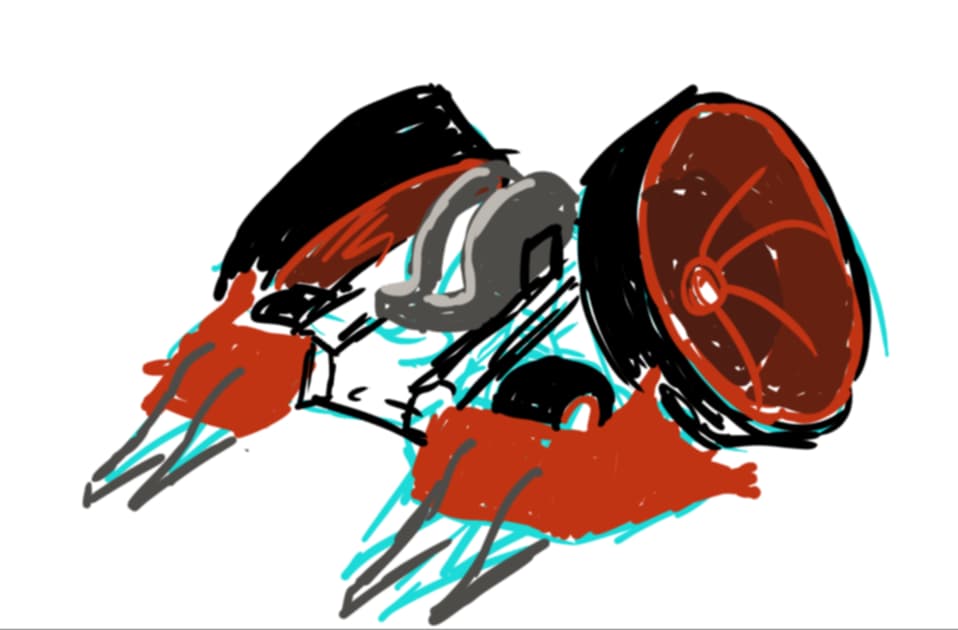
Big oversized cambered wheels and a puncher drisk seemed to tick all my boxes.

So off I went to cad and after many a wasted evening and early morning prework cad session - I had about 6 puncher weapon designs that I absolutely hated. So a rethink was in order.

Annoyed at the puncher designs I started to think about how to achieve the goal of a retractable weapon more easily and the obvious answer is a hammer saw. Keeping the rotational movement as rotational movement is much easier than trying to convert it into linear movement after all!

But a regular hammersaw? - that didn’t feel anywhere near weird enough to satisfy my strange tastes. At this point I remembered Seth’s shrapnel mine, the original version that was a front hinge with a saw weapon, not the new tantrum esque puncher.

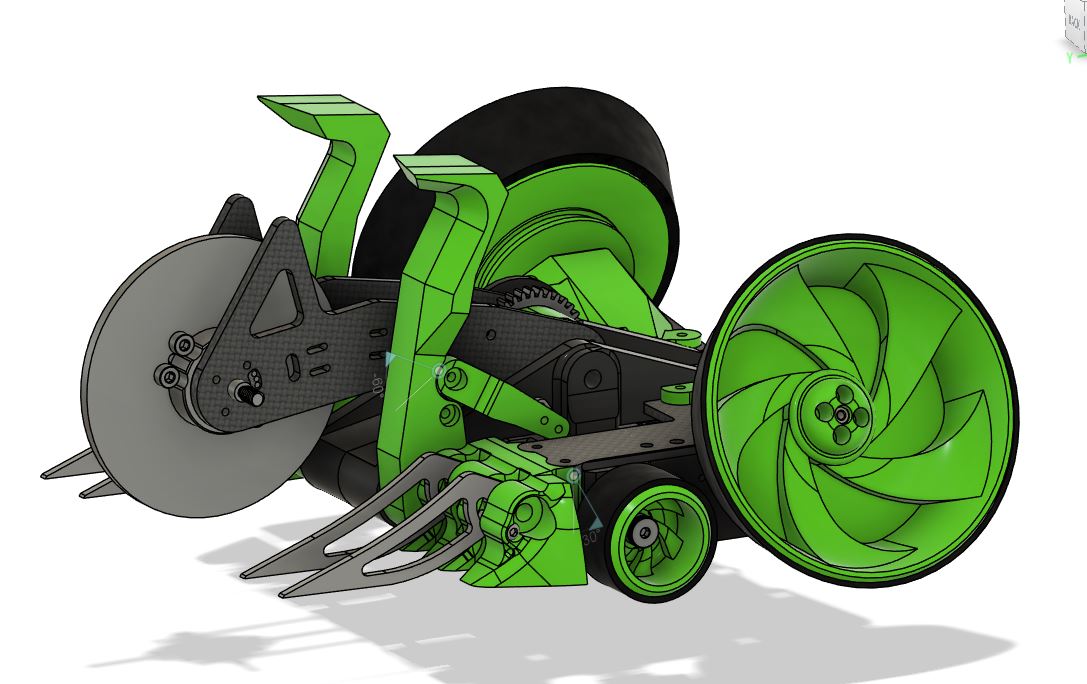
The idea of a bottom attack robot appealed to my need for gimmicks and if Seth isn’t pursuing it maybe I should? So I looked at his mech and quite quickly decided that separating the front hinge and the hammer saw would be drastically more useful in the arena and the new design started to form and relatively quickly I ended up with this:

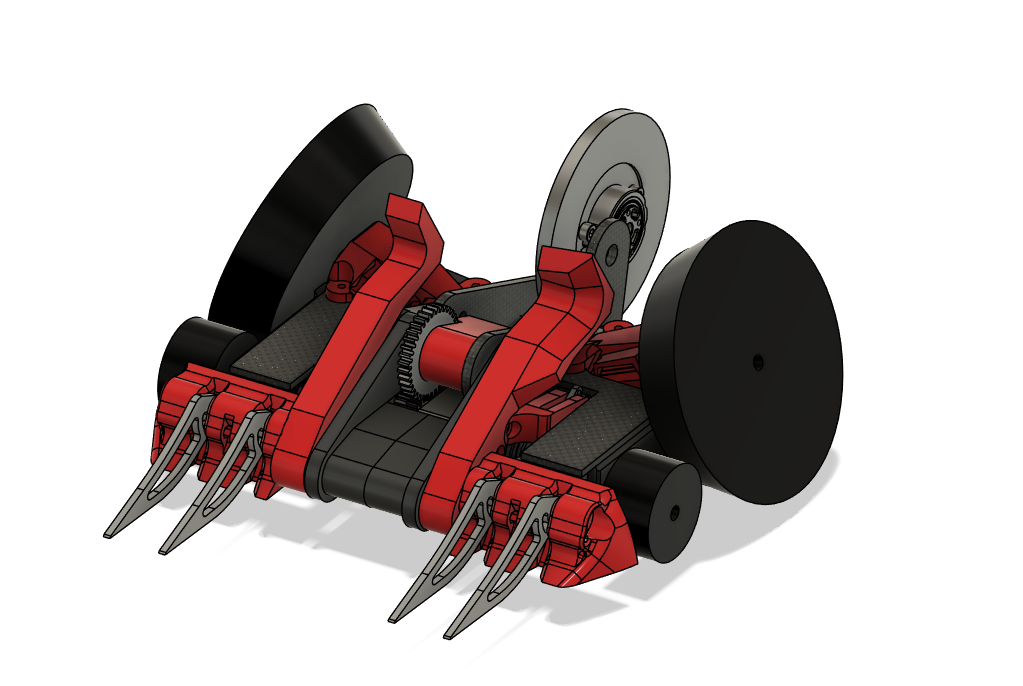
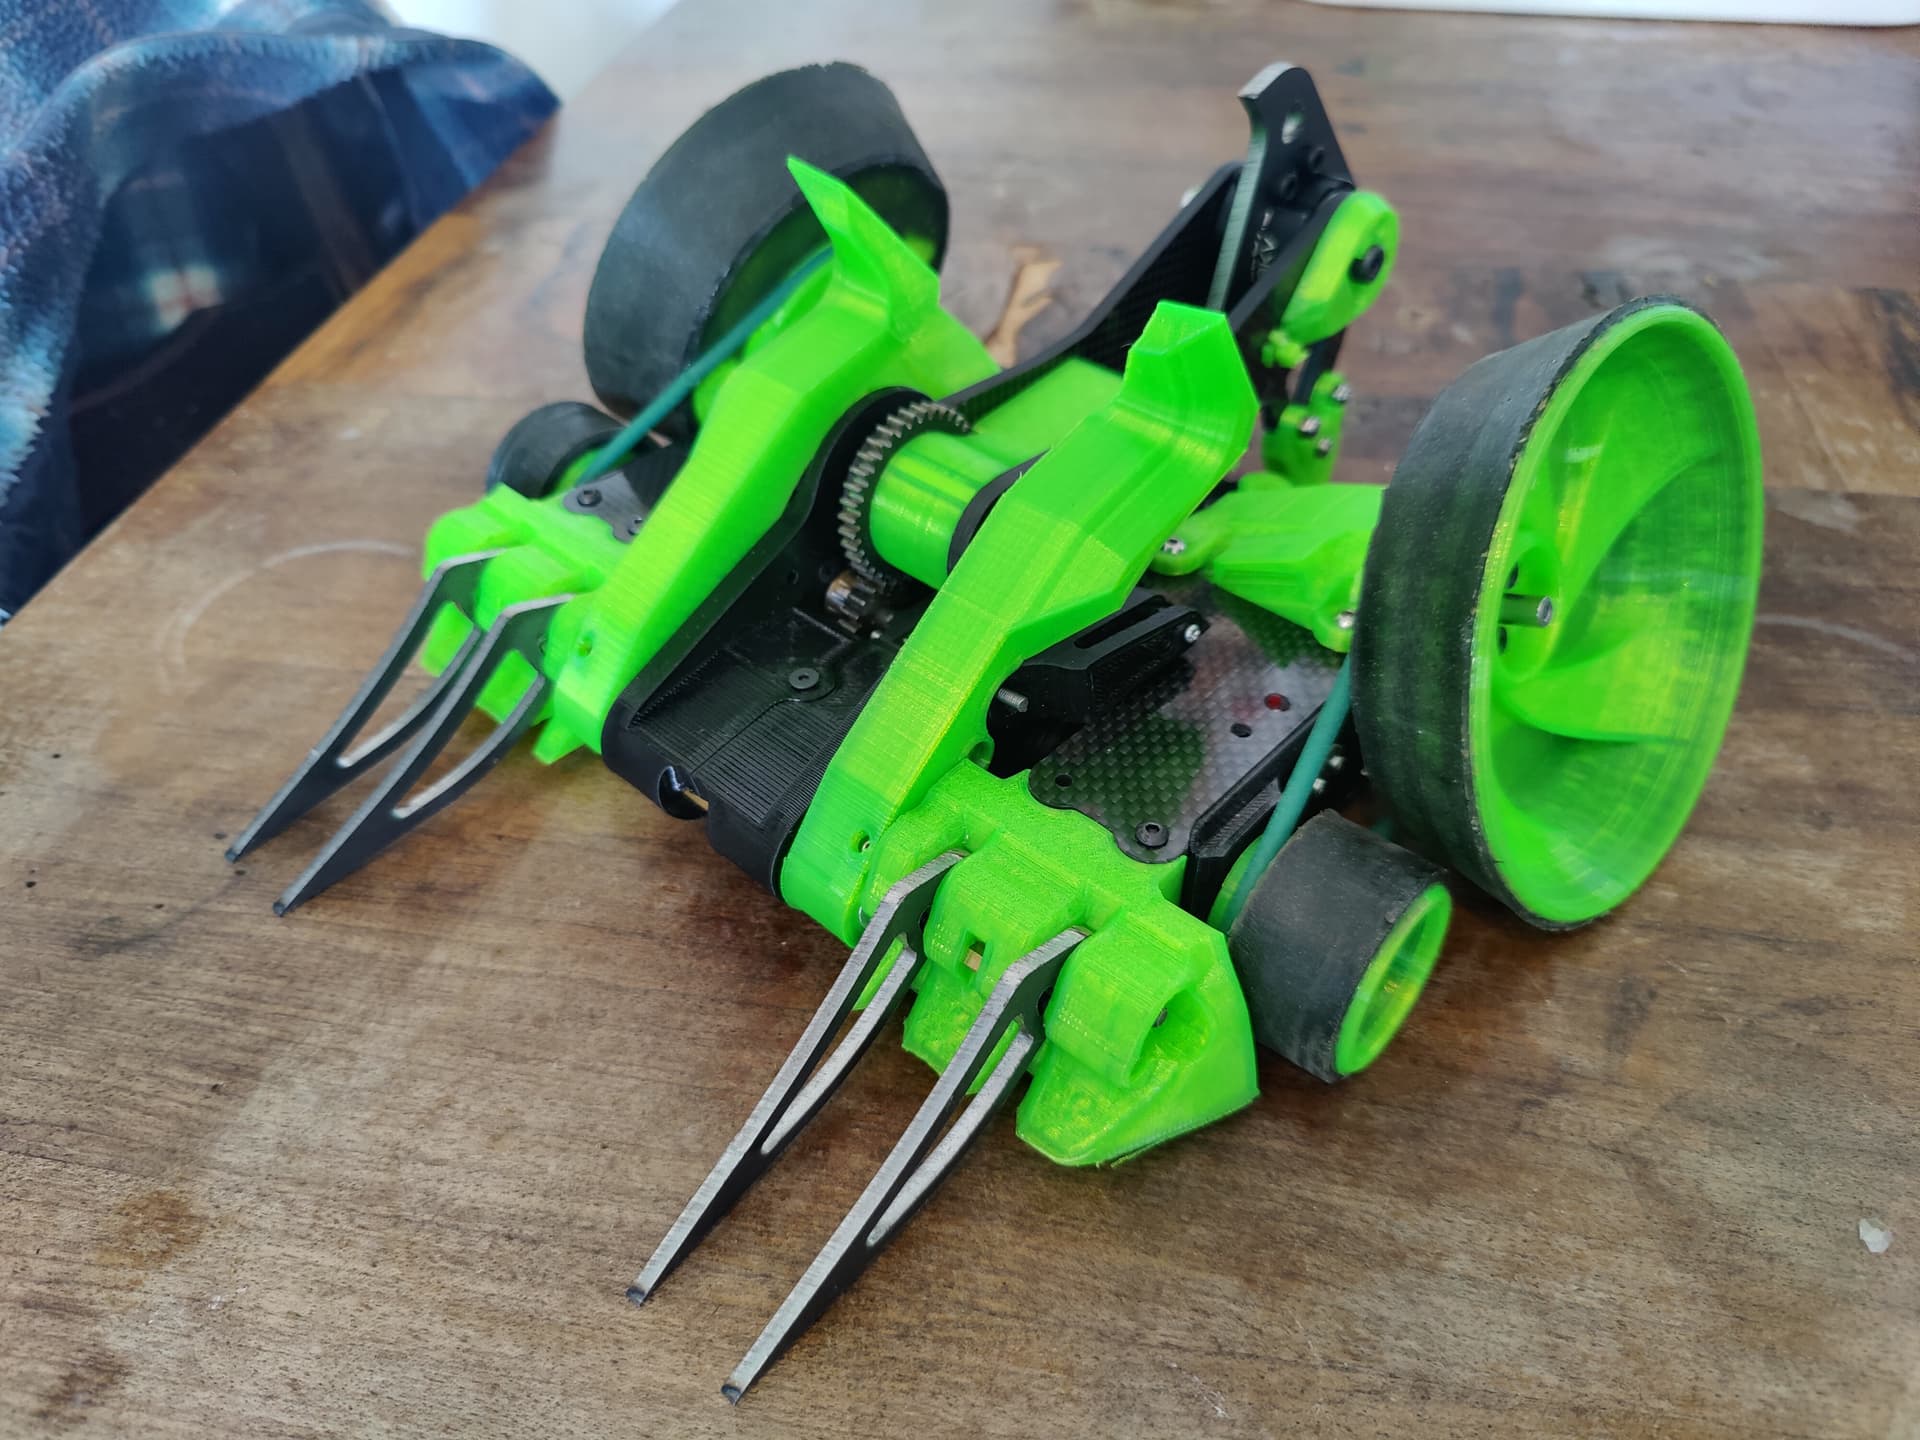
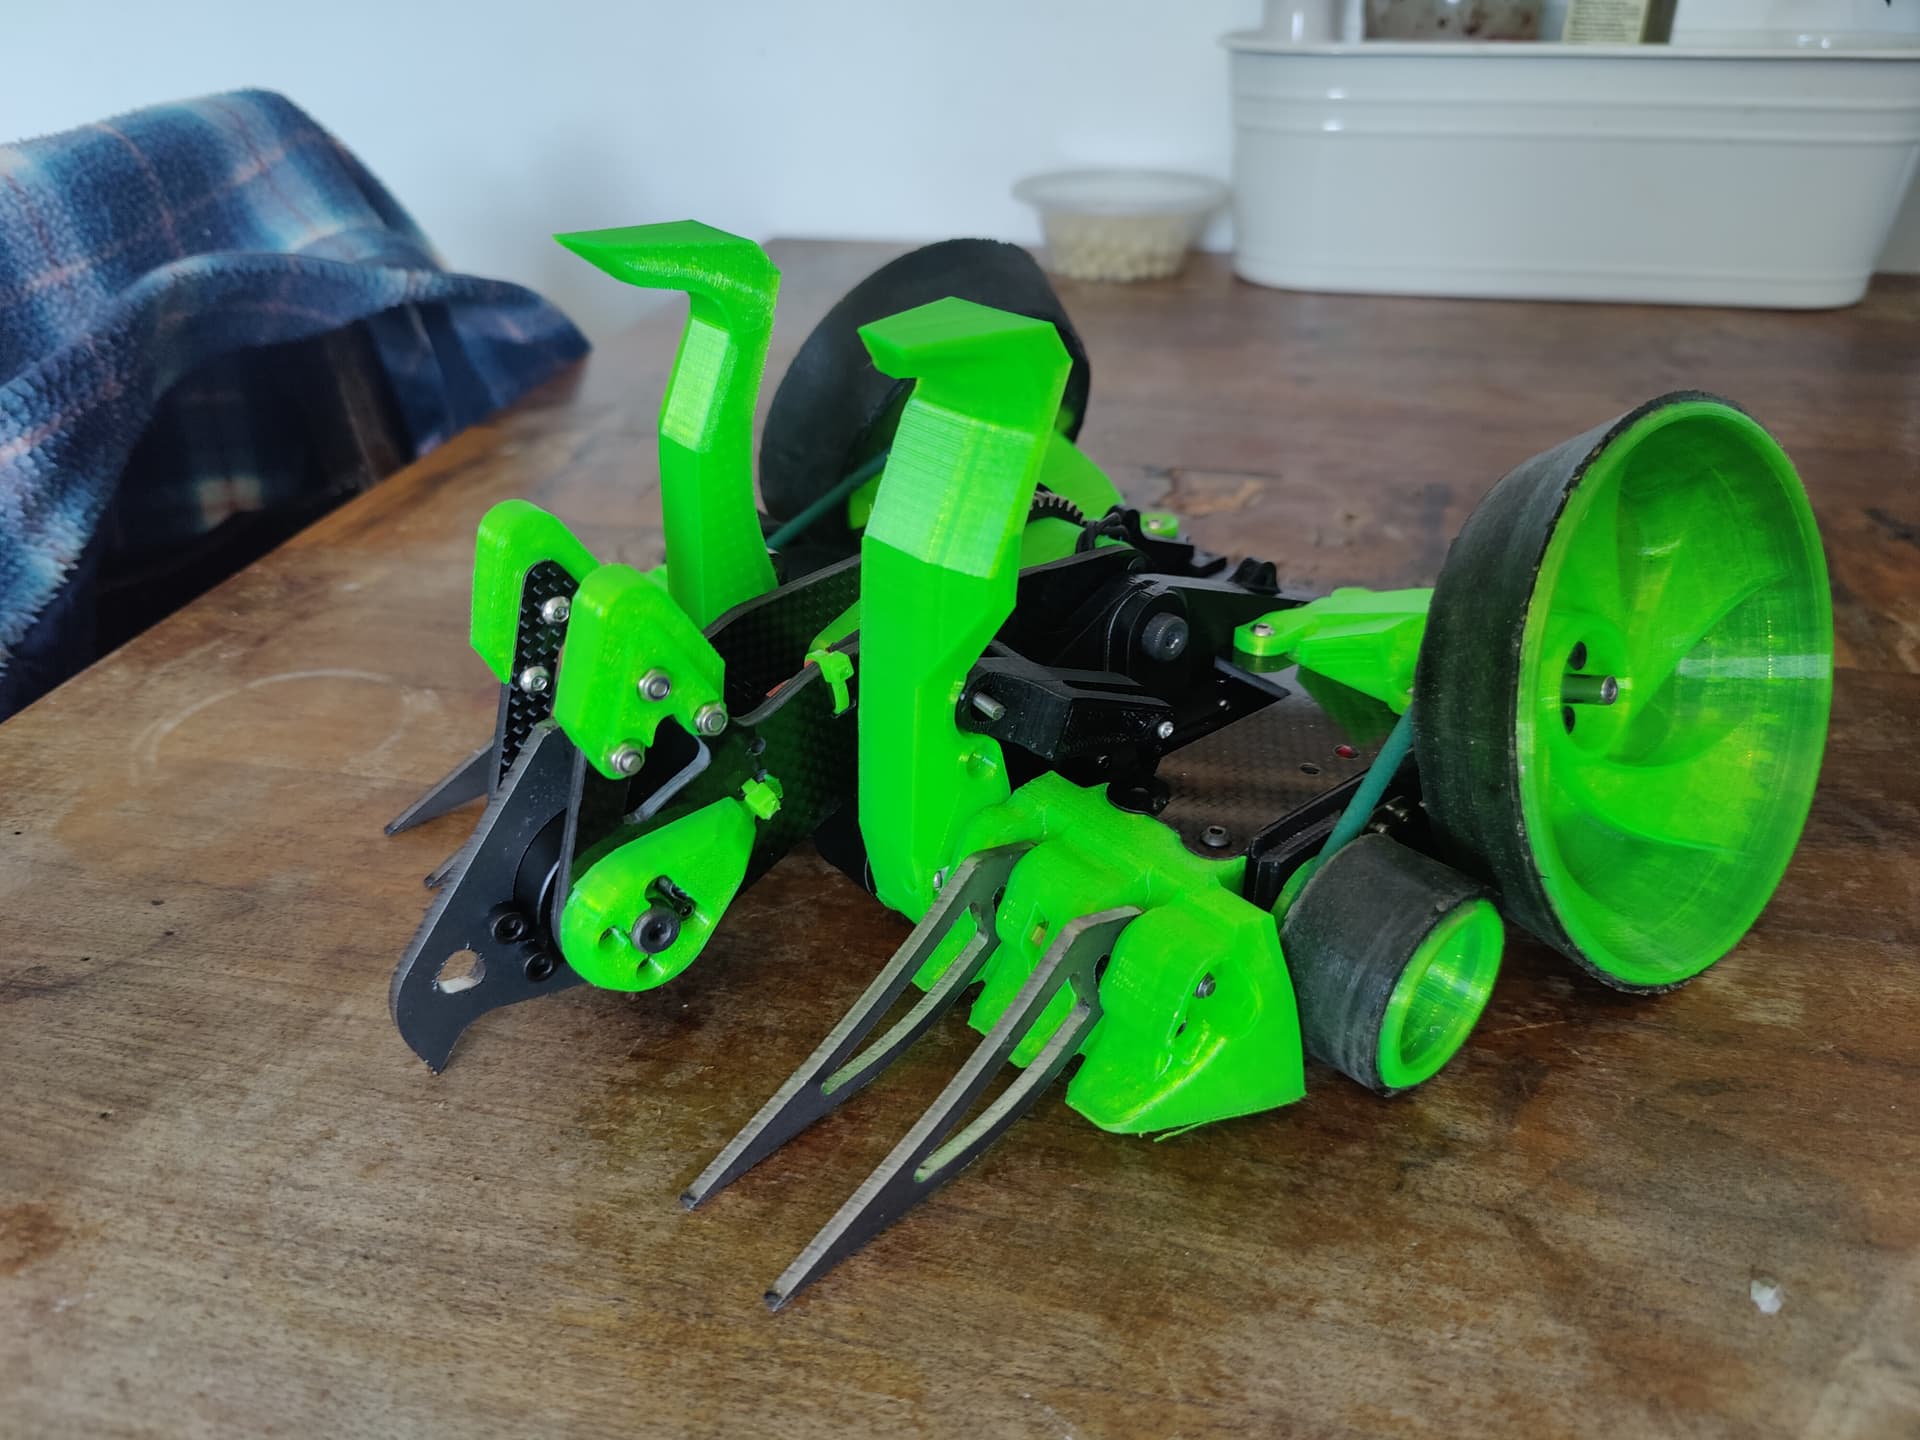
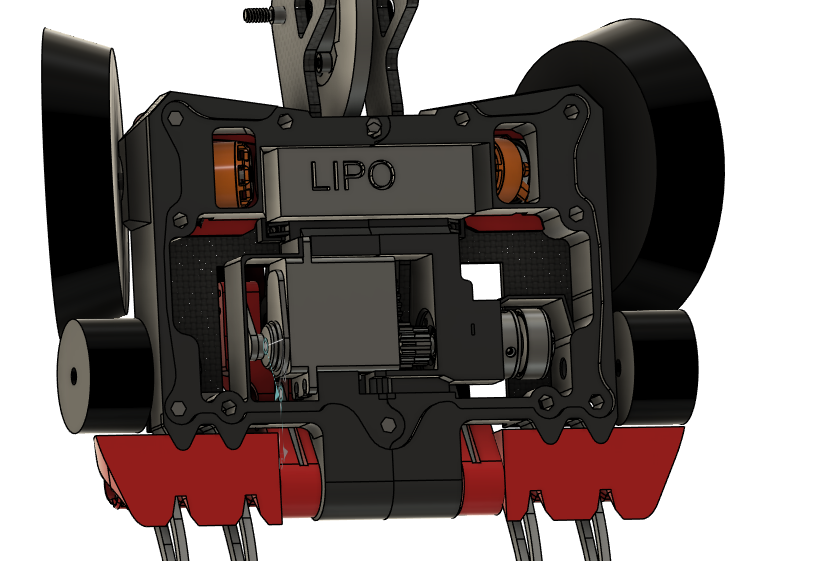
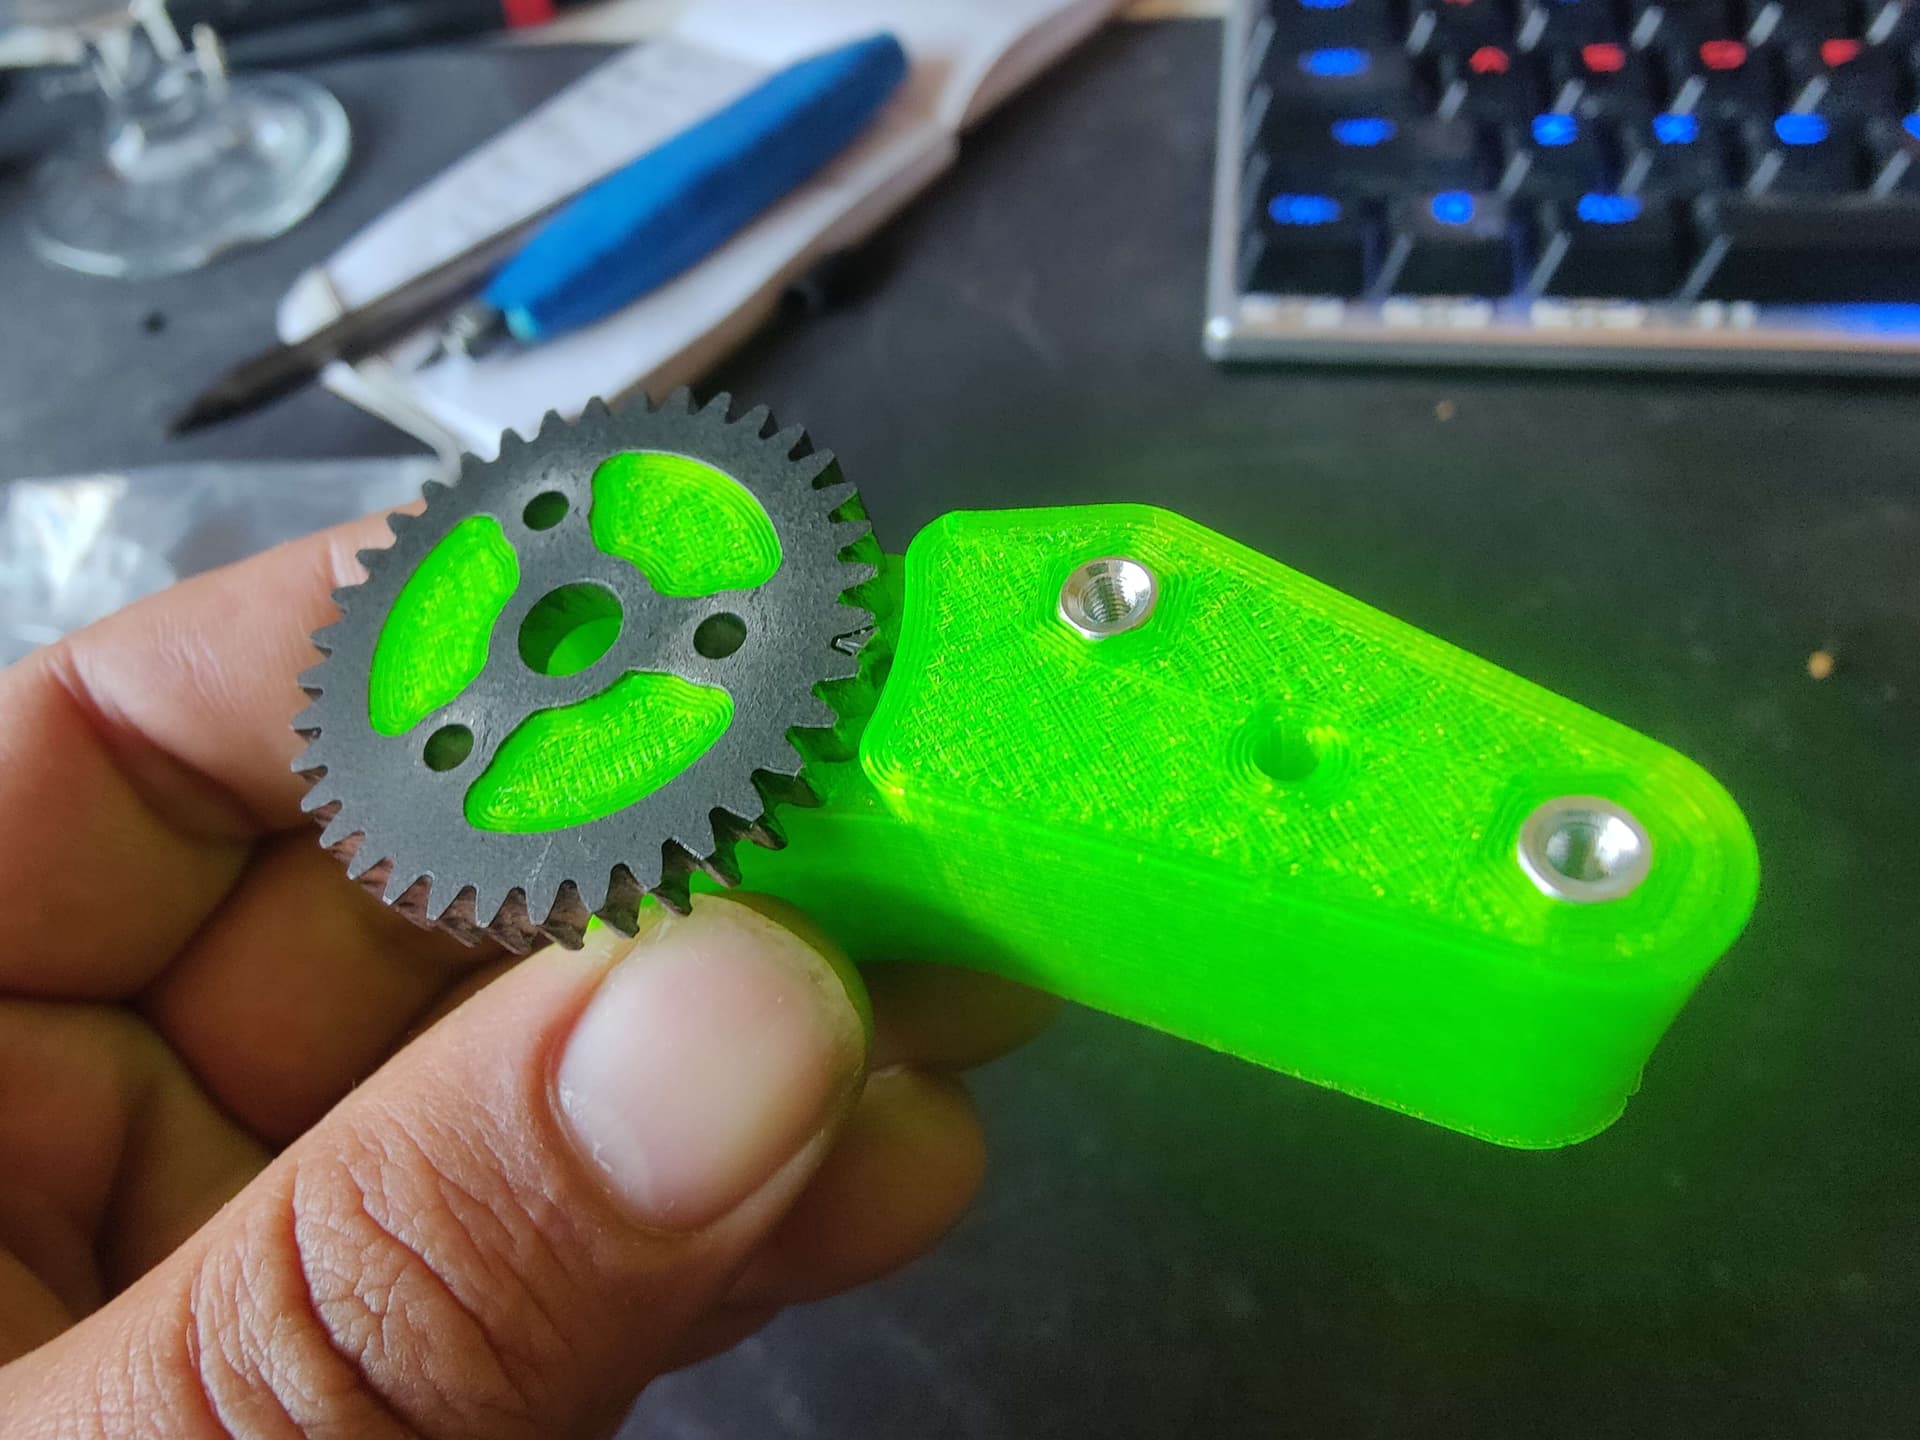
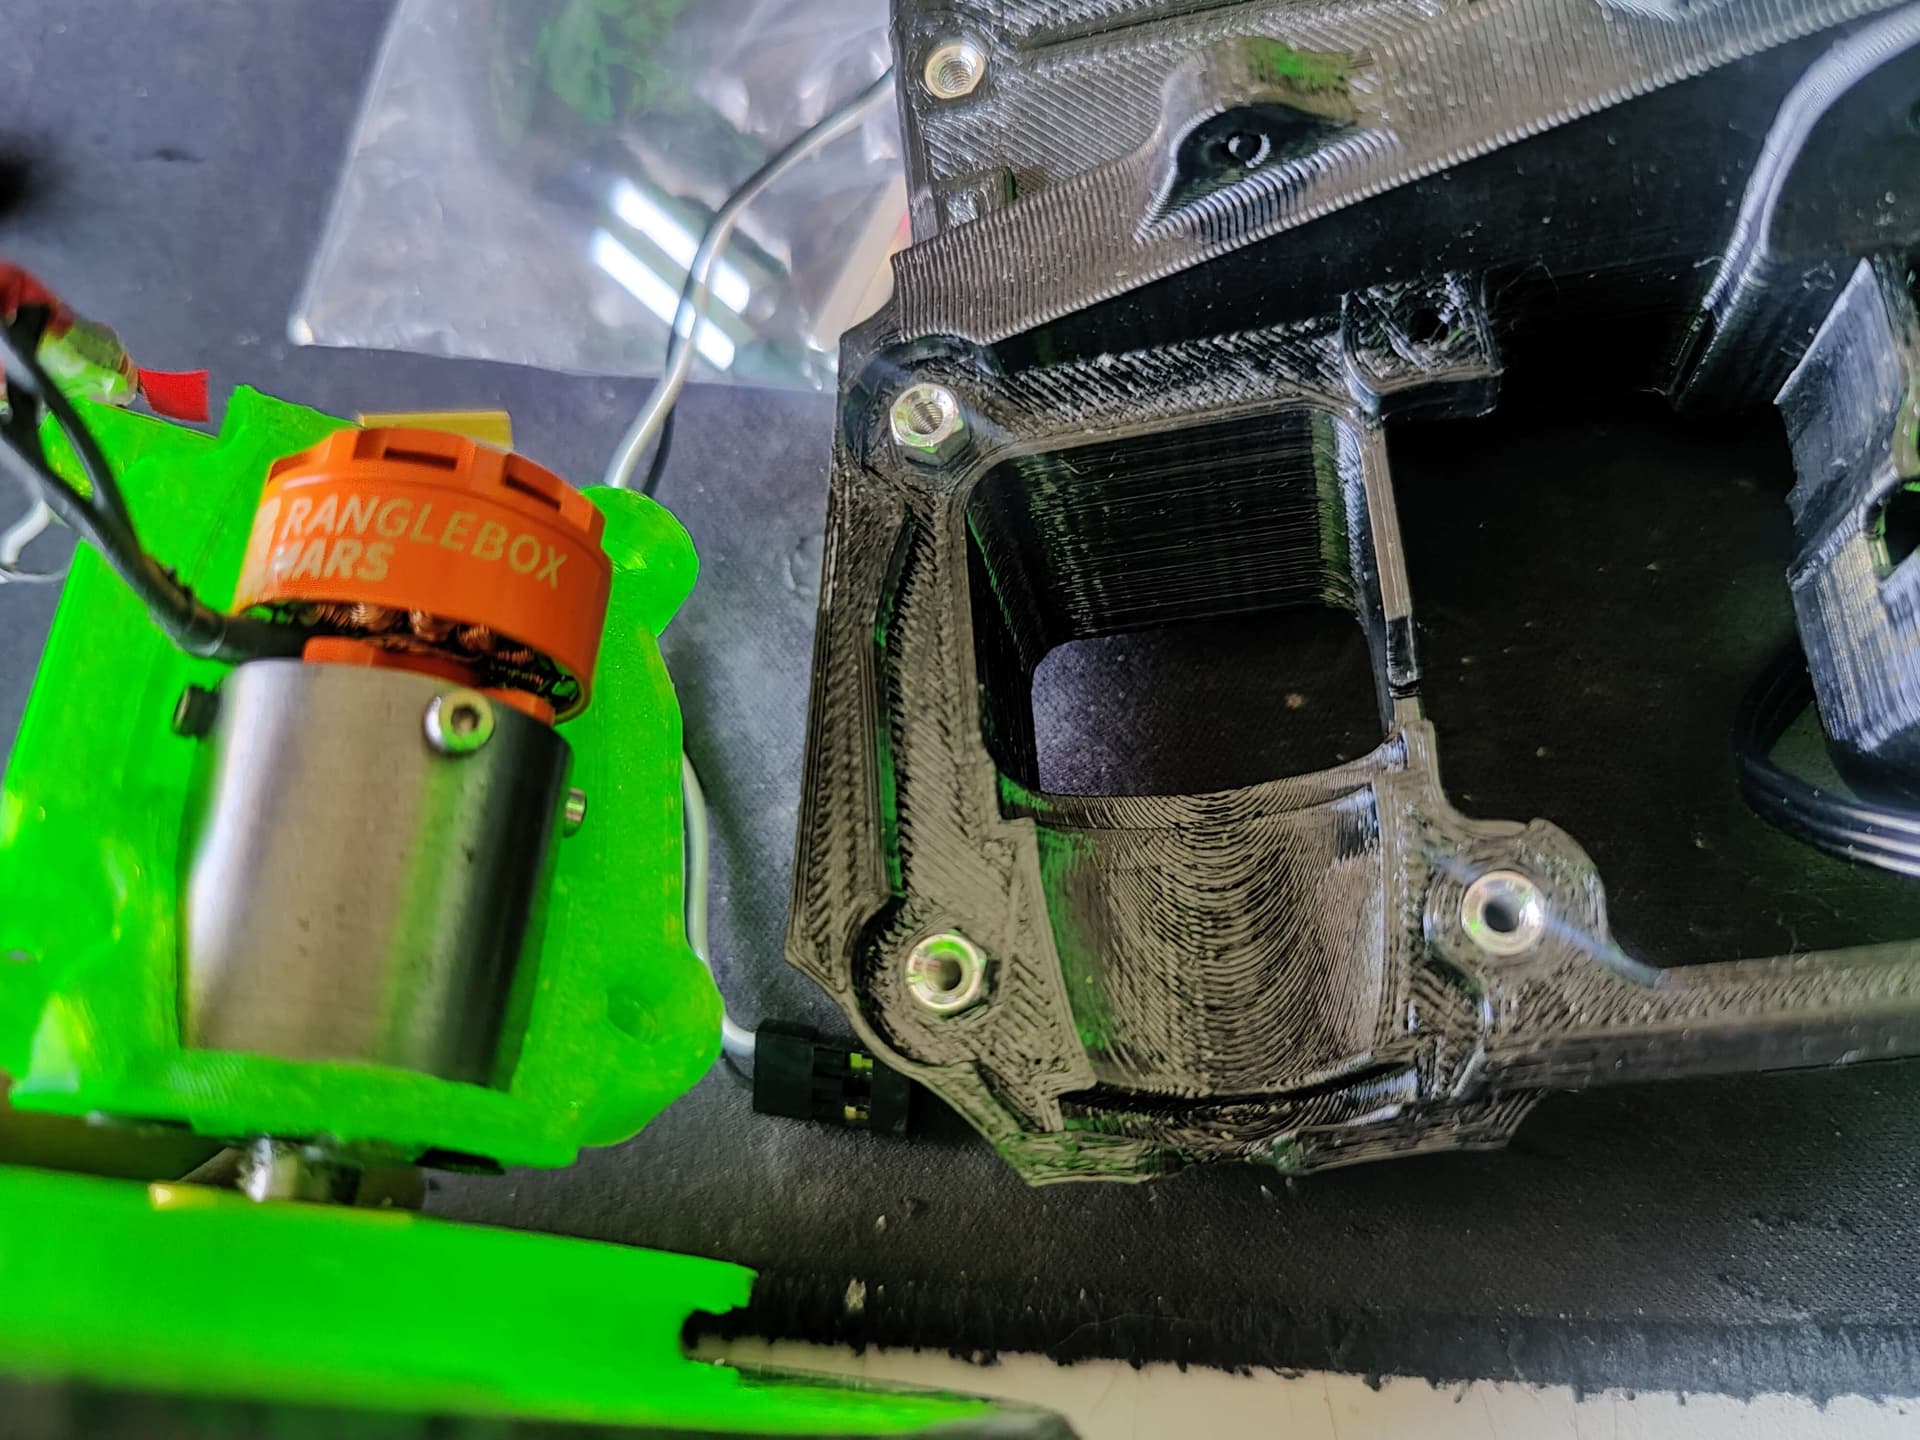
A lot of the early design decisions sorta made themselves. I knew I wanted to design around a repeat hub motor, this build was gonna be complicated enough without adding a custom hub motor to the mix. Weight was gonna be tight so carbon fibre and lightweight TPU prints where gonna the order of the day. And it was gonna have to be small and as dense as I could make it to get in weight. Round belts seemed like the simplest option for the drive, I felt a bit unsure of how the tpu construction would effect belt length and the round profile felt like the most accepting of the 20 degrees of twist involved in the camber.

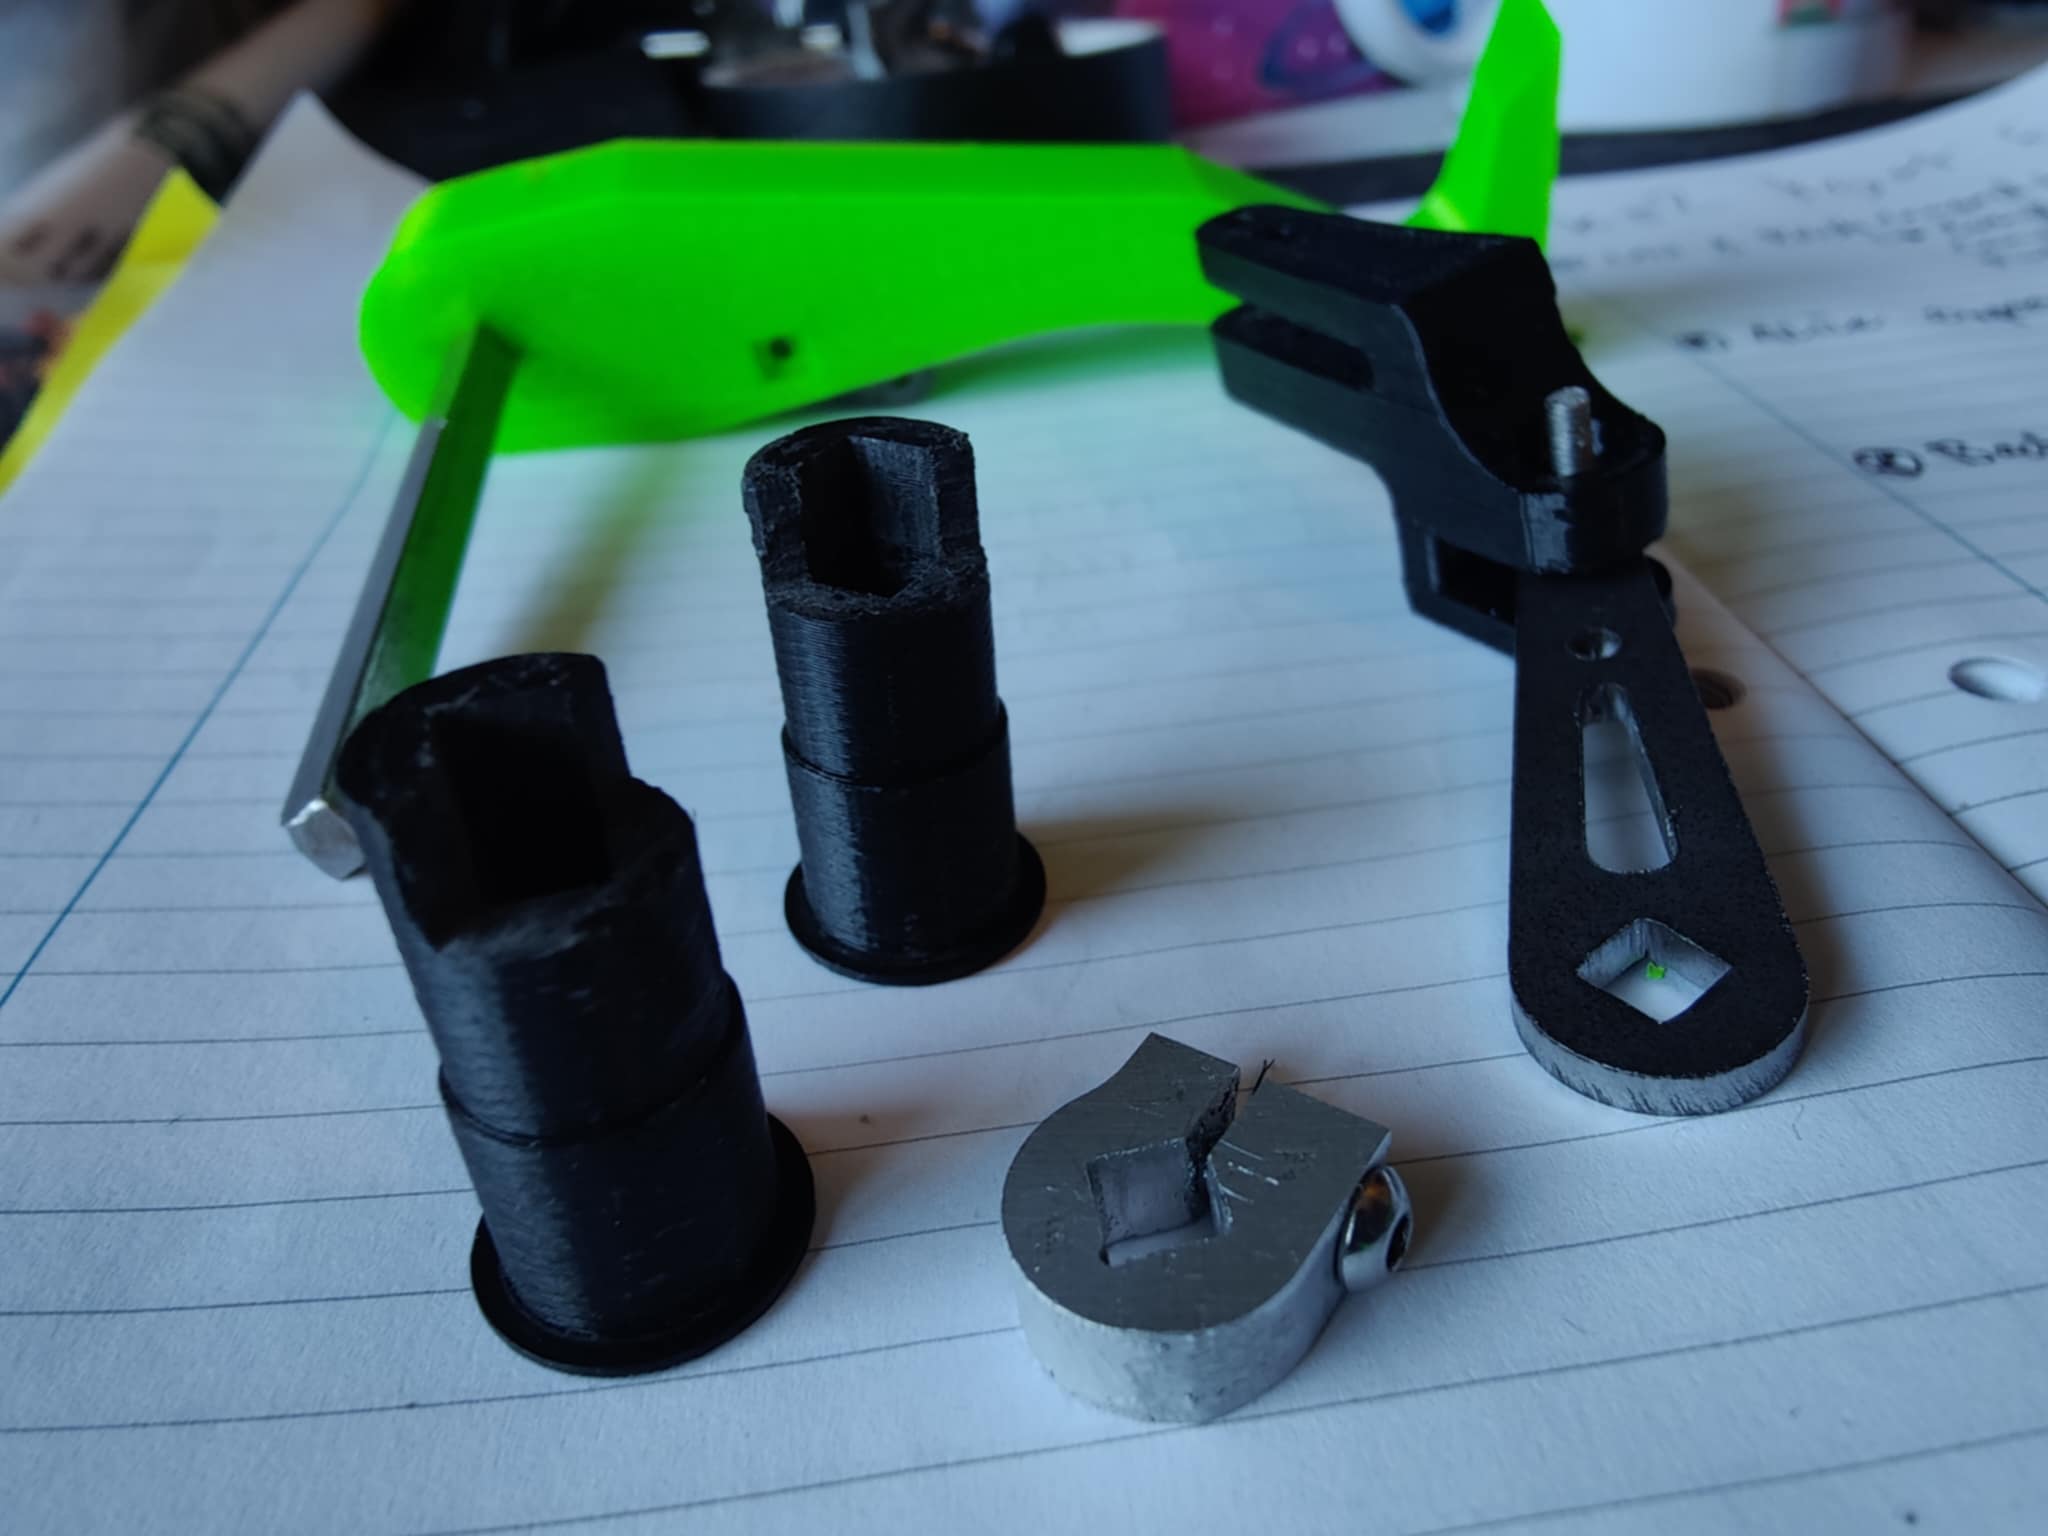
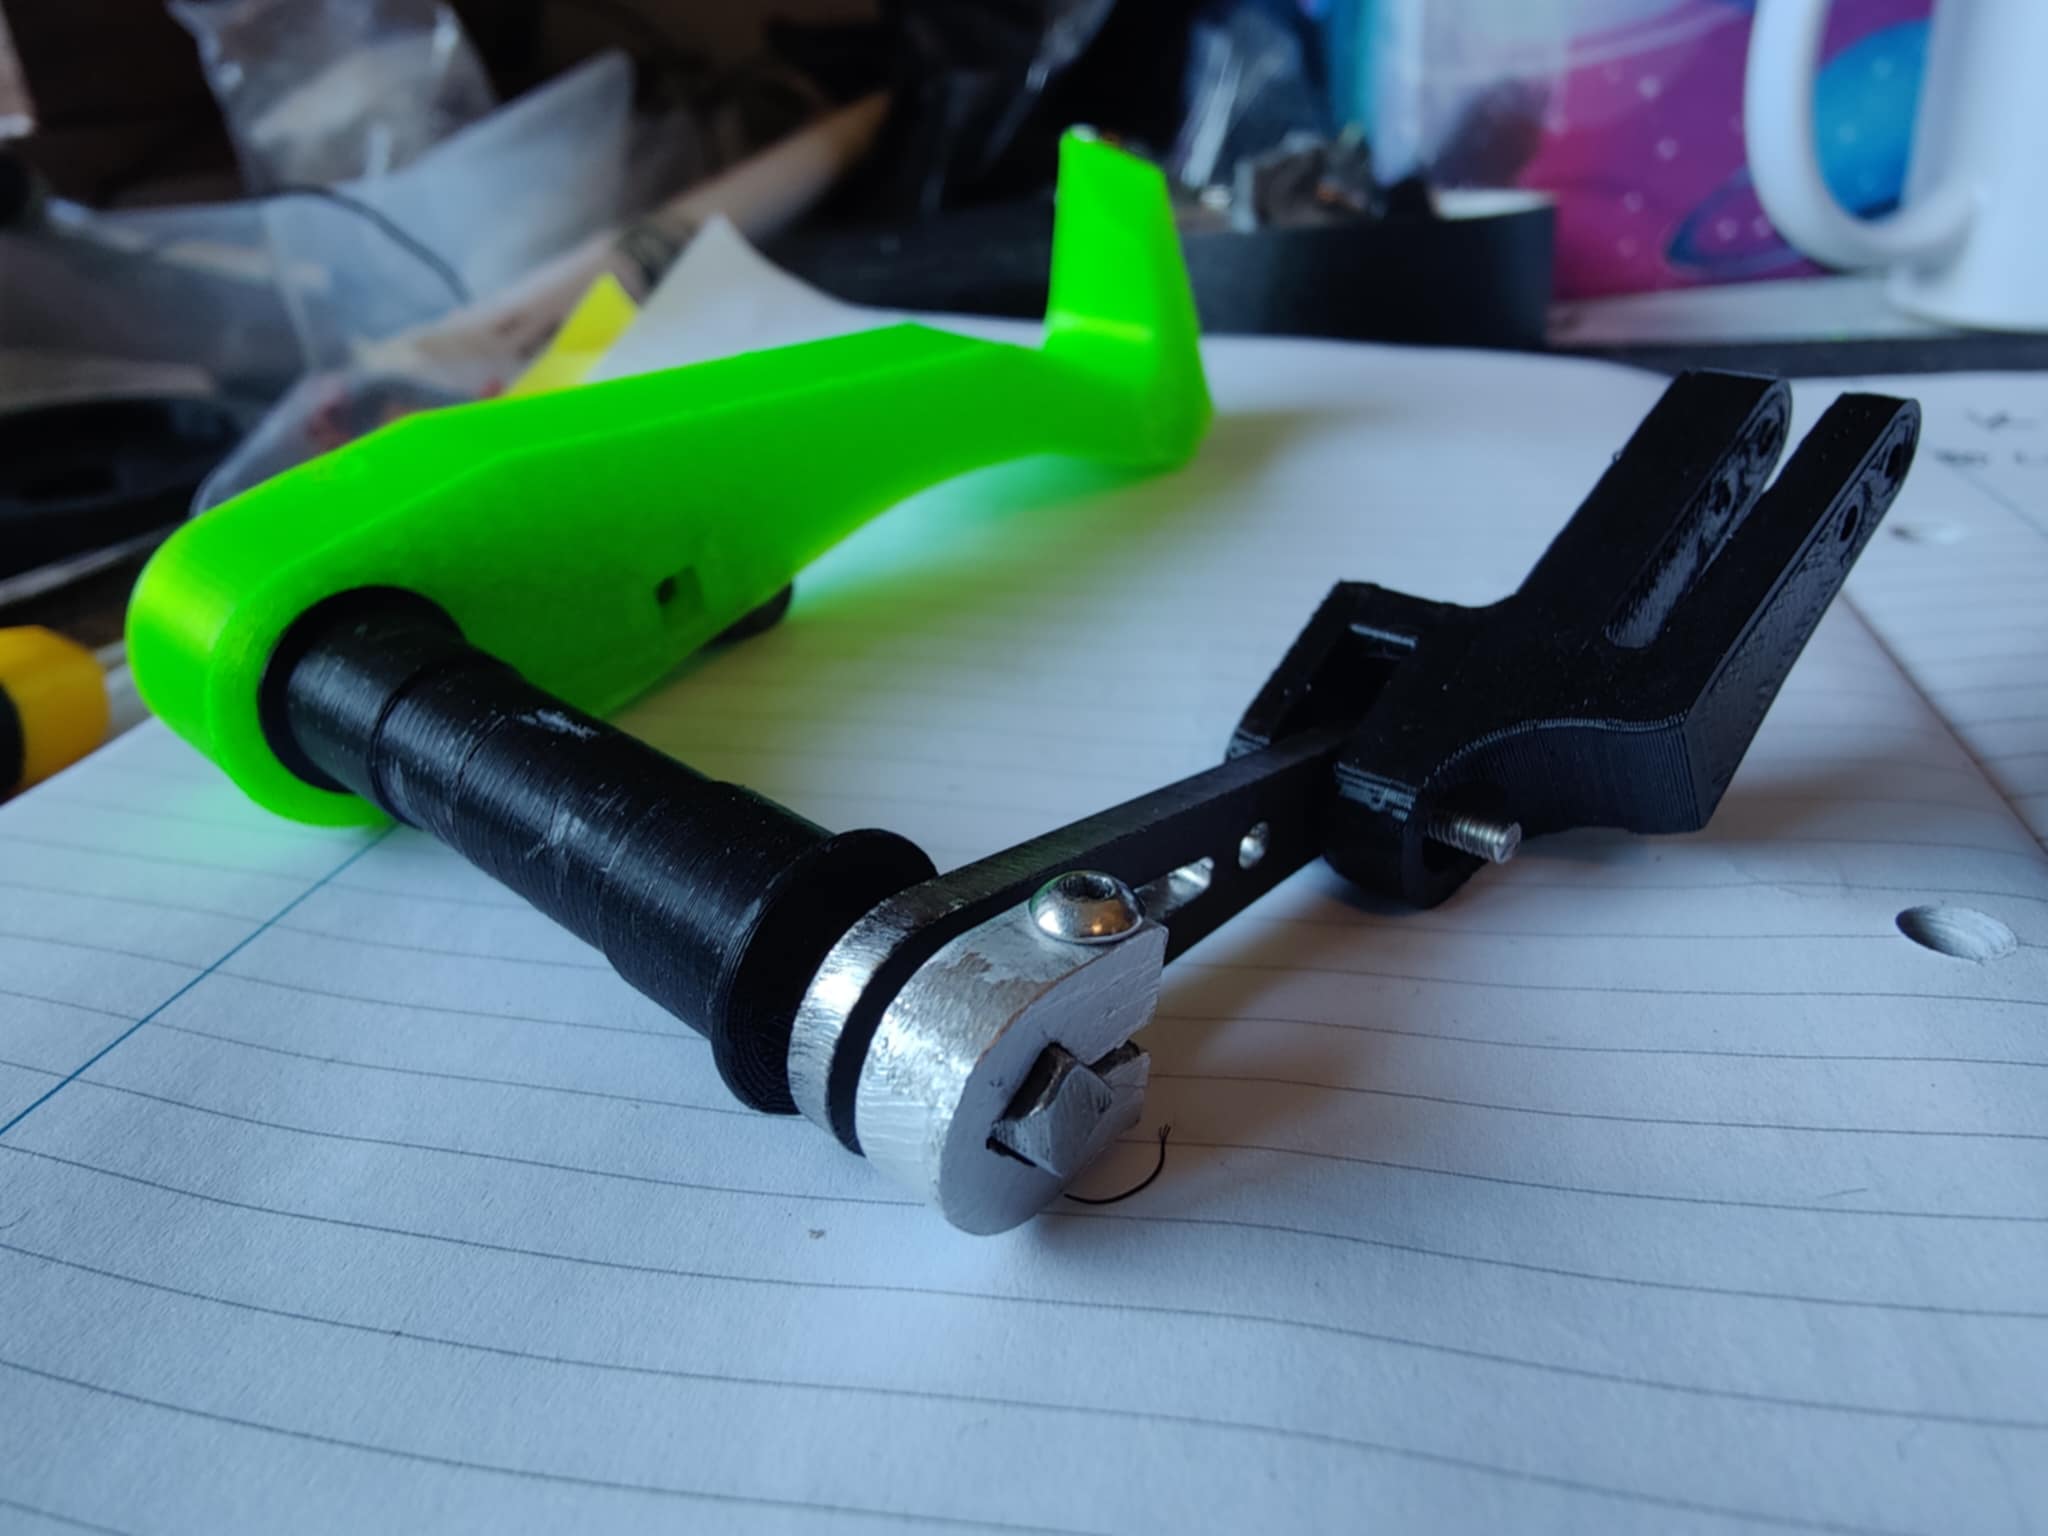
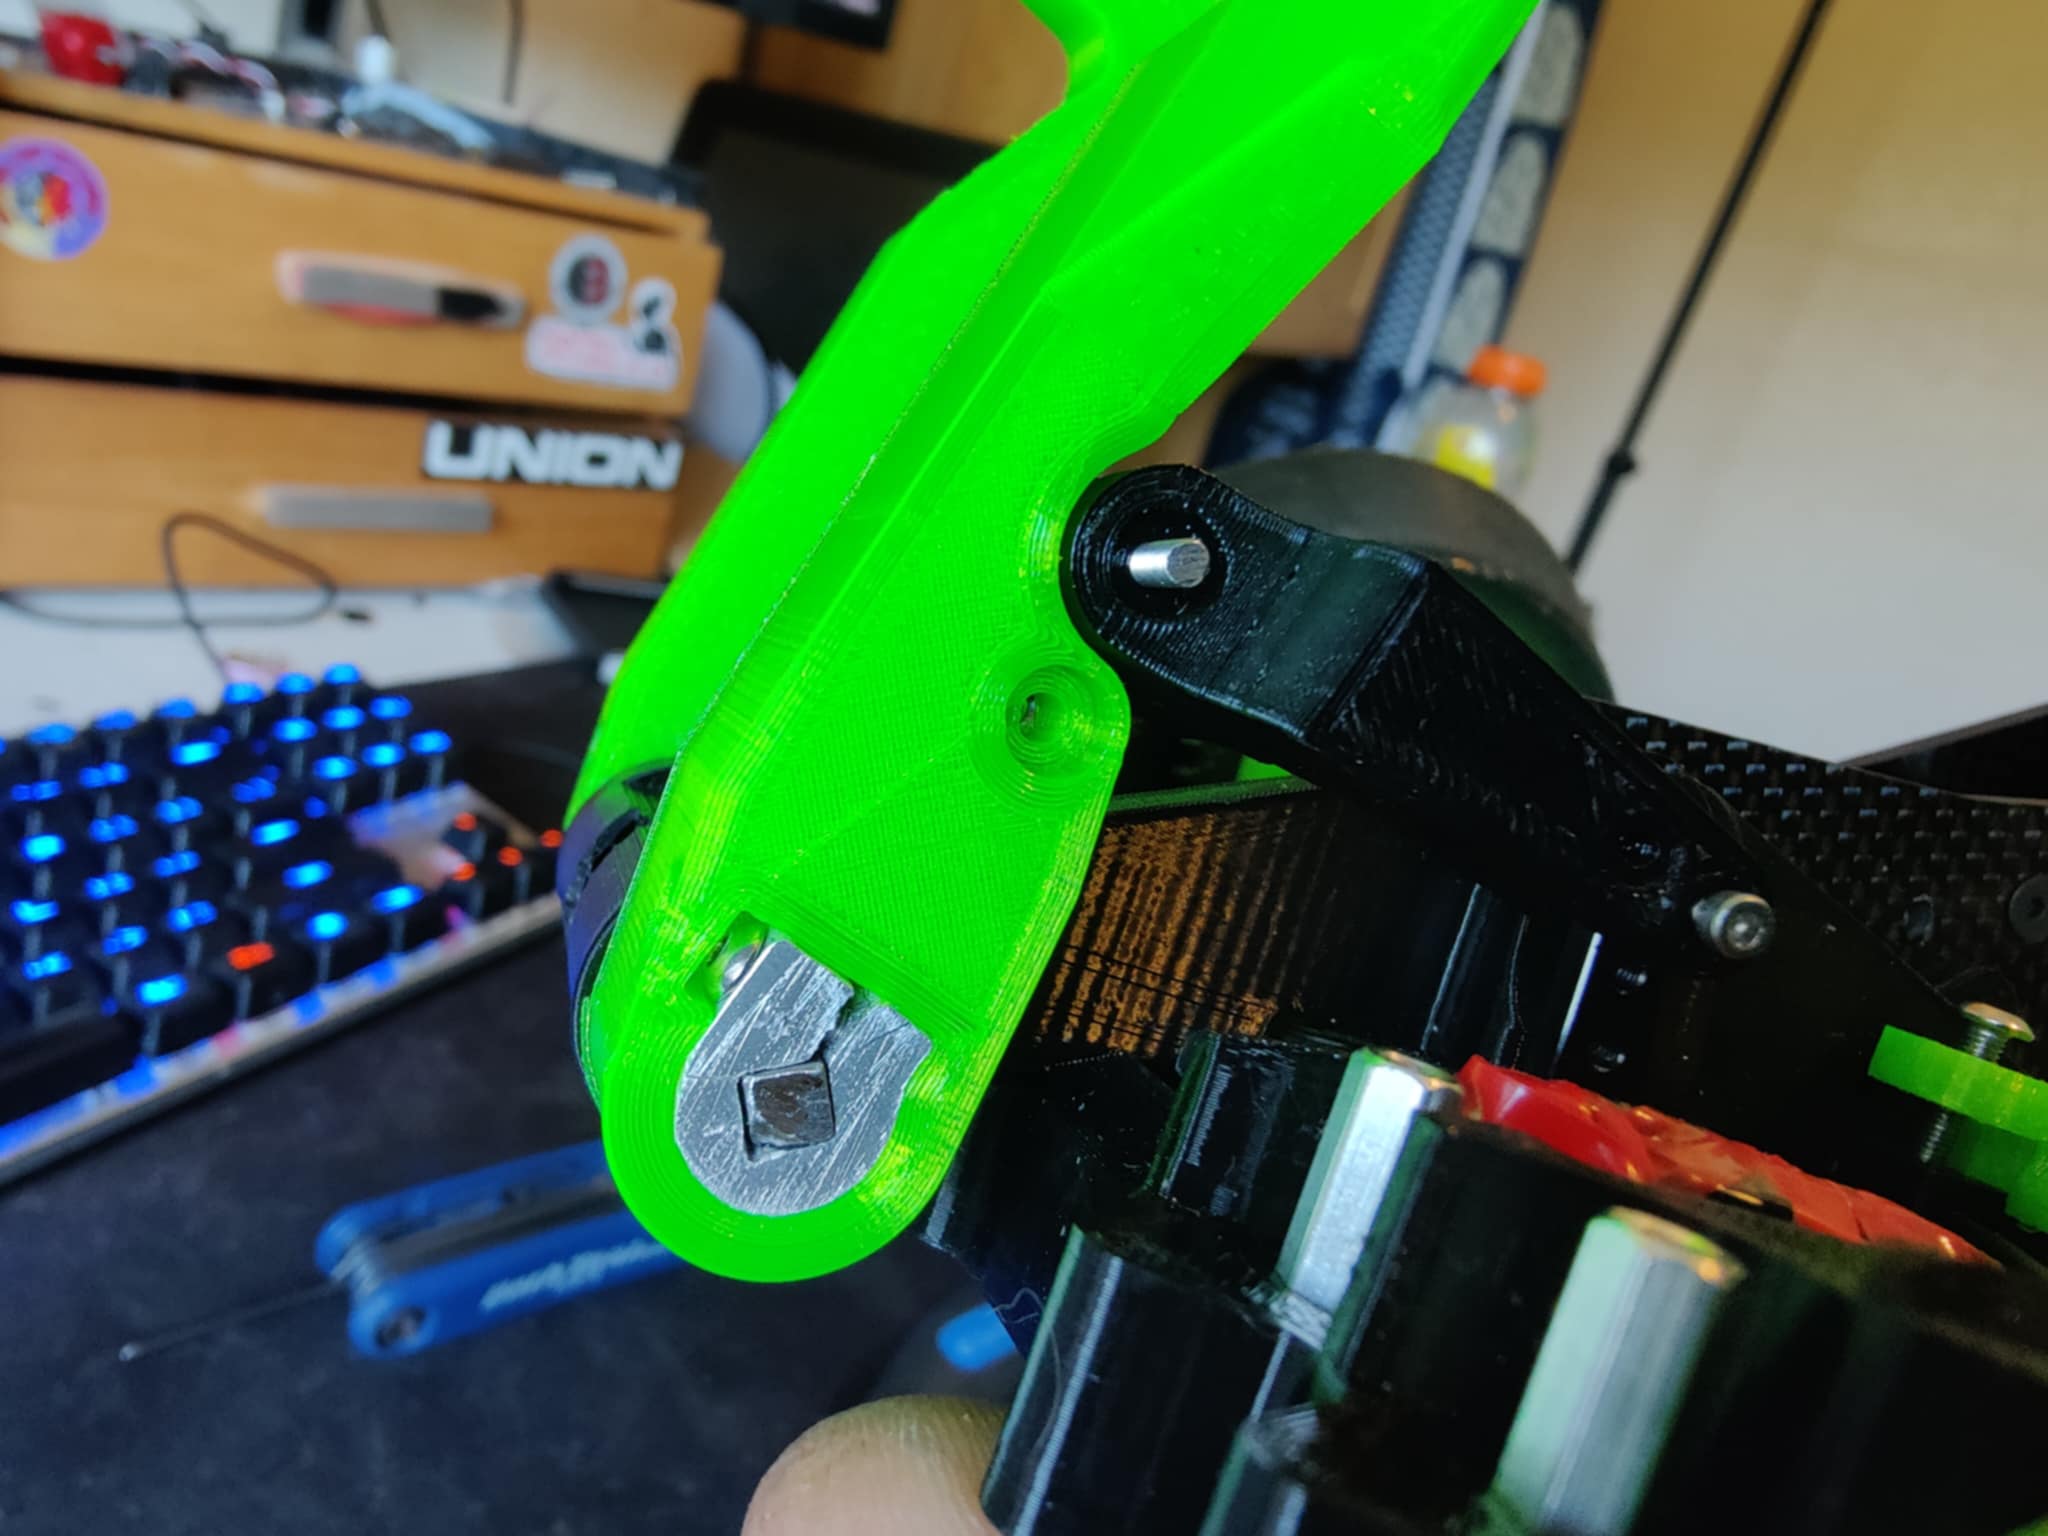
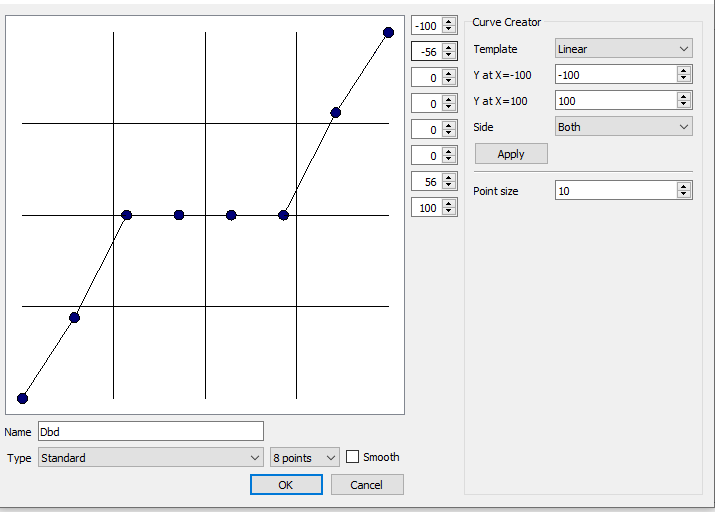
The hammer saw is powered by a repeat gearmotor with an external reduction stage and the lifter by a simple servo and linkage set up.

The layout was largely dictated by how I could most densely pack in all the component. I usually start designs by laying out the lipo, motors and servos and then building the rest around that layout.

After a bit more tweaking I ended up with this


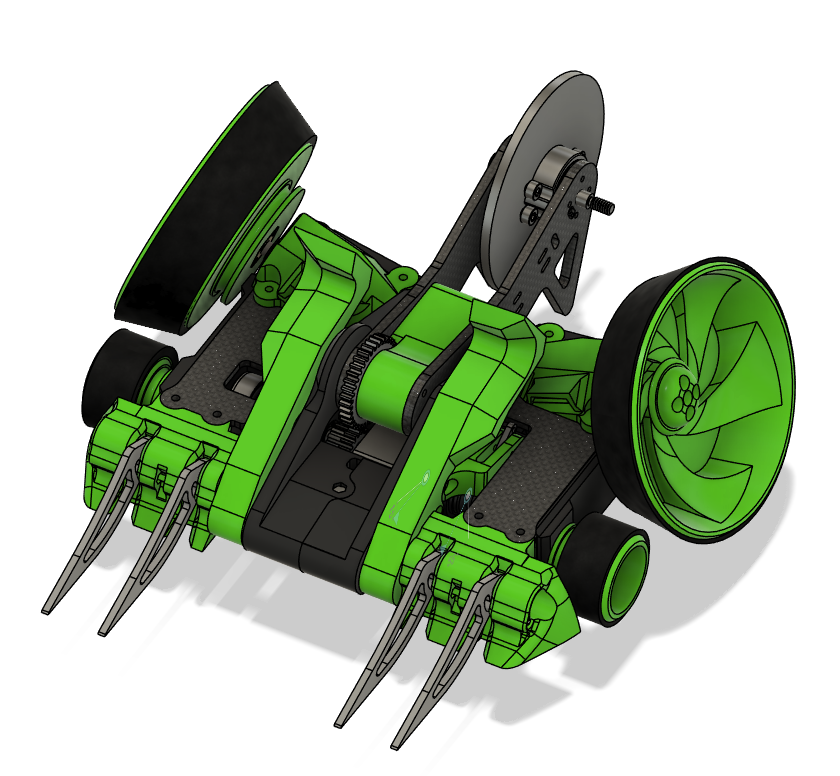
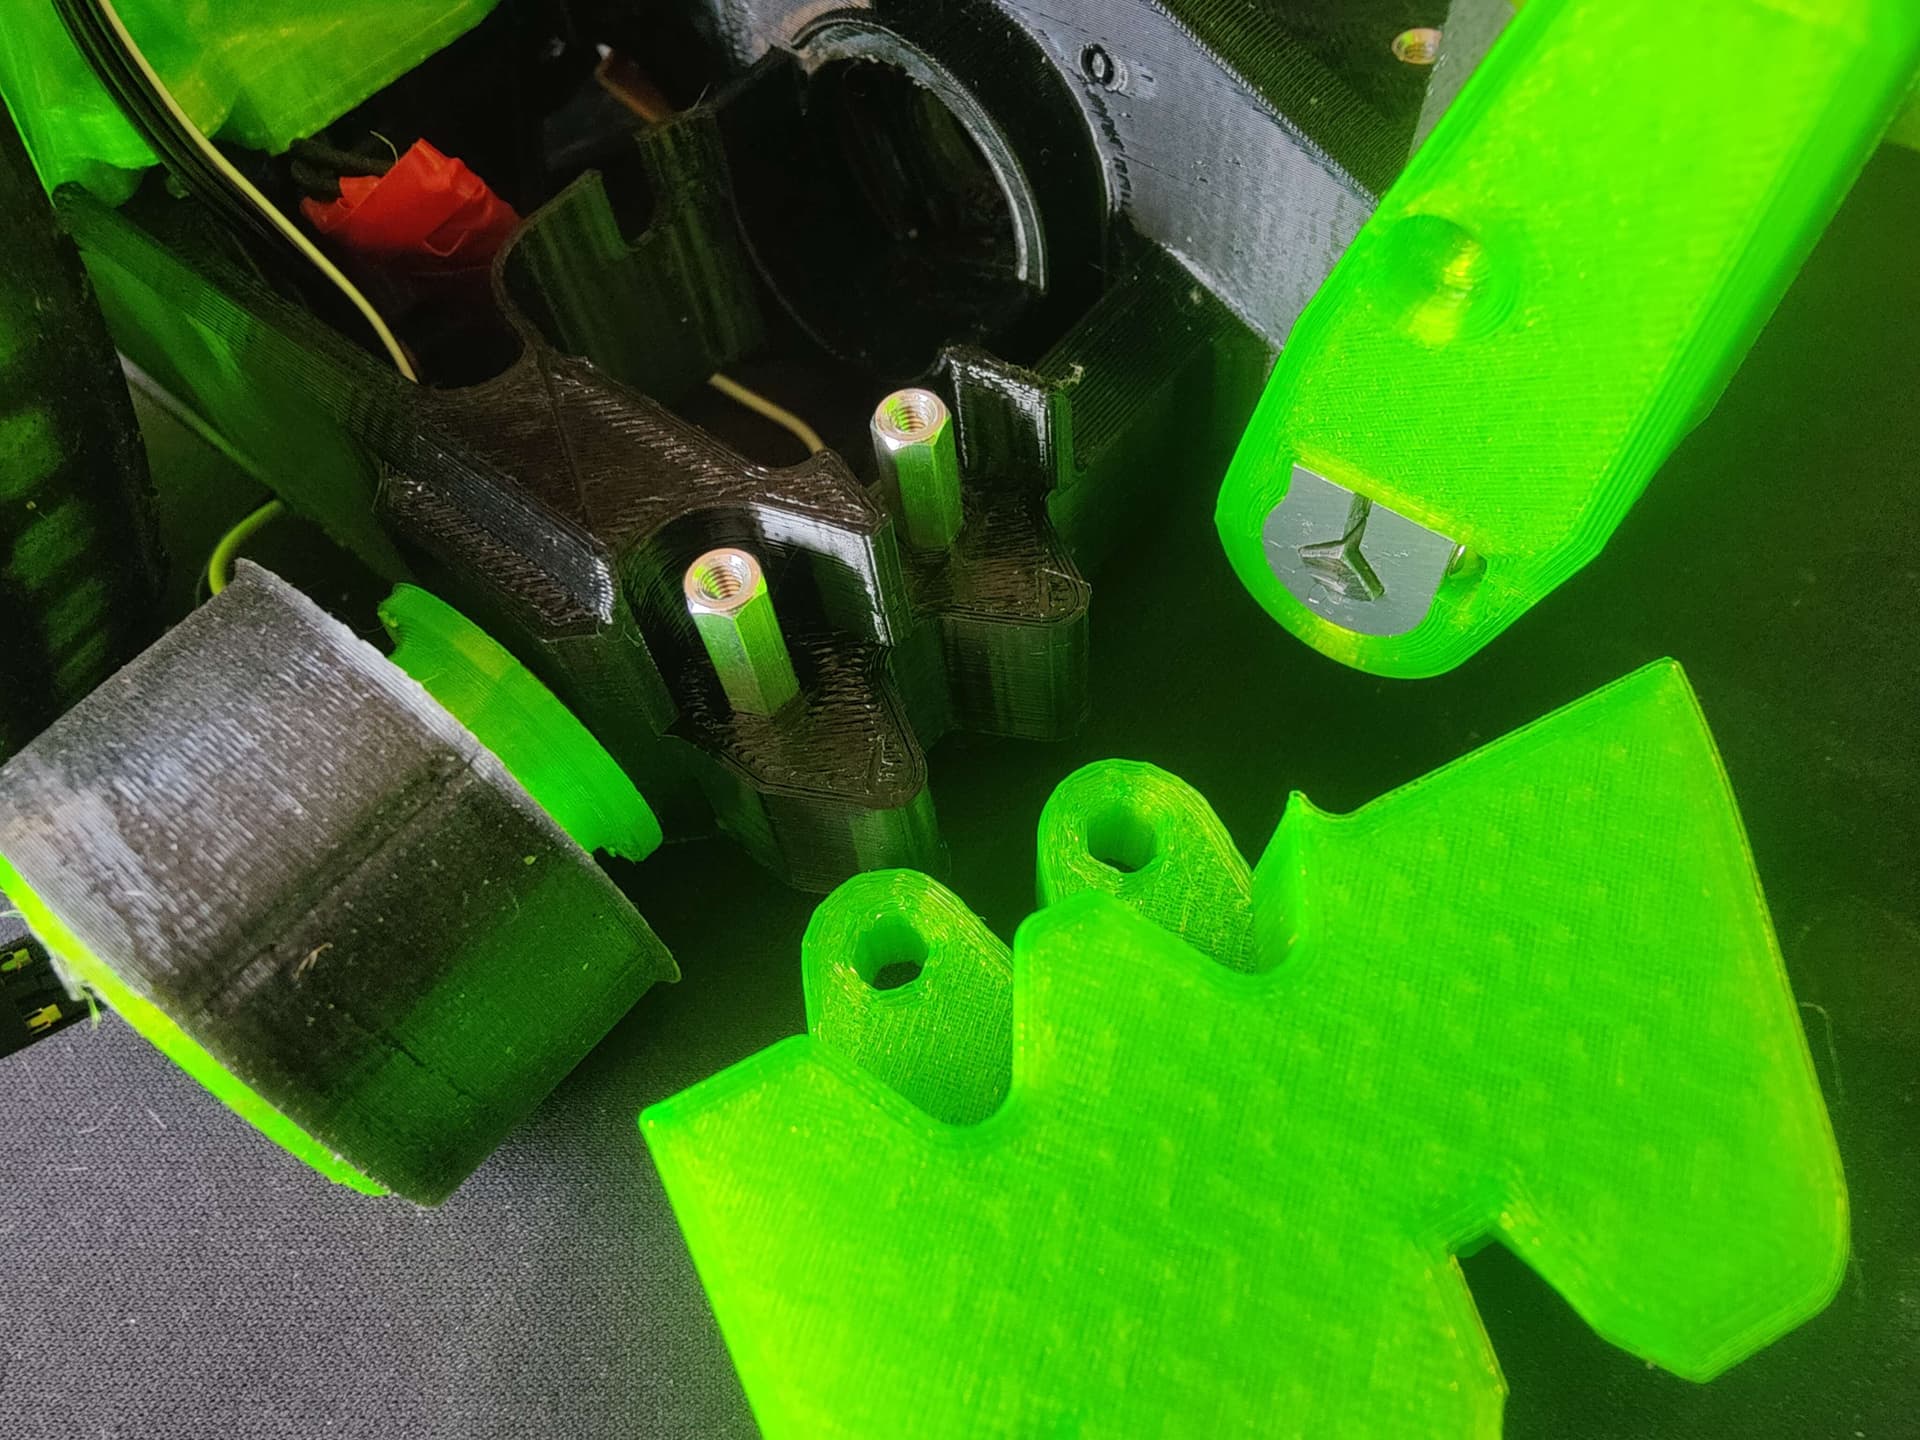
The chassis is designed in two parts, and is smoll, here’s one half:

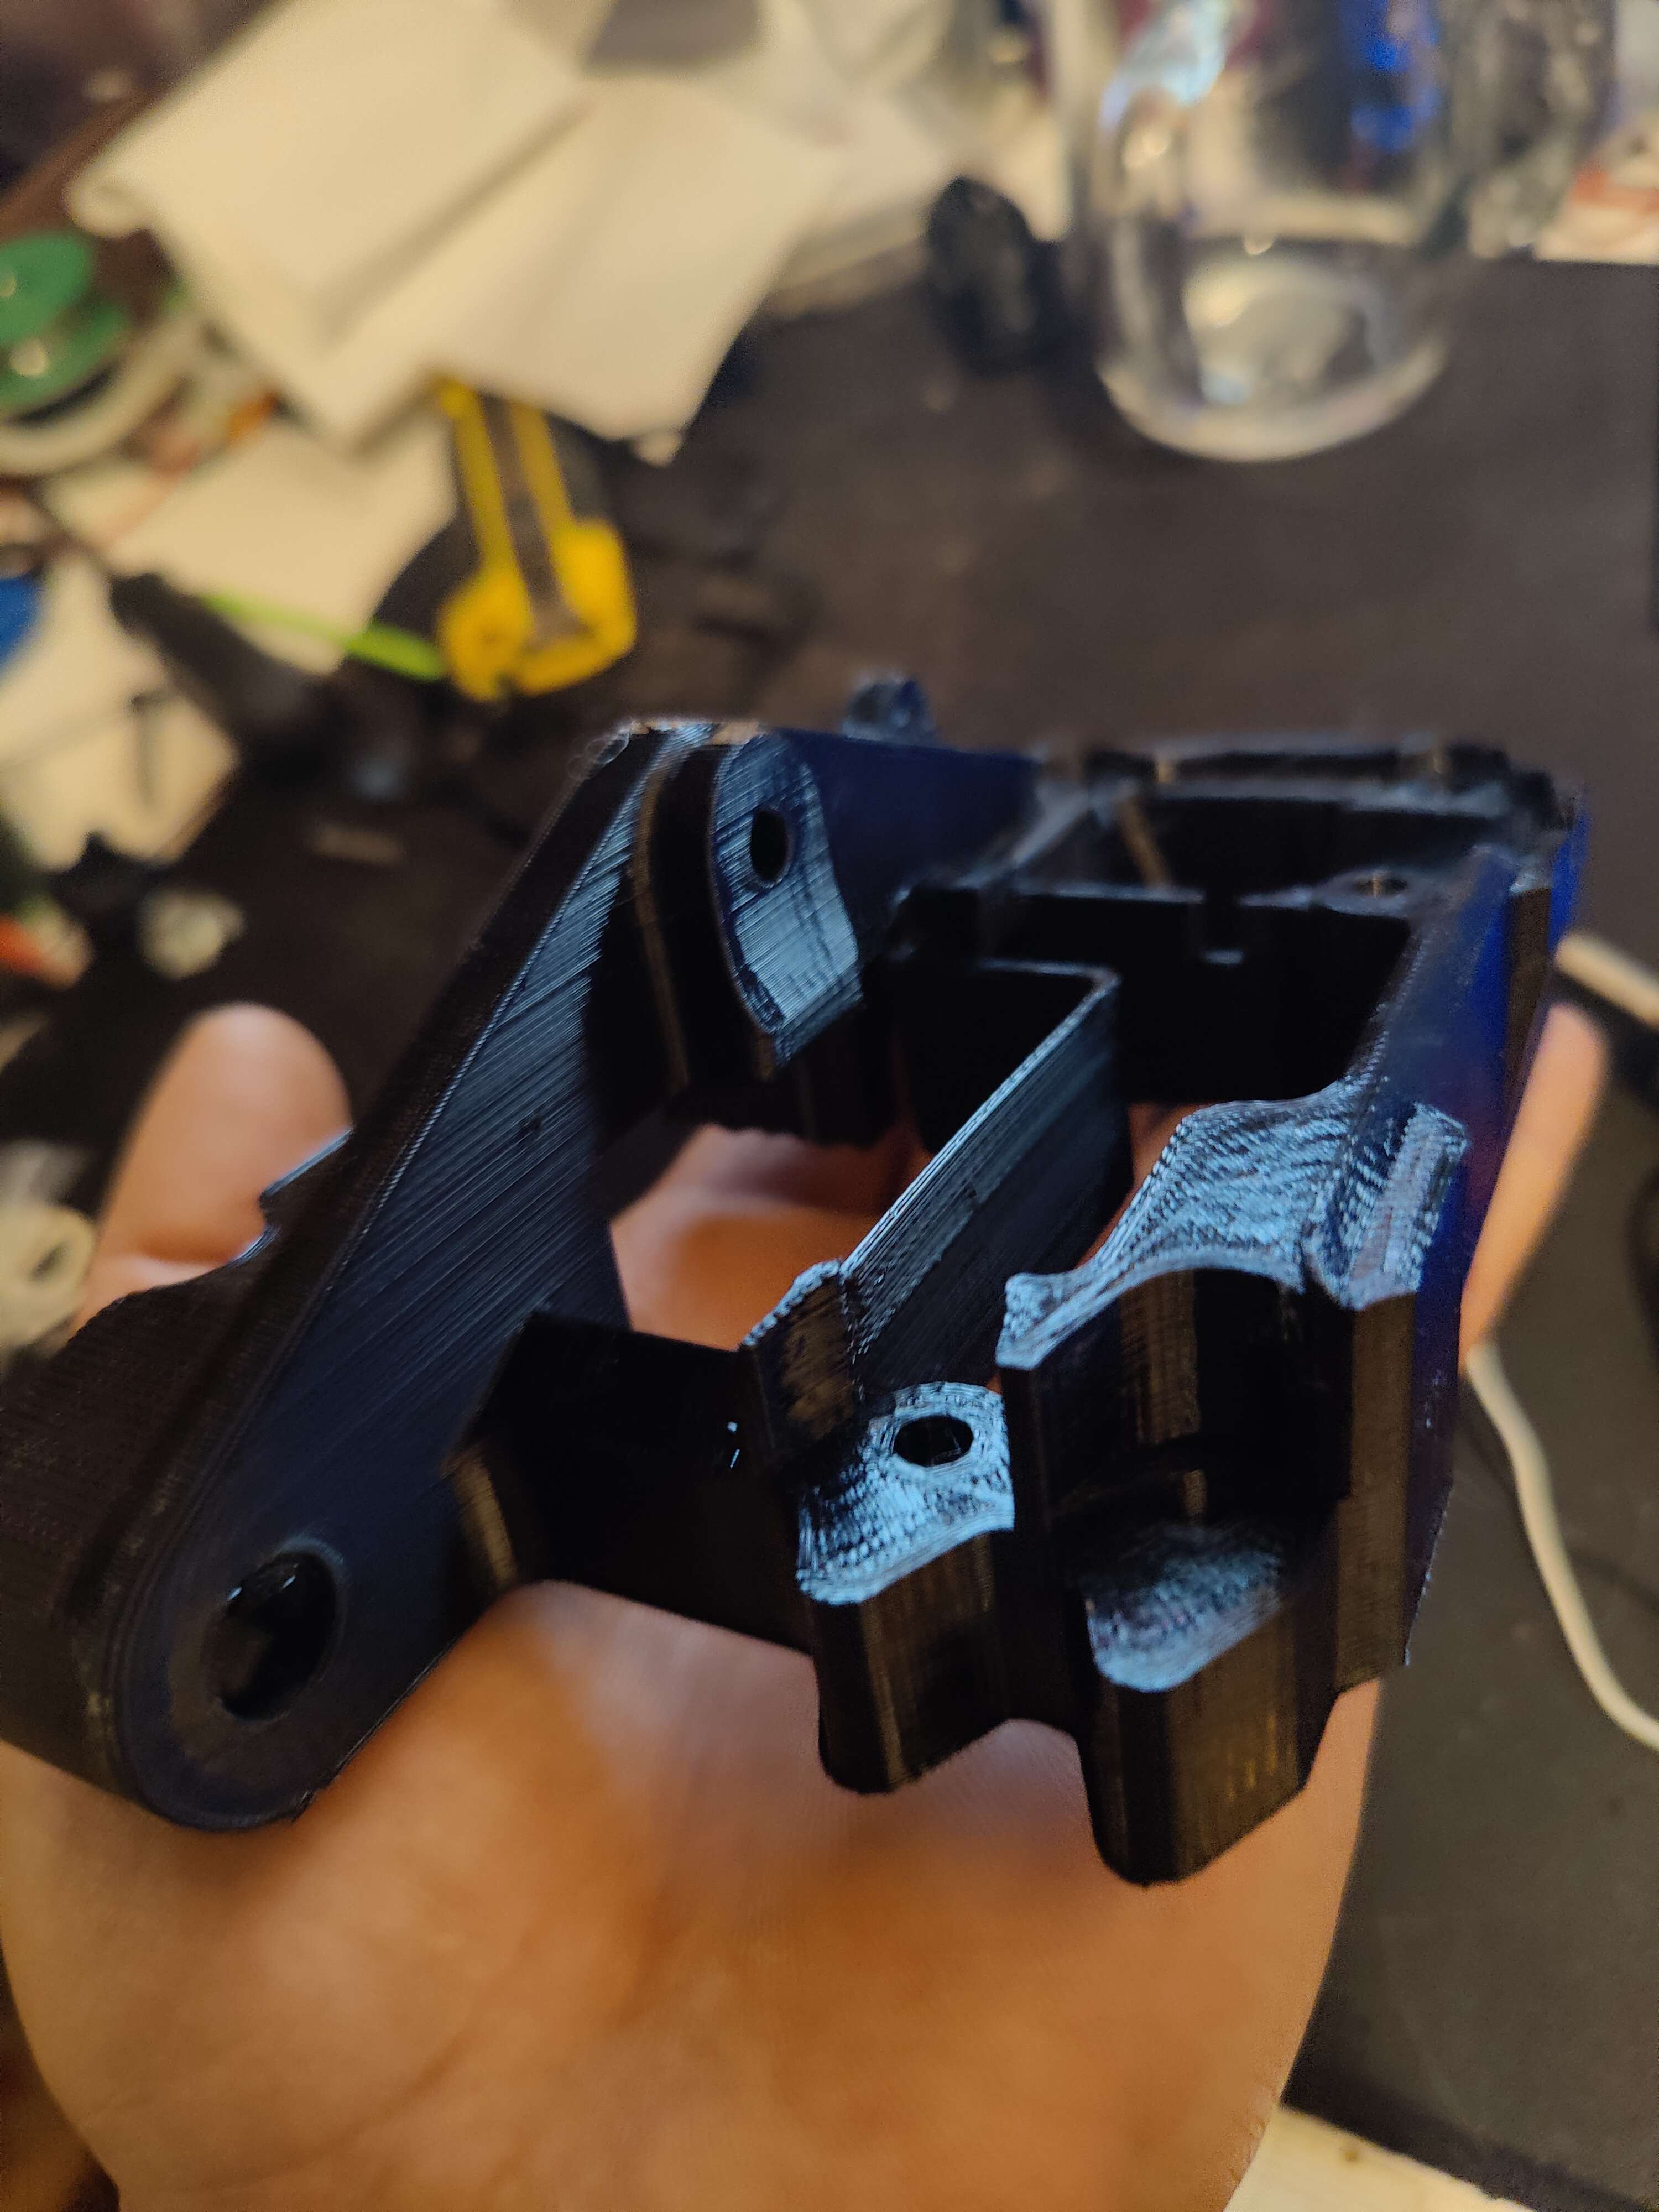
I knew with everything being as light as I could make it, and with it all largely being tpu - I was gonna have to use some fancy geometry and lots of keying to ensure reasonable strength.


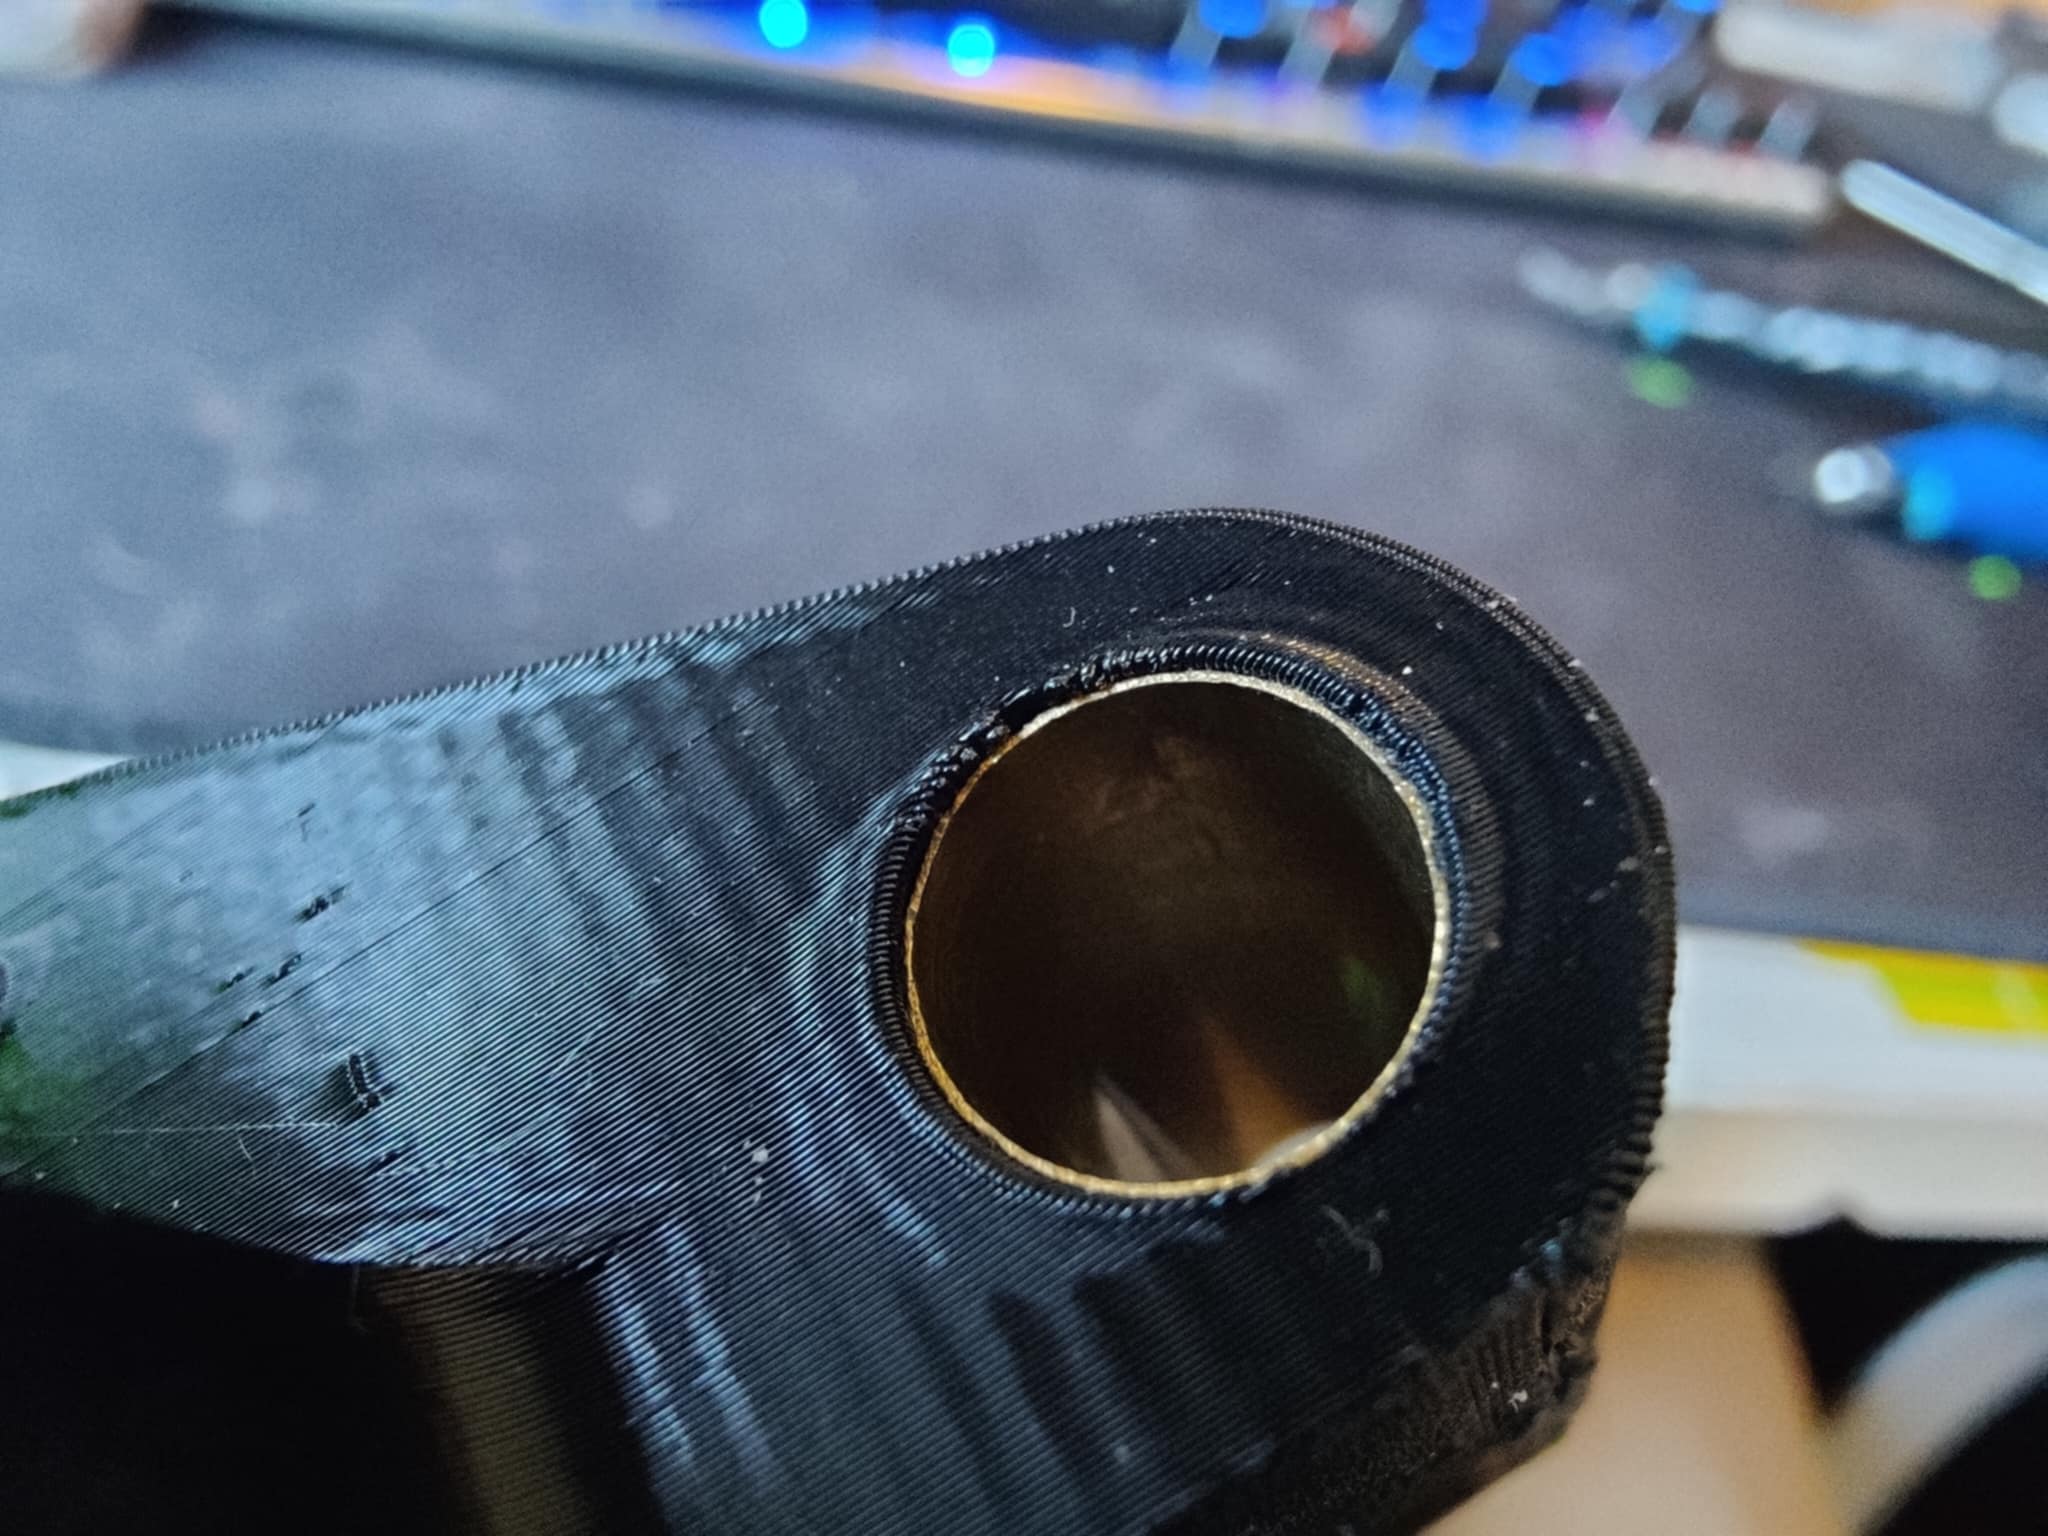
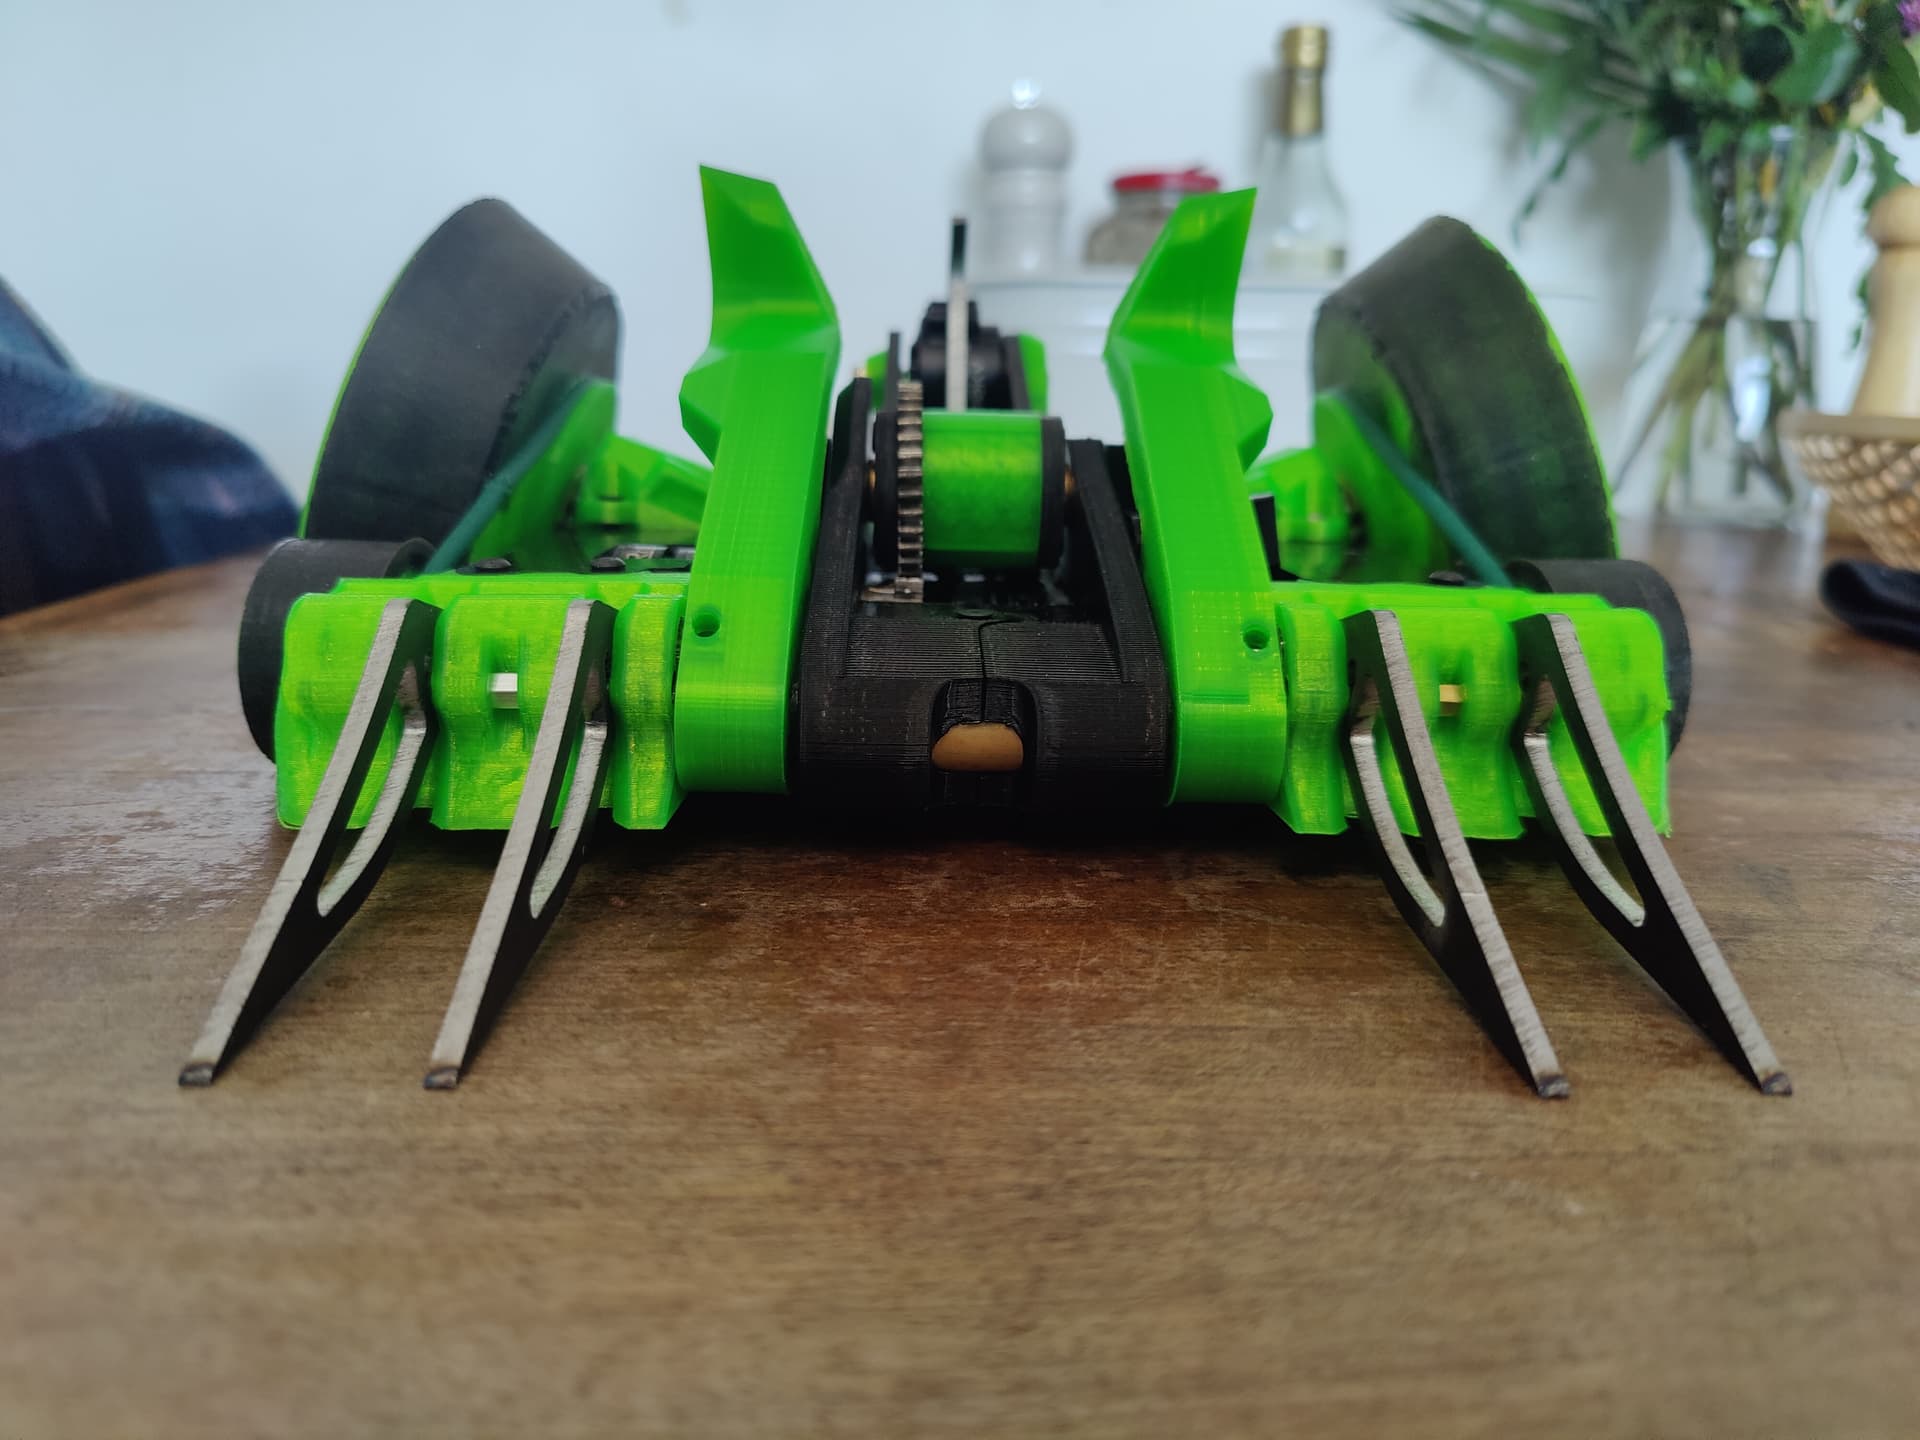
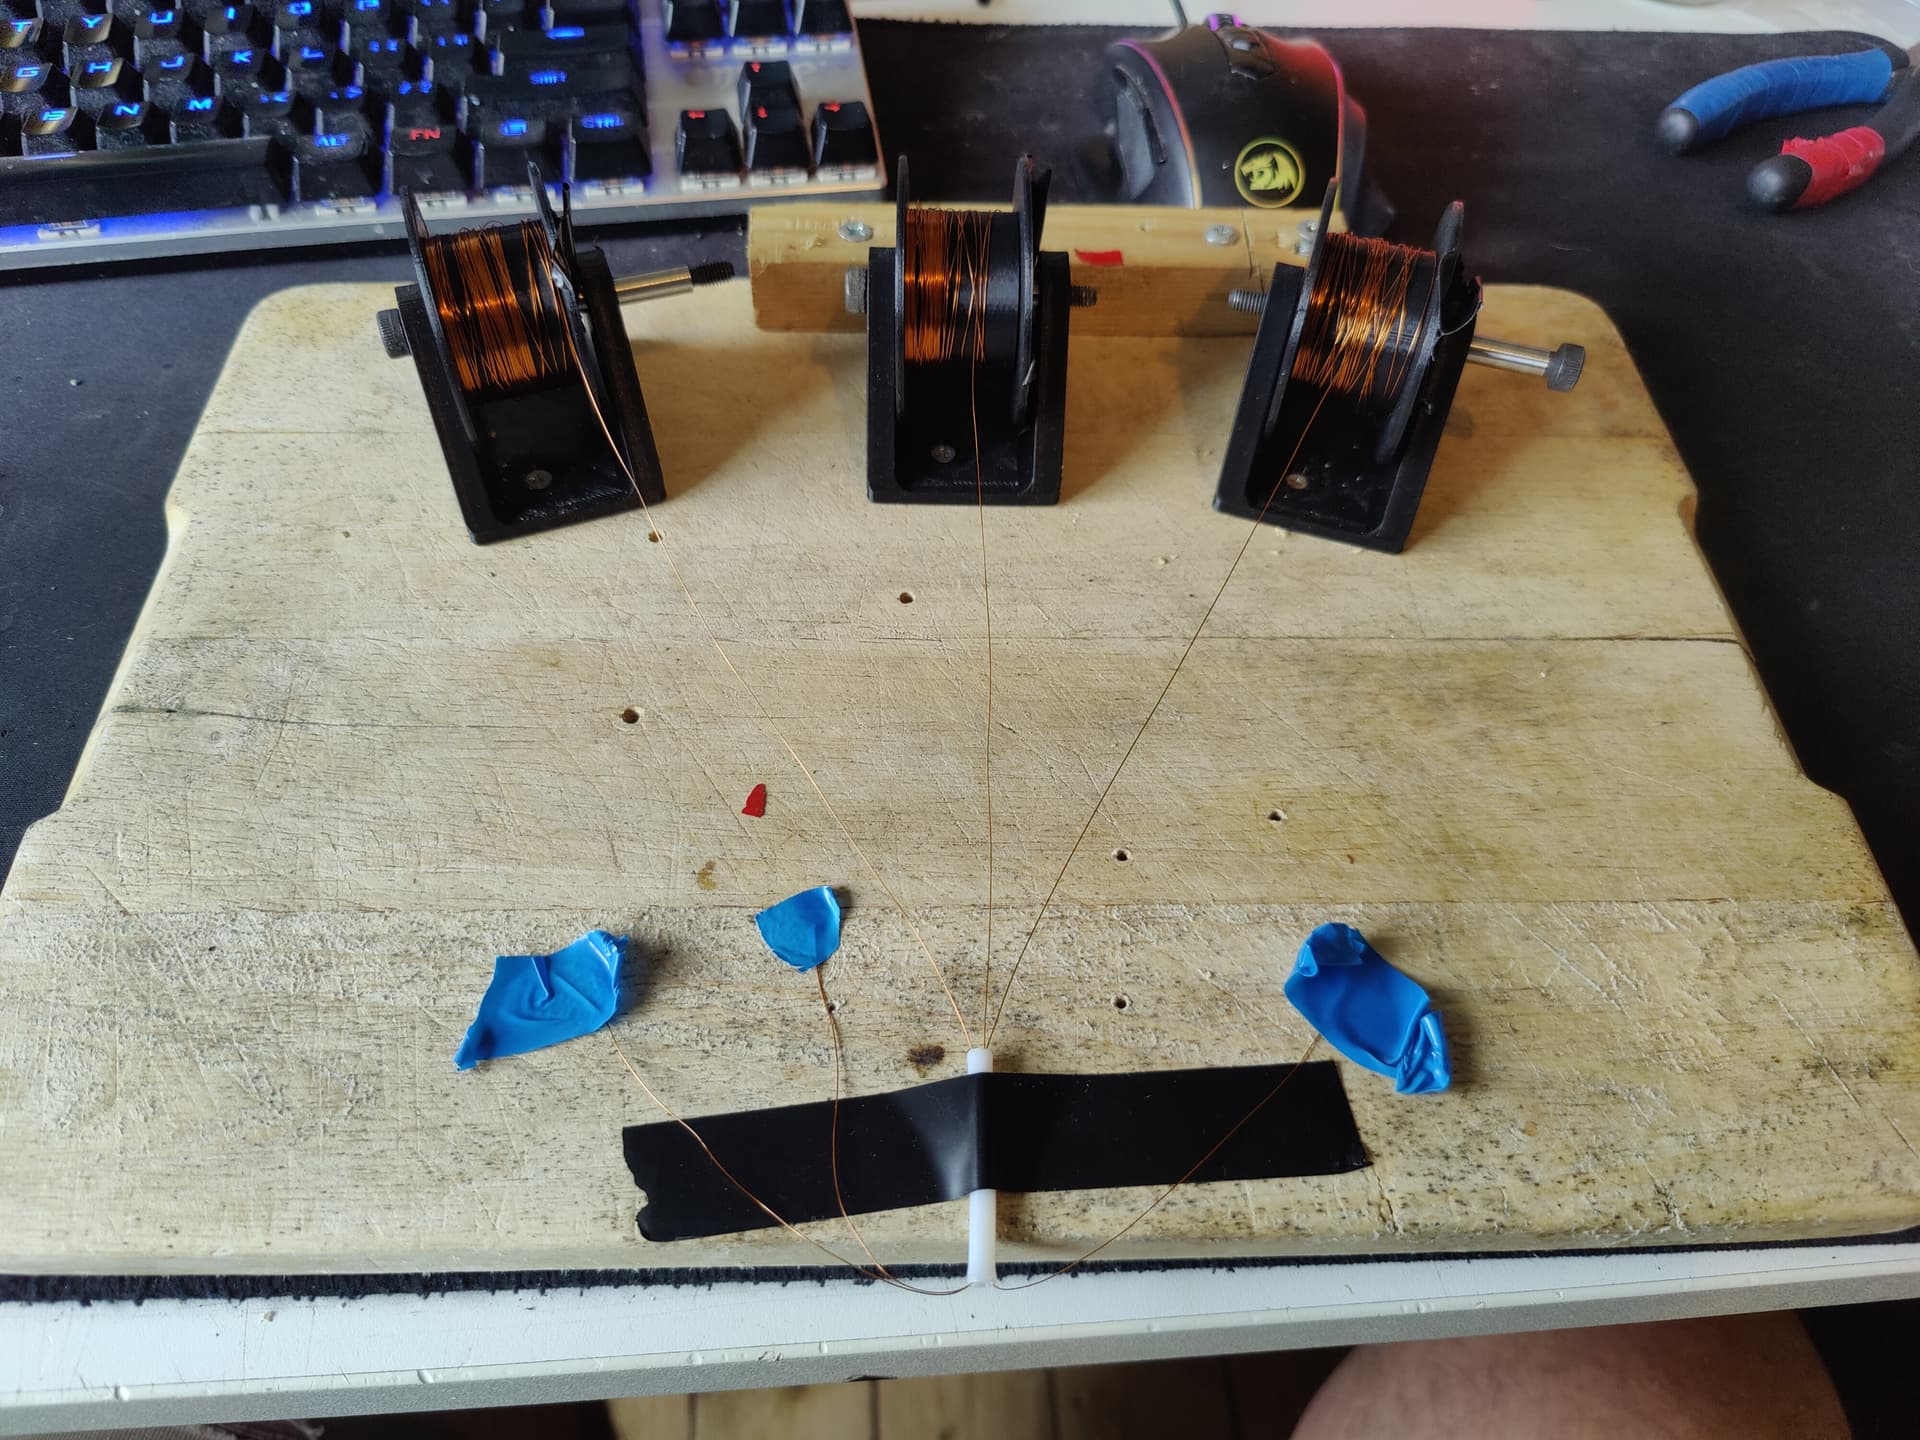
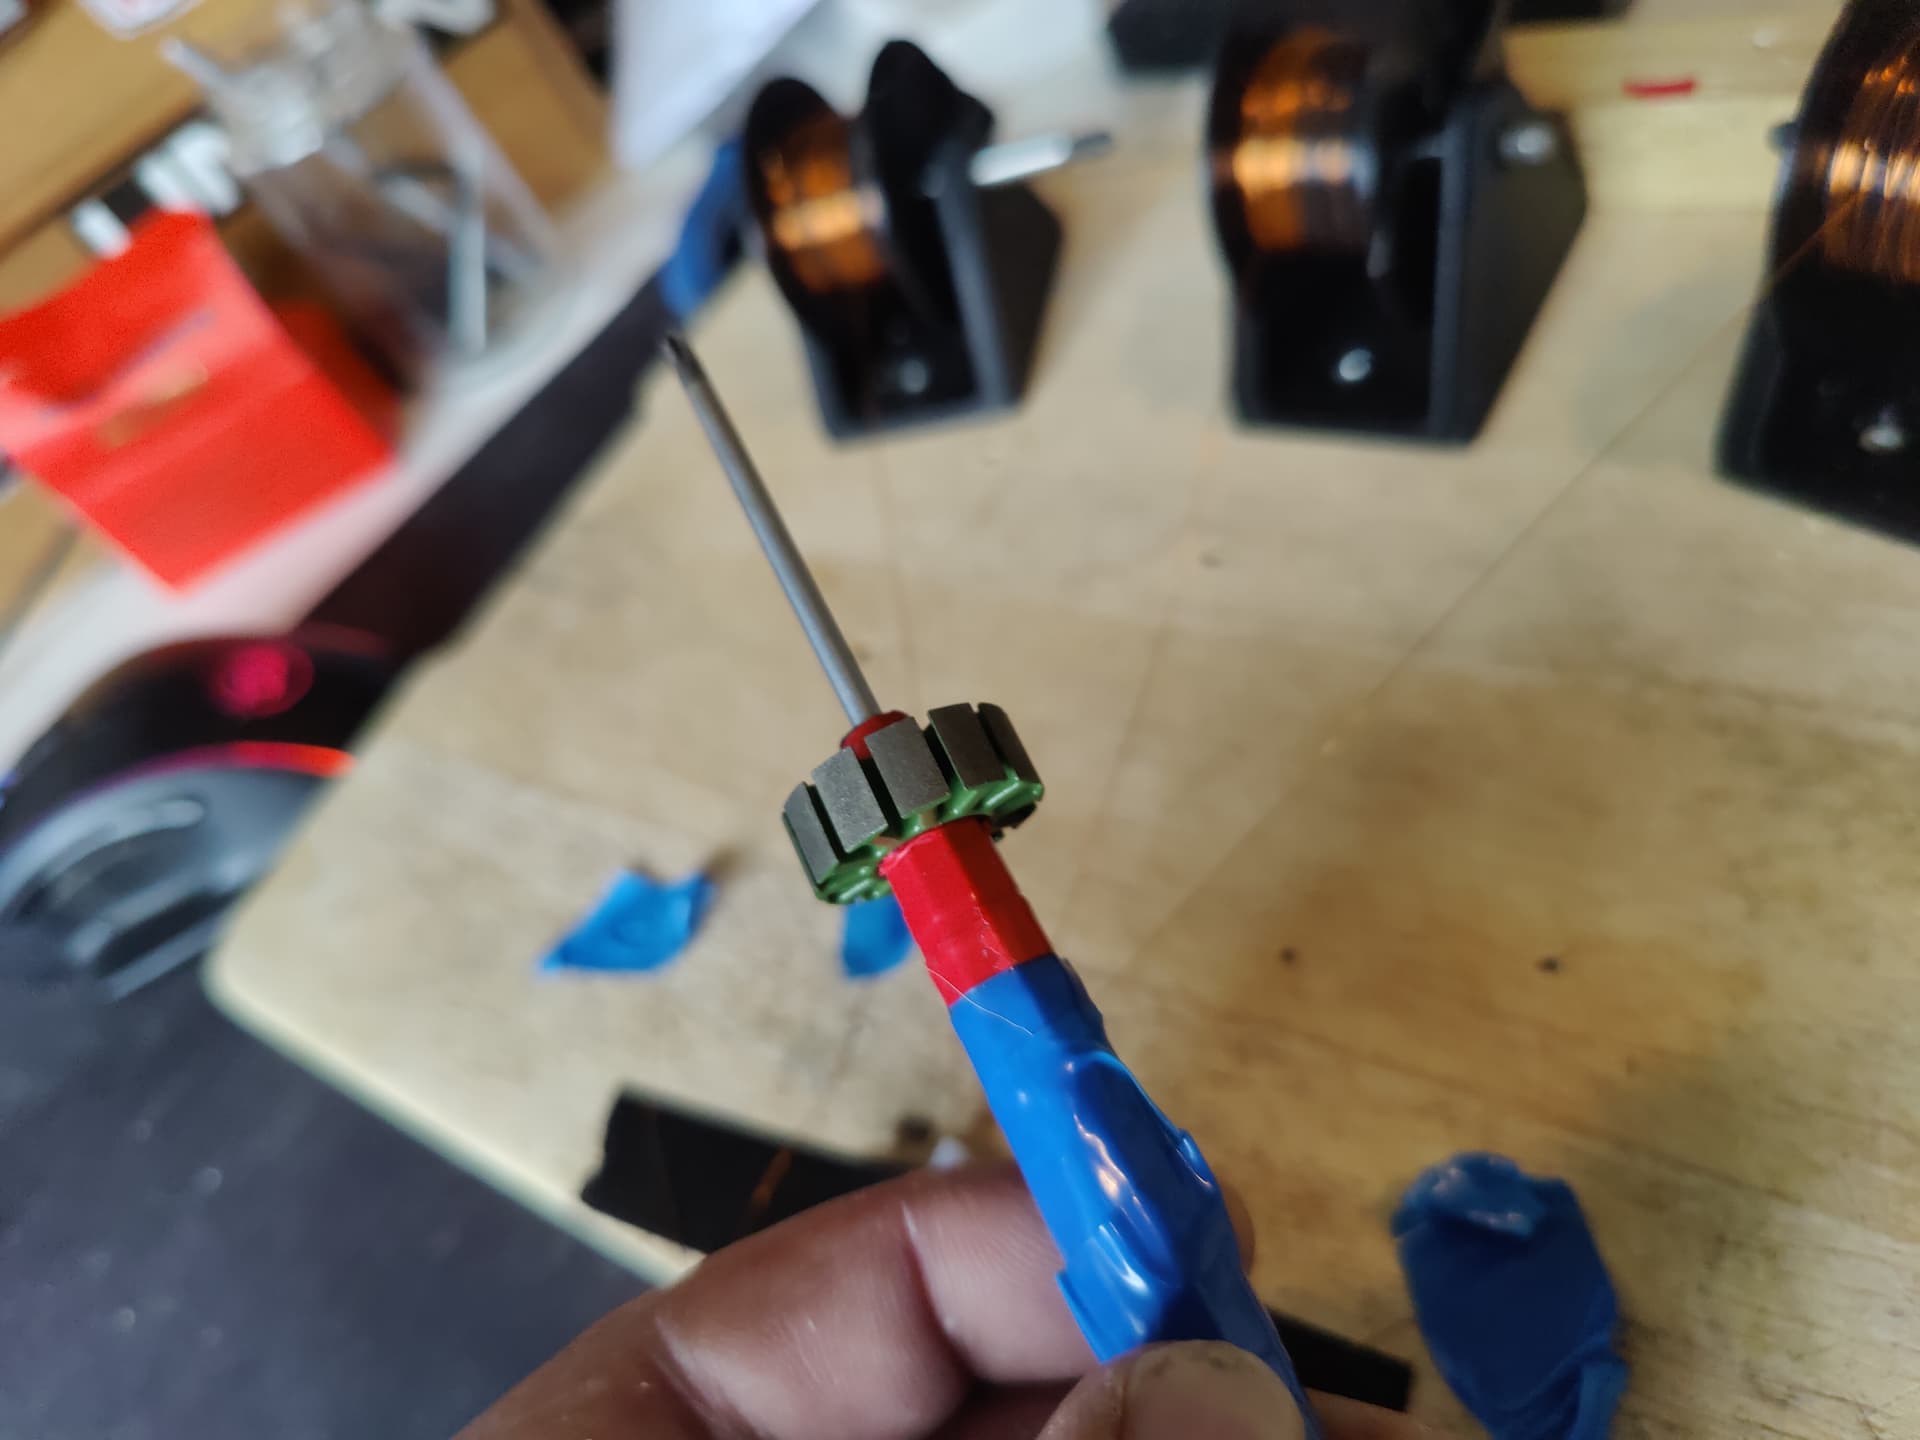
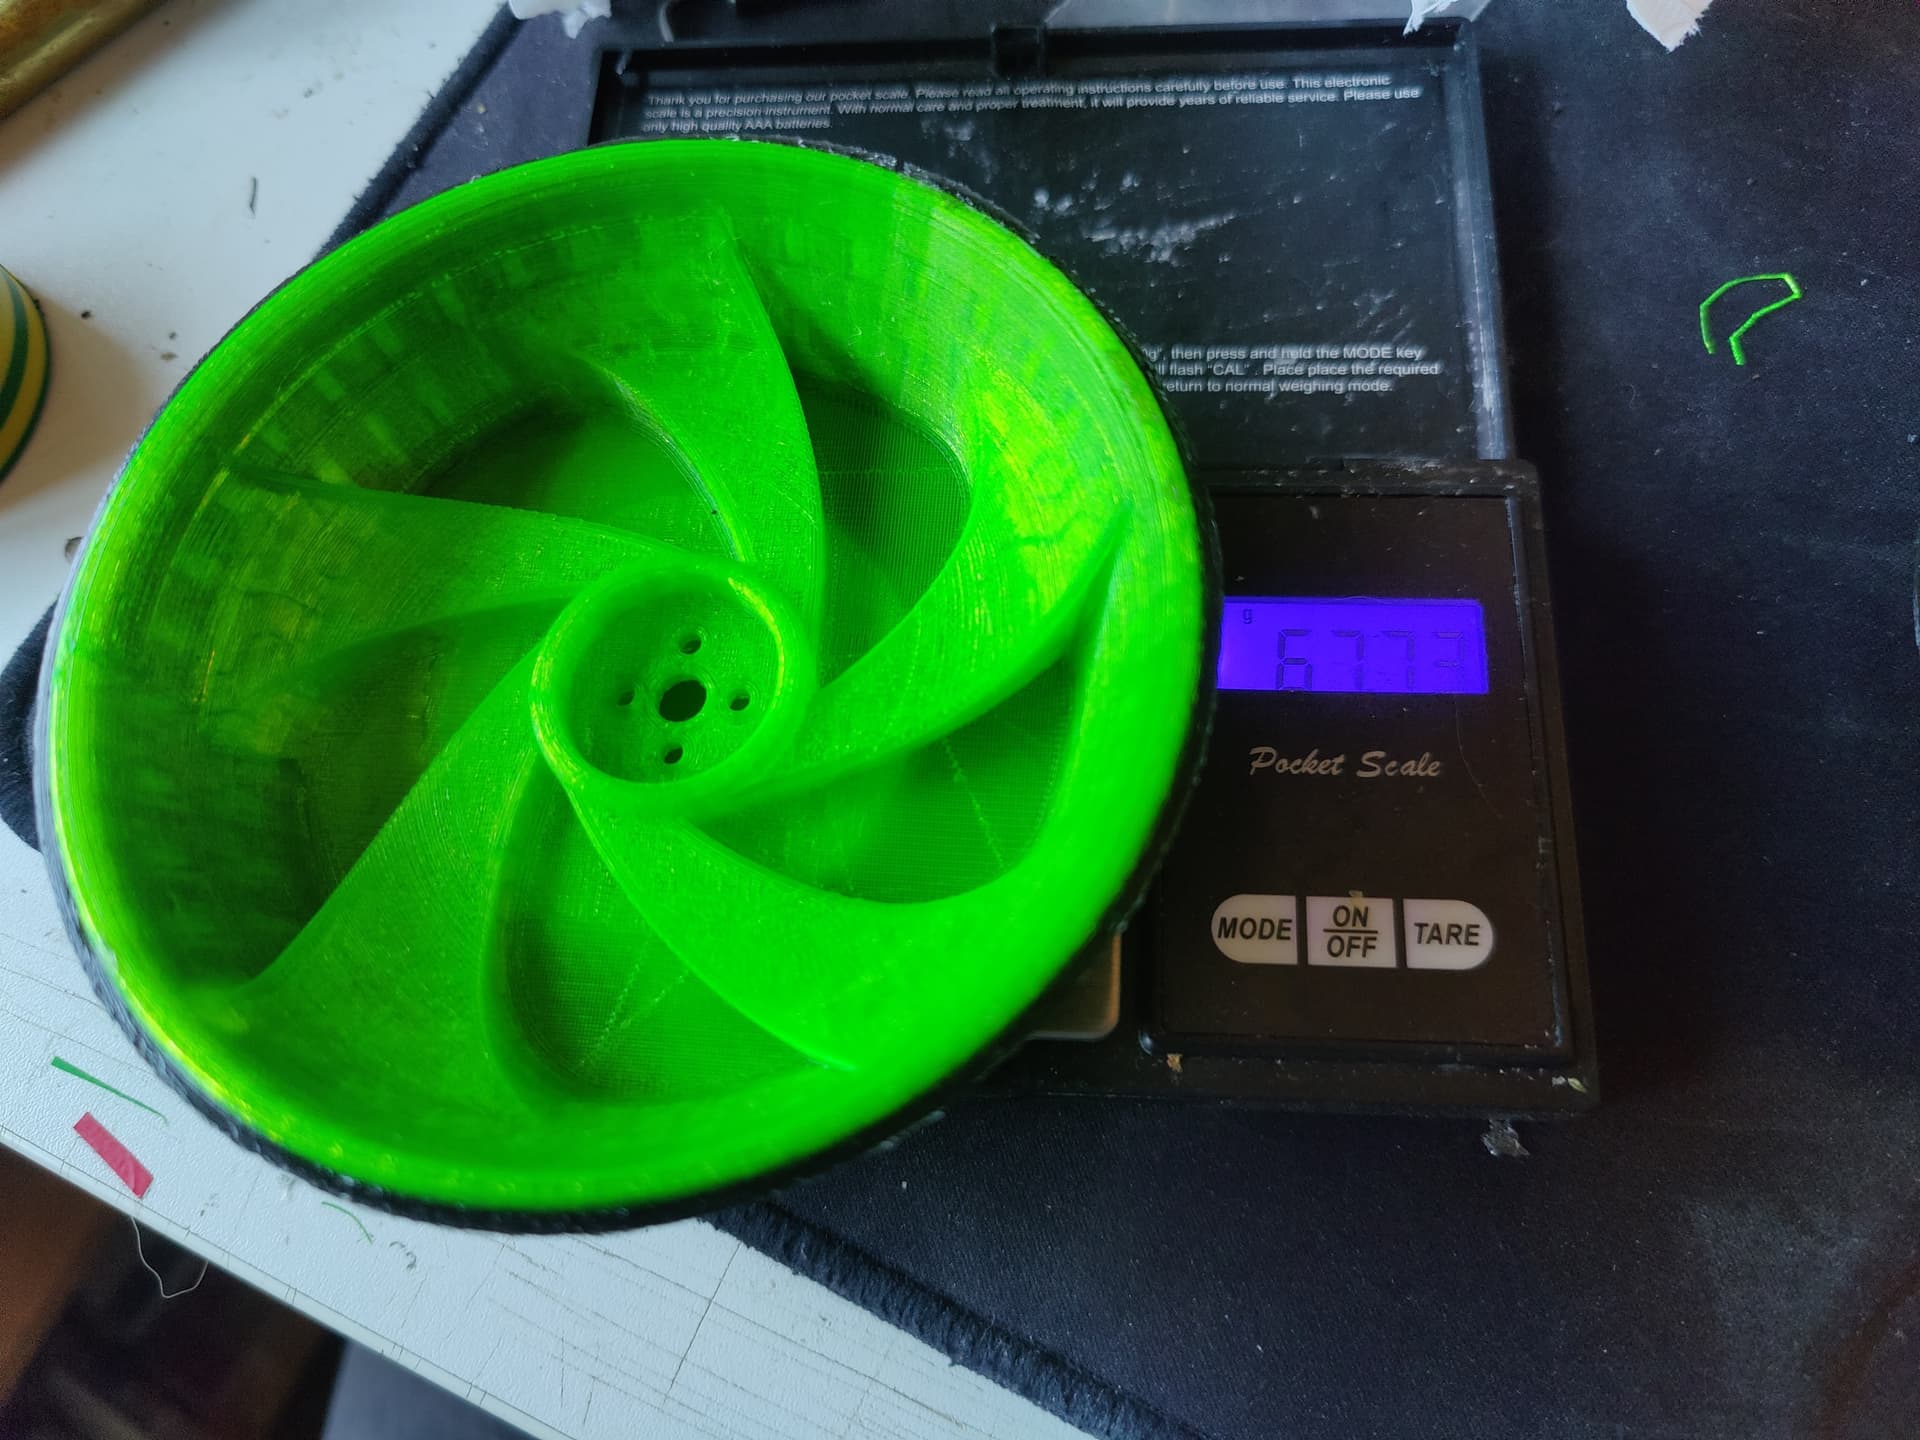
One of the trickiest parts was making the big cambered wheels. After a bit of trial and error I settled on using a multipart mold. A main mold cylinder and then a tapered insert for the camber.

Foamies would have been lighter but foamies are gross - I’m relatively happy with how light I got them despite the size

I’m still tweaking things, but the bot is together and drives

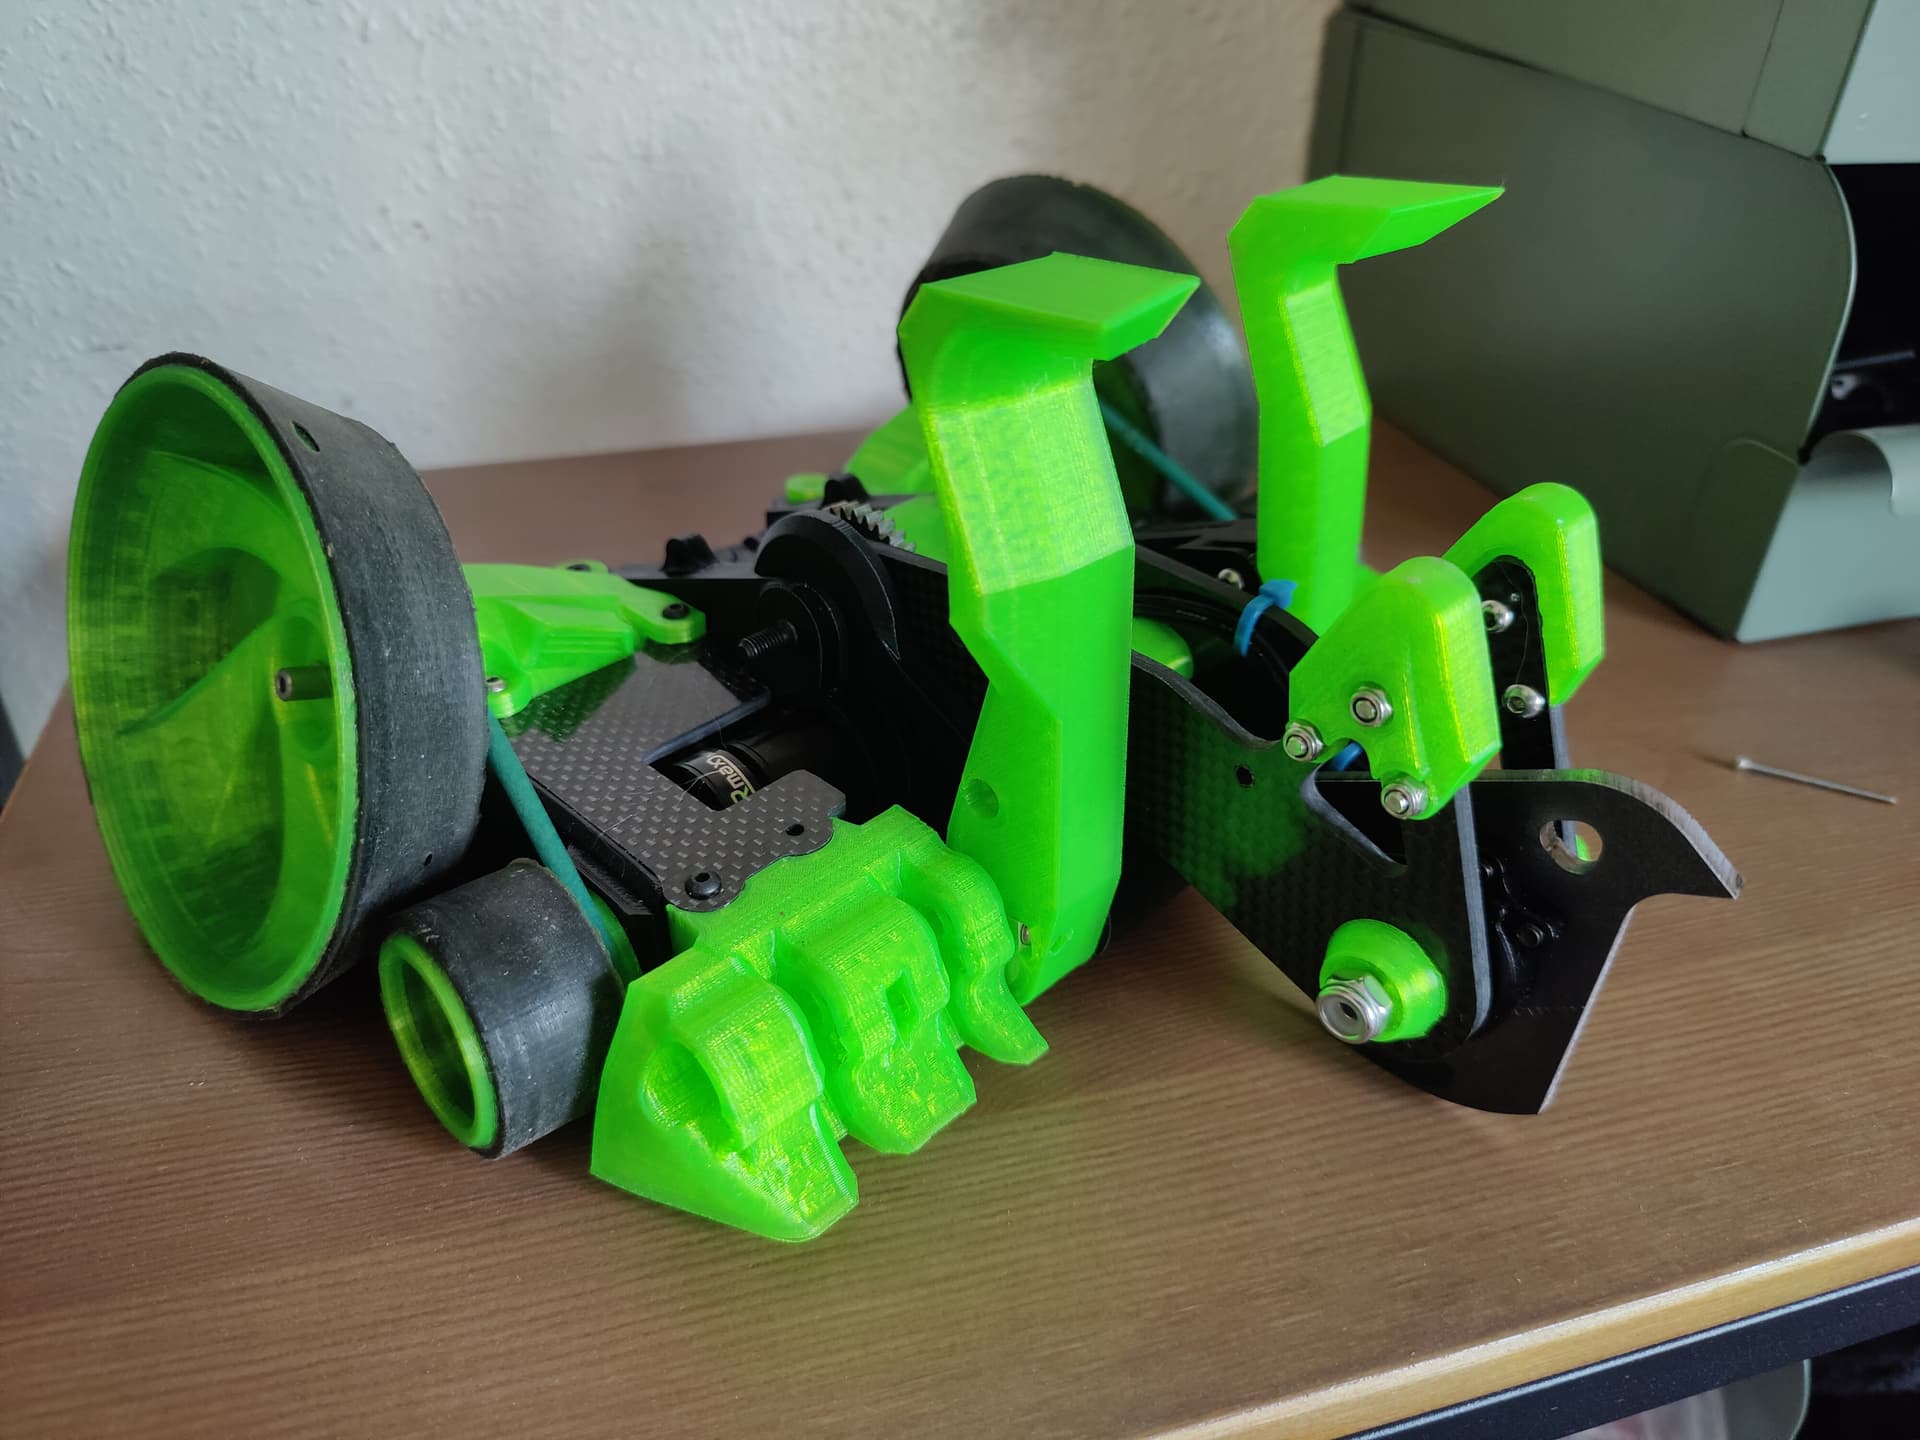
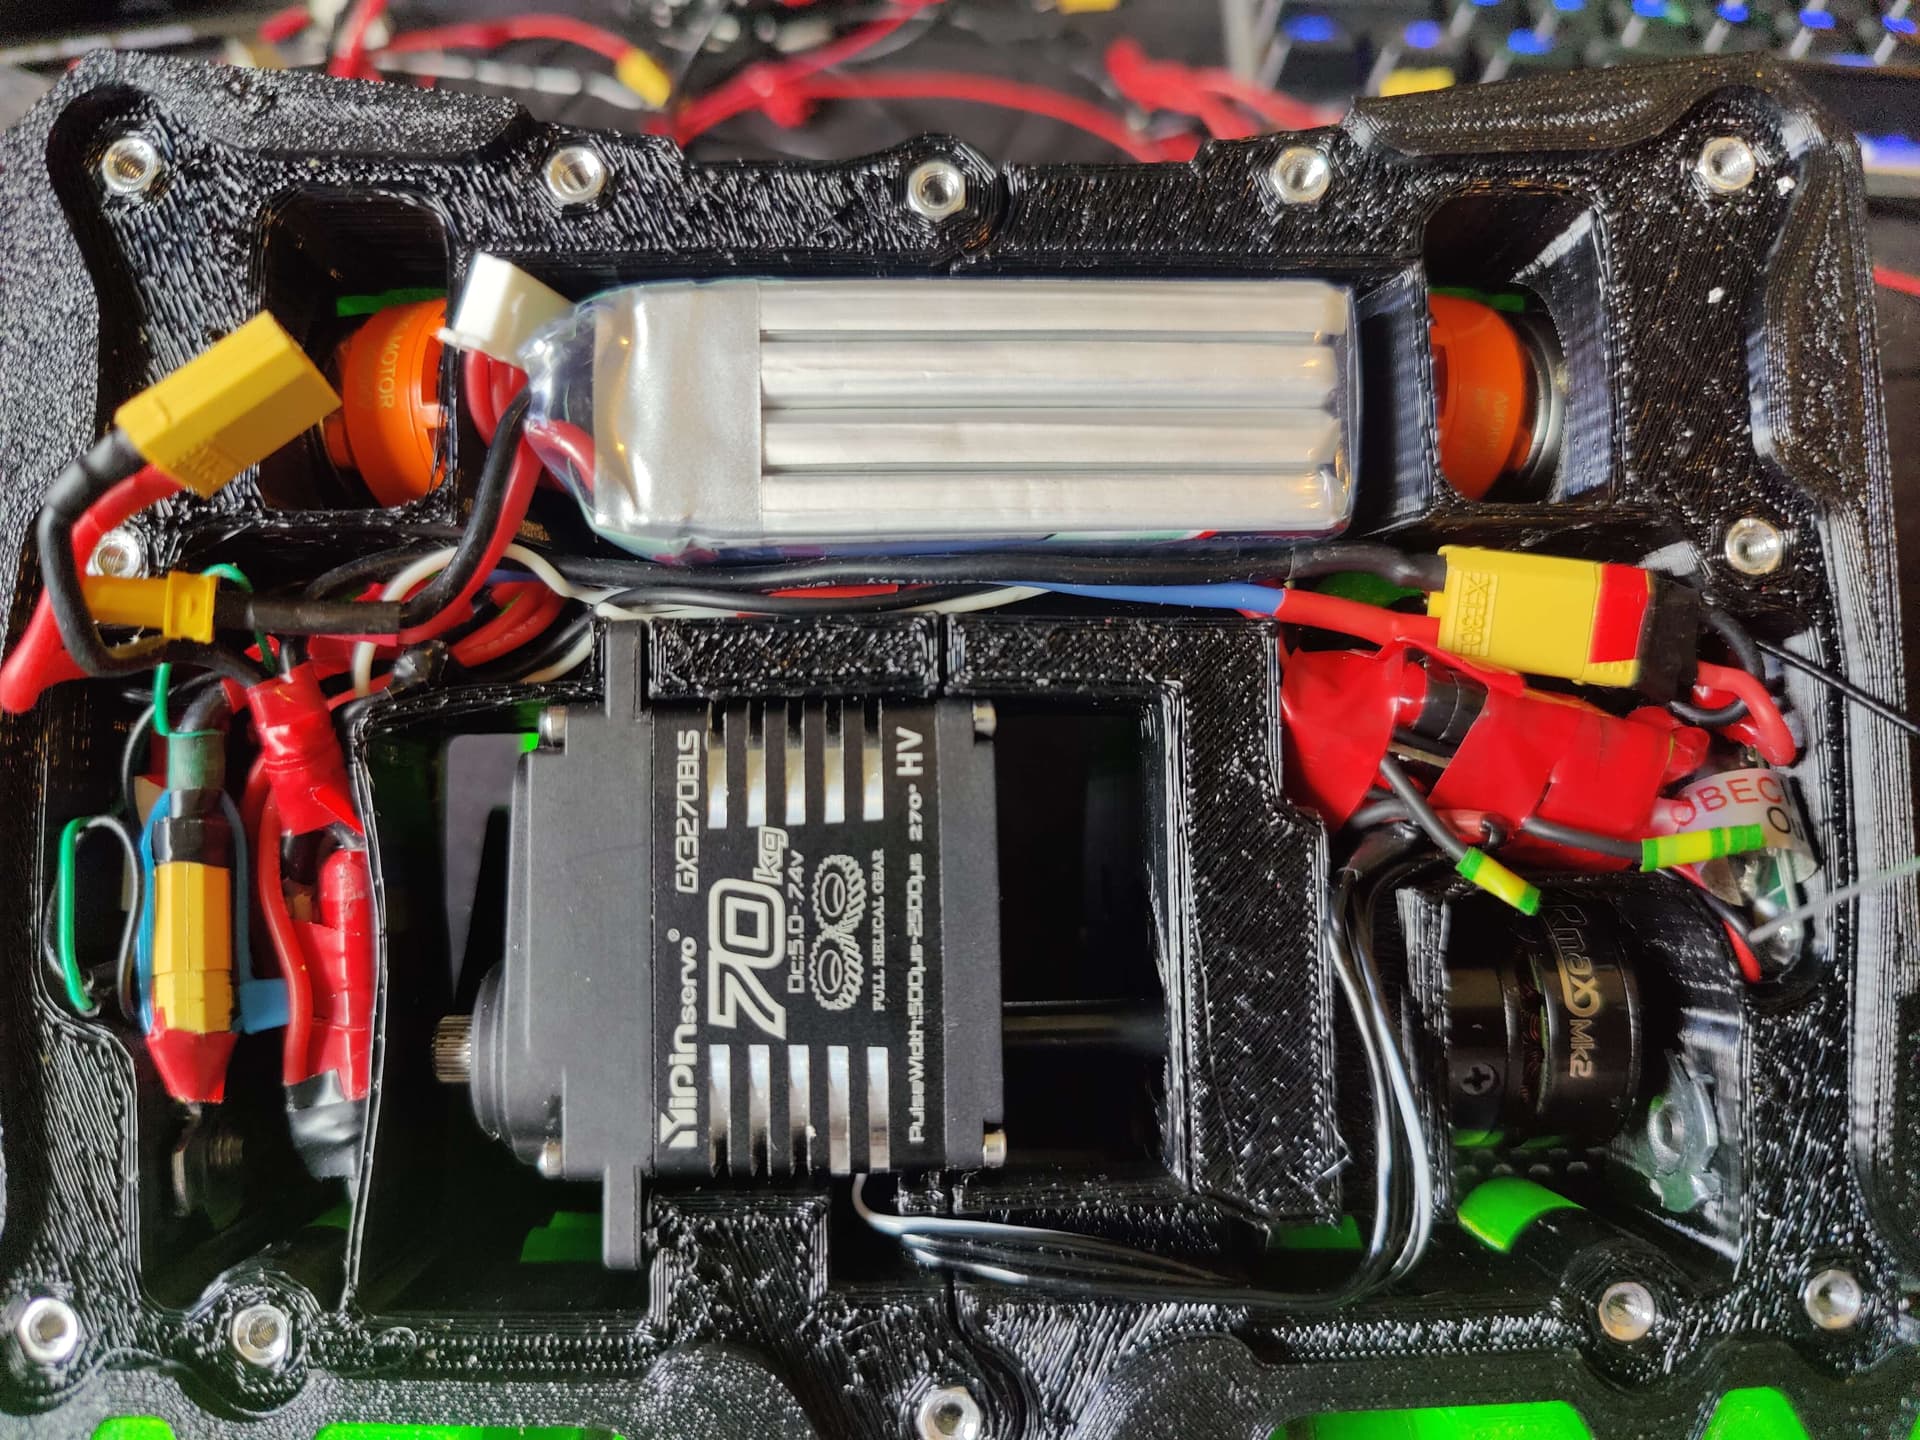
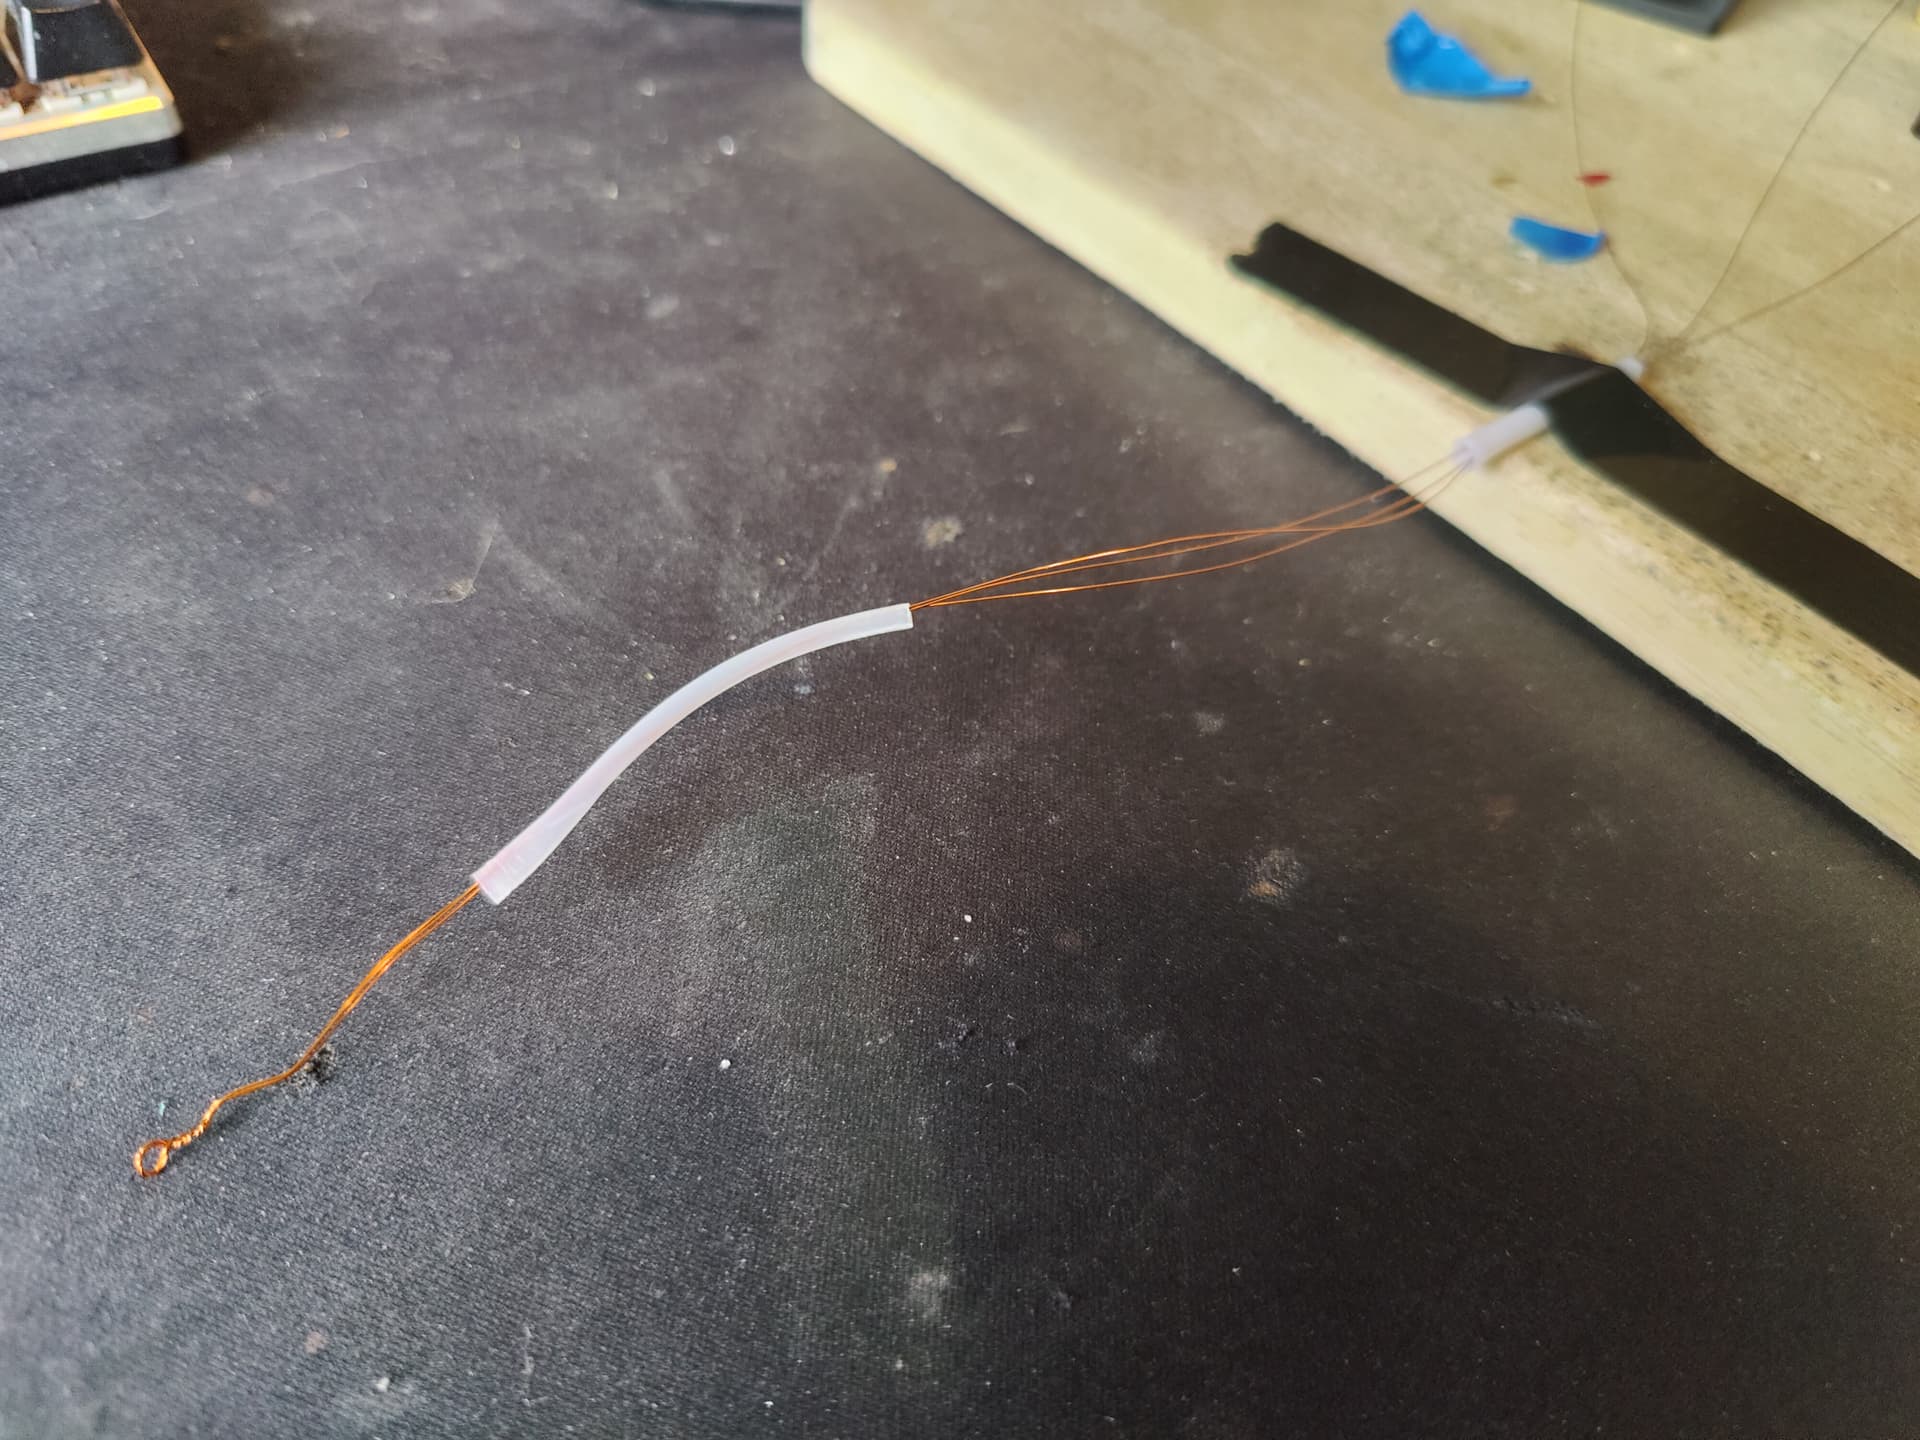
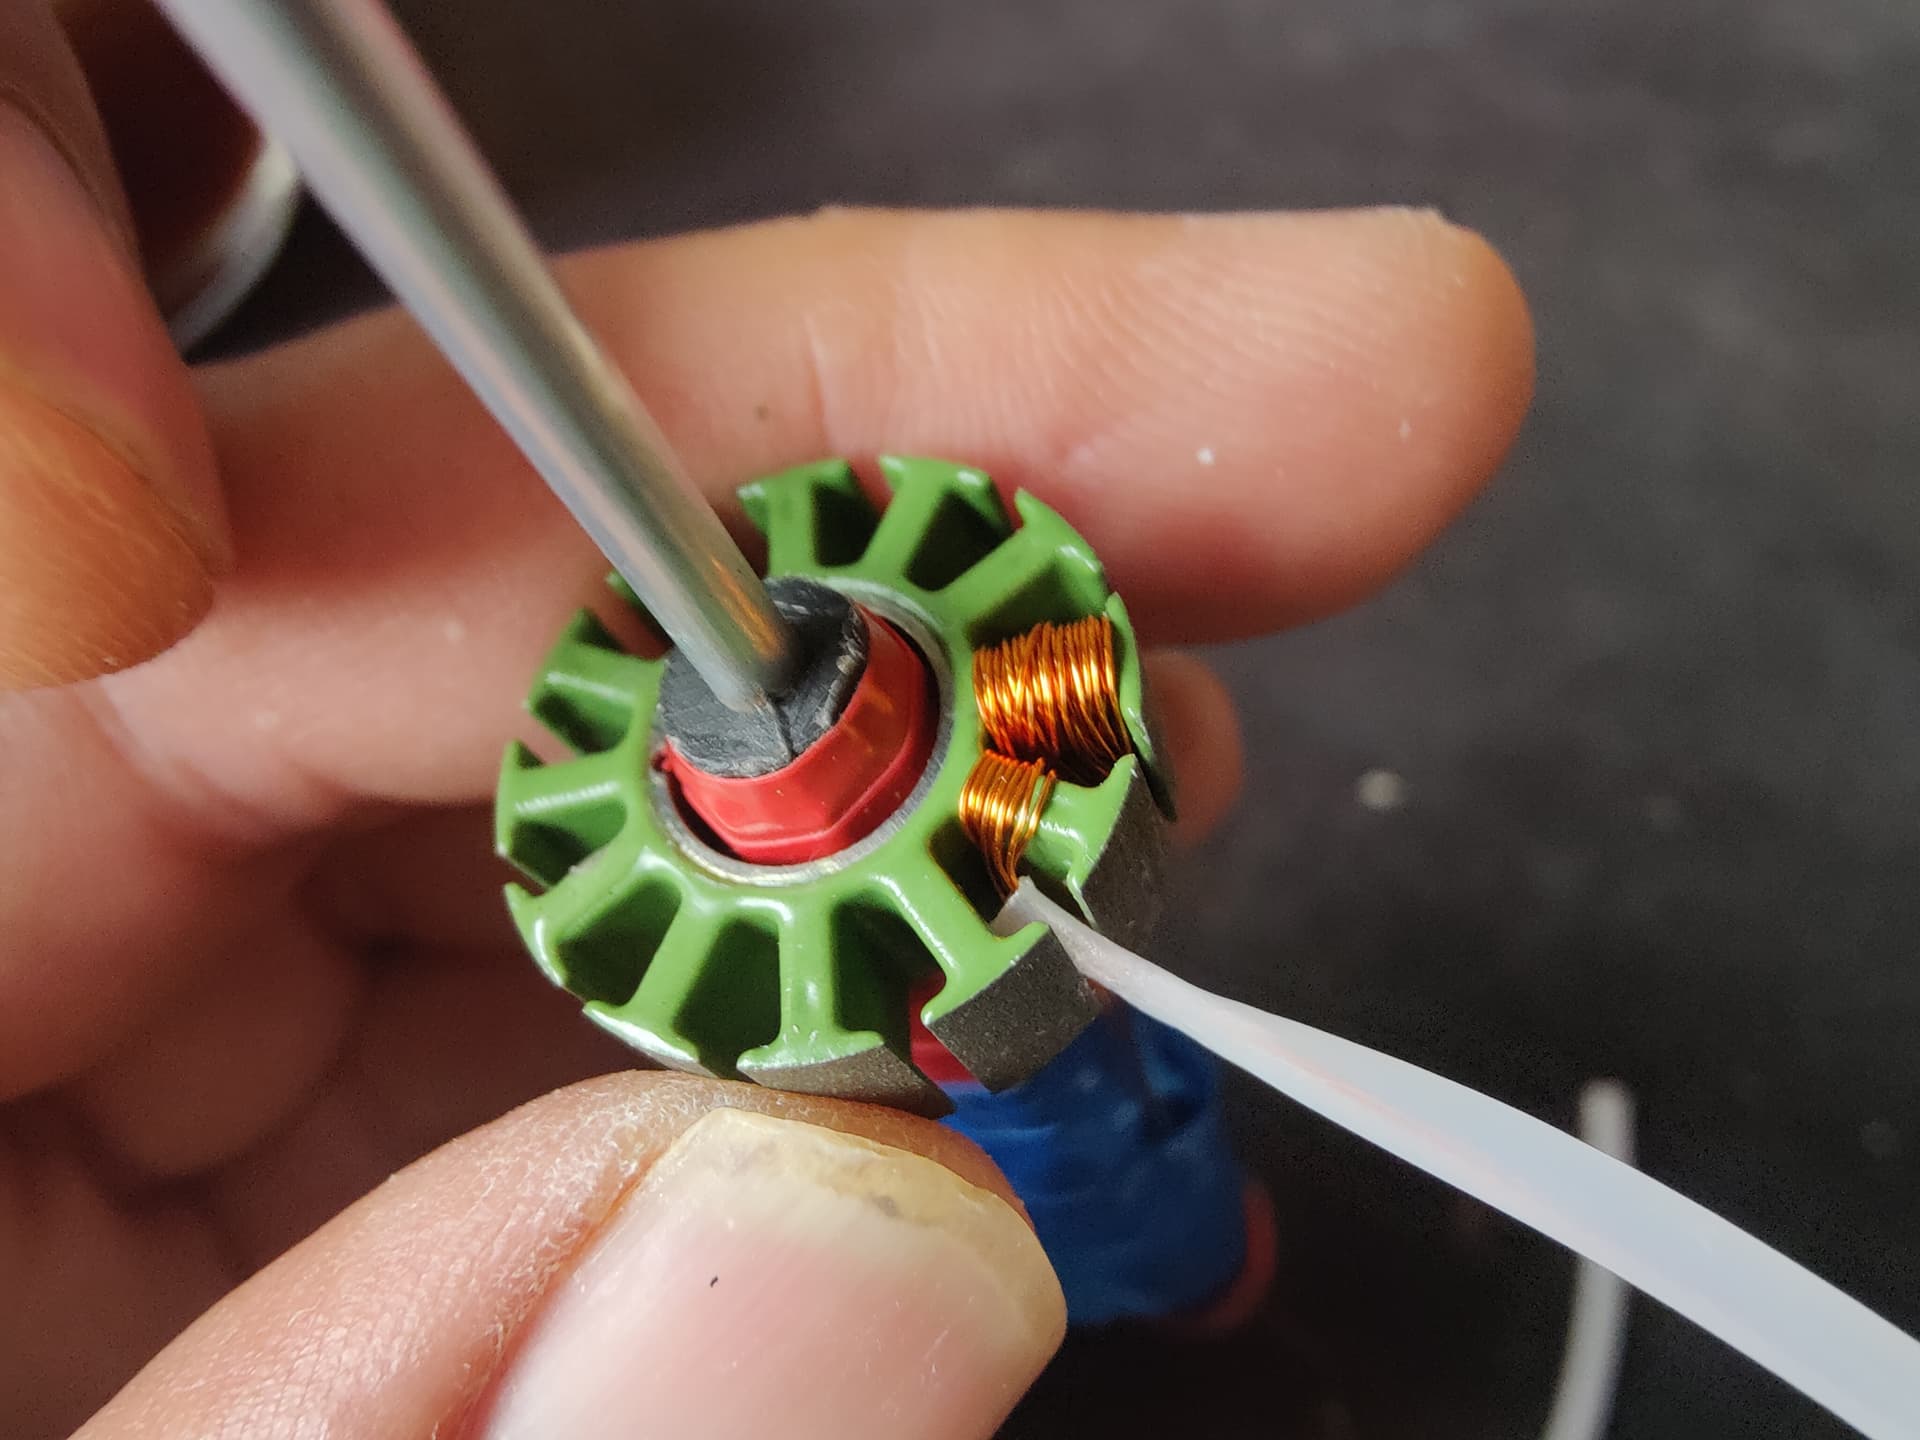
Wiring it up was a bit of a 'mare. With four brushless motors, four separate escs and a servo, with all the electrics crammed into two very small spaces on opposite sides of the bot, it was a bit tricky, but we got there.

10 Likes

Such a unique and eye-catching build! Looking forward to seeing how it does.

1 Like

Thanks Thomas, I dont think it’ll be anywhere near as competitive as my usual bots - but I’m super hyped to be experimenting with so many new things for me :smiley:

In my efforts to make the bot as dense as possible I kinda designed myself into a corner over and over - which lead to a bunch of over engineered solutions to problems I had made myself. None more so than my Lifter…

Because of where I decided to place the servo, the horn and linkage was ideally placed to drive one side of the lifter - however because I was determined to throw the hammersaw down the middle of the lifter that left me with a tricky situation of how to transfer torque to the opposite side arm? - Transferring the torque down the actual shaft seemed like the only option.

This meant some sort of live shaft and with the chassis being TPU I didnt trust it, to let a live shaft spin without tons of friction etc. So I decided to add a brass tube insert as a sort of bush and to provide a bit of structure/rigidity to the area.

From there I settled on a length of 4mm square key steel to act as the shaft (largely because I had it on hand).
A set of printed bungs make the assembly round and let it spin within the brass tube:

Then a set of lasered hardox spines that’ll key around the shaft and transfer the torque up into the TPU lifter arm.

And finally a set of custom split clamps made from some lasered aluminium which I drilled and taped for m3 bolts.

And there we have it - trust me to turn something as absurdly simple as a servo lifter into an needlessly complex multipart assembly - but hey ho we ball.

4 Likes

this bot is very very cool cant wait to see it get some good belly shots.

those angled wheels are also very neat, really like the solution of using the green belt to go between the two pulleys. like i know that belts can do that but it will never look right to me :rofl:

1 Like

Yeah, lots about this build feels a bit wrong to me tbh :joy:

I run narrow (3-4mm wide) T5 belts on Luchador and love the amount of torque they can transfer compared to round belt - but between the twist and the flex of all the TPU I felt certain that timing belts (especially narrow ones) would end up being more of a liability.

Was particularly concerned that narrow ones would end up flipping over and just end up smooth anyway.

So that concern coupled with the belt length concern from all the TPU’s potential to flex made round belts the clear winner

1 Like

Boomslang is now fully together and mostly operational. All the weapons mostly work and it’s all in weight!

I had a hell of a time getting the repeat hub motor to play nice. It really didn’t like any of my usual escs I use on TCD (30A little bees) and was pulsing, desynching and generally not spinning nicely at all. Cranking up timing and demag comp seemed to help a little in early testing but once the disc was back on still didnt work well enough.

Ended up pulling the BBB am32 drive esc that runs Luchadors flipper motor and redoing the settings for spinnery things and adding a bit of a slow up onto the tx and that seems to be working well enough for now. Will probably switch to a repeat am32 single at some point in the long term.

During all this troubleshooting I actually managed to over discharge the lipo I intended to use and damaged the balance connector by stuffing it in too small a space - so my charger stopped reading a cell… Whoops! :sweat_smile:. I quickly reworked the butt section of the chassis to accommodate a 660mah 4S lihv outta TCD and to give the balance lead a little more room and reprinted the chassis.

I’m really liking this build method for how easy making changes to the core chassis is. So long as the stand offs don’t move so the CF doesn’t need replacing I can iterate on the tpu sections very fast and without too much effort.

Having done some test box testing - I also think I’ve gotten the geometry all wrong to actually pull off the under attack thing - think I’m far more likely to be hitting side armour etc - but that is well beyond the scope of what I can sort before New Bloods so will be a problem for any future V2 redesigns.

A major problem I have encountered post testing is that occasionally the hammer arm will bind and lock up. This I think is due to the tpu bulkheads flexing on impacts and letting the gearmotor move around a little until the bell fouls something. Hopefully will be a relatively simple thing to fix tho, just need to bulk up the geometry around the gearbox a bunch and reprint that half of the chassis - or potentially design up a spacer that’ll constrain it all more between the CF :thinking:

5 Likes

Looking forward to seeing it this weekend. Looks fantastic.

1 Like

So I thought I’d take a minute to talk about my TX set up for this as its a little involved and I don’t think the bot would be possible without it.

Managing a servo lifter, a hammer arm and a spinner is a lot to deal with so I knew I wanted to leverage EdgeTX to minimise the cognitive load of it all and make it as easy to drive as realistically possible.

Lifter:
This is servo driven so has positional control and there will be occasions where I want it to stay up, so I decided to put this on the unsprung throttle. Nothing particularly complex here.

The hammer arm:
I’ll primarily be operating the hammer arm via the SA momentary button. On press this fires forwards for 0.5s and on release it fires backwards for 0.5s. This is done via some overrides and some logical switches.
Hammer Logical Switches:
image
L01: activates when SA first equals 100 (when its pressed) and lasts for 0.5s
L02: activates when SA first equals -100 (so when its release) and lasts for 0.5s

These Logical switches are then used by Special Functions that do overrides on CH4:


SF1: Activates while L01 is active and overrides ch4 to -46.
SF2 activates while L02 is active and overrides ch4 to -16.

(these values for the speed of the arm throw speeds are surprisingly low - which likely means I could do with some more reduction on the arm but hey ho we roll with what we have)

This works and is robust and simple press button and the hammer goes forwards, release button and hammer goes backwards I dont think there is a better way to have a hammer set up tbh.

However I still wanted to have the ability to adjust the hammer position manually if I need to - like if an impact recoil leaves it partially up for example. So the hammer is also operated via the rudder stick. To avoid unintentionally moving the hammer while operating the lifter I added a custom curve to the rudder stick with a big ole flat spot in the center to stop it reacting to very small left/right movements. This will let me adjust the arm manually if I need to but only with big purposeful left/right movements on the stick, not small unintentional ones.

The Spinner:
I quickly decided I wanted this on my other momentary switch and for it to spin as long as the button is held. This is straight forward to do, just set up a mix with the momentary switch as the source and the relevant channel as the destination. The momentary switches are -100 when not pressed and 100 as long as they’re being depressed. That’s the basic functionality sorted, however jumping in an instant from -100 to 100 isnt very good for the ESC and is likely to cause motor desync. Adding a 0.4s slow up makes this value transition from its starting value to its ending value in 0.4 seconds giving the esc and motor a nice ramp up to get to speed under control.

Great that’s functional - however I want more options than just 100% or no percent… And I also like to have a safety toggle on my spinners that prevents the spinner spinning entirely… we’re gonna need another set of logical switches and special functions. And here they are:

Logical Switches:
image
L03 is an a>x switch, that checks if ch5 is greater than -100, it also checks if the 3 way toggle switch “SC” is in the upward position. If both of these are true it is active.

L04 is an a>x switch that checks if ch5 is greater than 0 and if the switch SC is in the middle position. If both are true it is active.

Special Functions:
image
SF3 is active while L03 is active and overrides ch5 to -100;

SF4 is active while L04 is active and overrides ch5 to 0;

These combine to give me a limiter toggle.
While the three way toggle is in the upward position pressing or holding the spinner button will do nothing. This because L03/SF3 are actively overriding ch5 to -100, the bot is safe.

Toggle the three way to the middle position and L04/SF4 are actively checking if ch5 is over 0 and if it is, they override it to 0. This means if you’re holding the spinner button it’ll gradually increase in power until it hits half power (0 on a -100 to 100 scale) at which point the overrides kick in and keep it there.

Finally if toggle switch is “down” then none of the logical switches or special function are active and when you hold the spinner button the power will gradually build up to full power across 0.4s.

So these all combine to make running the hammer saw a case of, hold one button down to spin up. Press other button to fire hammer.
And if I’m going for the pin attack combo its, push throttle forward while holding spinner button and then when happy press hammer button.
Honestly I think this is all as streamlined as I can realistically make it - we will see how it goes and if its overwhelming come the weekend tho!

4 Likes