This probably won’t come as a shock to anyone reading this, but I’m quite fond of control bots. Basically every robot I’ve ever built has been designed around getting underneath an opponent, and either lifting them or grappling them, with the intention of using their own weapons against them, or to get them into the pit or an OotA zone. Up until this point, the only exception to this rule has been a 6kg vertical spinner I purchased from Sam Price, and while I absolutely do want to do something with it some day, it’s still yet to be fully functional, much less in an arena. All that said, I did want to make a robot designed around damage at some point, and I figured that this would be the perfect design to pursue after finally retiring the Schnake concept.
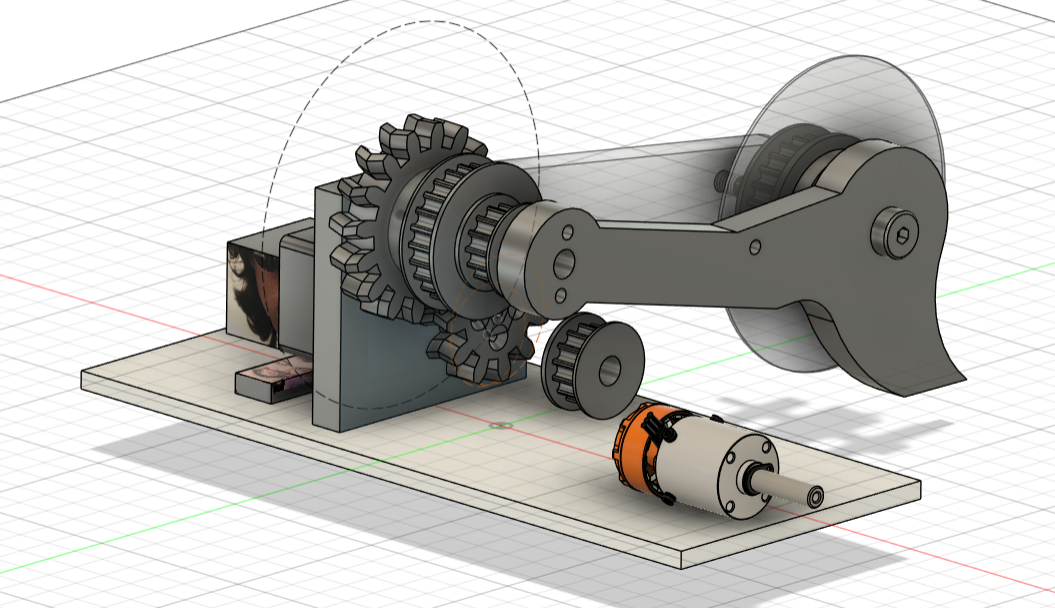
A snapshot at an early stage of the design, where I tried to place everything within the robot.
Typical of my nature, I decided to tackle a sawbot, the control bots of spinners. While almost all spinning weapons are designed with the intention of transferring a large spinning hunk of metal into an opponent across a fraction of a second, sawblades generally require an opponent to be held in place while a blade slowly cuts through whatever armour is protecting the electronics inside. When they work they can be some of the scariest bots around, capable of severely damaging opponents with a single cut, and the threat of sniping a battery or electronics can be so intimidating you can often win a fight via tapout, something you don’t usually get the time to do with a spinner, with the added boost of being a nice ego boost.
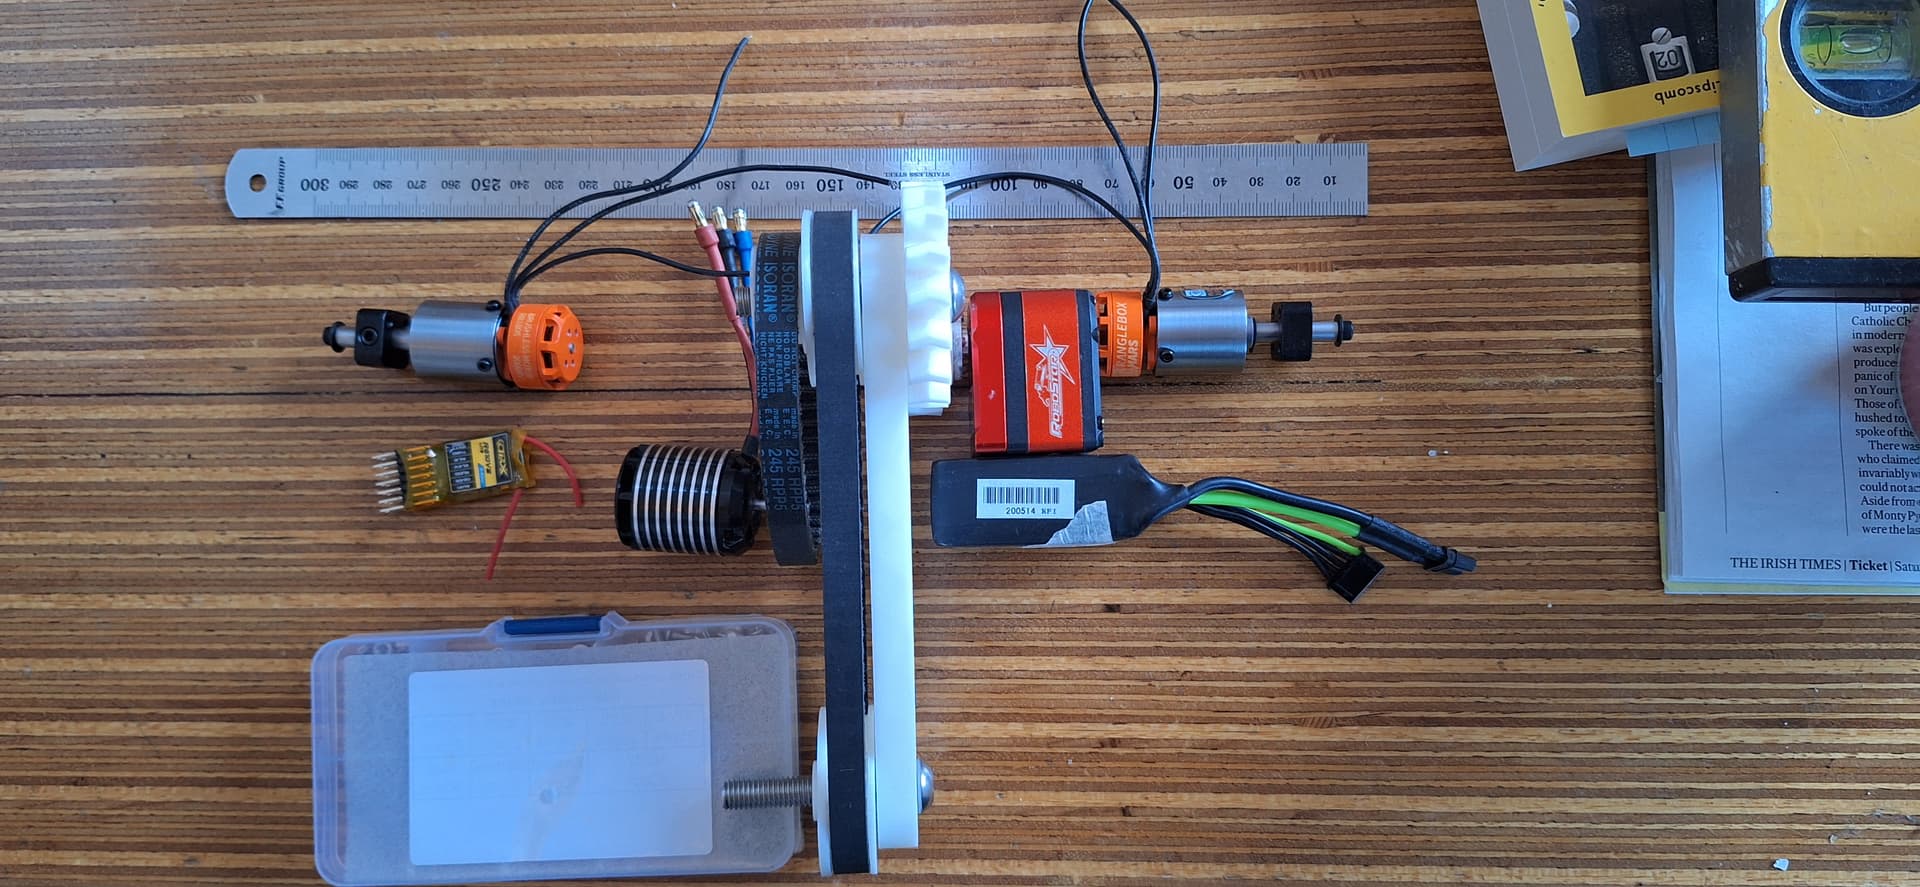
Some more attempts to locate core components early on.
Of course, a sawbot does come with quite a few challenges. Keeping an opponent static for an extended period of time can be a challenge, and an excellent ground game is basically a core requirement to ensure the blade doesn’t suffer any loads across some awkward axes. They also will have a lot of moving parts, requiring not just a sawblade, but a high speed/high torque motor, a servo/motor for the sawblade arm to deliver the saw, as well as separate ESC’s for both. Finally, you’ll also need to fit in a super powerful drive system in there to actually get your opponent pinned to a wall, a near prerequisite for starting a cut. There was a lot to juggle throughout this process, but I was eager for a good challenge, and since Babróg has needed no changes for the foreseeable future, I was confident I could get something working in time for events in 2025.
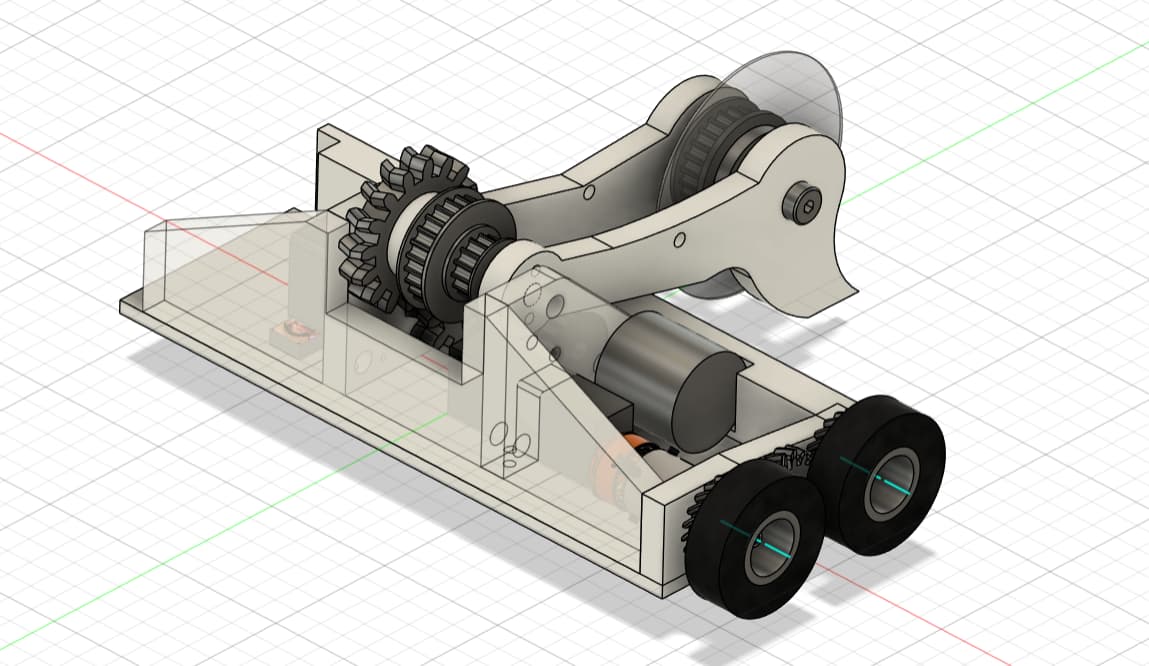
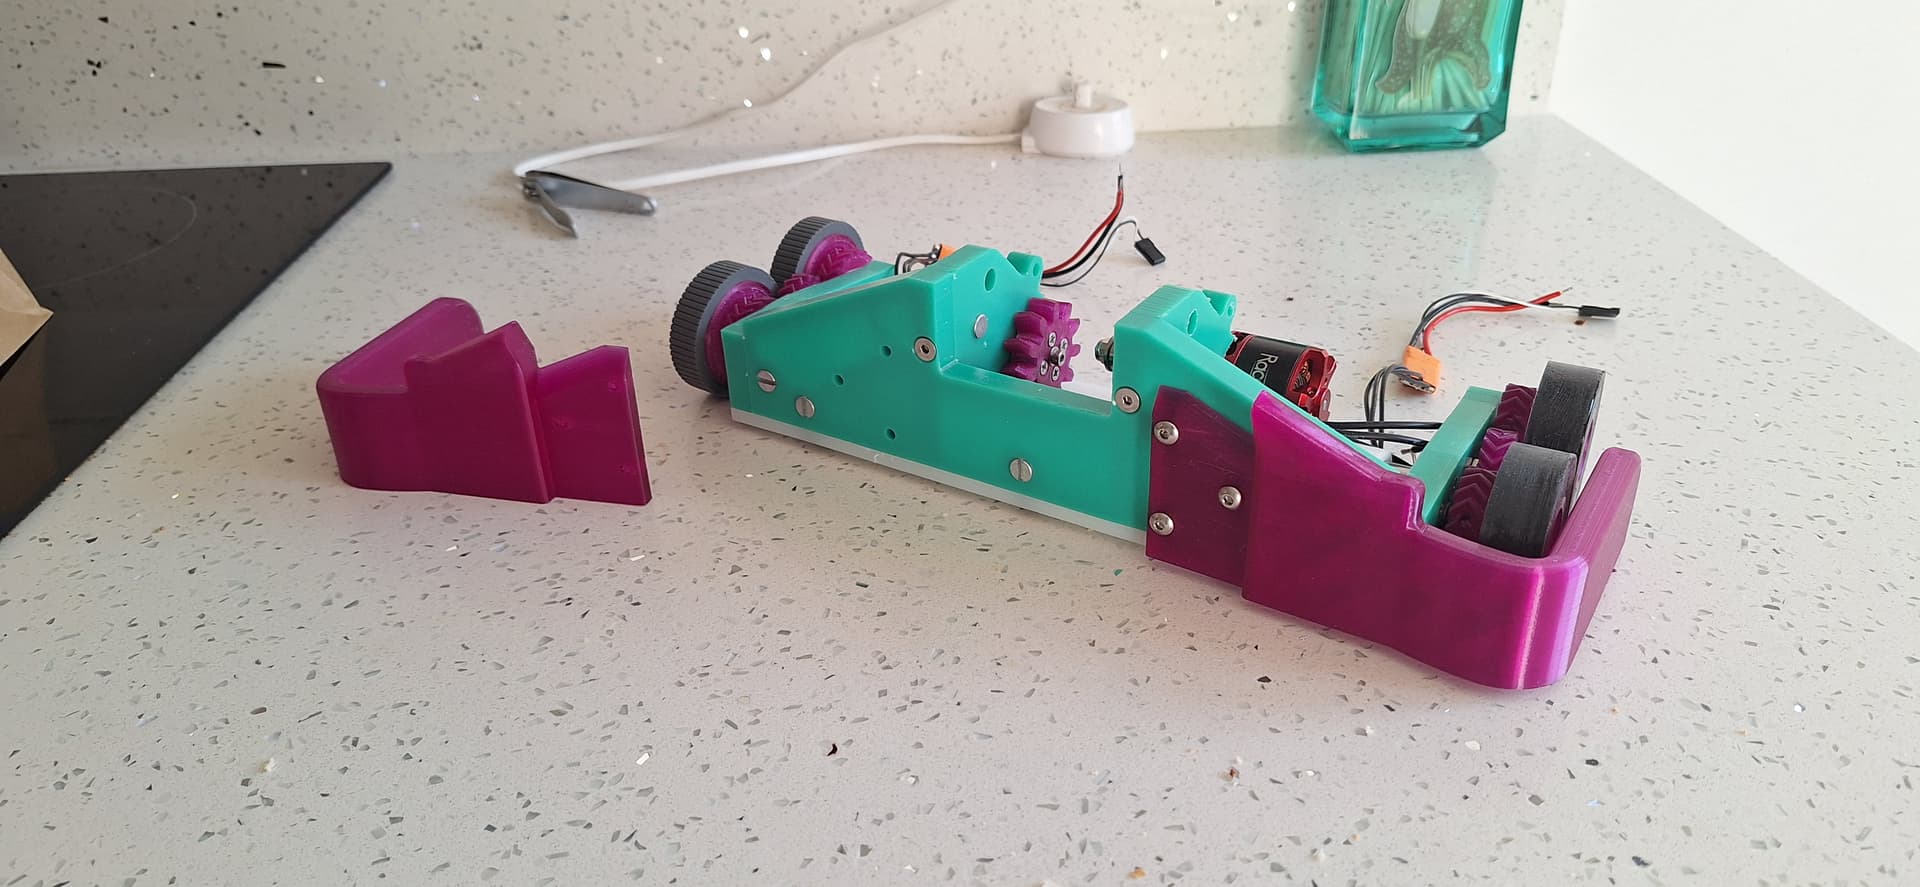
One of the later editions of the CAD. Handling and durability were core goals for this design, which is one of the main reasons I chose to stick with four wheels over two.
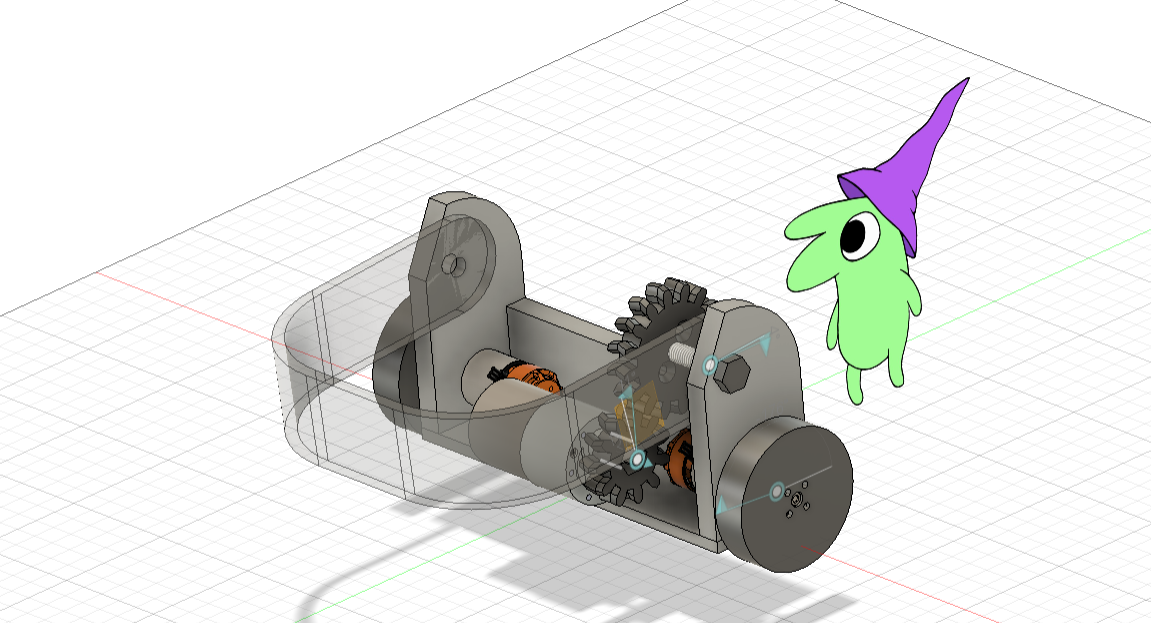
A quick bonus build; this was Glep, an attempt to prototype a Dwayne Nibbley-style grabber to replace Schnake. This one didn’t make it too far, but I would later rework the chassis and most of the core components into Cut d’Ivoire.
The first important decision for me to make was which motor to use for the weapon, as well as where to place it. I had seen plenty of saw robots stalling while attempting a cut, and I needed to be sure I had enough of a margin to reasonably cut through plastics, and possibly carbon fiber and aluminium (steel or titanium would be unreasonable bonuses). After looking at some of the other sawbots in Europe, I was quite impressed by Head For The Exit, which I had seen in person getting the kind of cuts I was looking for. I found out from Greg that he was using a Racerstar 2820 1000kv motor, and while I couldn’t get the exact model, I did end up going for the Racerstar 2814 which was close enough. The ESC HFTE was using was a little too big for the form factor I was after, but after talking with Joe Mitchell (designer of Kult), I elected to go for a DYS AM32 Aria 70A ESC, which had a current rating that should be plenty for the high draws required during a cut. The most critical parts of the electronics for a sawbot was to ensure your robot could draw enough current over an extended period of time during a cut without burning out the ESC, or even the main fuse of the robot (Greg warned about this in particular), so this bot uses a 60A fuse instead of my standard 30A one, which was trickier to fit in with the rest of the electronics, but was worth it in the end.
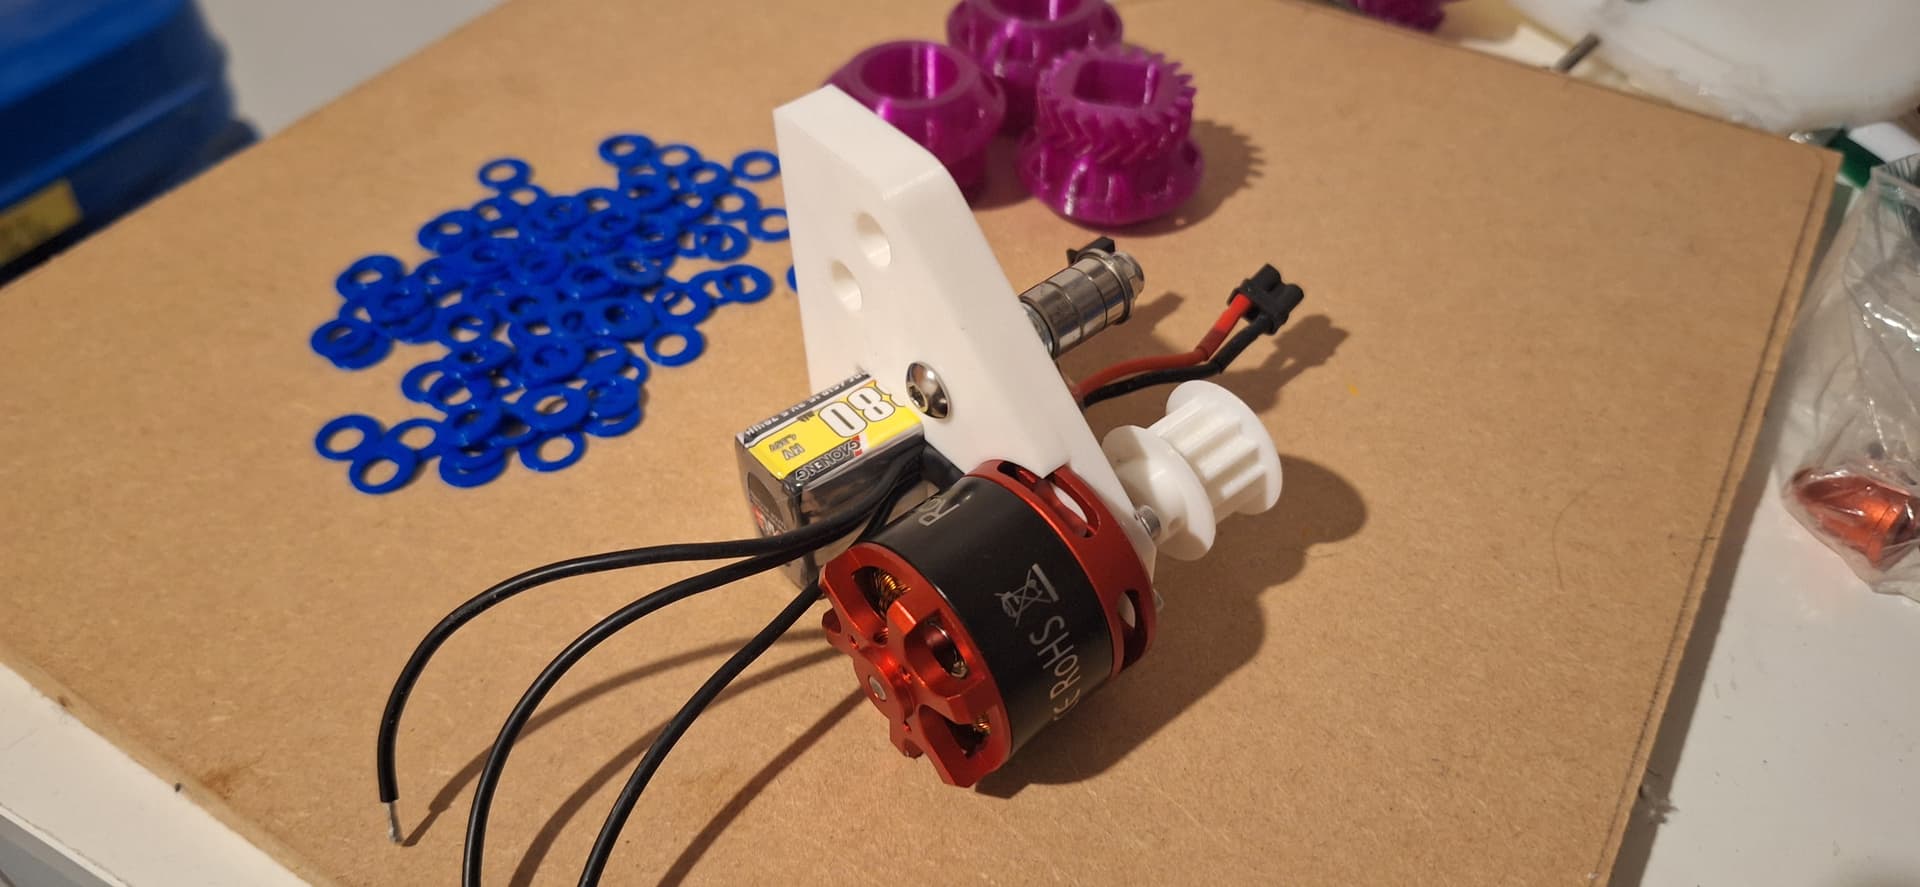
A mockup of the motor placement. Getting the motor to fit into a relatively slim profile took quite a few revisions.
Getting a sawblade spinning is one thing, but feeding it into an opponent is another thing entirely. Generally, there are three kinds of ways to mount a motor onto a sawbot:
- Mounting the motor directly to the sawblade (eg Mako in the US, Chopstick in the UK). This reduces the number of moving components and mechanical losses, but this leaves the motor far more vulnerable to damage.
- Mounting the motor internally, and using belts to transfer the power to the saw (eg Sawblaze). This provides the motor the most protection, but you now need two separate belts to transmit the power to the saw, and you also are using up a lot of space for the motor in the main chassis, which is already super tight on space.
- Mounting the saw on the saw arm, with a single belt leading to the sawblade (eg Maximum Ogredrive). This is a decent middle ground option, good for space and minimal mechanical losses at the cost of still having a pretty vulnerable motor.
In the end I elected to mount the motor internally, as I appreciated the protection it offered, as well as how it would keep the center of mass as low as possible. The pulleys are all 3D printed in PLA-ST, and each one ran on needle bearings running on shoulder bolts. I also added tensioners at each stage, both to increase how much the belt wrapped around the pulley, and also for space reasons; without the tensioner at the first stage, the belts would clash with the battery, and the tensioner at the second stage offers the belt some more protection from anything on the top of the robot I’m cutting into. Both tensioner holes were also slotted to allow me to change tension as I saw fit, both for initial tuning and to account for the belt stretching in any way.
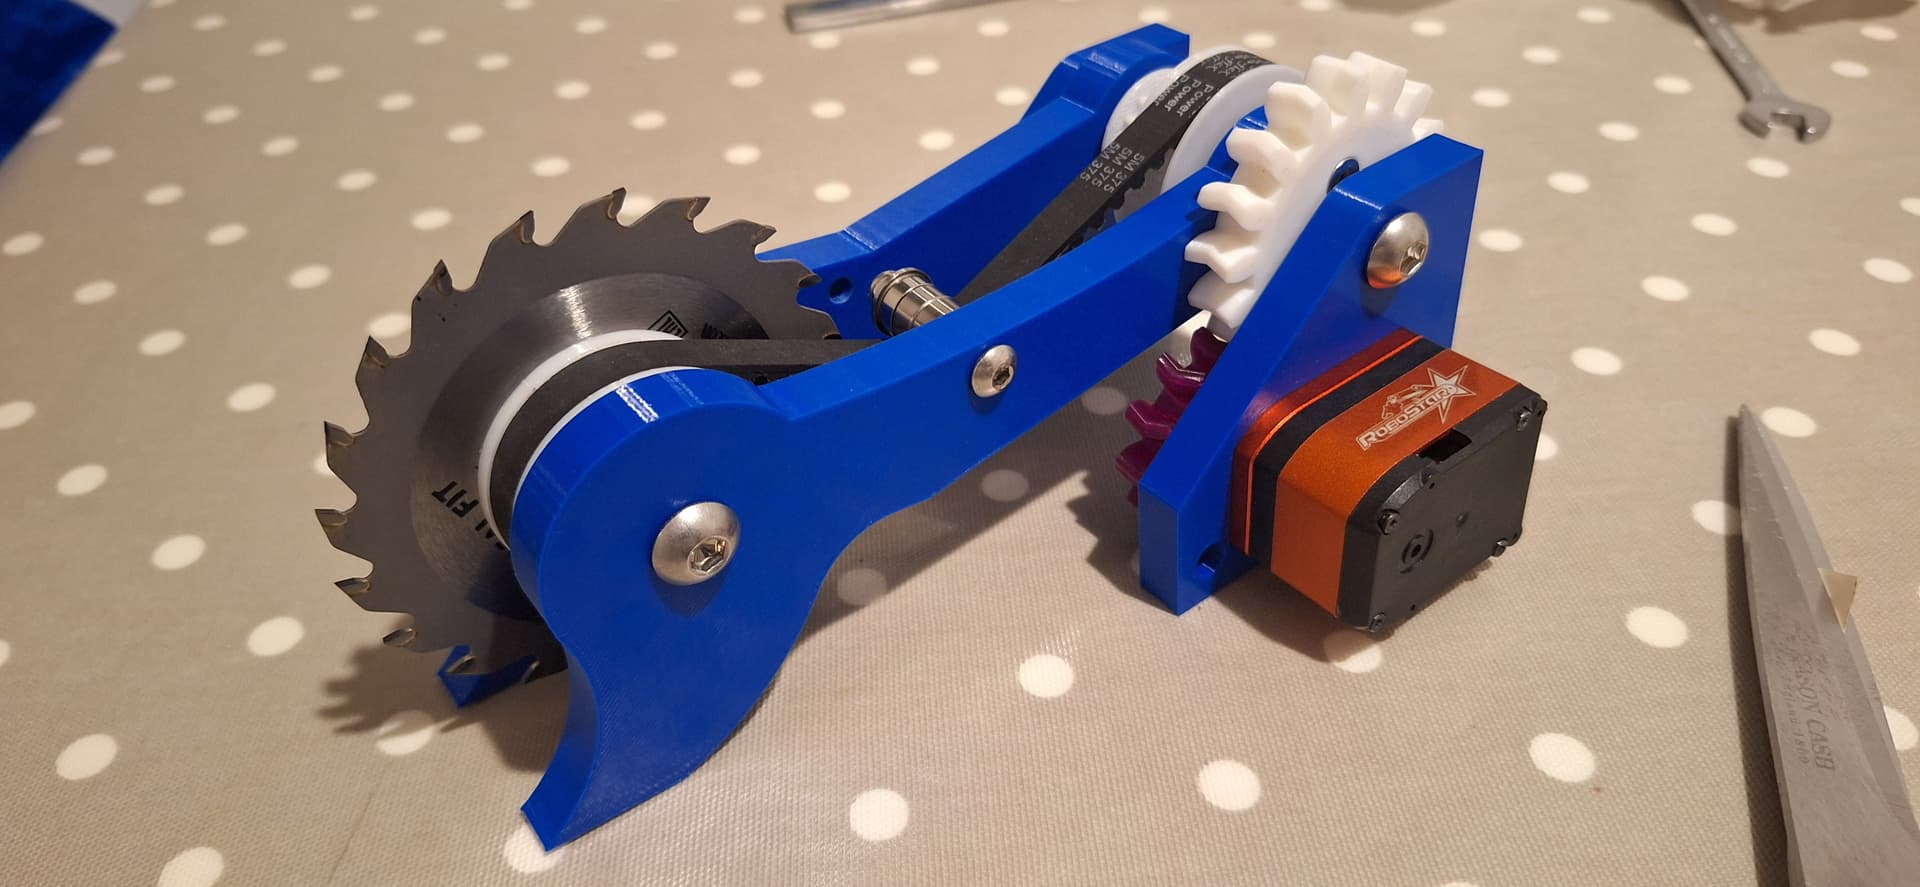
A nearly final draft of the saw mech. The sawblade pictured here has the same diameter as the finial blade, but until the newer one arrived, this one served to be a perfect placeholder.
Finding a good sawblade would be tricky, as you’re trying to find a good balance of tip speed and reach, but also maintaining the torque necessary to maintain a cut, and meeting the 250mph tip speed rule in European events. There were also additional rule concerns regarding sawbots that put them into the grey area of “is one of those legacy rules that is on the FRA sheet but no one really ever looks at”. The main one was rule 13.3, that “the speed of a rotating weapon … must not exceed the manufacturer’s specification”. Now ultimately most of the recommended RPM’s printed on sawblades were intended for life cycles far longer than what was seen in robot combat, and I was absolutely certain most competitive sawbots in the UK and abroad would be exceeding these limits already, but since I try to cover all bases, I searched for a suitable blade for my needs. In the end I found some blades from Germany that were 85mm in diameter, were designed to cut plastics and soft metal, and were rated for 17k RPM.
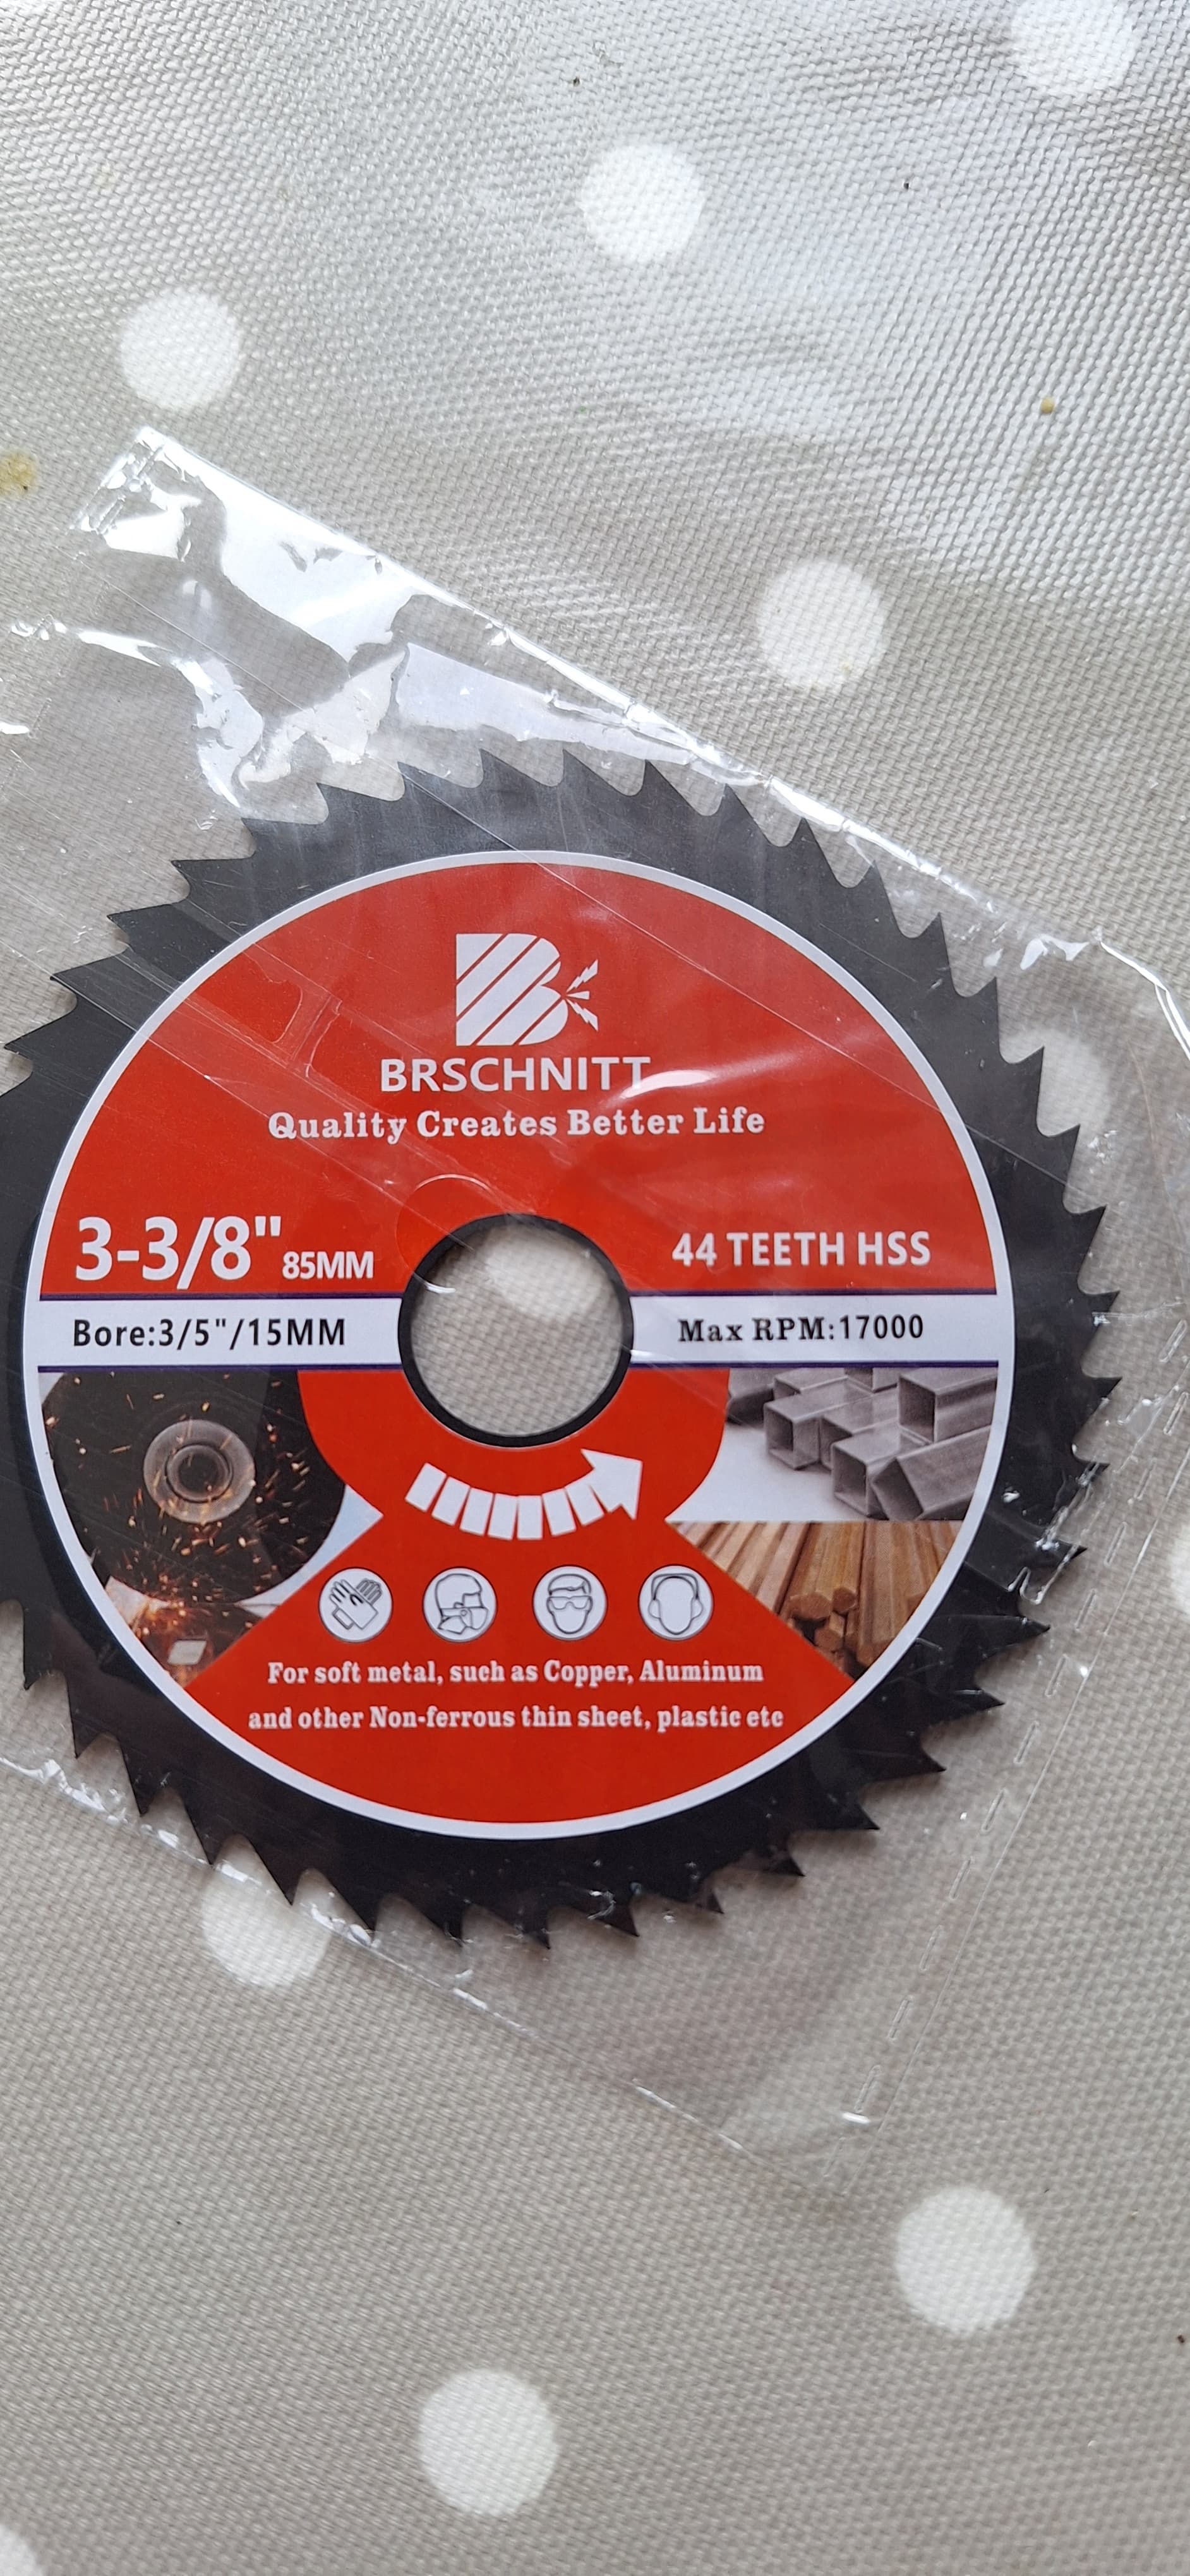
The sawblade I would use for the robot, FRA approved (I’m assuming)!
After punching in some numbers into the BBB tip speed calculator, and having to bring in a reduction from the final spinning speed (for space, availability, and torque reasons, the first stage goes from a 12T to a 16T pulley), I ended up with a theoretical max tip speed of roughly 130mph, at roughly 13k RPM. Certainly some more speed being left on the table, but for a first sawbot, I was happy to work with this as a base, and see how the setup handled these torques before further iteration.

Could be better, but it could also be a whole lot worse.
For the saw arm I originally considered using a 37mm motor, but it ended up being far too large and heavy to be viable. In the end I decided to reuse the hacked Robostar servo I used for the first Babróg, as it was relatively light and compact, and didn’t require an additional ESC. To provide further protection for the servo, I elected to use an 11T TPU gear on the servo to provide additional reduction, as well as to protect the gear from shocks and stalling, as the TPU gears would slip under enough pressure, doing the job of a clutch in essence. The output gear is actually the exact same as what Babróg is running nowadays, which means that when I get fancy nylon printed gears, I could use them on either machine.
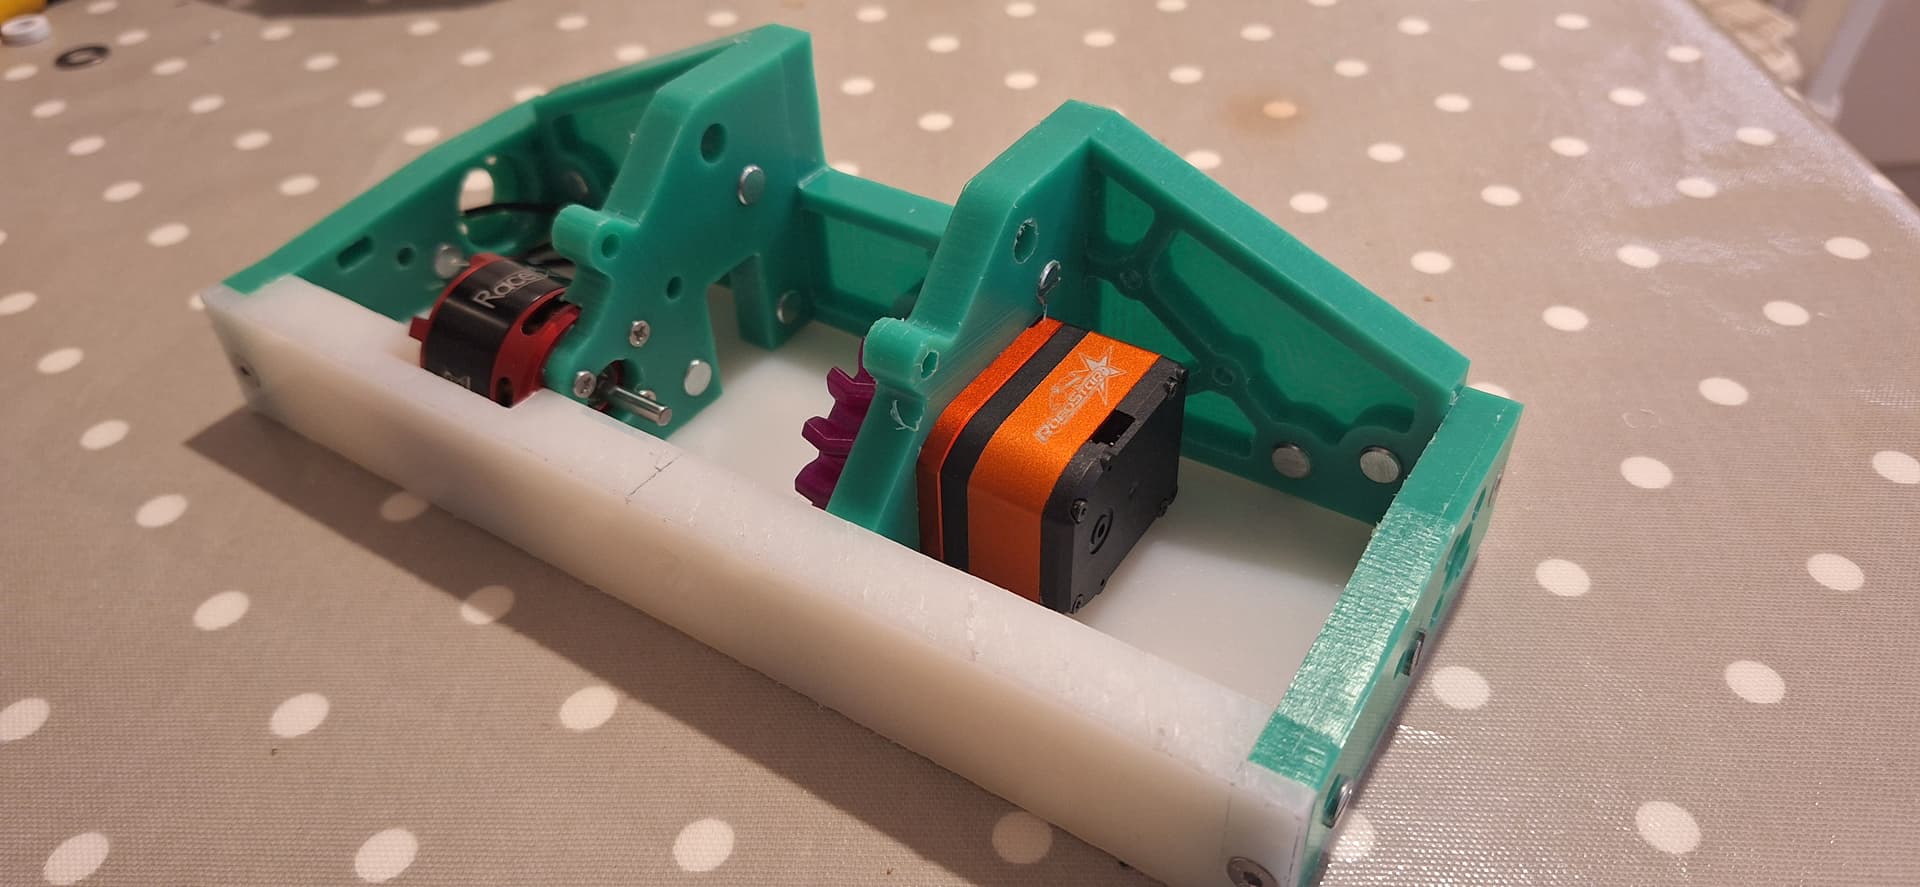
The servo and chassis coming together. I was very happy with how everything slotted together, though the accessibility of some of the machine screws could be tricky at times.
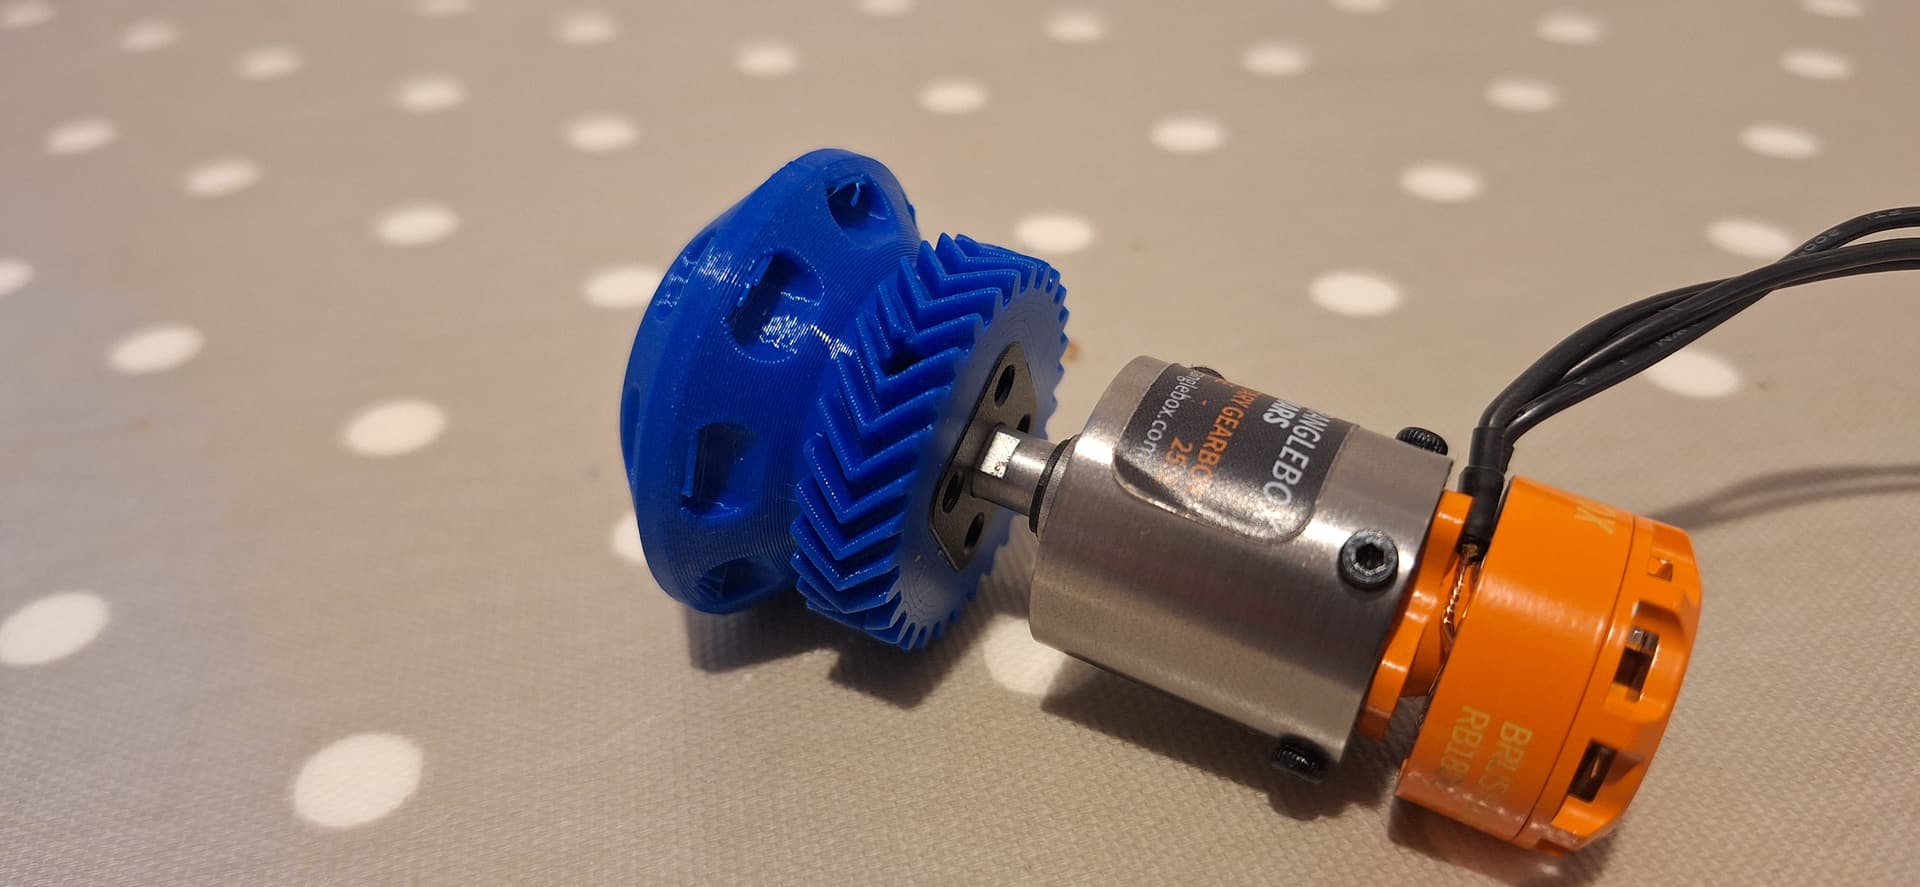
The drive was the last major change I would be making from previous designs. I decided that my beloved 22mm rotalink conversions were too twitchy and too fragile for a bot with much more exposed components, so I decided to invest in some Ranglebox Mars motors, a very well regarded drive system that were durable, driveable, and were available in abundance (at least they were until only a few months ago, RIP the Mars motors, reduced to another victim of international production chains in 2025). They were bulkier, but had a very durable 6mm output shaft, and were offered with some lovely hubs, with an eye-watering two M5 grub screws on each one. I could also use a 3D printed shroud design courtesy of Jack Franklin that attached to each motor using the bolt holes of the gearbox, which stopped any wires or other bits from going into the outrunners.
Using this chance to rework my wheels, I settled on a fusion of my own previous work, with elements from Alex Mordue and Jack Franklin’s designs. These new wheels were printed in TPU, running double helical gears that would be run on the gearbox at the front, and then driven at the back via an additional idler gear. The wheels would press onto the Mars hub and bolt on at the front, and would press onto an identical 3D printed PLA hub running a bushing at the back, so I could use the same design for both the front and back. I first tested the concept using a different style of hub that the Ranglebox tires wrapped onto, and once I was happy I cast the rubber onto the wheels using a method very similar to what I had used in the past. The grip, new motors and ESC’s, combined with the very wide wheelbase and my usual mixing tricks, resulted in what may be the nicest feeling robot to drive I’ve ever made.
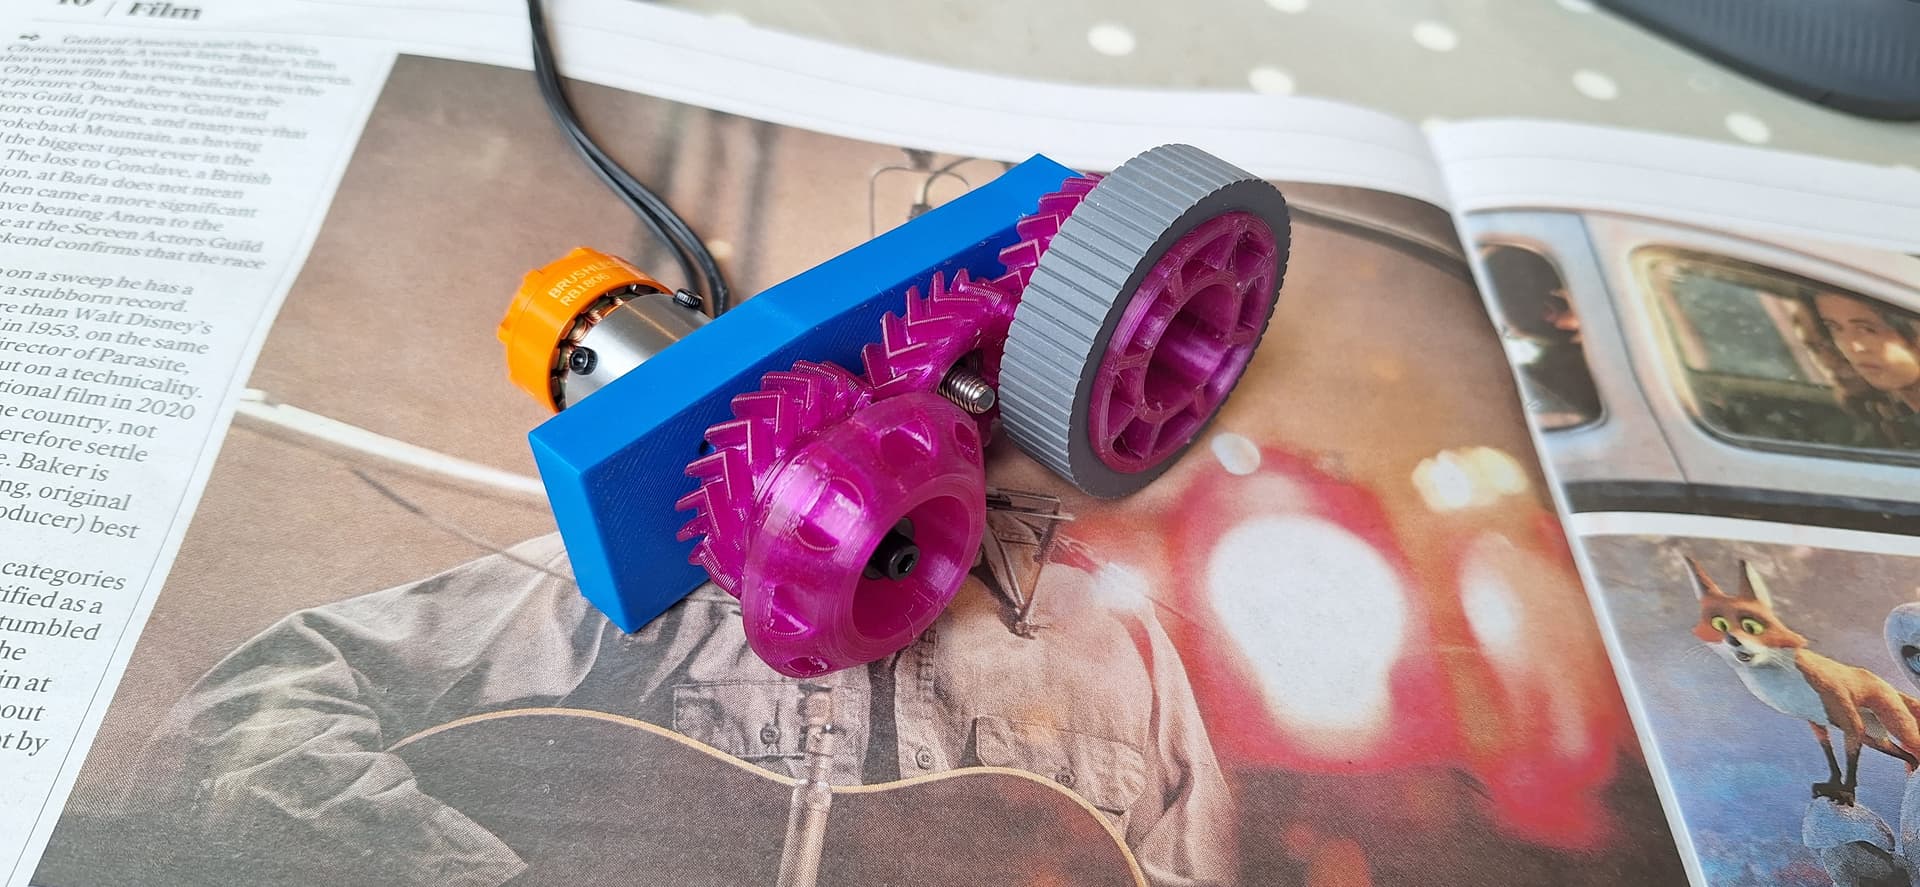
Here you see an early draft of the new wheel design in PLA, before printing the final design in TPU. An additional change I made was to increase the MOD of the gears, to reduce the risk of skipping.
From here, a lot of the chassis design was very similar to previous bots I’d made, being mostly HDPE panels, pocketed where possible, cut out of my mill, and bolted together with M4 hardware and barrel nuts. The top panels would require some more unconventional geometry, so with some caution I would use PLA-ST top panels, fully understanding how weak they’d be to any overhead weapon, but ultimately being too time constrained and lazy to care. Wiring on this one was an absolute pain, with every component generally fitting wherever space was available (the saw motor ESC floating freely in the middle chamber between the lifter gears and the pulleys is the most obvious example of this). This bot would also be the first time I would use a switch for the arming and disarming of the robot, though its first event was in Germany where links were still mandatory, so naturally I made a proper link system, now with a fancy TPU ridged door.
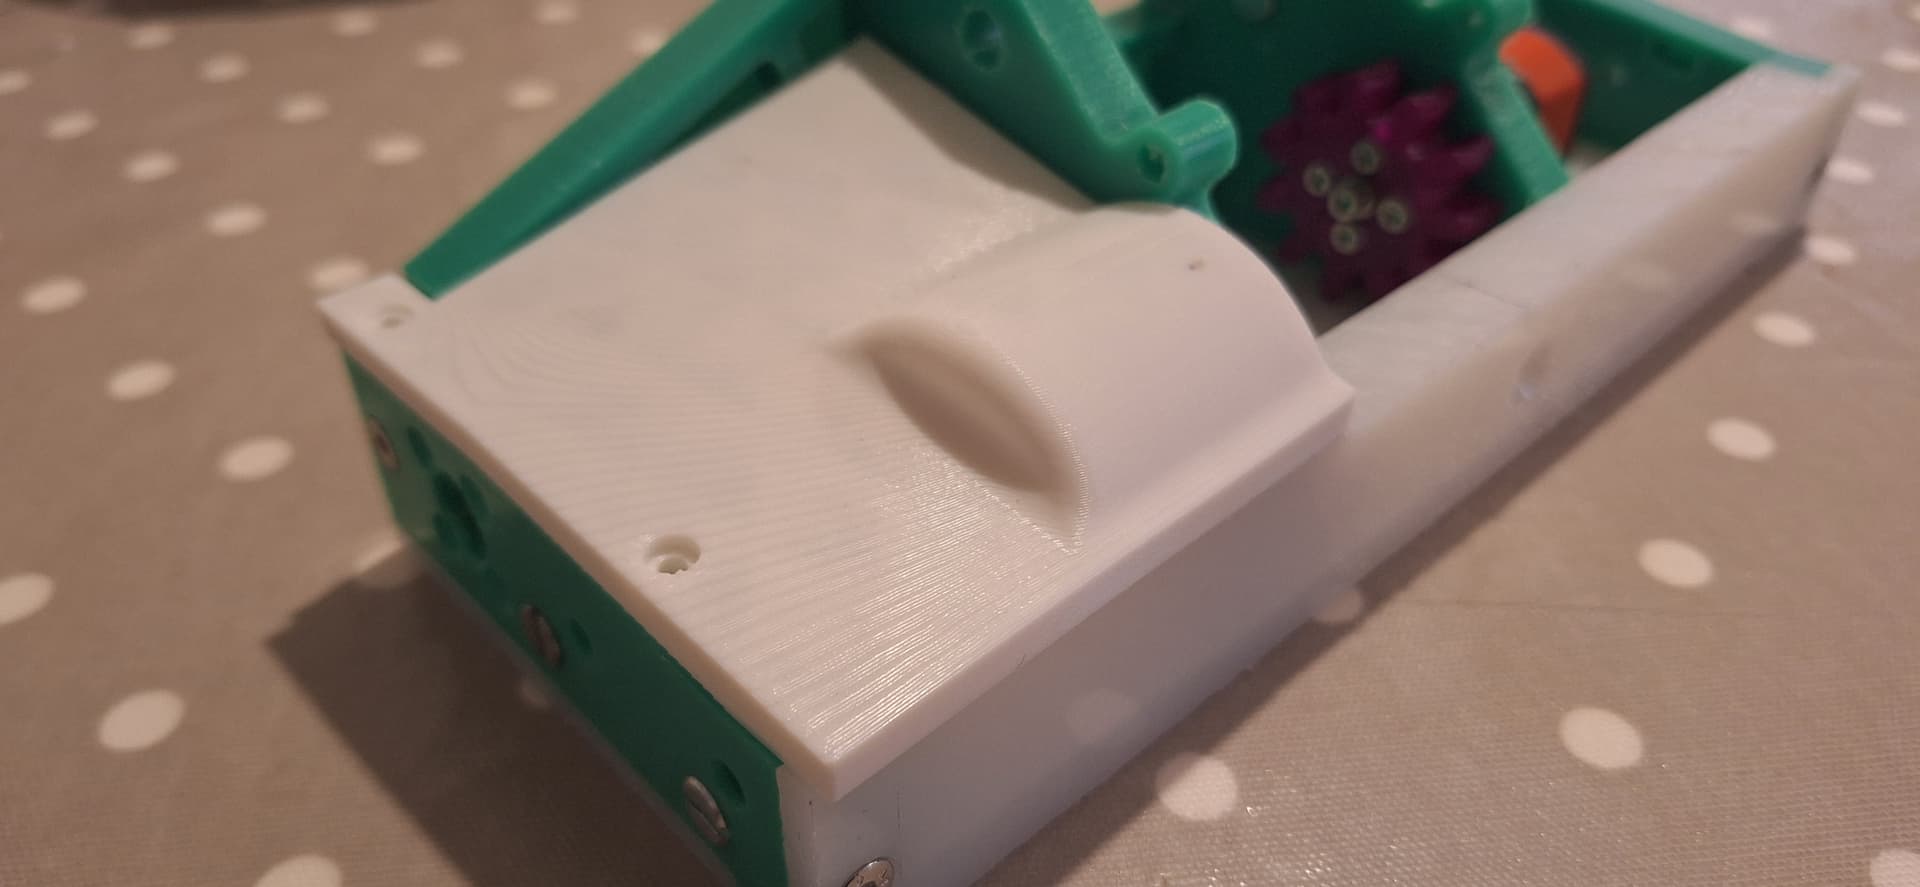
The back panel, before installing the TPU door.
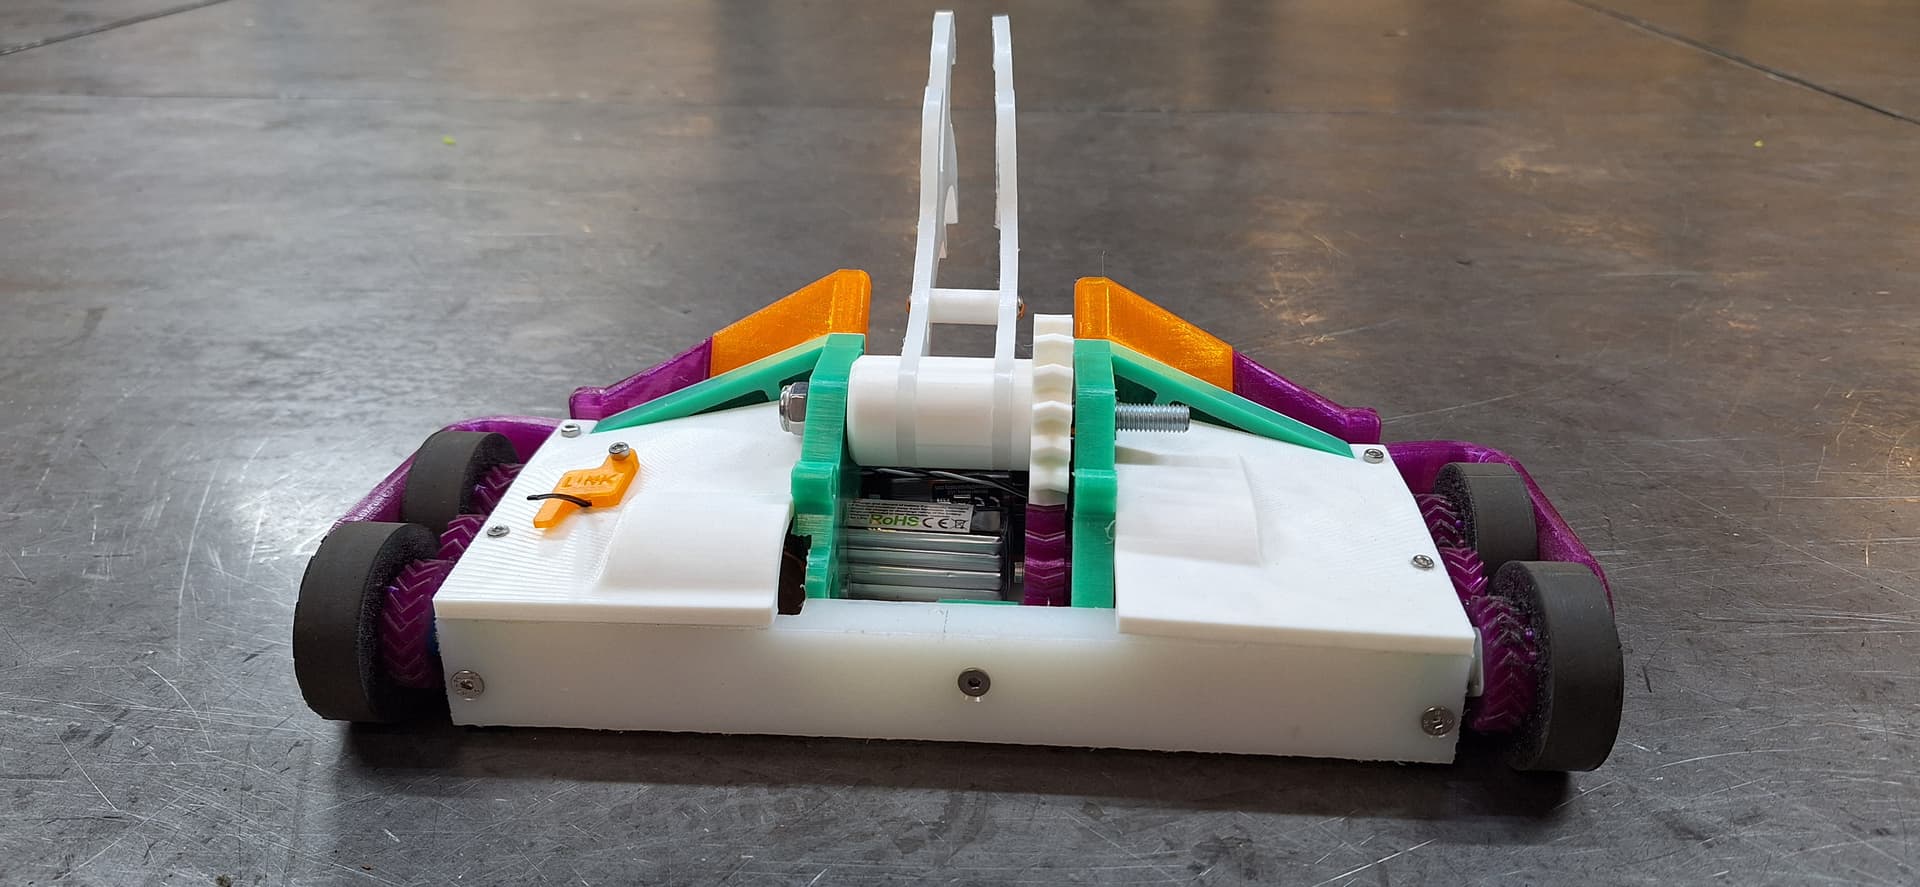
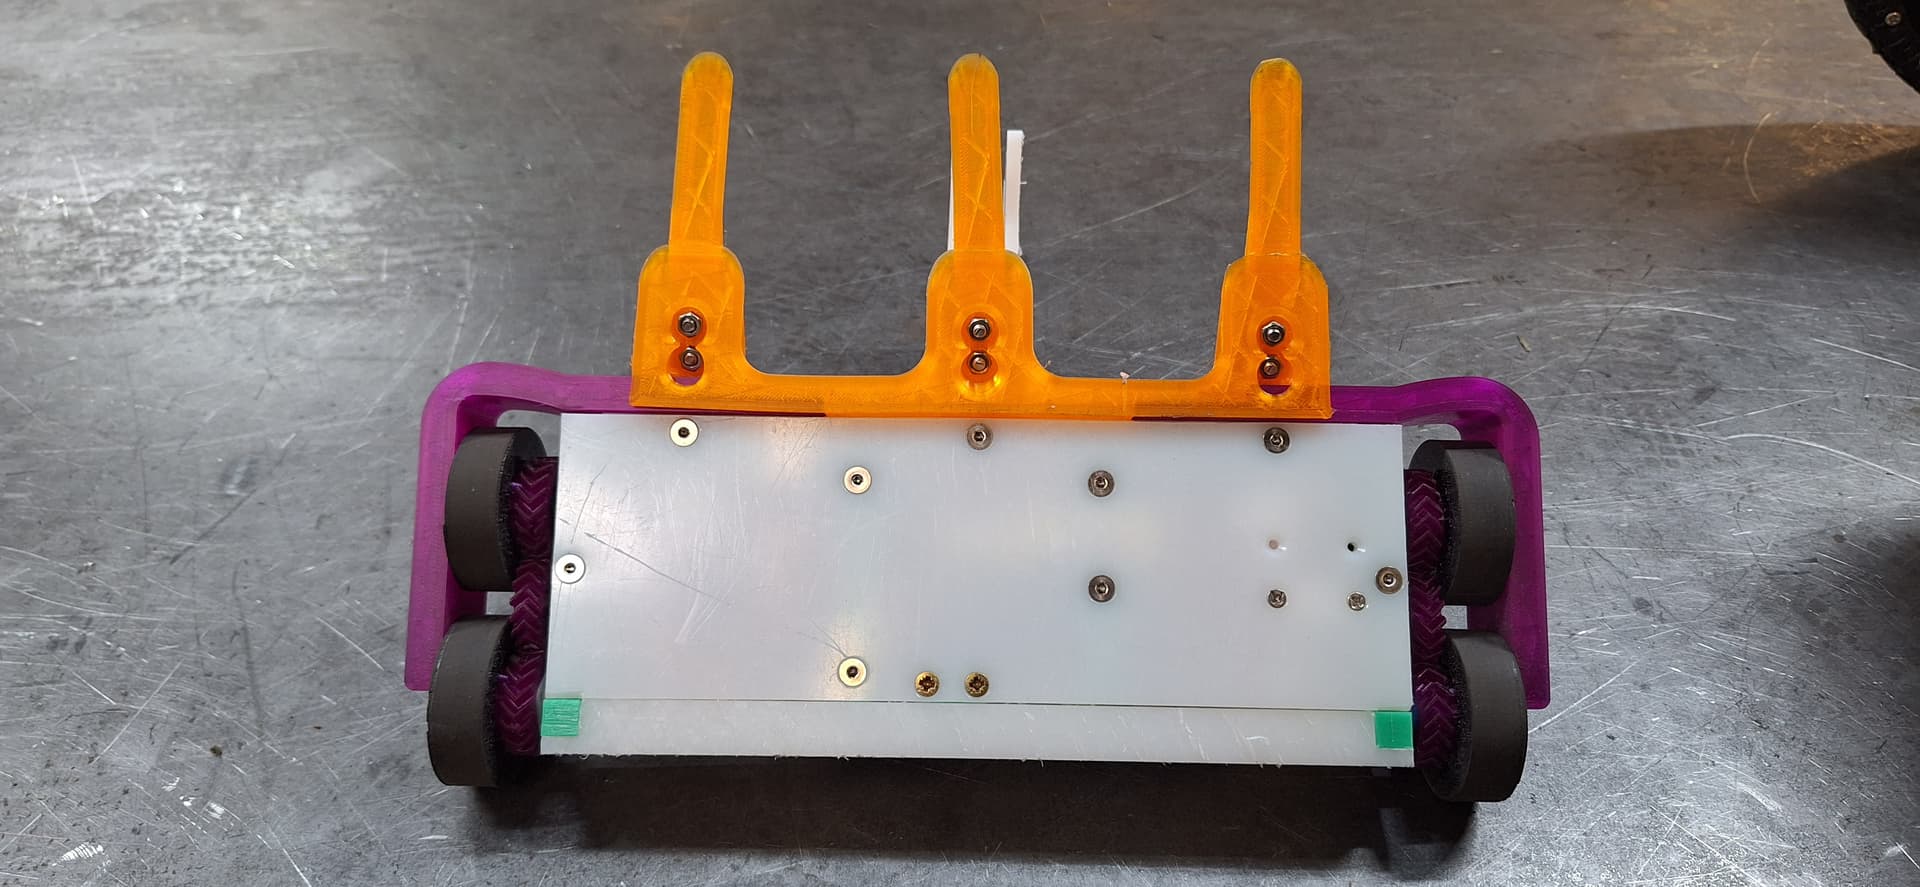
Given how important the front end would be for the robots defense and ground game, I was determined to get it right in my own unique ways. A lot of the inspiration for this front end came from Jack Tweedy’s Schism, mainly the thick TPU focus, the tri-forked options, and the lip running along the top to stop weapons from deflecting up into the valuable gubbins. Interestingly, my armour is printed in three separate components; a central piece that contains the fork mounts, and two side pieces that wrap around to protect the wheels, and the side pieces stack behind the front piece, using the same mounting holes for both pieces. This was to give me some flexibility with weight and setup choices, allow me to replace damaged components without writing off an entire setup, and allowed me to print everything within the bed constraints of my printer (also reducing the chances of print failure to boot!). The forks themselves are nearly identical to what Babróg runs, designed for reach and compliance, flexing and scraping into the ground while being unlikely to catch on arena imperfections, and spares could be easily printed and swapped on demand.
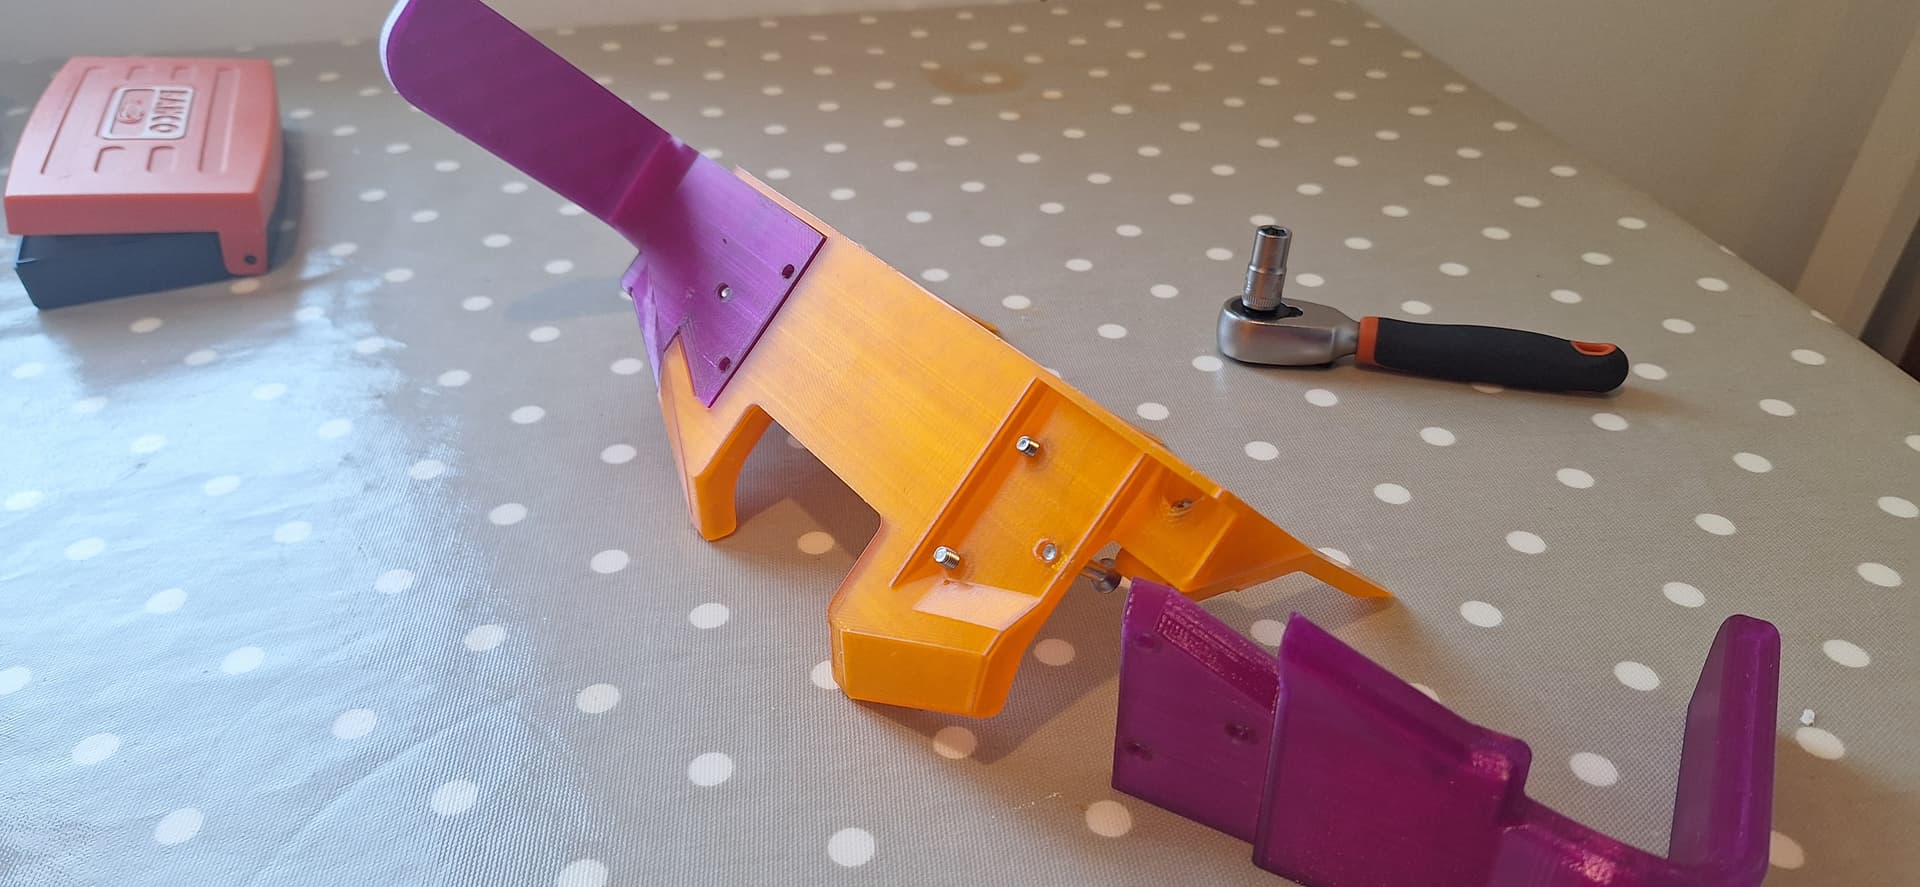
These two photos should give you a sense of how the armour bolts on. Was very happy with the final product, especially since no supports needed to be used during the printing process. Also I ran low on the Purple TPU nearing the end of the build, which is why you start to see the Orange TPU for the first time.
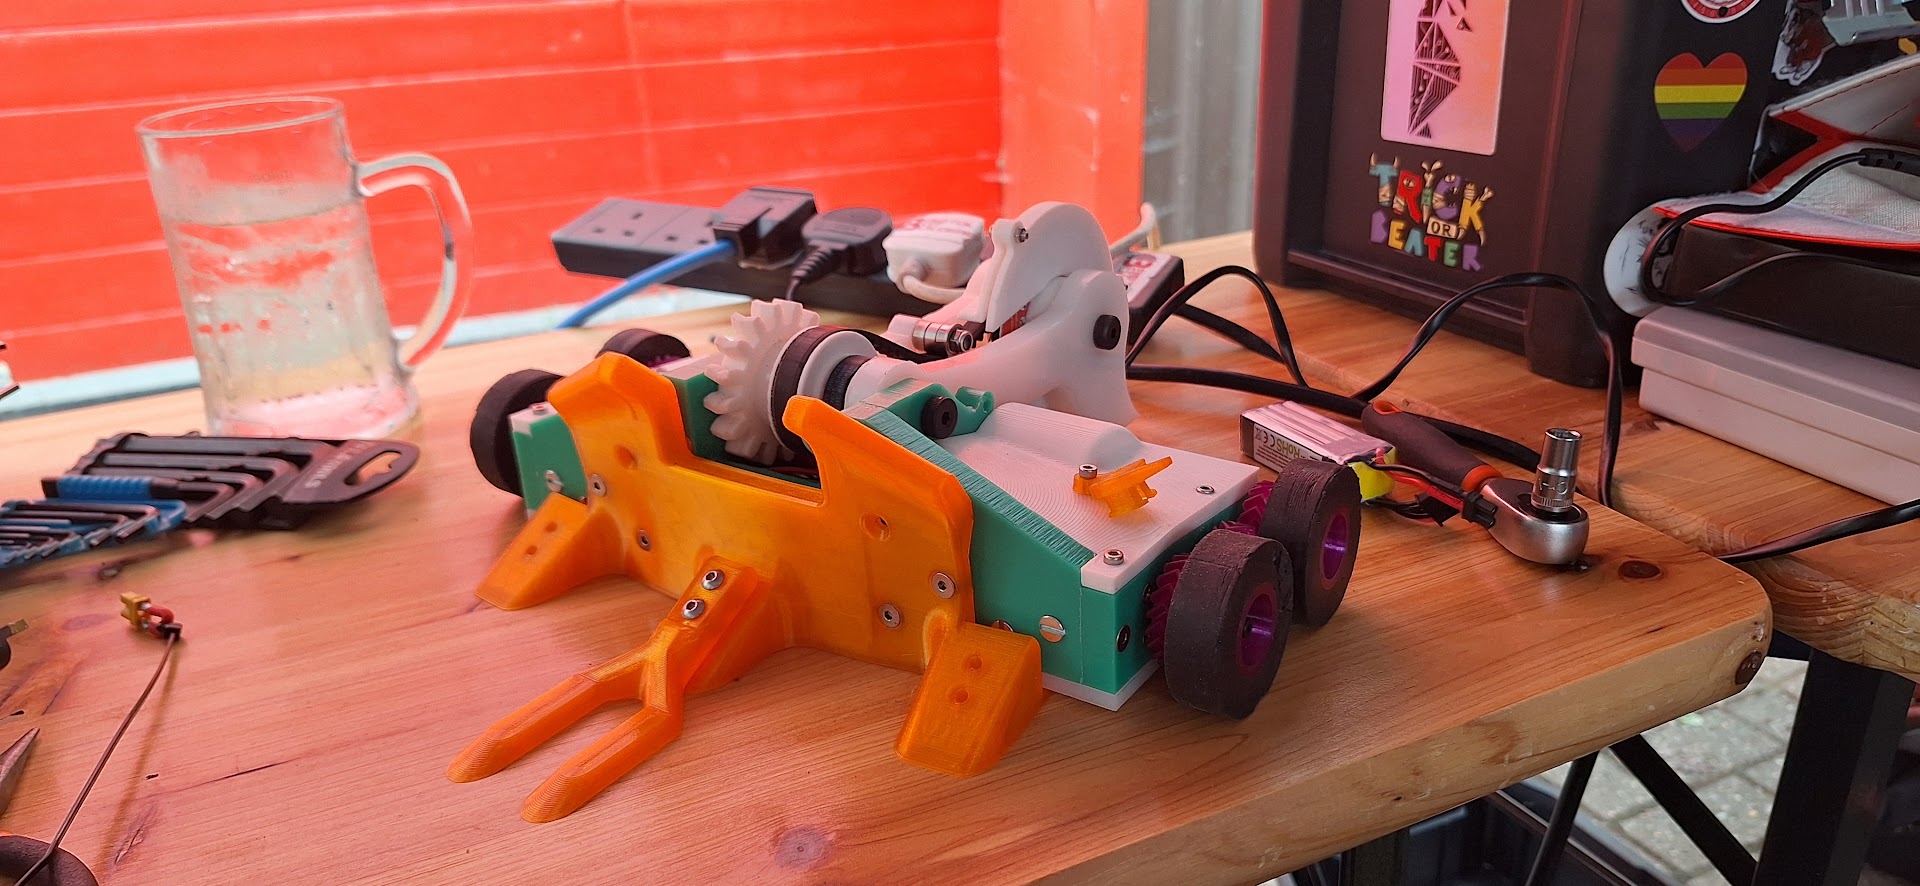
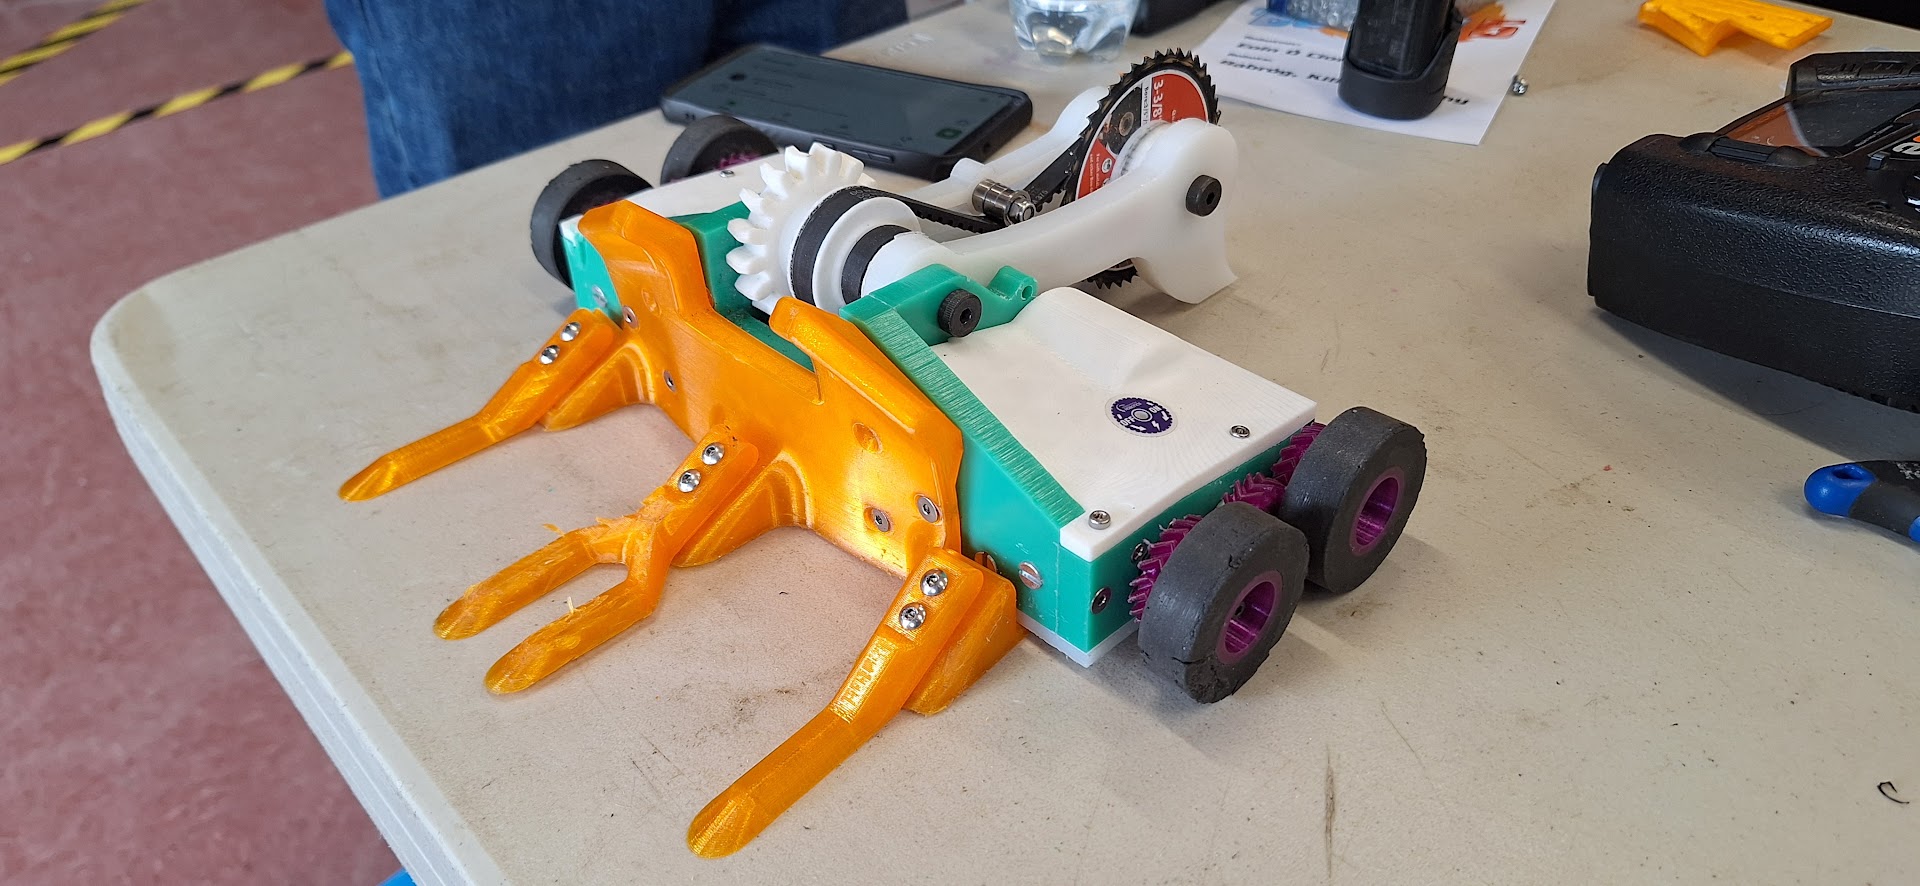
Now some of you probably raised an eyebrow when you saw Germany mentioned earlier. Well, for the first time, Team Barróg decided to go to compete in mainland Europe, running two feathers and two beetleweights at MMM 34 in Dortmund. Unfortunately, getting Cut finished for April was always going to be tight, so with some weeks to go, I decided it was best to use the event as a test for the main bots platform first, and save the saw debut for the BBB New Blood comp the month after. As a result, the robot was retrofitted into a grabber, keeping the servo in place, and replacing the saw arms with Barróg-inspired antlers. Interestingly, mid-event I would end up turning the bot into a hammersaw of sorts, but that’s a story for the MMM event report.
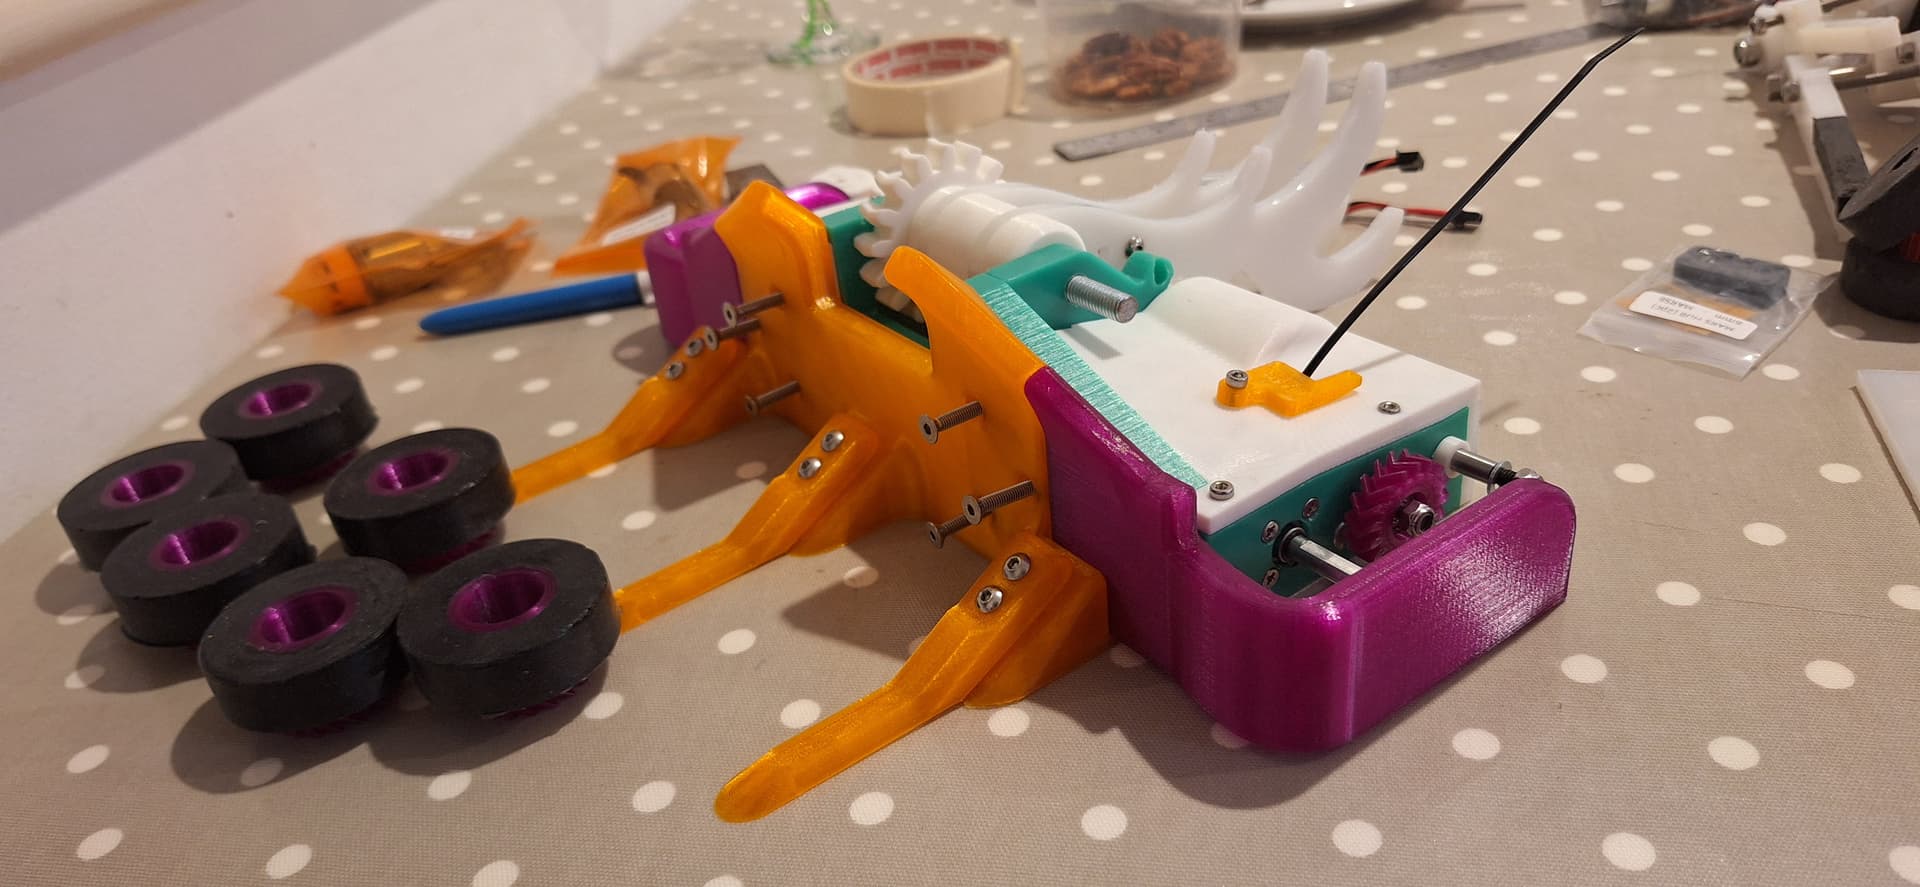
The robot shortly before flying off to Germany. Was definitely getting a little sleep deprived at this point.
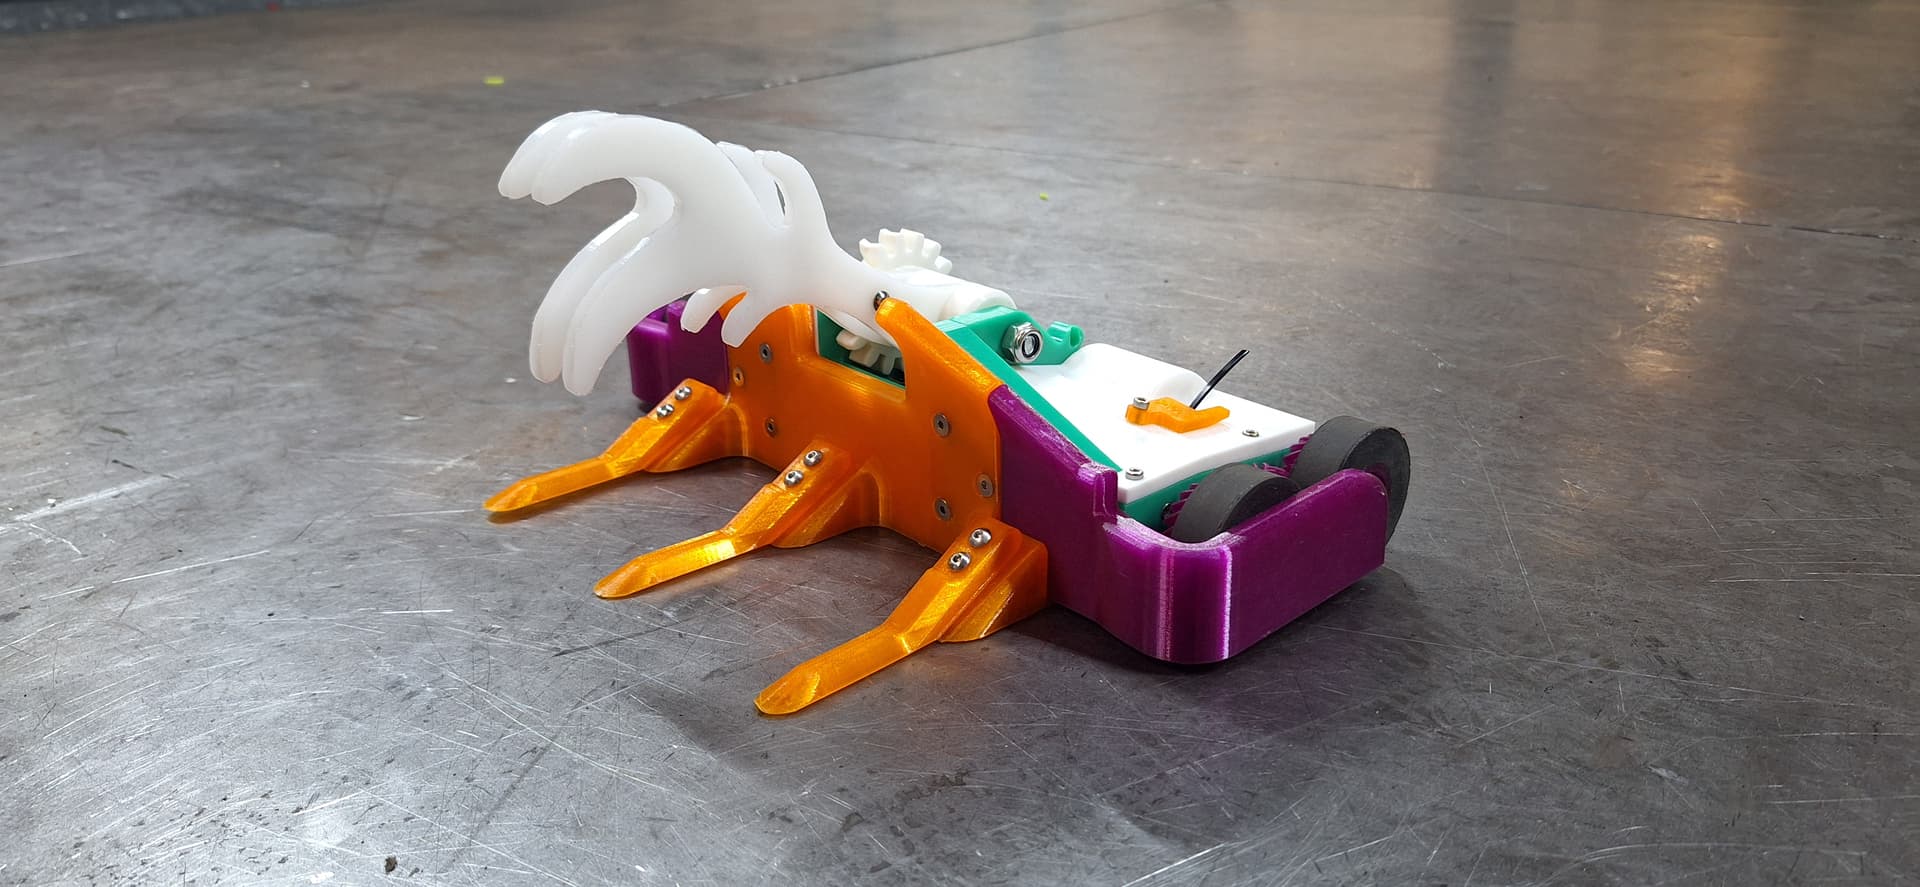
Here you see the robot that was known as Killian Murphy for its first event.
So now we’ve reached the end of the build! The saw was tested and seemed to spin the way it needed to, and once I got to Bristol the day before the new blood event, I could get some help with the electronics and get the torque and speed settings programmed just right. You can read about how the robot did in the event report for the competition to be uploaded here shortly, but this is as good a place as any to leave the build lo-wait why does it look like that?
Uuuhhhhhhhh…
So when I design robots, I rely on approximations a lot, with an idea that something should come relatively close to a weight limit when fully assembled, and that small tweaks can be added or subtracted when necessary. When I ran the robot as Killian Murphy at MMM, I had a lot of weight to spare, and by using my scales, I figured the robot’s final weight with the saw setup should be close to the 1.5kg limit. Unfortunately, I would only find out later that my set of scales had started to act up somewhat, where the output would change the longer something was left on them. And so there I was, in Joe’s apartment the day before the event, provisionally weighing the robot in its final setup one last time, only to discover that the robot I assumed would just be riding on the weight limit was, in fact, 150g over, a full 10% heavier than what was required. Naturally, this came as somewhat of a shock.
Somehow, after a brief period of depressed resignation, I was convinced to find some ways to reduce the weight limit as much as possible. Anything that was supported by two bolts and nuts was now only supported by one nut and bolt. The side armour was completely tossed, as well as all but one fork, without even nuts to hold the securing machine screws, themselves only really held in by friction and dreams. Key to this all was the beautifully machined backplate, a part I assumed would be a core part of the construction, needing to be tossed for a quick, hollowed out TPU replacement, printed that very same night. Somehow, all of these changes brought the machine right back under the weight limit, considerably more fragile than before, but thankfully with no loss to its handling or its cutting ability.
It’s on this point that I will leave this build log for now. There are certainly a lot of lessons I’ve learnt for future saw bots going forward, and hopefully it won’t be long before I document this robot’s adventures at MMM, BBB, and Edinburgh to you all. This bot is already effectively retired, and there are many changes that would need to happen for a V2, from chassis design to motor choice, but I’ll leave those changes for after I’ve shown what the robot could and couldn’t do competing across a wide variety of weapon types this year. I hope you’ve enjoyed reading the log up until now, and take care!
Cut d’Ivoire in its most recent state, ready to fight in Edinburgh!