Déjà Two! I've just been logging this build before!

(Okay, not really. This is the first formal build log I’ve done for DJ2, but I couldn’t resist the reference!)

I’ve had some R&D work going on in the background for DJ2 since around late August in an attempt to improve the weapon system on it. Here’s a summary of what I’ve been getting up to so far.

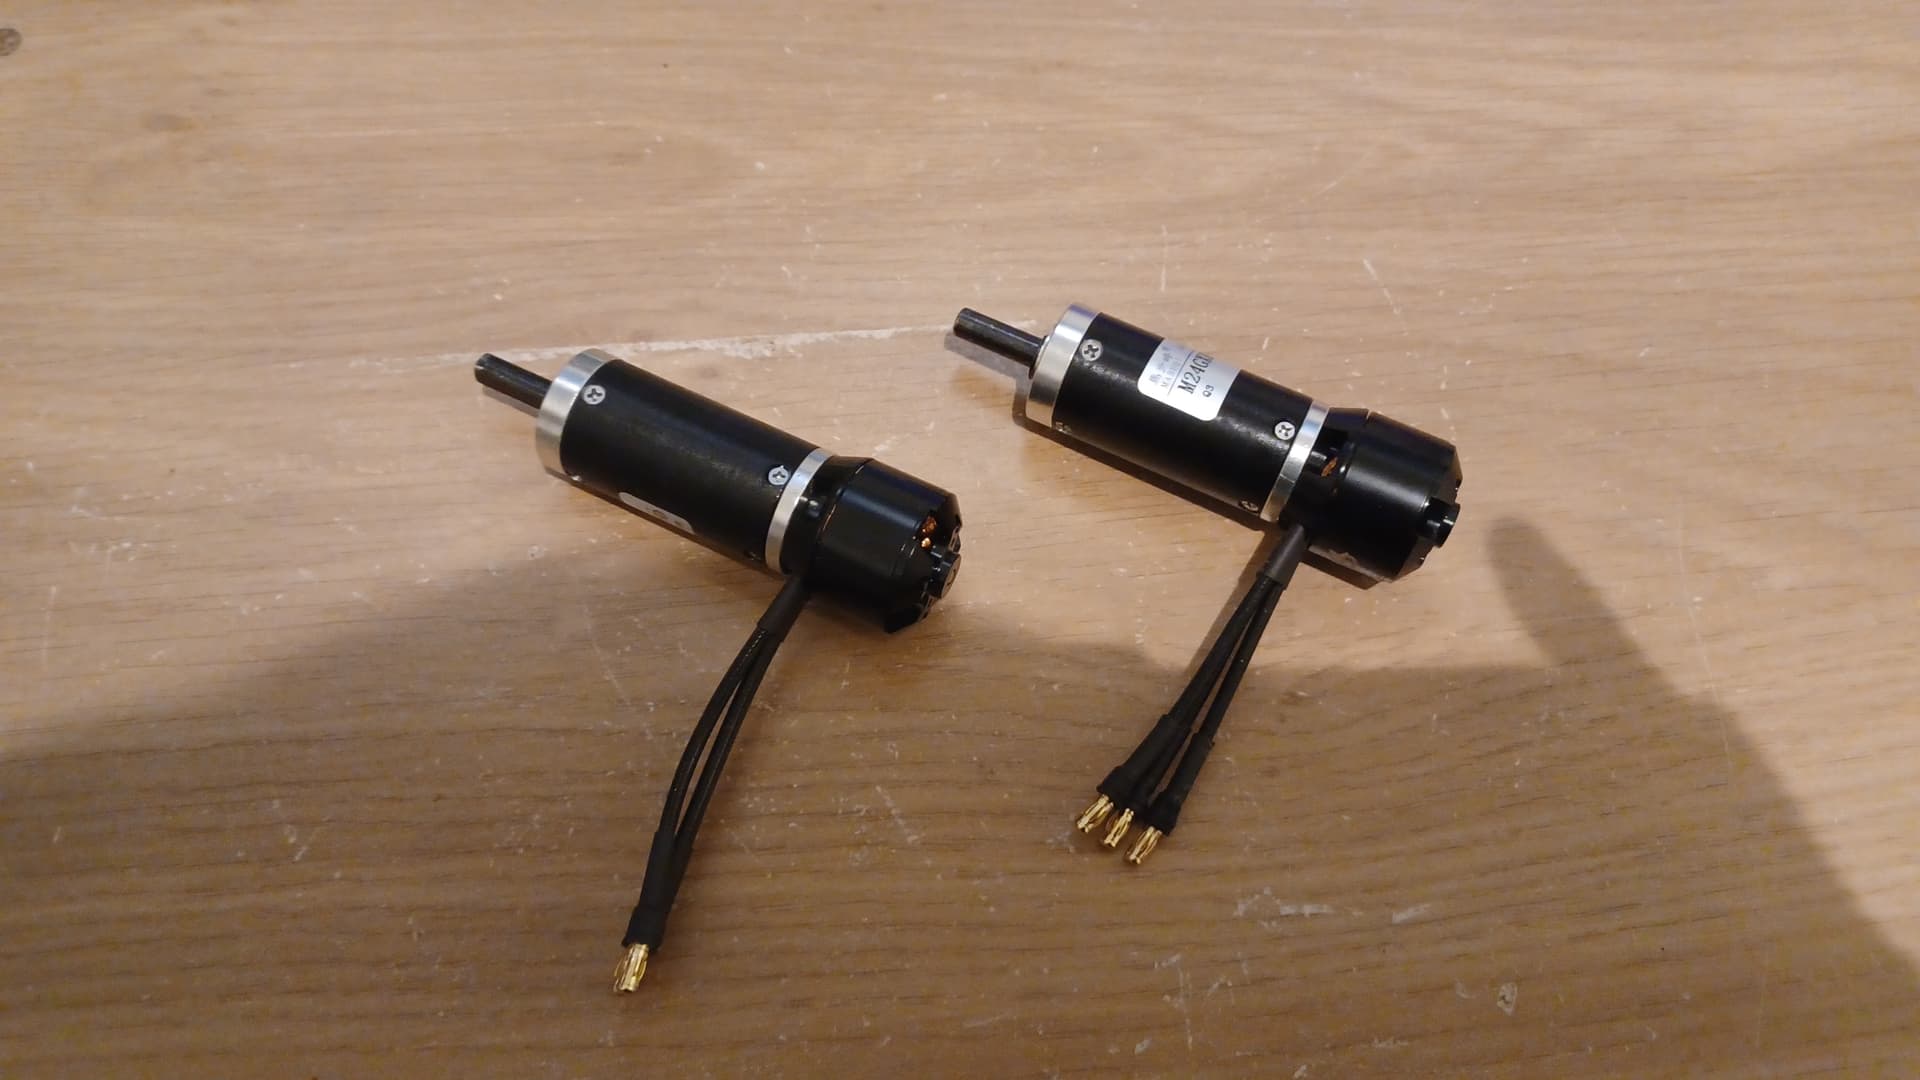
Quick recap - currently, DJ2 runs a Econ 34RPM 25mm gear motor, which boasts an insane gear reduction for not too much weight (around 100g IIRC). The problem with this gearbox is it is a spur gear reduction, which means the gearbox is relatively fragile. A suffficiently powerful backdriving force (i.e. a vert impact on the arms) can and has sheared gear teeth - this cost me in the fight against Han the Hammer at Rapture, and has resurfaced at most of the events I’ve taken DJ2 to since then. Ideally, I’d use a pololu 37mm gearmotor or a planetary gearbox on a brushless motor, but these weigh a fair bit more, which would make getting in weight difficult as I need 4 drive motors for the mecanum setup.

This led me to discovering cyclodial drive, which is a way of getting high reduction in a compact space, and a lot of videos online use 3D printed designs mounted to NEMA stepper motors for robotics projects. I thought I’d try to design a cycloidal gearbox to mount to an Overlander 2836/08 1120kv motor (which I’d already picked up a couple for PMXL V2), as this could in theory solve the weight and space issues that other commonplace solutions would have.

Cycloidal_drive

Cycloidal gear animation from the wikipedia article. Green is the driven input, purple is the output.

A cycloid is the shape you get when you trace a point on a circle as it rolls along a surface. A cycloidal disk is the resulting shape when you do this for a circle rolling along the circumference of a larger circle. The gearbox contains a number of pins that is 1 greater than the number of lobes on the cycloidal disk, and the cycloidal disk is driven with an eccentric cam. This causes a slow rotation of the cycloidal disk, with a reduction equal to the number of lobes on the disk. If I design a gearbox with two 14:1 stages, I can achieve a 144:1 reduction in a small package, which would bring the selected brushless motor down to 131RPM, much faster than the current setup for snappier self-righting but still (hopefully) in the controllable range. With a further 25:14 spur gear stage from the gearbox output to the weapon shafts, this should hopefully result in a more powerful and maybe more robust weapon system.

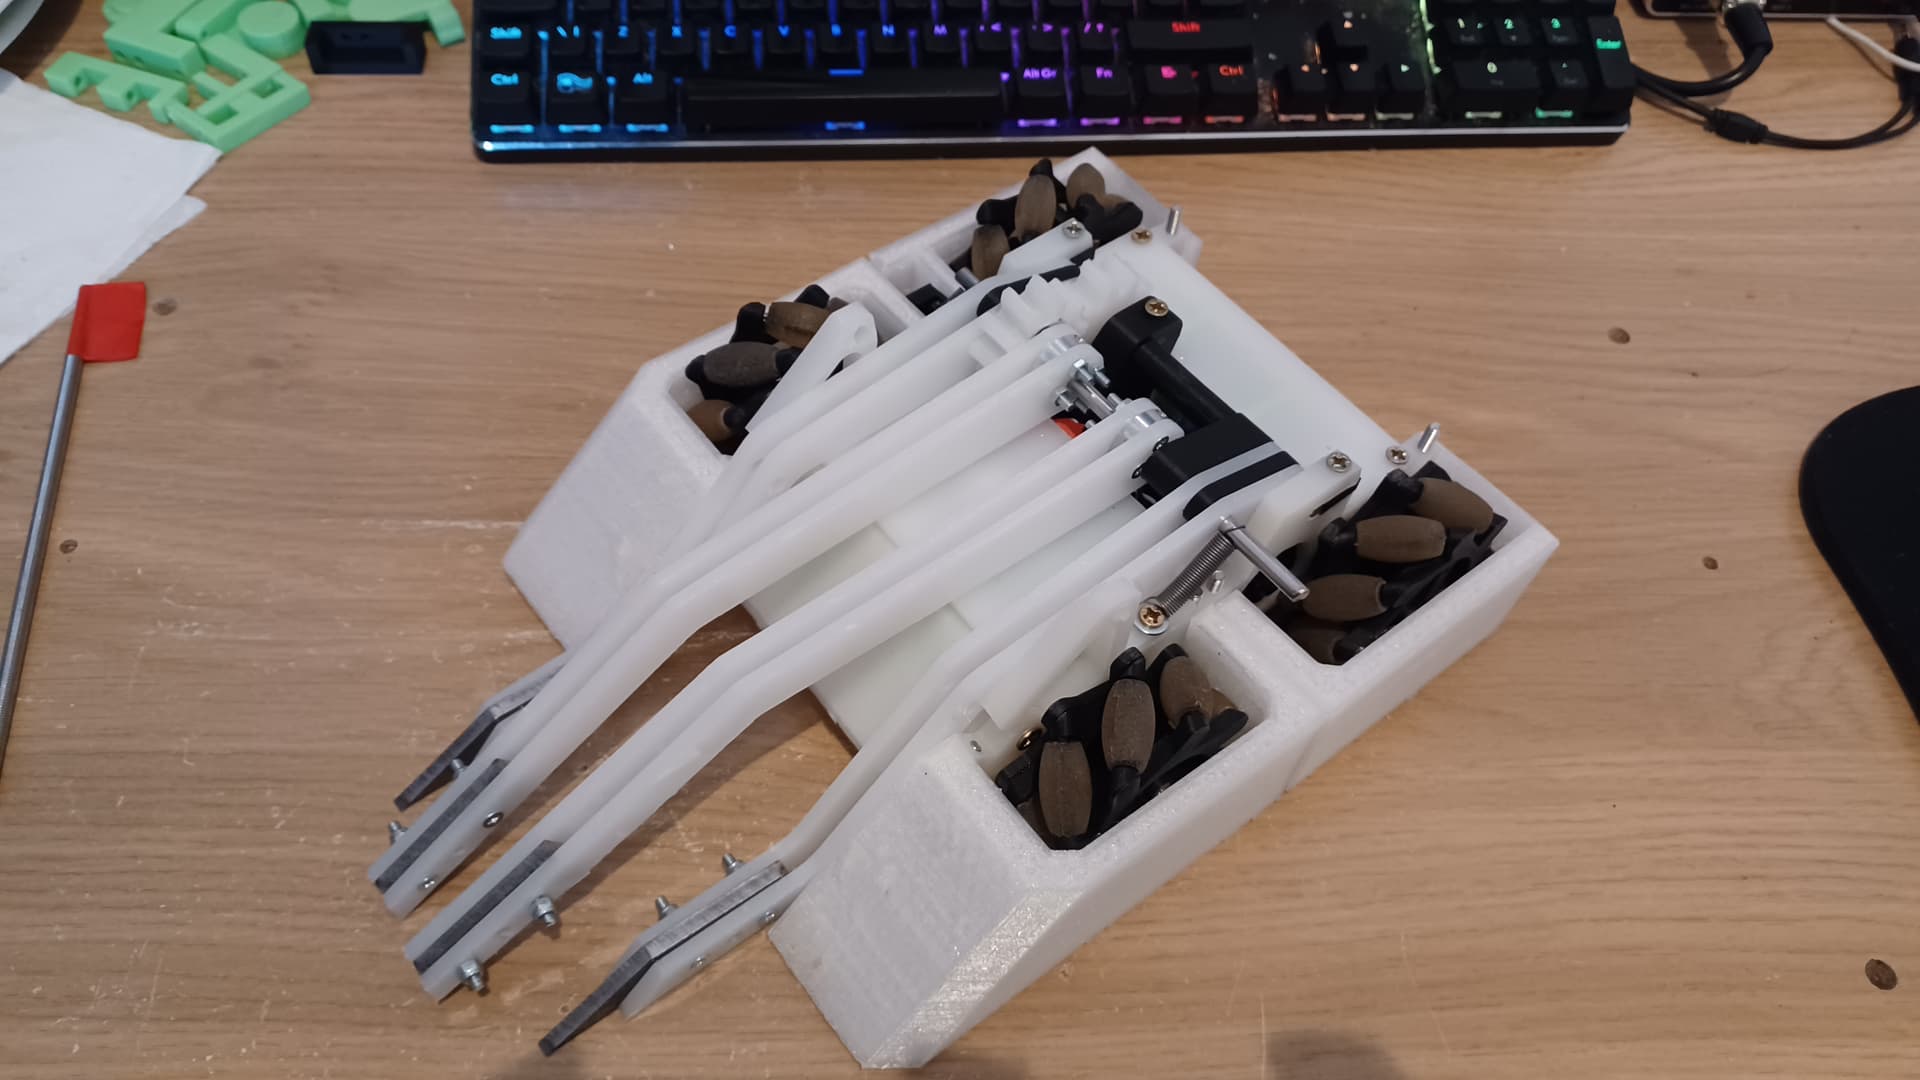
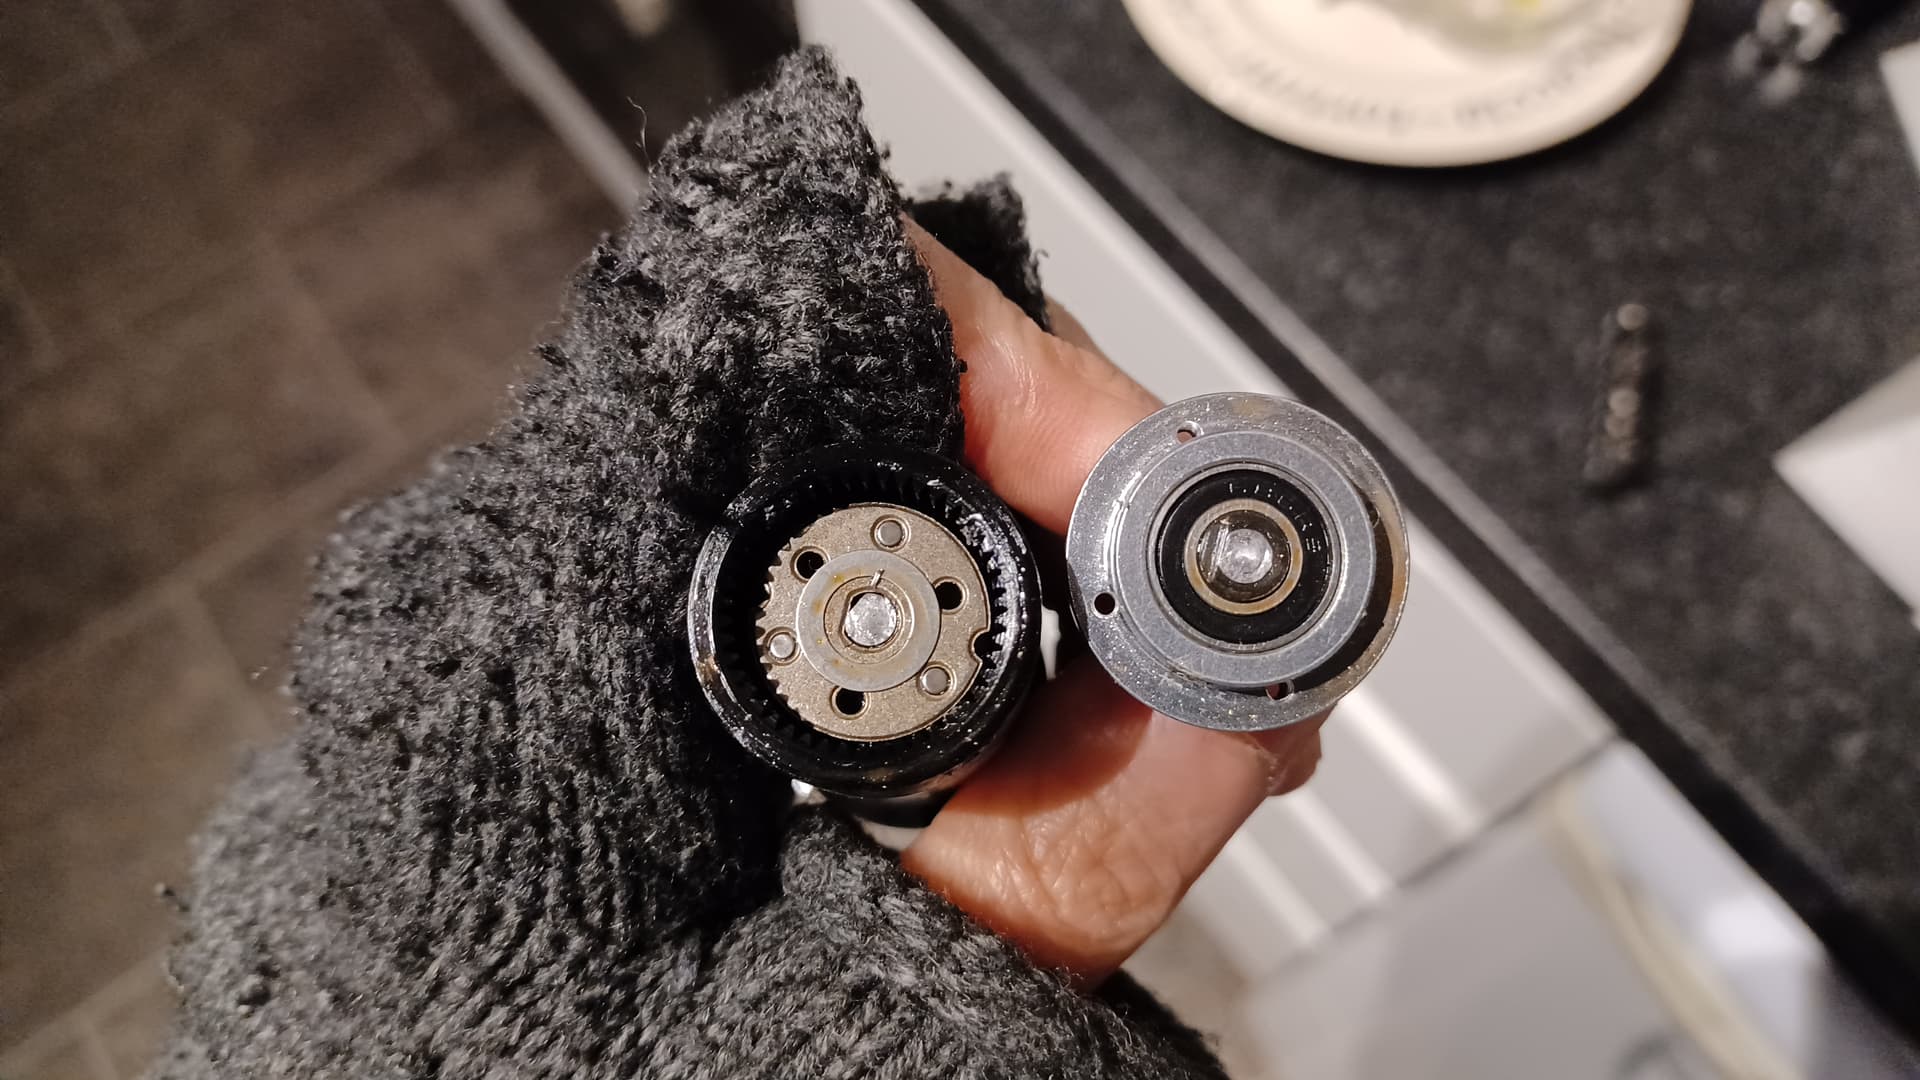
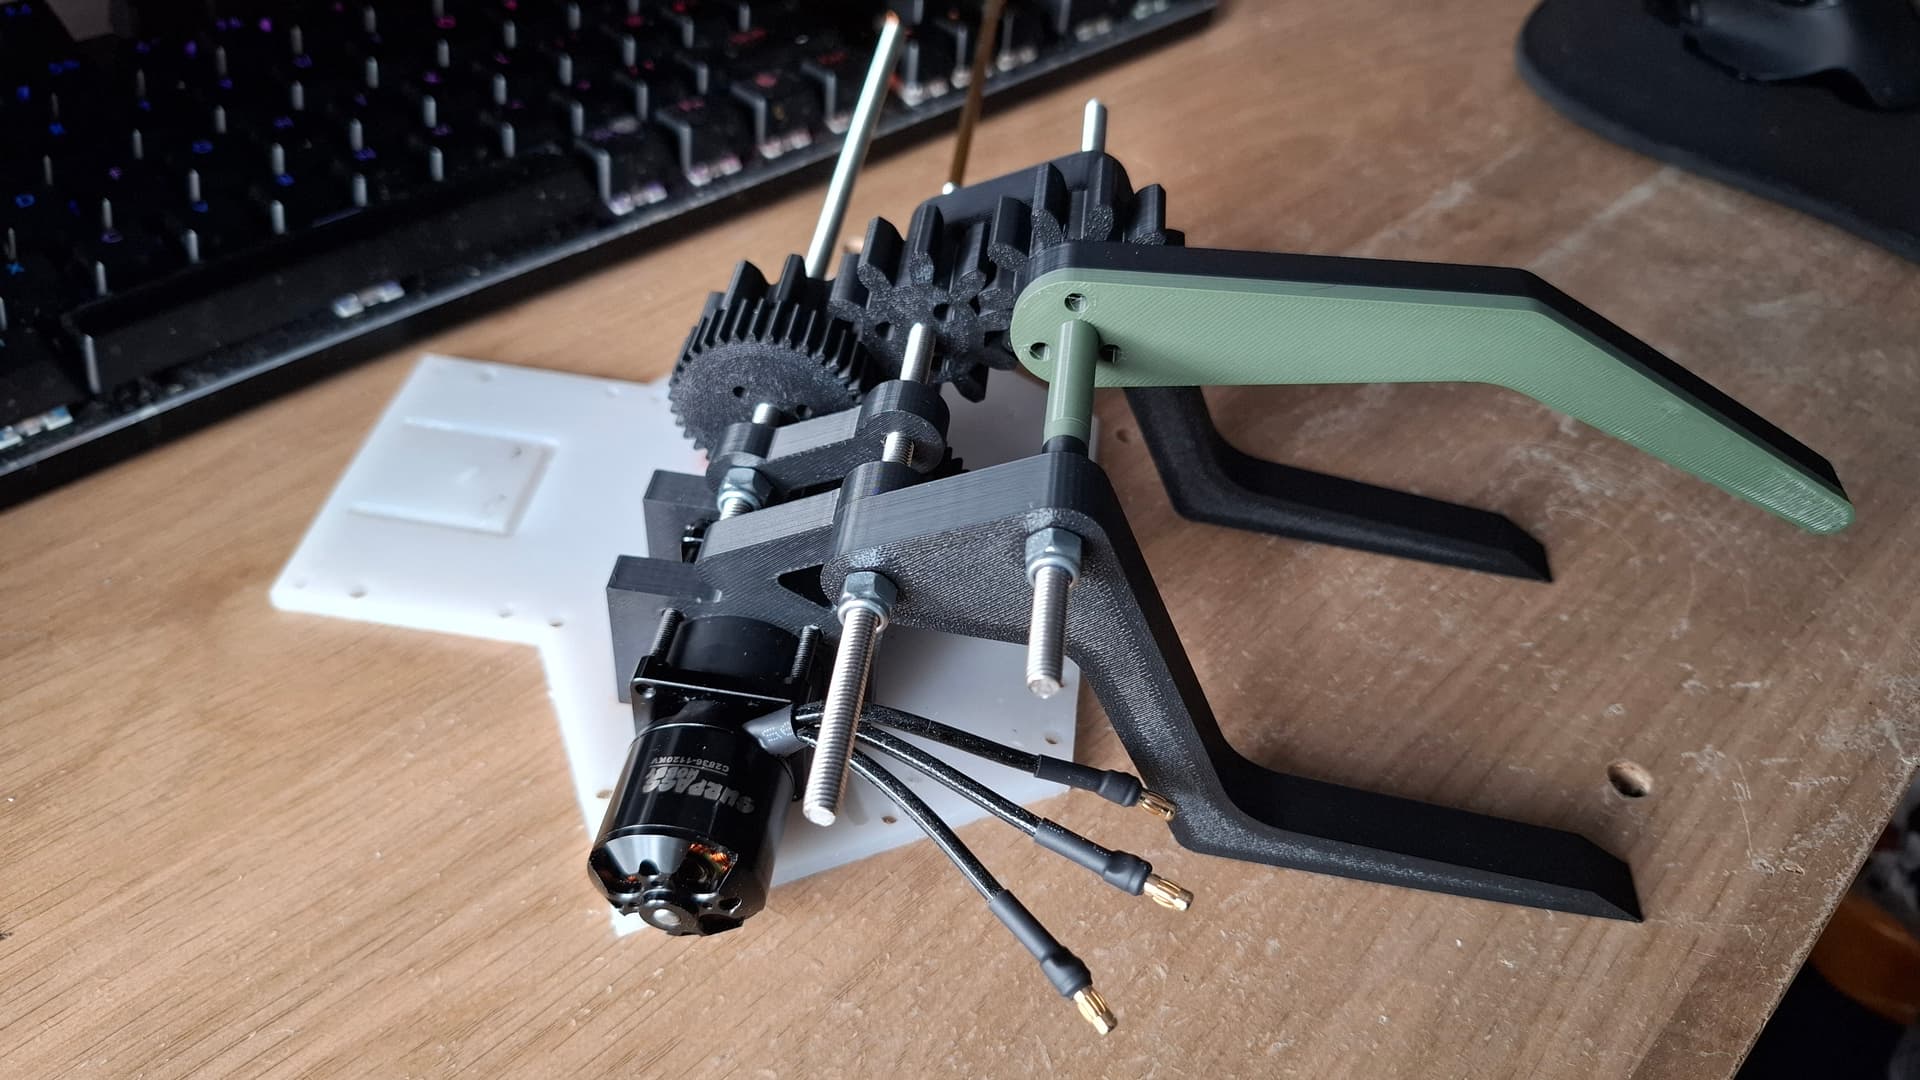
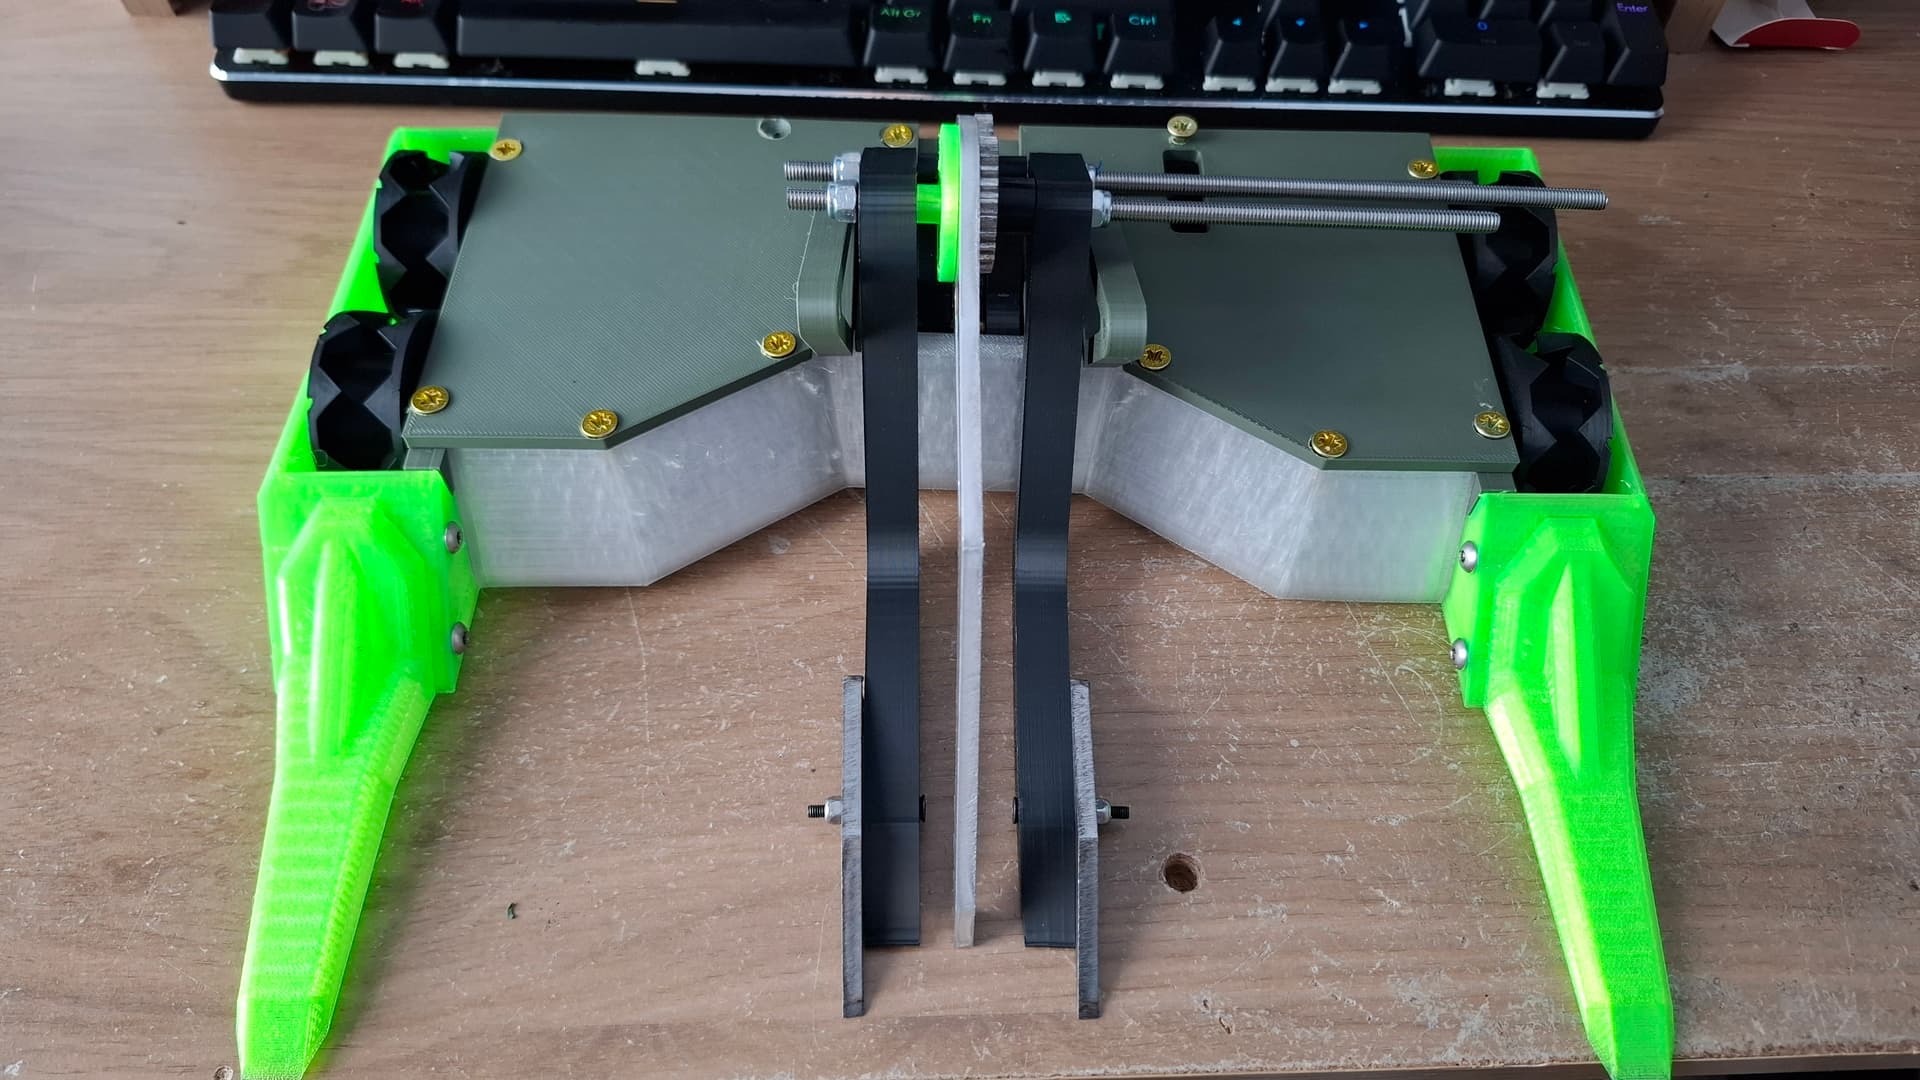
Following this tutorial, I set about making a prototype gearbox, for now mounted to a N20 motor I had lying around. This version uses two disks offset at 180 degrees to minimise vibrations that will occur from the eccentric mass, which is a common thing to do in cycloidal gearboxes. The output shaft is just a prop adapter for a brushless motor I had lying around.

This works great as a proof of concept, but has big issues with transferring torque, as the stator pins flex outwards. I also noticed the output rotation wasn’t smooth.

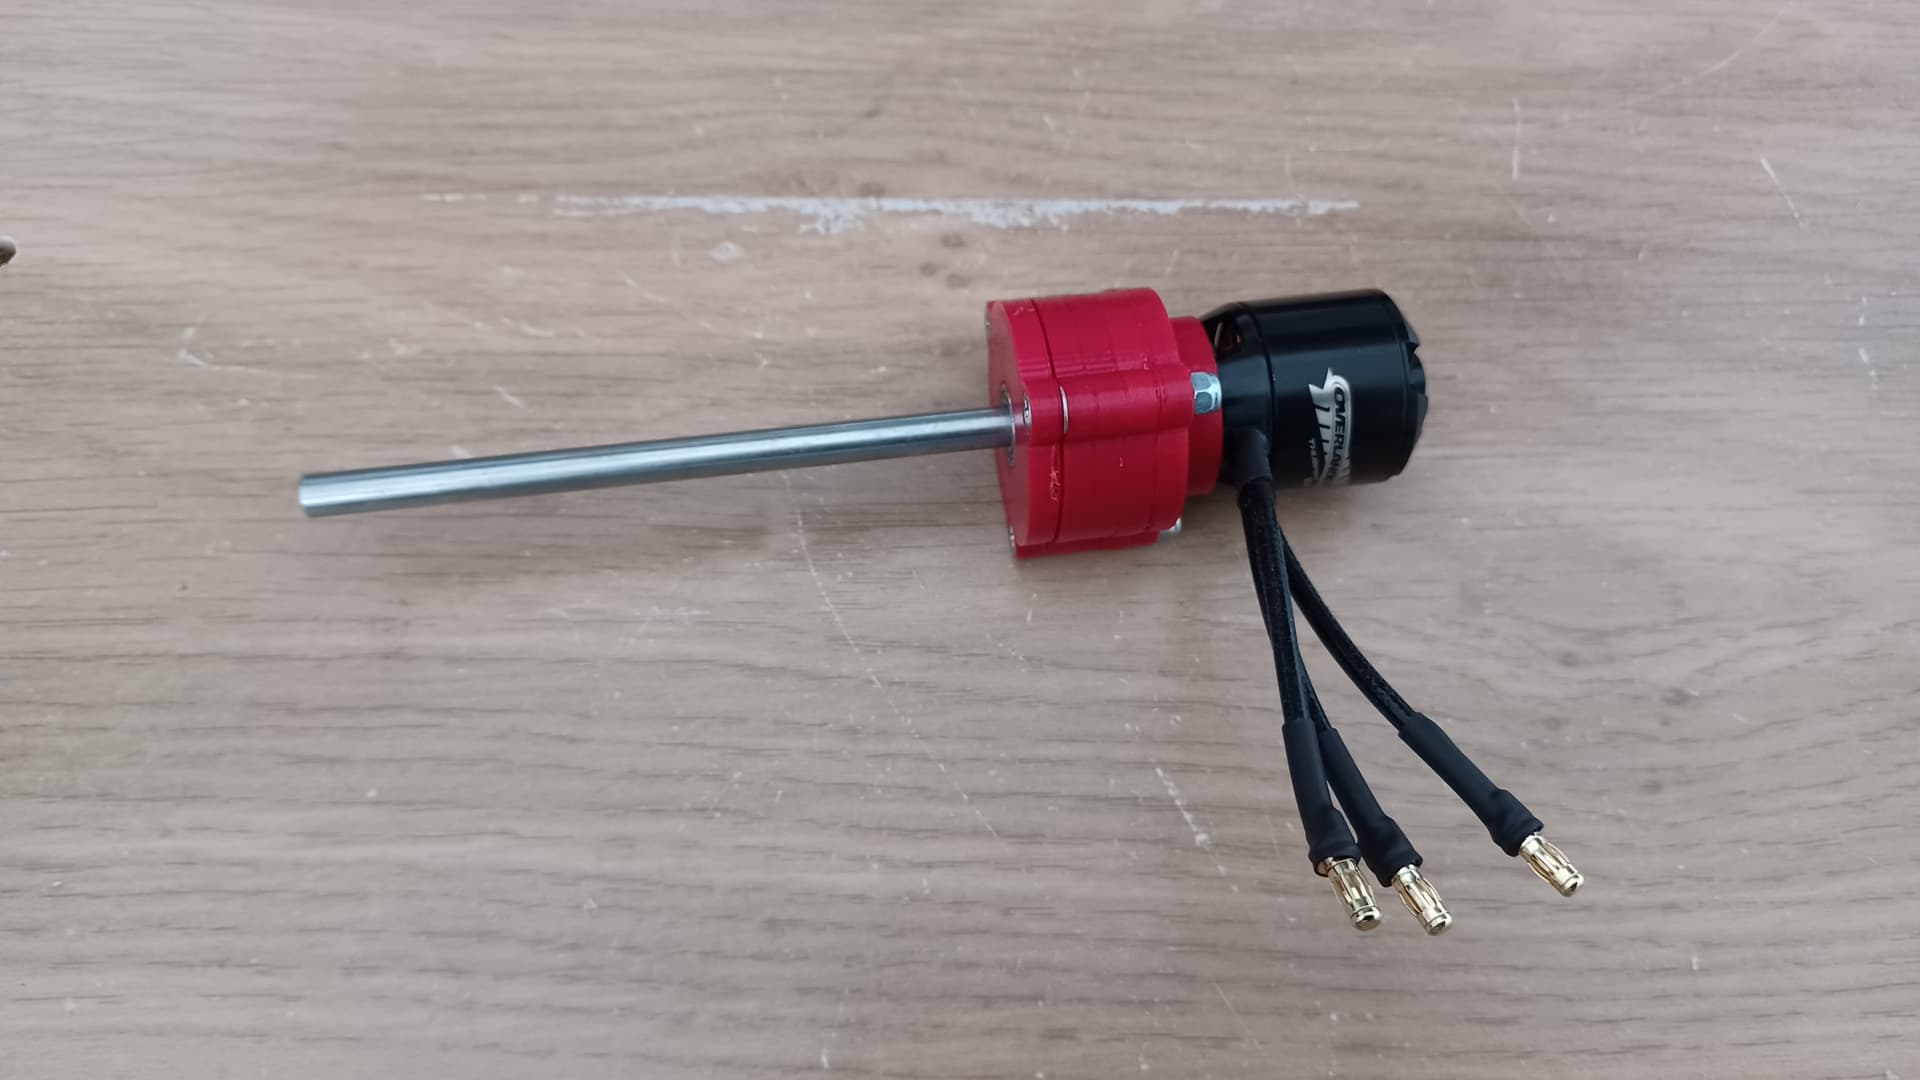
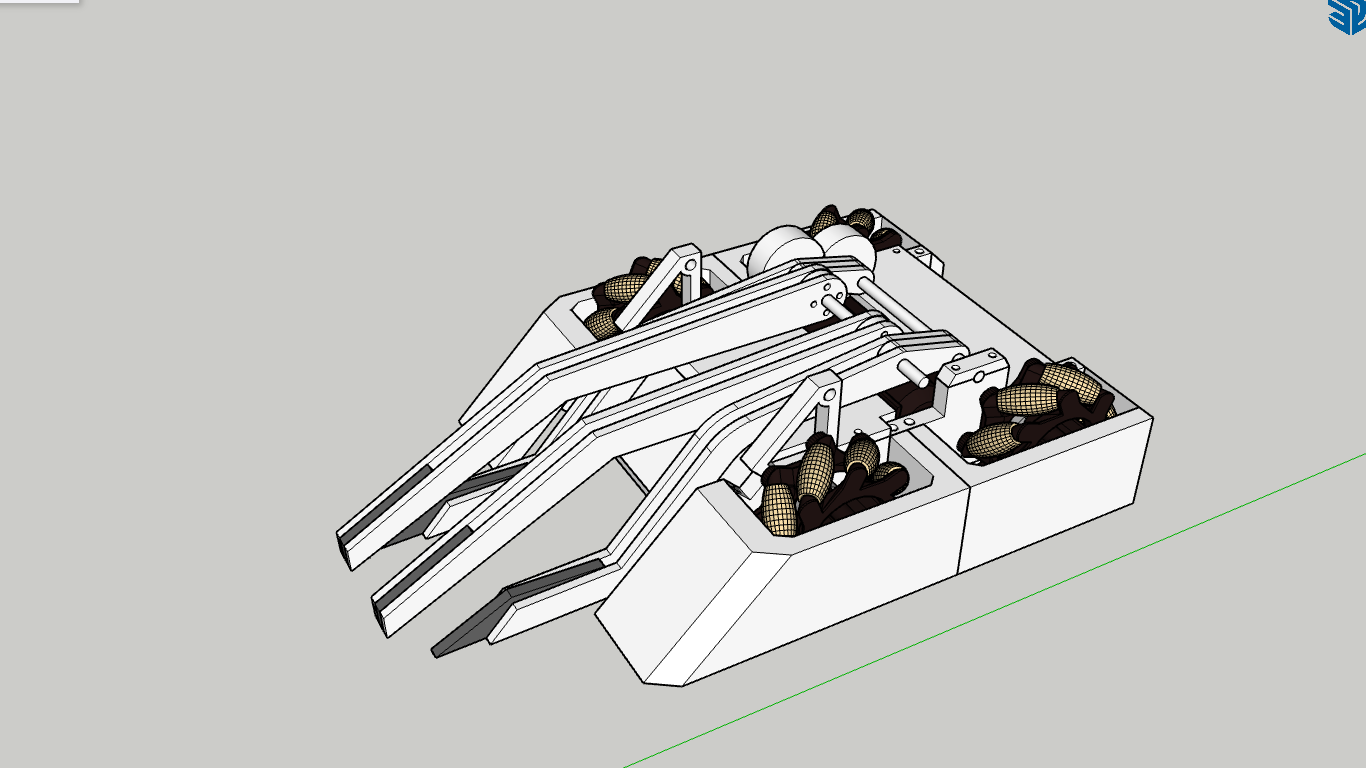
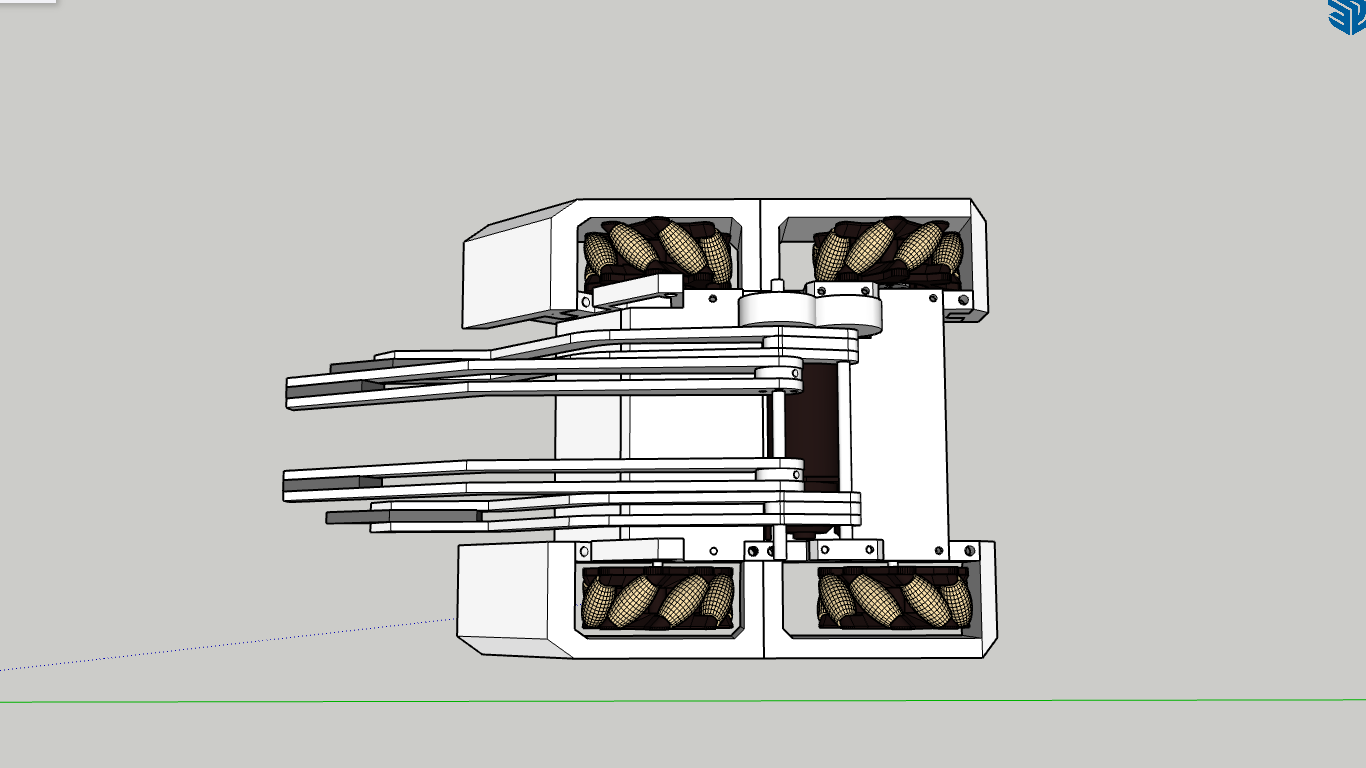
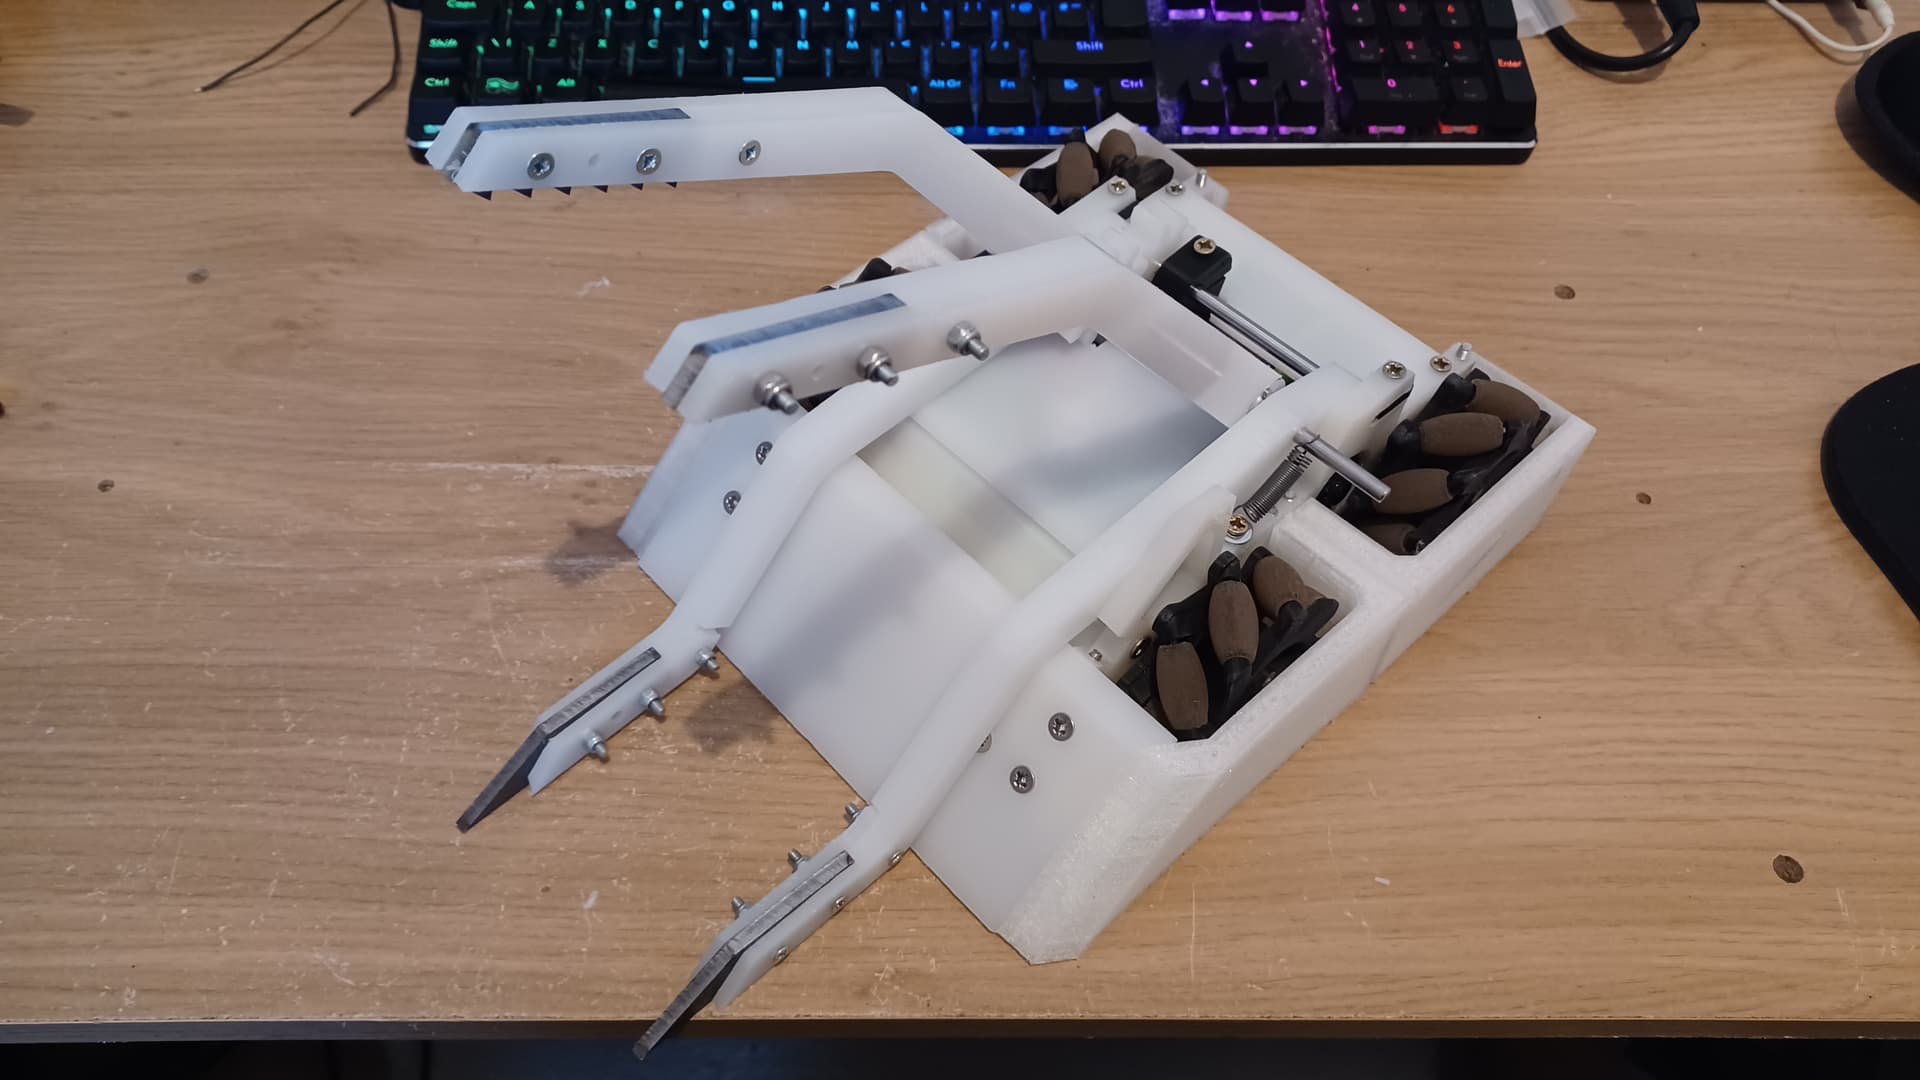
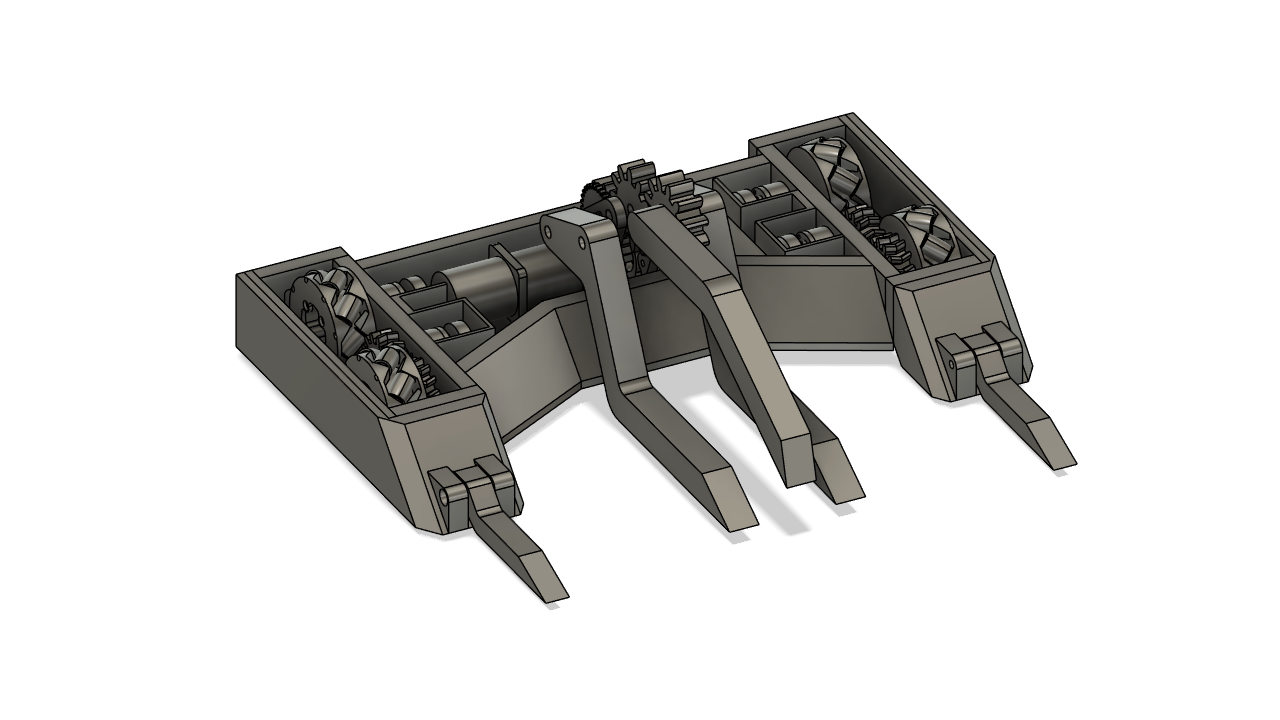
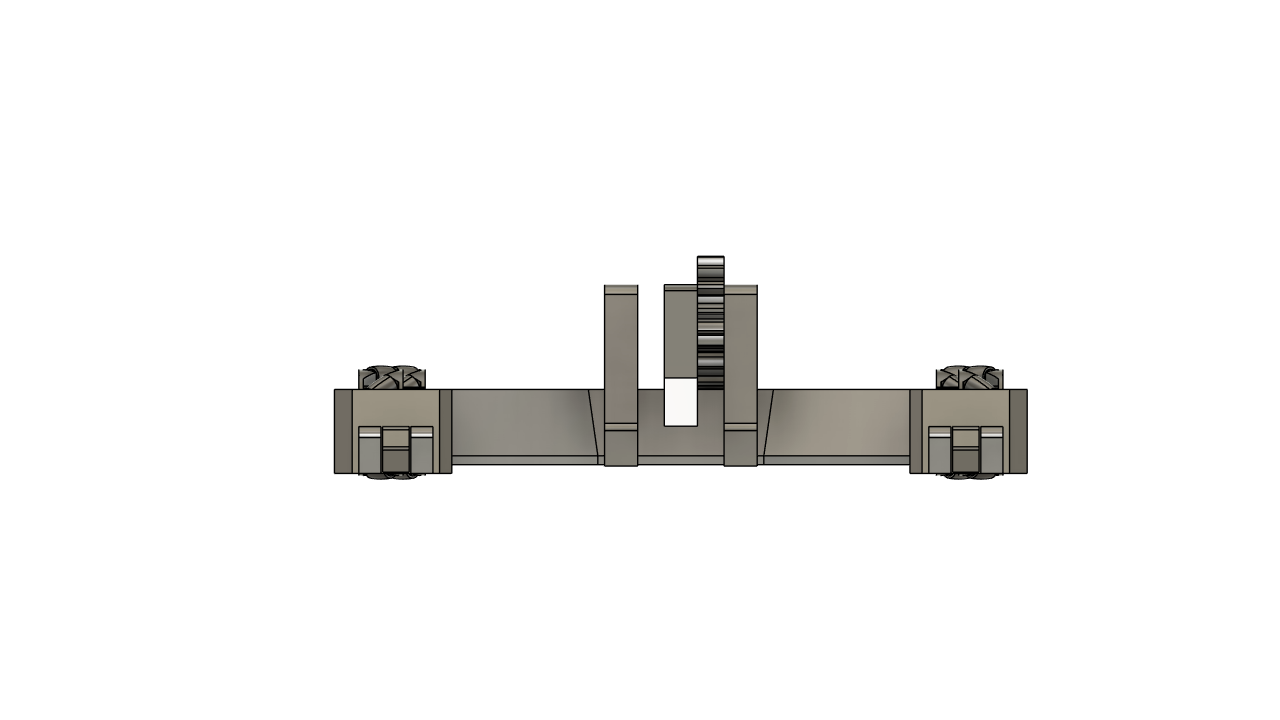
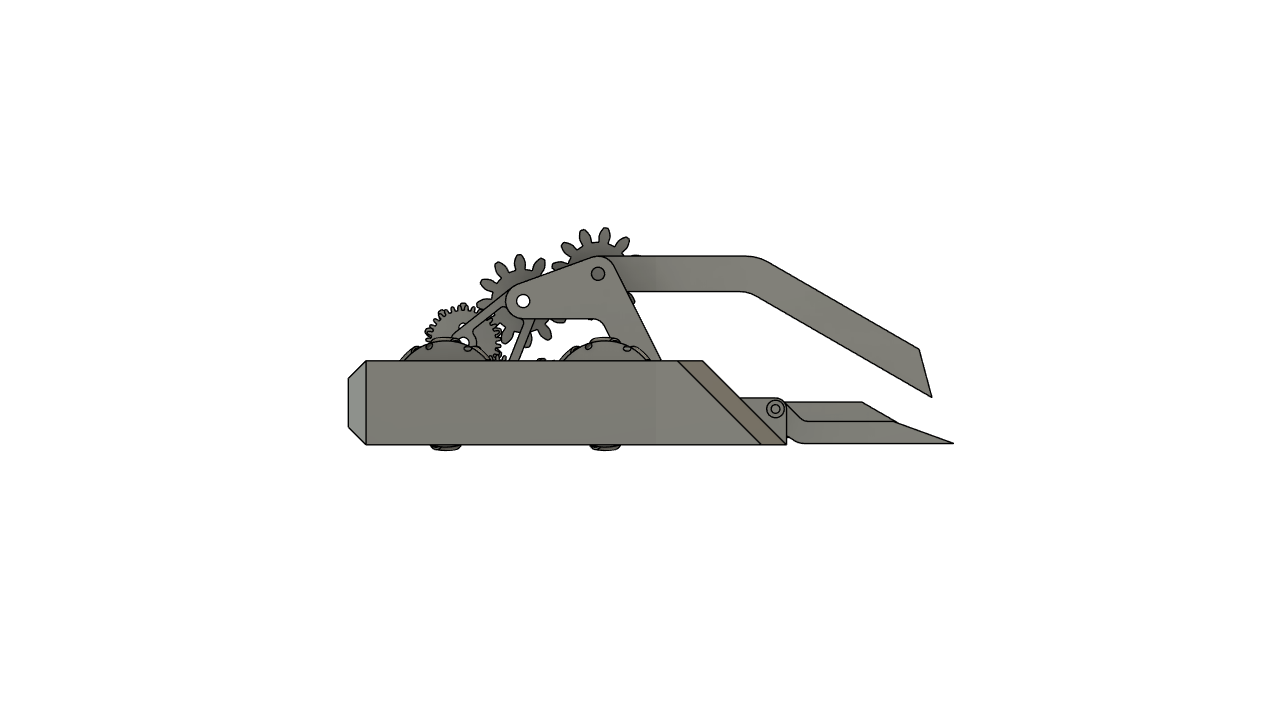
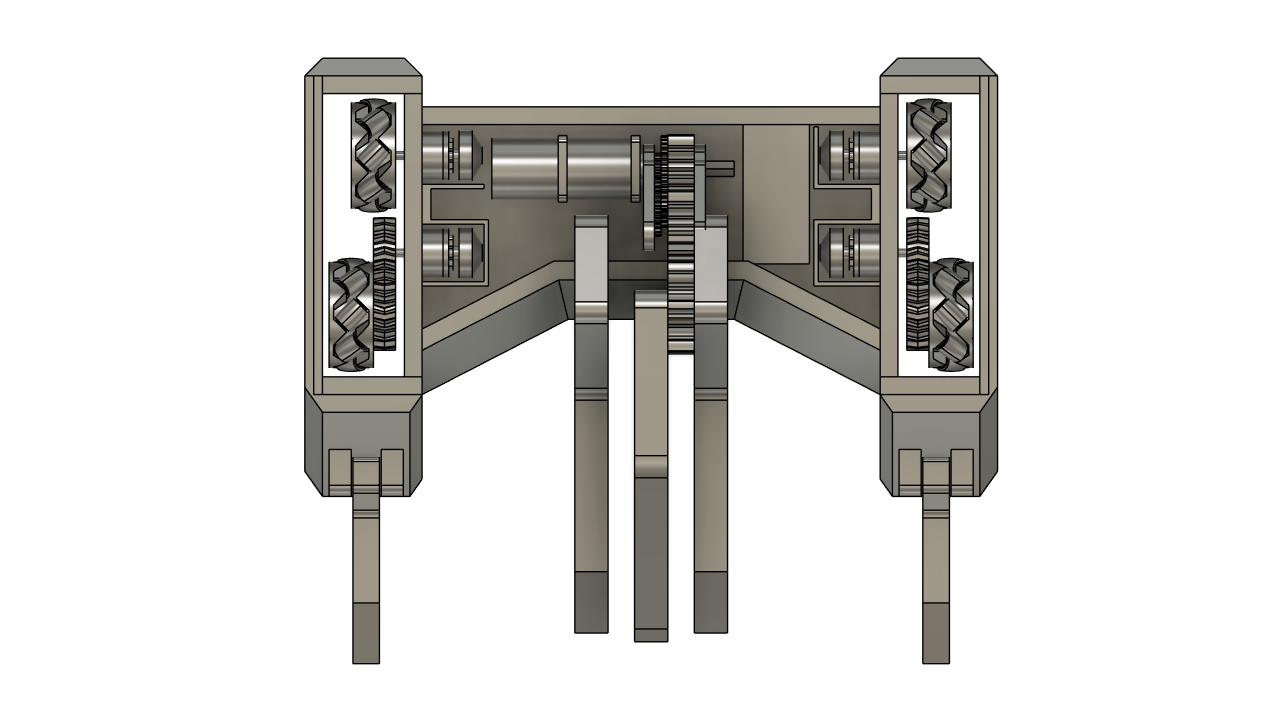
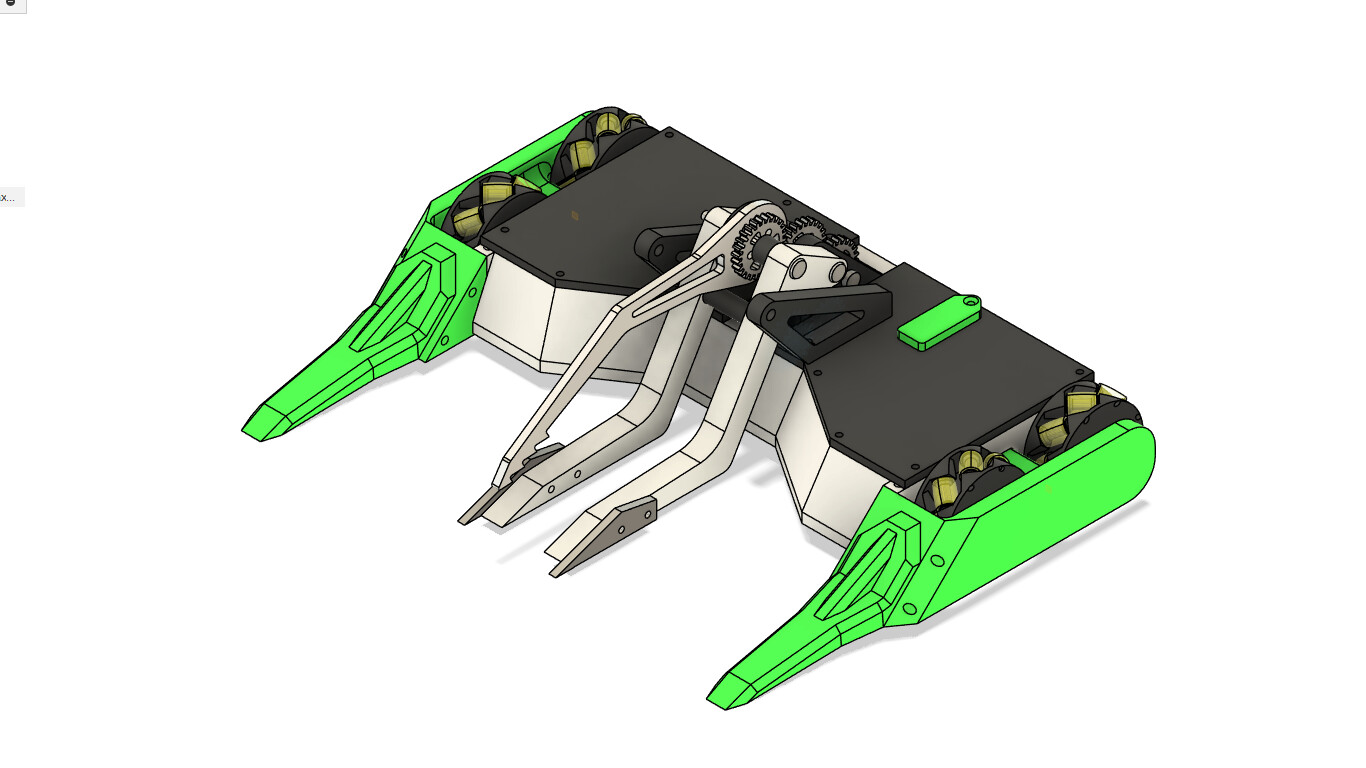
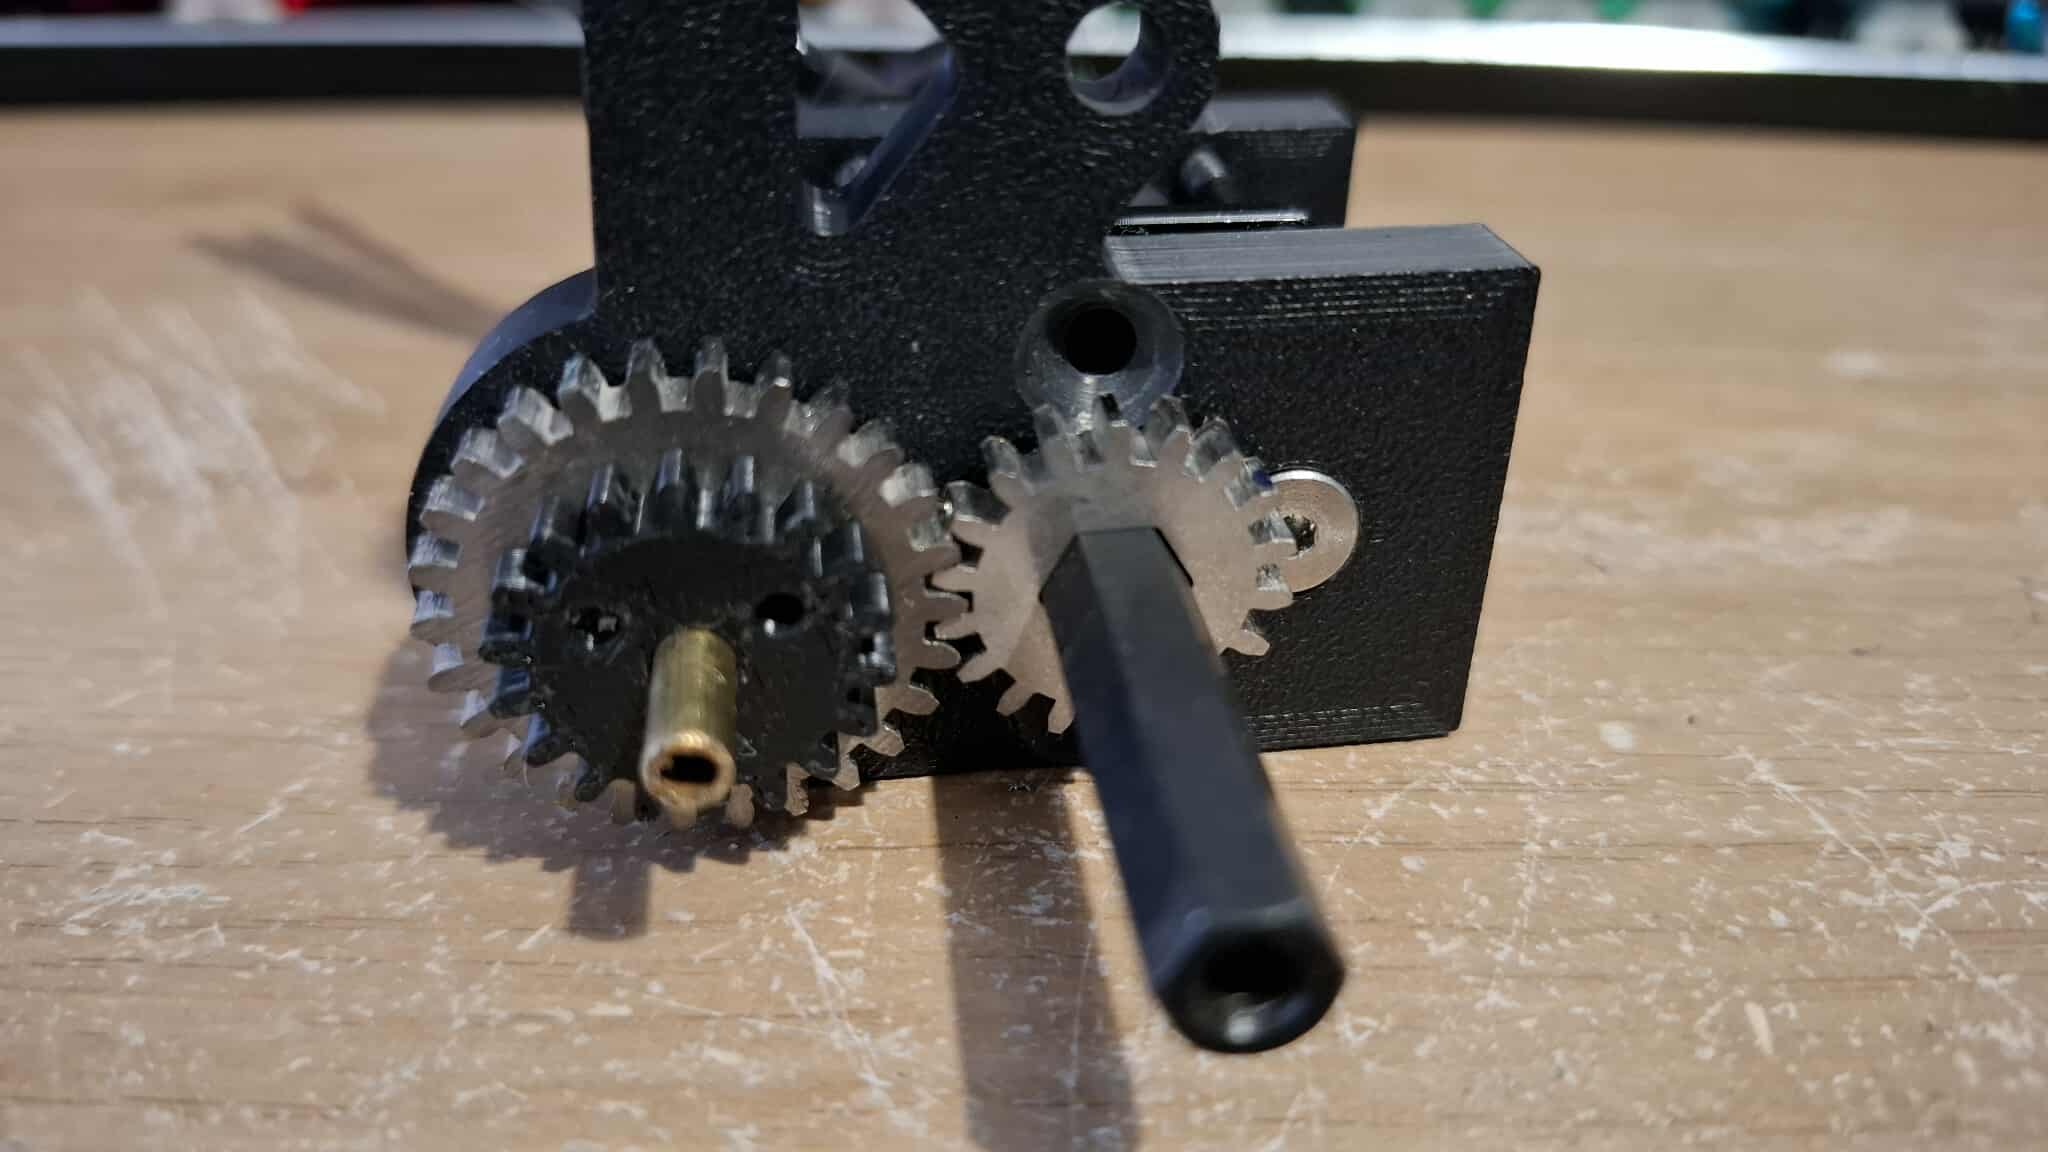
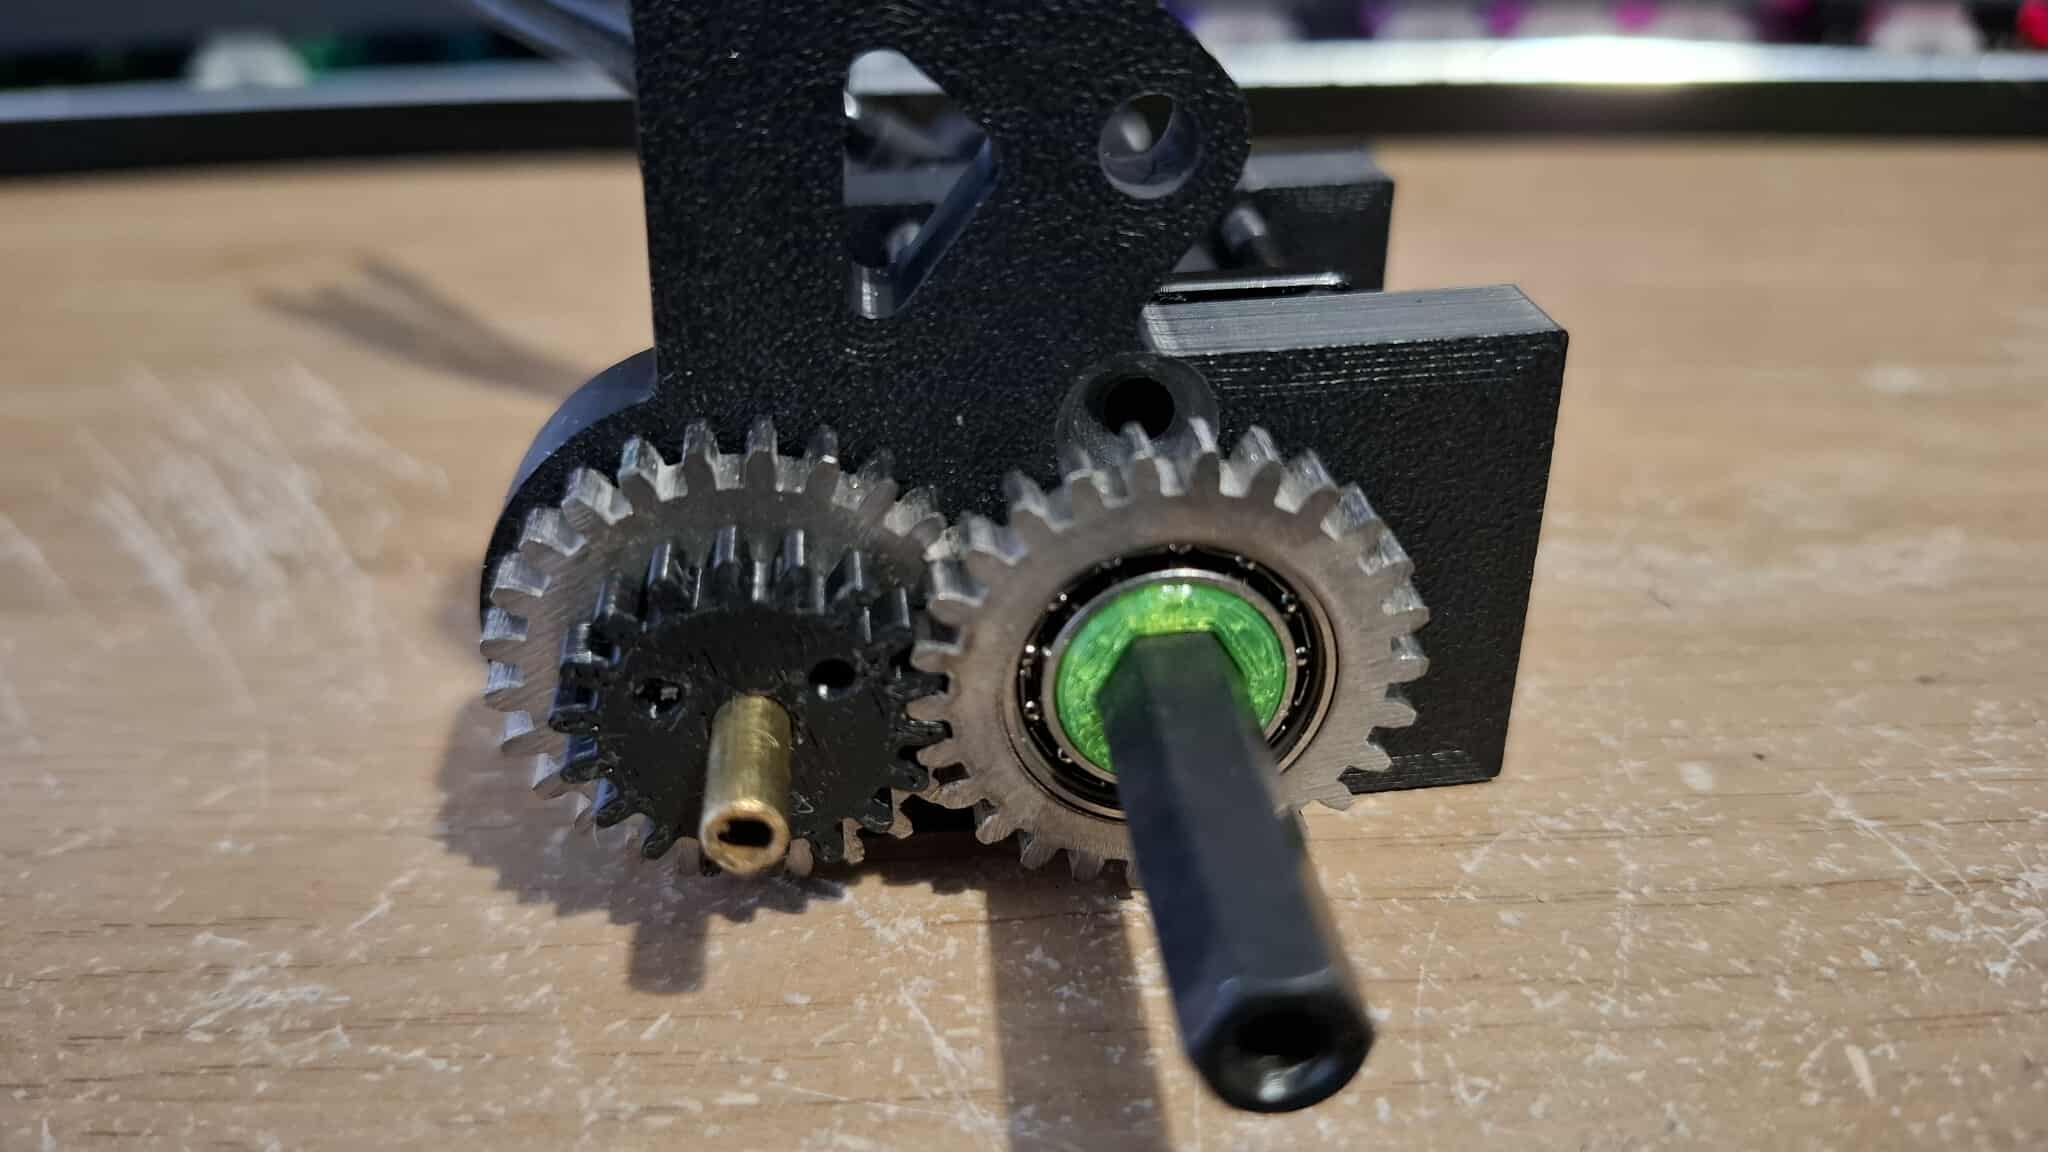
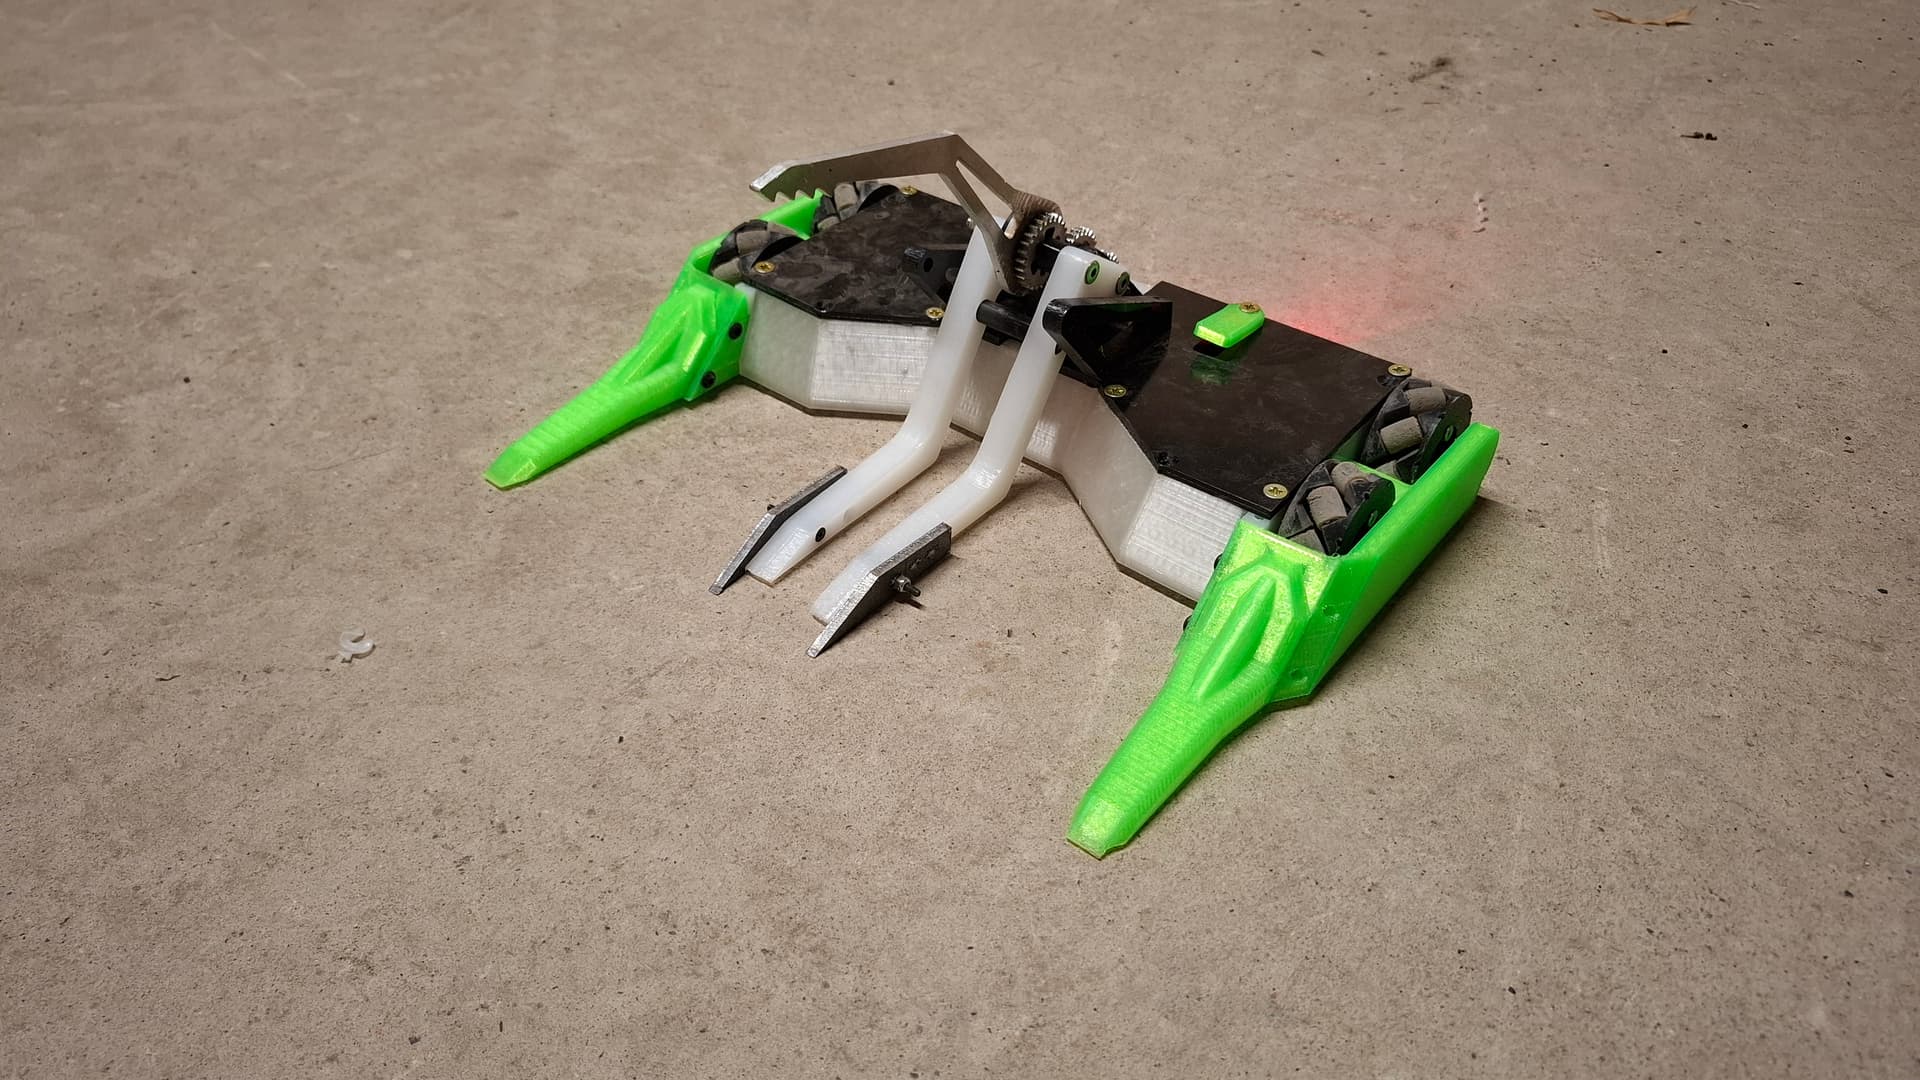
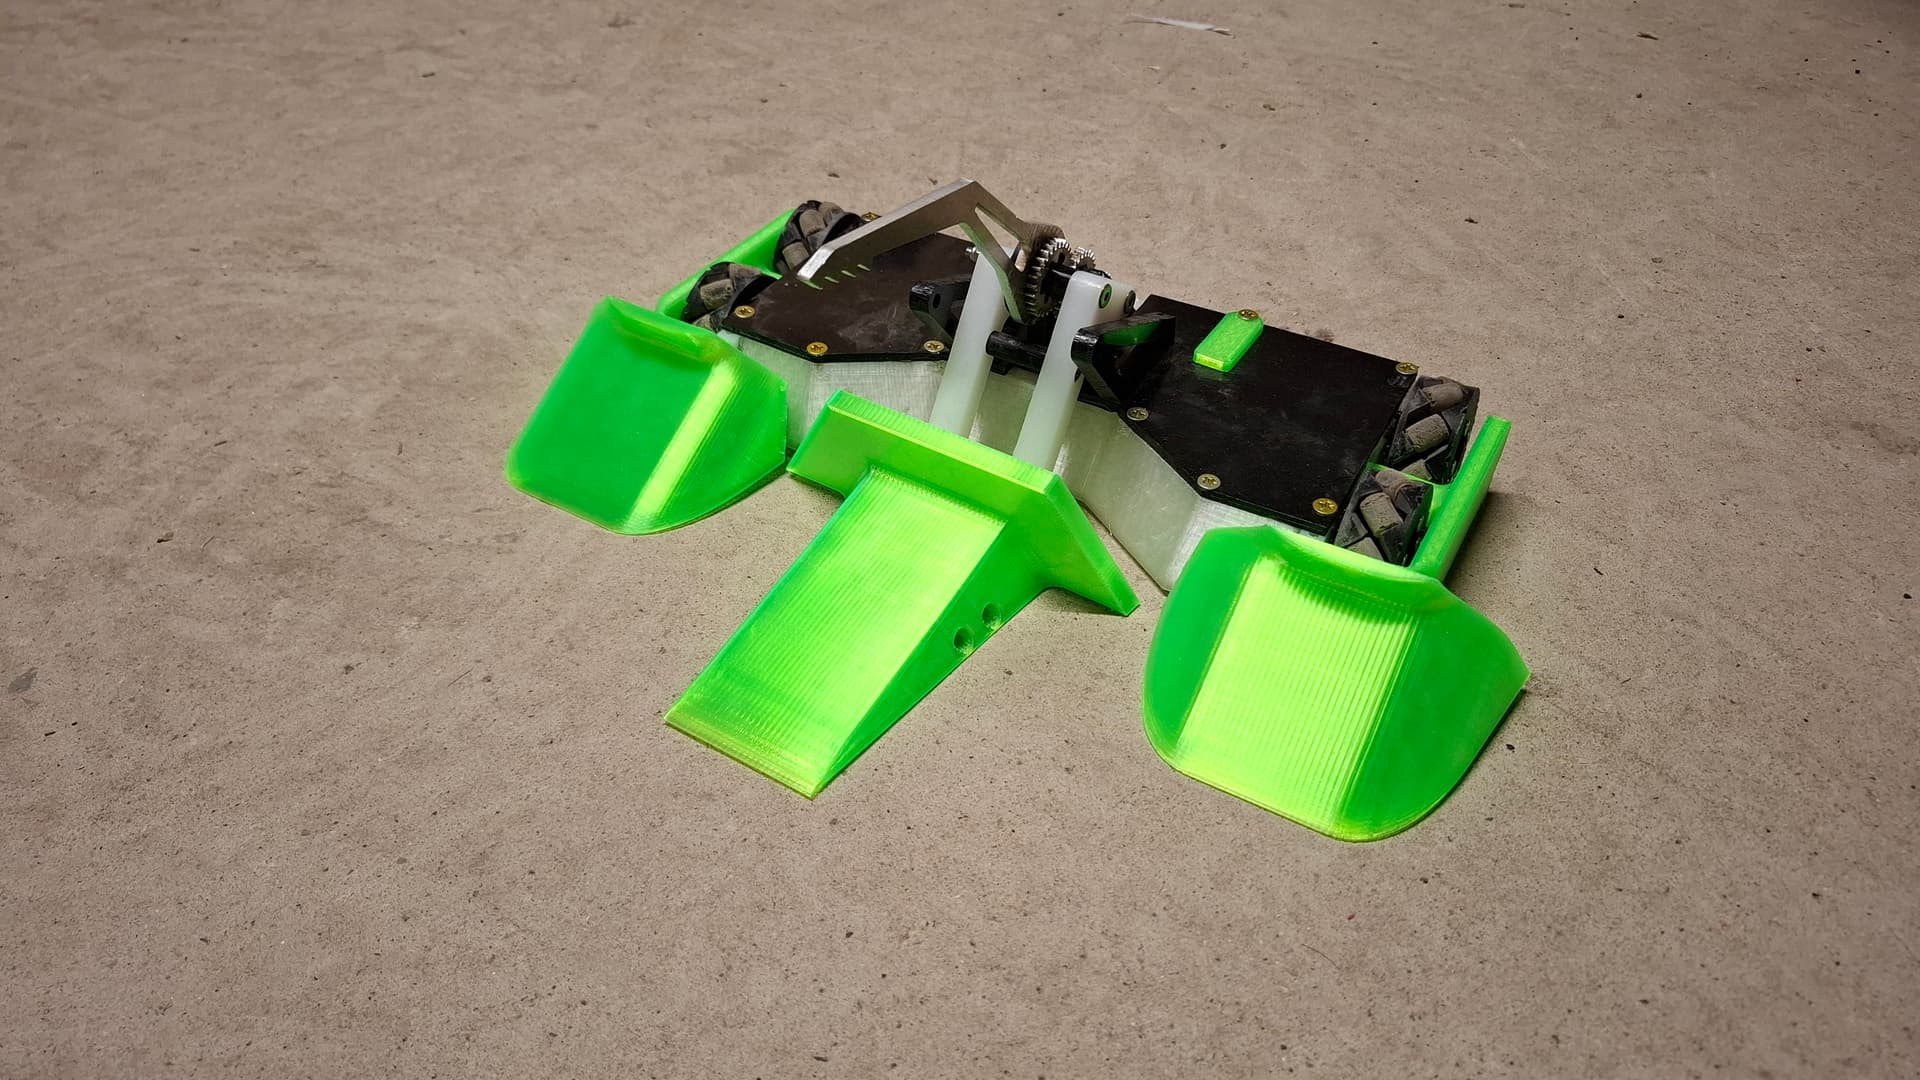
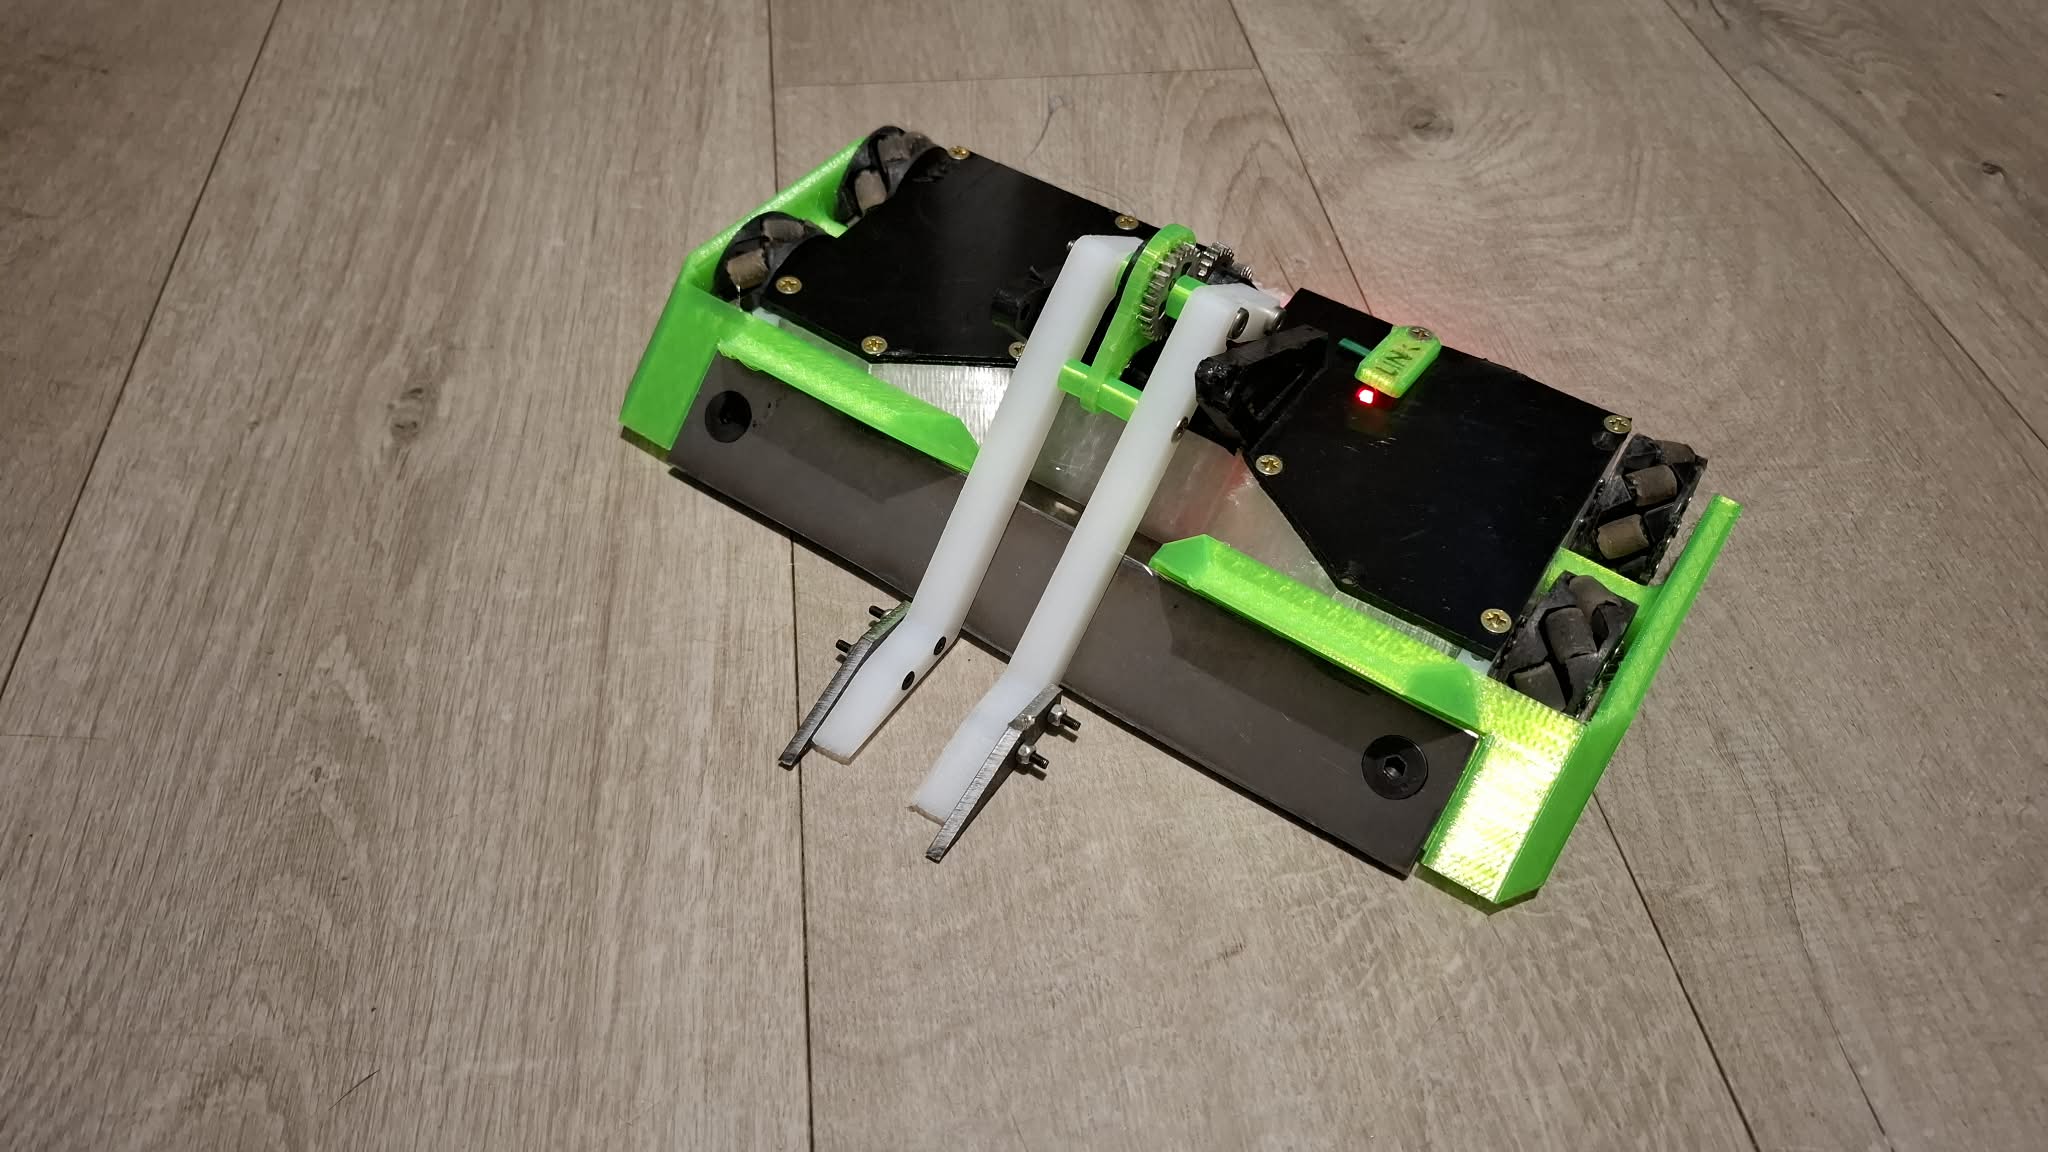
This is where I’m currently up to, with V2 of the gearbox. The pins are now connected together so that they’re more rigid, and the output shaft is a 6mm steel rod which will be keyed with a flat into the output disk. The whole thing is designed to be manufactured out of 3mm and 4mm plates, which will let me take advantage of Lasered’s aluminium cutting services. The gearbox is also mounted to the 2836 now. Still waiting on some bearings to arrive before I can test this version. Other things I need to work out is how I’ll mount the gearbox in the robot. I’ll likely face mount it, and will probably need to support the brushless at the back somehow. The brushless motor shaft is longer than I need it to be (you can see the smaller diameter spacer in between the brushless motor and the main gearbox), so I could push the shaft back out the other end and support that with a bearing.

Is this a productive use of my time? Will this thing even work? Who knows! But it’ll be interesting to see how it turns out.

5 Likes

Small suggestion of a possible hex shaft? Might make keying to the cycloid plate easier for yourself! (Plus cooler)

Really inspiring work, might have to give this a go myself :smiley:

A hex output shaft might be on the cards. The current round bar has been filed with a flat to key into the output disk but I do have concerns about it rounding out in the final version - I couldn’t do any torque tests with the 3D printed version as it immediately rounded out. The brushless motor shaft will probably have to stay as a round shaft (with filed flat).

in theory you could a hex shaft for the motor shaft too if your whiling to sacrifice a cheap Allen key

It would probably require some modding anyway to get the hex to interface with the motor can. A potential option though.

In any case, after seeing the success Grab Crab had a Burgh with its “Strangbox”, I thought I’d try my own in DJ2 V5 rather than faffing about with a cycloidal gearbox.

189:1 24mm gearboxes mated to an Overlander 2830 1300kv motor. I went for these motors because they have a 3mm output shaft as opposed to the 2836’s 4mm shaft, so didn’t need any modification and I could just press-fit the pinion gear directly on to the shaft (which was also conveniently pretty much the exact length required!). The higher reduction is to get even more torque on the lift - unlike Grab Crab, I’m not necessarily looking to yeet my opponents, and wanted to massively overspec the lifting power (as well as compensate for the lower wattage of the 2830 versus the 2836).

2 Likes

SO excited for this. Gonna be a serious torque upgrade!

1 Like

Slightly out of chronological order, I went to Burgh before the previous post!

DJ2 had a fresh CNC’d chassis for this event, but no spare parts. I had decided that after Burgh I’d do a complete redesign of the bot, so would not be economical to prep the usual spares I do. This also meant I had no spare weapon motor (I’ve really been going through these in the later half of this year!).

Fight 1 was a rematch against Firebolt from last year at Burgh. In that fight, I lost the judges decision. Now, I had better drive, running 4S and incorporating my Turbo button, so I felt I had a better chance this time round. My forks were doing well at getting under Firebolt’s front end, and after a bit of jockeying for position, I managed to get behind him, push him against a wall and attempt a suplex, but I lost grip halfway up and he slipped out of my grasp. he retaliated with a flip but I managed to self right.

After some more back and forth, I managed another push against the wall and attempted a second grab from the front, but again he slipped out of the arms. I pursued him across the arena, pushing him towards another wall, but he spun out of the way at the last moment and I managed to wedge my forks under the wall, getting counted out!

Fight 2 was against the terrifying drum of Yam!. This bot spins more than 750g of metal, so the potential for damage was very high! Unfortunately for him, but fortuantely for me, he was experiencing some major spin-up problem during this fight. With so much weight invested in the weapon, I could easily control the fight, though I noticed that the weapon was struggling to lift now. This fight ended up being mostly a pushing match, with me winning the judges decision.

Fight 3 was another rematch, against Oubley this time. Whenever we’ve fought, it has gone to the judges, with us both having won one each. I managed to start by getting round to his side and grab him, but released quite quickly as it wasn’t a good hold. I tried to keep my front pointed at him, but a hit after charging at him sent me spinning into the wall and getting my forks briefly stuck. He used the opportunity to hit one of my rear wheels ,but got stuck under me resulting in an unstick.

I manged to immediately turn to face him after the fight resumed, but got hung up on the pit and so could capitalise. With the loss of one wheel, it made getting unstuck a bit of a job, but I got there in the end. I went for the pit, as I thought I was losing the judges at this rate, and managed to get a good push across the arena, very narrowly missing getting Oubley in the pit, the broken wheel not helping with the control issues. I tried to keep aggressive by going at his front and jamming the top arms into his weapon, which managed to stop it spinning. However, once again I couldn’t push him into the pit. As the fight ended, he got a good hit that popped me onto my side, but my weapon had died at this point. It was a close judges decision, but I eked out the win!

With the wins being judges, DJ2 hadn’t earned enough points to continue into the main bracket, and with the damage it had taken, it would be weaponless for any additional fights, to that makes the Oubley fight this version’s last ever fight.

I have plans for V5 in the new year, and I’ve already done a lot of the CAD work. Hopefully I’ll be ready to show something here soon :slight_smile:

1 Like

I’ve spent time over the past month designing DJ2 V5, and I’ve got it to a point where I’m happy to show it off!

The headline change here is a full brushless diet. The drive motors have been replaced with the same 1804 Rotalink conversions that I have in PMXL V2, and the weapon uses the Strangbox at home mentioned a couple of posts above (2830 1300kv brushless motor on a 189:1 gearbox). Other changes to the weapon mechanism include a change to the way the main shaft is afixed to the chassis - now, I’ll use caps that get screwed into the main bulkheads for a quicker release method compared to constantly undoing and redoing locknuts. All of the arms have become twin 4mm profiles, with the gap in between for 4mm Hardox forks and top arm teeth for grip. This design should also allow the arms to flex a bit on impact compared to the solid 10mm arms from V4.

After liking how the armour skirt attaches to PMXL V2, I’ve done the same thing with DJ2 V5’s armour - a tab in the TPU armour slots into the bulkhead, and a M4 screw runs through both vertically, with a nylock nut on the other end. This will help prevent fastener tearout from big impacts. The robot is slightly thinner now, which means I should be able to print the anti-horizontal wedge on my own 3D printer, which maxes out at 200mm square.

With no events that I’m planning on going to in January, I’ve got a while to get all the materials and components delivered, and assembled before Robodojo in February.

4 Likes

Robodojo is in a few days, so I should probably show off the completed V5! Full systems test here.

There’s been a lot of incremental changes to the CAD from the start of the month as I started prototyping parts, mostly due to the frankly insane torque of the weapon motor (more on that later). The previous method of quick-swapping the lifter arms didn’t work out as the threaded inserts just pulled out from the torque of the motor. I instead changed to a slot at the back which gets plugged with a 90% infill PLA-ST block, held in place with a vertical screw.

I also added an additional support for the idle shaft where the motor is face mounted, as the sheer torque was causing the chassis to flex instead of the lifter arms moving up when trying to lift things.

Another thing I discovered is that the placement of the gear drivign the mechanism affects how it behaves. Placing the gears outside of the lower arms causes a large twisting force, so the right arm was lifting earlier than the left. To counter this, I had to move the geartrain inboard of the right arm, which meant cutting a hole in the left bulkhead for the outrunner can to sit inside, as I was limited width-wise by what I could print on my 3D printer for the anti-horizontal setup (200mm square bed, the total width of the robot is 194mm!). This hasn’t resolved the issue entirely, but it has reduced it somewhat.

Further to this, the move from a single 10mm piece to two 4mm pieces sandwiching the hardox forks means that the arms are a lot more flexible - you can see them bend in the lift test. I think adding another layer in the gap and bolting the three pieces together should sort that out.

Finally, about that super-high torque. During testing, I accidentally stalled the motor by ramming the lifter arms into the end stop while fiddling around with the throttle curve.

IT SHEARED THE OUTPUT SHAFT INSIDE THE GEARBOX

I have never seen that happen before. Somehow, none of the planetary gears broke (that I can tell, I haven’t properly pulled the gearbox apart yet), and the HDPE gears are all fine. Luckily, I had a spare gearbox ready so that is in the bot now, but I will have to be very careful with the weapoon going forward.

2 Likes

With great torque comes great responsibility.

Looking awesome Thomas your continued iteration is great to see

1 Like

My first event of the year was Robodojo’s February meet, bringing the brand new DJ2V5 for a trial run. Overall, I’d say it went quite well, winning 3 of its 4 fights but missing out on the 2nd to 4th place playoff.

The first fight was against Little Grey Fergie. This fight was mostly me getting to grips with the new drive system, which being my 1804 rotalink conversions, was much faster and twitchier than the previus brushed configuration. I also discovered that the flexiblity of the arms could cause them to fam as they got bent in/out. I couldn’t push LGF out, so it went to the judges, which I won.

Fight 2 was against Synthblade, a new crusher. Still getting used to the drive, I tried avoiding the front end and went for the sides. After some back and forth, including some failed attempts at a lift and some narrow misses from the crusher, I managed to get around to the side and flip him over.

The third fight was against Baby Dead Bopd. I attached the anti-horizontal wedge for this fight, but it only took one or two hits for Baby Dead Bod to cut clean through it! After the second hit, I was inverted against the wall, and the flexible arms had bound themselves up so I couldn’t self right.

The final fight was against Nightcall. We went head to head, and after some minor glancing blows, he punched a dent into one of my front pontoon which destabilised him and inverted him. I couldn’t right him and in the end he was counted out.

Overall, I’d say V5 is in a good spot. I just need to redesign the arms so that they don’t flex, so I’ll move to a single 12mm piece with pockets for the relevant fixings. I’m also reconsidering the anti-horizontal attachment, instead going back to my old staple of 8mm HDPE on a 45 degree angle, this time mounted to the TPU so there’s some shock protection (and hopefully held on well enough that the fasteners don’t pull out!).

The next event for DJ2 is Scouse Showdown in late March.

2 Likes

Scouse 3 looms, and Déjà Two has had some upgrades since Dojo.

One thing that was immediately apparent was that the arms were too flexible. This has been corrected, with solid 12mm arms replacing the 4mm sandwich. To keep the forks and teeth centred, I pocketed out a slot for them to go in, with a retaining piece of 4mm HDPE on the other side. This also let me integrate the gear with the top arm, removing the need for one of the mounting hubs.

The anti-horizontal wedge has also been redesigned. I’ve reverted back to the old angled 8mm HDPE wedge, this time mounted to the TPU side pods which then attach to the chassis in the normal fashion. This should hopefully offer a bit of shock absorption. I’ve also chamfered the sides of the HDPE where it meets the TPU, so if something cuts through the TPU to hit the side of the HDPE, it won’t have as much of a flat to bite onto.

3 Likes