Introduction
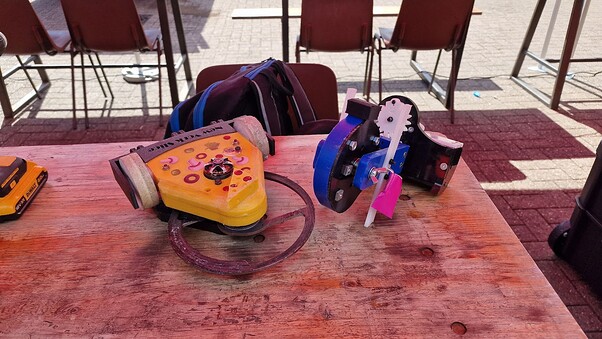
In 2022, following on from building pain per view, I designed and built a gyro walker, originally intending to use the accompanying wifi router that was left alongside Pain Per view’s Tivo Box. It ended up being a lot bulkier than the router itself, and while the vertical spinner was potent, Its mobility left something to be desired, and it was retired after 2 events as I wasn’t really satisfied with it, and I wasn’t really sure where to take any improvements. Fast forward to the beginning of 2024, and I wanted to give the Gyro Walker another shot, perhaps even squeezing 2 into a single entry as a cluster…
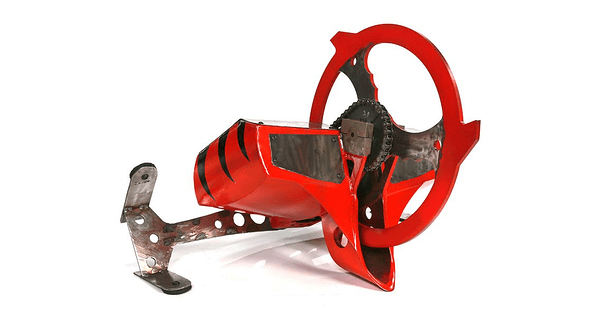
The first Die Fi. Slow, Stupid, Ineffective, but Lord it could make things explode.
Design
The original Die Fi was based on a wrecks style movement system, with a bar/paddle at the back of the robot to try and tilt the body and influence the direction of motion. Where this failed on Die Fi however was the weight of the body was incredibly front heavy, and the paddle did not really have enough influence over the balance of the bot.
It’s Wrecks!
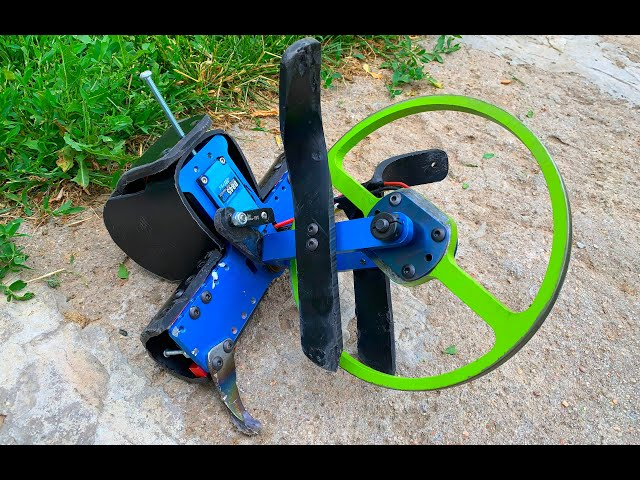
This time around, I wanted to take a different approach on locomotion. One of the other ways you can initiate gyroscopic procession is to try to unbalance the vertical spinner sideways, causing the robot to travel in the direction of the tilt (in theory). One of the more well known examples of this can be seen in Team Sunny’s walkers, Rickety Cricket and Kitten Mittens.
Rickety Cricket with its Hub motor and Anodized Aluminium parts
With the above in mind, the original aim was to build 2 of these, either to run both as a single entry or as a part of a wider cluster team. The challenge in this regard was going to be keeping the weight to below 1000g, particularly with the components I intended to use.
Build
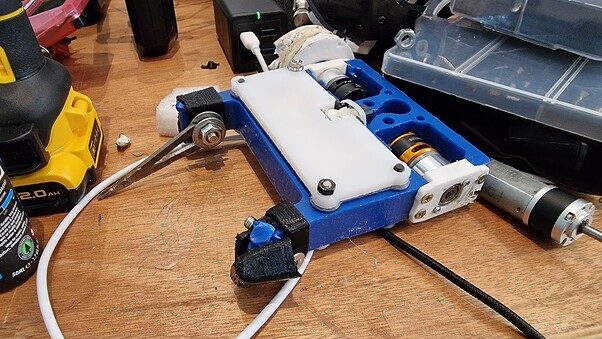
So I got to building the first Hotspot. Using a combination of the 3018 ProVER and a recently acquired Prusa Mini, I was able to quickly construct the body panels and get printing the Gears and Servo Hood. The arm panels were also cut at around this time to get a gauge on size and position. I had learnt a lot from my previous CNC adventures, and was able to keep the machining times down by keeping 3d paths and multiple processes to a minimum where possible.
The electronics for this project were probably the most simple aspect of the robot, only actually needing 1 esc with a BEC to be a part of the wiring loom. I didn’t really need any redundancy as if either the disc or the servo were to go down, the robot would be dead in the water anyway! I resorted to using some old hobbywing 30A ESCs I had to keep costs down.
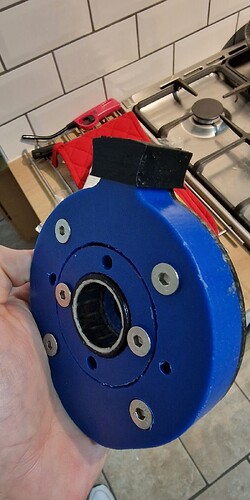
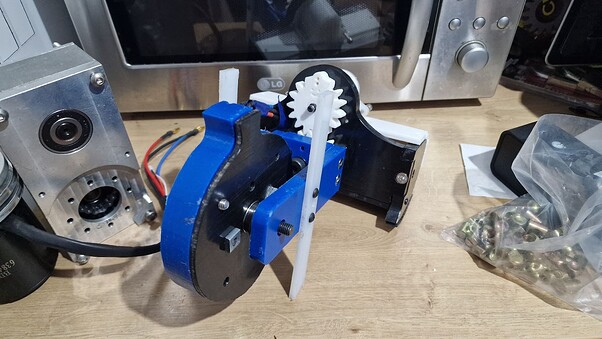
When it came to building the Hub Motor, I wanted to use a motor that I had become familiar with from using it in a past bot, namely the T-Motor AS2814, a 900kv largeish outrunner that would allow me to run up to a 182 mm disc up to the UK tip speed limit on a 3s LiHV battery if I needed to. I already knew that these motors had plenty of power to spare and would be a good shout in trying out for a beetle hub motor. Much like any other Hub motor, I needed to adapt the magnet ring so that I could run the rotor on a larger dead shaft that ran through the motor, rather than using the existing spinning live shaft. I cut the top of the magnet ring off the motor, leaving me with the magnets in their aluminium housing. Removing the interior bearings from the stator rather handily left a 10mm bore that I could easily pass a 10mm shoulder bolt through, becoming my “Dead” shaft.
I designed my magnet ring housing to be cut on my ProVER out of 20mm HDPE, leaving enough space for 4 M6 bolts in circular formation to pass through the sides to retain the disc to the magnet ring mount. This meant I could replicate a new hub in a couple of hours if I needed to. Once this was cut it was a simple job of pressing the ring into the mount using a vice.
The disc itself had a centre bore cut to the diameter of a 22mm flanged bearing, which sat in the disc nicely and was retained by the magnet ring mount by the aforementioned m6 bolts. There was an end cap that I originally designed to bolt to the other side of the disc with another bearing, but I was finding that it was causing a misalignment when testing the spin up, causing the motor to struggle to spin. To alleviate the issue I decided to stick with a single weapon bearing initially, pinned between the weapon bulkheads with thrust bearings and nylon washers on the inside of the magnet ring mount. This would prove to be a rather inefficient solution, but I’ll get into that in a later section!
As for the rest of the robot, I printed some gears for the servo to control the weapon bulkheads, the weapon bulked gear having a bearing inside to minimise the stress on the servo. The weapon bulkheads connected to the main body of the robot using once again a trusty 10mm shoulder bolt, is there anything they can’t do?
The servo and other electronics were protected at the back of the bot through a mixture of 3d printed cowlings, and ablative HDPE panels. To try to get some grip on the body bulkheads to help with walking, some TPU feet were printed and added to the bot.
The BBB Pub event that Die fi was due to debut at had a plastic spinner rule, no metal spinners allowed. So naturally, it was 20mm HDPE disc time.
One Chonky HDPE disc. You can see the magnet ring and the included resin to battle harden the can!
Despite the chonk, it still weighed half that of one of my hardox discs, go figure. I then printed some TPU socks for the tooth of the blade in the hope I could stop it from deforming too much the first time it hit something.
In testing the bot seemed to move ok, albeit slightly slowly. The bot wouldn’t walk so much as it would go off balance and lurch in the opposite direction, making it a real challenge to control.
Another issue I had face was that upon completion of the bot, it was becoming clear that I wasn’t going to meet the self imposed 1000g weight limit, with the plastic disc version of the bot coming to just over 1200g, leaving it well underweight for a spinner and especially so for a gyrowalker. With a bit of design rethink I would have been able to cut weight through using a smaller hub, or slightly smaller shoulder bolts, but with not much more I could do before the Pub event, I cut my losses and finished up.
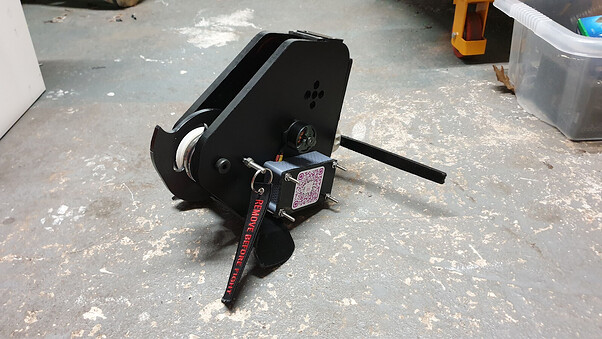
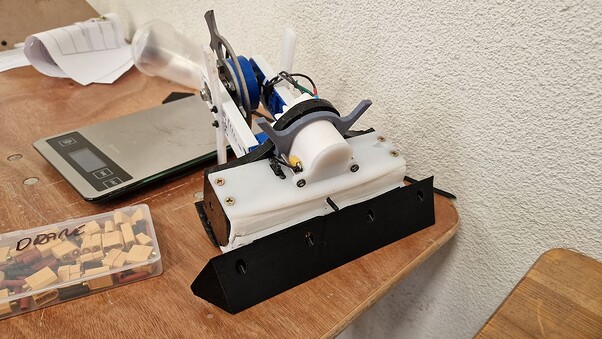
Finished Bot
Almost finished for the BBB Pub Event…
Die Fi’s first run at the BBB pub event. Hey look, it’s New York Slice!
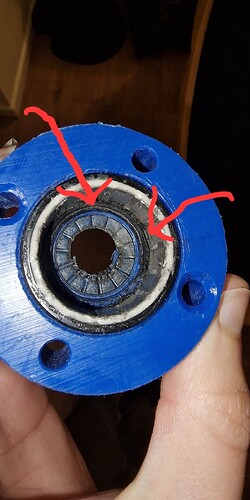
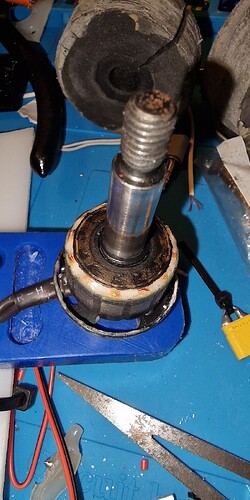
My aims for this build were to successfully design and build a hub motor myself, and to attempt some TPU printing to incorporate into the build. As a result of this, I was able to keep all the building work in house, aside from some lasercut discs. The initial test runs of the hub motor were promising, but after the first event at LHG pub beetles in May, it became quickly clear that there were some friction issues on the inside of the hub, causing a large amount of heat(hot enough to burn your hand on the shoulder bolt!), and melting the nylon washers which I had chosen for their low friction properties. This would need to be redesigned for subsequent events…
The crispy insides of the hub after the first event. You can see the indent of the thrust washer in the HDPE, which actually bent and seized within the hub. Not great.
Several melted remains of nylon washers, smeared on the stator. I’m so surprised I didn’t wear through any of the phases!
Design & Build iterations for Rapture
So with the Pub event in mind, I made a small design tweak to the hub to include a smaller flanged washer at the top end, hopefully keeping the magnets from rubbing on the stator during fast rotation. Given this was only a couple of hours to mill on my router, the outcome was an immeasurable improvement over the previous hub, meaning I was not only seeing less friction, but I was burning through less battery capacity as well. The other key advantage this would offer is a better spread of impact forces, hopefully giving the hub more longevity.
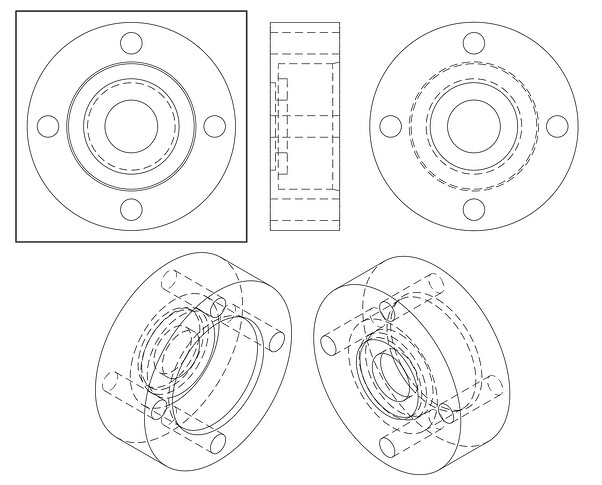
A drawing of the Redesigned Hub
I was also able to print off some bulkhead covers for the arm, to give it some more personality.
With the Full combat metal disc on the robot, the whole thing weighed 1300g, plenty of weight to spare considering I had a walker weight bonus to play with! With this in mind I designed and built a little minibot to be run alongside it with brushless drive and forks to help counteract the lack of control in the main bot. It drove really nicely with BBB AM32 ESCs and thick foam wheels, and aesthetically, I really liked the 2 bots together, I really felt like they complemented each other.
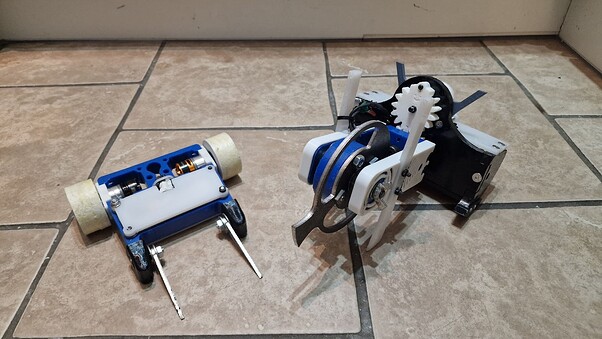
Die Fi Hotspot and V.P.N. looking swish together (they wouldn’t stray looking that way for long sadly)
Hey look, a 2wd vert
My precious boy
The secret wedge costume configuration (Unlocked when you collect 50 sacred McMaster Carr catalogues)
Design & Build iterations for BBB Champs
After less than successful Rapture (you’ll have to wait for the video for spoilers) the main things I wanted to improve were the weapon potency, the side to side mobility, and the ease of manufacture for the rear armour, moving to flat panels of HDPE rather than large curved printed pieces.
I have gone through all 3 of my discs at Rapture, all were bent or warped in some way (the downside of Hardox 400), so with a fresh metal order in mind, I designed the main disc to be stackable, adding an extra ring with 4 M5 bolts doubling the weight and thickness. I did consider moving to a thicker disc, but I wanted the weight to sit around the hub, closer to the centre of the 2 bulkheads rather than off to the left hand side. Hopefully the redesigned disc profile would help with the warping and bending.
The side bulkheads on the body were redesigned to accommodate flat rear armour panels, which also gave me a bit more space/air armour inside the robot. To ensure that I would not get stuck on my back, I printed a butt piece to allow the robot to fall forwards or backwards with its disc perpendicular to the floor. Also because it’s funny.
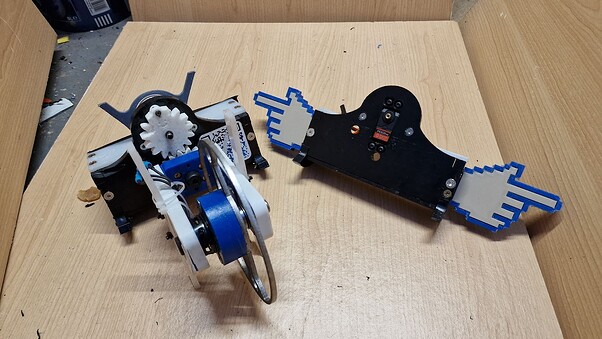
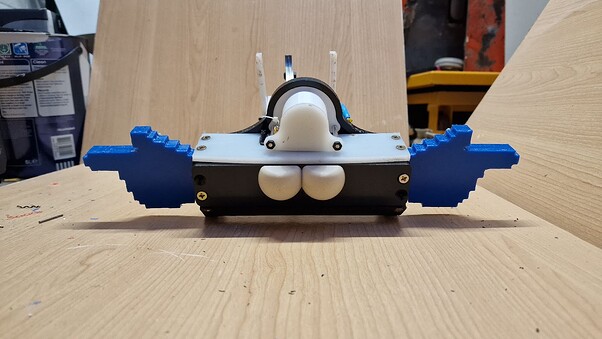
One of the consistent issues I was finding was due to the majority of the weight of the robot being up front, meaning that the body of the robot rotating often wasn’t always sufficient to control the direction, and would often jolt sideways in unpredictable ways, leaving the body on it’s side and at the mercy of the gyroscopic forces until I changed the throttle speed. I wanted to get more leverage at the back of the robot to influence this a bit more, so naturally, wider would be better. In this vein I designed “Link Fingers” to add some much needed width to the body, allowing for more control from the rear, and also lessening the likelihood of ending up upside down.
With the above changes I was running just over 1600g, still under my weight bonus based limit, but I did not get the minibot fixed for the BBB beetle champs due to time restraints.
Comparing the width of the new body against the old one. Put your fingers up!
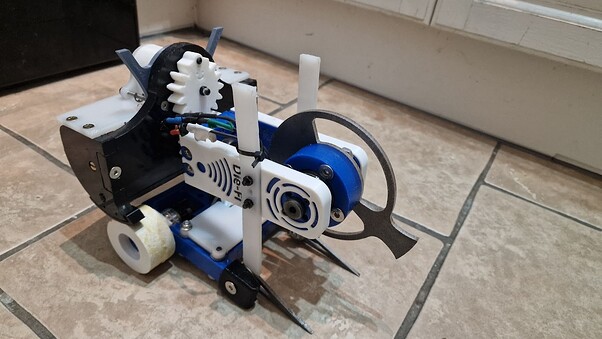
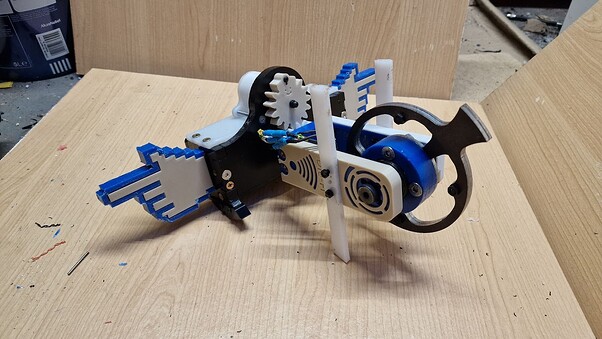
The mostly finished “v3” with Double Disc, Extra width…
And Butt.
Current Conclusion/Future Iterations
Sadly, after a chaotic but ultimately winless champs, the added weapon weight was proving to be too much for my current gear/servo setup, as I wrote off 2 metal gear servos from large impacts during the competition. In the future, I’m looking to try some flexible TPU gears, or perhaps abandoning completely for a linkage, in the more Rickety Cricket style. Despite this, I’m not done with Die Fi Hotspot just yet, despite damaging several arenas, and making EOs and Arena Marshalls alike wince at its presence. Another stupid dumb machine.
