ForkHead - Beetleweight Lifter/Grabber

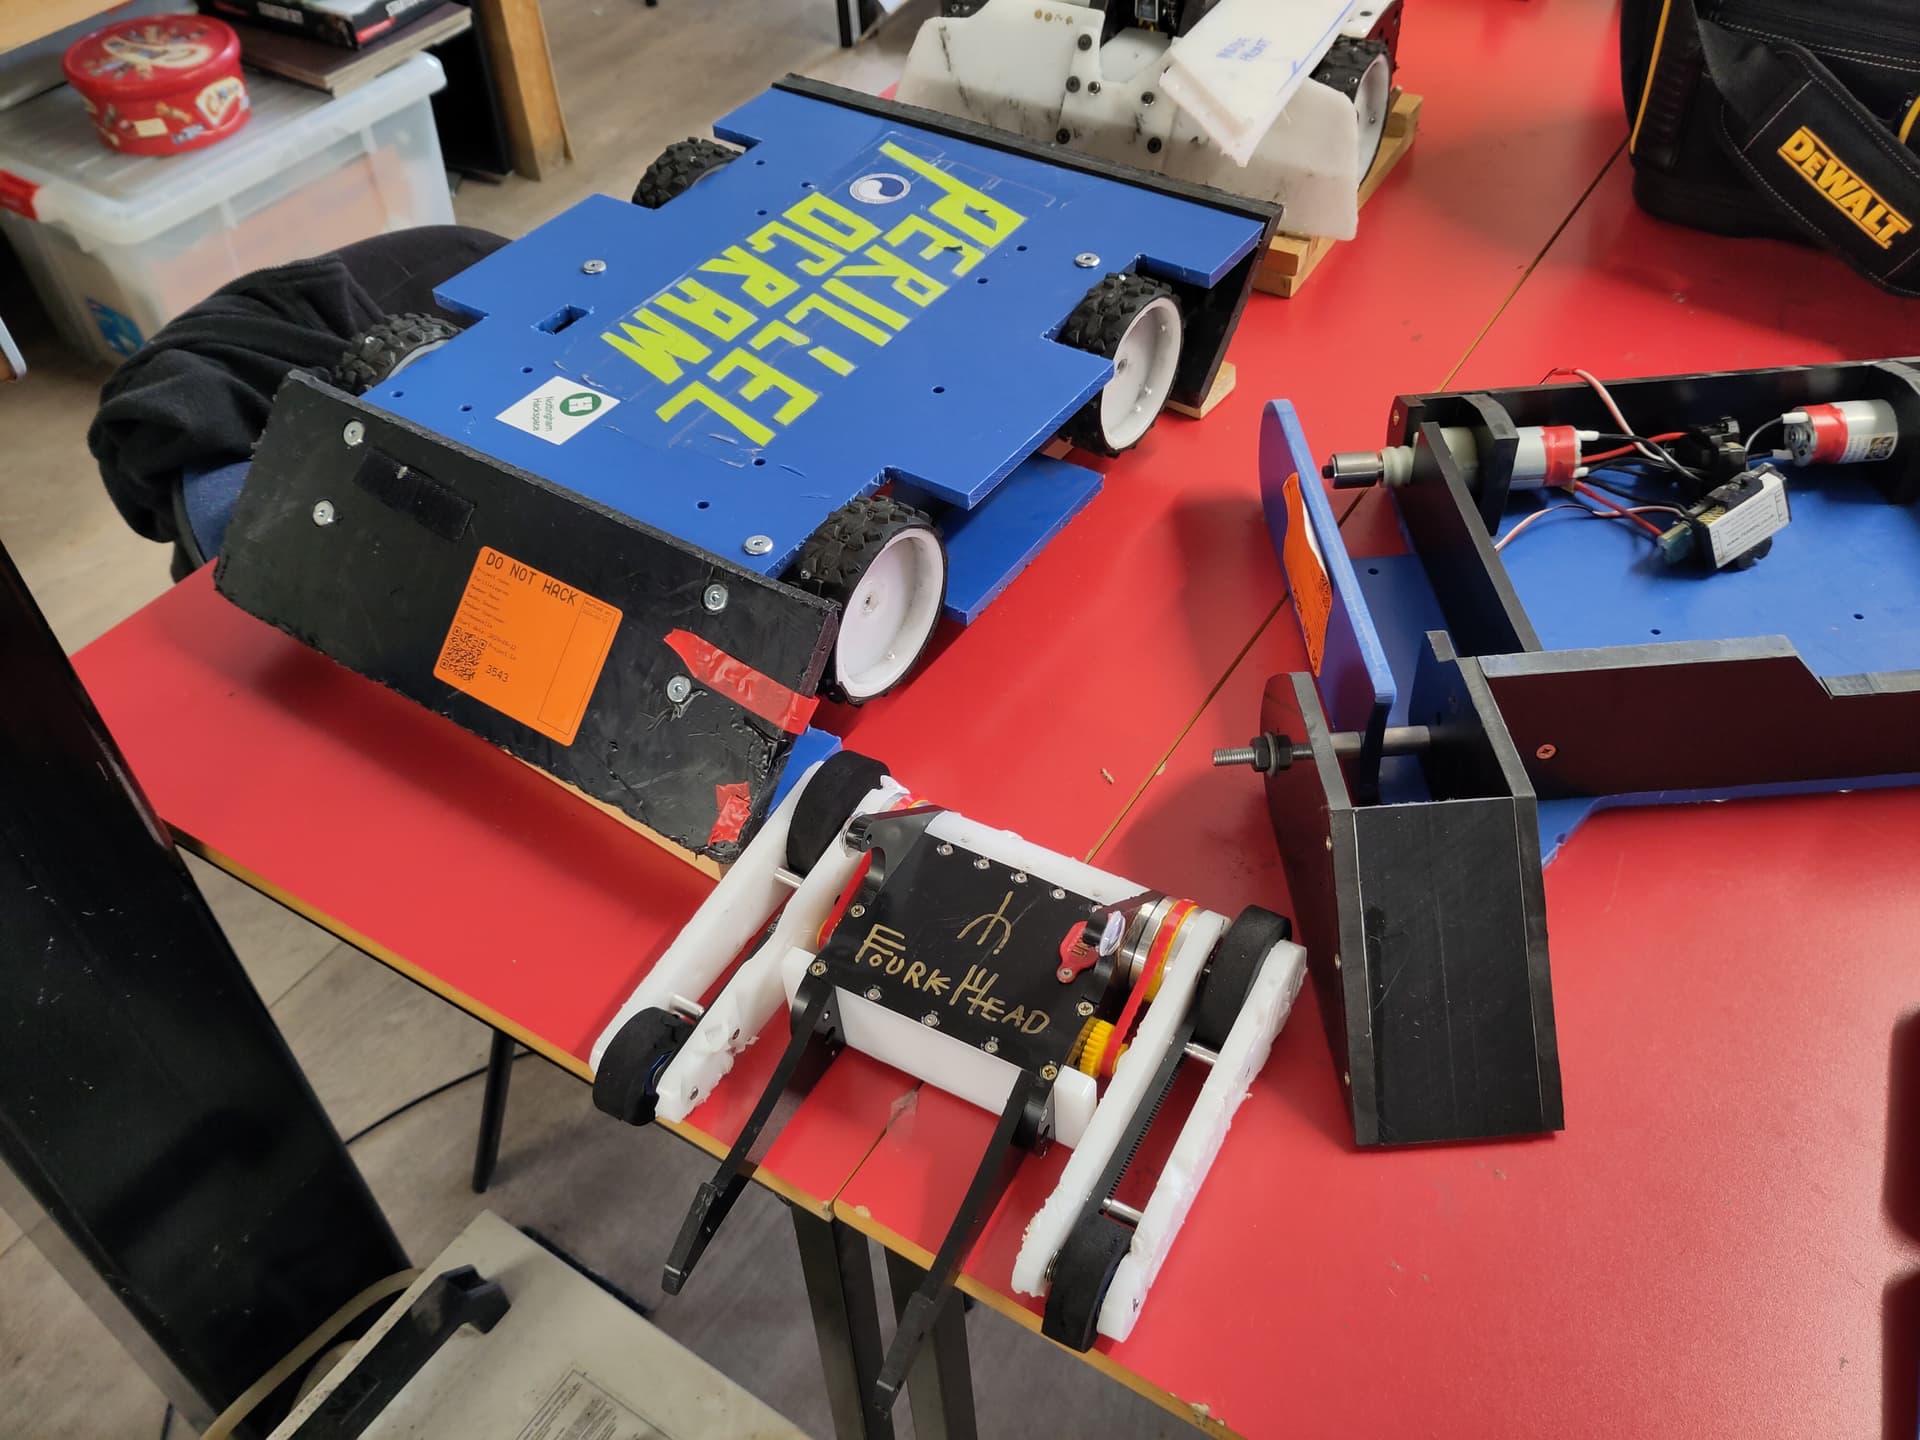
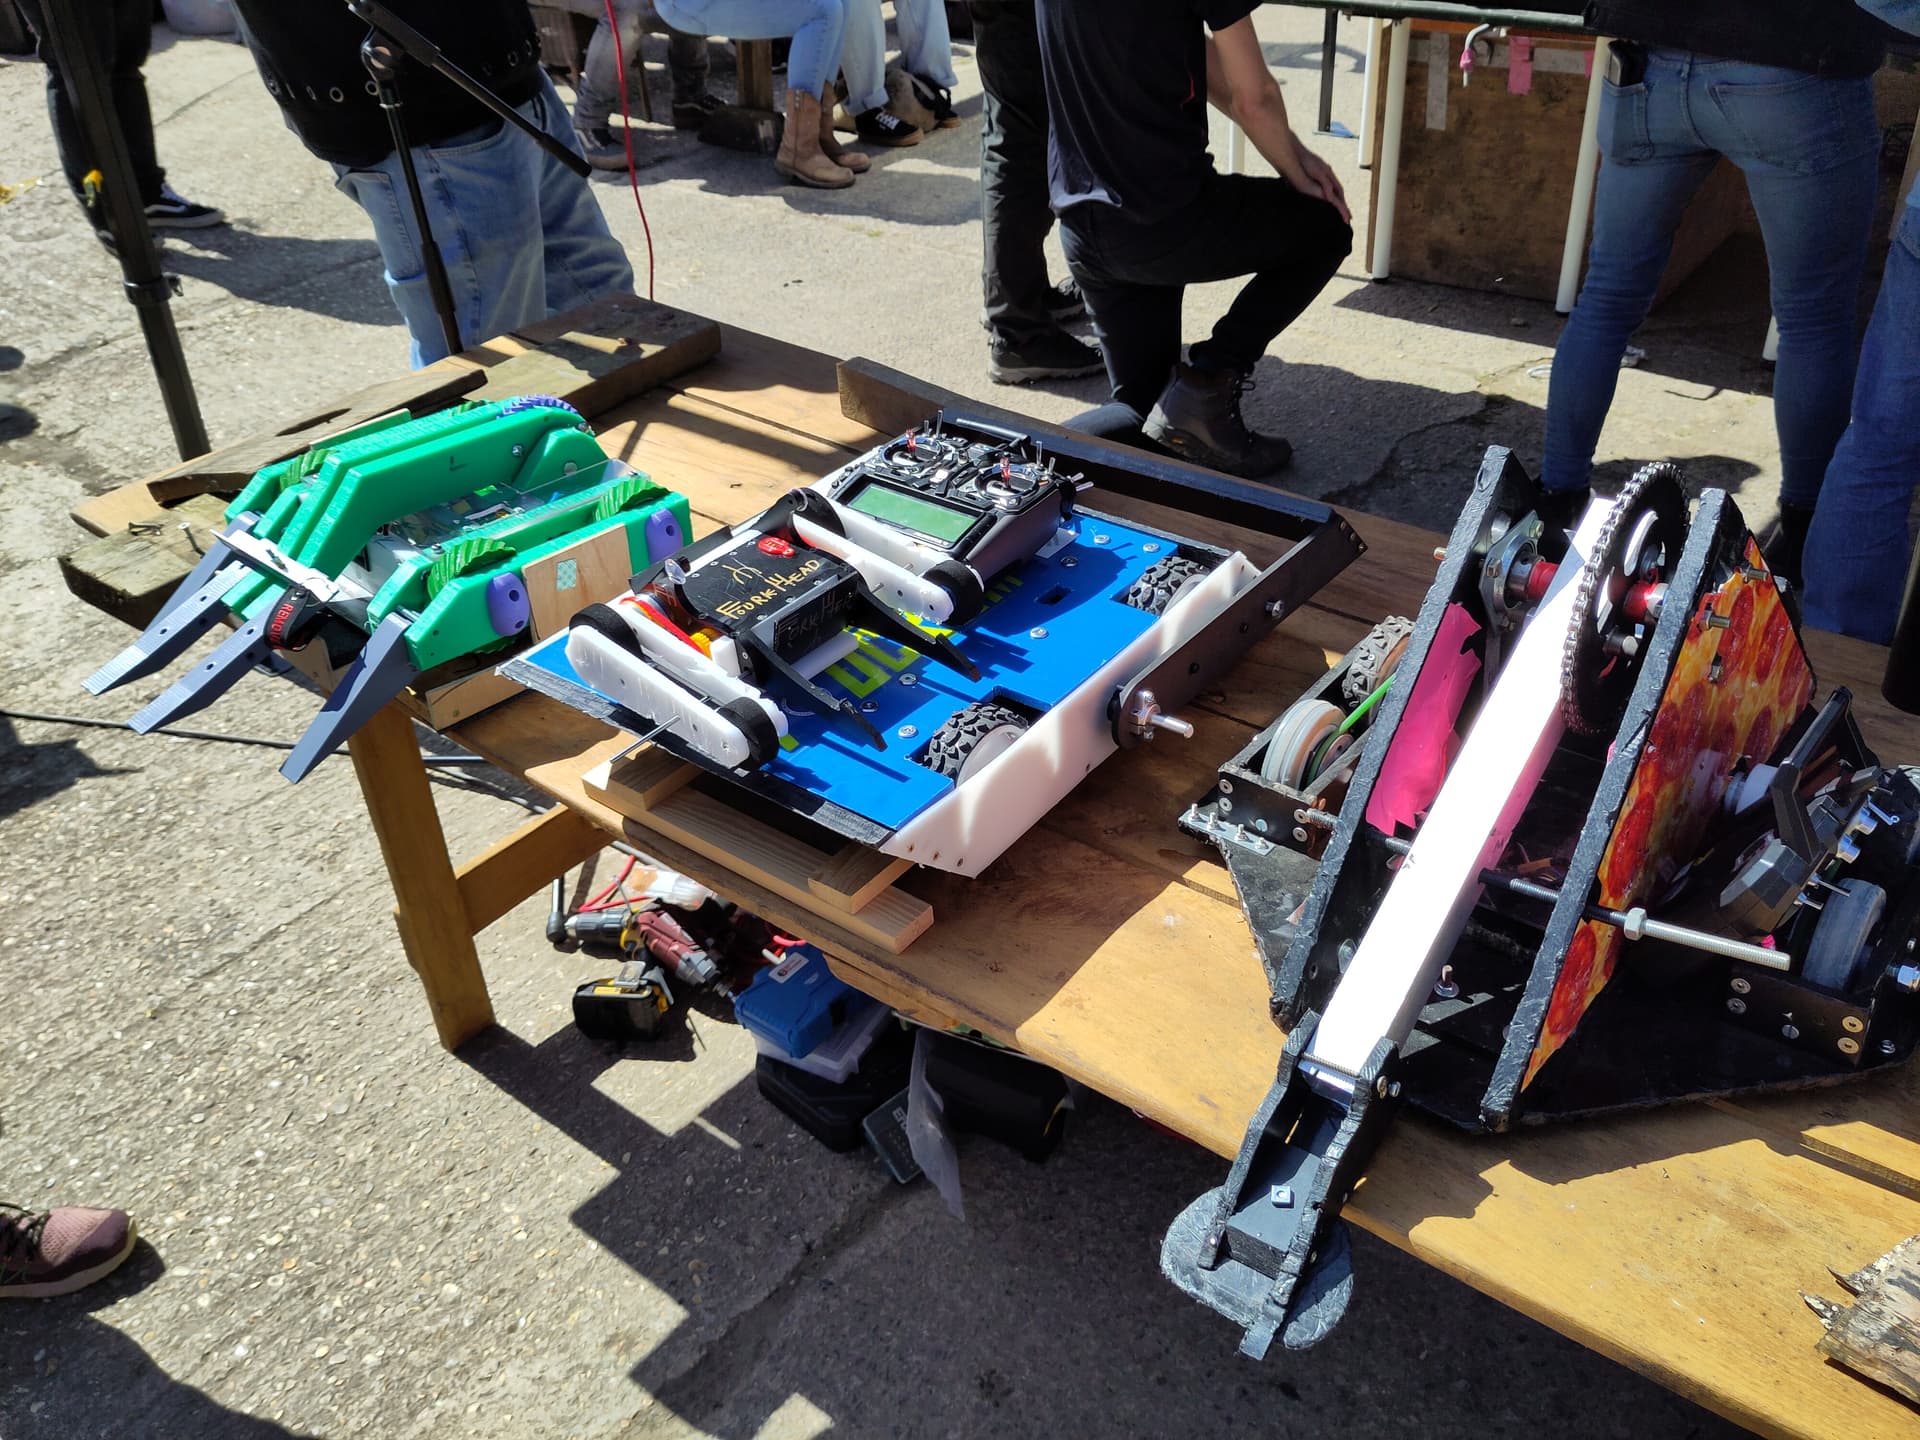
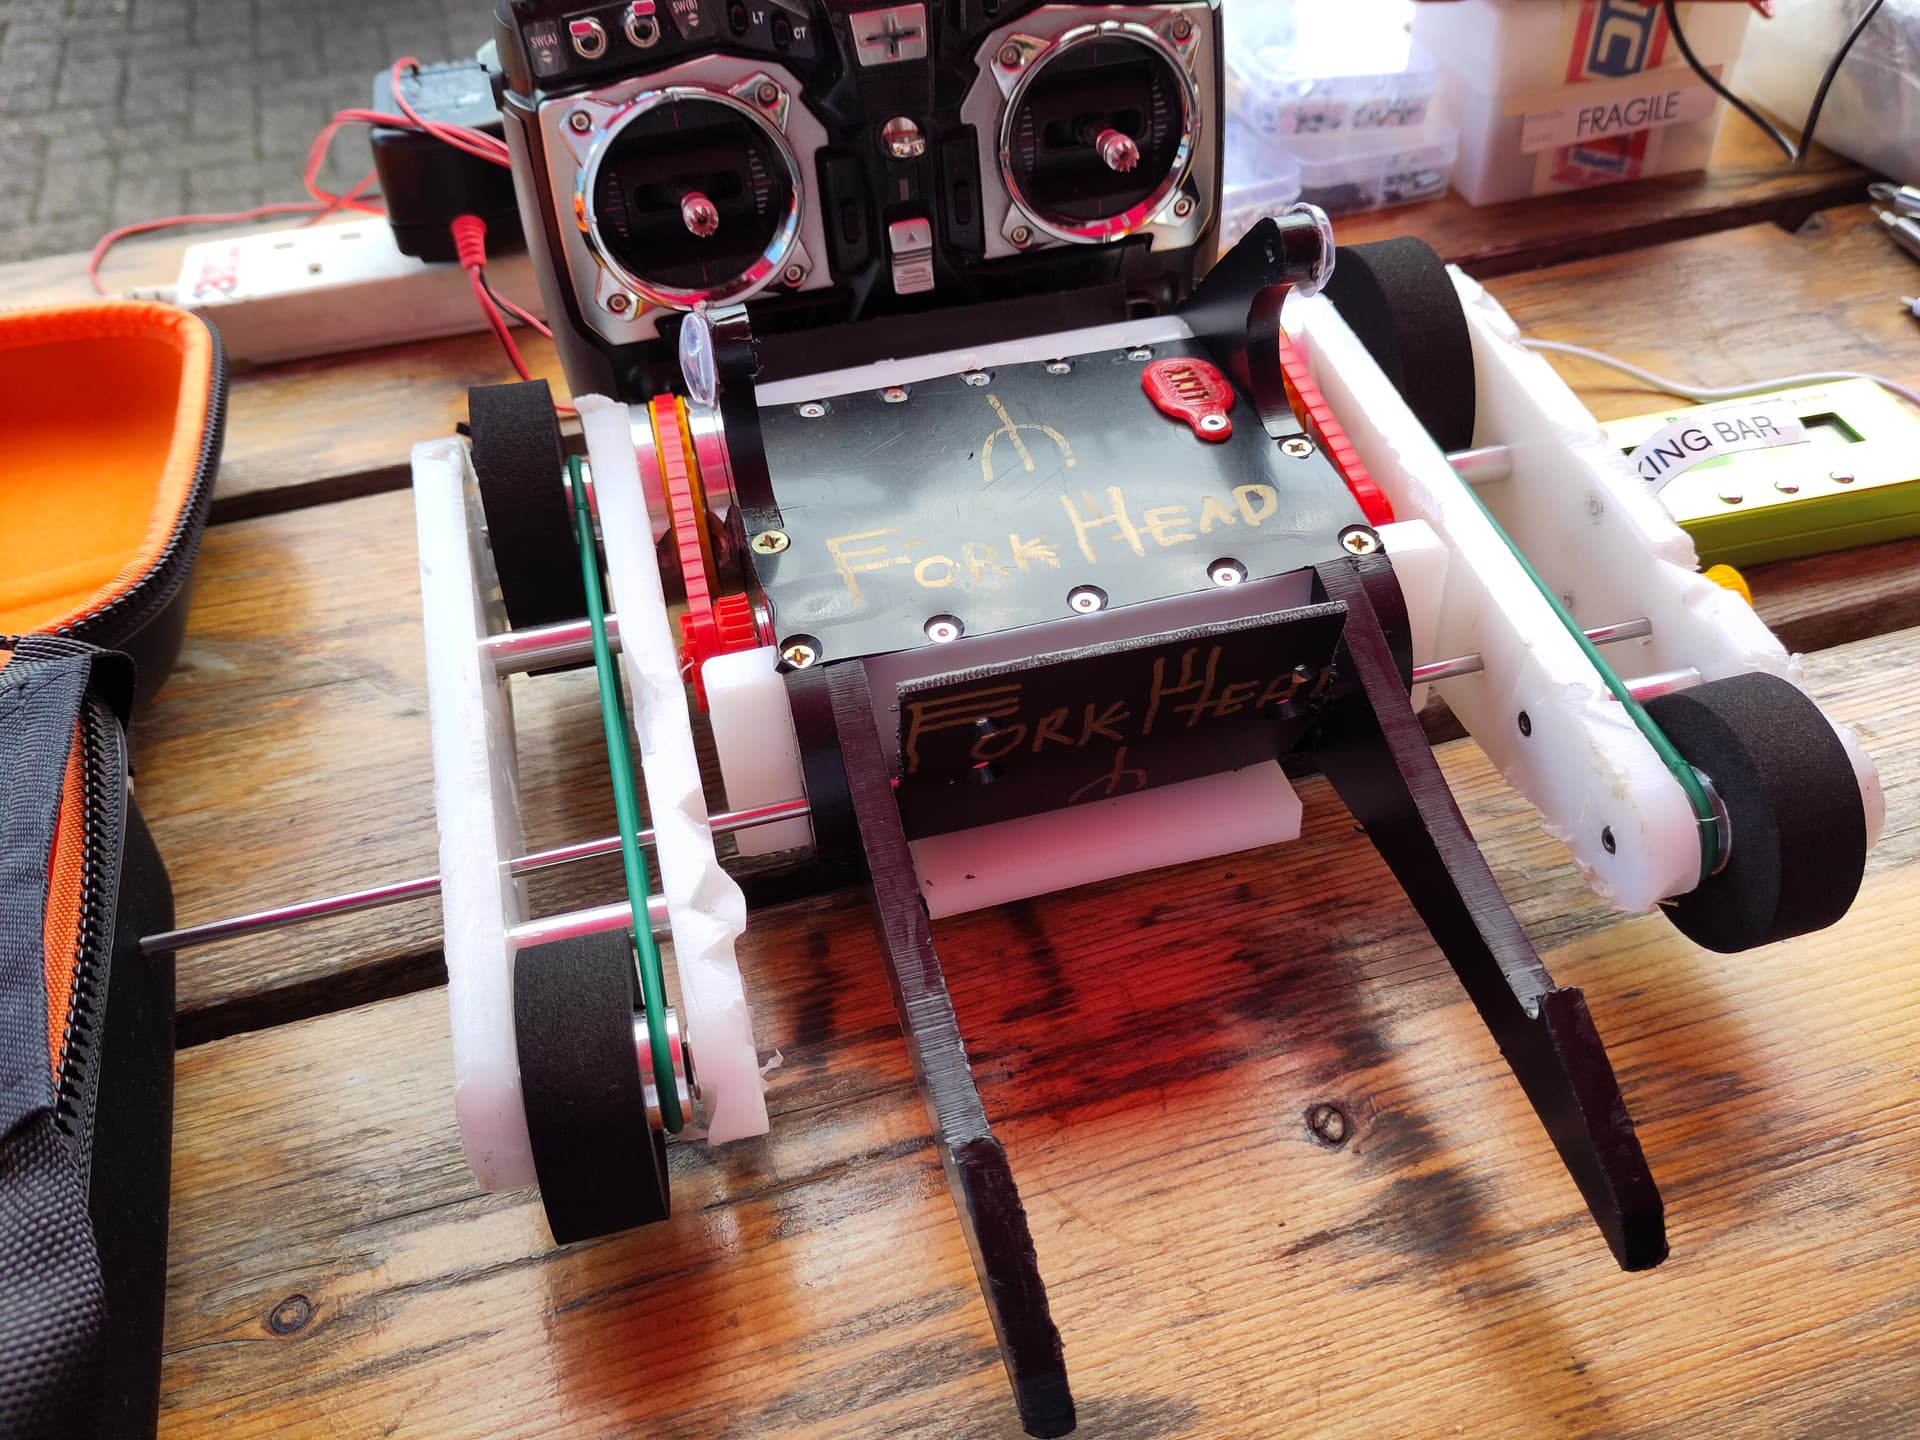
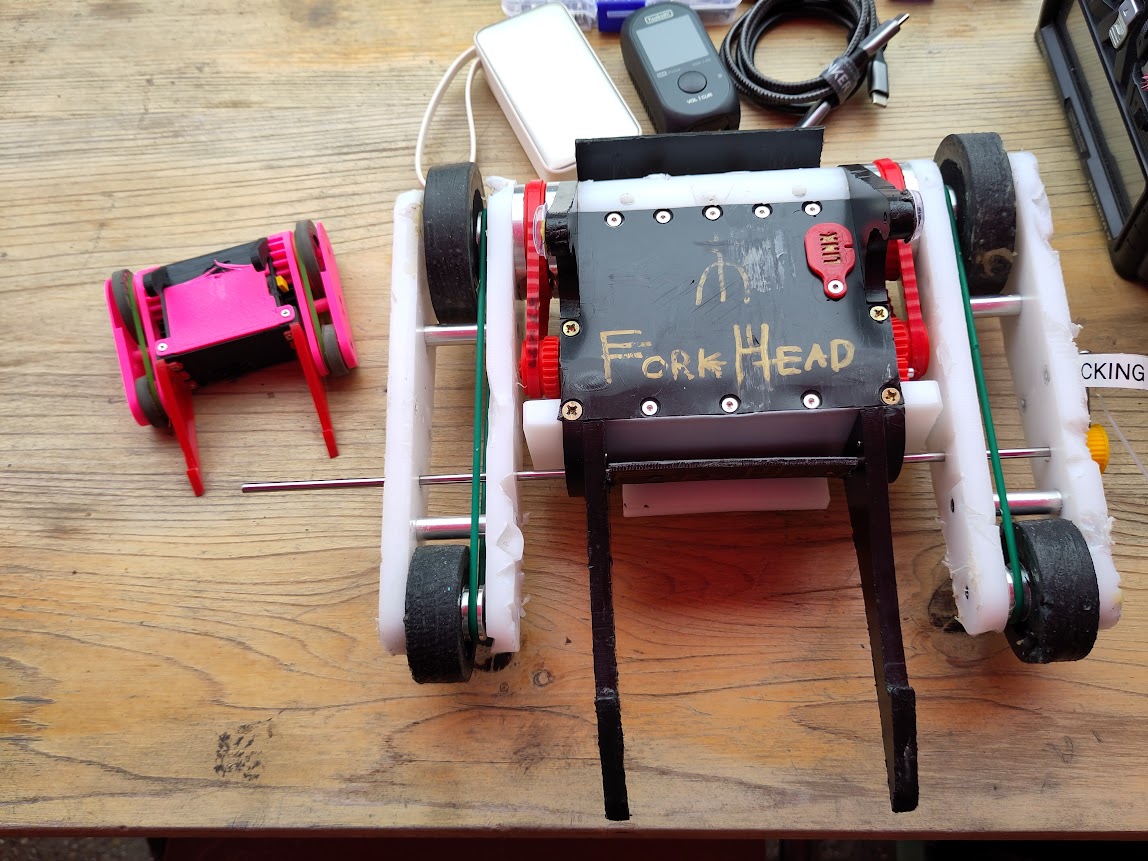
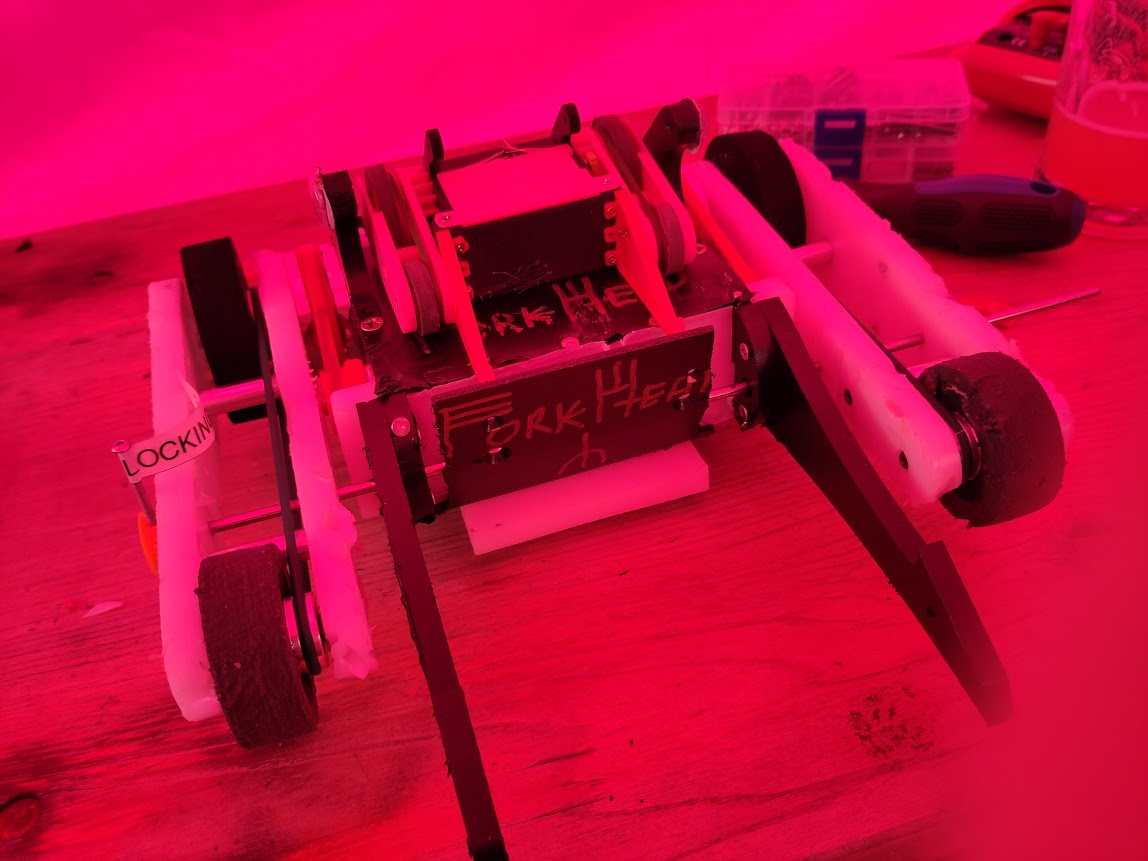
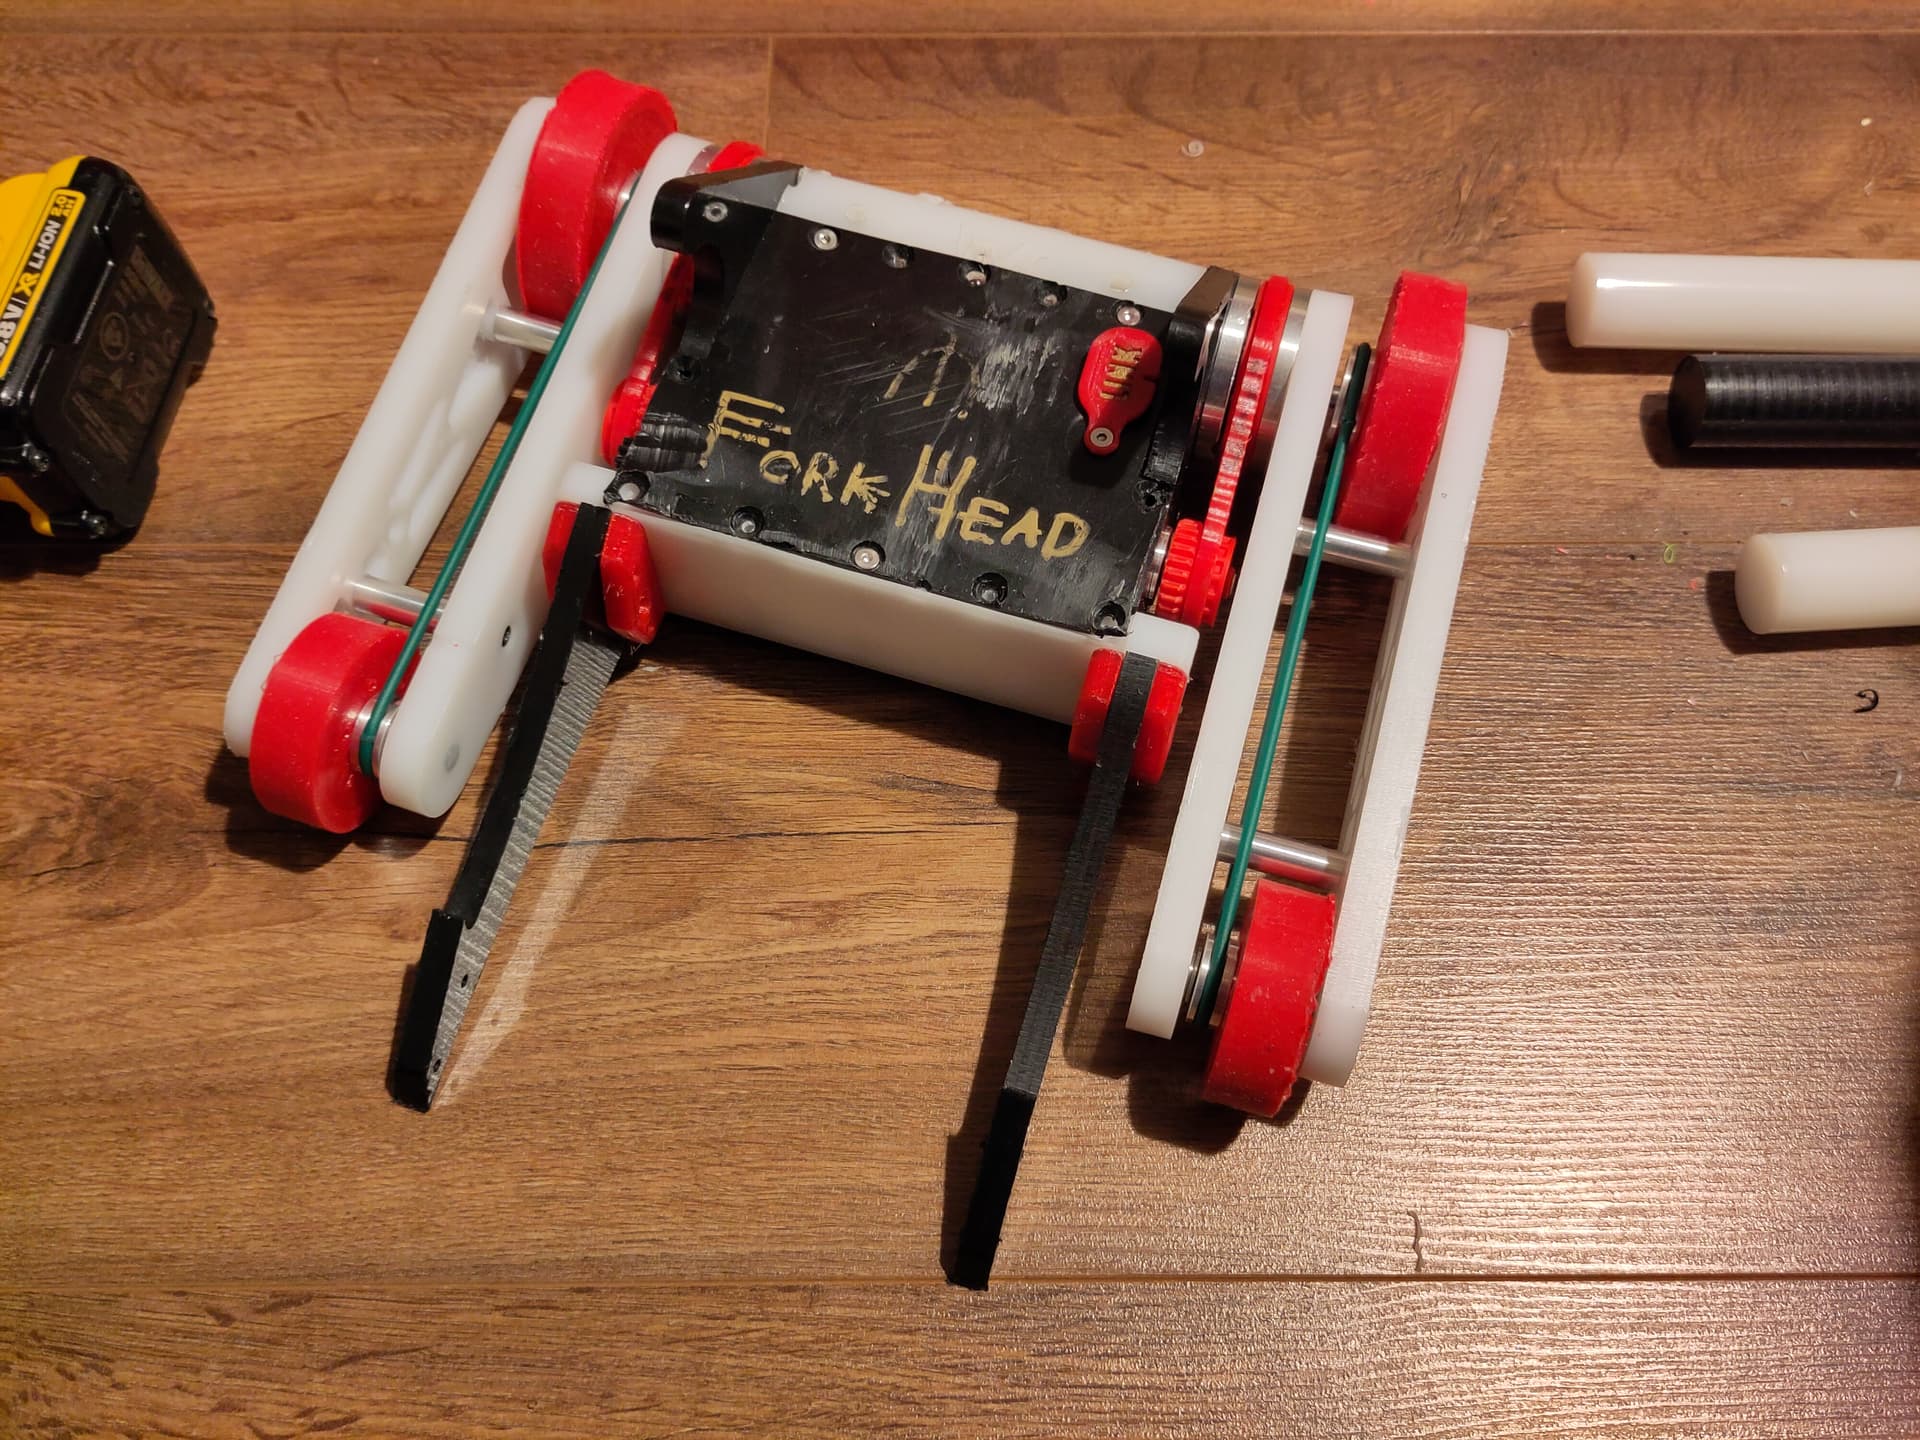
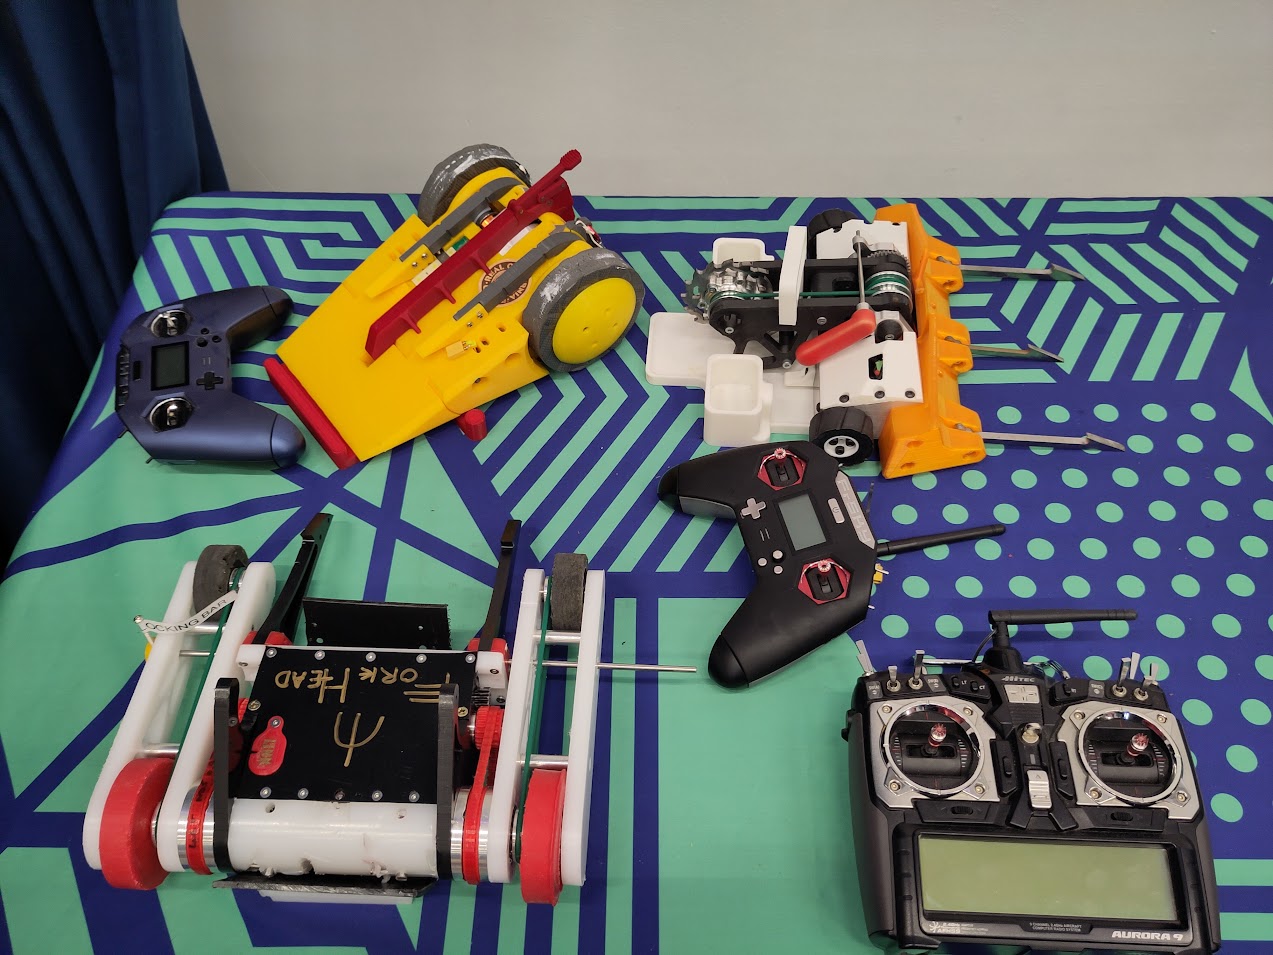
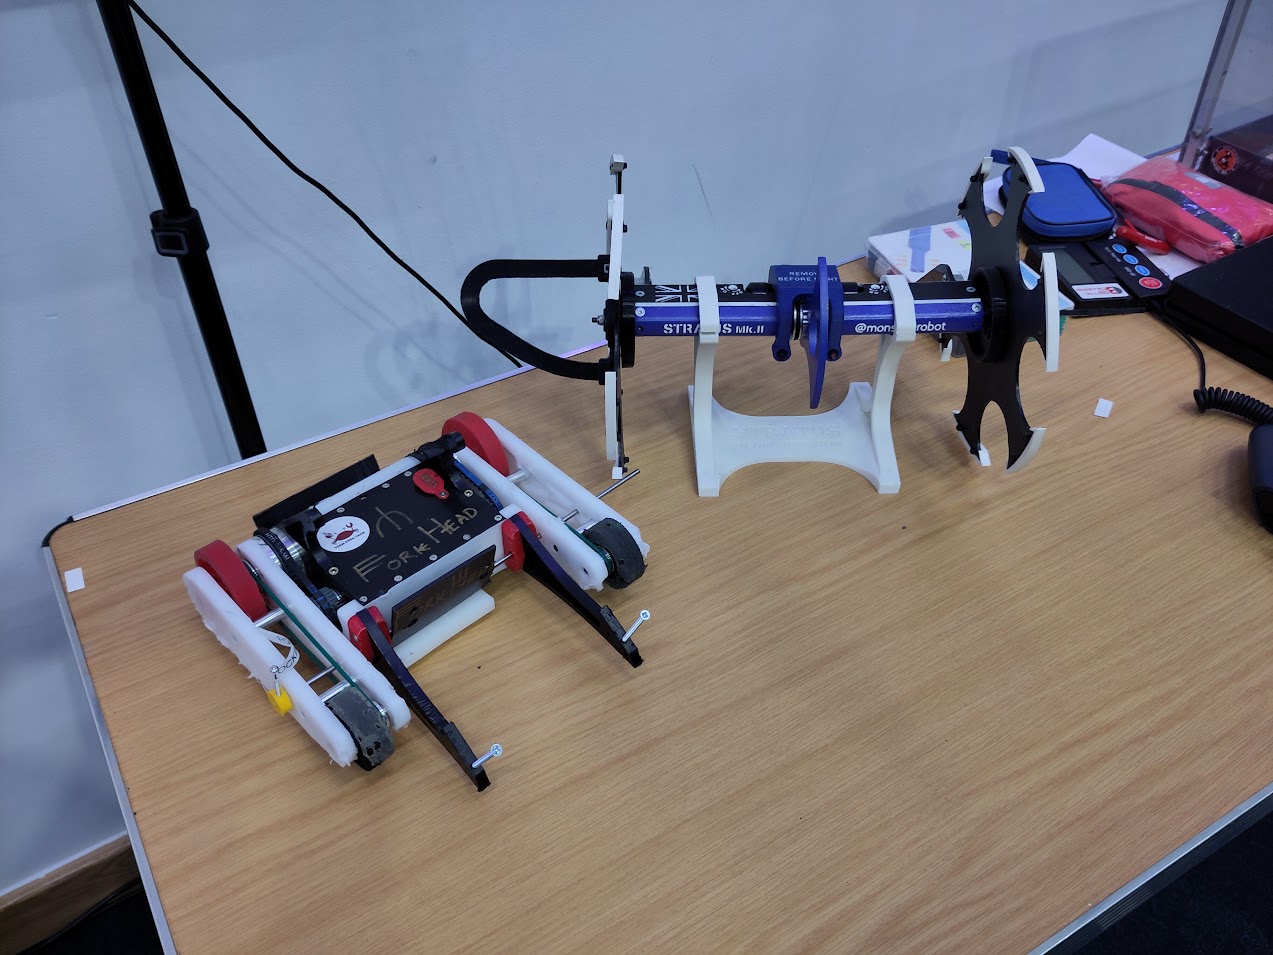
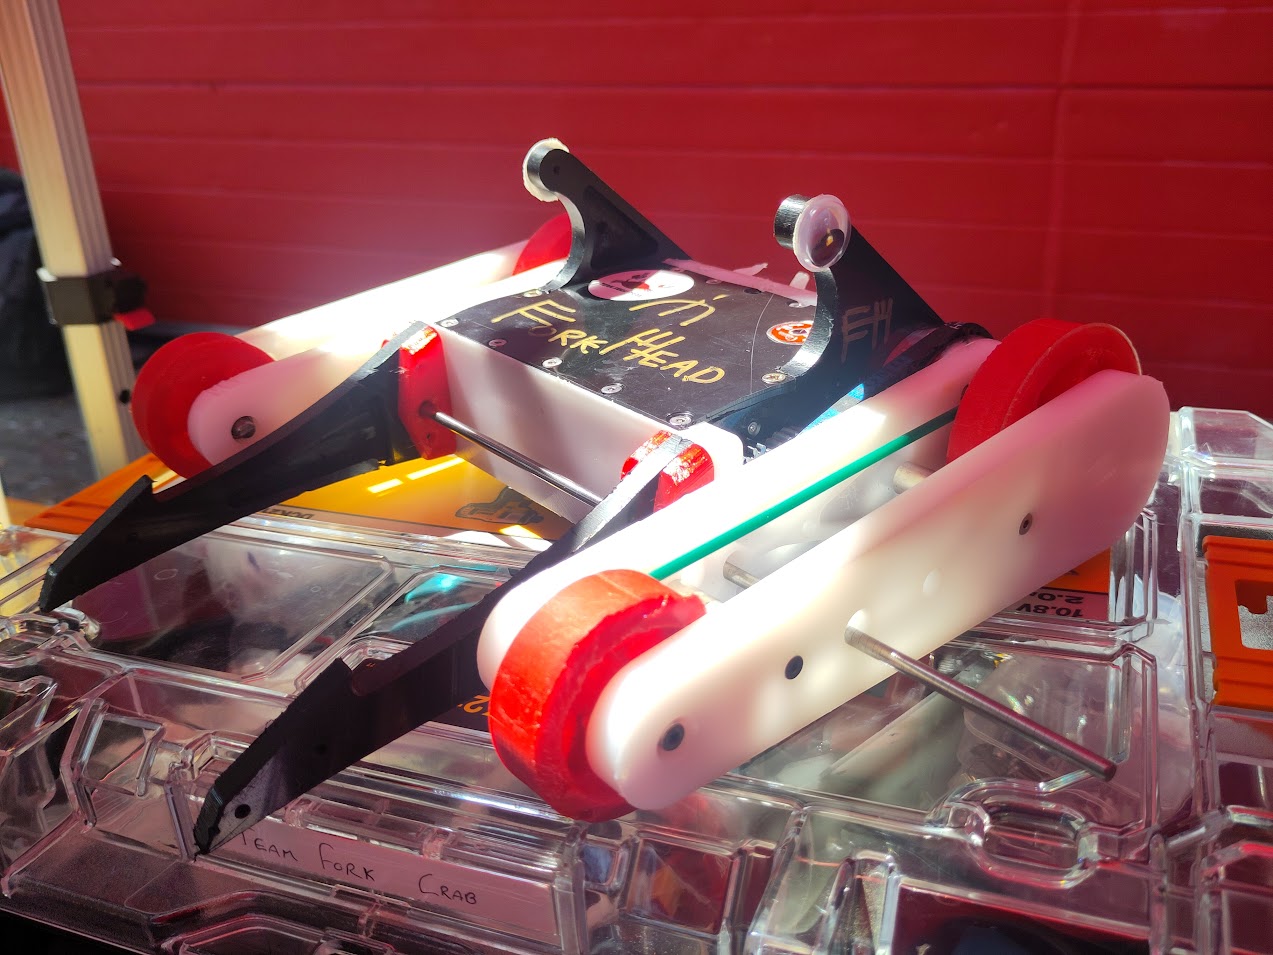
ForkHead drew a brutal lineup at SCEETLES 2, but it will be back.

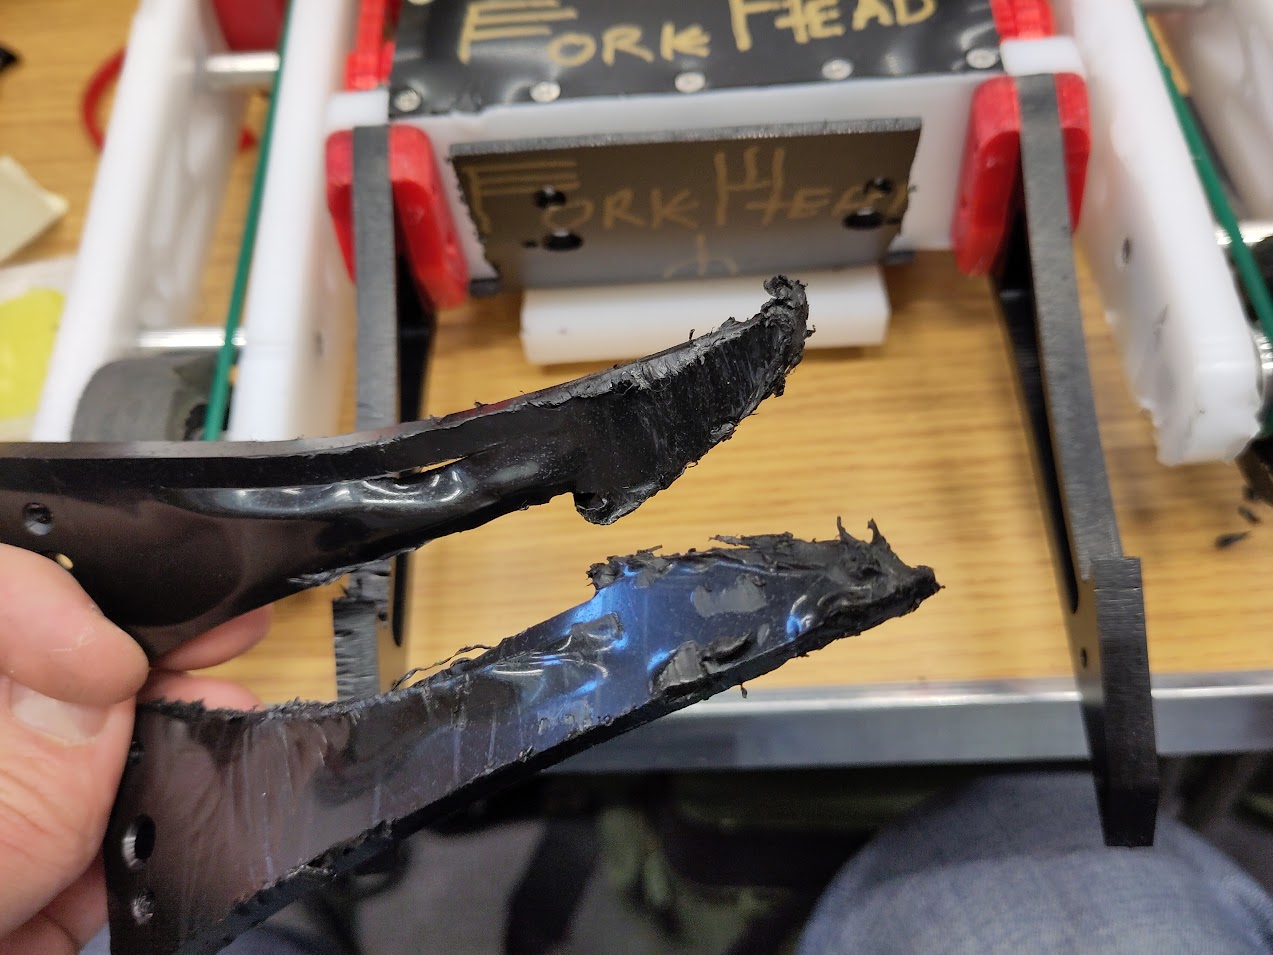
The first fight was against Qry About It, a wide 2WD vertical spinner. The first engagement seemed to go well with the prongs finding their way under QAI, until the disc made contact with (I think) the left prong. This ripped both TPU fork mounts off of the prongs leaving me with the damaged bare prongs for the rest of the fight.

forkheowd

The bot kept going but unfortunately I was too slow in self righting, resulting in taking another hit while trying to get away. This second hit left the drive pods out of phase with each other for a while. As the fight continued it weathered a bunch more hits but didn’t managed to get under Qry About It again.

Later on and missing the end of one prong and the belt that actuated one drive pod I was able to hit the pit button. In the last 30 seconds I attempted to get Qry About It between the drive pods and push it towards the pit, but the combination of Qry About It’s sticky tires and the rounded rear armour on ForkHead meant this didn’t happen.

The fight went to a judge’s decision which deservedly went to Qry About It.

Full Fight

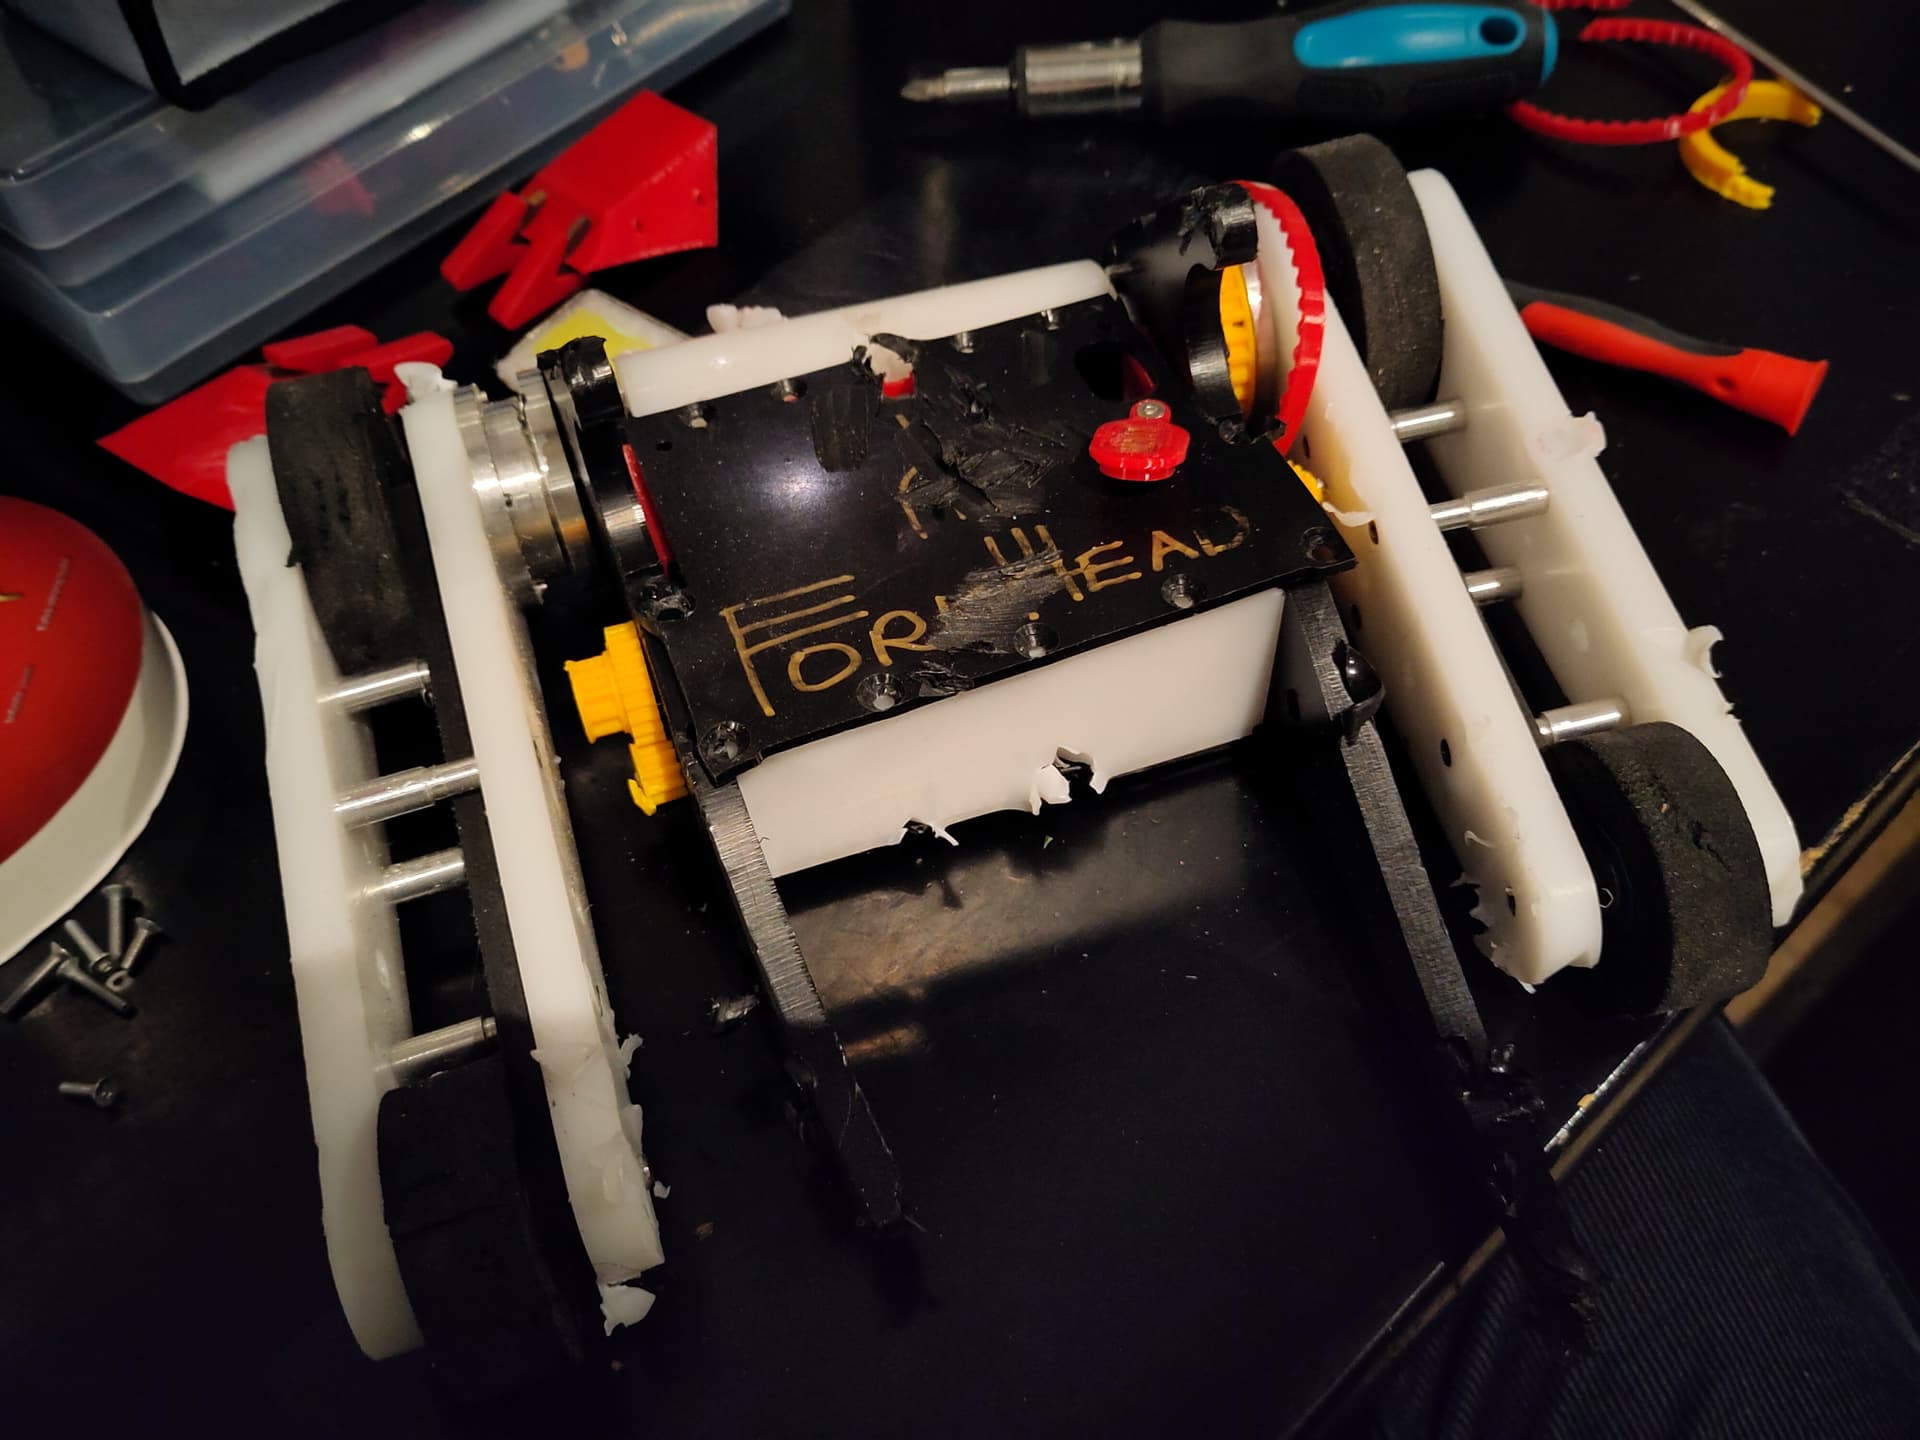
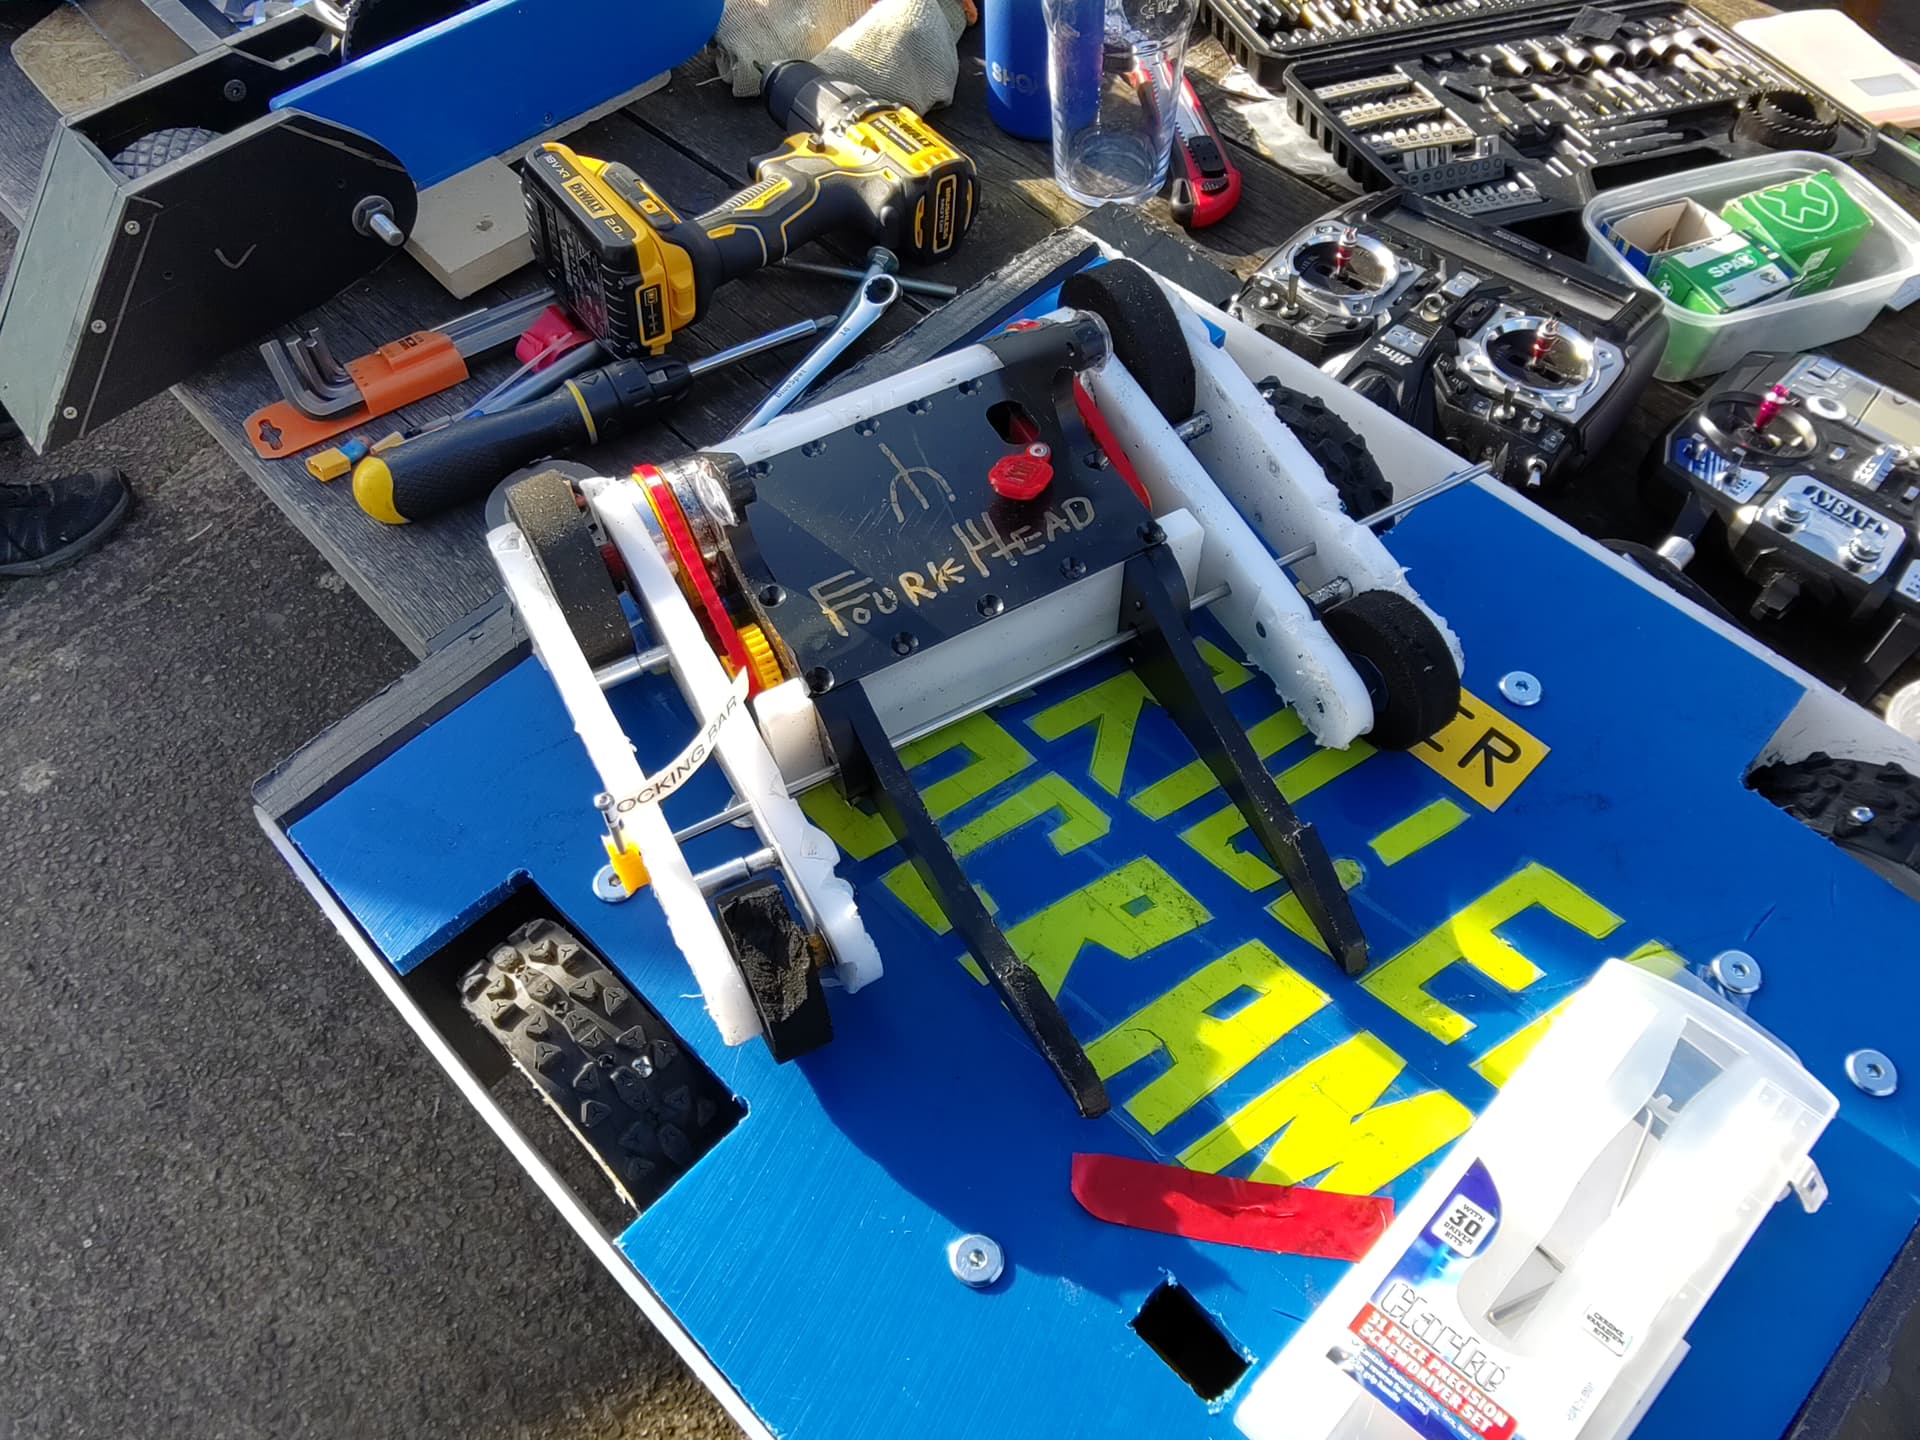
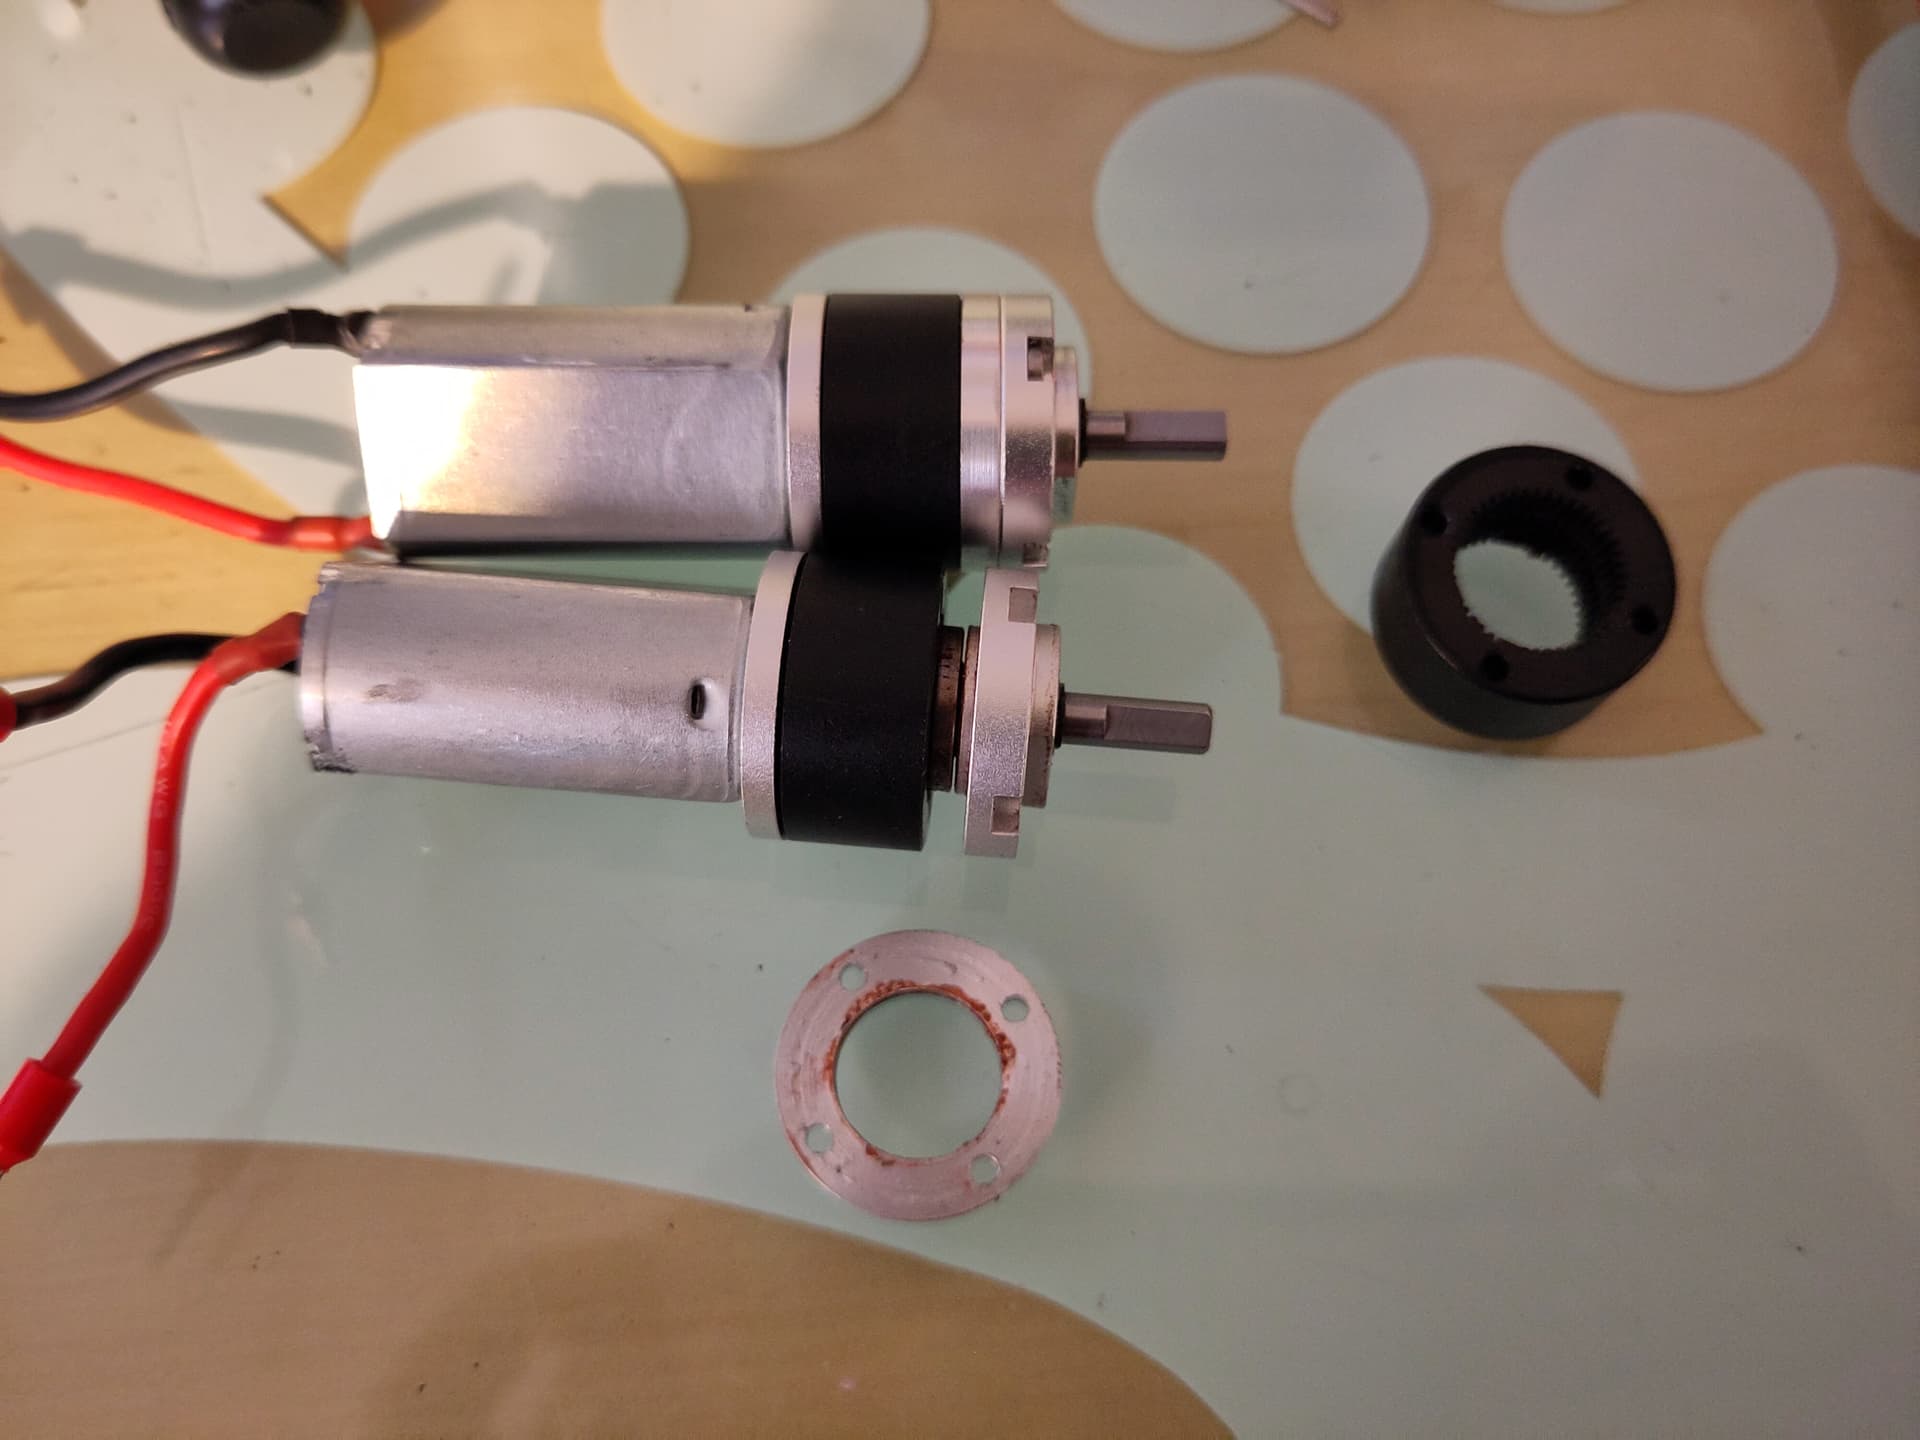
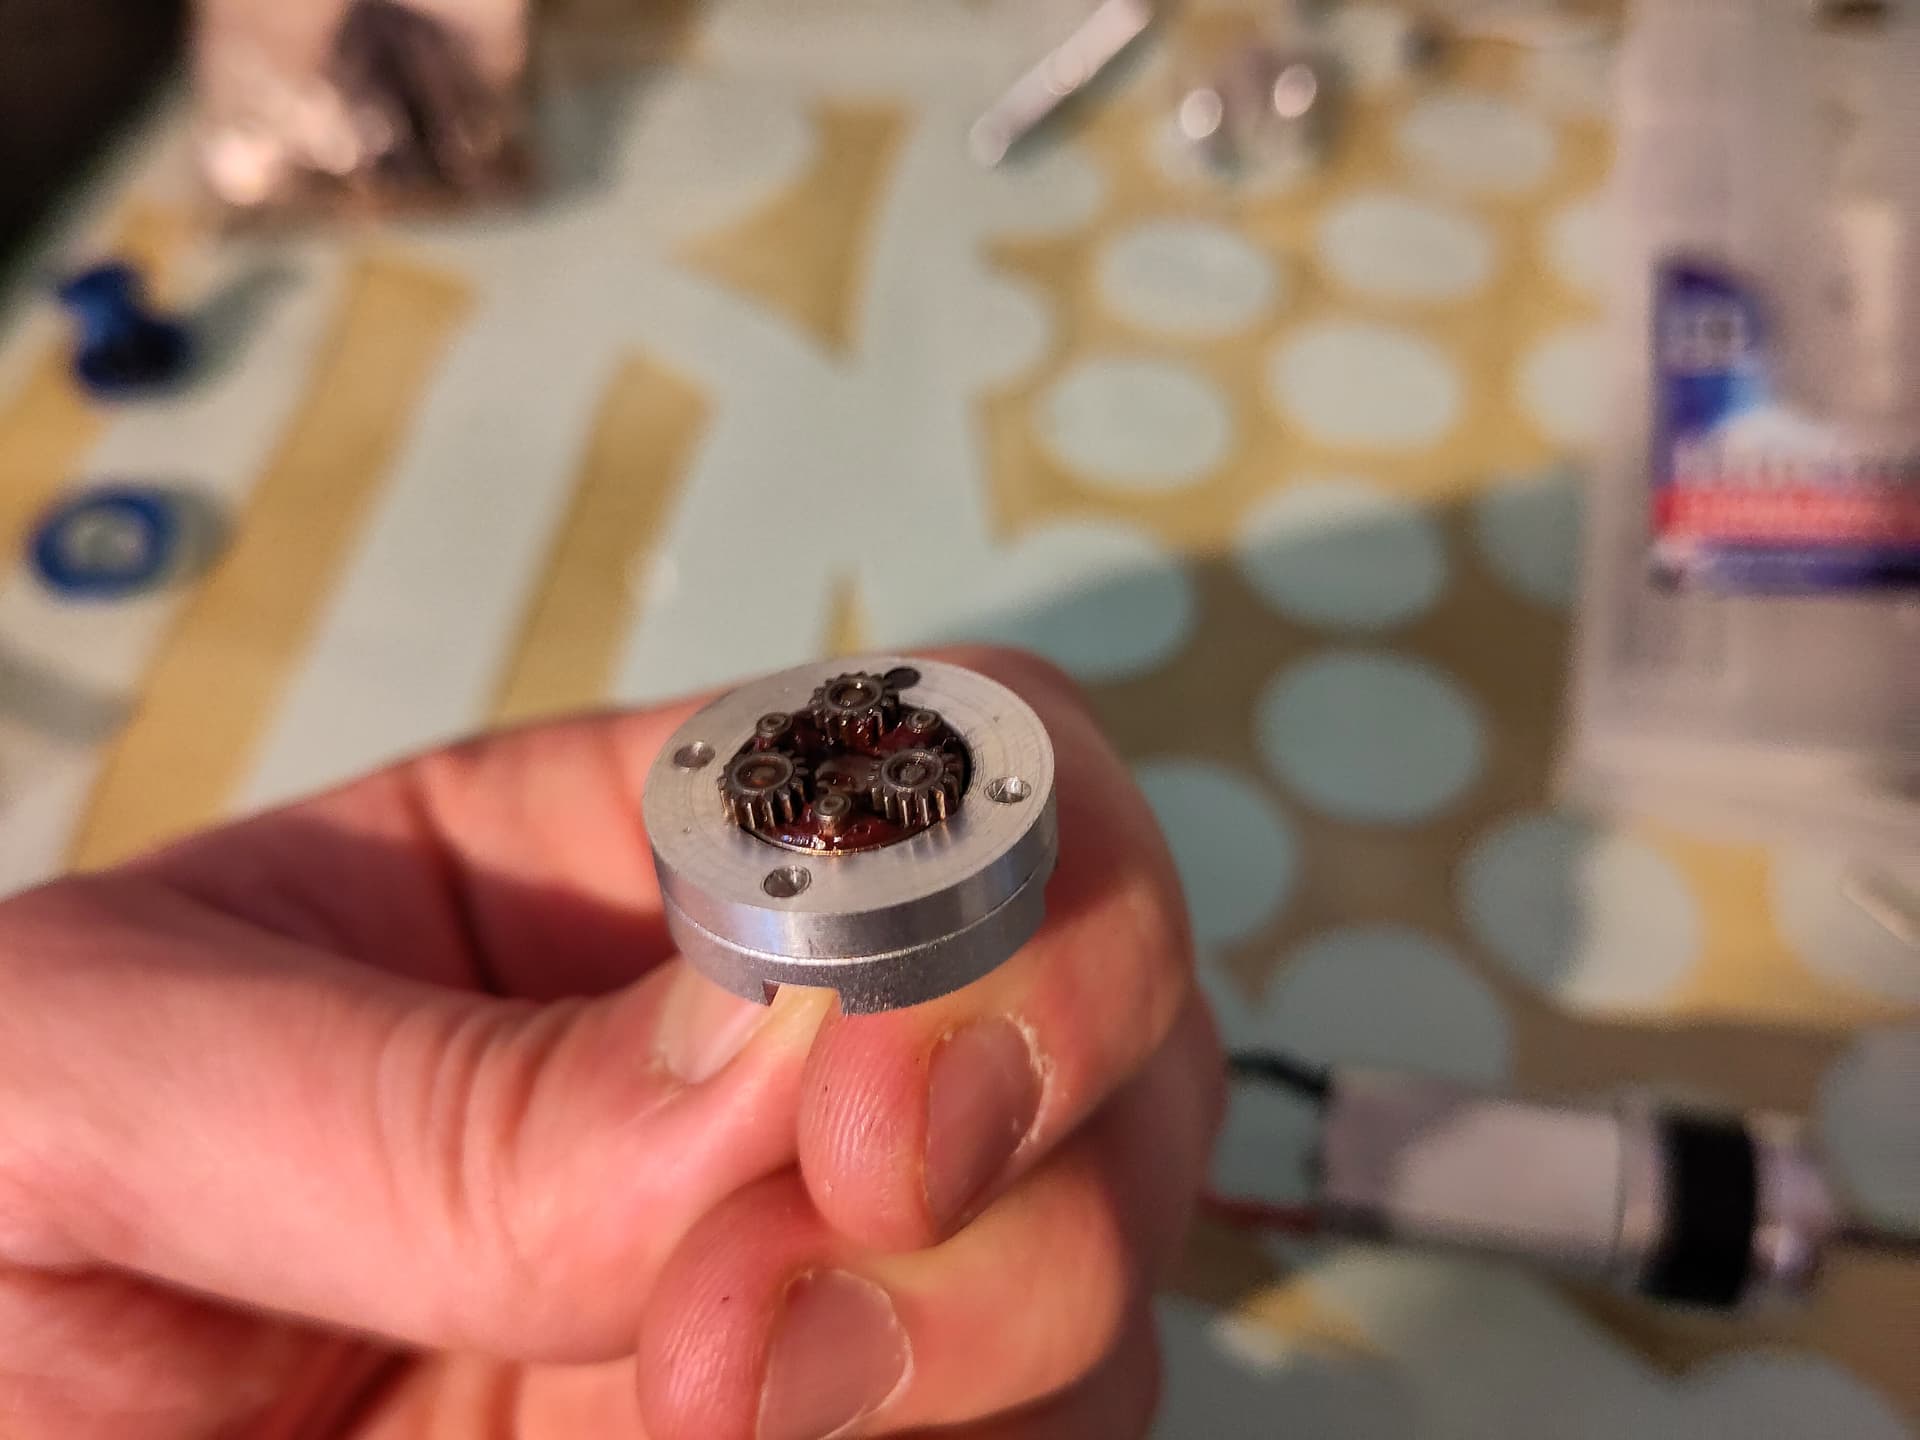
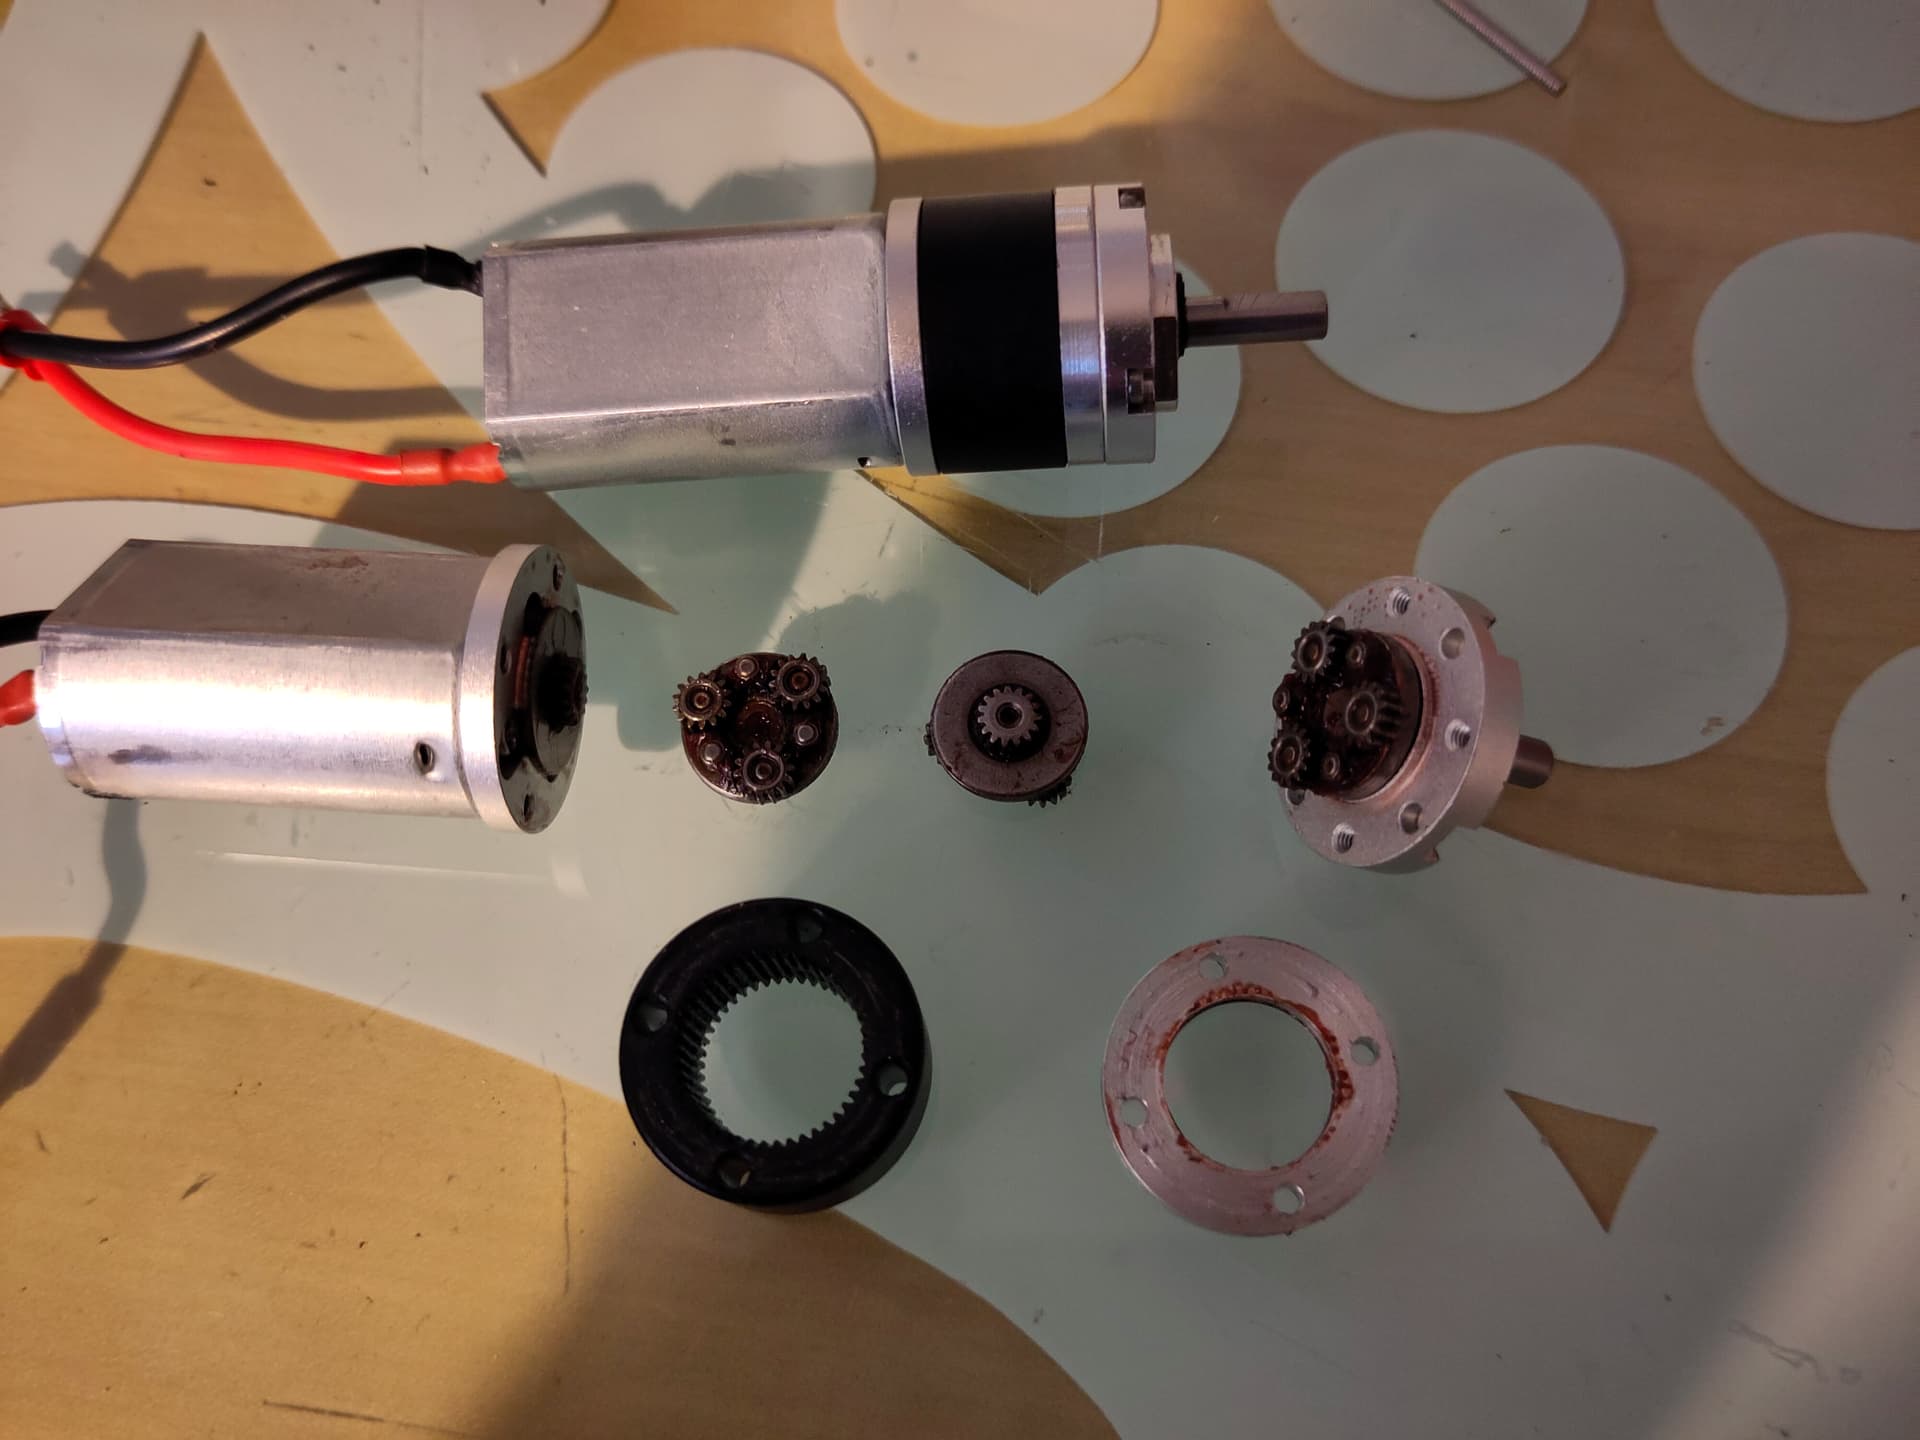
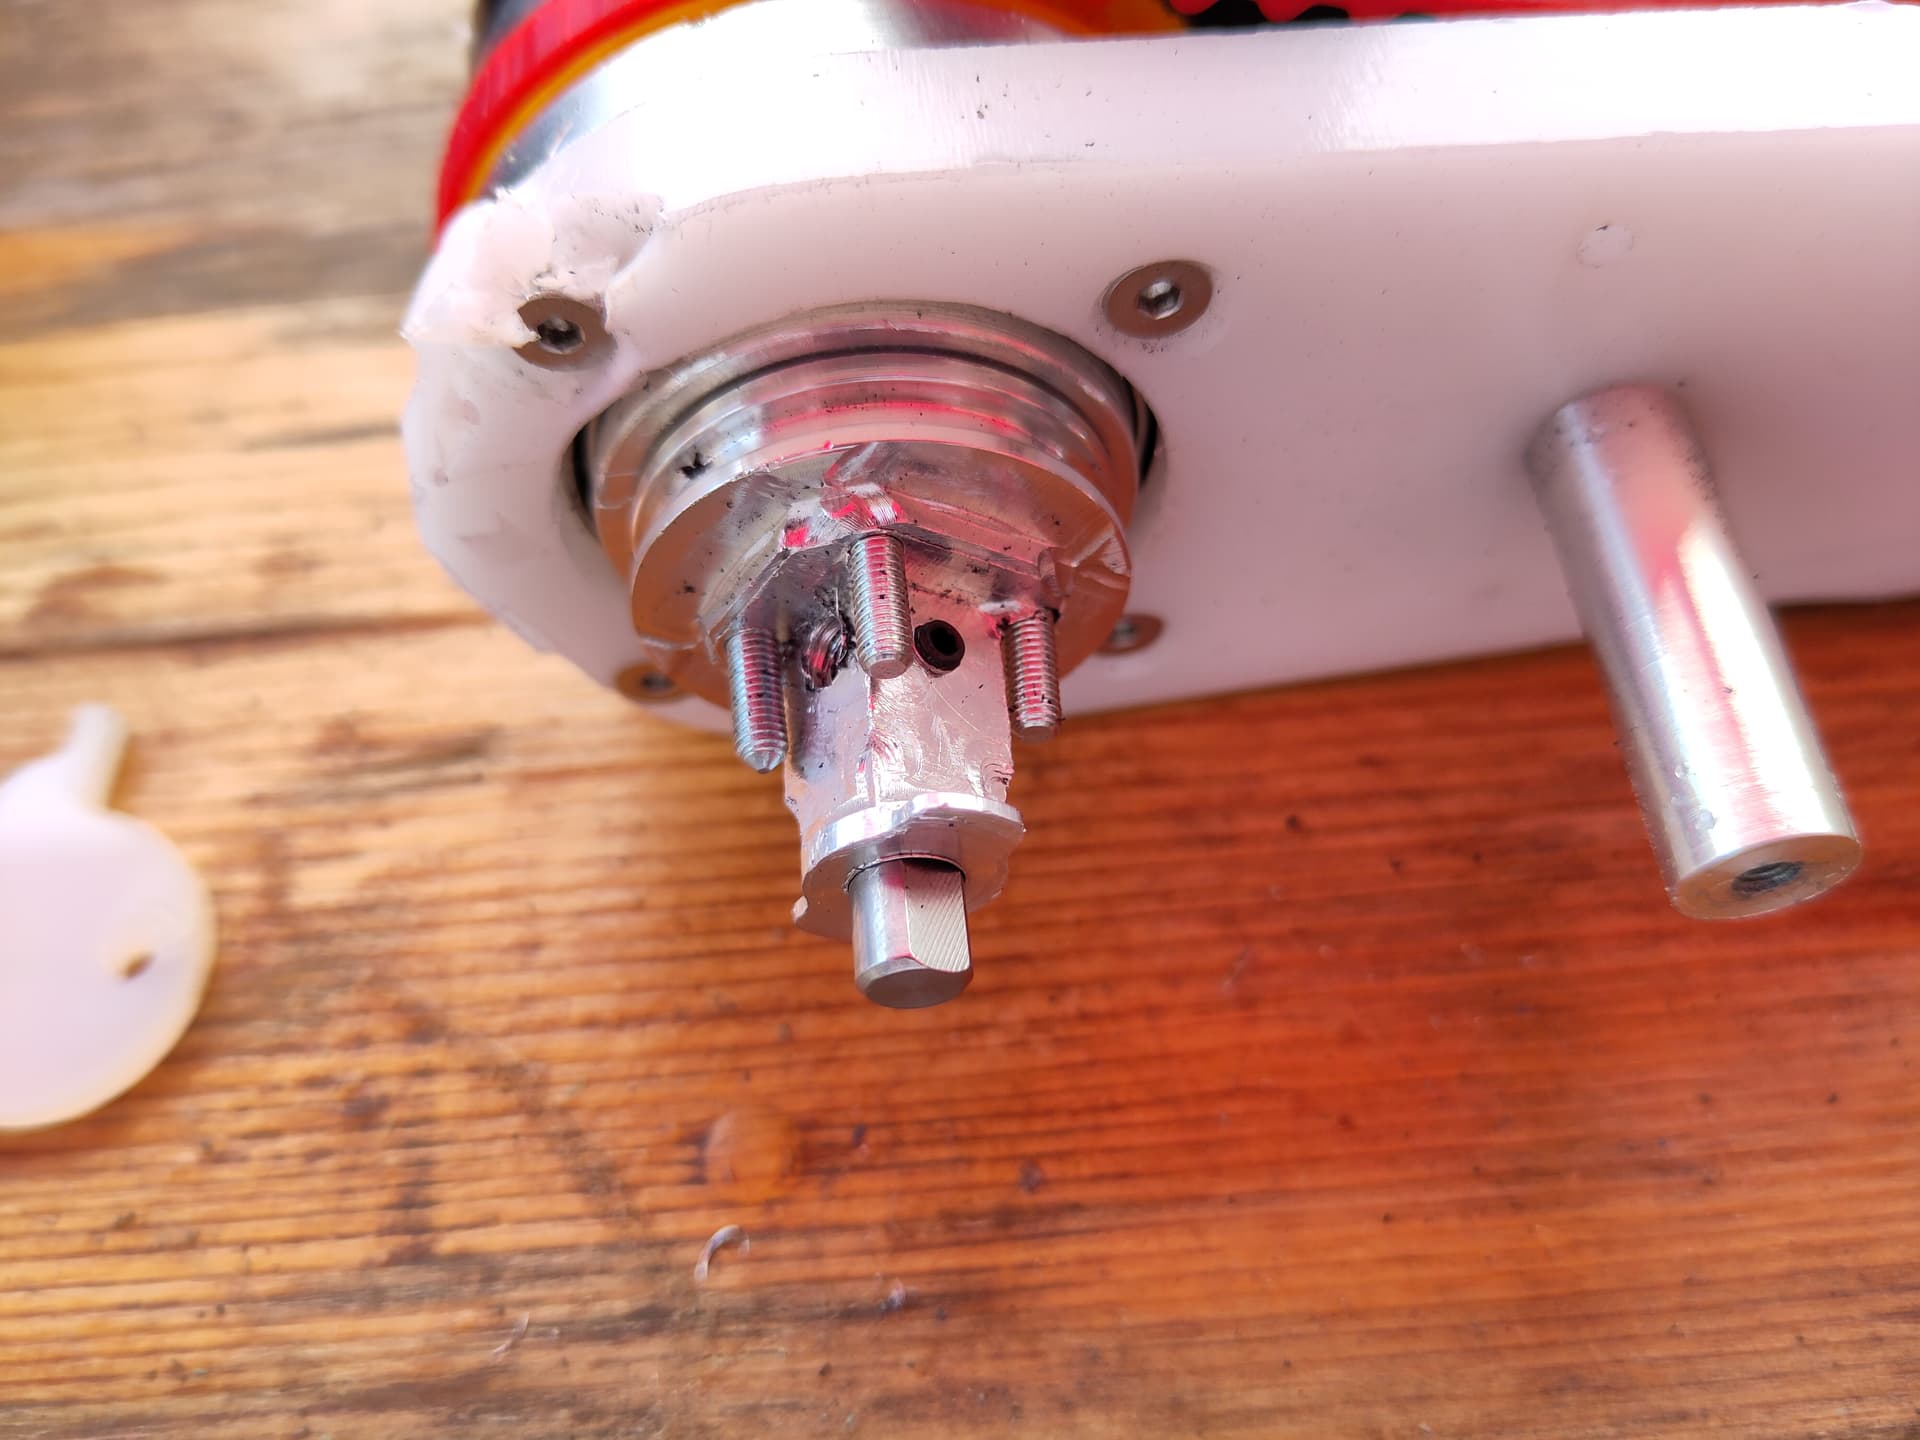
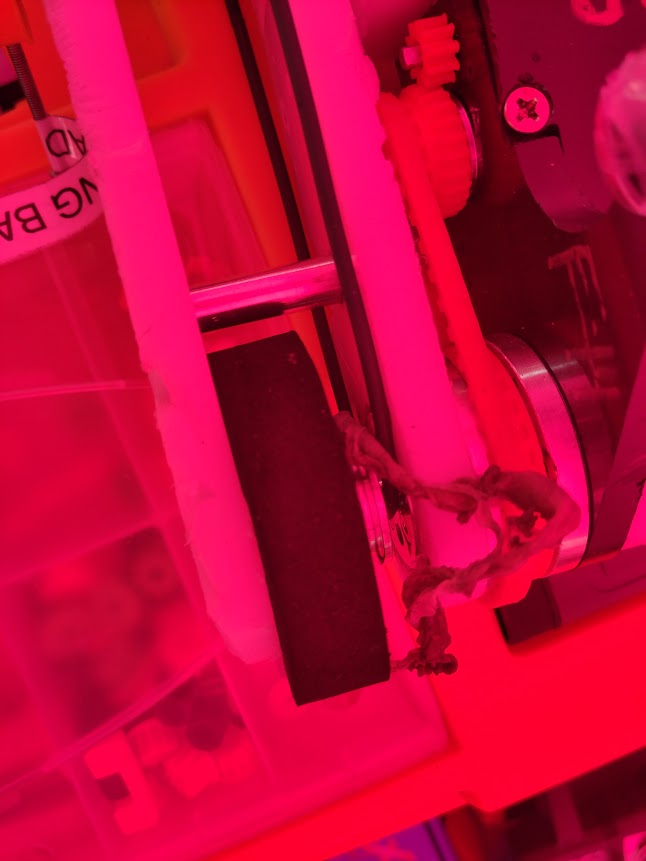
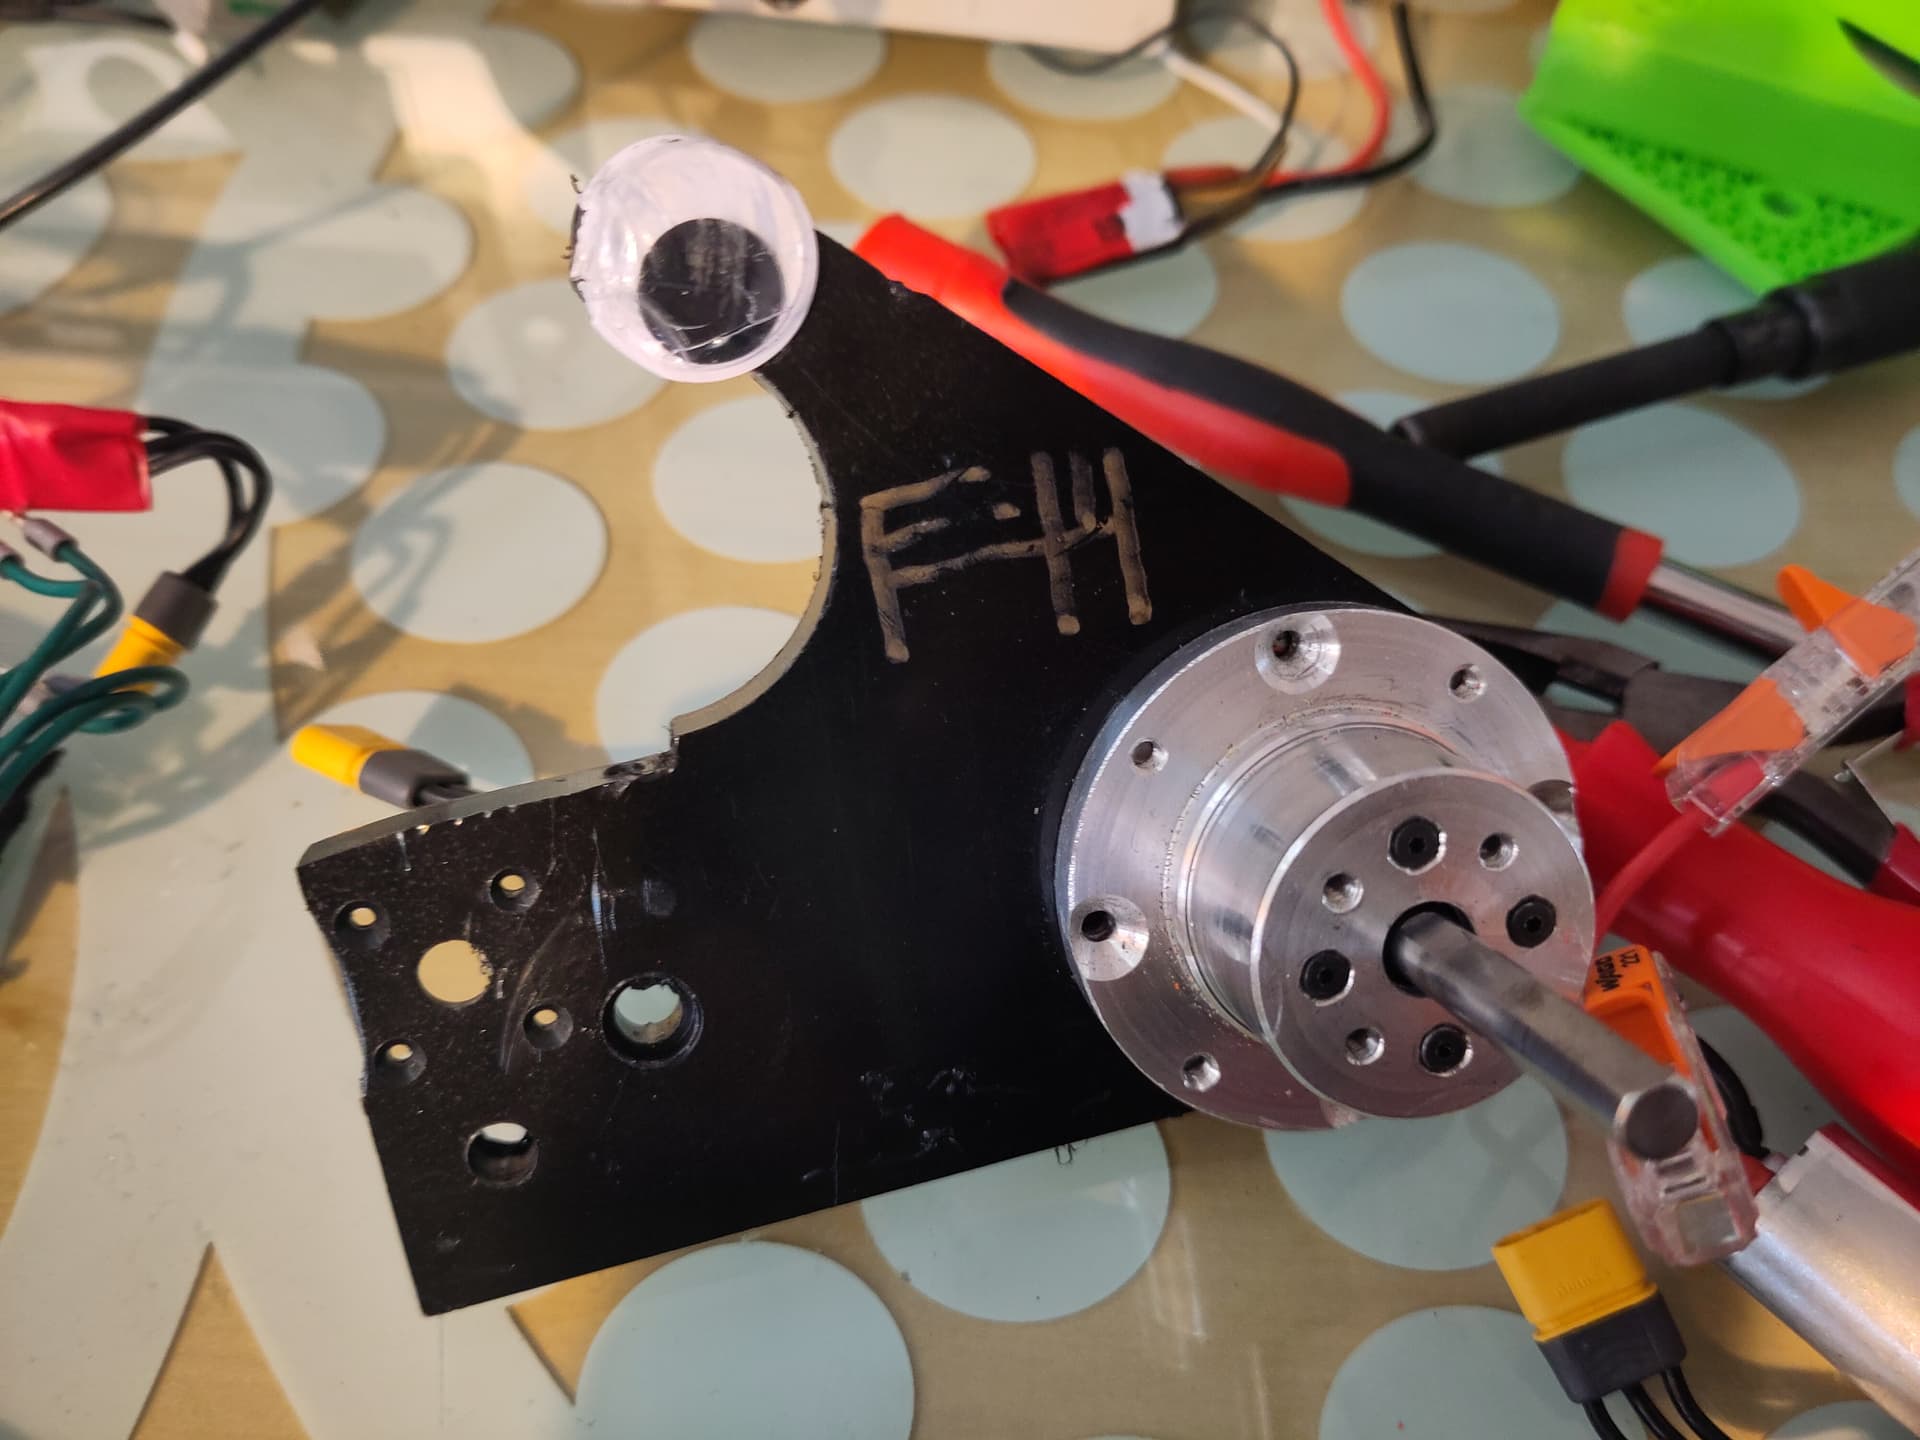
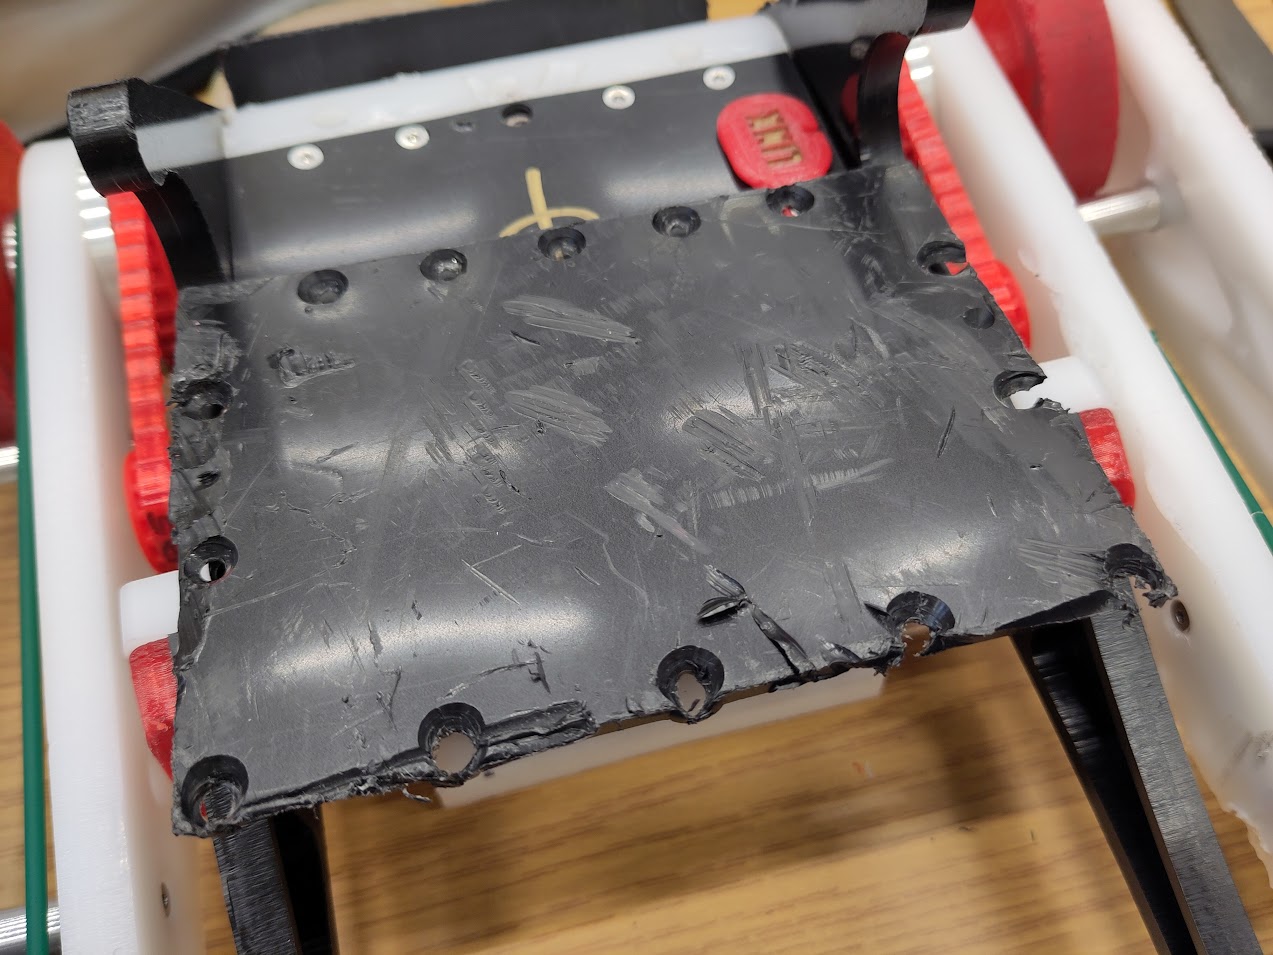
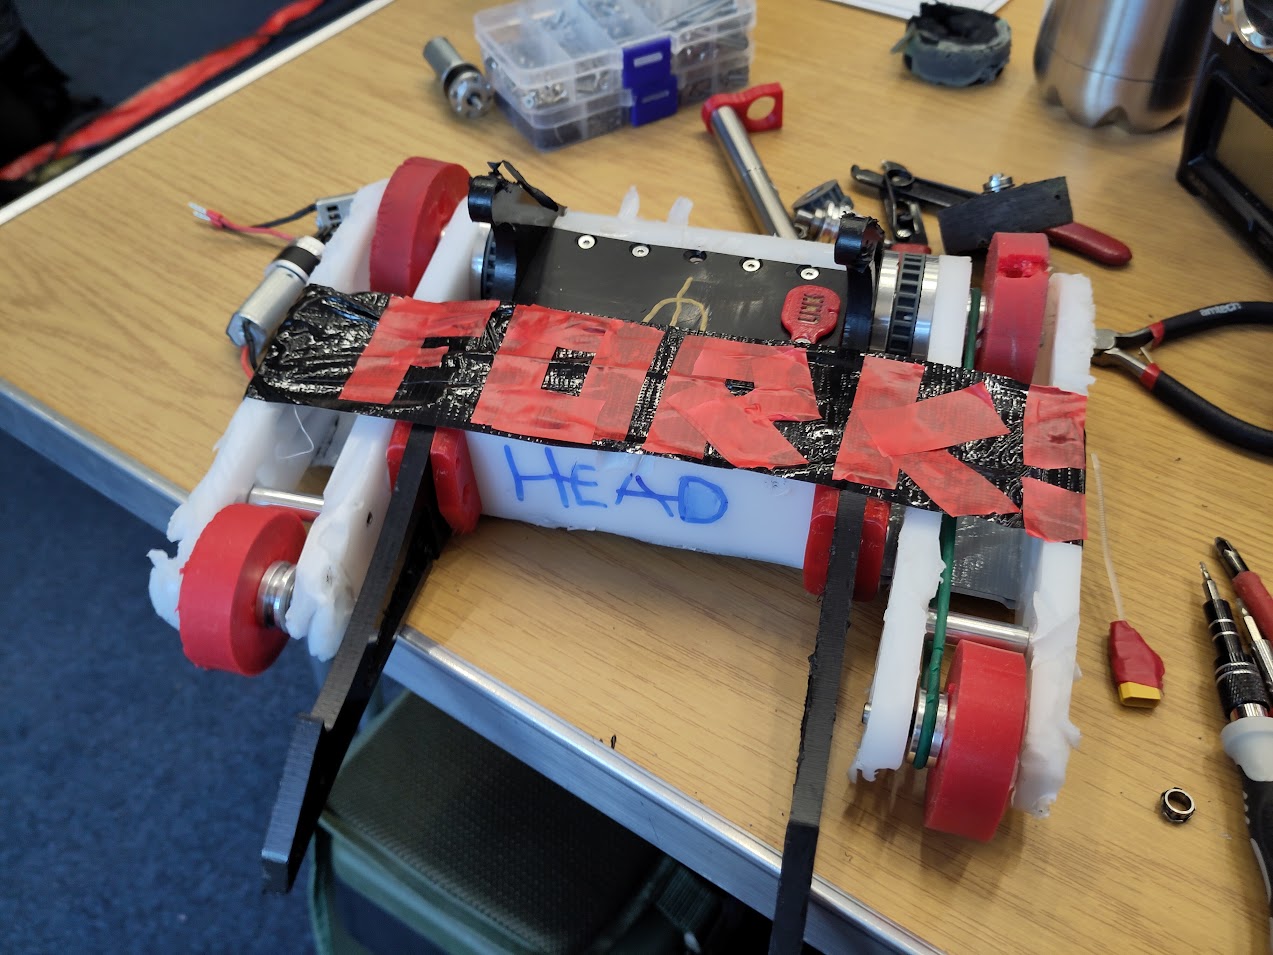
Apart from the prongs, one of which was torn off and one of which was mangled, and some bent screws, most of the damage was cosmetic and I’m pleased with ForkHead’s ability to take a hit. Unfortunately the drive mechanism that rotates the drive pods is quite exposed, and the countershaft that keeps both sides in sync took a hit and became bent.

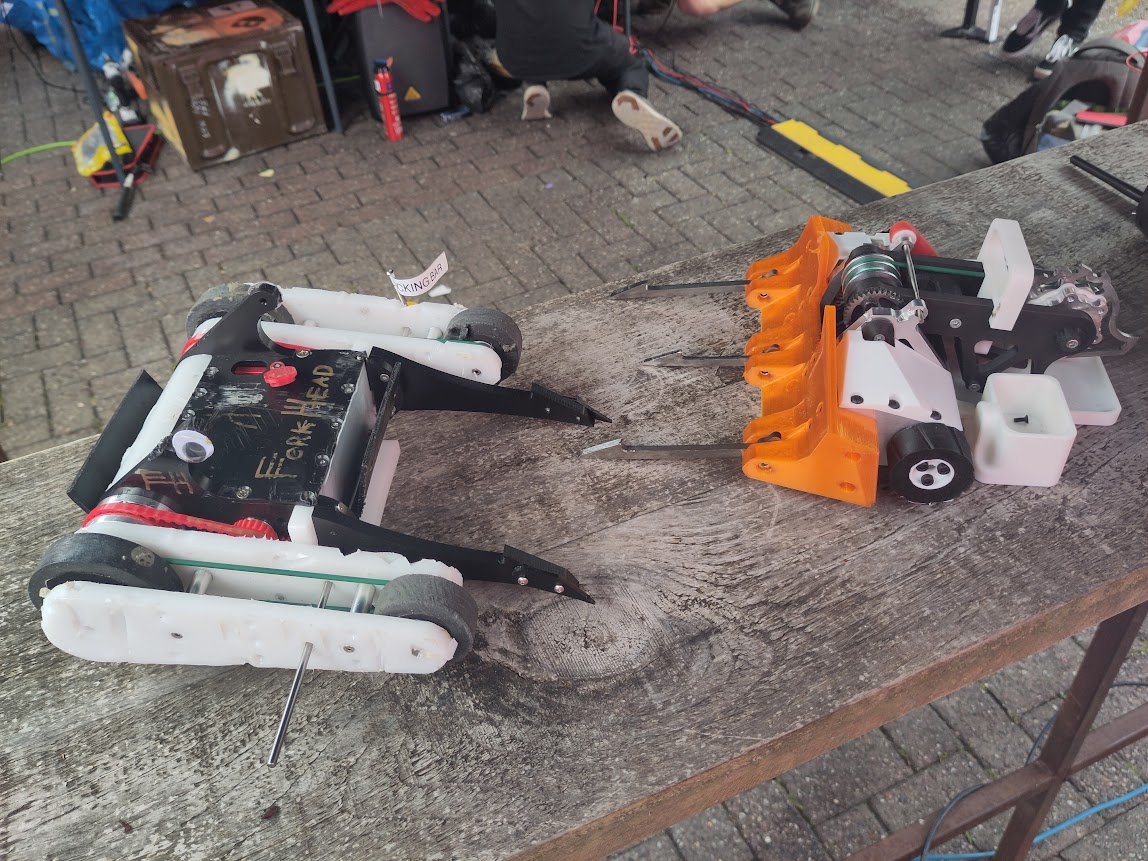
I spent the next hour or stripping the bot down to replace this shaft before finding that my spare countershaft was the wrong length. Having pushed my next fight back twice due to the amount of work needed to get at this component I had to settle for putting ForkHead into its next fight against BadFutherMucker with the countershaft removed and the drive pods spinning loose. I added some TPU armour to try and protect the remaining pod drive bits, but this ended up doing basically nothing.

Thanks to the way the drive pods behave in reaction to my 4WD system this went badly. This is obvious to see before the fight while I’m trying to get into a ‘both drive pods pointing backwards’ situation.

Full Fight

I managed to avoid taking a hit from BFM for the first 15 seconds or so of the fight, before getting thrown around quite a bit (and taking out a light).

I had to tap at 50 seconds because I had line of sight to ForkHead’s battery, and I suspect I also had no drive at that point.

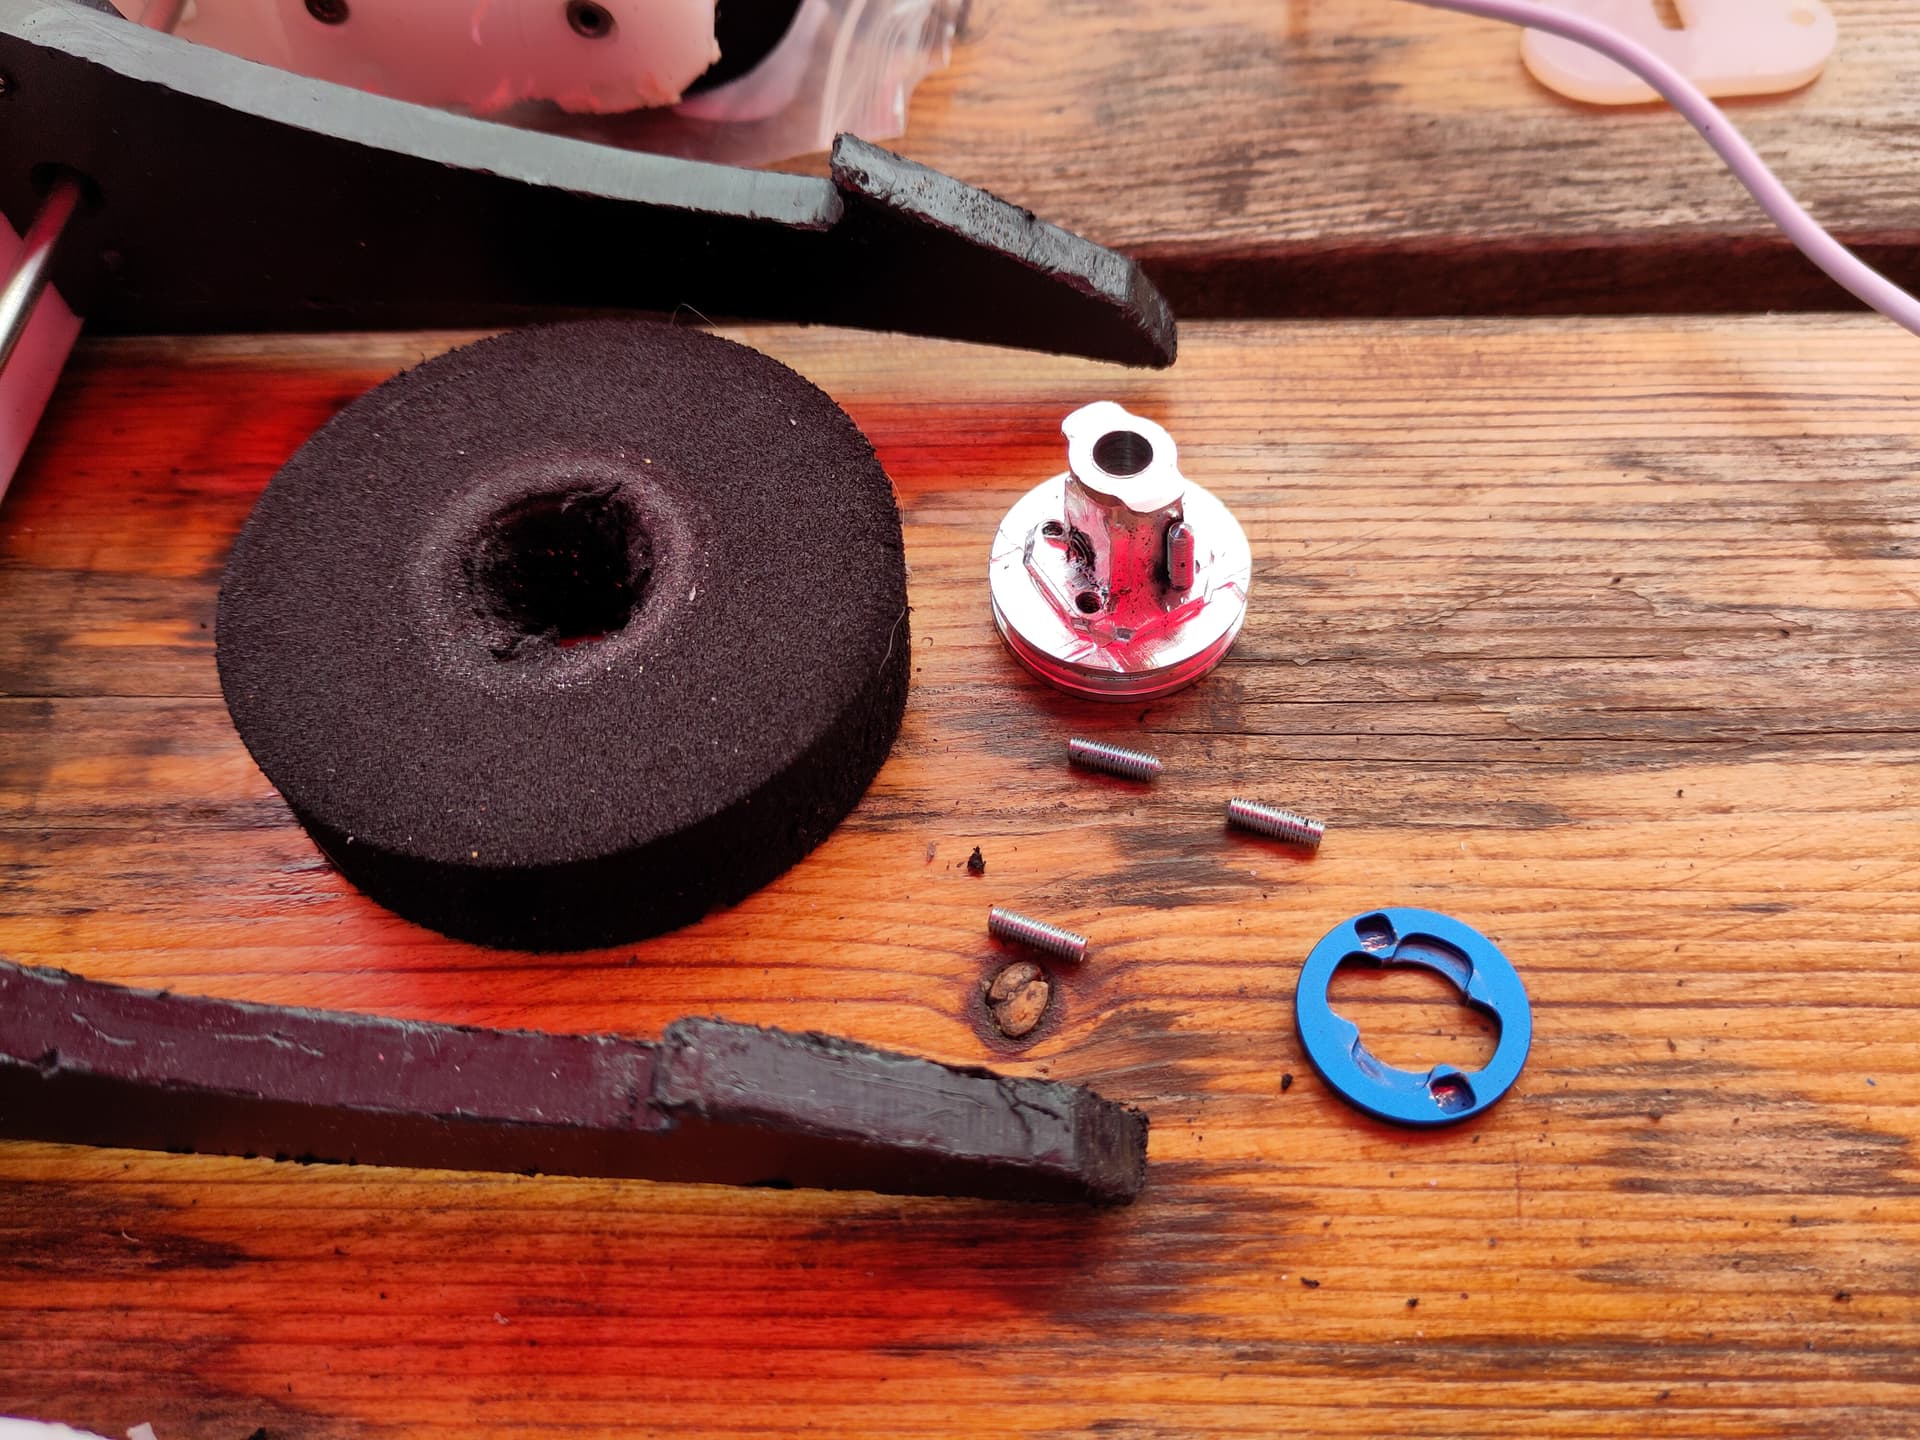
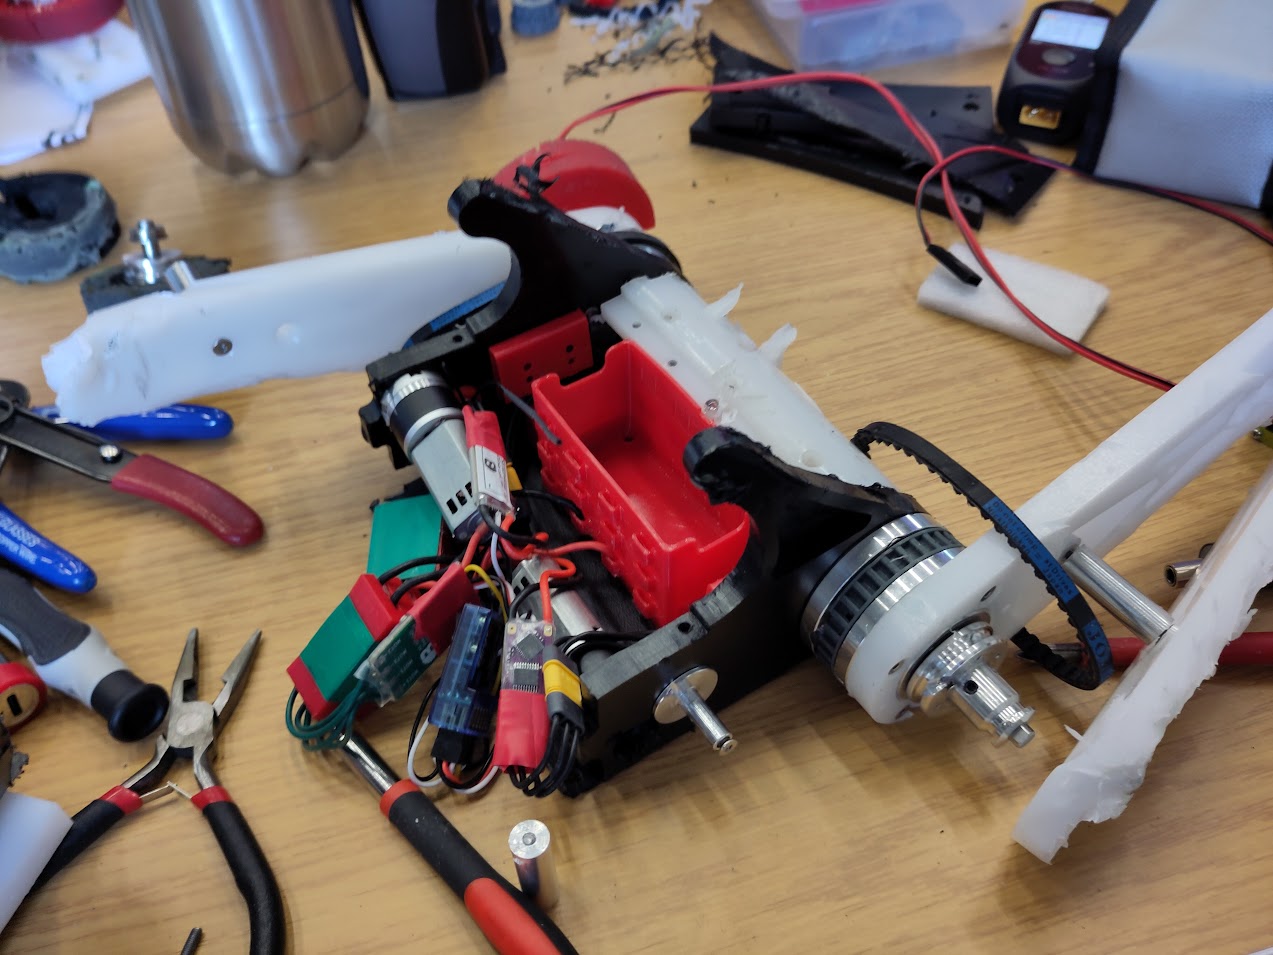
ForkHead was looking very unhappy after this fight. Hits to the drive pod had broken the aluminium standoffs between the sides of the drive pod (or the screws holding them) which had released the captive front axle. Having these act as shaft support for the drive motors was I think a bad idea, as the remaining standoffs just acted as a force multiplier sending further impacts on the outer drive pods straight into the motor shafts.

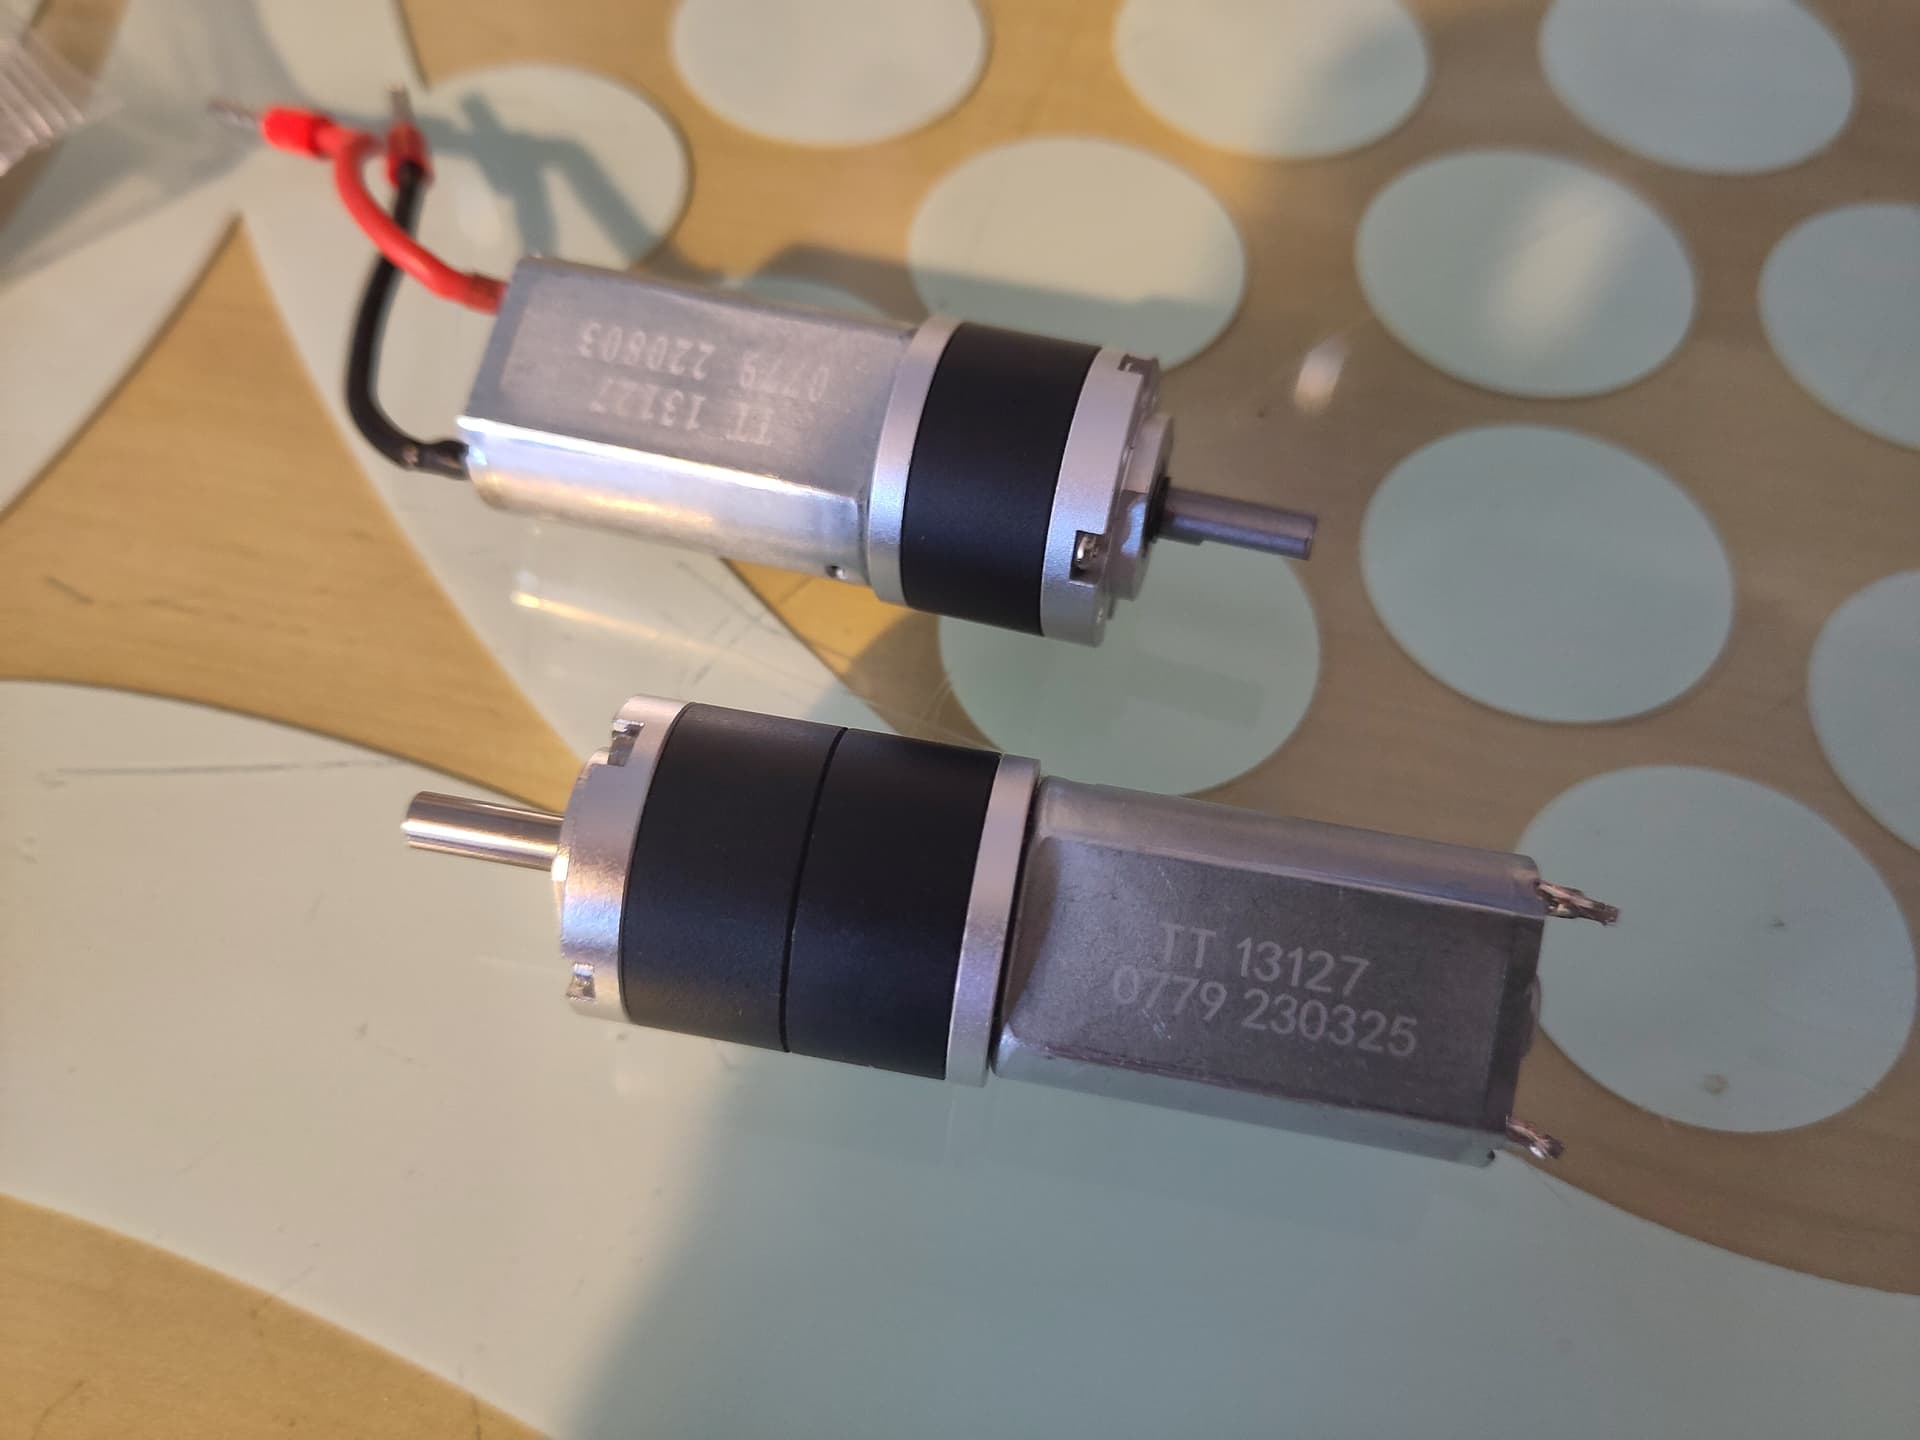
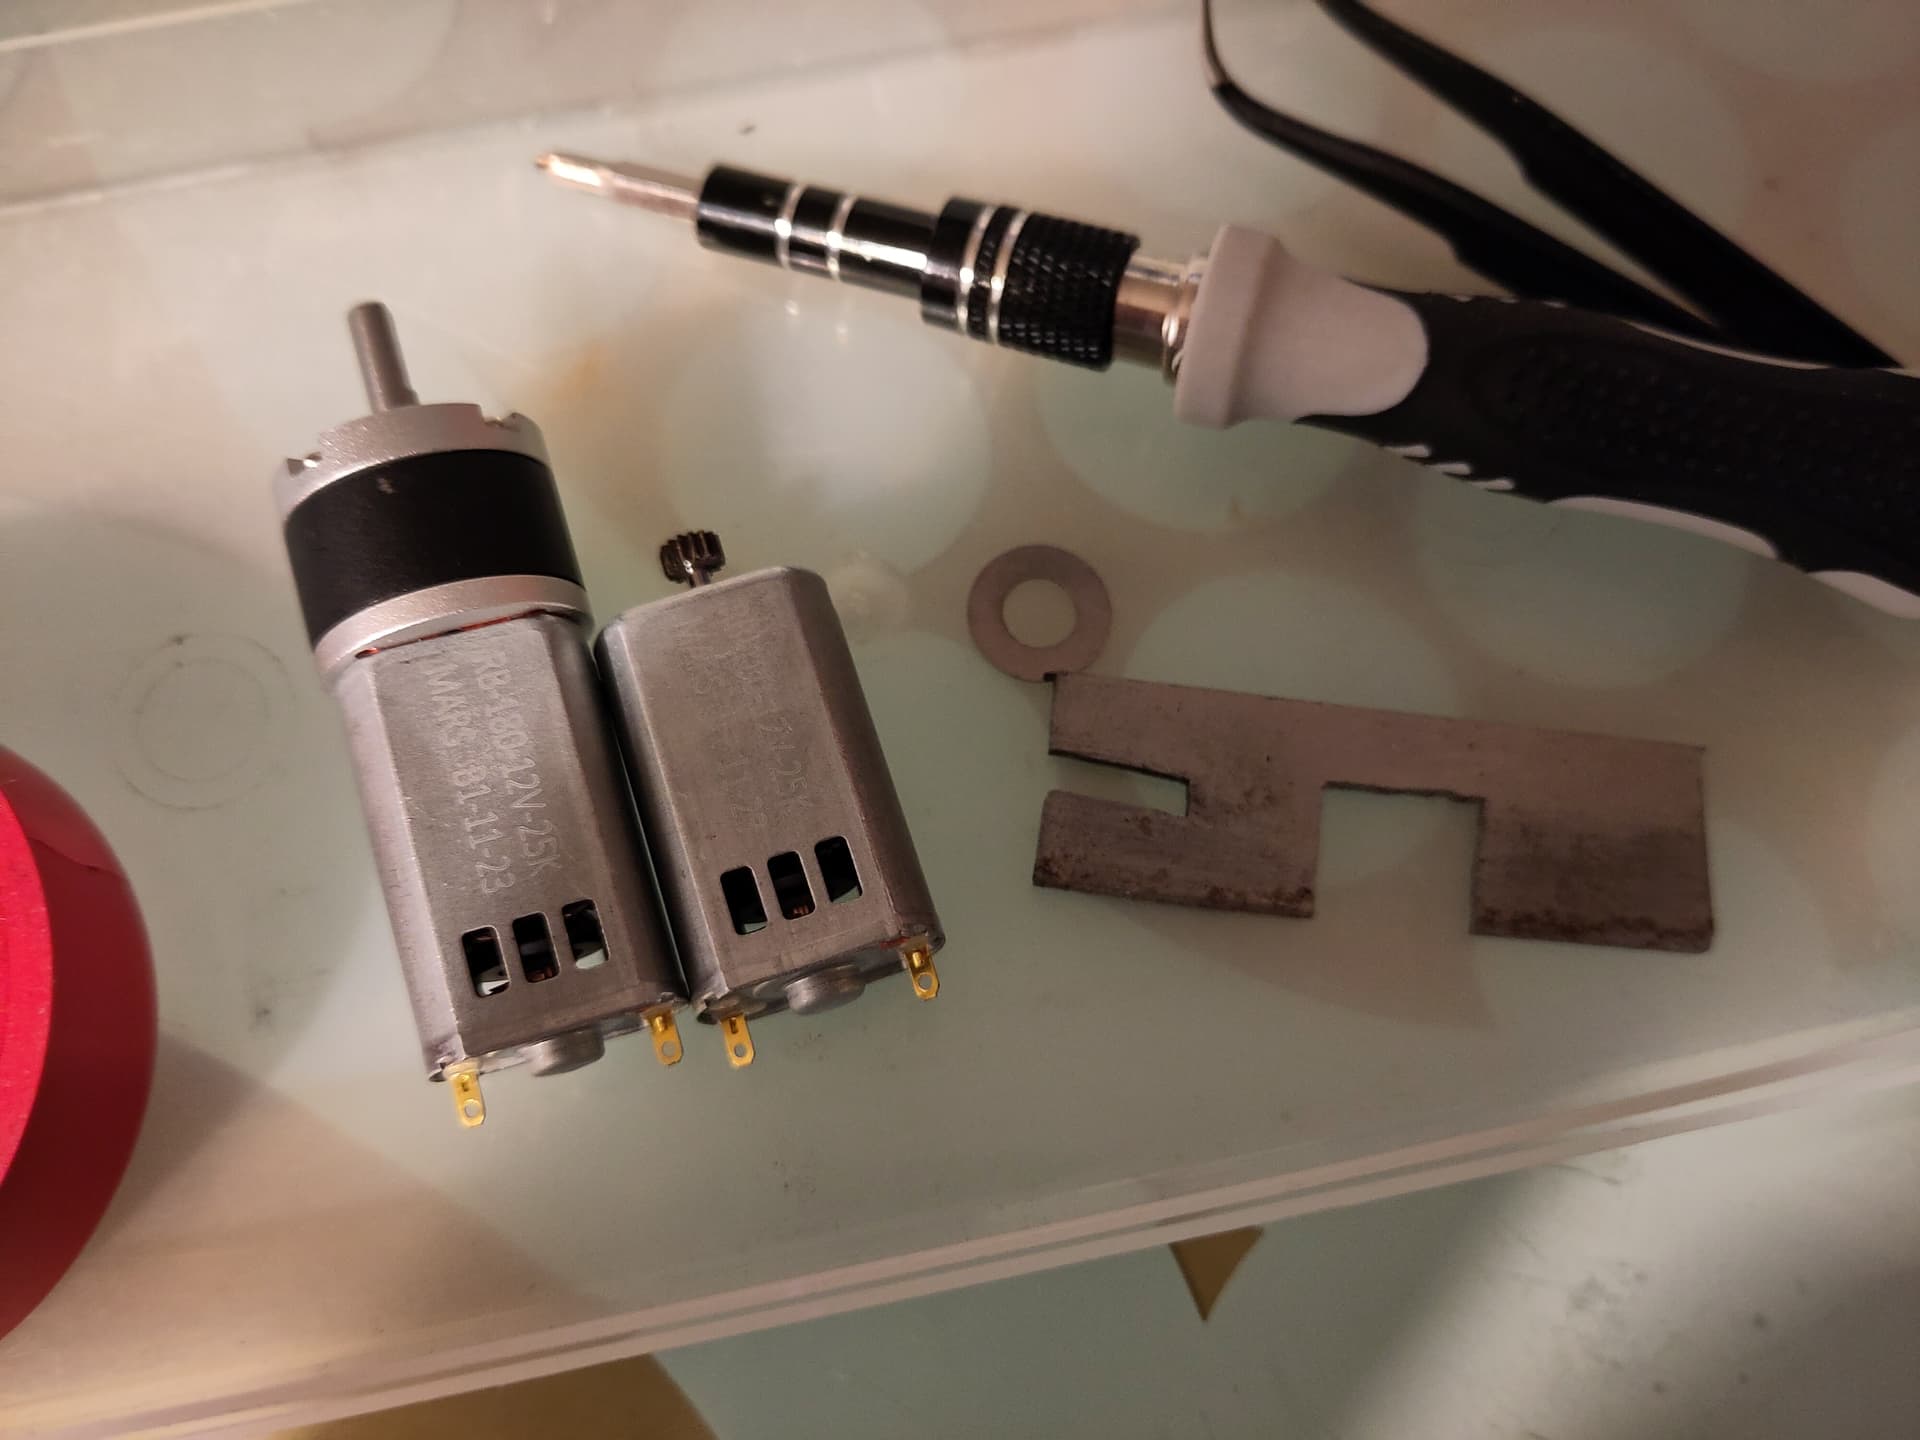
The core of the bot was still pretty much intact (after replacing/tightening screws) but with two MegaSpark motor shafts sheared and both 22mm drive pod rotation motor shafts bent I decided to forfeit the third fight (which would have been against another vertical spinner, Ultra Violence) as it would have taken a long time to strip down and rebuild the robot to replace the drive motors, and I didn’t want to sacrifice another pair of MegaSparks without making some improvements.

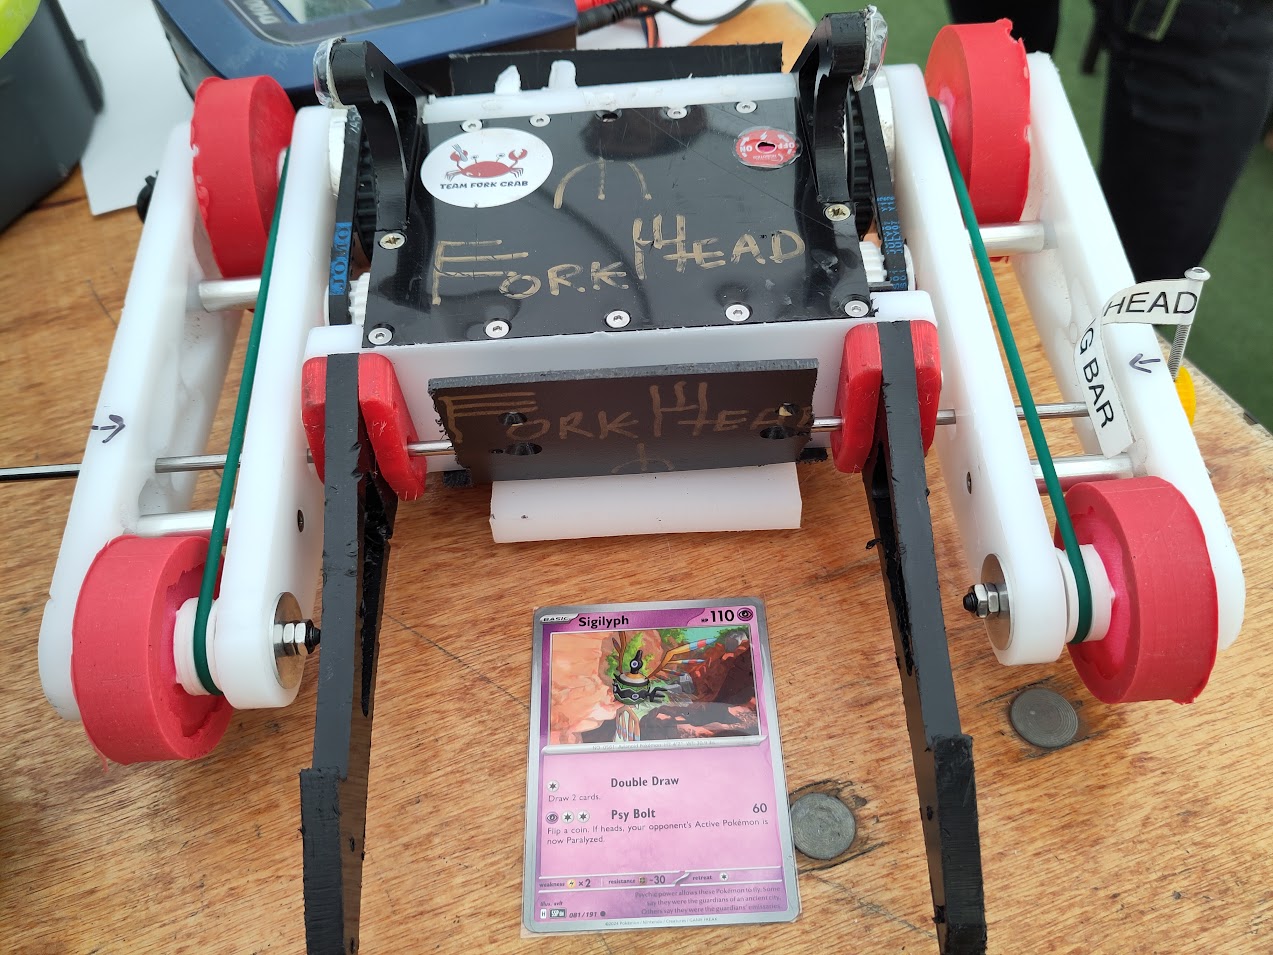
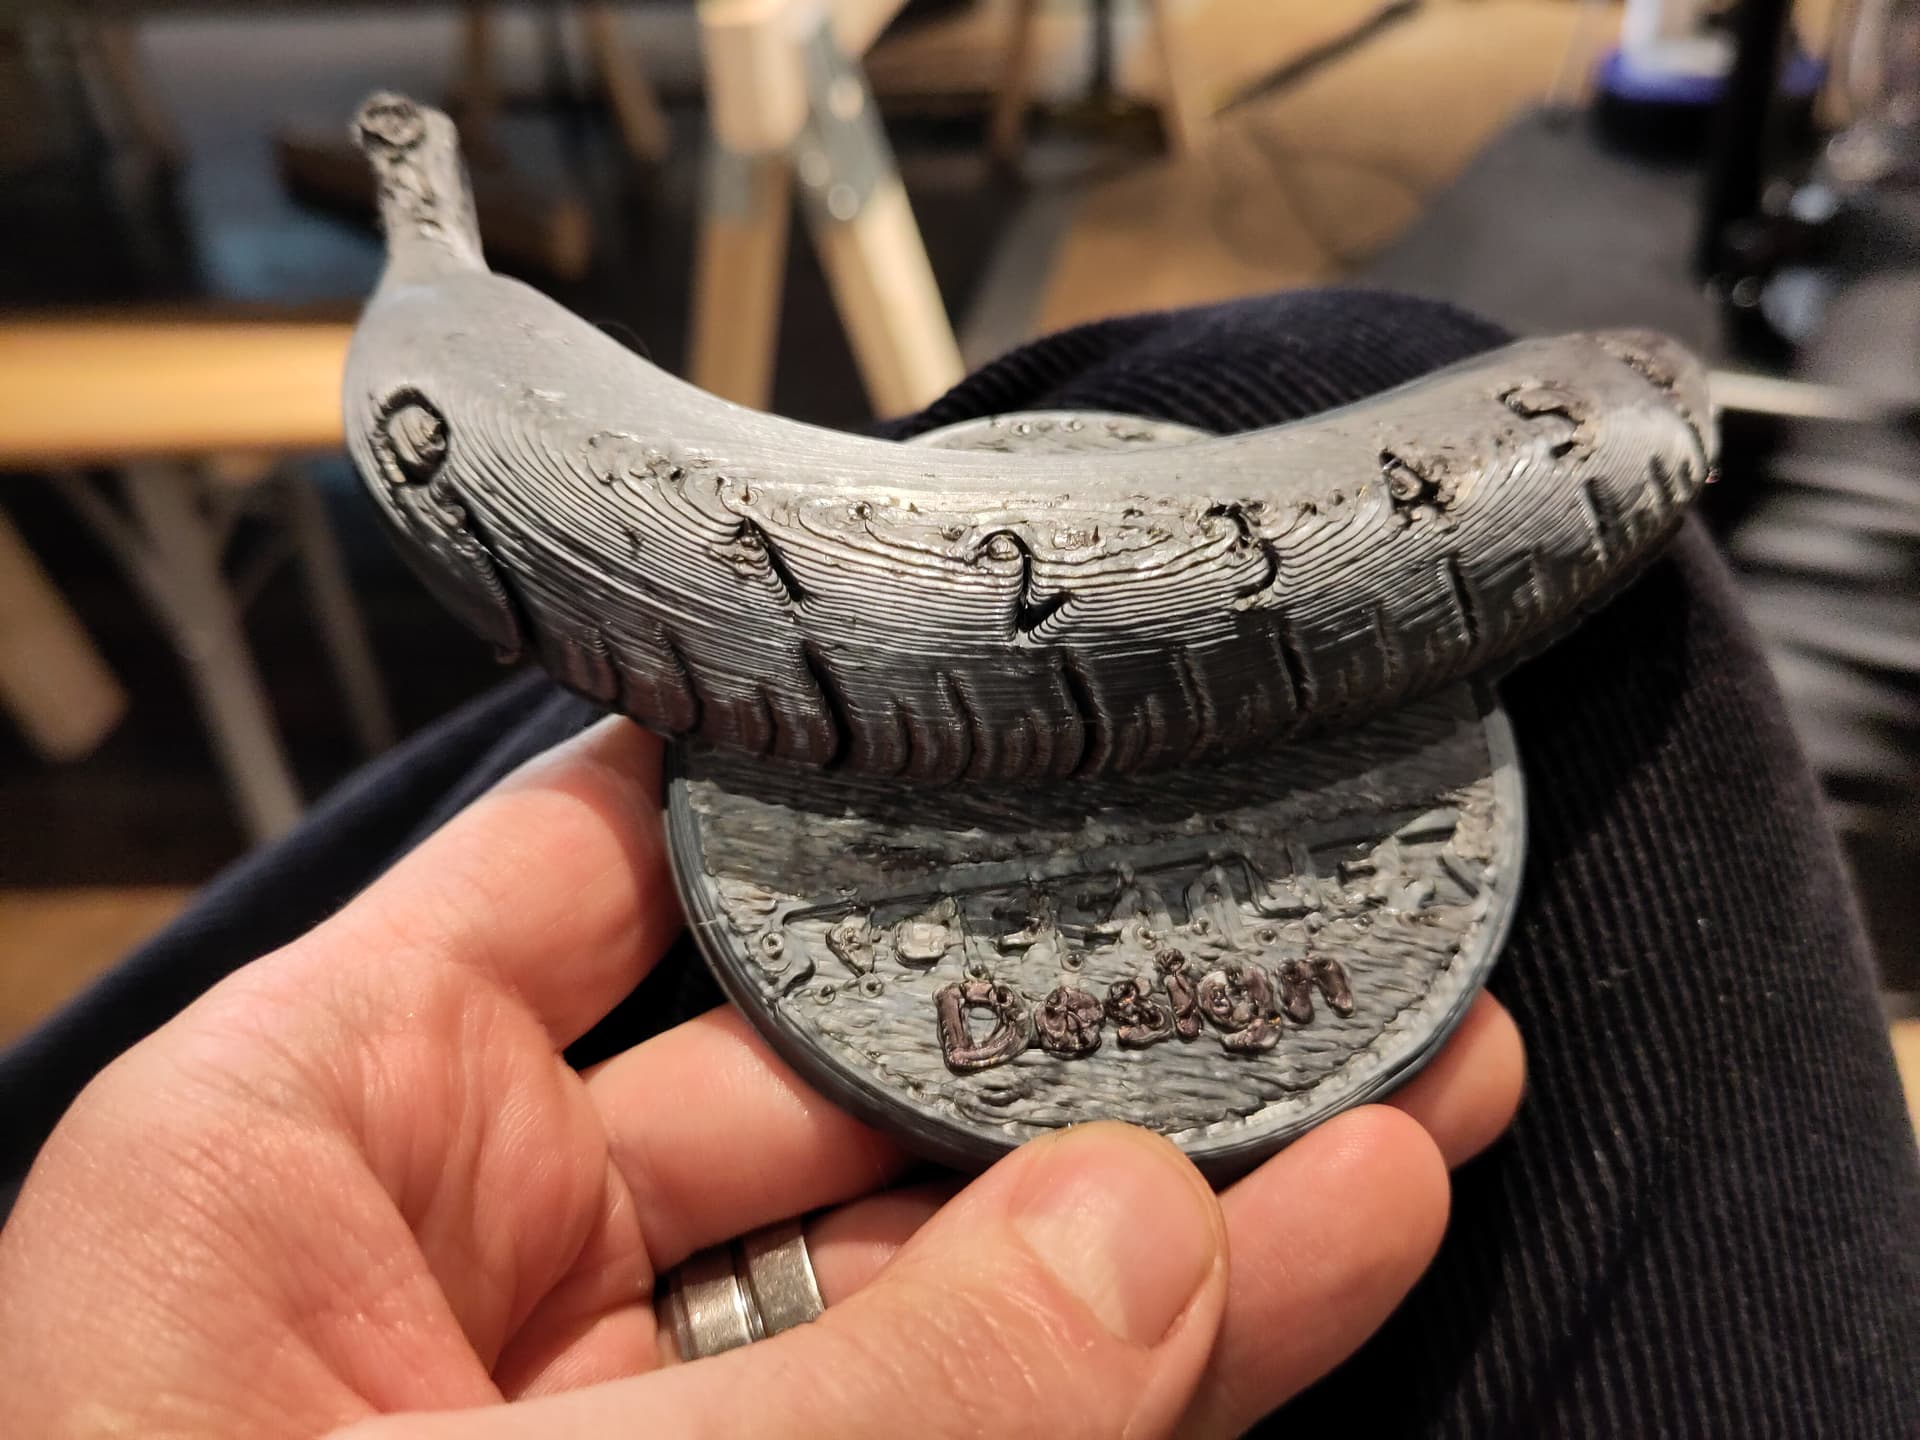
Despite coming home in pieces ForkHead took home a banana for scale tropy for Best Design and on balance it performed well enough that I’m intending to continue developing it.

Obviously I’ve got a long list of improvements to make for the next event, including:

  • Armour
    • Replace front armour panel with a wider piece that interlocks with the side armour
      • This should transfer impact forces straight to the side panels instead bending screws and ripping off the top/bottom armour
      • Wider panel keeps attacks from the front out of the pod drive system
    • Separate the prongs from the side panels
      • More modularity and weapon options
      • Avoids integrating something that’s likely to take damage (prongs) with something that’s hard to replace (side panels that everything screws to)
    • Think properly about forks and setups
  • Drive Pod Control
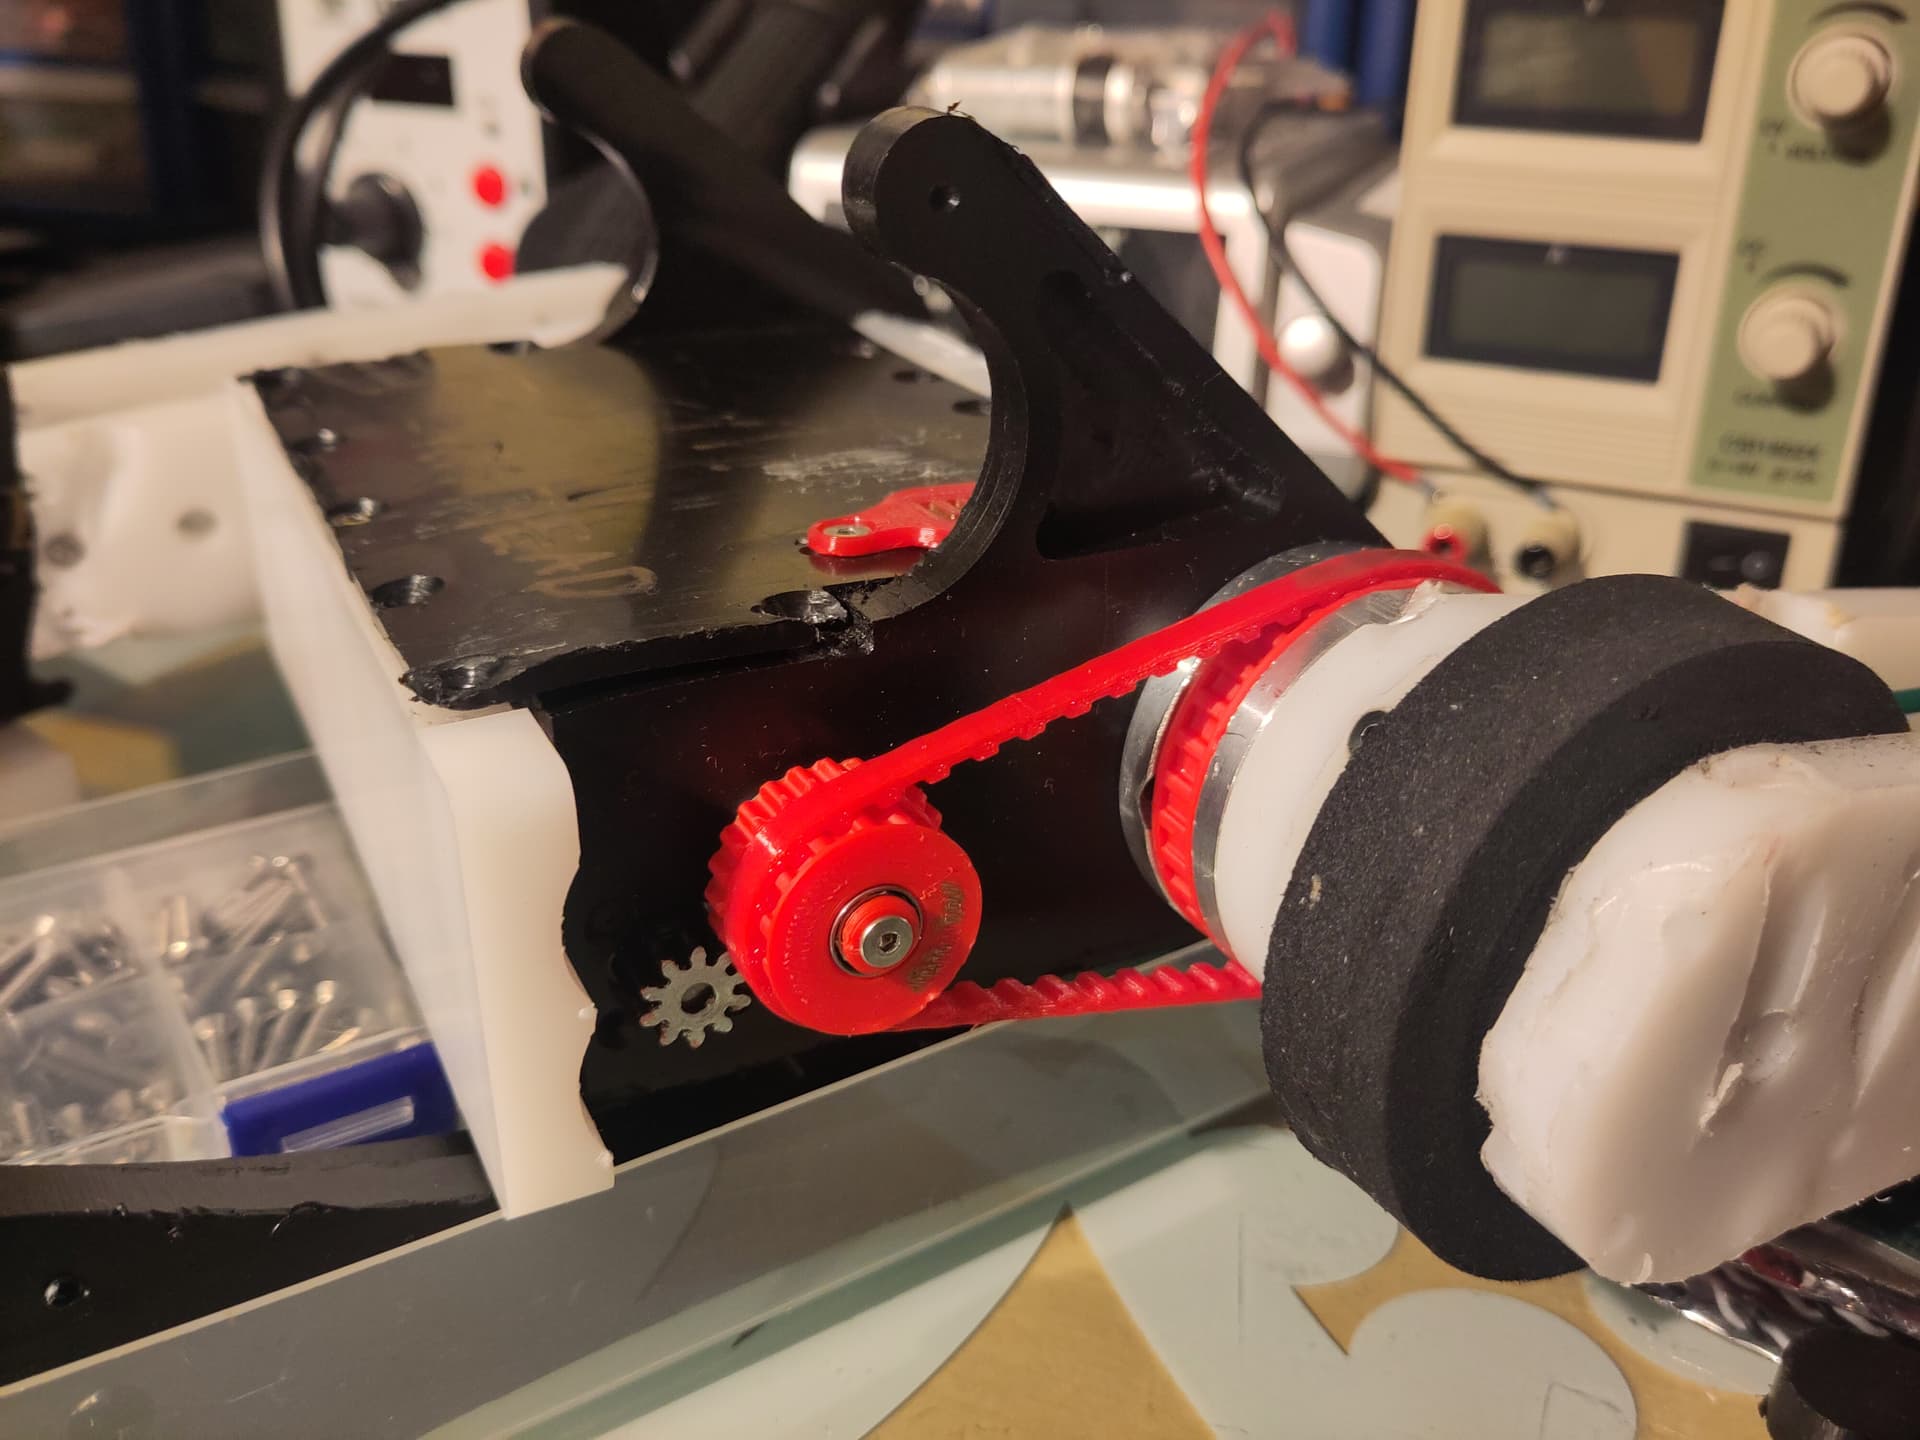
    • HTD5 belts worked well
    • Additional gear reduction for the pod drive motors (I already knew this was an issue)
    • Remove the ‘through body’ countershaft - it was awkward to replace and clunky
    • Come up with an electrical rather than mechanical system to resynchronise the drive pods (as loathe as I am to bring custom electronics into it)
      • Hopefully just an endstop switch for each side, with an RC switch in series to enable/disable them
  • Drive System
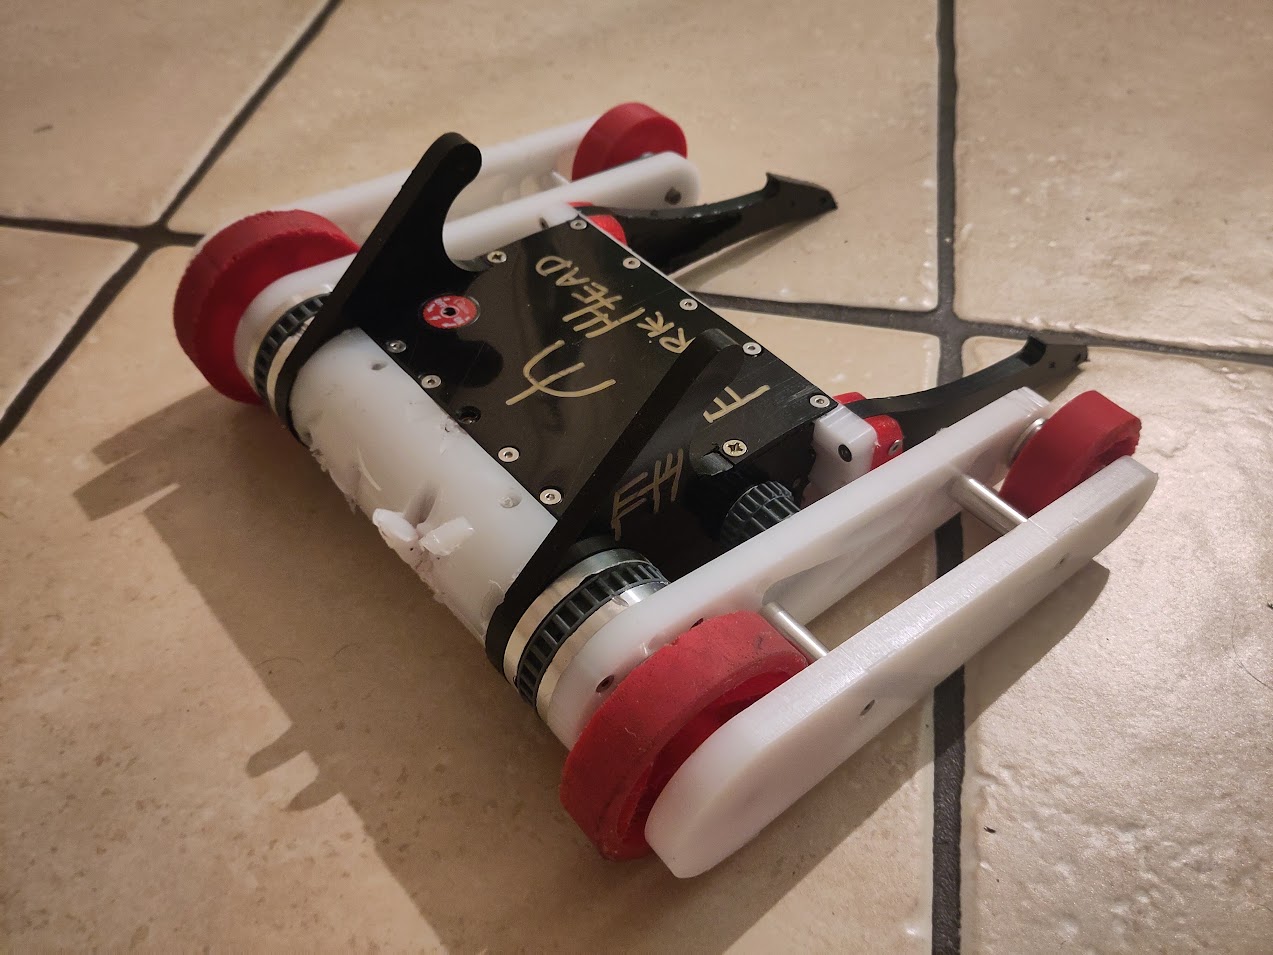
    • Replace outer drive pod with a thinner, non-structural armour panel
    • Run the front wheels on dead shafts so the outer panel is non-critical
    • Slightly shorten motor shafts and remove end support
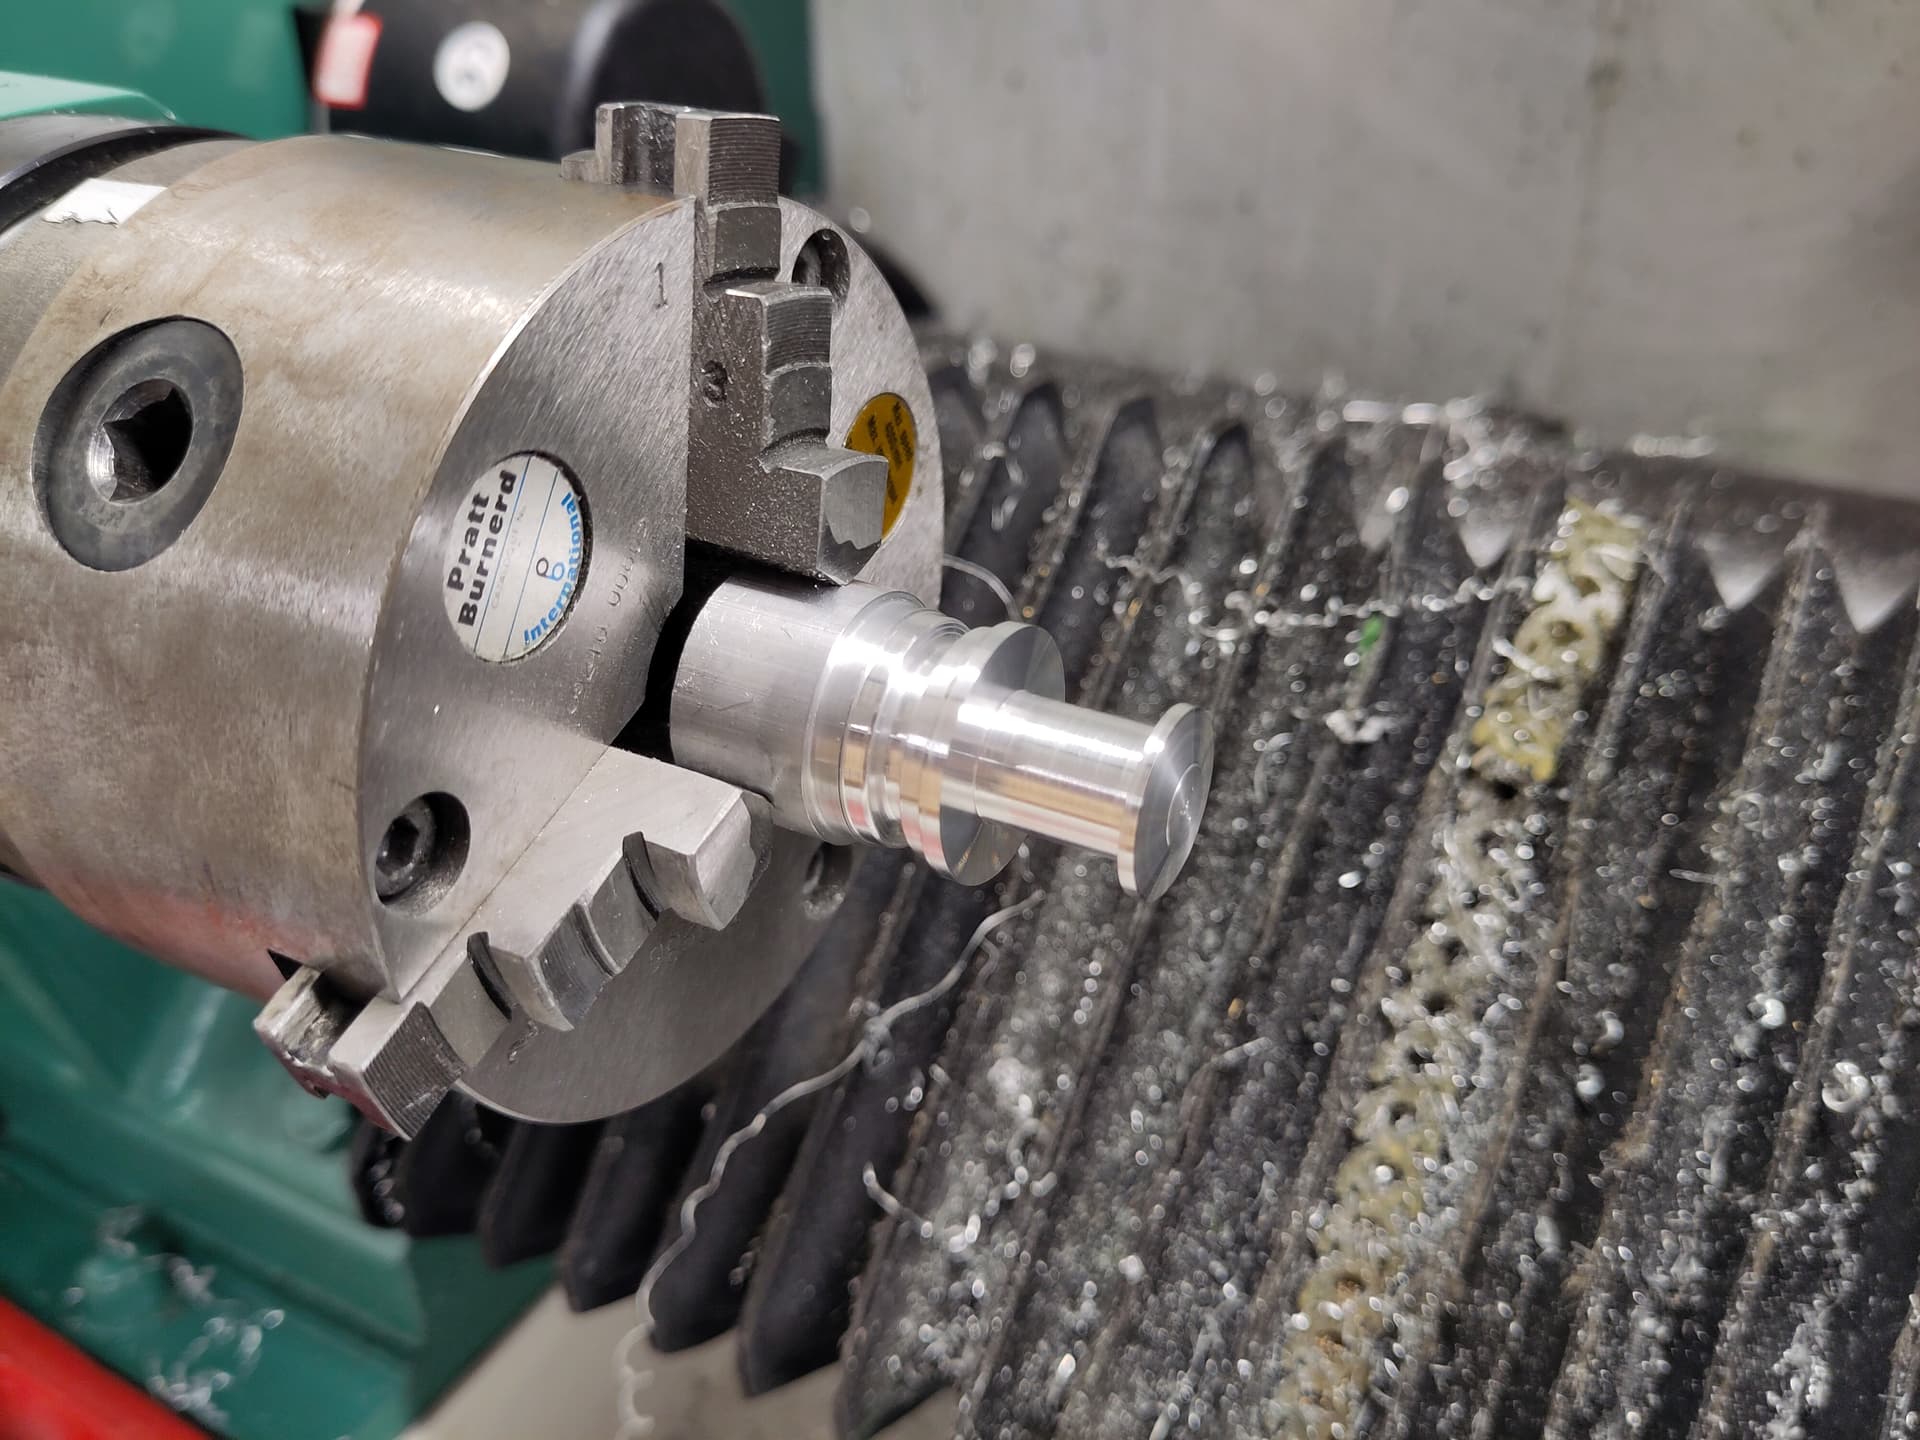
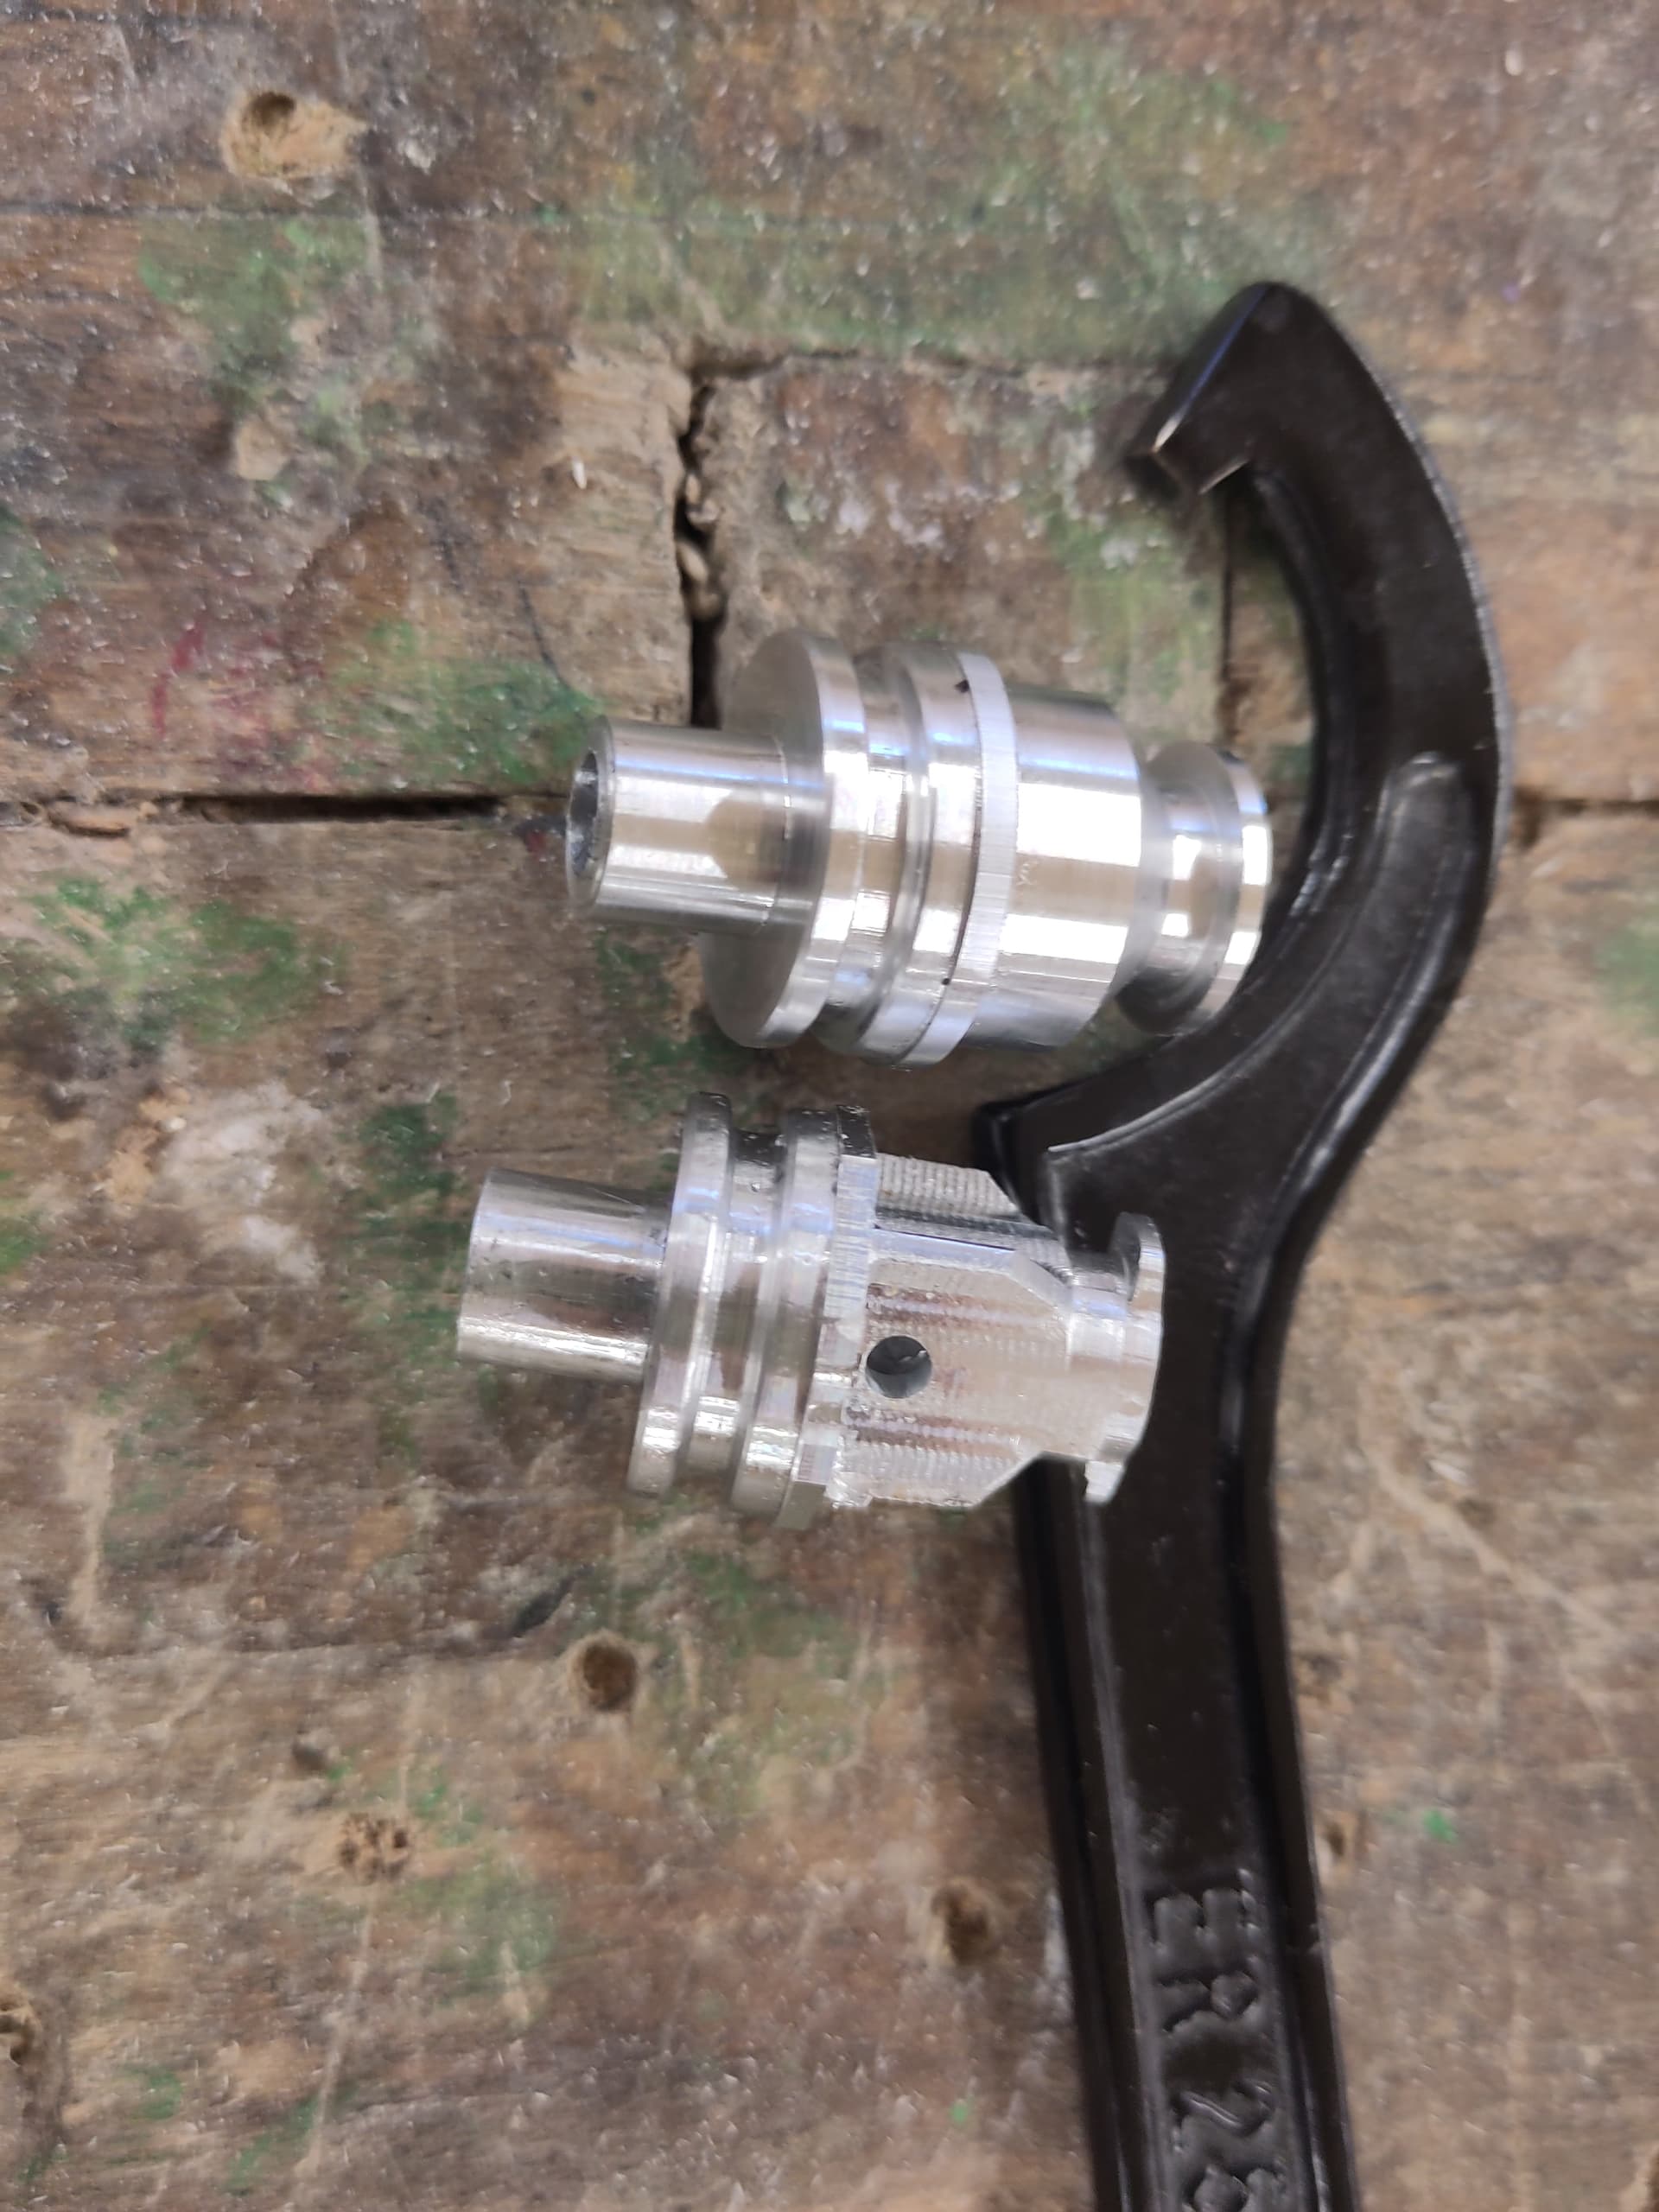
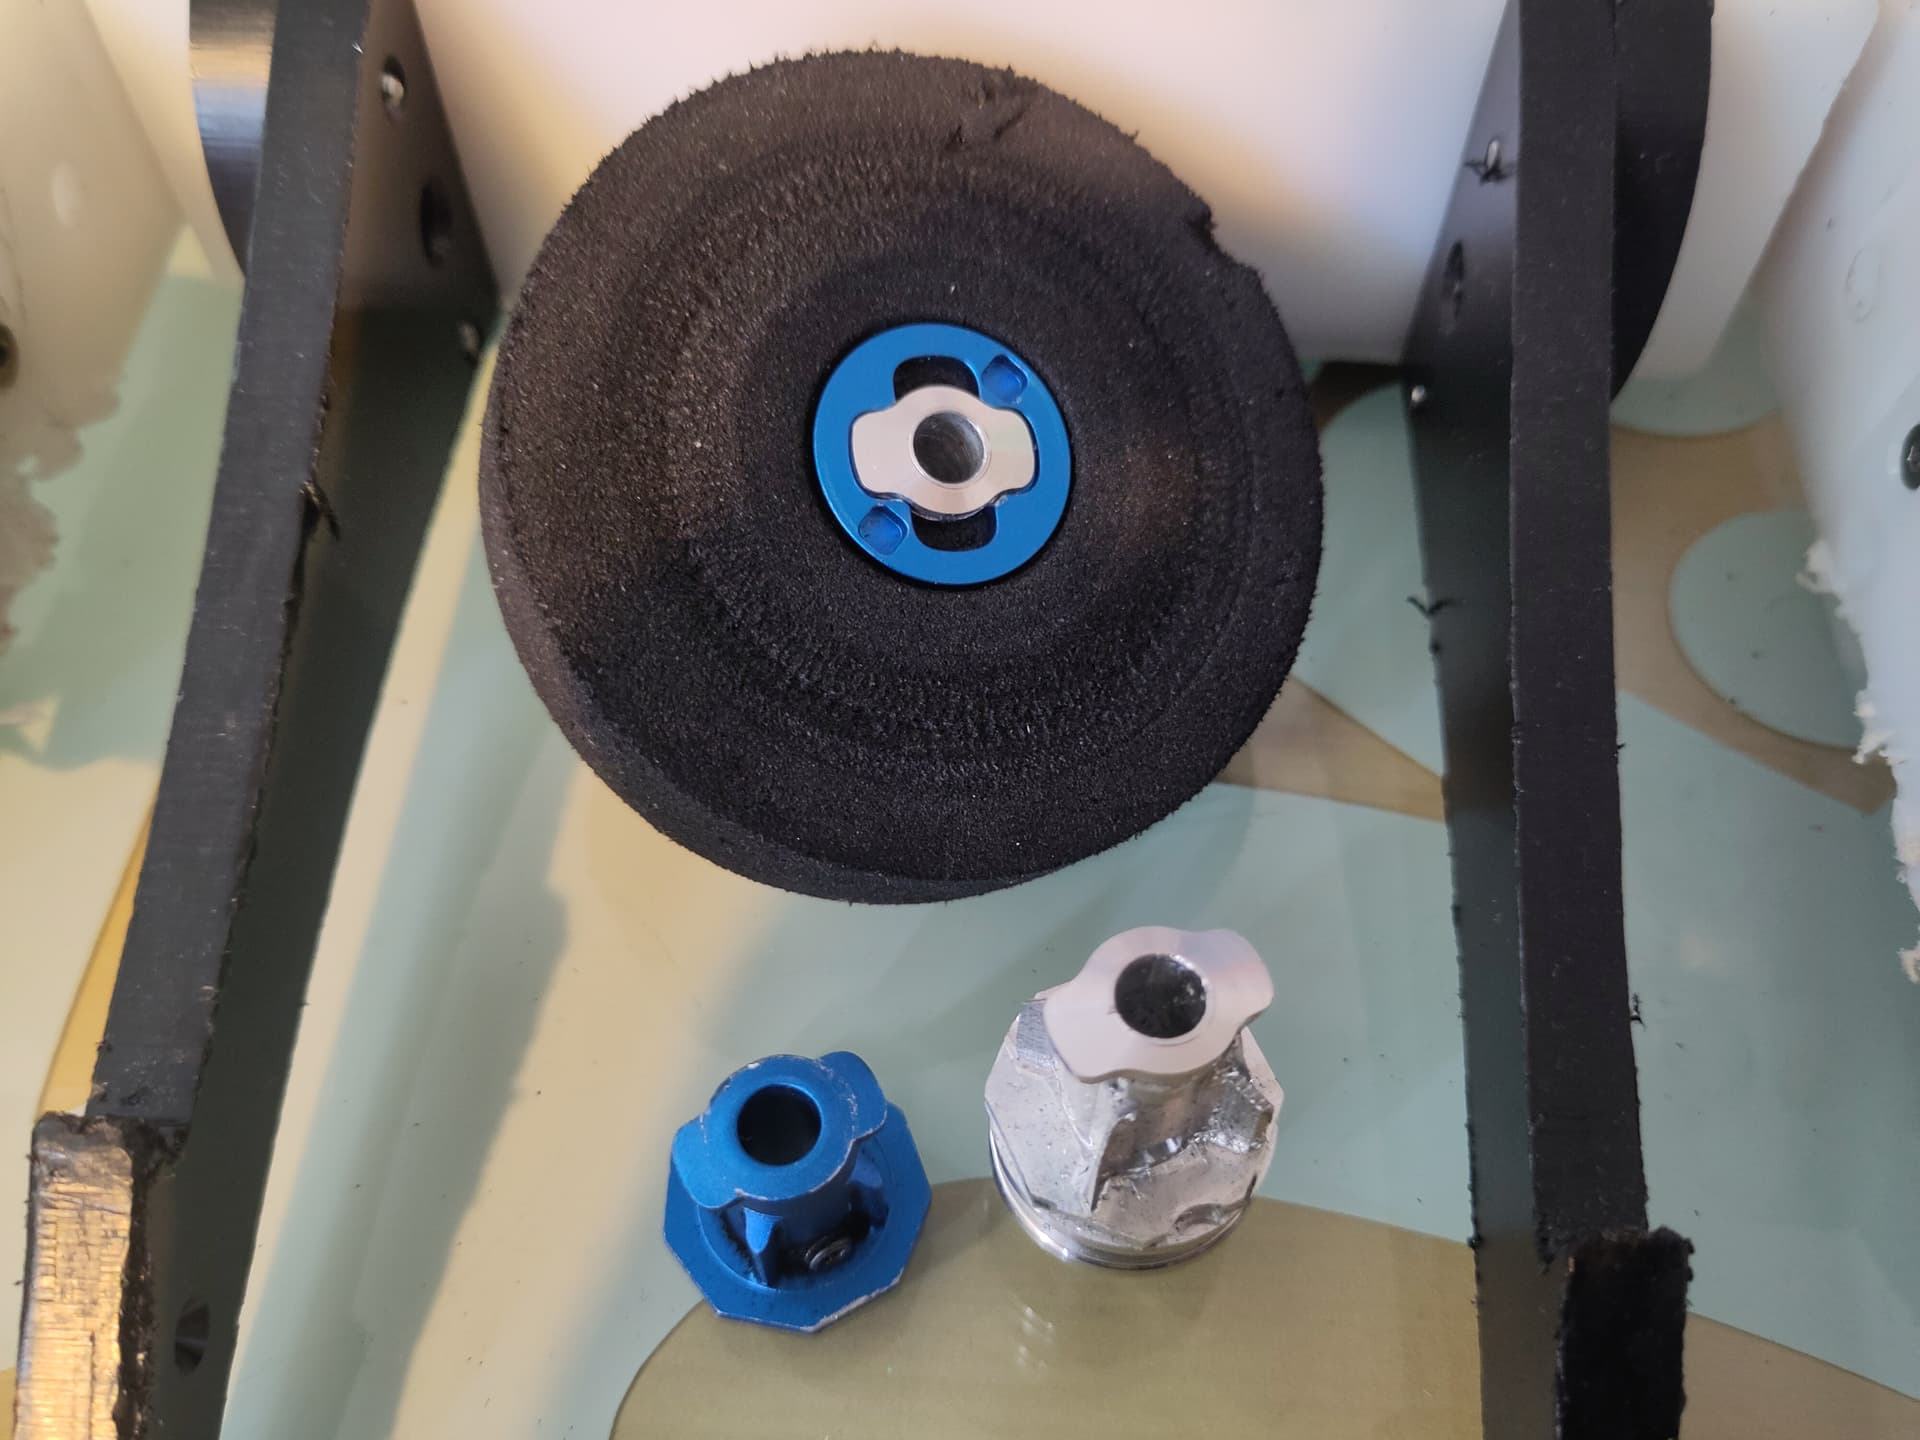
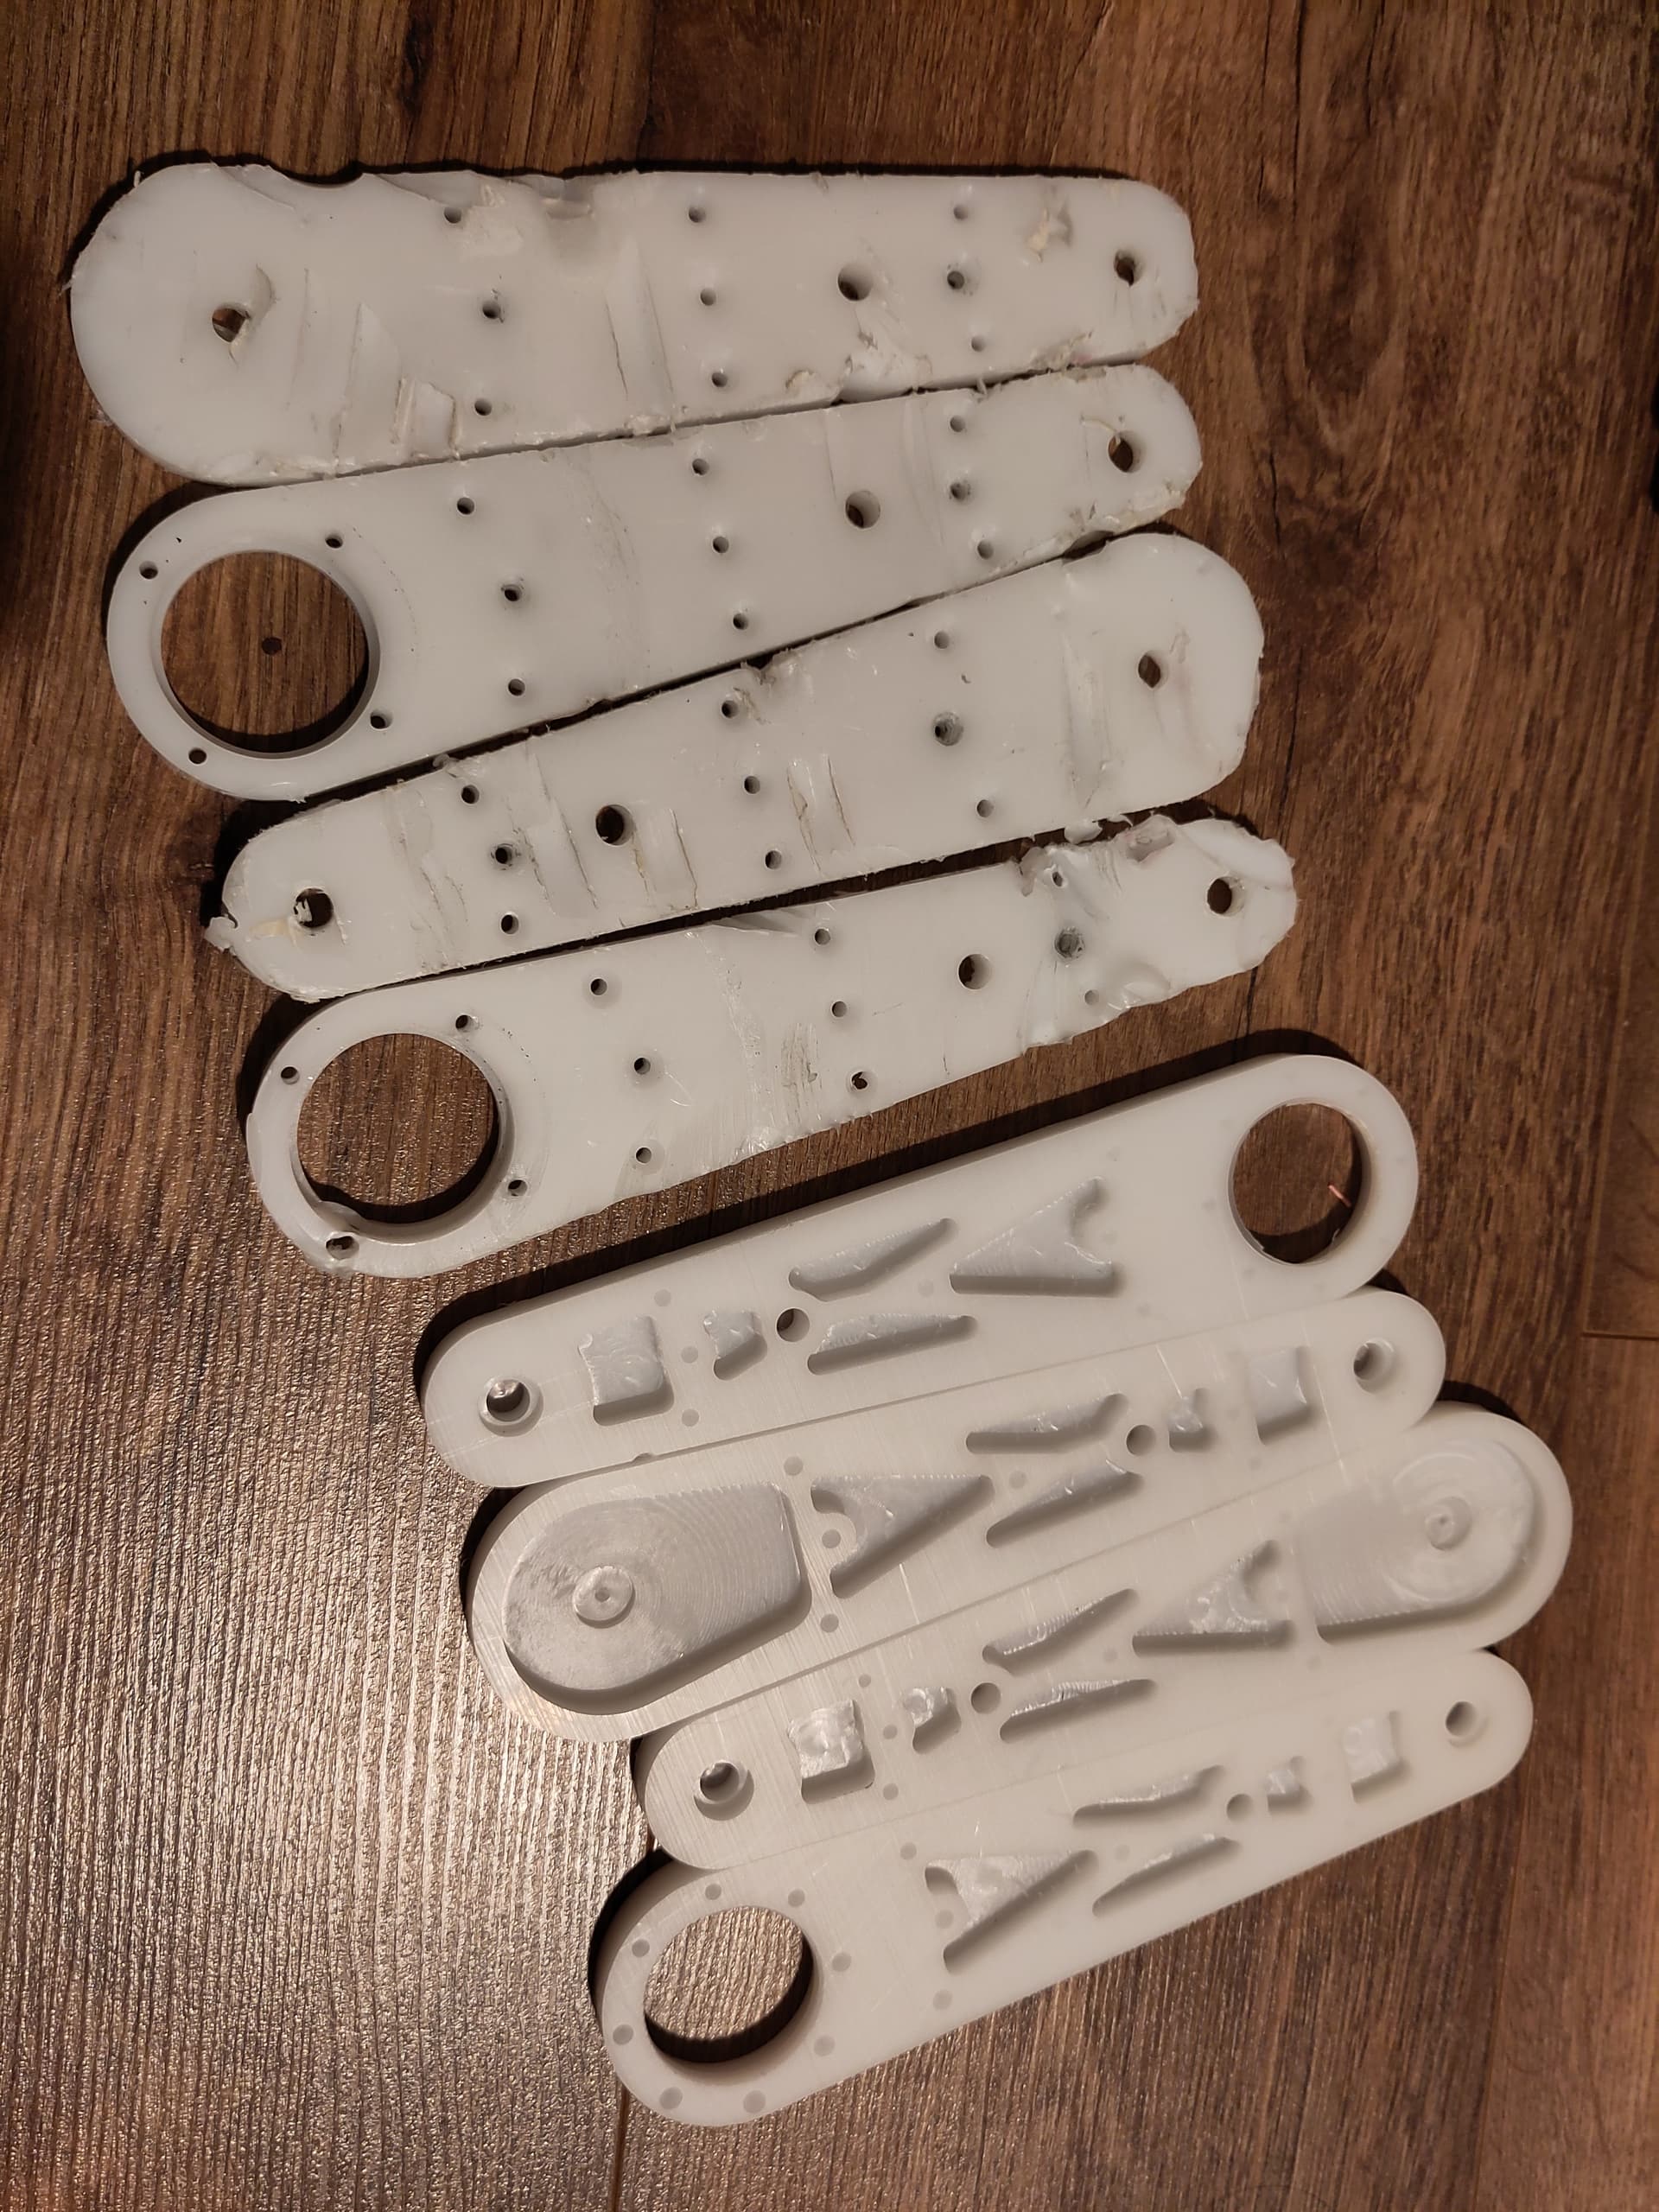
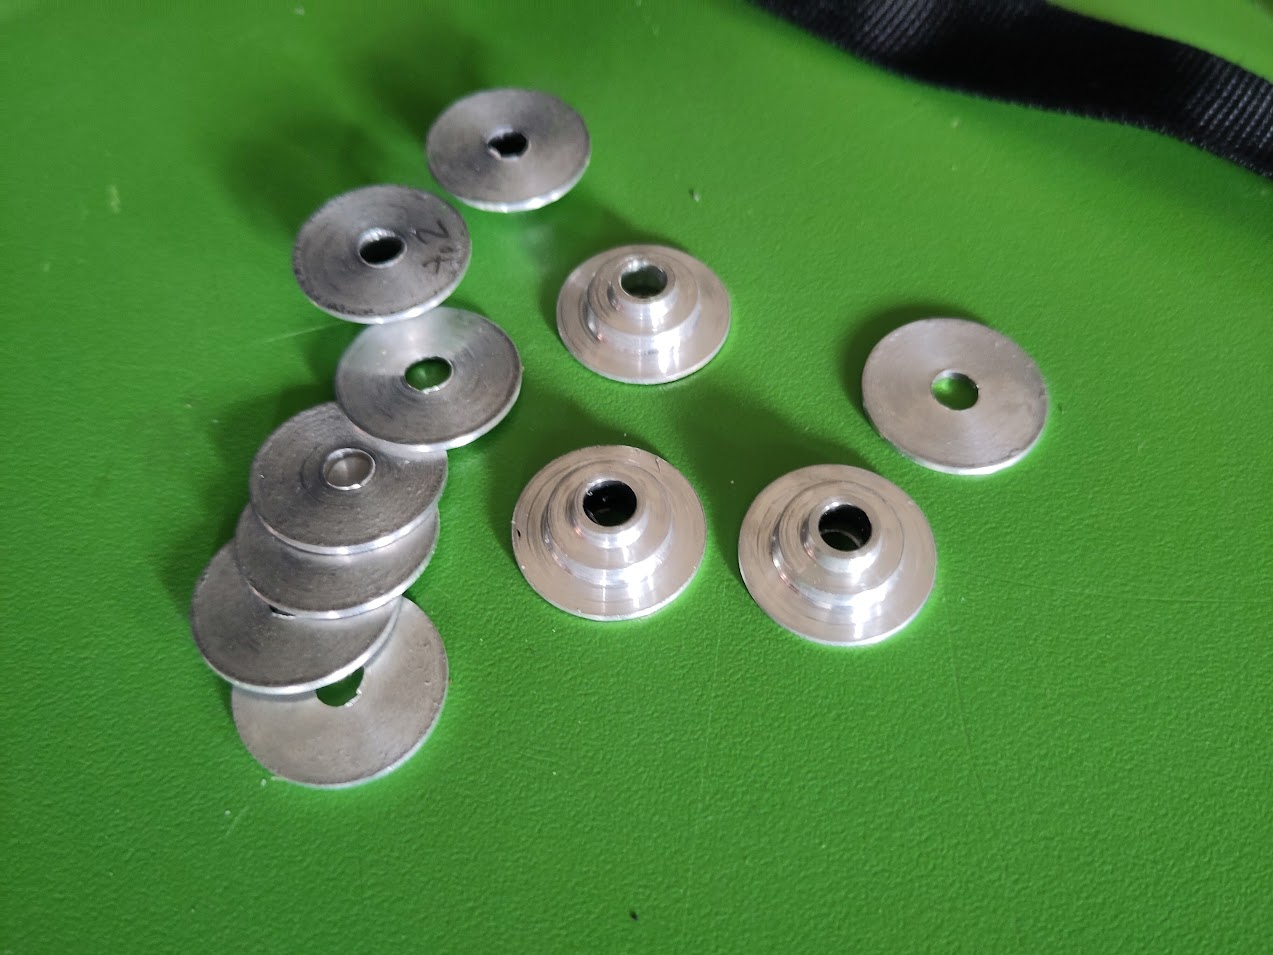
    • Machine some custom hubs
      • The current version is running FingerTech Hubs and 3D printed GT2 toothed pulleys press fit onto the shafts due to a lack of time. I considered adding some drive pins in holes in the hubs/gears, but I think it’s time for a custom solution.
3 Likes

That is some brutal damage! Glad you’re continuing this robot, it’s super cool. Interlocking panels for the win :slight_smile:

1 Like

You deserve major credit not only for doing a tricky and unusual design, but also competing in such a spinner-heavy event and keeping the bot running. You learn so much about your bots from the tough matches, and your summary at the end makes it clear you have a great eye of what works and what needs to change. Very well done, can’t wait to see what you bring to your next event!

1 Like

I took Forkhead version 2.5 along to North Down Havok where we ran it as a mini-bot alongside Perillelogram. Perillelogram gained a 360 lifter to meet the active weapon rule, and Fourkhead gained a U in its name. Together they formed Squadrilateral with a coherent 360 lifter and number four theme.

This version of Forkhead had the drive pod armour modifications from my list above, but was still running the old drive pods and lifter mechanism.

To work around the lack of grunt in the lifter mechanism (and lack of time to do anything different) I ended up bodging two gearbox housings and 3 intermediate drive stages onto a single 22mm brushed motor. This has serious torque, but is unsurprisingly glacially slow.

Having picked up some more motors at the event, and because I’m drowing in dead gearboxes now, I’m going to try cutting one of the housings in half to give an in between version with 3 reduction stages rather than 4. I’ll also try running independent motors on each side rather than both driving a countershaft. Assuming this gives a decent result I plan to make an interposer PCB that combined with a couple of switches to detect that the drive pods are in the neutral position will make syncing the drive pods back up after a hard hit quick and easy.

During the event Fourkhead took some fairly hard hits, and several hard slams between a fast moving featherweight and the arena walls but came off basically unscathed.

The only damage was to the already messed up tires that I hadn’t changed since SCEETLES - the chunks that were hanging by a thread finally came off - and one of the motor side drive pulleys which got wallowed out was locking up the front wheel. I just removed the drive belt and ran it 3 wheel drive for the last fight.

Despite the size disadvantage and some control issues with the messed up wheels it had a few moments where it was able to be an effective nuisance, getting under the competition and causing trouble. At one point it looked like I managed to pull Barrog away from Perillelogram and prevent it from being flipped into the OOTA zone, though on rewatch the footage I suspect Barrog actually just backed up. On the other side of the coin I felt like I lost us that fight by driving under Perillelogram and getting us both immobilised, though again after rewatching the footage it seems like Barrog pushed Perilellogram onto my so I’m maybe less responsible for that than expected.

All in all it was fun and maintenance free way to test out the first stage of changes to the robot, and the armour changes and DIY barrel nuts holding the rear armour together it seemed to hold up to punishment nicely.

I’m looking forward to the BBB Pub Beetles event which feels like something Forkhead could do well at, especially once I get the lifter working better and follow through with the drive system changes to save a bunch of dead weight.

3 Likes

I dragged Forkhead into the Hackspace today with a plan to cut one of the ring gears from a 22mm motor in half to make a 22mm brushed motor with 3 reduction stages (64:1 reduction) instead of the 4 stage (256:1) reduction thought I had from cobbling two of the ring gears together and stuffing extra reduction stages in.

Taking apart the modified gearbox I almost immediately realised I’d actually stuffed 4 intermediate stages plus the output stage in for a whopping 5 stages, giving 1024:1 reduction. Suddenly the glacially slow lifter action at North Down Havok made perfect sense!

After I’d gotten over this surprise I was left me a choice between cutting one of the 10mm ring gears in half and making two 3mm sections (for two 3 stage gearboxes), or milling two of them down to 6mm (for two 4 stage gearboxes). If the version I went for worked then great, otherwise I’d wasted at least 1 ring gear either way.

After staring at the parts for a few minutes and wondering how make the workholding for the ring gear happen I realised that the output stage had at least 3mm of thickness in front of the sun gears. This meant I could just make a 3mm spacer with no teeth on it, with no need to sacrifice any motor parts to try out the 3 stage gearbox. Conveniently while clearing out my storage box at the Hackspace I happened to find some 22mm aluminium bar which was perfect for the job.

After a little bit of cursing at random lathe issues (stalling when the drill broke through and blowing a fuse…twice, and the annoying size gap between my largest drill and the clearance needed for my smallest boring bar) I had a couple of 22mm OD, 13.8mm ID, 3mm thick spacers with some holes in roughly the right places and I took them home to try out.

After installing two of these in Forkhead these had enough grunt that I couldn’t backdrive them by hand and decent speed. Annoyingly but unsurprisingly the HTD5 belts were the weakspot again, slipping just on the verge of lifting the chassis of Forkhead v1 (about 1kg with the guts removed).

forkhead_just_lift_320

Time to make some larger pulleys, see if I can get them to fit the belts better, and then maybe add some tensioners.

2 Likes

Operation Deadshaft is proving tricky.

I was hoping to modify some Fingertech hubs to sit on a 6mm ID 9MM OD roller cage (since I couldn’t find 6mm ID ball bearings with a small enough OD), but this doesn’t give any sort of axial support so I suspect it would be a disaster. I could add some bearings outside of the hubs, but I’m not sure I want to accept the extra width (and extra vulnerability to them getting caught by a spinner).

For Pub Beetles I’m going to stick with a captive live shaft for the front wheels and have a go at custom hubs with integrated pulleys. Unless it turns into a disaster I’ll be switching back to round belts for the drive since I don’t want to remake the drive pods for this version and the spacing’s not really right for GT2 timing belts. If I do decide to go back to timing belts I’ll be enlarging the 3D printed pulleys I’m using and shortening the drive pods significantly with the spacing on the redesigned pods setup correctly for the pods I have instead of working around past decisions.

I had a go last night at machining some Fingertech compatible hubs on the Hackspace’s Denford CNC lathe and I’m calling it a moderate success.

This is the first pass, before drilling the through hole or parting off, with pass 2 (currently untested) being to mount the machined hub blank on a collet block and mill the locking tabs.

I’ve left off the fins that lock the wheel in place for this version, but I think I’ll leave the material for those in on the next one and see if I can mount it in a way that gives me access to mill out the material in between with a 2mm ball endmill.

Annoyingly I discovered the travel limit on this lathe stops the parting tool way too far from the chuck, and weirdly on the first attempt it just decided to silently stop moving on that axis upon hitting the limit, so the first part I made lost the integrated pulley. It might come in handy later though.

Having proved it out I made a couple more. The one on the left parted off correctly. The one on the right hit the same travel limit issue, but I stopped the program before it caused a disaster and will part it off later. I think the 6mm through hole is a bit conical because dialling the drill stations on the lathe’s turret to be on centre is tricky, and because the approach I took to peck drilling was less than ideal. Hopefully I can sort that out on the next attempt.

I’ll make some tweaks and add the fins then try again at the weekend, and hopefully see how the milling part of the process goes. :slight_smile:

1 Like

I’ve been really impressed by how this bot has developed, really cool to see all of the gearbox and milling shenanigans. It’s definitely not an easy design, but it’s cool to see you making progress with each post.

P.S. Me and my Dad are once again sorry for the late slam at BEV’s!

1 Like

P.S. Me and my Dad are once again sorry for the late slam at BEV’s!

Haha, definitely don’t worry about that. I threw it in at BEVs as stress test and it came out basically unscathed apart from the already chewed up tyres getting more chewed up. :slight_smile:

I made some hub progress on Tuesday. I’ve got the front pair mostly done (just need to lop off an extension I added for workholding and tap the hole for the set screw).

First step was turning a blank for them. Of course I realised the moment I finished the second one that I could have saved a bunch of time material if I’d flipped them end for end and done this in two setups.

Next up I used the 10mm extension on the back to hold them in a collet block so I could manually index them for milling. The first operation is milling the locking tab, adding an octagonal feature on the back.

I also added a little circular notch to make it easier to find the set screw when the tyres are on - this is a minor thing that always annoyed me with the Fingertech hubs.

locking_tab_smsh

After that there were four setups with the collet block on its side to cut the fins. I ended up doing this twice since I was using two tools (a 4mm and 2mm endmill) and there was some misalignment because the block of plastic I used to align the collect block on each pass wasn’t very repeatable.

If I make more of these I’ll make a better registration fixture or hold the collect block in a vice, and also cut out the 4mm endmill and do the whole thing with the 2mm. Running a 2 minute machining operation 8 times with 5 mins of setup in between wasn’t how I would have preferred to spend my evening. :stuck_out_tongue:

With these finished I’m pretty pleased with the results and they’re definitely usable. I did wish I’d added a few more stepovers on the final milling operation for a smoother surface, and the misalignment was obvious but not problematic.

These fitted nicely on the tyres, and as an accidental bonus the fins that lock into the tyre are a bit more aggressive, meaning that a tyre that was wallowed out and just span freely on Fingertech hubs was a nice tight fit and would definitely be usable on these hubs.

These are the front hubs and I’m calling them a moderate success so I’m going to go ahead and make a set for the rear (with a larger pulley to match the surface speed of the wheels), and I’ll test out the improvements I came up with on the second set.

It’s probably a coincidence, but I’m suddenly seeing a lot of adverts for CNC lathes with live tooling and a Y axis for mill-turn operations all of a sudden. Feels a little like I’m being taunted with an unobtainable but much easier way of making these parts. :joy:

3 Likes

In between prep for a Bodgebots workshop I’m running on Wednesday I’ve just about found time to get Forkhead ready for Pub Beetles.

I’ve got the new hubs installed with the old drive pod setup, and slightly wider spacers. The hub that was missing it’s fins got some threaded holes through the pulley so I could screw in some long grub screws as a fin replacement. It’ll do for now until I find time to make a replacement.

I’m looking forward to everything not being covered in a fine dust of foam wheels mixed with a small amount of the toothed belt that used to rub on them.

Boards for the limit switch interposer arrived but I’ve not found time to assemble them, do any programming, or figure out how to fit limit switches on the bot.

The independent prong drive is in though, with some little aluminium dead shafts that screw on where the countershaft bearings used to fit. The pulleys have some pockets for bearings.

It’s nice not having a rotating shaft running through the electronics bay, but a minor concern is the two motors (running from a BBB dual ESC) don’t seem very well matched.

I’m hoping this is just because I used one older and one new motor when messing with the gearboxes. I should find time to swap the struggling motor out and hopefully that issue will go away. If not it’s still better than the prongs getting permanently out of sync after taking a bit hit.

Looking forward to seeing how it works out at the weekend!