ForkHead - Beetleweight Lifter/Grabber

I’m currently working on getting CAD sorted for my new beetle ForkHead which is a inspired somewhat by my antweight Big Loader, but with a worse name and less tank tracks.

It’s retained the idea of having a lifter with the potential for 360 degree rotation, though I’ll planning on adding some kind of feedback mechanism for a more servo like behaviour to make it easier to drive. This one will be less of a bucket and more of a lifter with (hopefully) a secondary arm to keep opponents in place once lifted, suplex style.

The design feels like it’s starting to come together just in time for materials to arrive later this week, though I expect to have to make some concessions to reality and common sense along the way.

Currently I’m mildly concerned about weight (though the HDPE panels will get some serious pocketing before it’s done) and I’m back and forth on whether the focus on the lifter being coaxial with the motors is a great idea or a terrible one. Worst case a base plate can be added to move it towards a more conventional design if it doesn’t prove rigid enough.

In the current design the motors live in flanged tubes that will be turned from either aluminium or HDPE bar. These join the inner pod where the electronics live with the drive pods on the outside. The lifter arm(s) currently have free reign of the space in between. The main lifter and a secondary grabber will clamp onto and rotate around these tubes, with some spacers to keep everything aligned. The secondary grabber will likely be connected to the main lifter with a leadscrew and some small motors, enough to allow adjustment to the size of the opponent as opposed to any sort of crushing action.

Also not shown in the CAD are some kind of small forks to get under opponents. Ideally the back of these will sit above the lifter reducing reliance on precisely positioning the lifter and allowing the lifter to get a little mangled and remain effective.

Much of this design is likely to change once materials arrive and I’m forced to recon with the reality of building it. :stuck_out_tongue:

3 Likes

Love to see a unique design! Big Loader is quite unique in the large field of ants around, so it’s exciting to see you scaling it up.

Are the two brushed motors at the front of the electronics pod for the lifter (I’m assuming they’re BBB brushed)? I don’t know if they’ll have enough torque even with the additional from the belt because of the length of the lifter arm. Having made the transition from ant to beetle too, I’m still learning just how much torque is necessary to get a reliable lifter! Might be worth getting a quick test setup before you commit to the design.

1 Like

Thanks Thomas. Looking forward to seeing your kiwi drive beetle at Subterranean Showdown!

Optimistically one of the brushed motors was intended for the lifter and the second for a grabber, if that proves practical. If not and they fit in the weight budget there’s potential for them to share grabber duties, or to switch to two independent lifters which could be interesting against the right opponent.

Good shout on checking the torque, I definitely don’t have a handle on things at beetle scale yet so appreciate the advice. I was intending there to be a second stage of gearing, with the motor shaft driving a countershaft (I’ve not updated the CAD so it’s visible intersecting the top motor in the screenshot) via a belt for one stage of reduction, and then the countershaft running through the electronics pod to drive both sides of the lifter with a second stage of reduction.

I’m still not sure this will be enough, but once proof of mobility is taken care of I’ll try and run some calculations or real world tests. For now I’m hoping to get a driveable bot while leaving plenty of some wiggle room when it comes to the lifter. Even so I expect there will be a couple of revisions before I’m happy with it.

You’ve certainly set yourself a challenge, but it should be a fun one. Looking forward to seeing a Bigger Loaderer working!

I’d recommend checking out 37d gearmotors for the lifter if you haven’t already. They’re tough, reliable and fairly easy to get with encoders for position feedback. The only downside is they weigh 200 or so grams each

1 Like

I am very excited to see how this comes out Steve, if there’s one thing Big Loader has been missing up to now it’s a 9.07x increase in mass! It feels like pivoting around the drive motor axis is a neater solution in terms of the way the rest of the machinery is arranged, otherwise you’ve got to find some way to get past them on the way around the 360° rotation (which you have to keep, it’s your trademark feature!).

On gearing - Keith’s ridiculously convoluted drive from a BB brushed motor was approx. 10:1 - a 3:5 belt reduction then two 2.3:1 gear reductions. I think you can fit something neater in here in terms of the layout but that probably gave a rotational speed not a million miles from what you want (90RPM on 4s). I found some very cryptic looking bits in one of our spreadsheets - that seemed to say you’d have 1-2Nm of stall torque per motor at that ratio, which might not be quite enough, but you’ve got scope to up the ratio a bit and still have a decent rotation speed.

1 Like

I am very excited to see how this comes out Steve, if there’s one thing Big Loader has been missing up to now it’s a 9.07x increase in mass! It feels like pivoting around the drive motor axis is a neater solution in terms of the way the rest of the machinery is arranged, otherwise you’ve got to find some way to get past them on the way around the 360° rotation (which you have to keep, it’s your trademark feature!).

I’m not sure if 360 degree rotation or struggling to stop the rotation at the right place while driving is the trademark, but I’ll probably end up keeping both.

I am hoping to find time to mount a switch so it will trigger in a couple of useful positions, then implement a mode on my controller that will stop it when the switch triggers. Combined with a momentary switch on the transmitter to continue moving past these stops that might give a nice way to keep the benefits of 360 degree rotation without the downsides.

On gearing - Keith’s ridiculously convoluted drive from a BB brushed motor was approx. 10:1 - a 3:5 belt reduction then two 2.3:1 gear reductions. I think you can fit something neater in here in terms of the layout but that probably gave a rotational speed not a million miles from what you want (90RPM on 4s). I found some very cryptic looking bits in one of our spreadsheets - that seemed to say you’d have 1-2Nm of stall torque per motor at that ratio, which might not be quite enough, but you’ve got scope to up the ratio a bit and still have a decent rotation speed.

Ooh, that’s useful info, thanks.

I grabbed a 150:1 version of the 37mm gearmotor Jed suggested to try out (unfortunately couldn’t find one with an encoder in stock anywhere), and I think that is specified to run at 67rpm on 12v so it might come out fairly close. One issue with the 37mm motor is they’re designed for 12v so I’d be overvolting it on 4S. People seem to report that they can cope with that, but I’ve also heard they burn out very quickly if stalled so will have to be careful.

I got 2/3 of the parts I need for Proof of Mobility machined and spot drilled on Tuesday night, and I’m planning on cutting the central ‘pod’ parts tonight. These are going to be cut oversize for now, and with mounting features for both styles of motor.

Once PoM is covered I should be able to experiment a bit and make a decision on the lifter drive system.

2 Likes

I’ve got some 12A PTCs knocking around somewhere if you want to try one of those to protect against stall, that’s probably about what you need.

I’ll definitely take you up on the PTC offer Sam. :slight_smile: Thanks!

I managed to get enough of the robot together for the Proof of Mobililty video, so once I tidy up a bit I should be able to make a start on experiments with the lifter mechanism.

I need to take it apart again at some point and flip over the central pod, since I installed it upside down and didn’t notice until it was too late. :sweat:

1 Like

It’s starting to look like a thing!

Currently slightly under weight, but I’m sure the lid, wires and connectors, and a few extra pulleys and belts will take care of that. :slight_smile:

1 Like

Time for a long overdue event report from Subterranean Showdown.

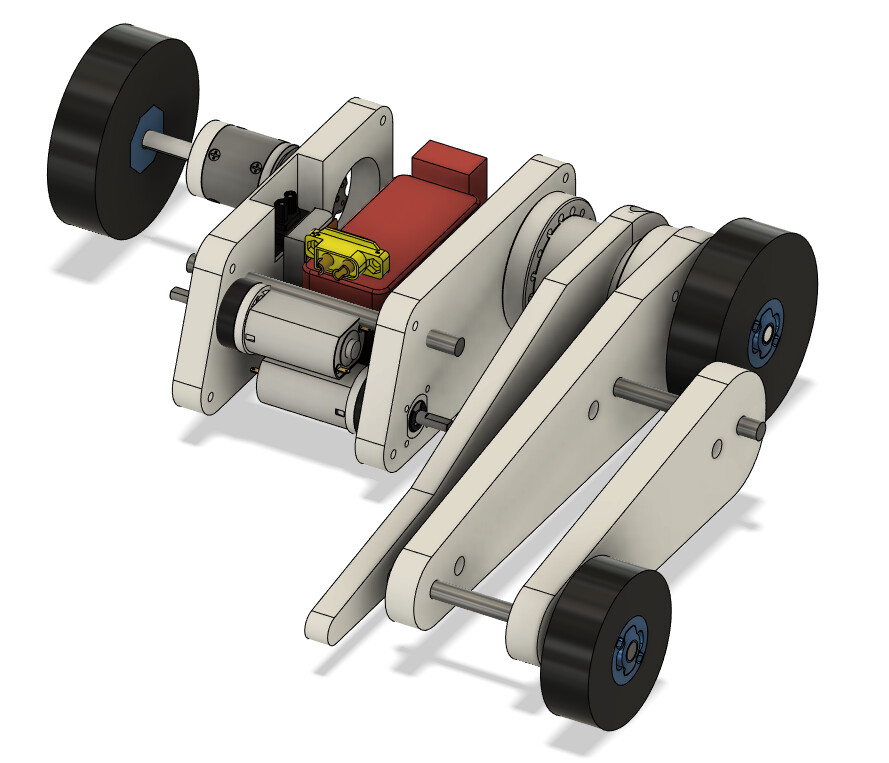
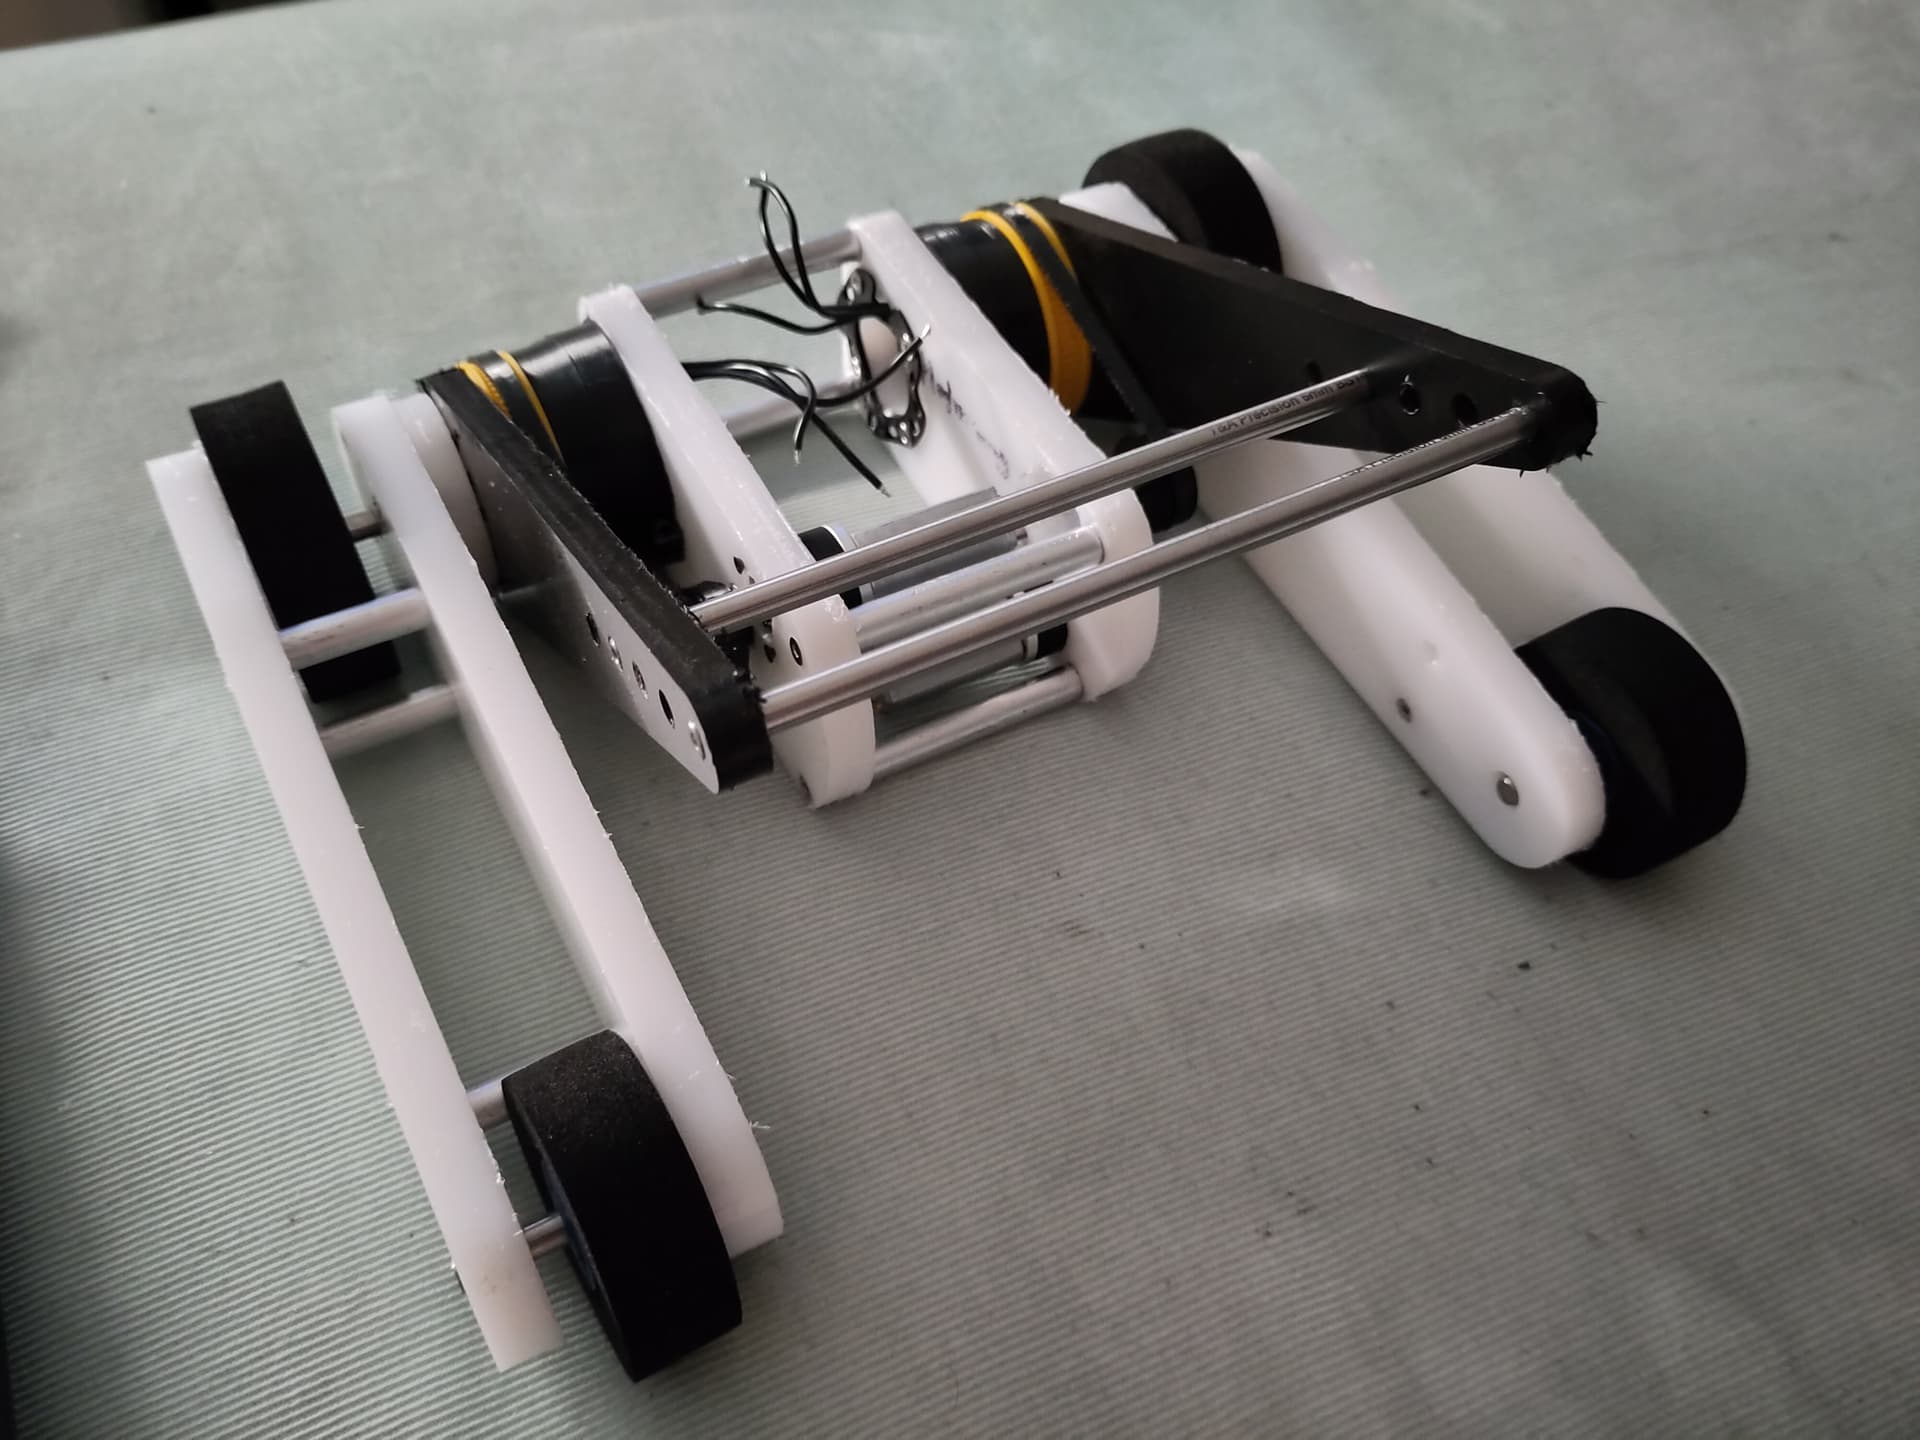
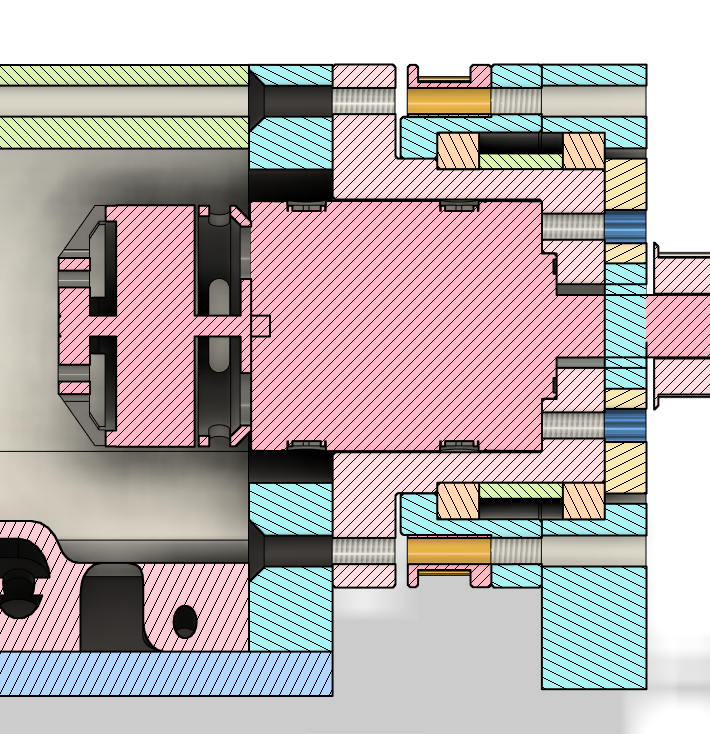
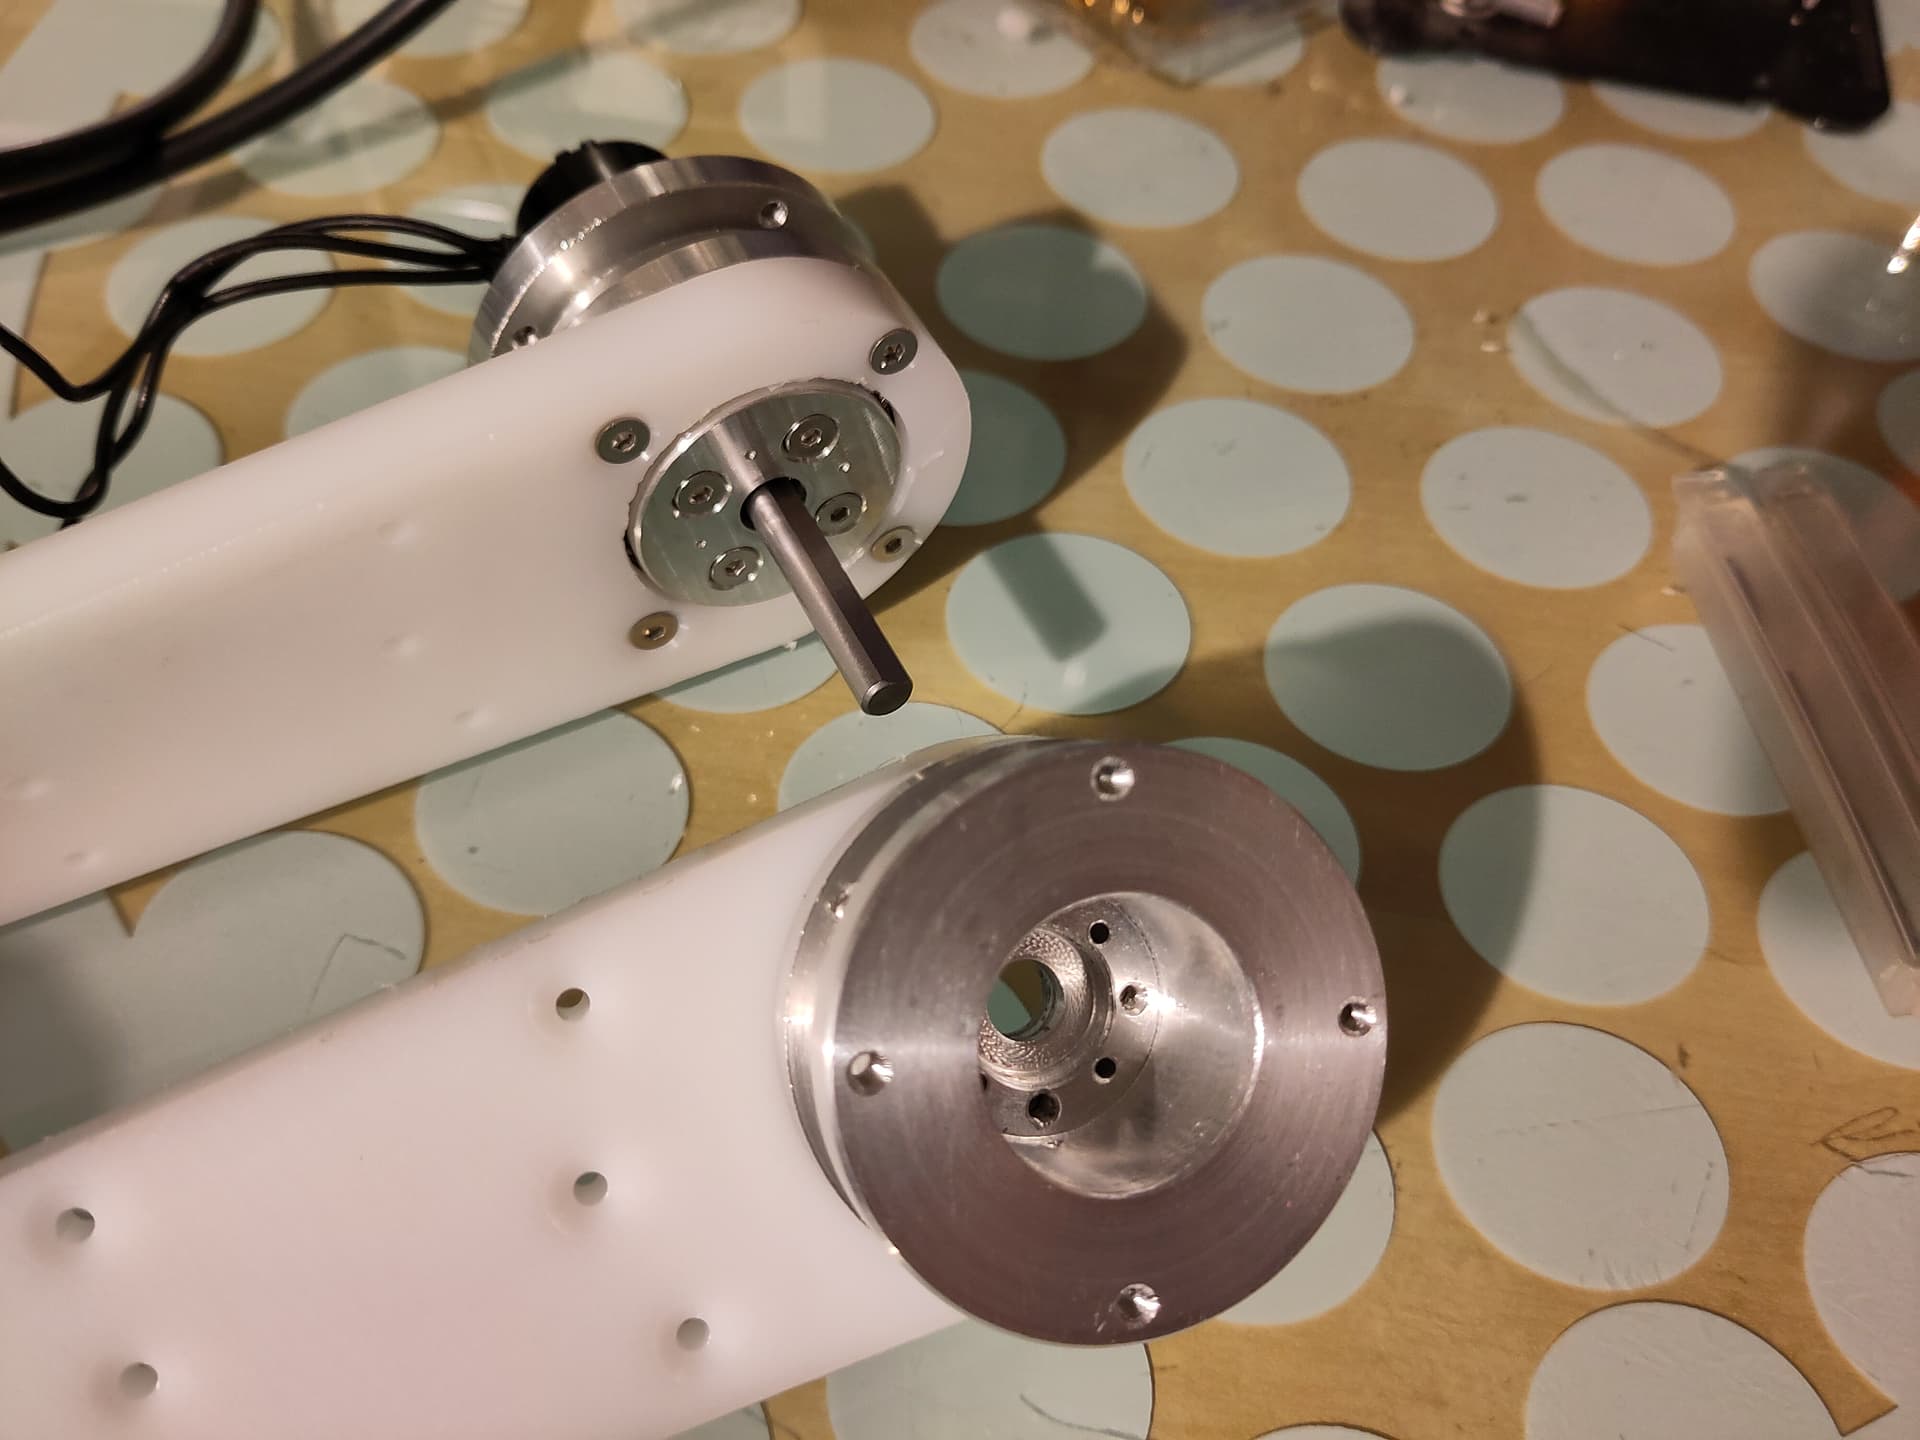
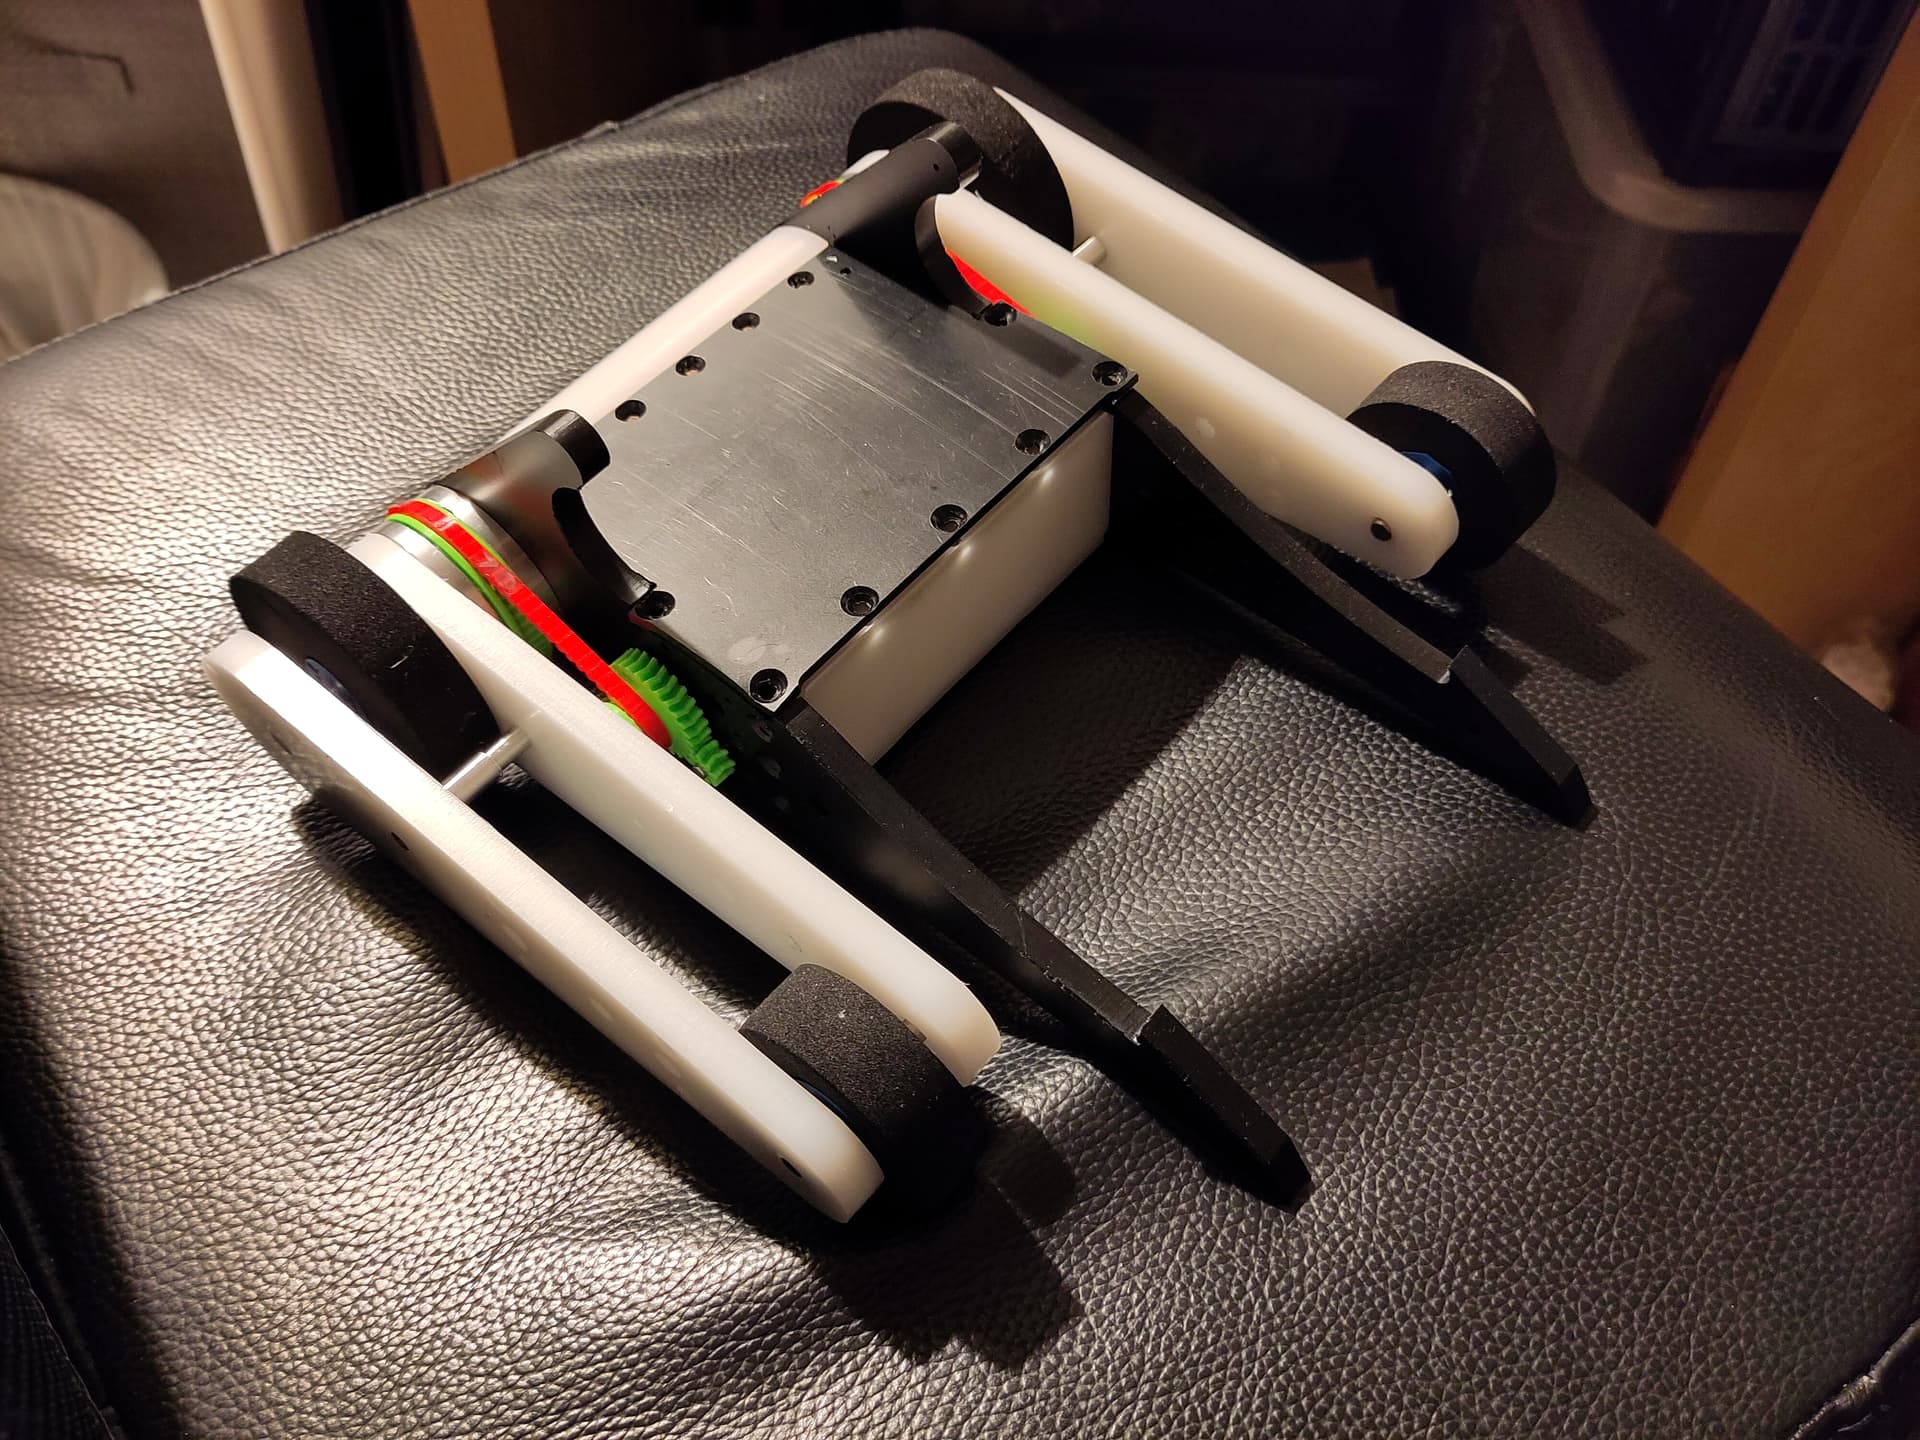
In the few weeks running up to the event I spent a lot longer than expected just trying to get a pulley setup for the lifter that didn’t slip before showing any movement. I ended up using printed GT2 timing belts printed from TPU and a mix of TPU and ABS pulleys, with the pulleys ending up smaller than they should be due to constraints that I couldn’t work around. Once the issues with pulley and belt sizes were resolved I hit a new issue with the pulleys slipping on the countershaft, leading to a whole bunch more experimentation to get that working.

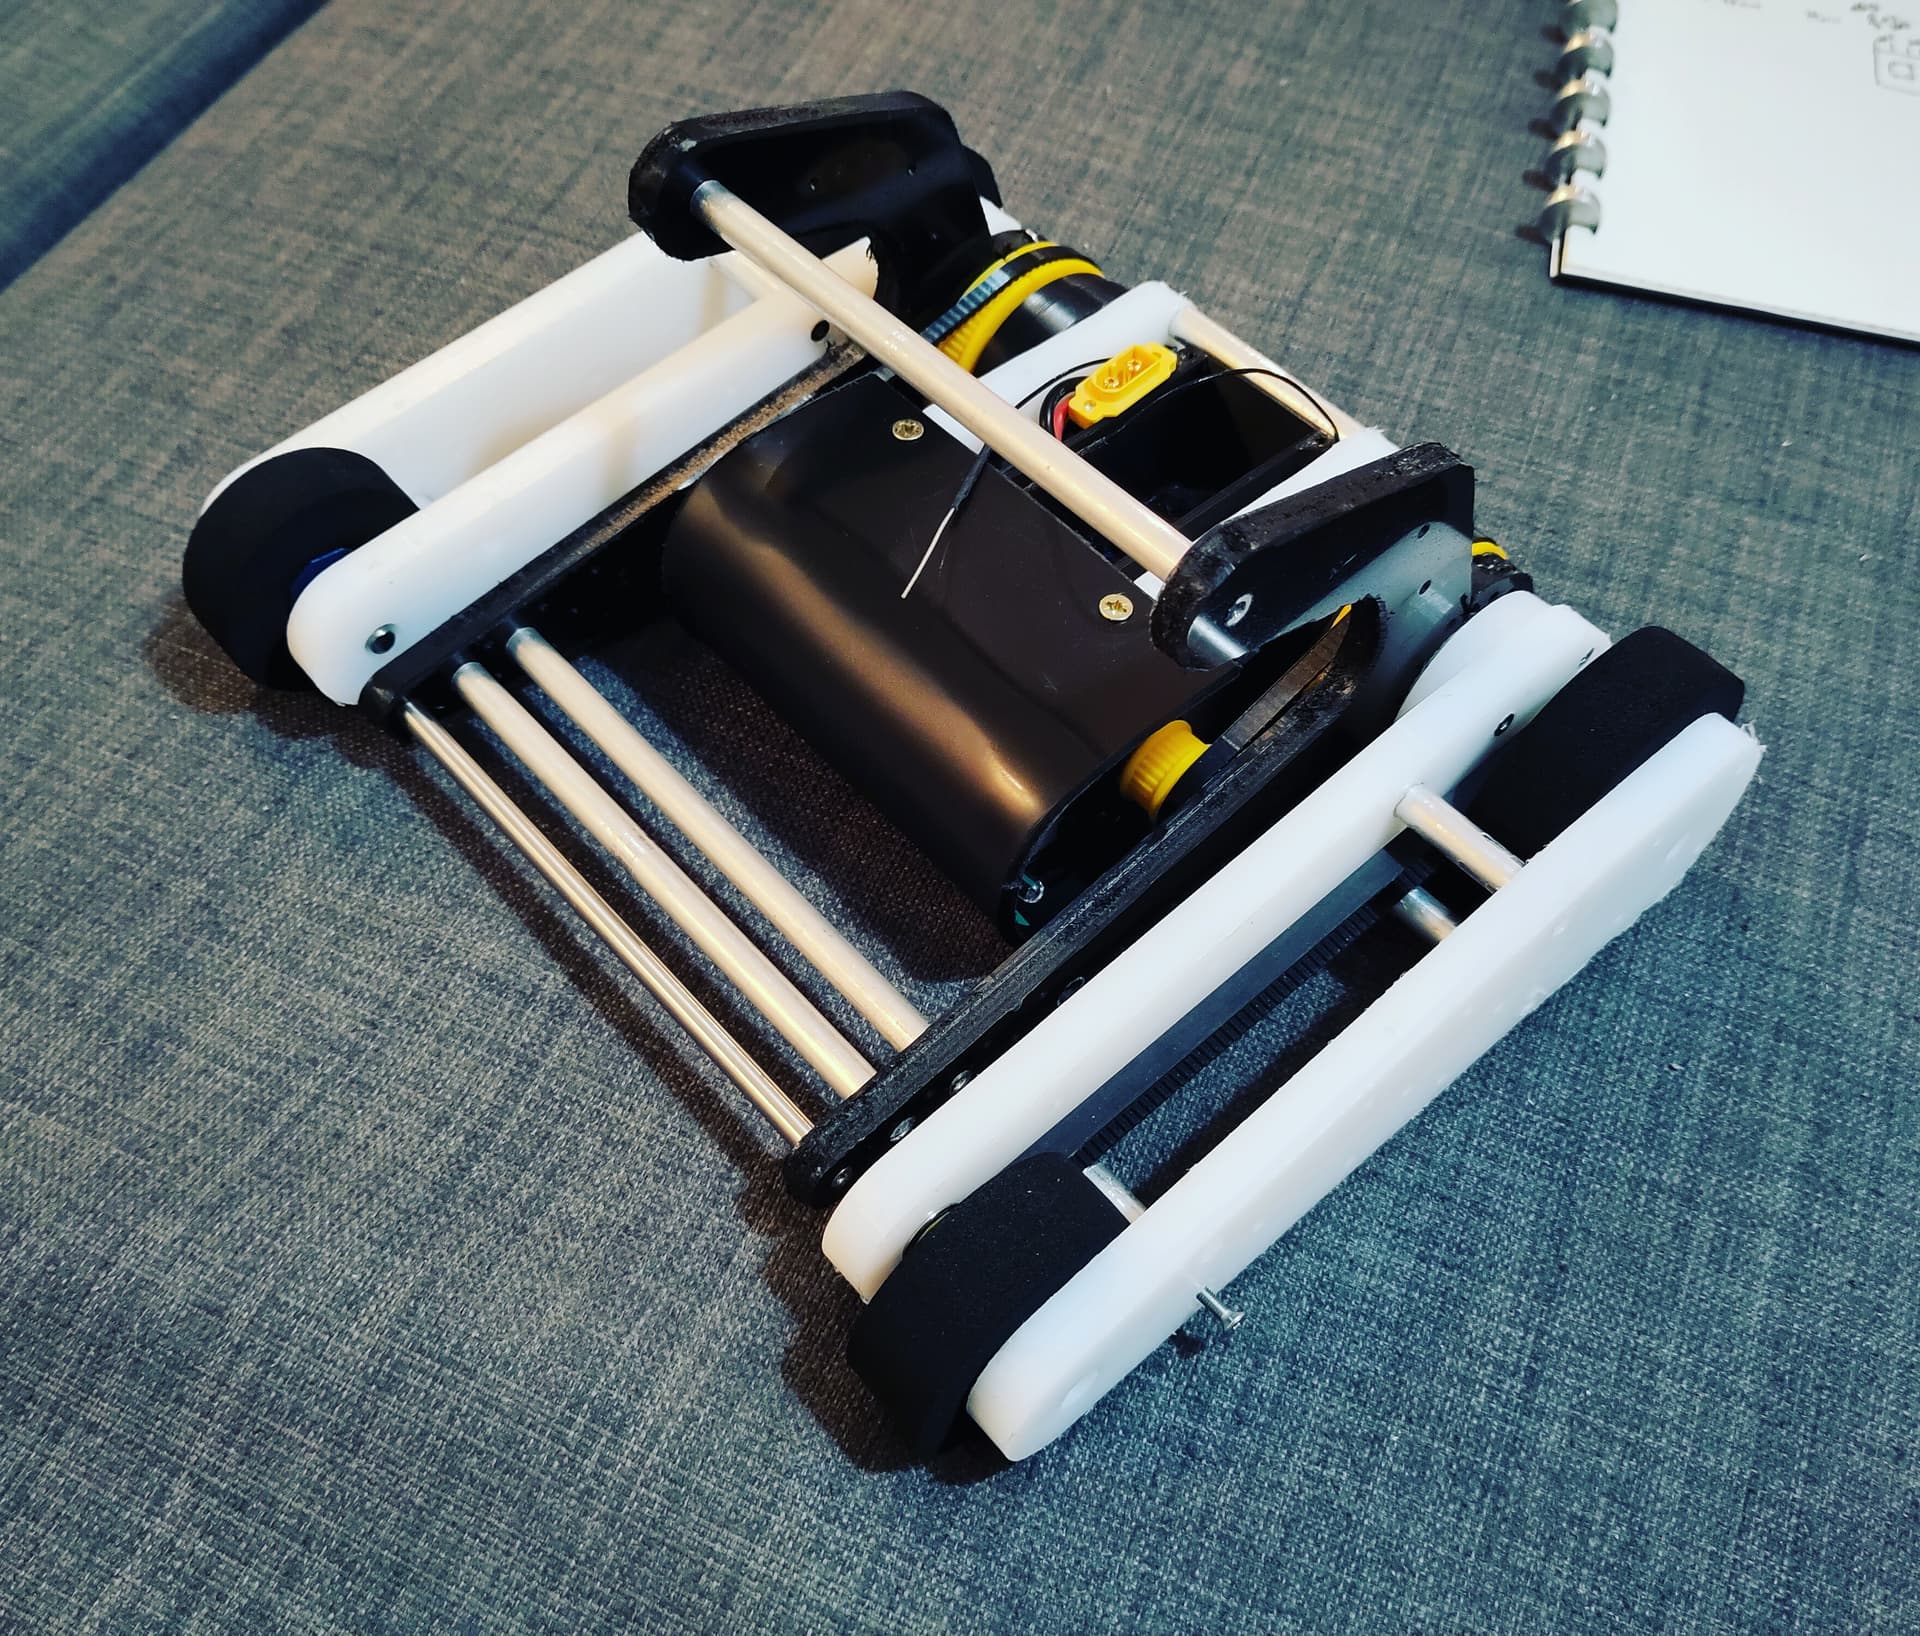
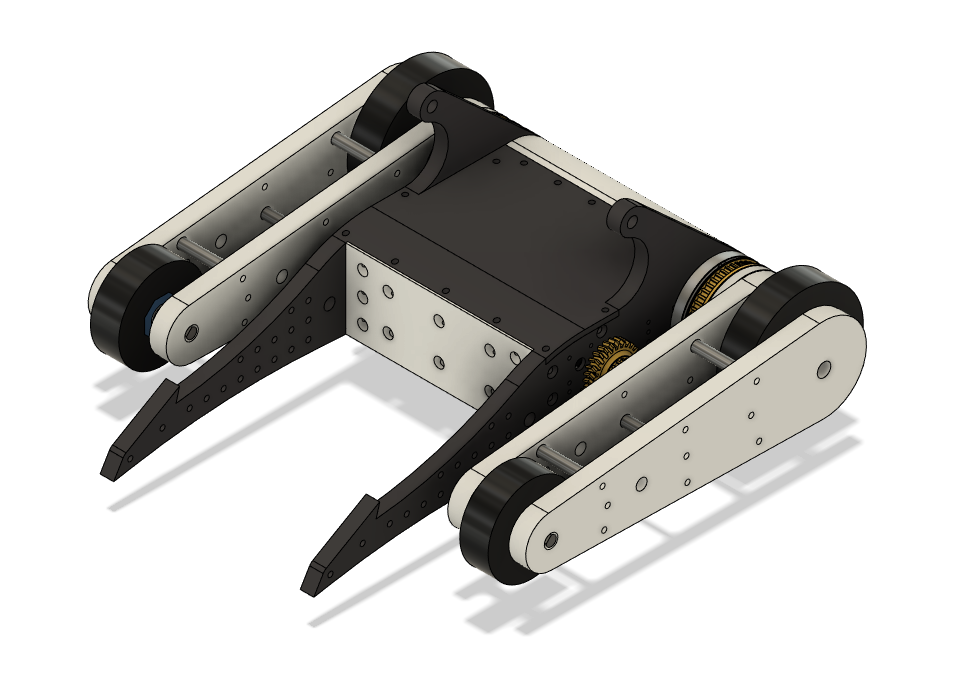
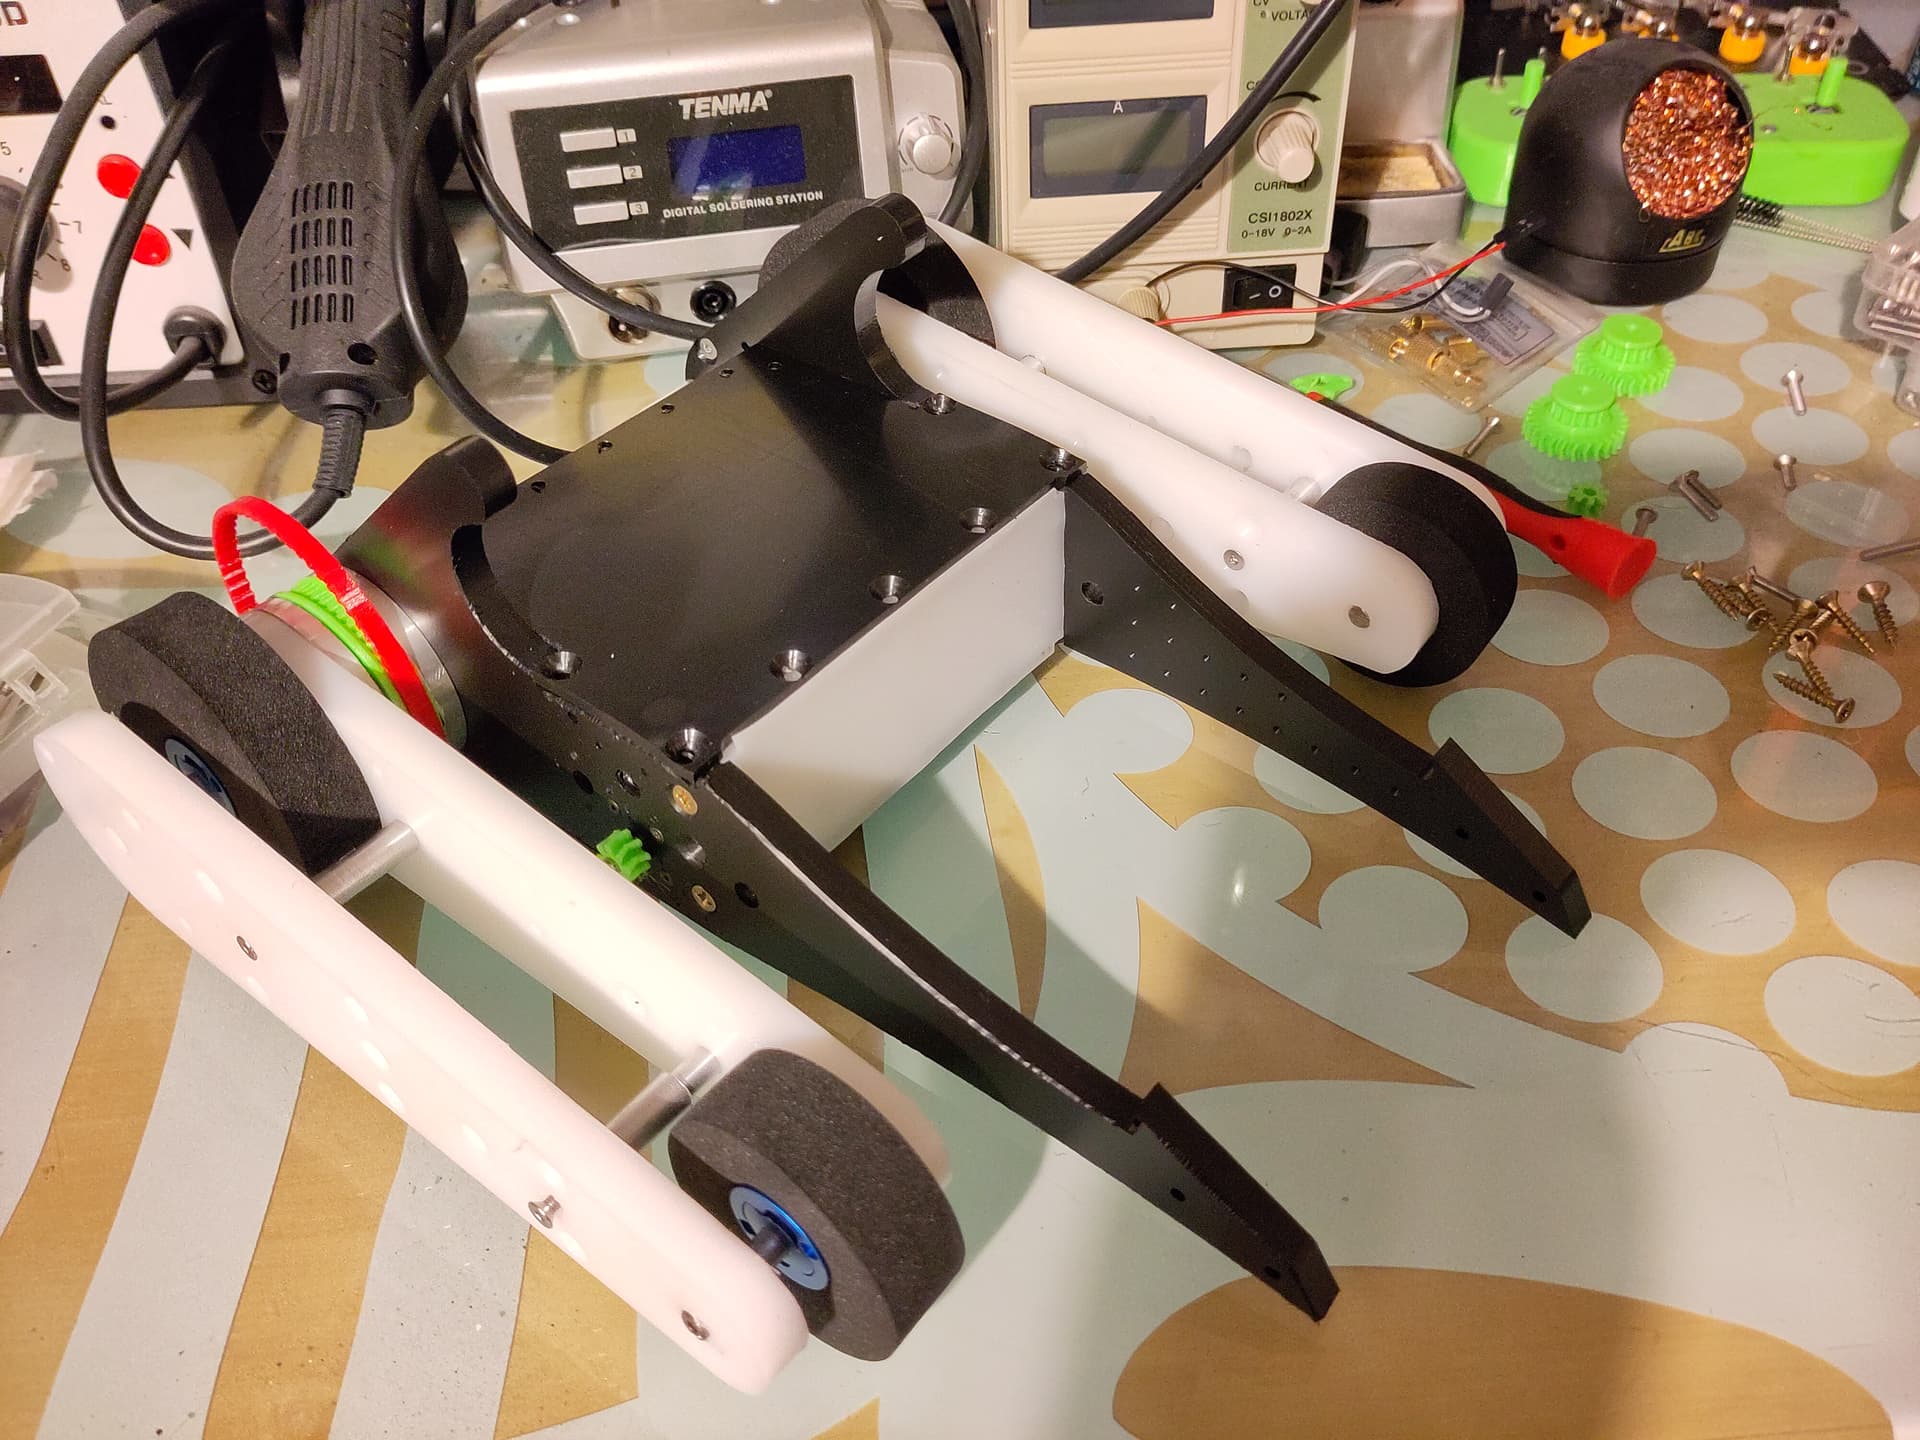
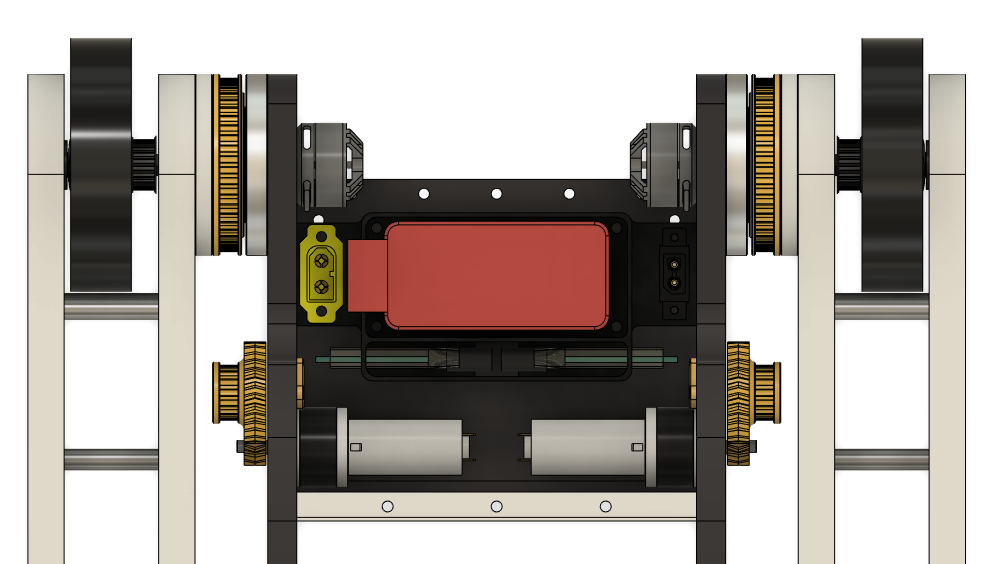
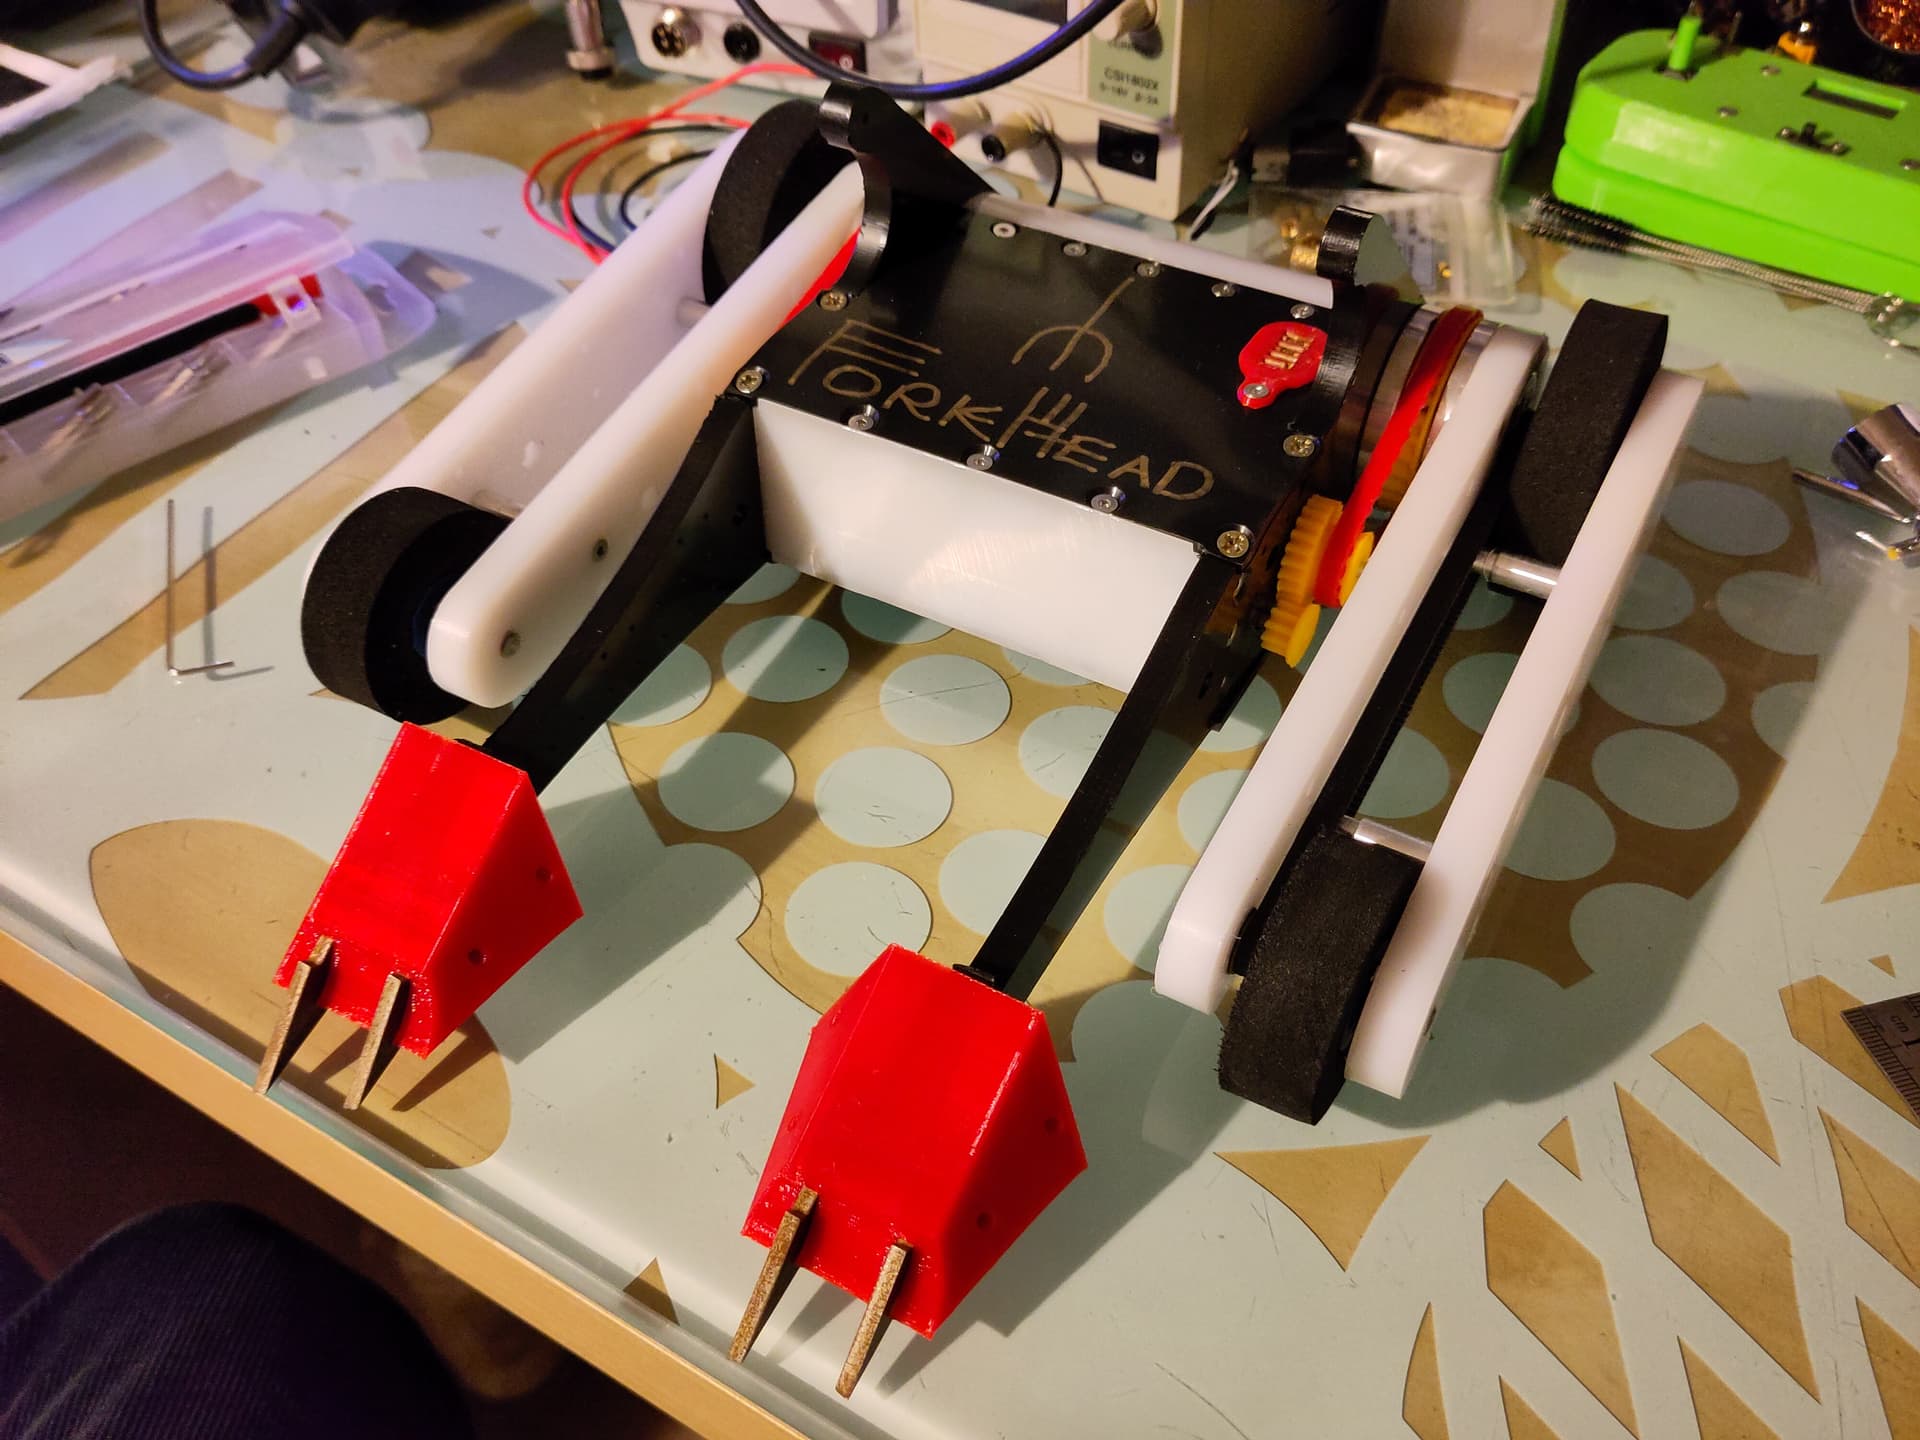
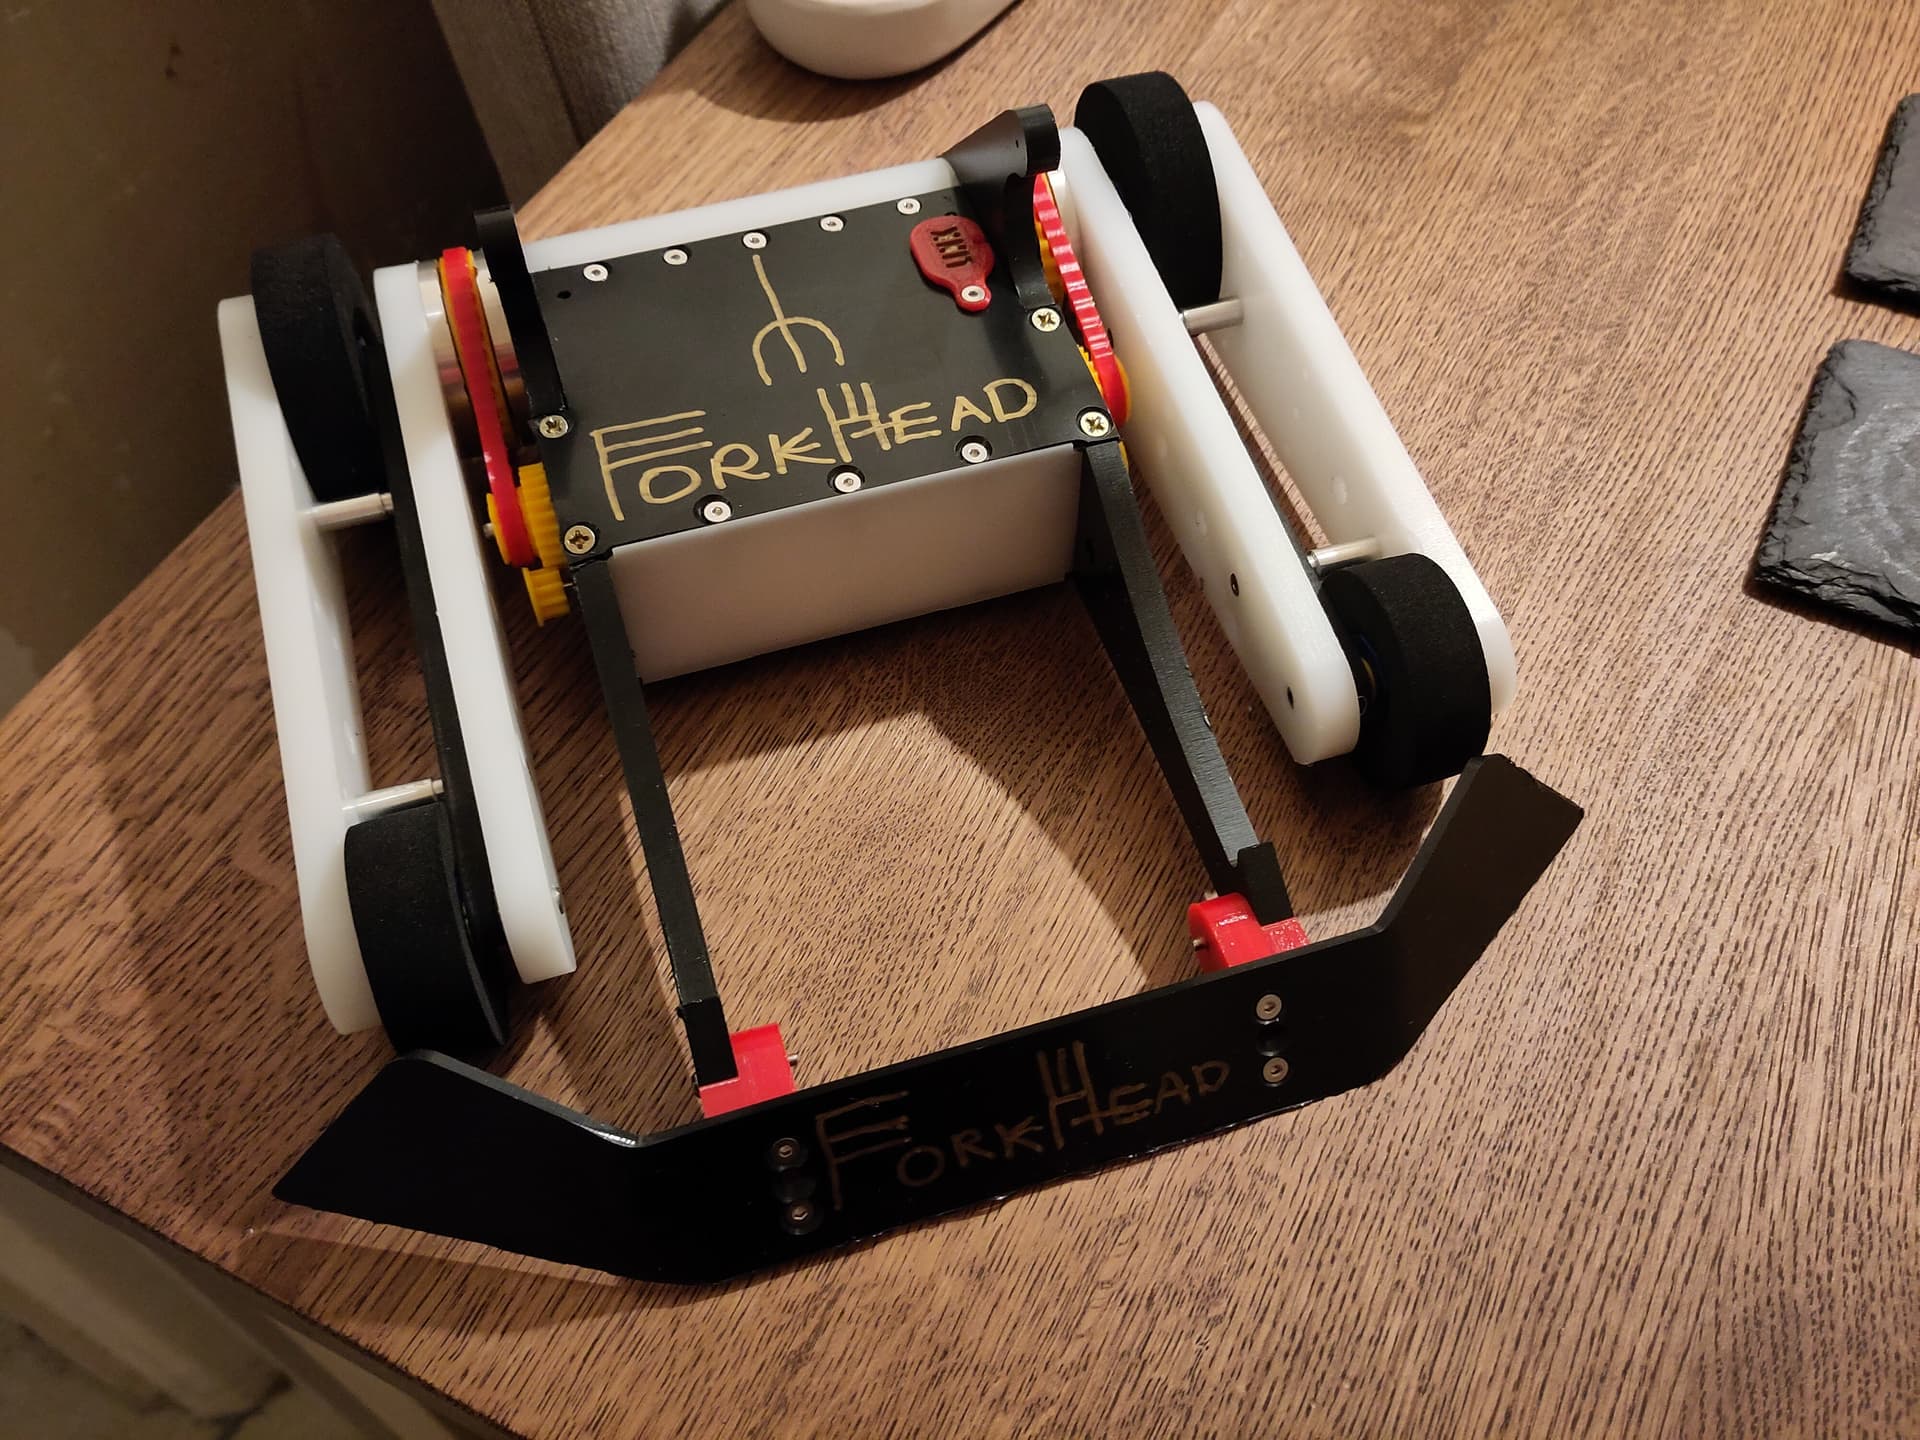
The final setup for the event ended up being two 22mm (one each side) brushed motors with a 16T TPU pulley pressed onto the shaft, driving an extra wide 28T pulley on the countershaft, the other end of which drove the 80 tooth pulley attached to the lifting prongs.

I benefitted a lot from Sam’s misfortune with getting Eye, Robot working in time and without his assistance I don’t think Forkhead would have been able to enter the competition either.

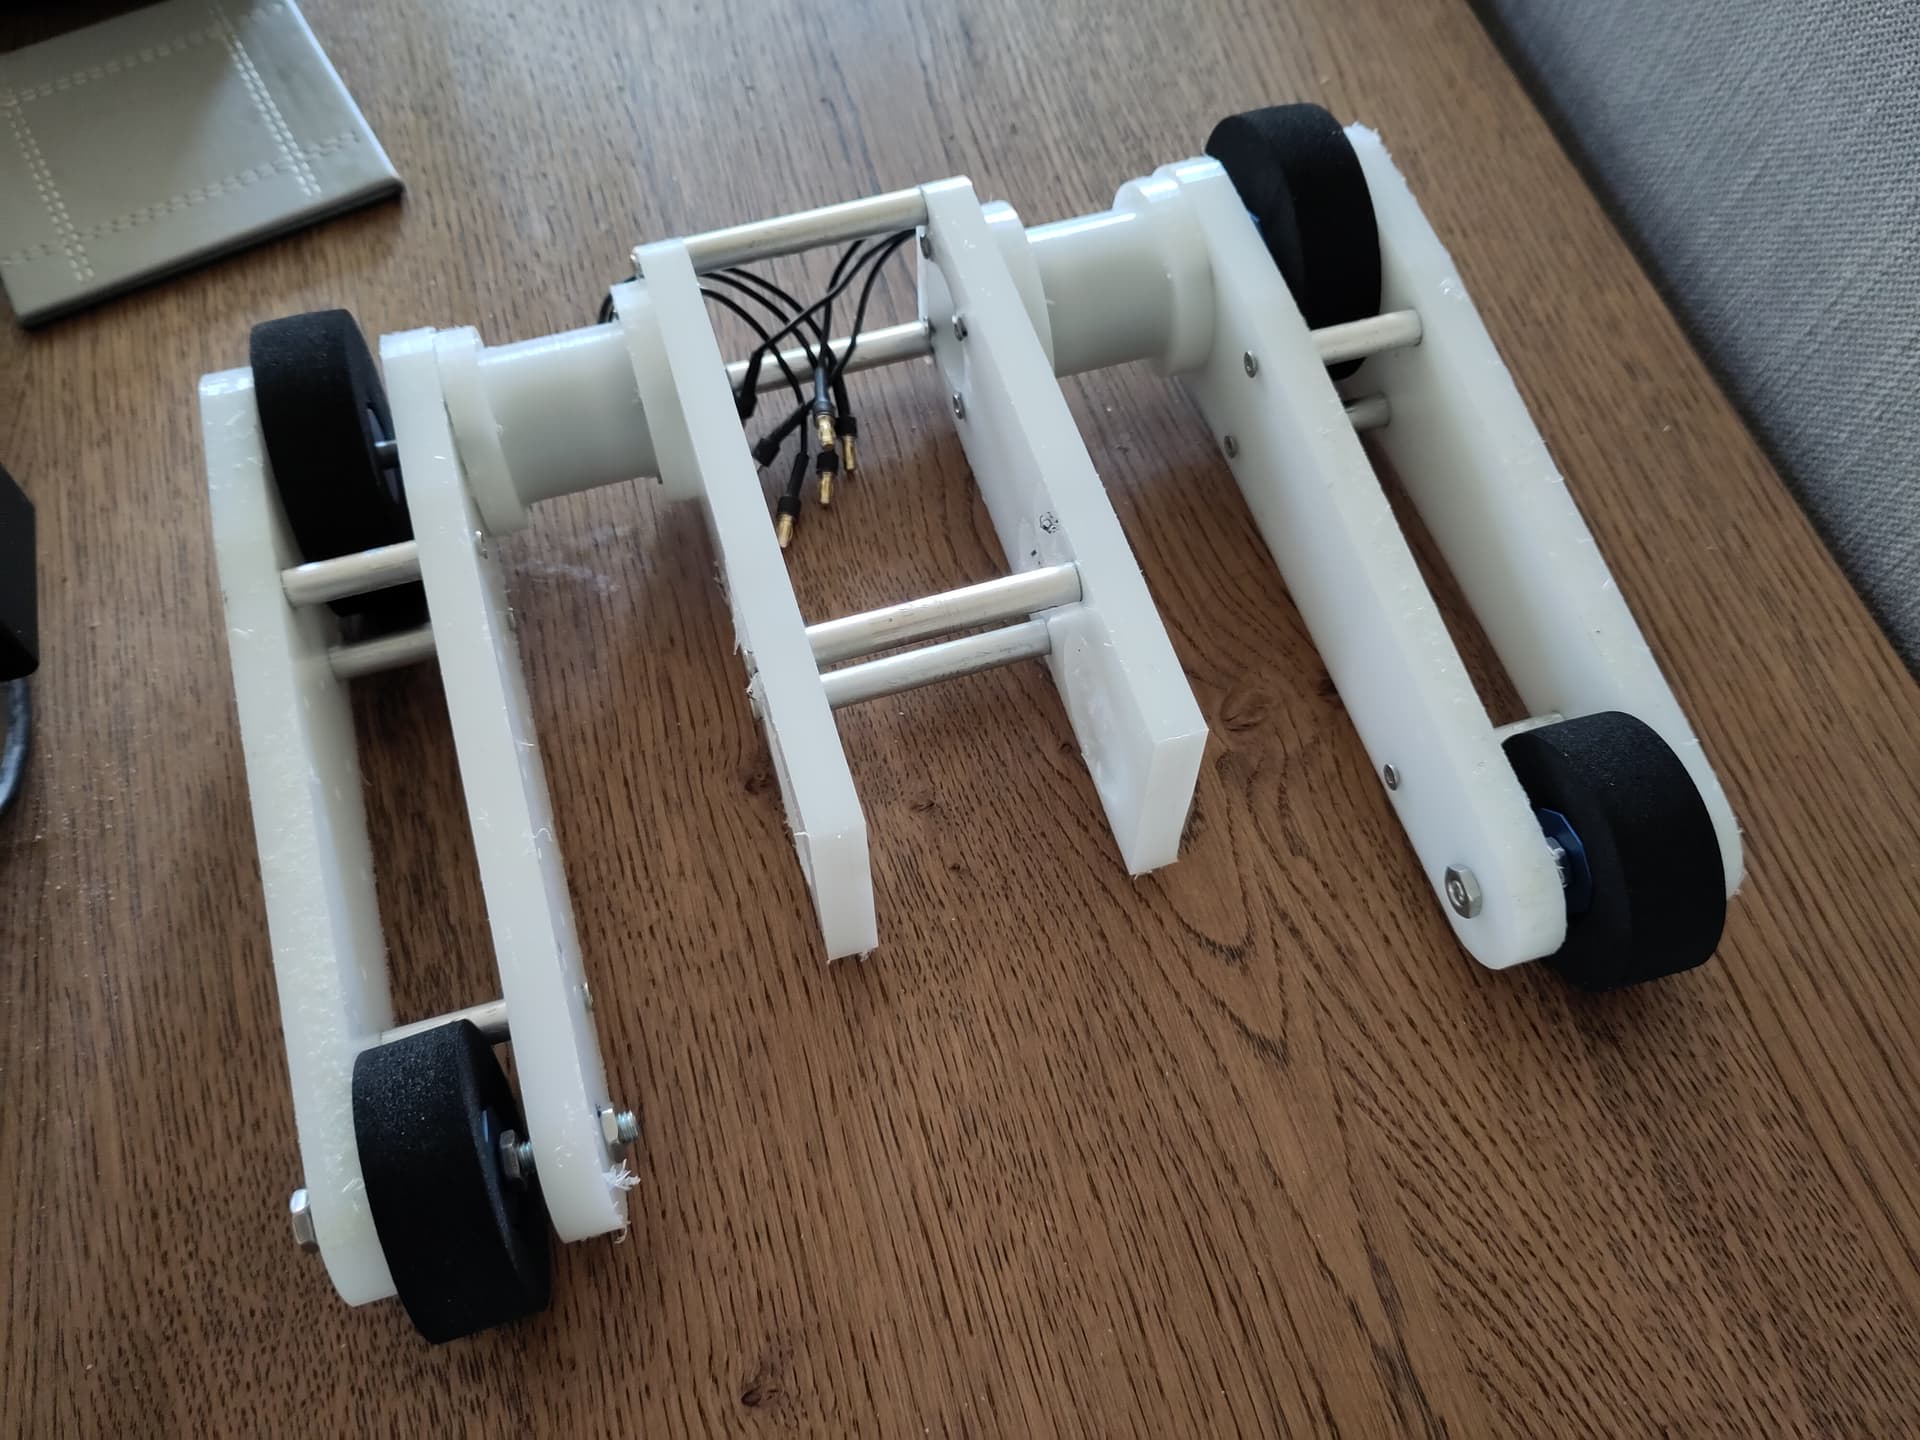
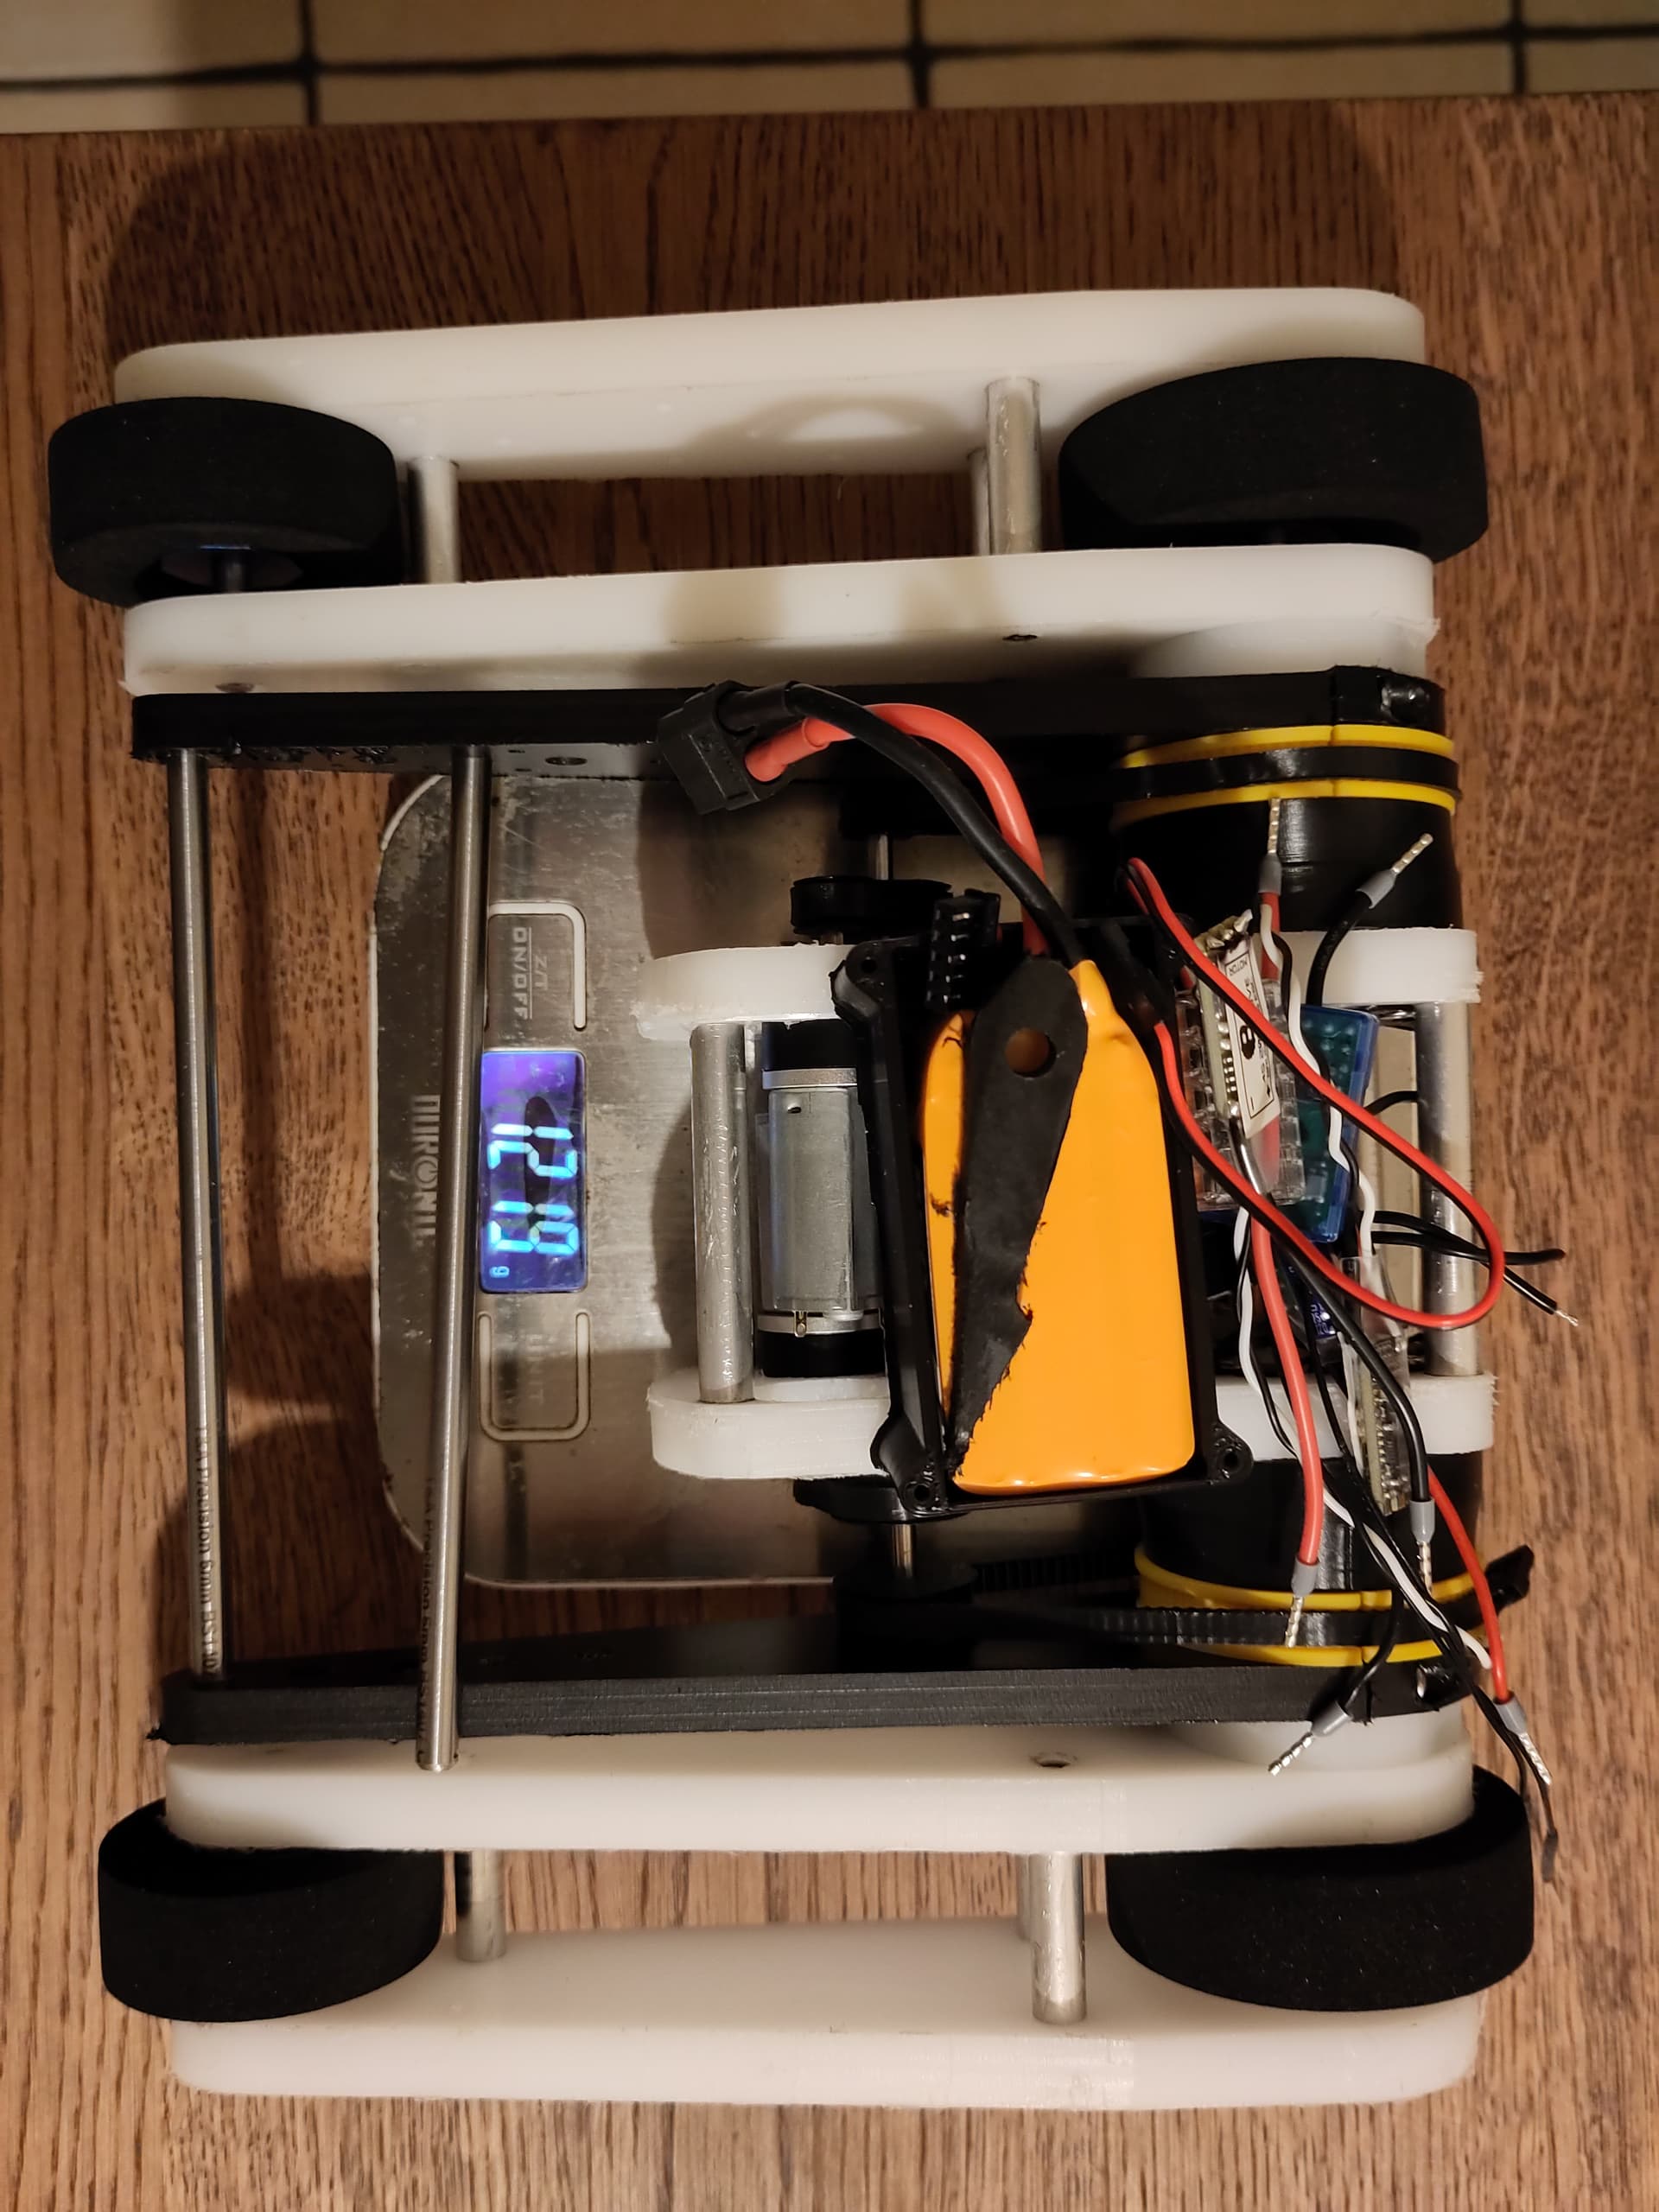
I managed to get things pretty much working the day before the event except for assembling the robot and enclosing the electronics pod, though the final assembly got relegated to a 2am building session once we’d made it down to Bristol and checked into our accomodation, and the enclosure ended up getting finished on the Sunday morning. Fortunately I’d clocked on the Saturday morning that I’d miscalculated the ground clearance and was able to order some larger wheels for delievery at the event, otherwise it might have been a write off anyway.

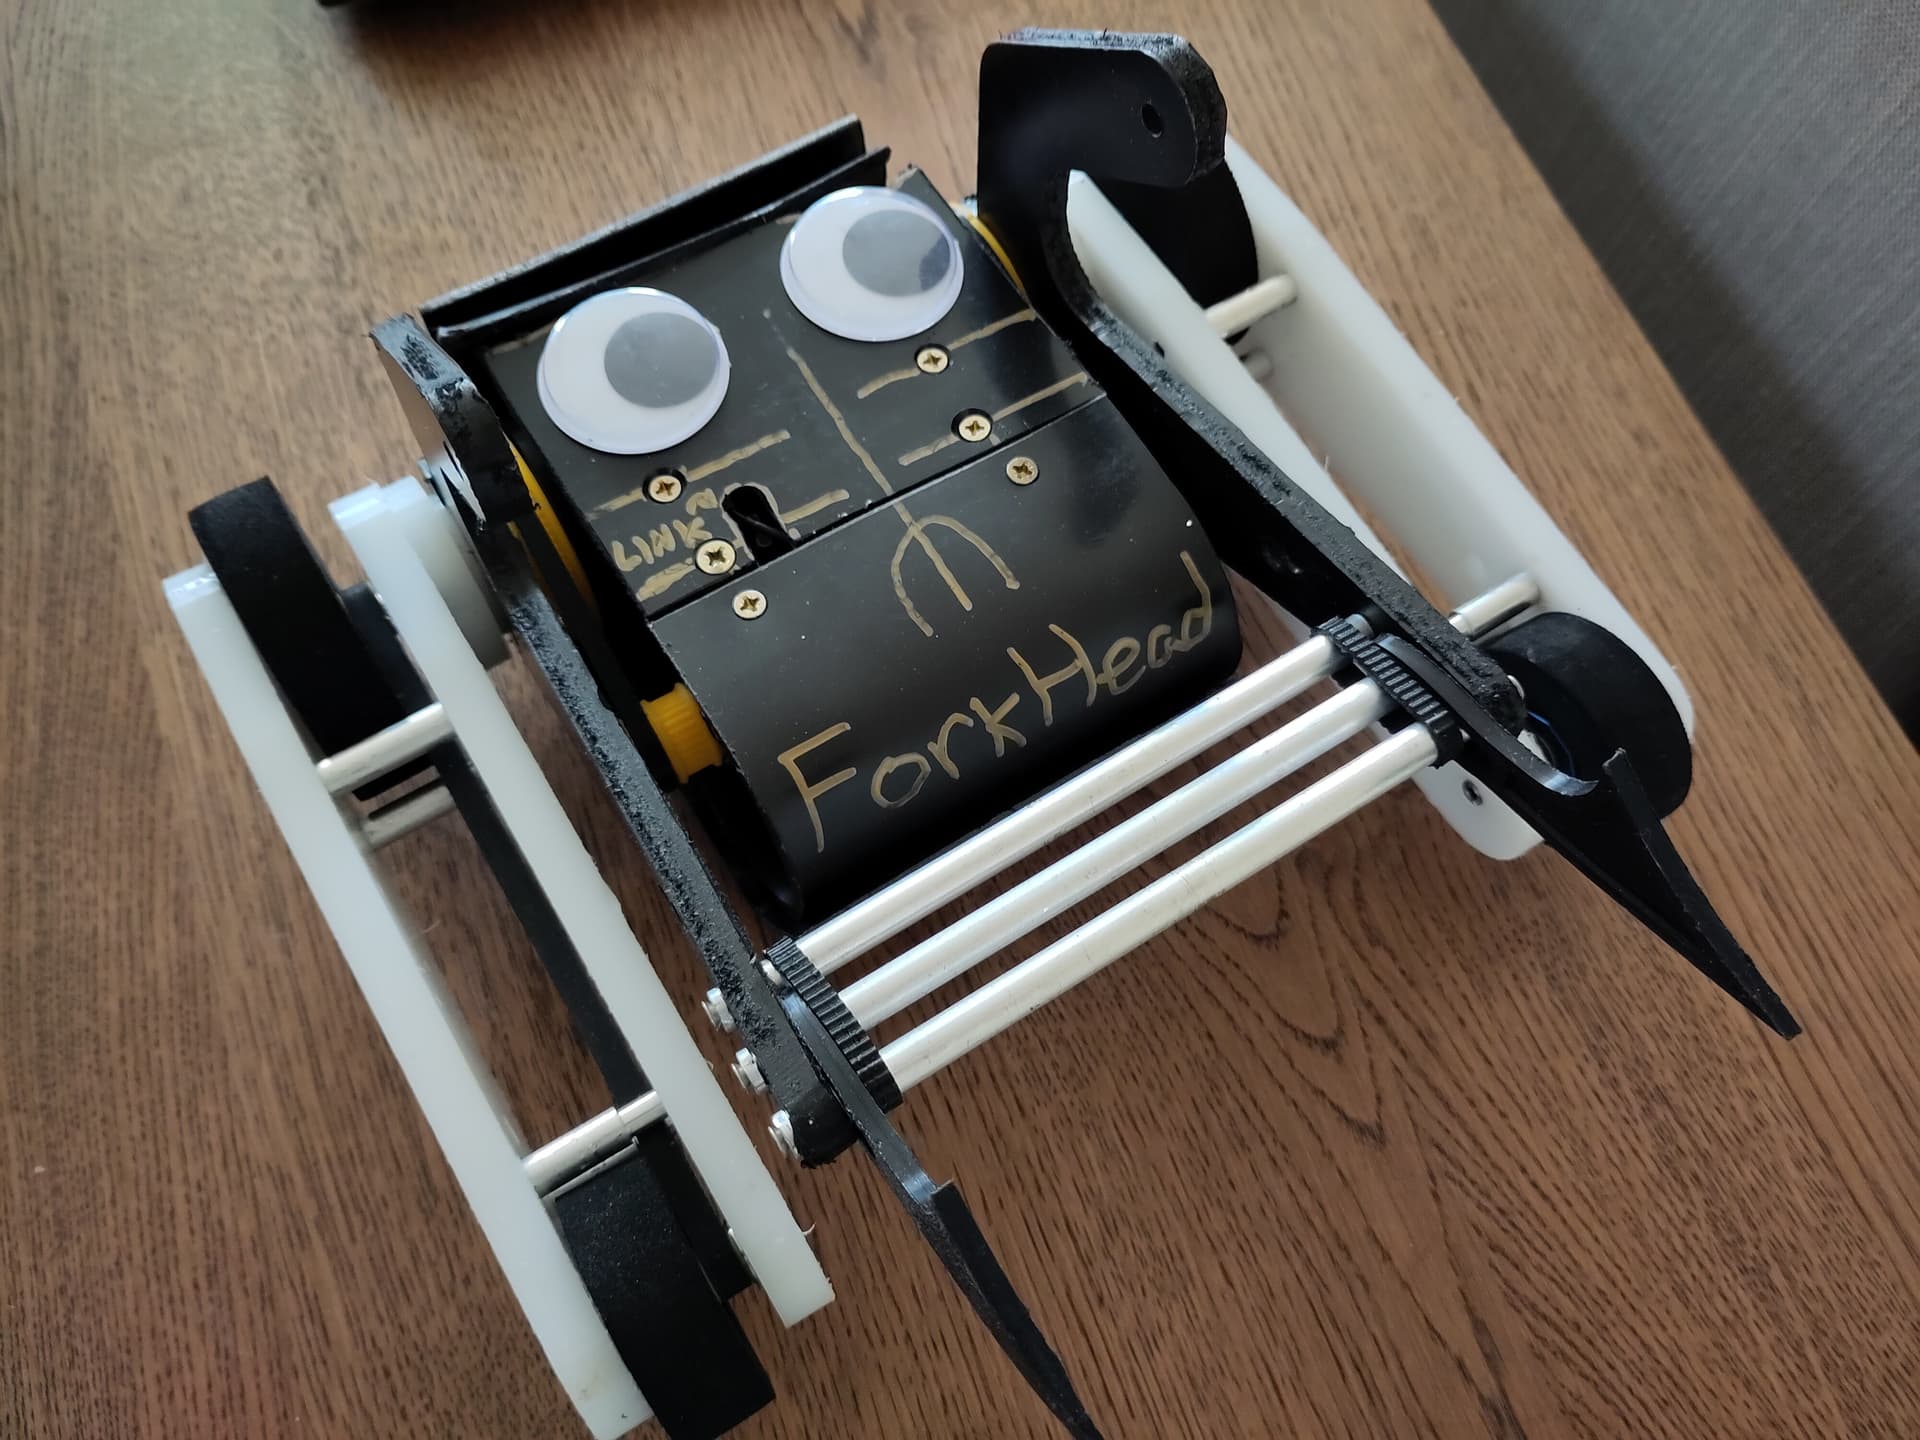
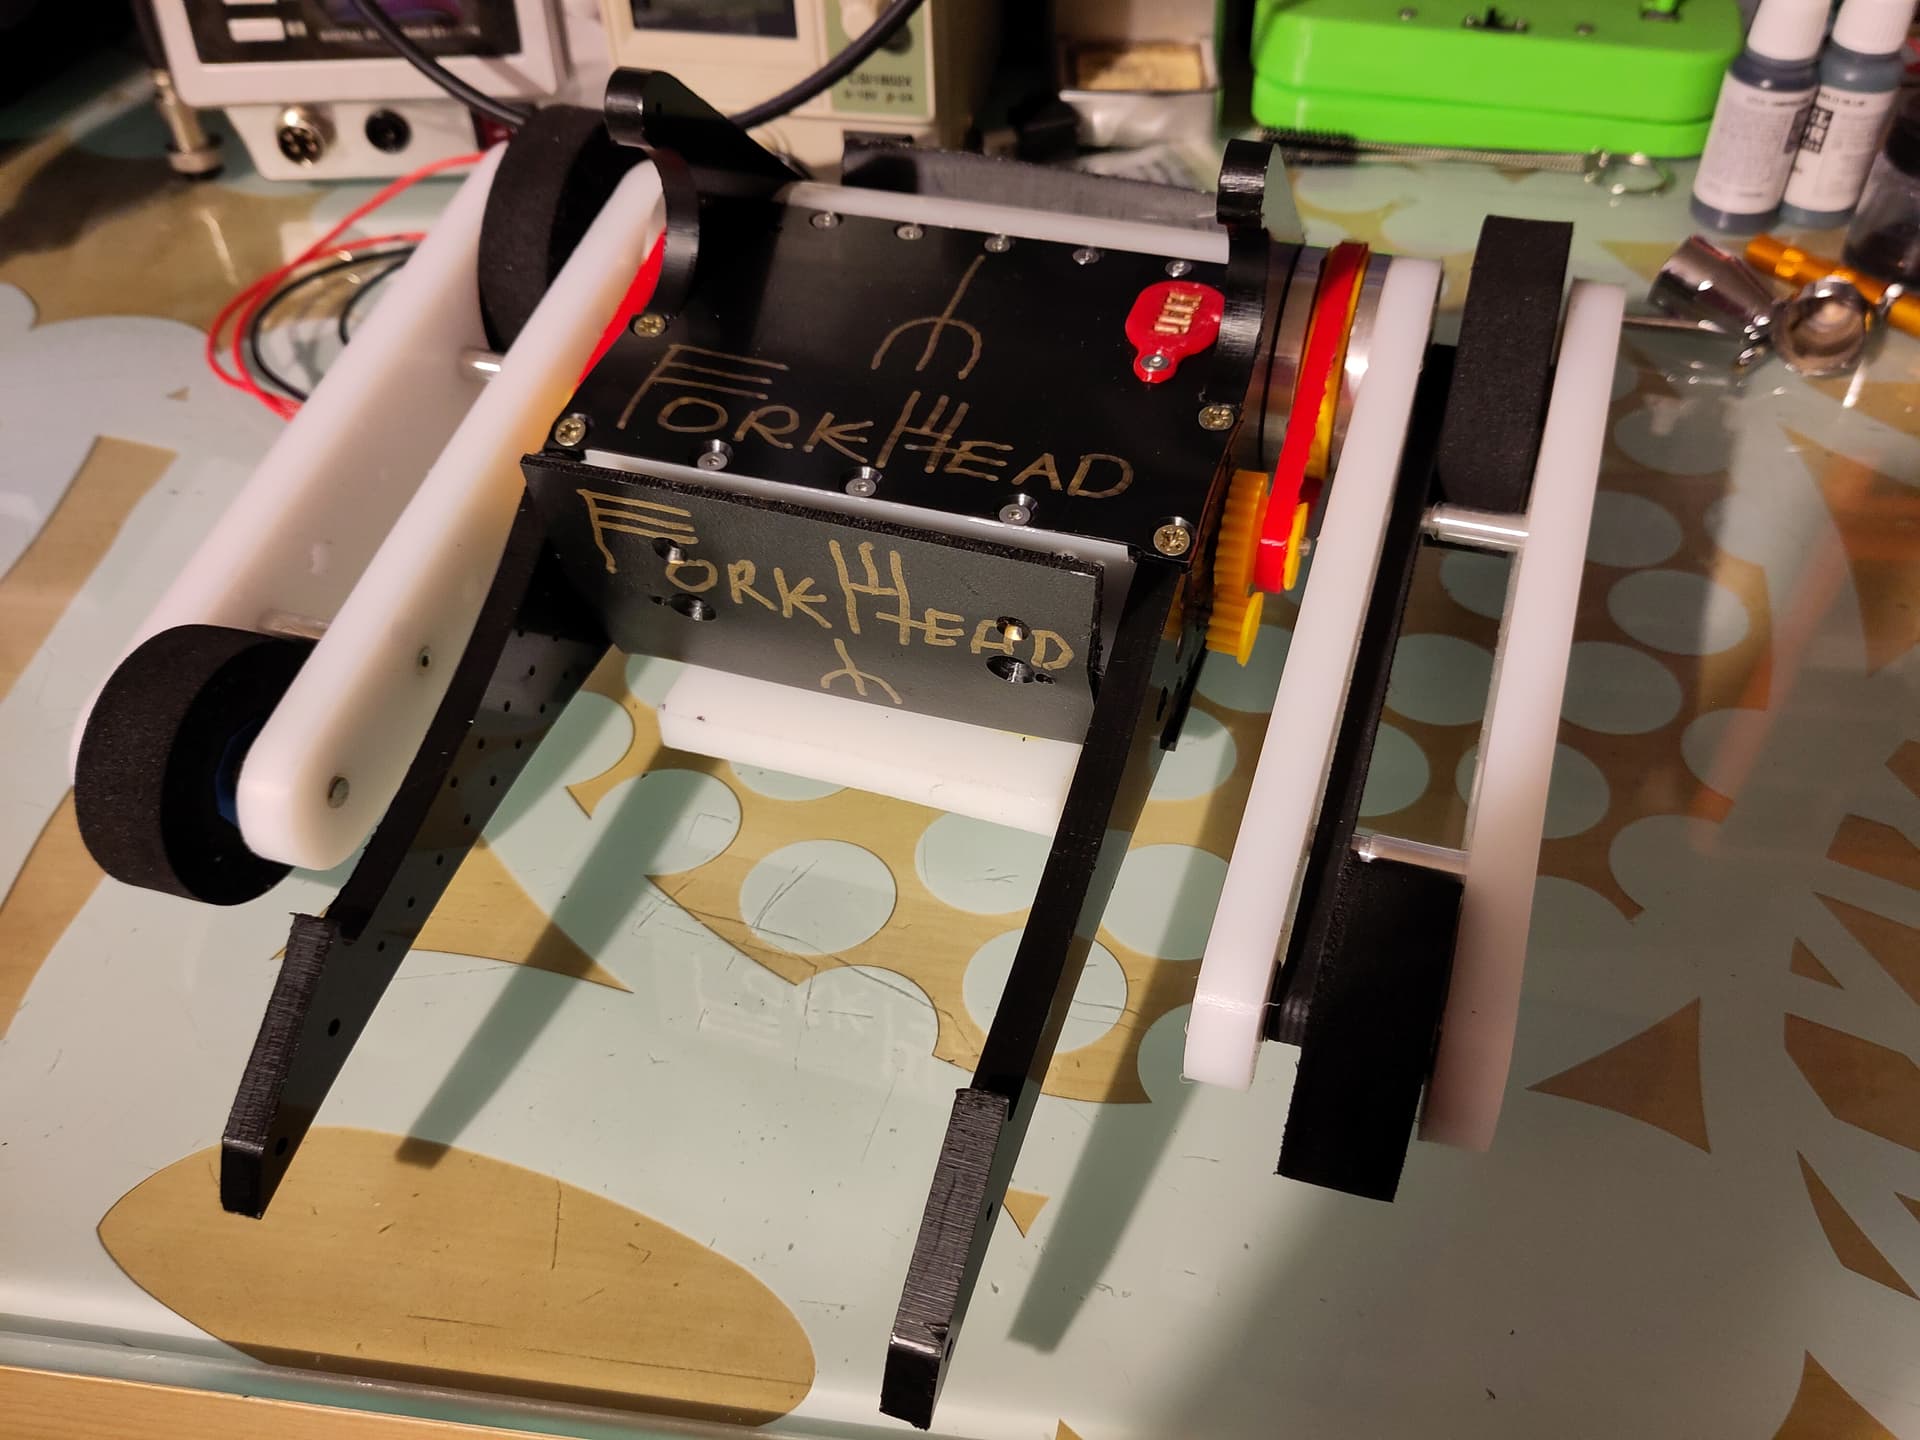
Once at the event I made it through tech check fairly easily, but instead of getting the larger wheels on I spent a bunch of time trying to get one of the various fork variations I’d designed and made, but not had opportunity to test, attached to the robot. After a bunch of time fighting with springs I gave up on my primary fork plan and switched to some bendy TPU forks that were much easier to fit.

Fight 1 vs Blast Furnace and Foo-d Fighters (a cluster of 4 smaller bots). Unfortunately ForkHead immediately demonstrated the predicted ground clearance issues which eventually led to its demise. The fight started with a disappointing lack of movement, but fortunately the prongs were mostly working and I was able to get the robot to sit on the rear prongs and the front wheels for a bit of mobility, but this gave me intermittent drive at best. After the Foo-d Fighters were mostly defeated Blast Furnace managed to push Forkhead to the far side of the pit where its ground clearance issues prevented escape before the pit button was activated. I managed to get some drive eventually, but too little too late and my attempt at escape led to ForkHead pitting itself with a dramatic swoon.

Fight 2 vs Righeous Death Toucan, another lifty grabby robot that was significantly more finished than Forkhead was. I fitted the larger set of wheels that I hadn’t had time to install before the first match, and we had an excellent grapply driving fight which came down to a judges decision, with the Death Toucan taking a well deserved unanimous win.

Fight 3 vs Eva 001. This was a very short fight which started very promisingly when ForkHead managed to lift and flip Eva 001, but then went south almost immediately after as Forkhead lost power after some grappling. This turned out to be the fuse wire in the removable safetly link shearing off. This was a frustrating way to lose, especially as the robot was starting to show some promise (and because I’d considered switching out for a different link seconds before the fight for entirely superstitious reasons).

That was Forkhead out of the competition, but the initial teething problems were resolved it was starting to show some promise.

Whiteboard fight vs Tsuchikage, Impulse, and Bop. This fight was great fun and Forkhead’s performance continued the upwards trajectory it had been on throughtout the day, managing to push some bots around and generally be a nuisance. Unfortunately this was cancelled out by my driving performance steadily decreasing from lack of sleep the night before, and ForkHead’s day ended when a drive across the arena put in the put, which despite the siren I’d failed to spot opening moments before.

I had a great time at the event, and despite teething problems I think the bot showed enough promise to be worth taking further. I’ve definitely got a few plans to underway to get things working better.

4 Likes

Such a cool and unique beetle, I love that you guys are always doing such different stuff. Bring it back soon!!

2 Likes

Forkhead’s had a bit of a redesign for SCEETLES. I’m also considering renaming it Big Loaderer but I’ve not taken the plunge on that.

The major change is that the prongs and the chassis are now one piece and the drive pods rotate. The motor is coaxial with the drive pod rotation so it can still be mounted in the central chassis.

This change about doubled the usable space in the chassis, which was previously a very tight squeeze.

The drive pods now rotate around a stack of bearings, rather than the previous plastic on plastic and clamped just right, which was rather awkward and not very robust.

I’ve been slowly building this over the last month or so, with the first parts being the bearing housings for the drive pod. The 50mm aluminium was about the max capacity of Nottingham Hackspace’s Denford Novaturn CNC lathe (designed for schools, not industry) so they were both the most time consuming part and the part most likely to fail. Fortunately they came out well (if you ignore the chatter on non-working surfaces) so I carried on building the rest of the robot roughly from the outside in.

I finally installed the top, bottom and front armour yesterday, along with a temporary joiner where the as yet unfinished back armour will go, and it’s starting the look like a robot.

Next up I need to print a TPU insert for the electronics bay to keep everything out of the motors, then I can focus on getting the drive mechanism for the prongs sorted and start designing attachments.

3 Likes

All of the essential machining is done and it’s reached the ‘minimum viable robot’ stage, weighing in at 1353g minus the belts and pulleys for four wheel drive, a few screws and some aluminium spacers.

This rear armour piece was fun to make, but also probably massively overkill.

I’m hoping to finish off some 3D printed TPU bits for armour and fork mounting next week.

5 Likes

Looks super clean, love the shape of this bot, excited to see it’s return! :slight_smile:

1 Like

Looking very stylish Steve. Have you tried the lifty mechanism yet?

1 Like

I definitely want to give it a proper test soon.

A quick test with croc clips and a bench power supply tells me that the GT3 belts will probably still be the weak link (slipping, not breaking). I also need to tweak the gear ratios slightly, the current pinion is too small and the PLA test piece immediately rounded out on the shaft.

I’ve managed to strip a screw mounting one of the lifter motors, so I need to decide between drilling it out or doing a full teardown before I can get at the motor terminals.

I considered using a dual ESC to drive each side of the lifter separately, but I’ve stuck with both motors driving a common countershaft for now to keep things simple.

To recover from the drive pods getting out of sync if they take a kit I’m planning on adding a single tooth ratchet mechanism between each drive pod and the side of the body. This will let the drive pods rotate downwards indefinitely (body moving upwards, for lifting), but provide a hard stop that keeps the drive pod from moving up past the body. The belt should slip enough that I can get them back in sync quickly, and as a bonus it will make it easy to get the prongs on the ground which has always been an issue with Big Loader (though the DIY controller I’m using for AntWeights has made that easier - I’m using standard radio gear for Beetles currently so don’t have that option).

If I’m feeling realy ambitious I’ll add a servo or solenoid to temporarily disable the ratchet, but I think rotating the drive pods 180 is probably a pre-fight choice (maybe when fighting an undercutter) and has enough other limitations that I won’t need to do it often.

1 Like

Just to warn I’ve found for my lifty beetles (grab crab & lob-ster for me) I’ve needed at least 5mm tooth belts - @Shooty has great success with HTD5 on Babrog , but even 5mm then I would get slip quite a bit with various tensioners, so nowadays resort to chonky HDPE mod3 gears (printed gears could work too)

2 Likes

Cheers Joe. There’s definitely experimentation still to be done with the lifter aspect. I appreciate the advice. :slight_smile:

HTD 5 belts (printed currently) have definitely improved things, it can lift things and the motors are now the weak link, stalling before the belts slip.

I think this is as good as it’s going to get for the weekend, and combined with a strategically placed wall it will hopefully be effective enough to lift or even suplex an opponent.

This version of the robot has largely been about building a better platform for future plans, and I’ve definitely managed to eliminate a lot of the issues that made the first version difficult to work on and overcrowded.

For the next minor update I’ll rework the lifter mechanism to allow additional reduction, which will require new side panels and a reorganisation of the innards, but not many other changes.

1 Like

It’s at a place where I’m calling it done for now, though after the weekend there’s a bunch to do.

Here’s the raw prong config. They’re hard to replace since they’re integrated with the chassis sides, I’m unlikely to run this against anything with a spinning weapon.

Probably the main config. Some metal forks with chunky TPU mounts/wedgelets.

Full wedge config to keep the wheels safe against horizontals.

The lifter works but is a bit insipid. For the next version I need to either revise the gear train or switch out for different motors and revise the geartrain. I’m looking forward to being happy enough with that apsect of the robot that it’s worth committing to metal or machined HDPE gears.

4 Likes