Hey you fun zesty individuals. I’m planning to dump out all my 150g laundry here as and when I build things. I tend to do ants on a whim so they will fit no concrete vision and progress will be pretty much either feast or famine.
Recently I went along for an afternoon of robotic violence at the Cider box where I plucked a plastic FBS out of my arse and into reality in a couple frantic days. It had a fairly sedate set of components that were all just hanging around in my parts box. It was fantastically terrible and terribly fantastic at the same time.
To be Bants legal it sported a plastic shell and impactors which held up pretty well (he says knowing full well it split along its layer lines in every single fight)
I put a lot of this down to a wibble in the print and being rushed out in the absolute cheapest and nastiest PLA known to humankind. I think the idea has legs however and since Bants are dropping from 175g to 150g it makes sense to rip up this design and start again. It has a lot of good ideas just poorly executed. I am going to shrink it all down, make it cube legal and gear up for full combat.
The drive system was pretty neat on the V1 but I had to change things up a little bit for the new version. I’m planning on O ring tracks which lets me direct drive the pulleys.
First drafts are printed (obviously) and it’s looking pretty promising. So far I am planning nylon for the shell with some kind of metalic impacting surface in the form of a ring disc.
Really impressed with this design! About the simplest I’ve ever seen an FBS, but it sounds like it can give quite a punch if the prints are splitting like that! Am excited to see what the V2 with better materials looks like. Am reminded of Wajoo the more I look at it, which is only a good thing (I think Wajoo was also gonna be 150g originally if I remember?).
For those not in the know, I had a semi successful 2wd beater robot at the last AWS I attended. It worked way better than I expected and came away with the most succulent and illusive of treasures - a positive W/L ratio.
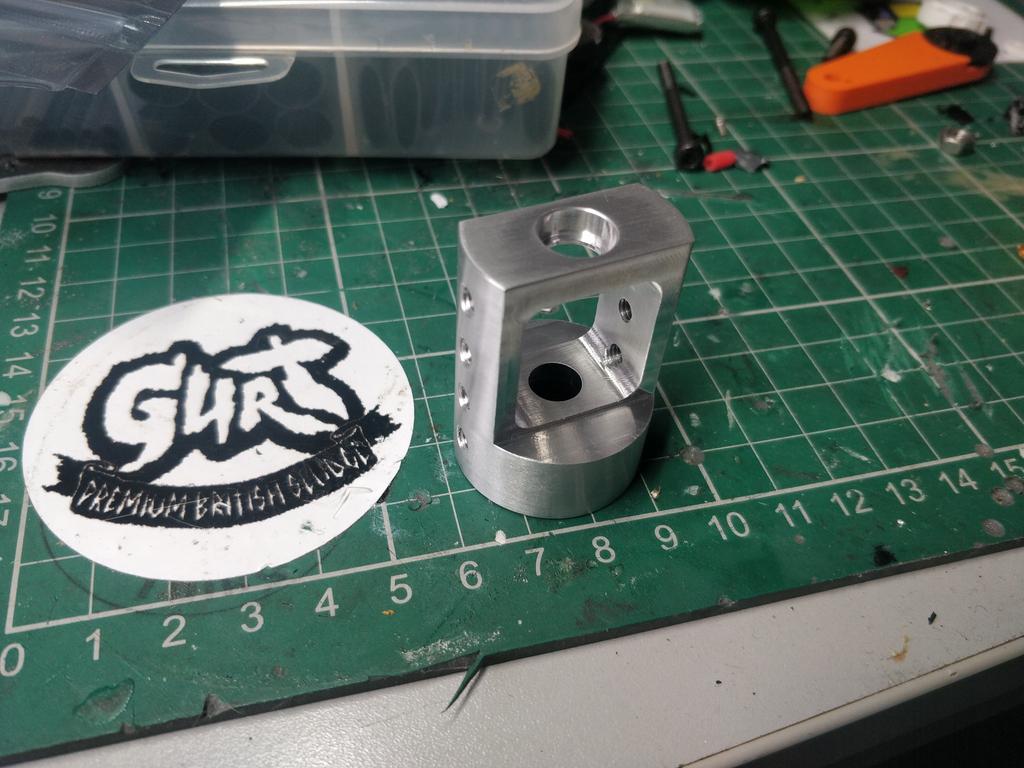
I wished to improve it by toughening up the weapon and the chassis. The biggest change was changing out to a more traditional drum style of weapon with countersunk bolts for teeth and adding in a massive dead shaft in the form of a M4 shoulderbolt. This ties the front bulkheads of the robot together and should increase strength massively (the old frame cracked with impacts) The rest of the chassis remains mostly unchanged aside from adding in some geometry for heat press inserts and trying to remove a few tiny atoms of weight here and there.
Satisfied enough, I bought my ticket and took the ride. Within 2 weeks I had some pleasing clickly clacky blocks of 6061 to play with and I quickly installed a magnet ring and the two 5mm ball bearings. With the addition of a single shim washer it spins beautifully.
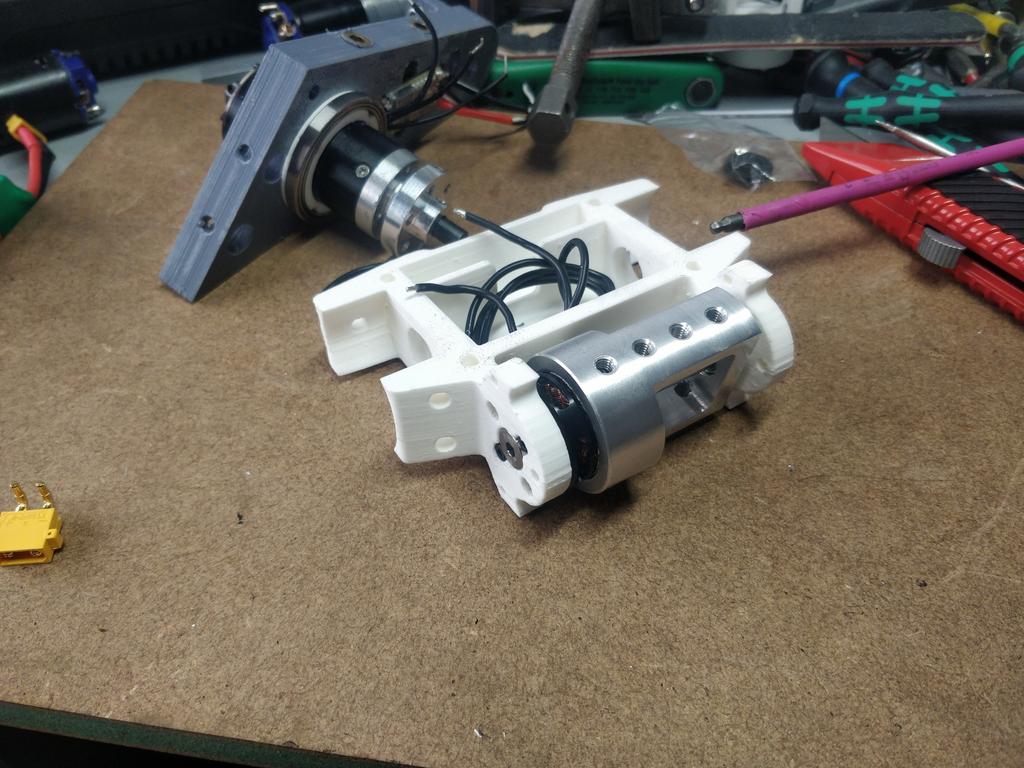
I kept the stator connected to the ‘base’ of the motor, only modifying it to knock out the tiny bearings and ream out the bore to 5mm. This bolts to the bulkhead with the dead shaft passing through the whole assembly into a captive nut in the opposing bulkhead. There is a hefty allocation of weight up front but I feel pretty confident driving this into even the most fearsome of horizontals with glee.
I have two of these robots to make, one for myself and one as a commission and a total of 3 drums to prep. Looking forward to having this hot potato back up and slugging.
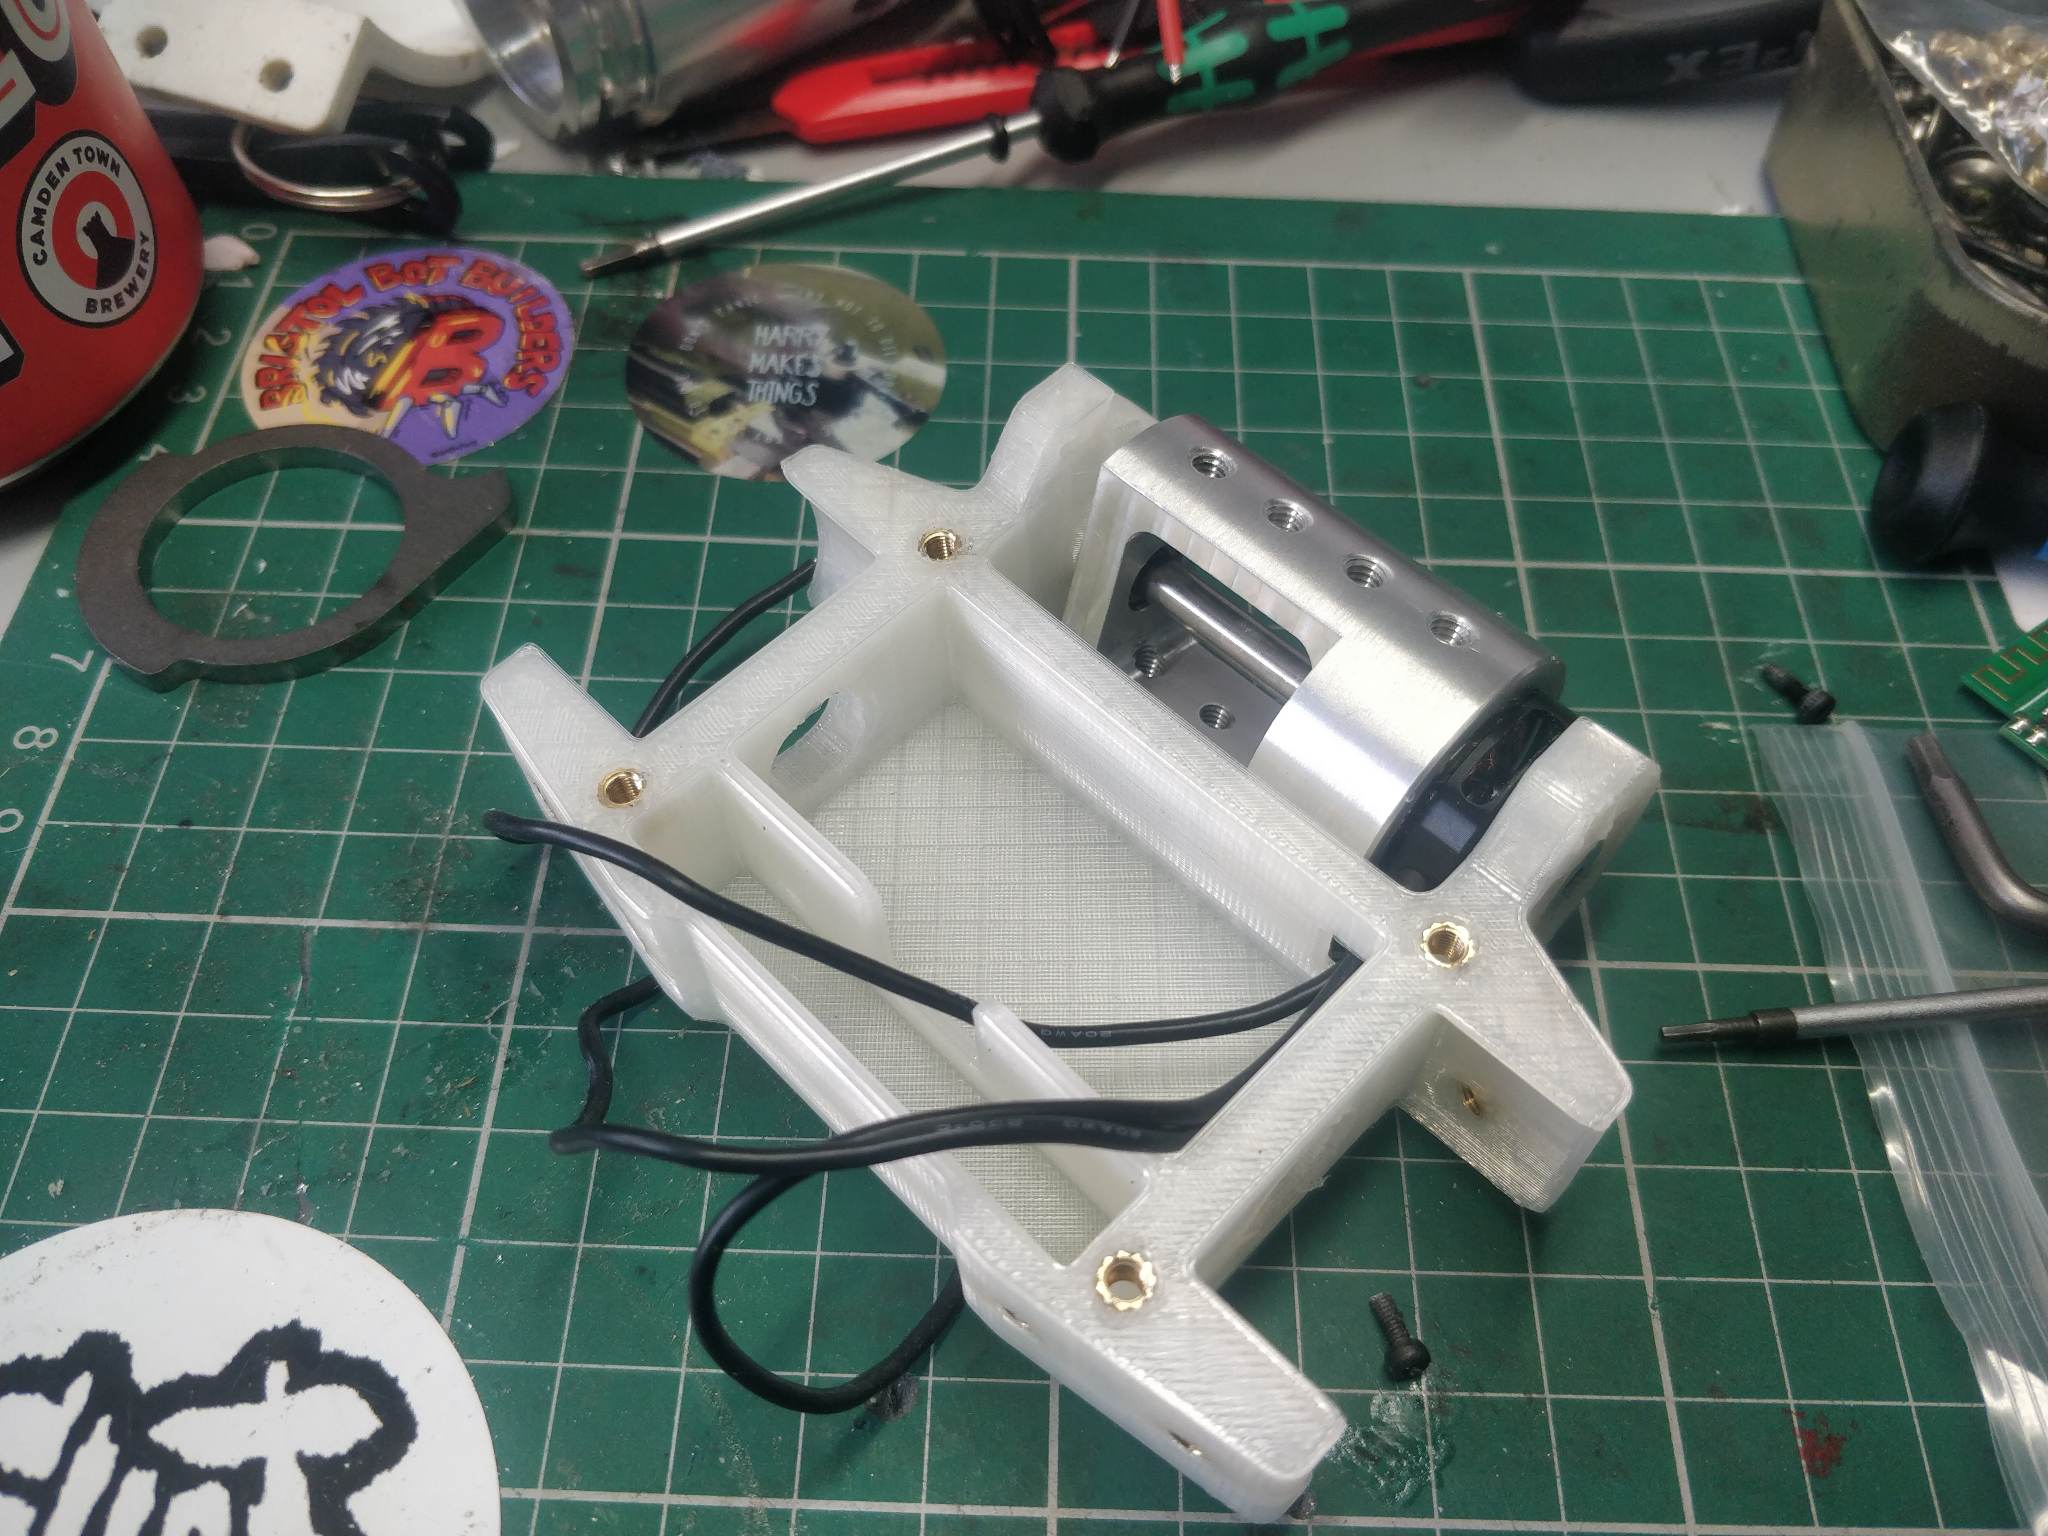
Taulman 910 chassis has dropped courtesy of Ranglebox - feels a lot stiffer than the Esun nylon I used on MotherLoader and the print was a lot cleaner (another big shout for tree supports)
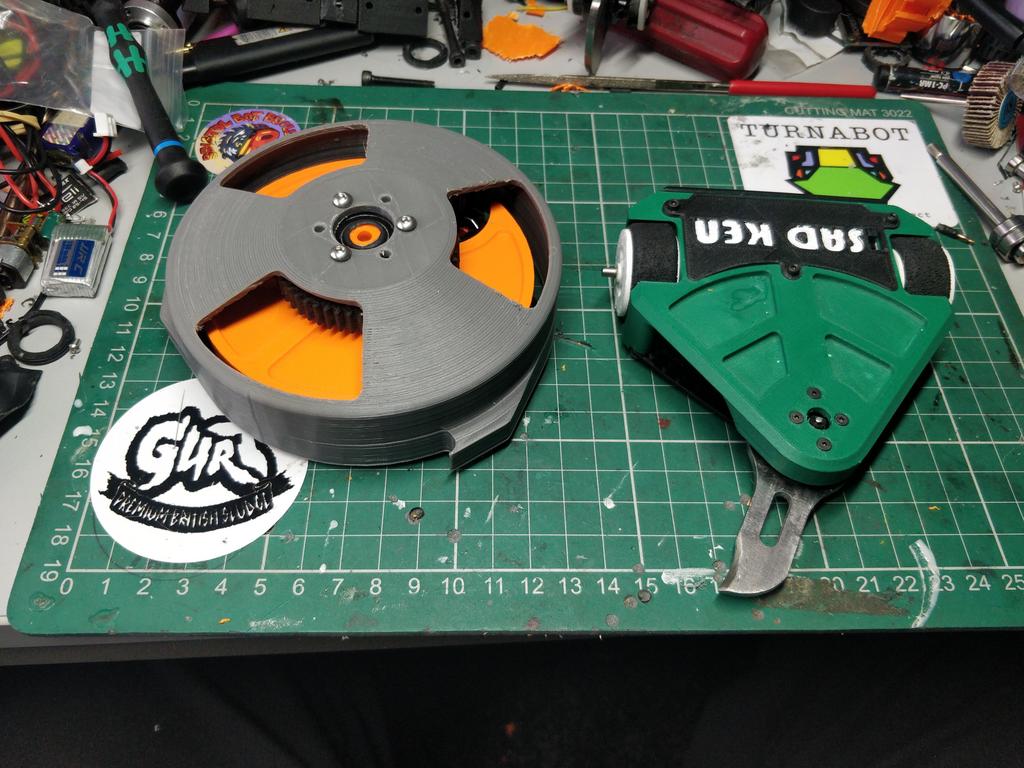
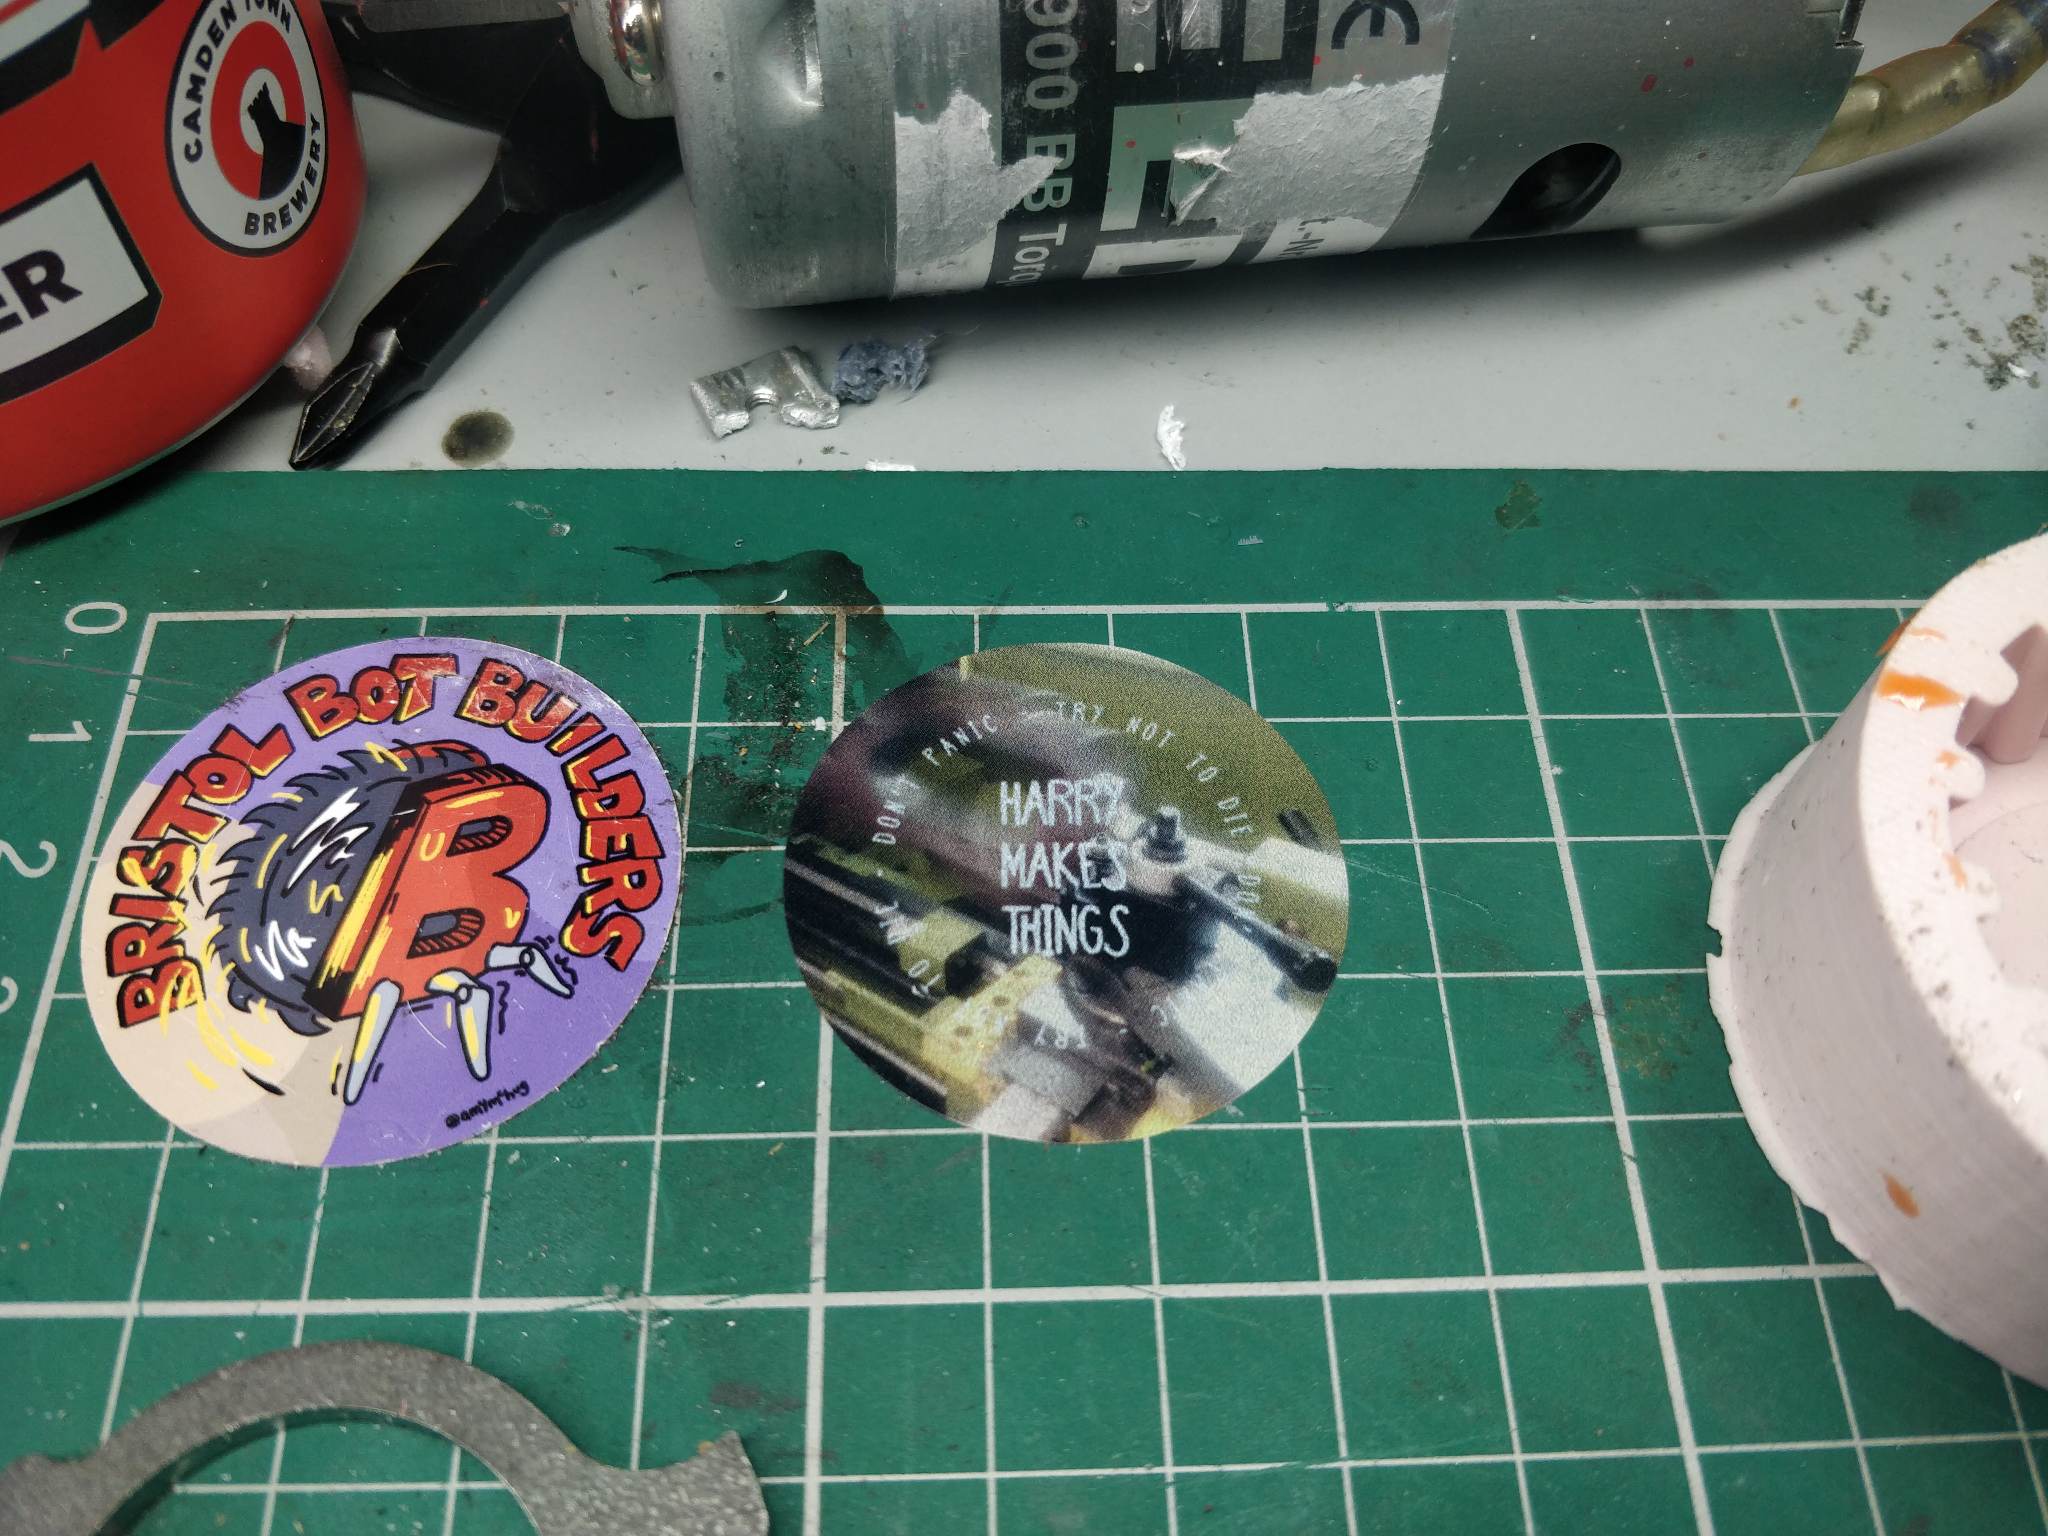
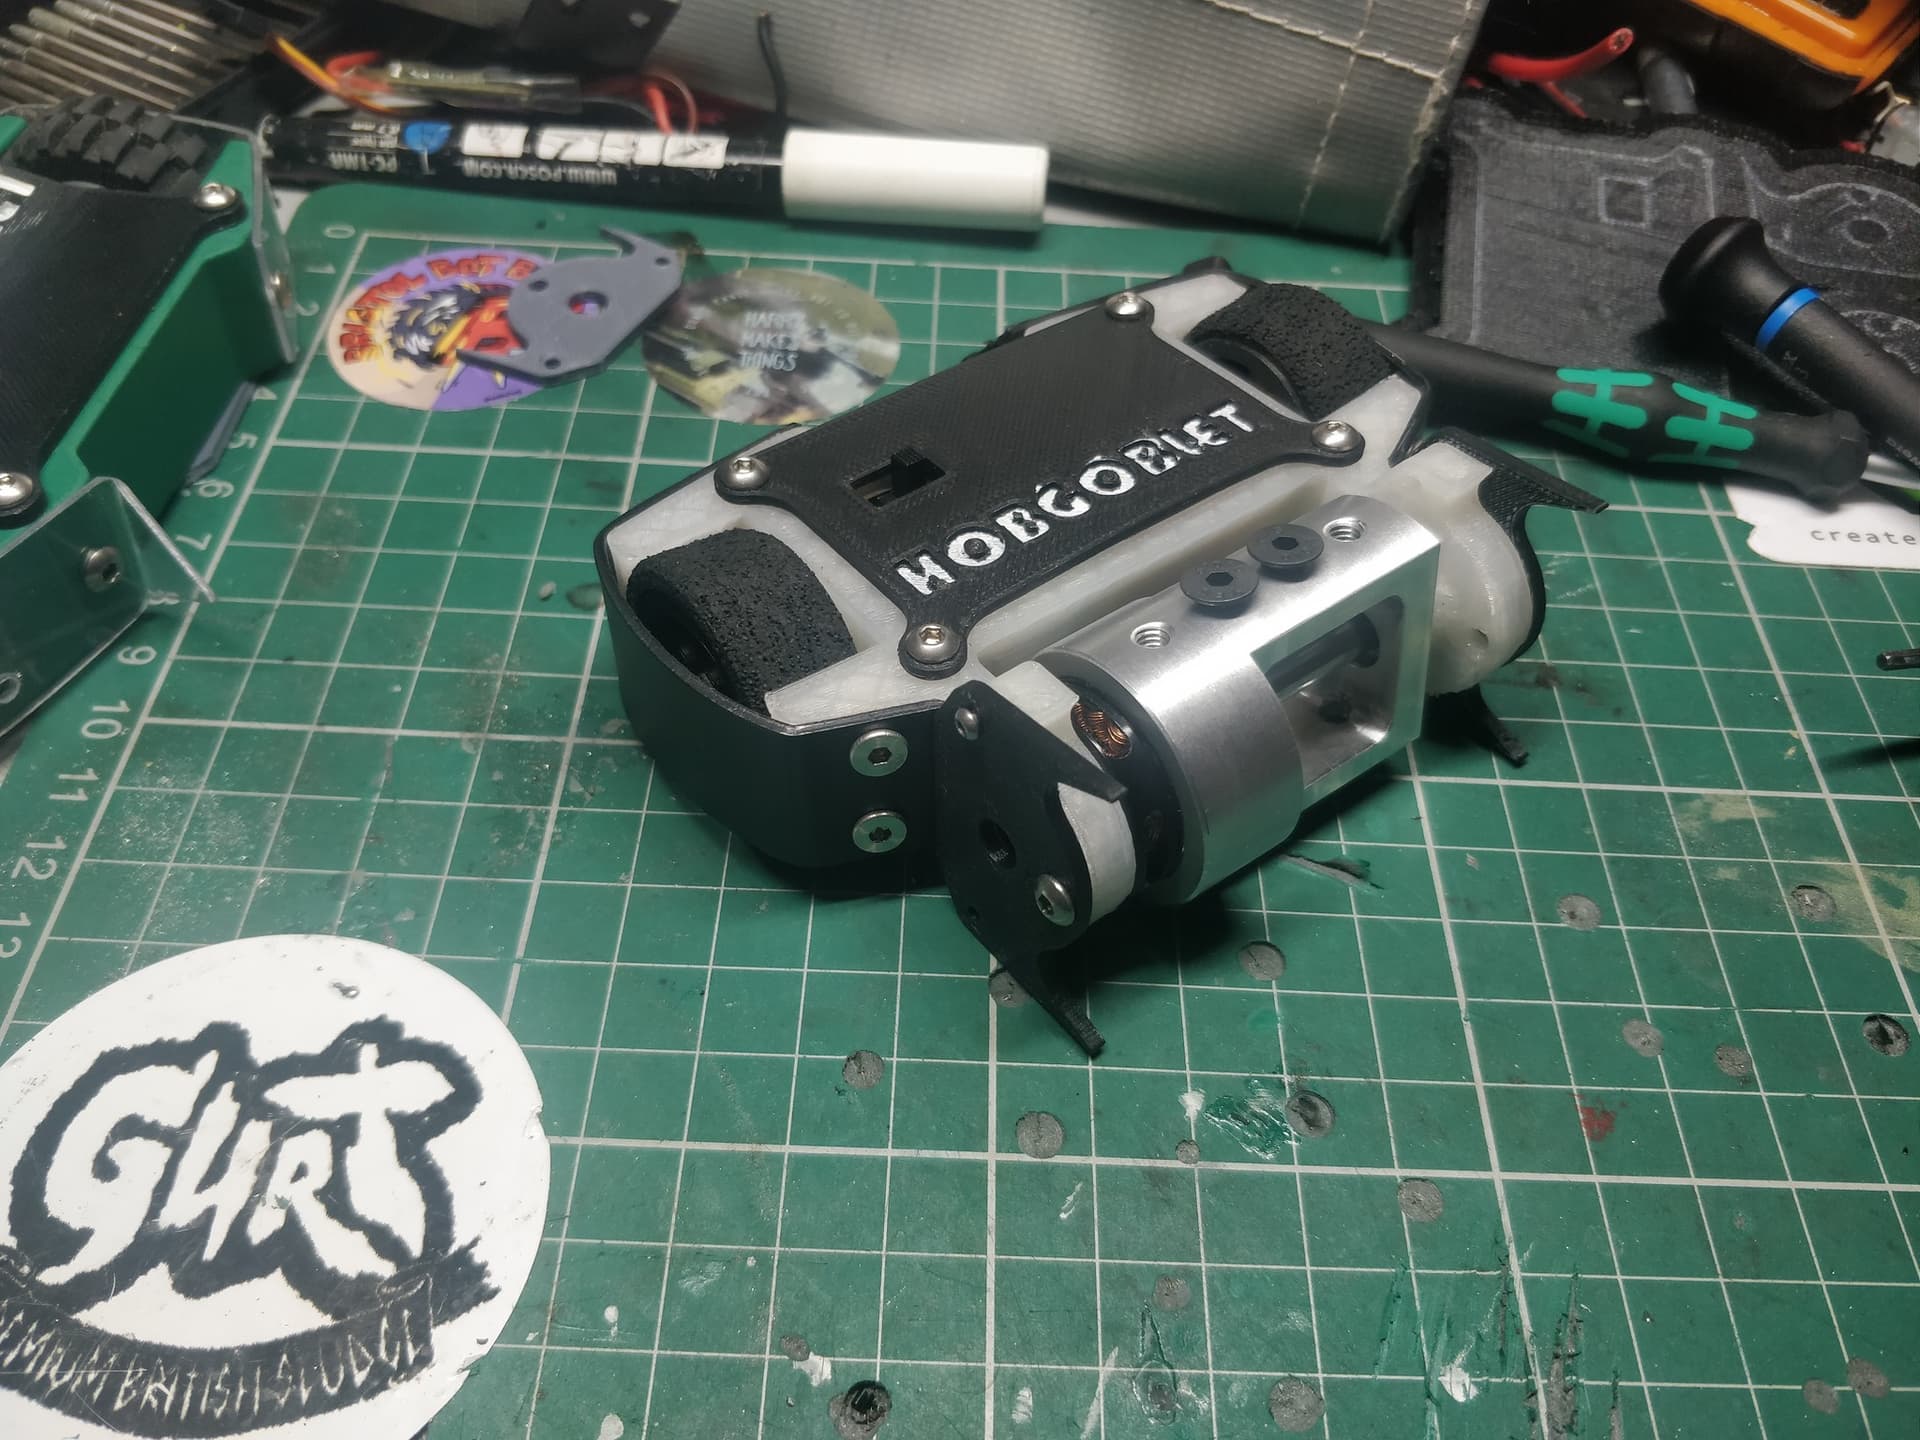
With the drum installed it is feeling pretty tough at the front - also featured on my bench are my HMT stickers I finally had made - an homage to my RW days.
Back to ant business - I slotted in the electronic package of 150mah lipo cells, a Malenki Nano and non name blheli brushless ESC. It sports two Turnabot N10 motors which are 700rpm (fast by my standards). I’m actually making two of these simultaneously, one for me and the other for Matt at Team Croc. Same weapon just he has quicker drive motors, one of the slimline Malenkis and a proper, respectable brushless ESC from BBB.
With a pair of Sad Ken lego wheels it is comfortably in weight. Wraparound HDPE armour and bolts for the weapon teeth are still to be added but it should slide in under 150g.
Working on evil twin ready to ship off to Matt at Team Croc. First time working with the new slimline malenkis and it was super neat having the two power terminals which made tagging off the BBB esc super easy.
Super impressed with both of these bad boys - the BBB weapon esc has excellent settings making spin up really nice and punchy without an aggressive brake when ramping down. Might have to grab one of these for Hobgoblet too! I drafted my forks and printed them in PLA-ST. In an ideal world these will be titanium so when I get enough things racked up that need to get cut out thin sheet I’ll rattle them out. Until that point it will be consumable plastic. 3 bolts lets you change them out every fight.
HDPE wraparound has started and it feels nice and pliable next to the polycarbonate. I am adding a bit more ‘bulge’ around the wheels to give it a little bounce and roll when it lands or gets hit.
Spins pretty fierce without being an uncontrollable mess of mass!
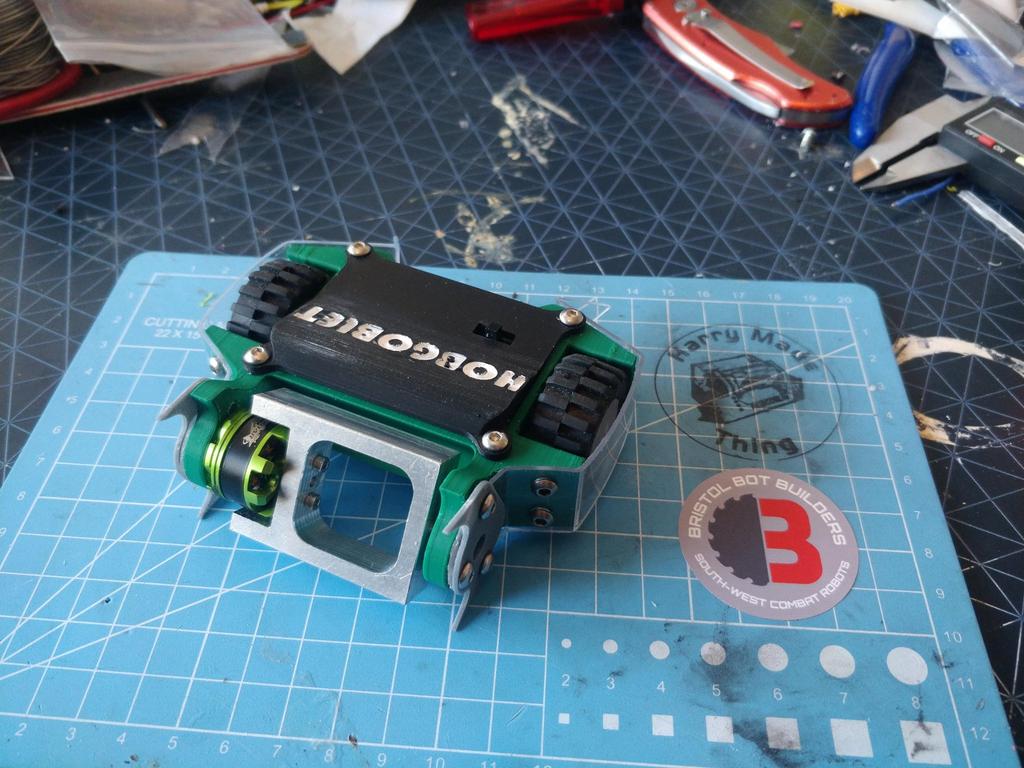
Hobgoblet Mk2 ready to disappoint at the BBBB (the extra B is for BattleBoats) at the weekend. Lacking the colour sadly but it looks pretty mean and tryhardy in the black and white so it’s staying for now.
The armour is all 1mm HDPE bolted down with some cool super low profile head M3 bolts I snagged from aliexpress to make up change on and order but seem pretty useful for avoiding pull-through in plastics. The forks are 2mm ABS and the lid is 1.5mm
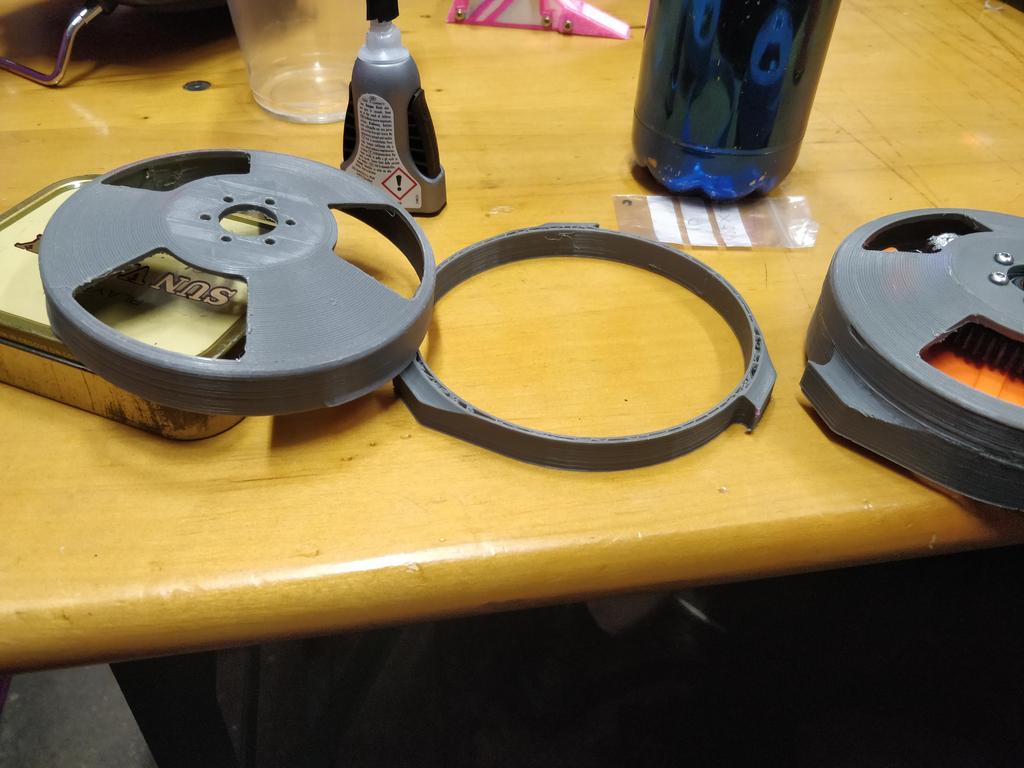
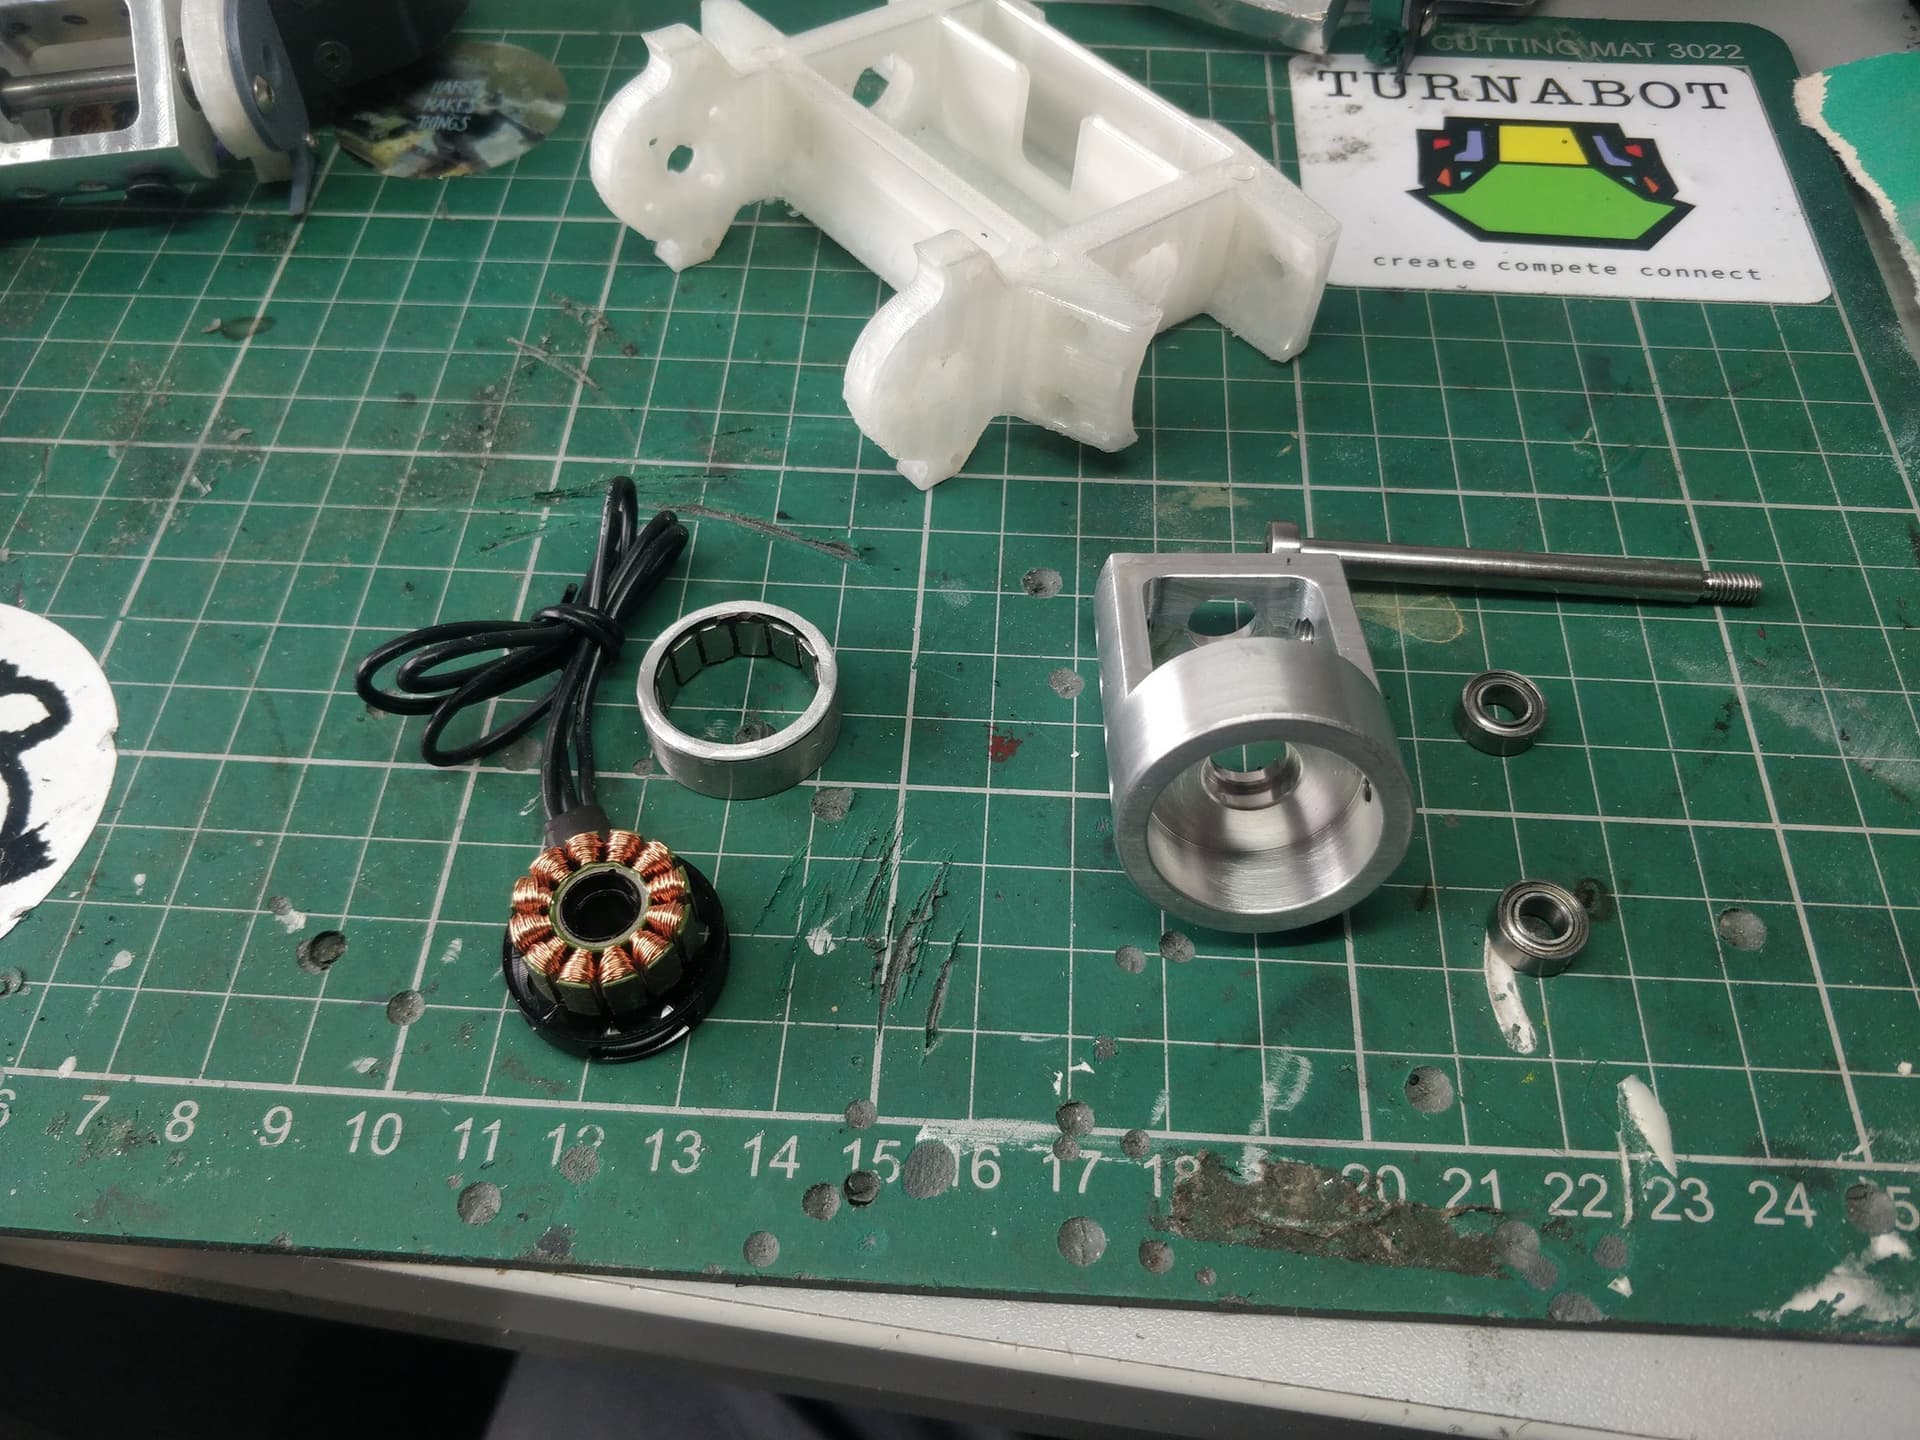
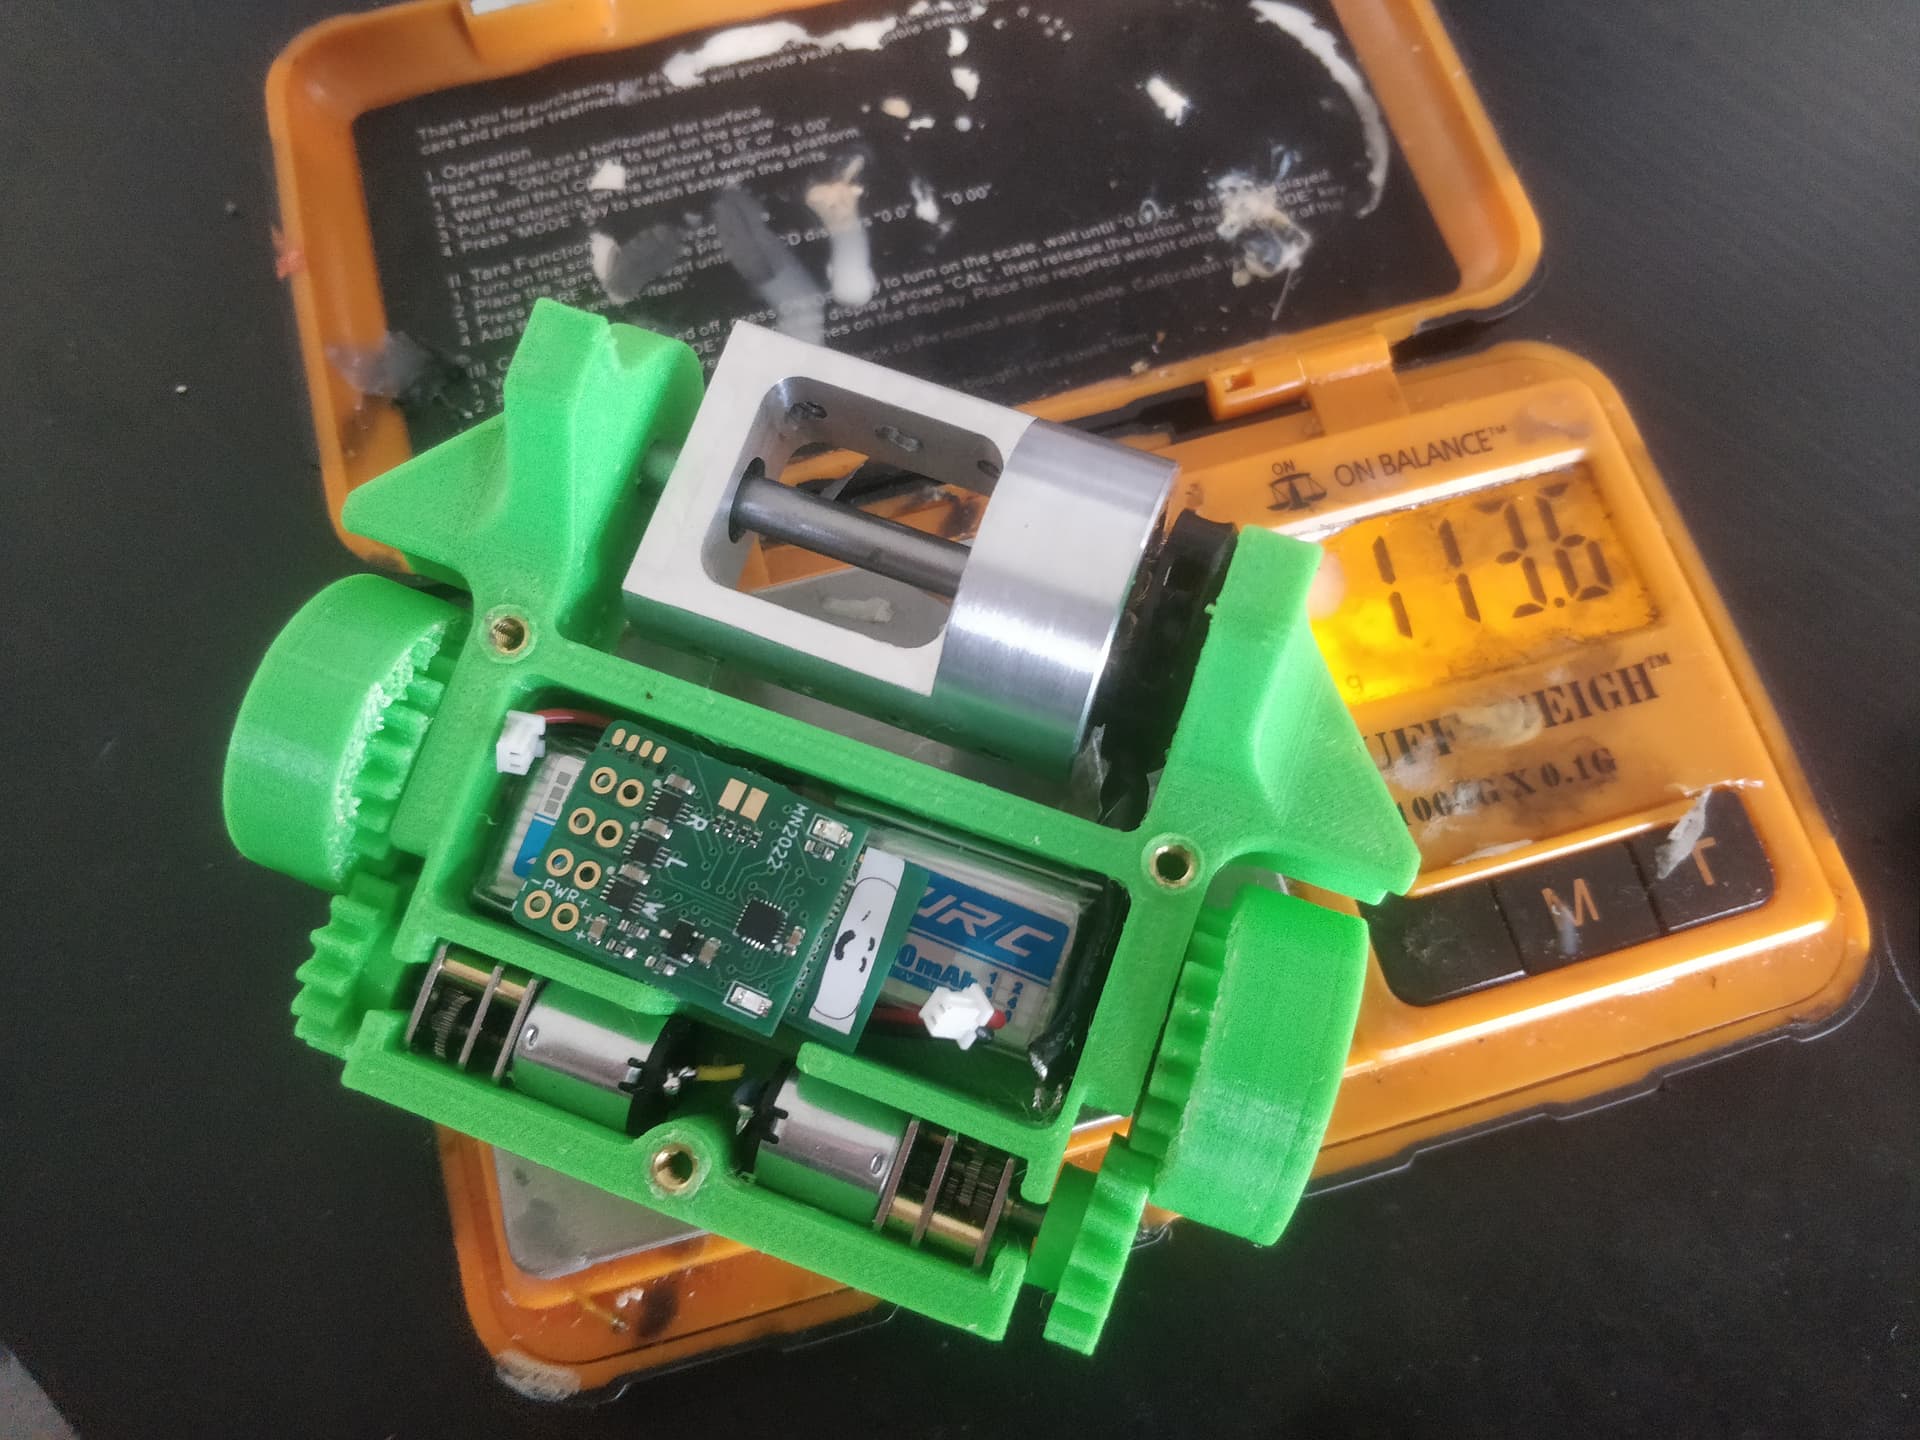
For anyone super curious this is how the drum goes together. It is deceptively simple and hopefully robust - though I am slightly disappointed in the play from the bolt shaft. As it is stainless it isn’t ground like a standard shoulder so its a bit sloppy and there is some resistance in the drum assembly. Ah well it spins when I hit the go button so it can just self clearance for a couple minutes before I drive myself out! I may have a hunt for better alternatives or (ew) make a custom part.
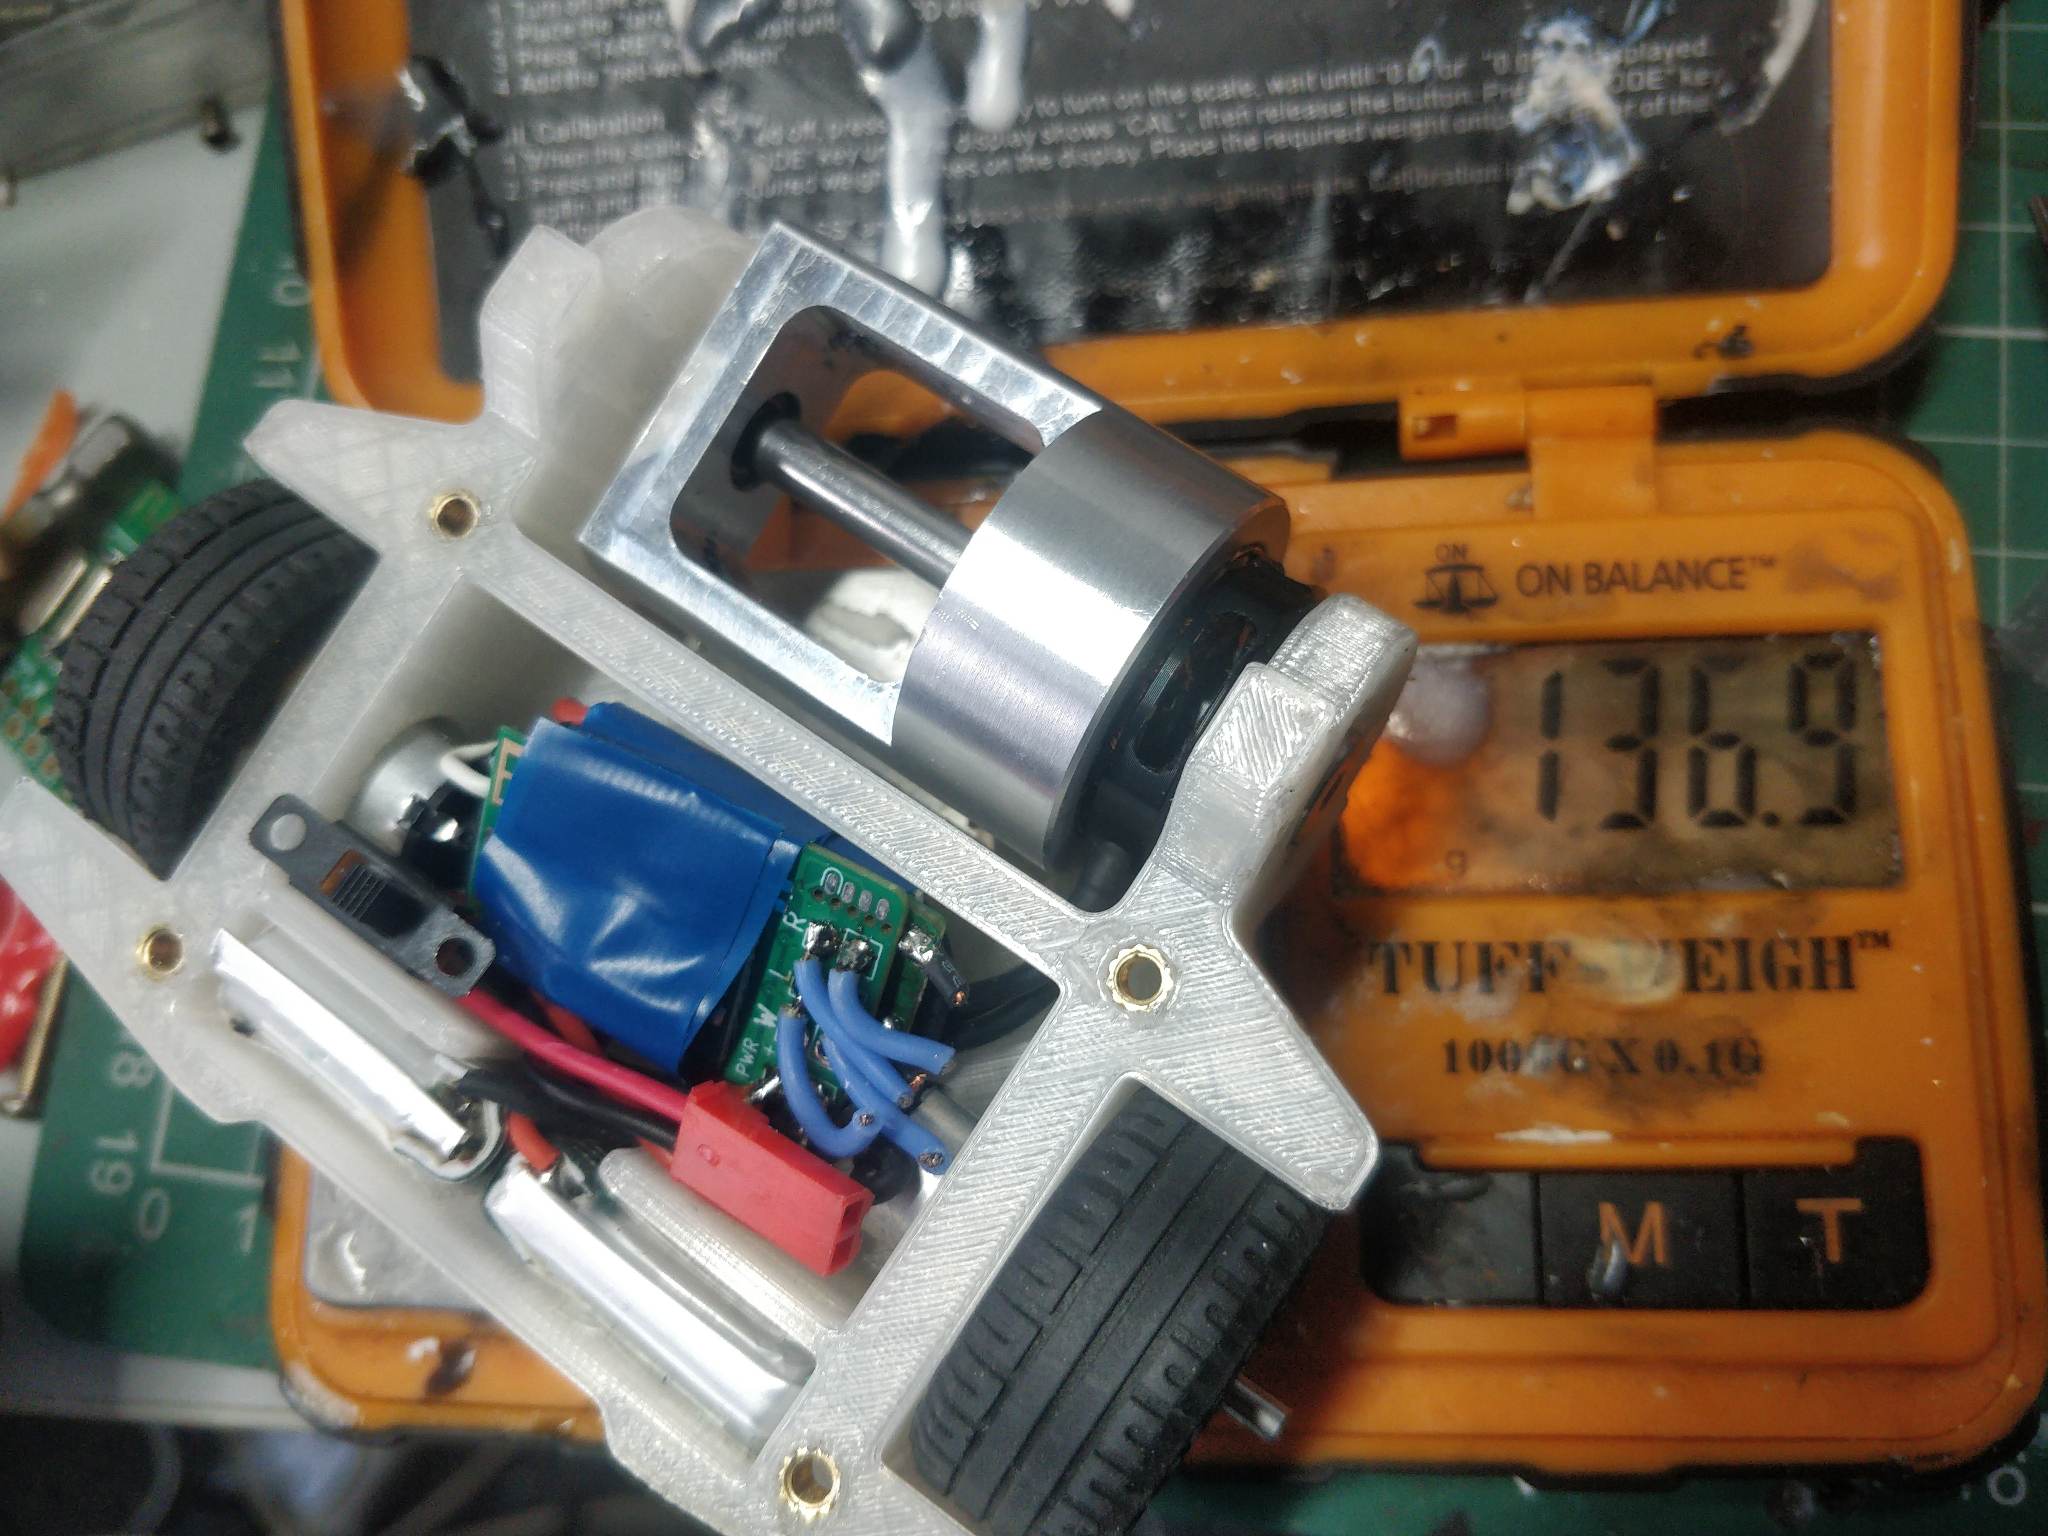
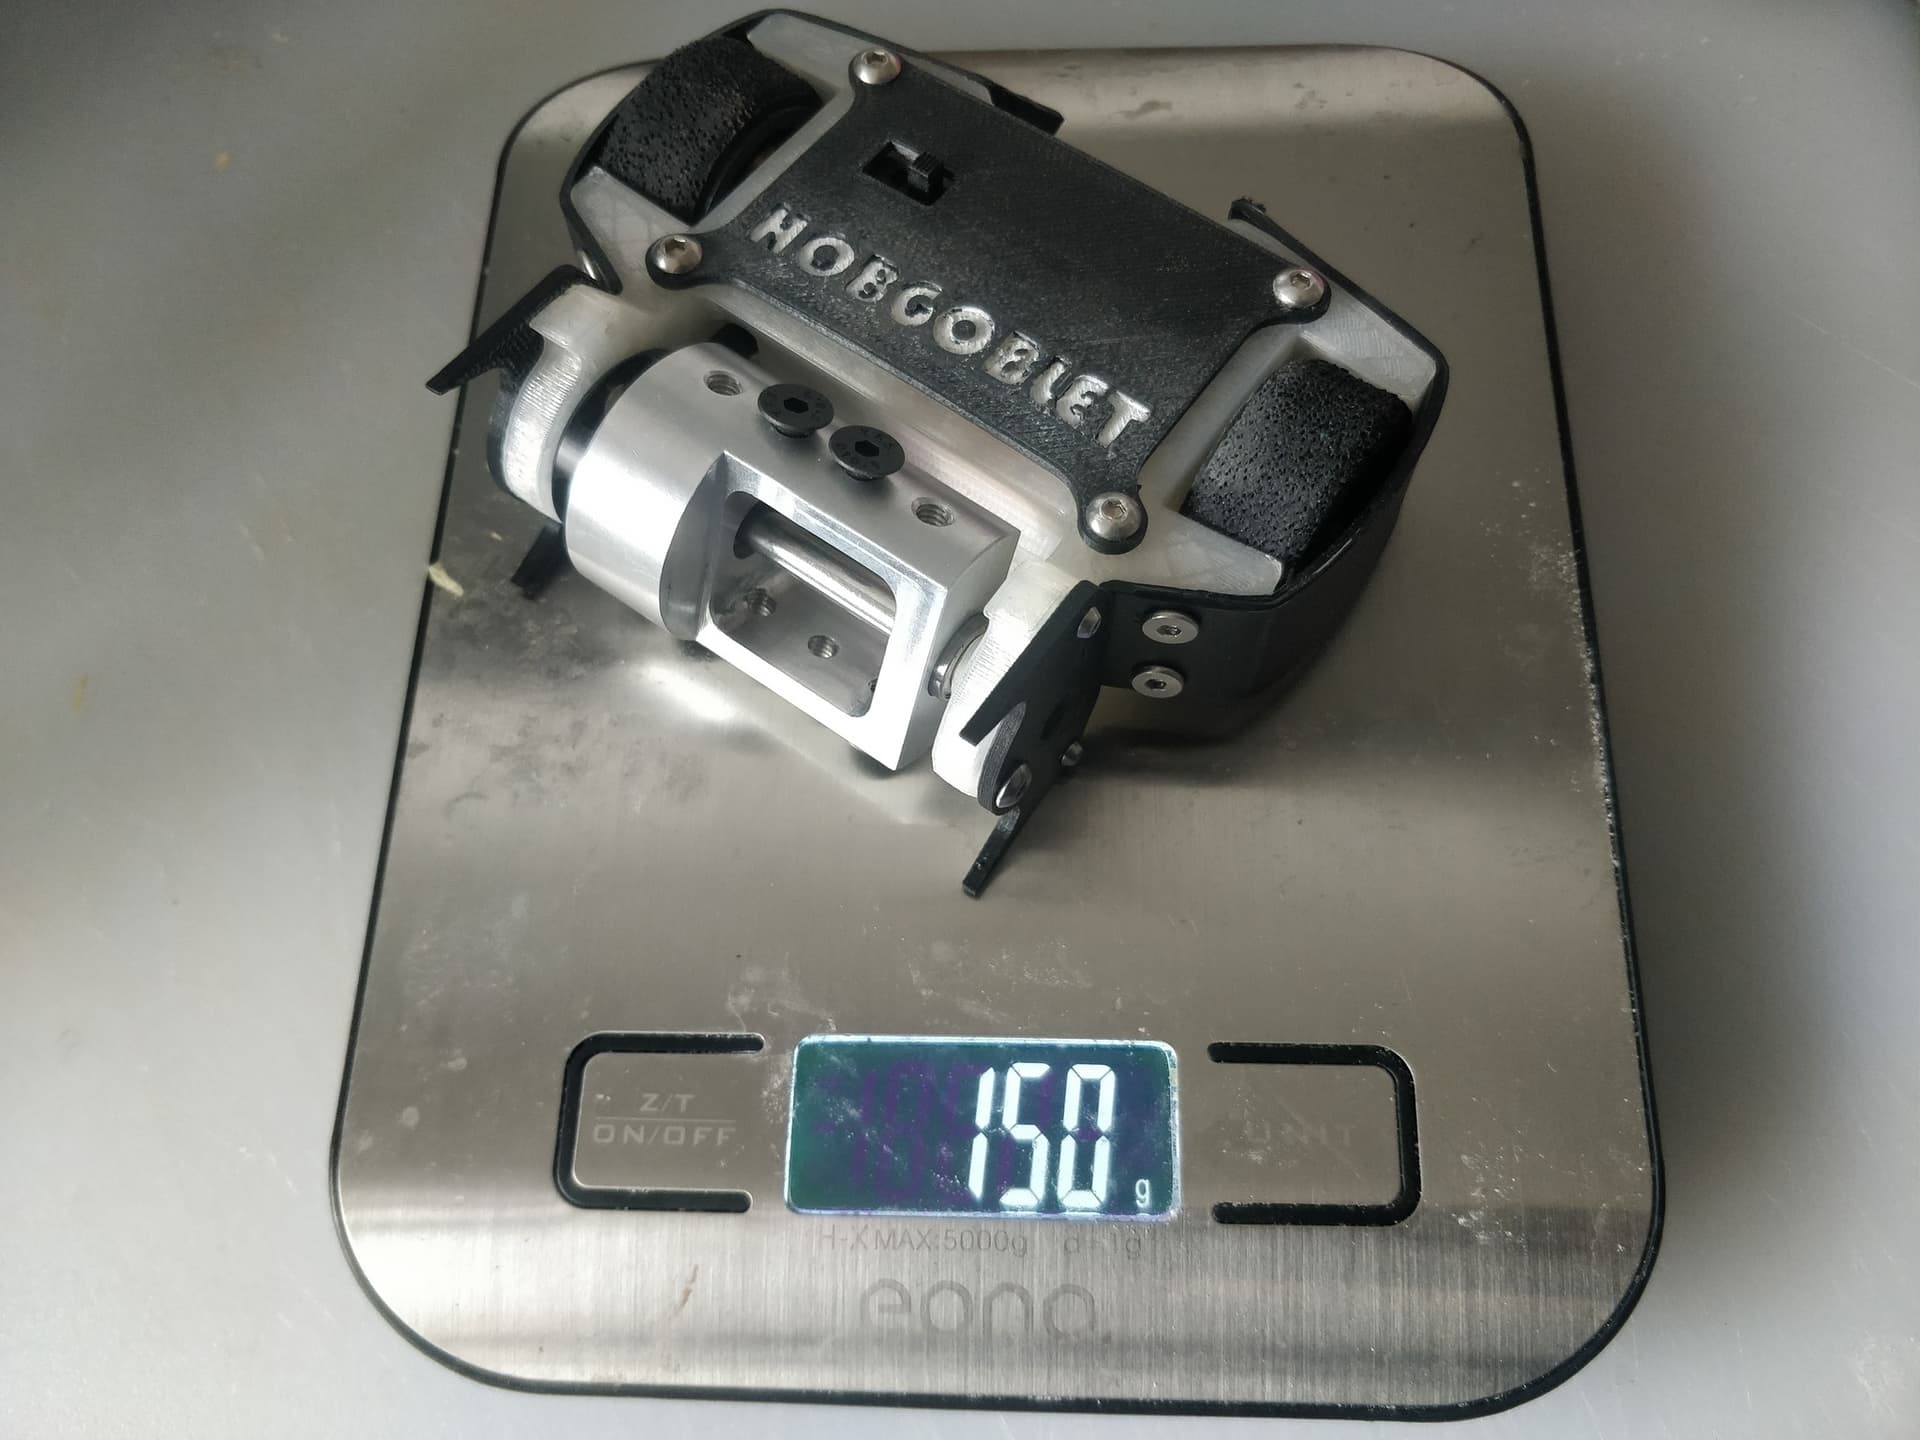
And as a bully bonus, it scrapes under the weight limit. The old one was in the ~136gm range and I have easily added 40gm of additional hardware so all the scrimping and tweaking was absolutely essential.
I feel pretty confident this is objectively a better robot than the first one, but I have a sneaking suspicion it will not perform nearly as well… Not trying to hedge my bets here, just slightly aware I may have made it worse by making it better.
In the end Hobgoblet never got a run out as me and the Mrs caught the sun really badly and couldn’t make it to the BBBBoating event which was a big sad. I wasn’t entirely happy with it as I hinted before but Matt’s copy seemed to be handling itself well through a couple of competitions so I had some notes to improve.
They stayed notes until a couple days ago when I was inspired by Jack’s wonderful GetGot so I stuck on some death grips and knuckled down to put my plans in to practice.
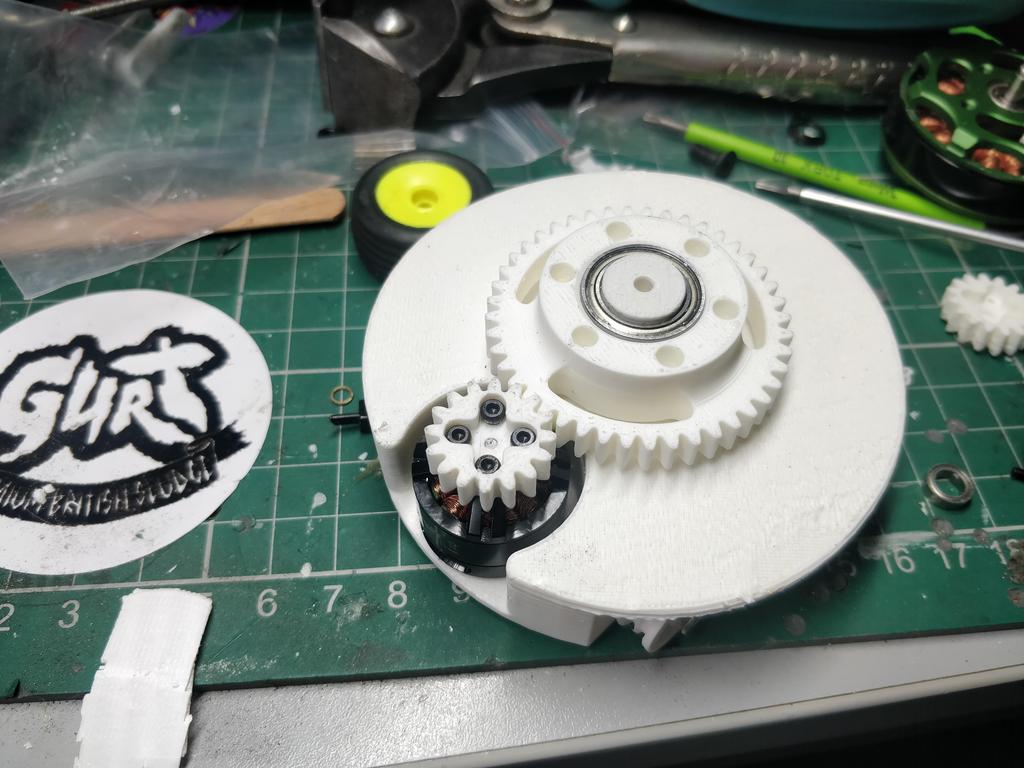
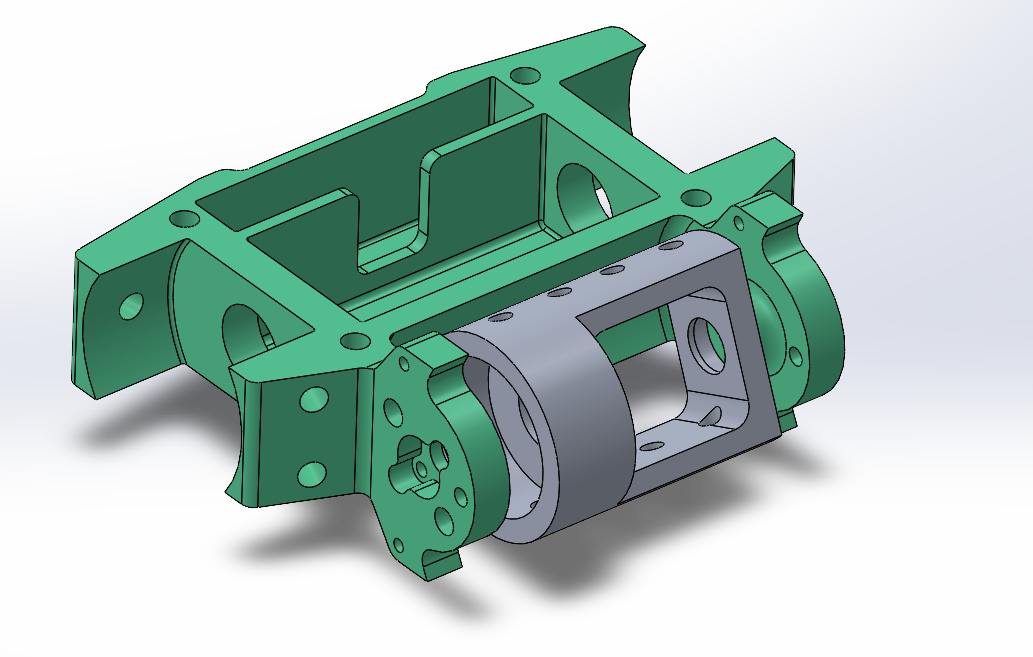
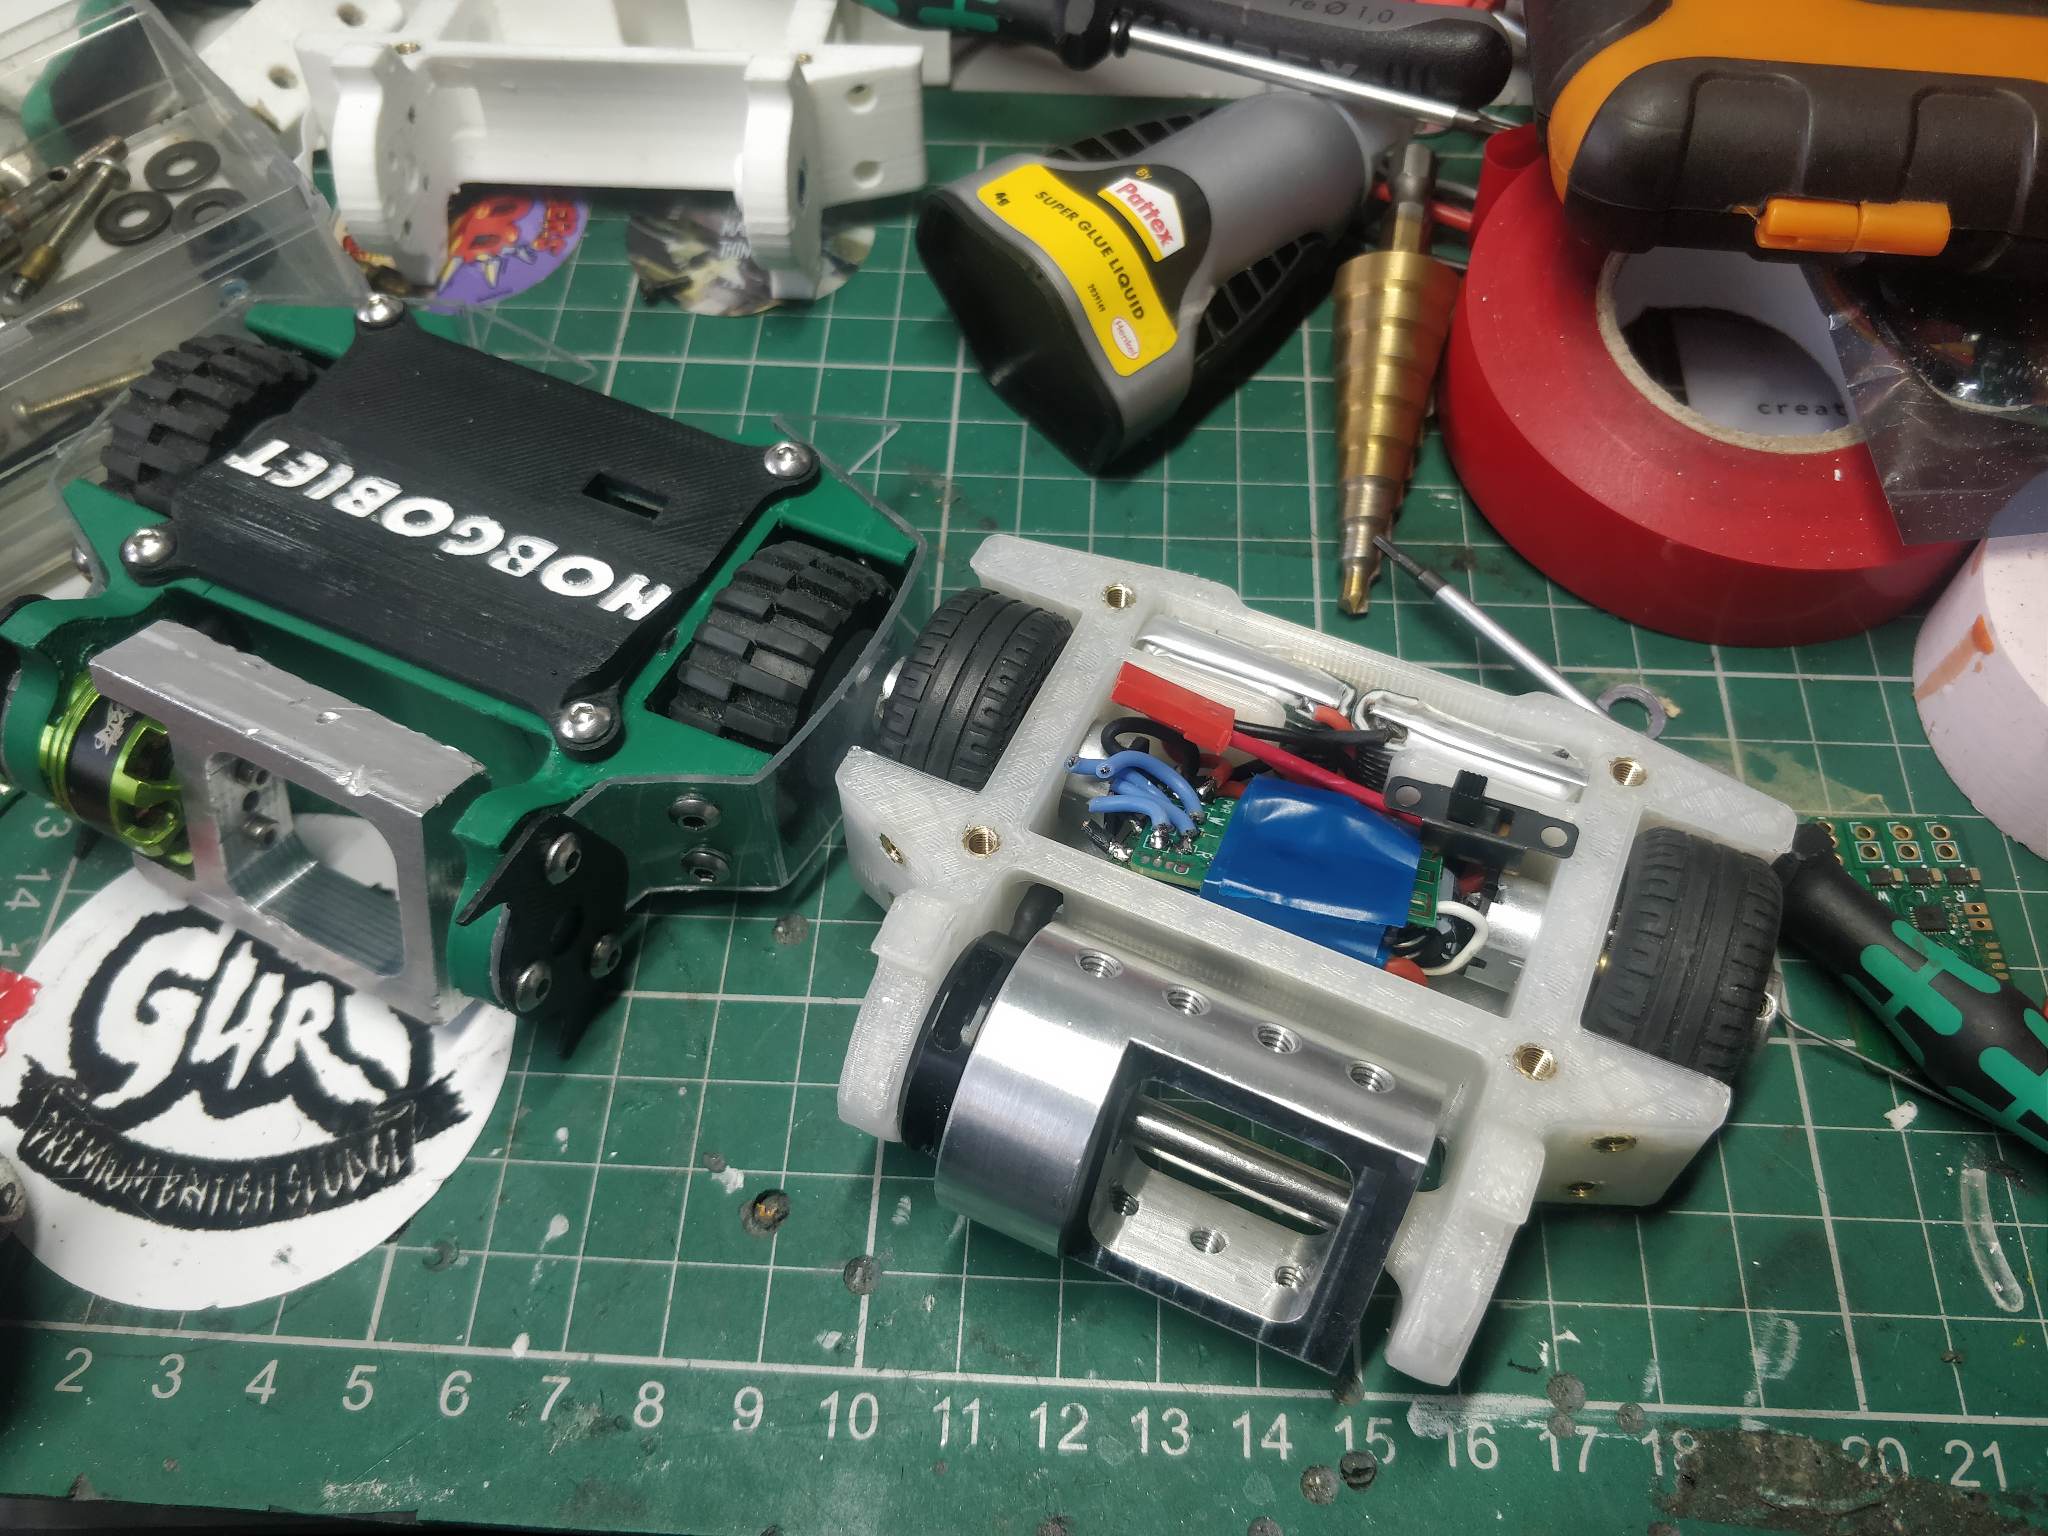
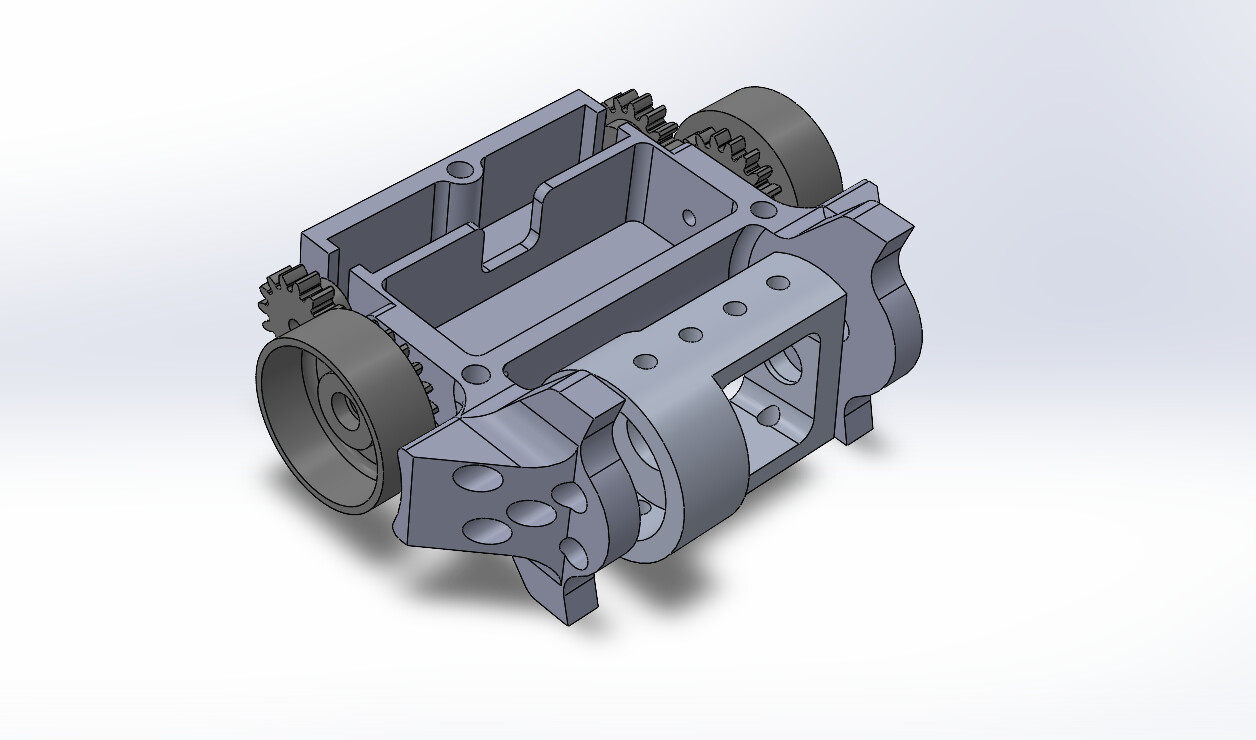
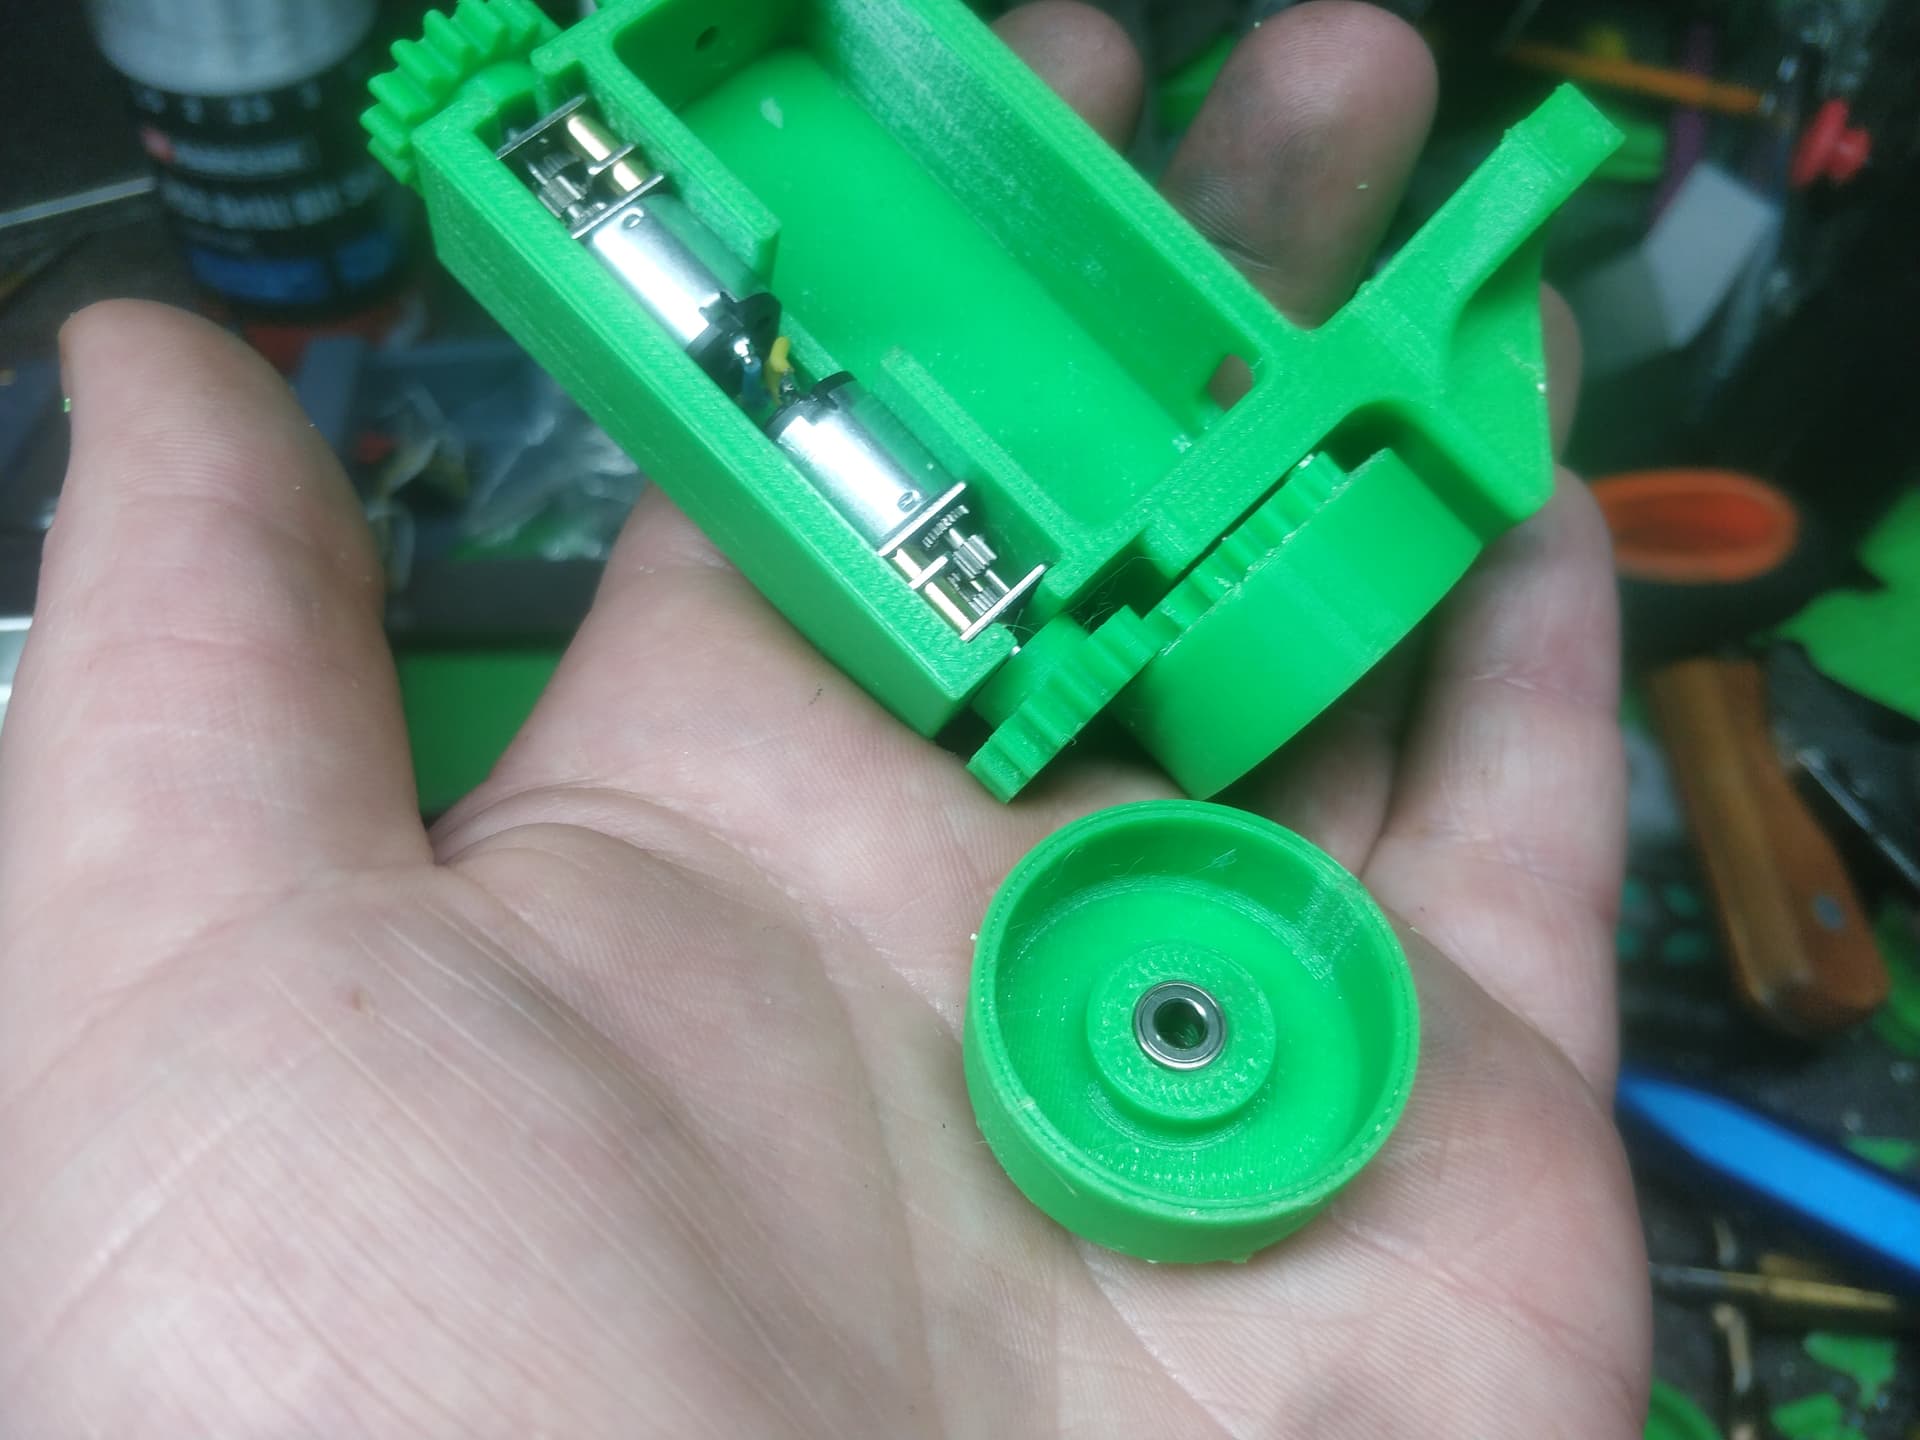
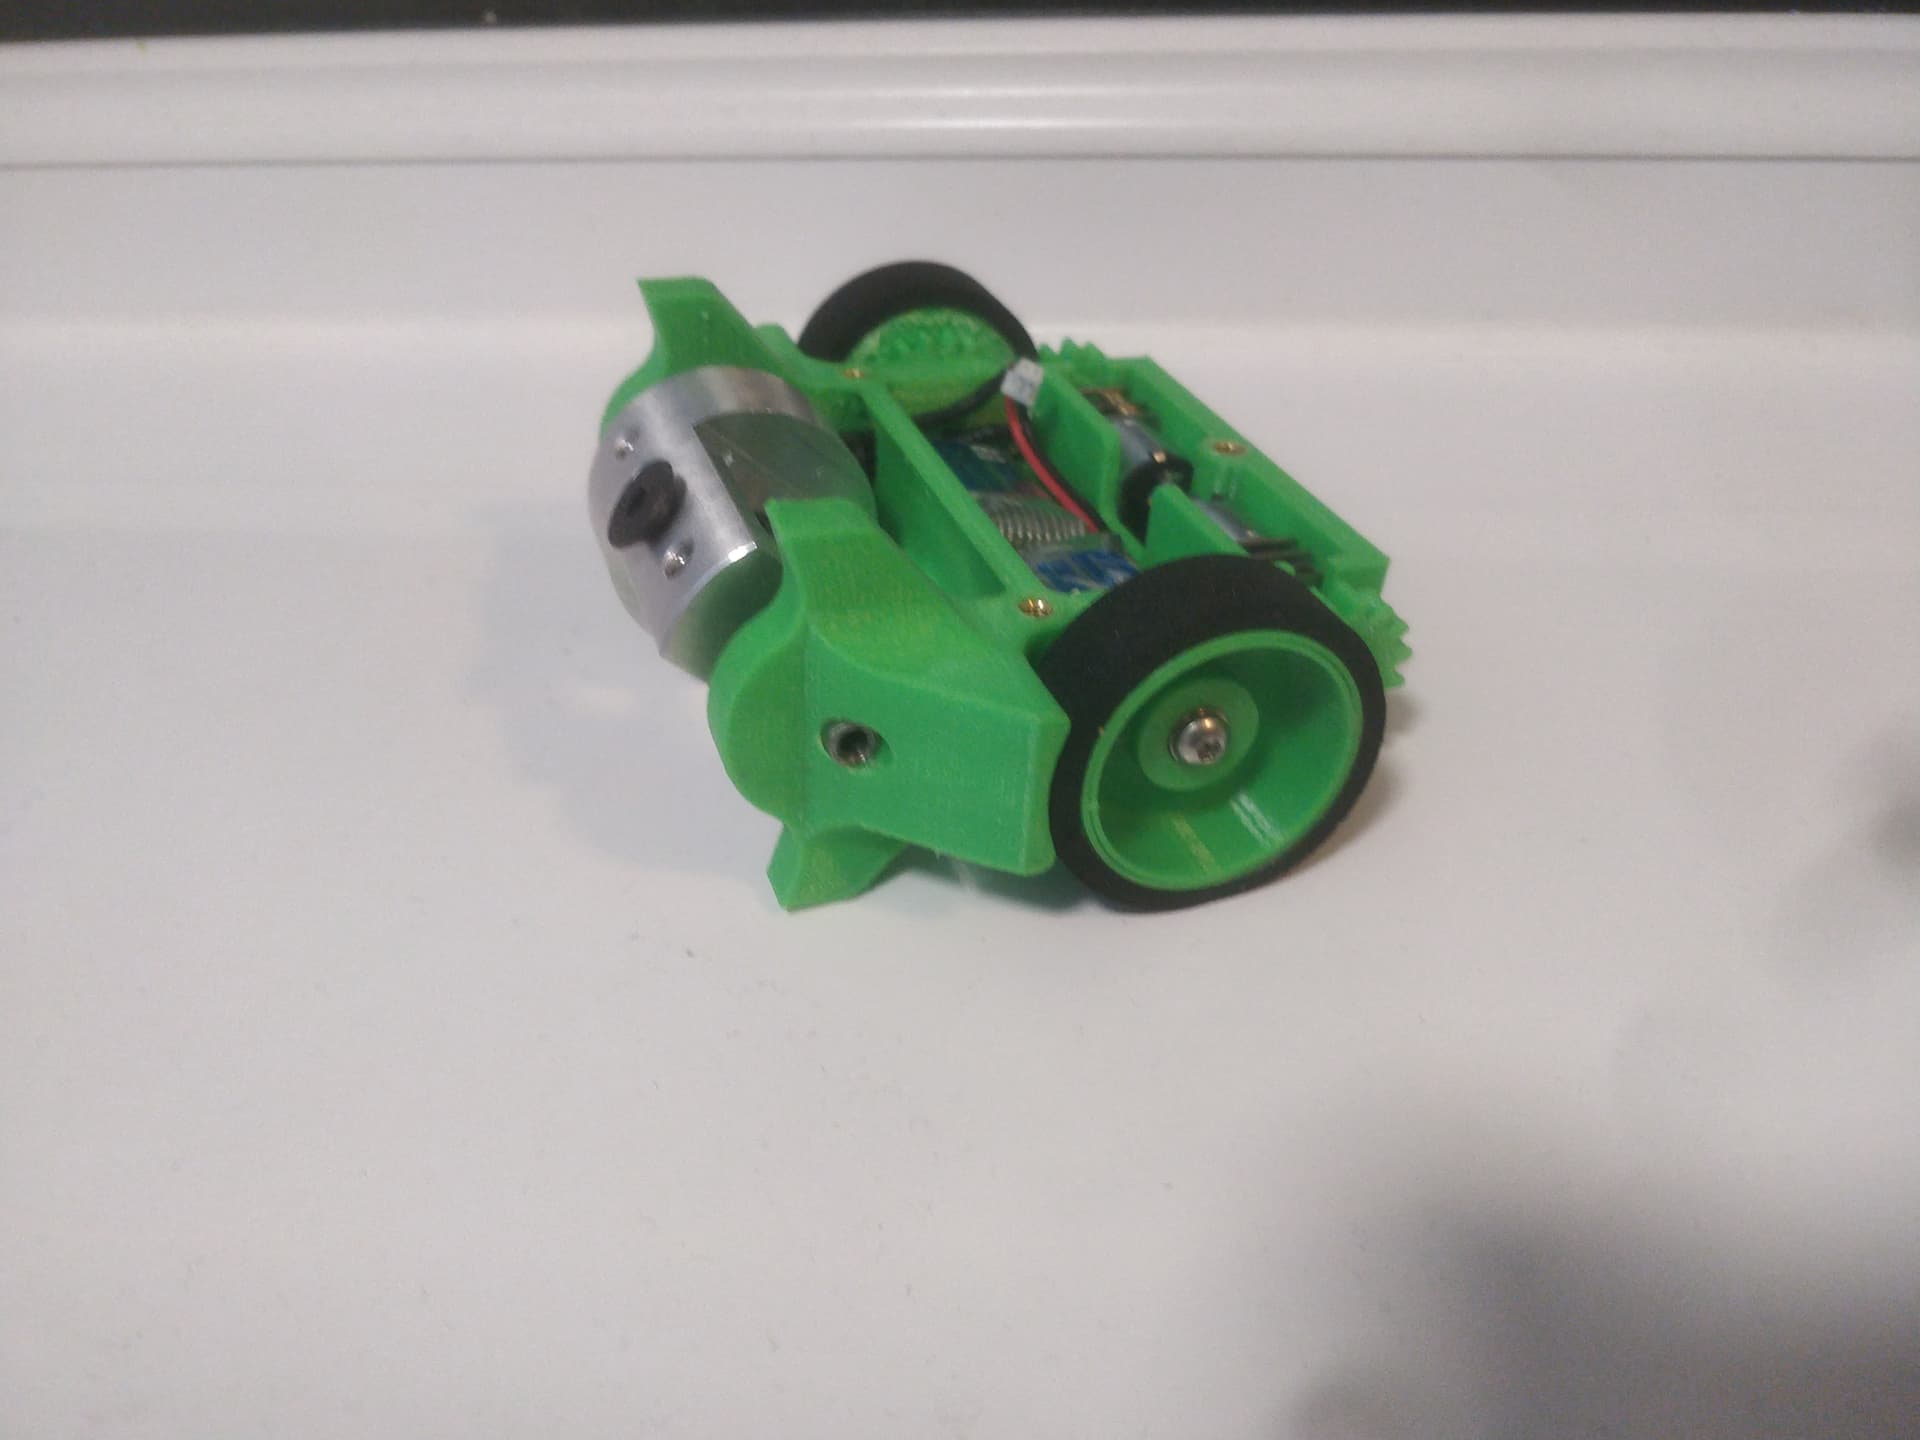
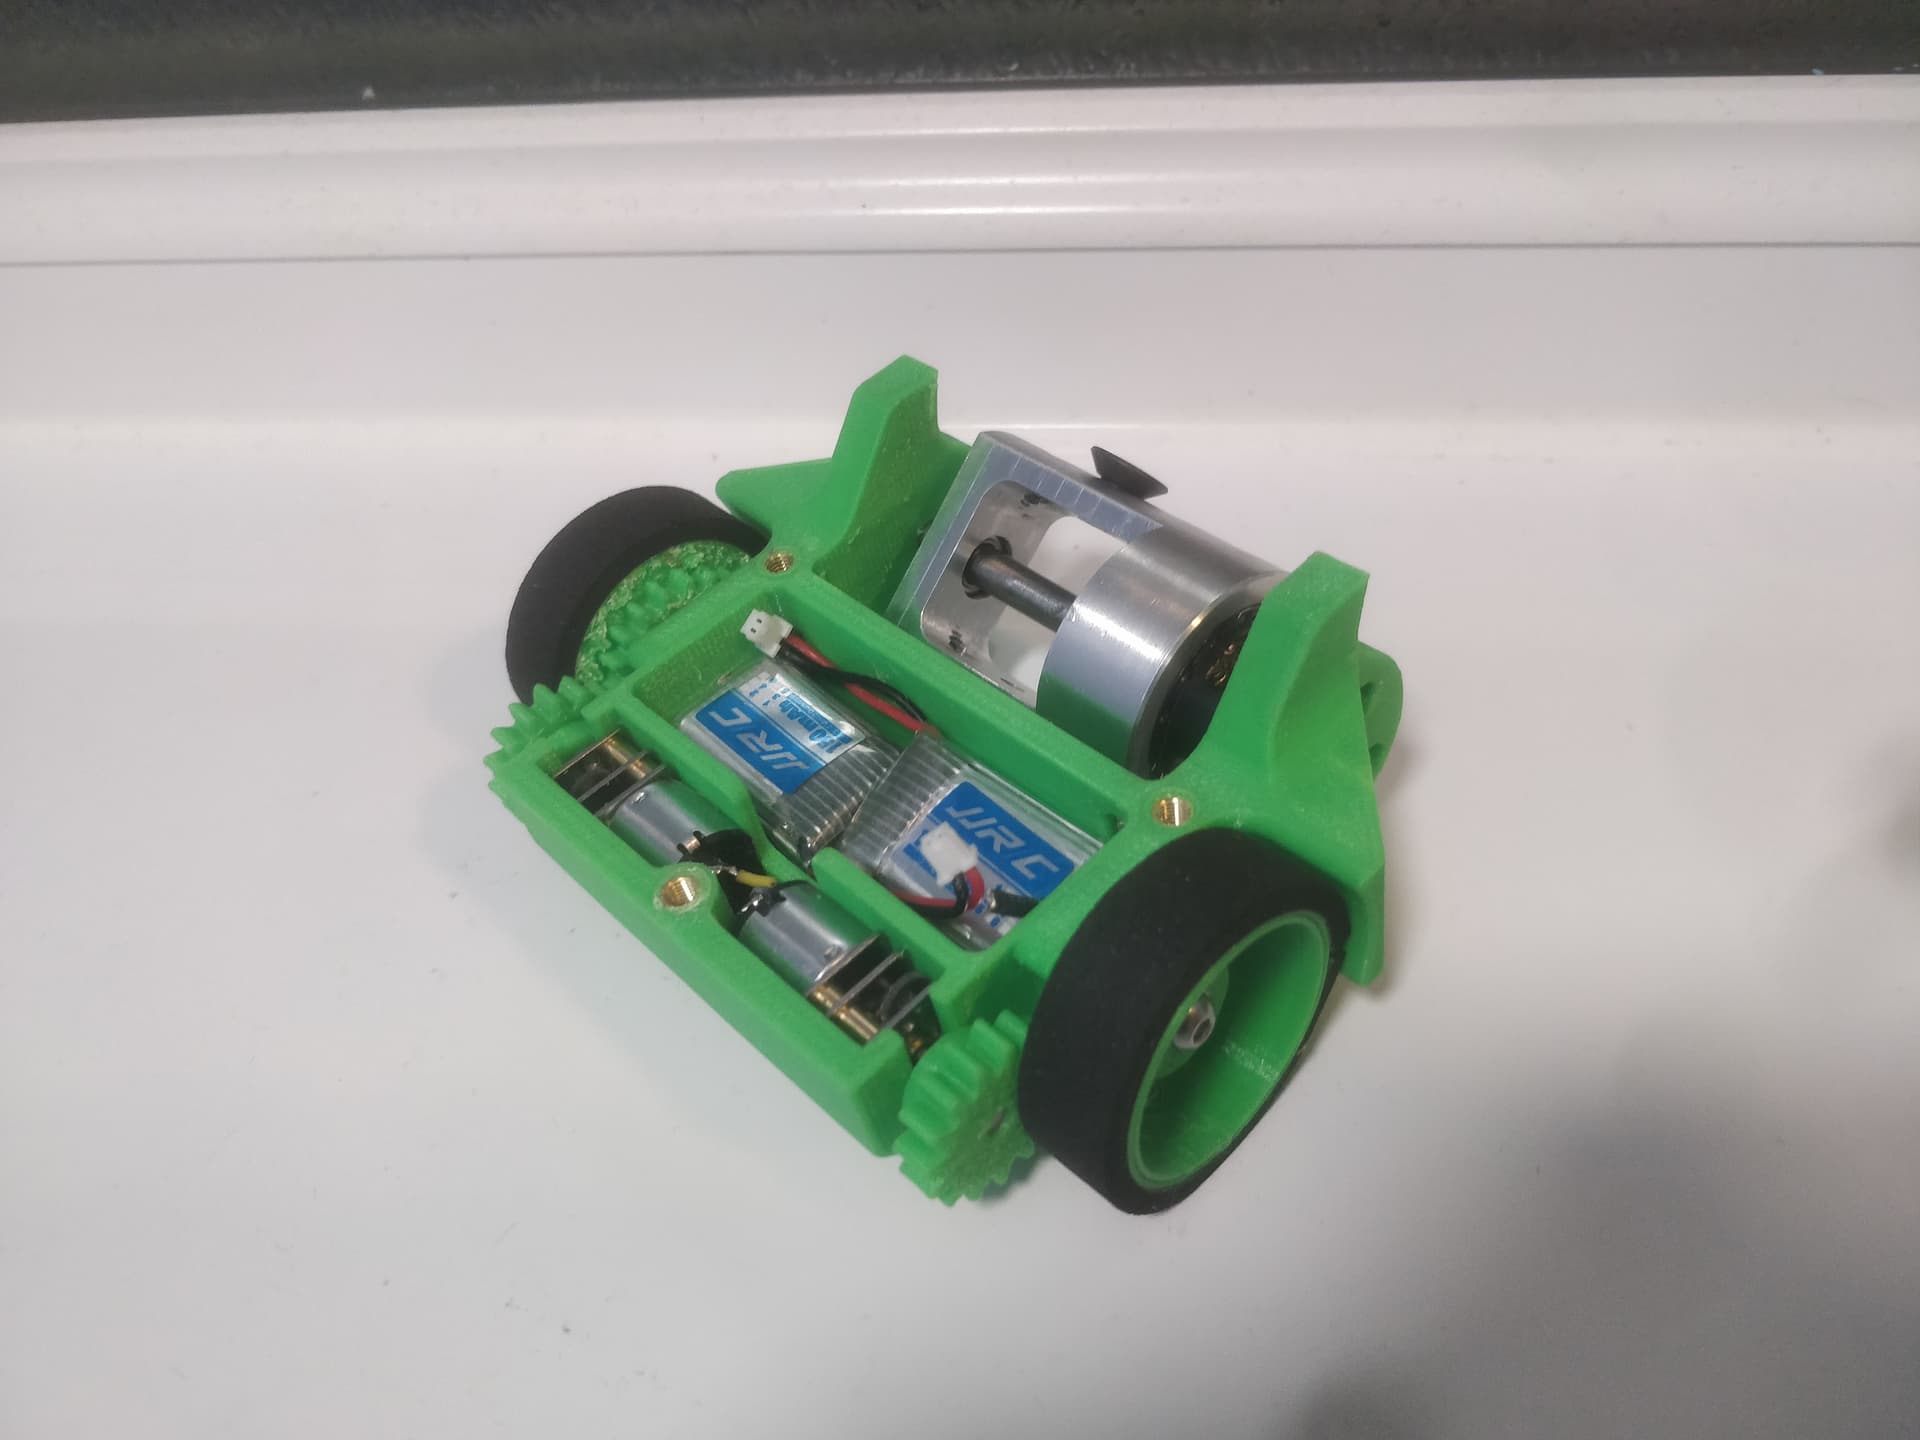
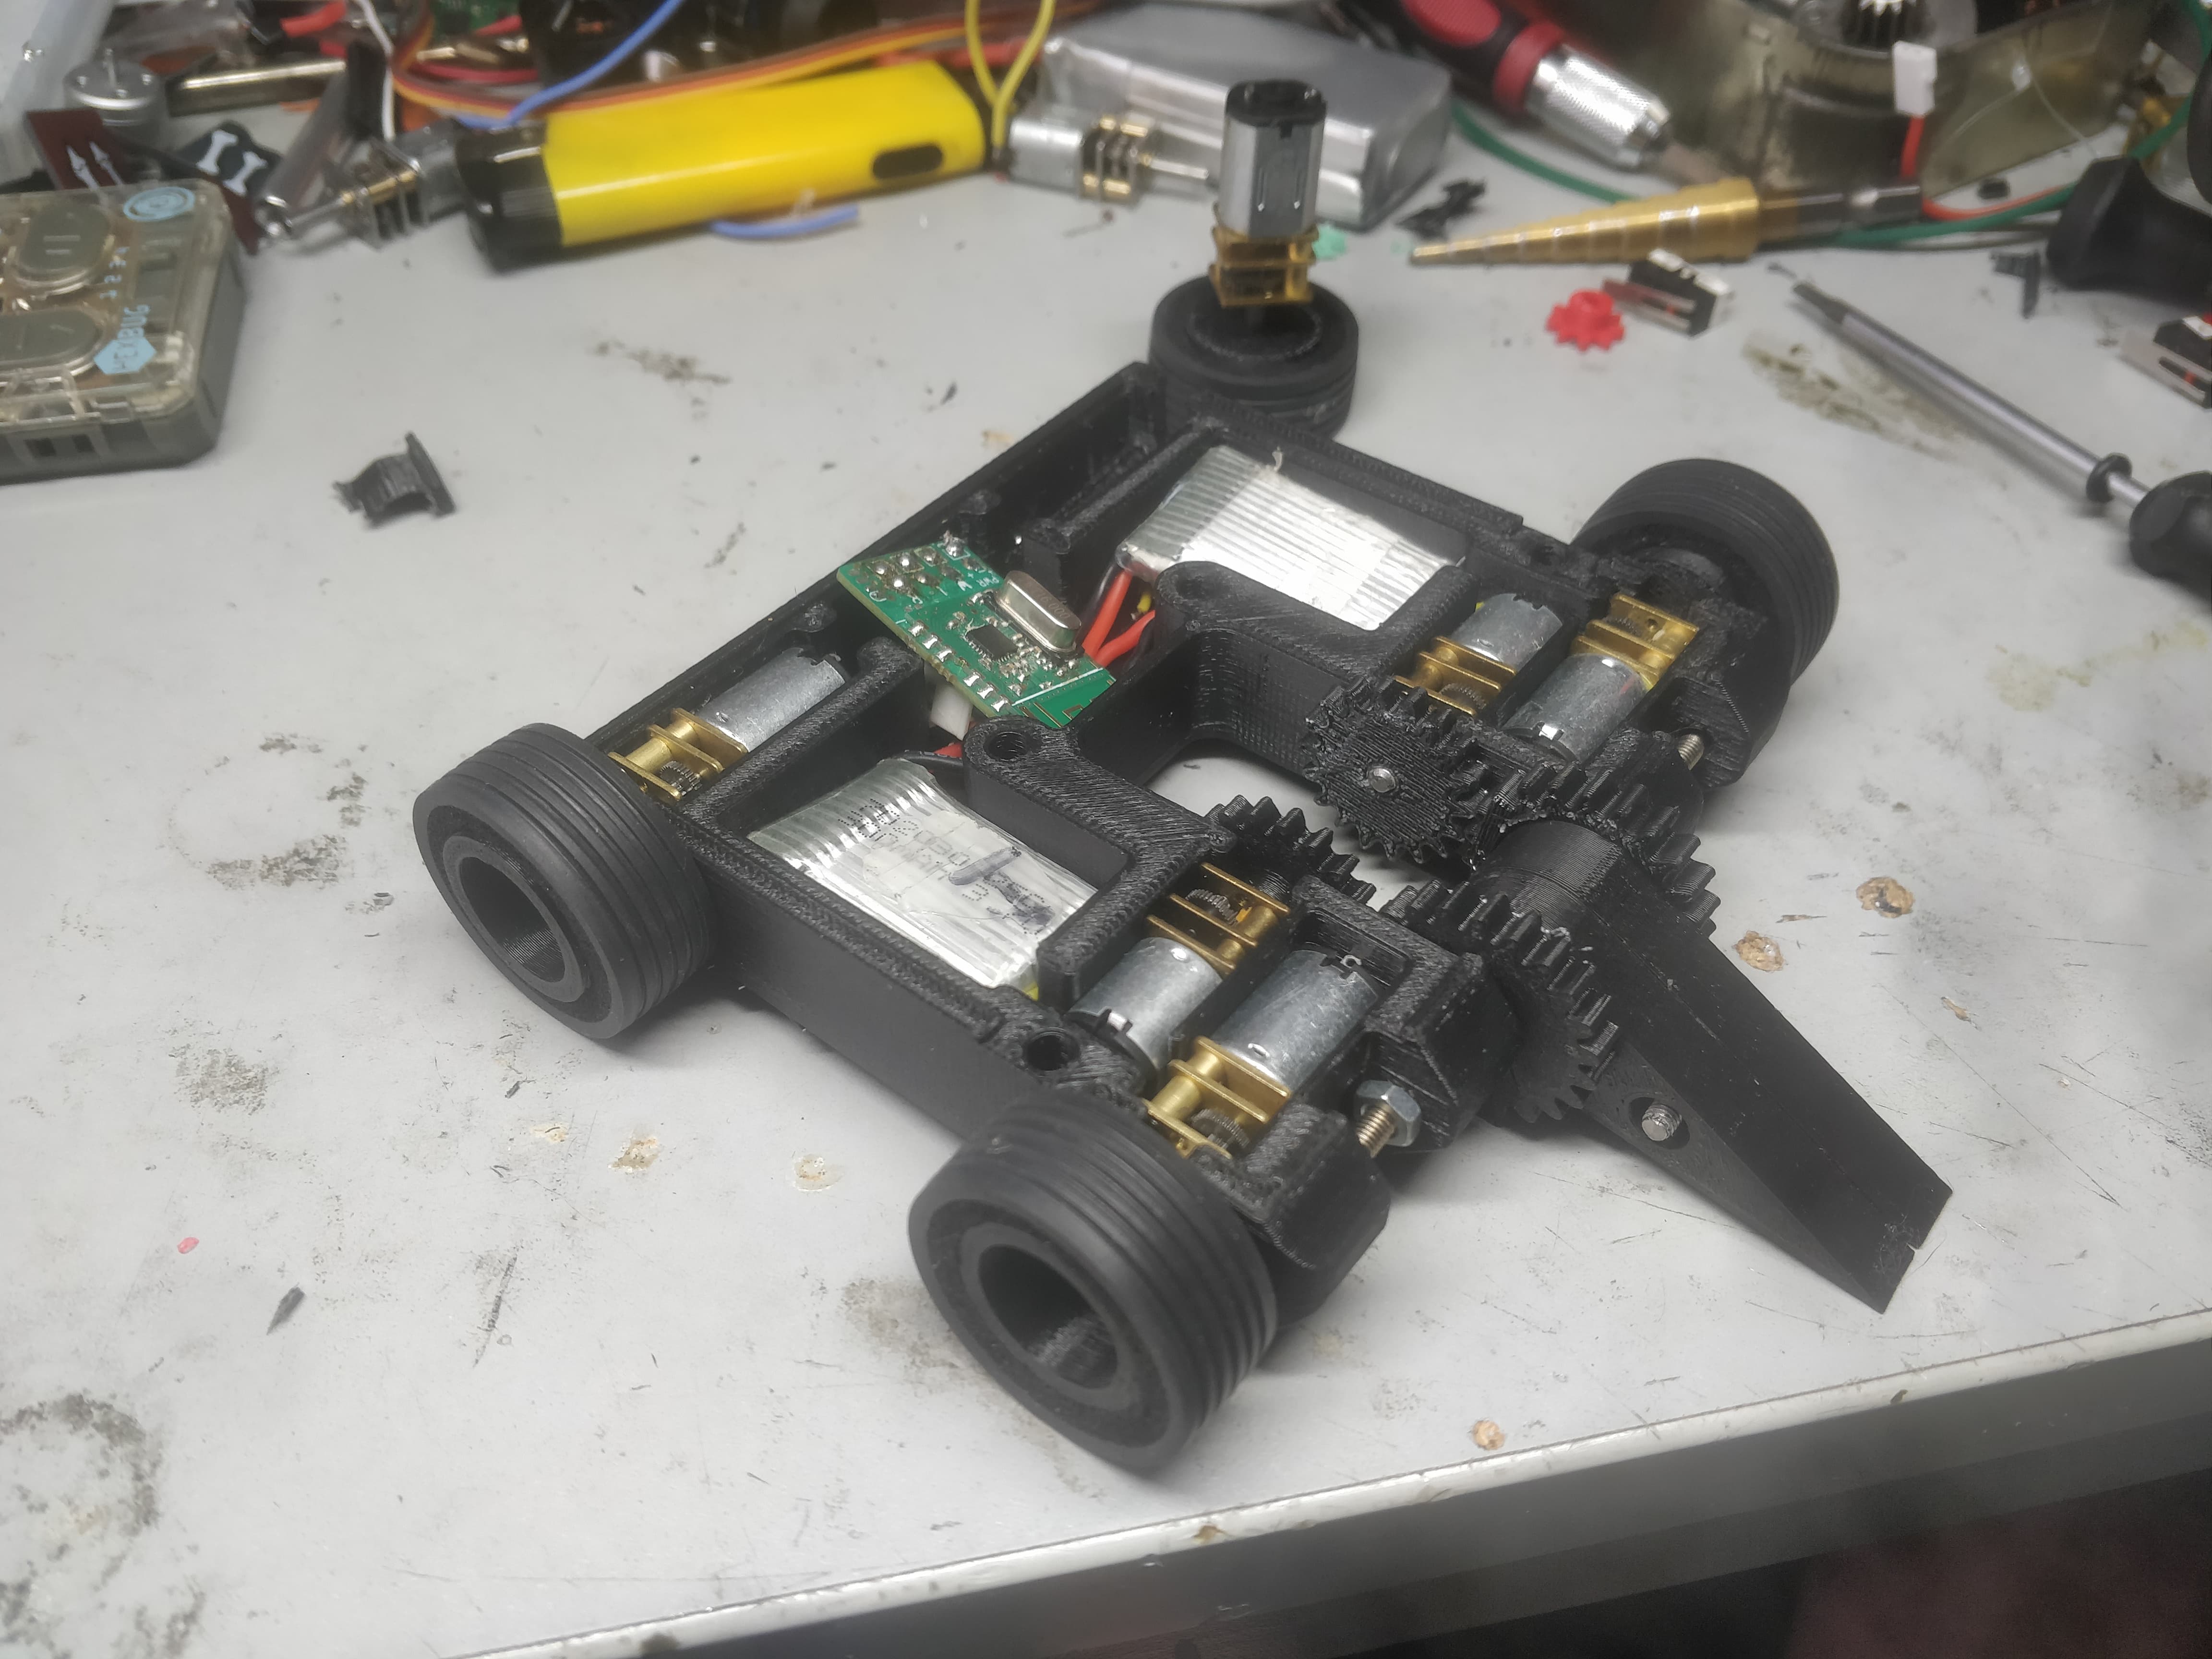
The aim is to cut weight out, get space for a bigger drum swing and increase the weight over the wheels to get it driving a bit better - though the last version was pretty good in this regard with the battery right up the back. but I do like me some indirect drive, even at 150g. I wanted a more aggressive stance for the robot too, something a bit Brazilian in nature.
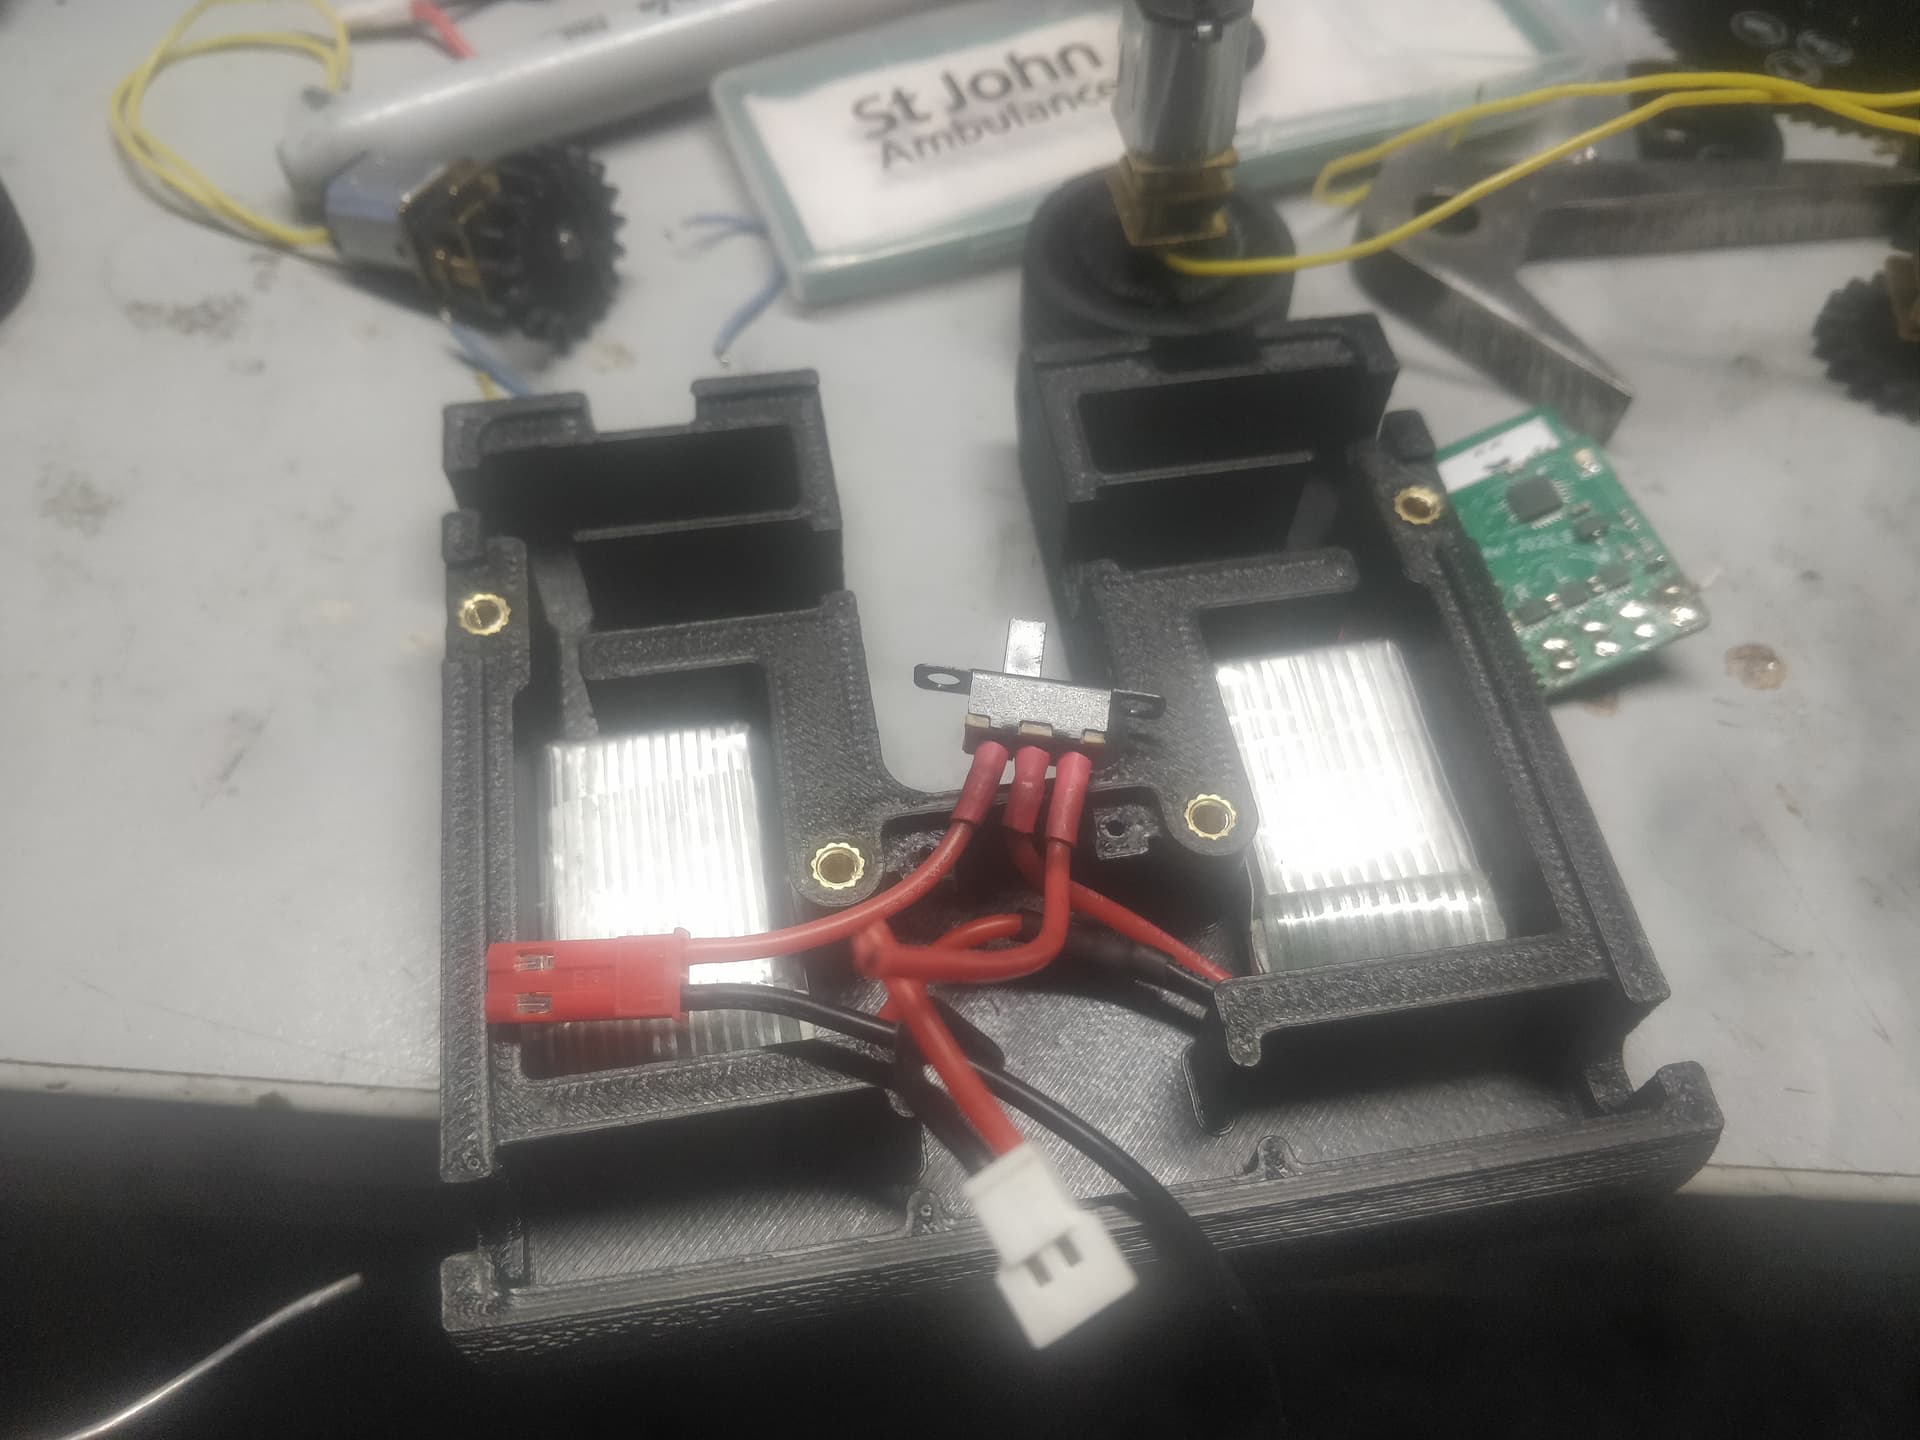
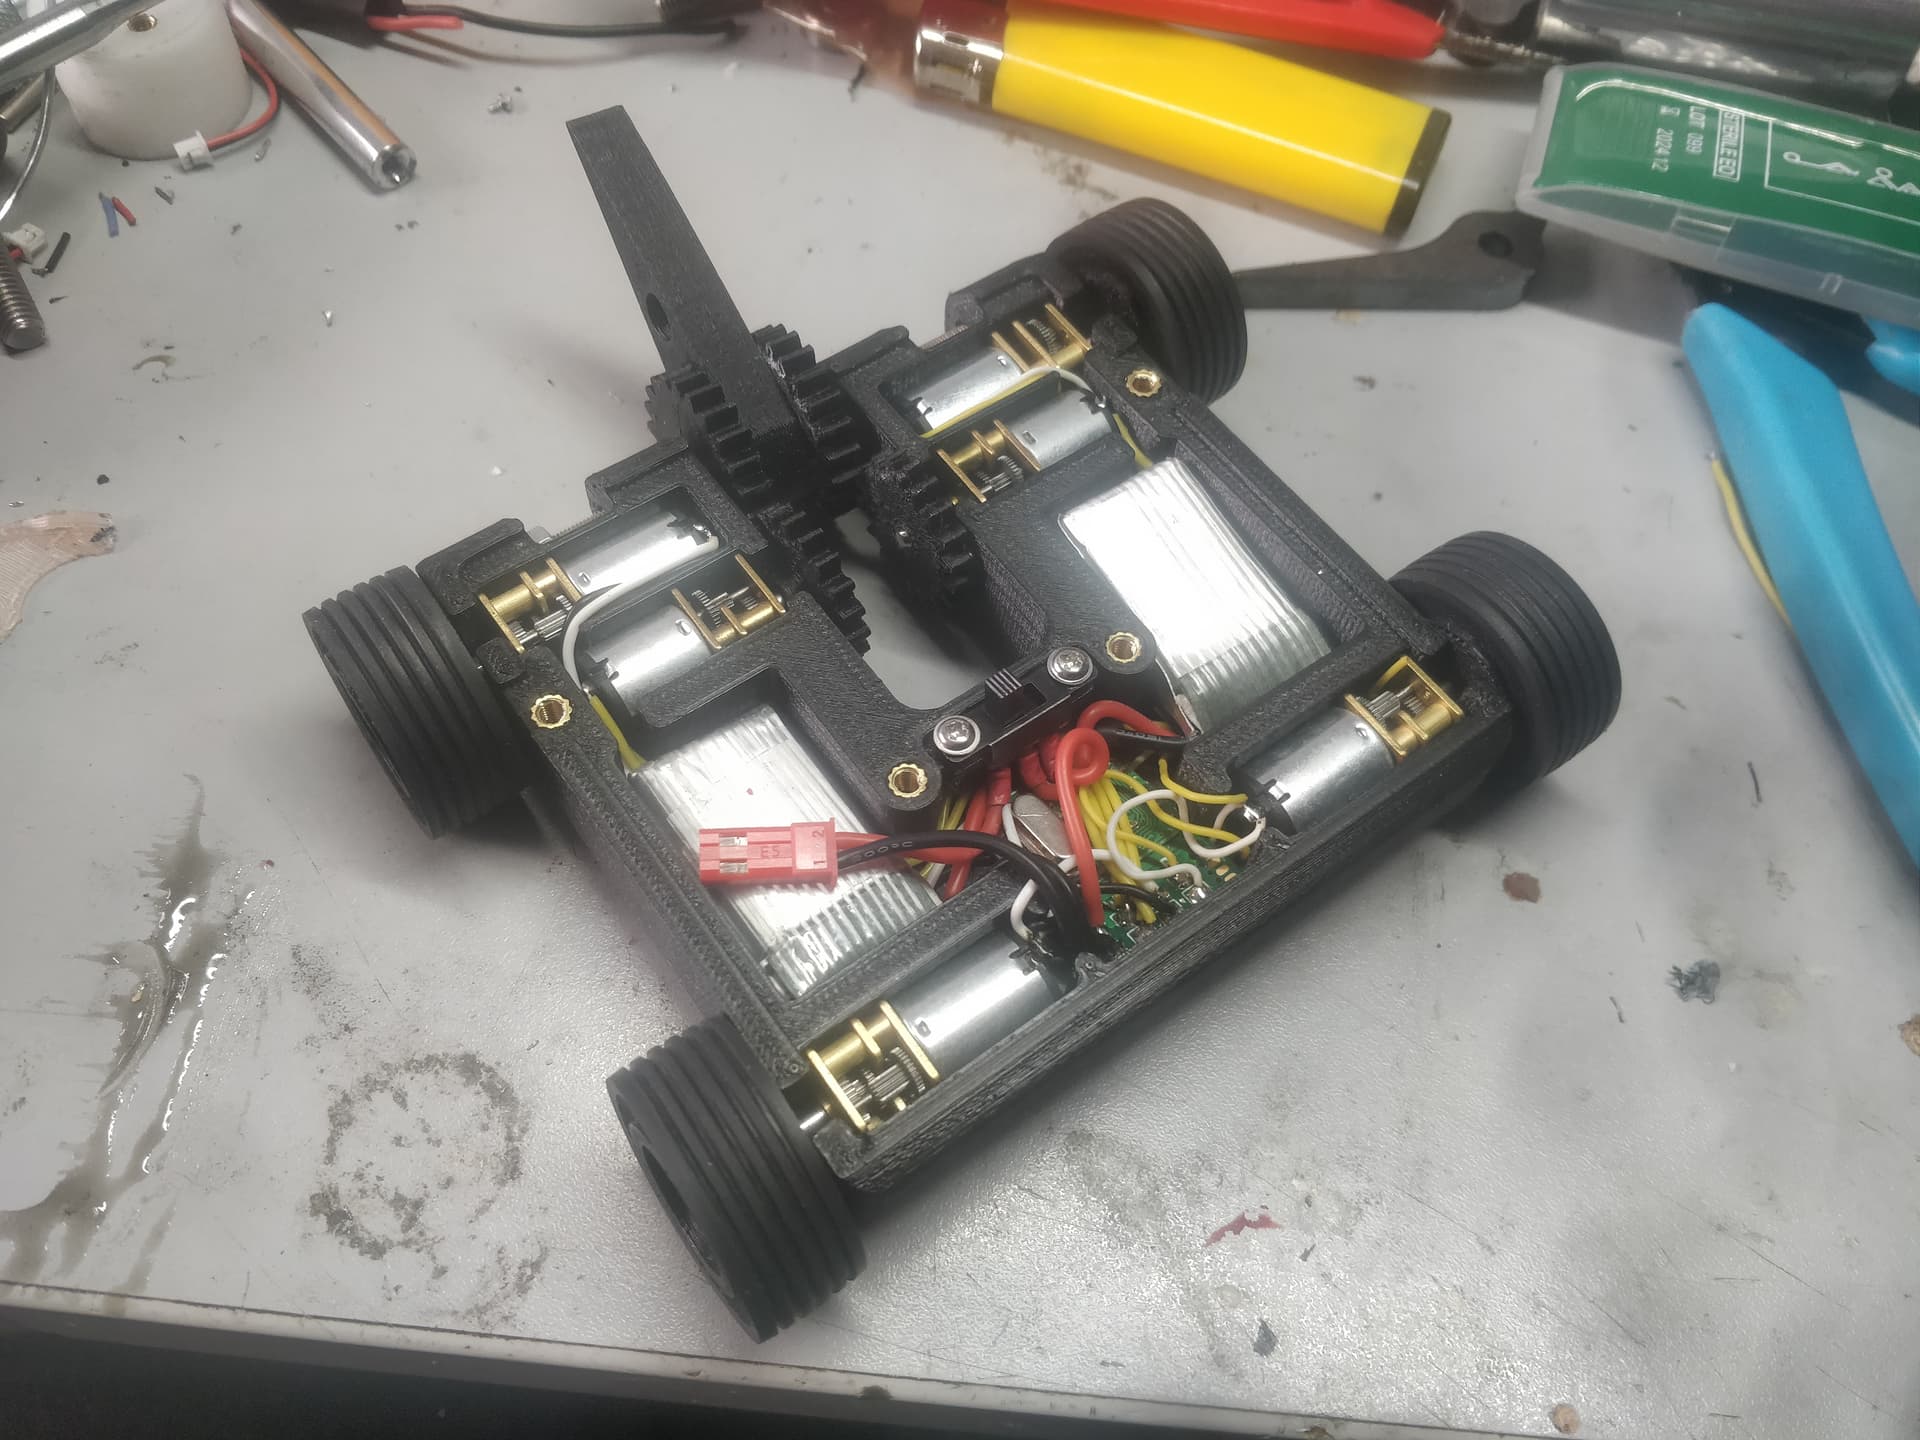
There are two N10’s right at the back which drive the wheel through spur gears. There are two bearings in each wheel. I’m planning to make the chassis out of something like nylon with the wheels being TPU to take a bit of abuse. I have some foam rubber coming in the post which sits over this to form a tyre.
Two single cells sit flat in the core of the robot and the ESC’s fit on top of them. The switch and charge port is still up in the air but I imagine its going to be in the top left hand corner. I am probably going to add in some geometry to protect the gear a little but I’m not going to go mad with the wraparound armour. Part of me is leaning towards a full TPU frame with a fat wall and higher infill to just tank hits.
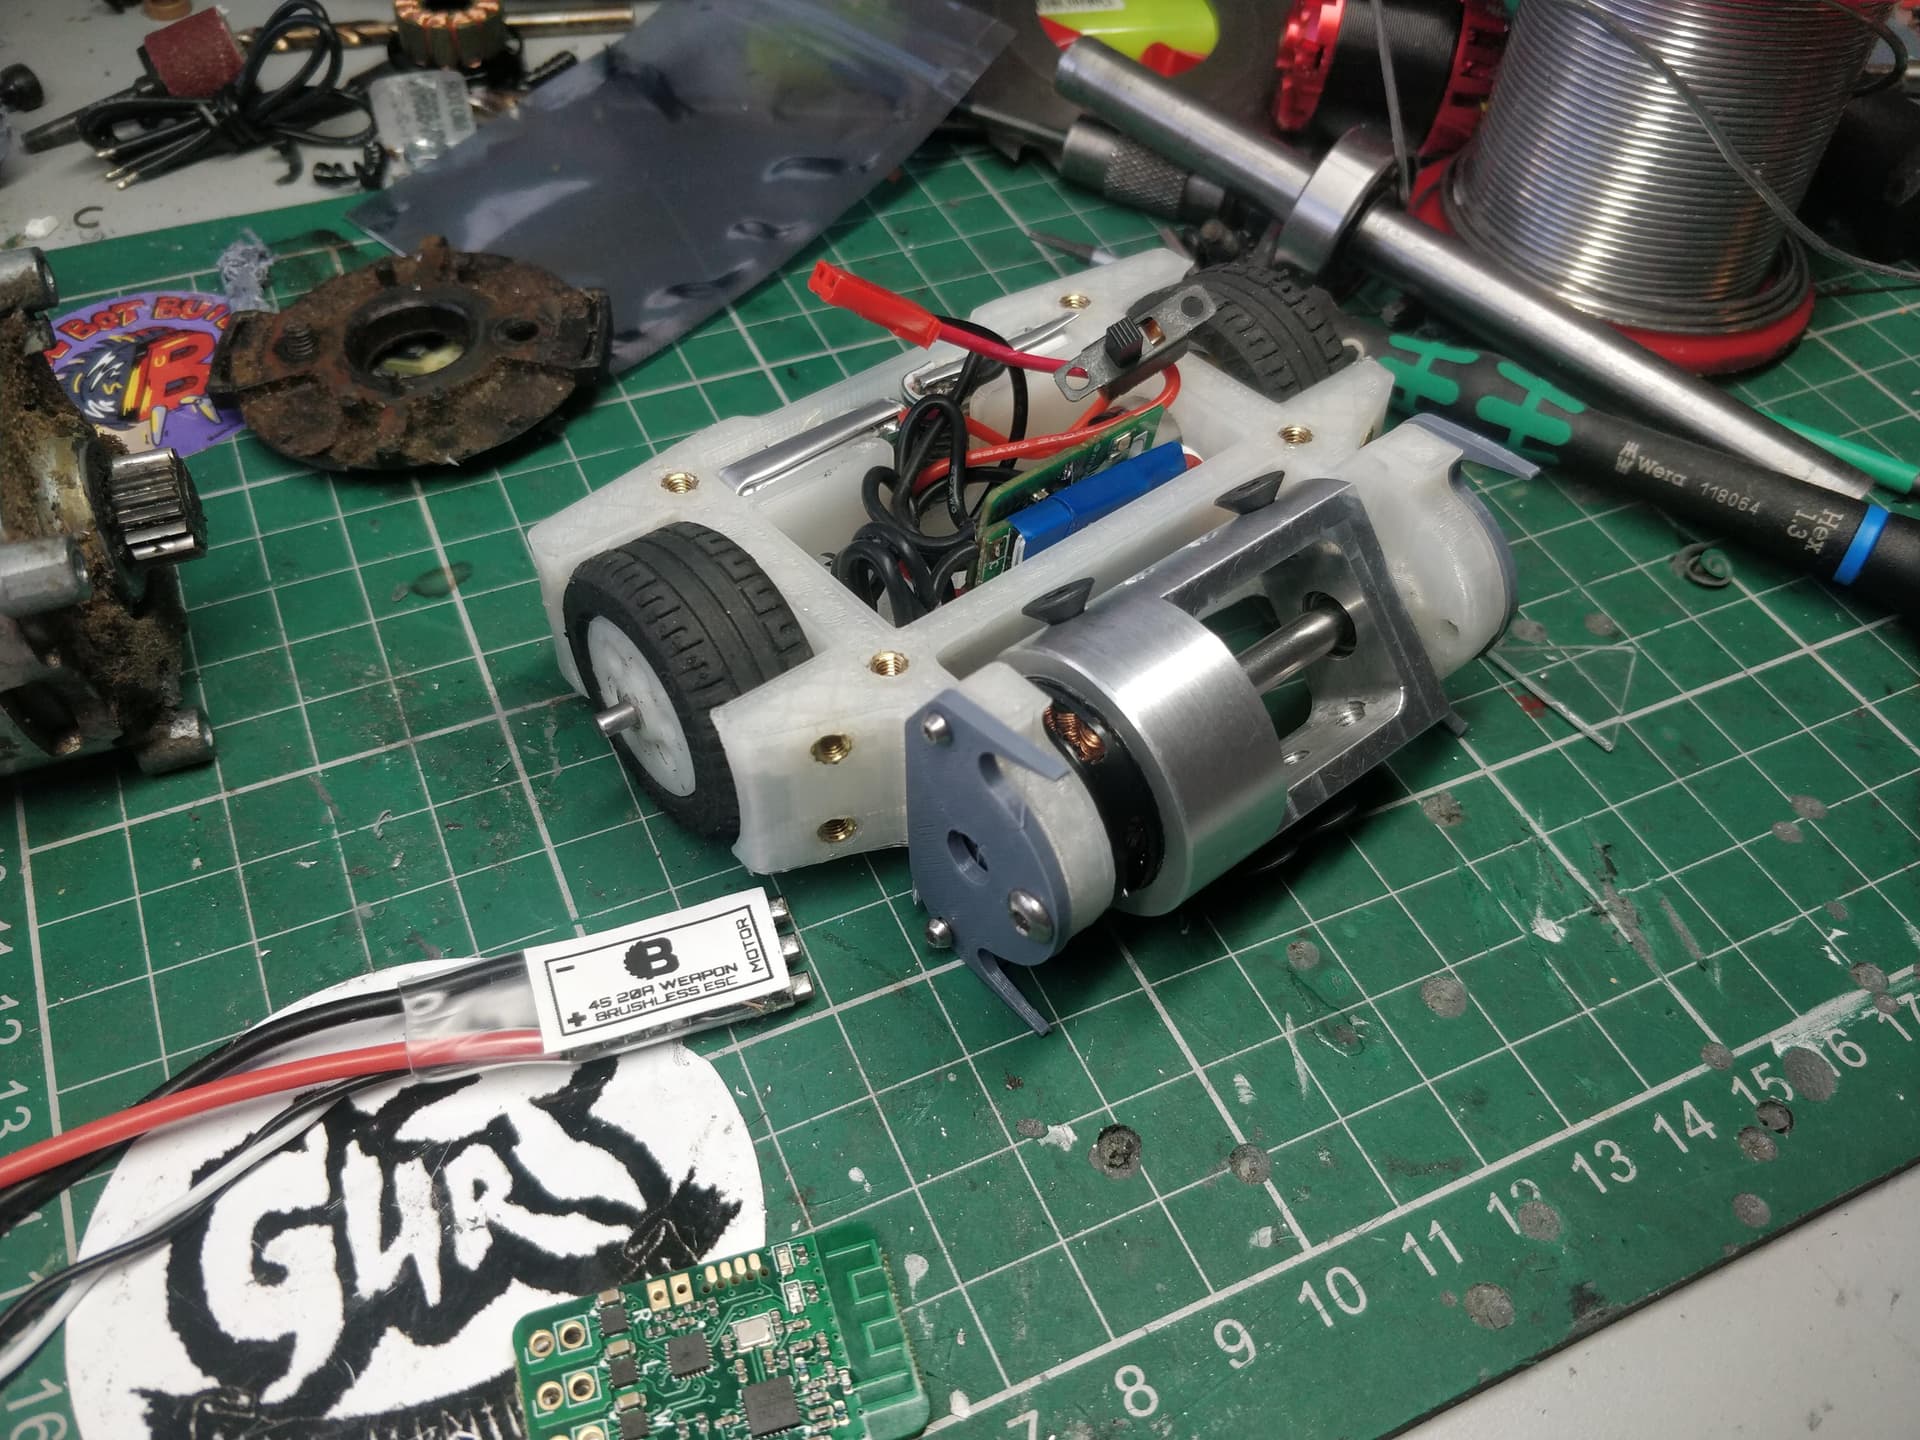
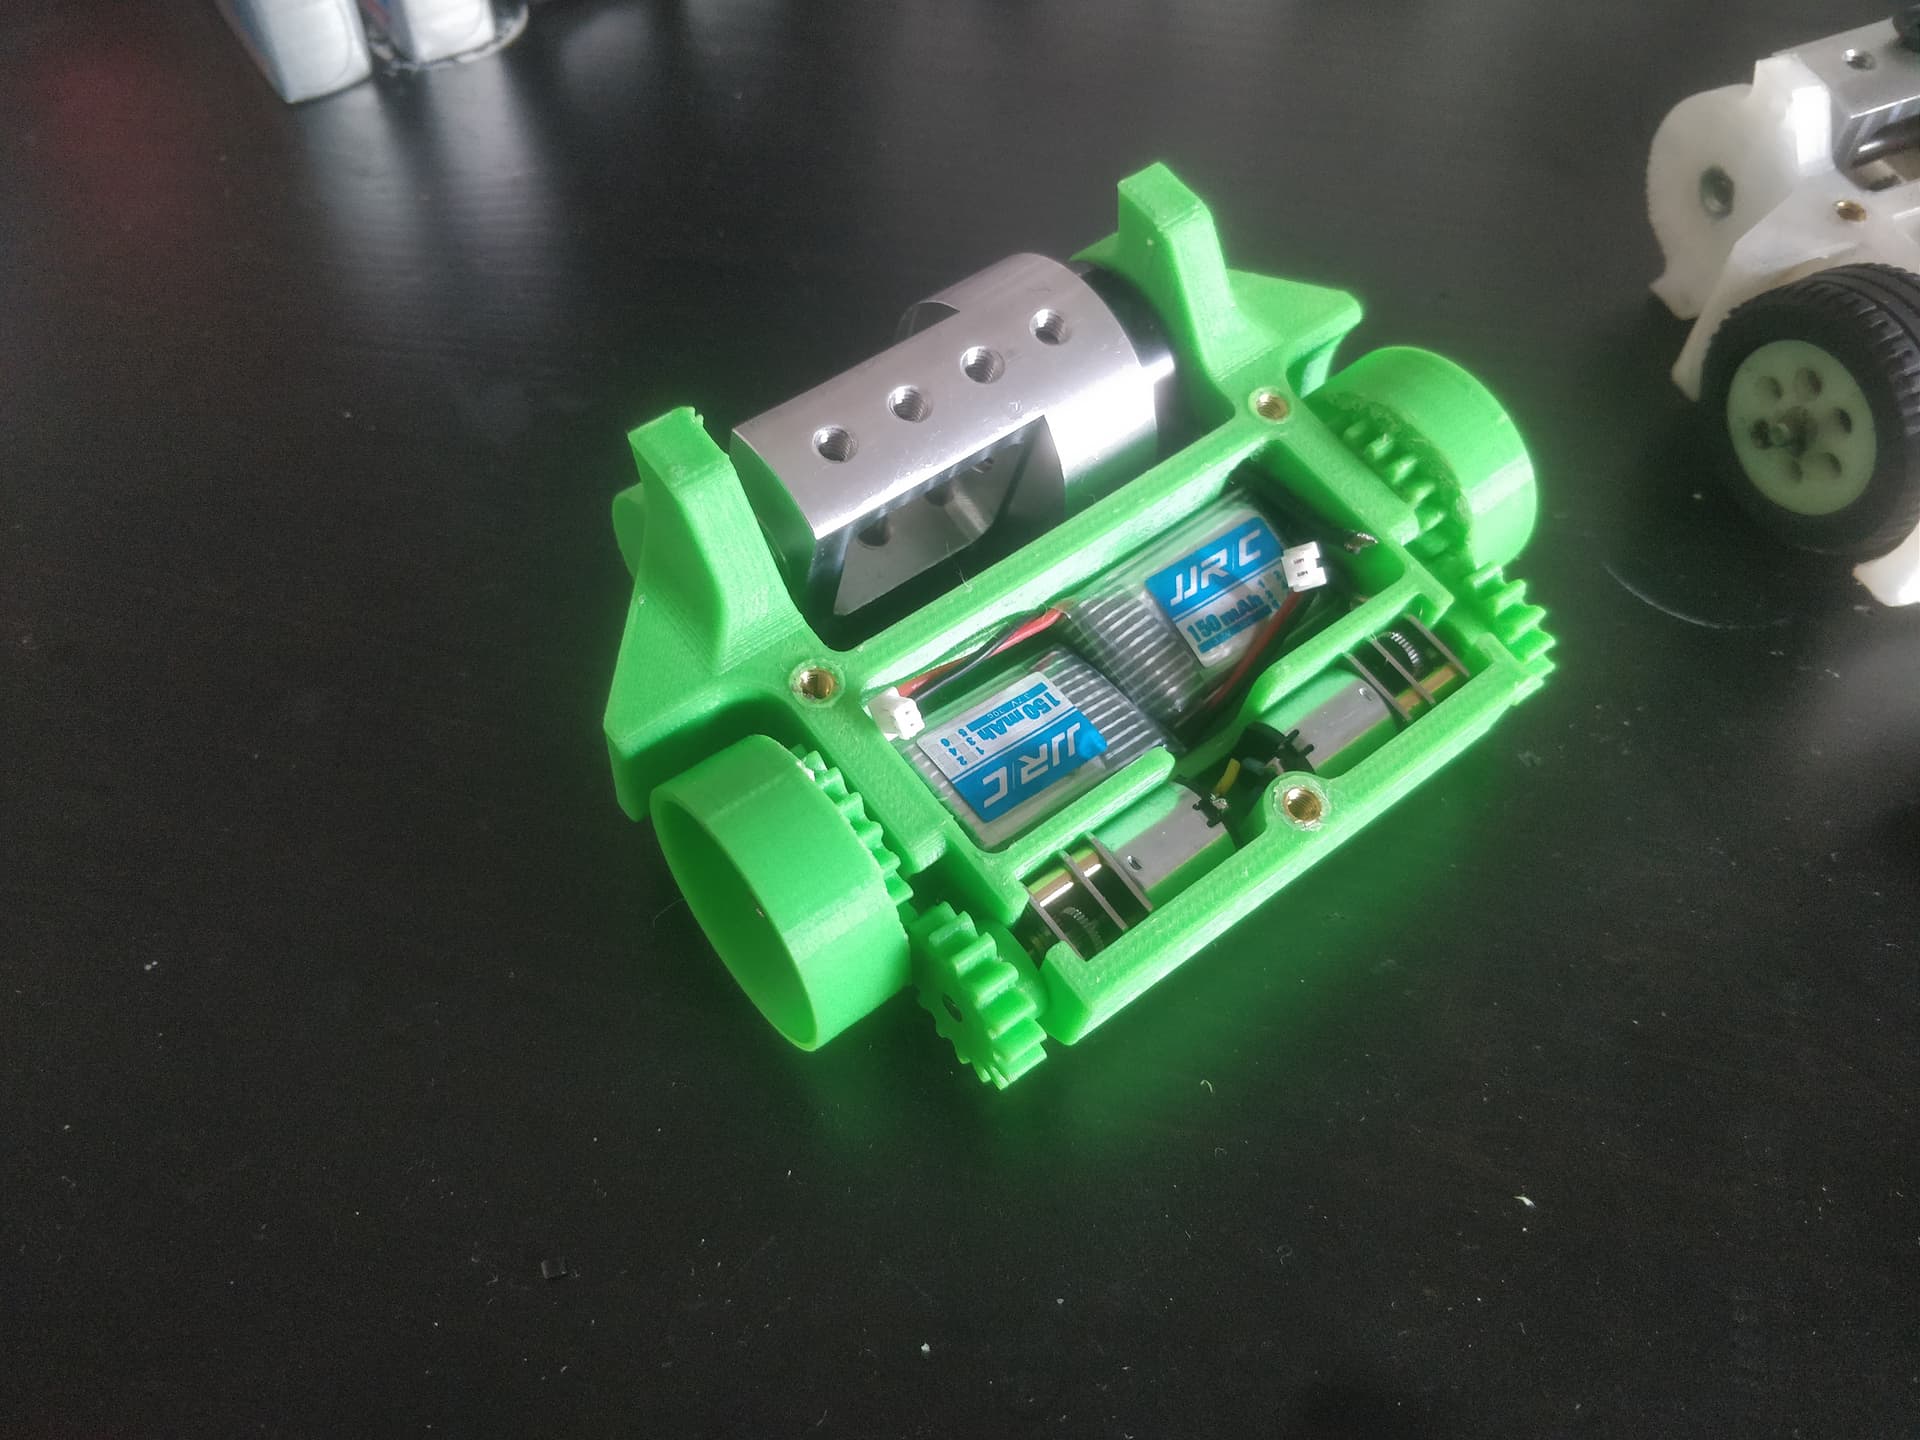
The main point of improvement was ditching the shoulderbolt which was stainless and not on size. It’s been a well observed cheat that you can run bearings on shoudlerbolts as they are ground and hard-ish but not below 6mm it seems. The M4 with a 5mm shoulder all seem to be stainless and are really undersized which leads to a lot of play, over ~50mm that means it can just clash with the stator. Not great. I just ditched this entirely and replaced it with a length of 5mm silversteel. This and a better shim, a deepened bearing pocket and it’s like butter. If butter span at 18,000 RPM.
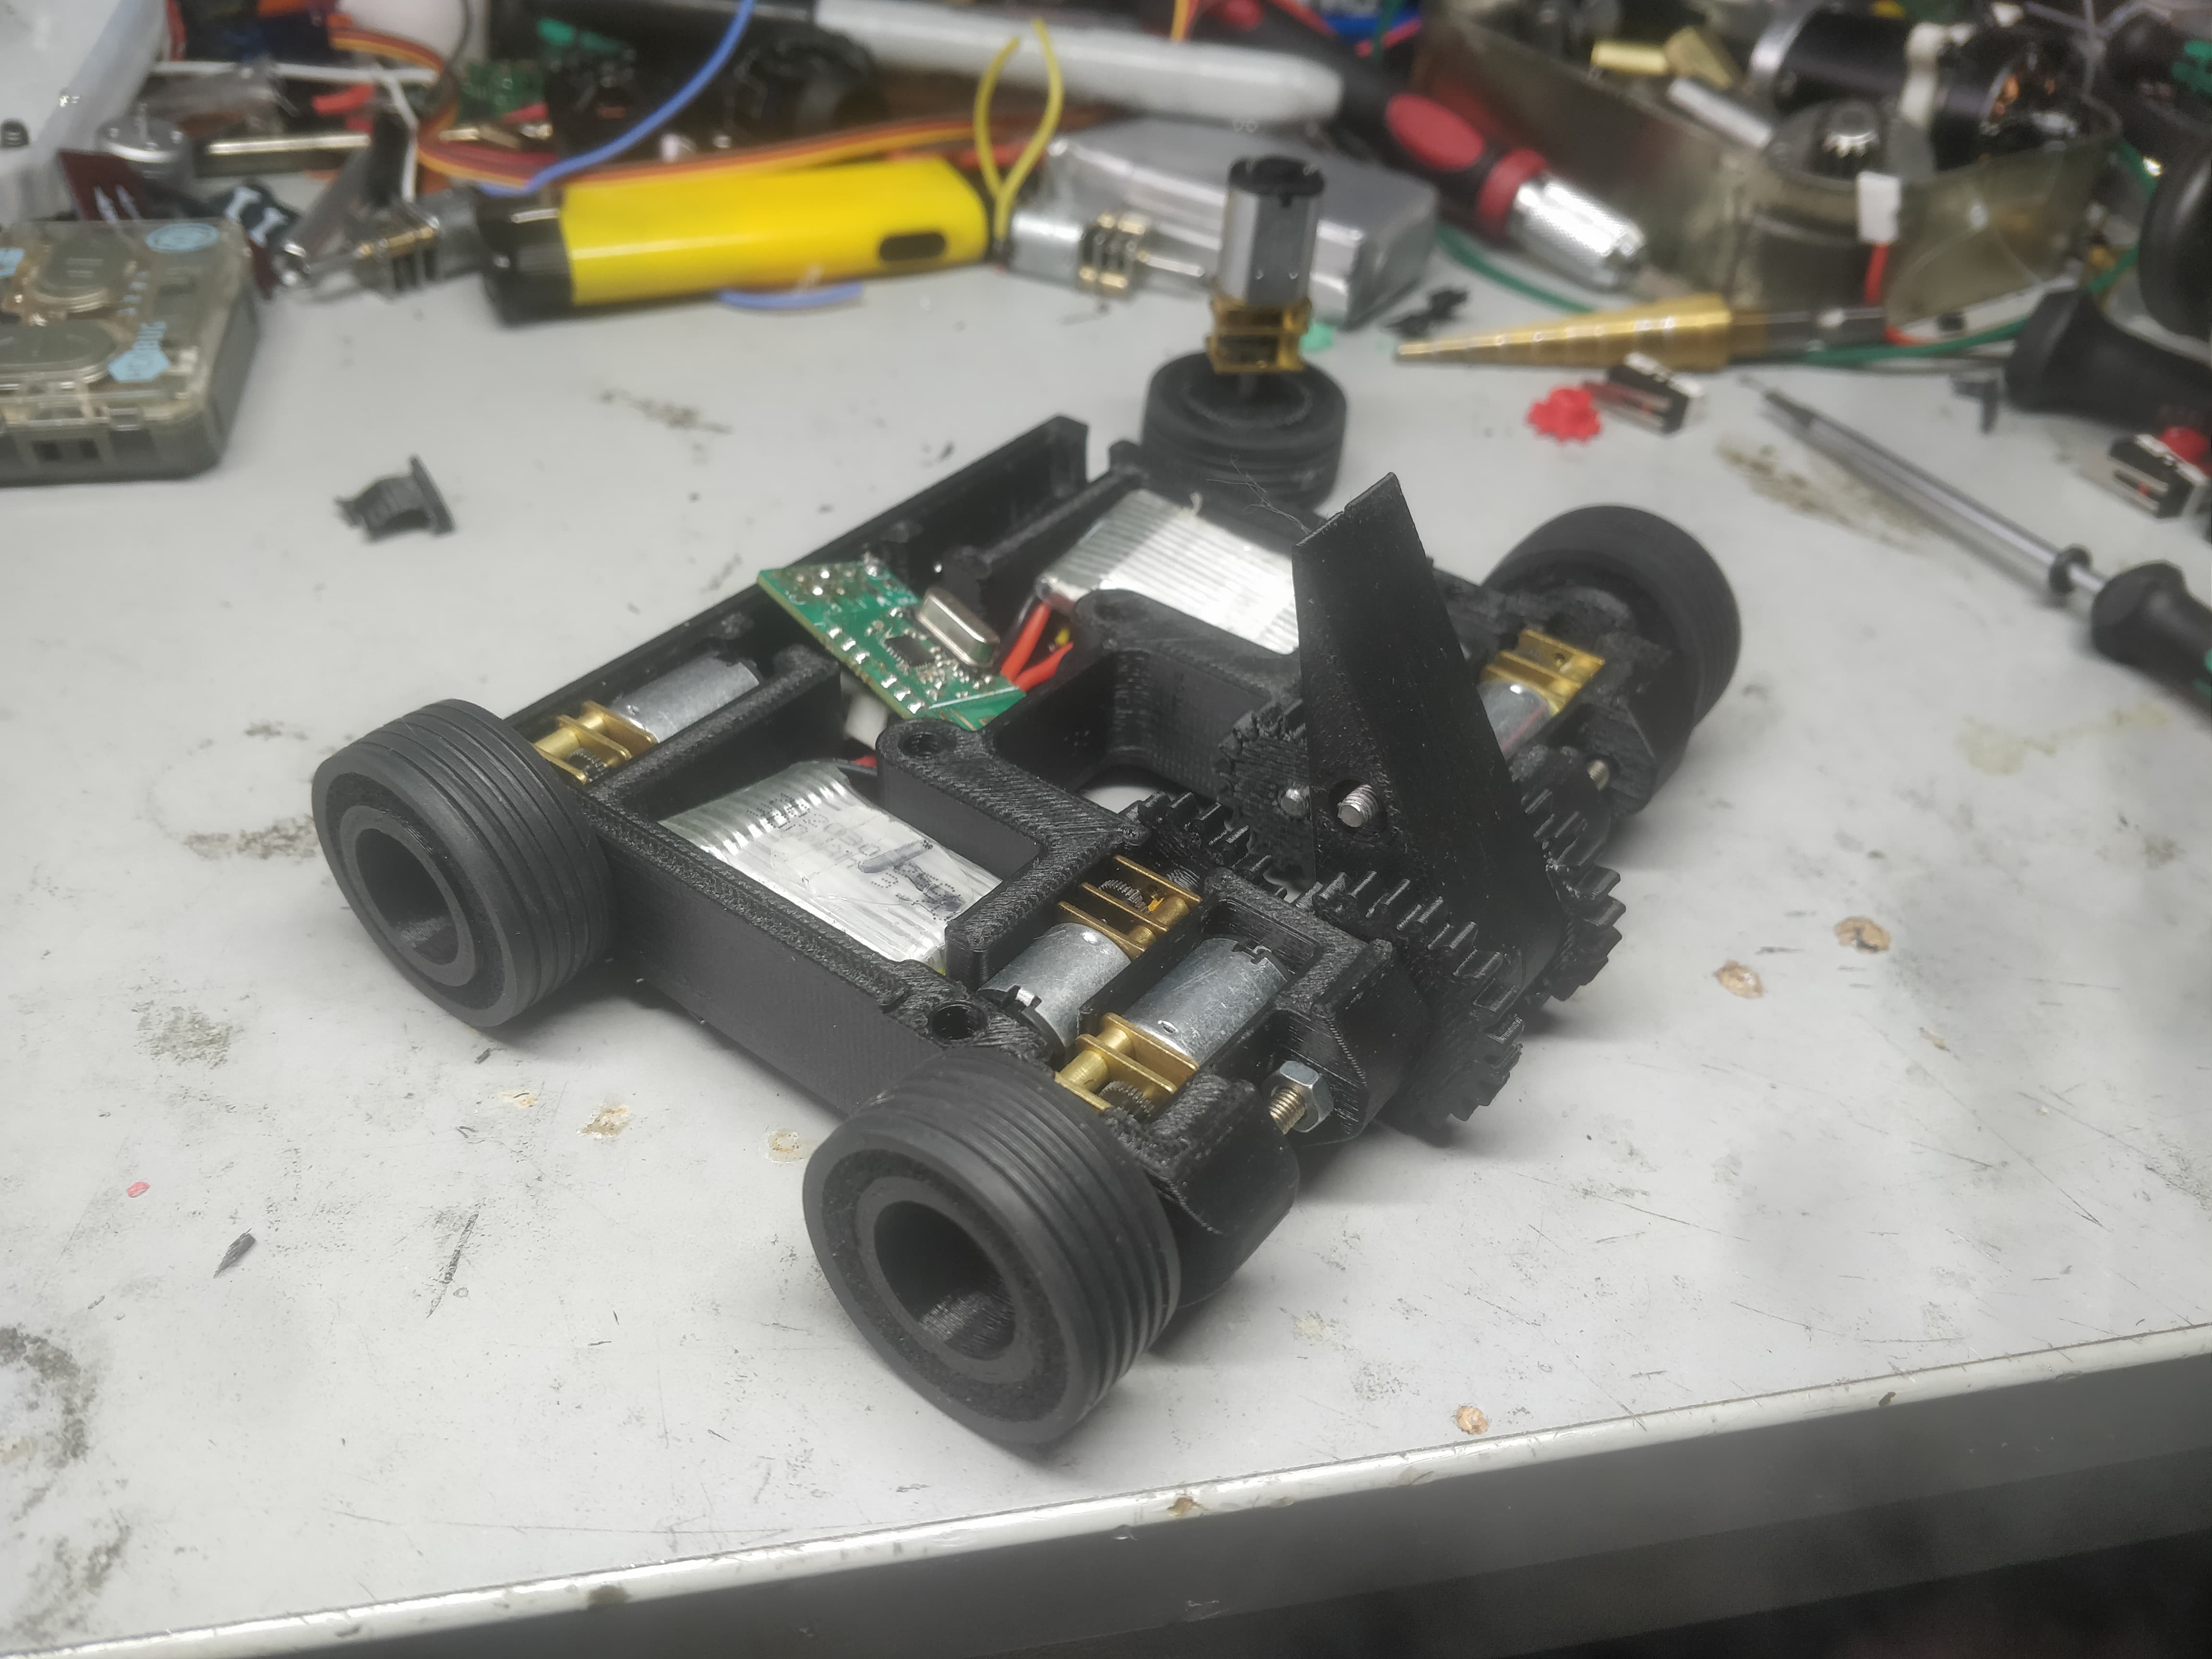
Shorter, fractionally wider but lower chassis height. Overall it is a fair chunk lighter already. The drum itself is growing in diameter a little with the M4’s being taken out to M5 so there is a bigger tooth and a more aggressive impact (hopefully)
To prevent sator drag on mine using the stainless shoulder bolt - I ended up having to go down to a very small bearing size that was thin enough for me to squeeze two sets in the driven side of the drum.
That seemed to cut out enough axial wobble to stop that from happening for me.
Although that being said, I would almost certainly go down a custom shaft approach if I were to do it again now that I can lathe.
I keep toying with the idea of buying like a c1 or c0 just to be able to make little shafts and bore out gears. Would make my life so much easier once more.
Luckily this doesn’t need anything custom it’s just a length of ground shaft cut to length with a couple of perpendicular pins to seat it in the bulkheads.
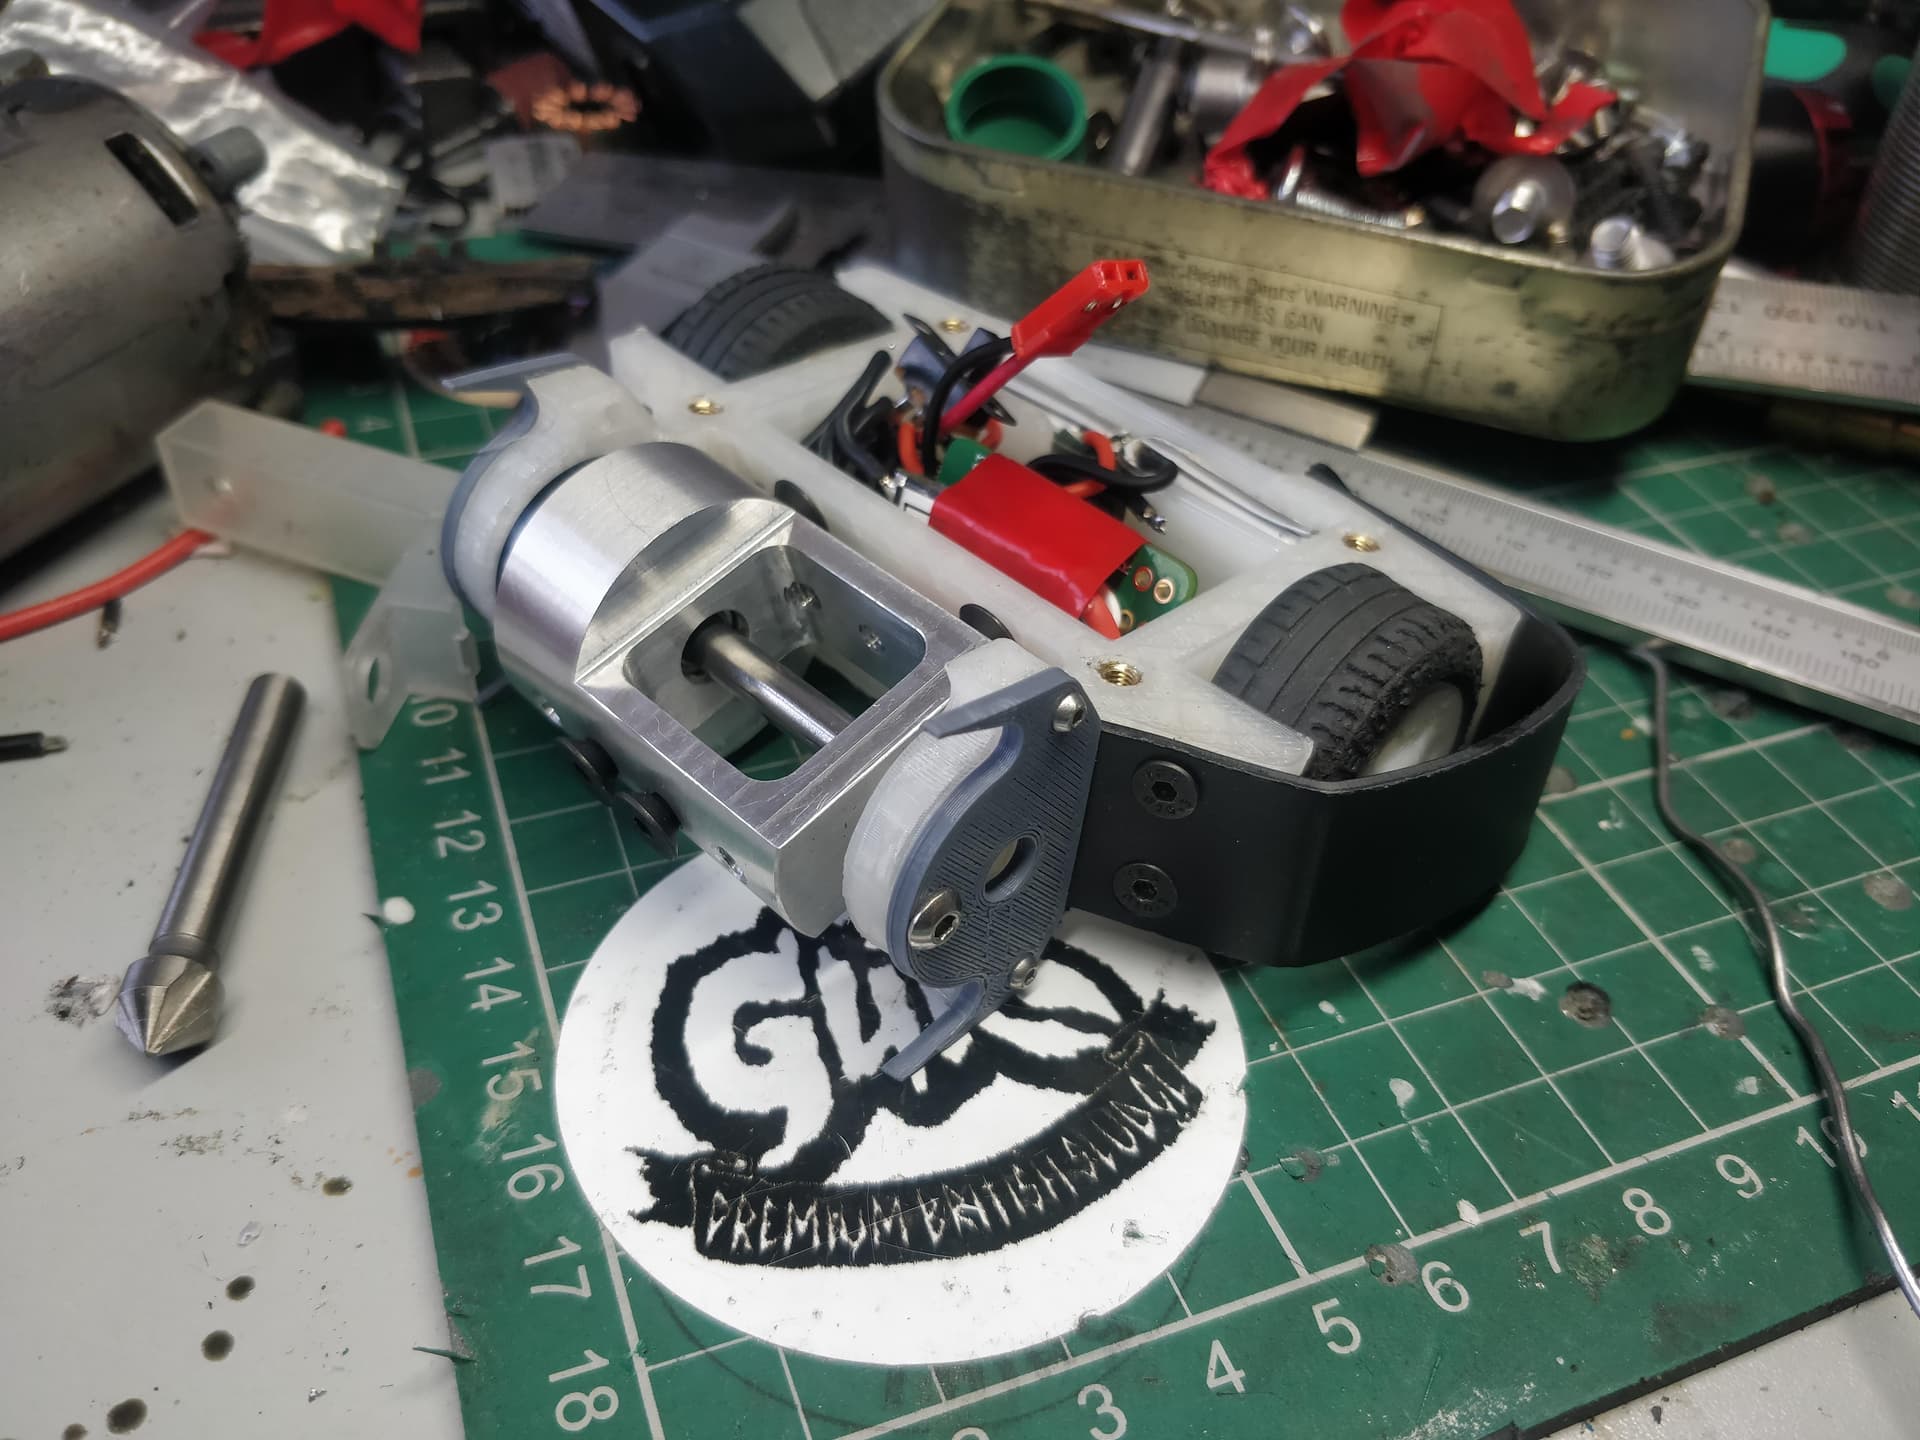
Threaded the drum for M5 with one bolt in to check clearance and it’s looking great. Much more meaty. They’ll get ground down slightly so they get a little more engagement and they don’t clash.
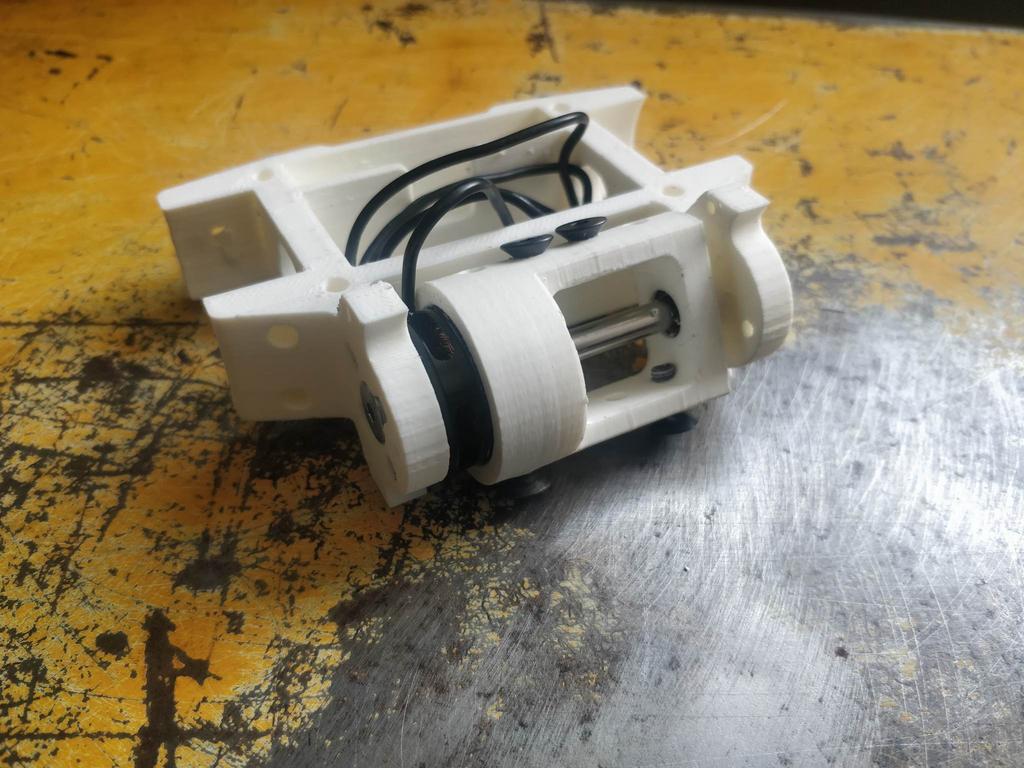
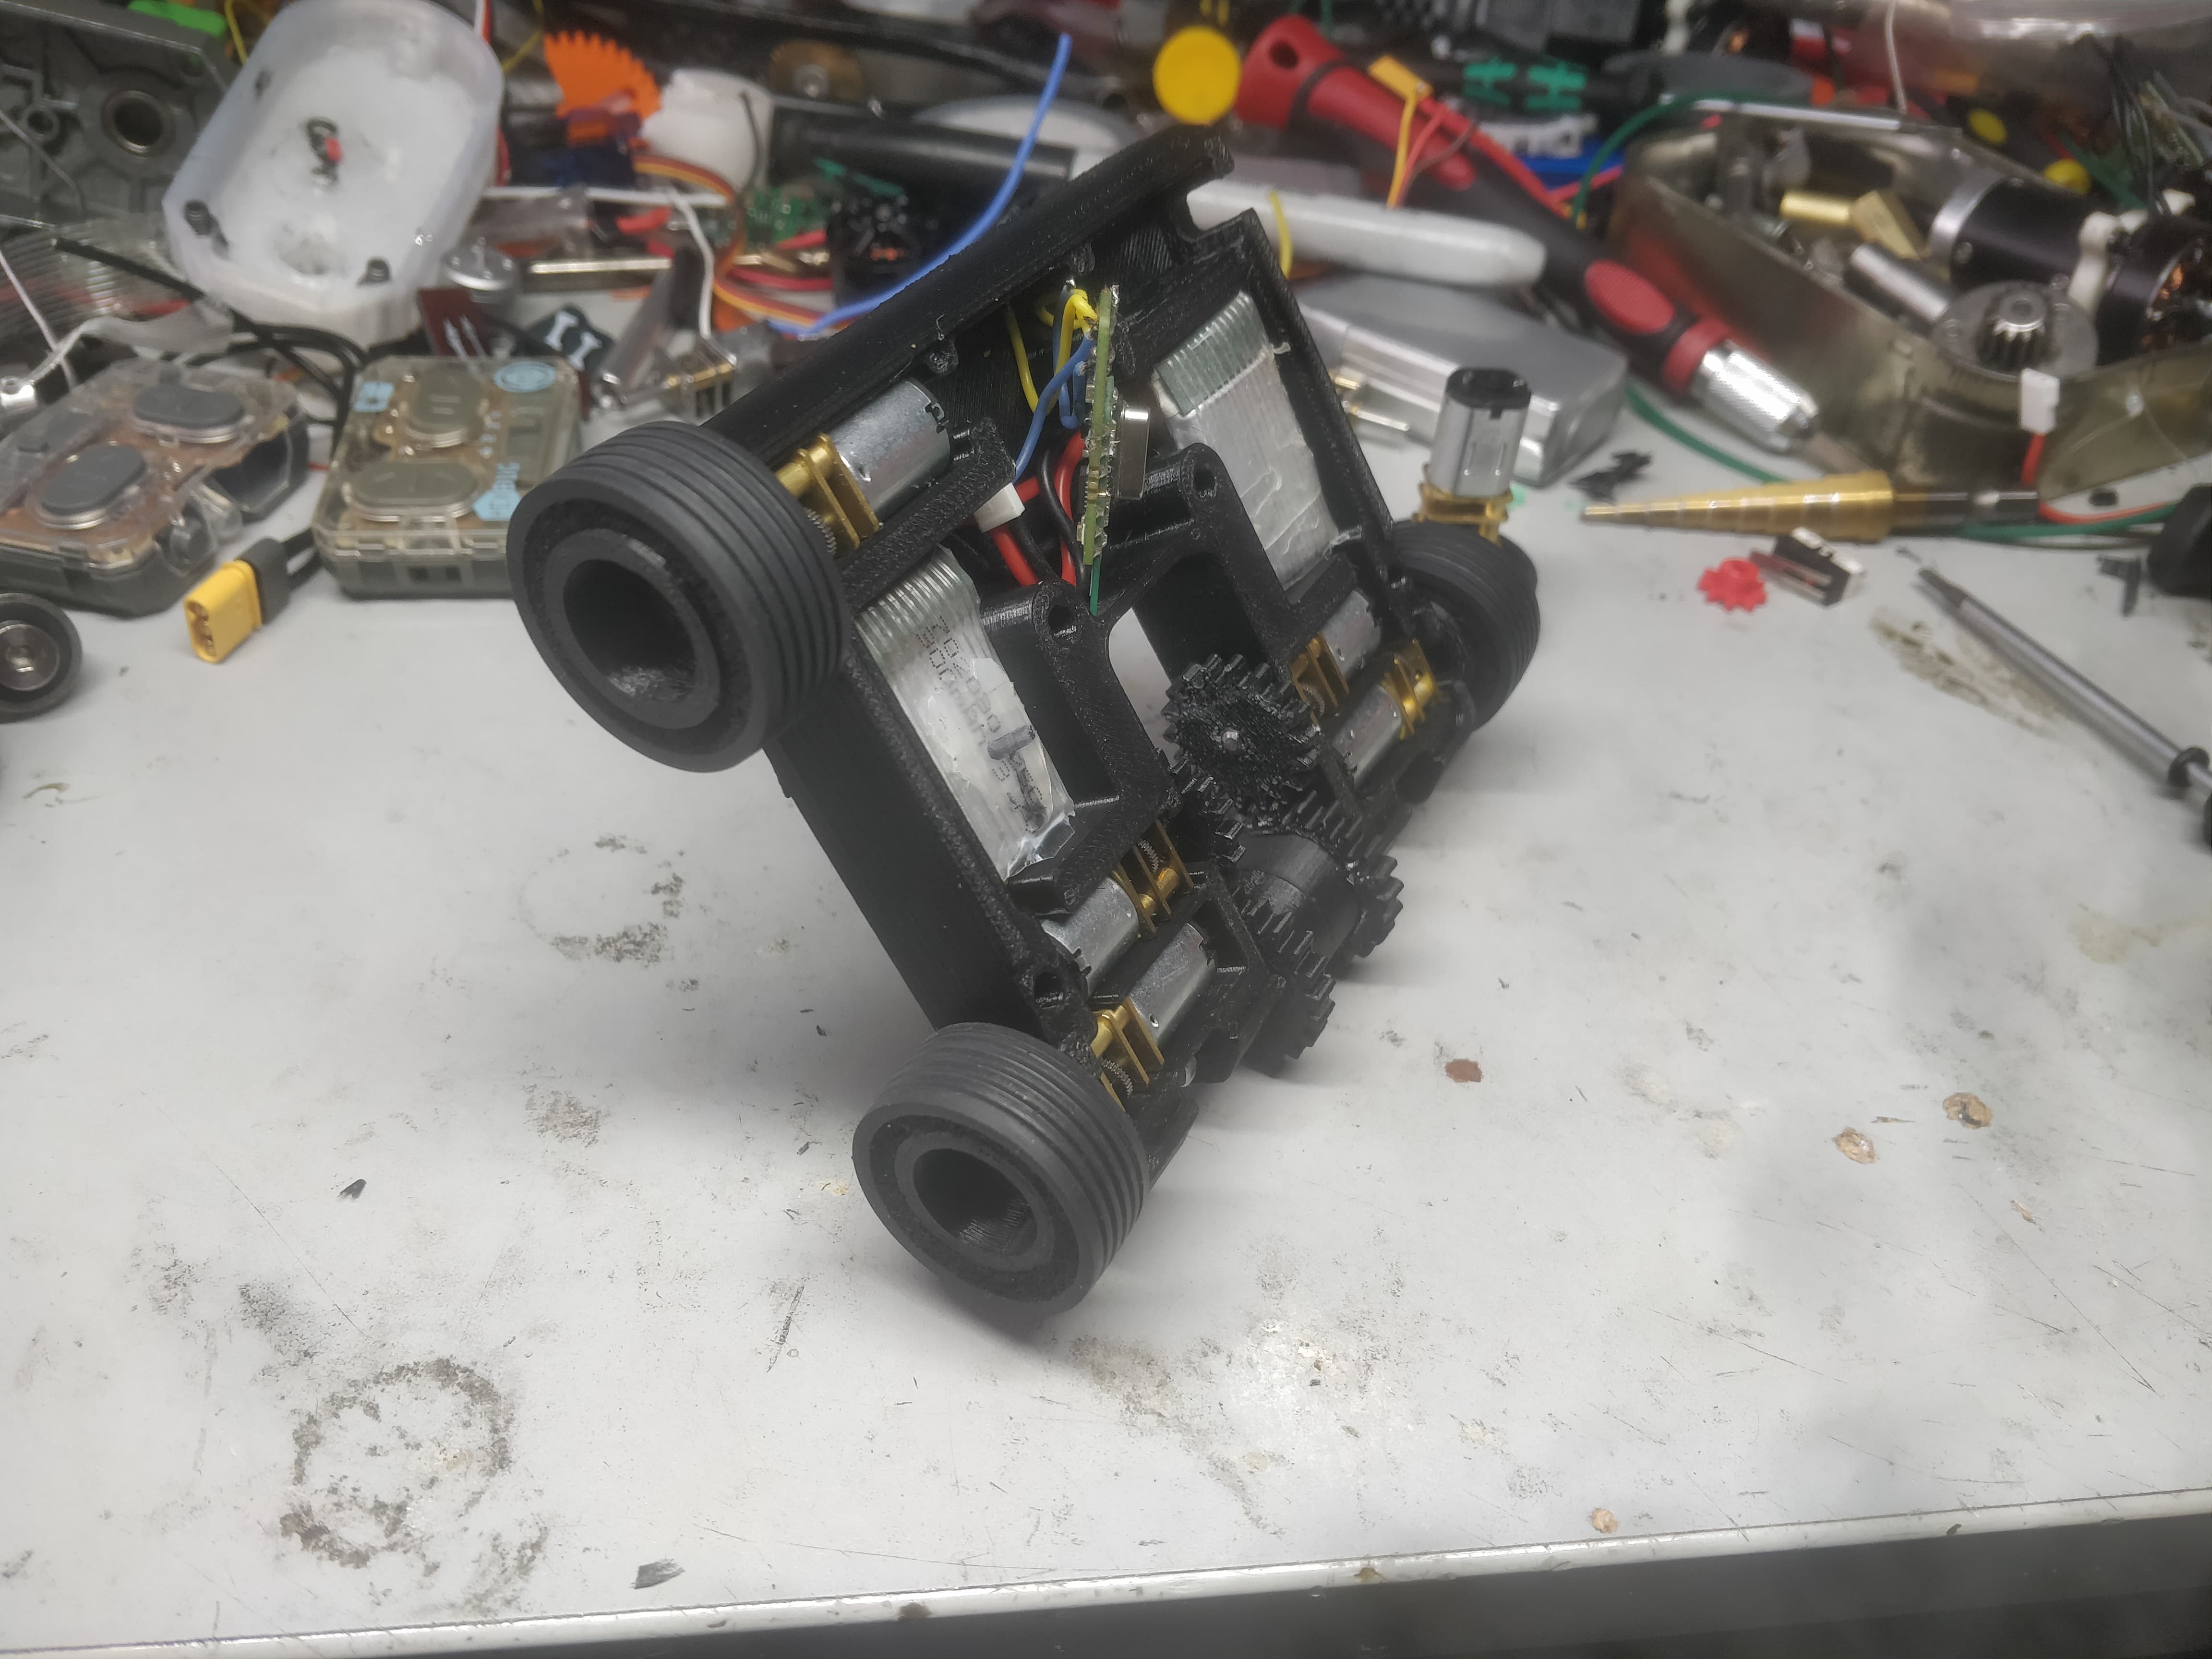
Tyres are done and I’m pretty pleased with how they look. Just the icing on the cake. I’m going to try and get it wired over the weekend and give it a rattle around.
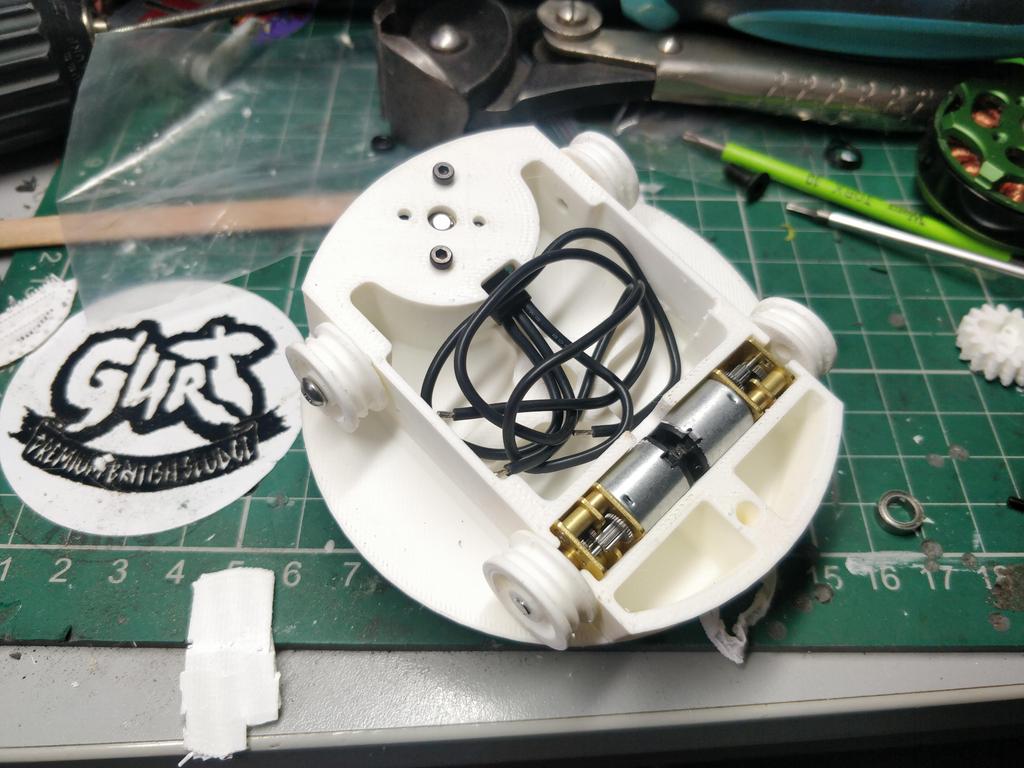
Took the time out today to wire up and have a little play with a chassis I designed and printed over a year ago. It’s very boring, I blame this on the fact I was working a cushy job as an proper engineer behind a desk which made me work at home for multiple days a week. I hated it and barely lasted the month. The uninspired nature of this robot is probably why my place is outside in the cold doing something greasy and dangerous with my hands.
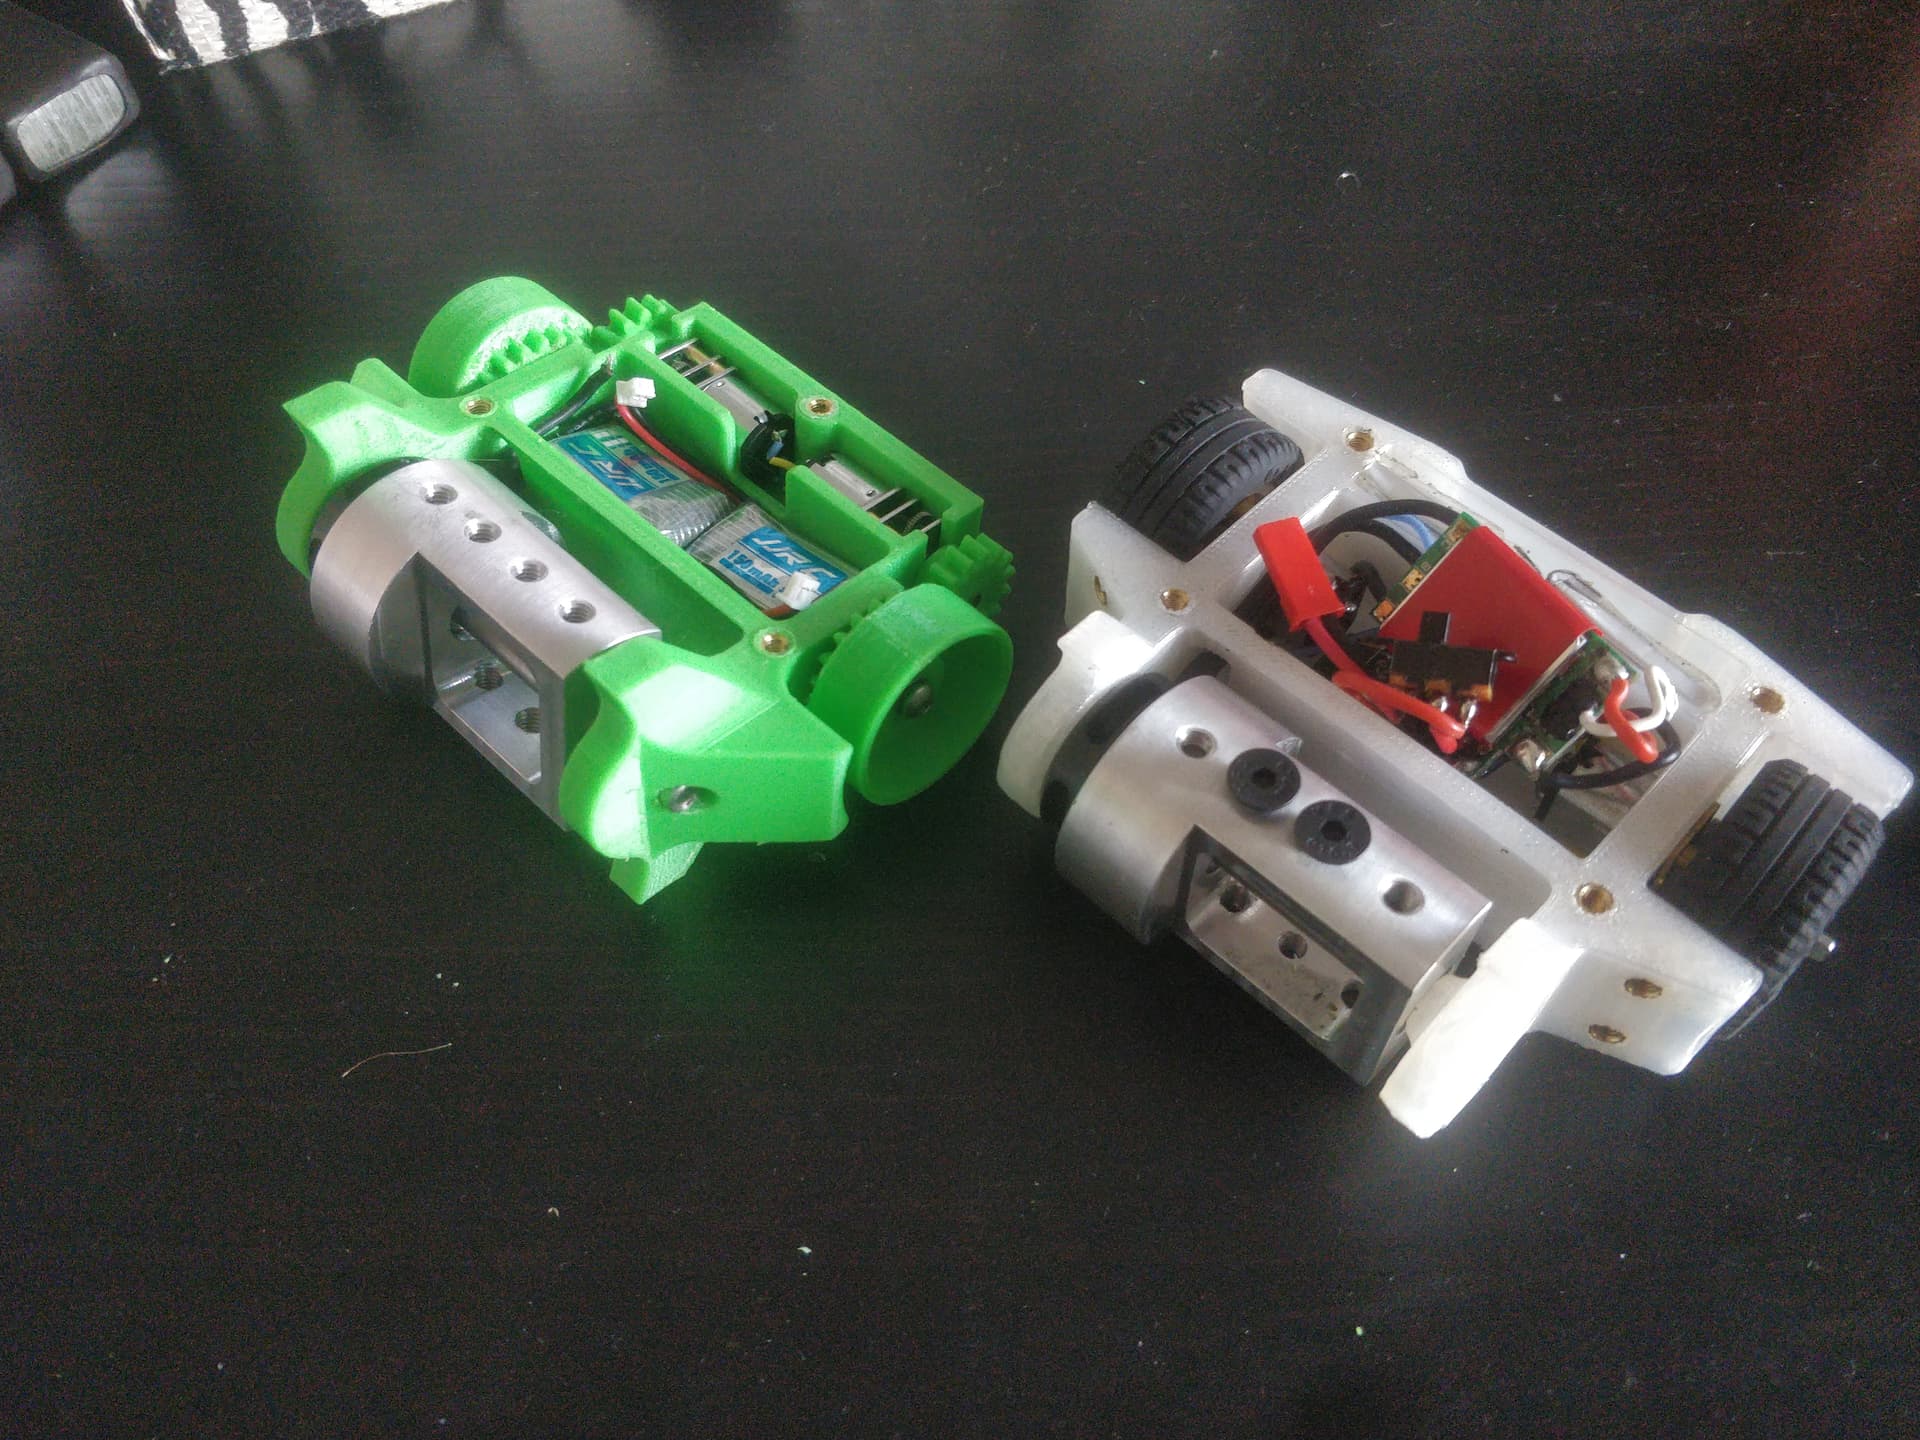
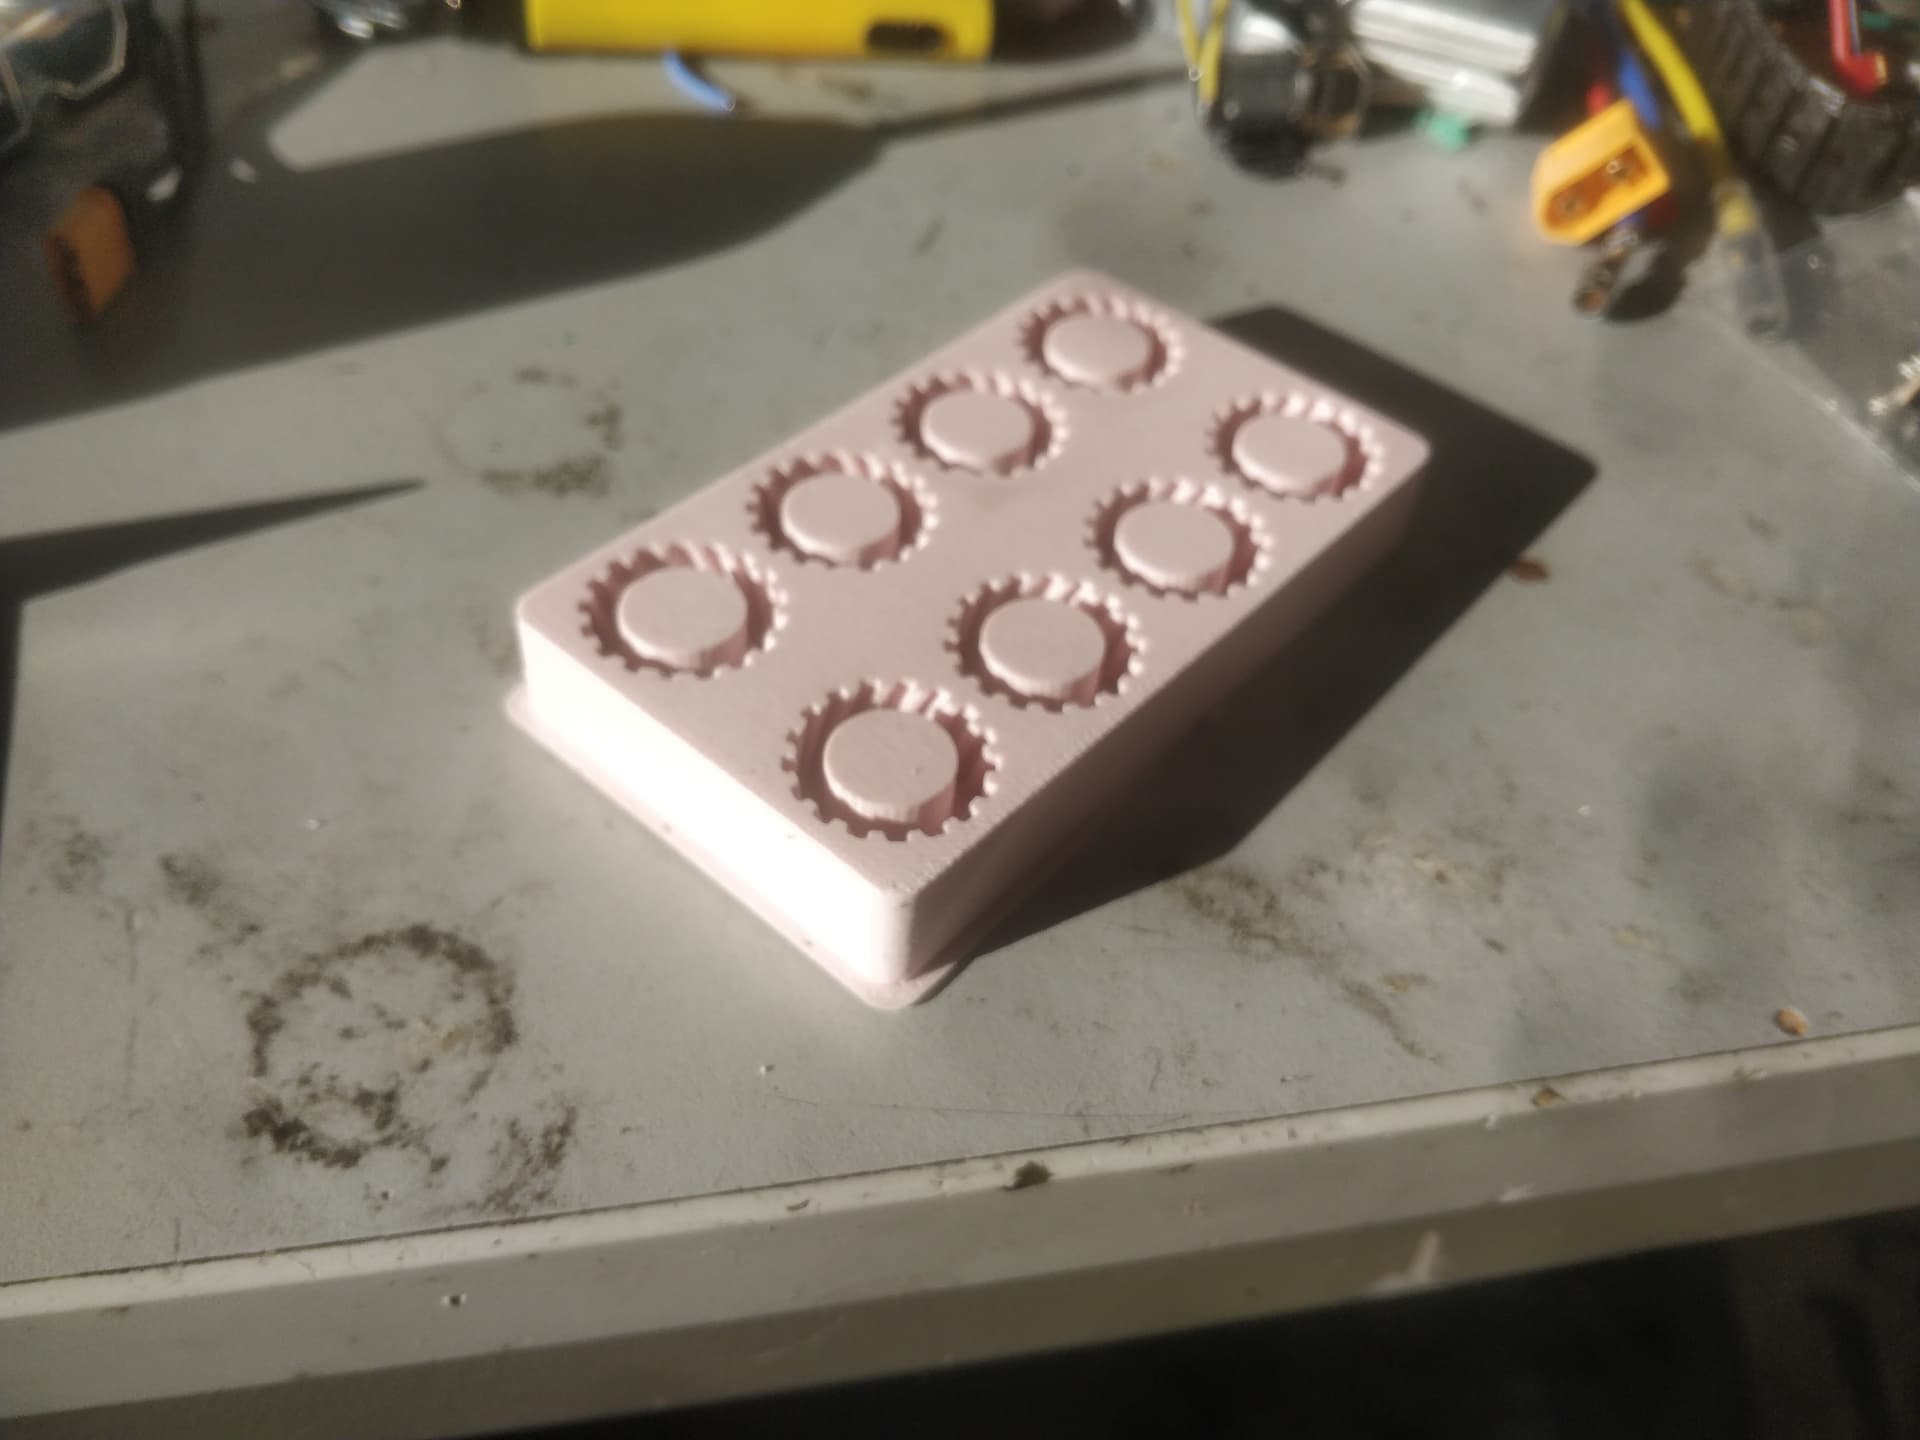
Amusingly, the colour of the print matches the spool I had in the last time I updated this. It’s like poetry, it rhymes.
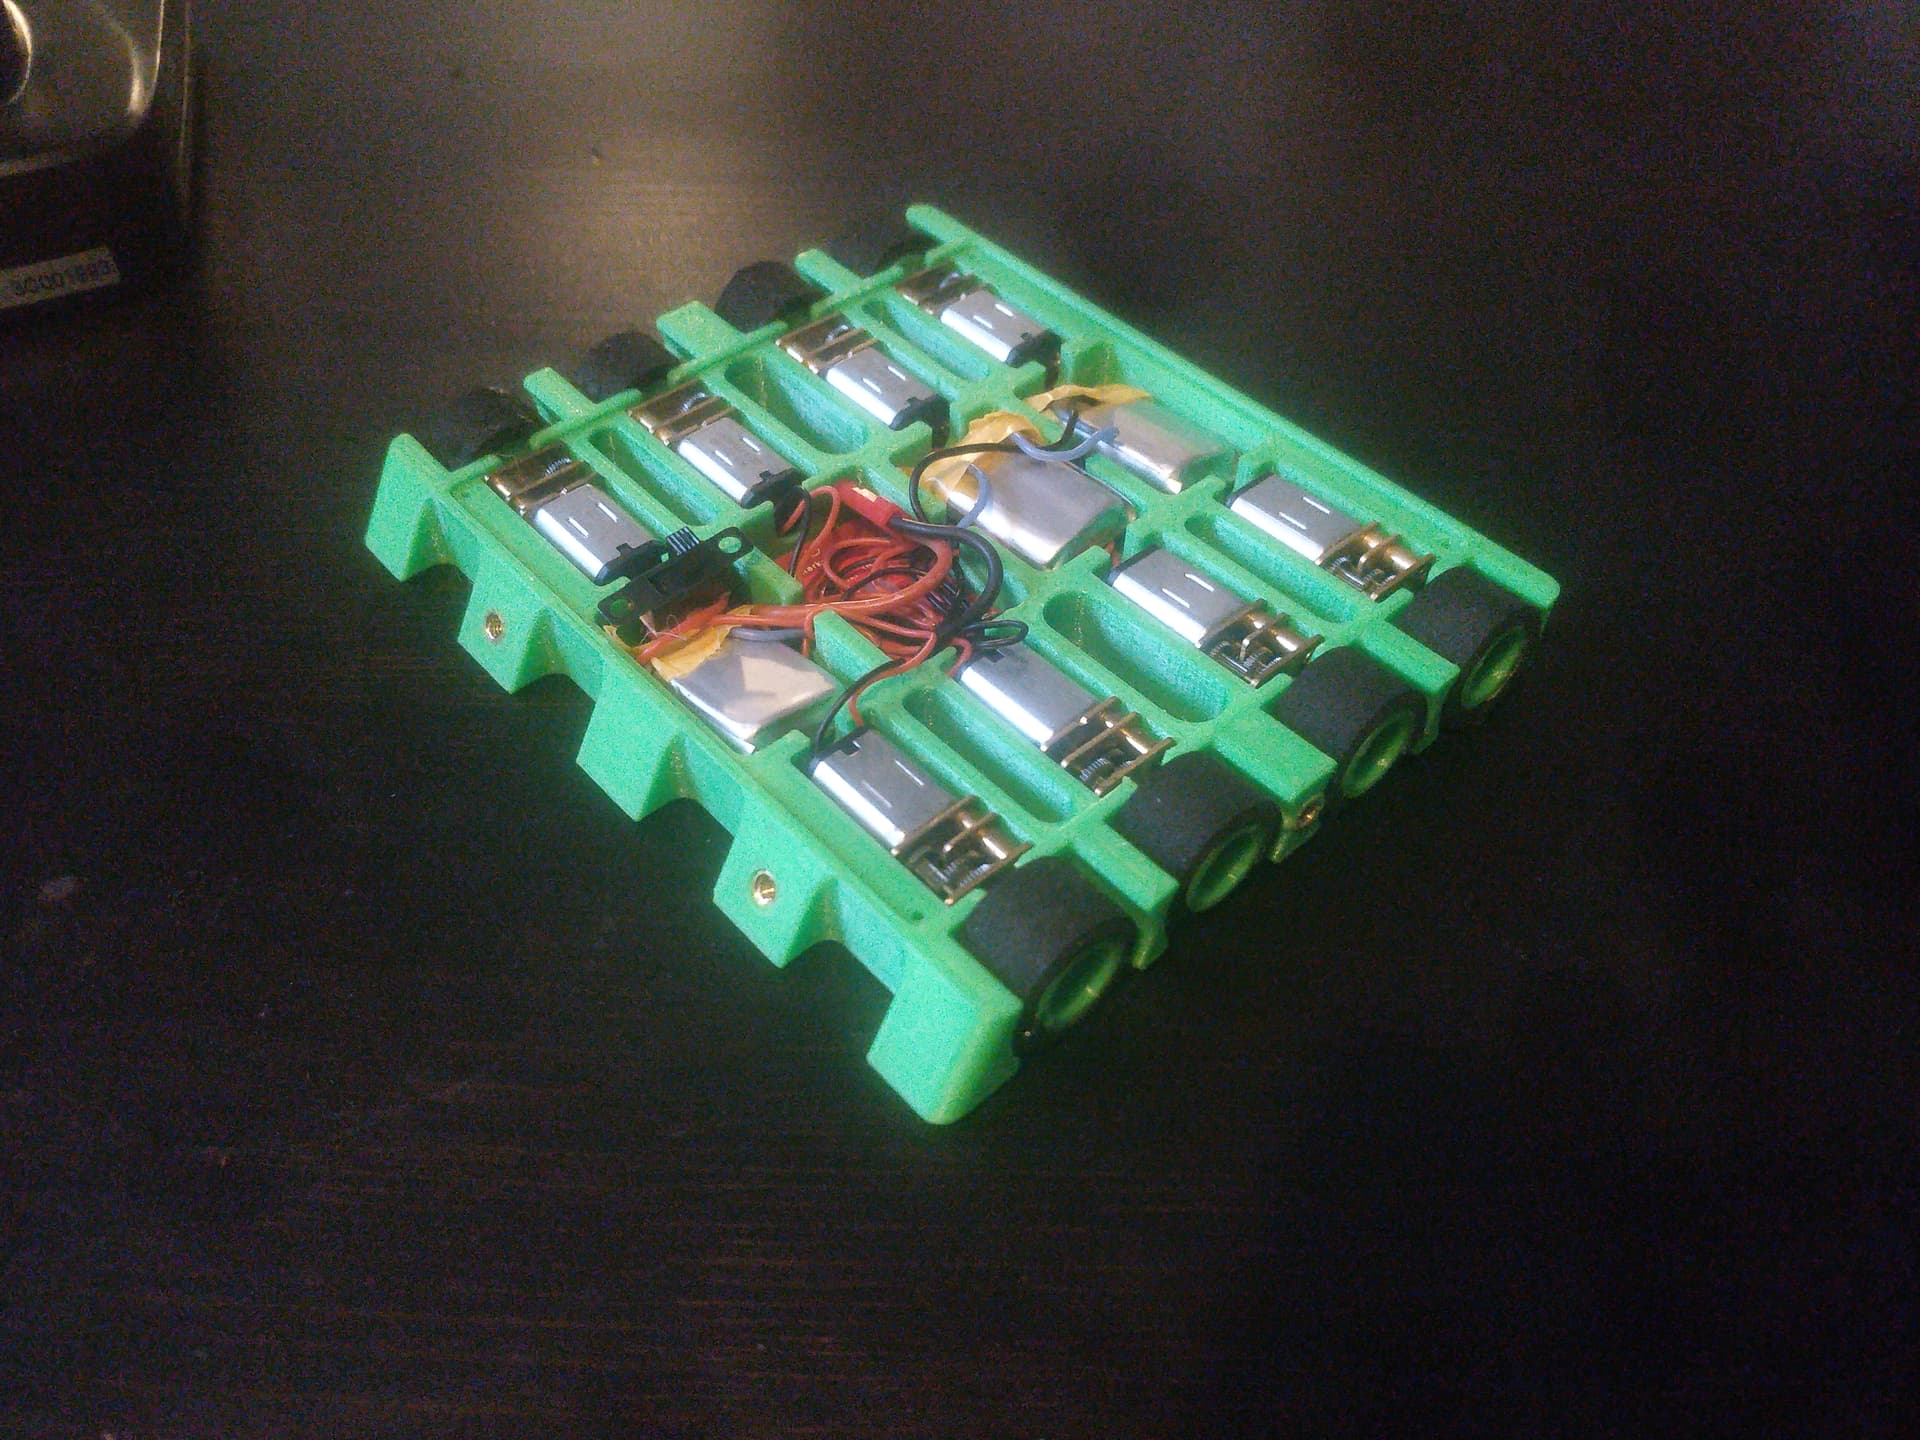
It’ll be getting a reprint in black ABS or potentially Nylon if I can be bothered. With the prospect of a chill BBB event in March and missing out on most events last year I dug out “Pretty 8 Machine” and looked at finishing it.
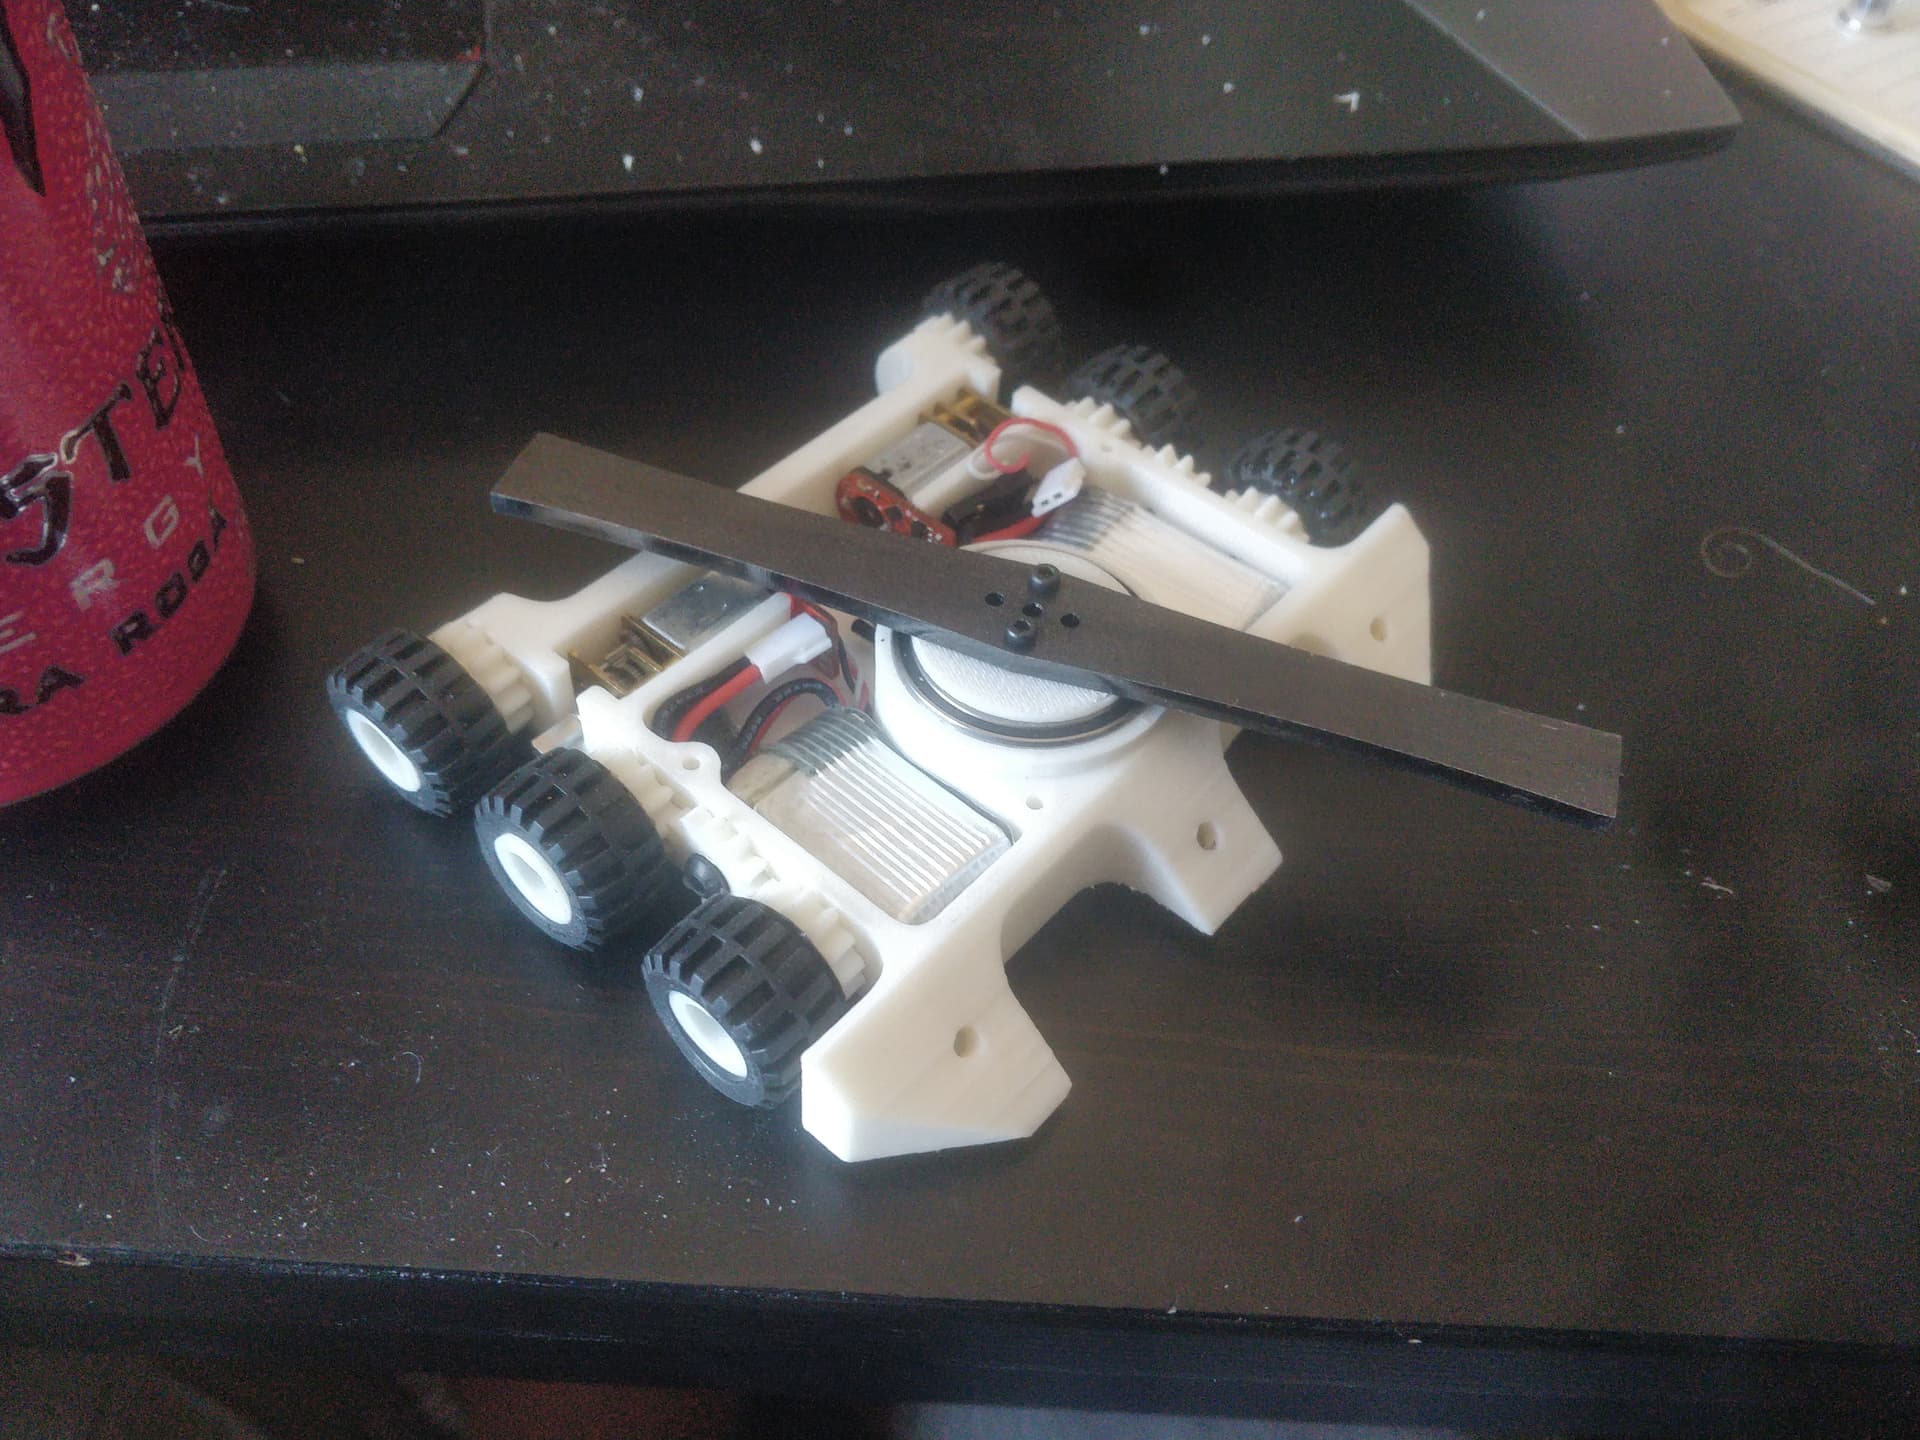
It’s 8x super budget N20’s which are mild enough wound I’m not too fussed about them on a single Malenki HV run off of 3 150mah cells. That’s it. Robot? Done. Hotel? Trivago.
It has some foam based wheels which aren’t great so I’m considering putting a sliver of effort in and casting something with a bit of grip.
Currently 134g so there’s enough for a lid, a token wedge and very little else. Originally I was hoping for a TPU wraparound armour band but that may become HDPE for simplicities sake. It’s also fully cube compliant which is pointless now but I’m happy working within it’s comfortable 4" confines.
Well, I’ve never seen an 8 wheel drive robot. I think you should probably finish it, just to see if 8wd is meta. Though at that point, you might as well us tracks.
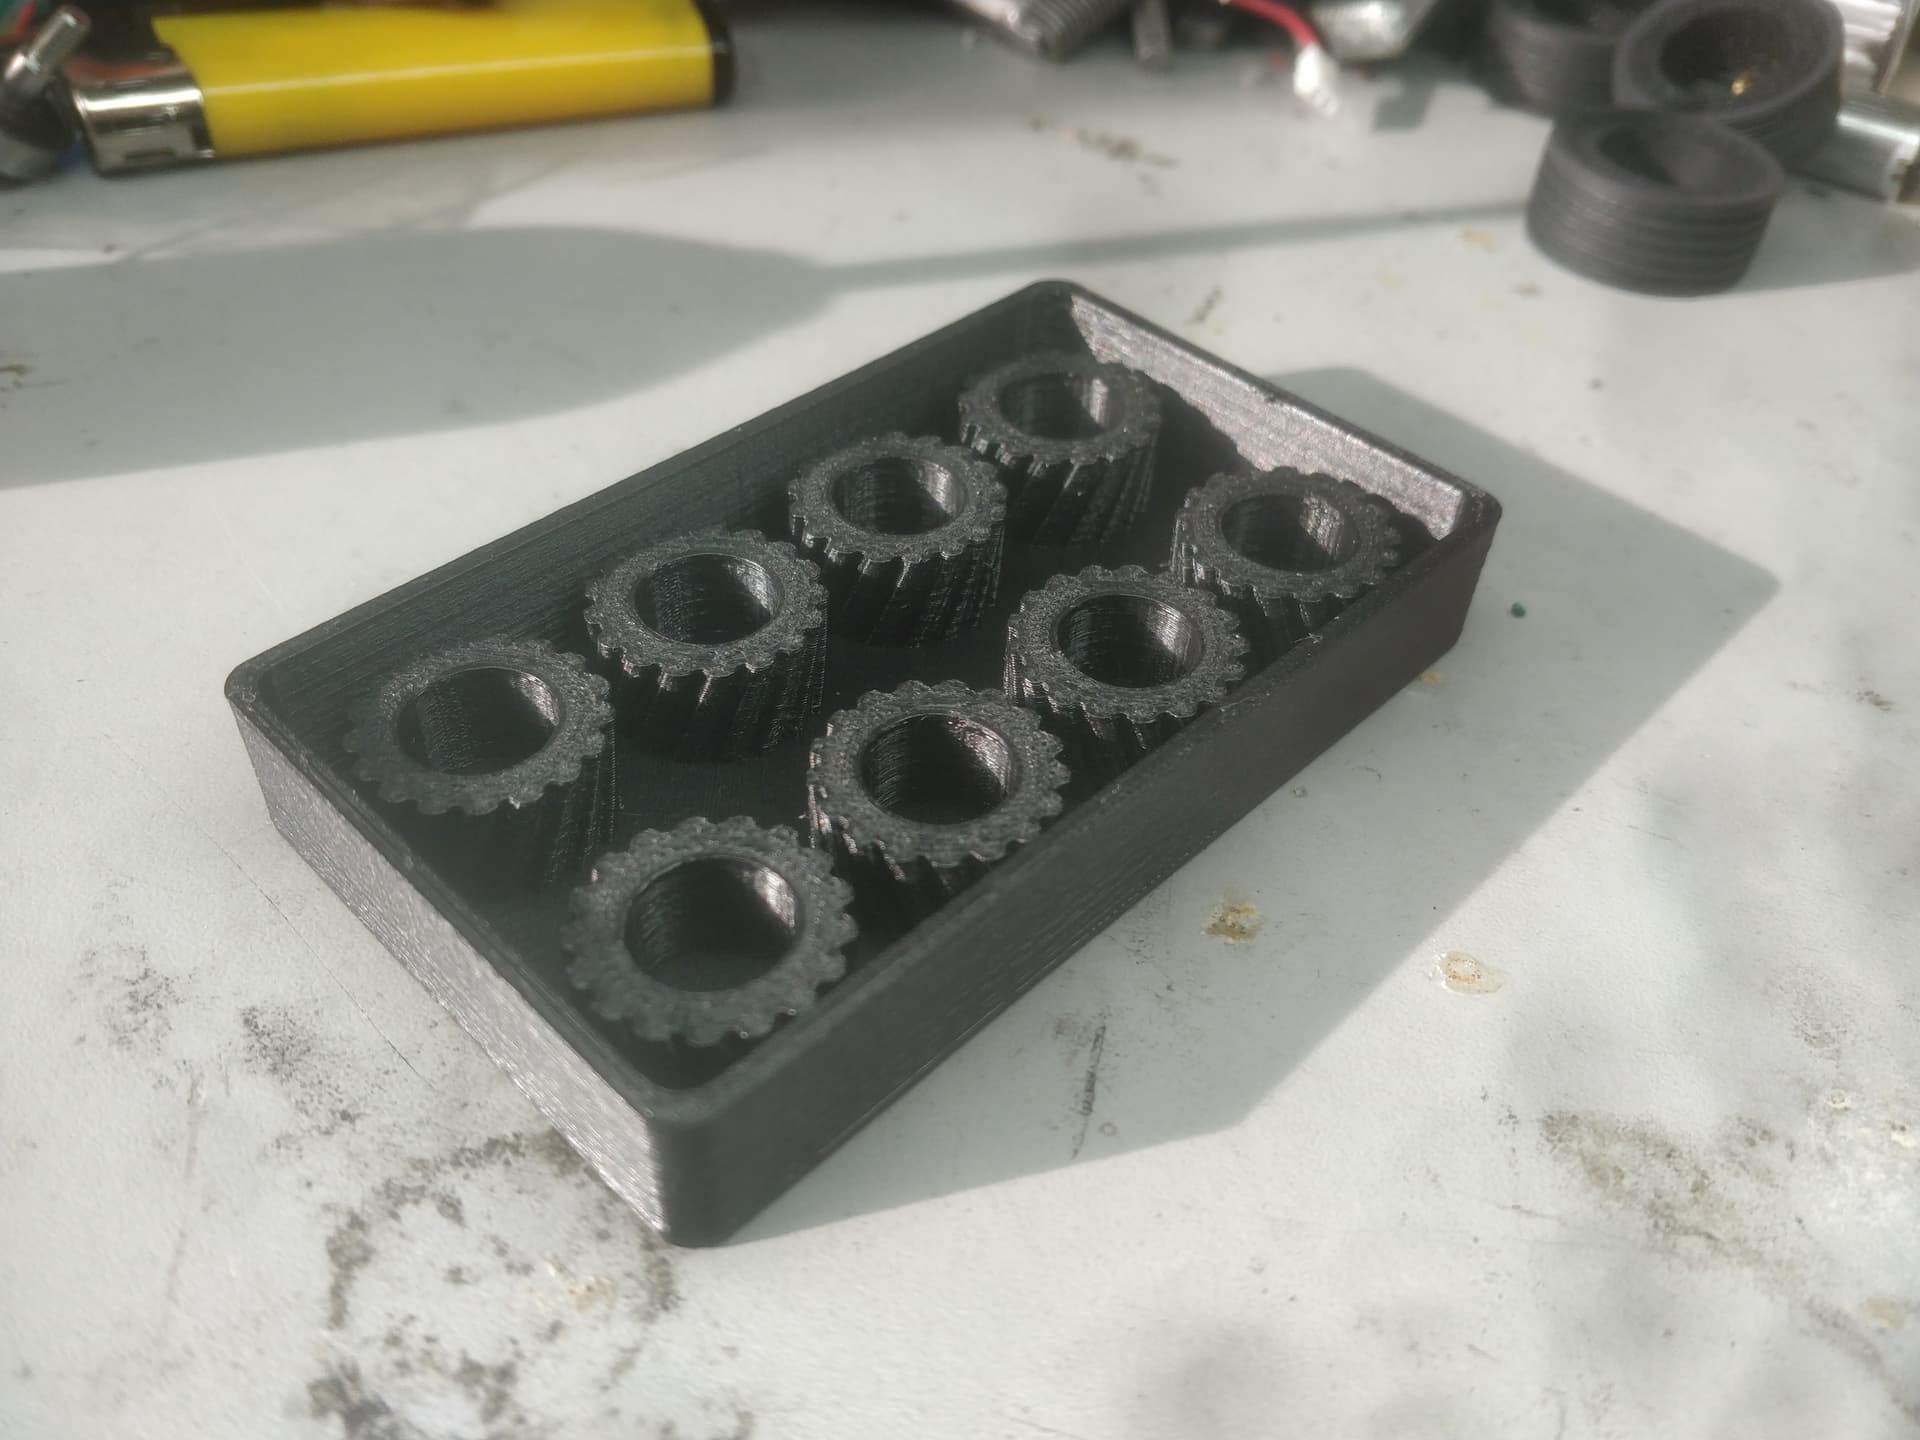
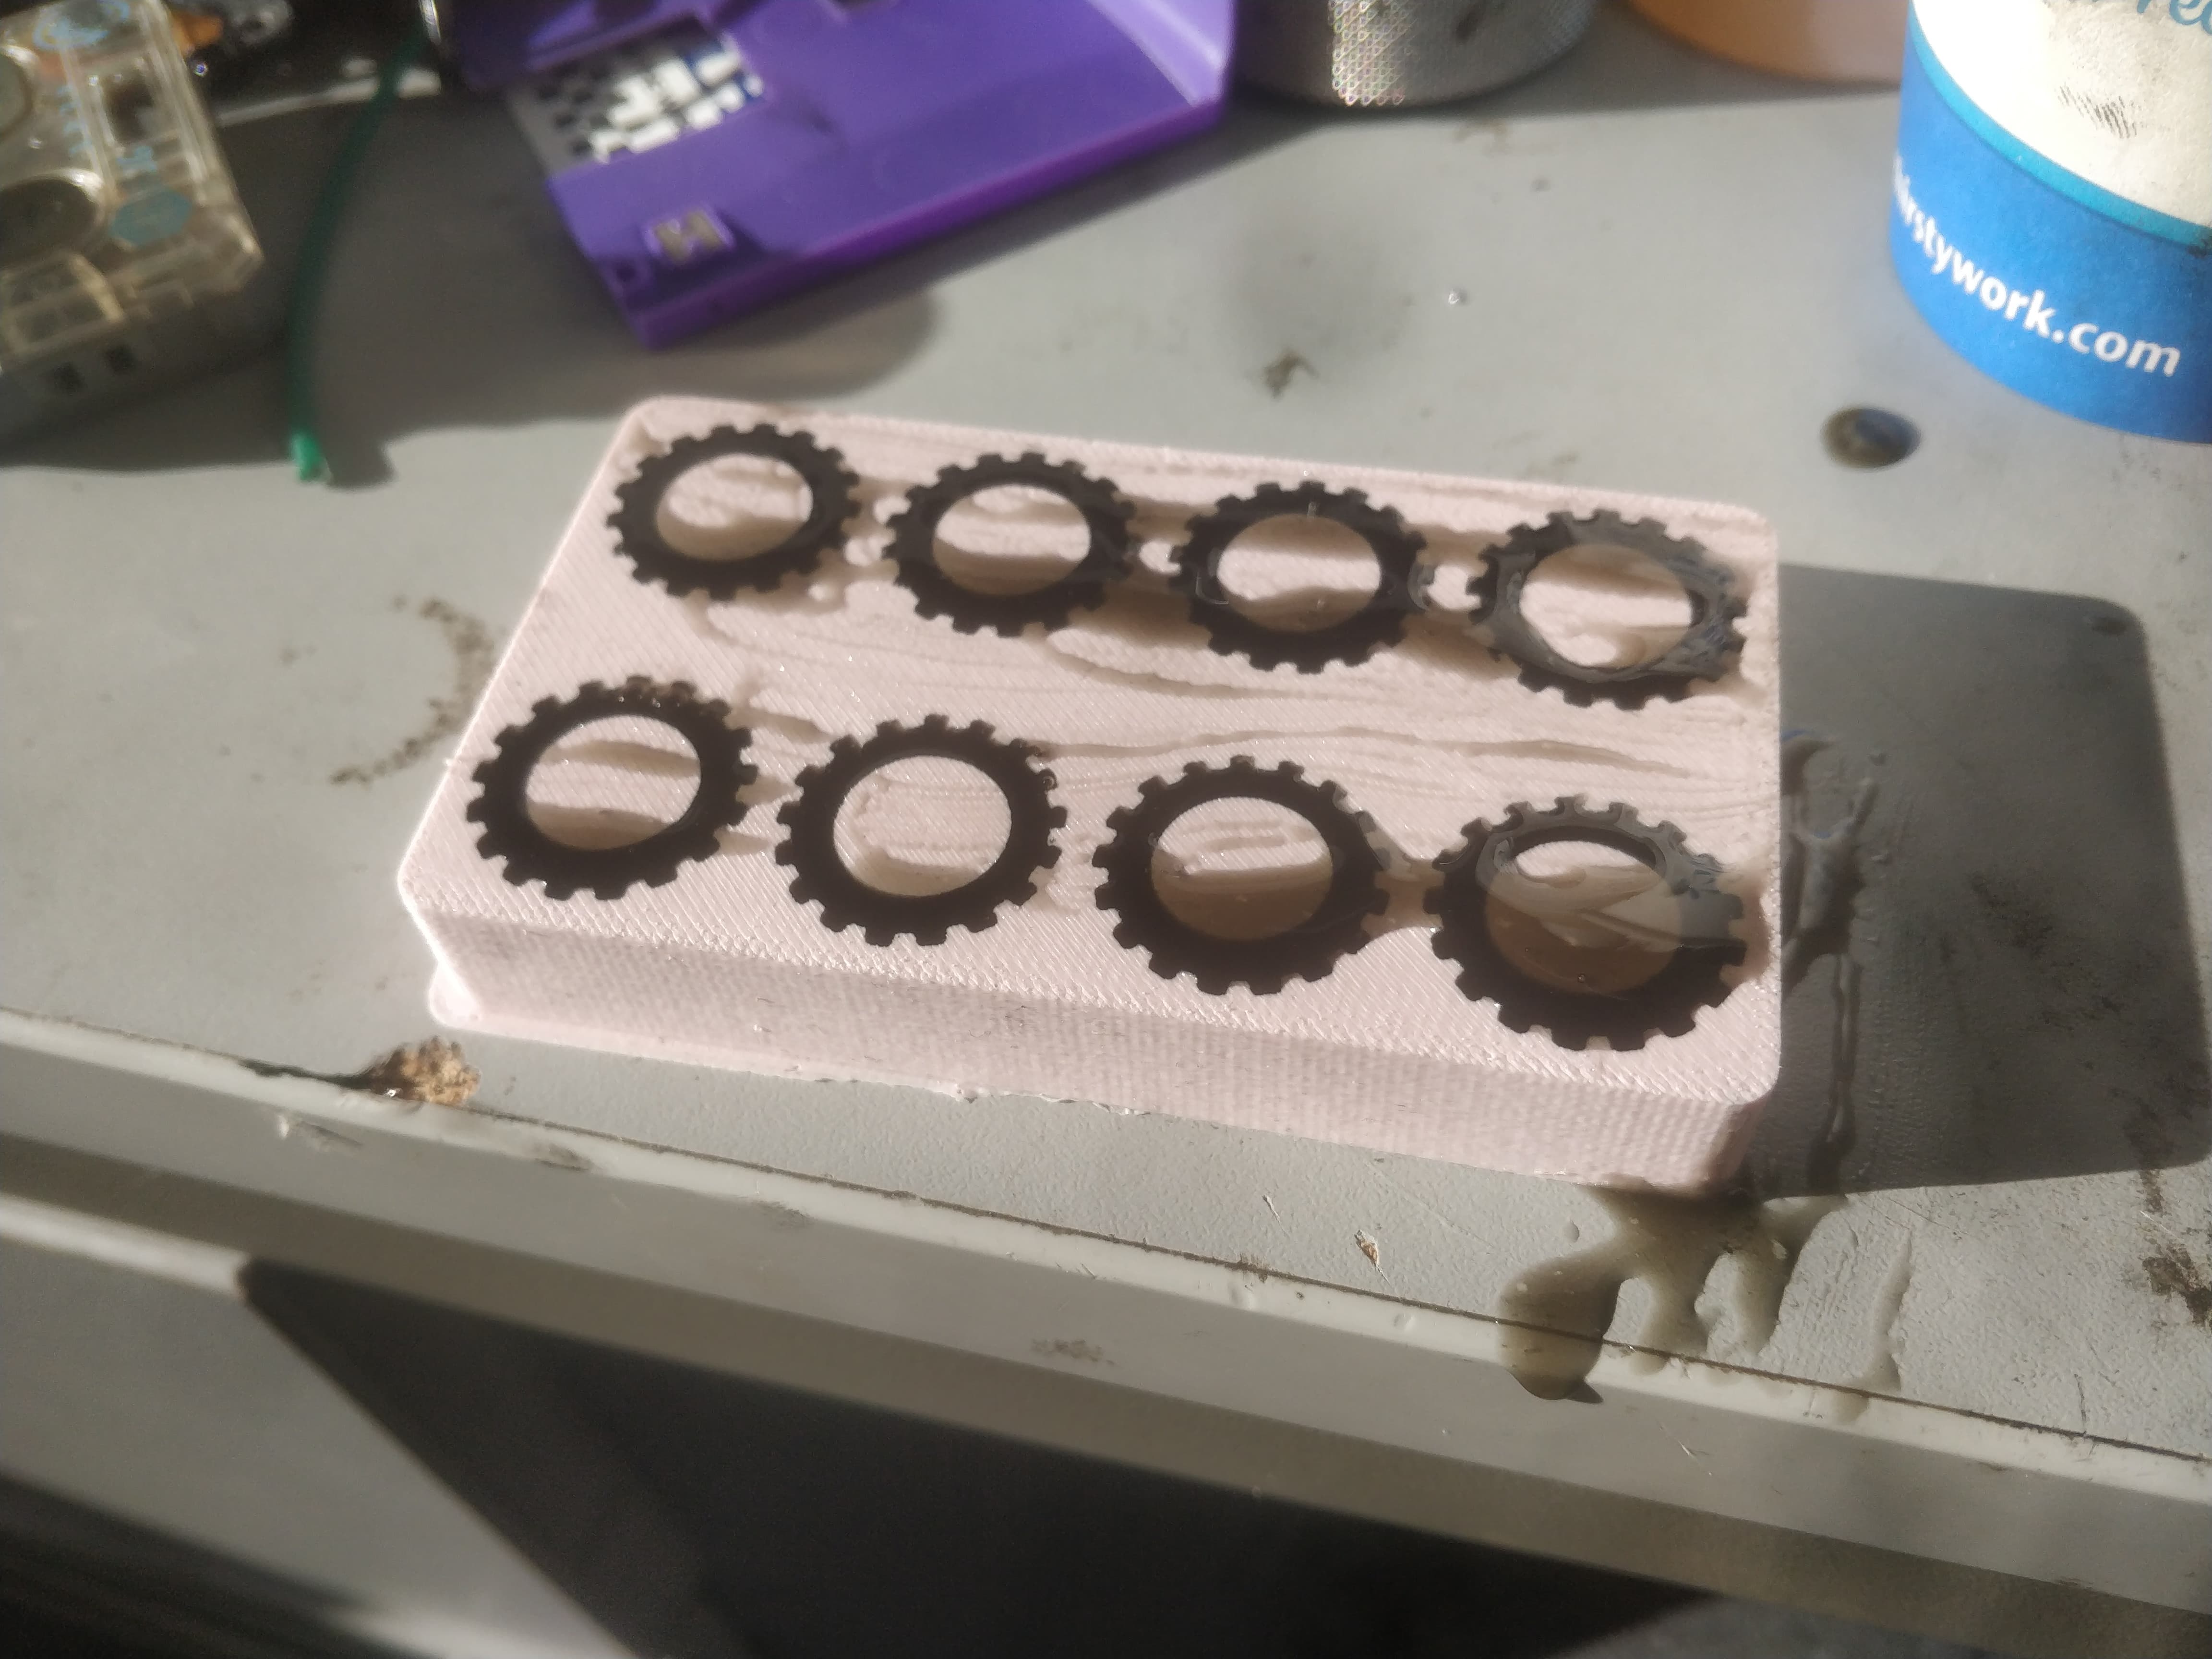
I drew up a tyre mould and hit print. Currently brimming with strawberry milkshake/silicone to make a quick 8in1 mould for polyurethane tyres. I’ll probably go 30a as it’s the softest I have in stock. These just go over a plain hub and will get a dob of glue to retain. Anyone needing 18mm diameter wheels just give me a shout.
Accepted a cool job yesterday which incidentally was my birthday so I was day drinking, saying goodbye to a month of Funemployment and seeing what I could shakedown in solidworks to use up some “nice” parts. Man getting old is boring.
4 legit turnabot N20’s on ranglebox tyres with an elderly Malenki nano, 2x random high reduction N10s and some of the single cells I picked up for a single shiny penny from Joe.
So pokey stick is the main one but I’m also wanting to mount ploughs and forks and wedges in the slots up front. Currently 133g so I have enough to play around with a kid & some waggly attachments. I think I’ll keep the chassis ABS but the rest should be TPU.
So I’ve added a TV under the bonnet and three PS2’s in the passenger footwell. All that’s left is for the airbrushed mural of Xzibit smashing Tim Westwood in the face under a full moon to dry and my ride will be suitably pimped.
Ahem, anyway yes the yazoo mould is set and I’ve brimmed it with polyurethane already. Only slightly over filled but at like 2/3rds cure I can peel the excess away with a fingernail or just like, roll with it man. It’s ants!
The flappy Duck clone is reprinting - few housekeeping changes and 6mm cut out of the width to help it fell a bit more proportional. This also means it needs a narrowed beak but it should still be fine and dandy.
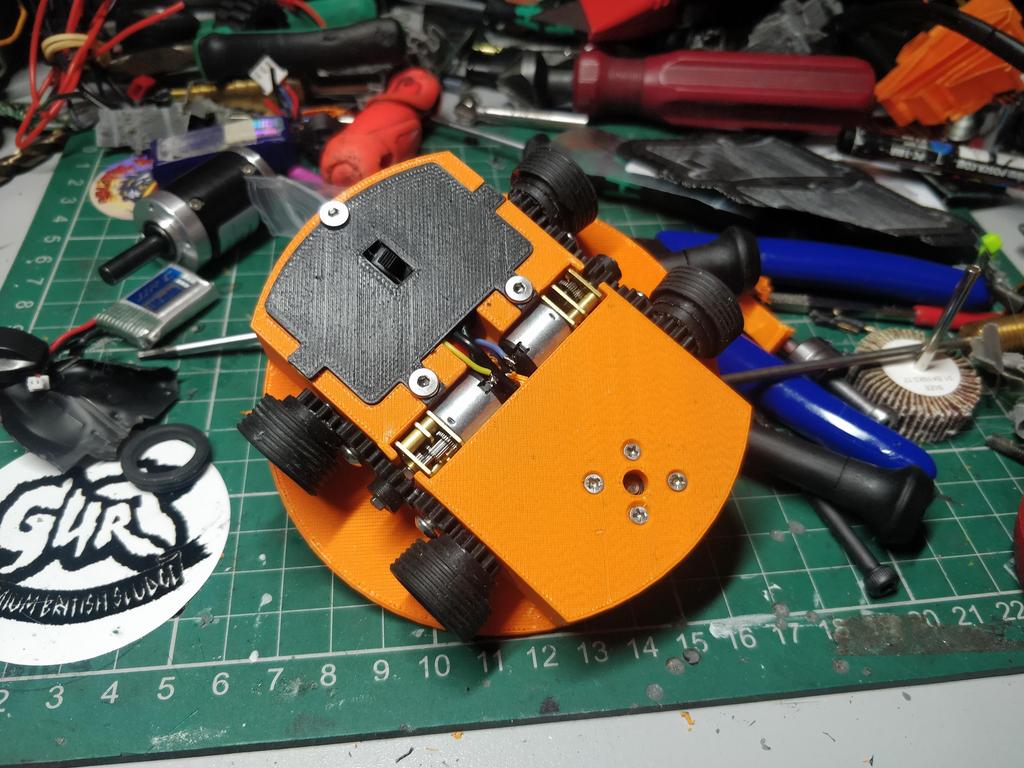
Tweaked and twiddled chassis is done and I’m super happy with clearances and fit. It’s got brass inserts which aren’t entirely awful with enough meltage and up sizing. 4 bizarrely spaced M3 hold the lid on. Surprisingly I’m doing things fairly properly wire wise - look mum, I insulated my switch connections. Now watch me do it with no hands.
Sprinkle in the components and it’s done. I have changed the spacing of the front axle out a little to give any attachments a bit more mounting room so the centre distance of the gears is now out. I’ll need to go up a tooth but I’m the grand scheme of things, it ain’t no thang. Drives pretty nicely and has more pep than I’m used to with the 800rpm motors but it’s not uncontrollable. Will have to get some colour on it and think of a theme/name.
New shoes are pretty good for a quick ‘n’ dirty cast. Bit more pigment and some more wobbling and poking to get the air bubbles out but they’re serviceable. Better than the foams anyway. I might get some pink and blue to make the final wheels so it can thematically match the Pretty Hate Machine cover art. Only annoying thing is I thought to direction the moulds so there is a LH and RH tread pattern which will annoy me when I inevitably put one on the wrong way round.
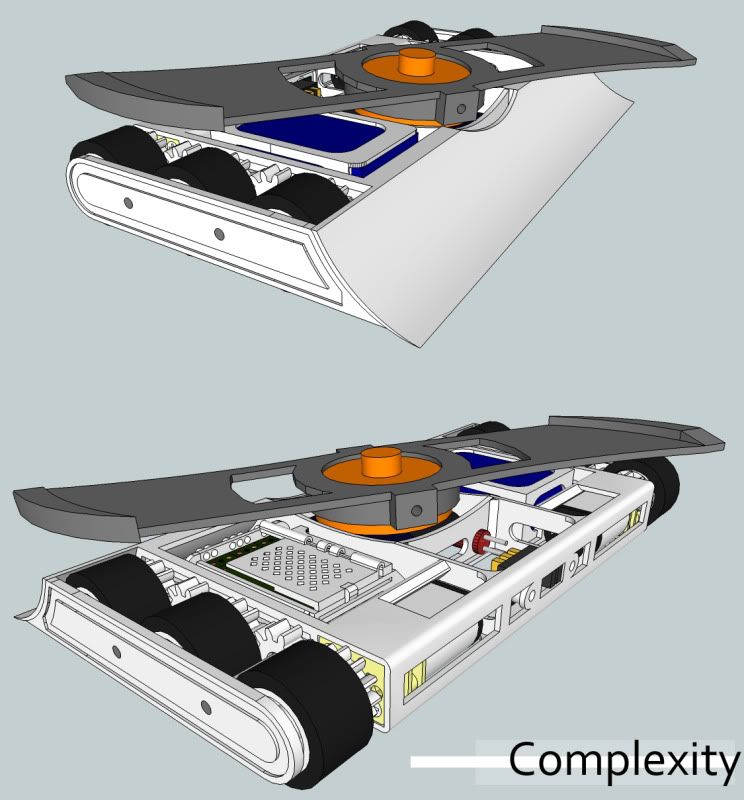
One of my favourite robots like ever ever was Josh Valman’s complexity from back in the day when Shapeways and Hobbyking ruled the waves and ESC’s didn’t cost the same as a meal deal (with clubcard)
Mad respect to that being drawn in SketchUp too. It sure was a different time.
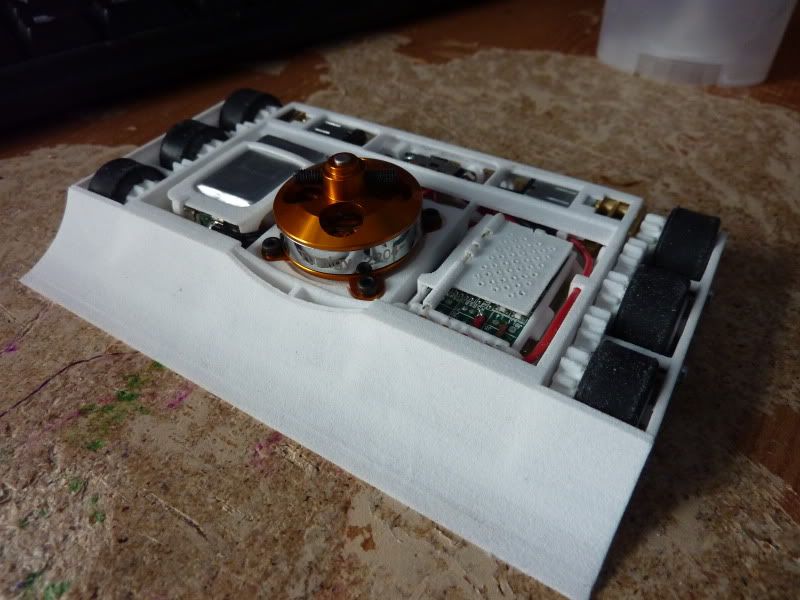
Anyway yes I have scraped out the parts bins and thrown them into Inventor and this is the outcome. I always like 6wd, plus an overhead spinner is a bit of a white whale for me. Morgan had some bars and discs for sale for almost no money at all so I took that as a sign and ran with it.
It’s a 130mm diameter hardox bar just slung off a 1400kv 1806. Only rubbing two 300mah cells (ex Joe) but with that diameter I’ll take the slower speed for less chance of Sudden Unintentional Physics. It has a 25mm thin section ball bearing built into the frame to stiffen the weapon assembly when it hits things and to take as much load off the motor can as possible. 65mm is a bit of a lever arm at this scale.
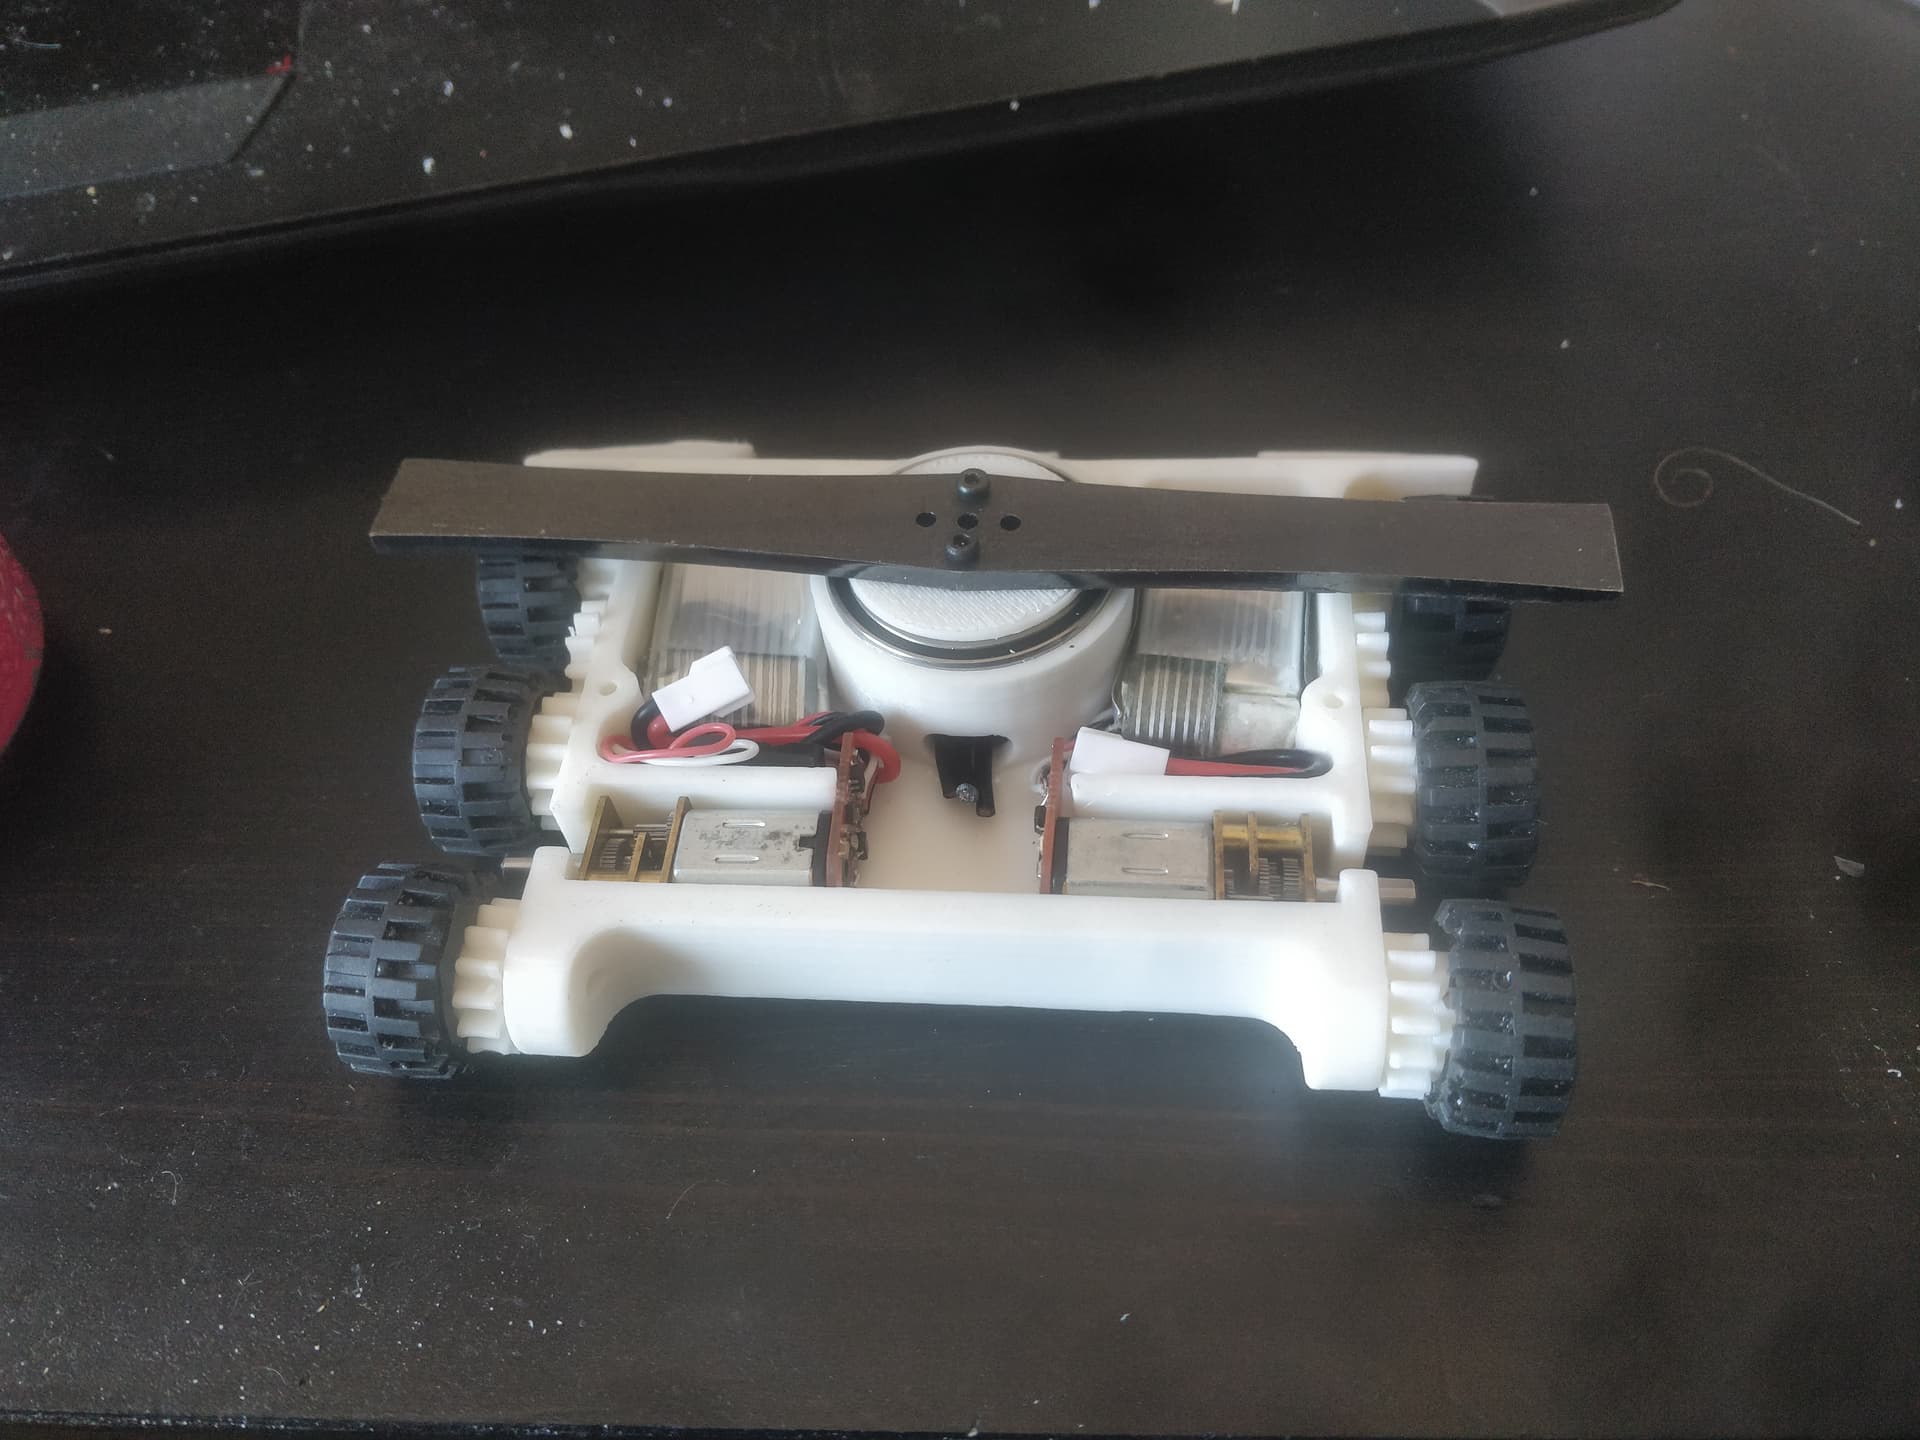
Finally using some of the red escs (also 2021 vintage) that were the first things I ever bought from BBB which are mounted up to some of the £1 5v N20’s I bought like 30 off 5 years ago and have been abusing since. A lil 4ch flysky Rx and a suitably cute brushless esc will sit between them up the back.
The wheels are custom cast polyurethane versions of Lego tyres. They’re incredibly soft and pliant compared to the stock Danish Plastic Brick Merchants.
I have a lot of improvements to make off this v1 frame just tightening up tolerances, cutting a little space and weight out of some of the meat of the ABS block. As and when!