I’m excited to be returning to the world of robotics after a few years away. I’m in the process of building my new robot, “Hydrant 2,” and I could really use some guidance.
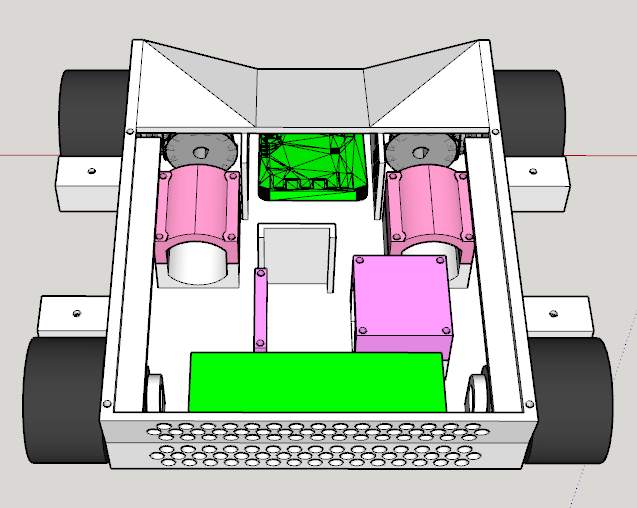
The design includes three micro geared motors: two for driving and one dedicated to the weapon (continuous rotation). Space is limited, so I’m looking for compact components.
Specifically, I need:
The smallest possible 7.4V LiPo battery that fits within tight space constraints
The best speed controller setup, ideally a pre-mixed type that can connect directly to the receiver for simplicity
Maximum power delivery to the weapon motor, of course.
If anyone has recommendations or sources for these components, I’d greatly appreciate your help. Thanks in advance!
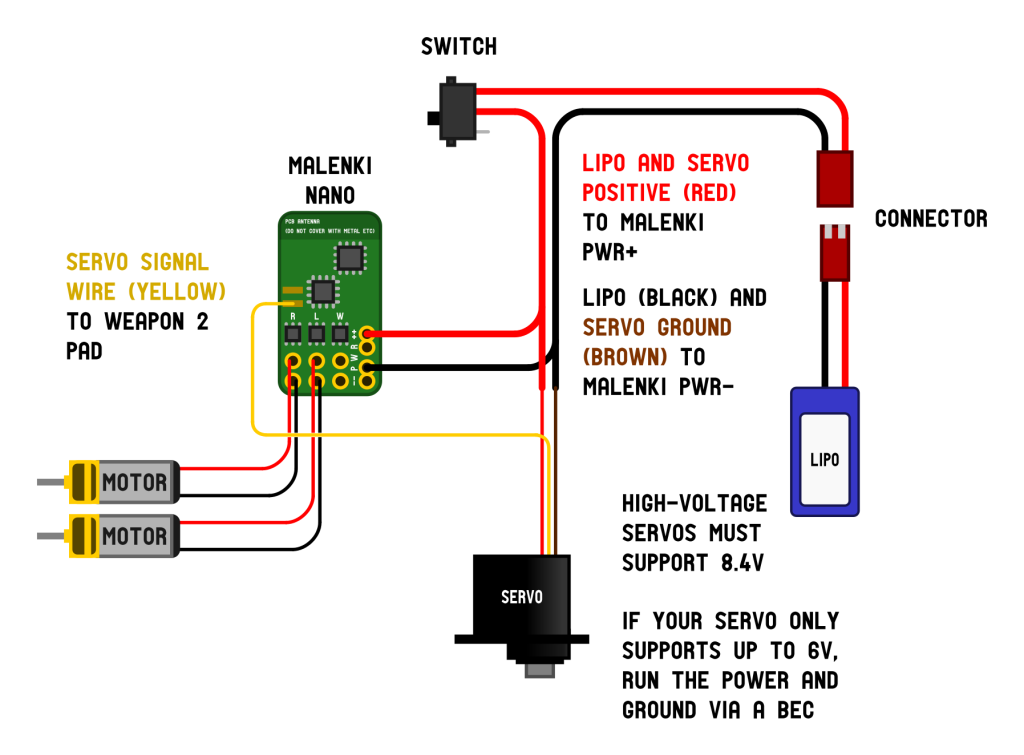
For the speed controller, I would say you need a Malenki Nano, obtainable from right here at BBB, since it is a pre mixed esc with an integrated receiver, with an extra brushed esc channel for your weapon. It only works with flysky (AFHDS2) radios though.
Echoing @McMullet Honestly with a need to control 3x motors and be small the Malenki nano is genuinely the best option. Cost effective too! Only downside is a compatible transmitter - gone are the days when the spektrum DX5e ruled the waves.
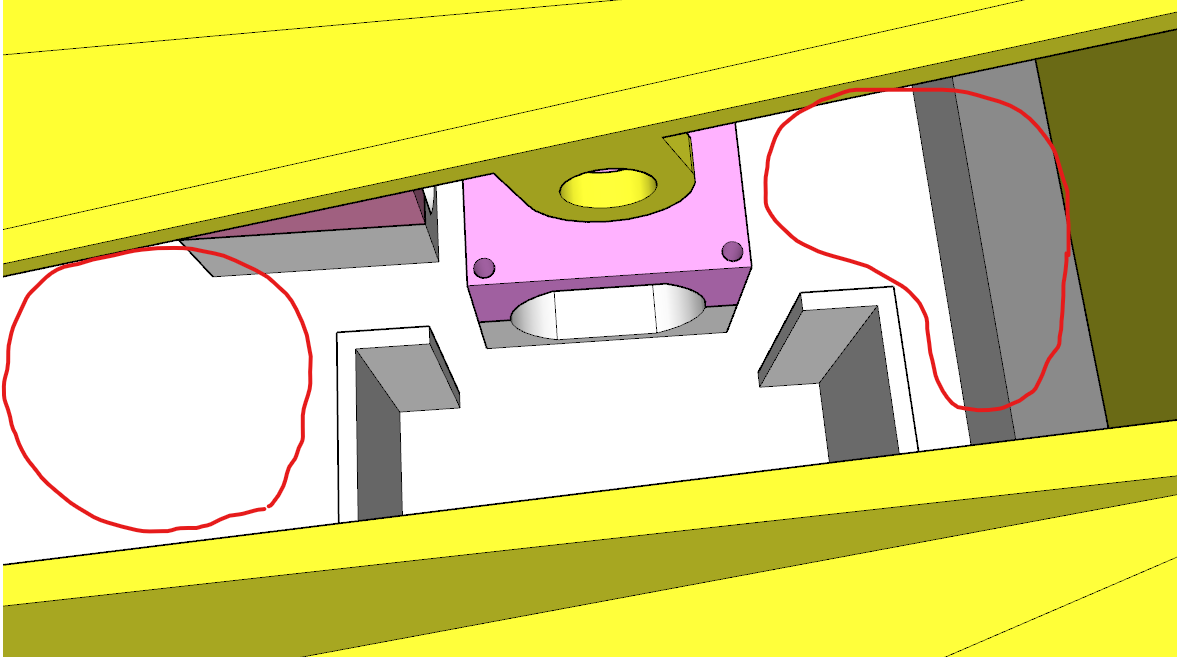
I’ve got two spaces in my chassis for electronics (shown in red, 16mm deep left, 35mm deep right). Assuming I use a “Malenki Nano” and a small LiPo battery. Do you have any guidance as to how I should design the chassis to fit the electronics?
Also, can you recommend any other parts for a standard electronics setup e.g. power switch/link?
I always tend to just make sure there is a set space for things to go then gently wedge them, normally just retained by the lid and such. Cable ties is completely valid.
Probably worth just roughly modeling the malenki or downloading the CAD files on the webstore so you can make a plan
As a fan of obnoxiously small robots I like to take little pockets out of the body to hold the electronics and route the wires. Most components exist somewhere on the internet as a STEP file, and if they don’t they can usually be approximated as a rectangle. I drop them in space inside the body, figure out how they’ll be connected together (ideally so the whole loom slides out of the robot in one go, not always possible…), and then make all the cutouts required. Sometimes takes a few goes to get the clearances and angles right, but it doesn’t mean a part is scrap - if I can I just warm it up with a heat gun and poke at it with a spudger till the wires fit.
The upside is that you know everything will always fit, and that you’re way less likely to have a wiring fault if the wiring is constrained. For me, it also means I can make my robots far too small - I’m aiming to have basically no plastic left inside the robot when I’m done with this process, just enough to hold everything in place. The downside is that it means having to plan all your wiring in advance. For me it also means any repair job requires a bunch of soldering*, but you can leave more space than I do and use it for things like extra wire and pluggable connectors.
*I actually don’t mind the soldering, and will solder pretty much anything you put in front of me at an event, especially if a slack handful of loose haribo appears at the same time.
Yes, looks like it to me! BTW, are those bevel gears on the motors? I’ve been using them for a while on my ants, big fan of what it does for packaging.
If you have space to set them a bit slack and use shims to space them out, then that can help figure out your clearances on the first couple of prototypes! I’m curious how the lego ones work out, I’ve been 3D printing mod1.5 gears and they’ve held up well but they are quite bulky.
Shapeways will do it £55 pounds, but that includes 1 part made of brass at £17, so in terms of stuff I could expect to print within the community, £38.