Introduction
At the end of 2022, Myself and a few other roboteers entertained the idea of visiting Norwalk Havoc in the following year. Roll around to February 2023, and with flights and hotels booked, there was a distinct feeling I was forgetting something. I certainly wouldn’t get far without a robot to bring!
How I imagined I looked showing up to most these events sleep deprived and Jetlagged
Design
I had initially thought of creating a control bot to take over to the USA, but with my last control bot Bento not doing so well at the 2022 BBB Beetle Champs, I wanted to focus on something that could help me deal some damage, especially in the KE fests of the Norwalk cages. So I settled on an Undercutter weapon, hoping to improve on what I had learnt from my previous one, Pain per View.
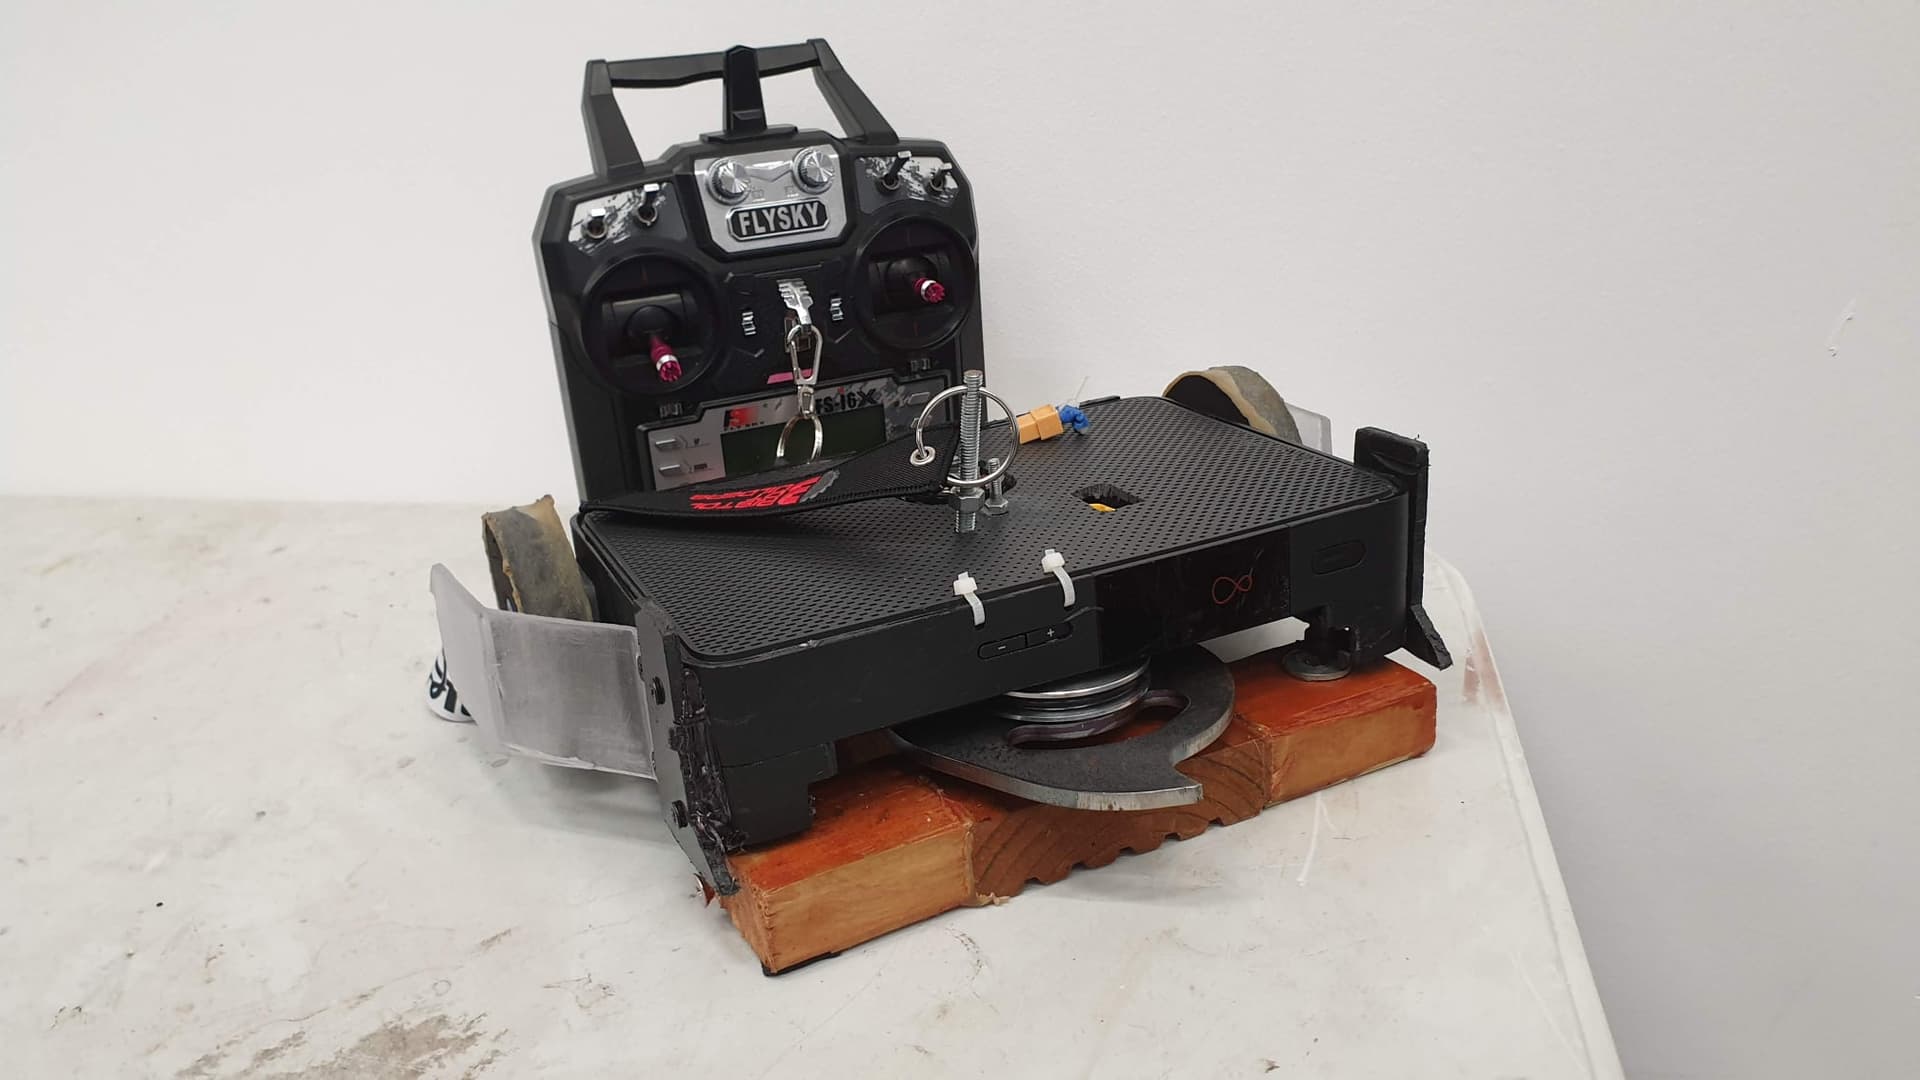
Pain Per View, my first spinner, and ex Virgin Media Tivo box (Build Log Retrospective coming one day)
From the start of the design process, I was keen on the idea of creating a clamshell billet chassis, very much inspired by the wonderful Night Fury from Sam Griffin. The aim was to keep everything contained within the 2 chassis pieces held together with hardware, creating a solid body. I naturally gravitated towards the Pizza Slice shape in my initial cadding, and so decided that would be the theming going forward (very important).
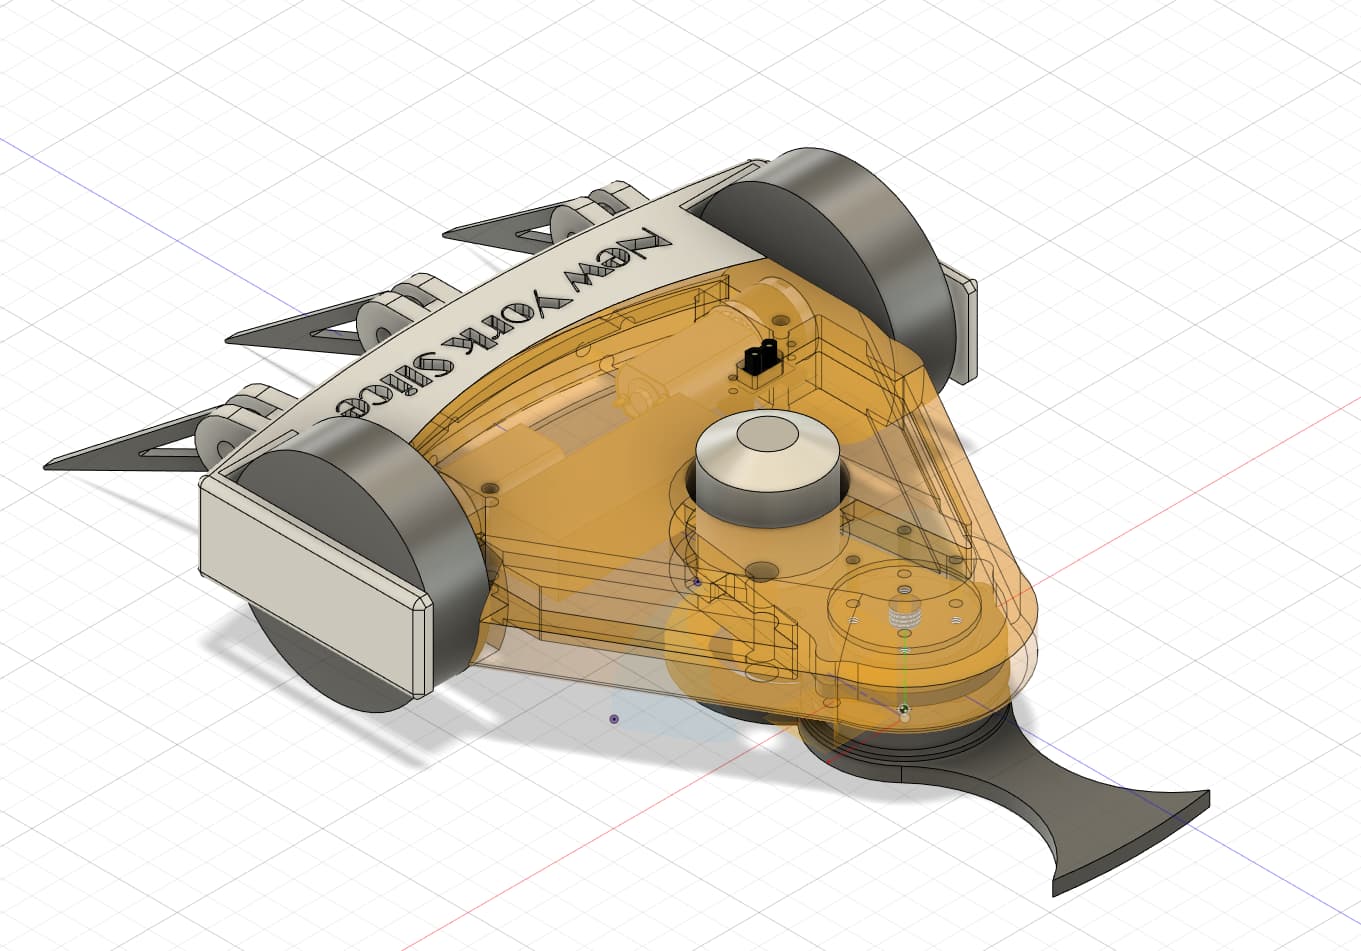
Small, but lots of flavour
The main cavity would house the drive, ESCs and Battery, while the front cavity kept the outrunner separated from the rest of the components. The outrunner would be mounted on a hardox plate which would also have the weapon shaft/mounting hub attached, to keep the spinner setup nice and rigid.
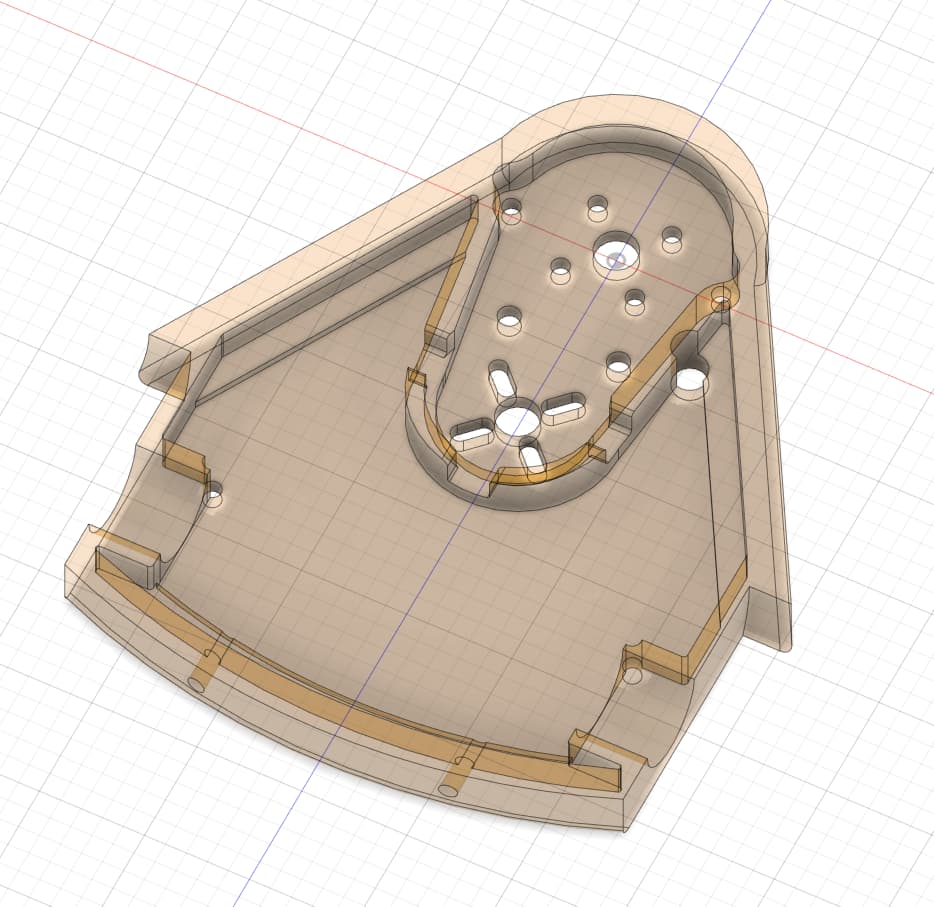
Base of the clamshell. The Weapon plate keys into the front section, all the gubs in the rear.
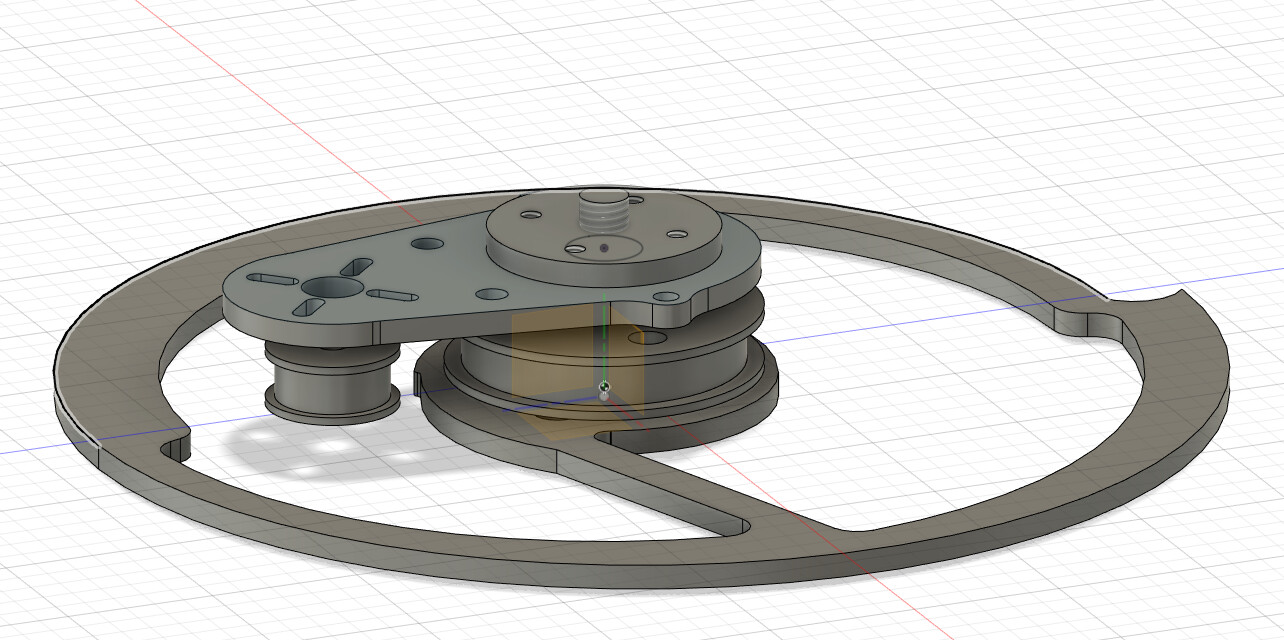
Weapon Plate Assembly
One of the main things I wanted to do was move away from O-Ring belts to Toothed ones, so I opted to go with GT2 belts, as they were a nice cheap option for pulleys and belts online.
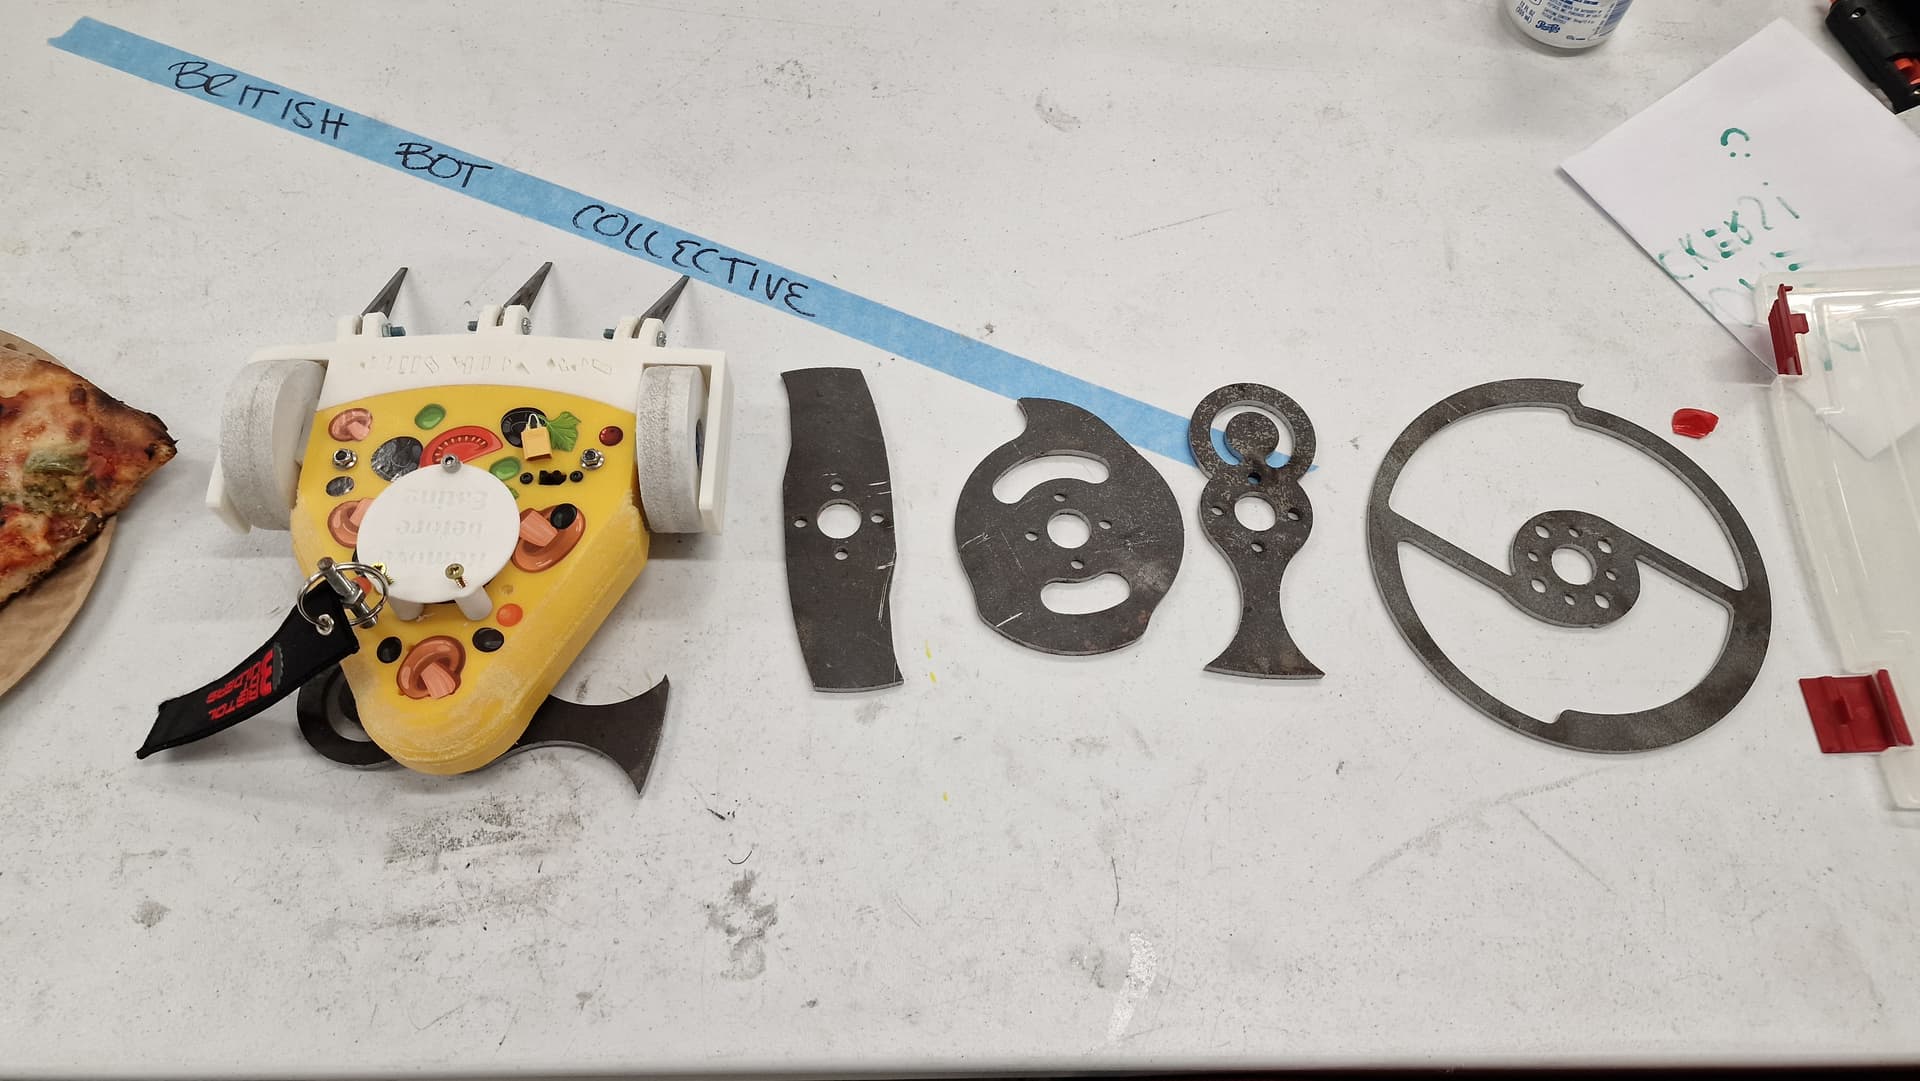
Weapon wise, I wanted to use the 2 blade designs that Felix had designed for me for Pain per View, but also add 2 new designs of my own. The Pizza cutter blade is a light Asymmetrical design with a very aggressive rake, the aim of this was to try to grab and rip TPU where possible with maximum engagement. The Chaos disc was something I designed the night before the metal order was sent off and was done as a bit of a joke to see how big of a blade I could practically get on the robot.
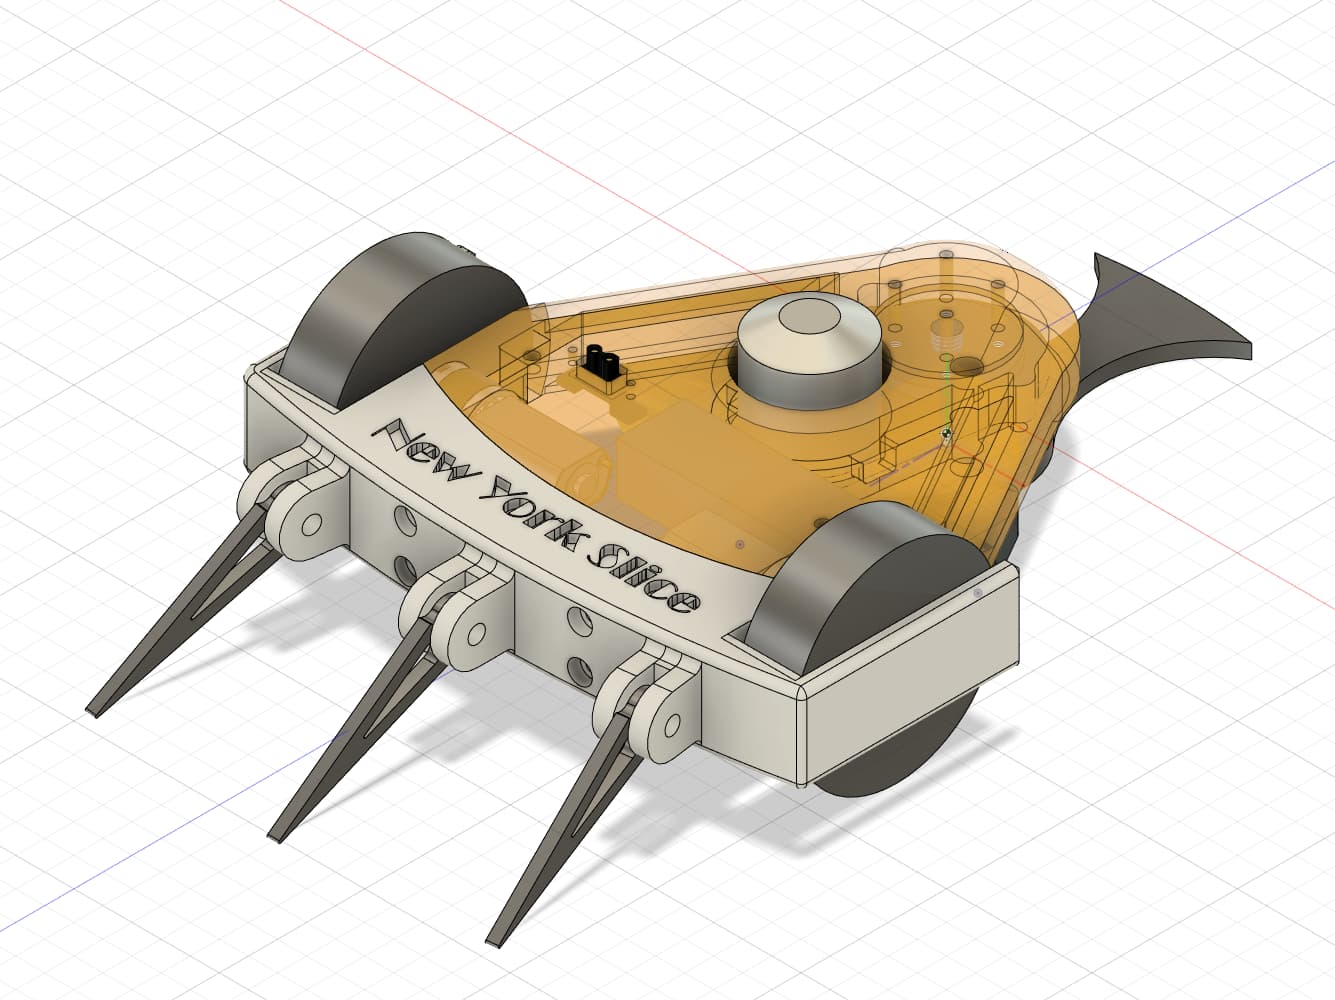
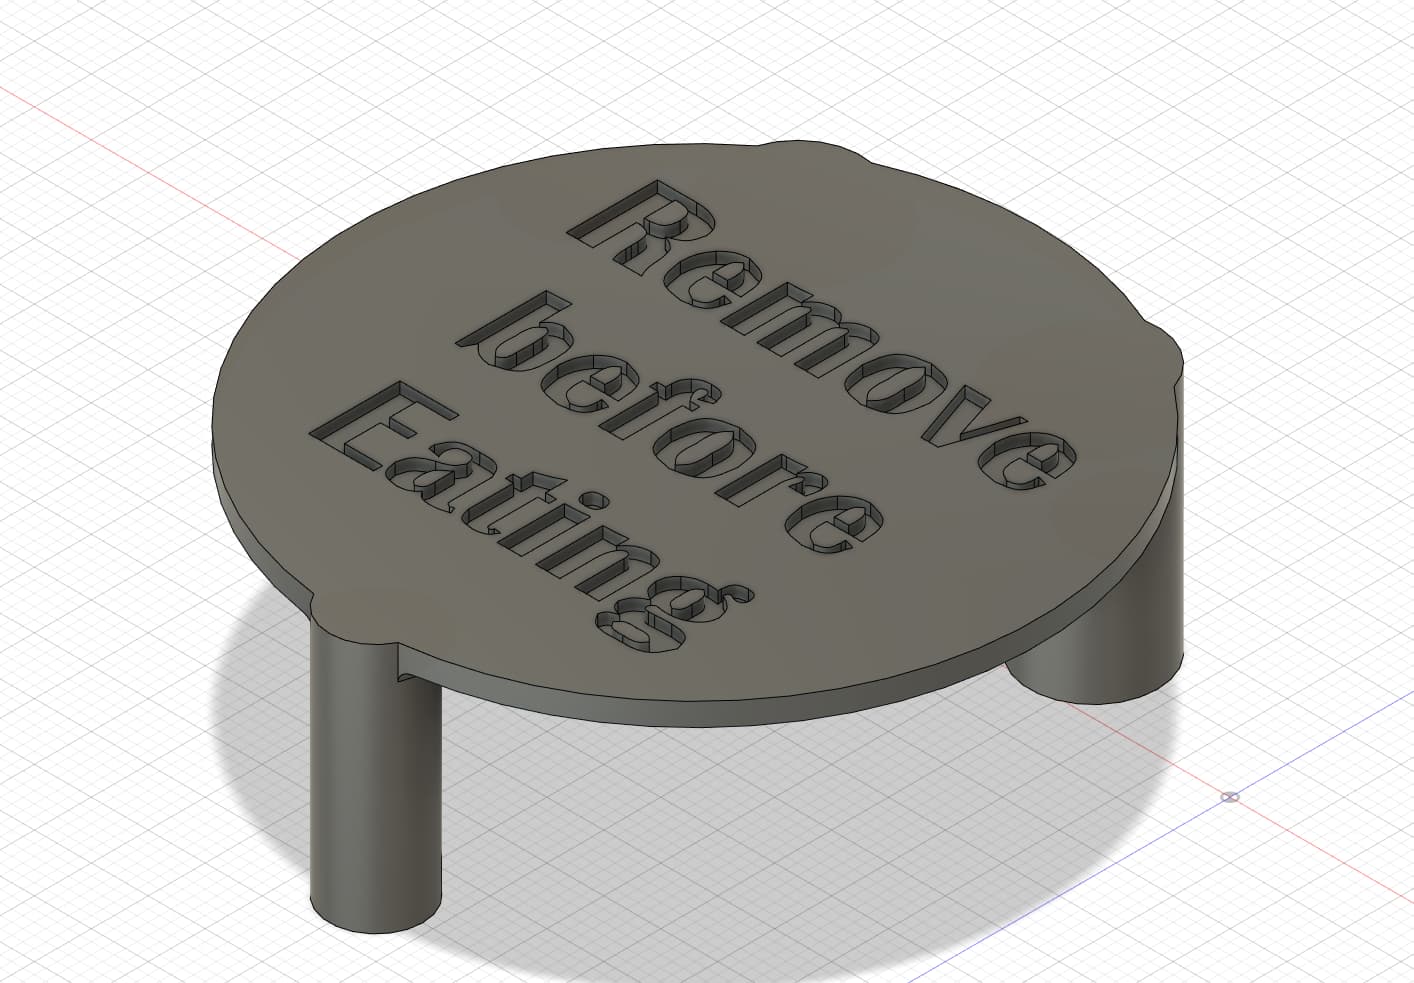
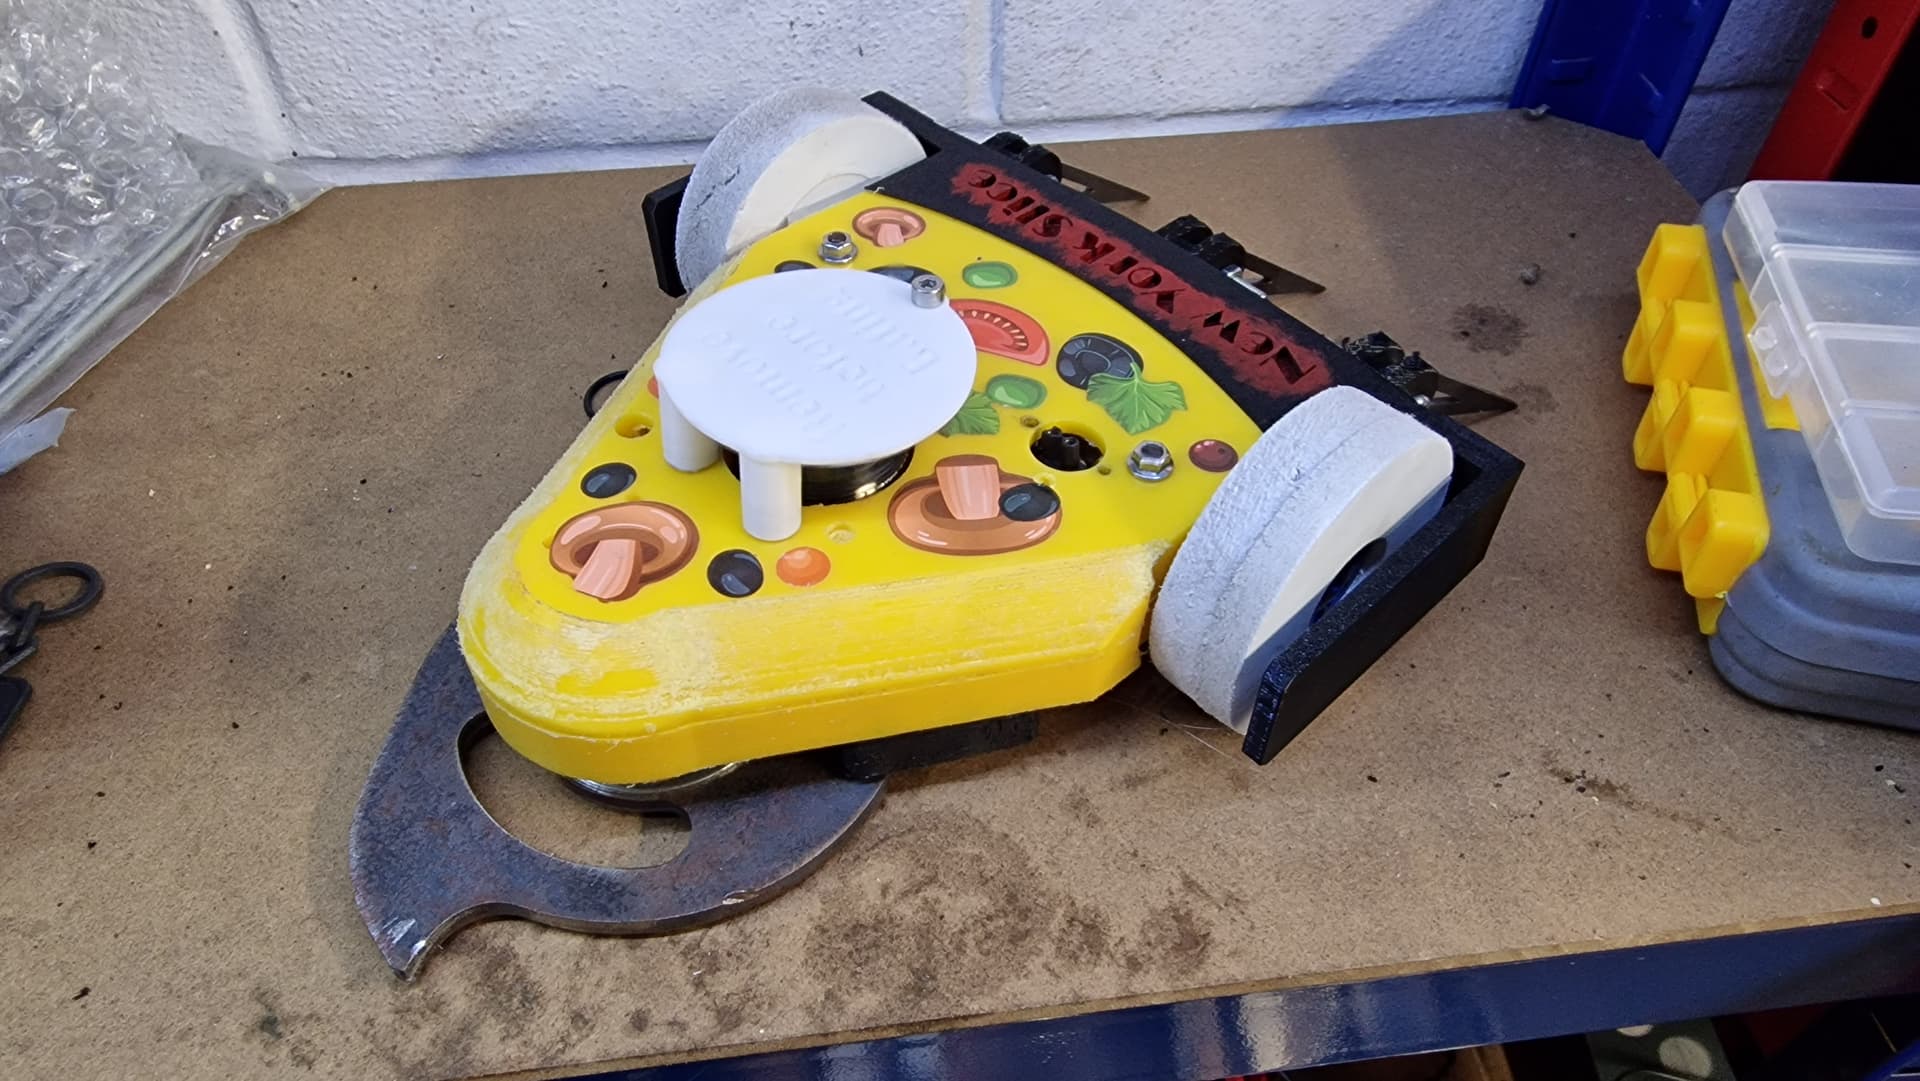
At the rear of the bot, a separate armour piece was added not only to help protect the rear, but also to add some extra clamping strength to the 2 halves of the clamshell. I then added some fork mounts on this piece for aesthetic purposes. Also for aesthetic purposes, a little pizza table cover for the brushless outrunner on top of the bot, as we all know, theming is important.
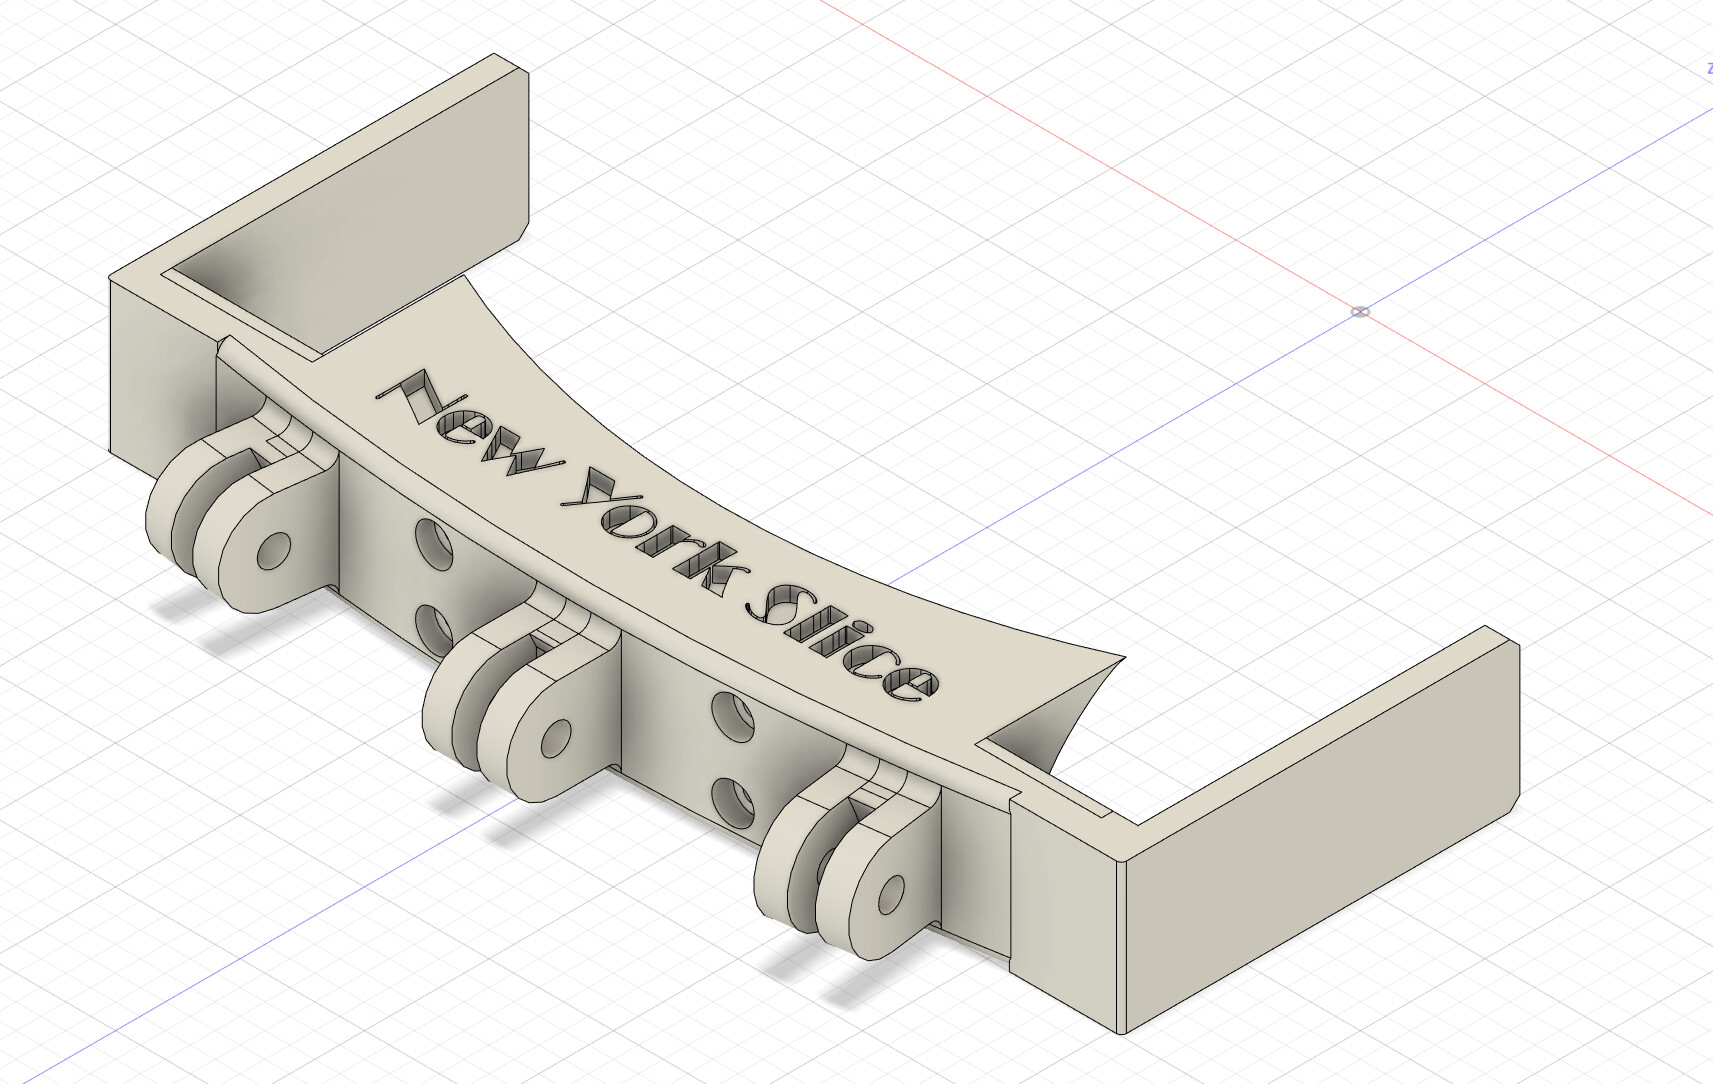
A Butt for the robot, a robutt, if you will
Useful Advice
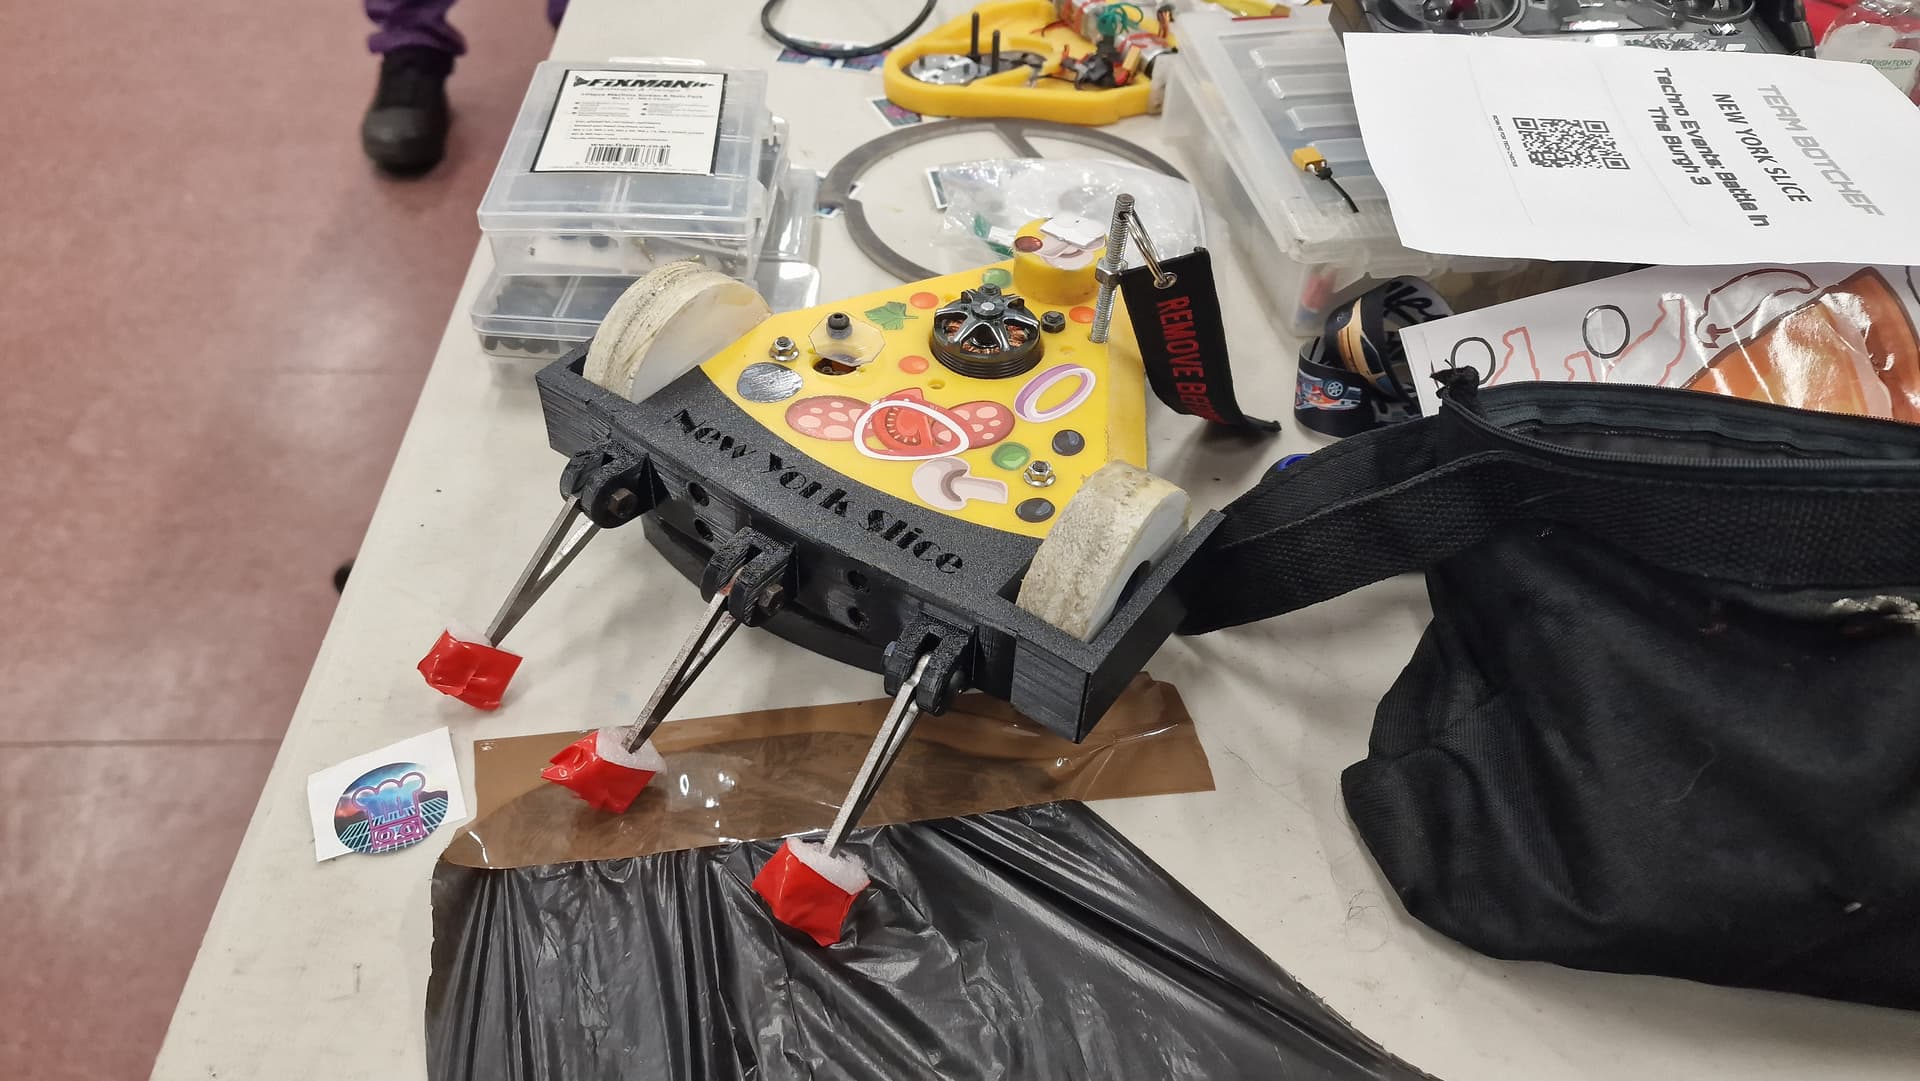
When it came to the components, I was looking to go big on weapon motor power so opted for a selection of 3536 brushless outrunners at different KVs for choices sake. I wanted to stick with established drive components for simplicity so opted for the BBB Drive Kits, a nice easy solution with a proven track record (not sponsored).
In 5 years of building combat robots, this was the first one which I have to mostly cad fully, not only for the billet but also for sizing and weight guessing.
Build
From the very start, I knew I would need to try and find a source to CNC machine the clamshell billet. I reached out to some local machinists to no avail, and the quotes I received from some of the online machining services were in excess of £300 for 2 bodies. That will show me for designing a billet with curved 3d profiles and operations on 2 sides. In the end, I did what any reasonable person would do in this situation, and I purchased a desktop CNC, the 3018 Prover from Genmitsu.

Clearly the correct financial choice
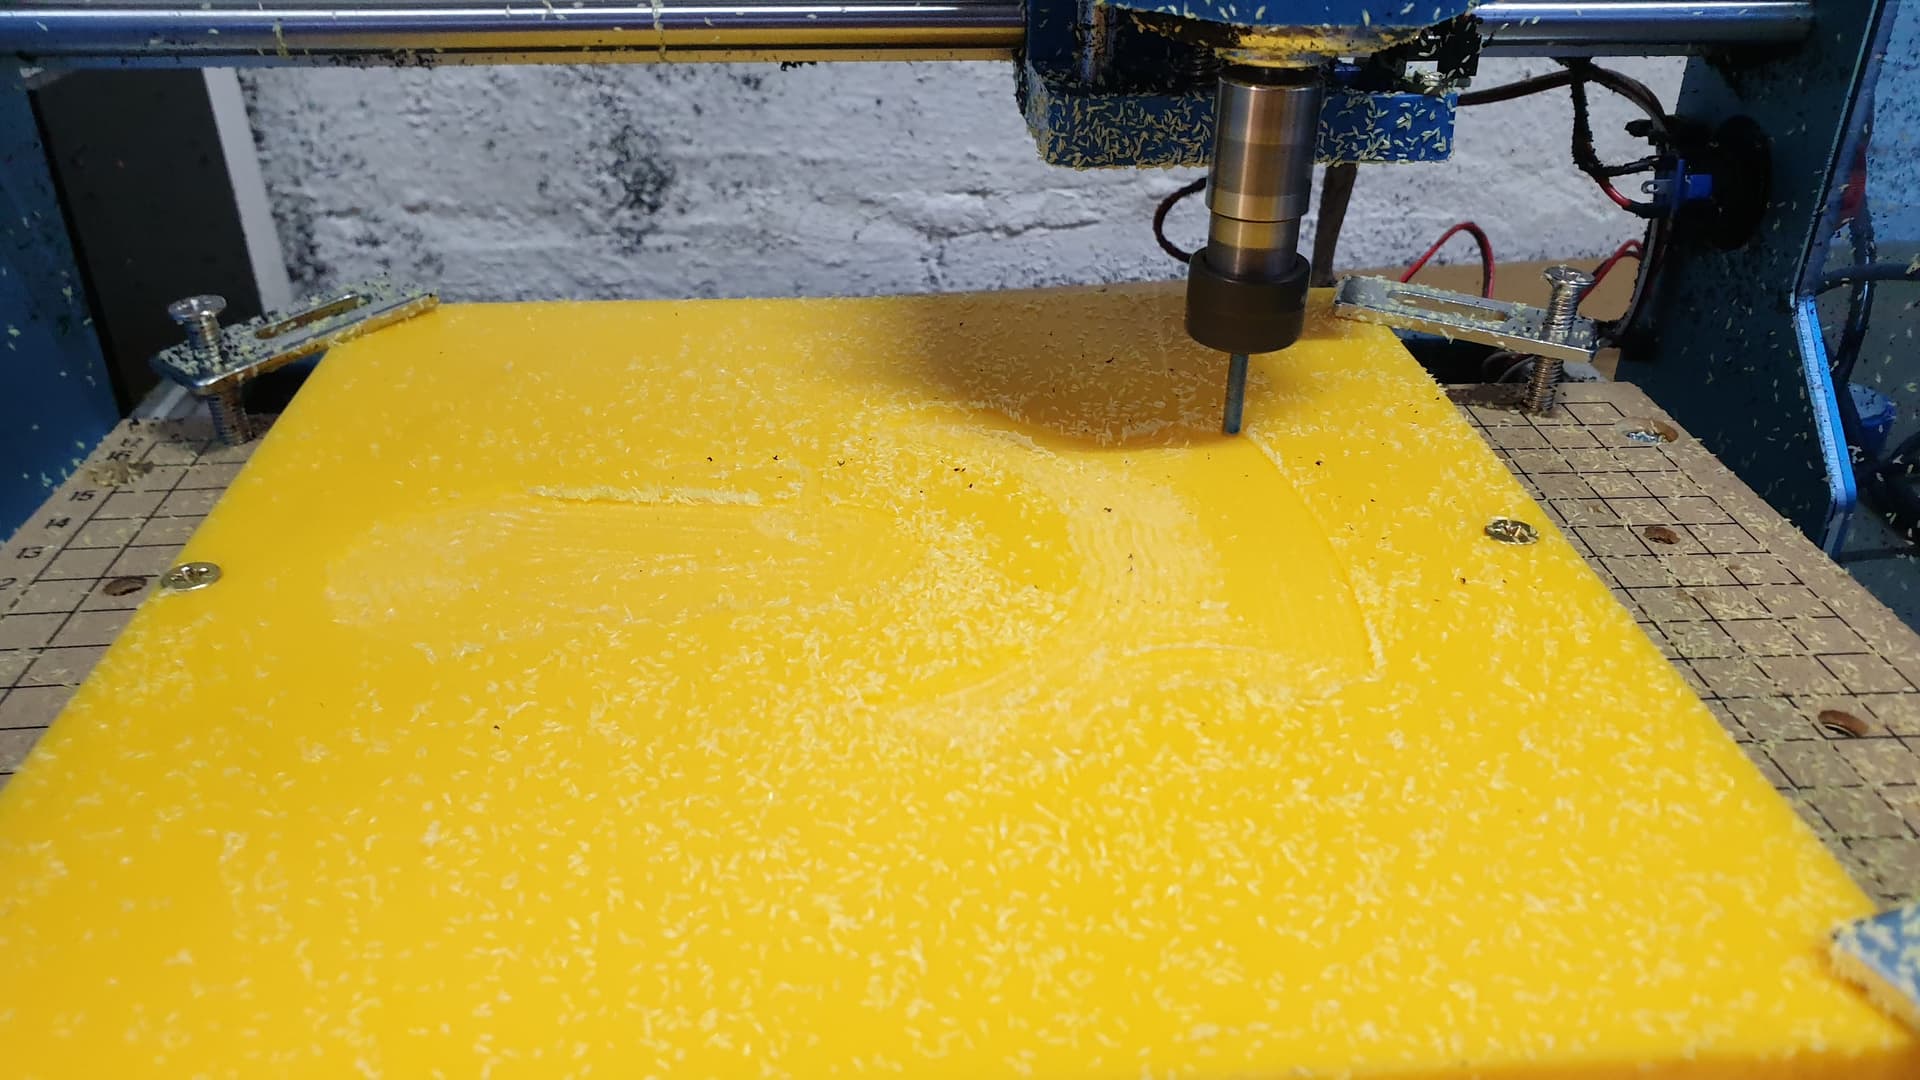
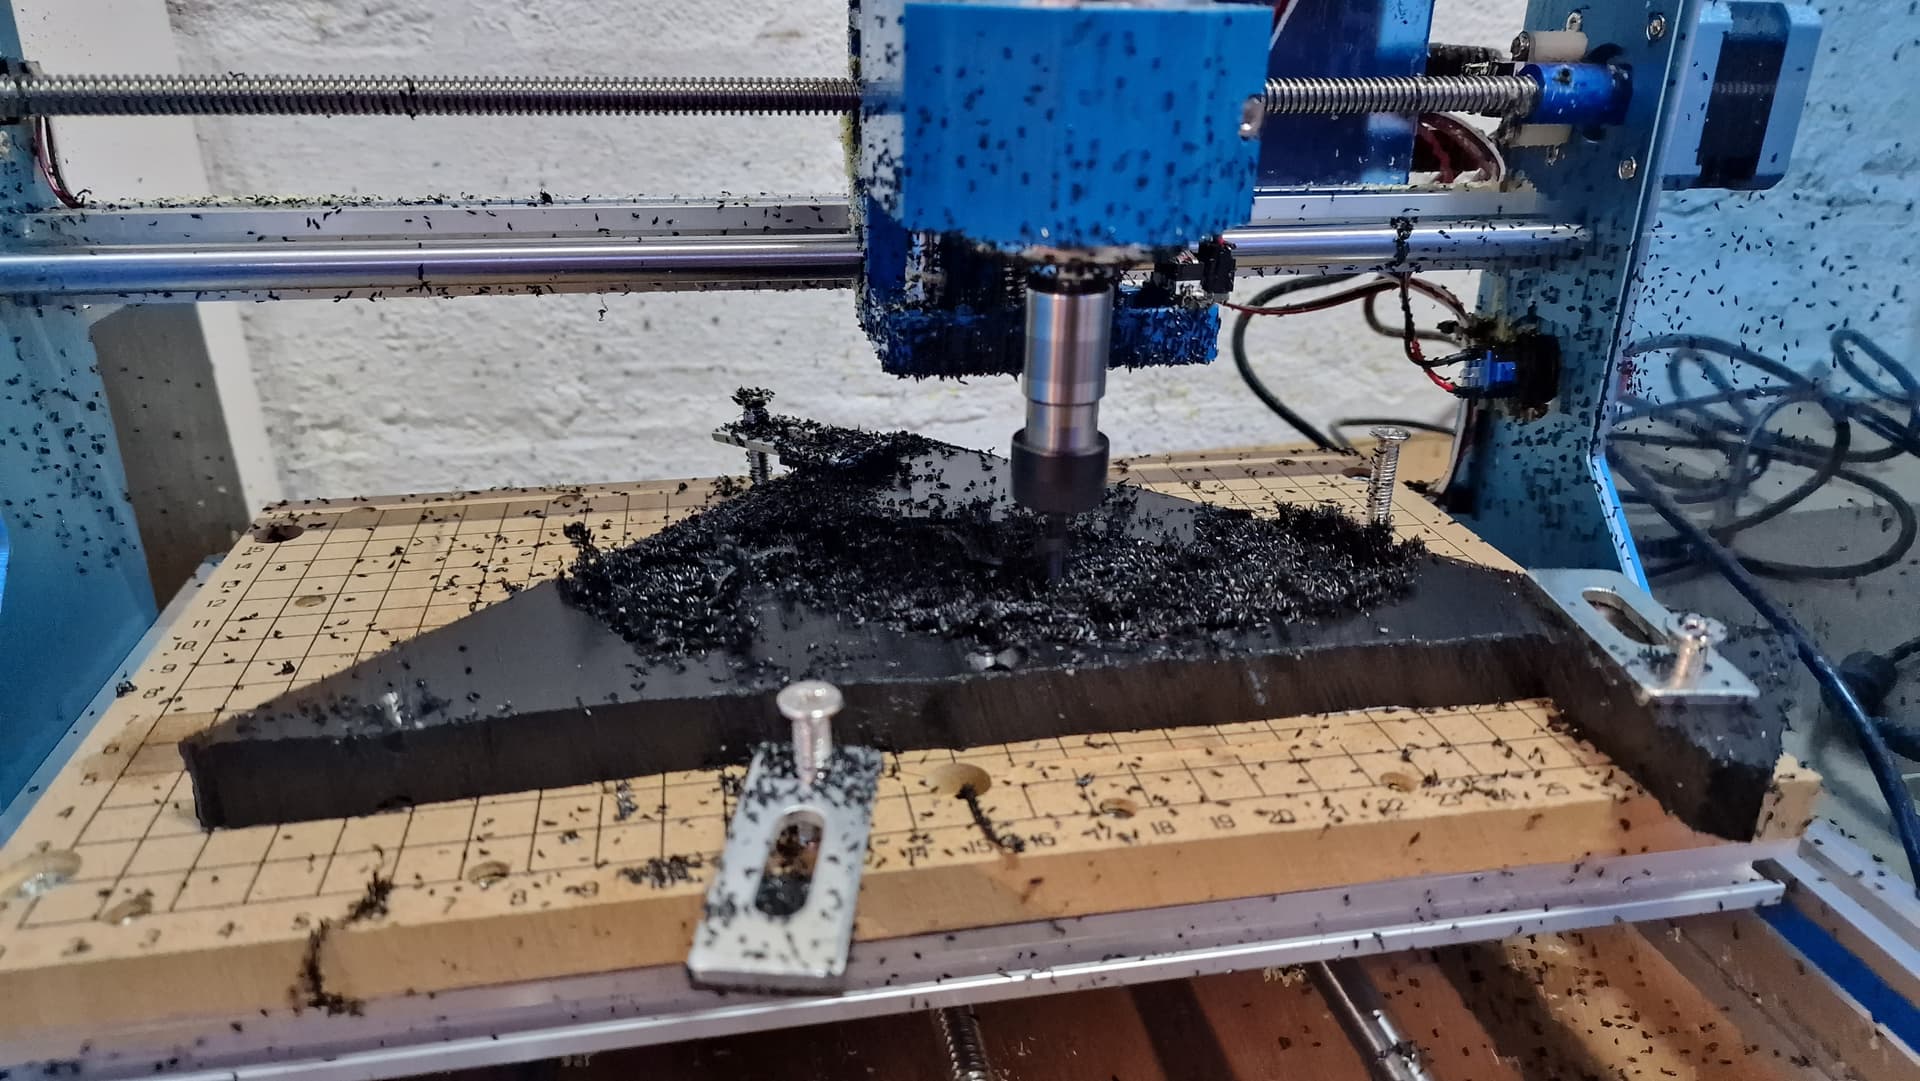
After a crash course in CNC machining on youtube, various forums and advice from pals, I resurrected my 13 year old laptop, installed Lubuntu and UGS, and ran my first test cut on some scrap black HDPE I had. Remarkably it did come out ok, if with a lot of swarf and burr. It was time to move onto the yellow 15mm HDPE.
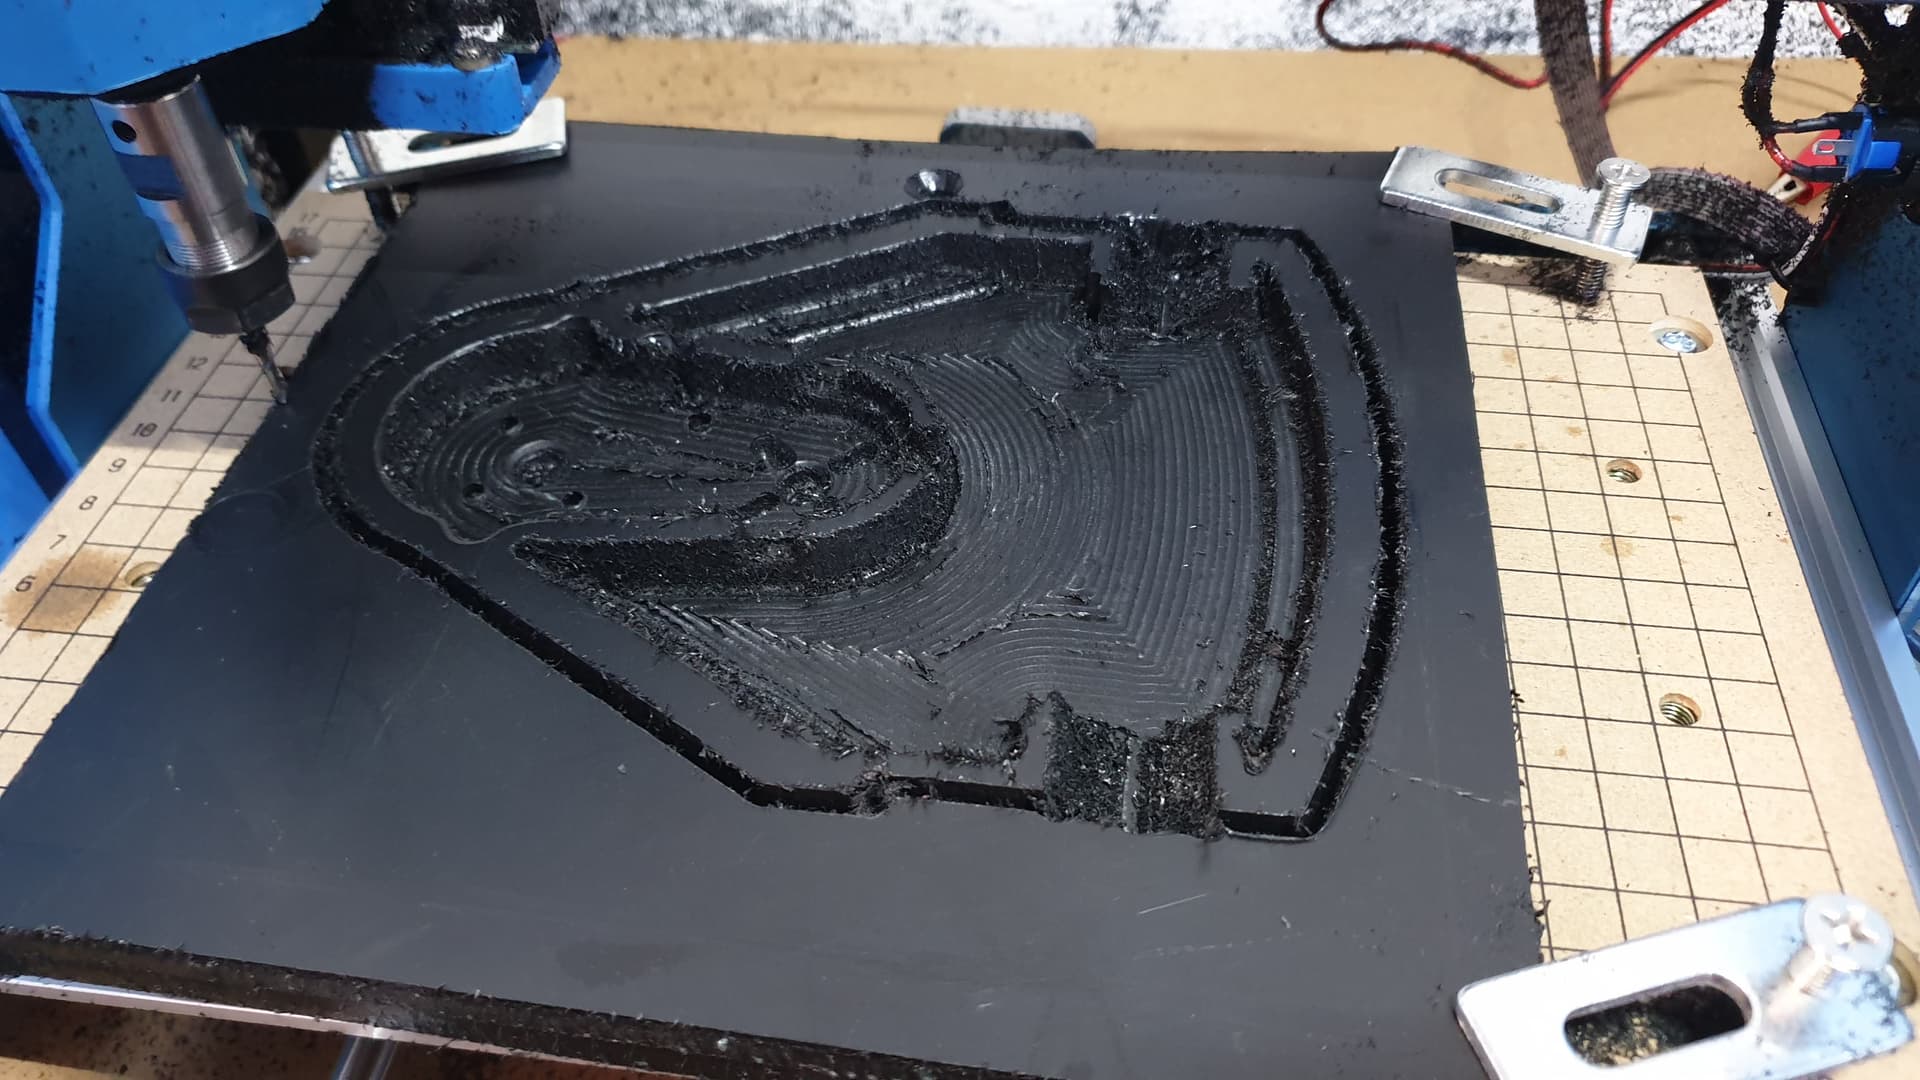
Not too bad for a complete newbie to CNC #humblebrag
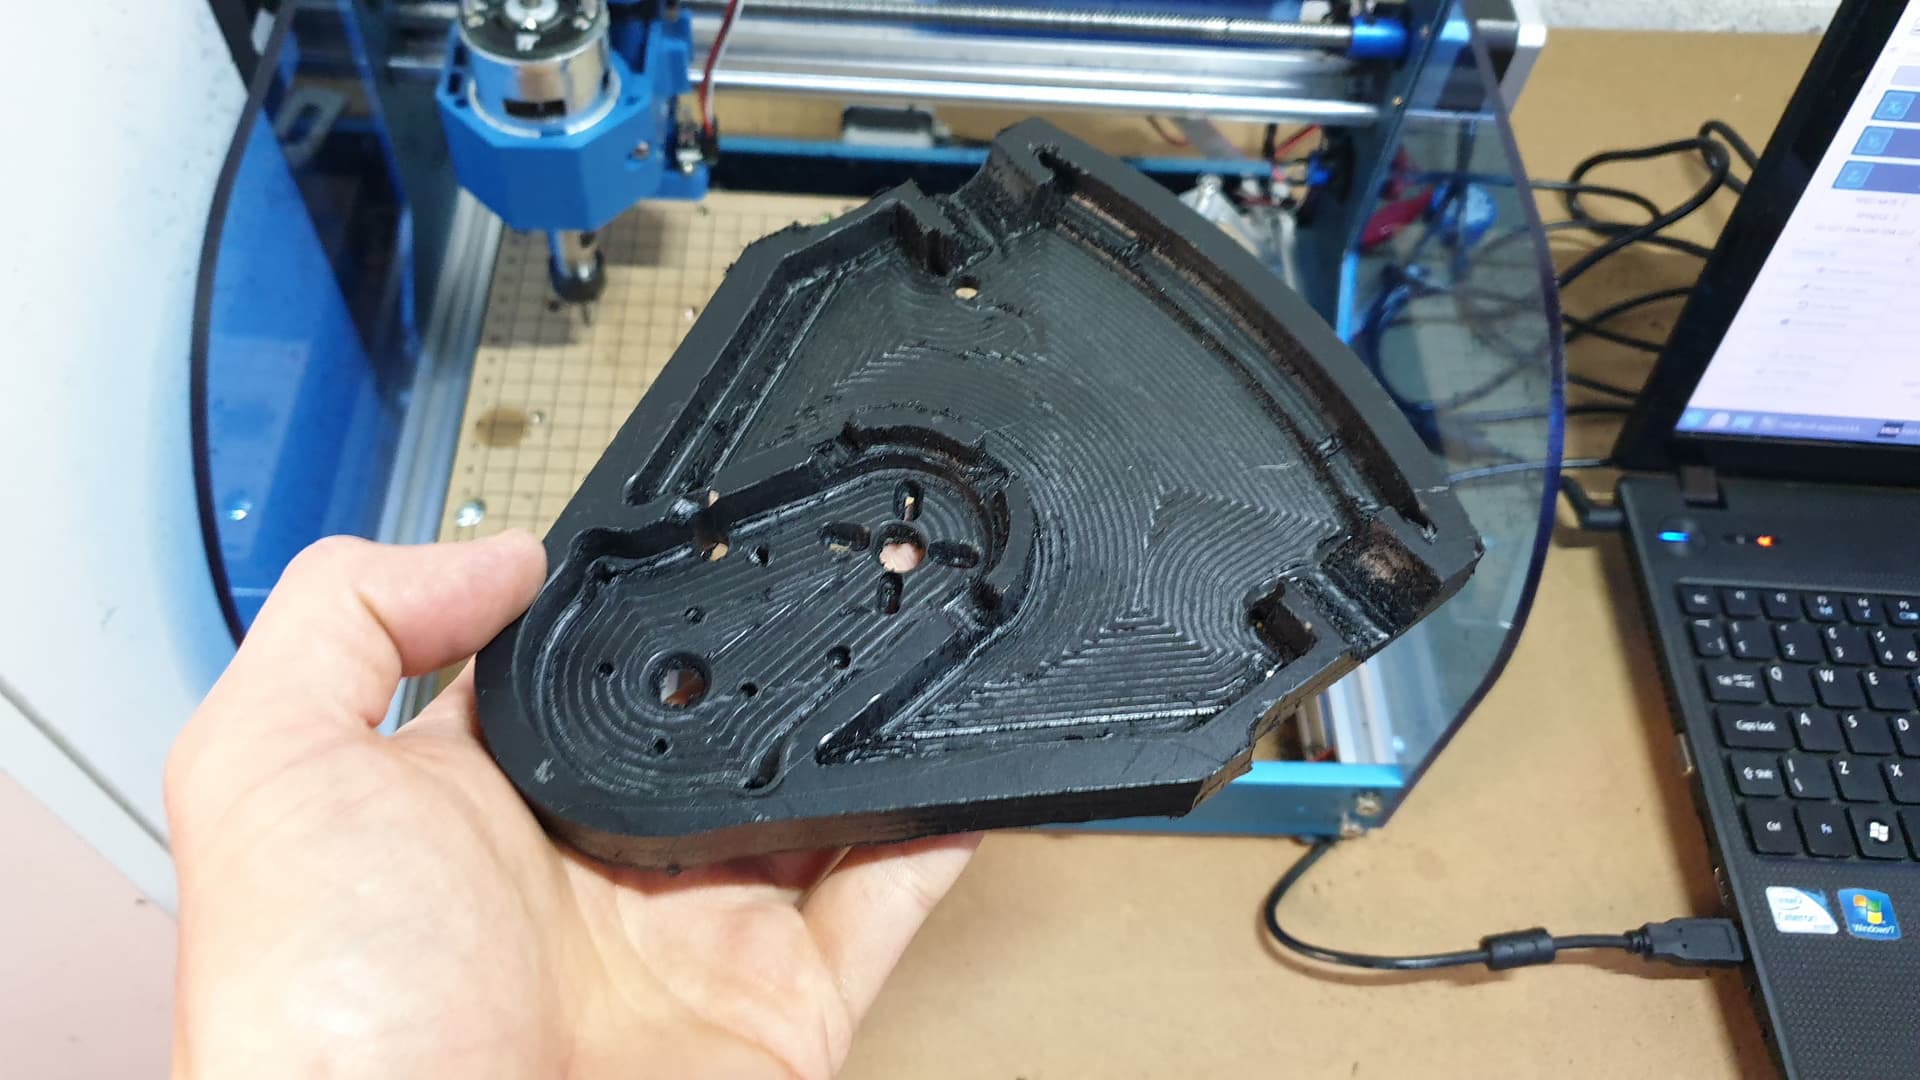
Overall each chassis was around 15 hours with about 5 tool changes in as many processes. To ensure that each clamshell half was machined correctly on both sides, I would complete the chassis cavity first, with screws holding the workpiece in place. Tabs would keep the body attached to the workpiece, and making sure that the origin was the same on the 2 tops, would flip the workpiece and screw it down in the same position. This worked a lot better than I expected, even if I grazed a couple of screws occasionally!
Many, many hours of pain
Once deburred, filed and cleaned, I had 2 complete chassis and one spare. I then wired up 2 complete looms for the robot in advance to ensure I could progress quickly come final assembly time.
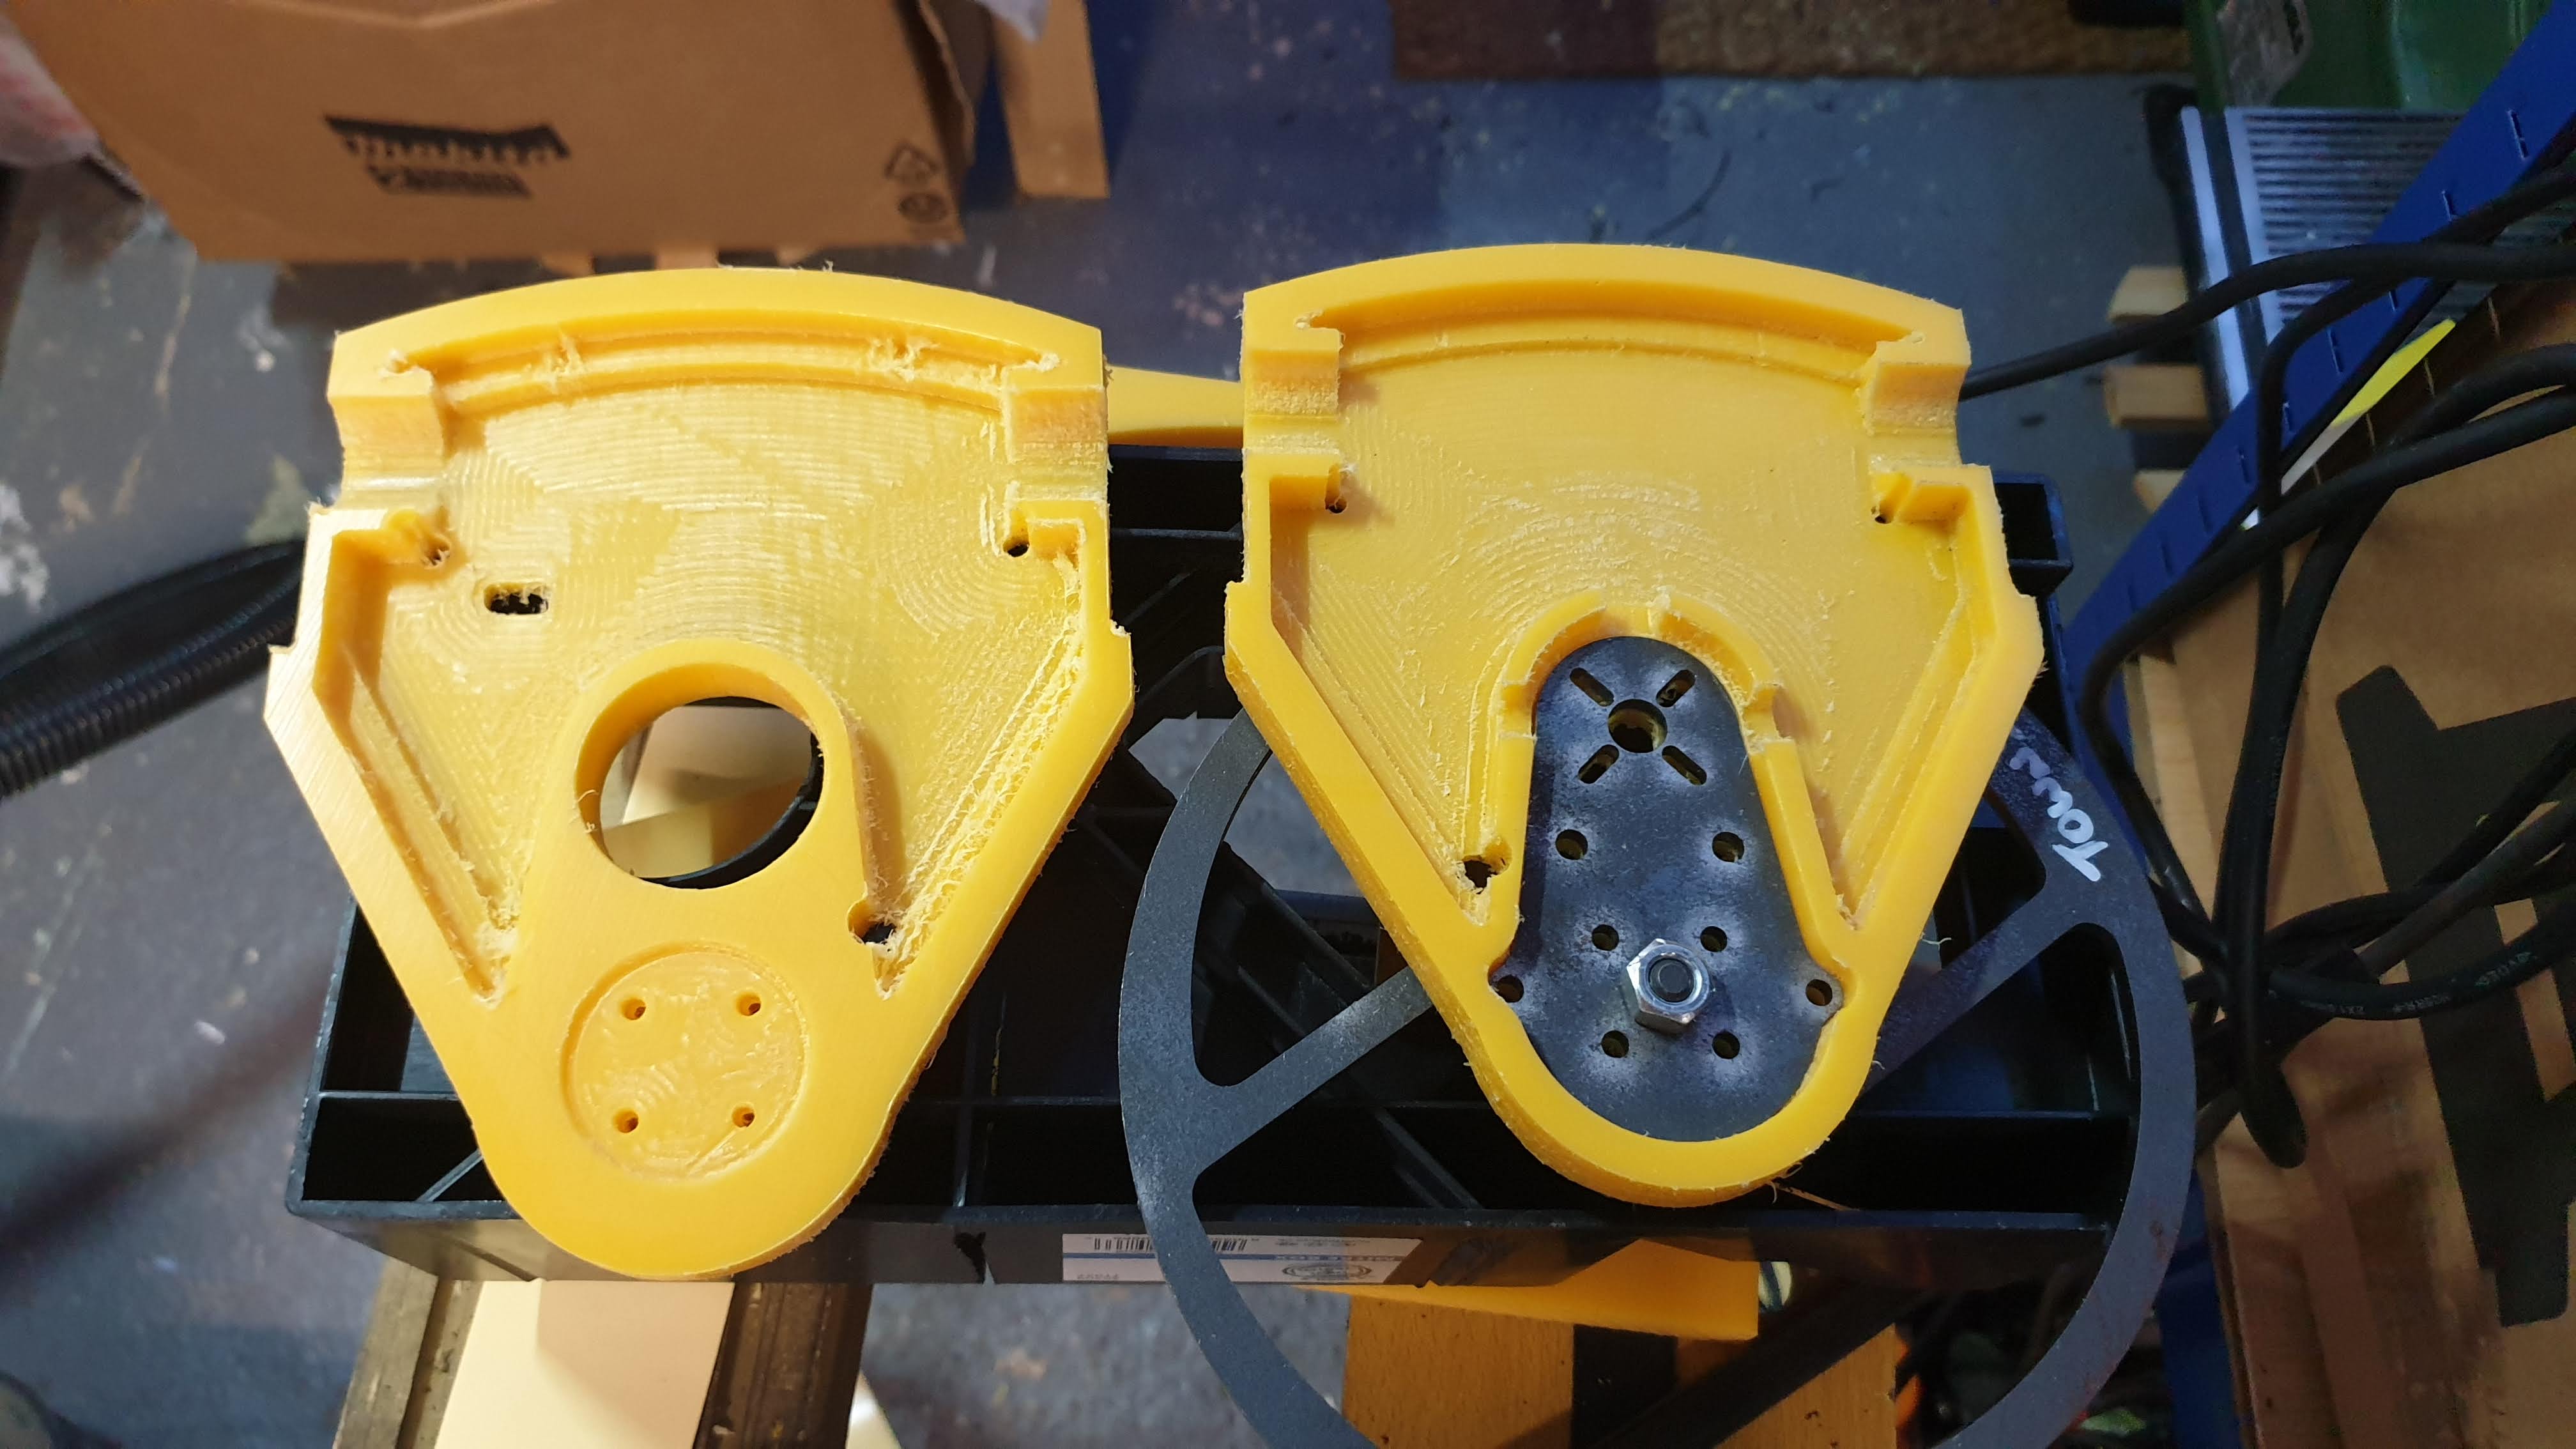
A complete clamshell, with weapon plate and disc for size testing
The pulleys for the weapon system needed some work doing to adapt them to my weapon setup, and the wonderful Felix Townsend helped me out by lathing bearing pockets and mounting holes in the disc side transmission.
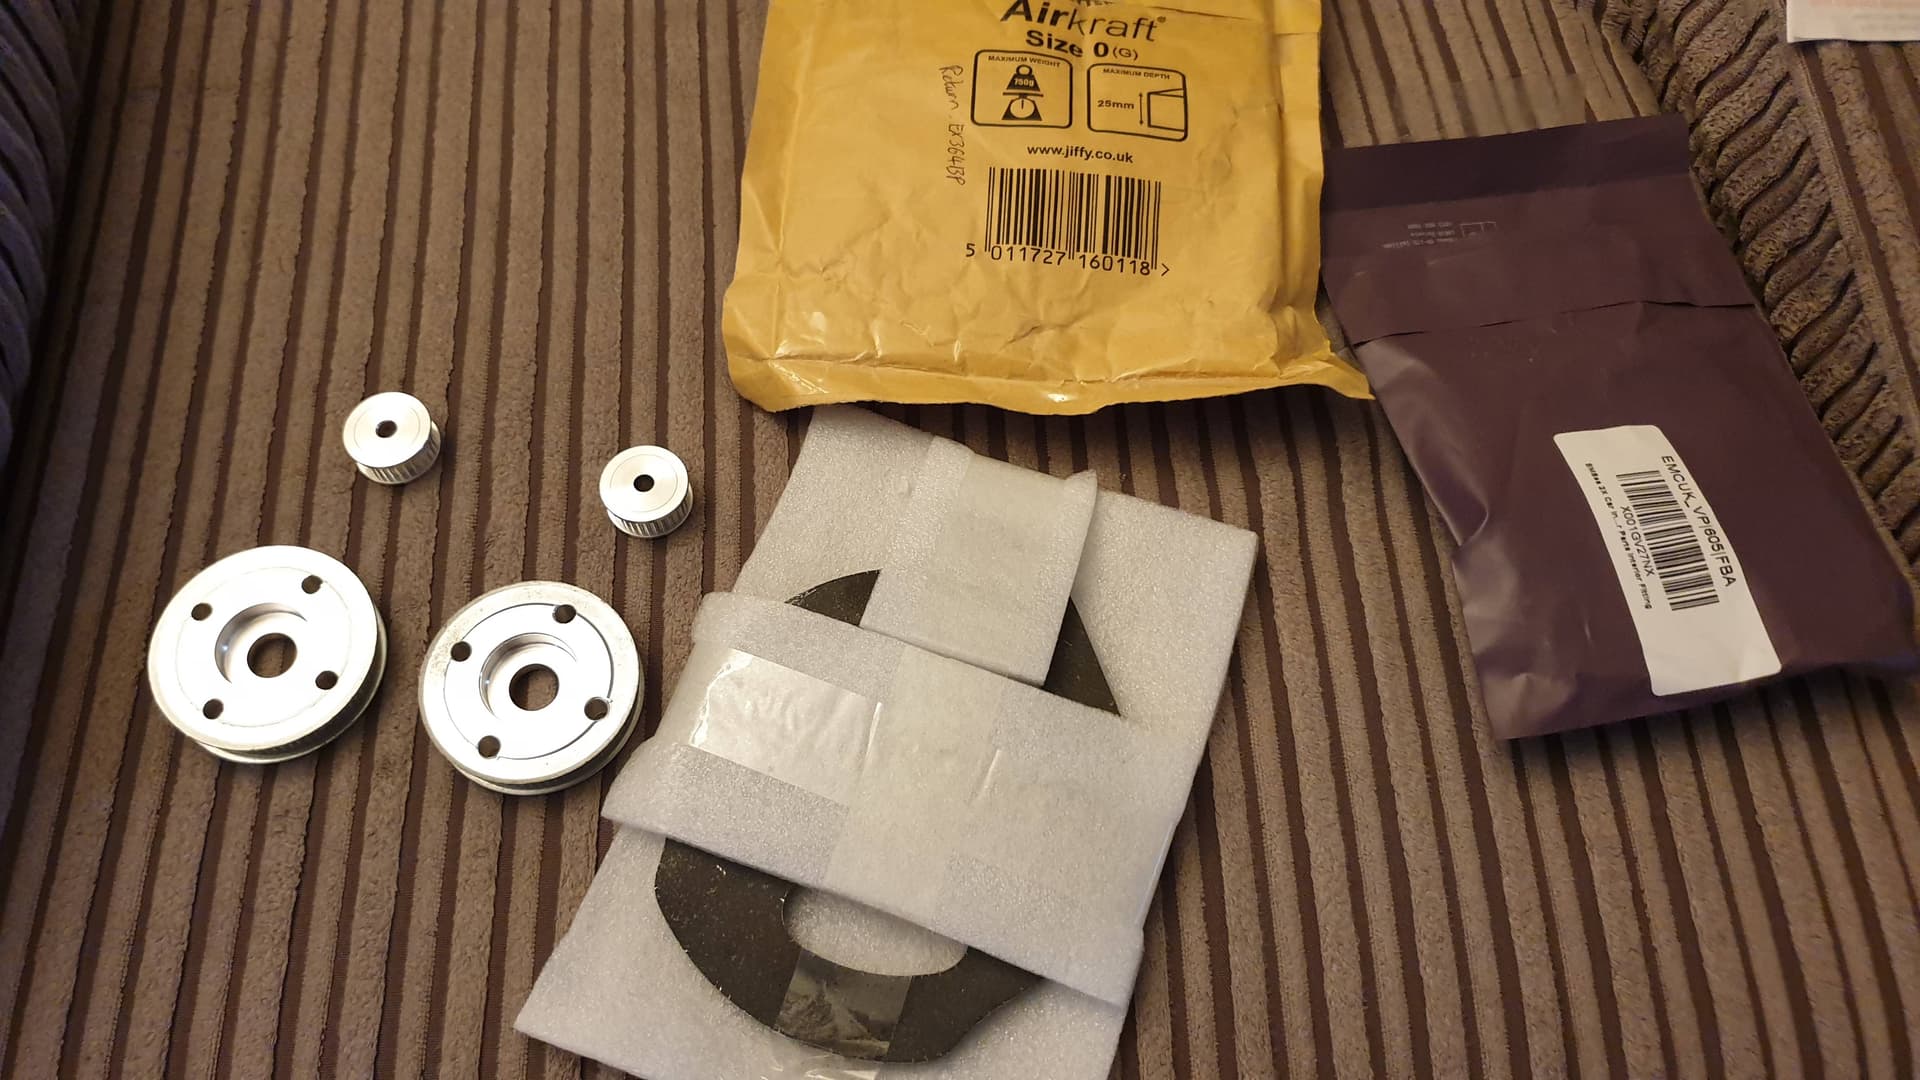
Fresh Pulleys, straight from the farm
Upon fitting the loom in the Clamshell, I realised that space was a lot tighter than I originally thought, mainly due to having XT-30’s on all the powerlines to replace components easily if I needed to. Backtracking slightly, I accepted that maintainability would have to take a back seat to practicality, and rewired the looms without connectors.
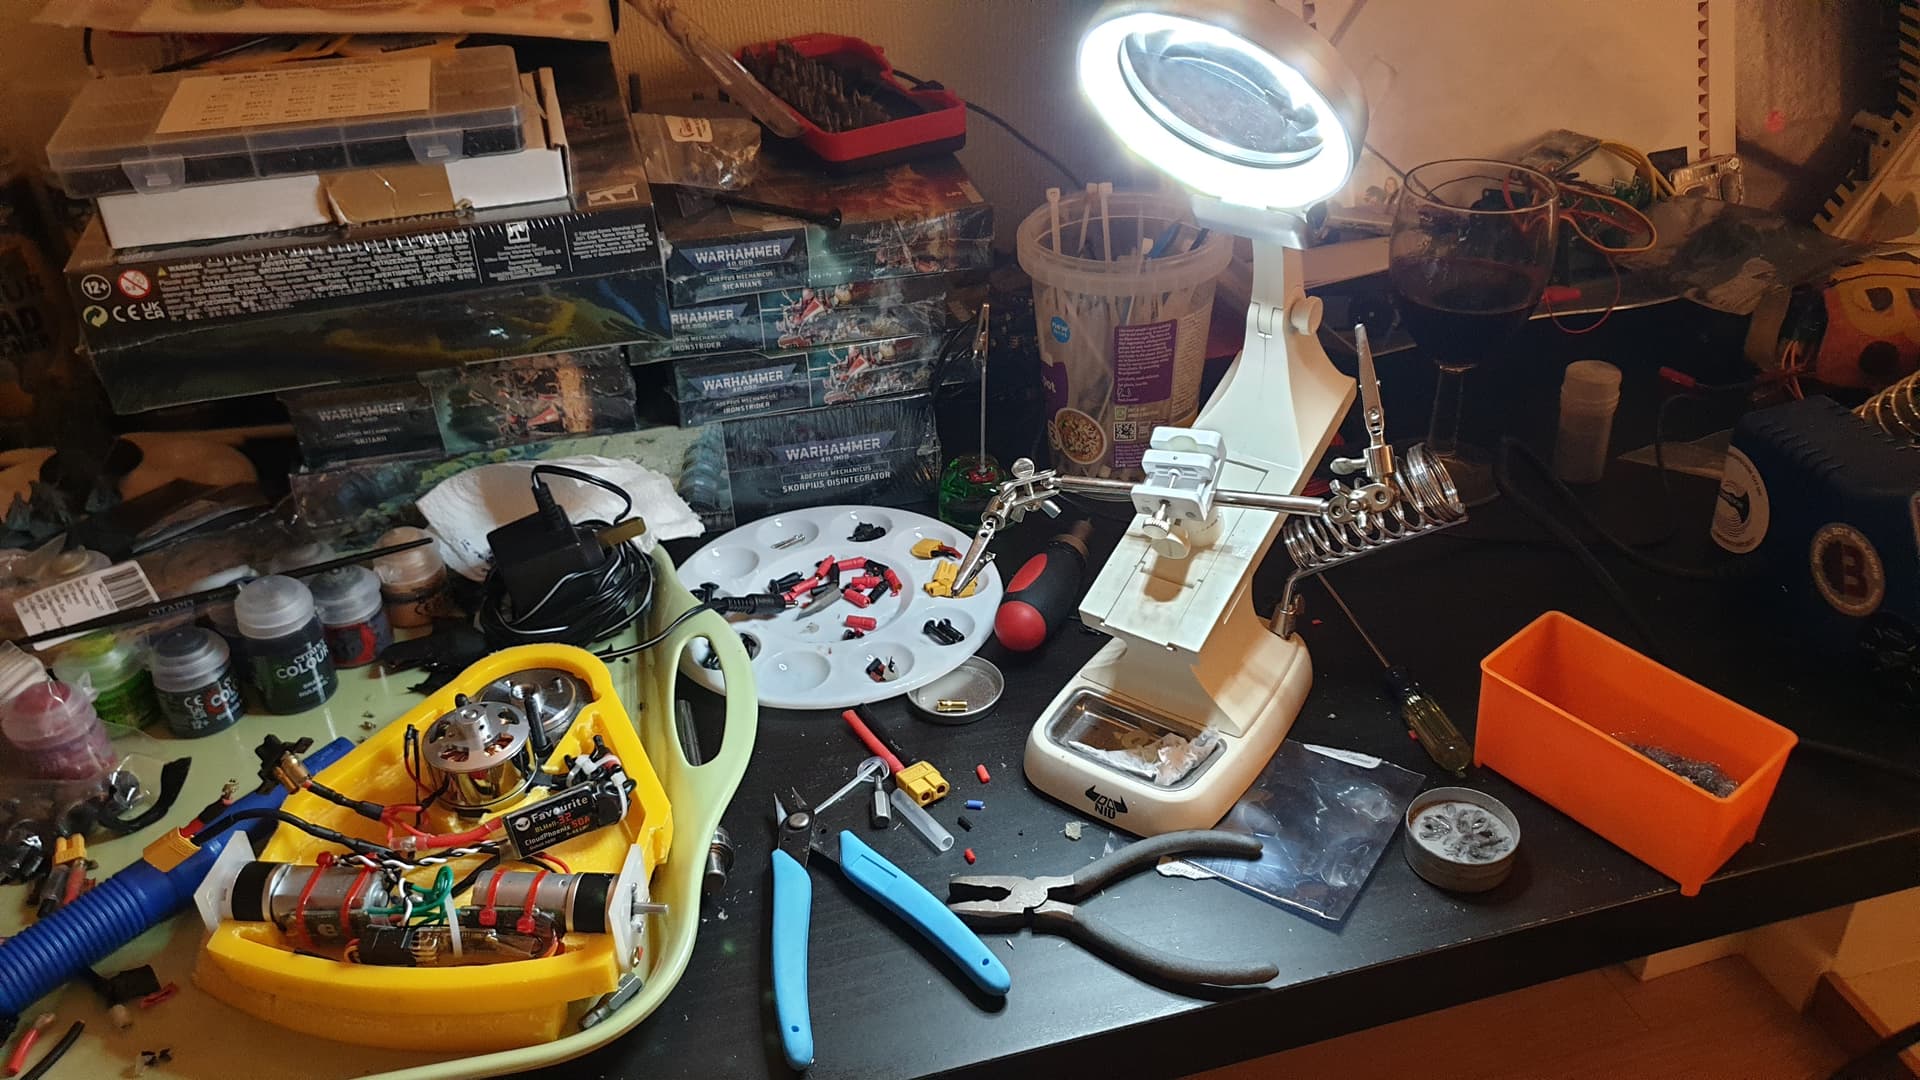
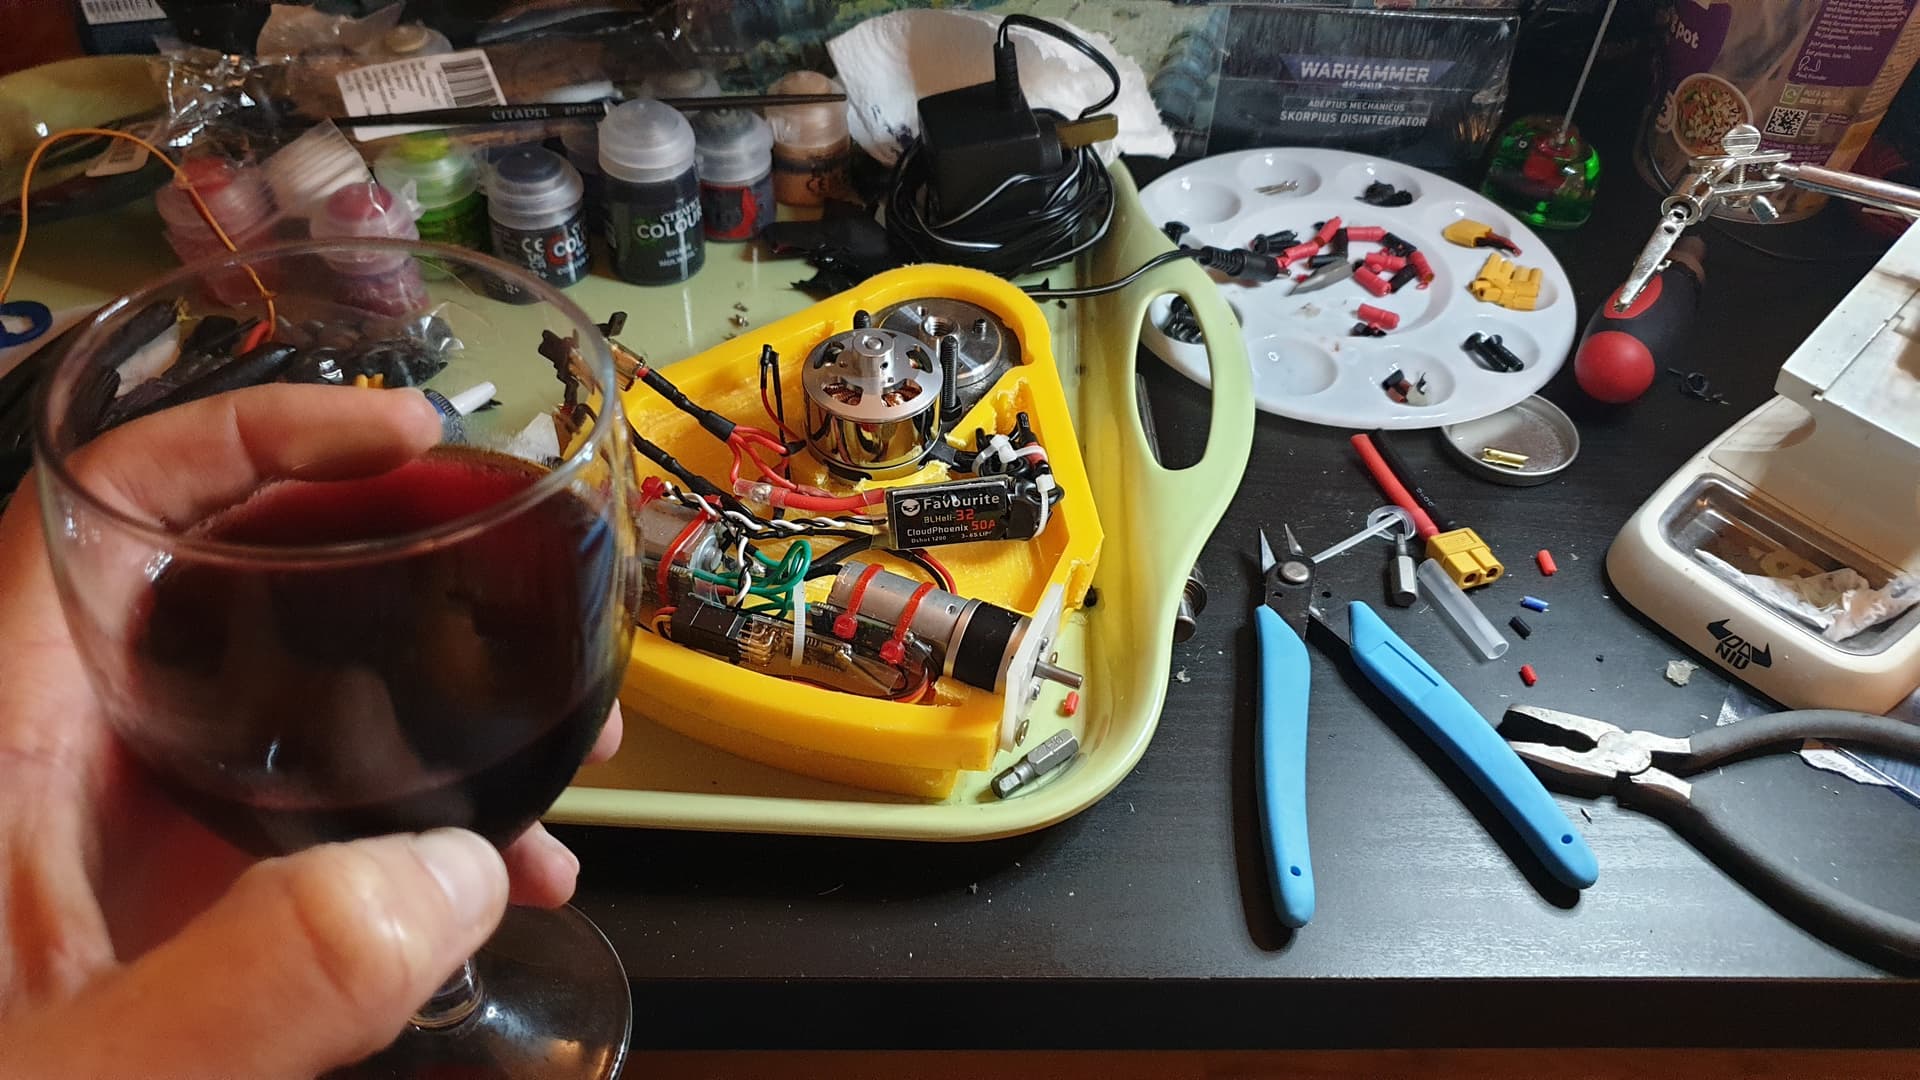
Resoldering connectors, made easier with wine
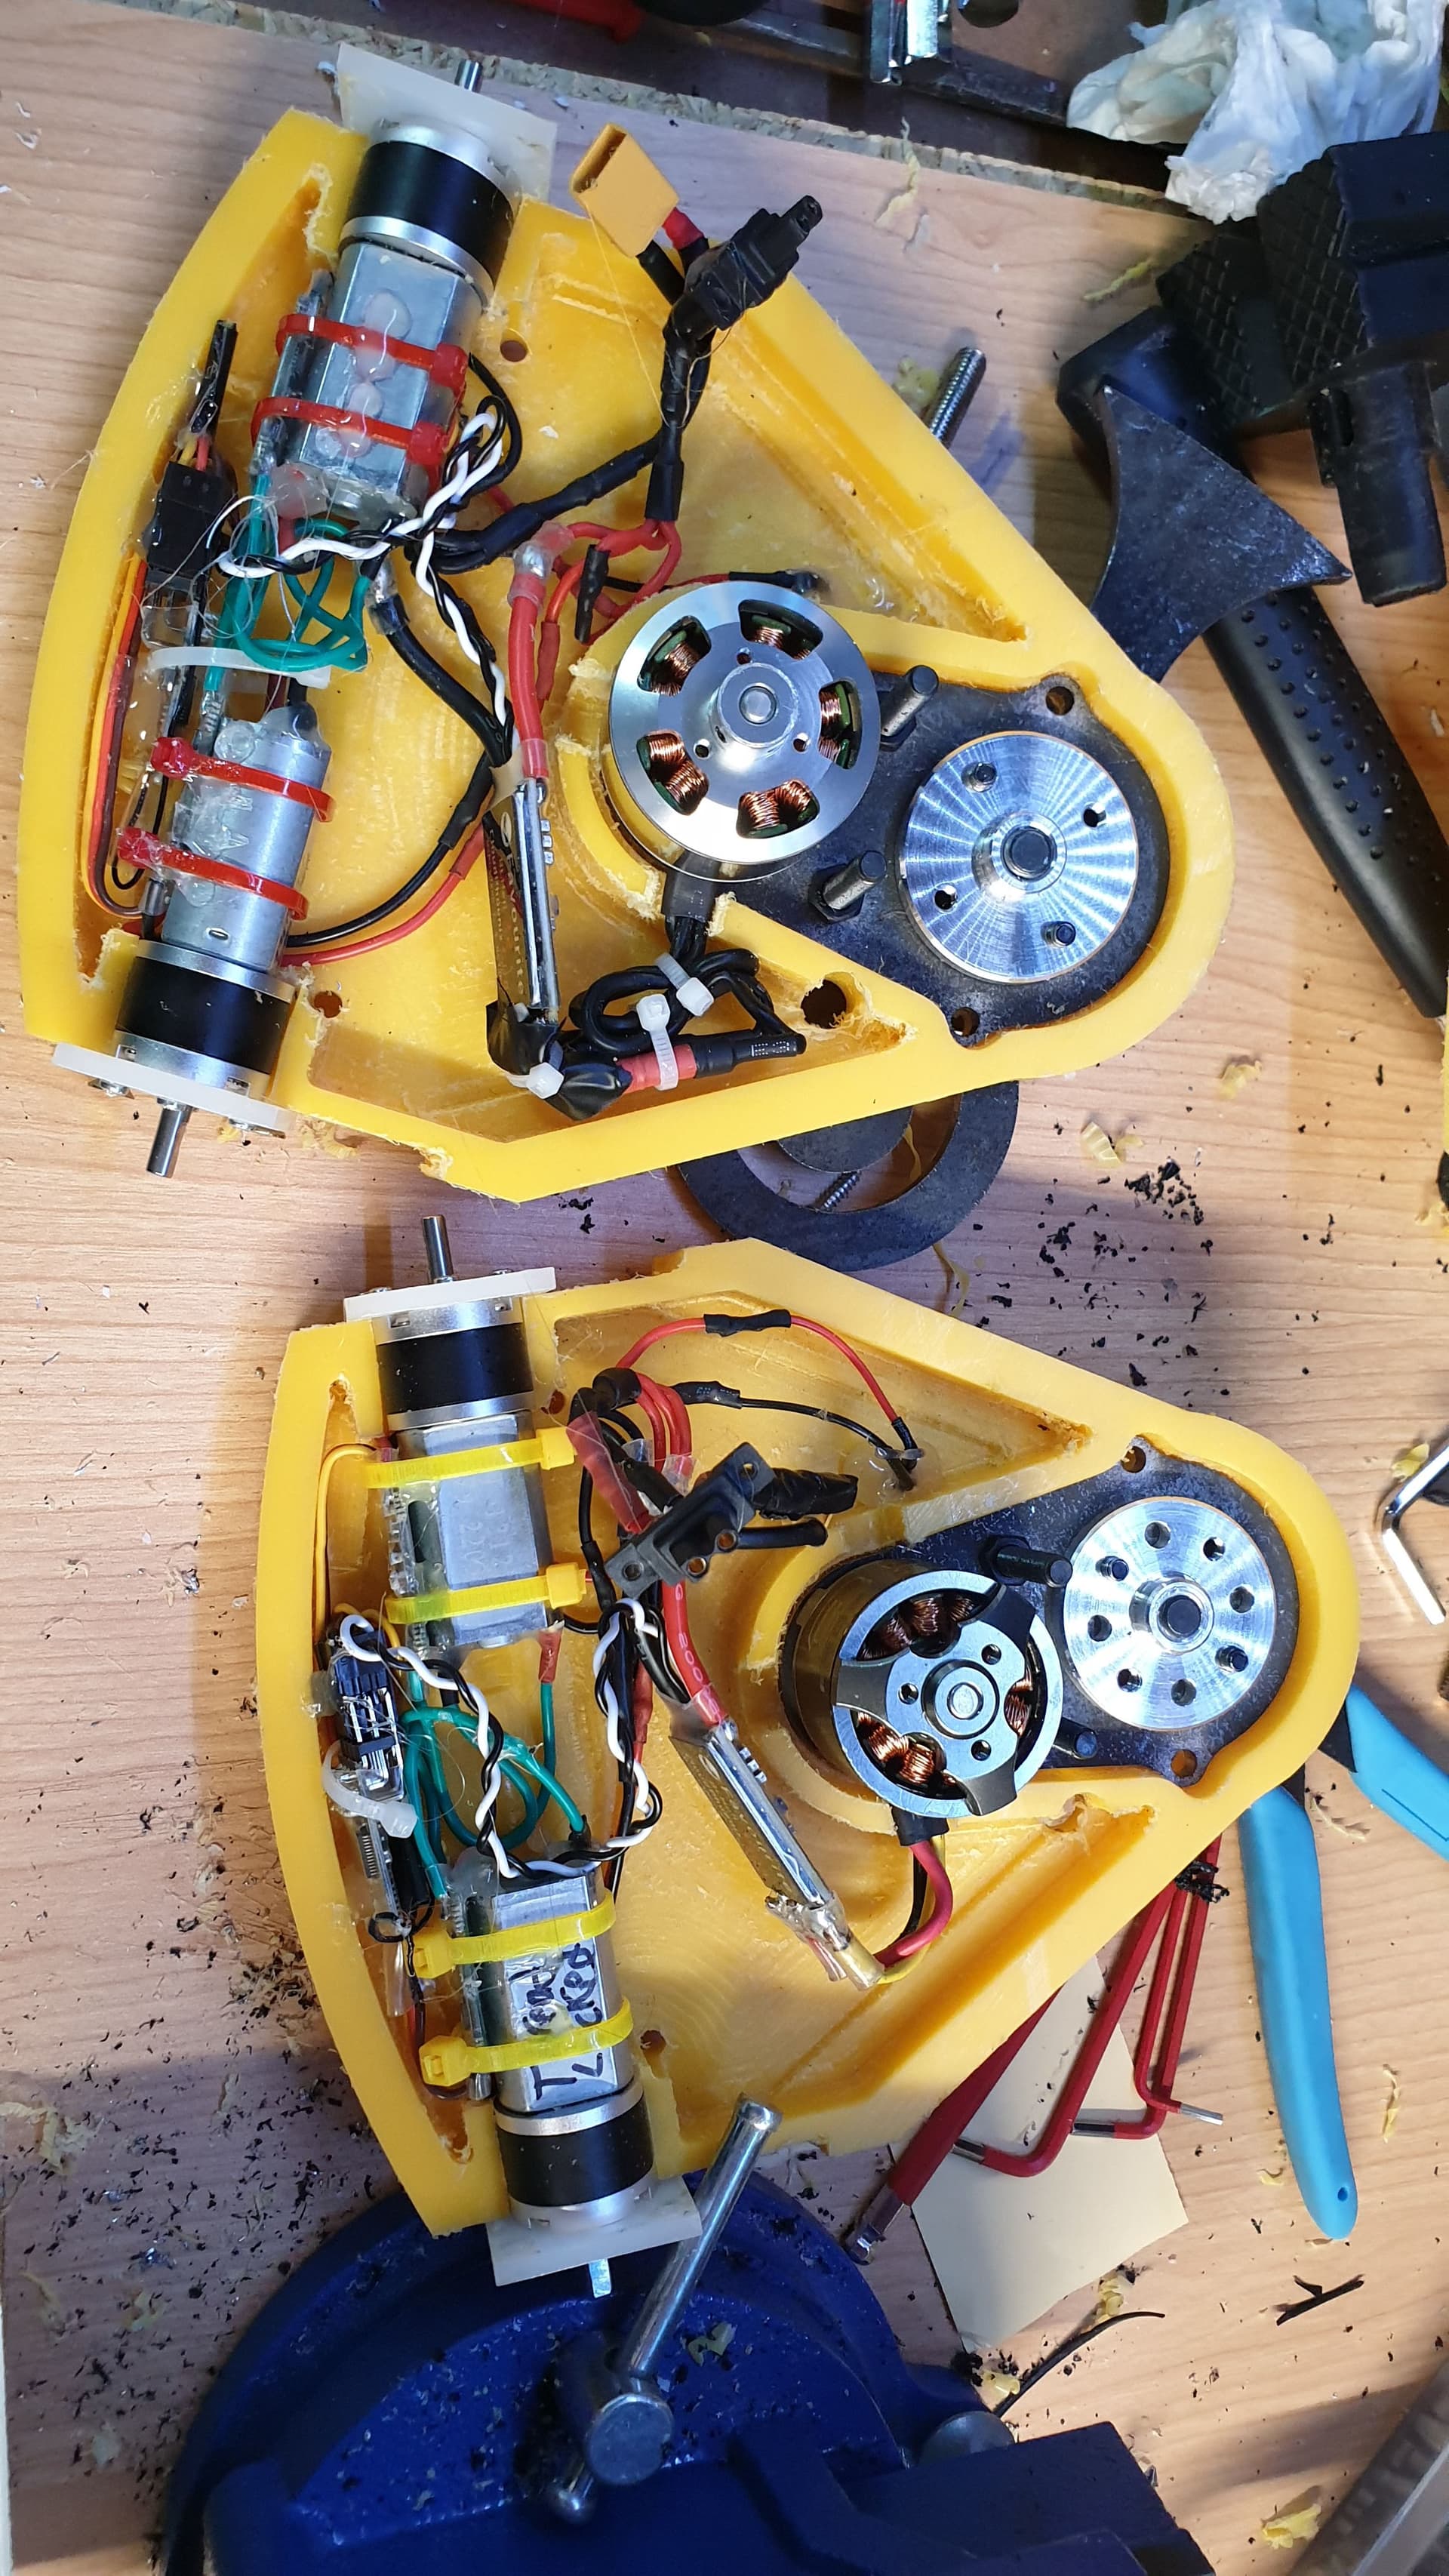
Messy, but complete and ready to go!
I had originally planned to get the rear armour section printed in TPU, but at this point in the build I was running short on time, so reasoned that due to the sacrificial nature of the piece and it’s inherent thickness, I used PLA-ST, printing several spares and also the little pizza tables for the outrunner cover.
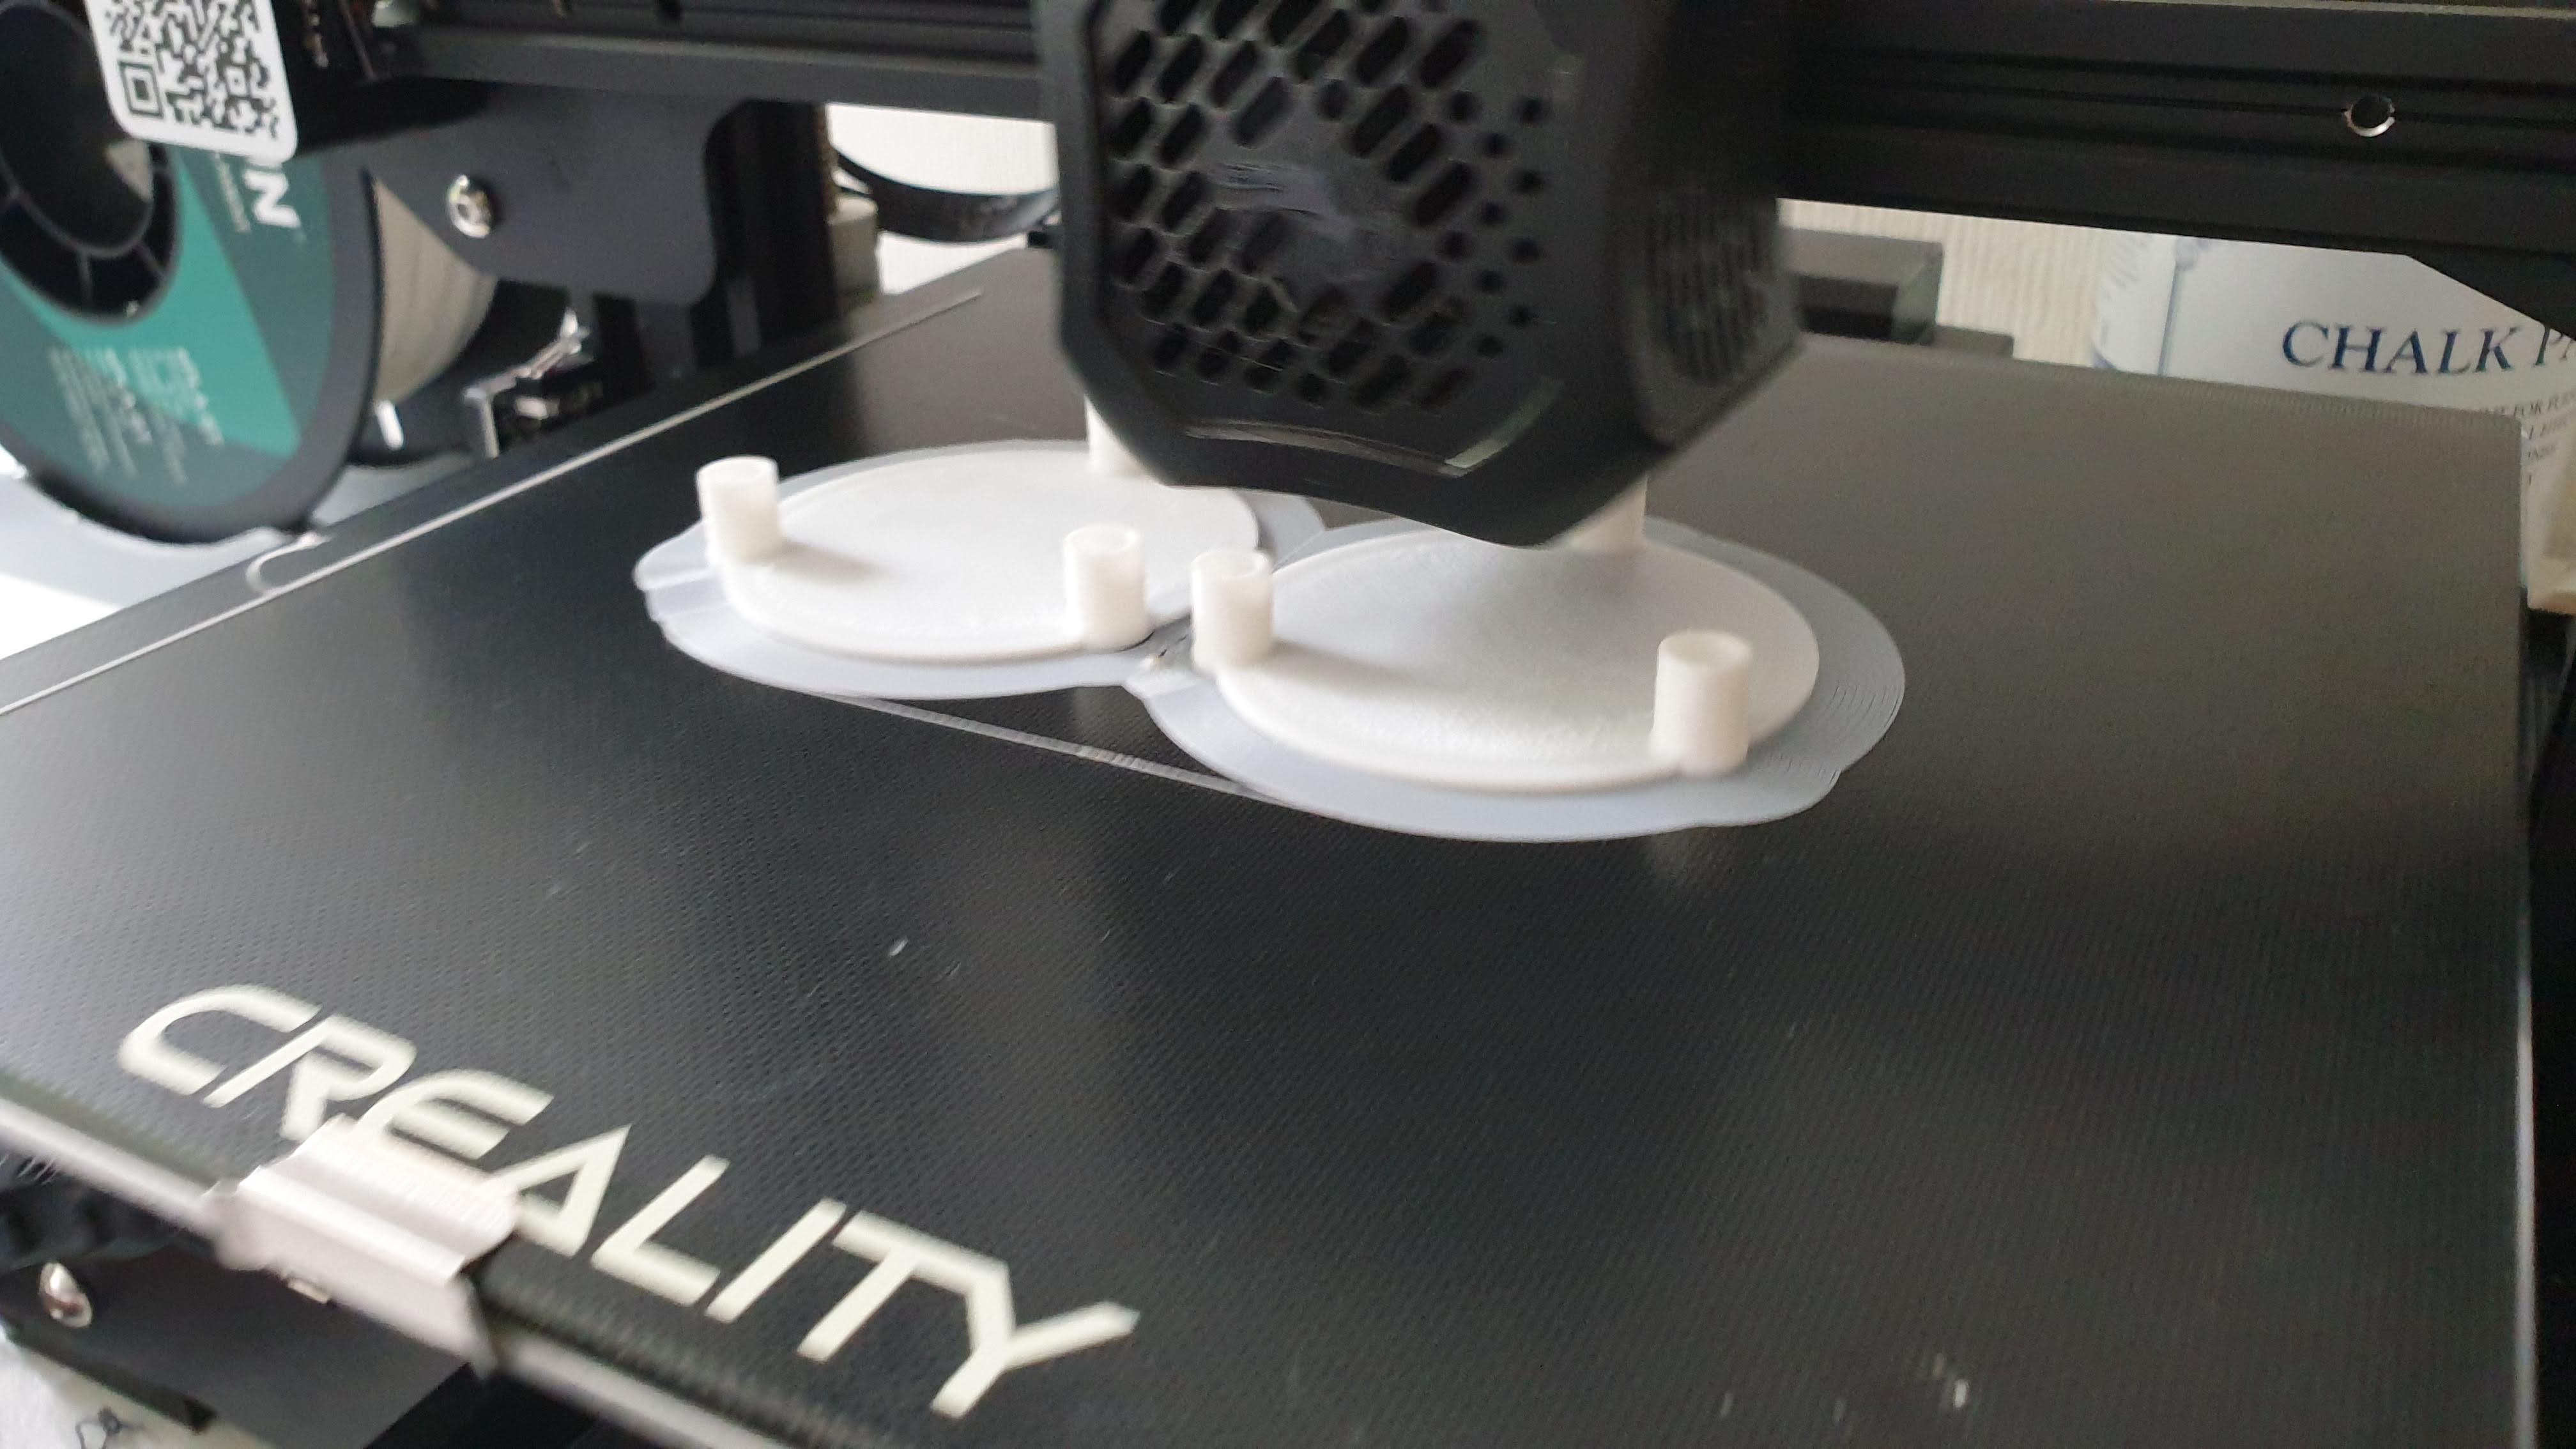
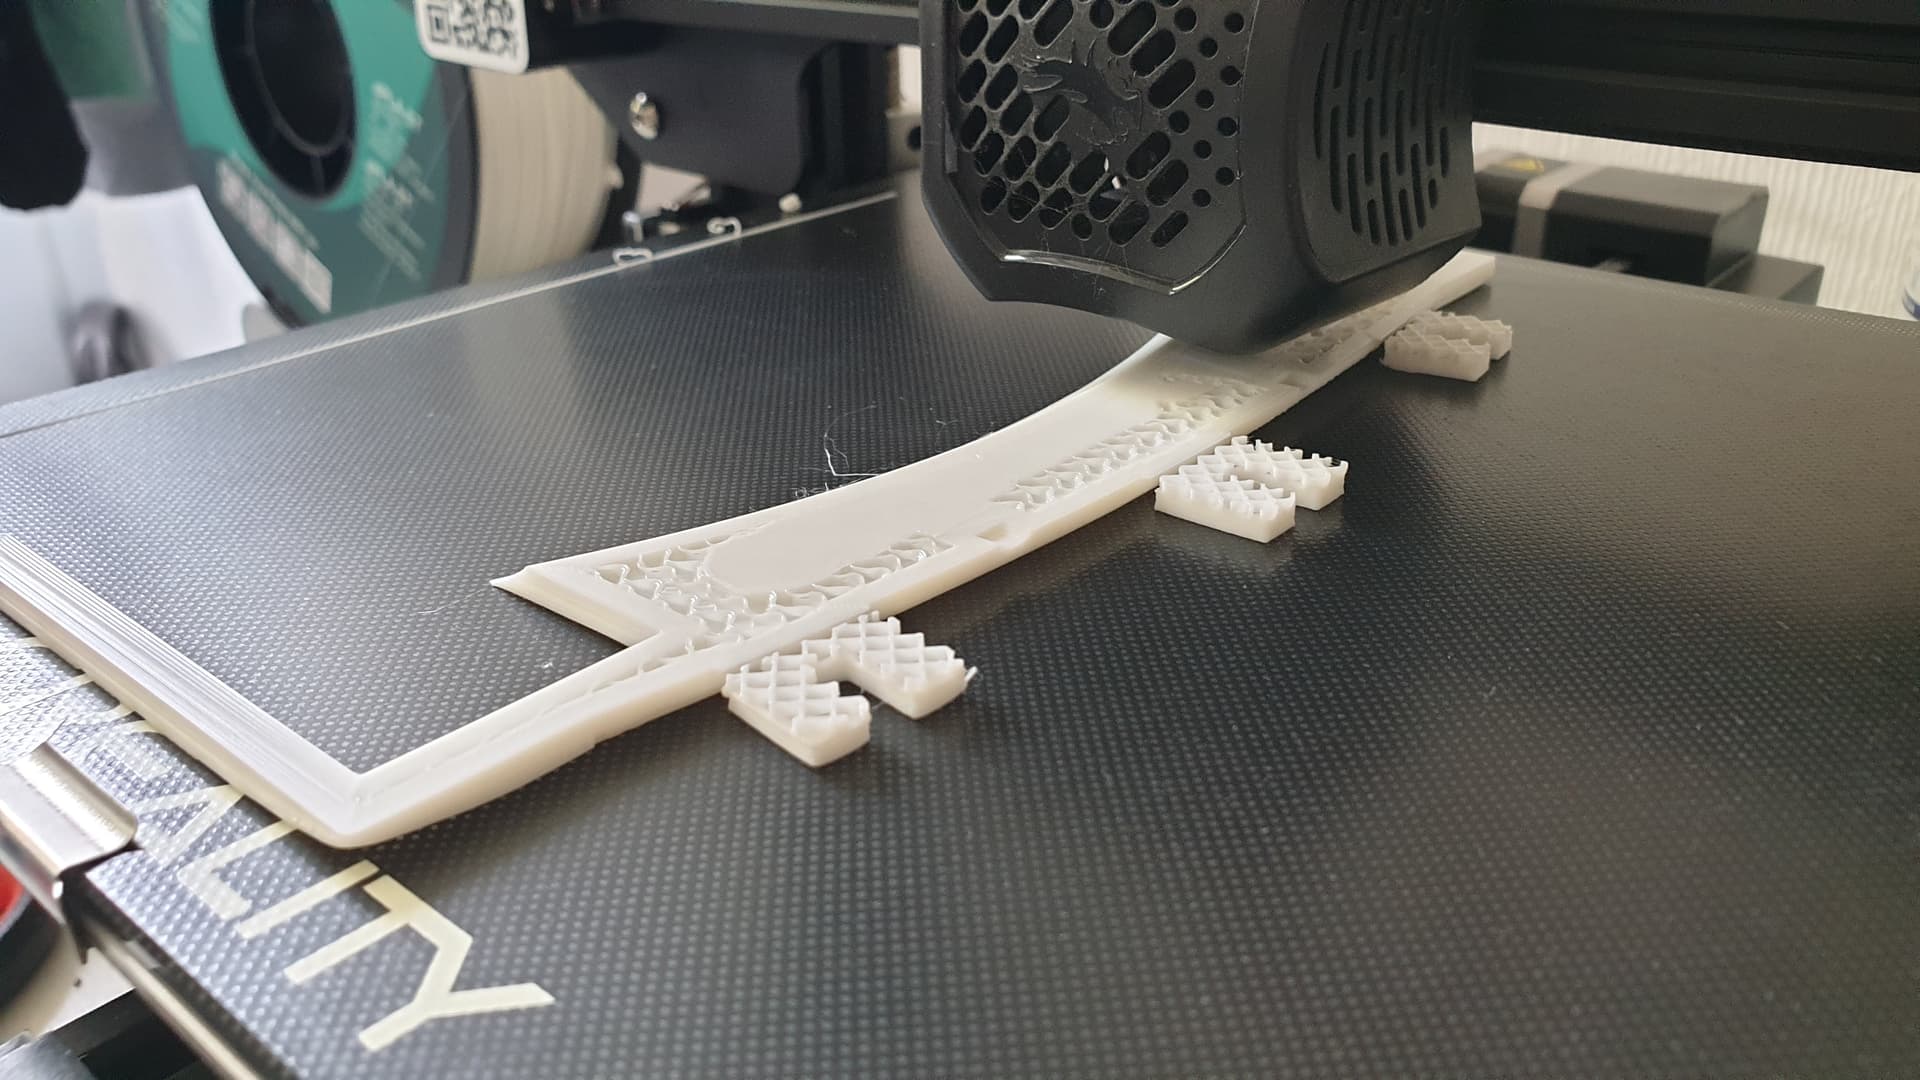
Acquiring accoutrements
As for wheels, I was intending to stick with fingertech hubs for simplicity. I did want to get quite a few wheels for spares however, and after all the cost of the trip, components, materials and new tools, I was reluctant to buy fingertech stock. Fortunately, Hobbycraft sells thick EVA foam in A4 sheets at roughly the same thickness as the Fingertech wheels for £3, so it was as simple as using a holesaw on a pillar drill to quickly cut out plenty of wheels for the competitions ahead.
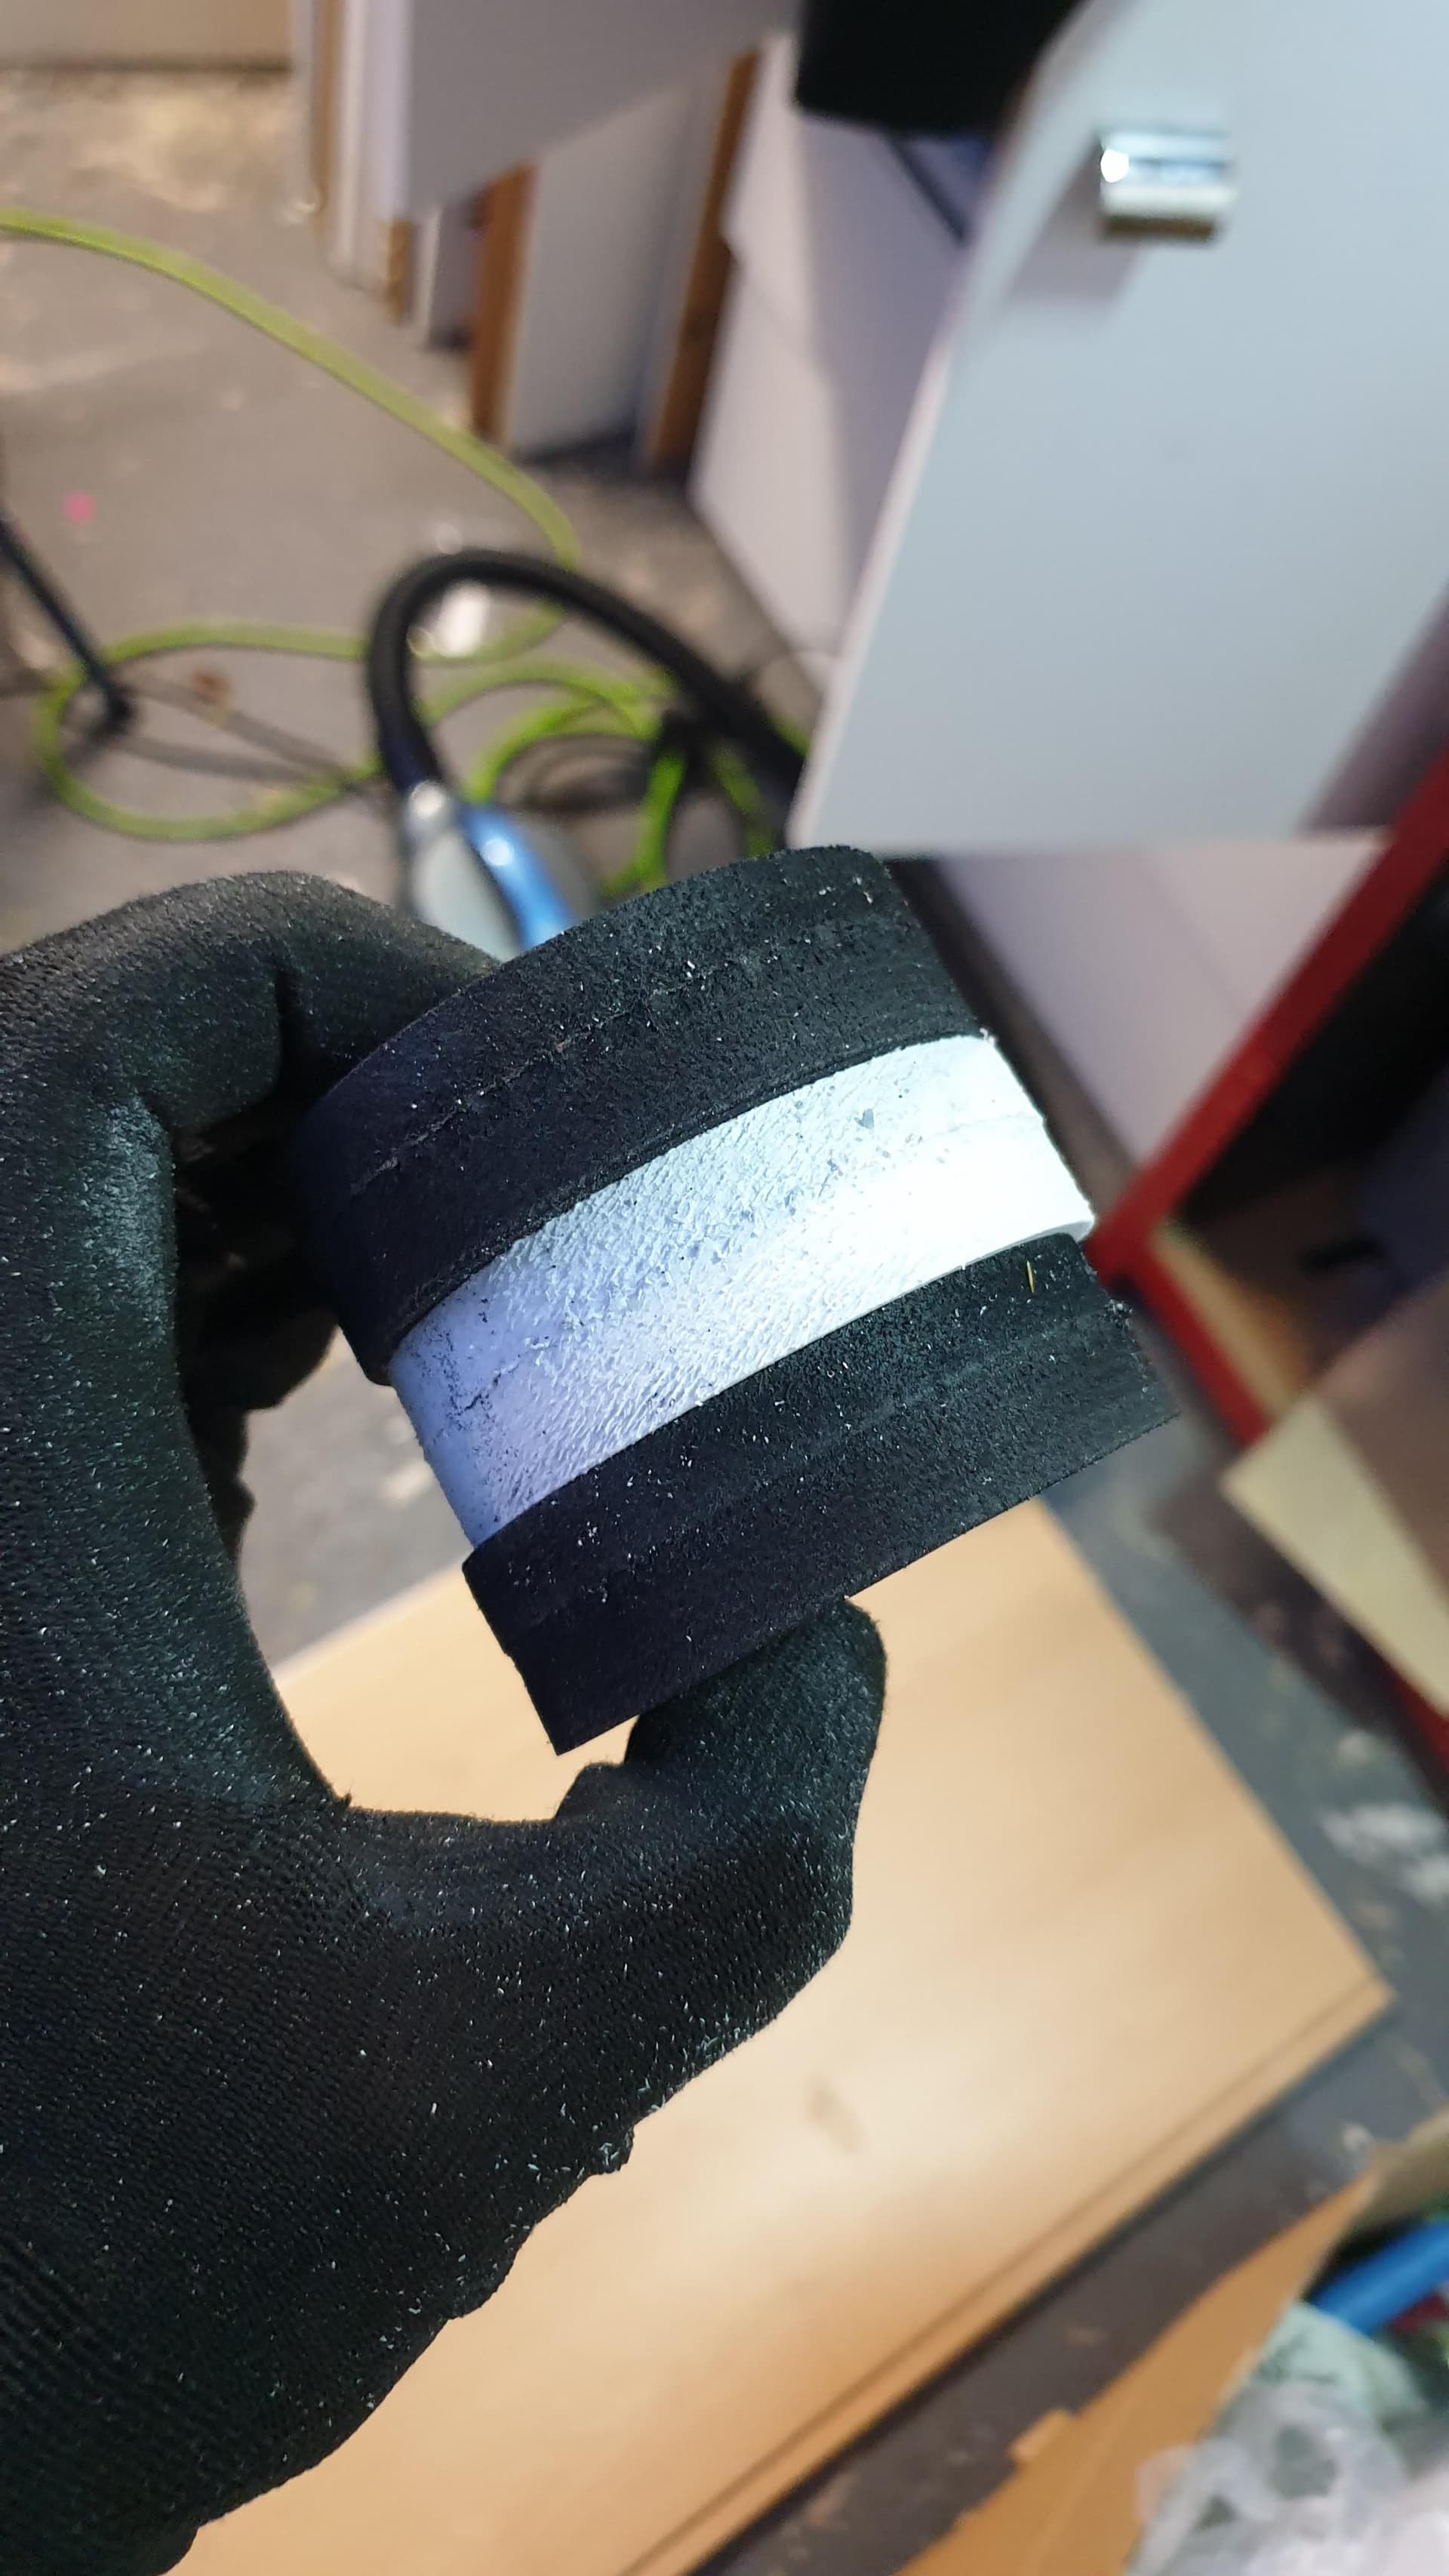
A nice cheap wheel solution (sorry Fingertech, I got bills to pay)
Finished Product and Improvements over the year.
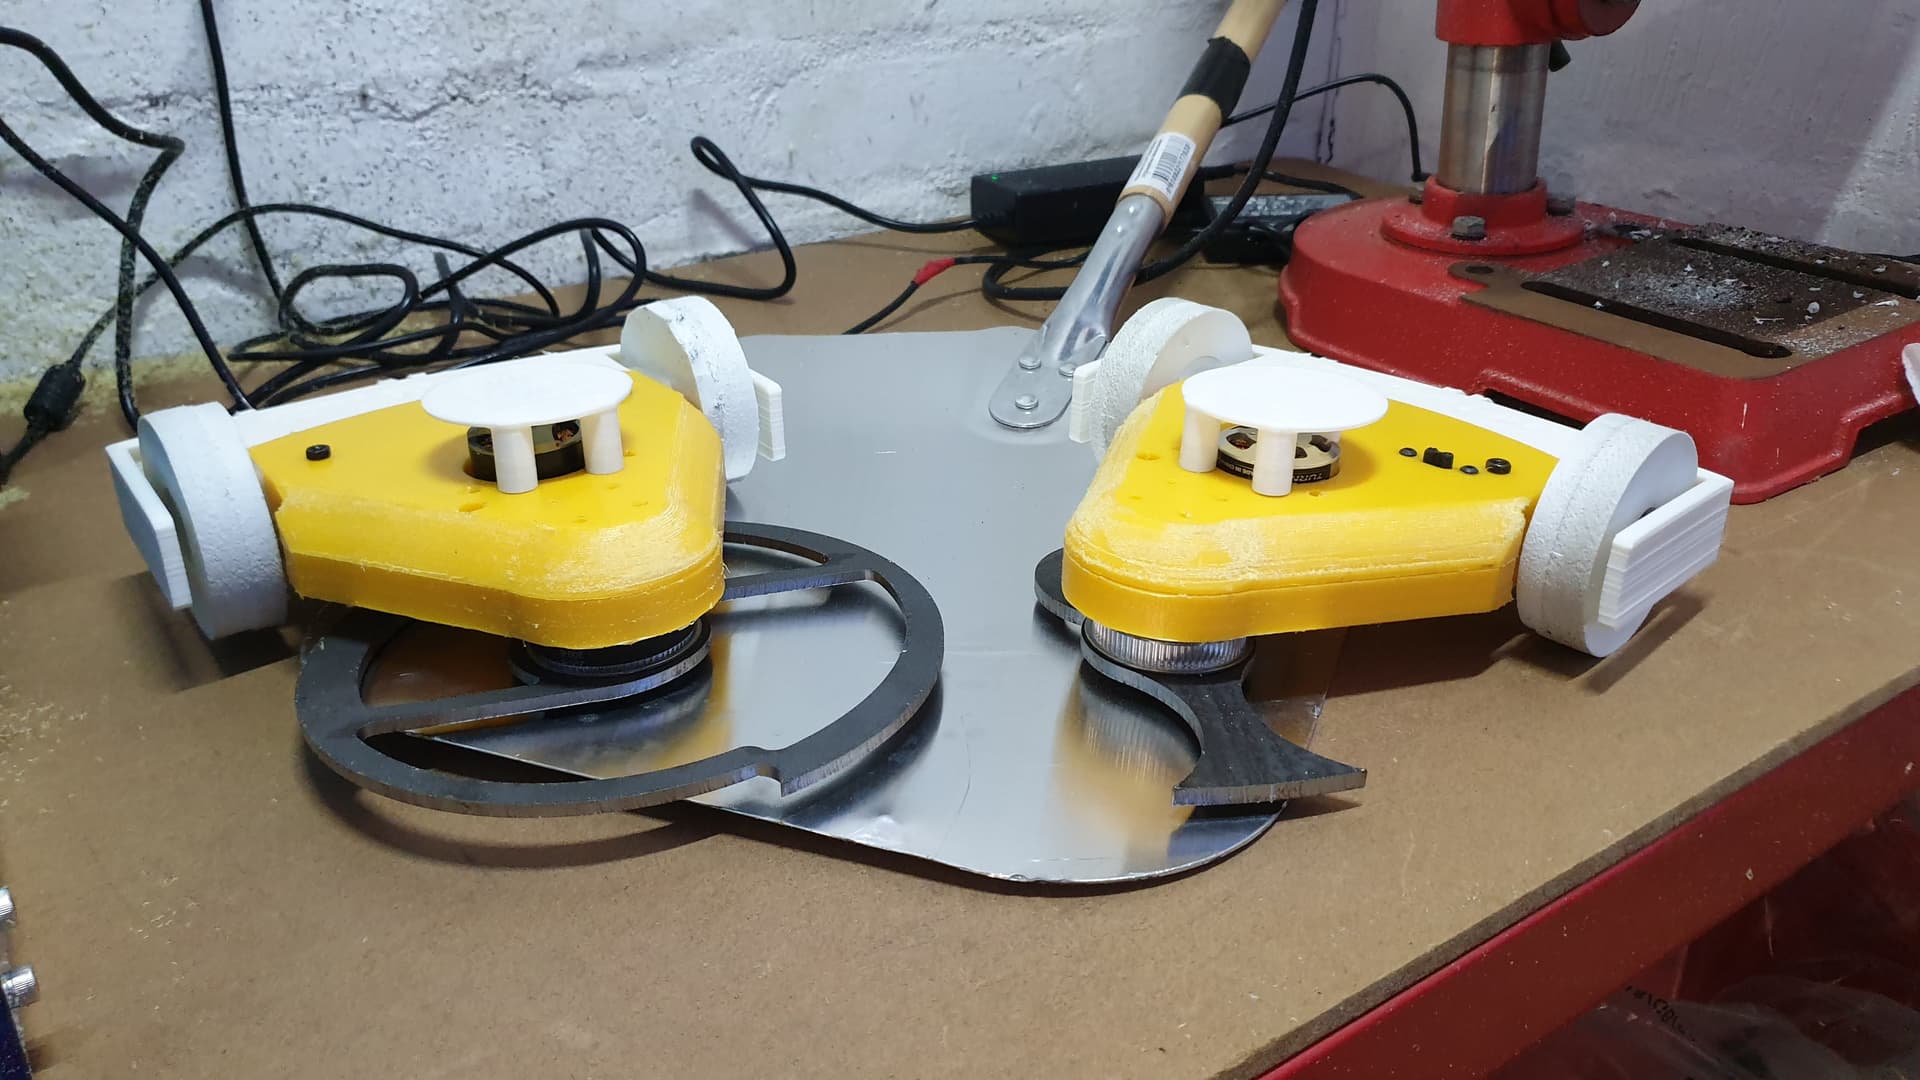
All the pieces come together to form 2 slices!
At Norwalk with the blade selection (The Heavy disc made the bot overweight so I was not able to use this in the comp)

A beautiful Hero shot of the bot, courtesy of JCRB Photography
With that, New York slice made the trip over to the US and subsequently Chatham, both great events in their own right. With 2 further events down the line, there were some changes that were made based on how the bot performed.
One was dropping weapon motor KV down to 900, whilst originally not intentional due to stock available, I was finding engagement was a lot better at these lower speeds.
I designed a pulley guard for the weapon motor pulley, this was a sacrificial piece of hdpe which I machined to stop the weapon blade from glancing back up into it on hits.
I forgot to take pictures of the finished blade guard
I got some lovely TPU rear armour configs from Jack Tweedy to further strengthen the back of the bot.
New York Slice gets a new butt
In it’s final event, I removed the Pizza Table from the top of the bot and attached some scrap HDPE which allowed the robot to run upside down in a much more stable manner, keeping it level and balanced as opposed to gyroing around like a Tazmanian Devil.
The Final version of the bot
Overall, I was really pleased with New York Slice. There were aspects that were challenging but It felt like it had loads of potential and that my experience as a roboteer was finally coming through on my builds. It’s retired for the moment but may get another look one day.
For details on how NYS did, there are a couple of event reports on my team facebook page if you are interested below;
Big Up the British Bot Collective, the best TV network themed UK based cohort.