Percussive Maintenance 12lb - the Beetle, but Bigger

With Robodojo’s inaugural Hobbyweight event in 3 weeks, it’s about time I actually build the hobbyweight that I’ve been talking about since last year’s Elizabeth Day memorial event.

Soon after that event, I started throwing stuff into Sketchup:

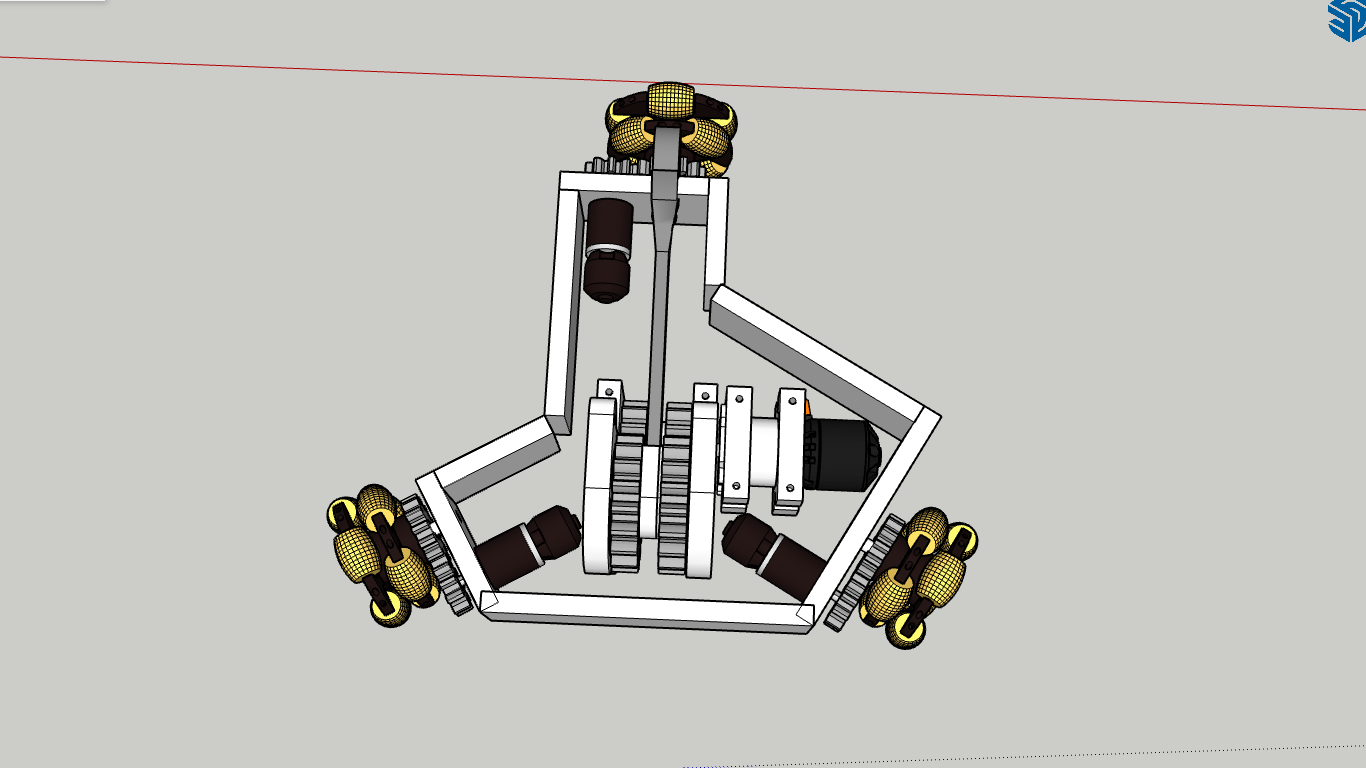
The iniital design was this incredibly funky asymetrical shape, in an attempt to remove as much chassis as possible. This was ditched due to the large footprint - more big = more weight innit.

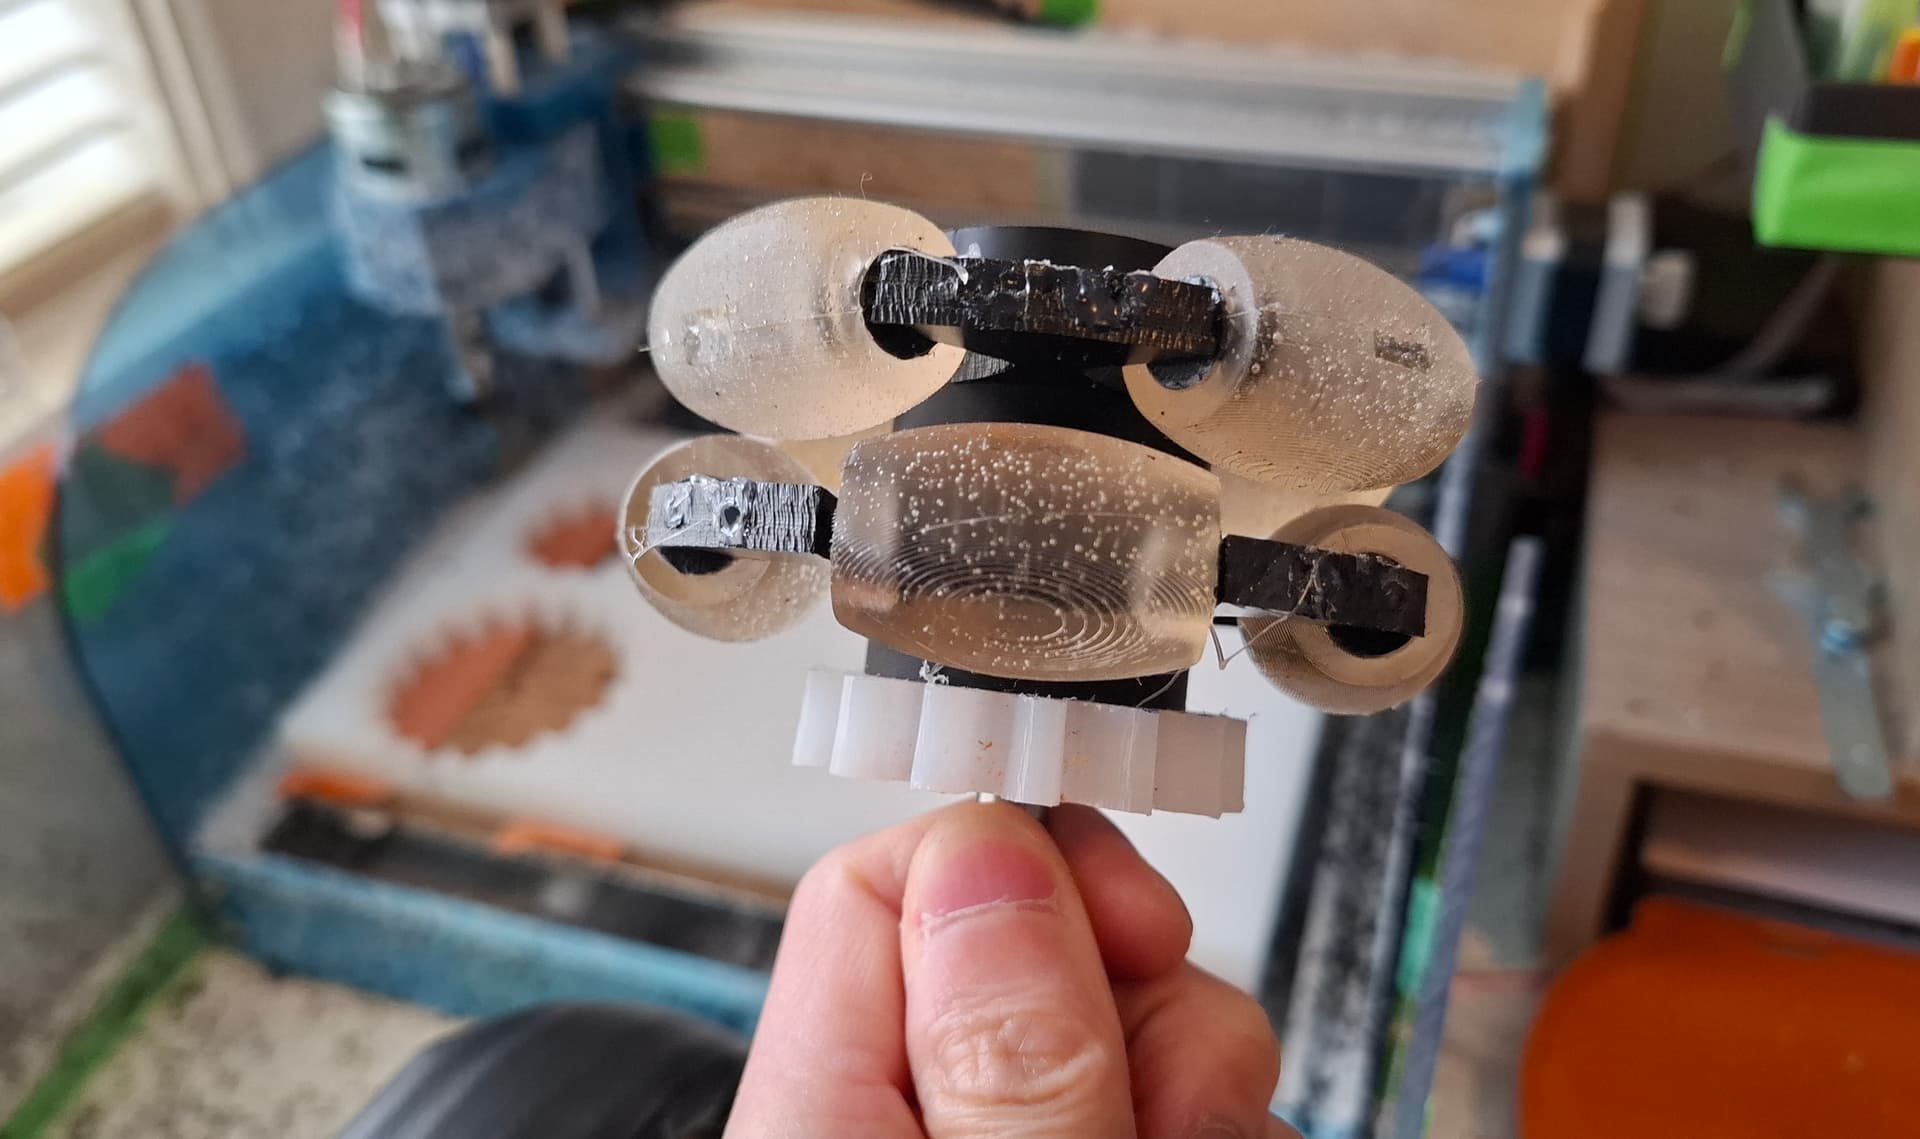
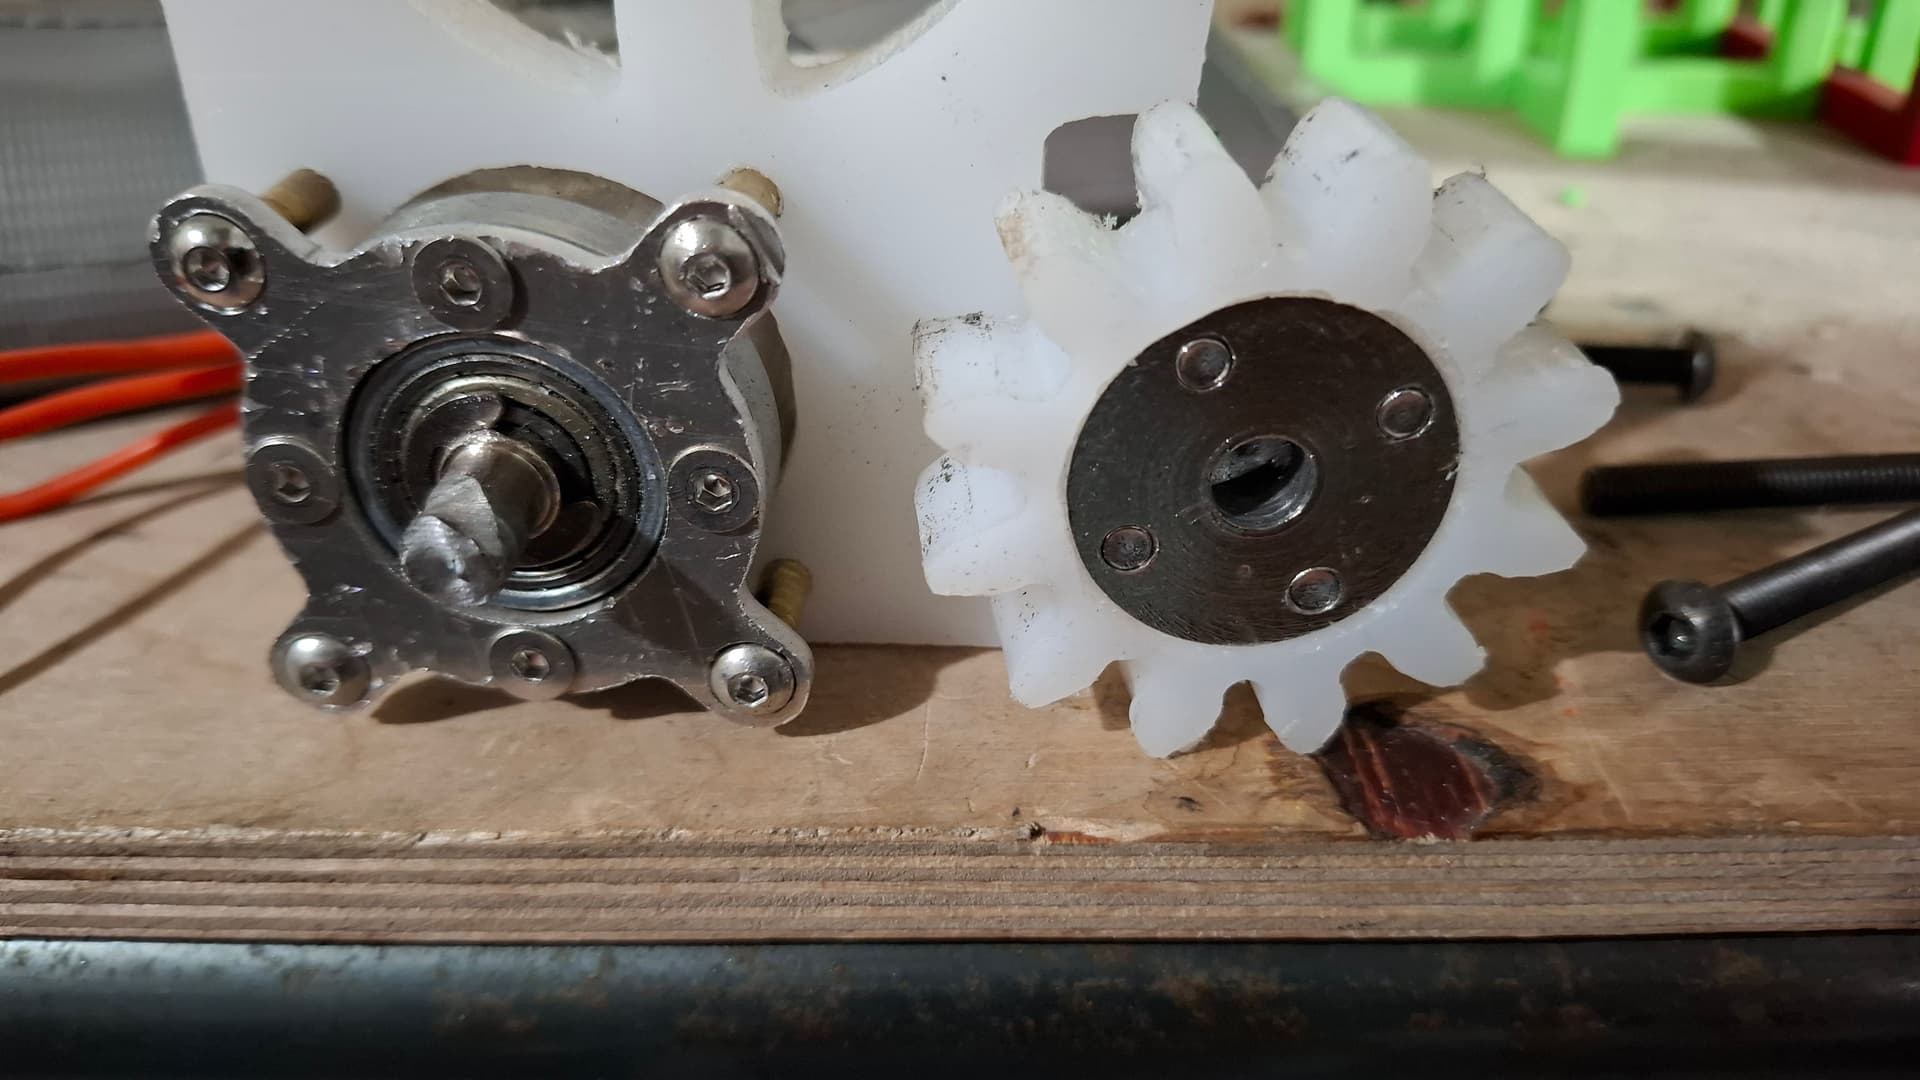
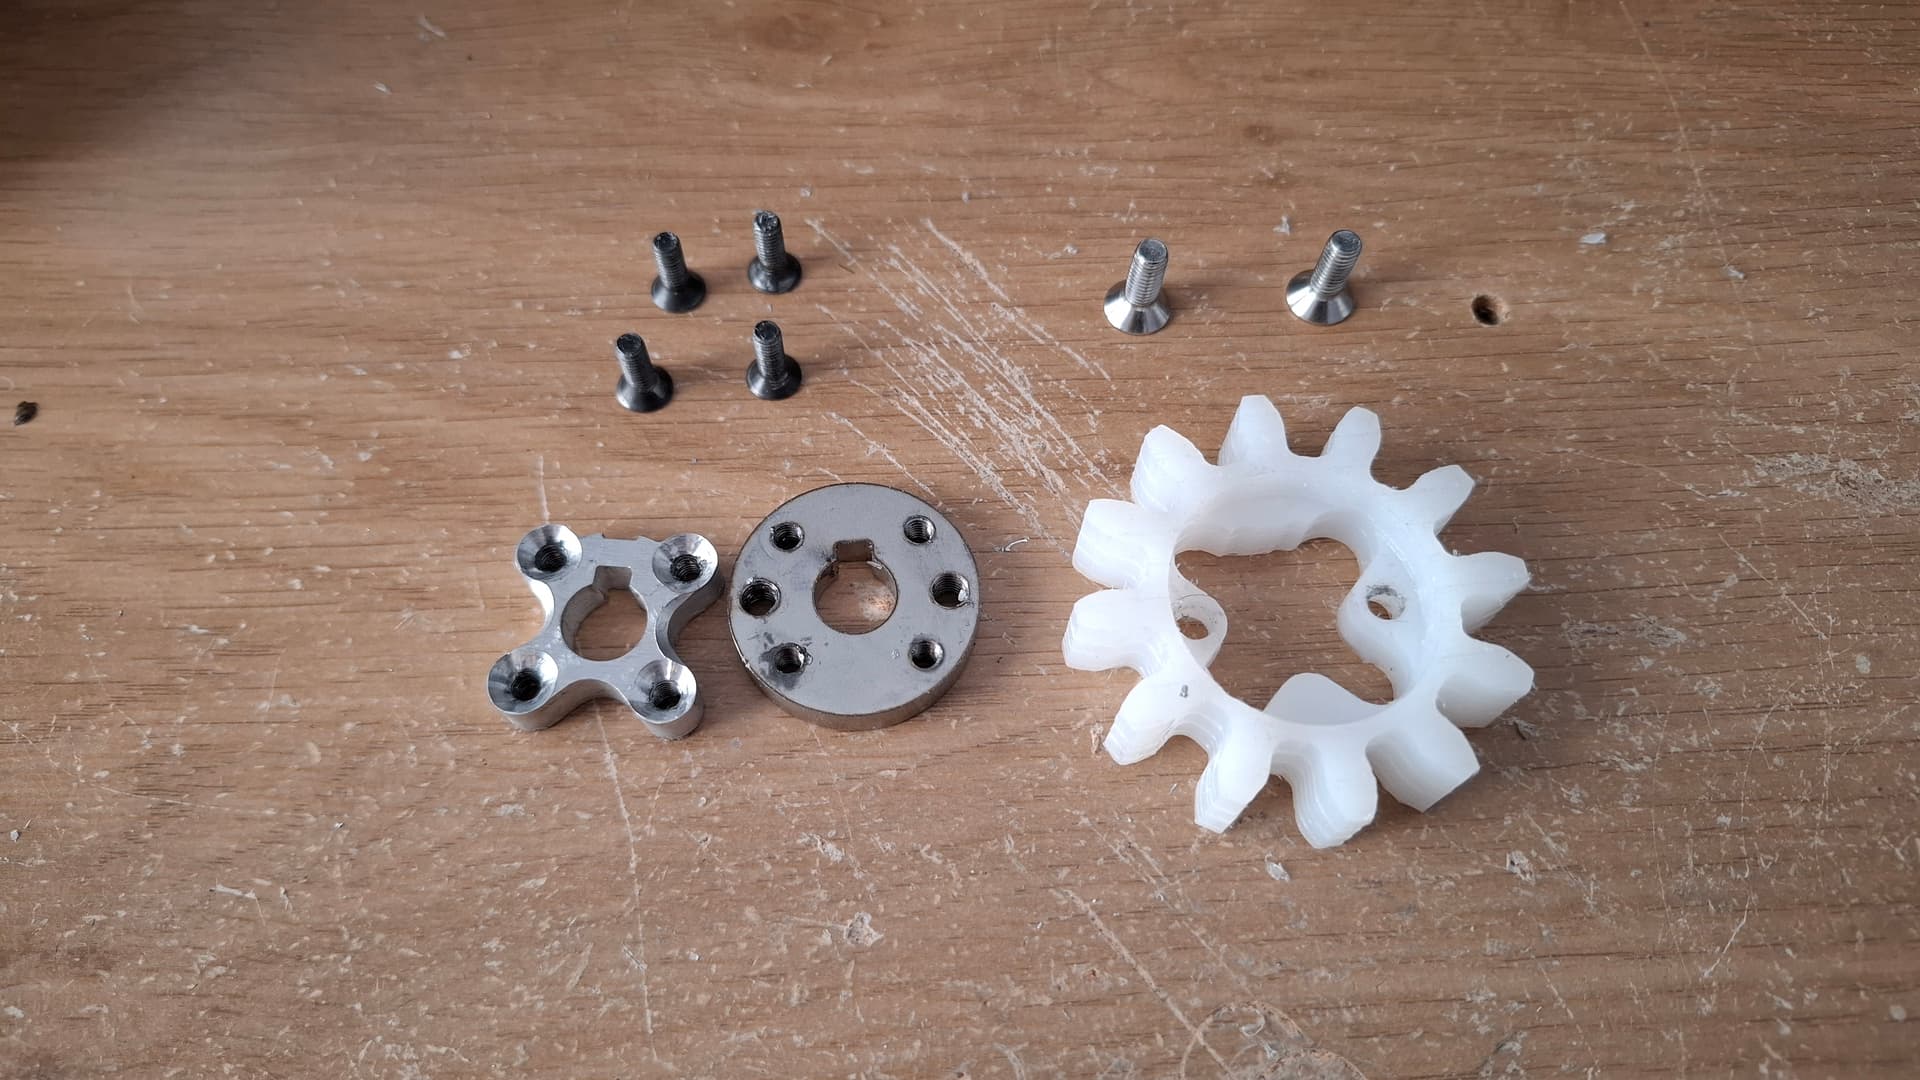
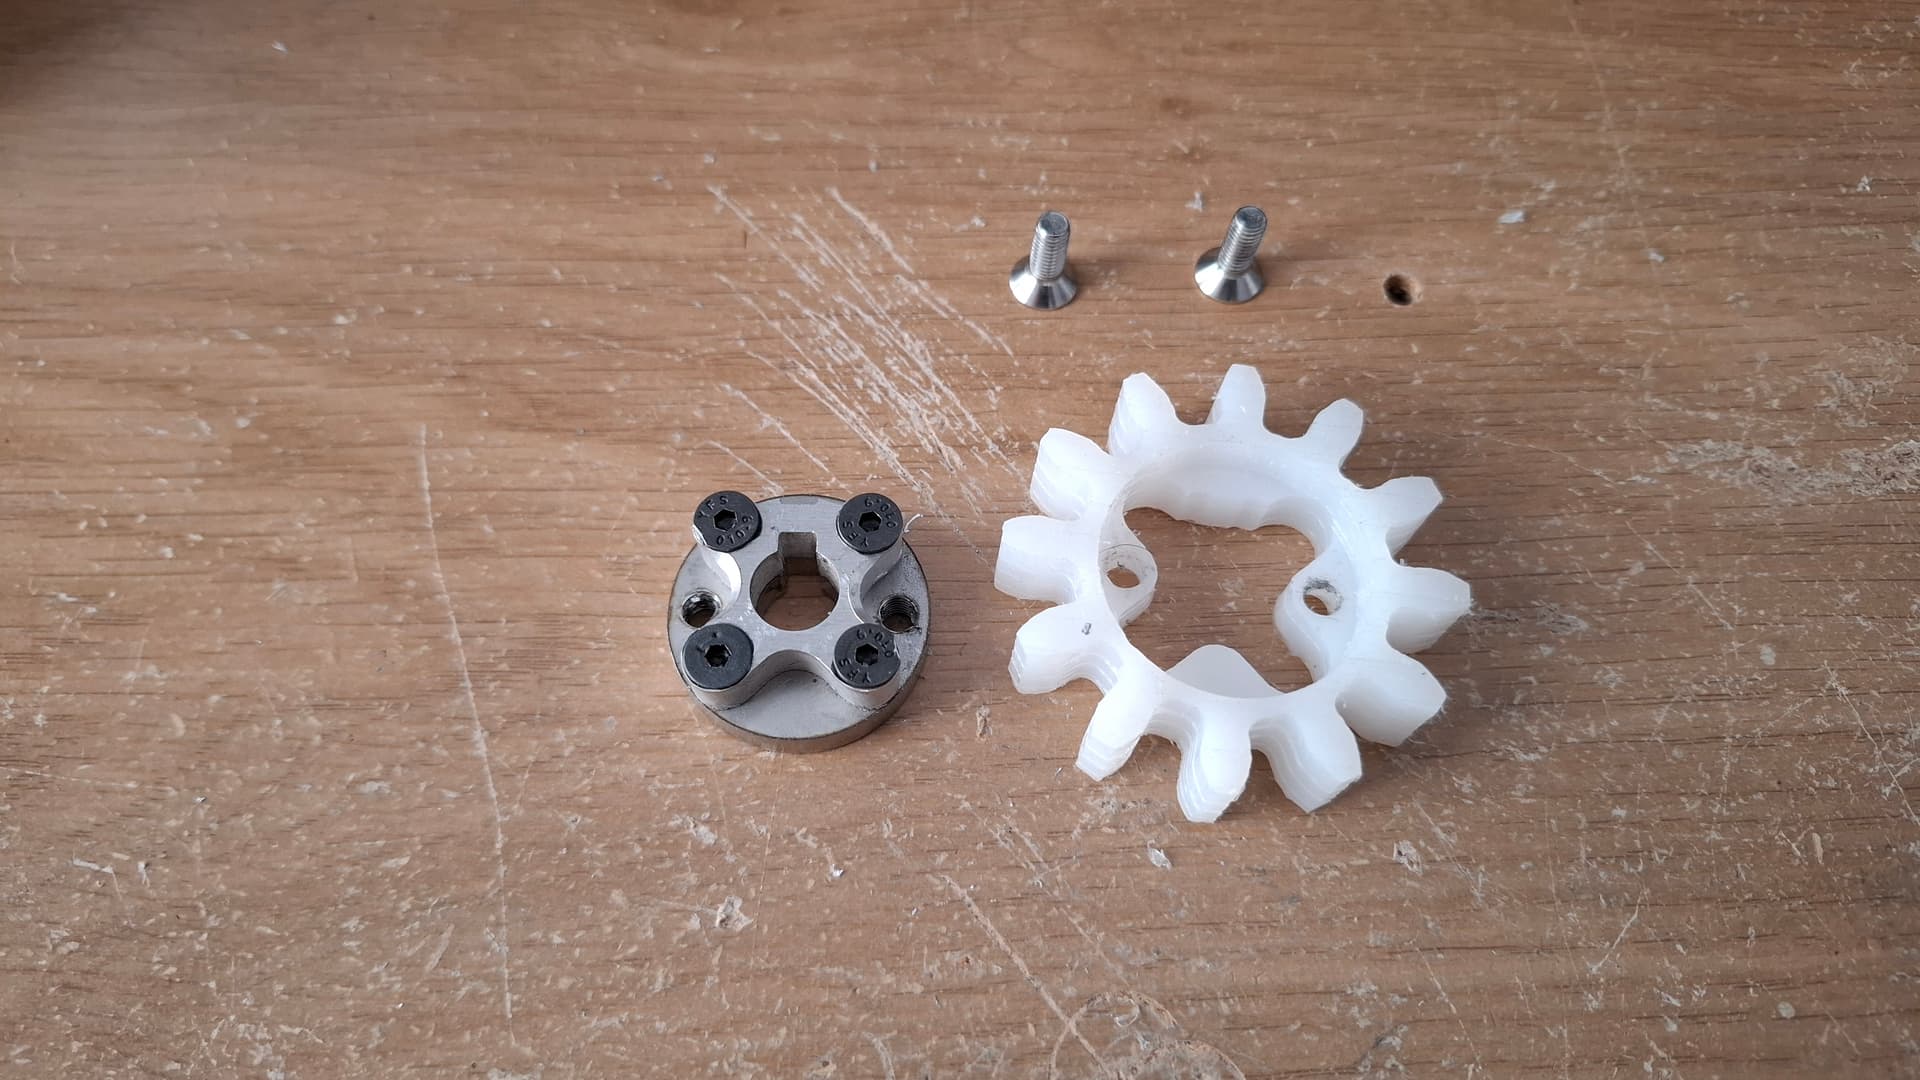
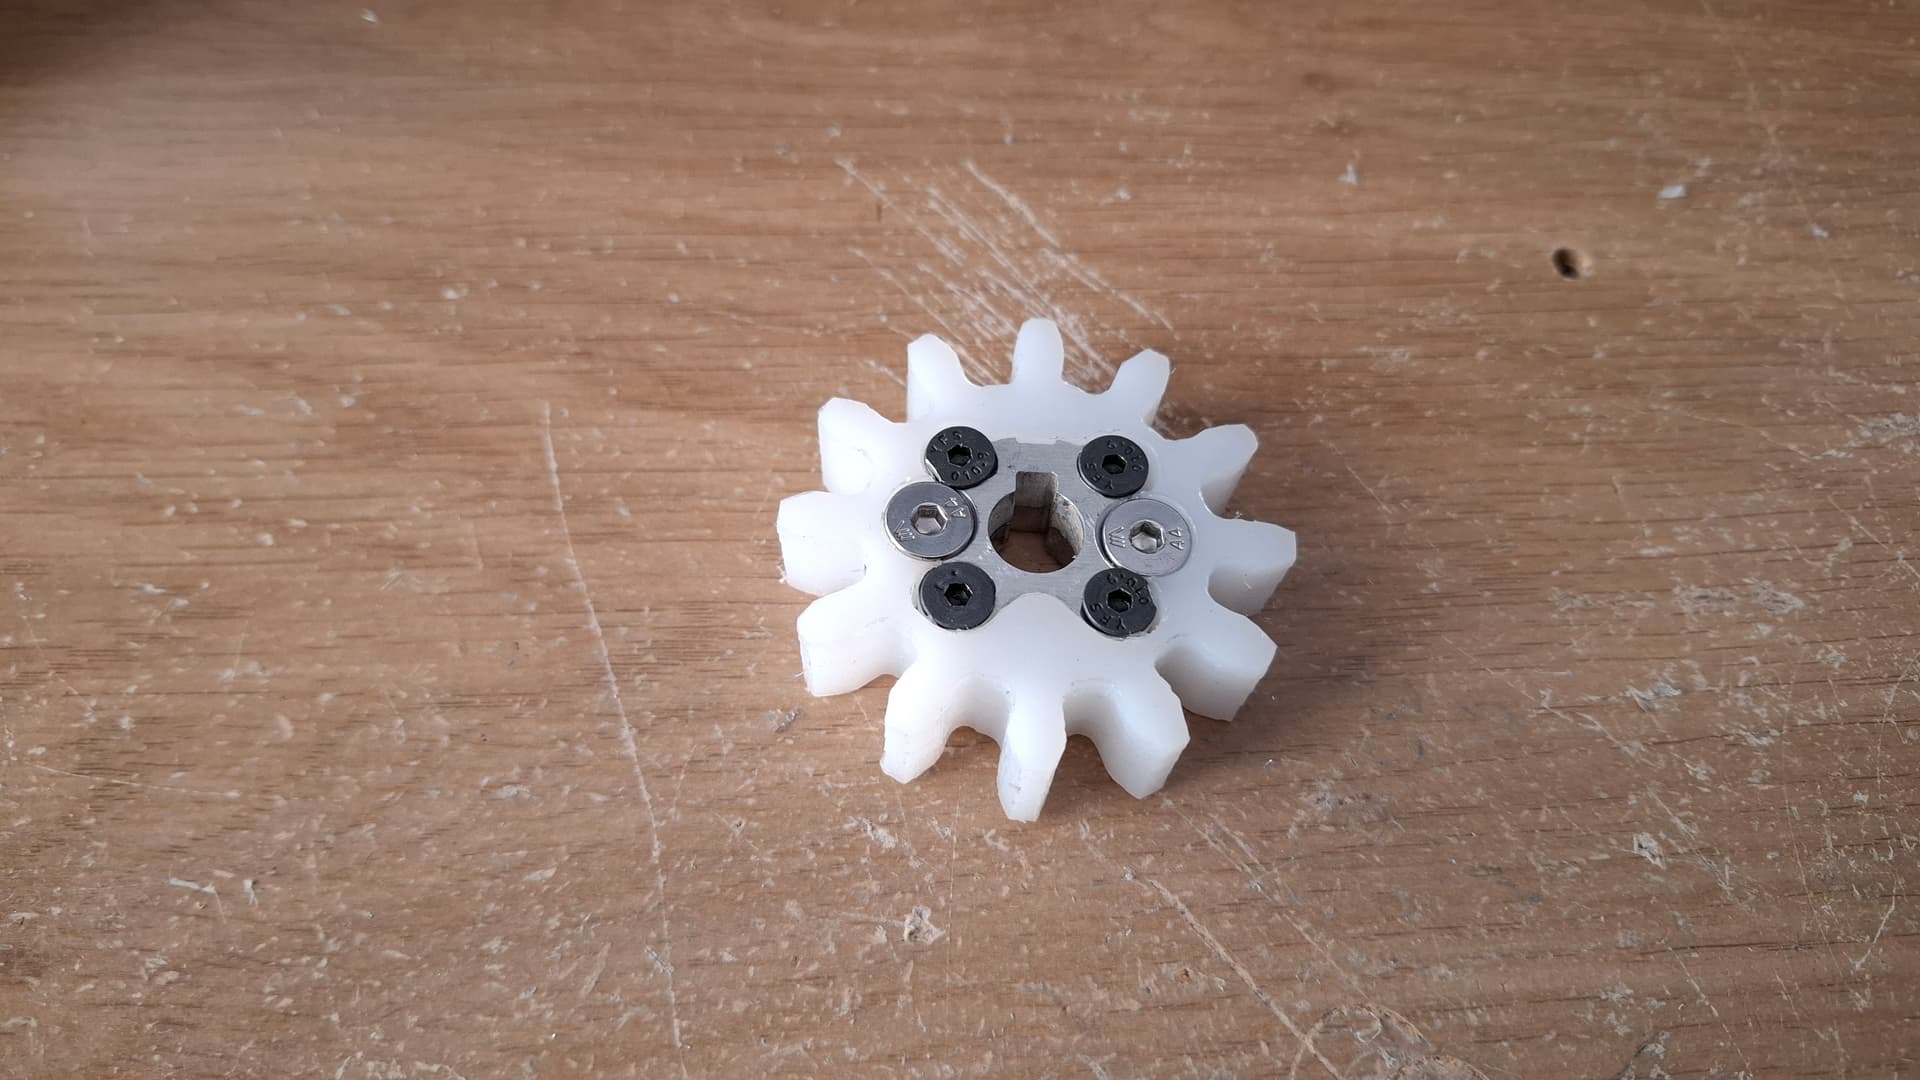
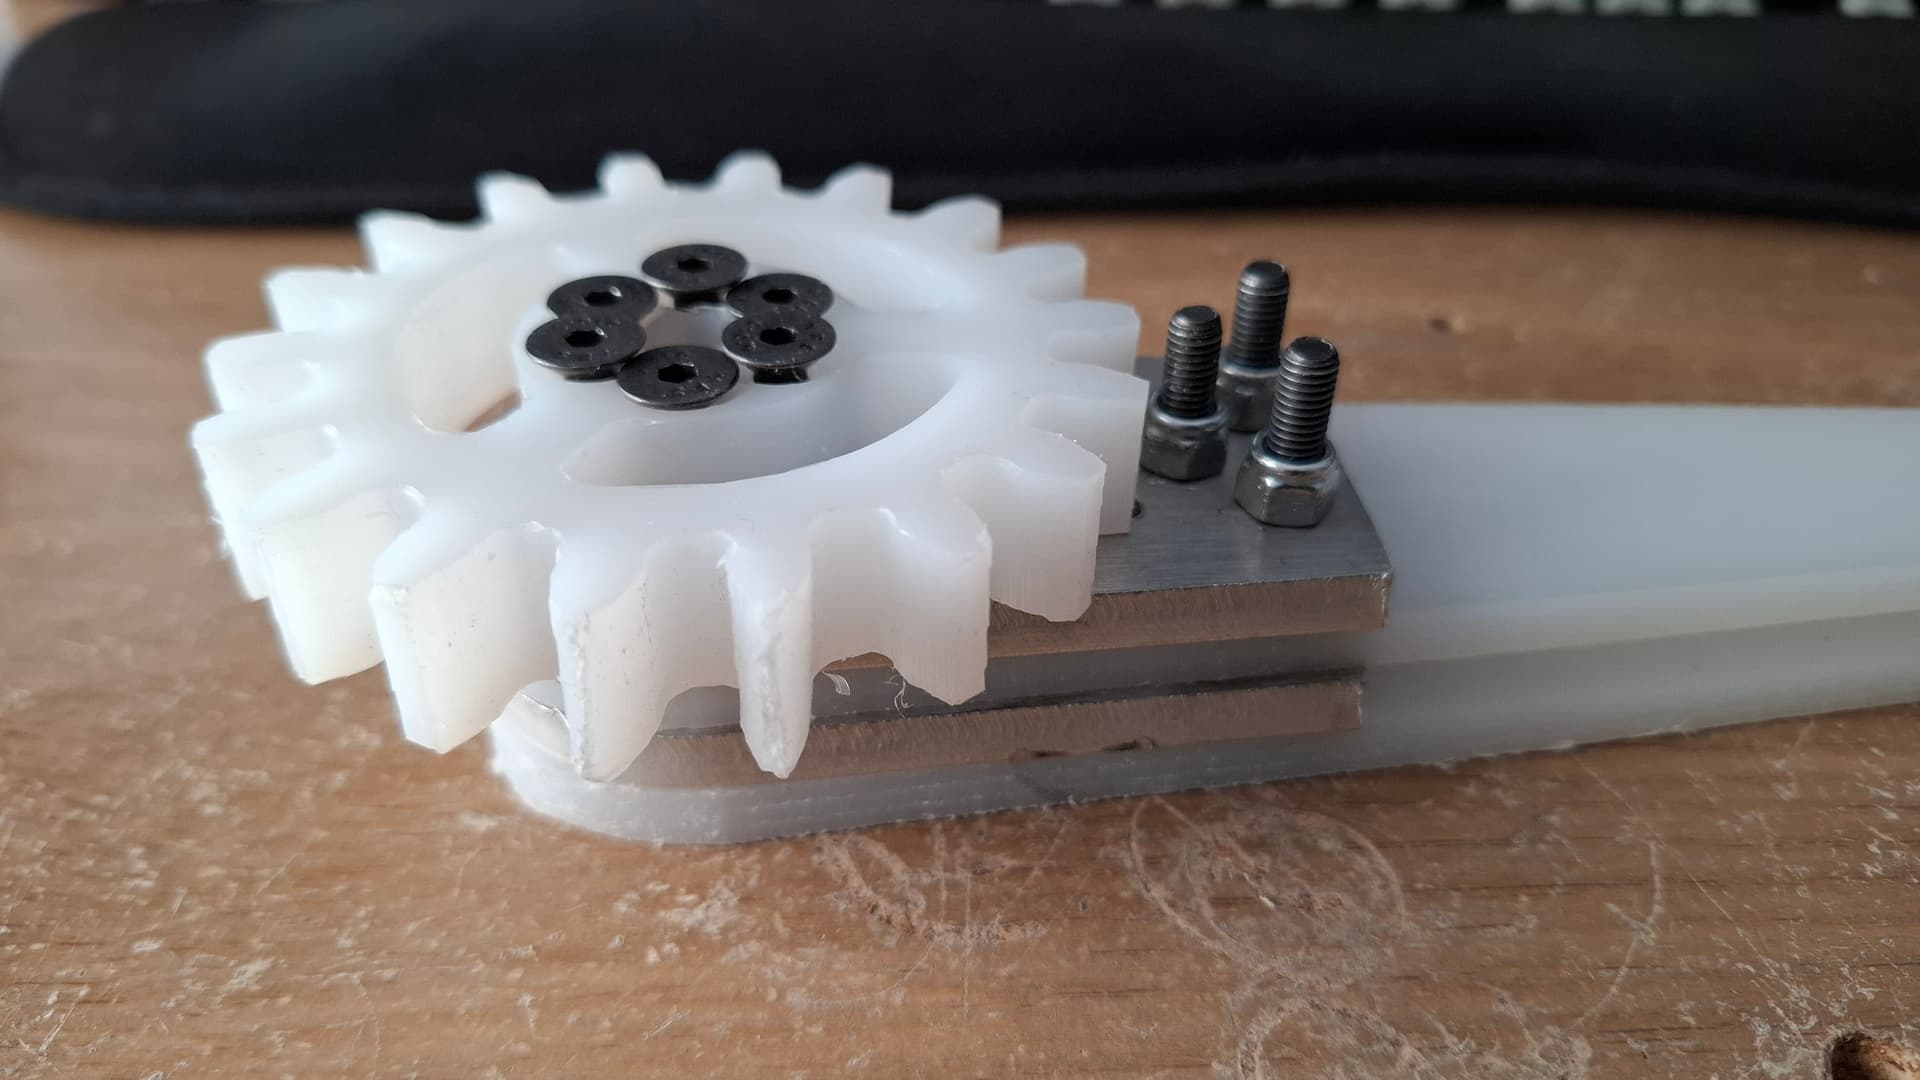
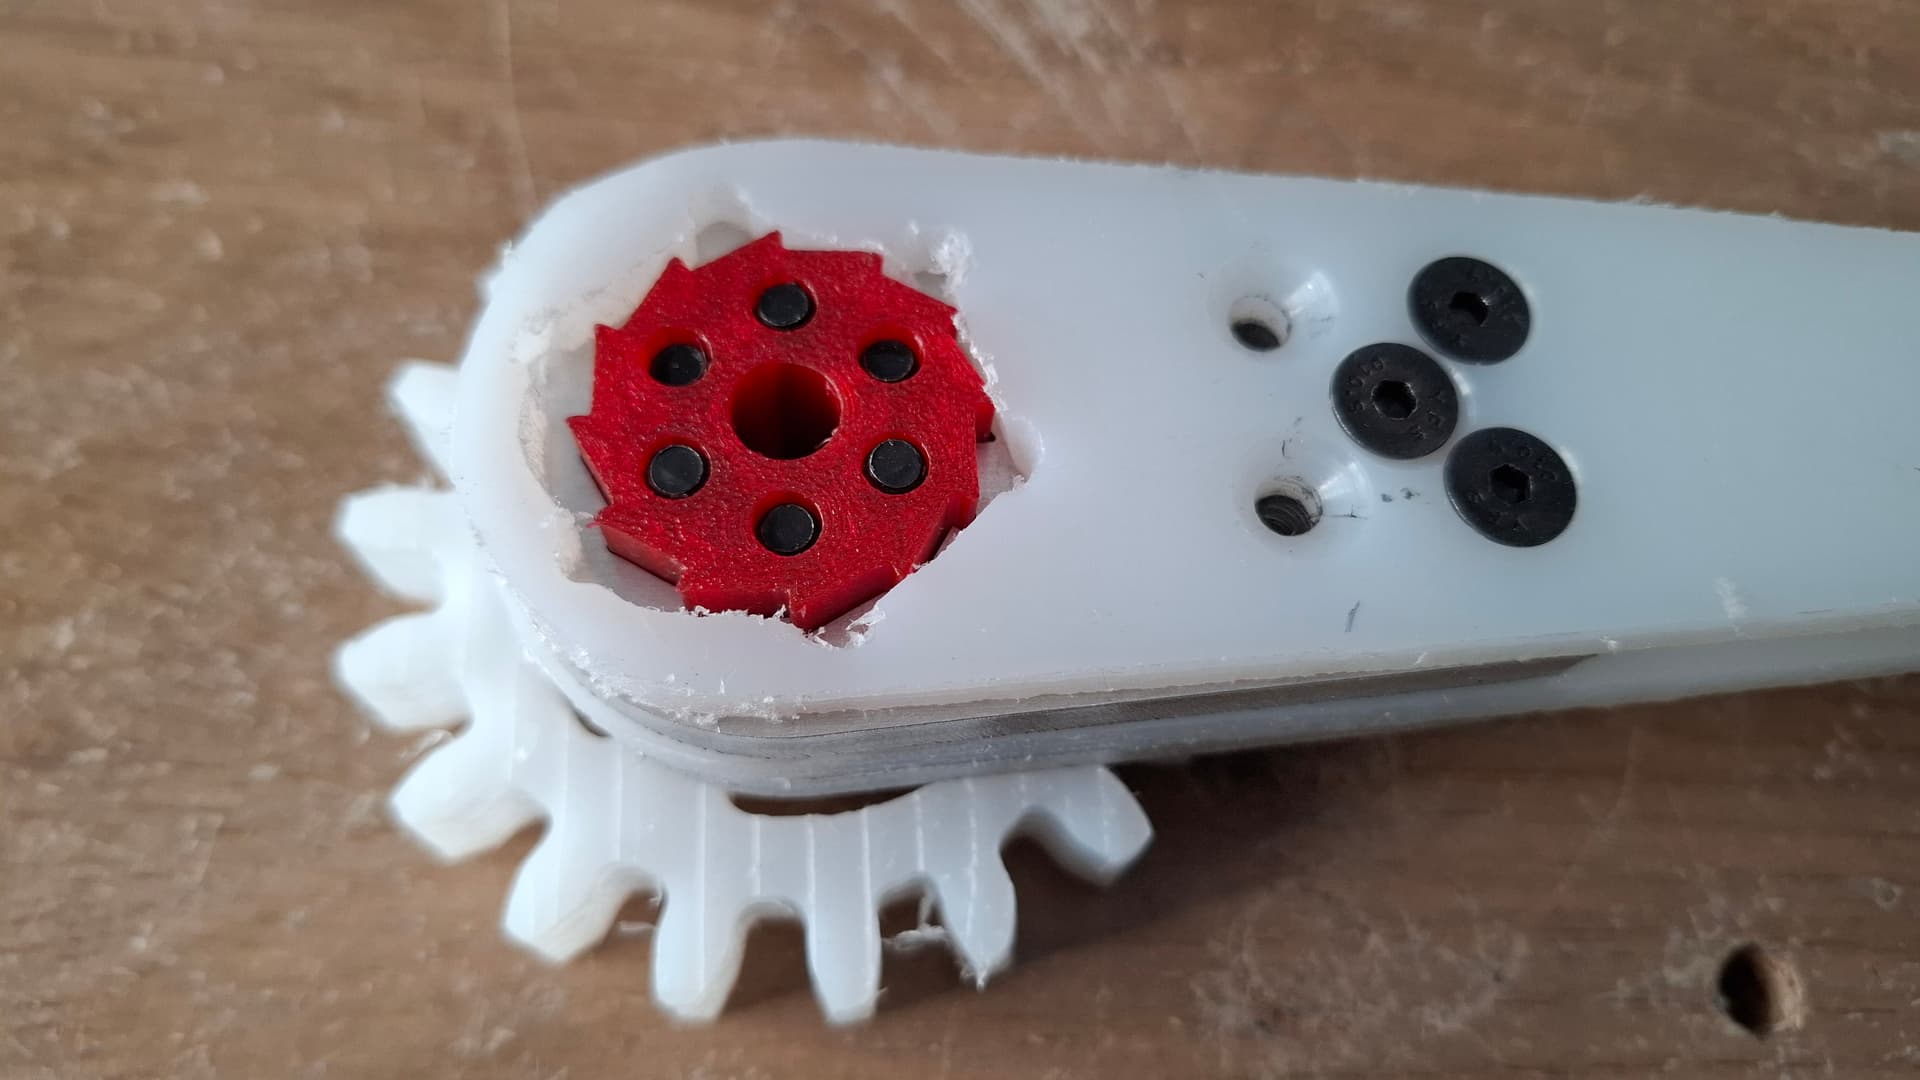
One thing that I have kept from this design in some form is the gear train from the drive motor to the wheel. With only 6mm shafts, I didn’t want to directly mount the wheel to the motor, as a direct hit to the wheel could do a lot of damage to the motor if set up this way.

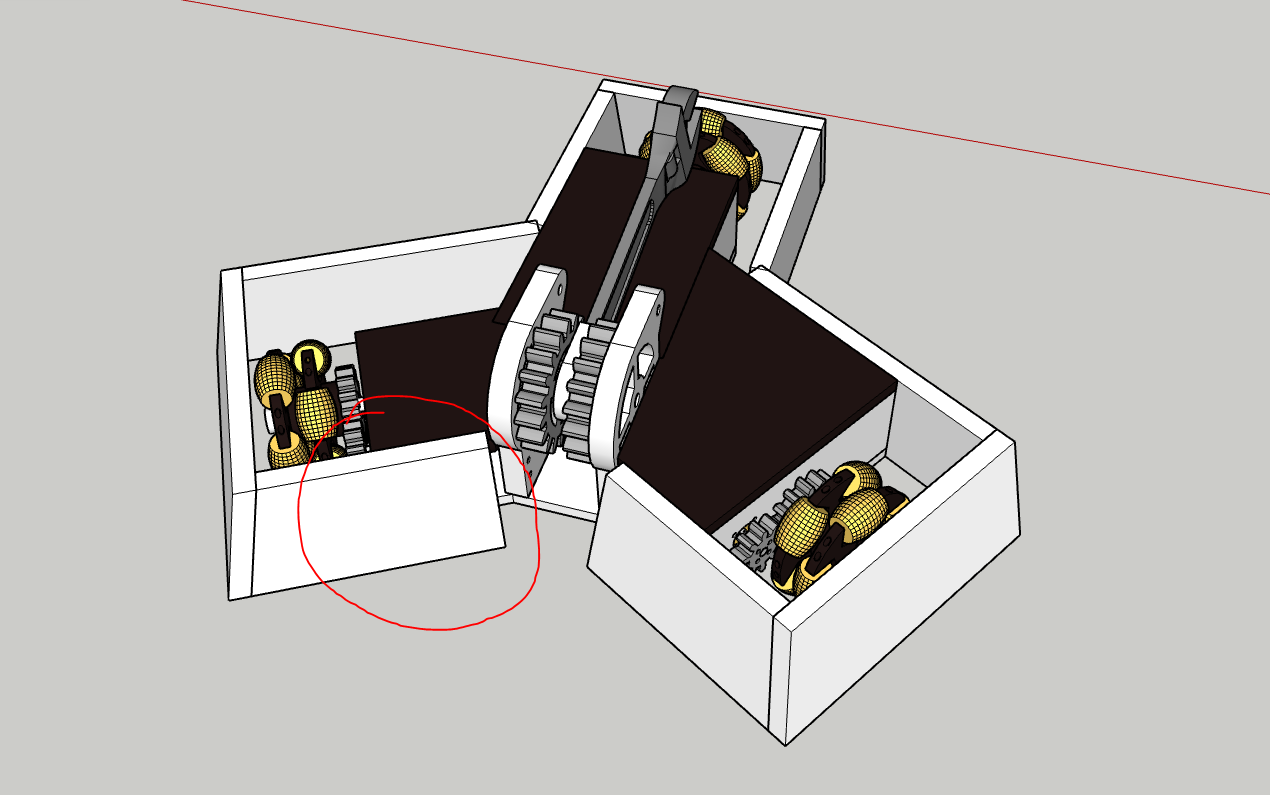
I planned to use 12mm HDPE for the armour skirt for this, but again would have cost a lot of weight, and resulted in lots of awkward shapes to cut.

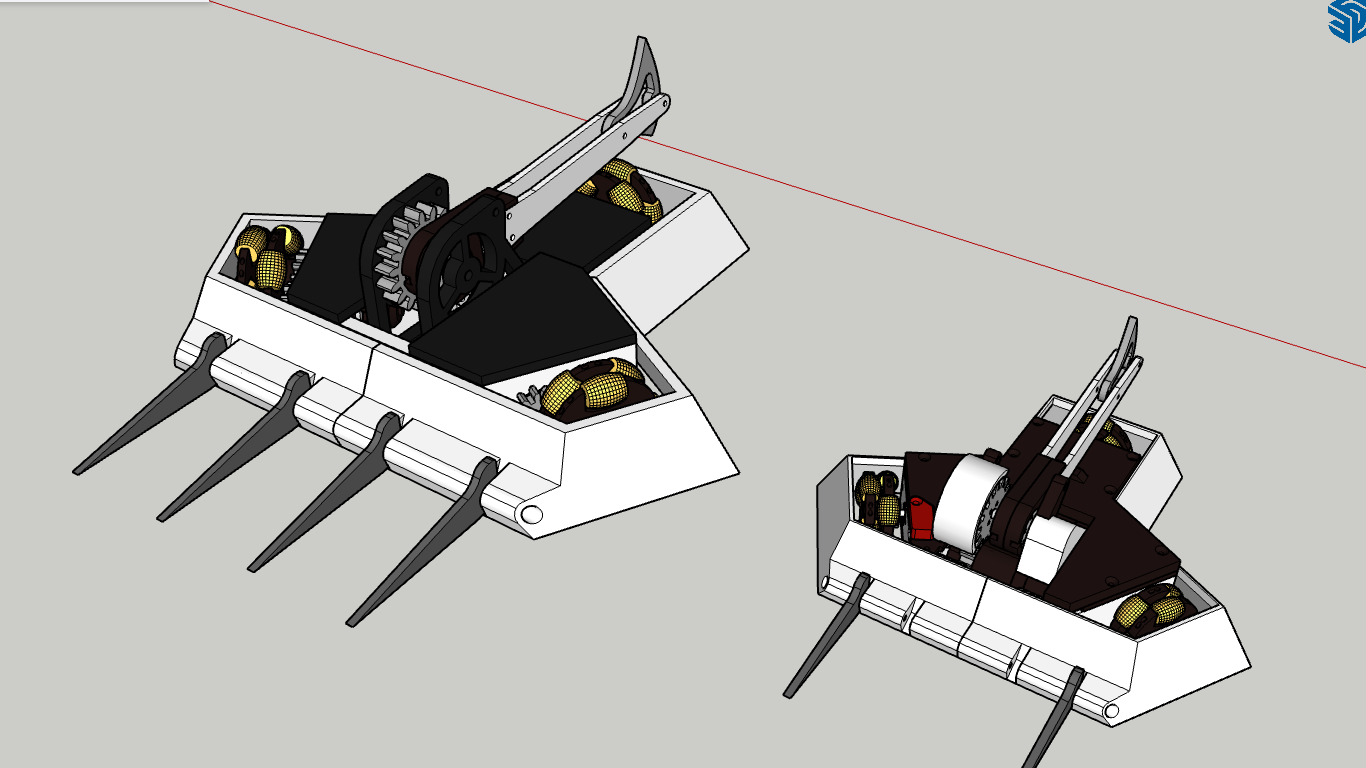
Attempt 2 around last September was to literally scale up the beetleweight design and modify the parts to fit. This was a lot more aesthetically pleasing to me, but I still wasn’t sold on doing that, as now component location was largely dictated by the beetle design.

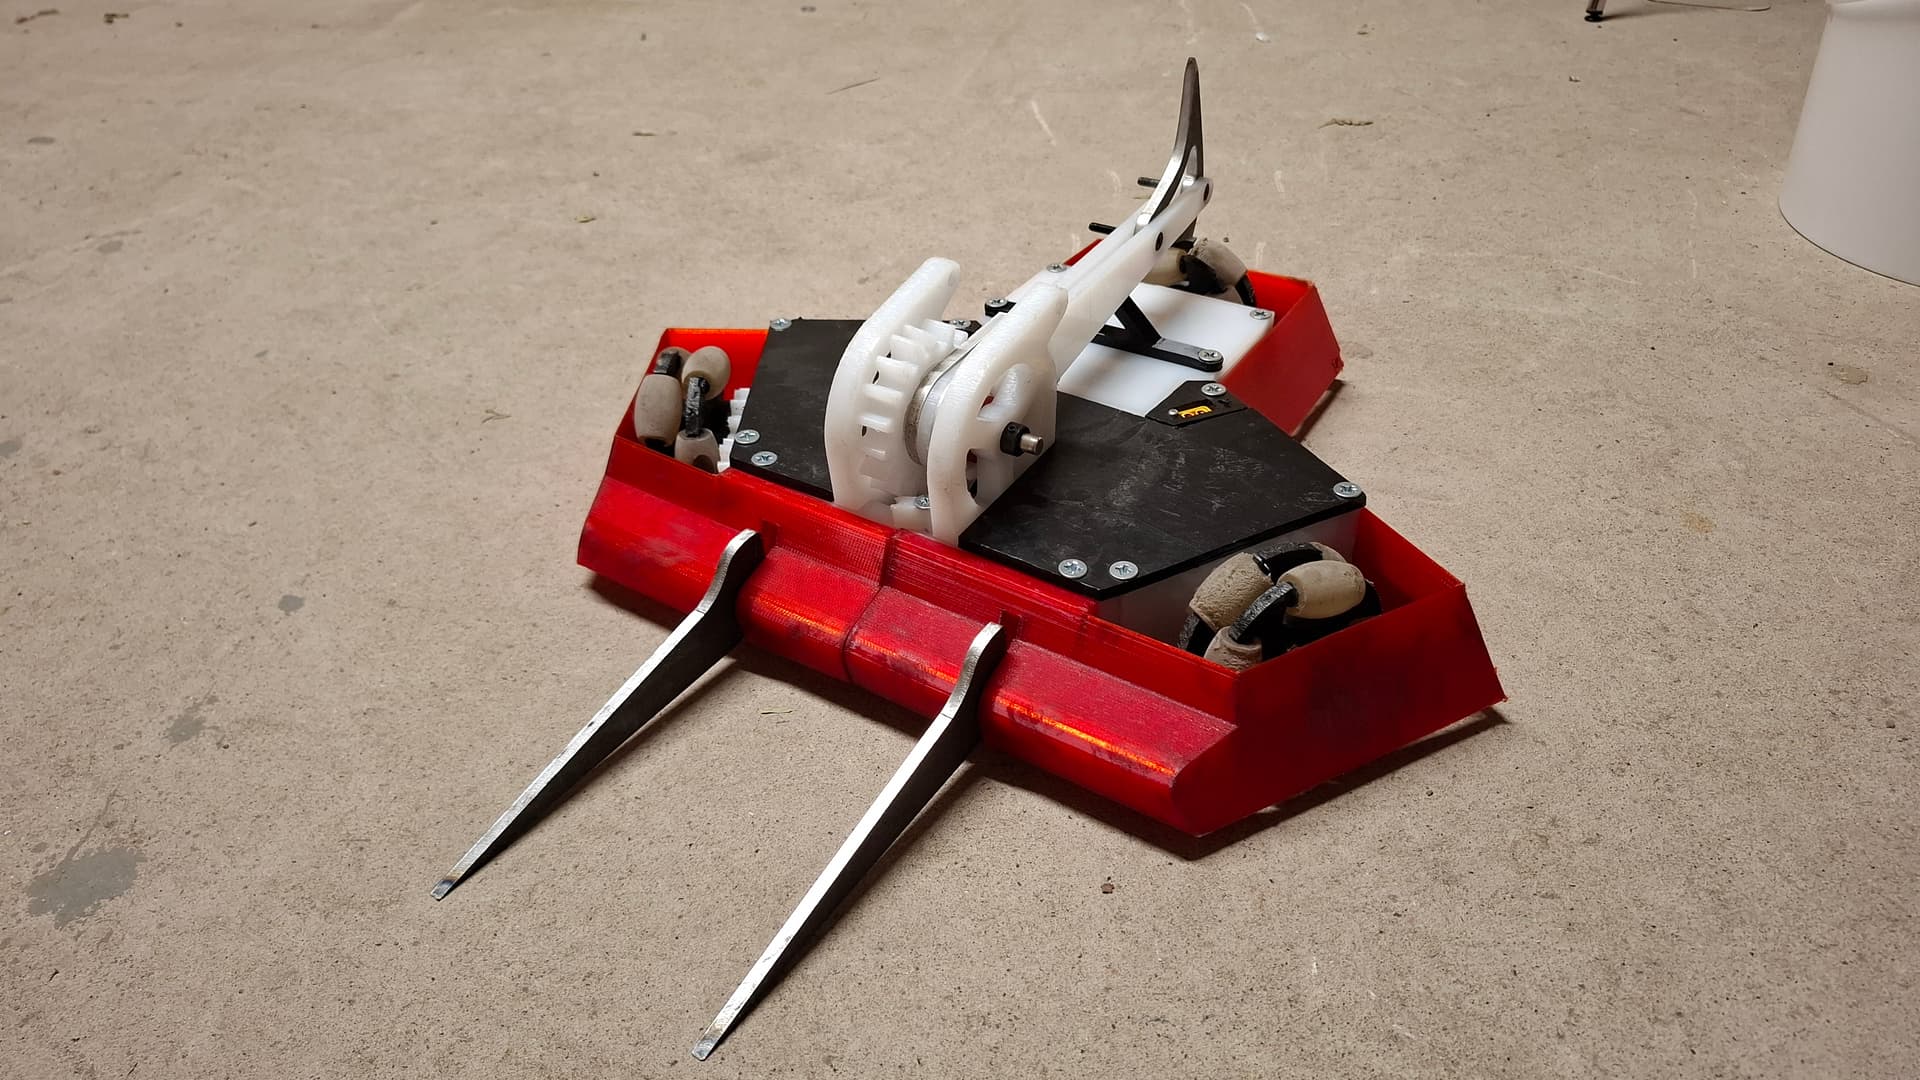
I did a Lasered order at the start of this year in preparation for actually building the bot. I more or less scaled up the fork and axe head from the beetle 2x.

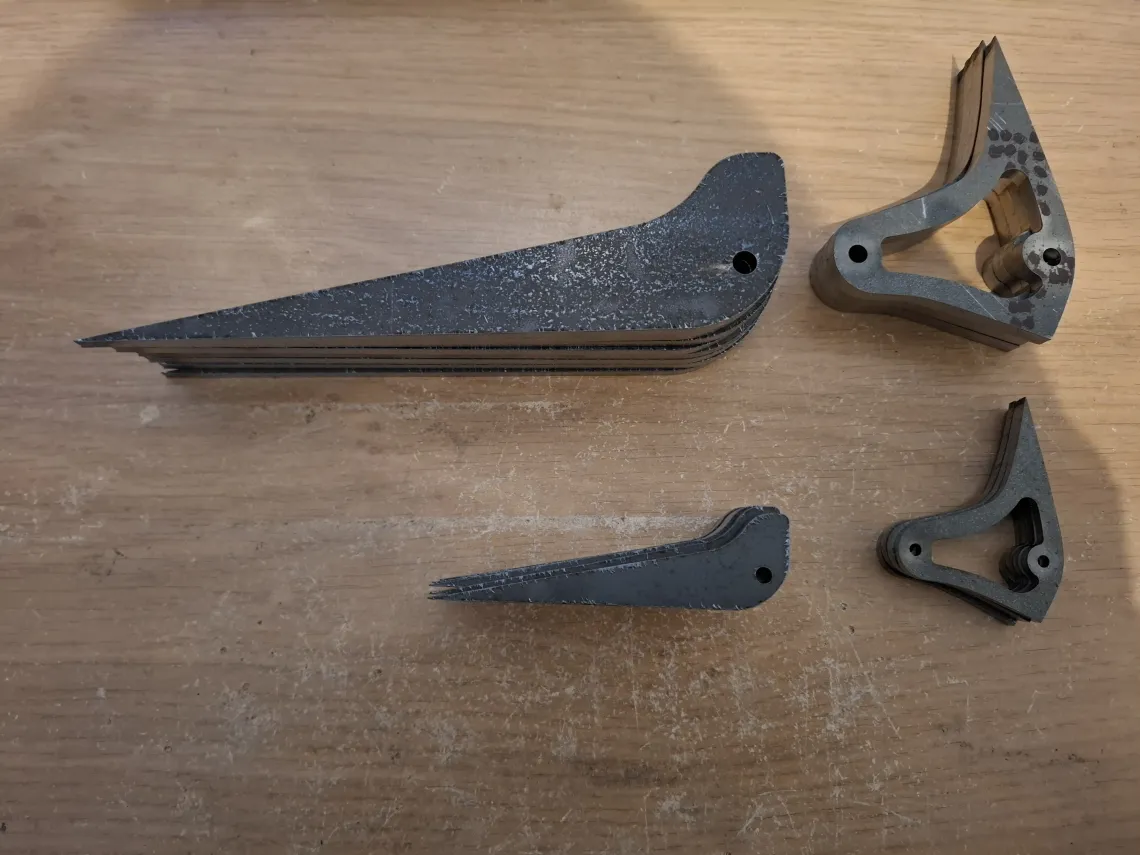
Admittedly, the forks are chonkier than necessary, if I get more cut, I’m going to remove some material from them.

A couple of weeks ago, I finally got off my backside and started to make a Fusion 360 version of the CD. This time, I just made it from scratch, learning some of the key features of F360 along the way - components and the timeline really helped here!

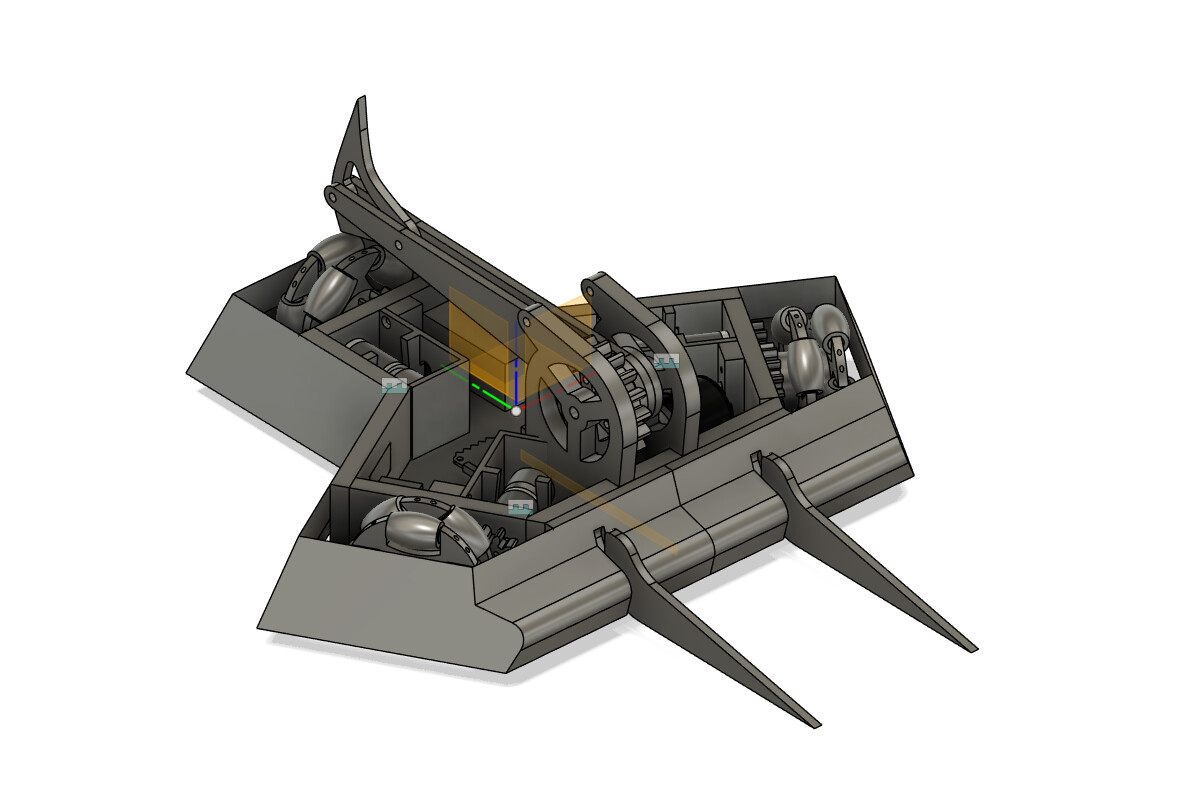
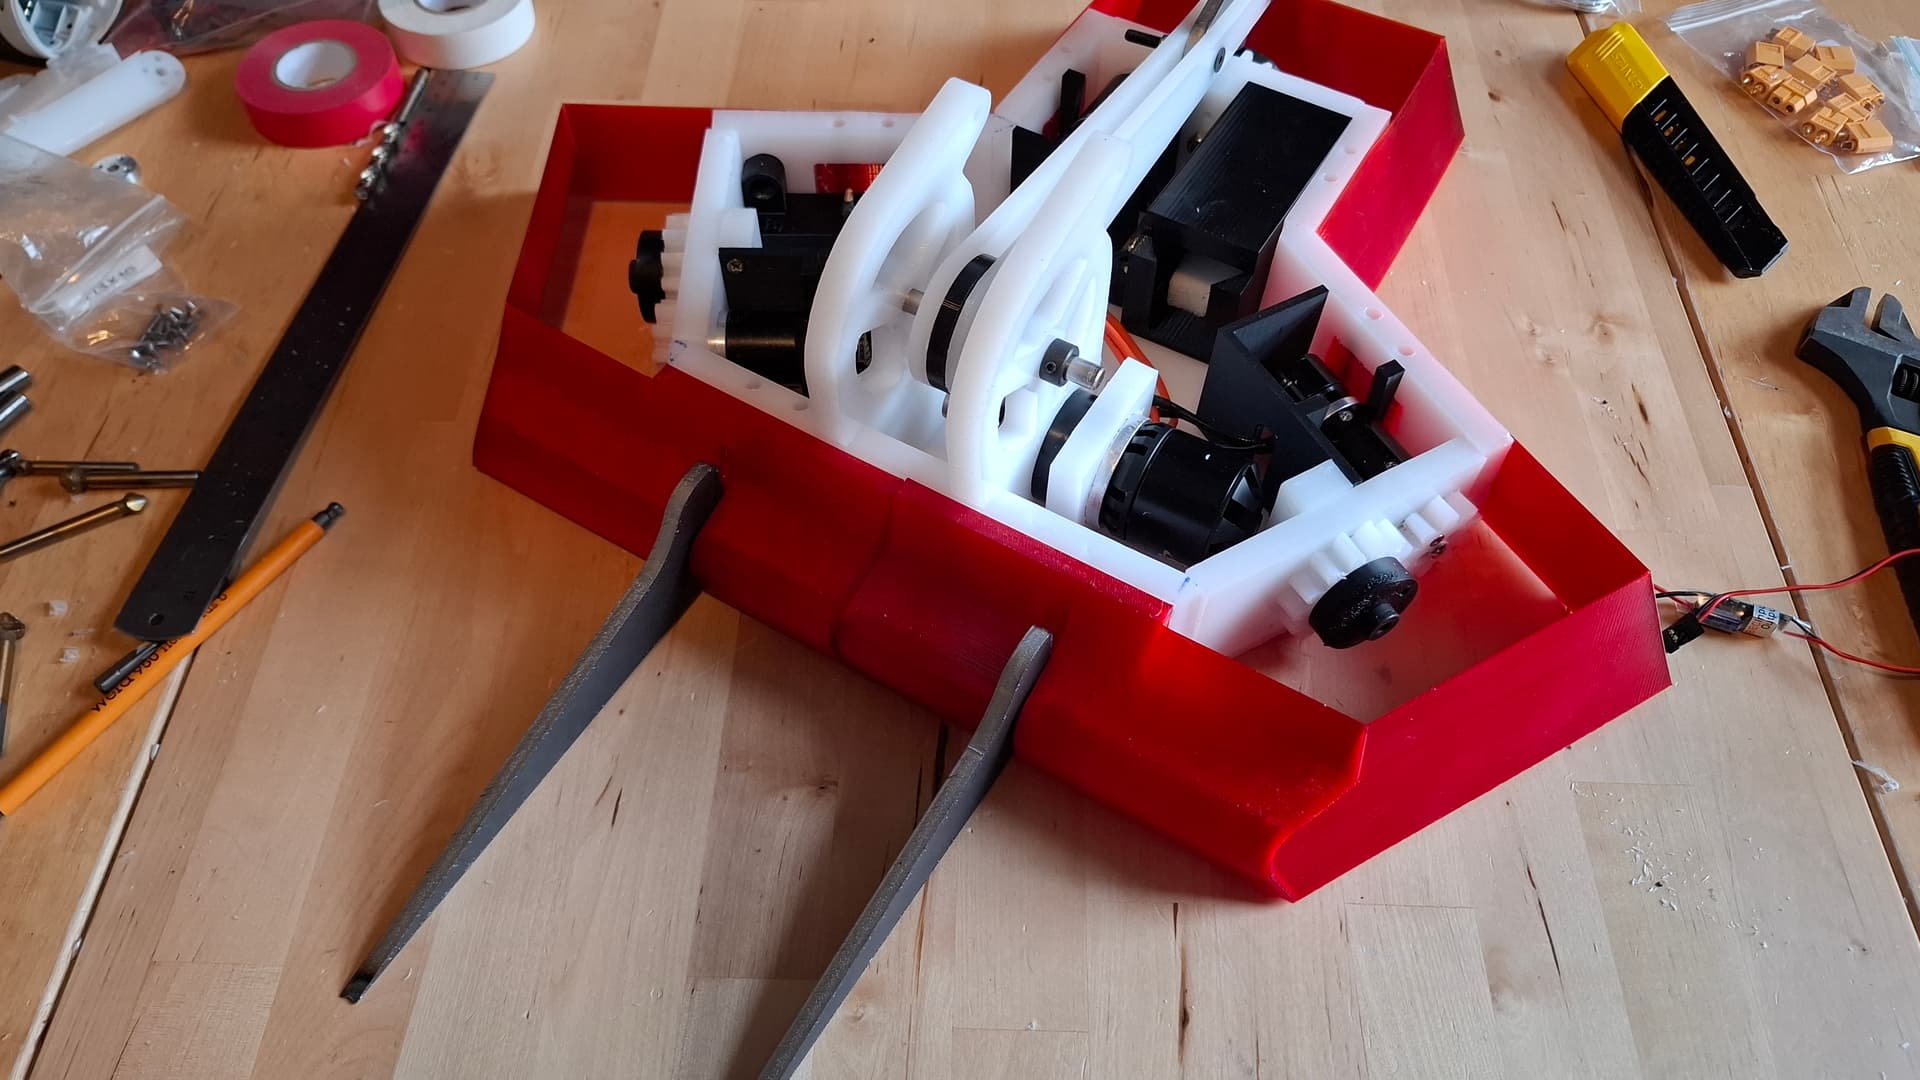
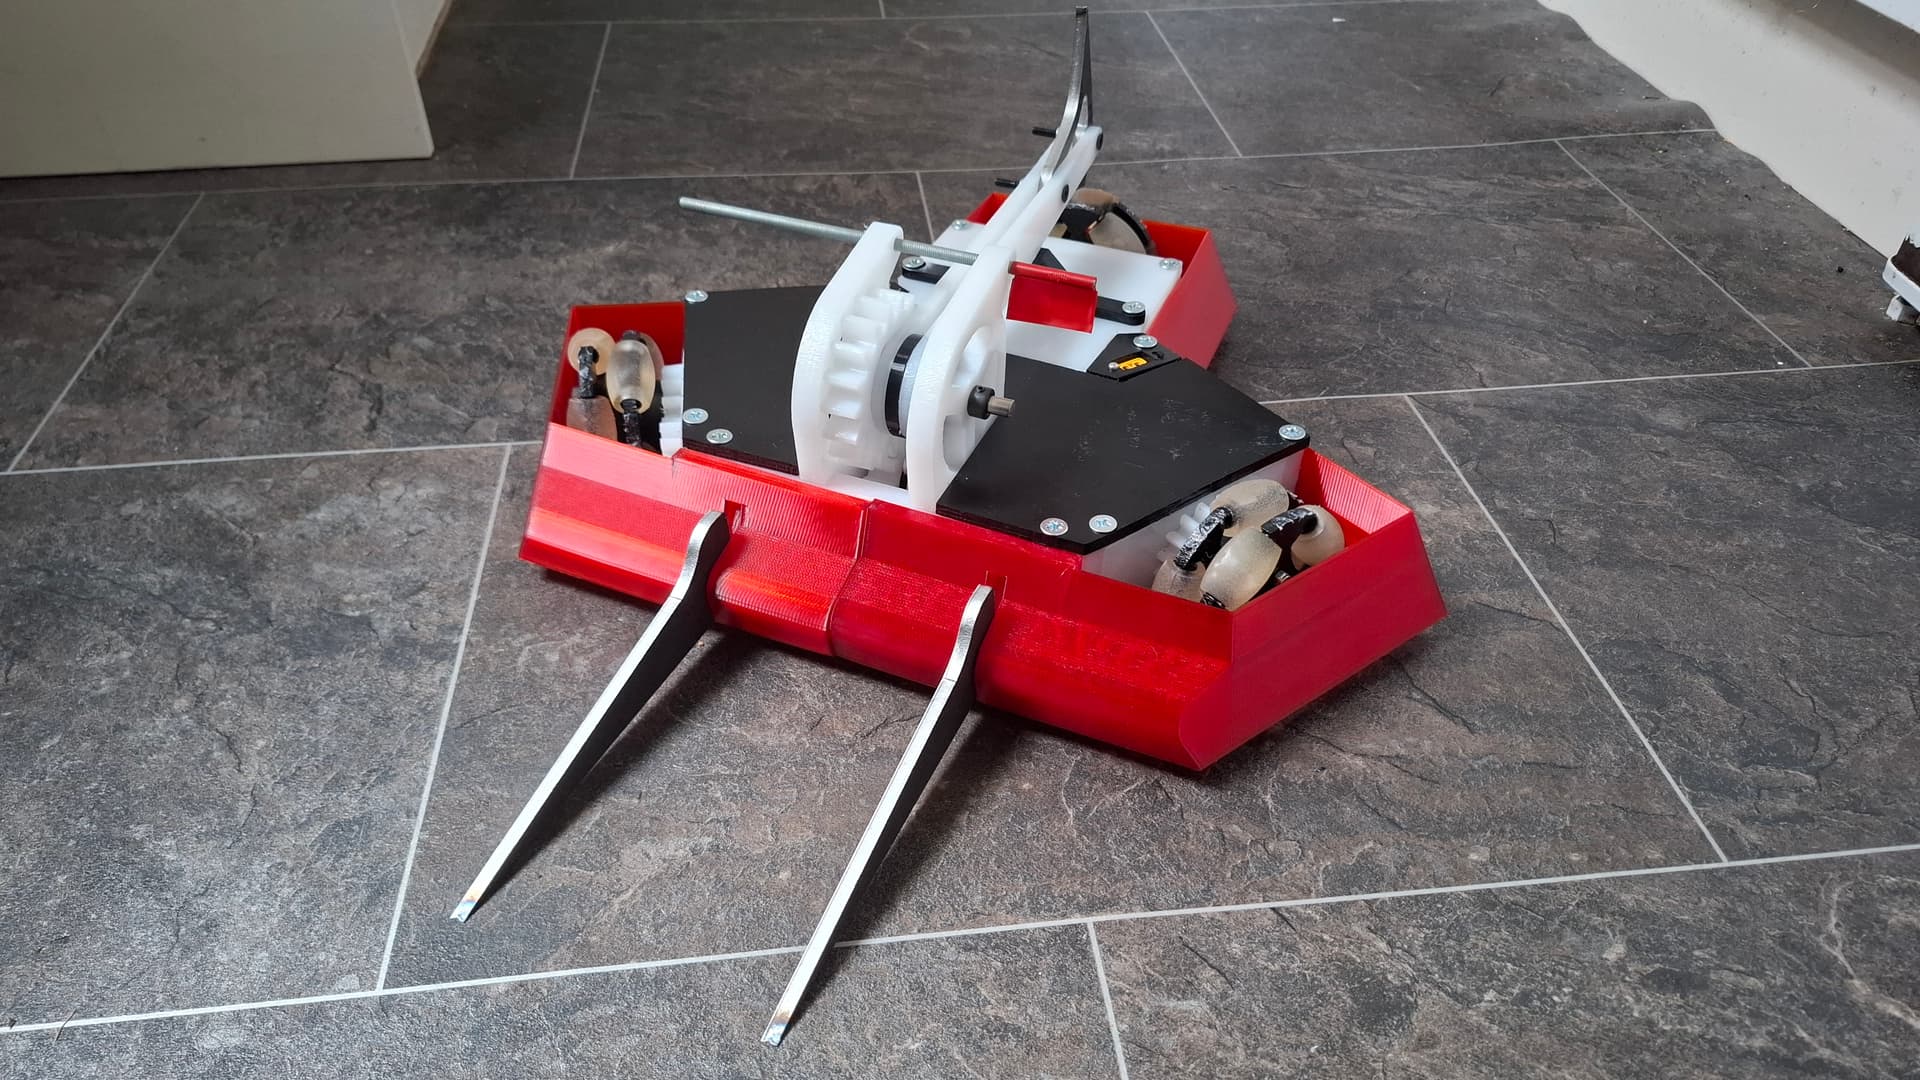
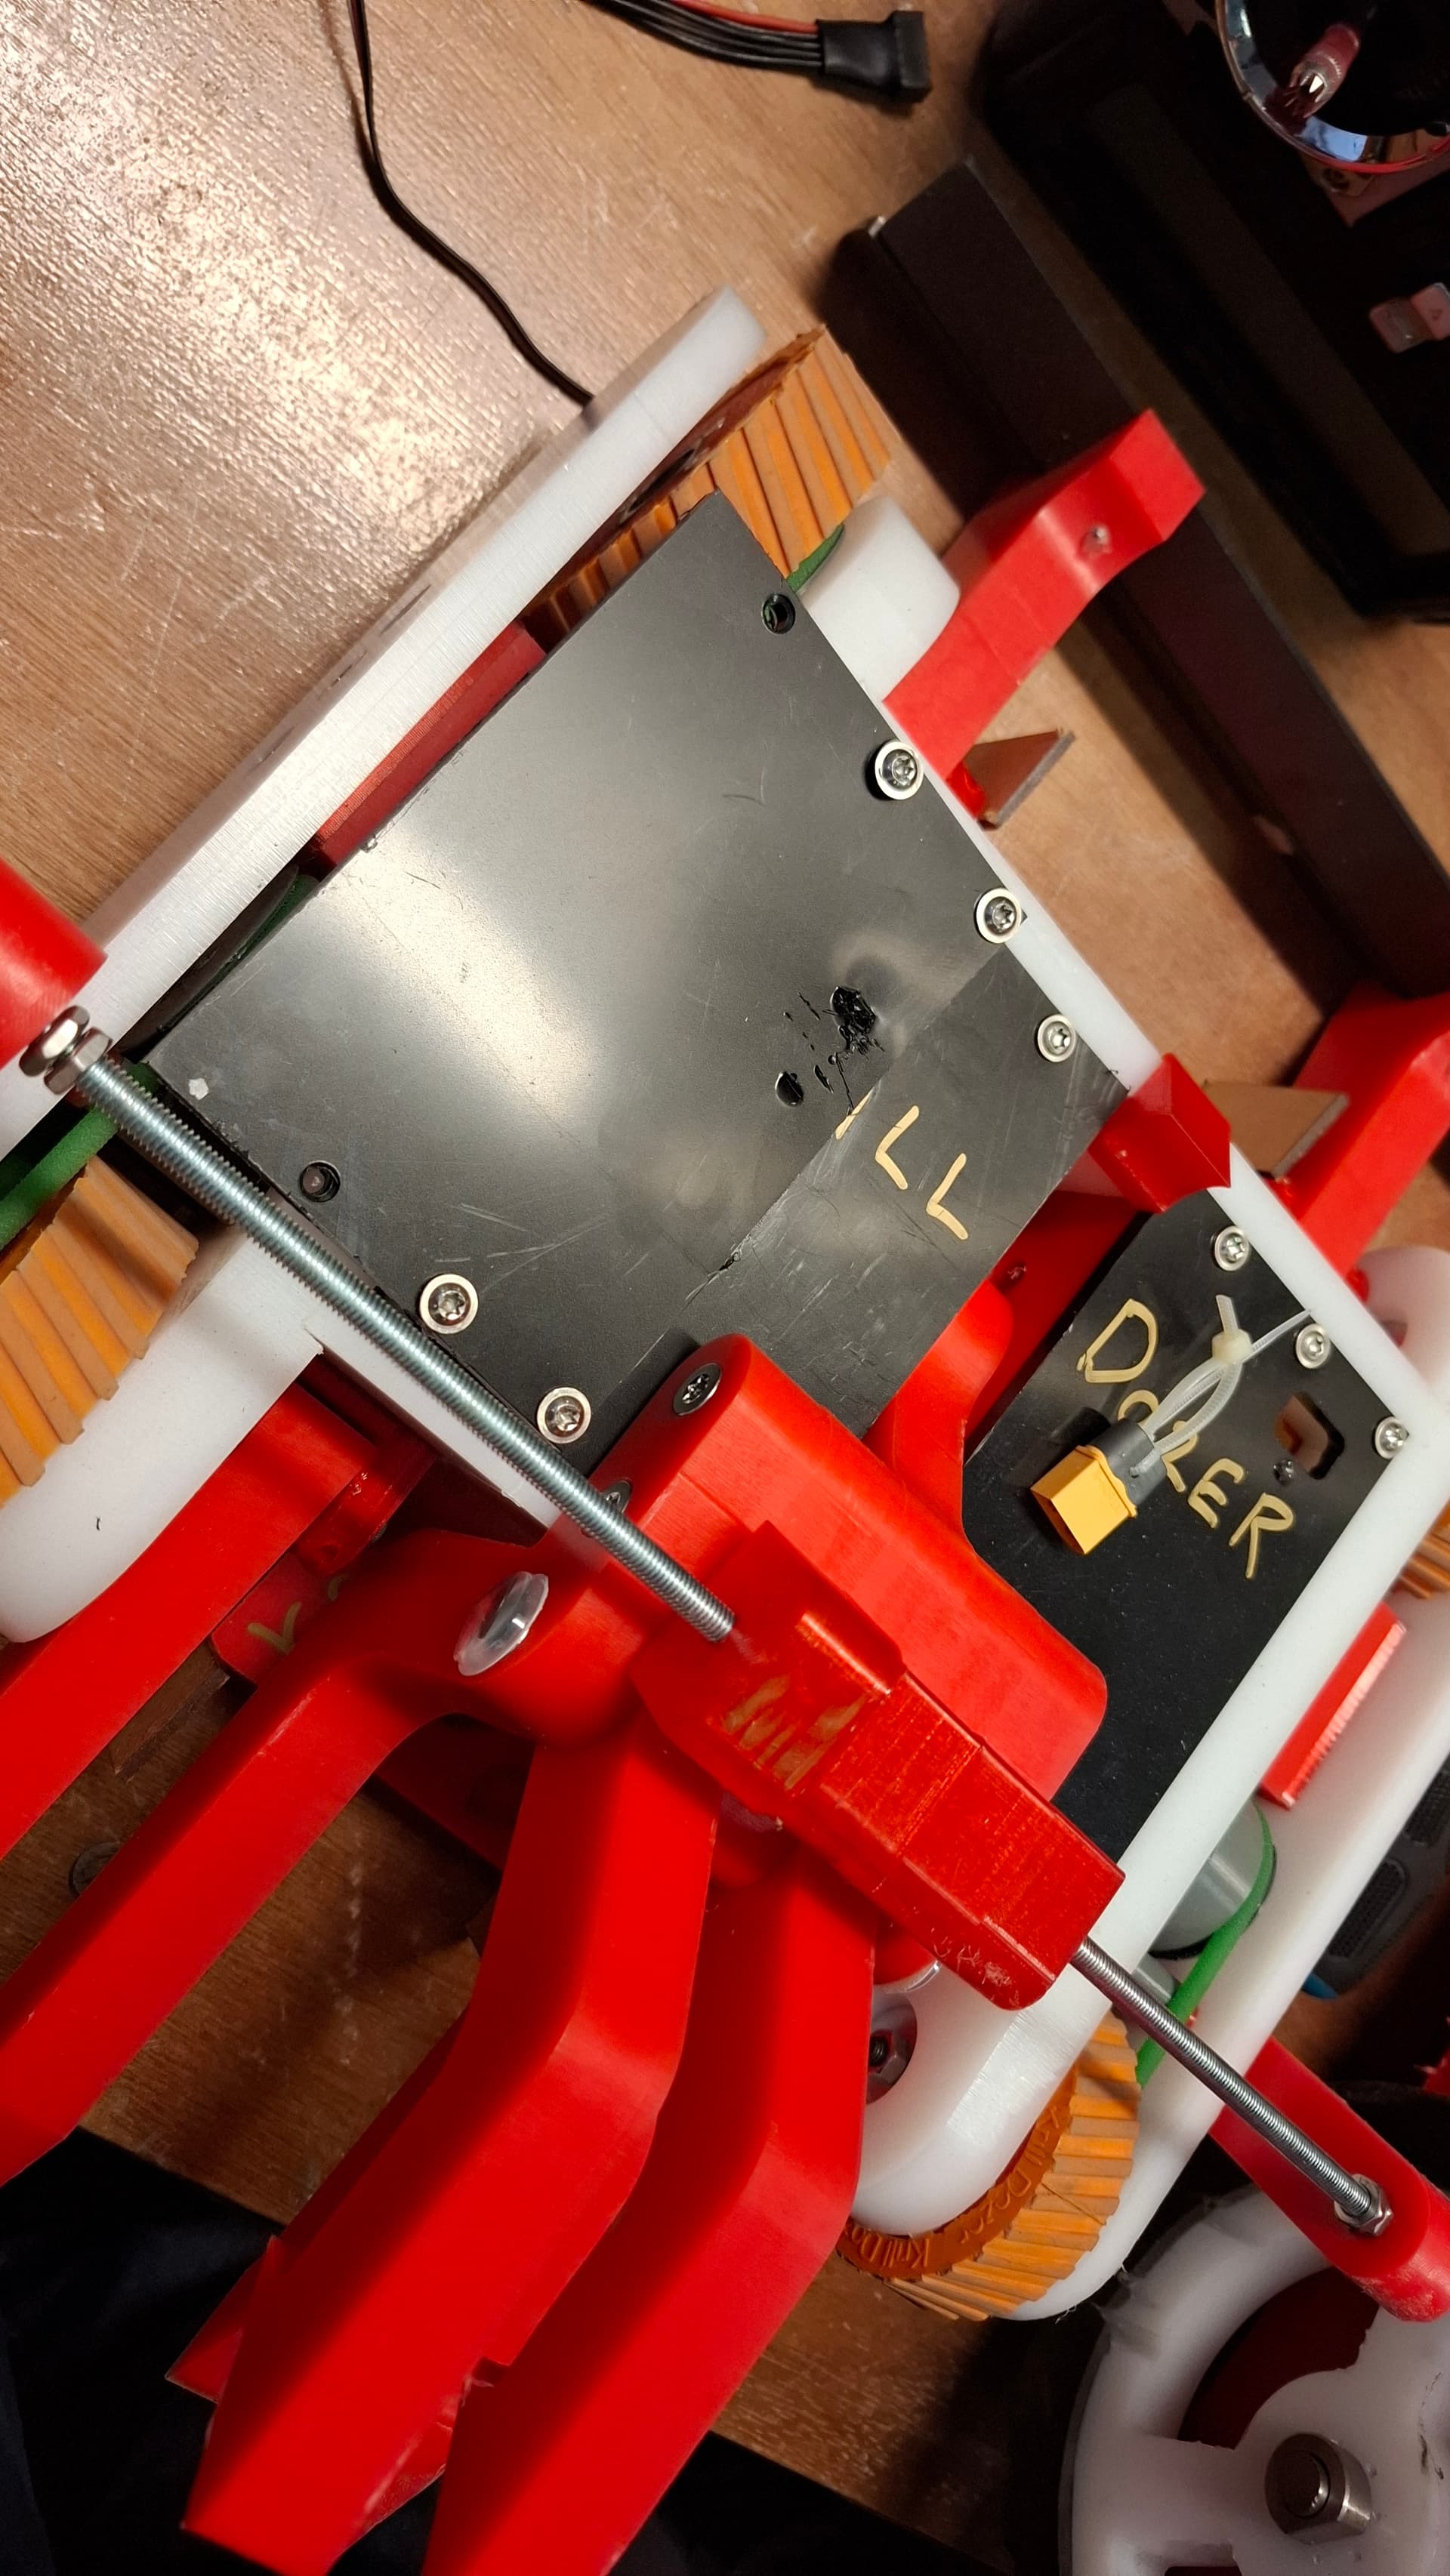
Still a few things to sort out - the most obvious is the lack of top plates, but some more detailed work like mounting/support for the weapon motor and TPU enclosures for the electronics, but happy with the general design now.

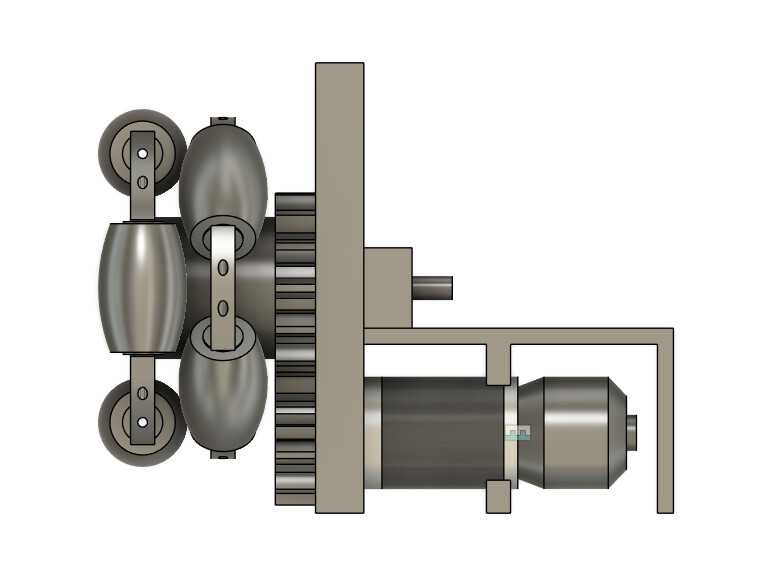
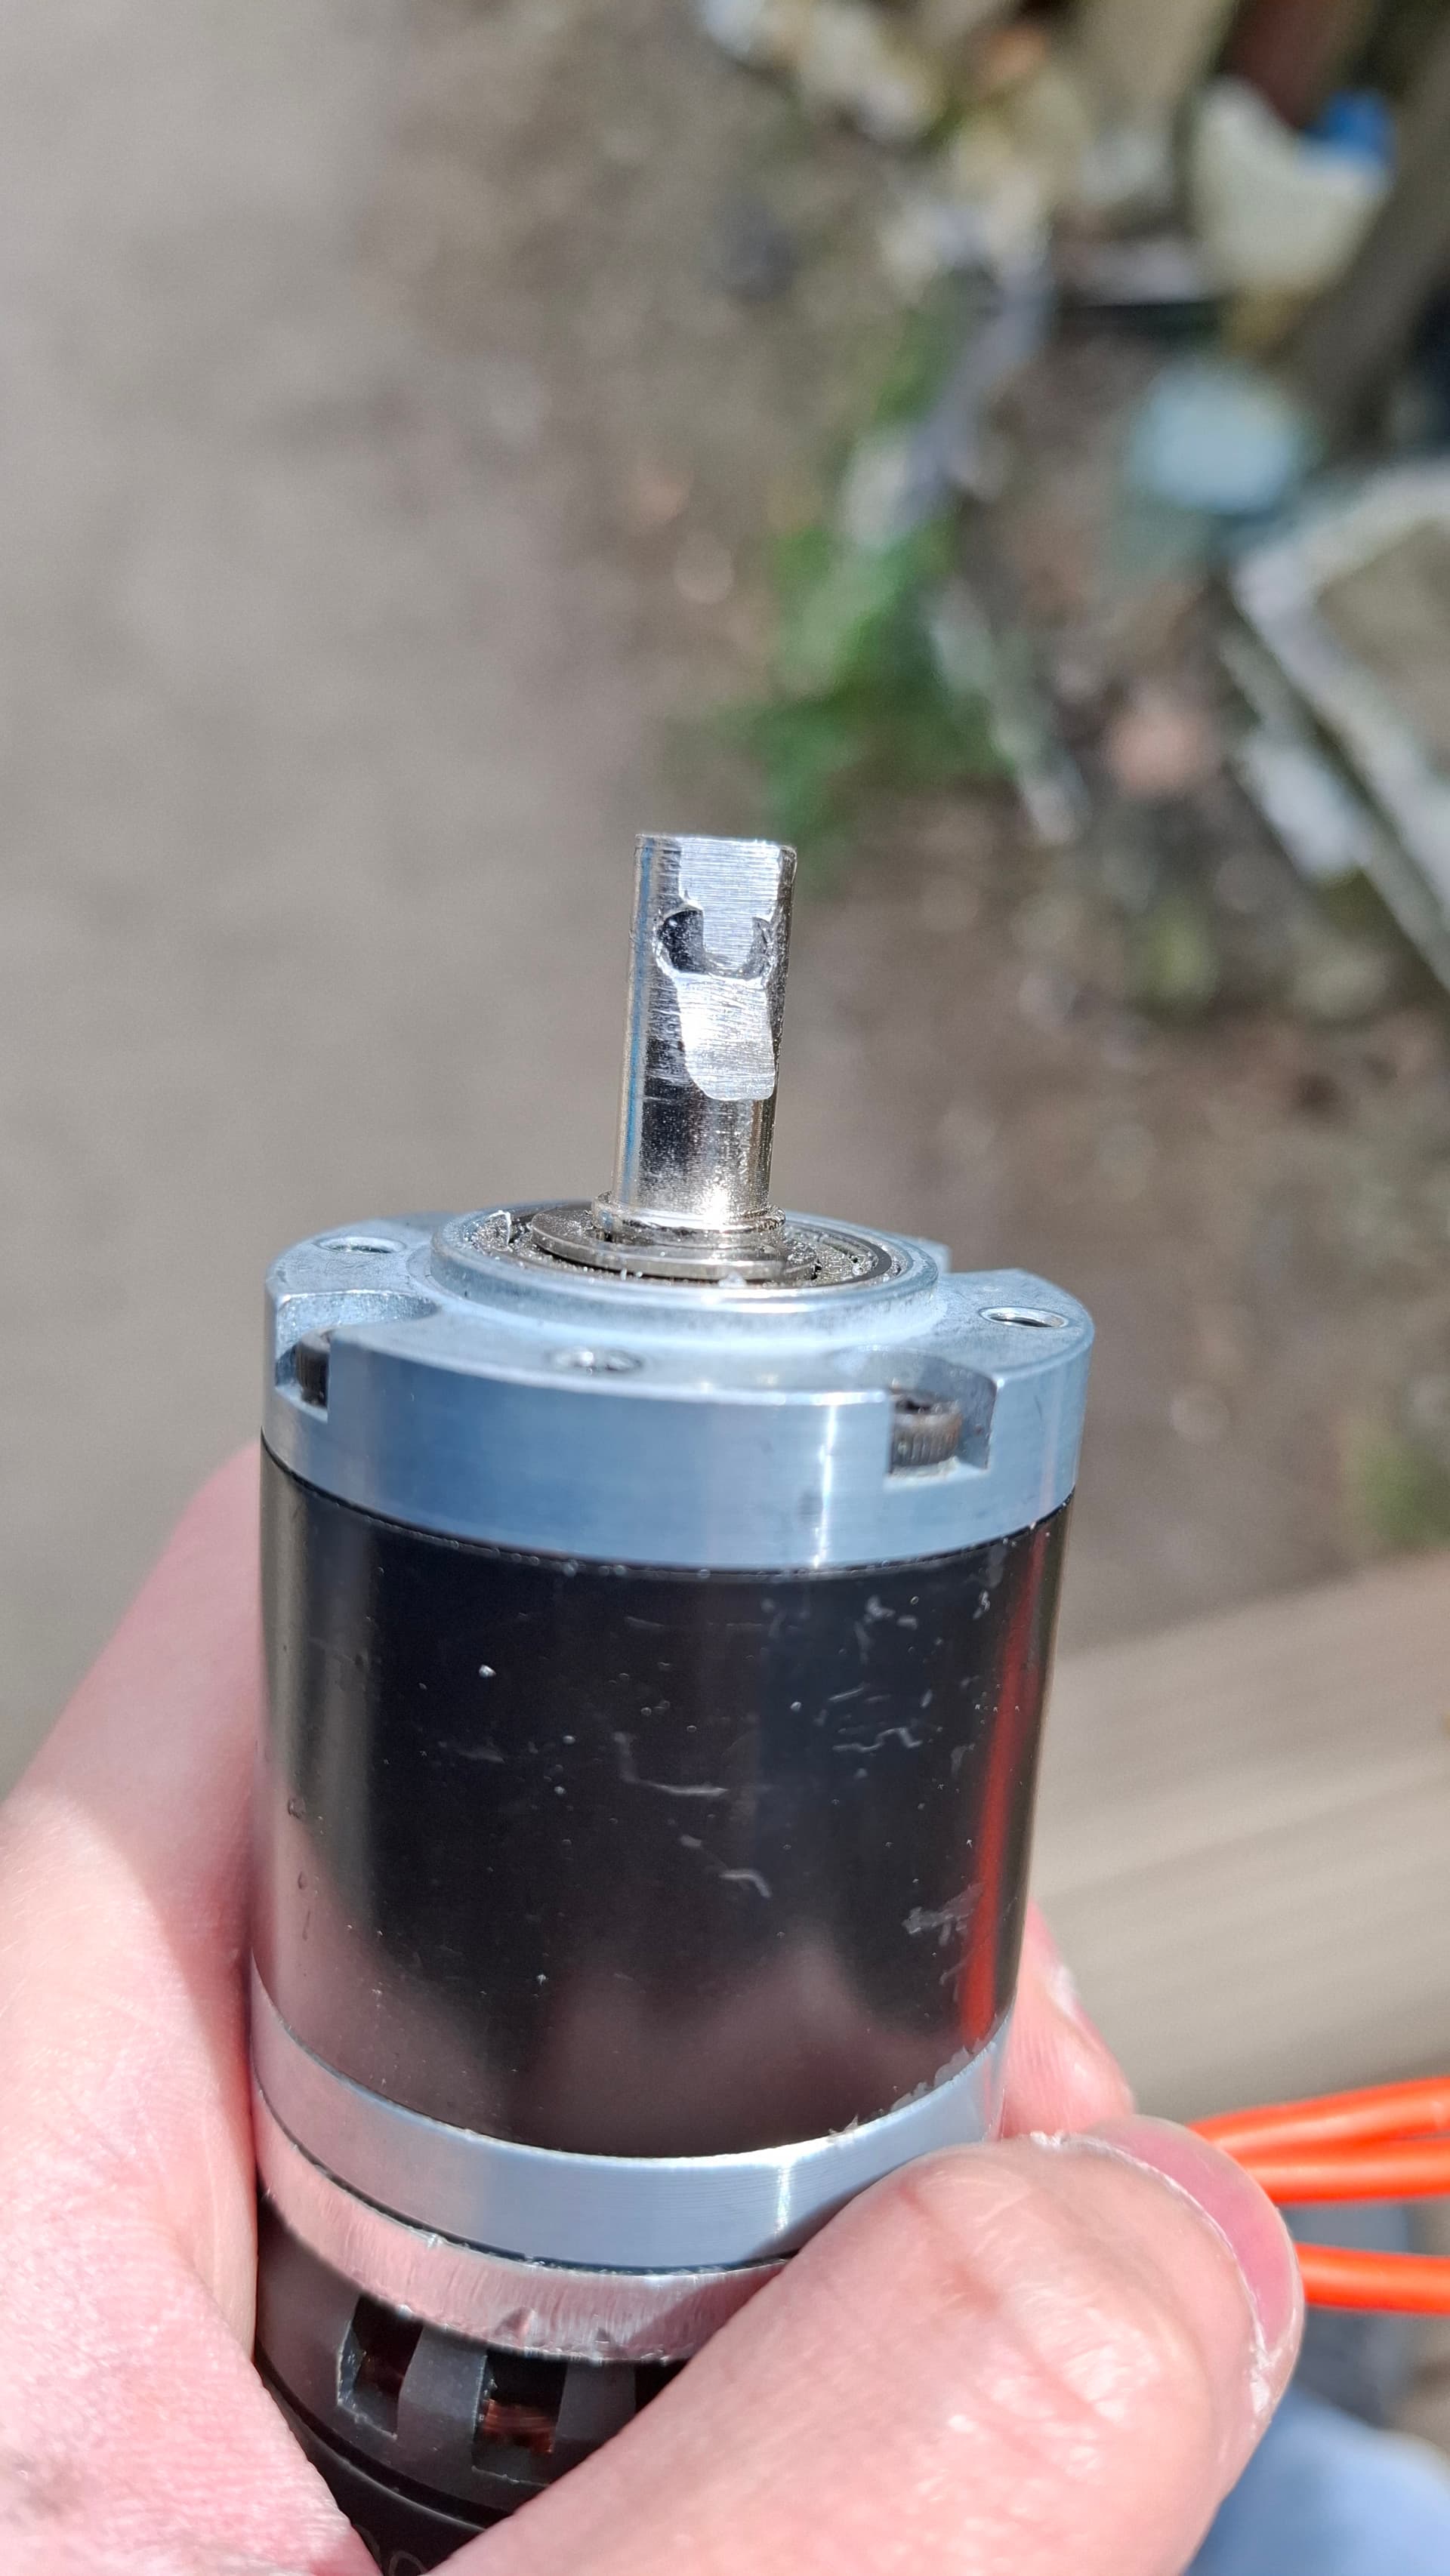
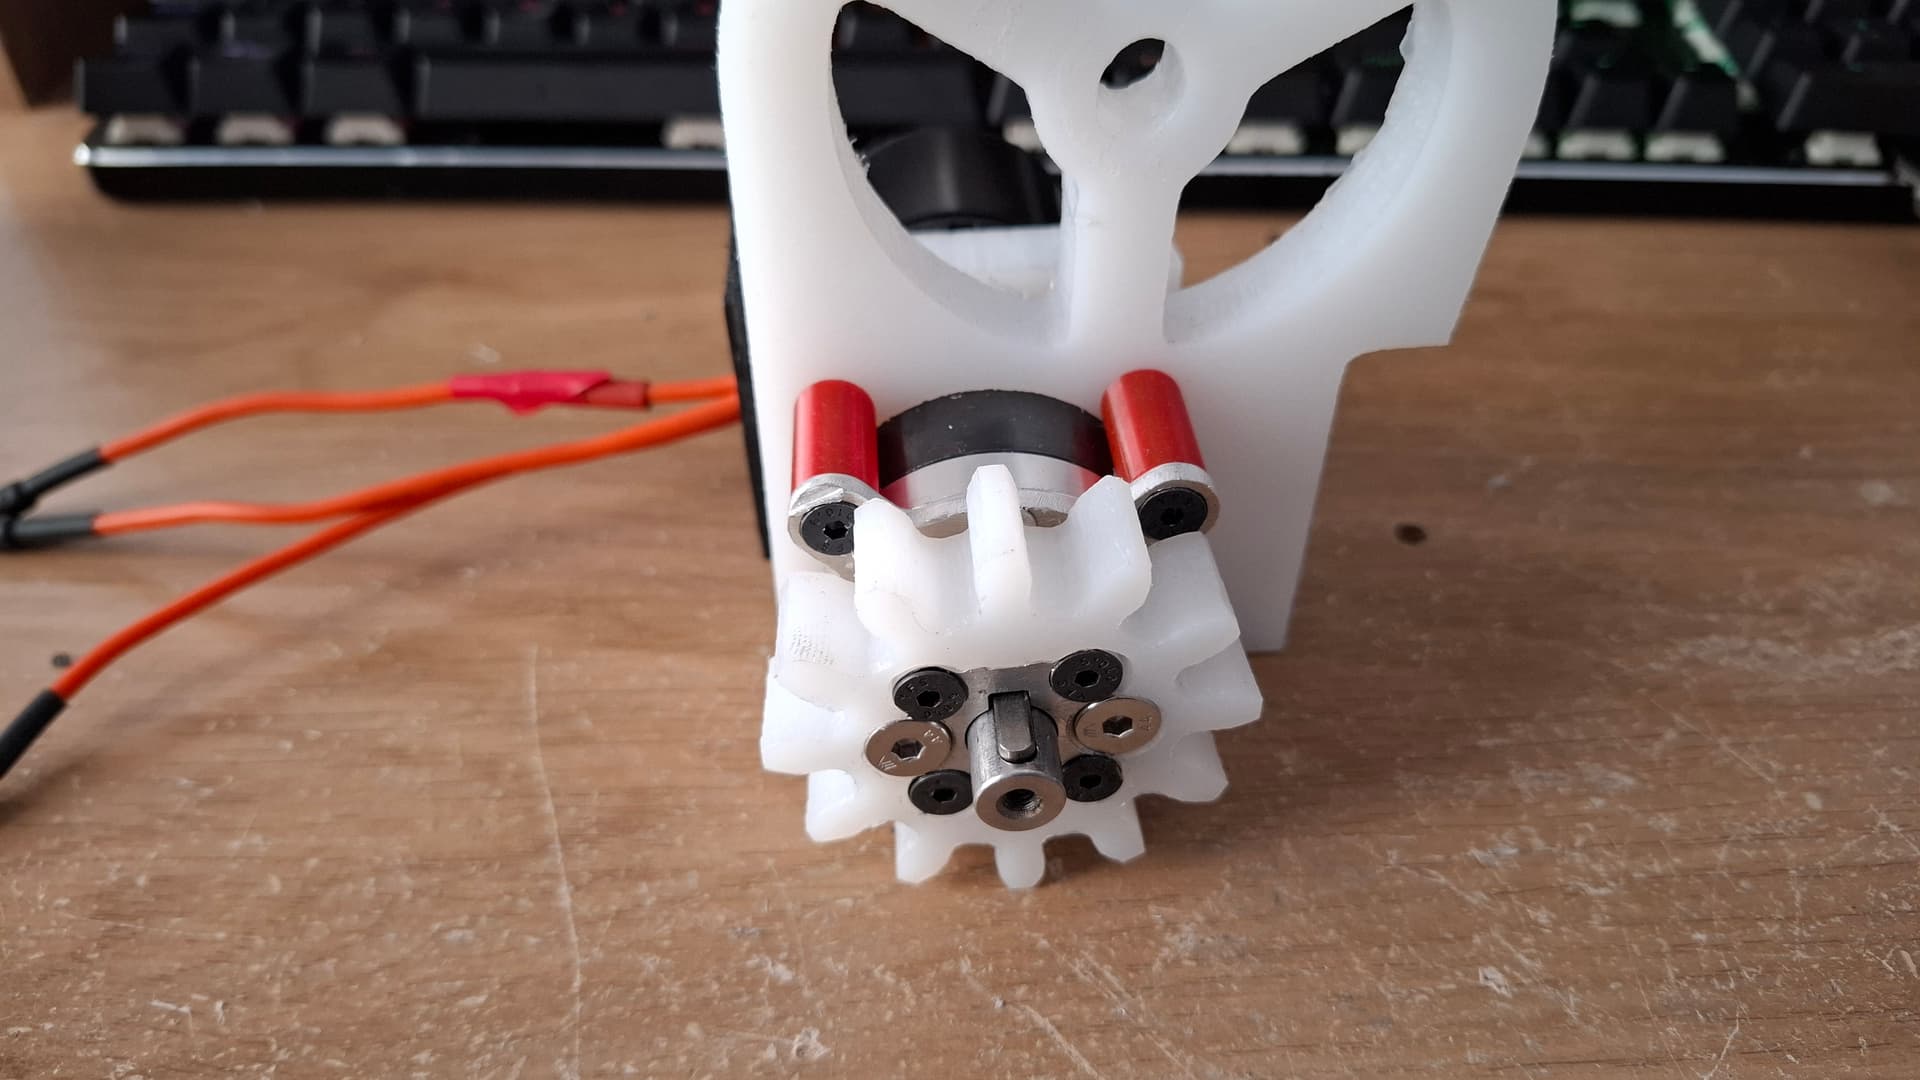
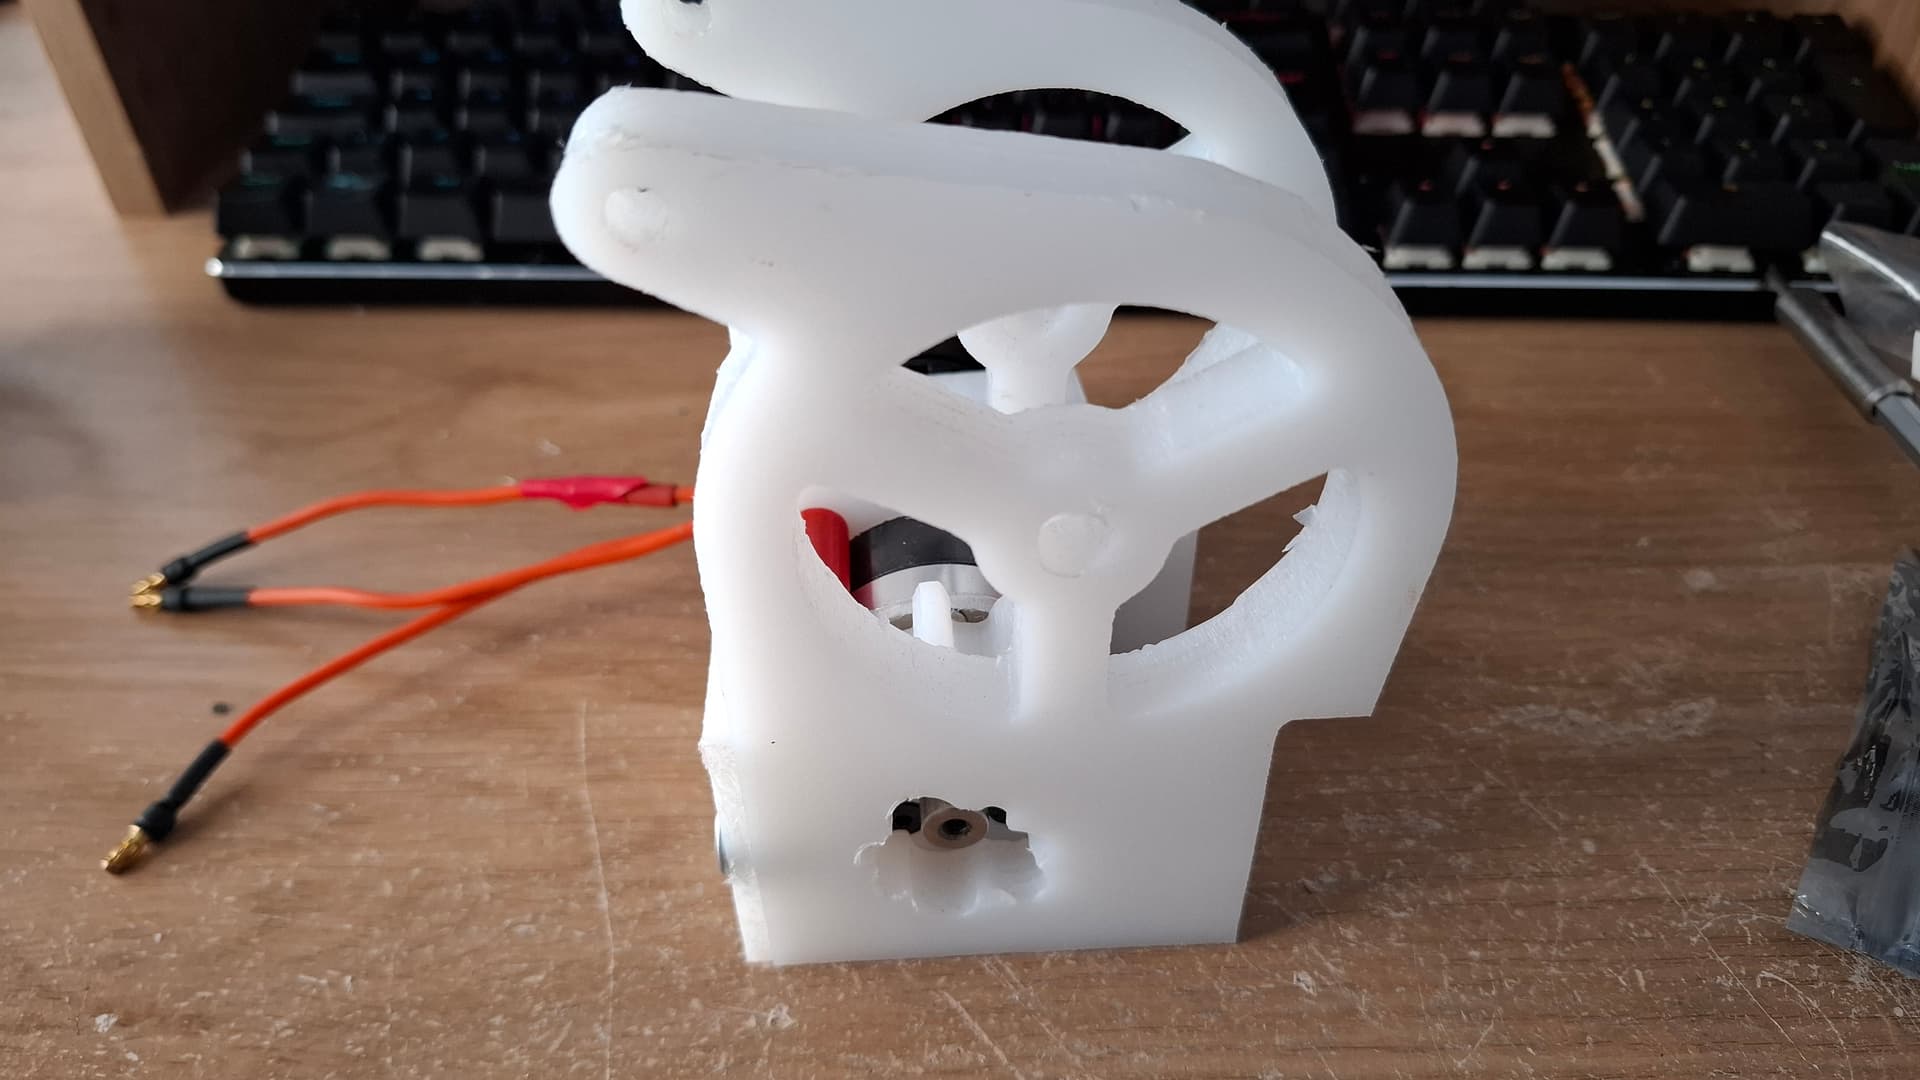
The motor is an Overlander 2830 1300kv coupled with a 14:1 gearbox, the same as what is running the weapon on the beetle (horray for reuse!) Wheels are 85mm nominal diameter (89 with the rollers), and will be constructed from 6mm HDPE plates for the roller plates, and PLA-ST spacers. The wheel runs off a 8mm shoulder bolt. The whole motor setup is a single component, and is identical for all 3 wheels, so I can have a fully assembled drive pod ready to go if I need to replace one in a hurry.

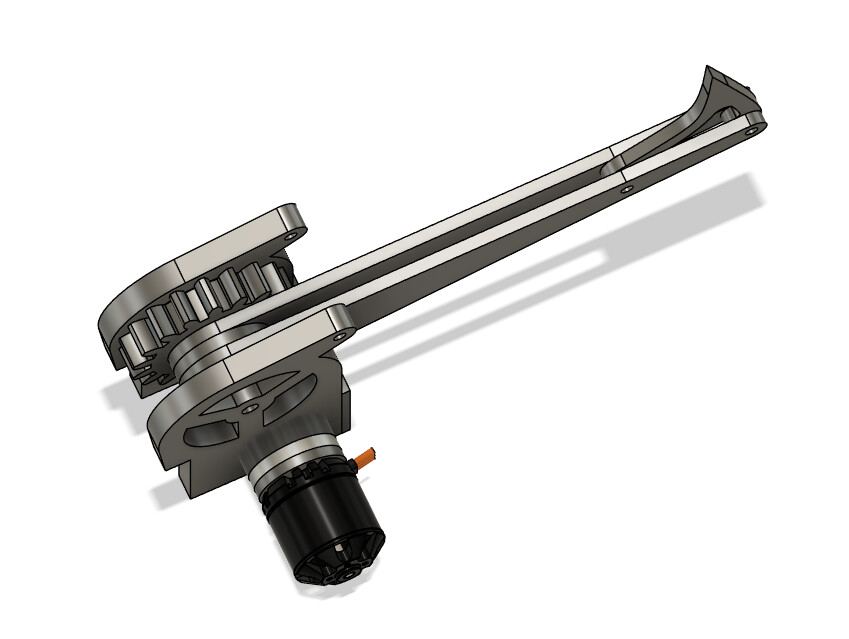
The weapon uses the Ranglebox Saturn and 14:1 gearbox combo I used in Accept Cookies last year, and in Overclocked V1. This drives a 1.5:1 HDPE gear reduction to the axe, with 2x6mm HDPE arms to the 6mm wear plate axe head.

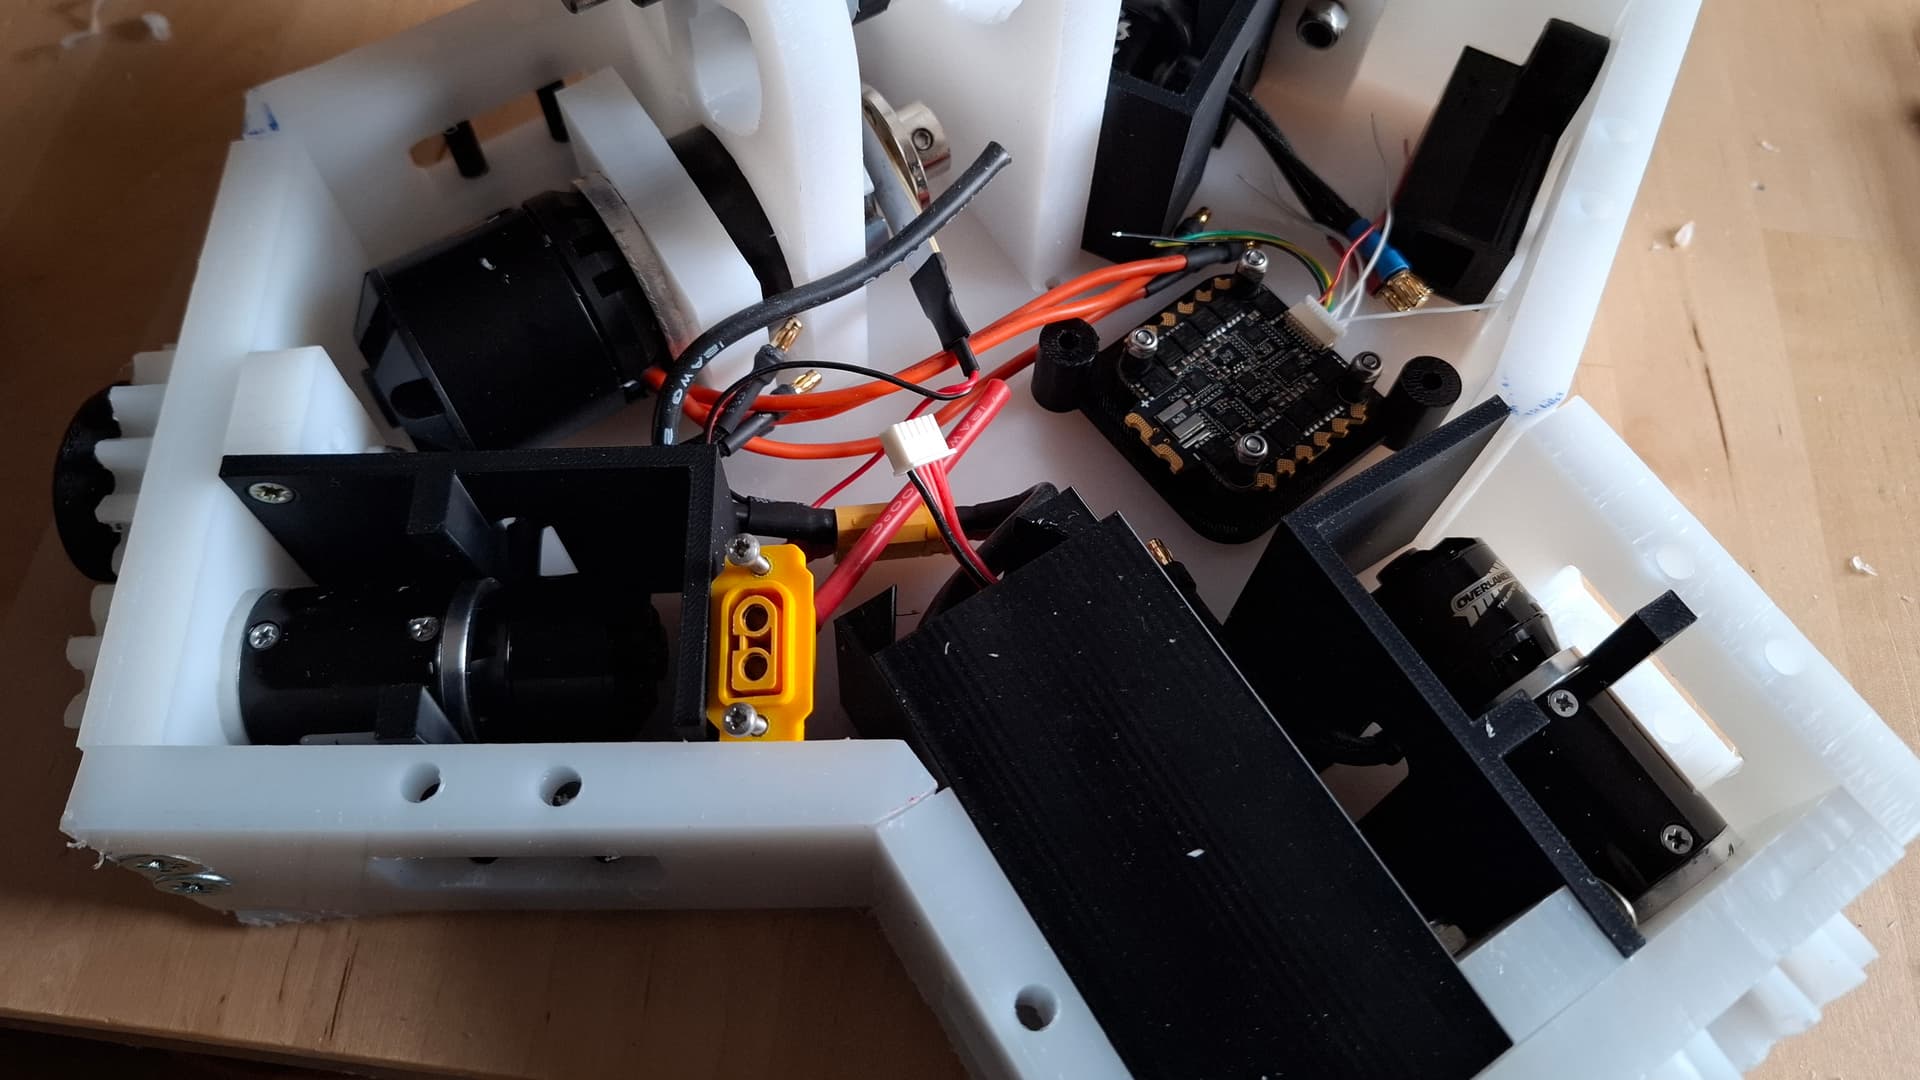
For control of everything I am trying out a Sequre E70 G2, a 4-in-1 AM32 ESC that advertises 70A per channel. It lacks current limiting to my knowledge, so we’ll see if it actually matches the spec. A Radiomaster R86 and BEC rounds out the electronics, powered by the 4S LiHV 1700mah battery I have from Accept Cookies.

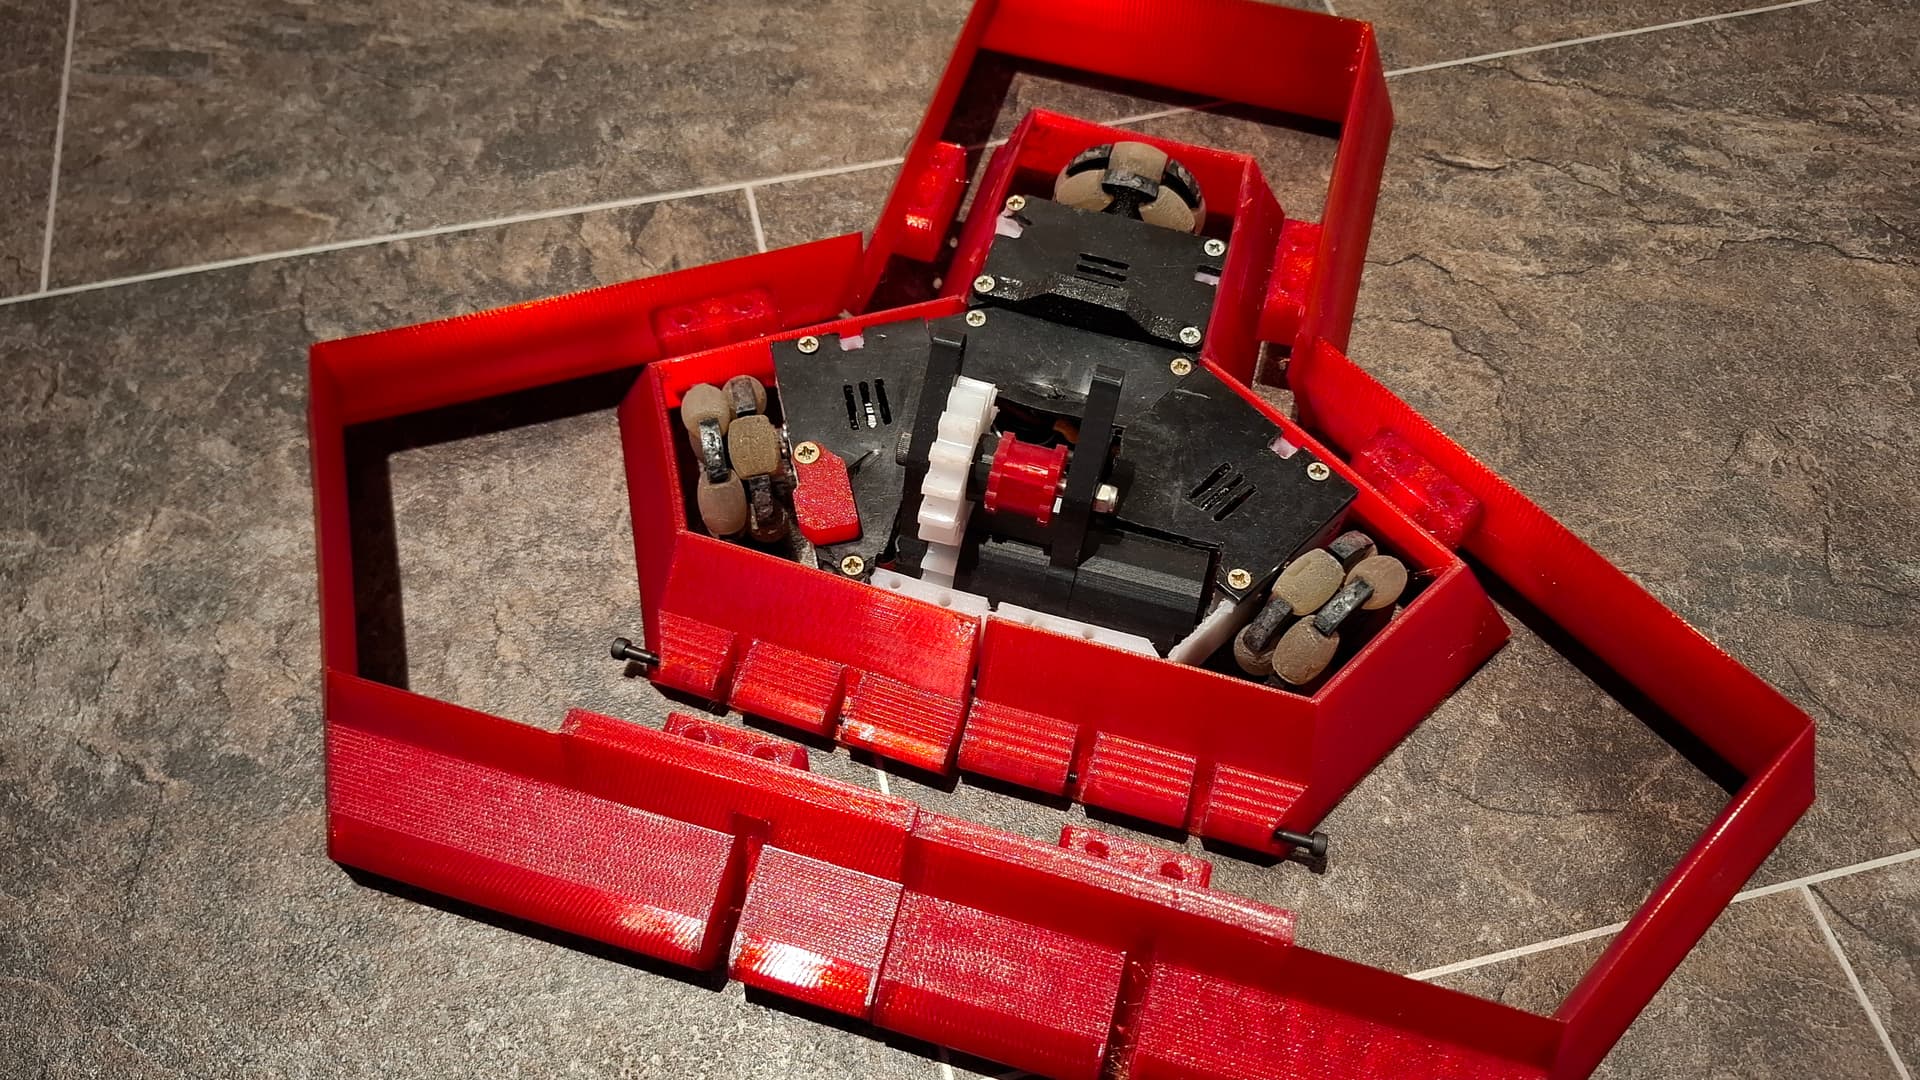
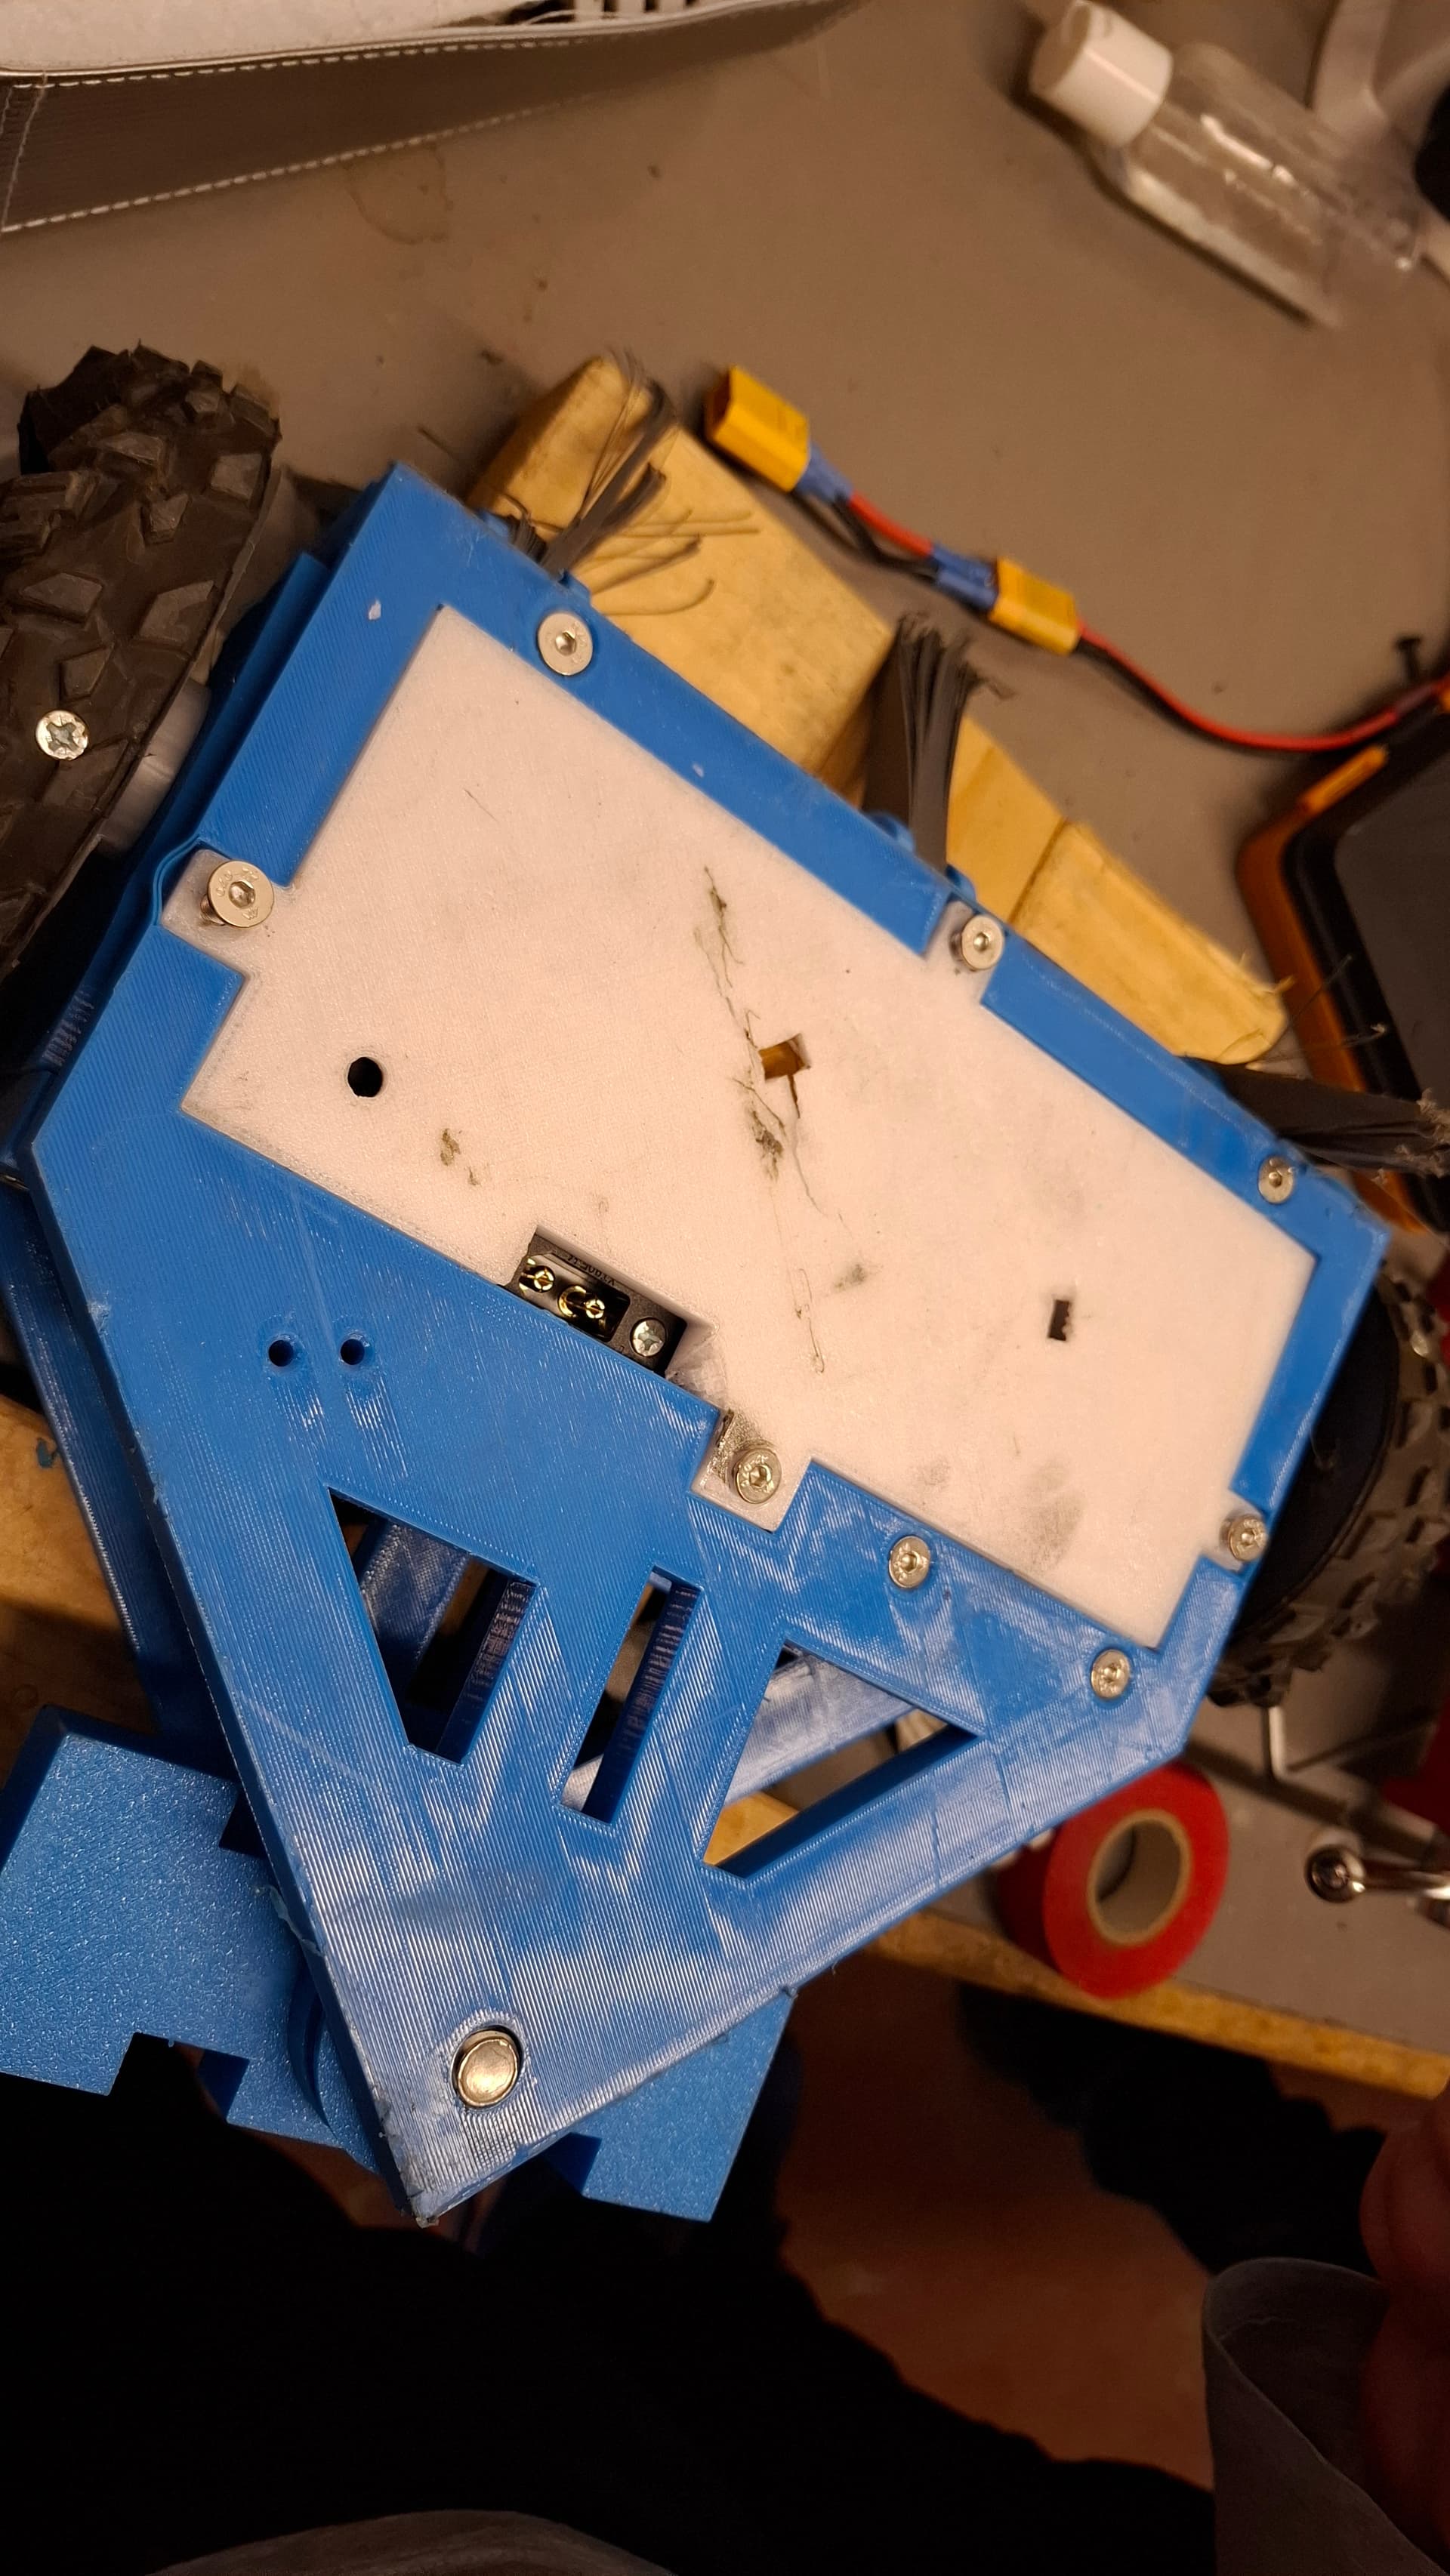
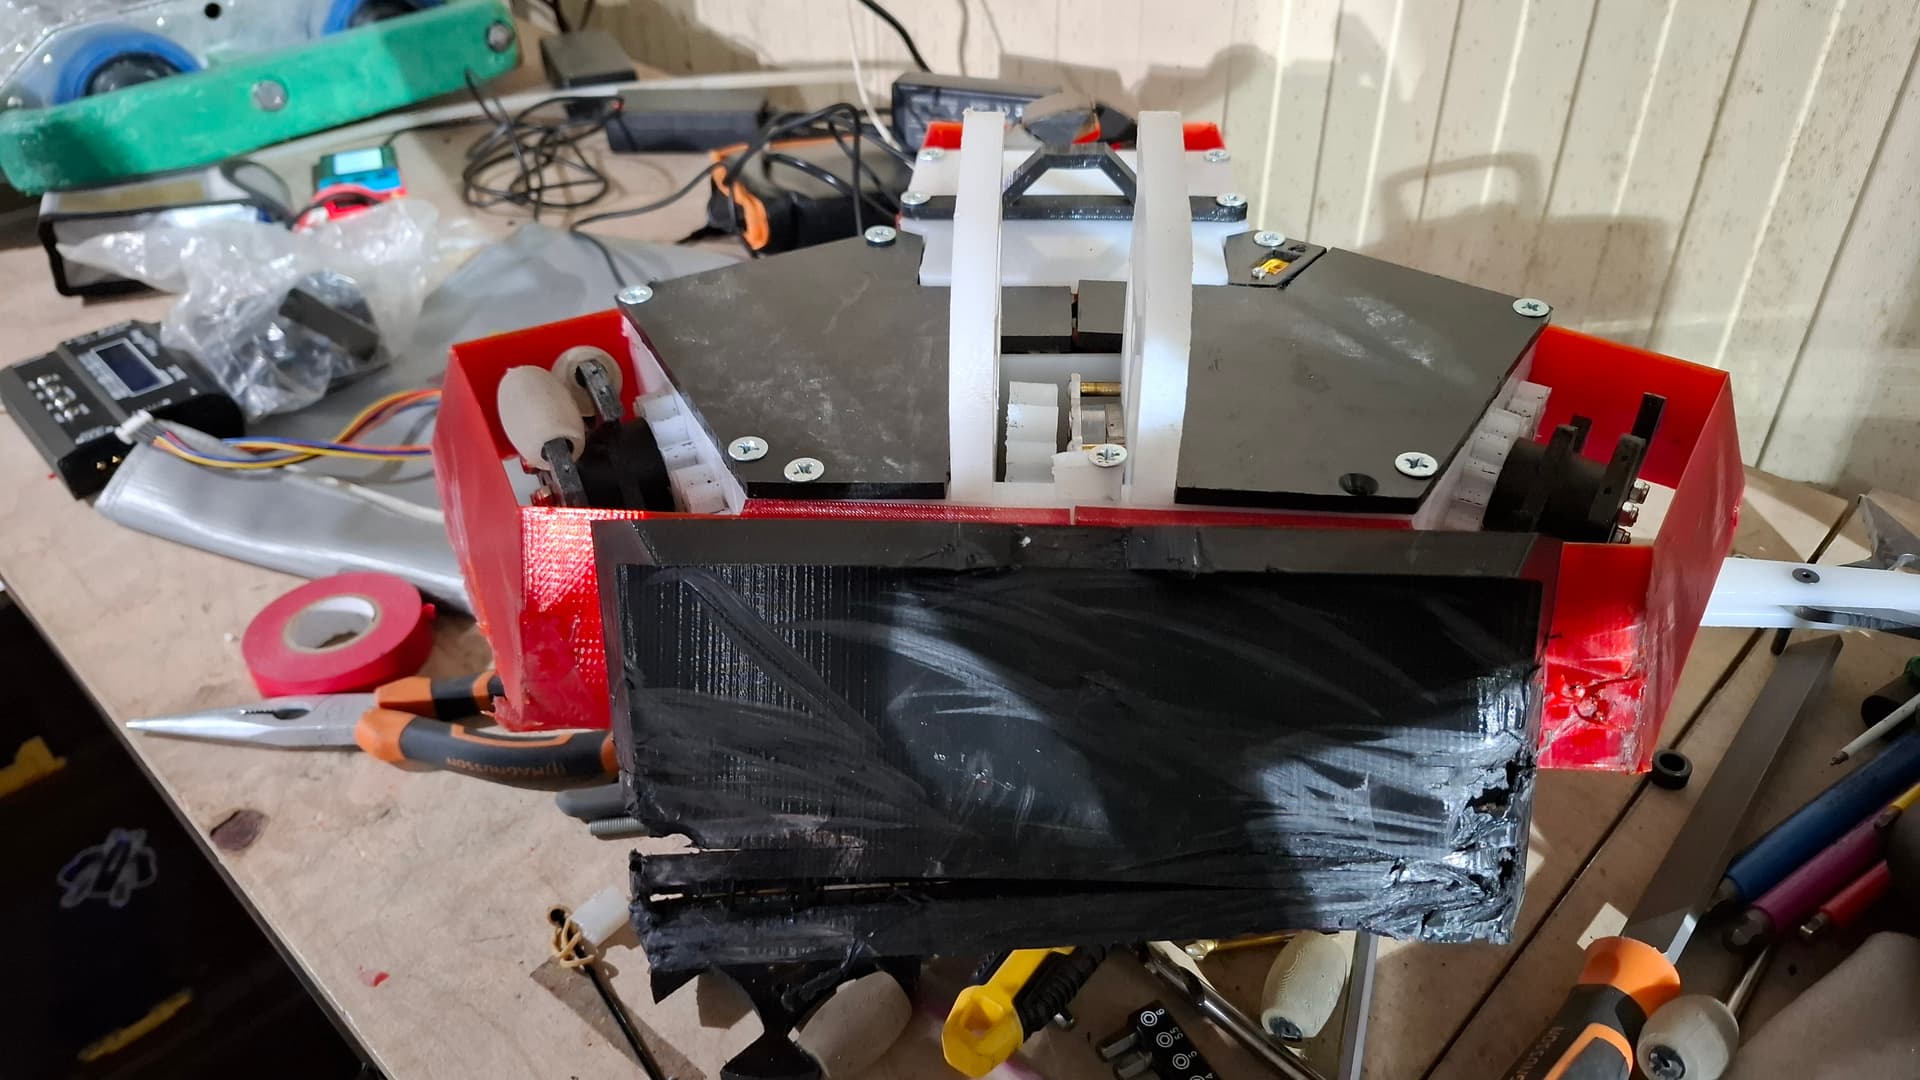
Yesterday I printed off the first part of the armour skirt, which was juuuuust small enough to fit on my print bed.
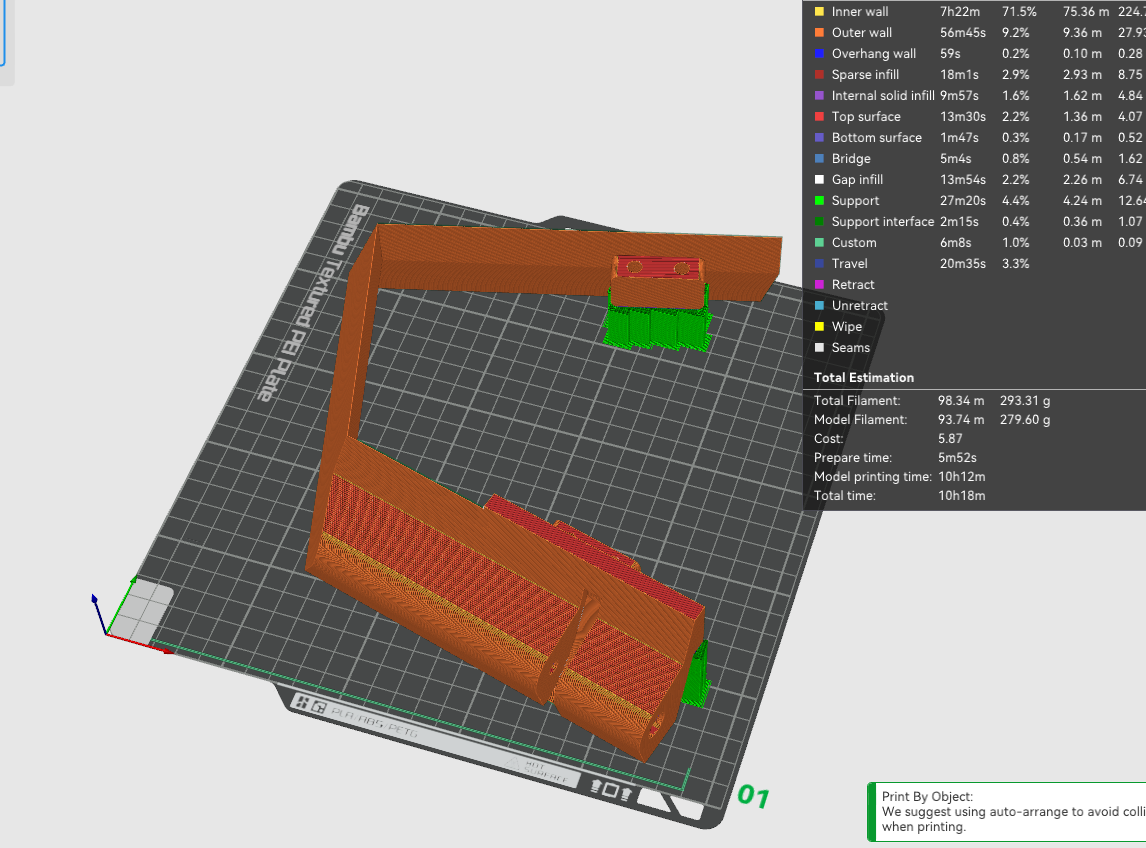
It’s pretty hefty!

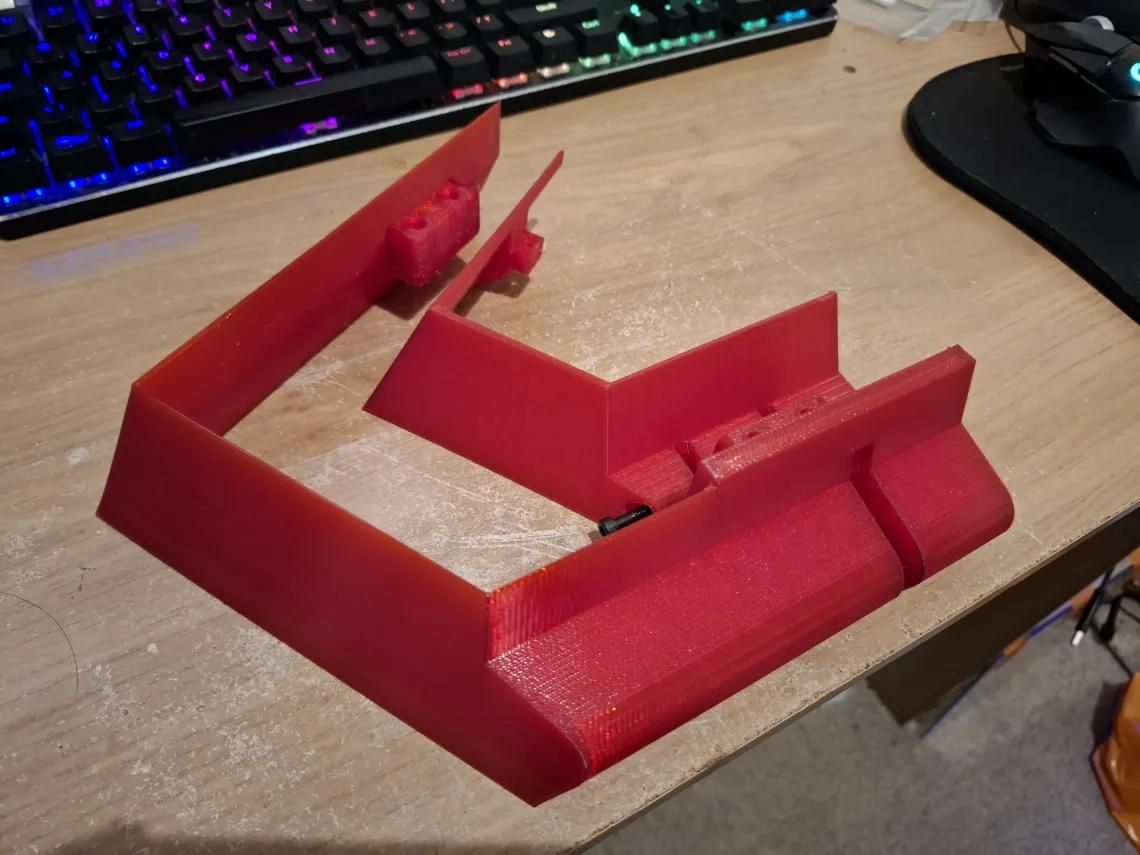
This one will be relegated to the spares pile though - this was done before the CAD above, so the fork mount is 20mm closer to the centre, and the corners have curled up a bit (which should be fixed with some brim ears).

3 Likes

looks fantastic! cant wait to see it do the acrobatics with the axe like the cluster half did

1 Like

Finally got the thing finished, with less than a day to go!

Picking up from the last post, the printer was hard at work churning off parts.

To give a sense of scale, here is the armour skirt around the beetle.

Unfortunately, it seems in the past couple of weeks the extruder gears have worn down sufficiently that I got several print failures on these large prints. Luckily, I managed to get enough parts printed that I’m not without any specific part, and Morgan was very kind in printing the anti-horizontal wedge for me, which will be needed as 5 of the 12 robots signed up are horizontal spinners of some variety!

I did the majority of the building last weekend, ending up with a mostly complete shell.

I had some trouble soldering to the 4 in 1 ESC - some flux core solder and more heat on the iron eventually sorted that out (though I will admit it’s not hte prettiest of solder jobs). I have a bit of a scare when I went to power the bot on and the ESC seemed to not do anything, but then I remembered that it was originally intended for drones so the channels weren’t bidirectional. A quick programming session later and everything was working.

The electronics have their own little TPU holders - the ESC had mounting holes which I’ve used, in combination with the rubber shock mounting wubs, whereas the battery and rx get their own box to sit in. These all bolt to the chassis in some way, so hopefully won’t rattle around much on big hits while still having some shock dampening.

The wheels are my usual fare of cast rollers, 85mm nominal diameter and 89mm effective once the rollers are factored in to account. They’re pretty hefty, each wheel weighs in the region of 175g.

And here it is! The rear panel is white as I ran out of 6mm black HDPE stock, but I guess this helps to see the power LED as it shines through the white. I may still drill a hole in that and adhere the LED to the inside of the hole to make it even more visible.

Drive test here

The bot weighs in at 5.12kg, so some wiggle room for configurations in the future.

4 Likes

This put on a great show at the weekend, looking forward to seeing it in action again. The wedges were incredibly tough.

1 Like

A decent showing at the Dojo hobbyweight event a couple of weeks back!

The field for the day was surprisingly horizontal heavy, which was a problem because my printer decided it didn’t want to print TPU anymore due to worn extruder gears. Thankfully, Morgan did me a favour and printed off a wedge for me, thanks a lot for that (as it turns out I’d need it…).

During tech checks, I found that the weapon channel on the ESC wasn’t working. I think that was because I did some ESC tuning the night before and didn’t test that the changes I had made to the programming worked. I worked around this by moving the weapon onto the output for the rear wheel and swapping the rx wires, so I was running without a rear wheel for the day.

The first two fights were against non-spinners, giving me an opportunity to check everything works before jumping into the deep end. In the first fight against Krill Dozer (which ended up getting 3rd place), the axe made a couple of good holes in the top armour, but jammed quite quickly, which beached me as the axe at full extension props up the front wheels. This turned out to be broken teeth on the gears inside, as well as a pretty gnarly twist on the output shaft.

With the gearbox replaced and an end stop installed to stop the beaching issue, I then fought Rear End, which was supposed to be a horizontal spinner but unfortunately did not get the spinner ready in time for the event. This time, the axe worked throughout the fight, and I managed to control the pace and get plenty of hits on Rear End.

Fight 3 was against Lord Barquaad, a Tombstone style horizontal spinner. The horizontal wedge held up well, though Barquaad was not at full power due to a partially charged battery, but was probably a couple of millimetres too low, as it kept catching the seams on the arena floor. I didn’t manage to land any proper hits on the chassis before the axe broke again.

This time, the output shaft had sheared completely, with a proper twist in it to boot!

The final fight was against Morgan’s shell spinner Sugaar. I had to enter without my axe as I could not cobble together a working gearbox from the leftovers of the two I had. The wedge held up well enough, tanking multiple full speed hits, though by the end of the fight it was pretty beat up, so Morgan ended up taking the wedge he printed for me back home as a trophy! The wheels also ejected most of the rollers over the course of the fight, the hot glue plugs didn’t stick very well to the HDPE hubs.

Overall, I’m happy with the general build. I’ve already got some new gearboxes with 10mm shafts and keyways instead of flats for set screws, so that should solve the issue there. I’ve also designed a clutch like I run in the beetles to help dampen the shocks that shaft takes. I need to use a better sealant for the roller axles, I’ve been looking to something like JB weld or plastic welders as options.

2 Likes

Thanks! Yeah, impressed how the thin TPU skirt held up when I couldn’t keep the front thick wedge pointed at the horizontal spinners