Another year, another Schnake, and after the disappointing performance of V2, I was determined to do better and iterate on what worked and what didn’t. Going into this design, I had three main goals:
- Replace the brushed 22mm motors and go back to the reliable and proven 1806/Rotalink combo, alongside the 49mm wheels, in essence back to Schnake V1’s drive setup.
- Redesign the robot so that it follows less of a U-shape, with a better back and top panel design and some form of cross bracing at the back.
- Ditch the compromised invertibility design and incorporate a self-righter into Schnake (in theory the trickiest change of all).
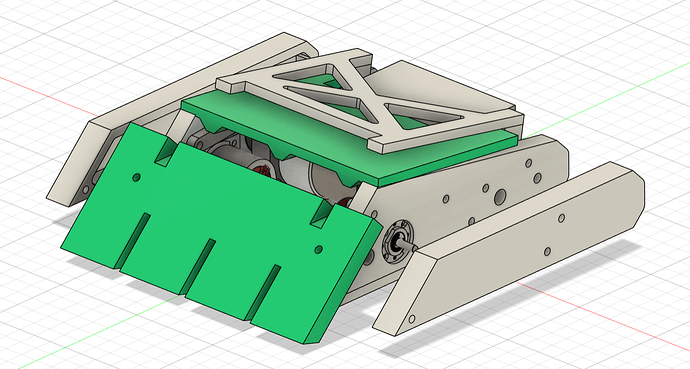
The only in-progress image I could find of the CAD for Schnake V3.
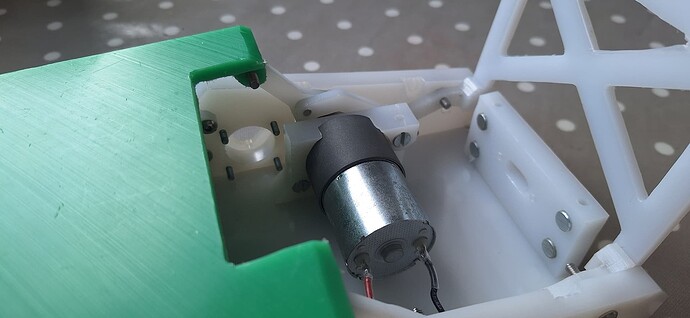
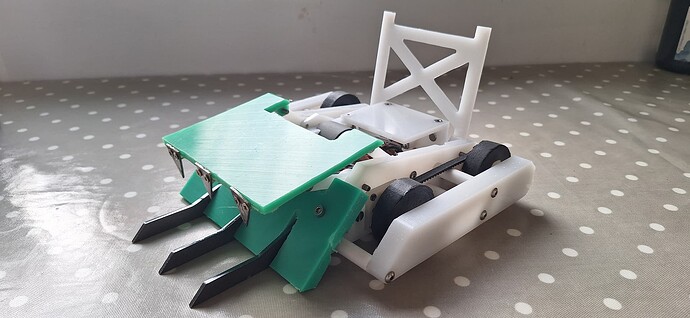
First and foremost on the list was the self-righter. Having any kind of additional motor or servo was out of the question due to weight and complexity demands, and I couldn’t see any way of re-doing the grabbing arm itself to allow self-righting while also remaining an effective grabber. As a result, I wanted to see if there would be any way of powering the lifter off of the same grabbing arm. After some tinkering around, I came up with a levered design that would raise as the lifting arm moved forward, while also not catching on any part of the main assembly. This all hinged on a cross threaded bar that went along the entire length of the bot, granting the bot some much needed rigidity. This is one of those designs that is better seen than described, but I was very happy with the result!
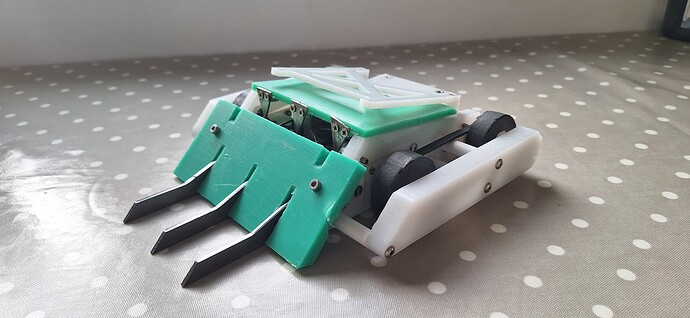
The new mech, with the clearest image I could get in person before all of the electronics were added.
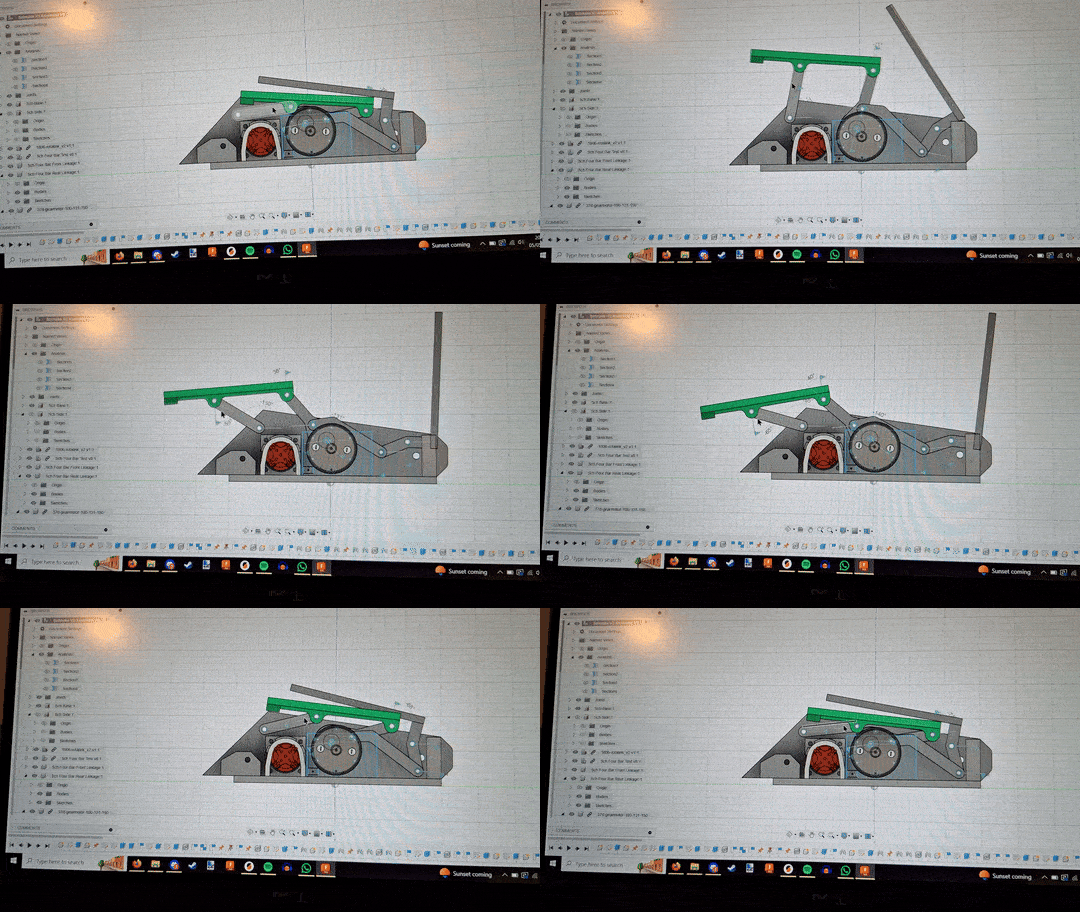
The linkage in action, forgive the poor recording (also did you know imgur removed its Video to GIF feature? fml).
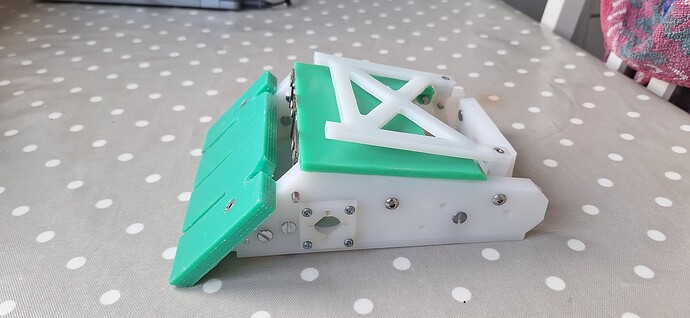
Fortunately only some minor rearranging of internal components was needed this time around. The motor/gearboxes needed to be moved to the front to make room for the self-righter, with the battery moving to the rear in turn, and this all required small tweaks to the weapon and link mounts to ensure nothing overlapped or rubbed together. I unfortunately had to abandon my fancy bent back pieces for this iteration, but the new setup was ultimately easier to design and work with. Despite my self-described hatred of “bum links” (as can be seen here: https://forum.bristolbotbuilders.com…ing-to-you/229), the self-righter and grabbing arm left me nowhere else to place the link, though I did try to beef it up with a HDPE protective ring as well as a fancy new TPU link mount. Finally, the side armour was redesigned to be bulkier overall with hollowed out pockets inside, as well as being shorter at the back to allow the wheels at the rear to make contact with the ground at an earlier point.
The new chassis sans internals and side armour. The overlapping you see in the CAD upon retraction doesn’t matter as much in real life due to the flexibility of HDPE.
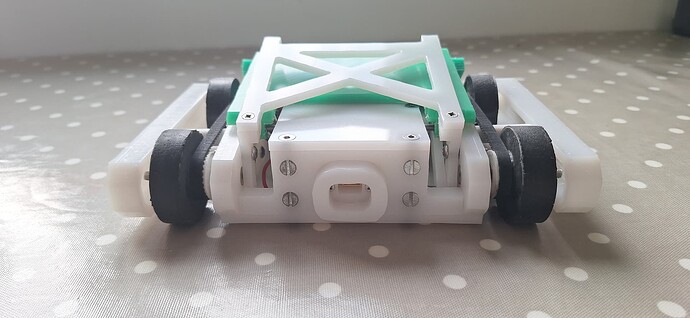
The rear of the bot, with the dreaded “bum link” only missing a TPU door. This hurts me more than it hurts you, but in my defense, where else could I have fit the linkage?
And so, in record time, the new Schnake went from CAD to reality in record time for me, around 5 weeks (or roughly 11 “Ellis’s”). The robot seemed to drive far better than both previous iterations (I was now running the new BBB brushless drive ESC’s), and the self-righter, as gammy as it was at points, seemed to genuinely work! The bot maintained the dual control system, where my dad drove and I operated the weapon, and we were feeling fairly motivated flying over to Robot Rebellion to see just how much of an improvement this design would be.
Schnake V3 in a ready state! Unfortunately I have a bad habit of not taking as many “in progress” pics with the Schnake family due to them not being my main bot, as well as the speed at which they tend to come together.
