I’ve always loved shell spinners, the chaos and the power is right up my street but id only ever built a crappy plastic ant weight since making the shells at higher weight classes seemed like too much work (spoiler alert it still is) but finally decided to make one following the tip speed shenanigans with fc feathers leaving my newest fc bot high and dry
However hobby’s seemed much more likely to me to be spared tip speed changes and id wanted to build a proper hobby again after my first few attempts with an overhead were less then stella. turns out I guessed right and hobby’s would be allowed to run at dojo!
it was around this time I was looking back at some old forum posts and started reading the one about Vega and suddenly the prospect of making a shell felt allot less daunting, just find a company than can do ring rolling a jobs a good’n, i also really liked the look or Chonkiv and wanted to replicate the weight it gets with lots of magnets, similar to Wajoo, and like Wajoo i wanted it as close to the floor as possible and be as short as reasonable (I’m not insane enough to try and get it anywhere near as short as wajoo)
ill talk about the shell first but it changed as the inside body got smaller and smaller it will kinda jump around
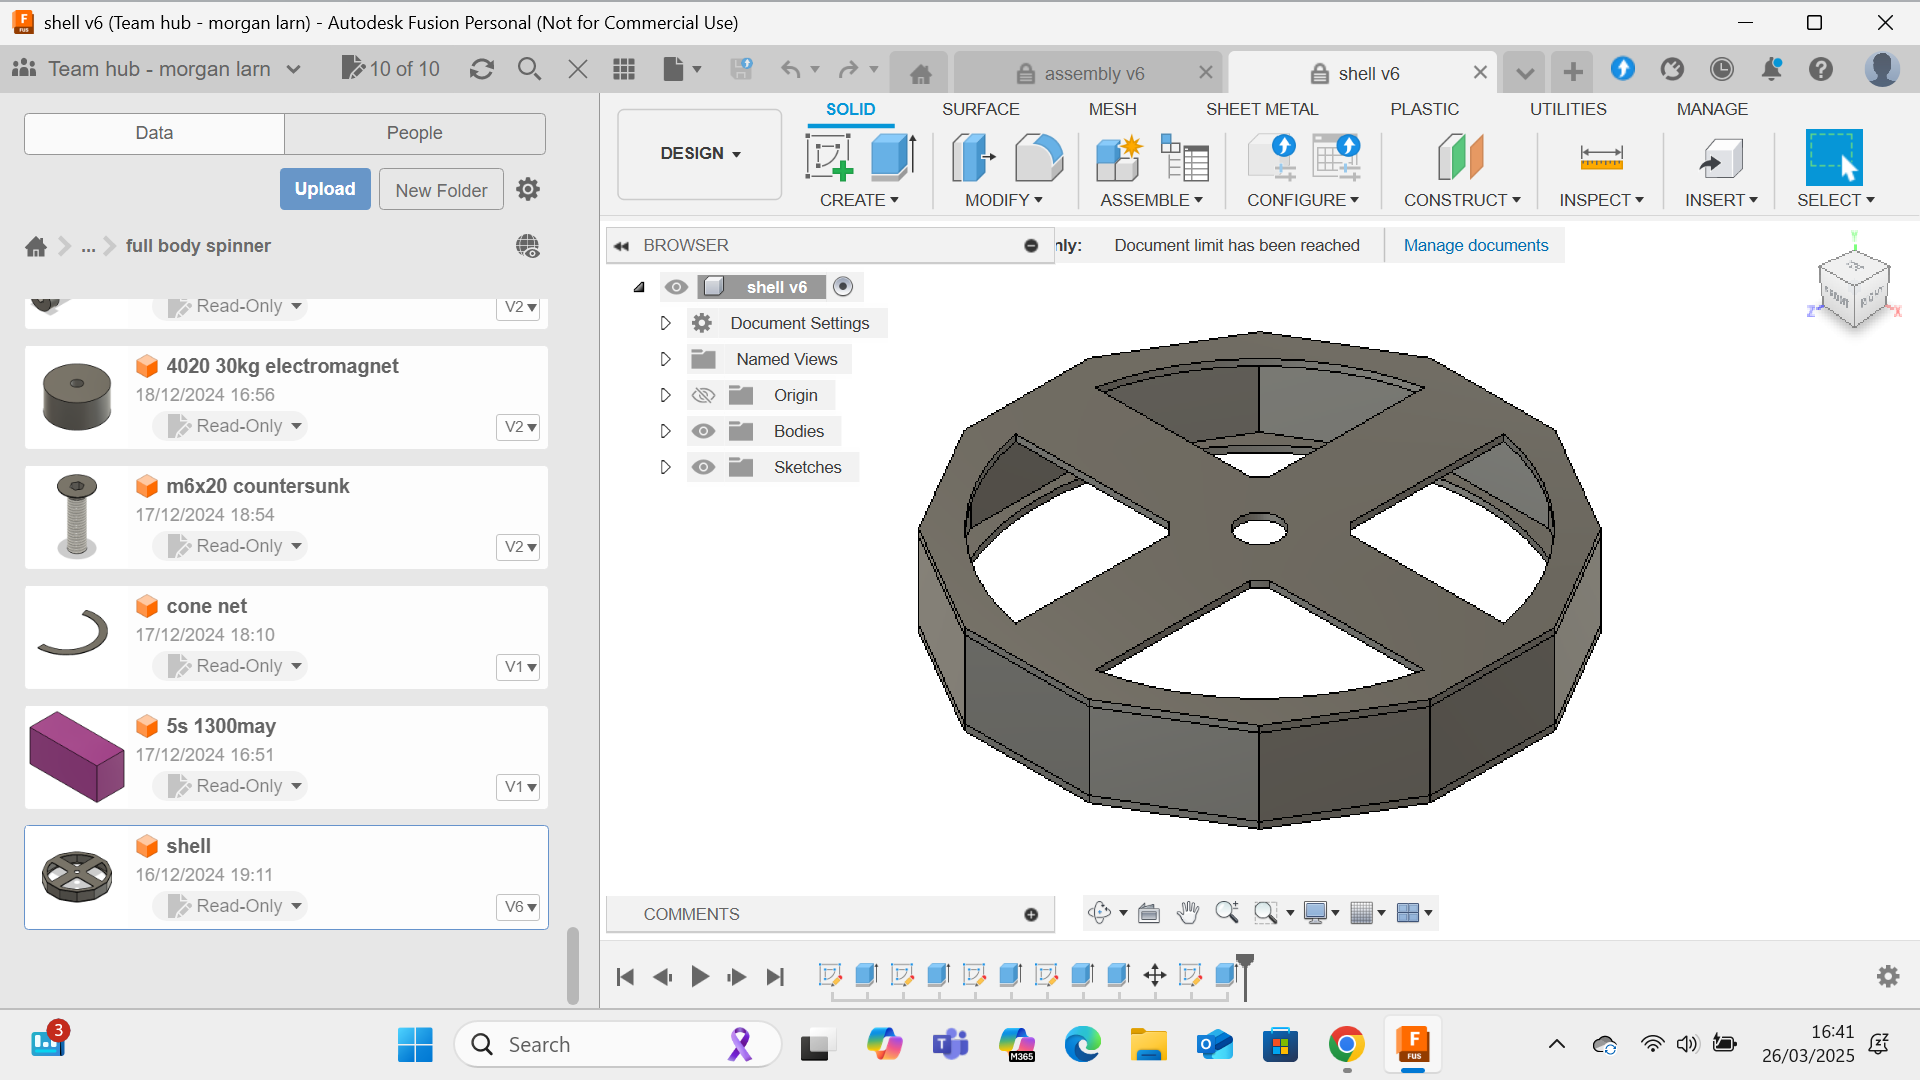
I wanted to ensure i could still make a shell if I couldn’t find a place to role the shell, hence this hideous looking shell which would just be flat welded plates, but as was pointed out to me this would suck at fighting horizontals so I designed up a much more attractive slanted shell. it was also much smaller diameter, which I made just small enough to have some 28mm gearboxes with a motor on the end sit in a roughly square orientation, since as with most bots the smaller you can make it the lighter it becomes/thicker armour you can fit. this is taken to the extreme with shells since they are solid still on the outside, so even a few mm you can remove from them saves allot
this was the final design, a 350mm tooth to tooth and 56mm to the flat of the dome. the bottom rim is 4mm the teeth are welded to this and the side of the dome and are 8mm thick, the walls are 3mm and the top is 6mm. I kinda just winged all these sizes on what felt about right and also drawing advice from the previously mentioned Vega blog which let me trust that the 3mm sides would hold up. the 6mm top was chosen to defend from potential hammer saws as well as to take vertical impacts, the small vertical teeth on top are mostly for show but do serve a purpose of protecting the centre shafts from horizontal impacts as well as to hit the underbelly of any bots i get under which with how short the bot is may happen. I didn’t feel I could make it much lower without major sacrifices in weapon motor power as that is really the limiting factor in the design. I think you could probably make one lower if you went to multiple pancake brushless motors but whenever I’ve ran multiple motors chained together they always end up fighting haha
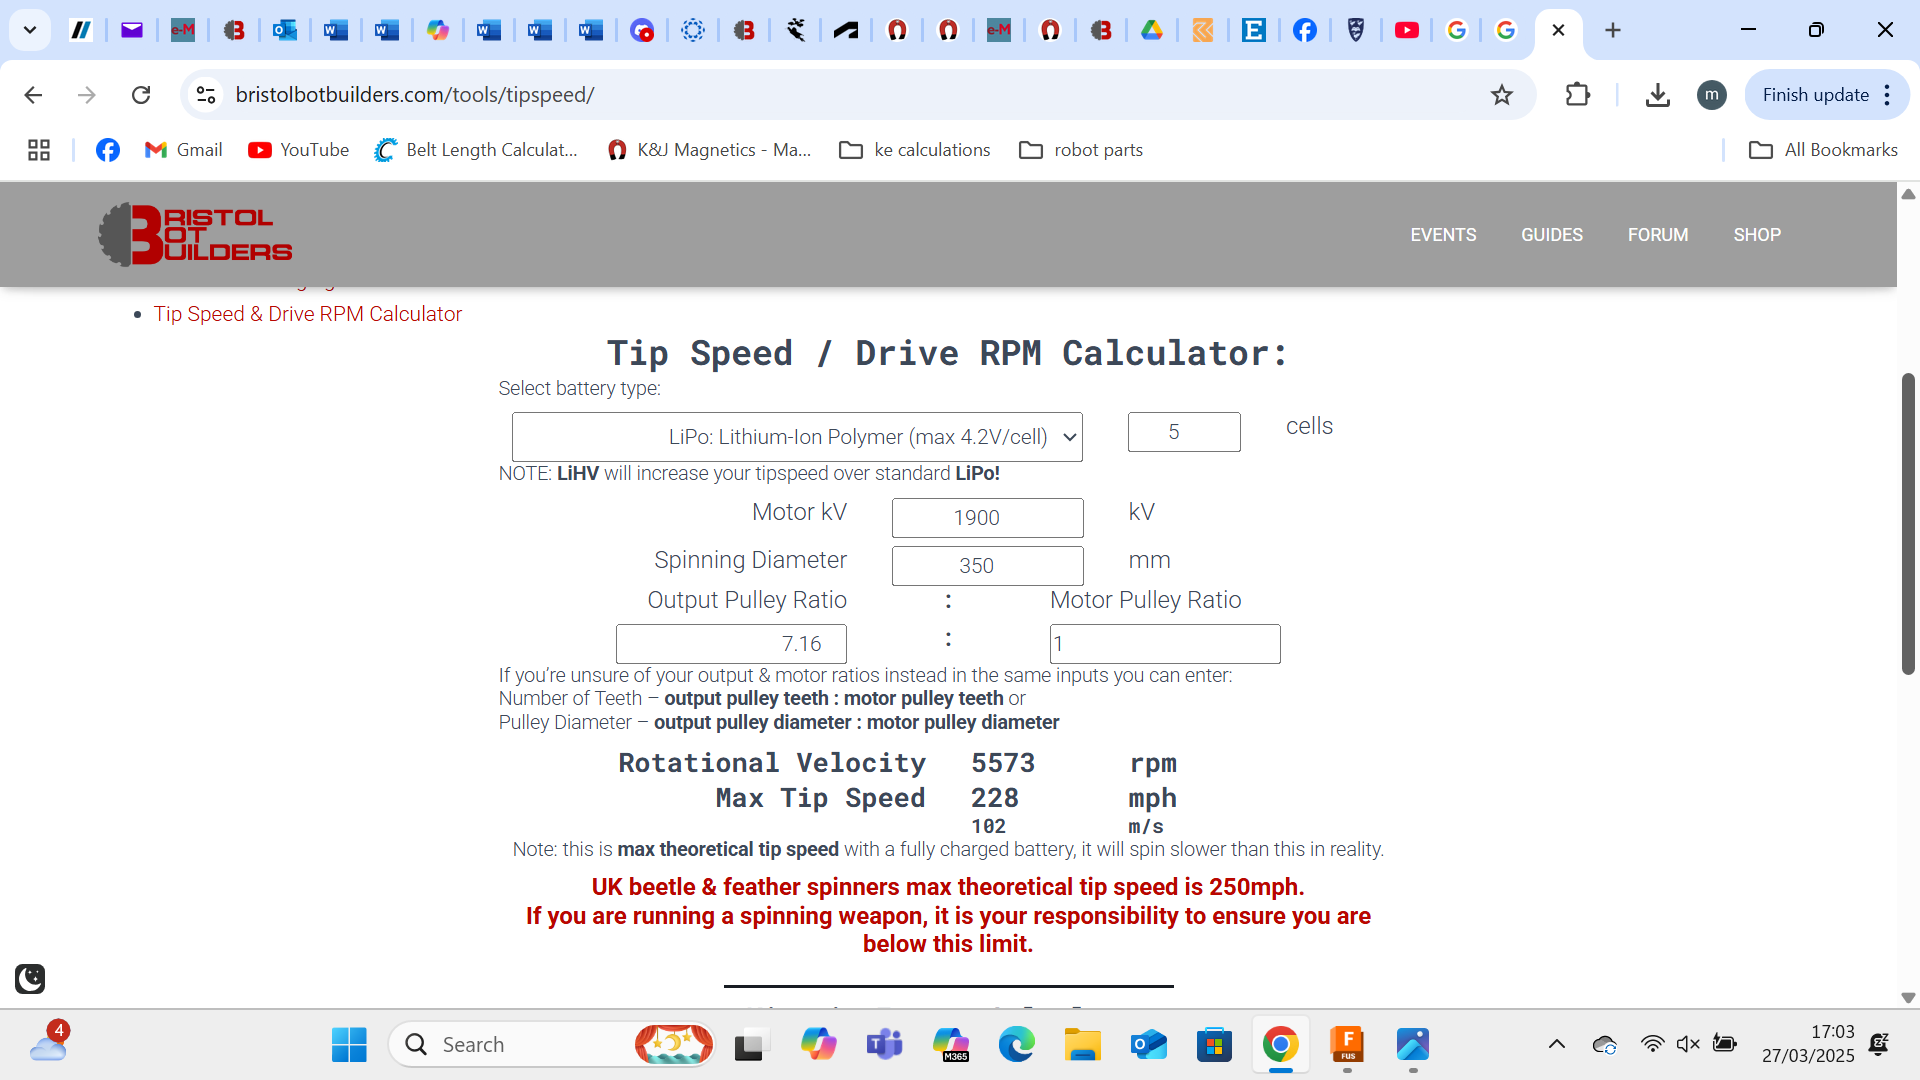
energy wise its pushing 5kj at 230mph. which is very hard for a hobby
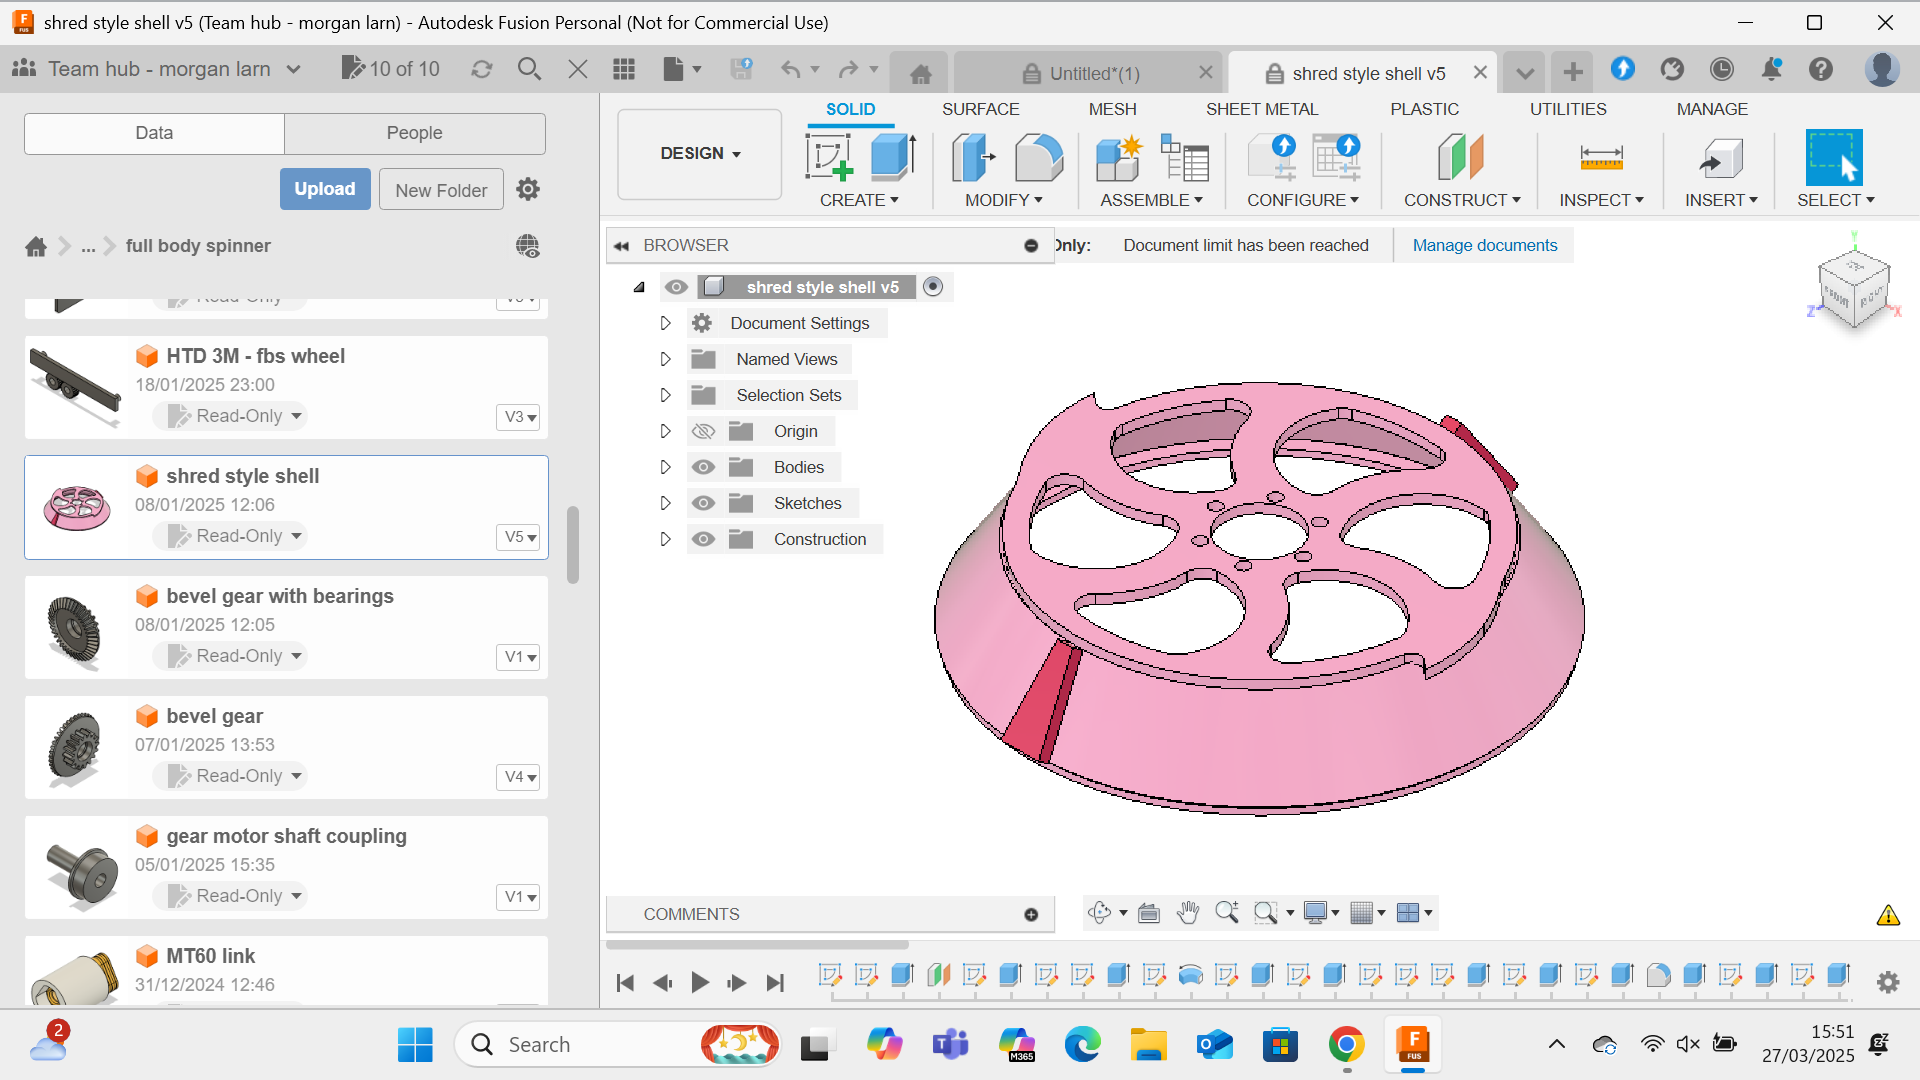
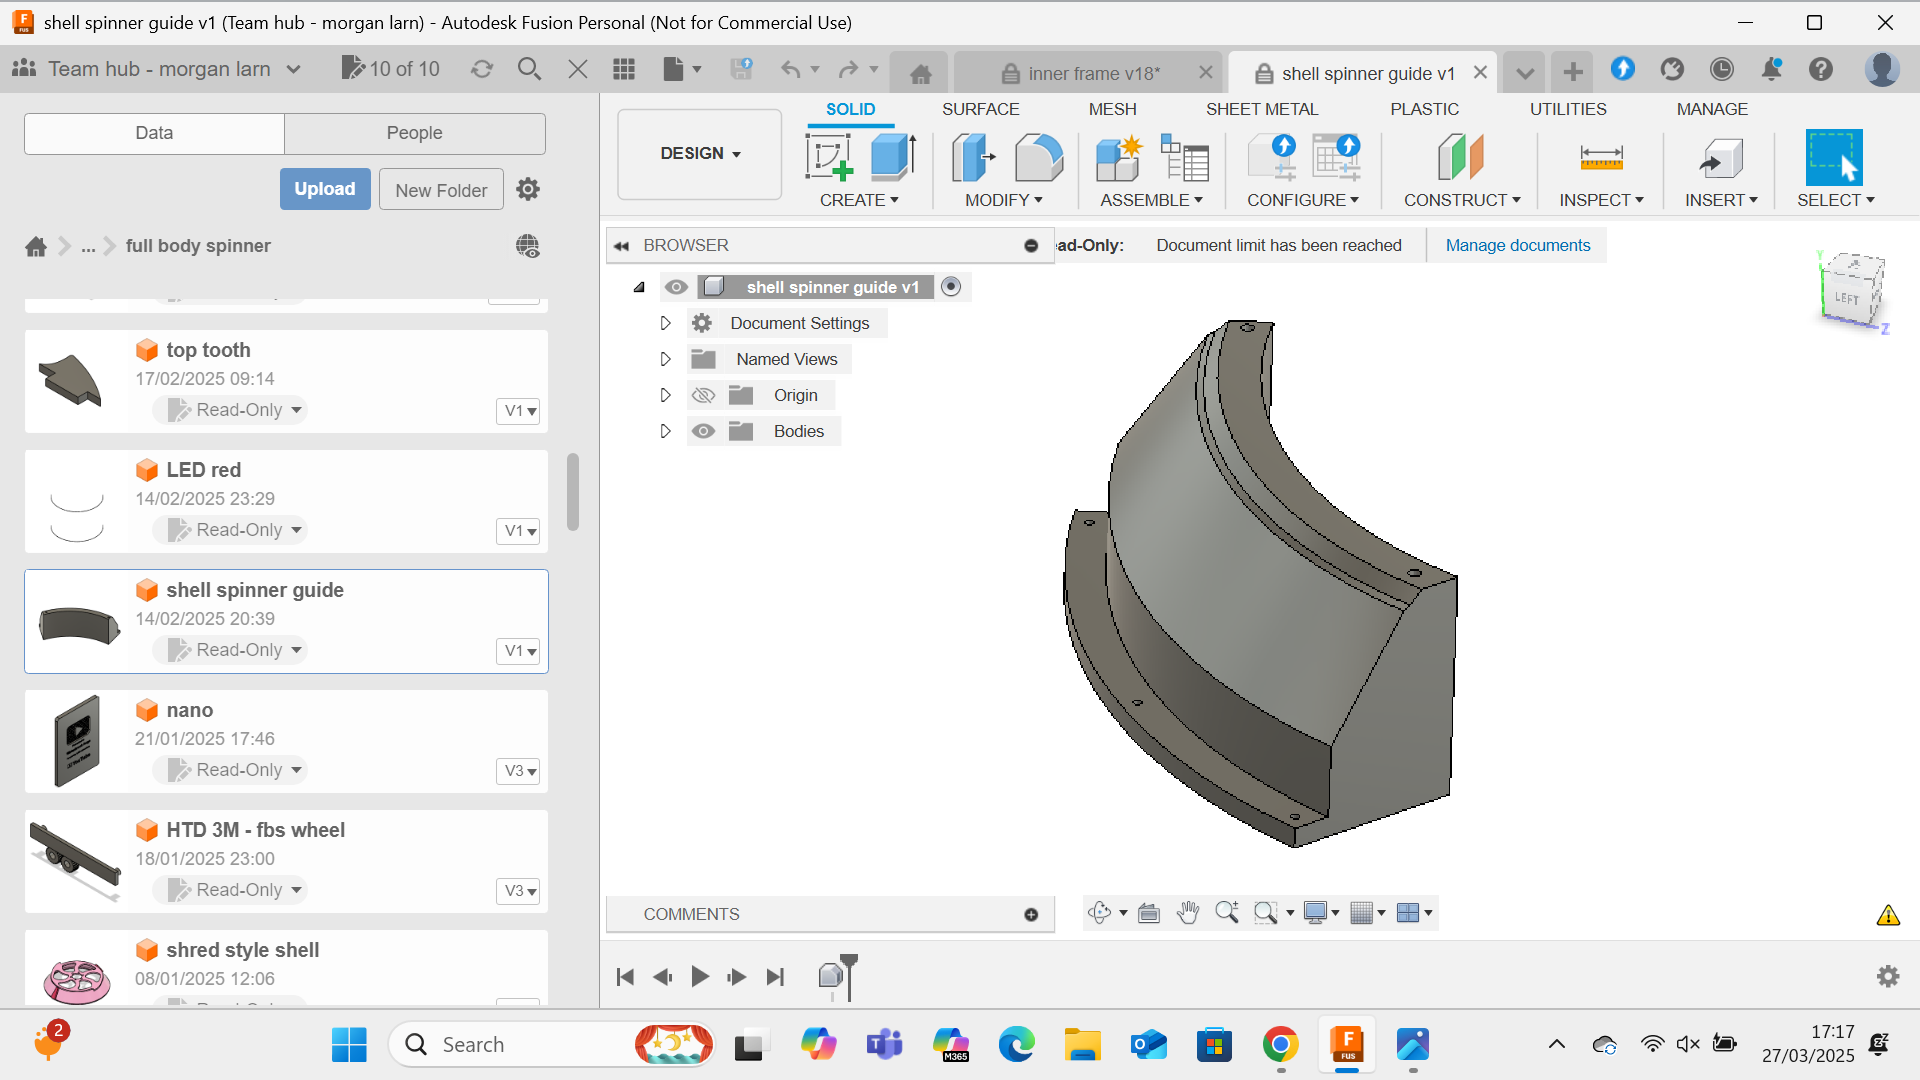
I did design an alternative shell more based on shrederator than gigabyte, designed to go weapon to weapon with horizontals rather than them glancing up the shell and the top tooth were made for any big wheeled bots, decided to go with the 1 shell for now as it was pretty spenny and frankly i think the gigabyte style will be much nicer to look at
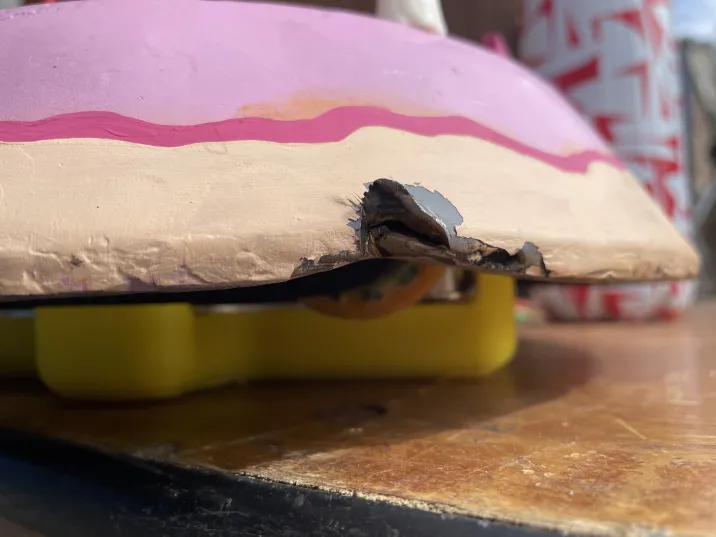
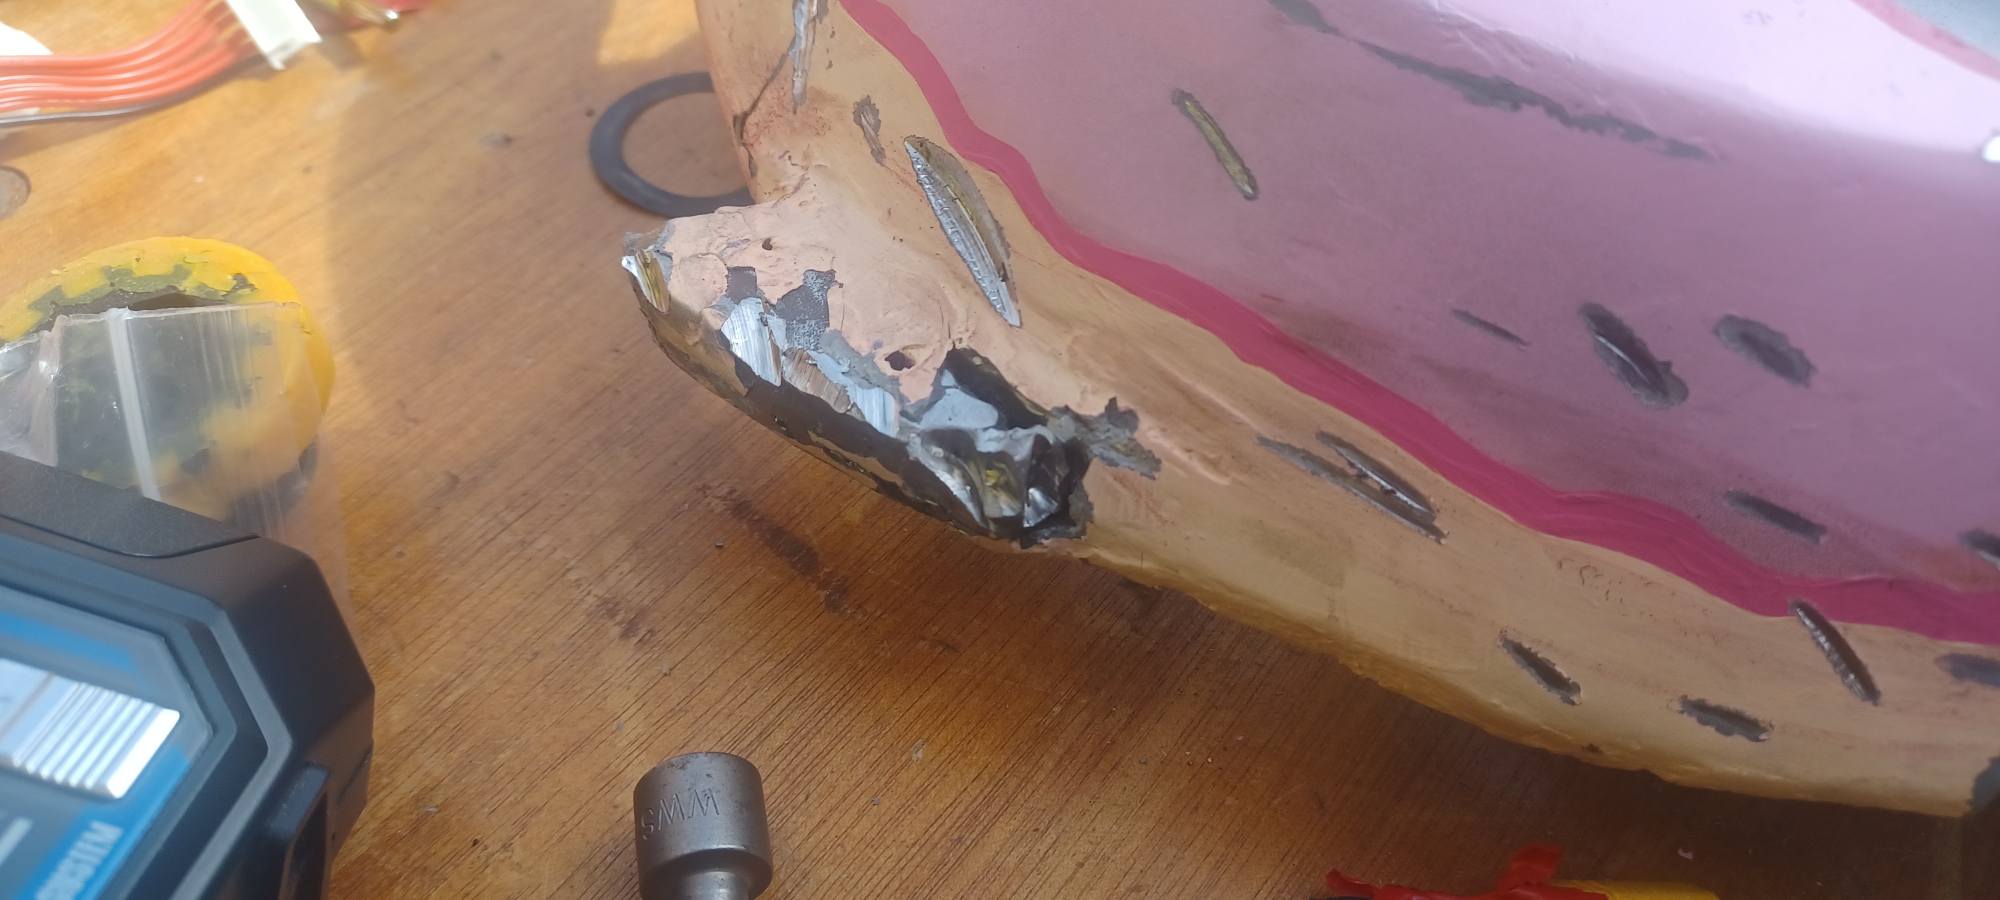
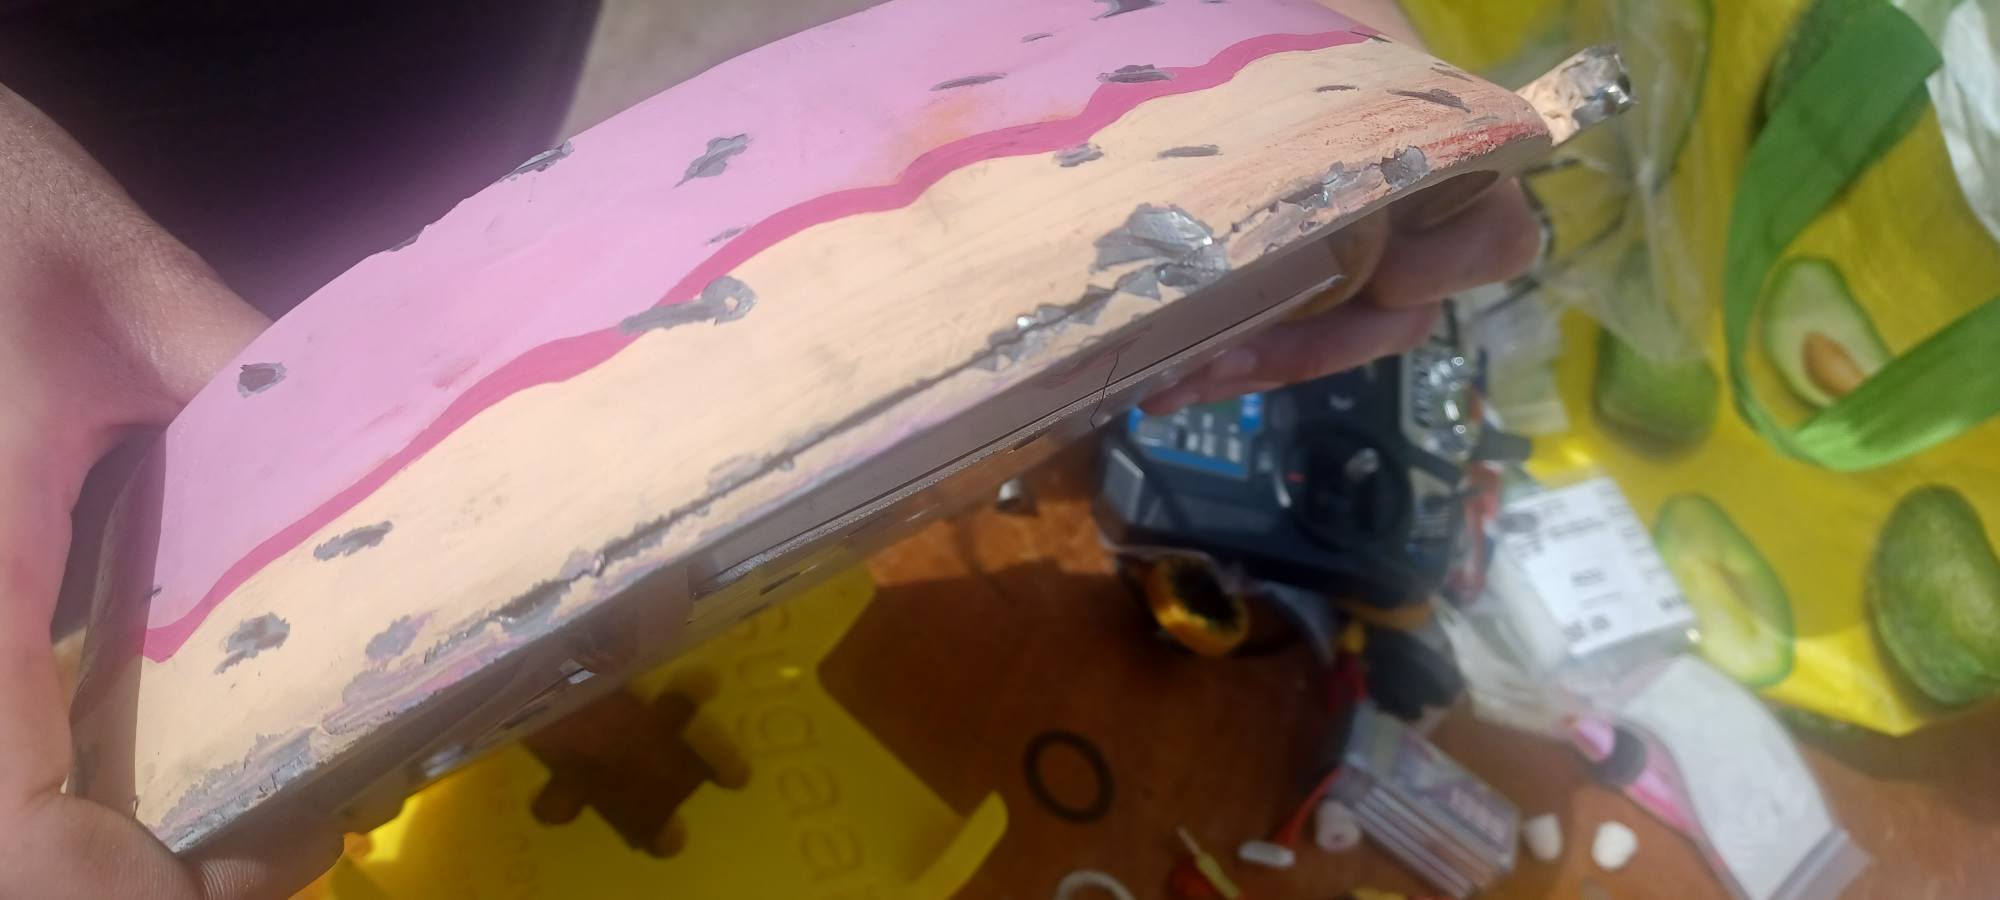
the dome ended up being made from legit Hardox 400, since I wanted to ensure all the work in the post fabrication would not be bend first fight, in hindsight I wish I could of made it from hardox 500 or greater but the company didnt tell me they stocked the stuff till after It had been made. one way to get returning customers i guess haha interestingly the dome was not made with a roller but with a press break in 2 parts since it was too small of a diameter to put in the roller, so it was bent in increments rather than one smooth curve, this caused a bit of an issue though as it ended up making both sides a little too small
before and after welding
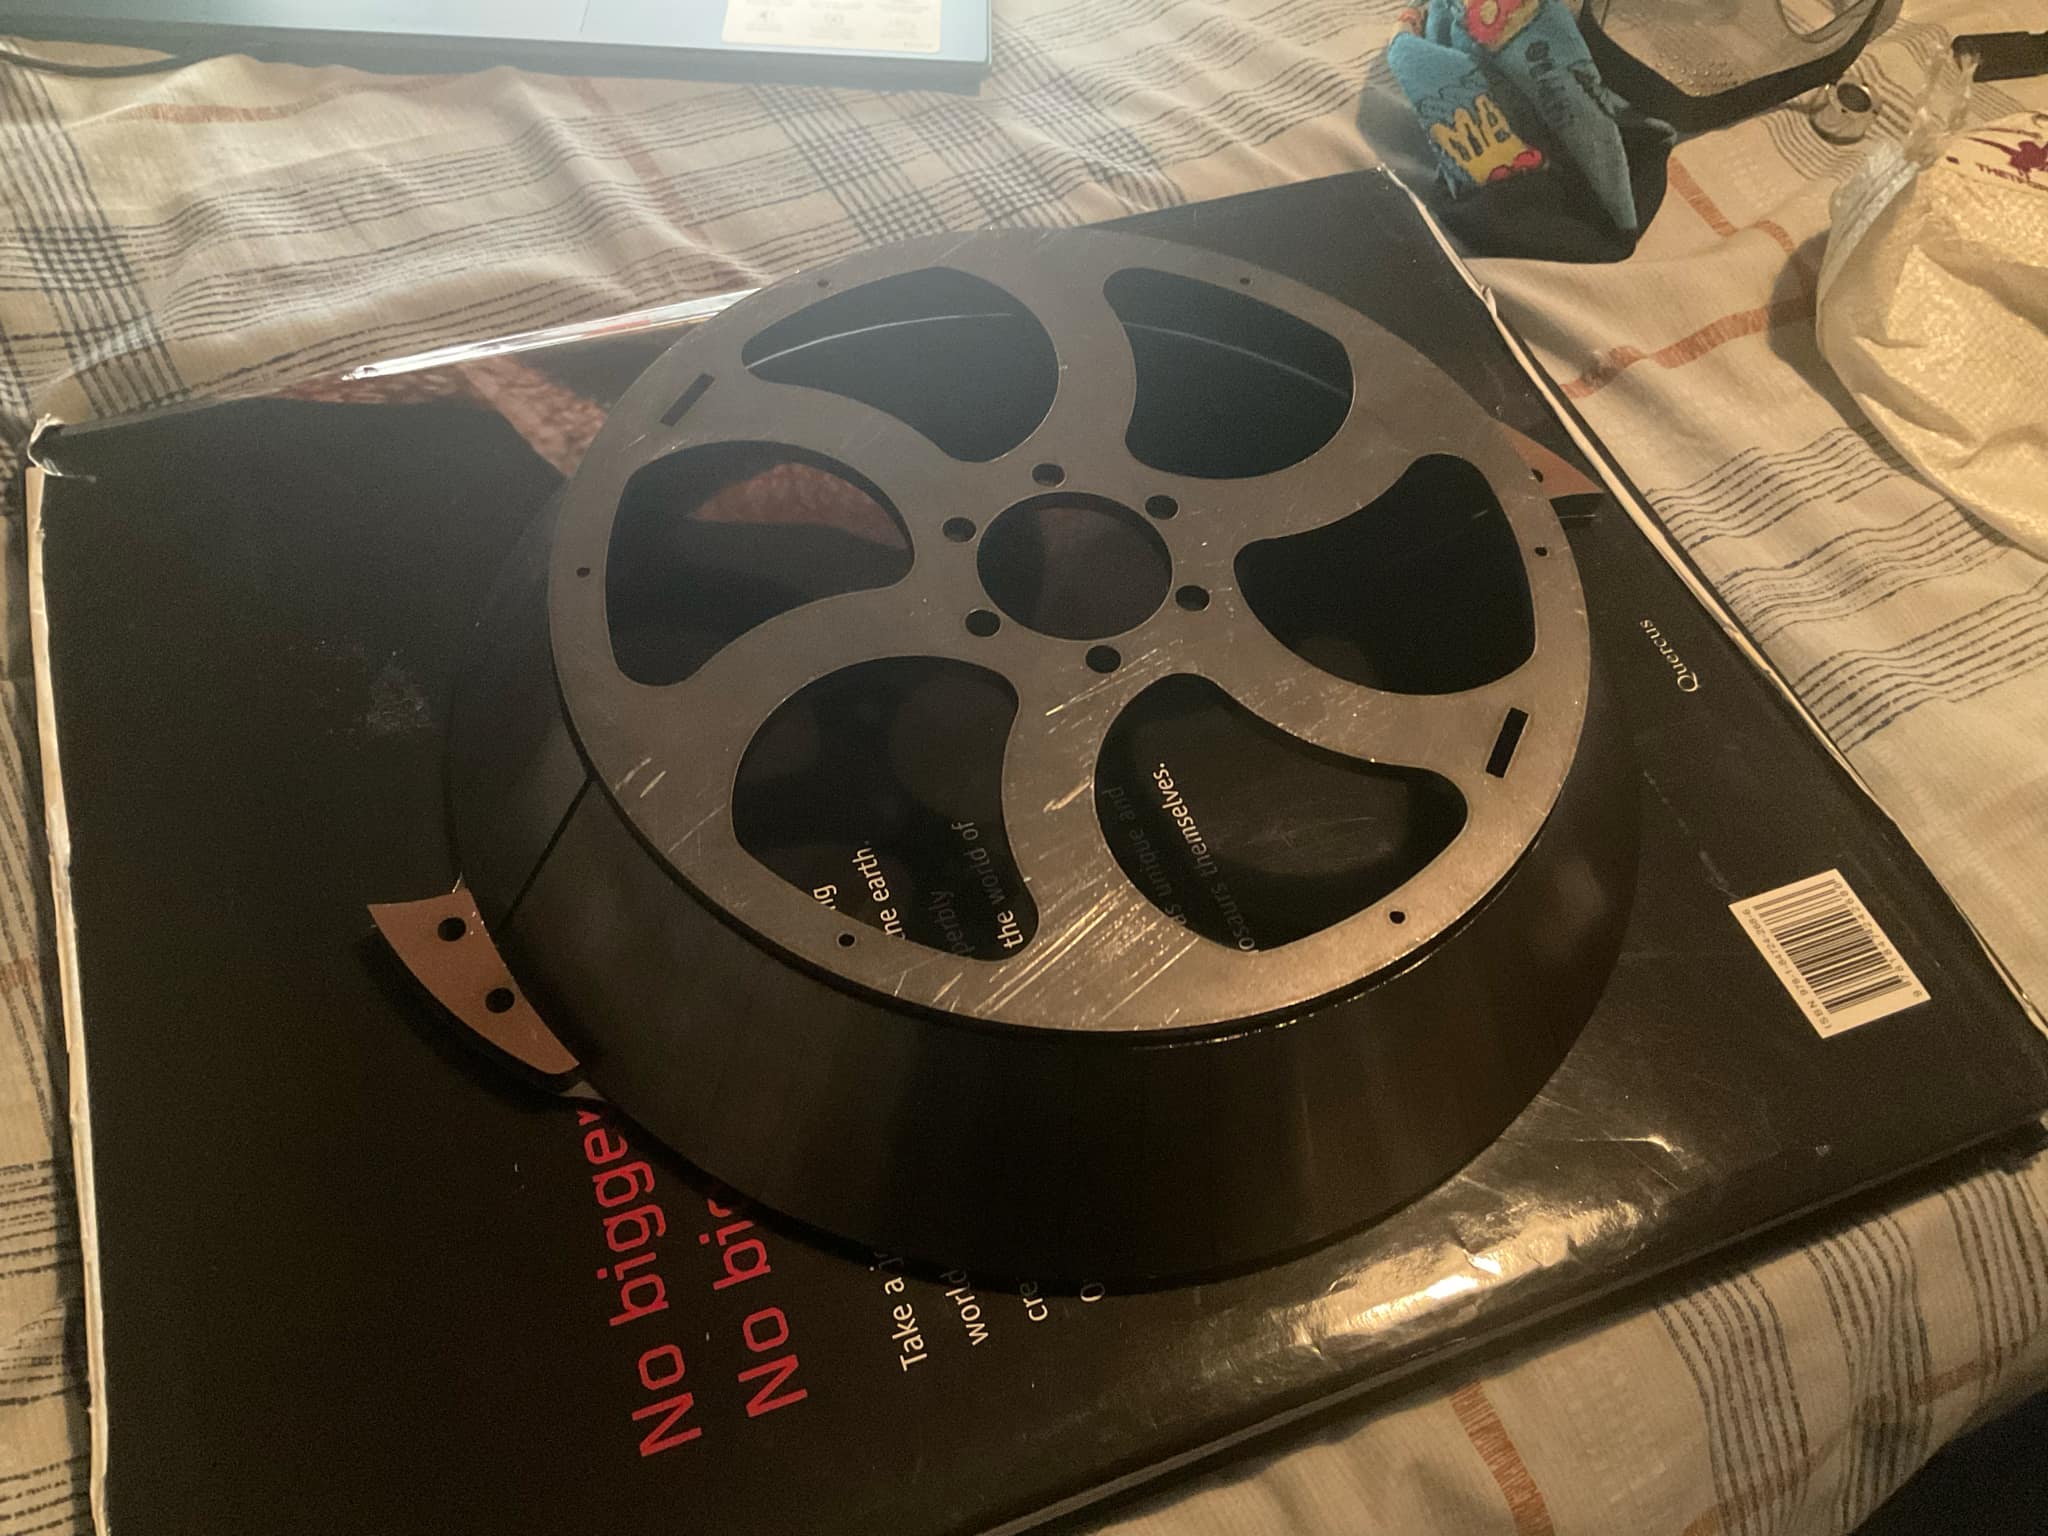
you can kind of see the bent pattern on the shell, was very cool but it all ended up being ground smooth during finishing
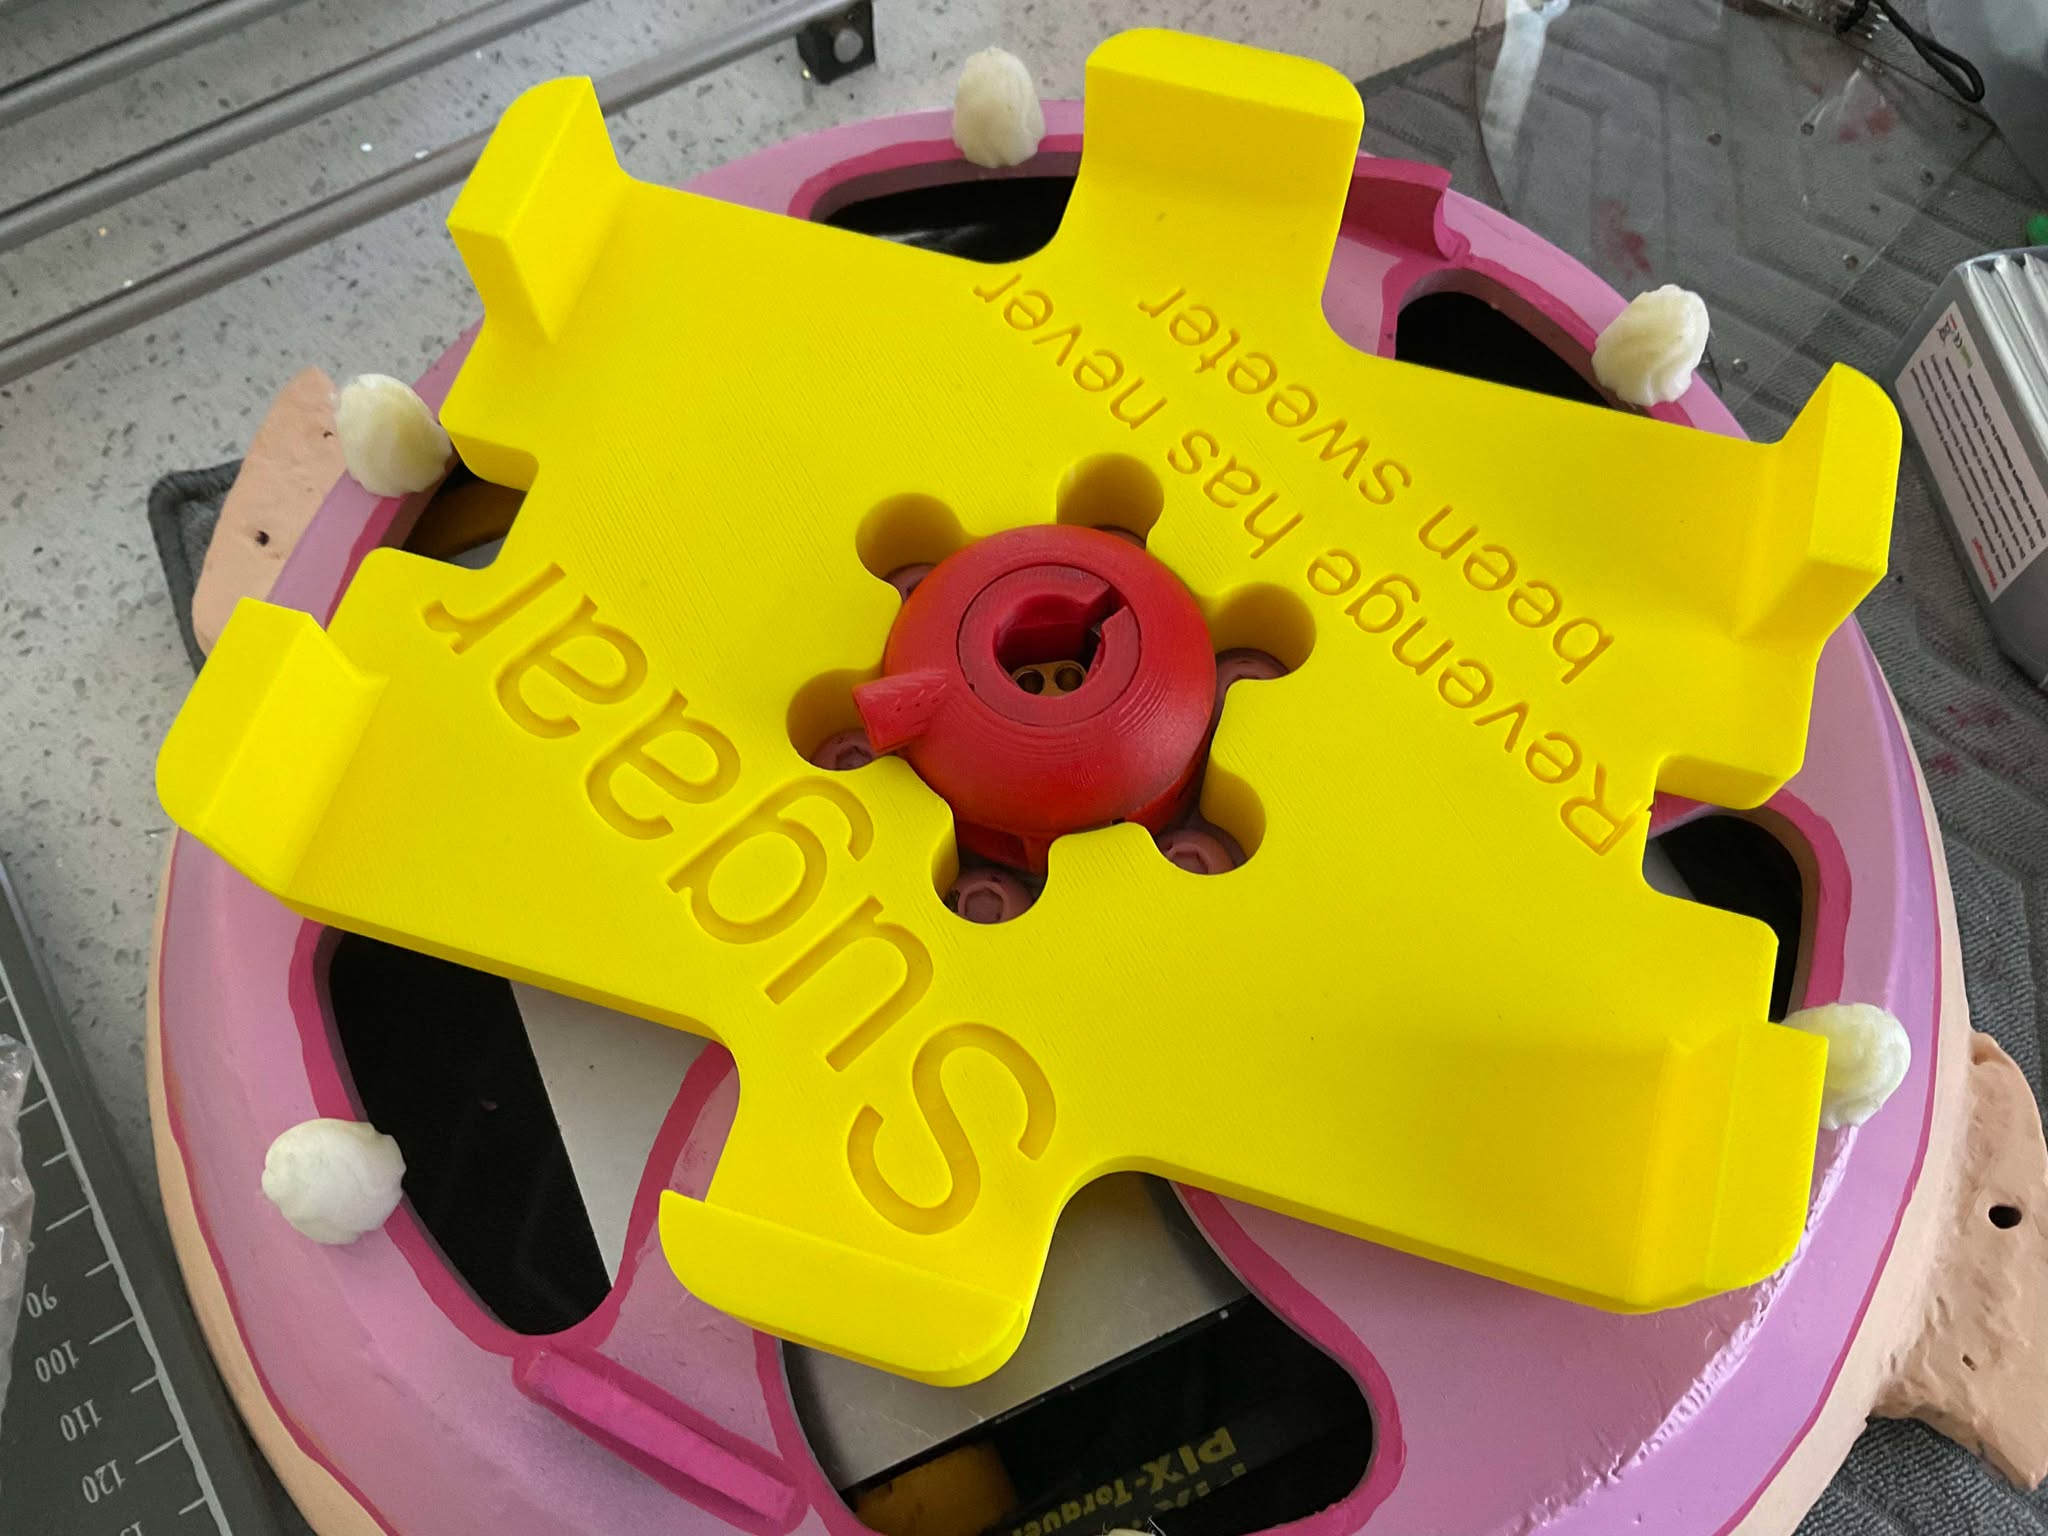
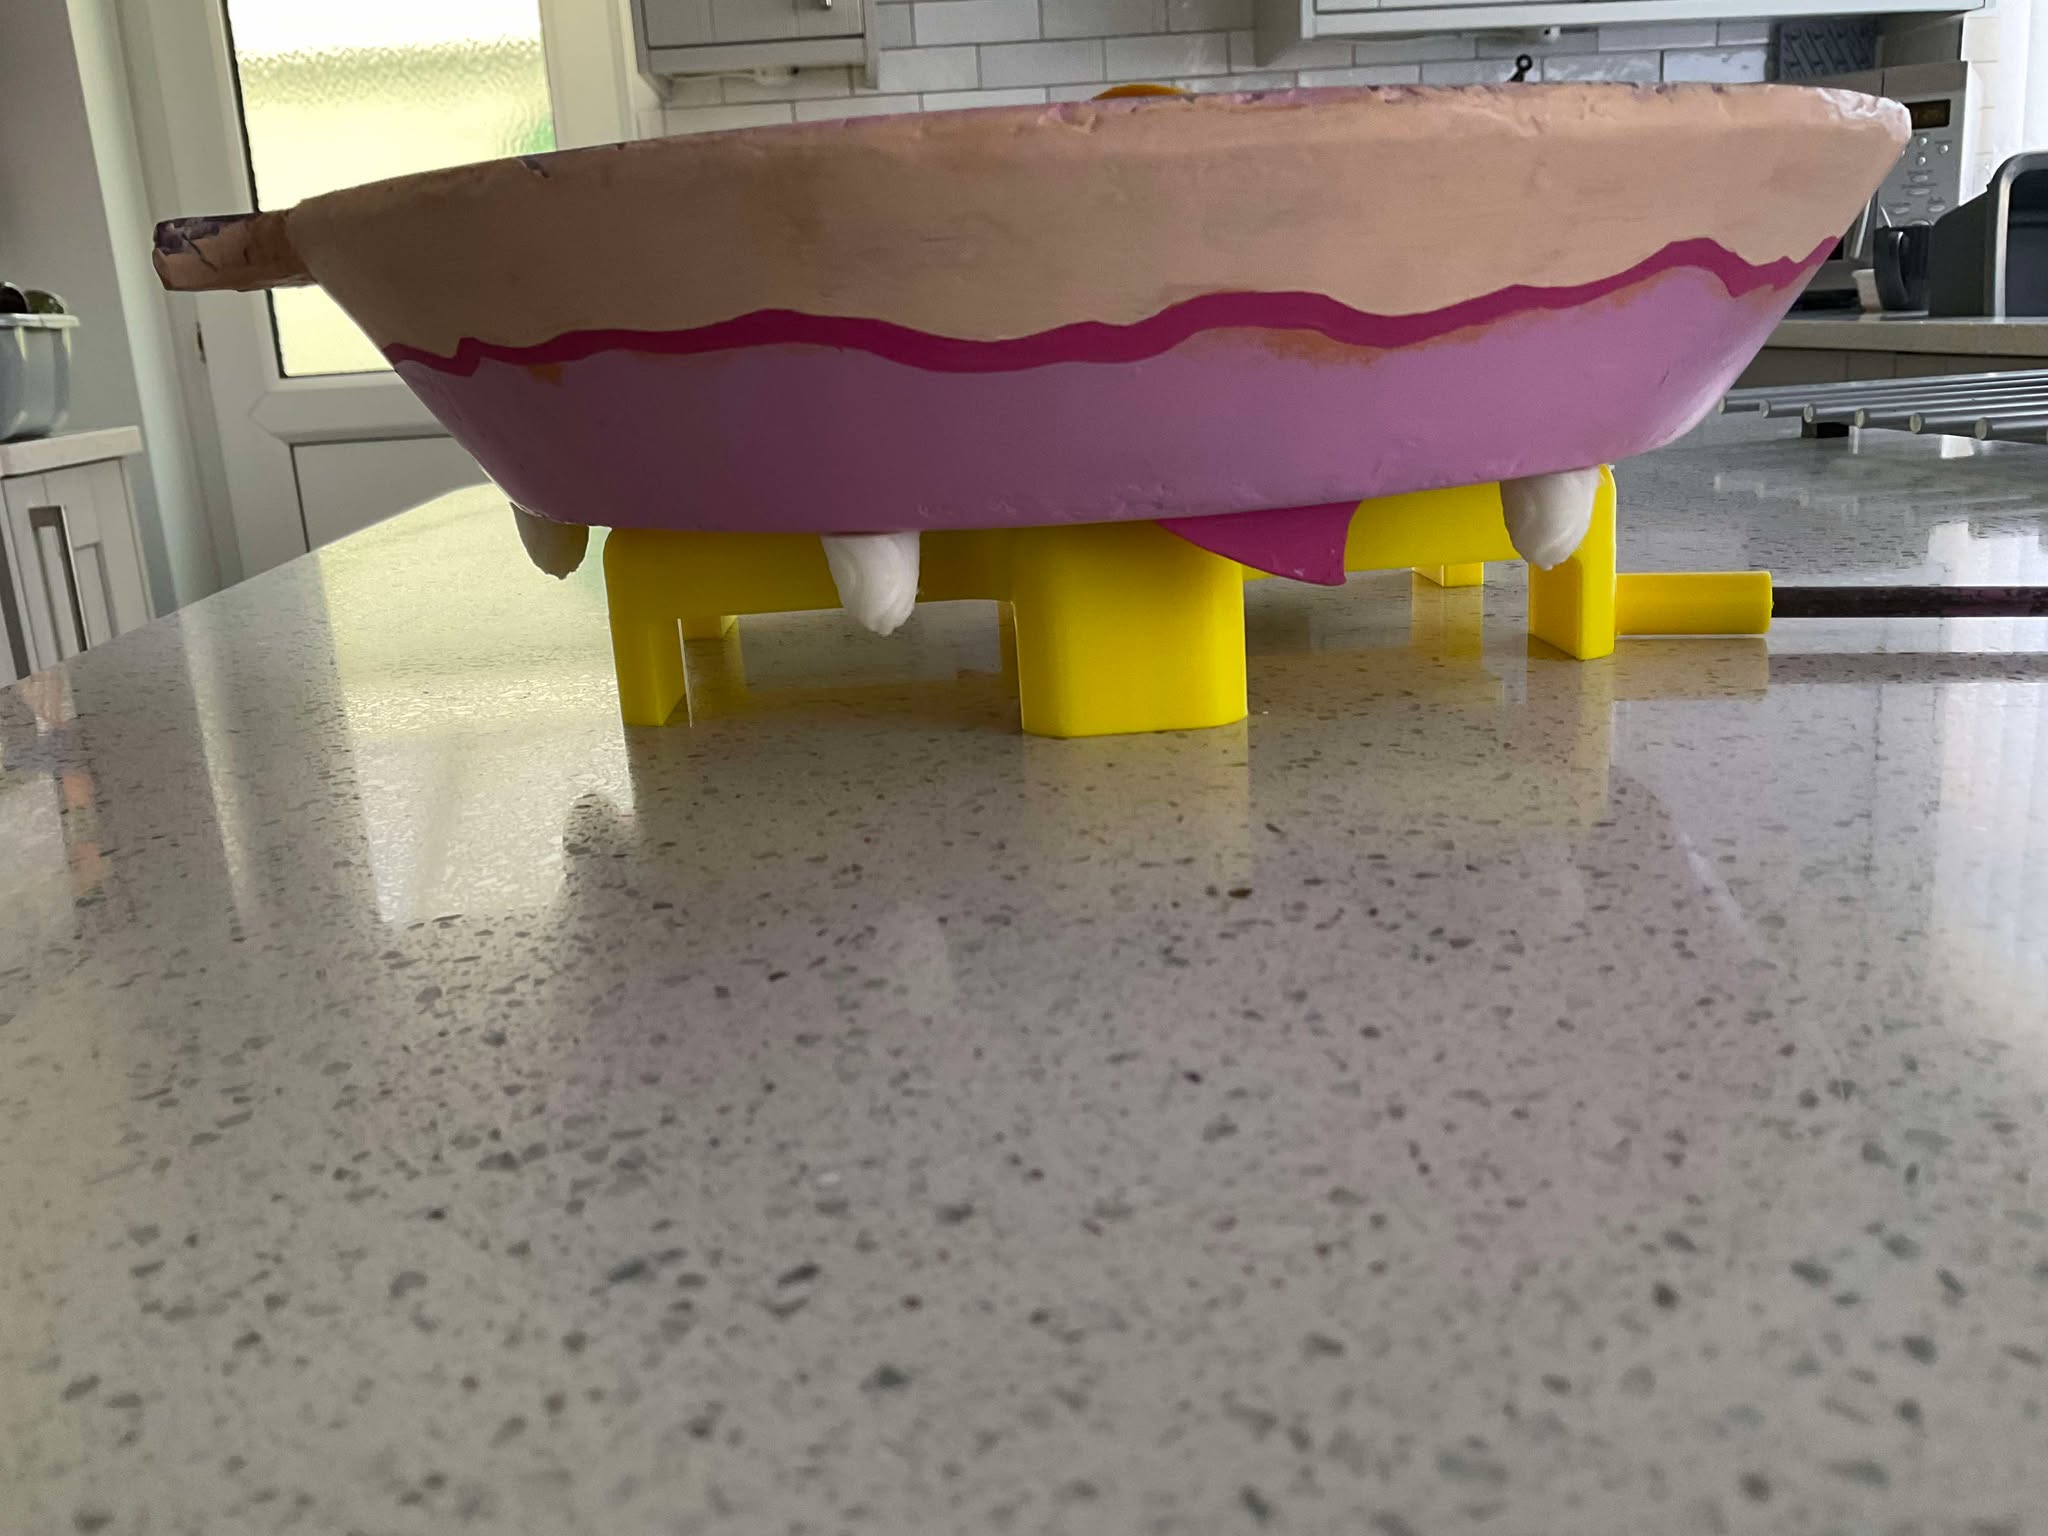
however this was solved with a bit of scrap Hardox and a file to get the fit just right. the jigging was done with some 3d printed PLA blocks that screwed into the top of the dome and held the bottom rim tightly to the slanted sides
a few clamps and it was good to be welded
thankfully my long suffering gramps/partner in crime is a great welder and stuck it all together for me
pictures of welding

this did leave it a little imbalanced but that’s nothing a grinder and some bearings cant fix. on this note small 1 gram magnets are fantastic for seeing how much material you need to remove. Finally it was wiped down with acetone and some jb weld applied to smooth out the surface for painting
all in all the shell weighs over 3kg

now onto how the shell is held on the bot, this jumped around allot in the design with it originally being a Ali shaft to save weight with a steel bearing block. it was around this time OD found if I went to a mt60 rather than an xt60 I would save so much on the diameter and could hide the link down the shaft of the bot rather than sticking it out the top in a plastic mount
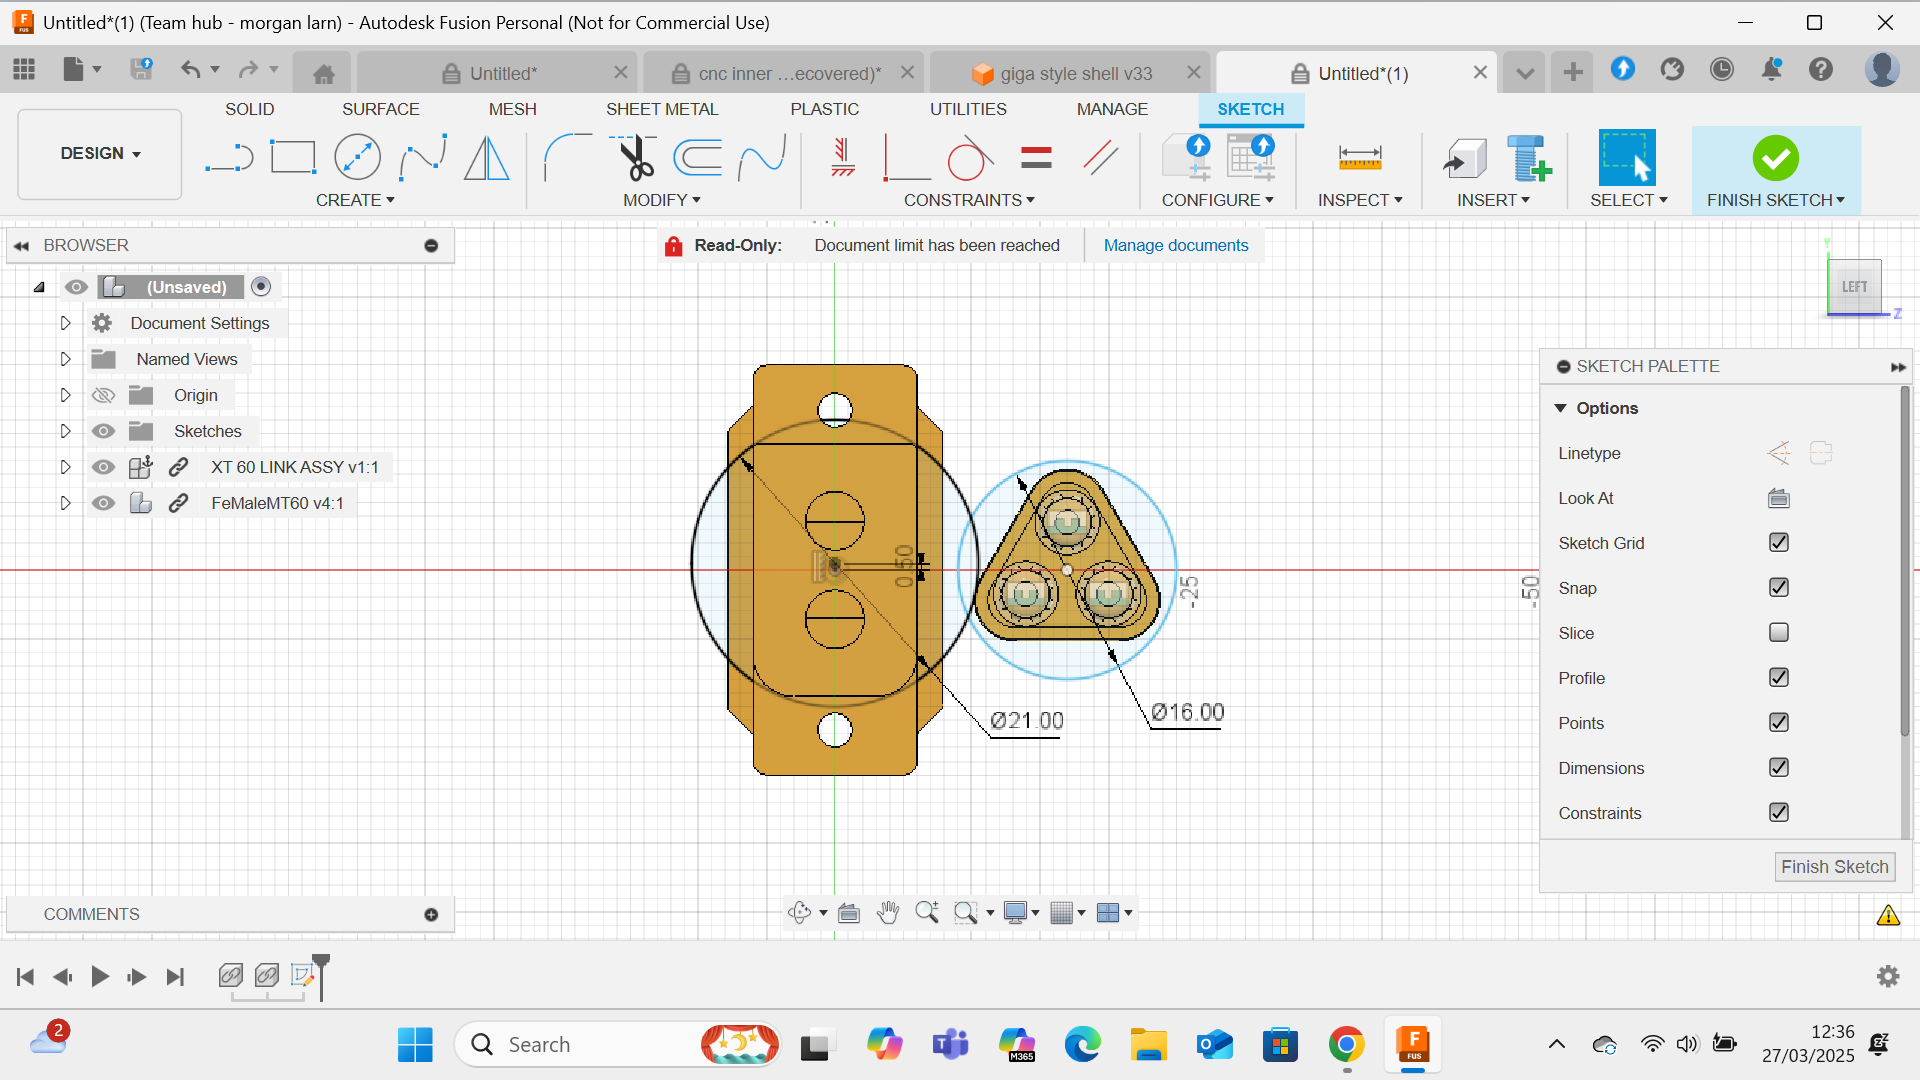
when wiring I just used 2 of the 3 as power and soldered in a nice wire loop on the 3rd terminal to pull the link out
as a result i went with steel for both parts, en25t specifically which i machiend myself
the main reason for the material change was since the inside diameter would be much larger to accommodate the link at 17mm which with a 25mm od should be more than strong enough, I mean it worked for my 6kg weapon of my feather. the shalt also included a 6mm thick flange which had the bolts go through to the body to hold the shaft in place
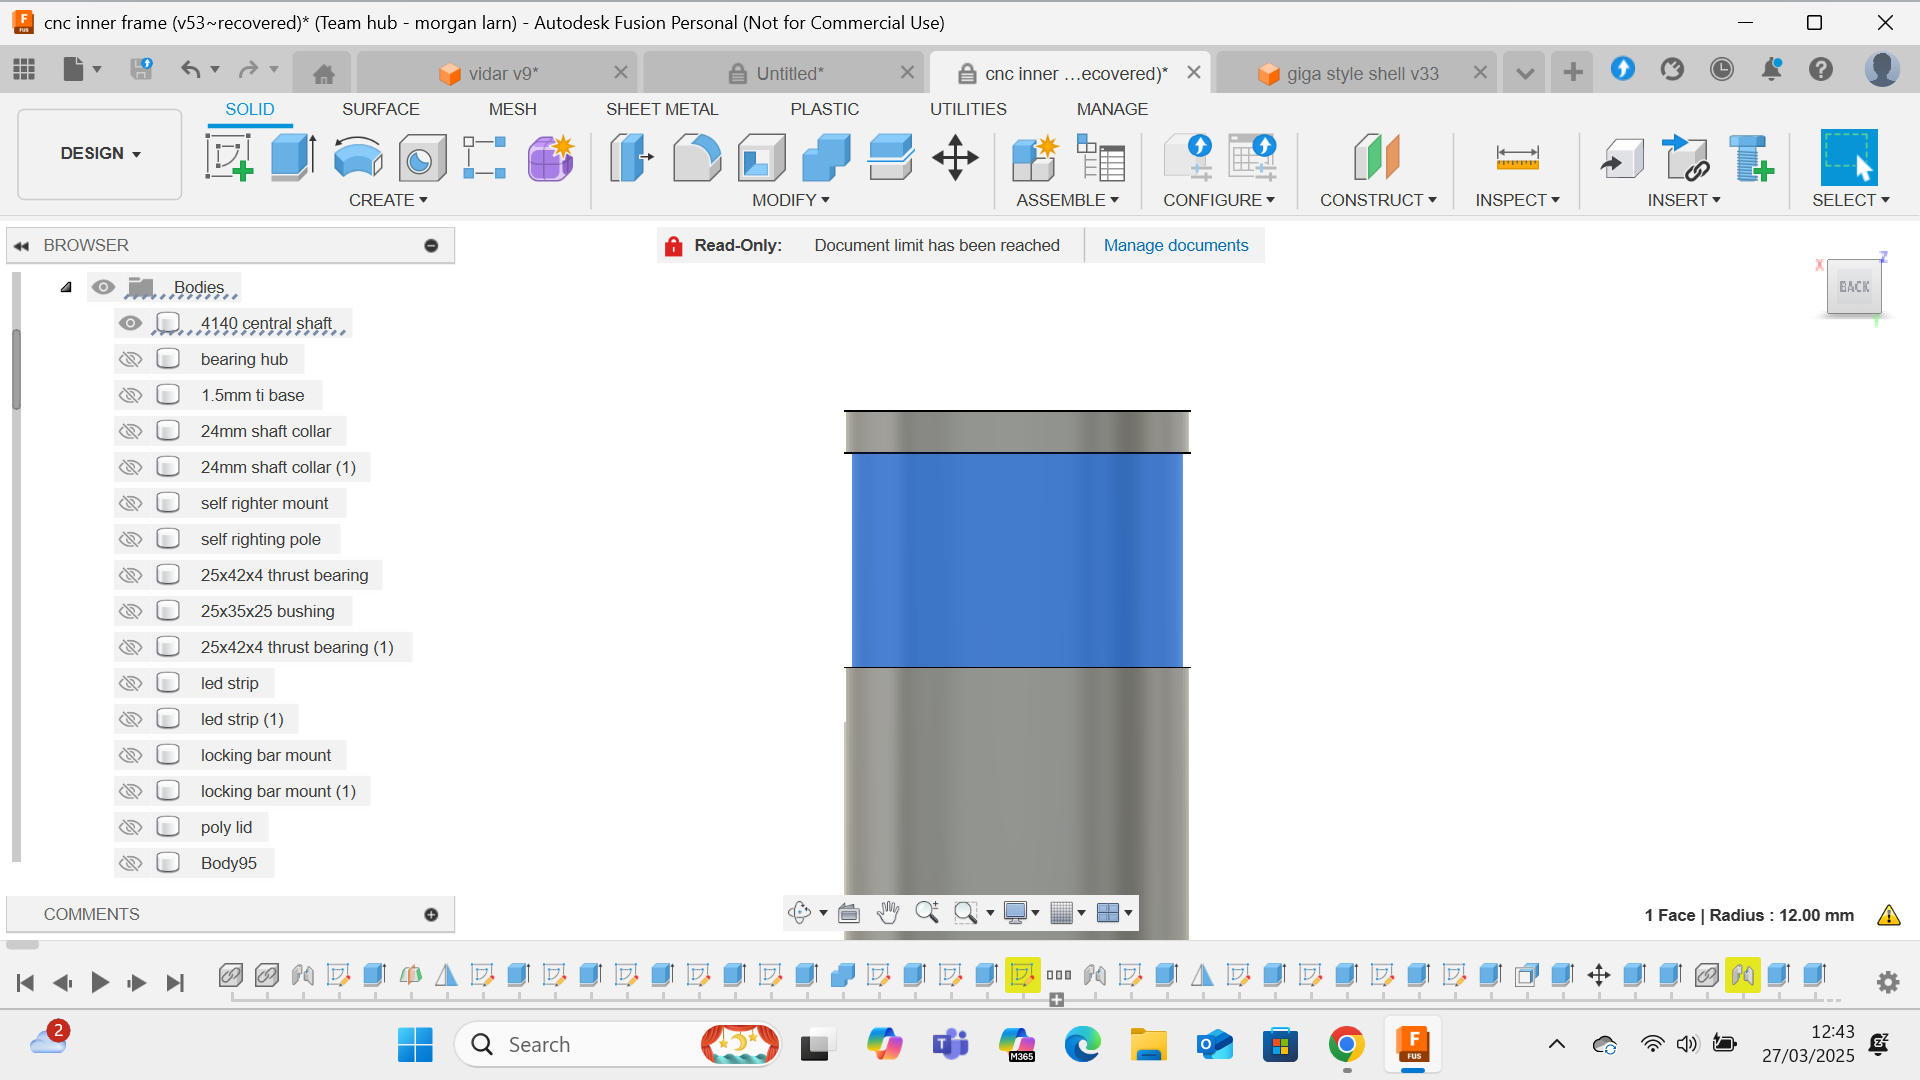
the bearings were originally a pair of 25x37x10, in the cad this seemed fine but when I made the hub and pushed them in they just felt really weedy
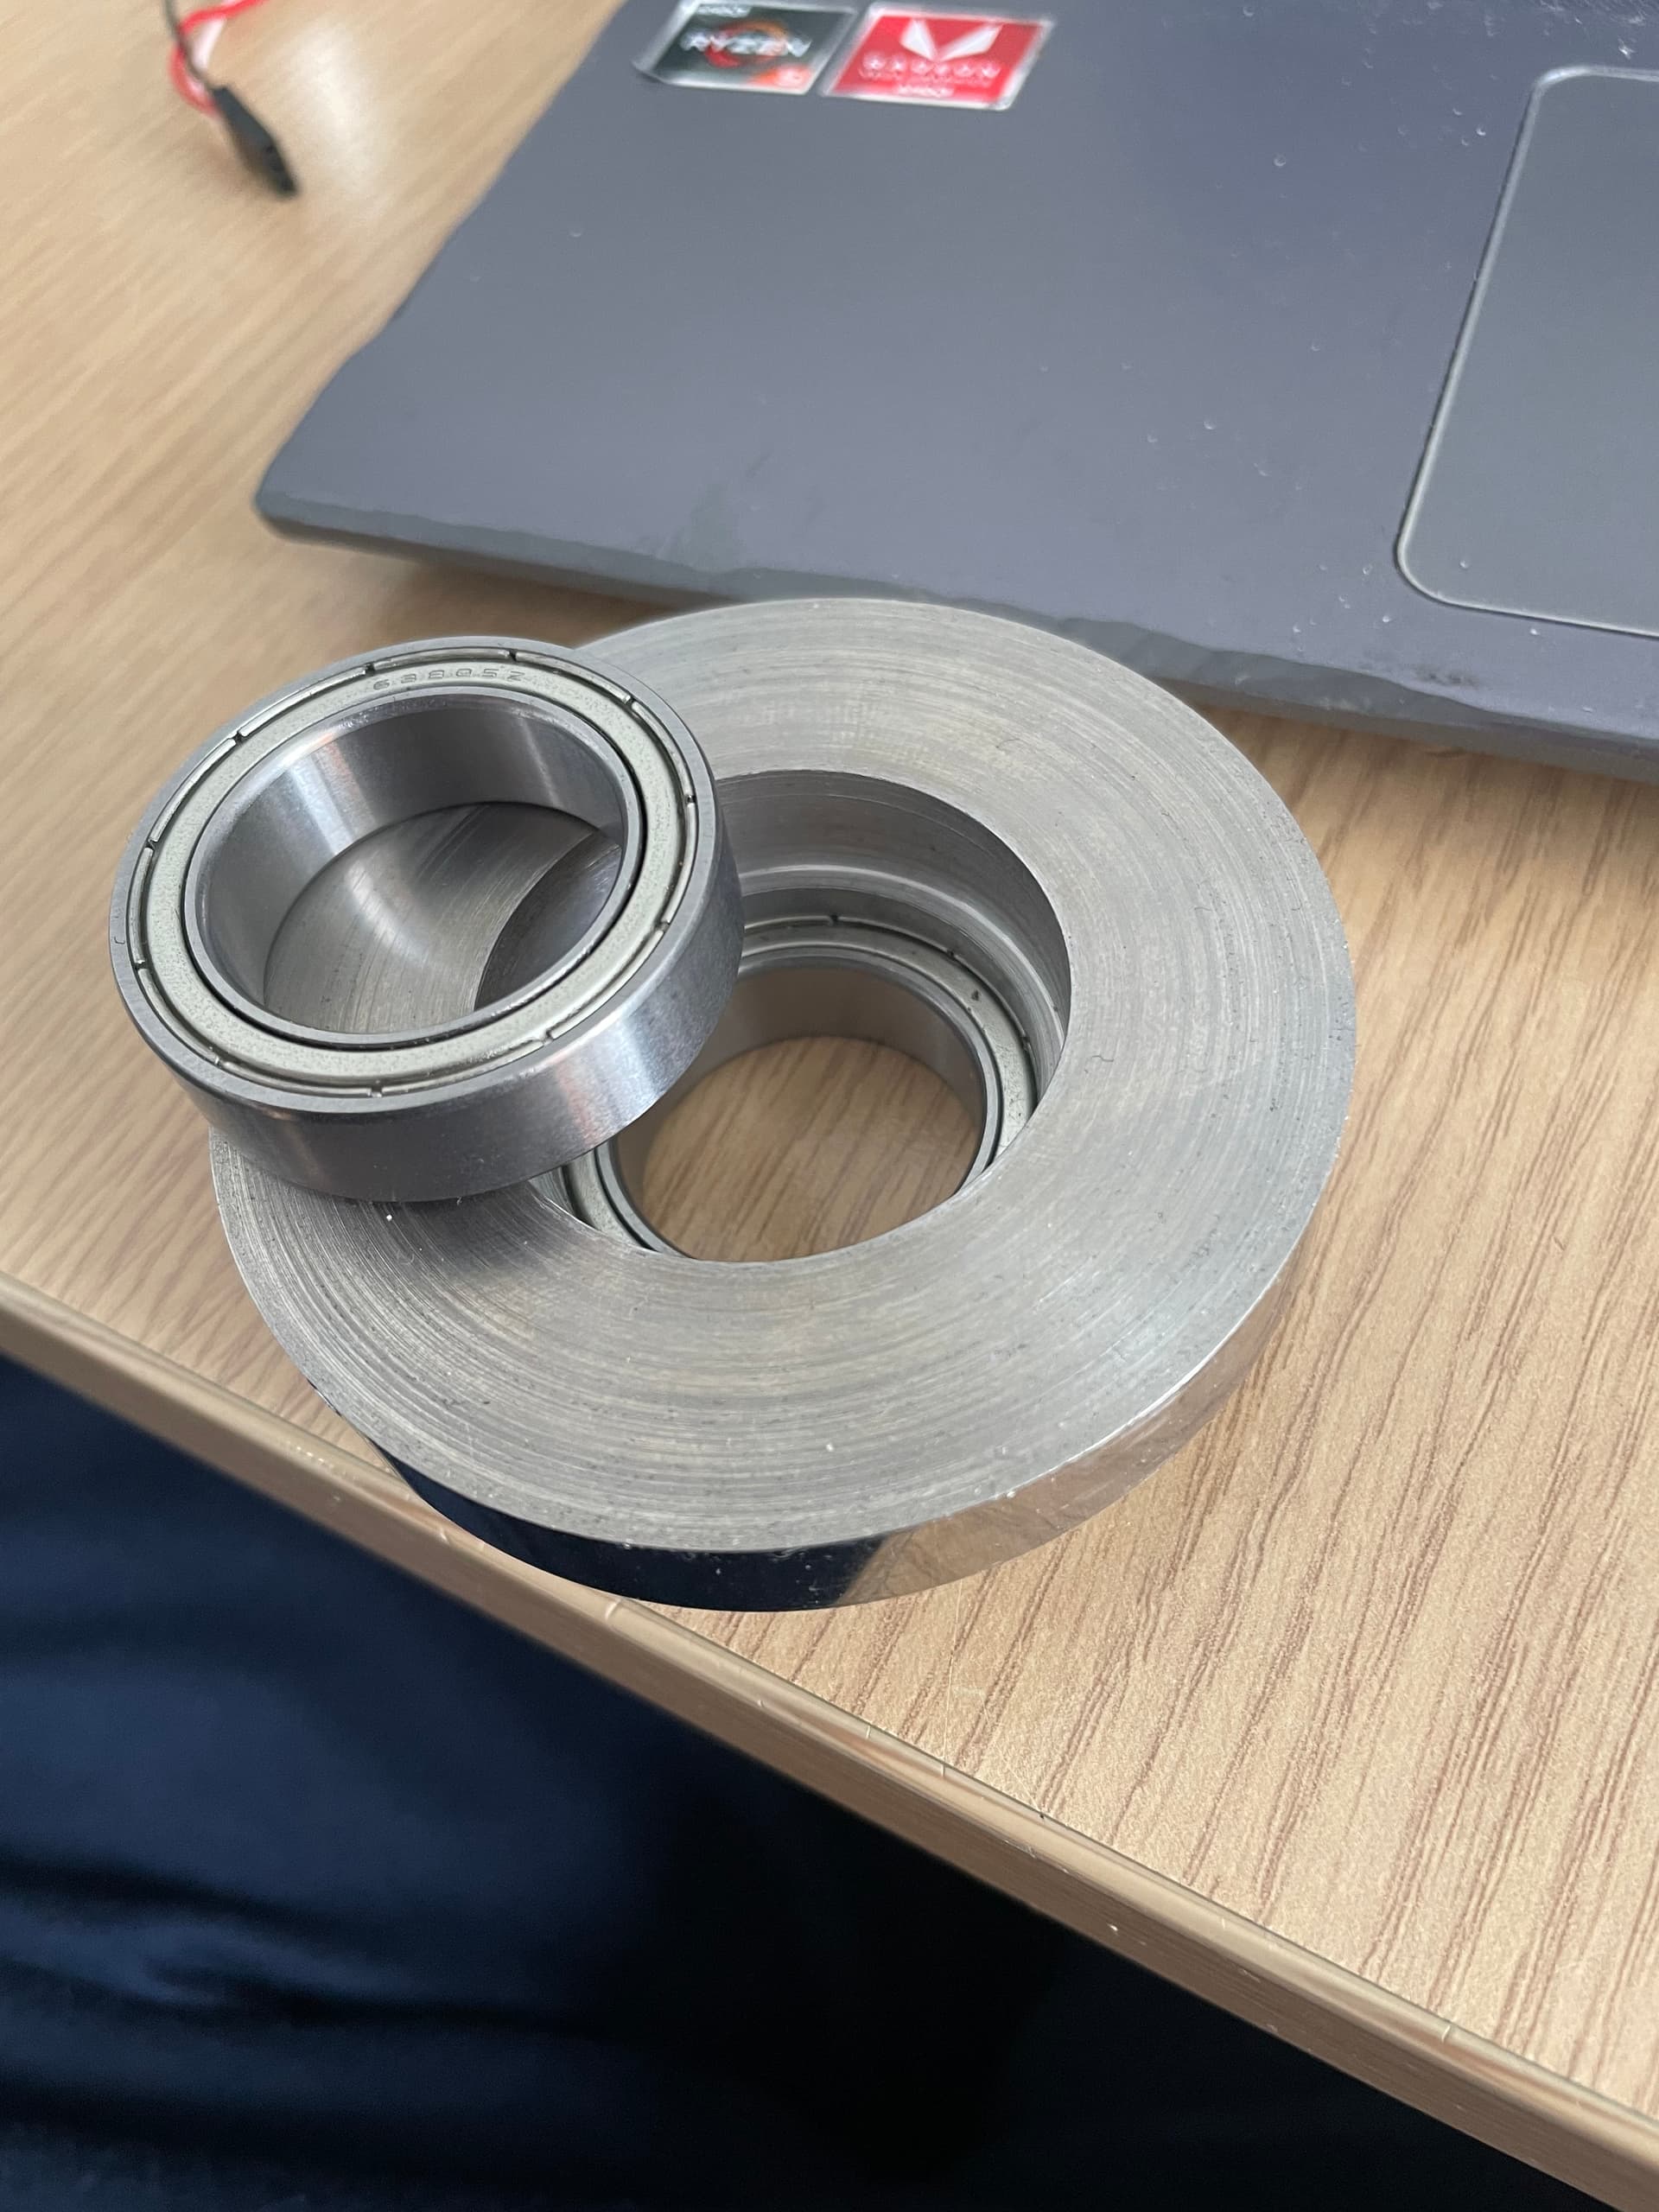
so I ended up going for a 25x35x25 bushings and cutting it down to size, this also has the effect of making the whole stack-up 3mm shorter and much less likely for something to explode as bushings tend to dent not shatter like a bearing
this is ofc way too fast for the bushings rated top speed but with 3 minute fights at a time I think it should be fine. and frankly if its still spinning at the 3 minute mark its not done its job as something should be dead by then. be that the opponent or my own bot
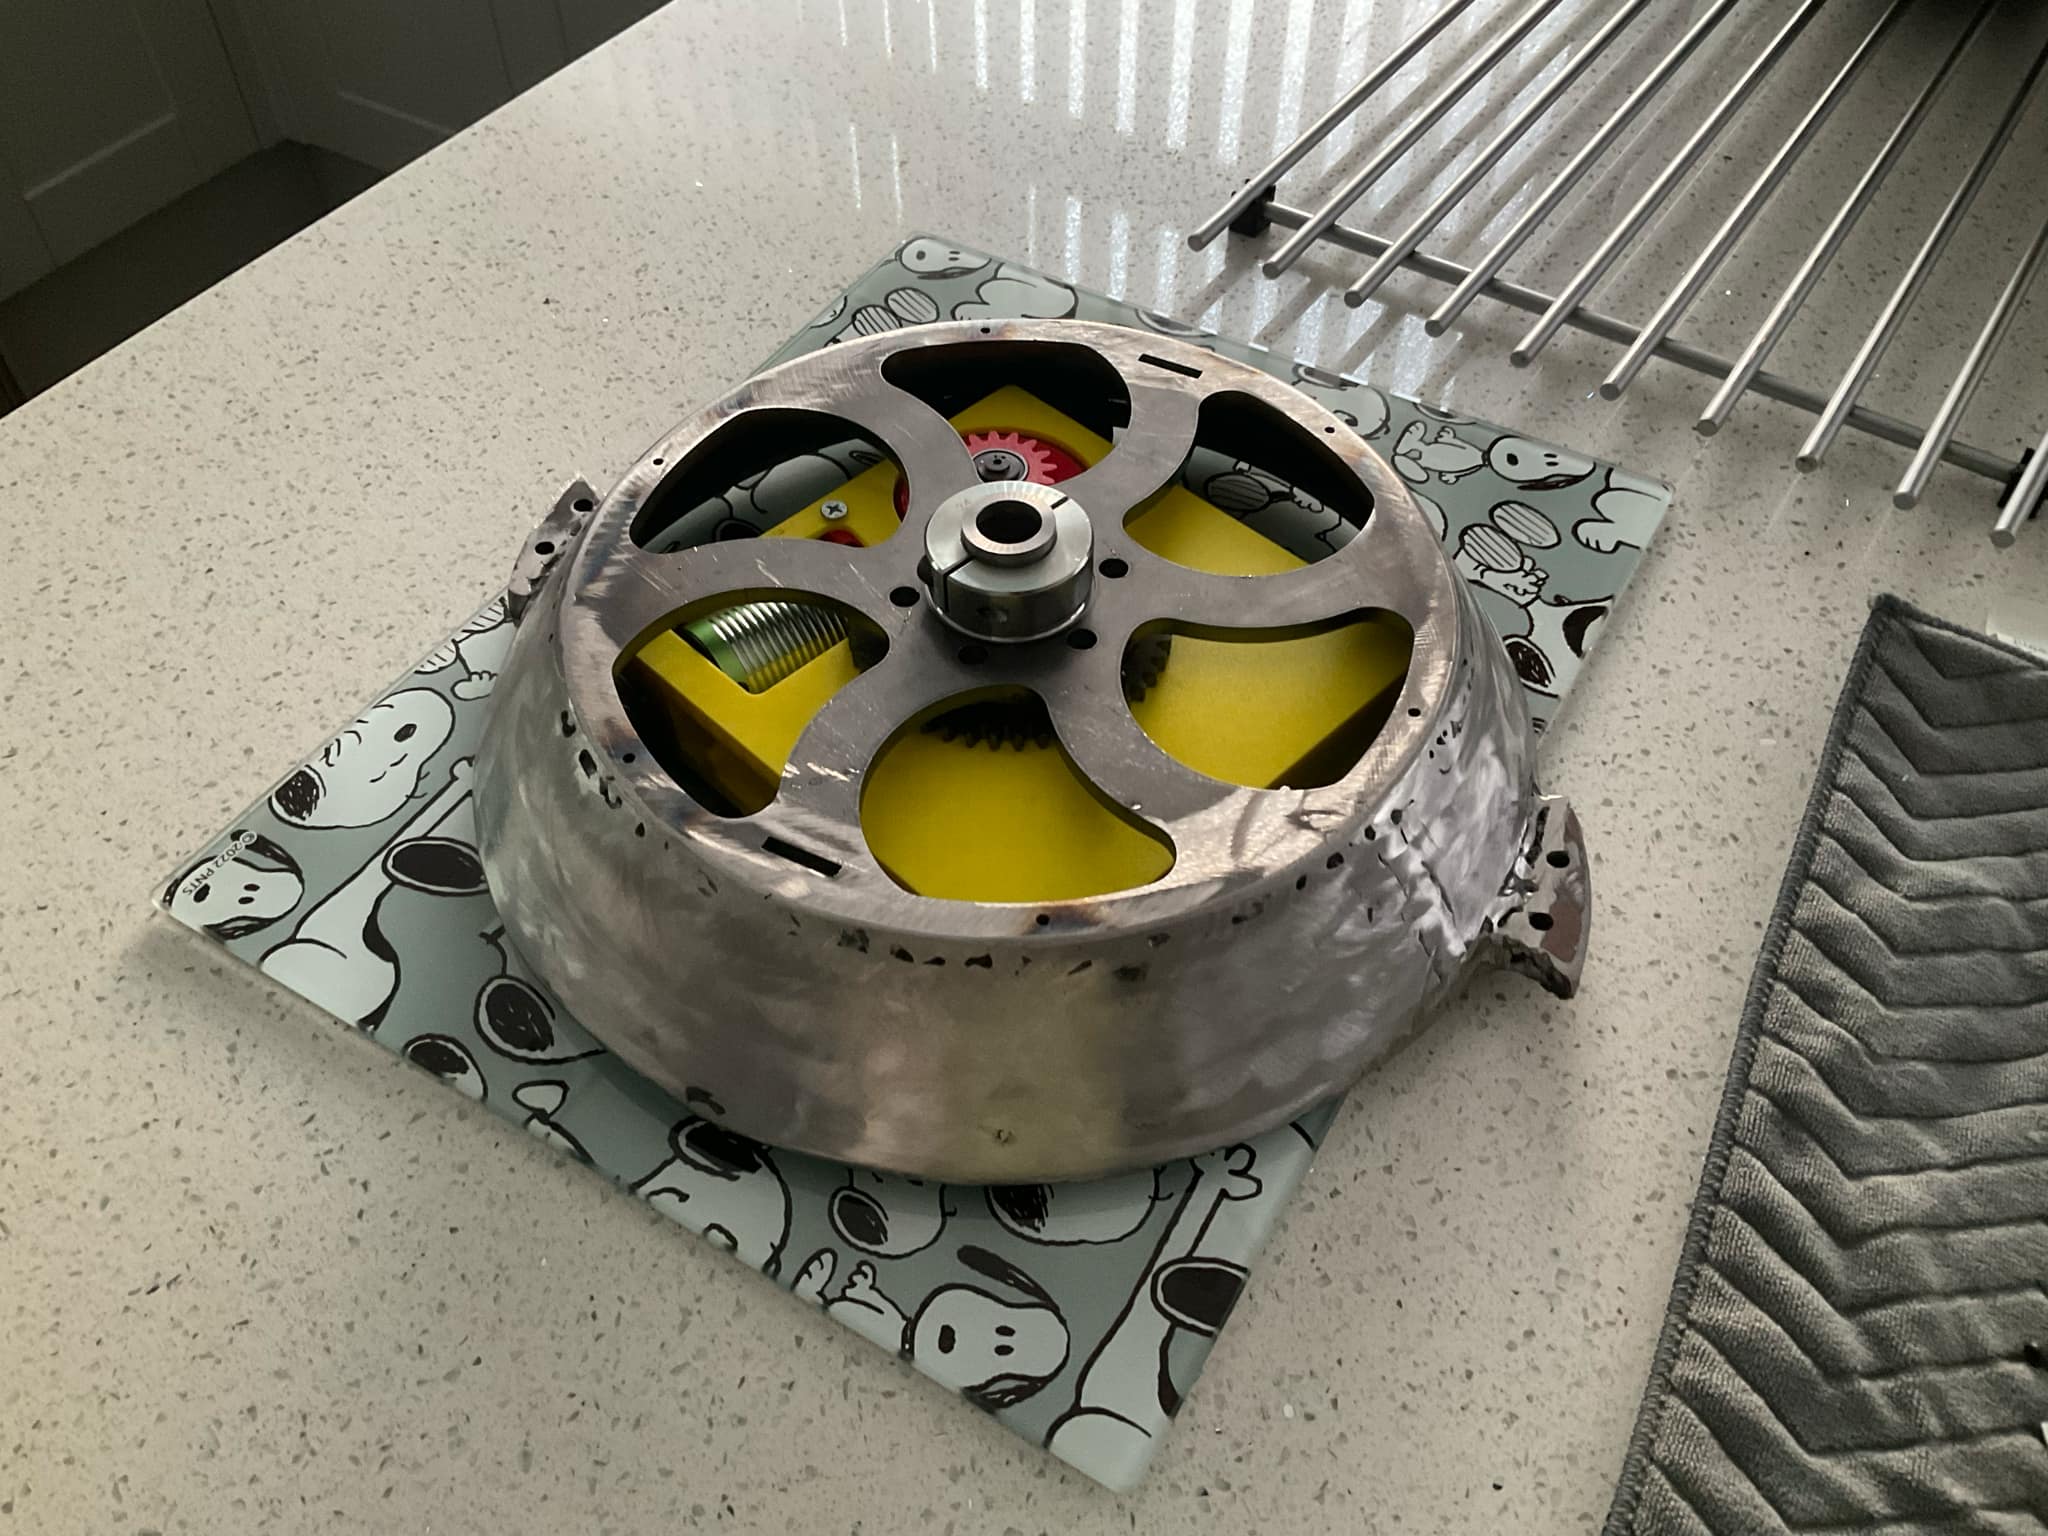
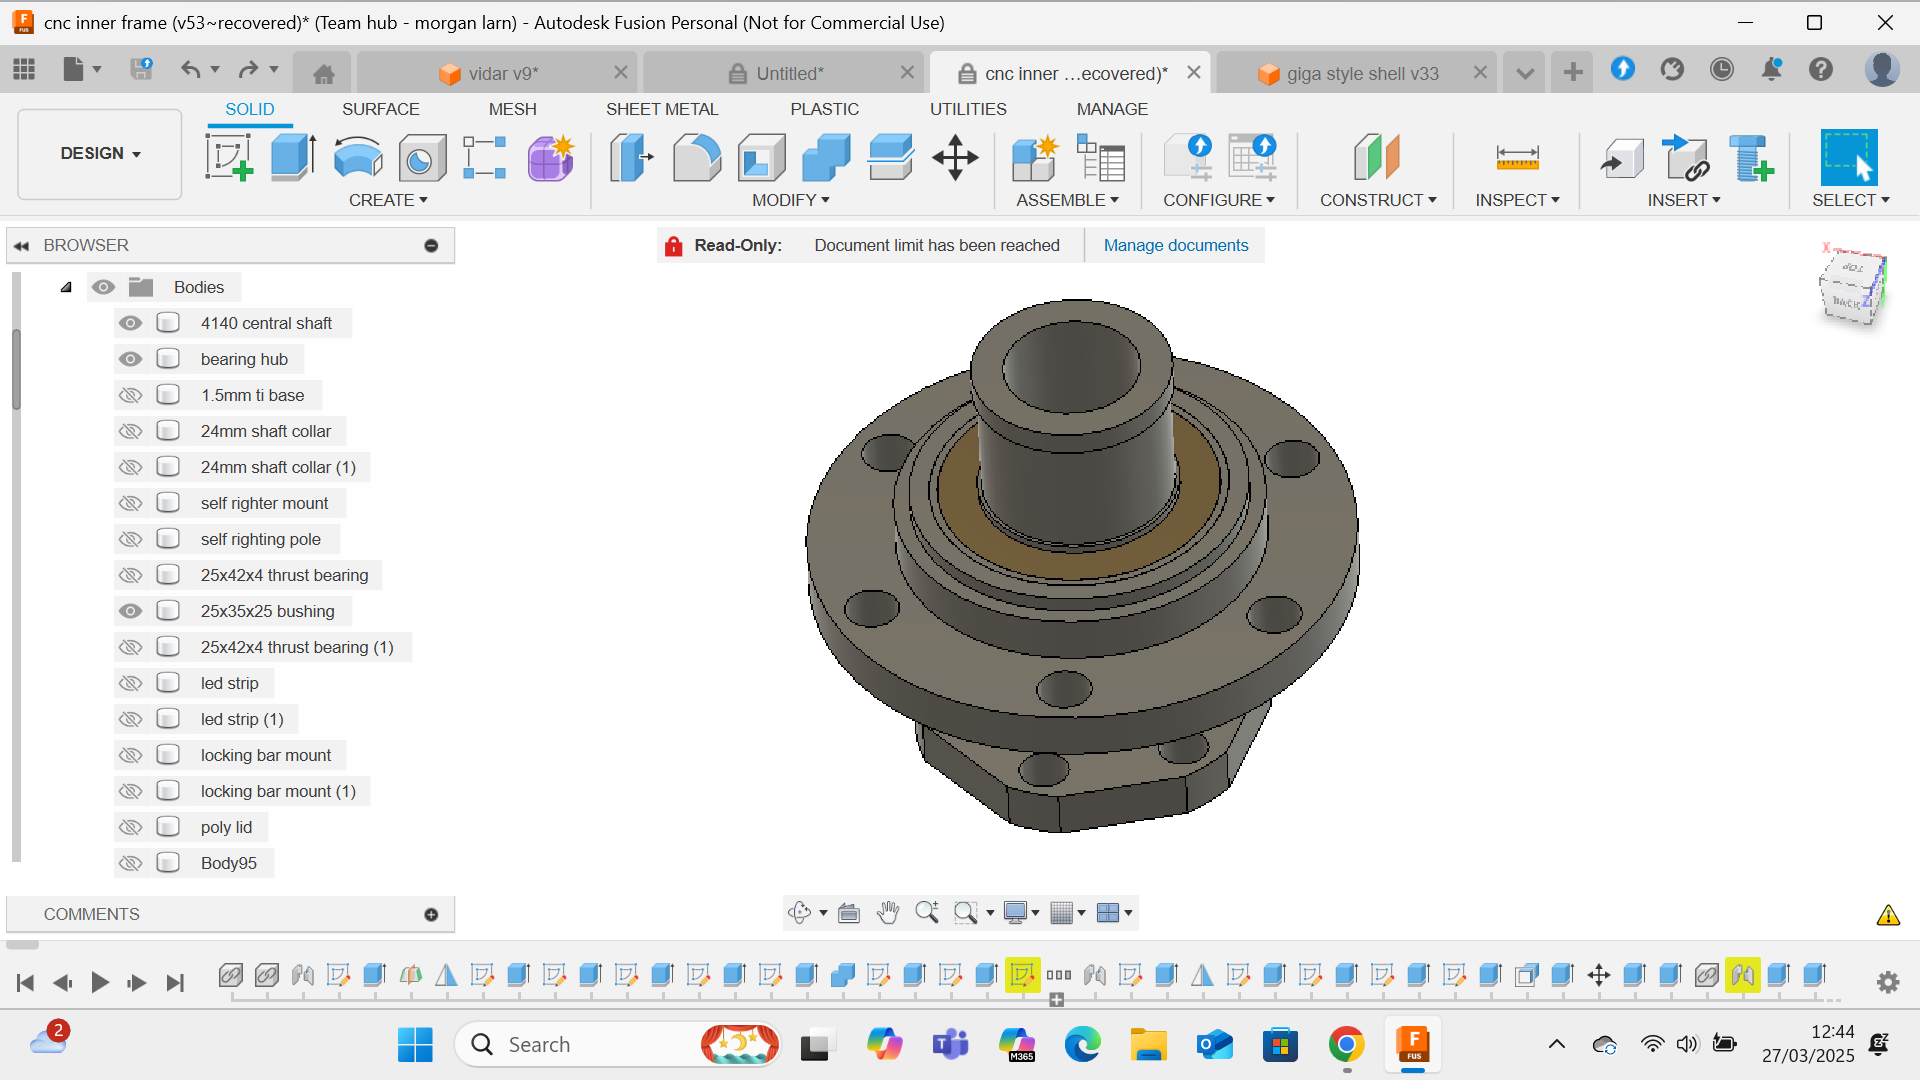
the bearing hub was made with a boss for the shell too sit on as well as clearance for the heads of the bolts
the shell is secured to the hub with 6xm8 button head screws which not only thread into the hub but also the 6mm Hardox gear beneath for maximum thread engagement, you can usually tell when someone was designed into a corner if they end up needing to tap Hardox
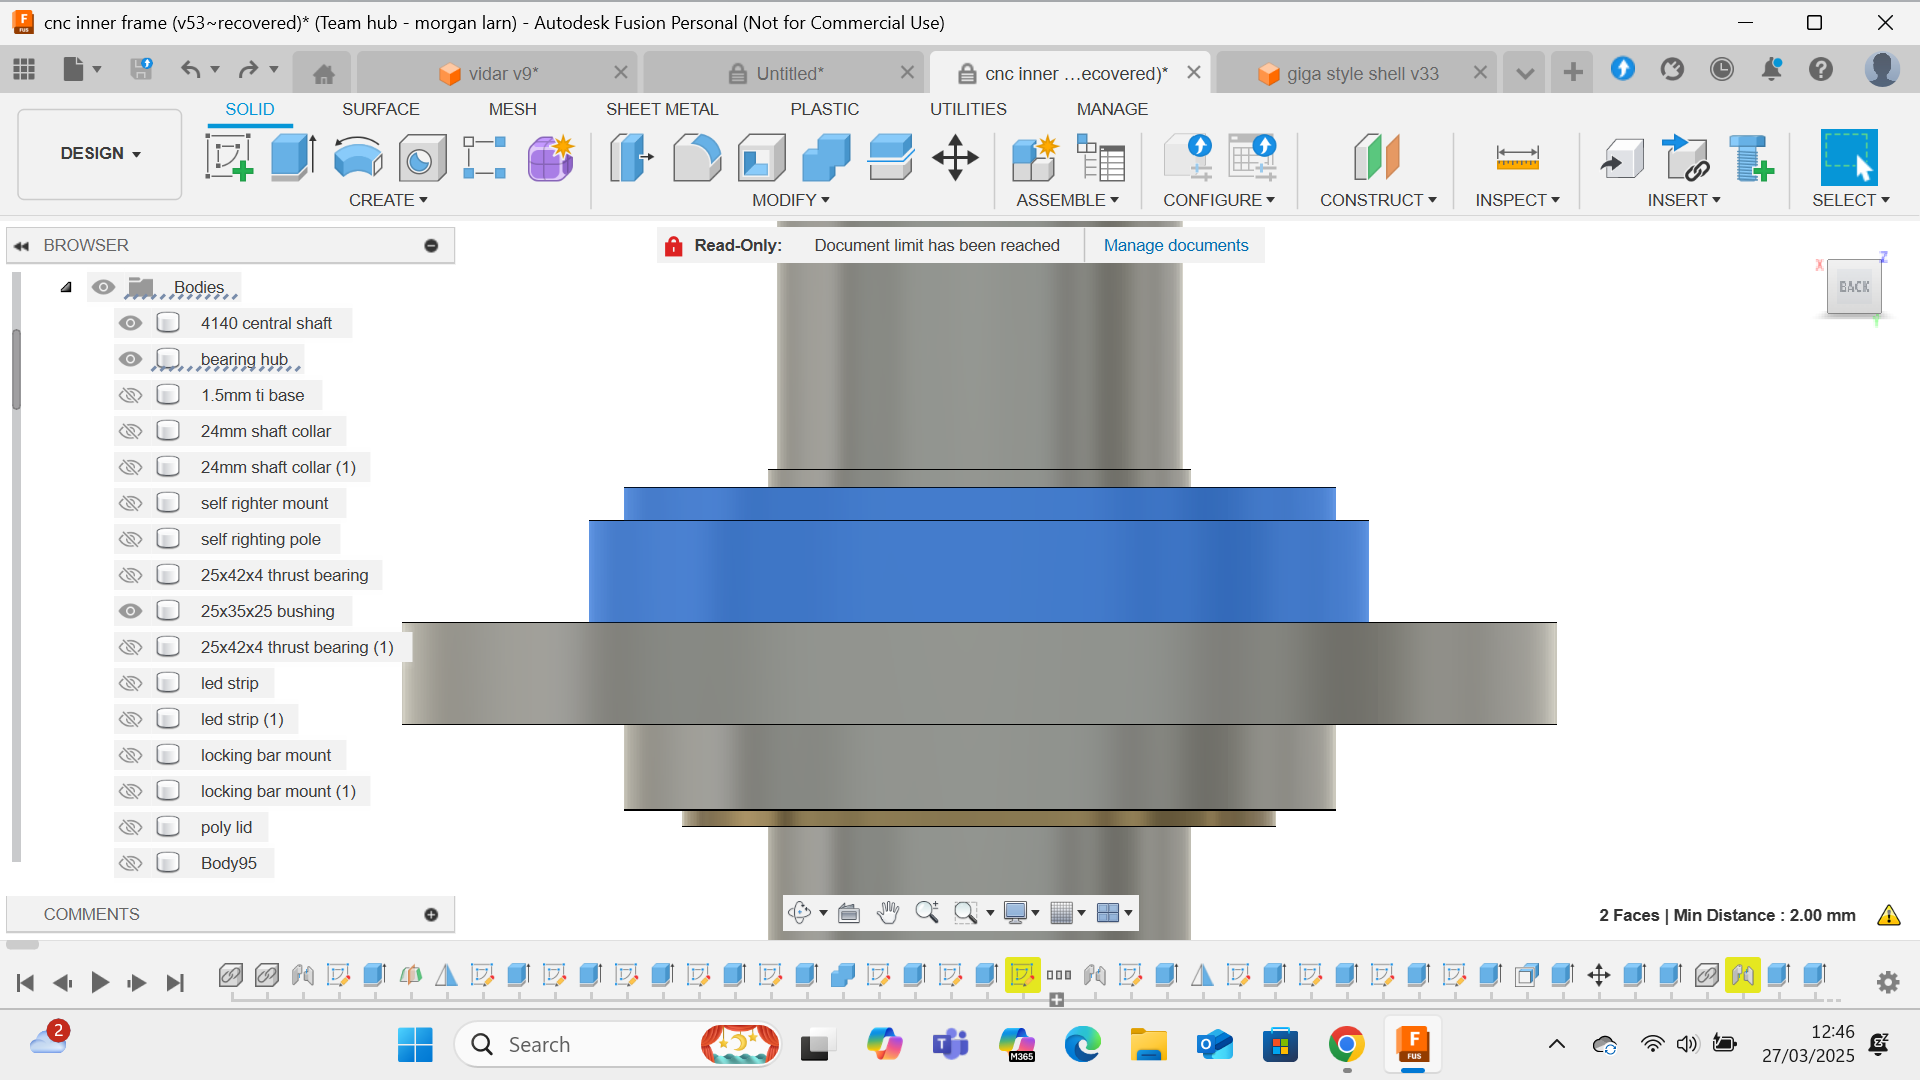
top and bottom of this are a pair of 25x42x4 thrust bearings with shim washers to remove any wobble from the shell
the whole assembly is then secured with a 24mm shaft collar. i originally designed this with a nut however there were 2 issues with this. firstly the normal pitch of a nut this large would nearly cut the shaft in 2 with the 17mm bore for the link which could be solved by going to a finer pitch thread but this brings me onto the second reason being if this got hit it would be nearly impossible to remove, a shaft collar might end up with a grunged screw to remove but if the while thread was mashed together that could be pure pain to remove
as a result i went to a shaft collar, this shaft collar sits in a recess
which stops it popping off the top and also lets me add preload to the bearing stack-up with shim washers, it may end up just popping off but we will see
i did also consider a self right infact a cadded a few ideas for one
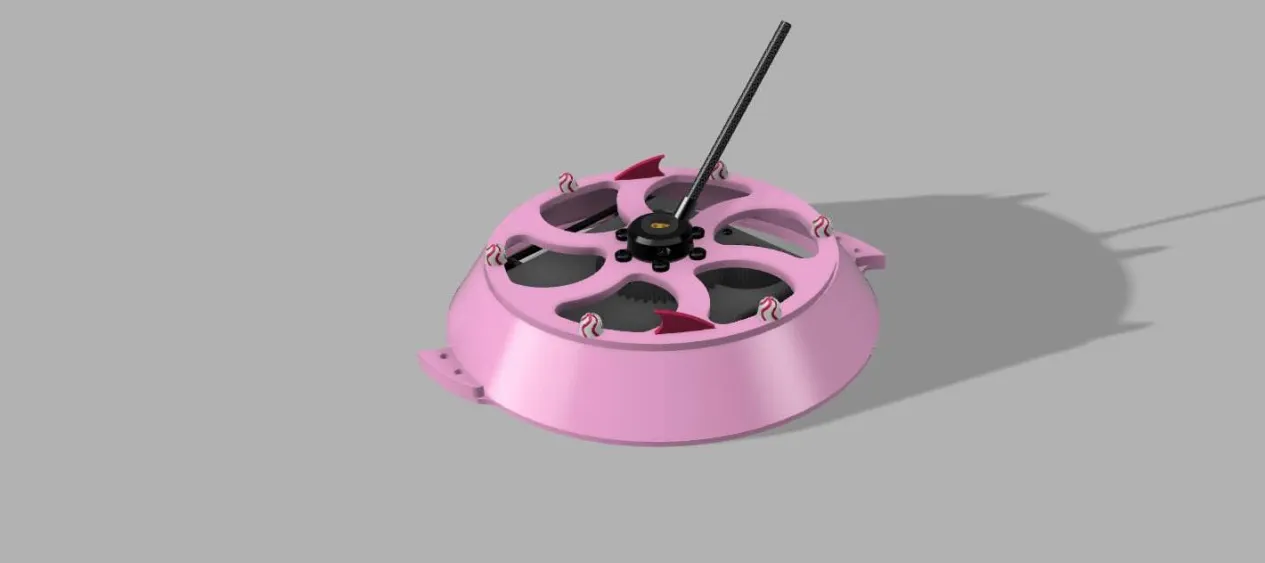
main consisting of a bit of pipe welded to the shaft collar assembly and a piece of Ti/HDPE/CF making up the pole
but I’m going to not bother for a couple reasons, firstly the weight required to make on strong enough to do the job well would be at least 500 grams which i couldn’t get without losing weight in the shell or another area, and also the chances of it getting ripped off and leaving me stuck upside down is pretty high. plus all the extra weight on top would shift the centre of mass and make it potentially more likely to flip upside down. and in the spirit of wajoo who needs a shrimec when you can have magnets!
the gearbox is probably my favourite part of the whole design and was partially the reason i decided to build the bot in the first place as i had the gearset from a past project and wanted a reason to use it, sunk cost fallacy say what
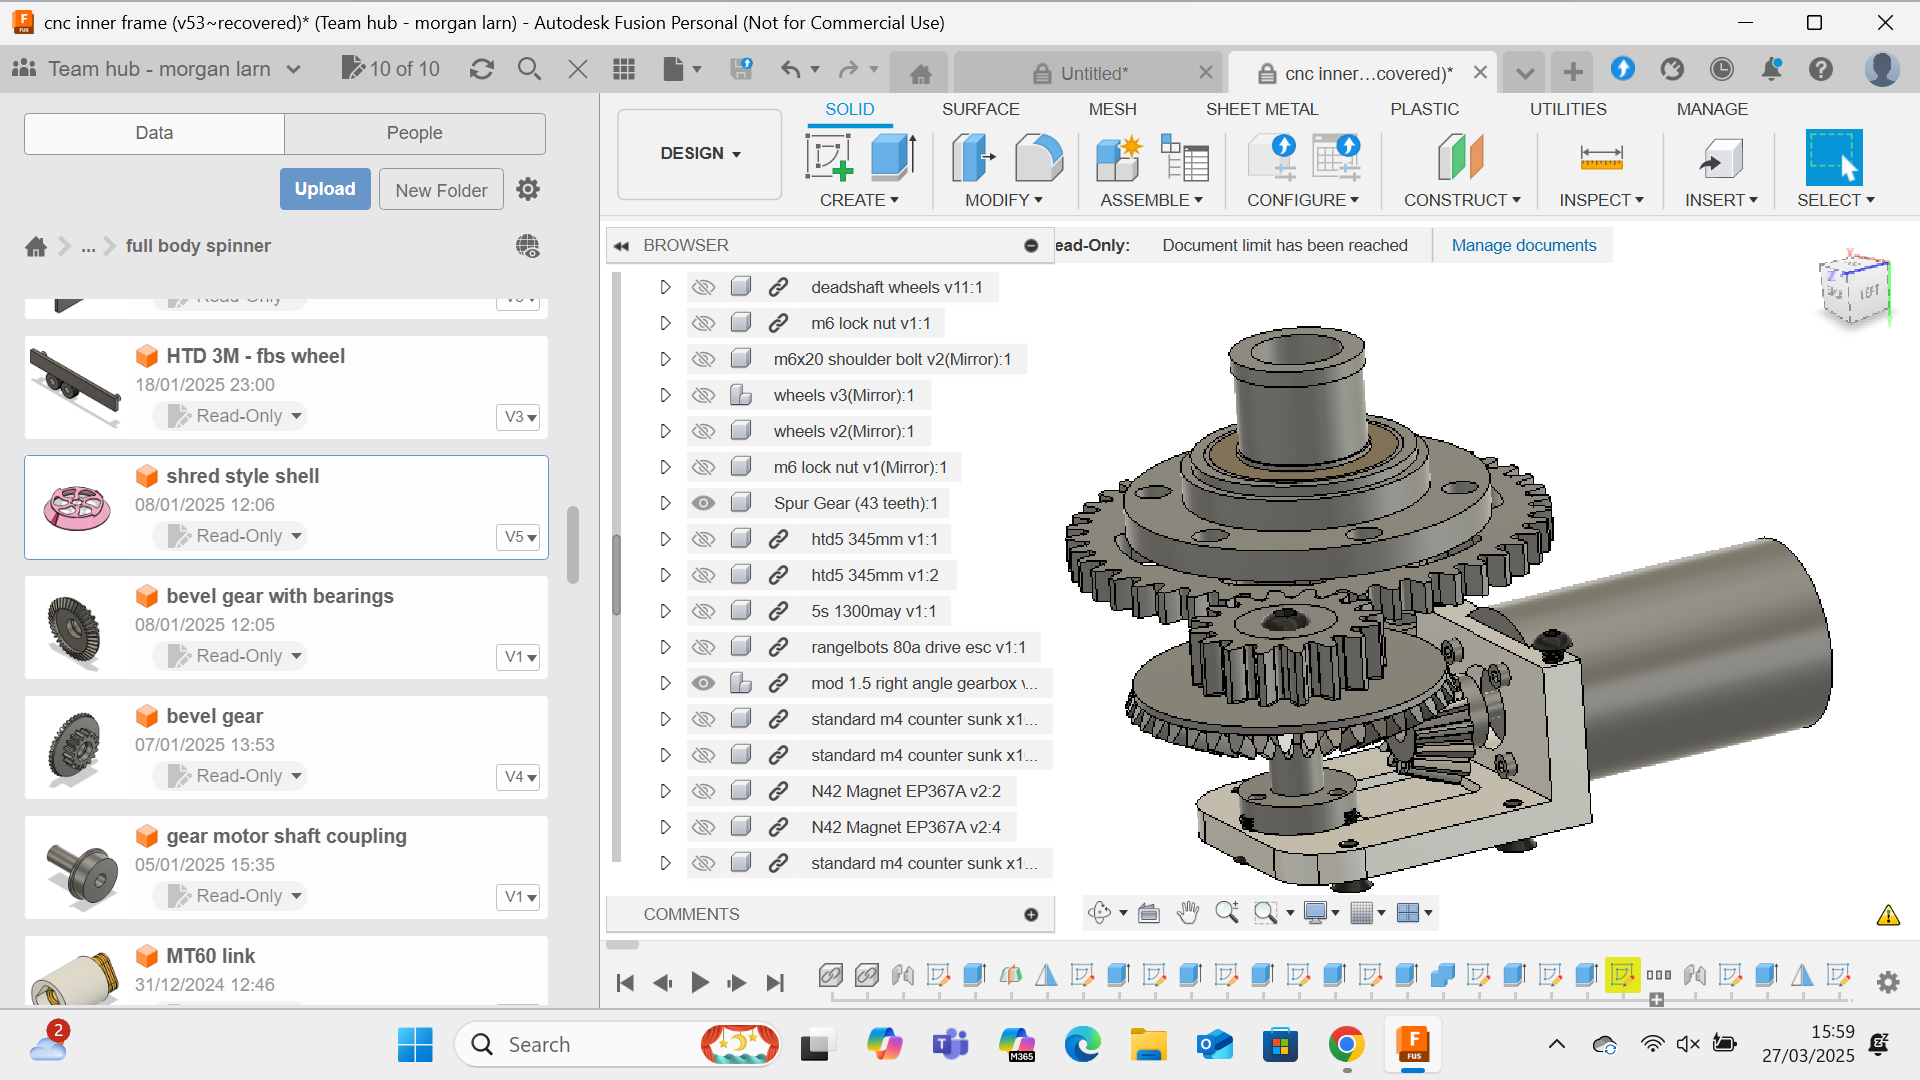
the weapon uses a 3660 1900kv in runner on a mars 80a esc, which goes through a 2.6-1 initial reduction in the spur gears to a further 2.6 to 1 reduction to the shell resulting in a 7.16:1 reduction. this was achieved using a compound metal 3d printed gear made of tool steel by pcb way,
which is so insane to me, 100% going to use the technology in future
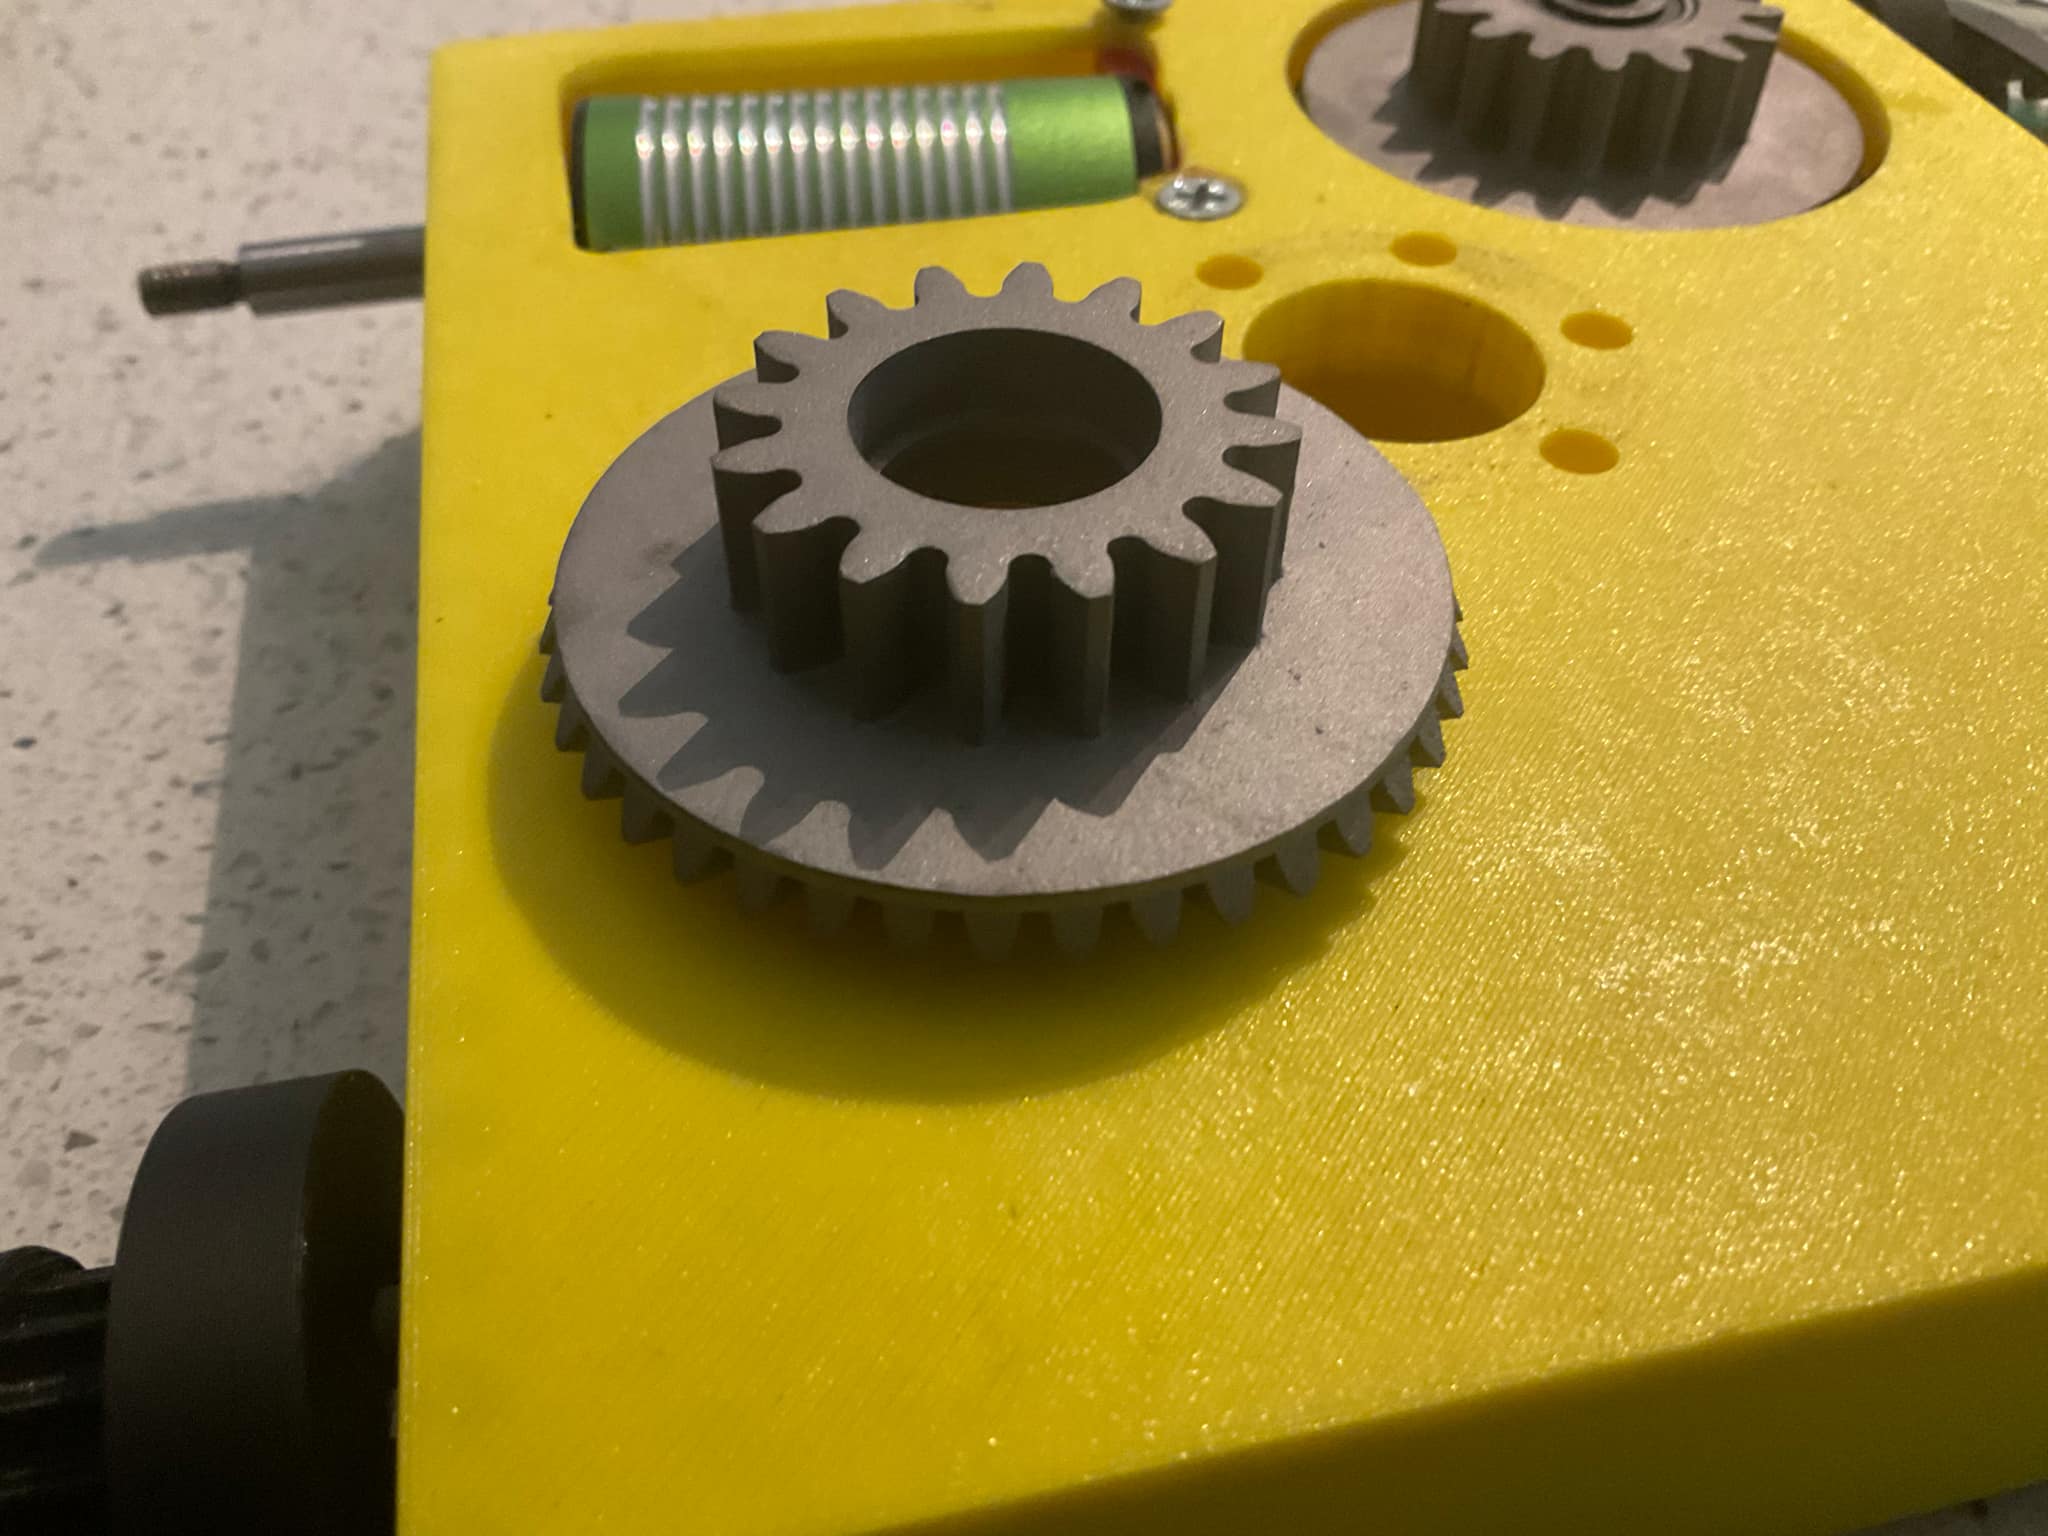
its 100% not as hard as a proper hardened gear but for 50 quid a pop when the only quote i could get for it machined was more like 250, not bad
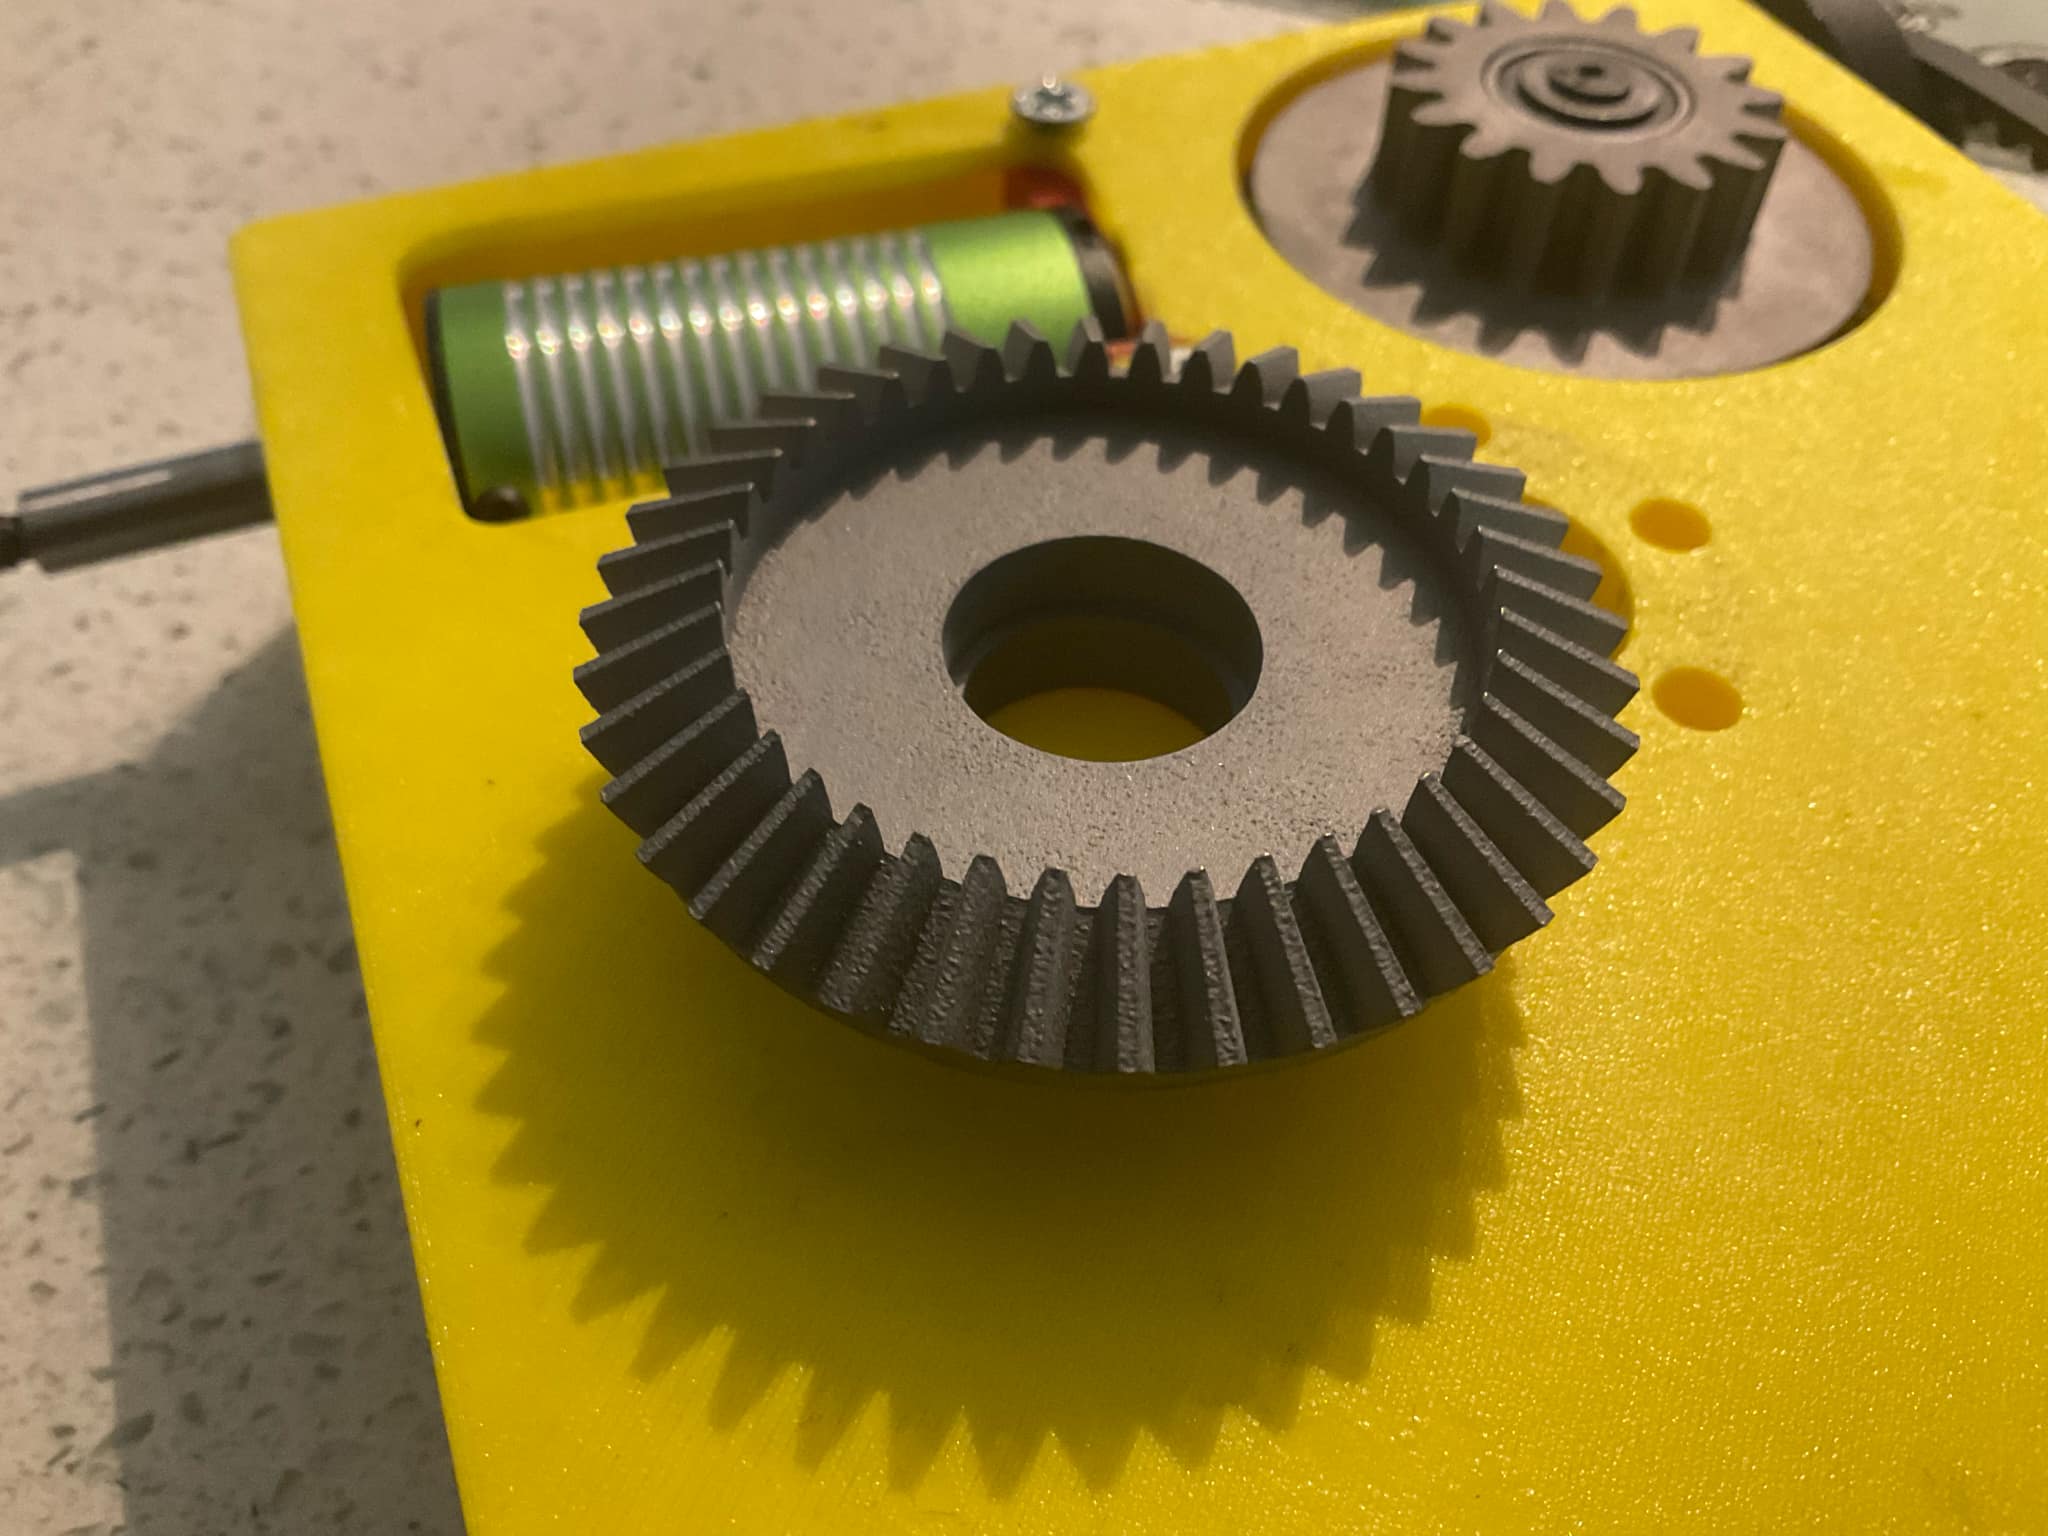
this runs on a 10mm shaft with some small bearings. there is no clutch in this system however I think it should be fine, if not ive got a spare gear haha
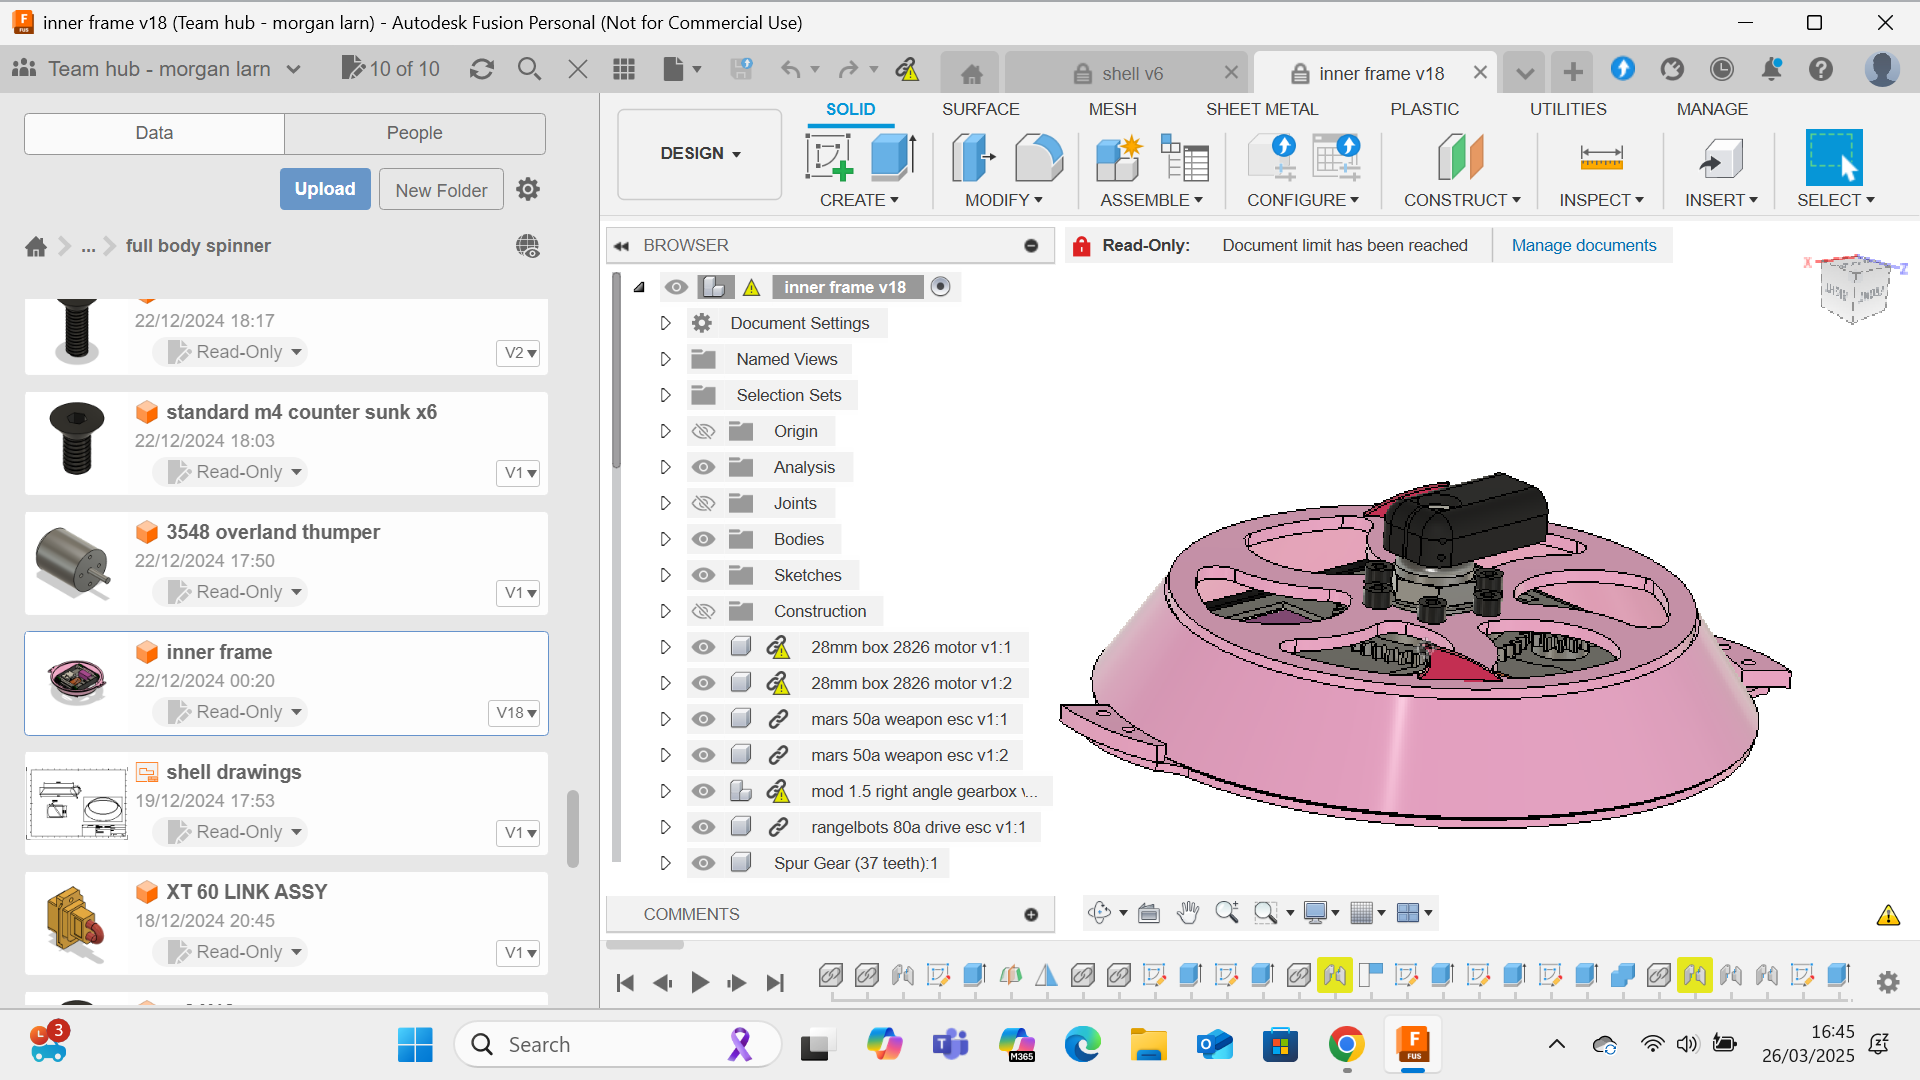
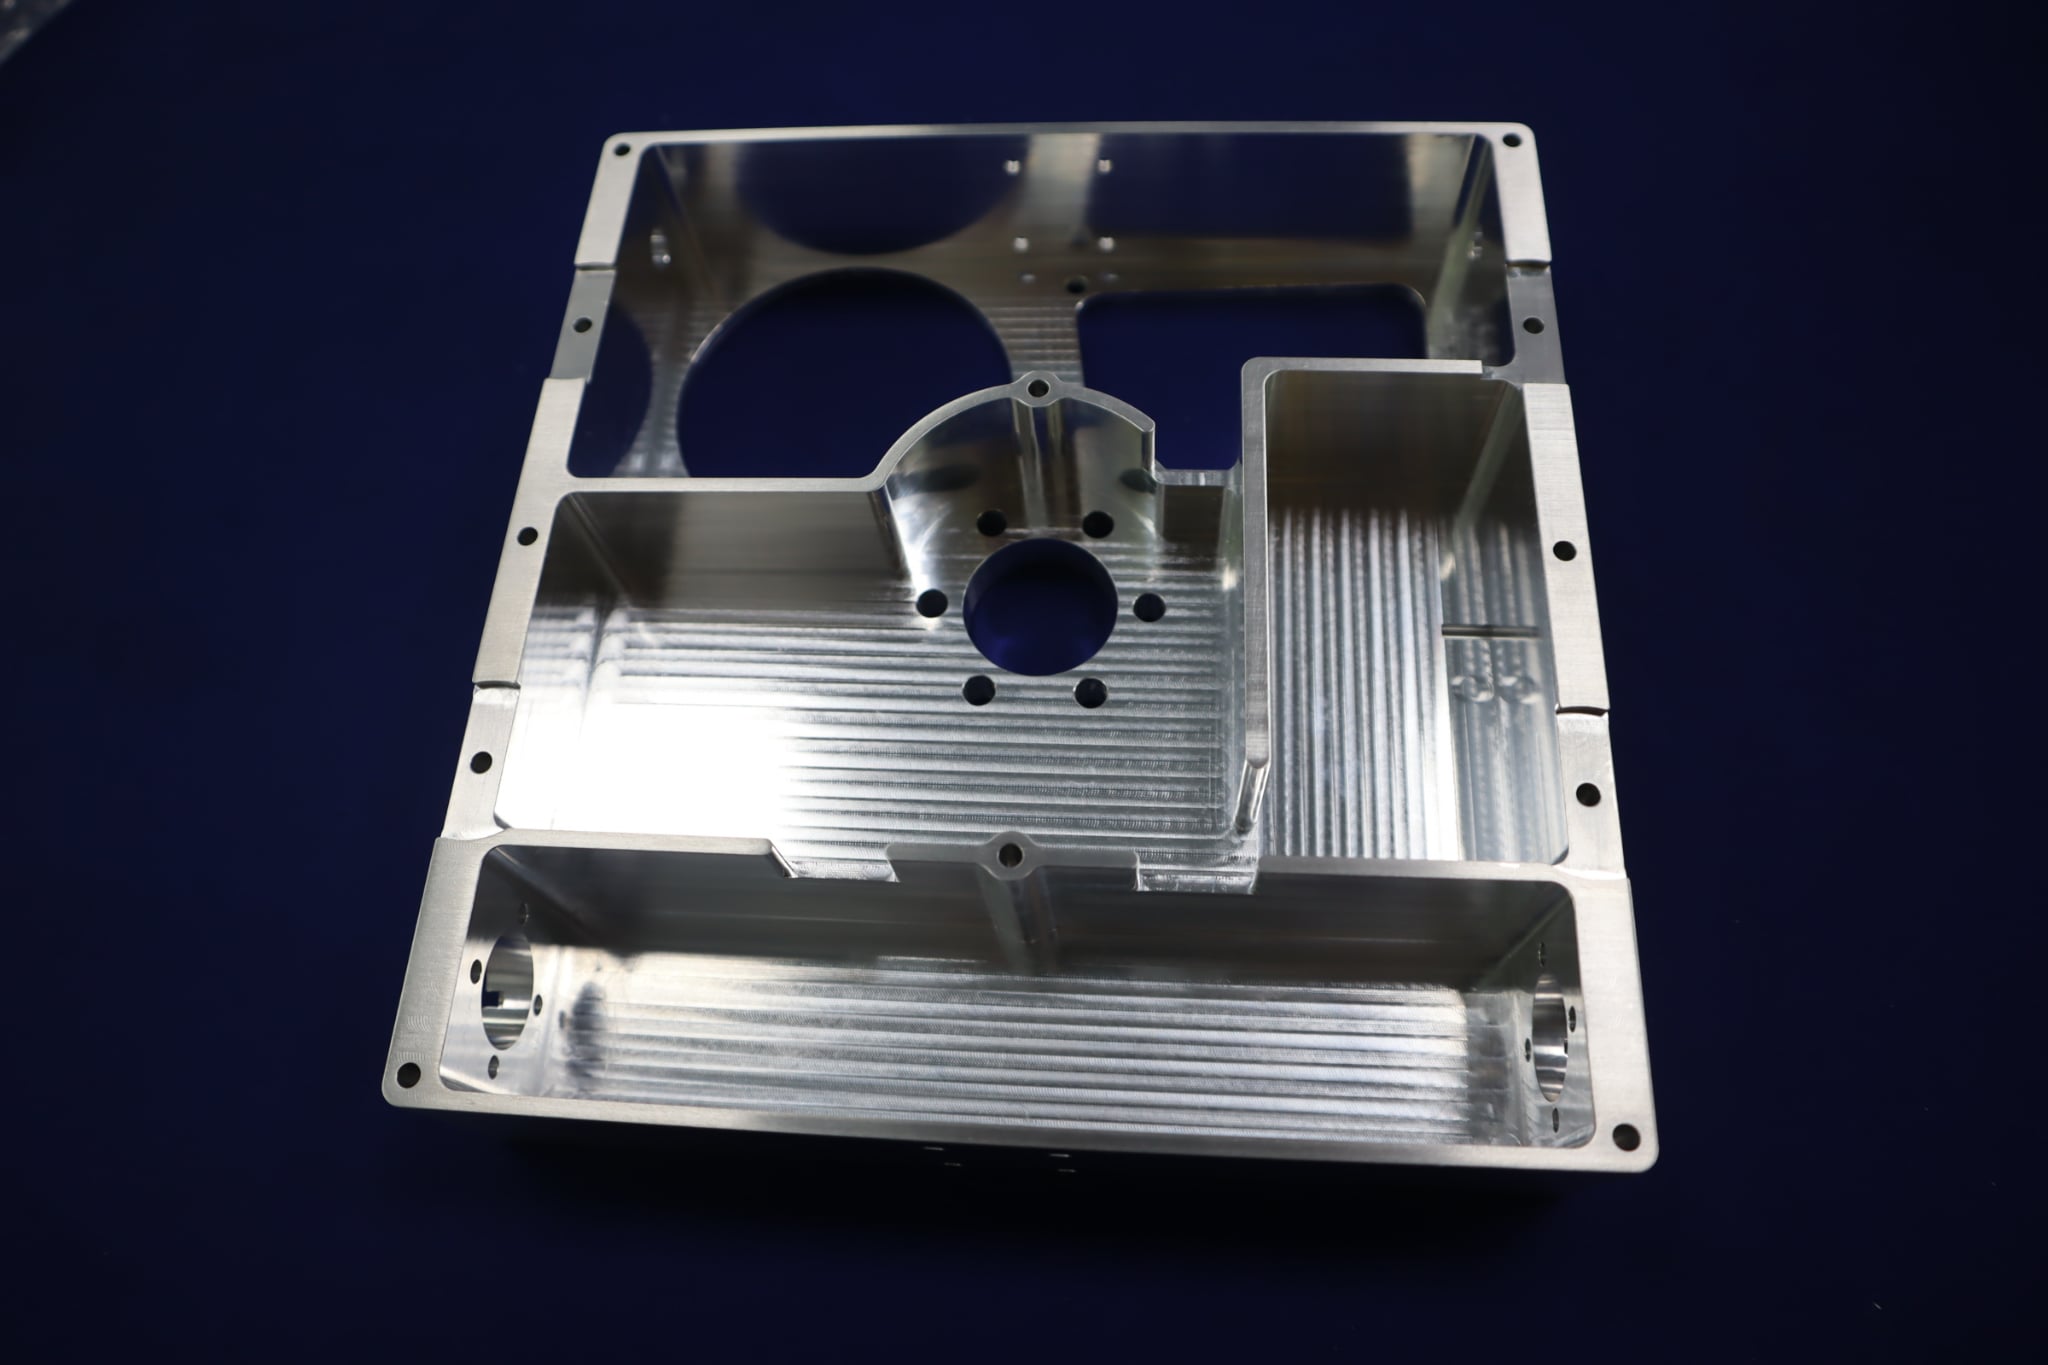
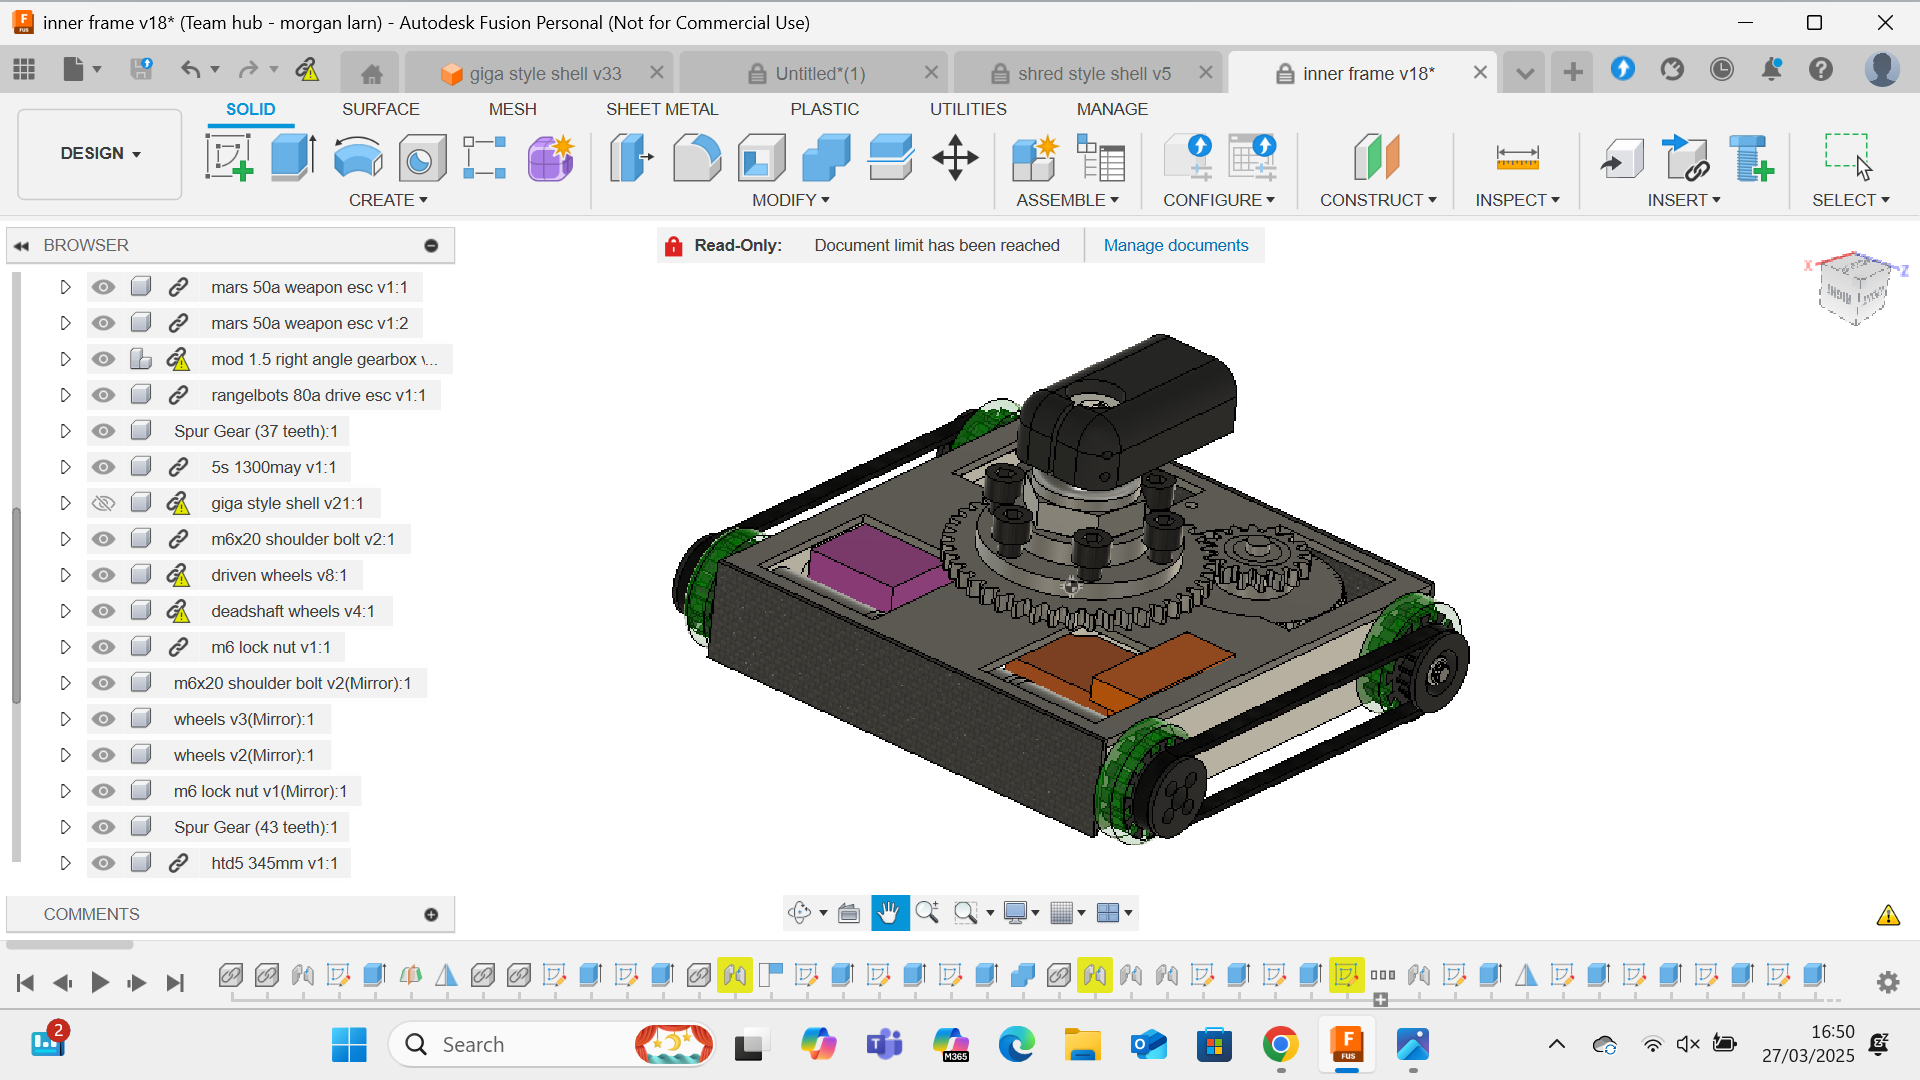
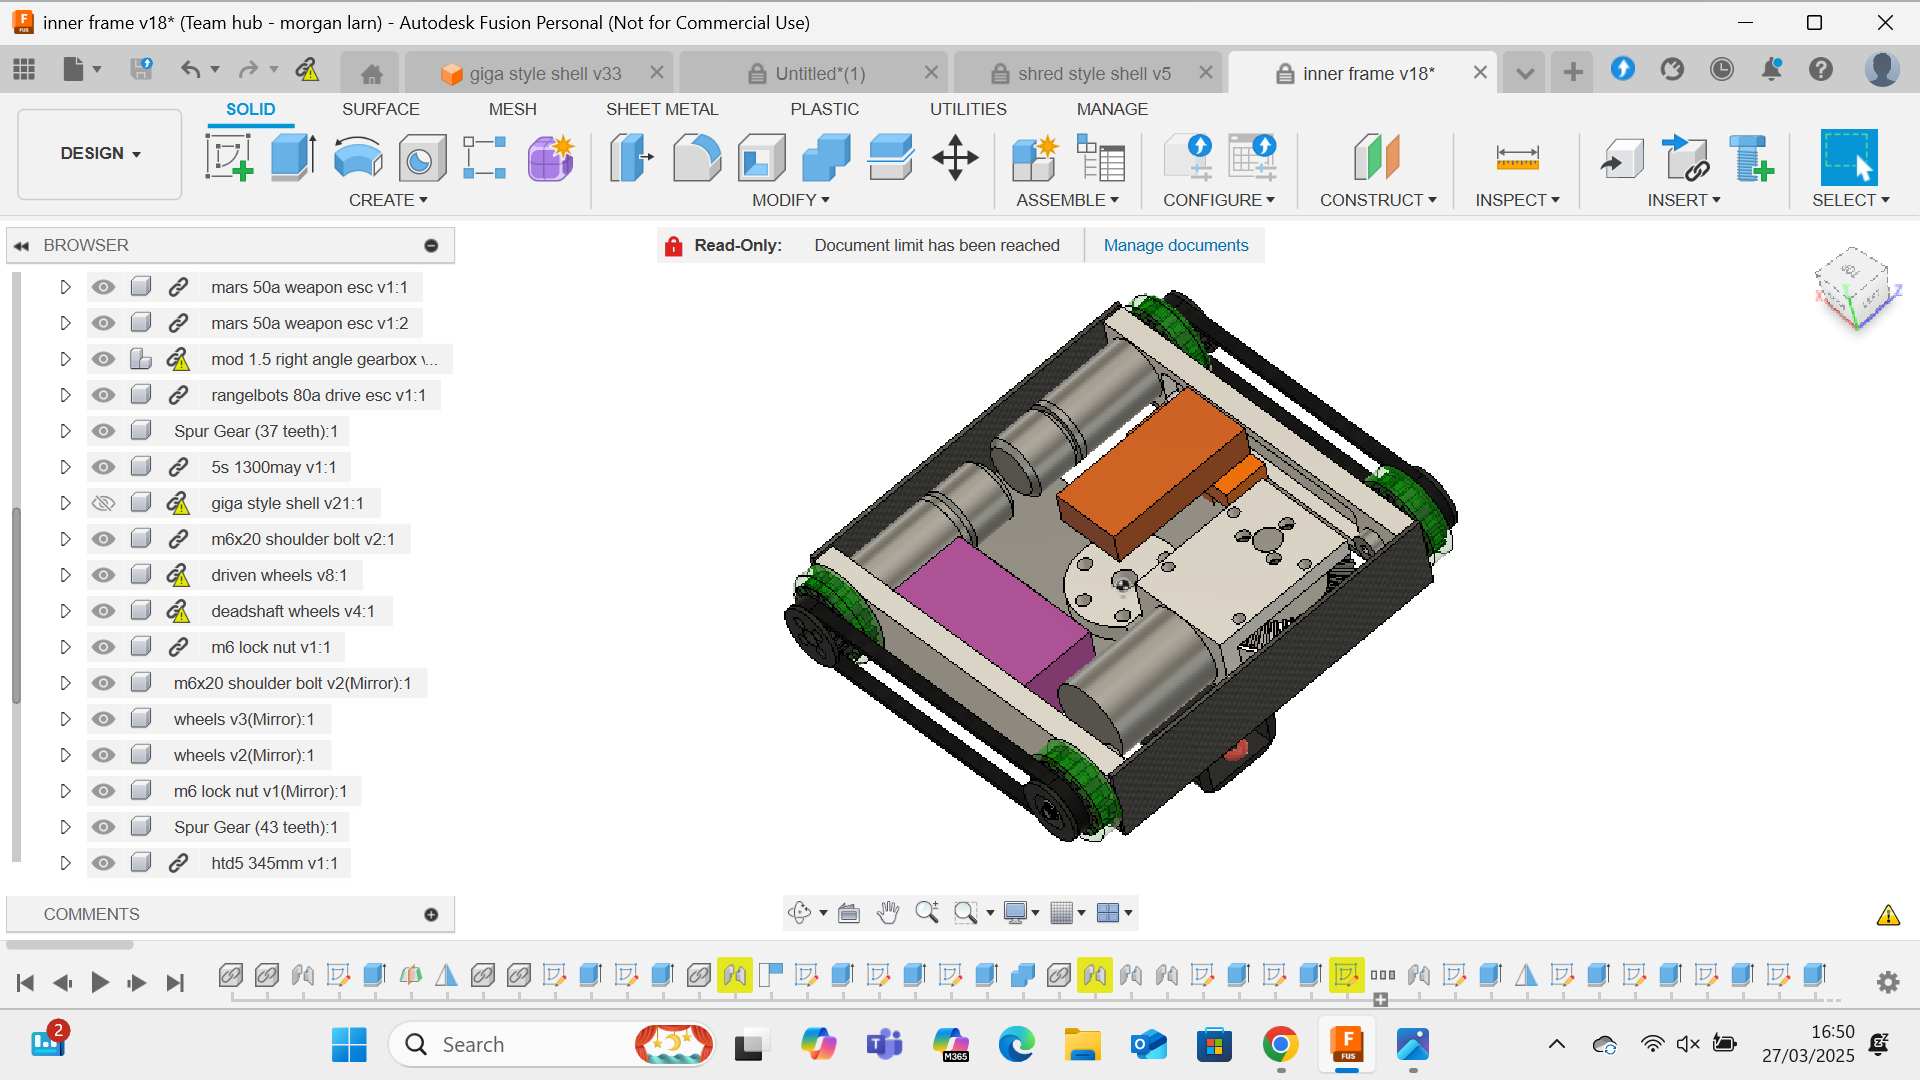
this brings me neatly onto the body which could best be described as well optimised, with the weapon motor sitting in at a 7 degree angle to make space for the battery
it draws some pretty heavy inspiration from the build log of hyperpolarised where he made the top of the bot the stiffest point and had access through the base, meaning a shorter weapon shaft and much less pain to maintain
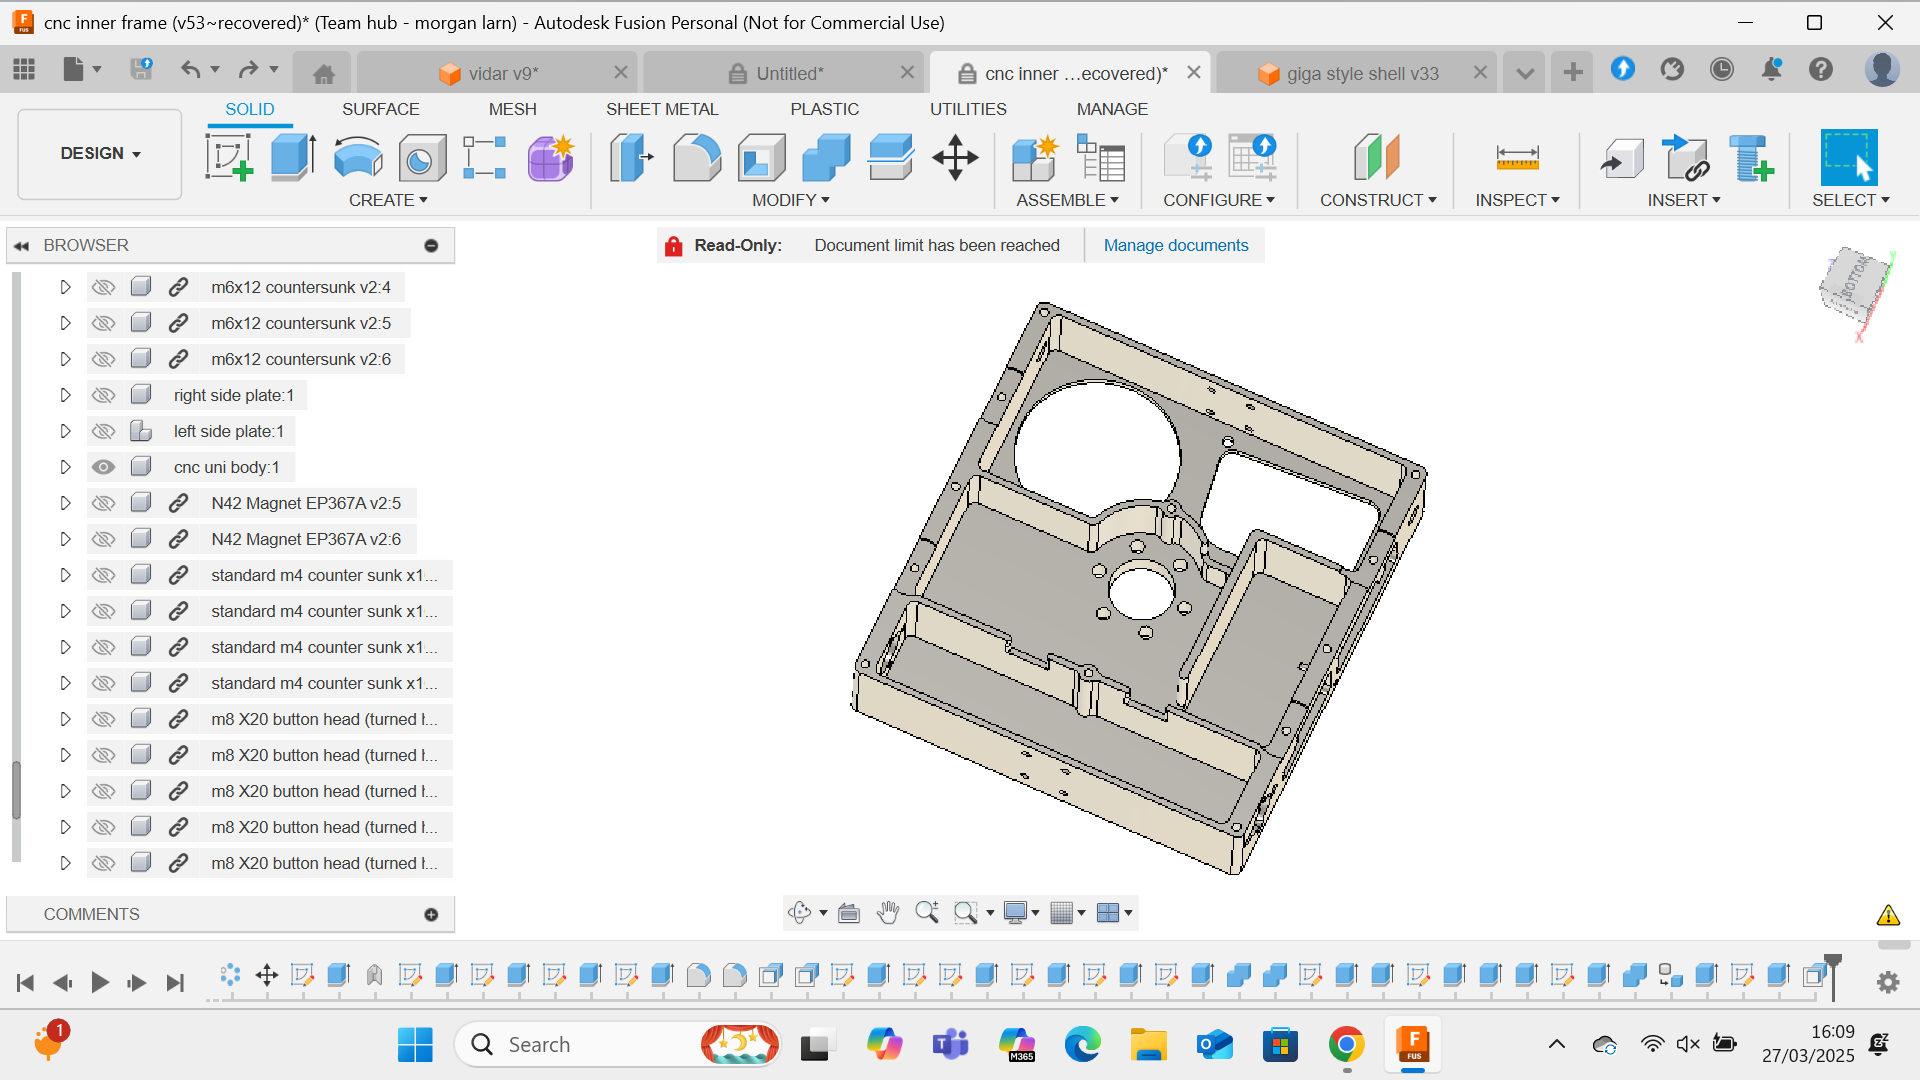
its made from a billet of 6061 ali and although very heavily pocketed in places given its hiding beneath a 3kg shell of death it should be fine. i also included space for the 20mmx4mm magnets to sit in, with enough clearance around the outside to allow for a small tpu cup for the magnet to sit in to give it a little shock absorption
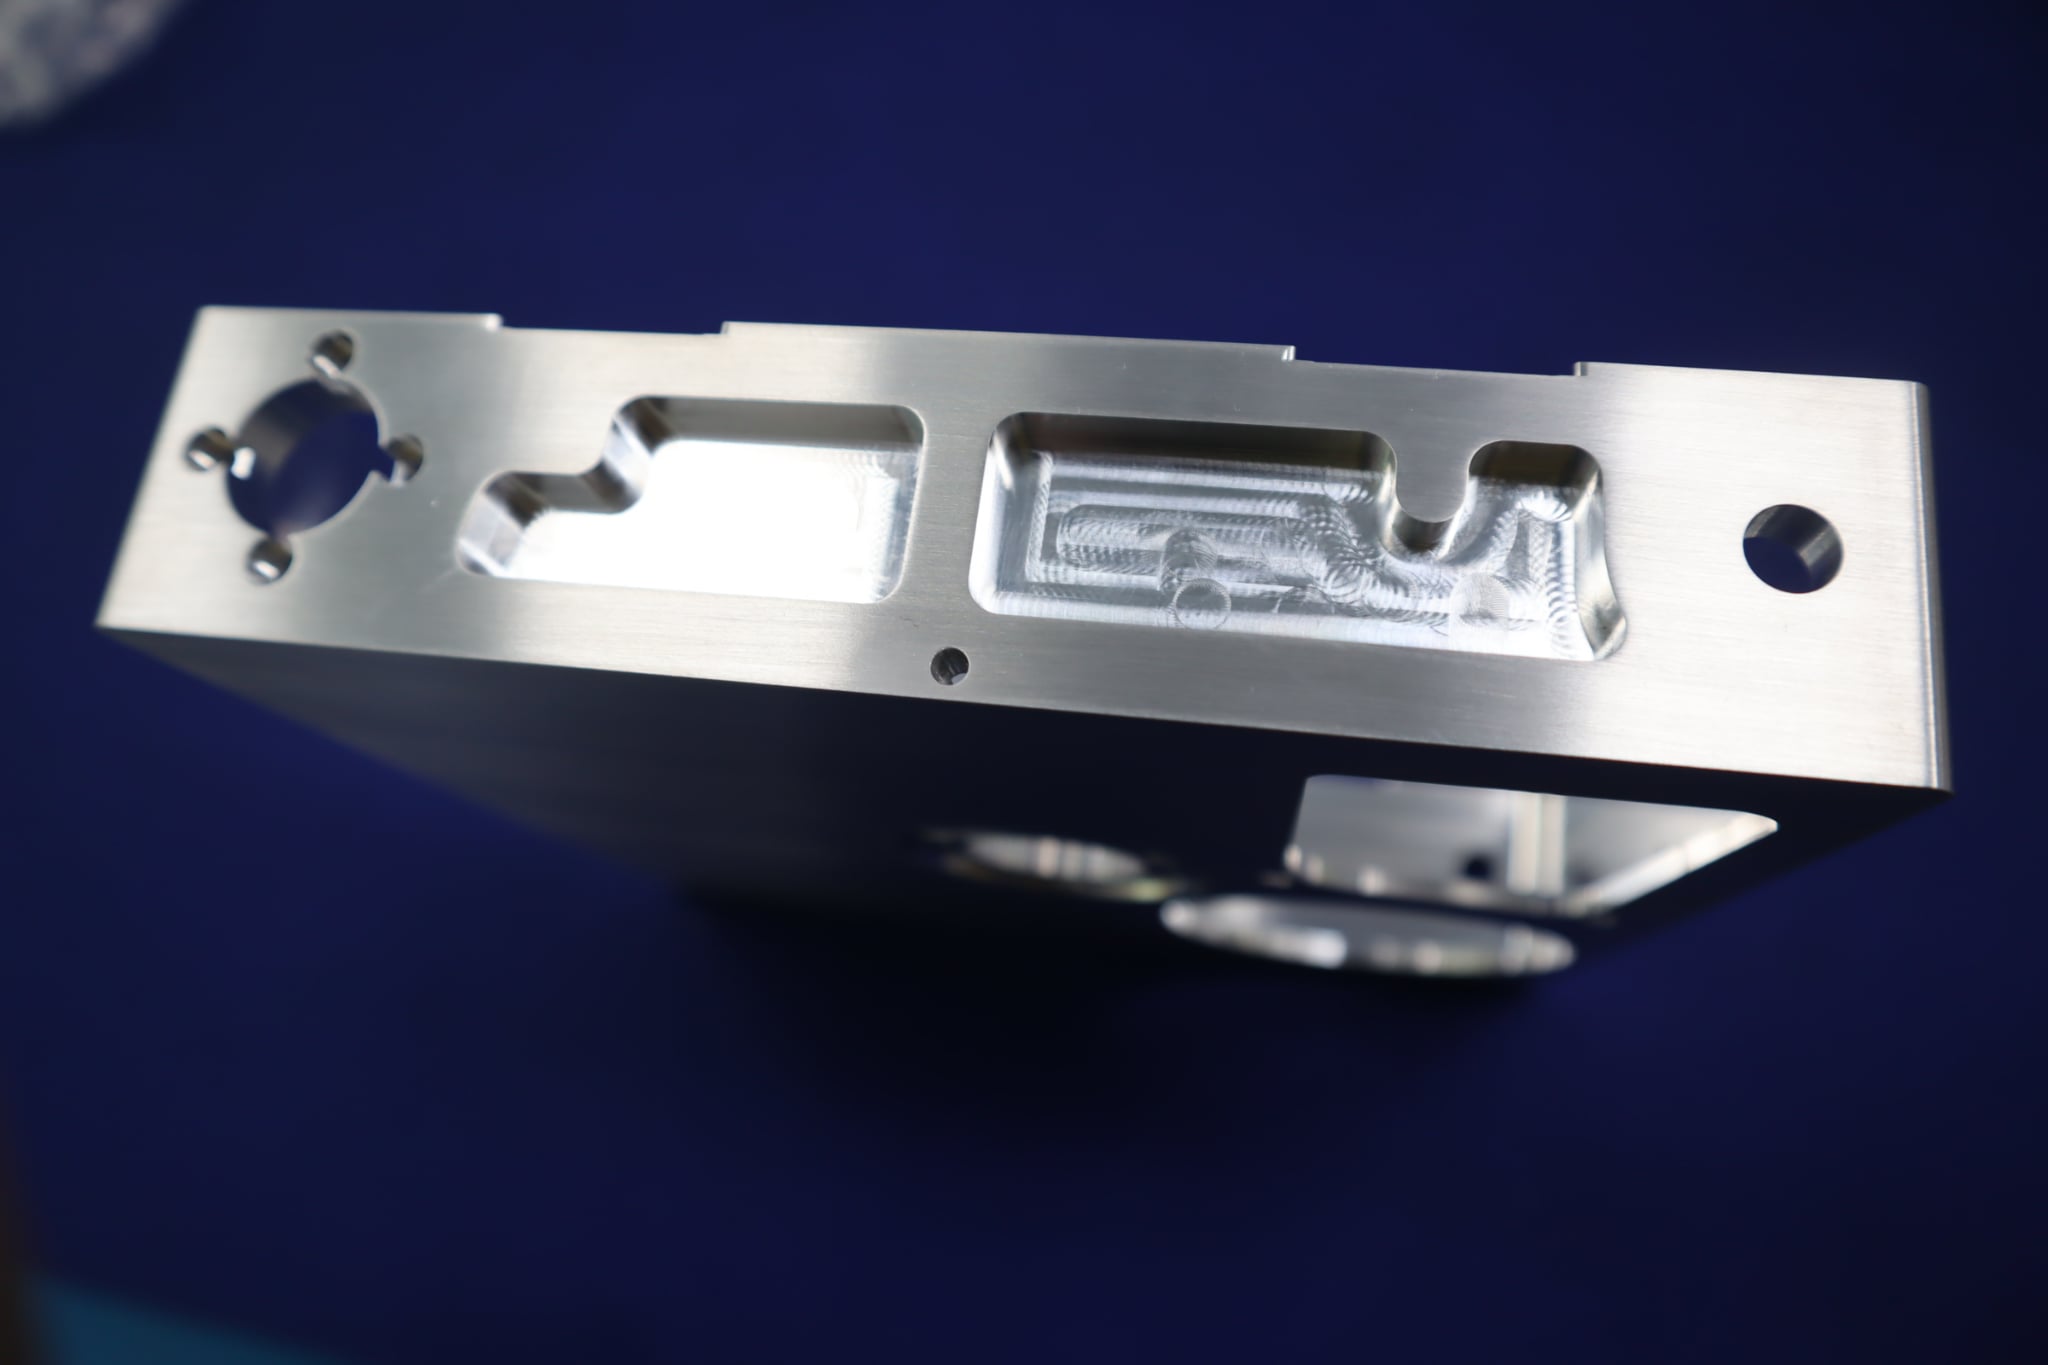
this was made by ztl which was slightly cheaper than pcb way but not by much there was only one issue with the part and it was me being an idiot and making the central shaft tolerance too tight so had to break out the 4jaw and open it out. as much as i hate lugging the bloody thing out from under my lathe
i had the gearbox plate machined at the same time from the same material
the baseplate was originally going to be 1-2mm carbon fibre but in the end i went for ali as it was going to be much more receptive to countersinking and carbon fibre has a nasty habit of building up static which i didnt fancy dealing with
i did originally try and design something without having to go for a billet as a dislike making expensive parts that will be difficult to modify for first versions of bots but the weight wasnt there for anything else that would be as stiff, and the bolts would only be weak points
the original design for the body
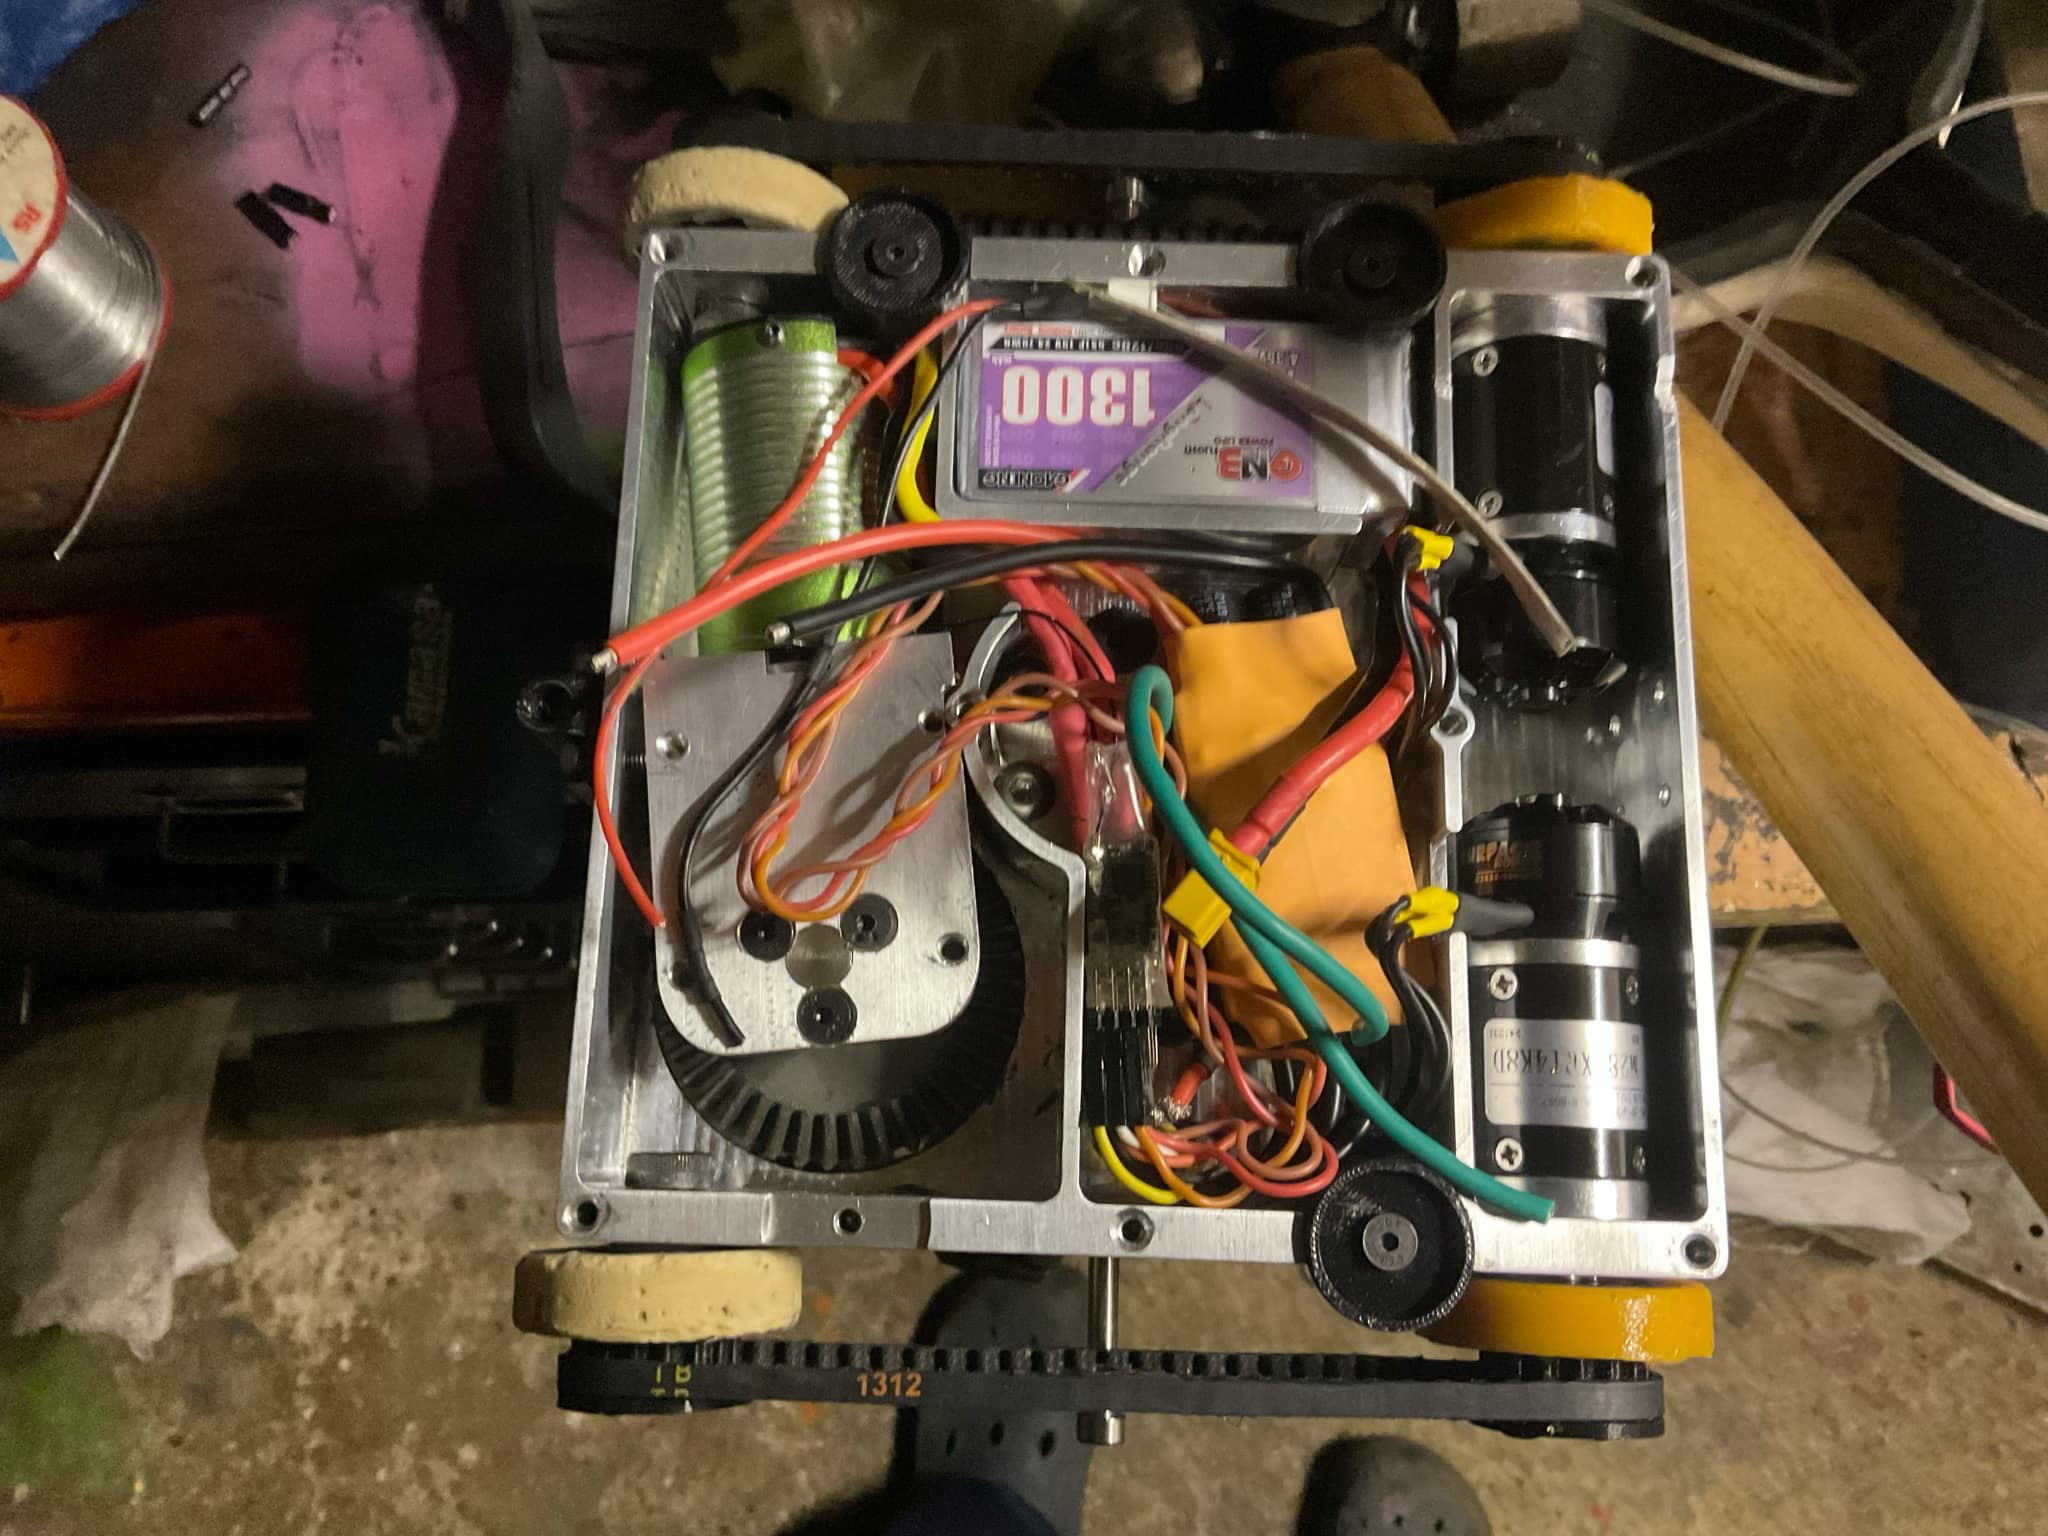
electrics and drive wise it runs 2x28mm gearboxes at 14:1 with 2826 1900kv motors with a 6mm wide htd 5 pulley to the wheels at the front which run on shoulder bolts with bushings and some plastic spacers. the wheels themselves are currently 50a rubber but ive got some stiffer rubbers on order as it currently cant spin on the spot with all the magnets on, which tbf to it is like 5kg of magnetic down force. ive also ordered some higher reduction gearboxes as its currently geared for nearly 15mph which is way too fast for me and the 19:1 would net me 10mph and a bunch more torque. i could go to 27:1 but this would need me to open out the bore on the gear they come with to accommodate my motors but would also cut the speed down to nearly 5mph. which would put it very much on the slow side for hobbys
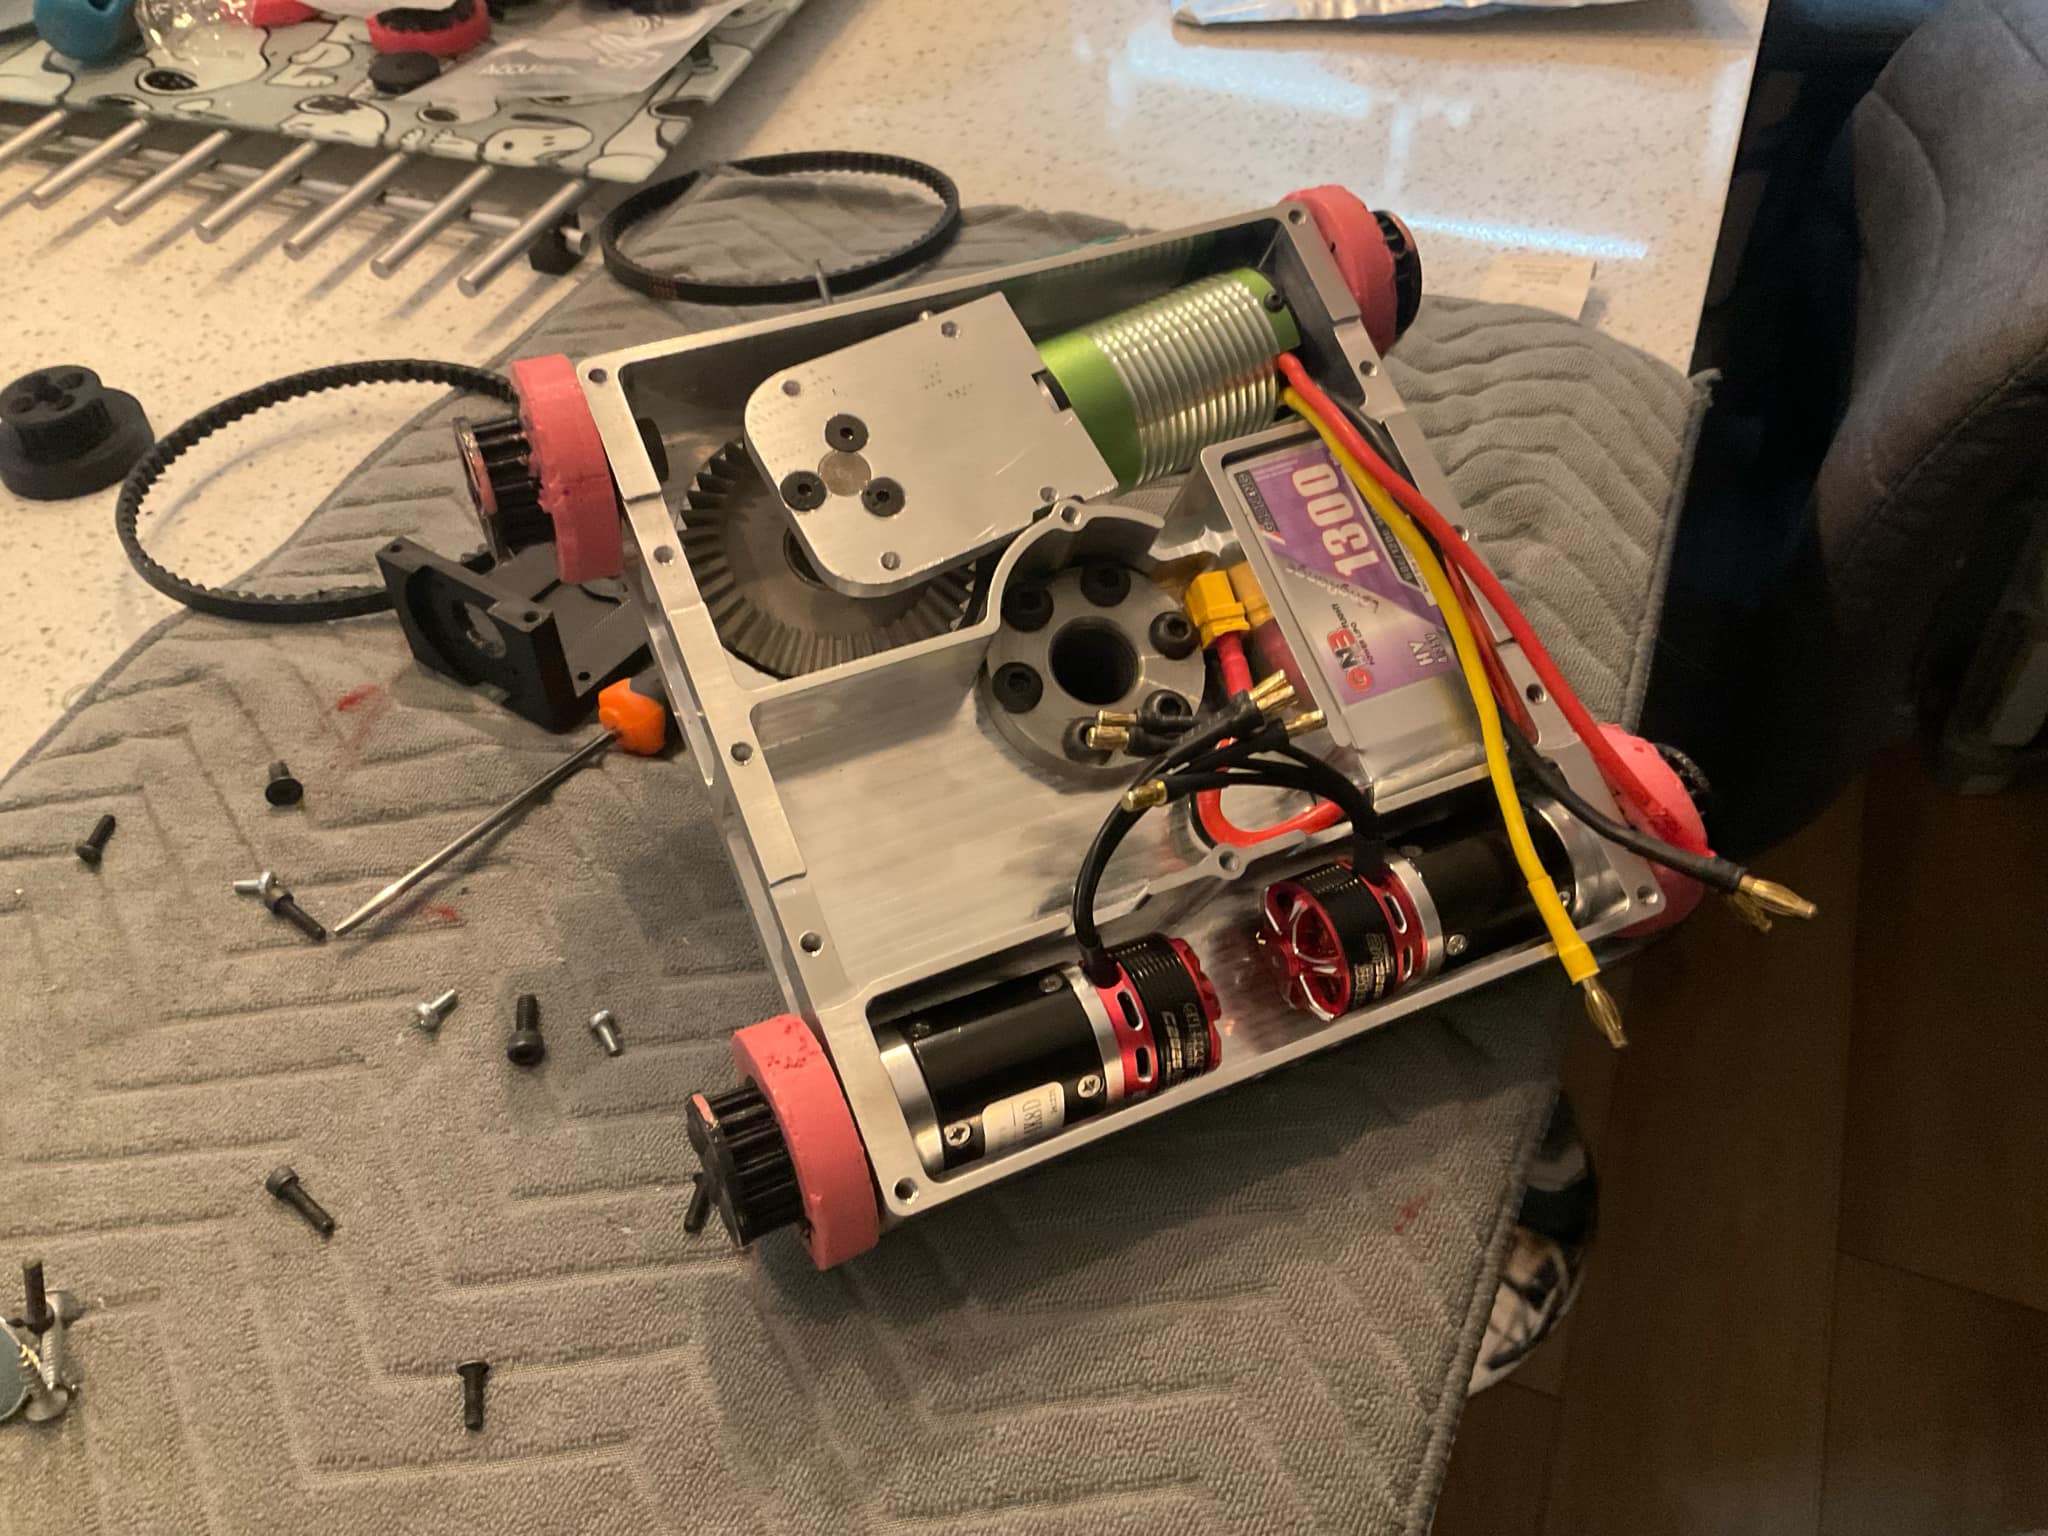
turns out i got very lucky with the battery as the stated dimensions were slightly smaller than reality, it just about fitted with some squishing and trimming of some heat shrink. its a 5s 1300mah battery, it probably doesn’t have enough juice for a full 3 minutes of spinning and driving but its a shell spinner, if its going to the judges its already not gone to plan
Drive motor esc wise it used a repeat 2:1 esc with BEC, which saved a tonne of weigh and space
it may not look it but everything did end up fitting after a little grinding on the central shaft so the weapon esc could fit correctly against the top of the bot. I did originally have a mars 50a in there which to its credit did spin it up but it very much didn’t like it and browned out on anything over 50%
the 80a esc spins the shell up to dangerous speeds in under 5 seconds and to full speed in around 10. which is pretty long as wind-ups go but im hopeful i should be able to drive away and get some space to spin-up. plus that was with me just jamming the throttle, i suspect with some more tuning and intelligent application of the throttle it would spin-up much faster
goes without saying no humans were near the spin-up. unless someone decided to vault the fence behind which at that point its just Darwinism in action
oh and a quick psa, if your tuning a am32 esc for a in runner go off the number of stator coils not magnets, the motors were all advertised as 4 pole which i assumed was what i needed to plum in and it basically never spun-up properly. however the OEM manufactures page listed another figure of 12a alongside the 4 pole figure. which i googled and didn’t meant anything but that was the number of stator poles. not sure if this applies to outrunners but it made the world of difference for an in runner
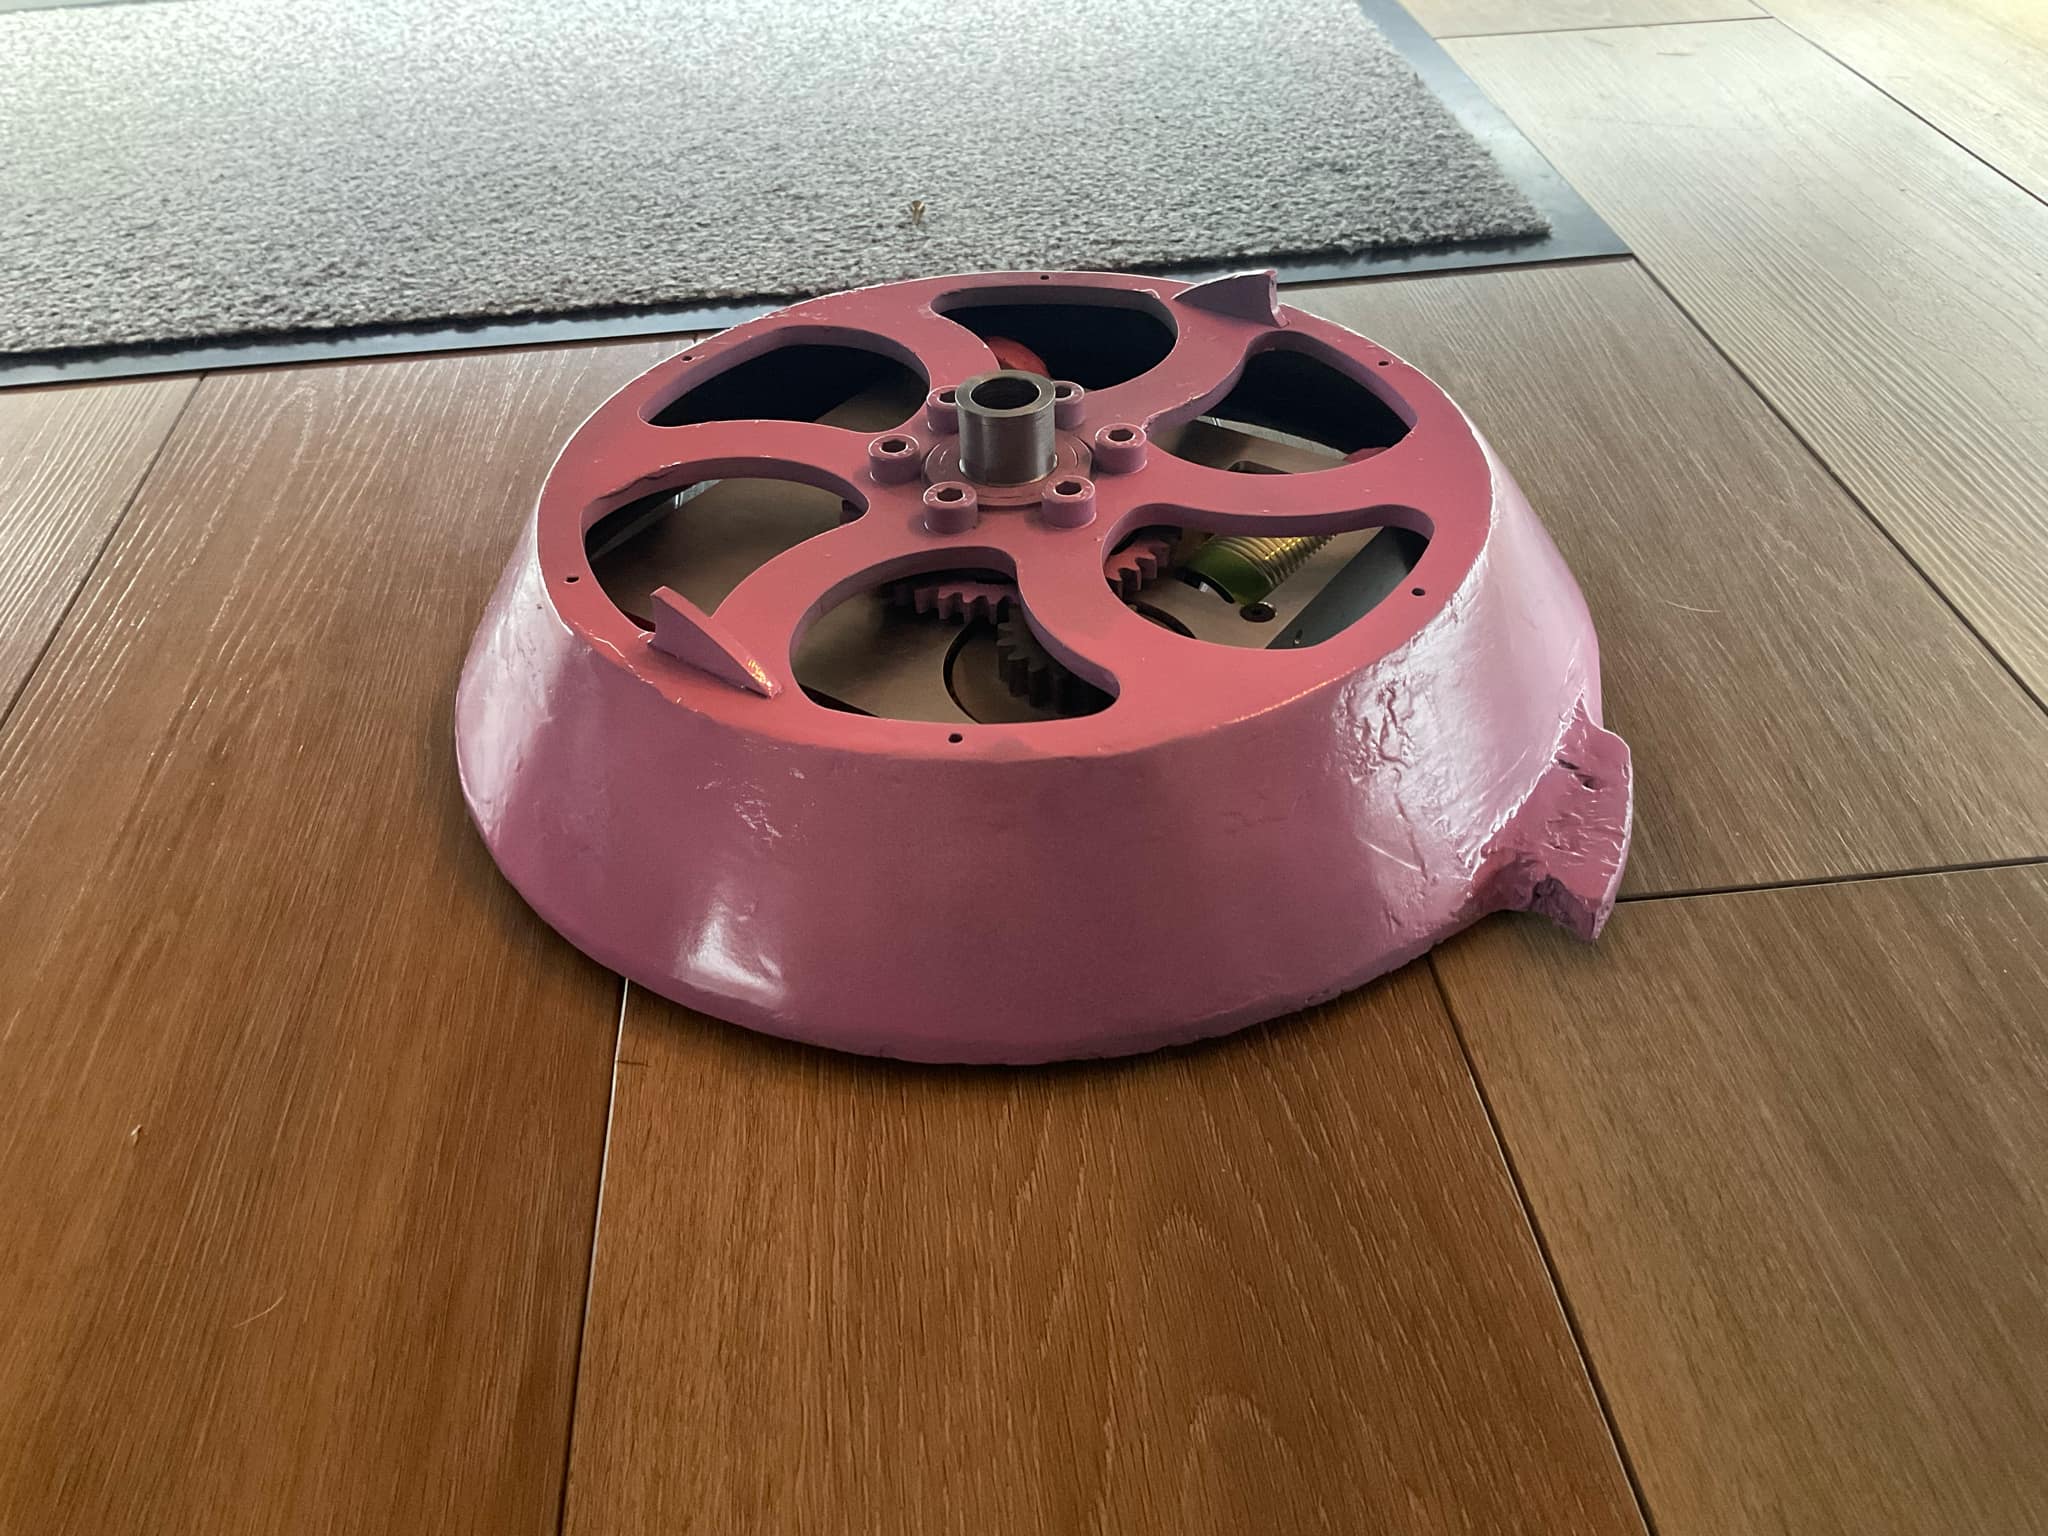
nearly finished minus the shaft collar and button head bolts which have since been fitted but i scratched up the shell doing some additional balancing so its not very photo genic atm
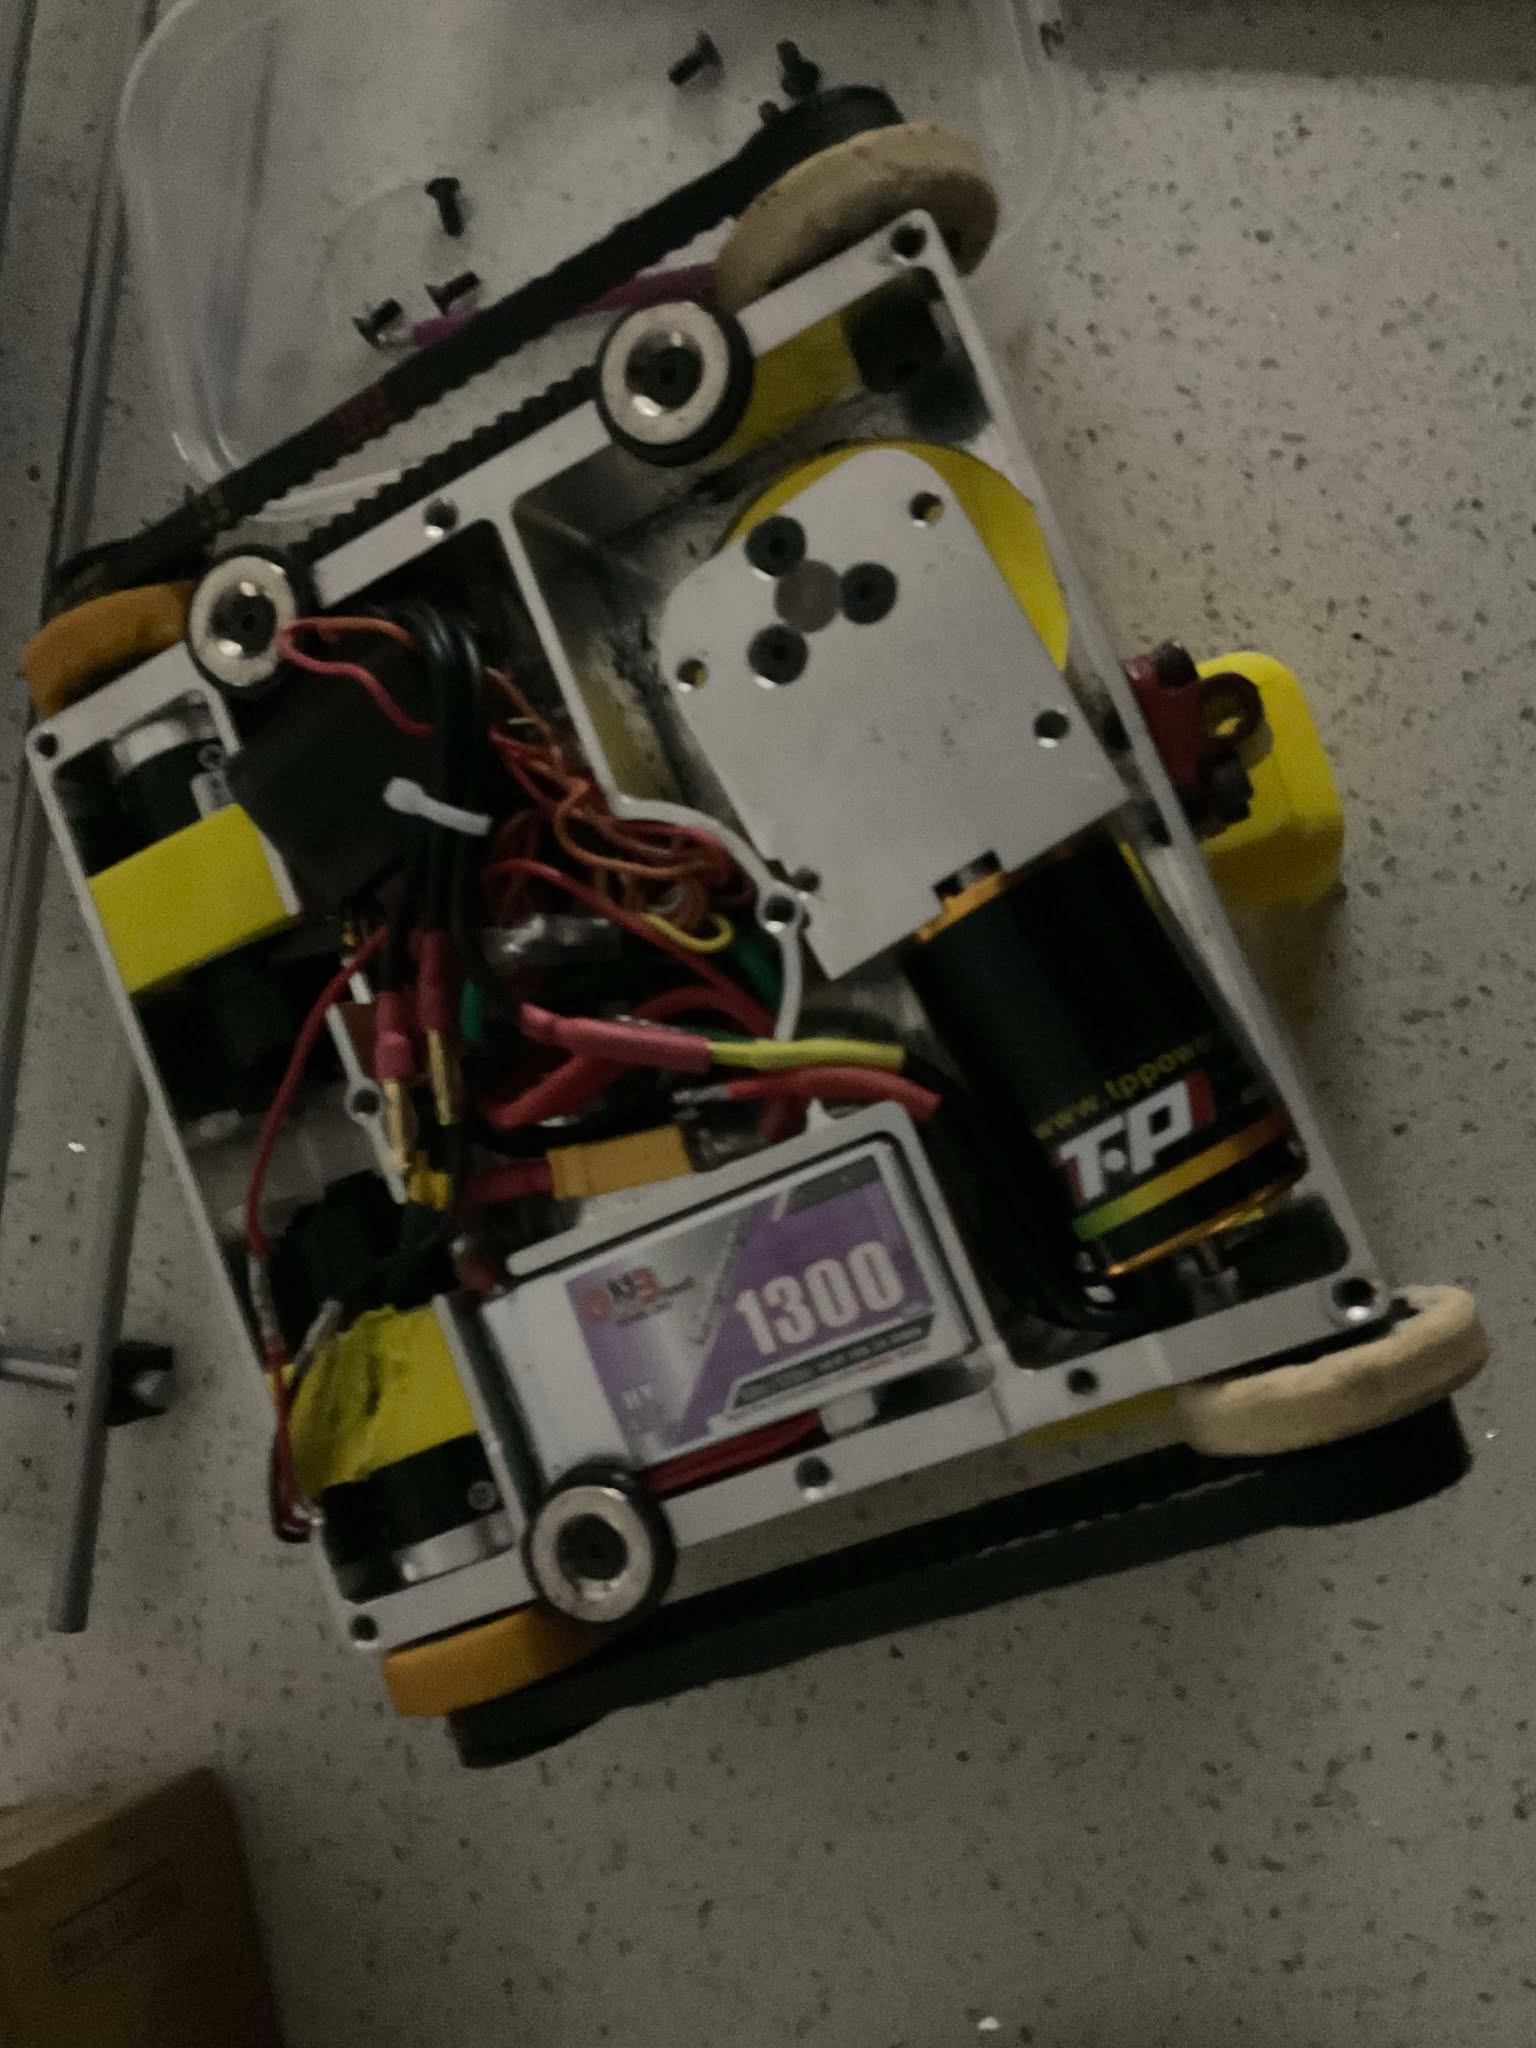
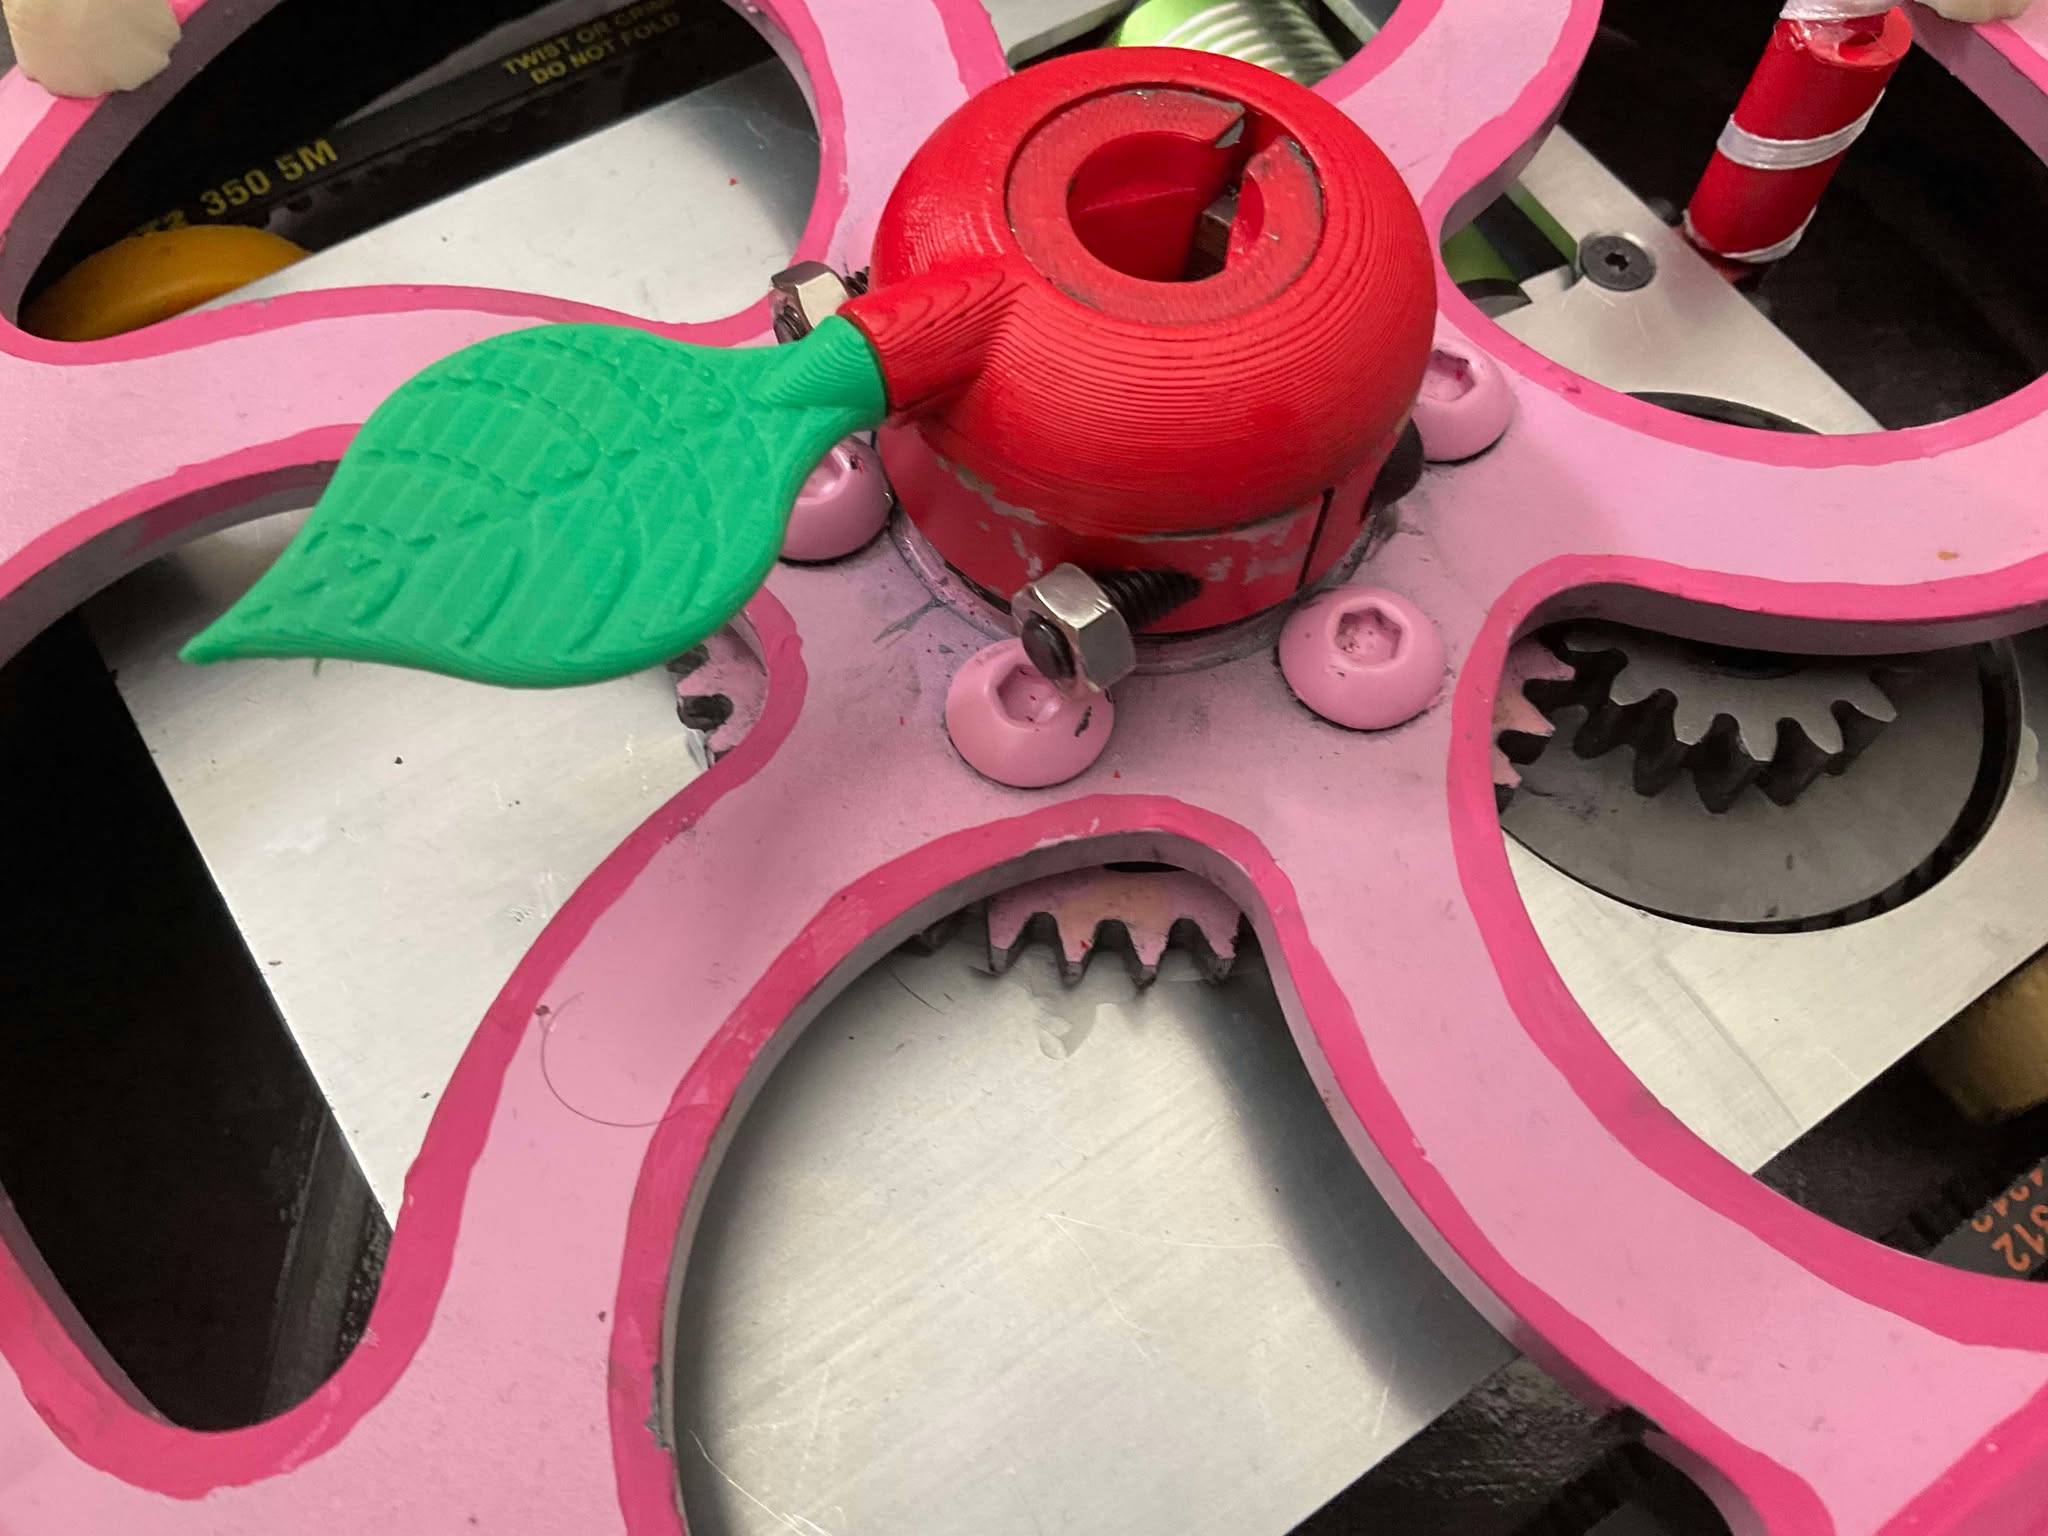
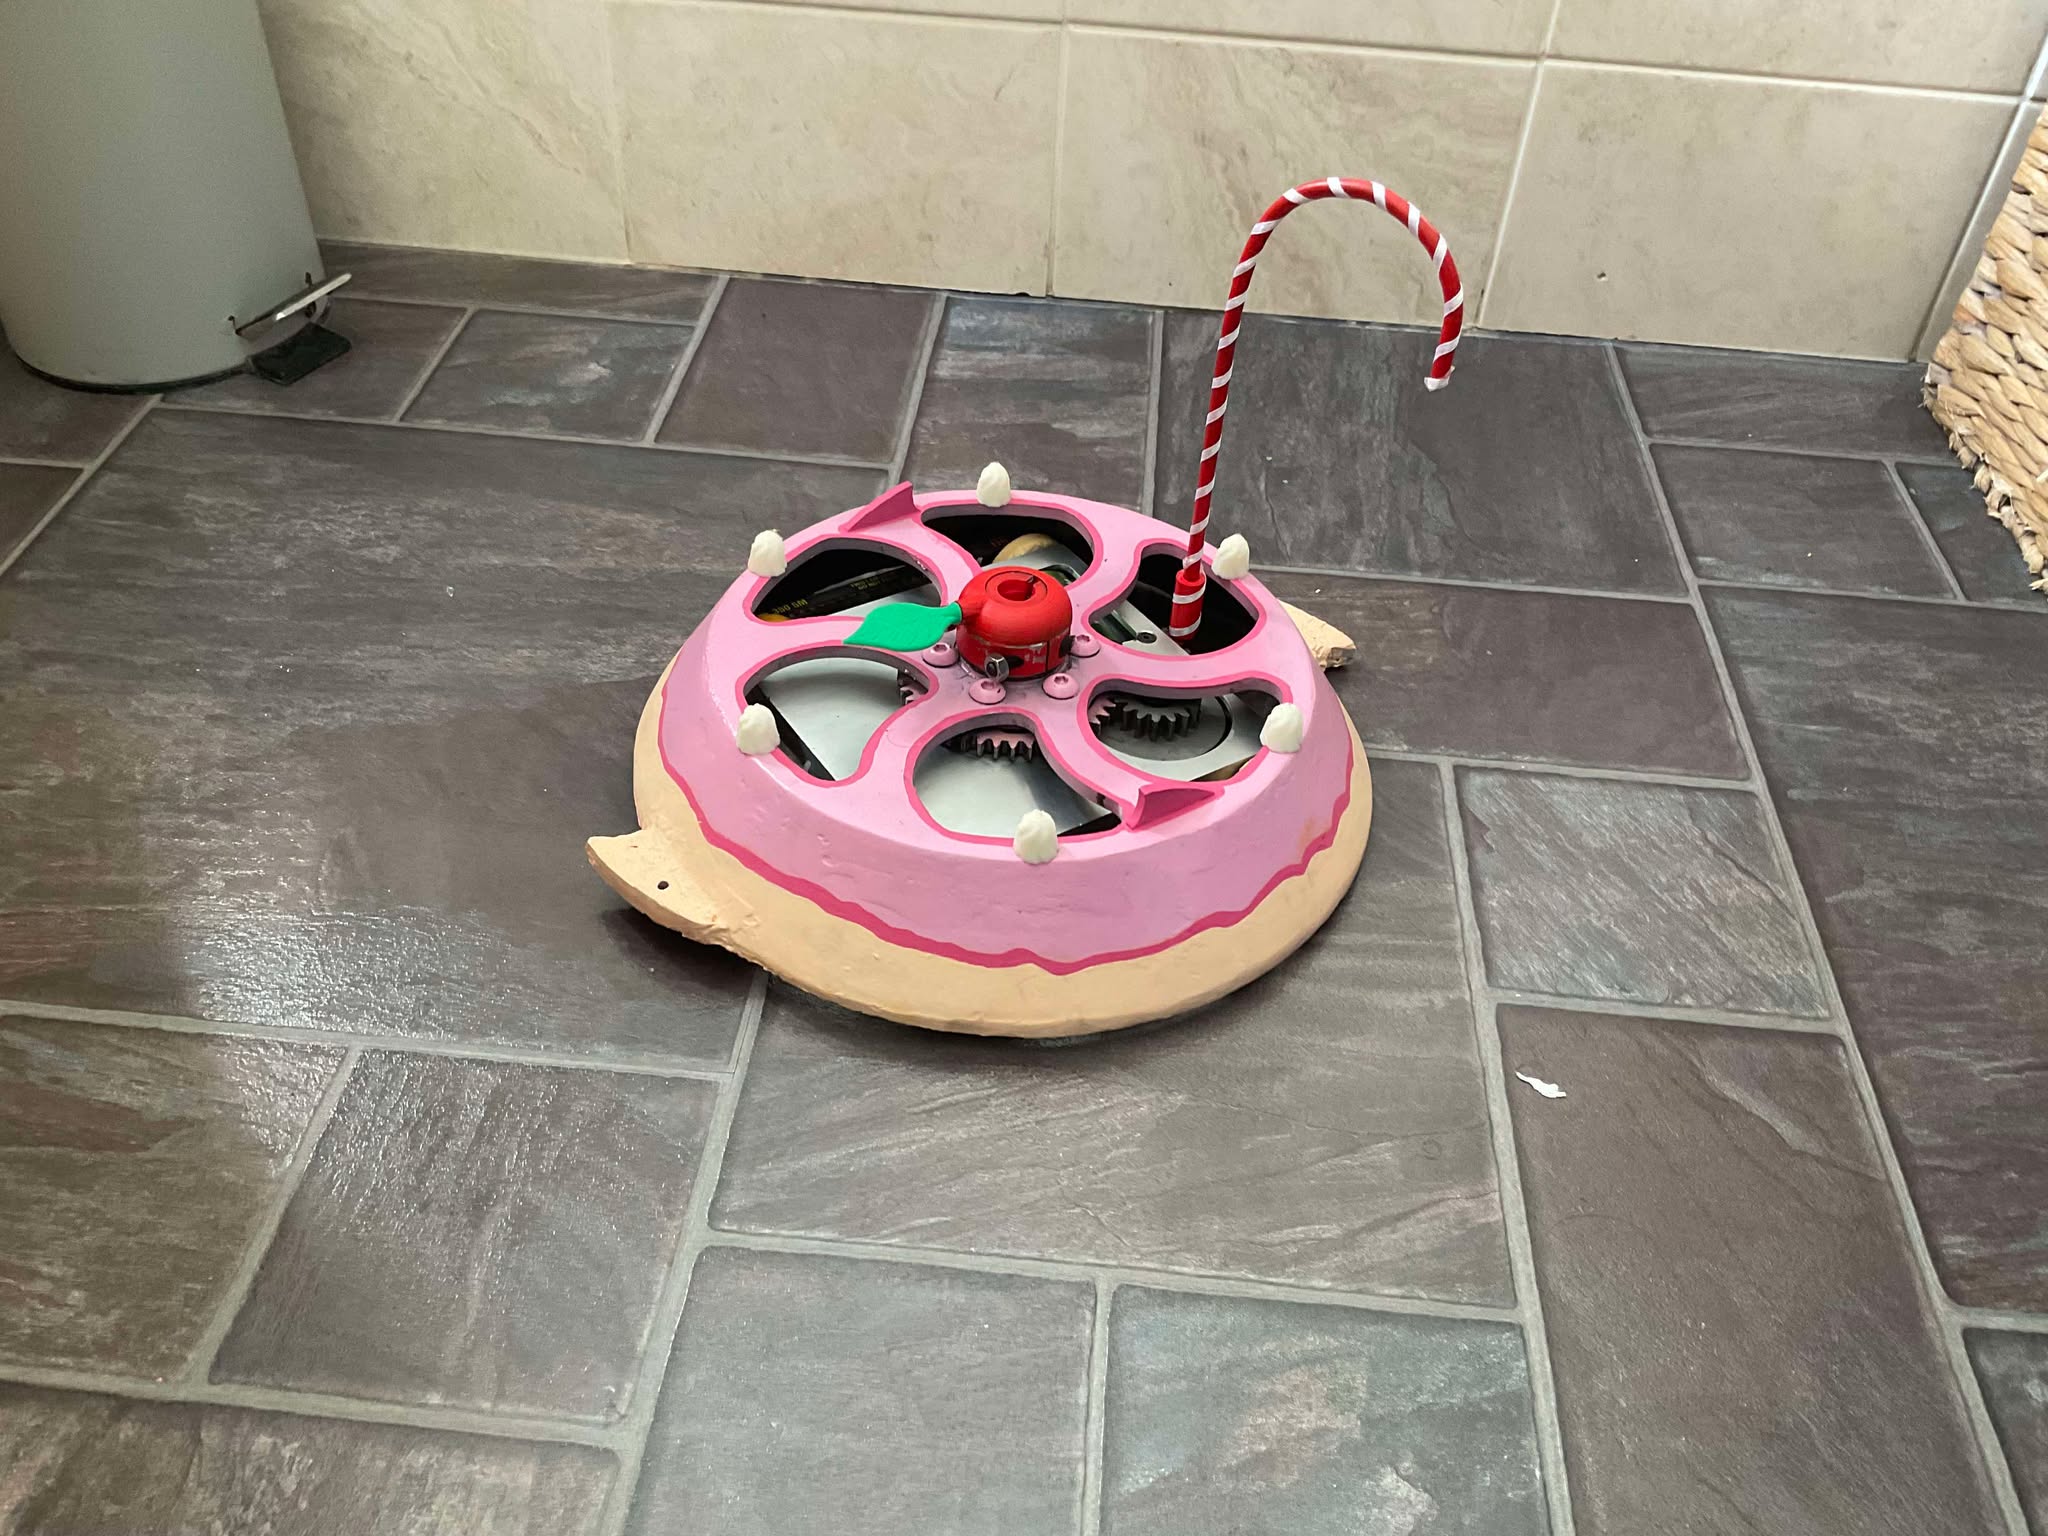
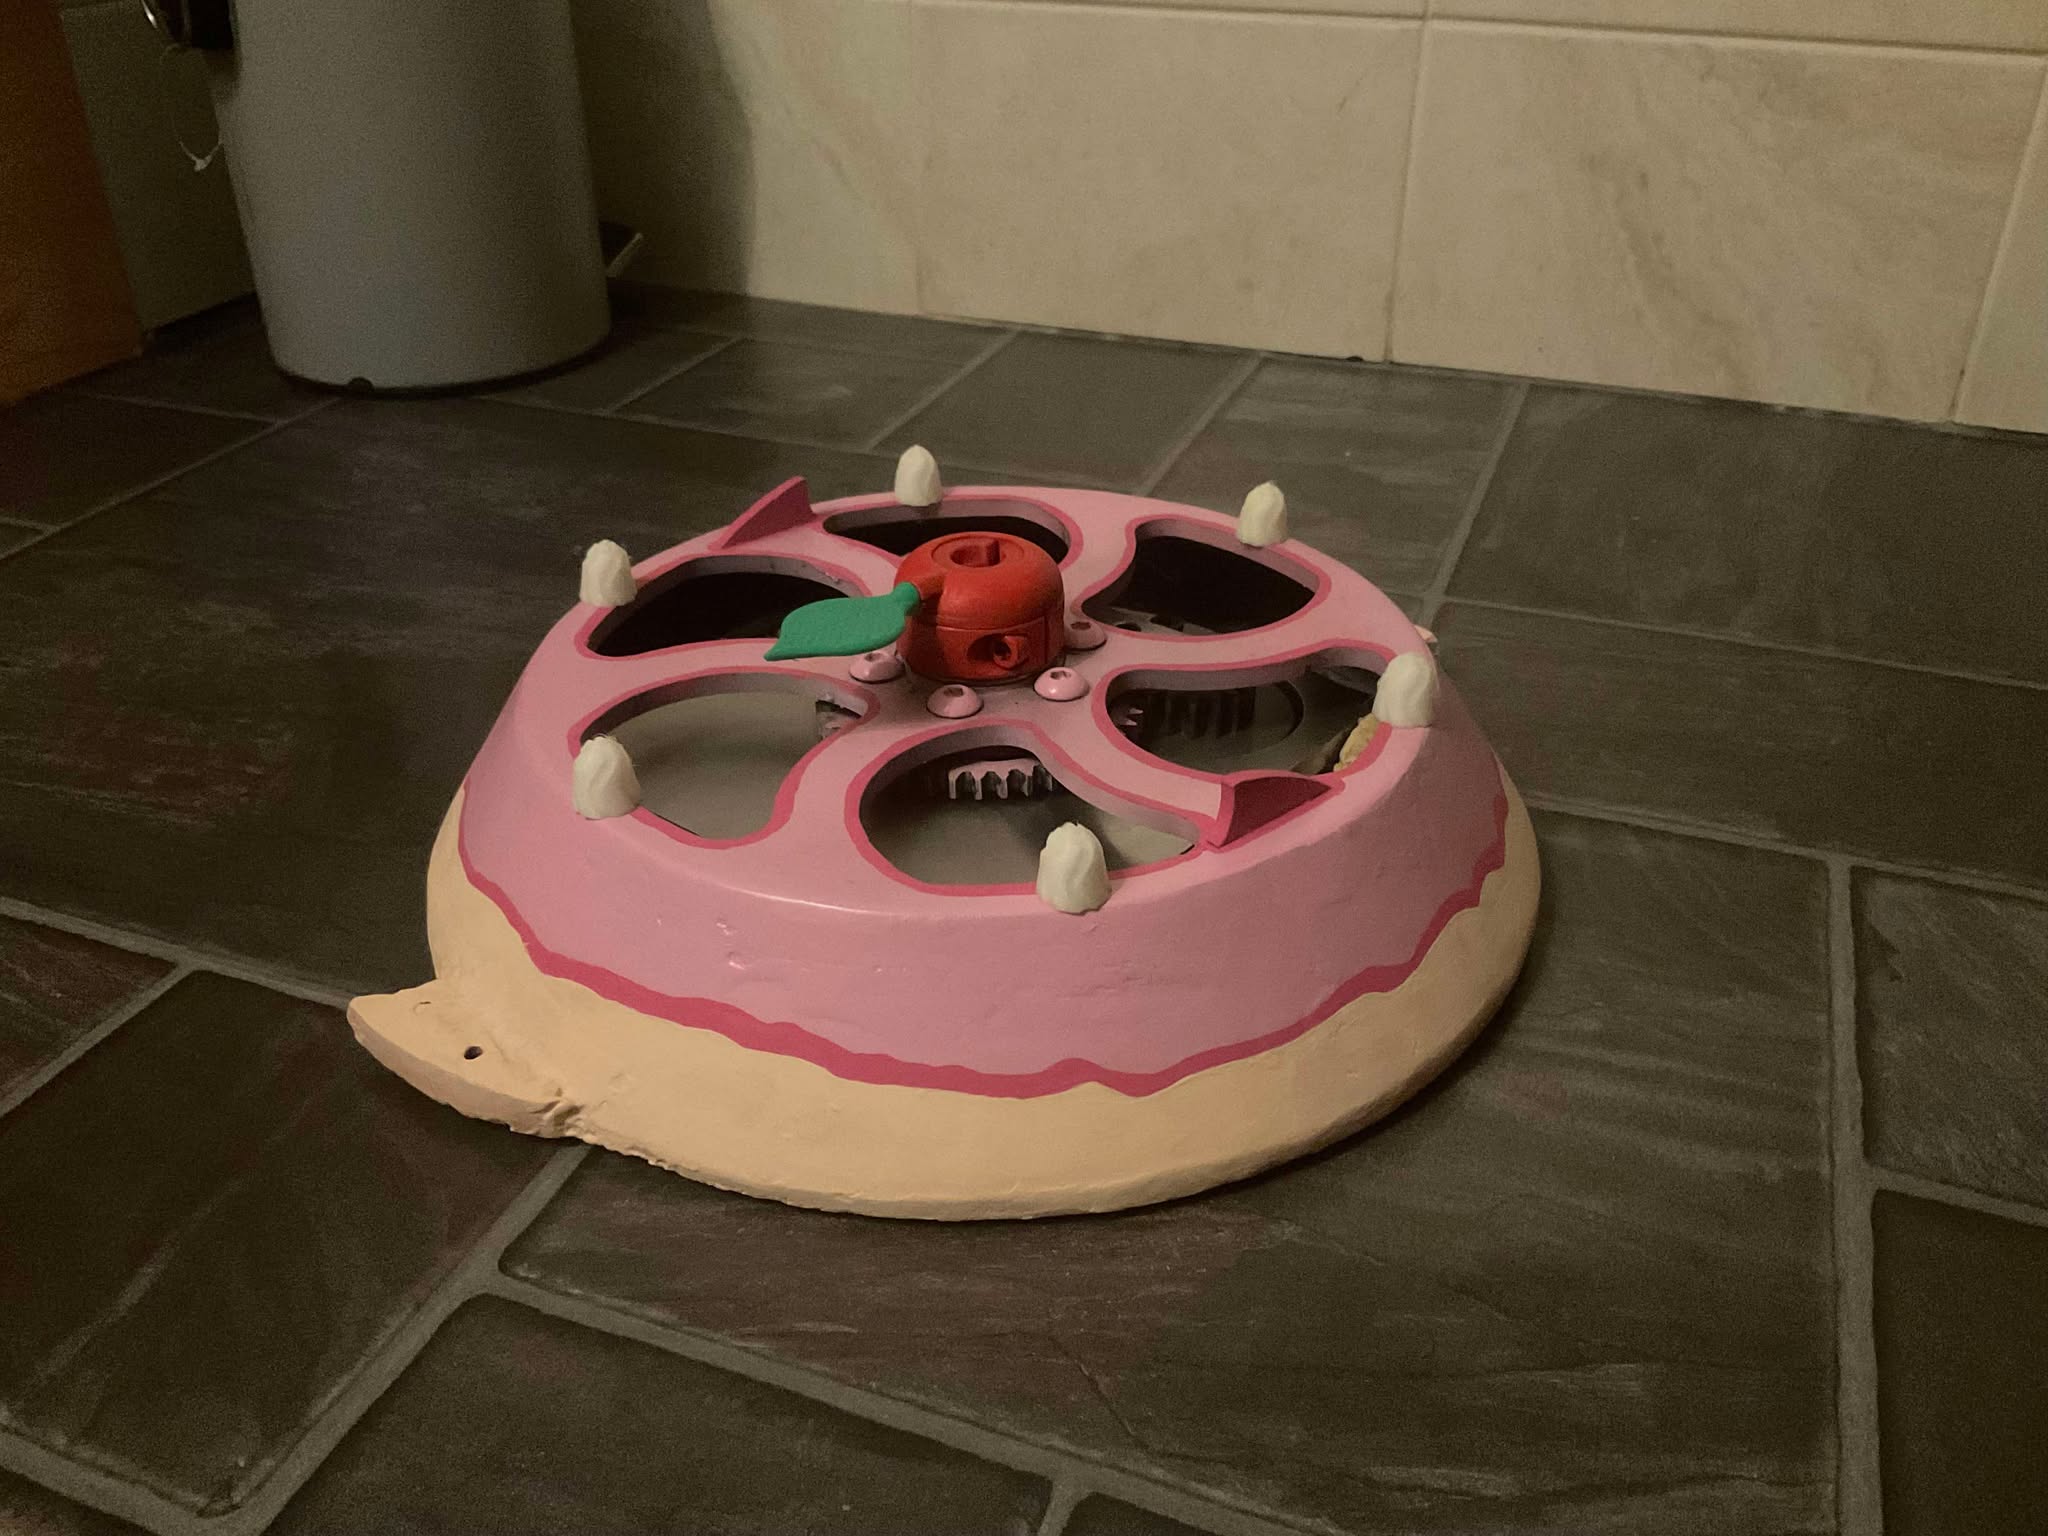
and thats it done, its currently about 200 grams underweight so im going to use that weight for a few things, mostly a mini bot to bail for the pit if things go sideways and some thin top armour incase i get pinned by a hammer bot. and the rest of a nice pain scheme as its supposed to look like a big cake! gunna get my partner to break out the brushes and give it a lick of pain and ill be adding some small details to the top to add to the theming
changes i need to make are some stiffer tires and higher reduction drive gearboxes so i can run the magnets. im also looking into some end support for the gearboxes and motor cans in the form of some tpu blocks. as they are only mounted at the front of the gearbox these could get shaken around allot in battle
also a directional indicator for the top, the led does a pretty good job but its not perfect and i could see myself losing the heading in the heat of battle. im also aware of how notoriously hard shells are to drive so want to give myself as many references as possible lol
also the ground clearance may become an issue, the shell runs 6mm off the floor which was intended to prevent undercutters getting juicy shots and the magnets run 2mm off the floor with the belly pan only being a 2mm or so above this. the belly is already only 1.5mm ali so i cant really go much thinner. i can run slightly bigger wheels to mitigate this but only fighting it in the arena will tell. I’m hopeful the shell should be able to kick any debris away. either way will find out at easter! really looking forward to seeing how the bot does, especially fighting horizontals as ive always had a soft spot for shell spinner vs horizontal fights
Overall im very pleased with the way its all come together and i hope this was a useful read!