Somatic Damage was a beast! You dished out some really spectacular yeets.
I like Nom’s face best though. ![]()
Somatic Damage was a beast! You dished out some really spectacular yeets.
I like Nom’s face best though. ![]()
Thank you! already ordered all the parts for an improved version! hoping to get the weight in for a hardox bar and maybe even poly-carbonate supports for the weapon instead of ABS.
i’m pleasantly surprised with how it performed, i did not expect it to throw bots as well as it did.
thanks!
i wish Nom did better, i had drive problems with it all the way through the event, i need to change the transmitter since its definitely starting to show its age now haha. aiming to switch all my bots over to flysky when i can.
Hey peeps, i’m working on a new 150g robot atm and i’m looking for quite a short brushless motor for a spinner robot. i’ve been having a look but unfortunately the only one i could find was discontinued… does anybody have some good recommendations?
I’ve been using the T-Motor F2004 1700kv in my undercutter, which is 17.25mm from the mount to the end of the shaft. It has a smaller bolt pattern than the standard 1806 though, 2x5mm and 2x6mm M2 screws instead. T-Motor F2004 Motor (1700kV, 3000kV) - Unmanned Tech UK FPV Shop
Thanks for the suggestion! will probably end up using it as it seems to be really good height wise
since yesterday i decided to work on a 4th robot for my future AWS Fleet, this is the work in progress for RDM (Random DeathMatch)
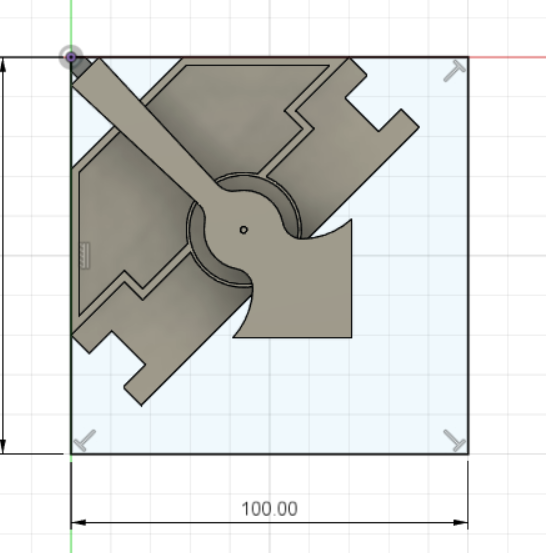
This is the CAD design for the bot so far, i’m planning for this to be a shuffler bar spinner, since it just popped into my head at work and seemed fun (And maybe also deadly if this somehow works out), i’m going to give it a bigger weapon than the one it currently has, as in the image there is plenty of volume to still play with, but other than that i’m happy with the way things are going so far, currently the bot should be just under 20mm high so hopefully will be able to hit opponents quite low down!
Not entirely sure at the moment how i’m going to make the shuffling work especially with a somewhat limited amount of space (vertically at least) but hopefully i’ll find a way to make room for it…
Now that’s my kinda shit. Just remember you can always put the bot in corner to corner! Don’t be afraid to go bigger that 100x100mm as a footprint.
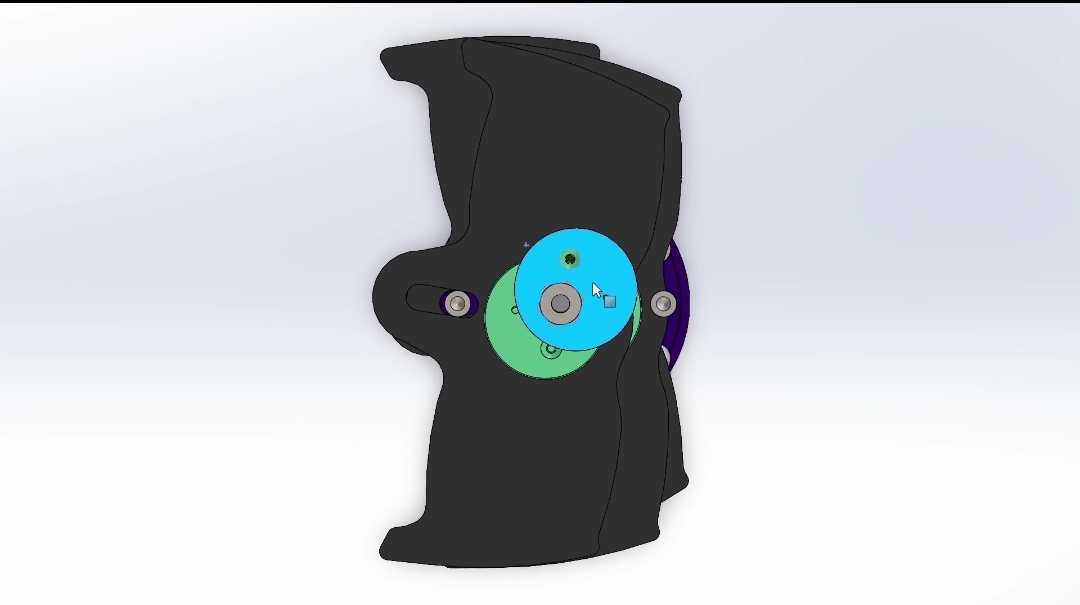
In terms of shuffling, you might want to set the pivot point to the side of the rotational piece in order to overcome the height restrictions. Example below
Cheers! yea i’m going for corner to corner, which is how i’ve done the CAD for the robot. i didn’t realise that i had so much room to spare until i drew out the 10x10 square haha. that room will definitely be used up. I probably could just try and get it to fit in diagonally but i’d rather just play it safe and get it to fit in flat since its definitely a lot easier to design that way.
As for the shuffling mechanism, i didn’t think about a sideways pivot point to be honest, thanks for the suggestion! it would definitely be the best option with the height of my robot in mind. Only real issue for me is probably going to be cadding each piece out since i’m not really very knowledgable on shuffling mechanisms, but i’ll figure it out in the end!
I’m half-debating going between a 2 legged and 3 legged shuffling mechanism, 2 would probably be easier, but 3 would be a lot smoother, which probably means this robot wouldn’t kill itself whilst just driving. Will probably just go straight to 3 legged though
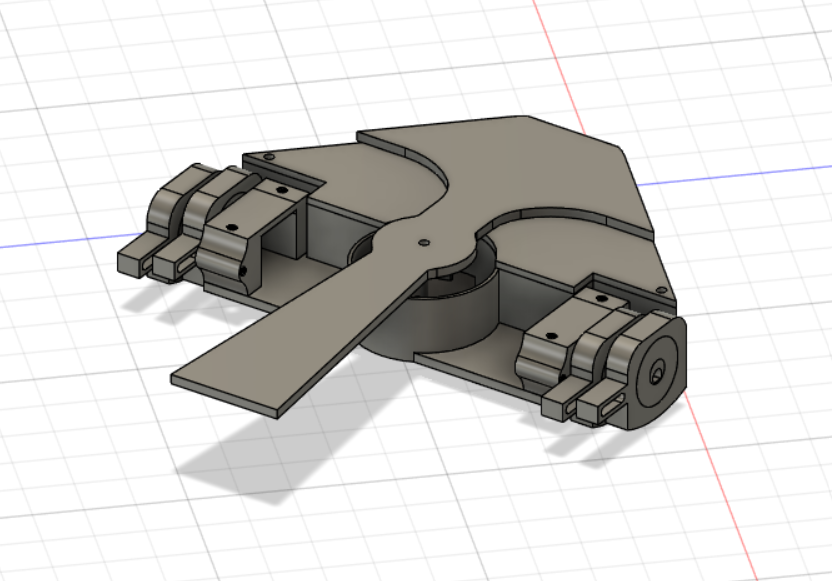
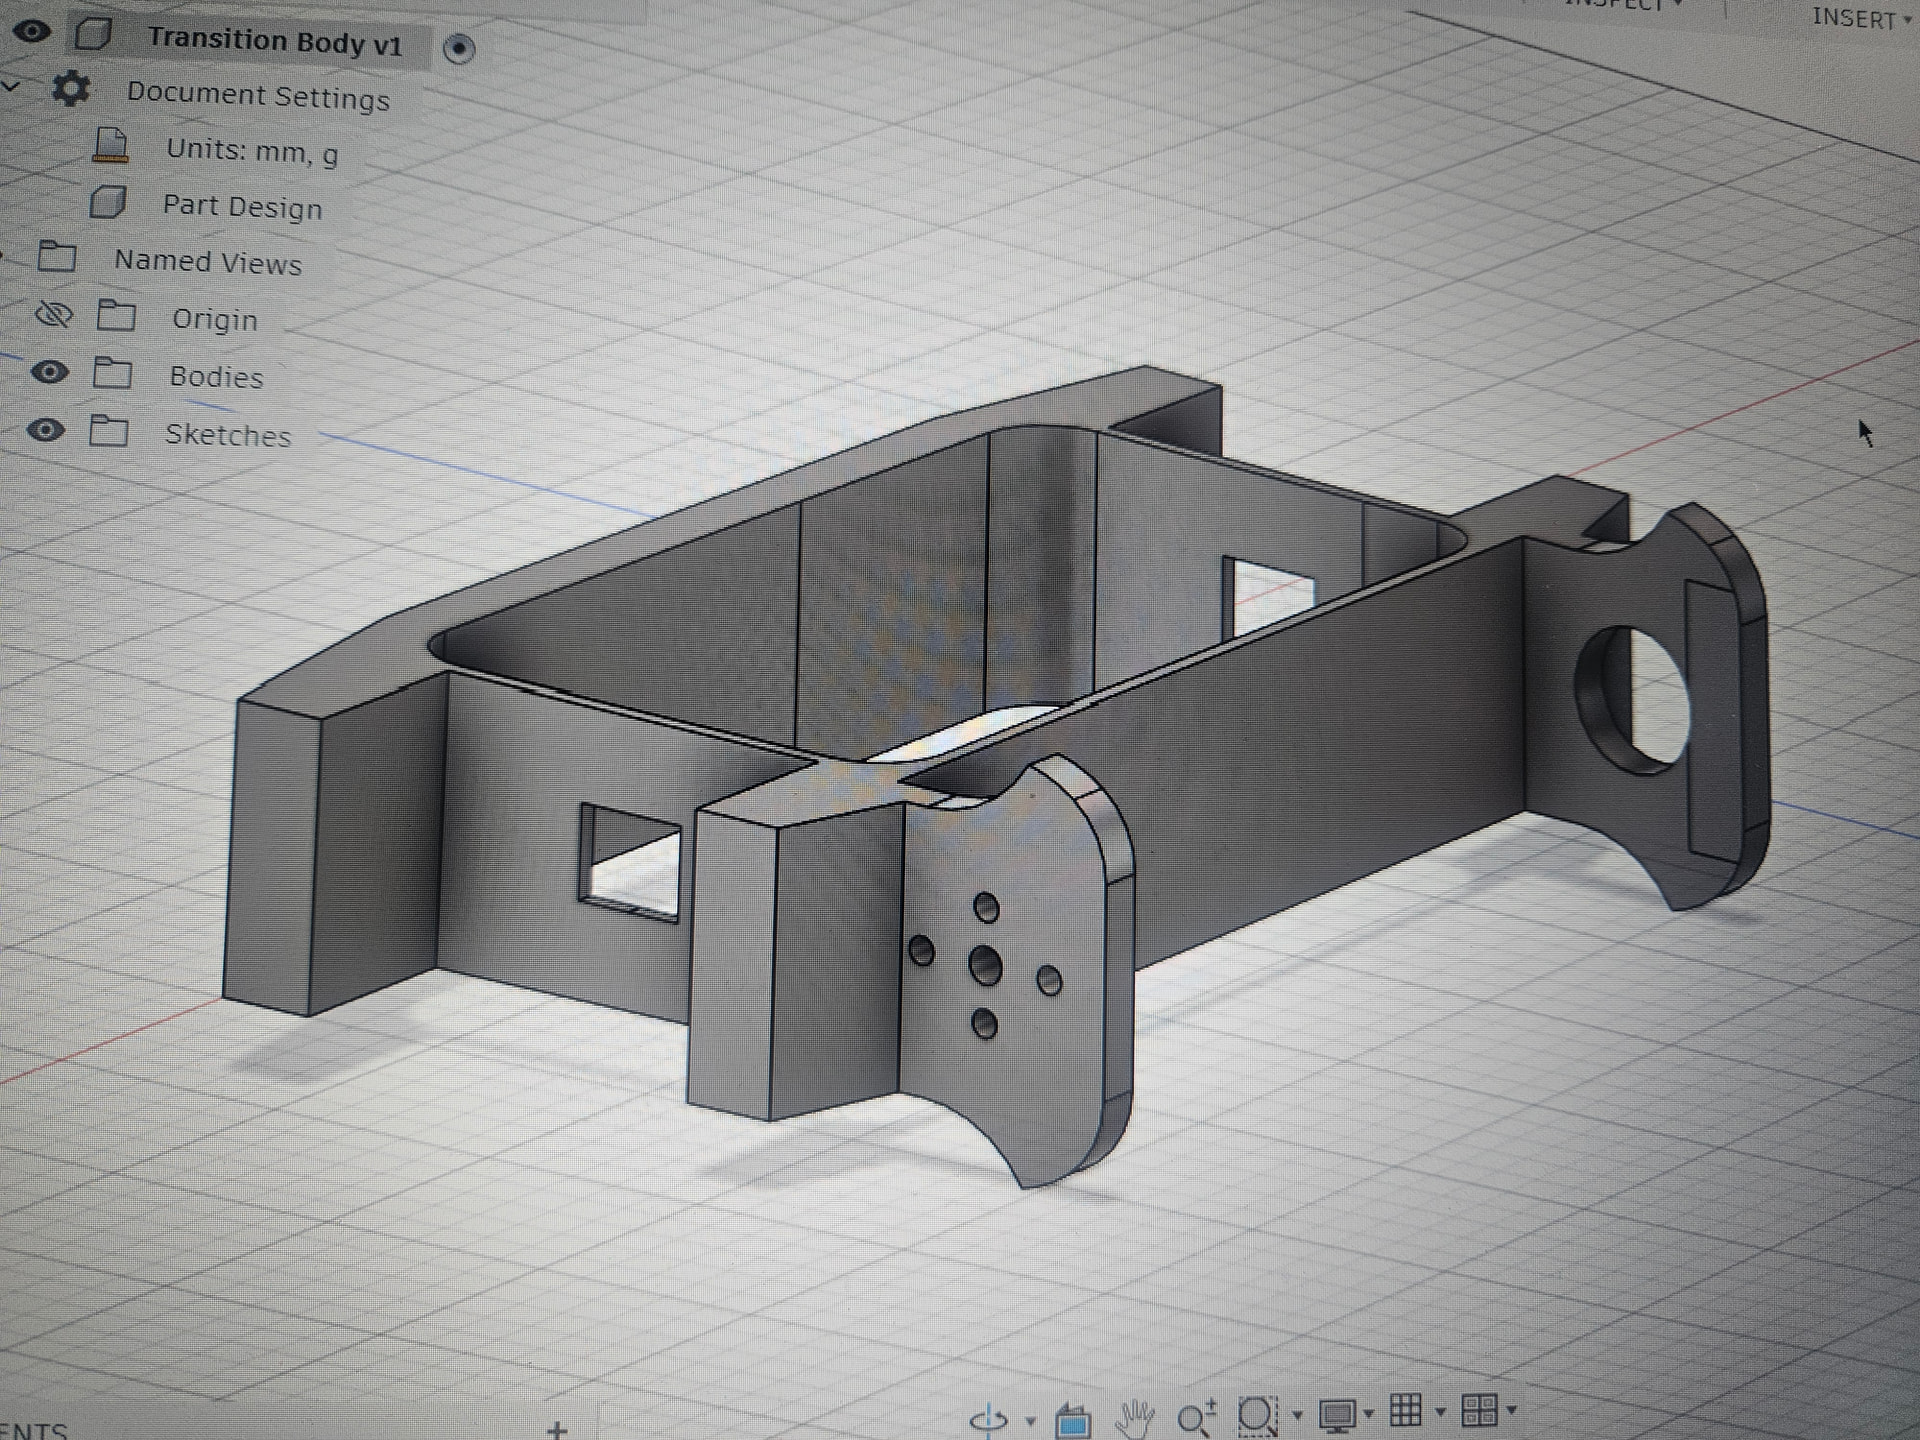
finally (i think) finished the cad for my new robot RDM, this is how it looks assembled in CAD, i need to make the chassis a little shorter to make room for screws and also going to move the screws further in too since they are currently a bit close to the corners, but other than that i reckon this is it done.
I don’t really know if i’ve designed the shuffling mechanism correctly to allow it to work, and unfortunately due to me having to order all my 3d printed parts since i don’t own my own printer, its going to take a bit to find that out lol, but i’m happy with how it all looks in CAD (With the limited shuffling mechanism knowledge i do have anyways)
I do wish that i could have made a 3 leg cam work on this bot, which was my original plans. But i just could not be bothered to figure it out, i am concerned that it might not walk smoothly enough and will hit the floor and die, but there’s only really one way to find out if that will happen, isn’t there?
Hey people, it’s been a while, I may or may not have lost Interest in the hobby for a bit. Which is weird on one hand because being at ORCS 1 made me realise how much I missed competing and building robots, and how fun and enjoyable the people were too.
Then on the other hand building these robots (soldering mainly) is an absolute pain in the ass for me, and it makes me regret taking interest in something so electronics-based. But oh well, my soldering is slowly improving, and this little bit here is boring anyways

When I last posted, I talked about ordering new parts for somatic damage, as well as some hardox bars too. And I had also shown off CAD for a shuffling overhead spinner named RDM
So… where are things now?
Somatic Damage:
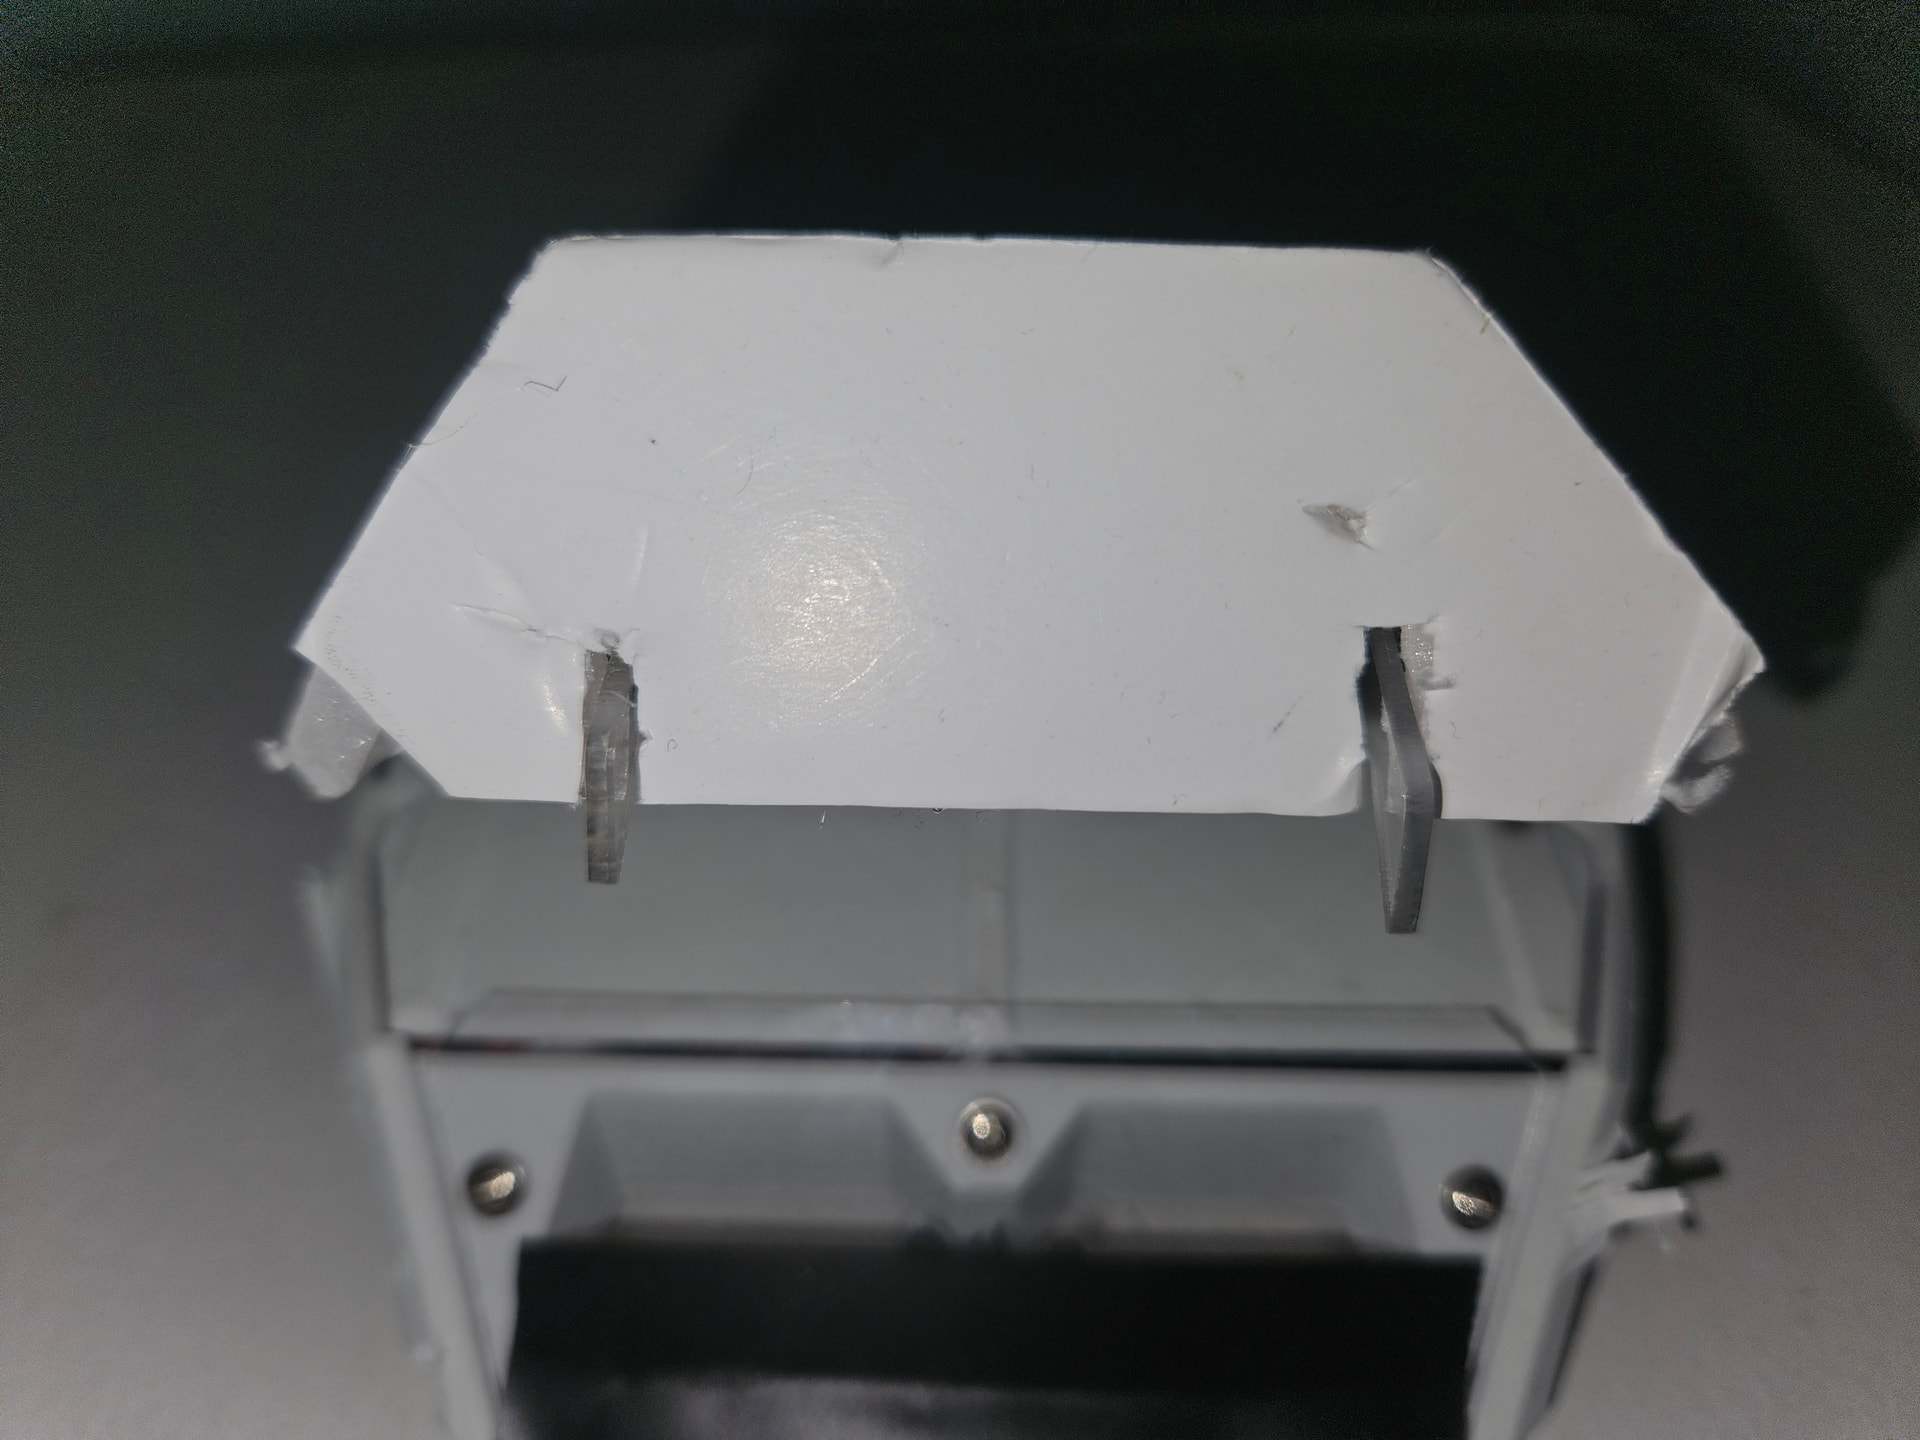
All the prints for the new version of Somatic Damage have arrived, weight was a big problem with the first version of Somatic Damage, and to help eliminate that I shaved some weight from the back plate to give me slightly more weight to play with for some other hopeful upgrades.
As it stands, I’m not too happy with how it looks honestly, as you can see above, the new rear is shorter and leaves some air room inbetween the top plate and the top of the rear, which i don’t really like, i think it definitely would have been nicer to just keep it at full height, like on the old rear. Though one good change that this version does sport, is that the middle section does now have a wall to protect it from spinners. Given how many wires are present at this section, i am VERY happy to have this as an addition to the bot, and i hopefully will be able to make more changes to the design of the chassis too, like making the rear look nicer by making it taller again, and also maybe even making the robot shorter if i can, we’ll see how much space i have when i solder it all up.
One of the biggest weight reductions for Somatic Damage have been internally, with the electronics. Instead of using the BBB dual ESC, I have gone for two Red ESCs, which make soldering a lot easier for me and weigh considersbly less too! I have also started using a 180mah lipo in my bots, which i have ordered from turnabot.
All of this weight saving is to get my robot under the weight limit, which it very slightly exceeded at ORCS 1, sitting at 151g(i believe?). Though these weight reductions were also for another planned improvement, which were my hardox bars, supplied very kindly by David Weston ![]()
RDM:
On the last post, I showed off the CAD for RDM (which stands for Random Deathmatch). The weapon had changed quite a bit since, which was a very tedious process I must admit. Trying to balance an asymmetrical weapon (especially one as big as this one) is quite the task, but I managed to get it incredibly close in the end.
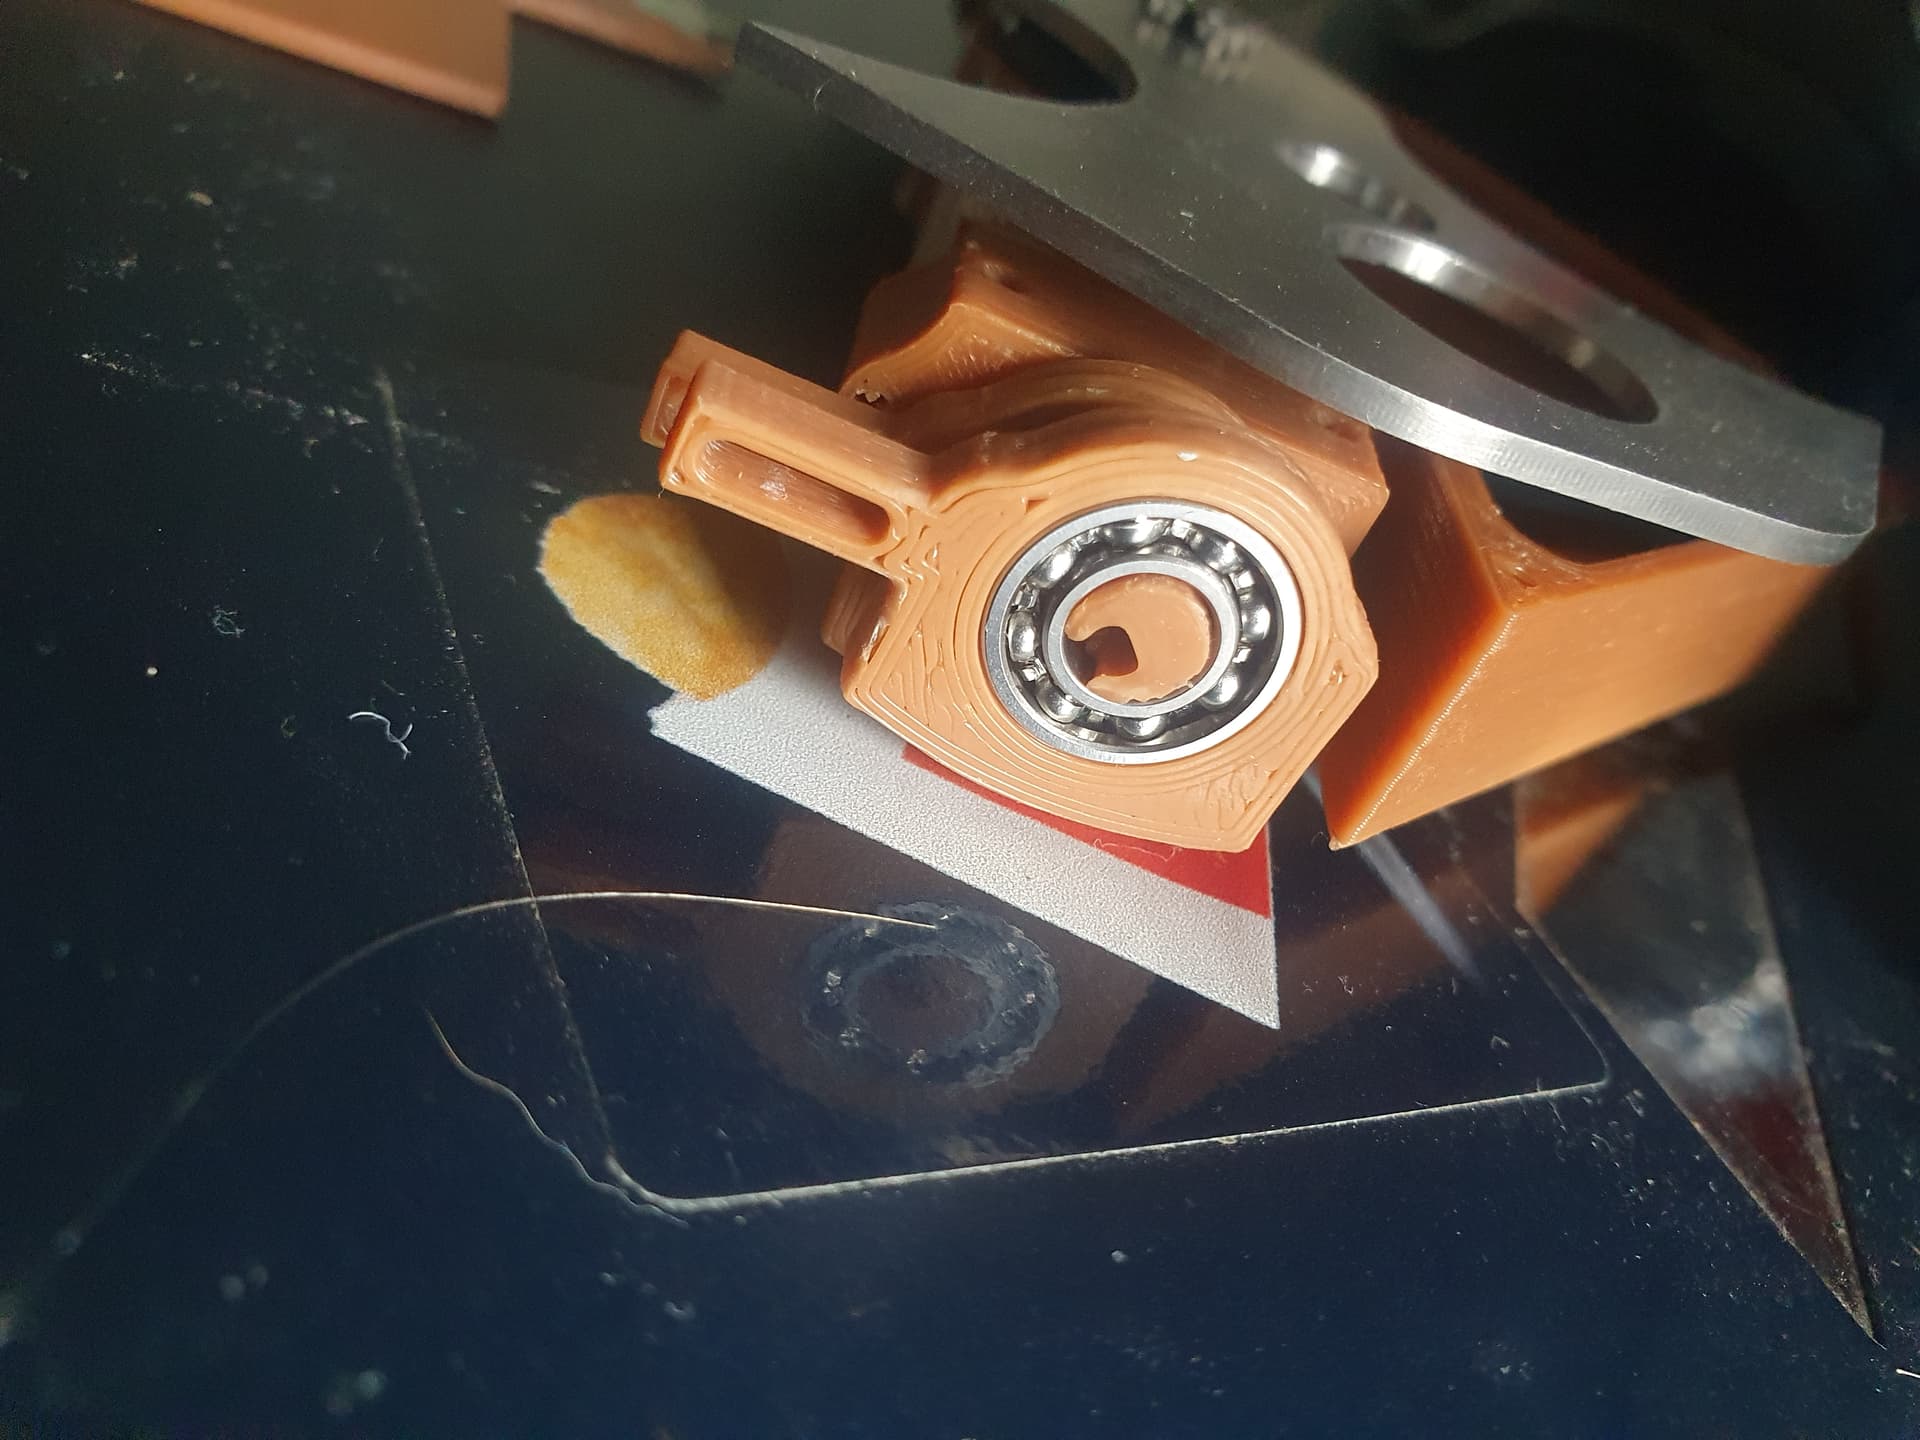
I sent all the files to be printed and ordered the electronics for it online (from the BBB store ofc ![]() ). I was eager to see if my shuffling mechanism would work correctly the first time, especially with these tiny bearings that I managed to find online.
). I was eager to see if my shuffling mechanism would work correctly the first time, especially with these tiny bearings that I managed to find online.
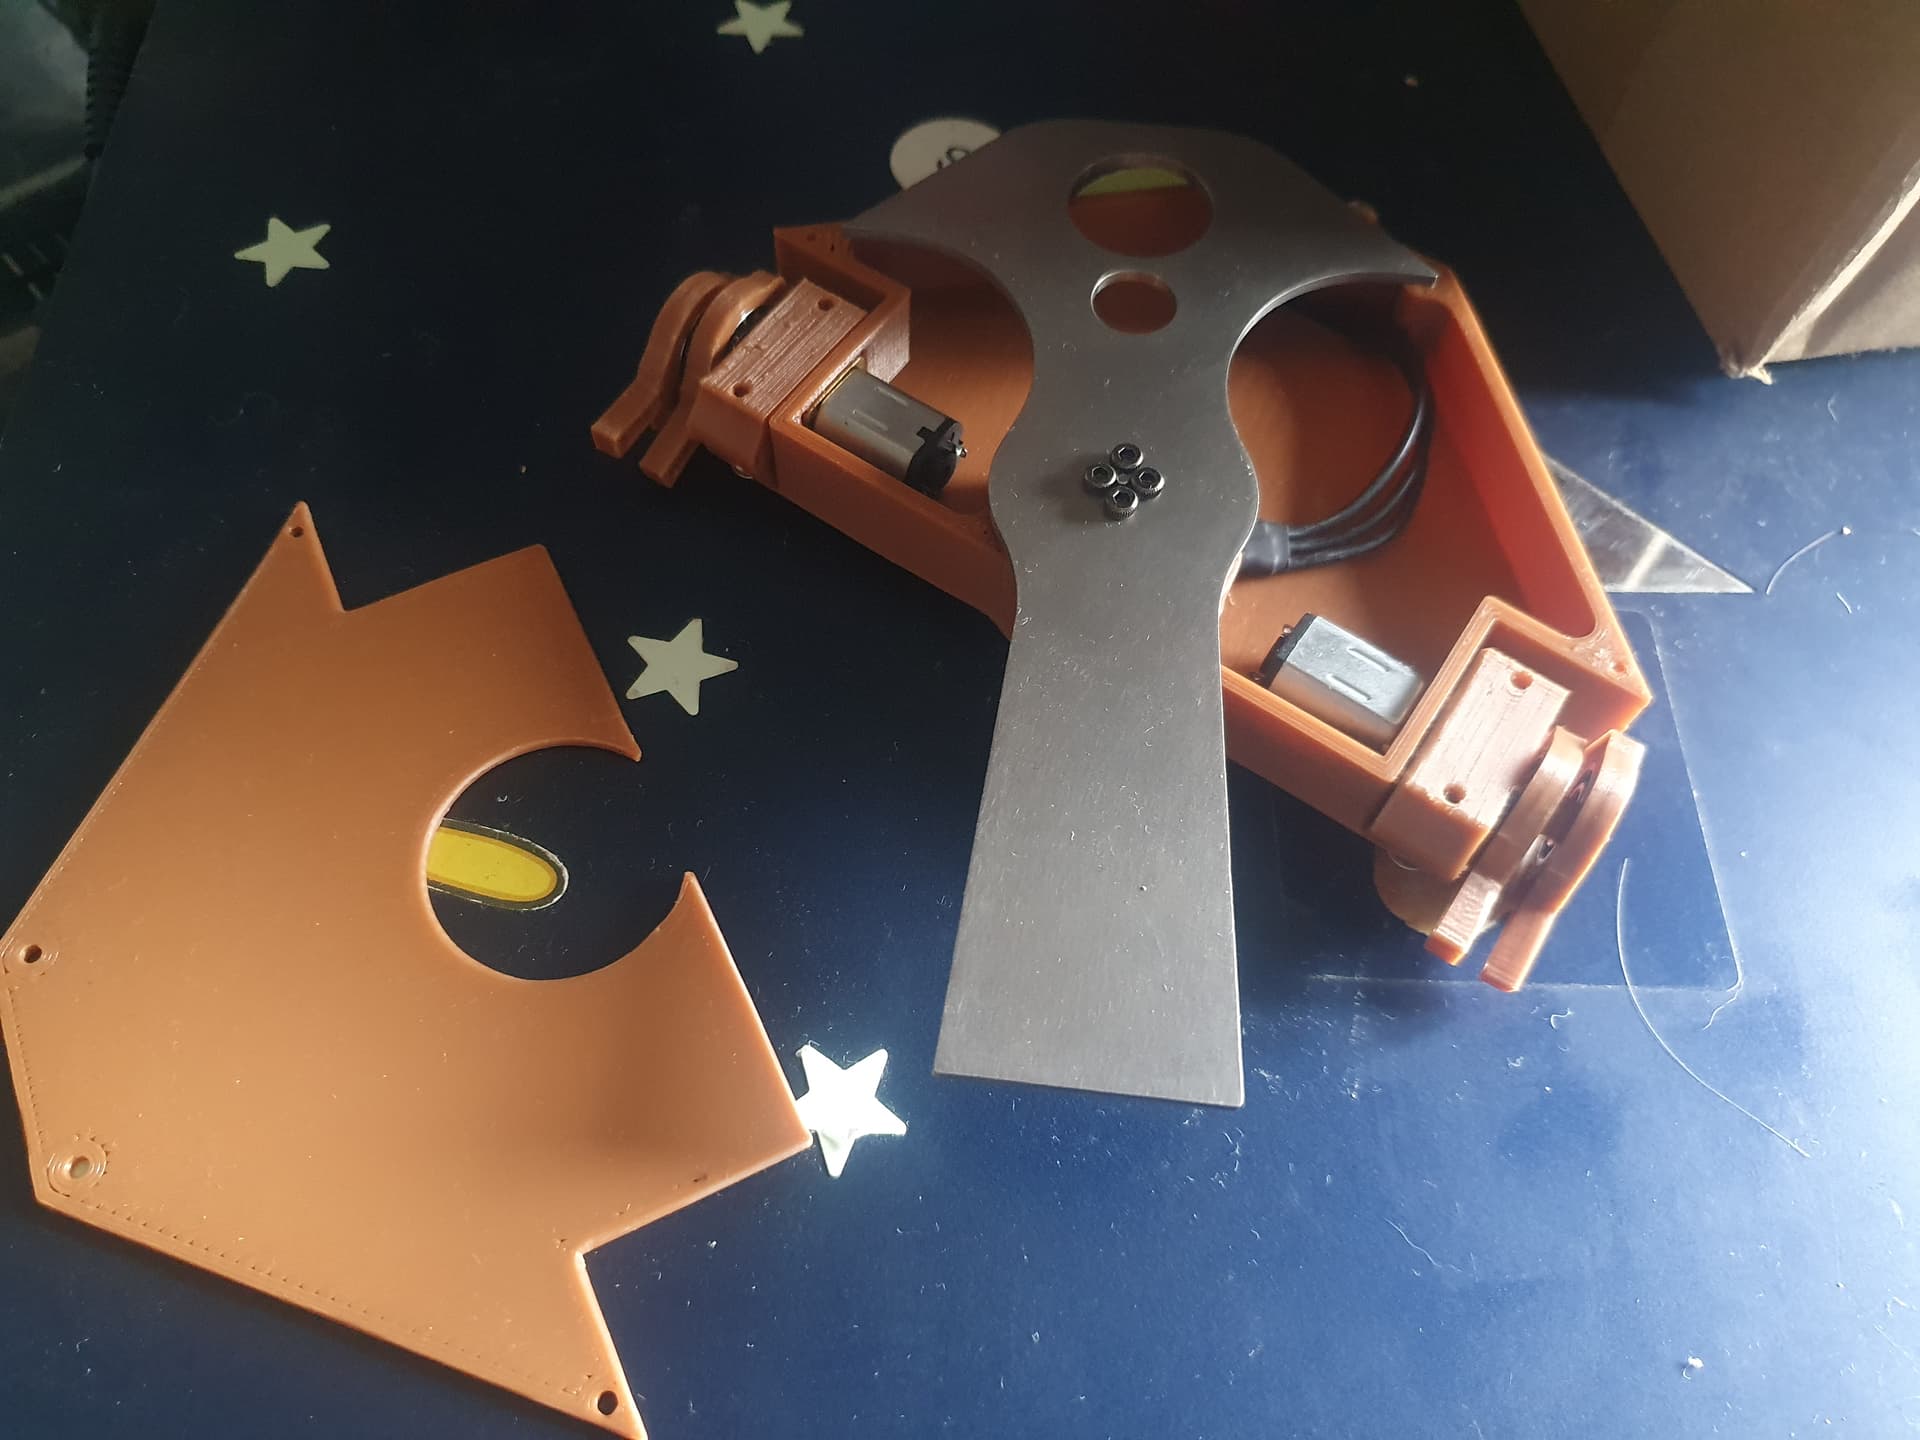
And here is how the bit looks in its current state!
The weapon on this one is absolutely awesome, and the chassis looks really nice too, however i did have to cut some plastic away as i put the slot for the wires in the wrong place… oops.
The big question is, do the legs work??? And the answer is… i’m not sure, they could? Maybe? There are just some problems.
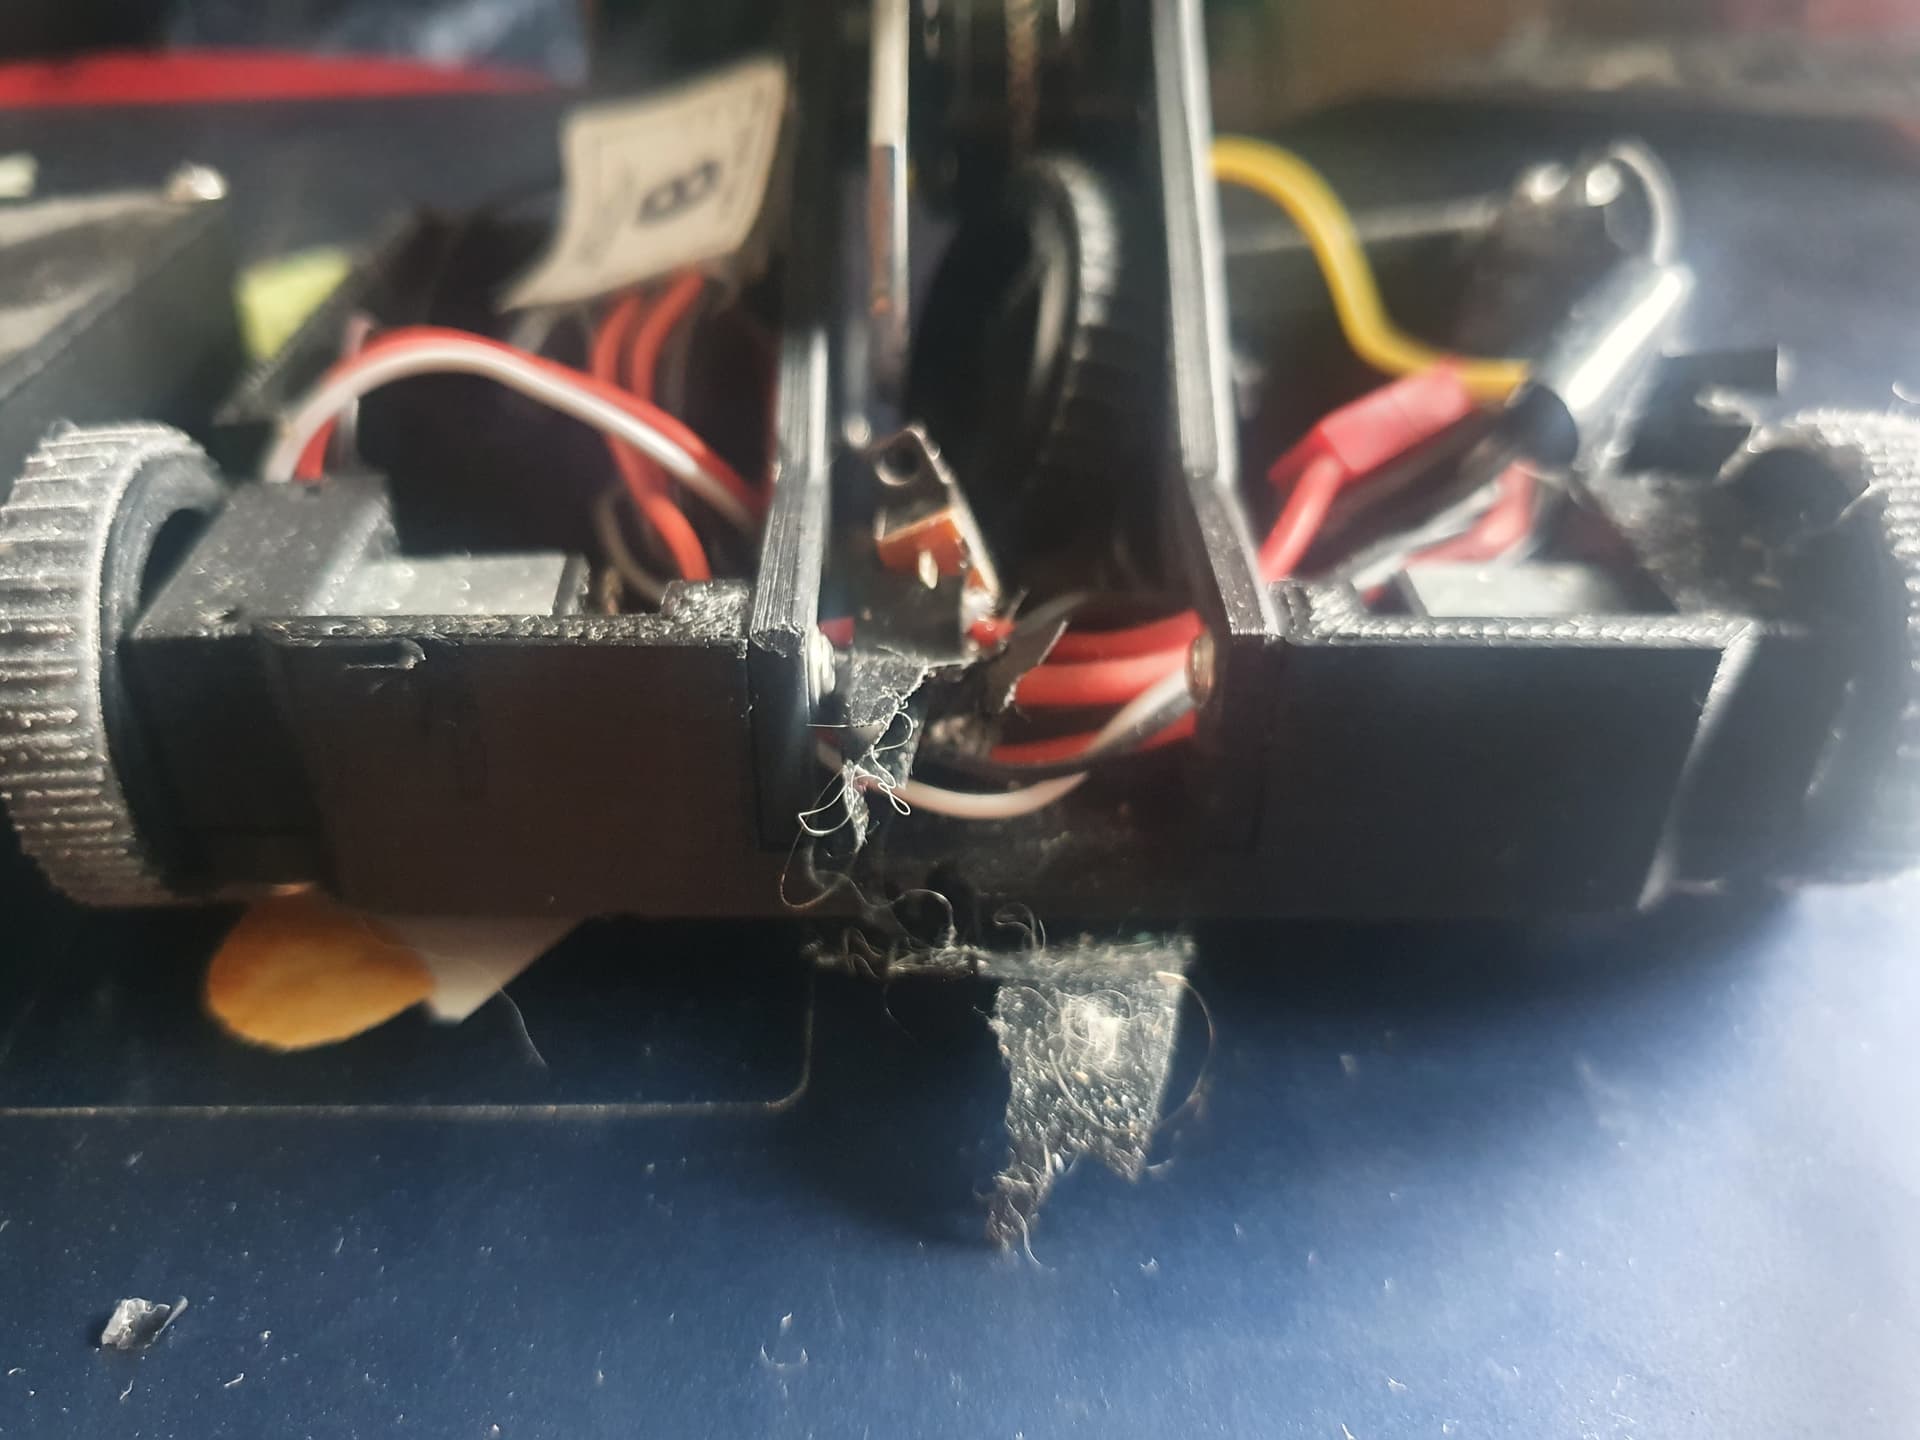
Here is a photo of the legs for RDM, the slots at the front are to allow for a screw to thread through, which would keep the outer legs from falling off and keep them in place to stop them from rotating too far too.
However, the screw i bought for this is actually too thick to slot through the legs, meaning i need to make these slots thicker for that idea to work unfortunately. I was thinking about maybe instead slotting a pin through and gluing it into the motor mount, which would probably make these legs work ok in their current state.
As of now, no soldering has been done yet for this bot, and its currently not at the top of my priorities either, probably sitting at around 3rd right now. Though, making this robot has been a very interesting experience, especially trying to figure out and make a cam system that works properly for this design.
New robots:
I had also started 2 new robots after my last blog on here, which I shall introduce now!
First of all is my vertical beater named Night Light. This robot was designed in CAD just after Somatic Damage, and I managed to get the weapon for it finished and machined thanks to PCBway, which have been quite a wonderful service to use for weapons! The weapon axle fits (quite tightly) into a bearing which is press fit (also quite tightly) into one of the sides of the robot. Stupidly, I did not put any tolerances in place so everything was quite the nightmare to put together overall. HOWEVER, it did go together in the end ![]()
As it stands, all of the electronics are soldered on this one except for the weapon ESC to the switch. Other than that, this robot is basically done. However there are already some improvements I’d like to make to this design, which I’ll talk about another time.
The 2nd new robot I have started is called Viper, and it’s a 2 Wheeled-drive wedge robot based on Manta Ray, who was my first robot and also a kit robot from nuts and bots. Manta Ray was fairly successful, getting up to to joint 5th at one event, and I wanted to have a new robot that was more my design with a different idea. It IS based on the original Nuts and Bots kit, with some differences. One of the main difference physically is that this robot is printed entirely from TPU, this was one thing I wanted to try after seeing robots like Slightly Rubber. I thought it was quite cool. The chassis is heavier. However given that the robot is weaponless, I feel like i can quite happily invest that weight into having a strong chassis like this one hopefully is.
It is mainly just an experiment at the moment, and it’s definitely not perfect, but I am hoping I can make this bot work effectively and efficiently in due time.
As it stands, I haven’t done any soldering for this robot yet, but I’ll get around to it all sometime soon!!!
And… for now that is all I have to update on this blog. I plan on continuing to solder everything up this weekend, and I’ll hopefully make a blog about that soon enough! My plans are to start with Somatic Damage and Night Light, but making plans is always easier than actually doing them ![]()
howdy peeps! finally decided on a whim to hop back into building some robots. been doing work on a new version of Somatic Damage first!
current upgrades are some protection on the rear, some new weapon discs/bars and also changing up the electronics to help reduce weight, in the form of two Red ESCs and a small 200mah lipo which im honestly surprised works just fine. i am running into some SMALL issues with the fact that none of the motors feel like spinning, despite the robot having no blinking lights at all, but that is hopefully resolvable… any guidance on that would be appreciated ![]()
but for now its nice to be back into things, will be designing a new chassis for Viper, and also some new legs for Wipeout (formerly RDM), will post updates soon!
I don’t think i ever showed this off, but heres photos of the damage Nom recieved all the way back at ORCs 1, wish this robot controlled better as it was a lot of fun to drive!
also very surprised the head didn’t take any damage as it was easily the weakest part of the whole machine…
howdy peeps!
all my parts for my robots have finally arrived, so where are things at right now?
Somatic Damage:
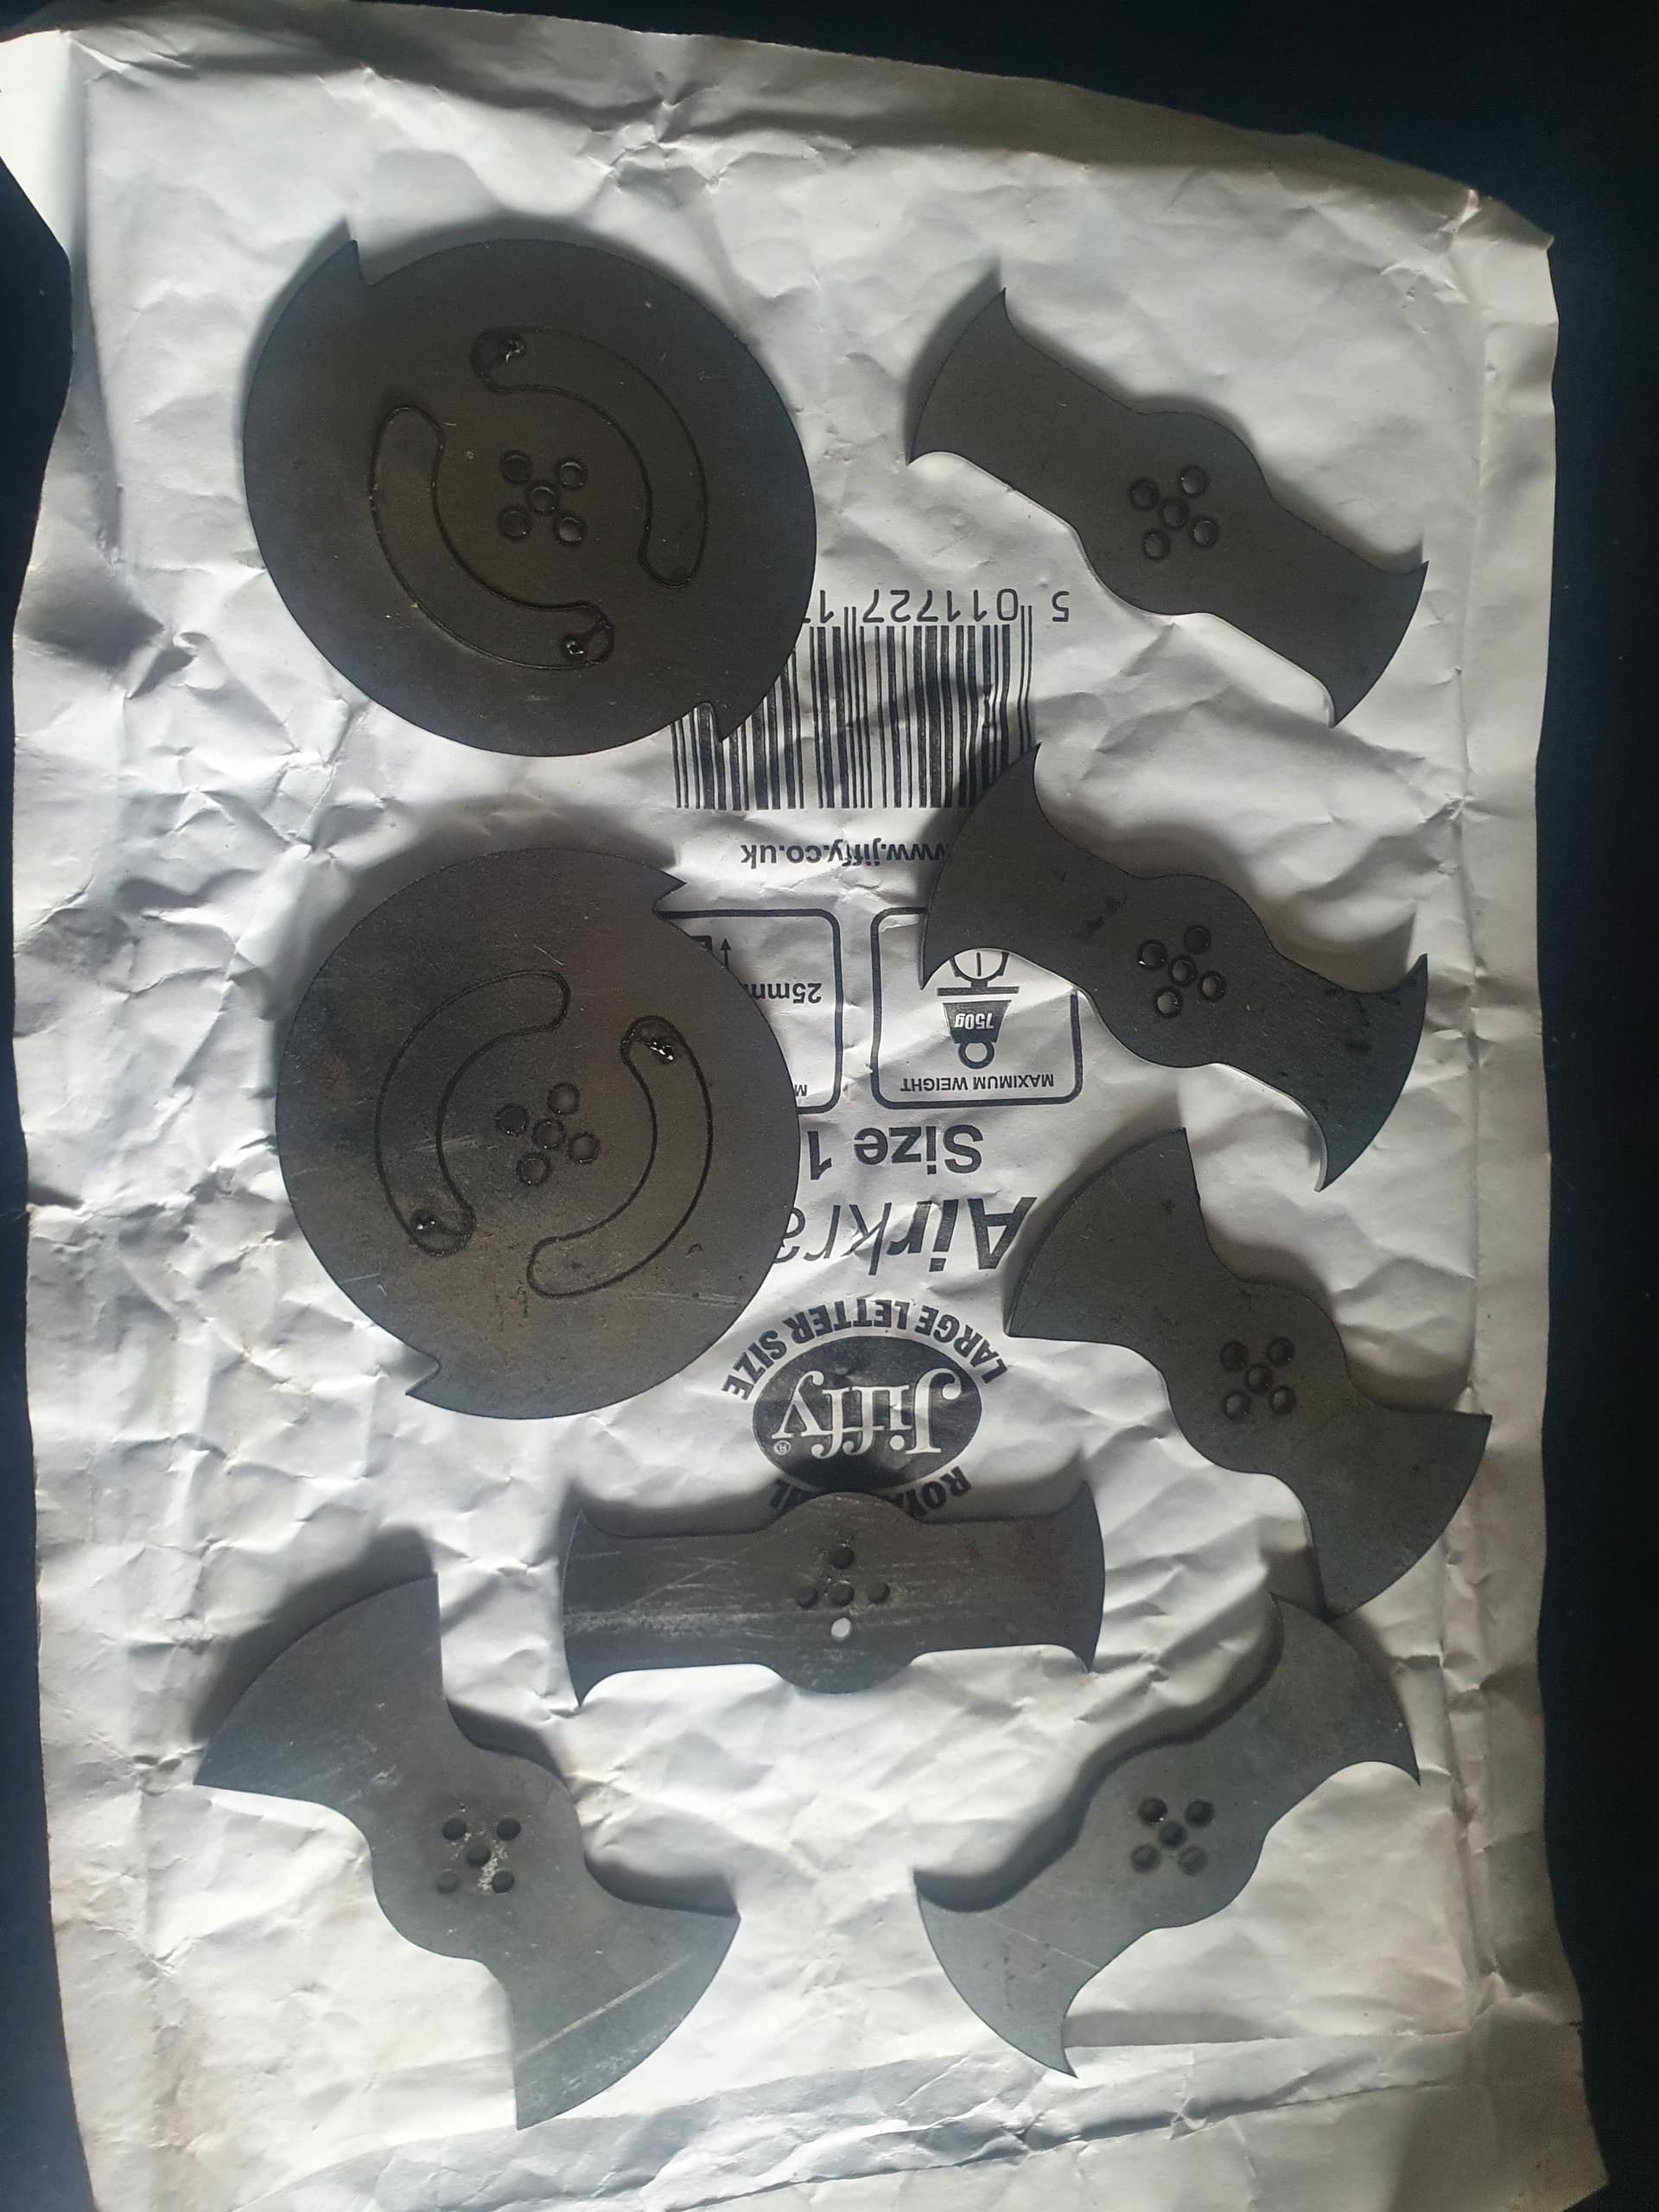
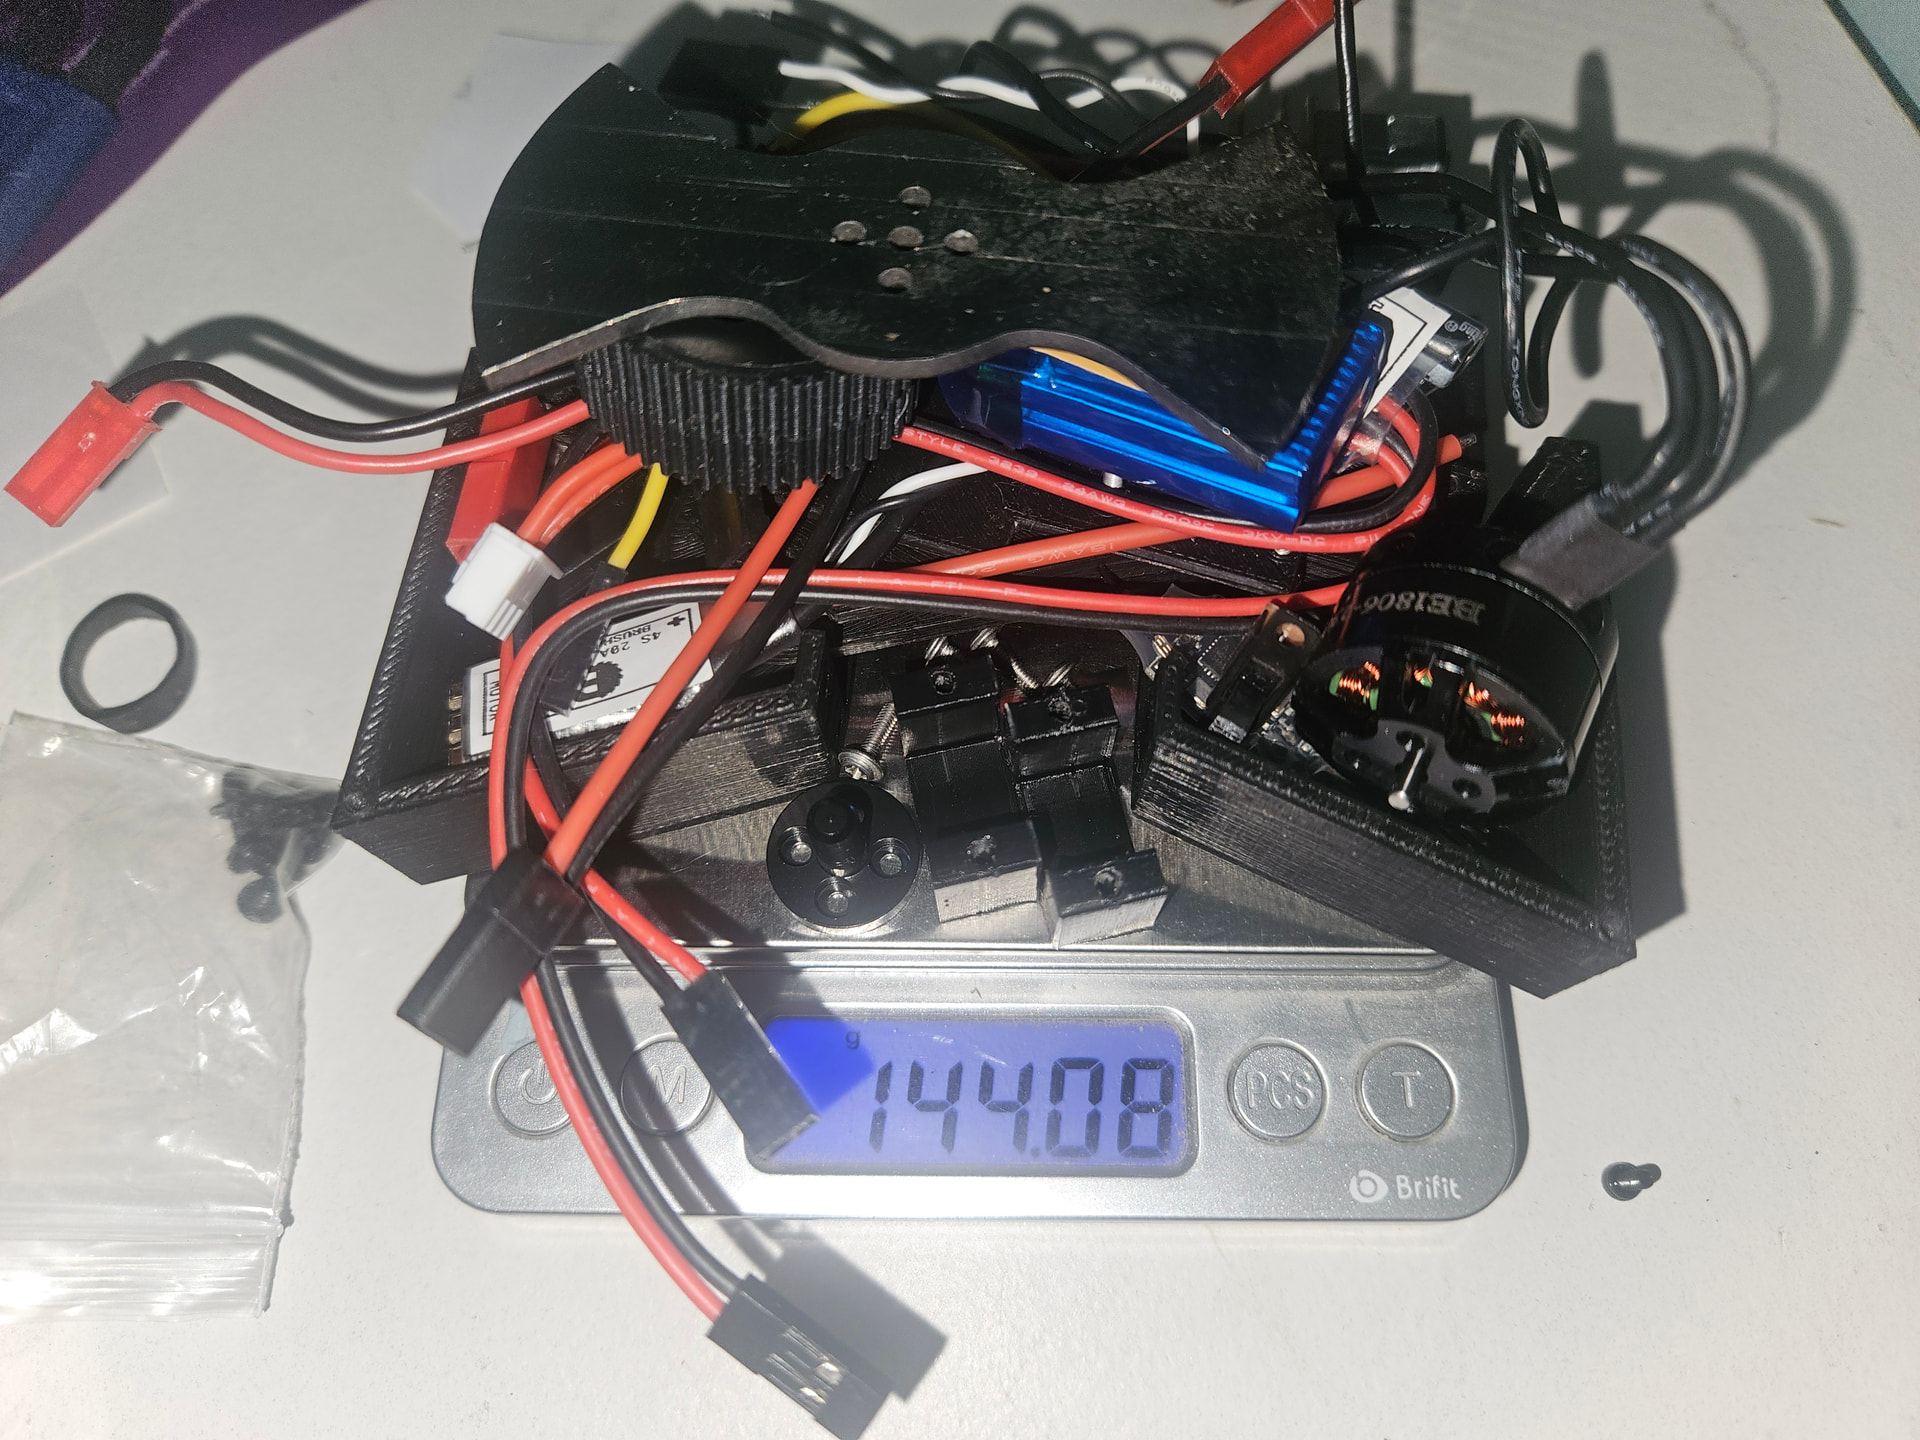
Somatic Damage worried me at first because with the Titanium disc it was sitting at 149 with the Red ESCs. however, changing the disc out for my heaviest bar had it sitting at 144g. unfortunately however, i dont have the weight for my heaviest hardox bar, as it sits at around 152 with that. but, more on that later
here is the disassembled body, everything is included there, the body, mounts, top plate ect.
Night Light:
Night Light is not as fortunate in terms of weight…
Night Light is overweight even without the top plate, which is not exactly the result i was hoping for honestly… i have a way to maybe cut a few grams, which i’ll get to later. and, i can also cut down the wires on the electronics which is helpful.
Wipeout:
Wipeout has been quite iffy for me, the new parts have arrived but i think a redesign of the legs and mounts are in order. it seems i did NOT consider how much sideways movement would be involved when i designed these mounts.
the mounts are designed to have a long screw go through the side to keep the legs in place, however the hole is way too close to the edge of the print AND also isnt far enough away to go in and allow the legs to move around it. i’m definitely eager to have a walker, especially one with a big scary weapon like this. but i think the best approach for now is to give the robot a good redesign (especially given all of these robots were designed back when the 4 inch cube rule was a thing)
i do have a small plan to upgrade these, and i wish i realised this in hindsight honestly. but im going to be upgrading the drive to N10’s instead of N20’s, which should shave 4 grams off of the weight for each bot. This means ill have enough weight on Somatic Damage to use the Hardox bars AND Night Light can finally be in weight too!
I’d love to get Somatic Damage ready for the BBB event thats coming up in the next few months, would be super fun to have a good outing with it and see how it holds up, i have a plastic ant i can take as well, which will be exciting since its a robot ive never fought with before, but ill show them off soon!
howdy again peeps!
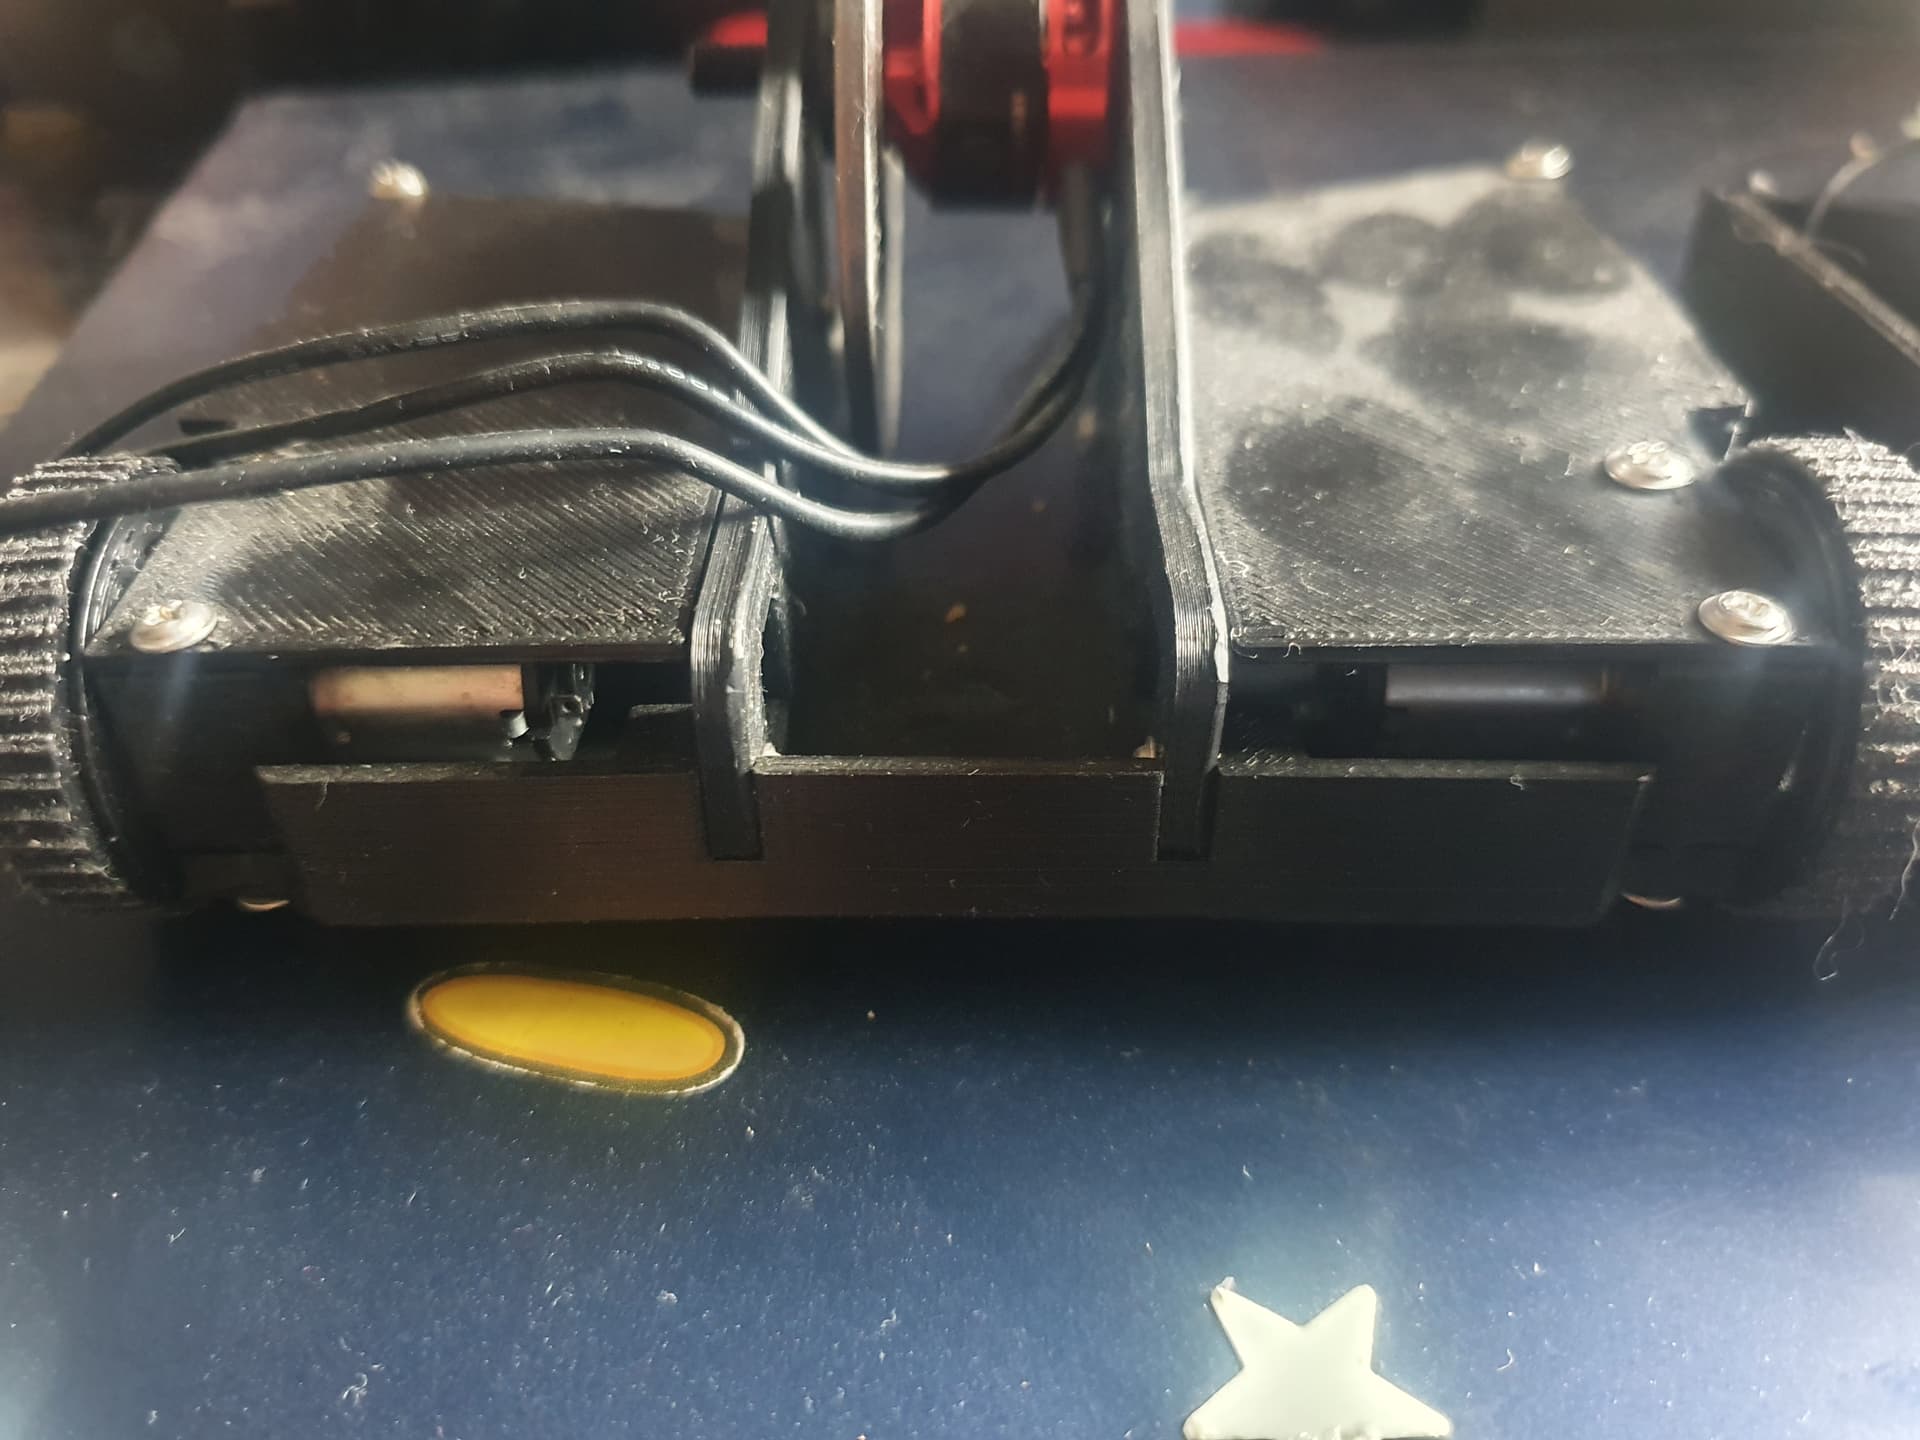
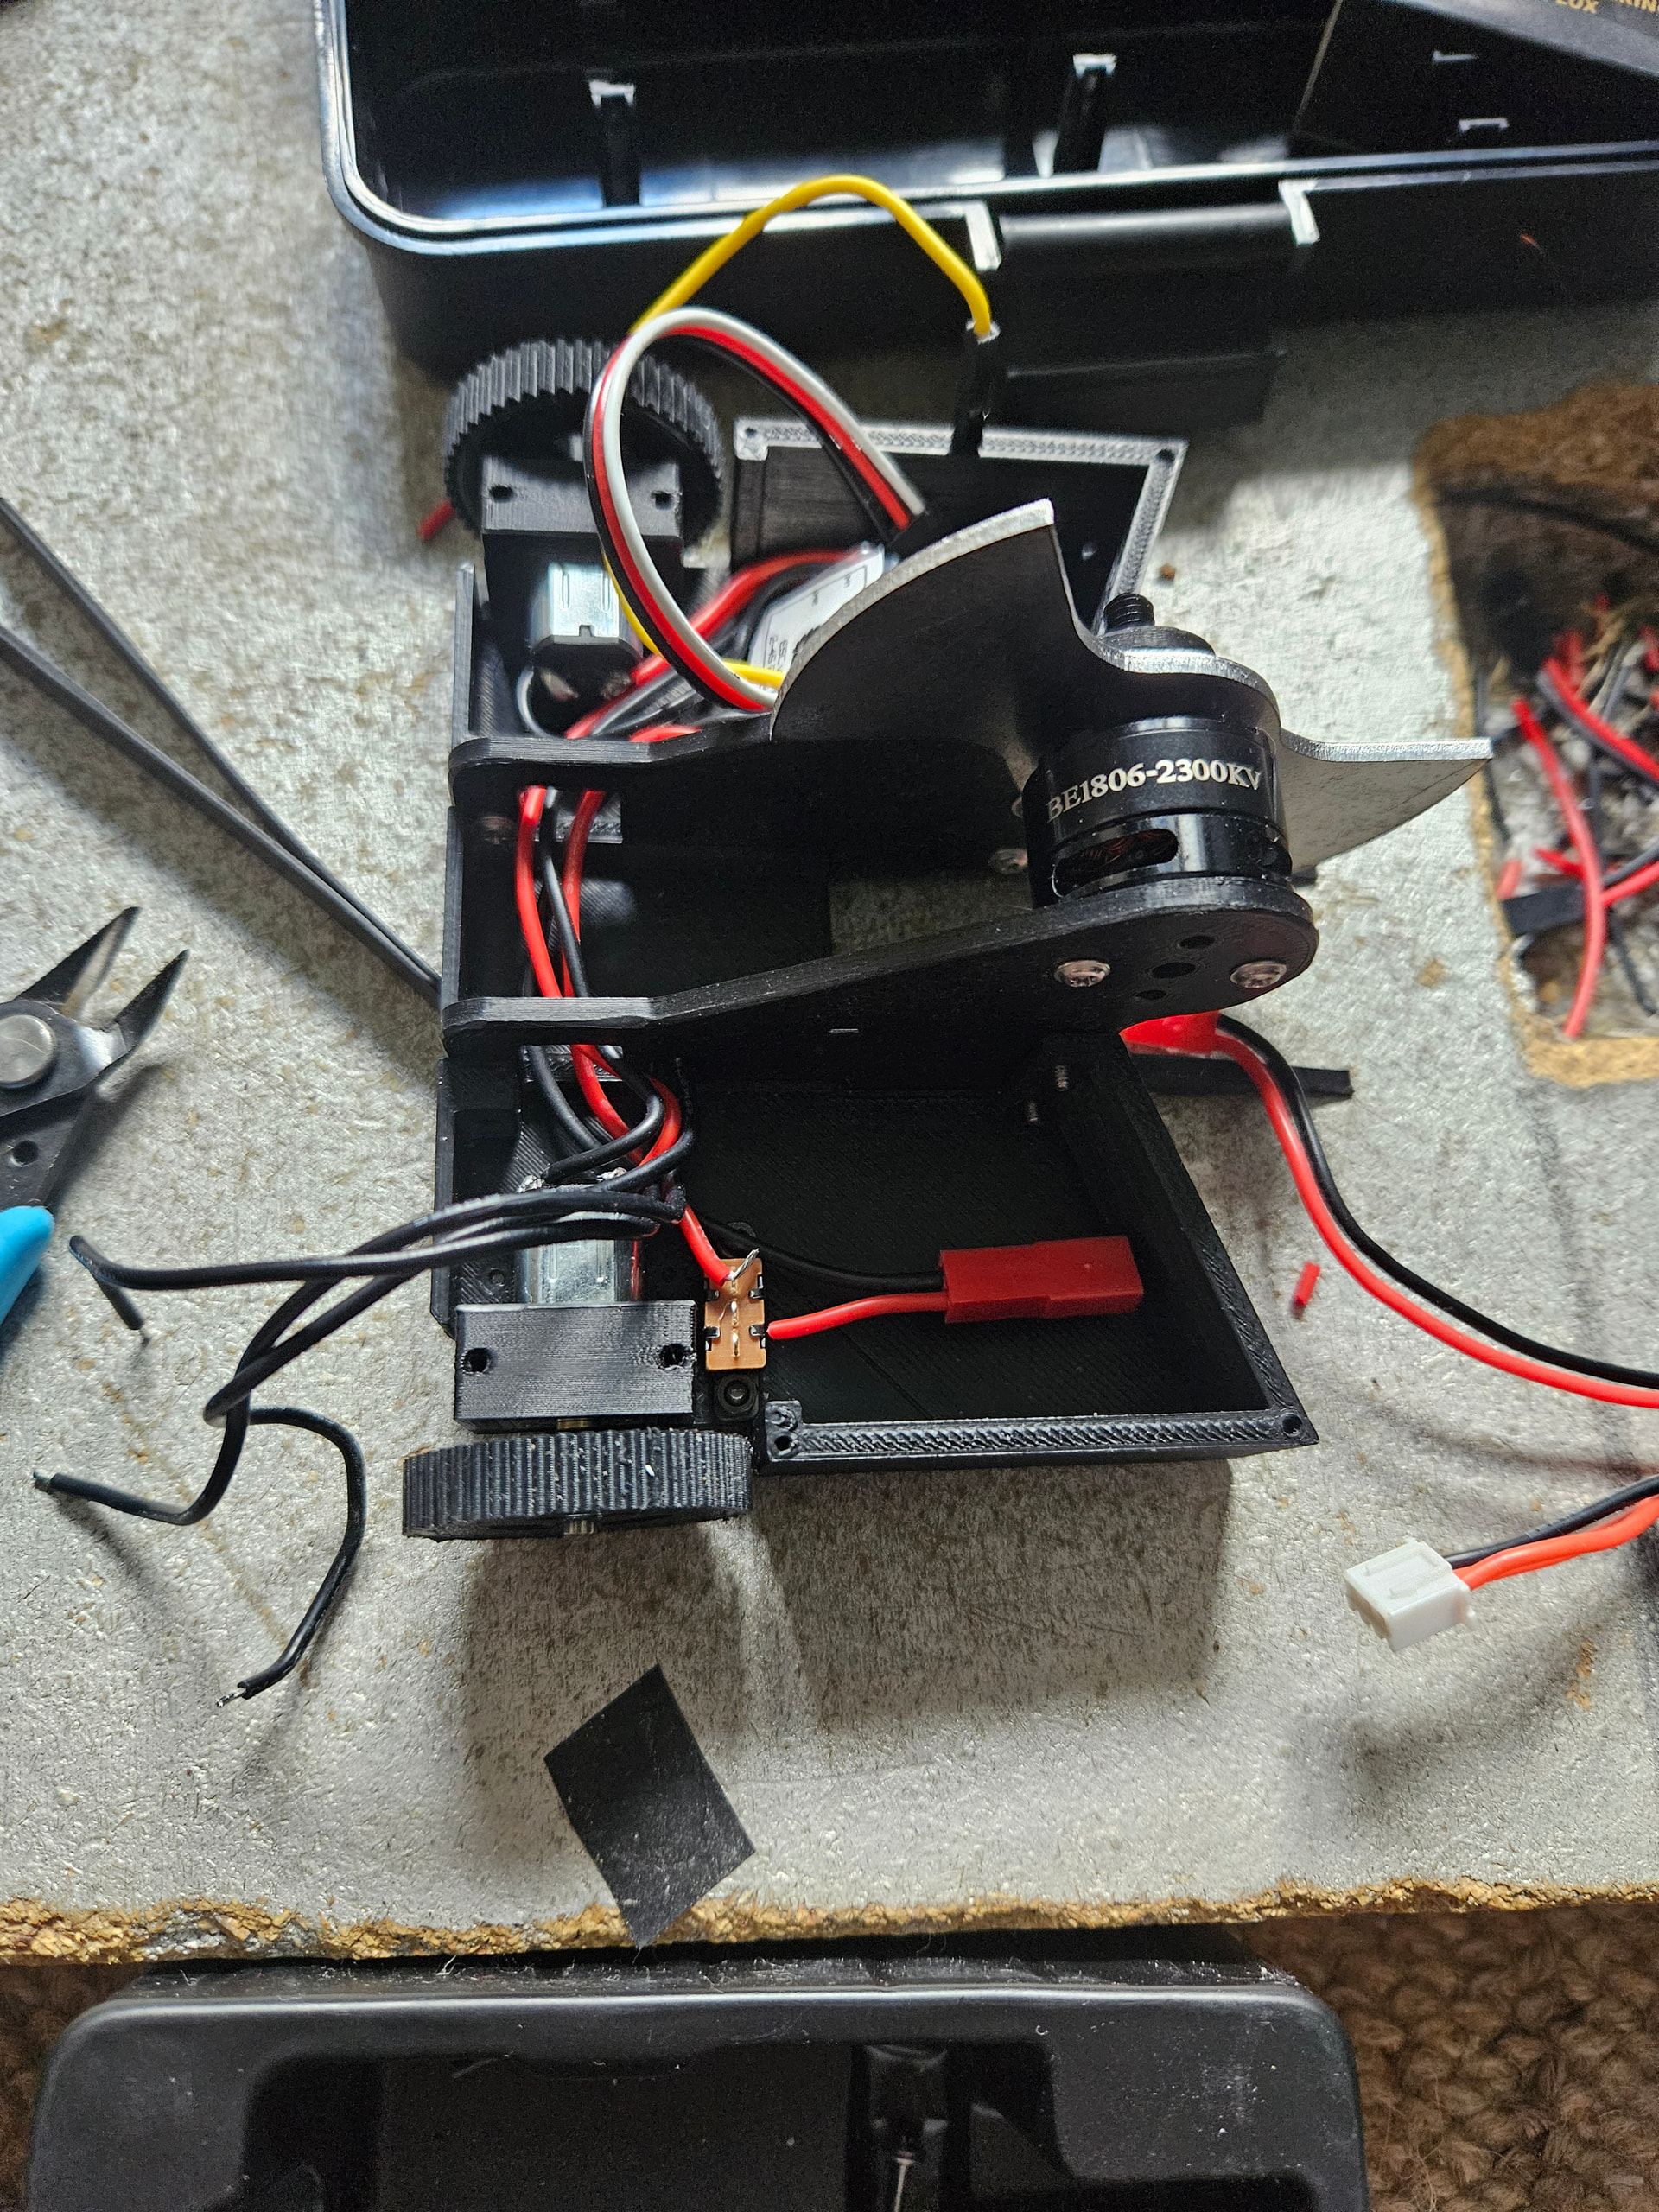
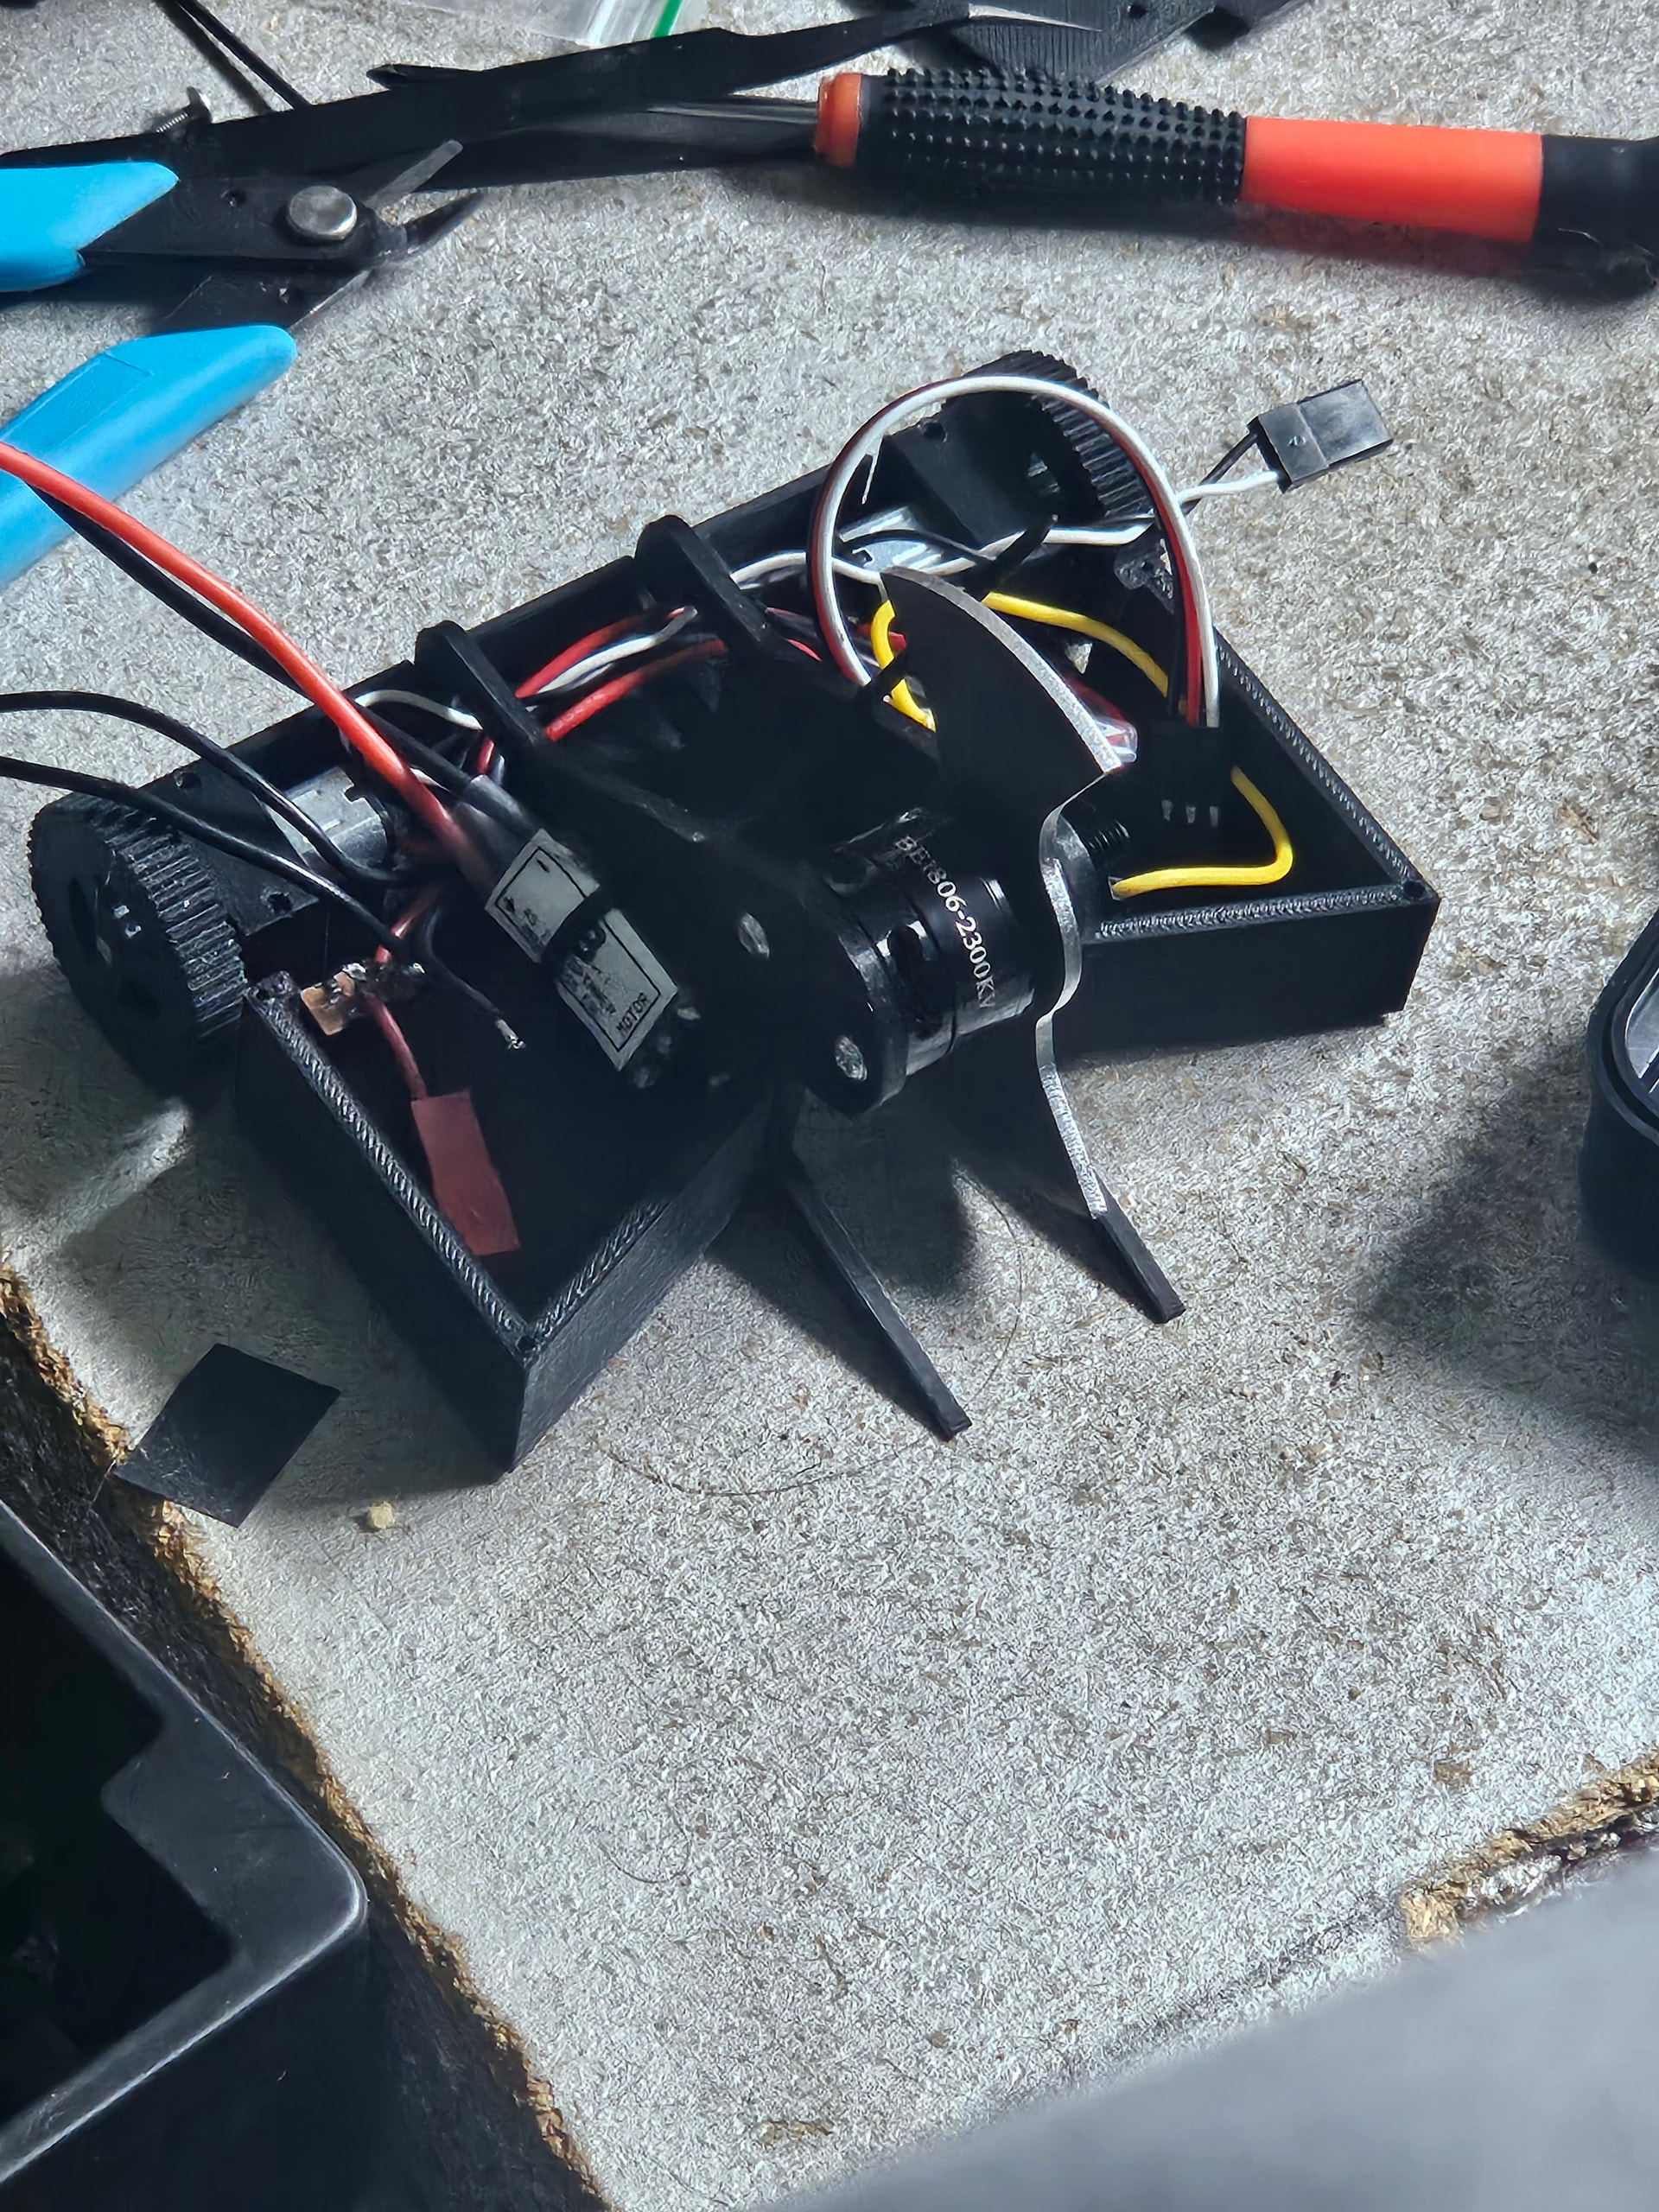
been doing some soldering today on Somatic Damage, which has been a minor learning experience but, things are (mostly) smooth at the moment.
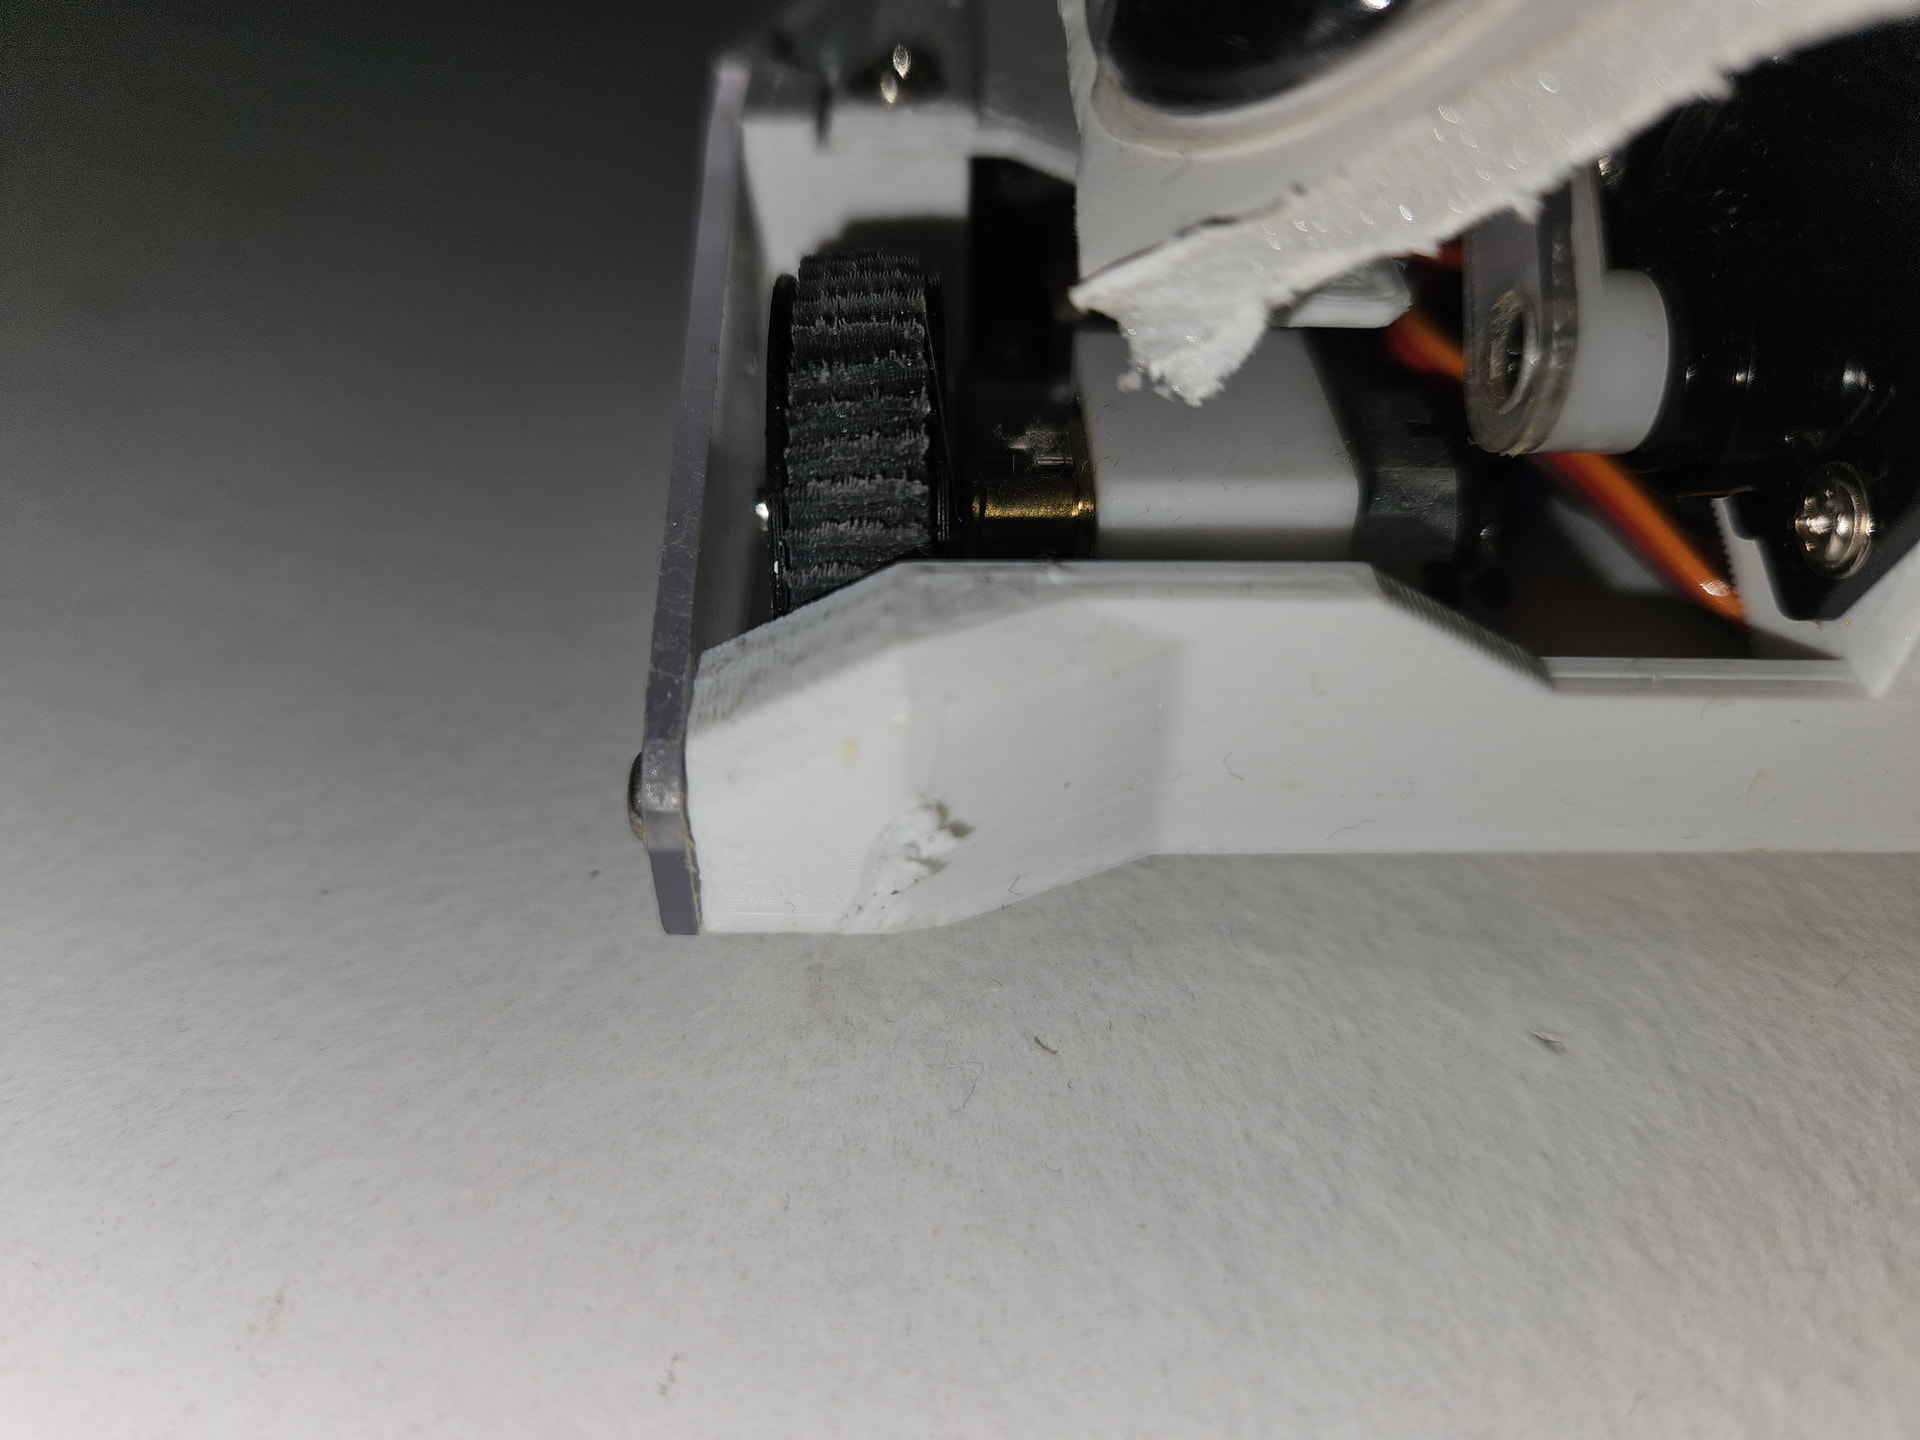
my N10 motors came in, and for weight reduction they have worked a wonder! but ill get to that shortly ![]()
i haven’t been able to finish soldering unfortunately, as it seems the new soldering iron i got has very little ability to do too much soldering before it decides its time to recharge… which was quite annoying at points i must admit (especially so when im very slow when it comes to soldering) But, i just need to solder up the weapon and i’m all done, which is exciting!
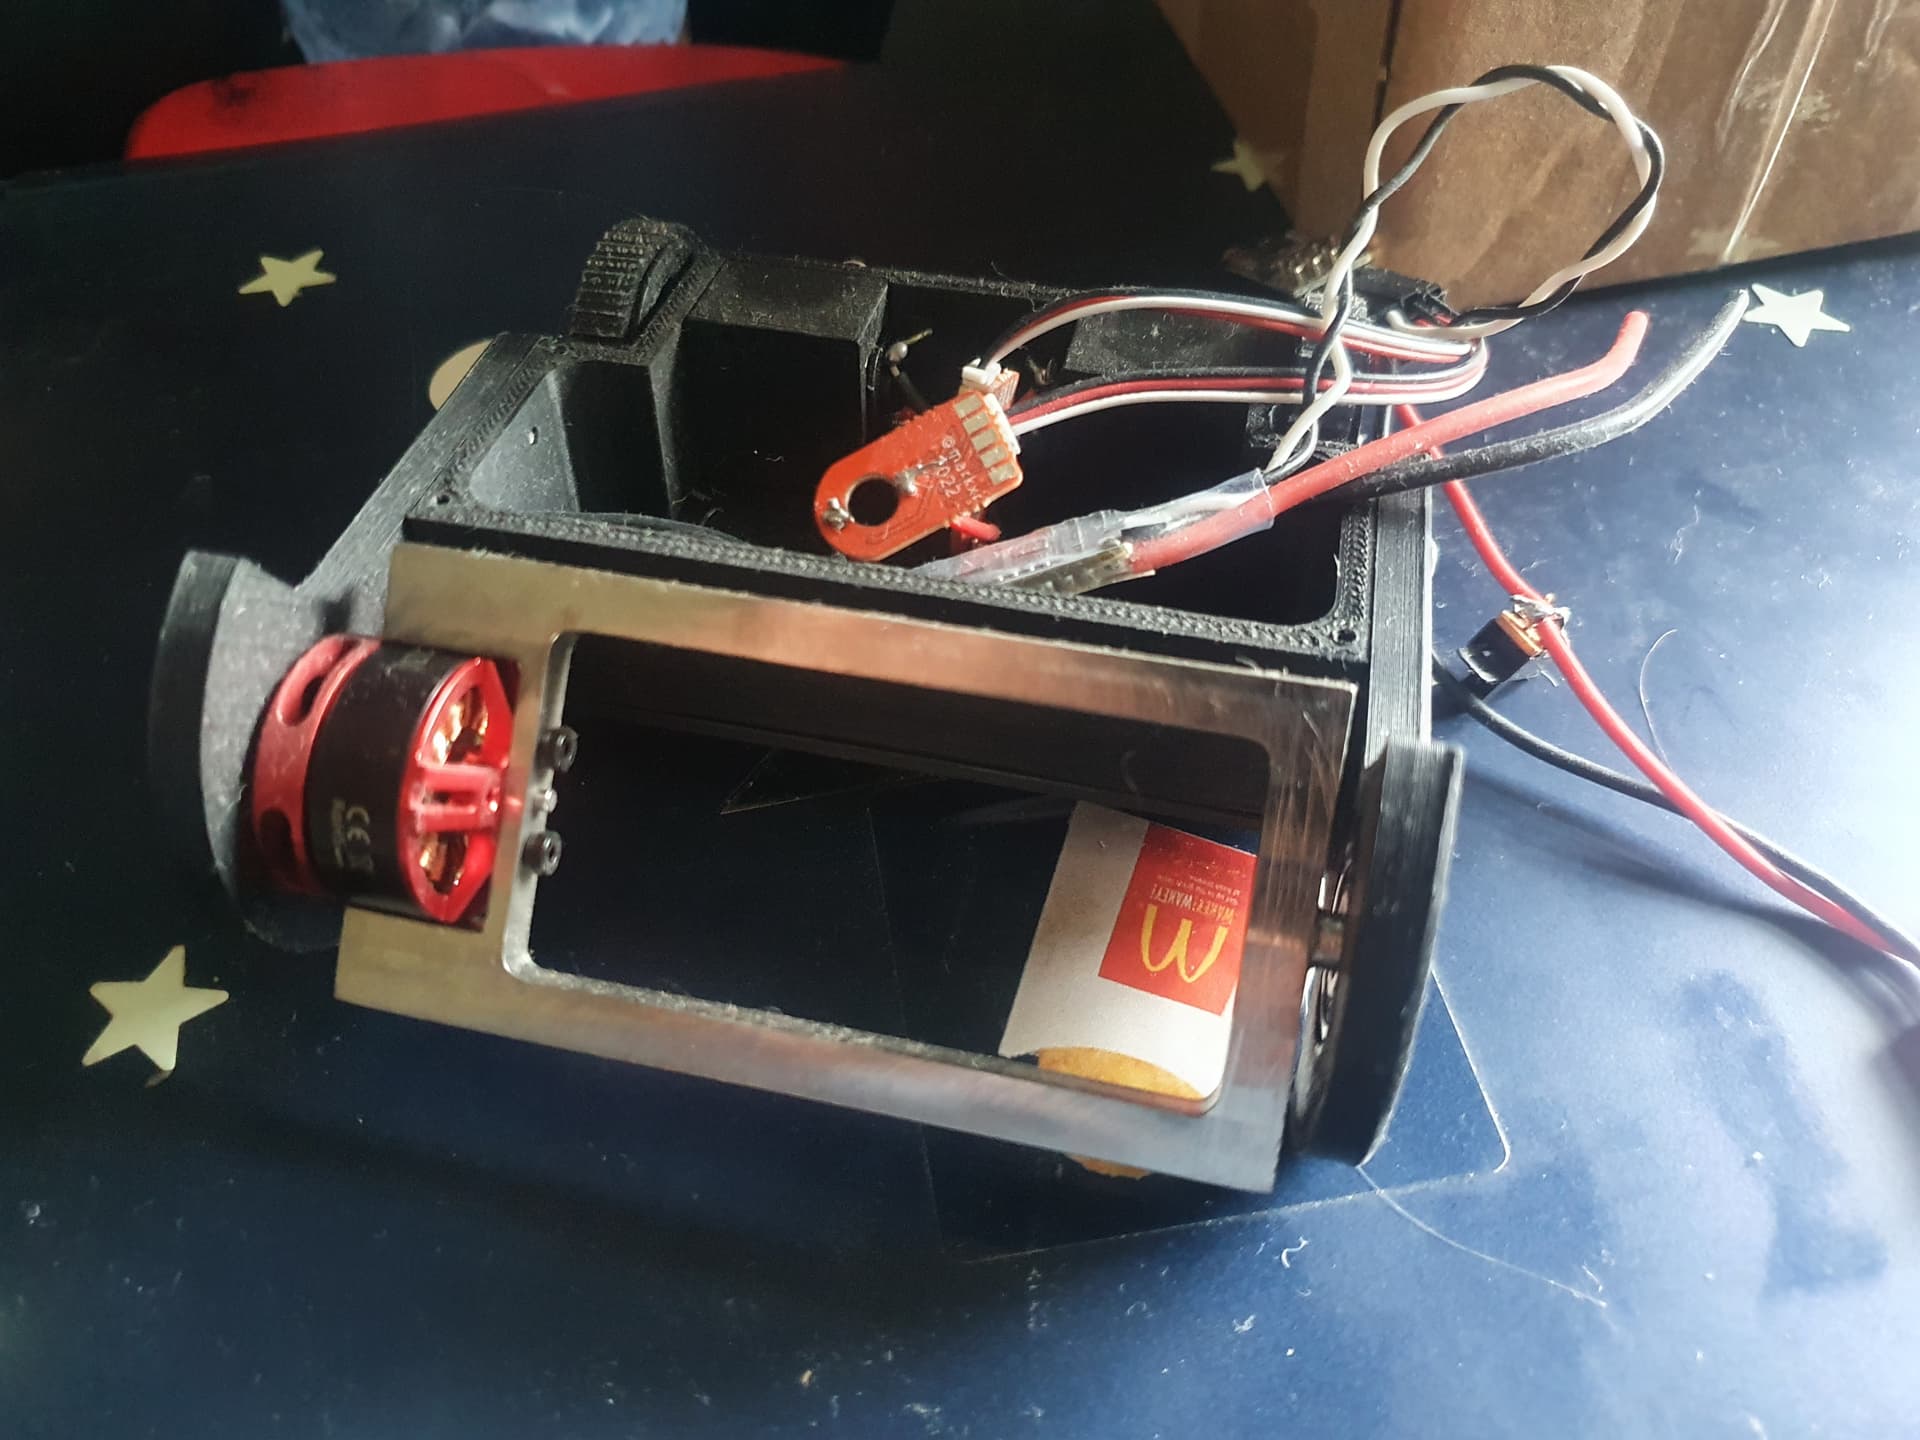
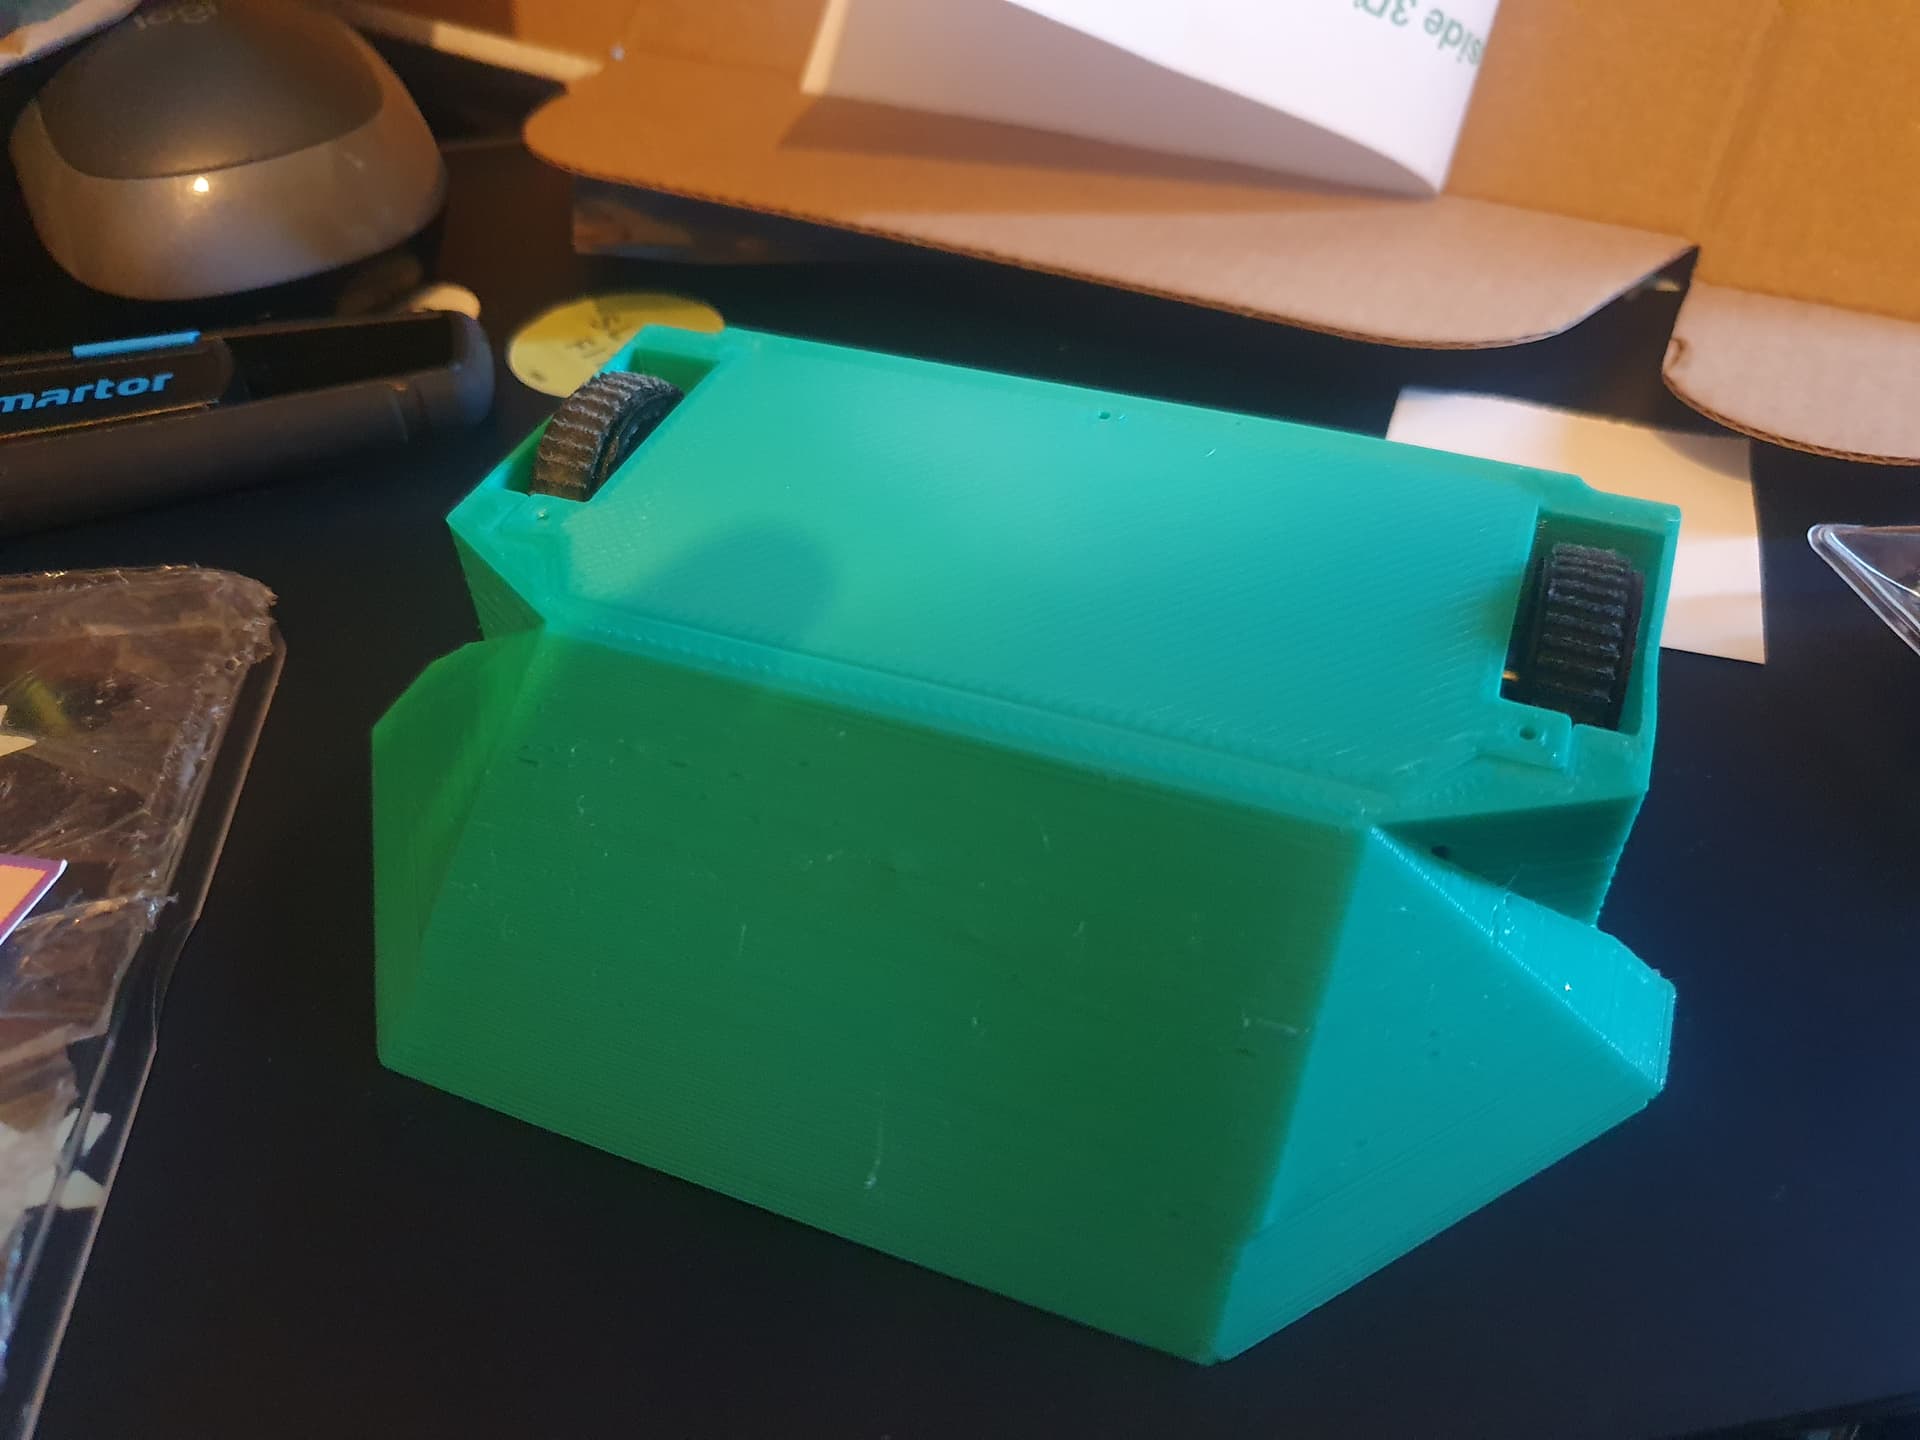
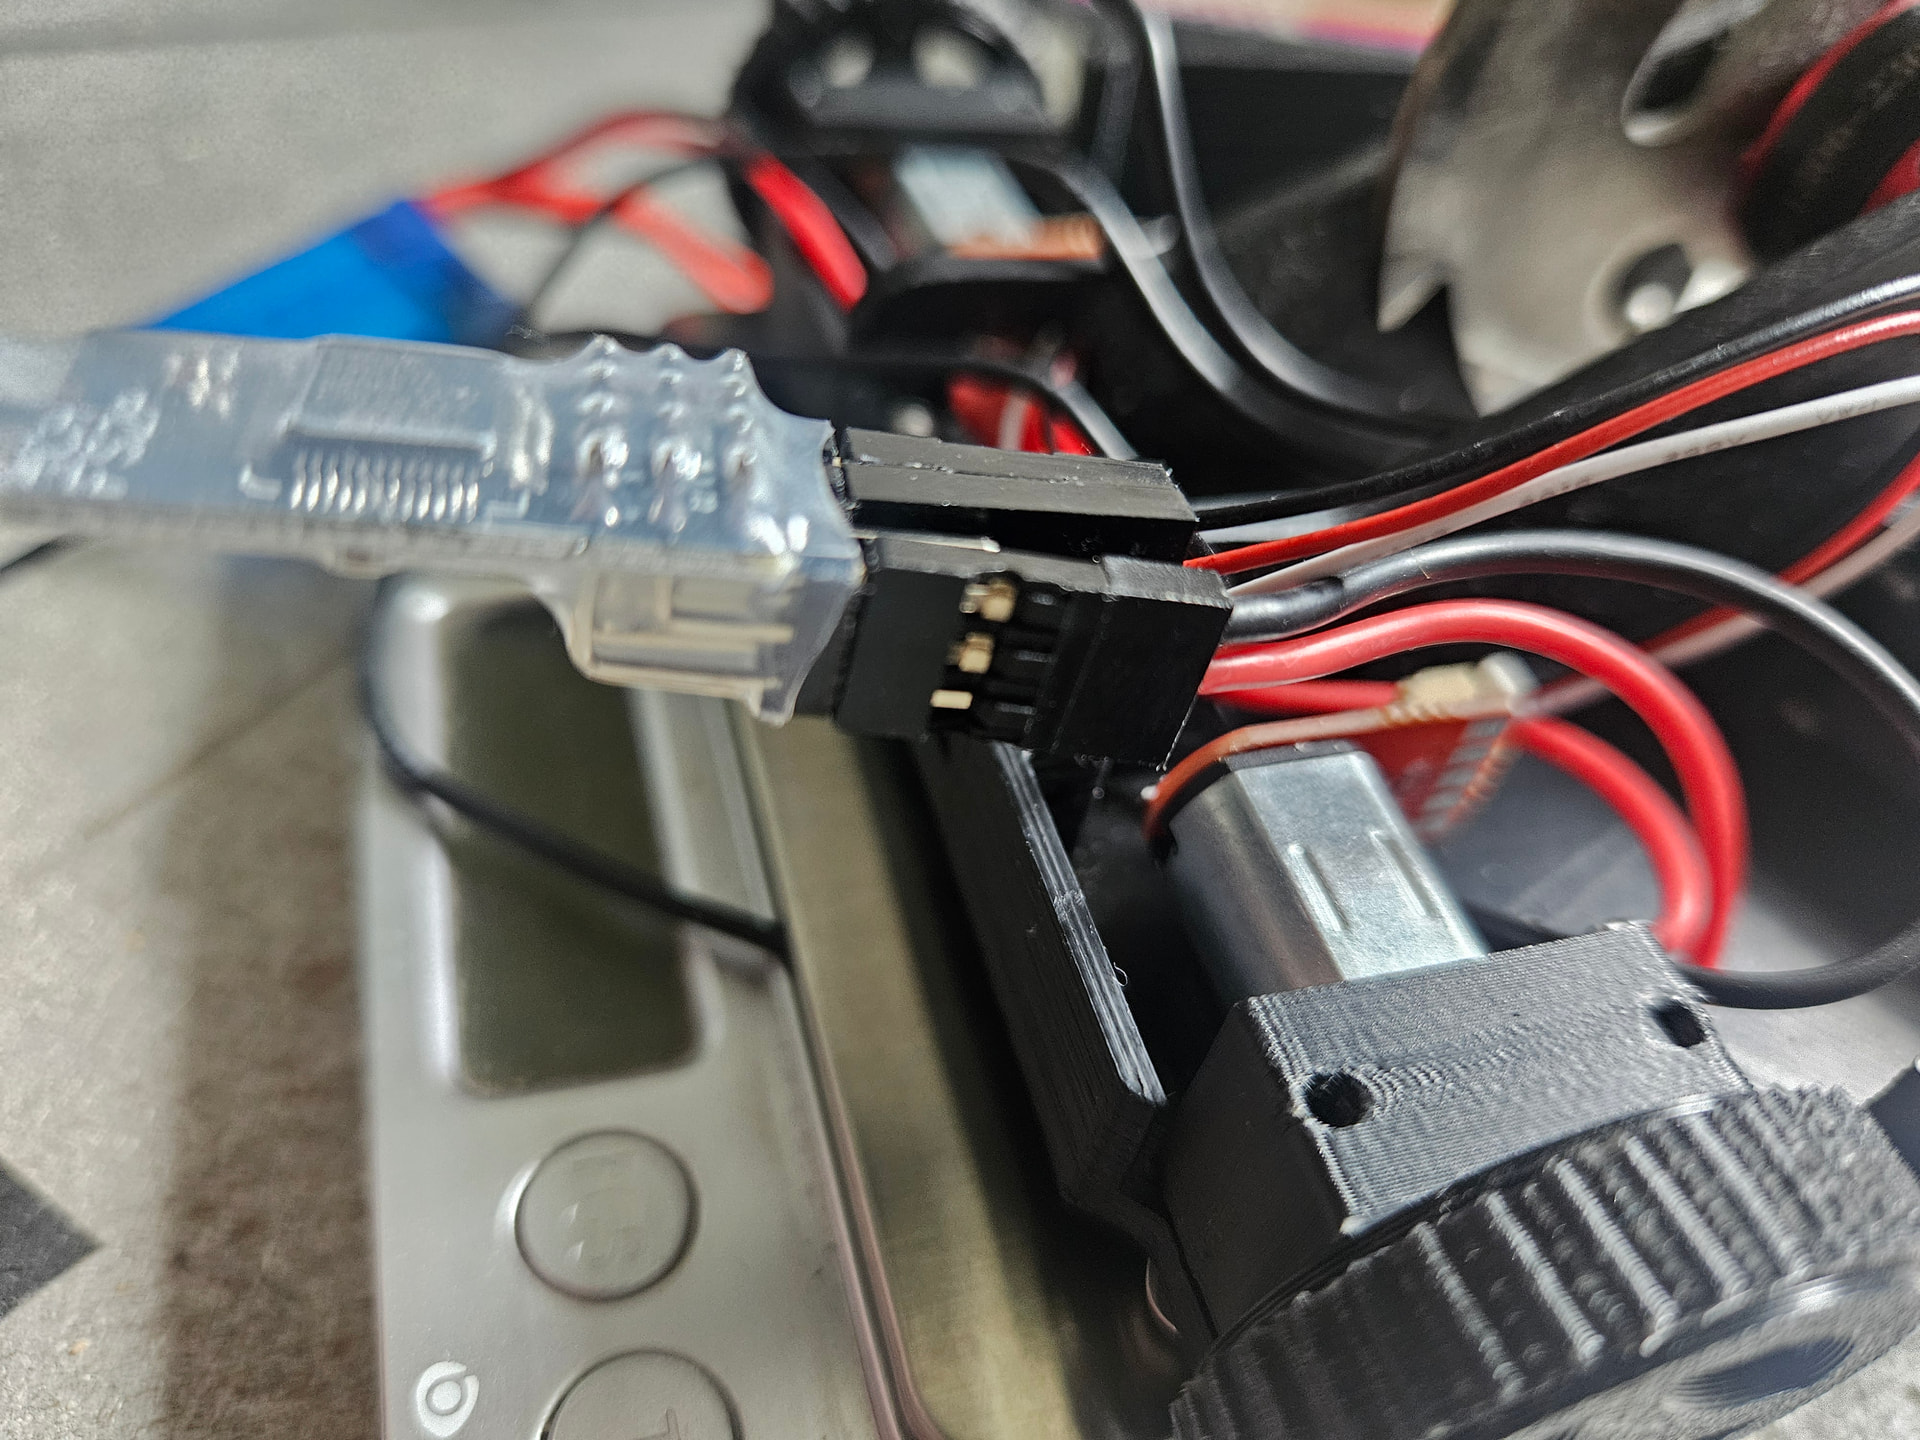
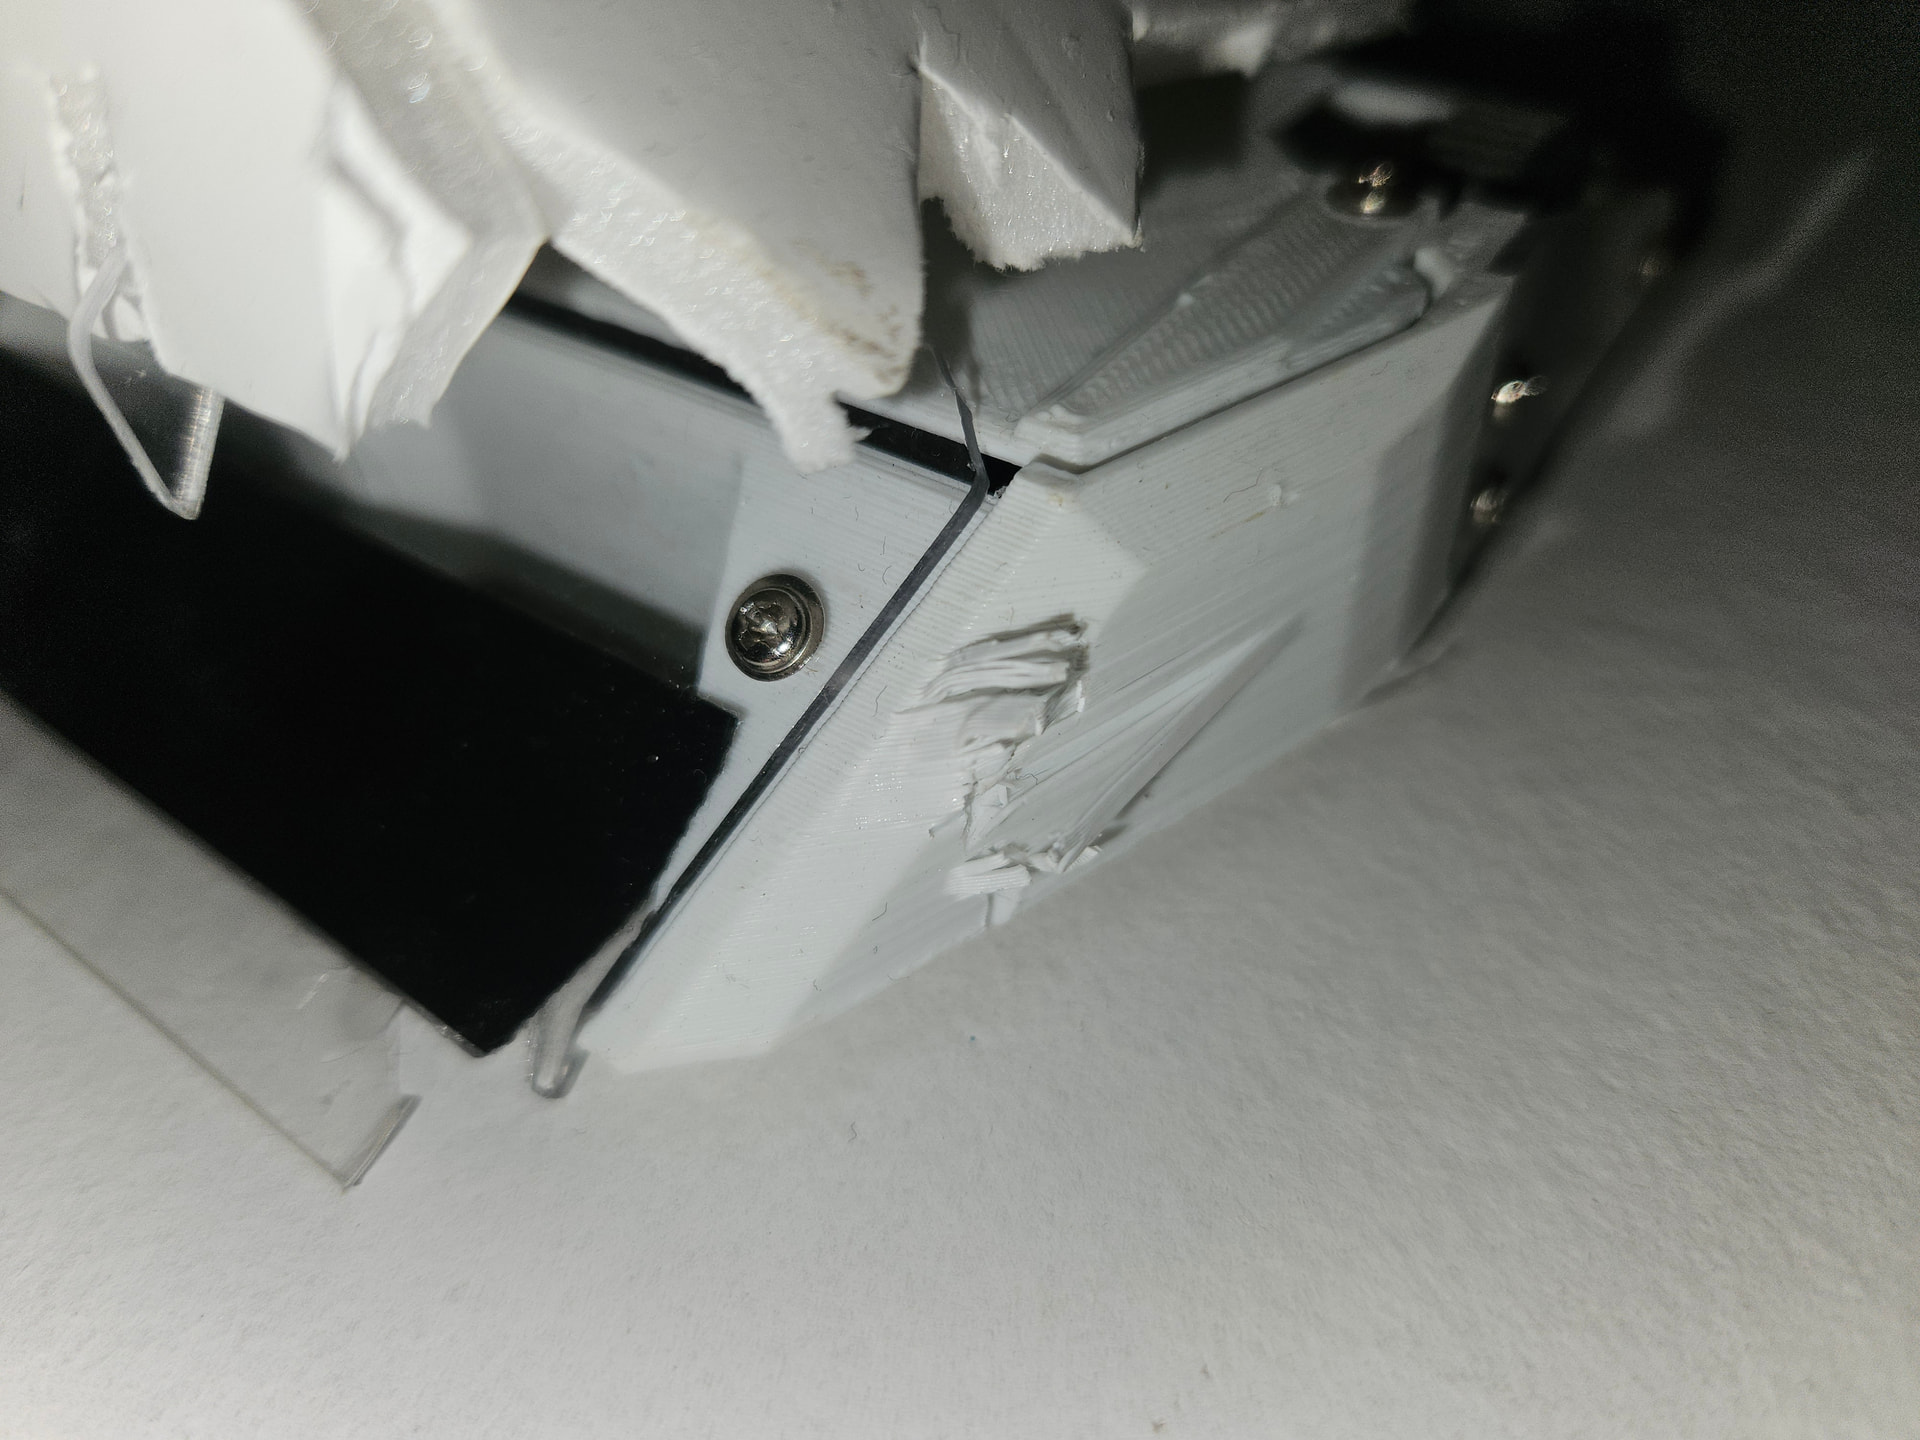
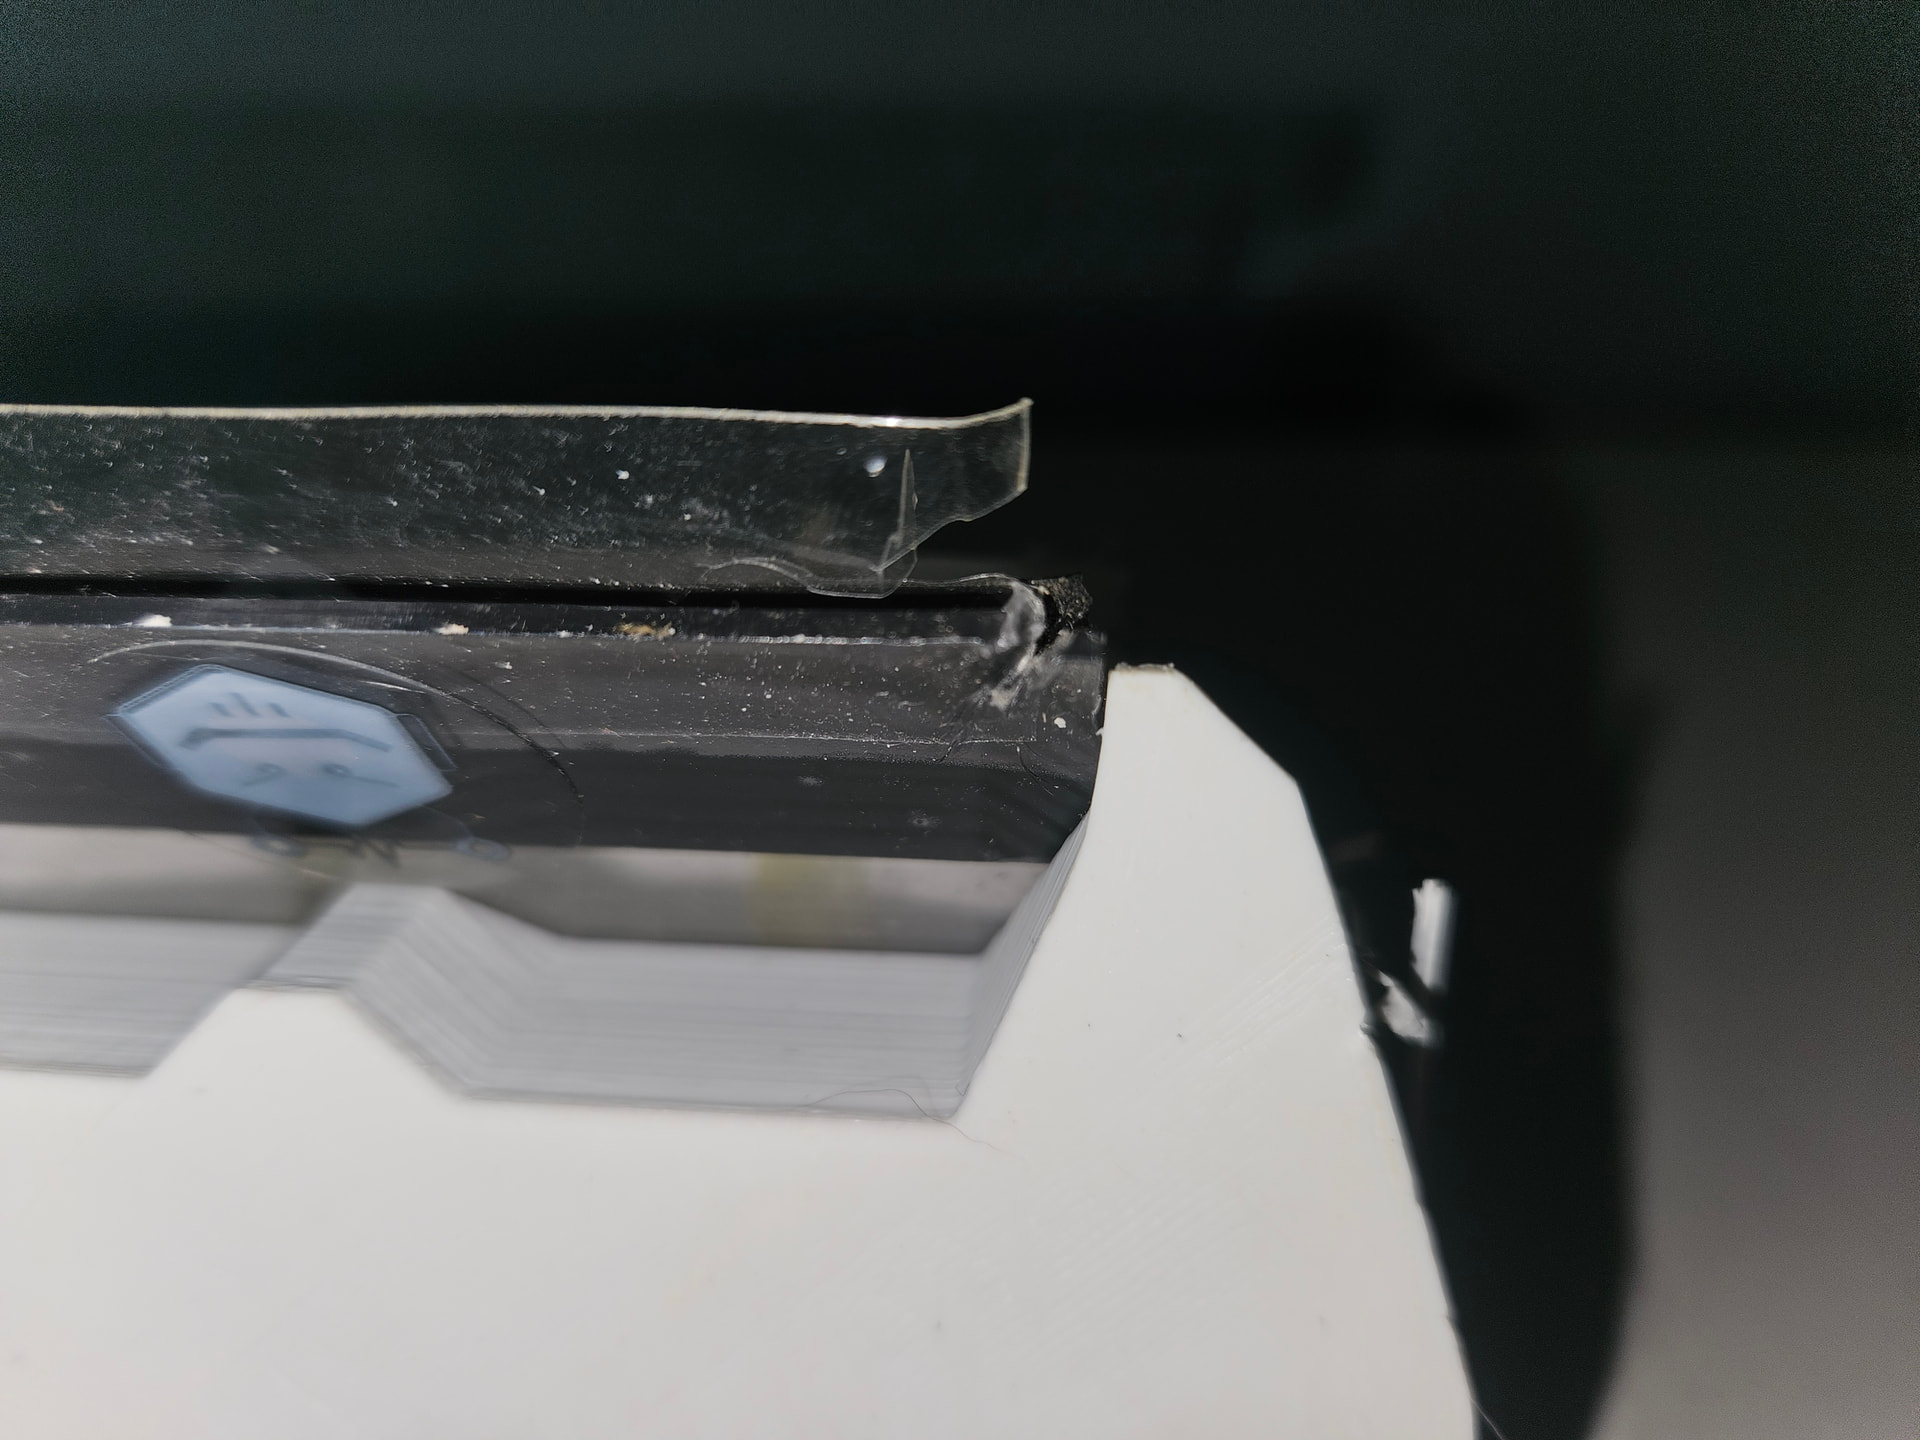
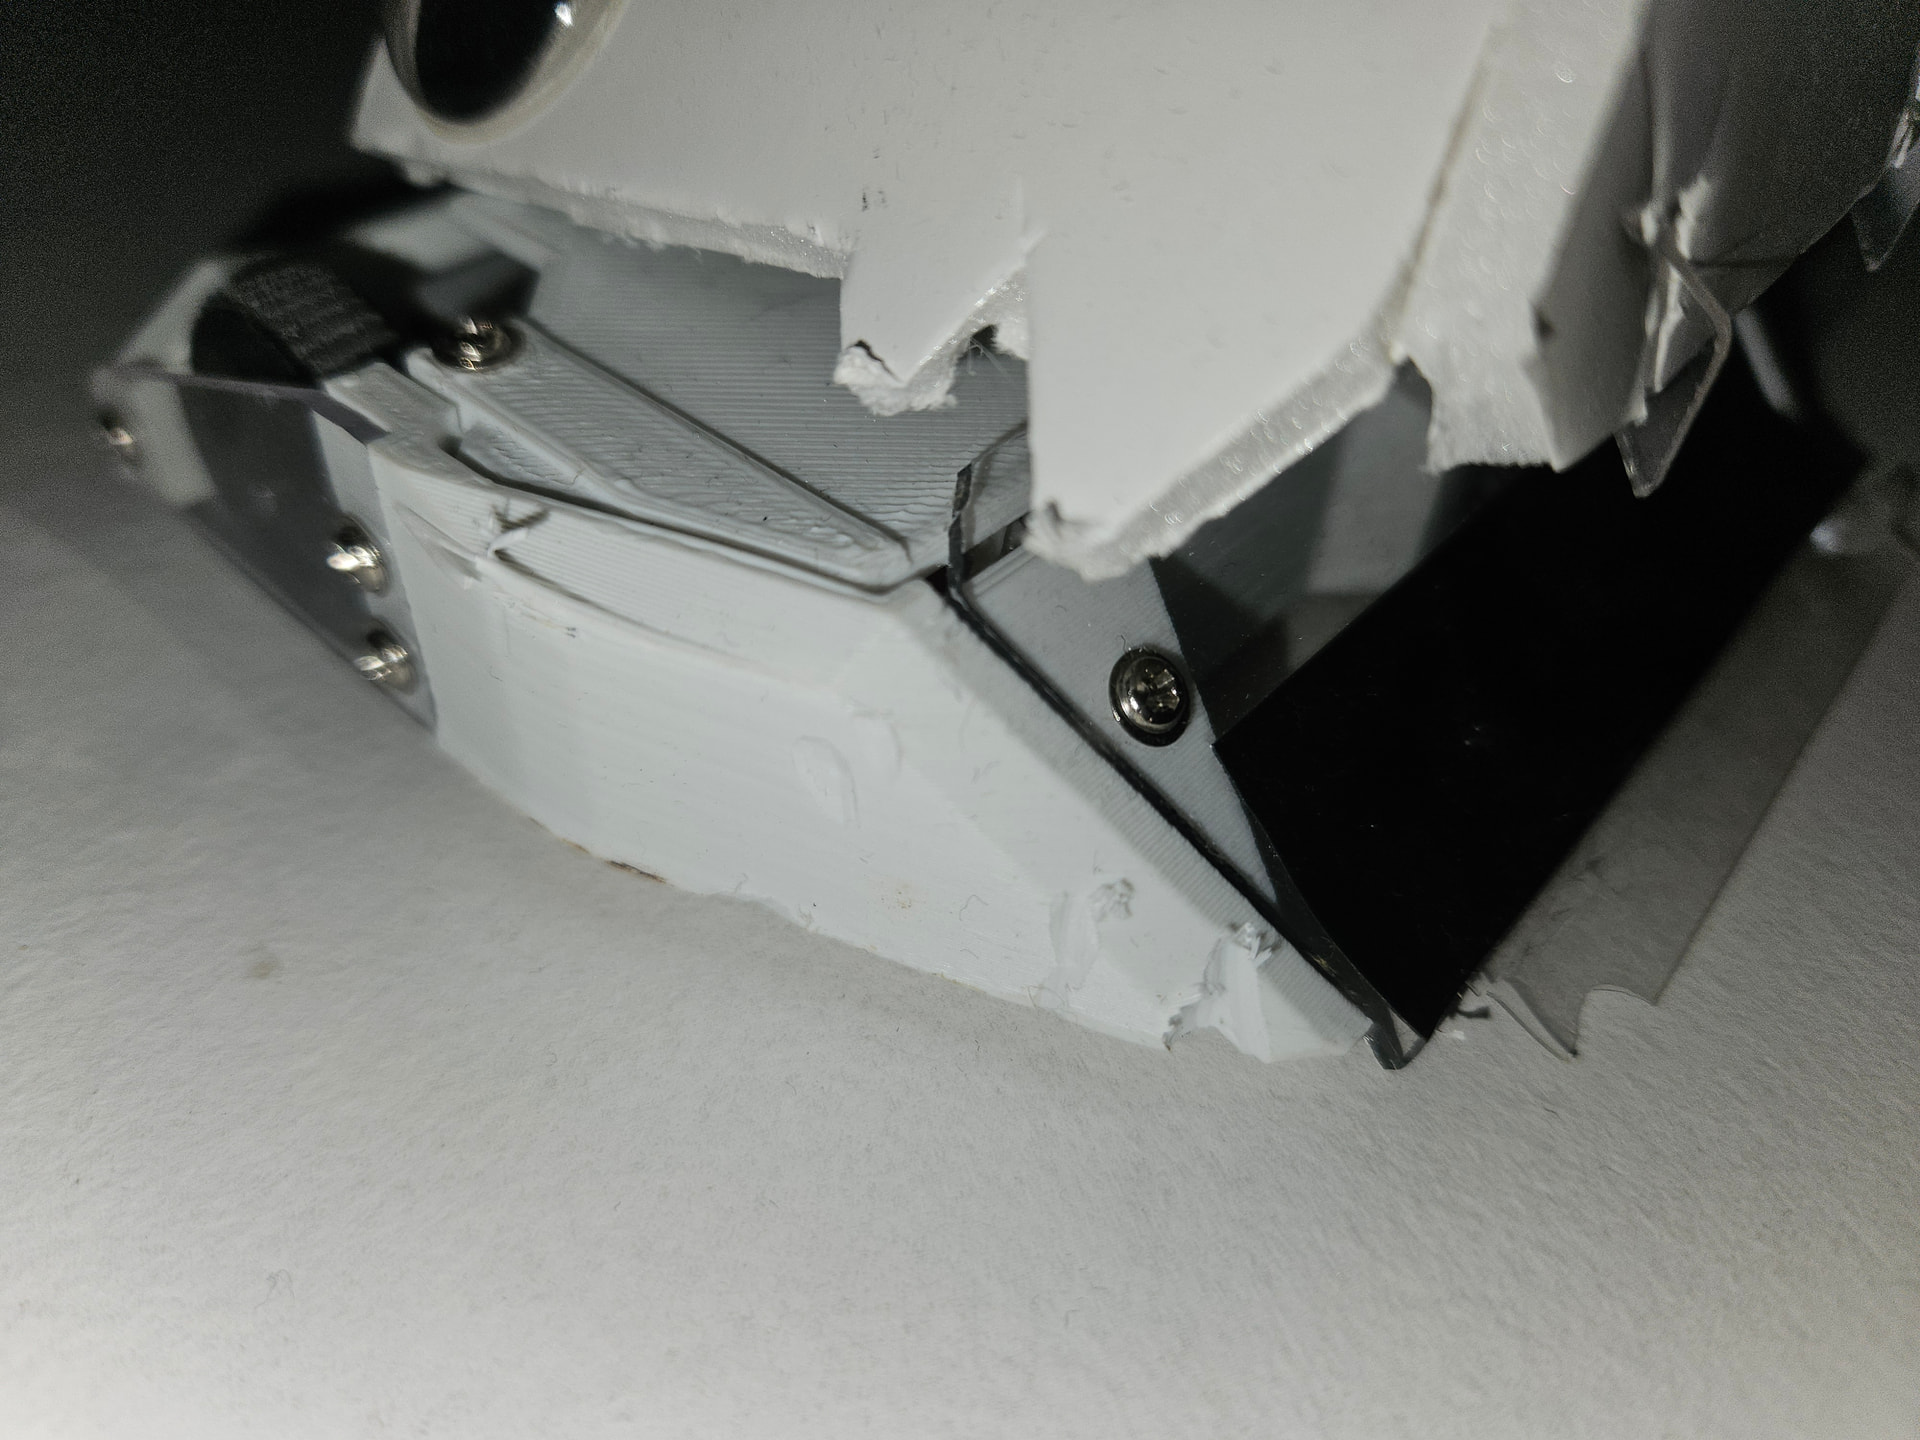
I’ve had small problems throughout with the layout of the internals, mainly the fact that I moved the switch on this version which I did NOT take into account at first, but thankfully resolved! super happy with how things have been going, here’s some random photos I took throughout the day of Somatic Damage
the best part is, my idea to lose weight absolutely worked! the robot now weighs in at 147 grams with everything included, EVEN a hardox bar which I’m super happy about. I have a few bars for different cases, so having my heaviest bar on this bot be well within the weight is awesome news for me (less fortunate news for everybody else).
After I’m done soldering up Somatic Damage I’ll be moving onto Night Light, and praying that I’m as lucky with weight reductions as I have been here ![]()
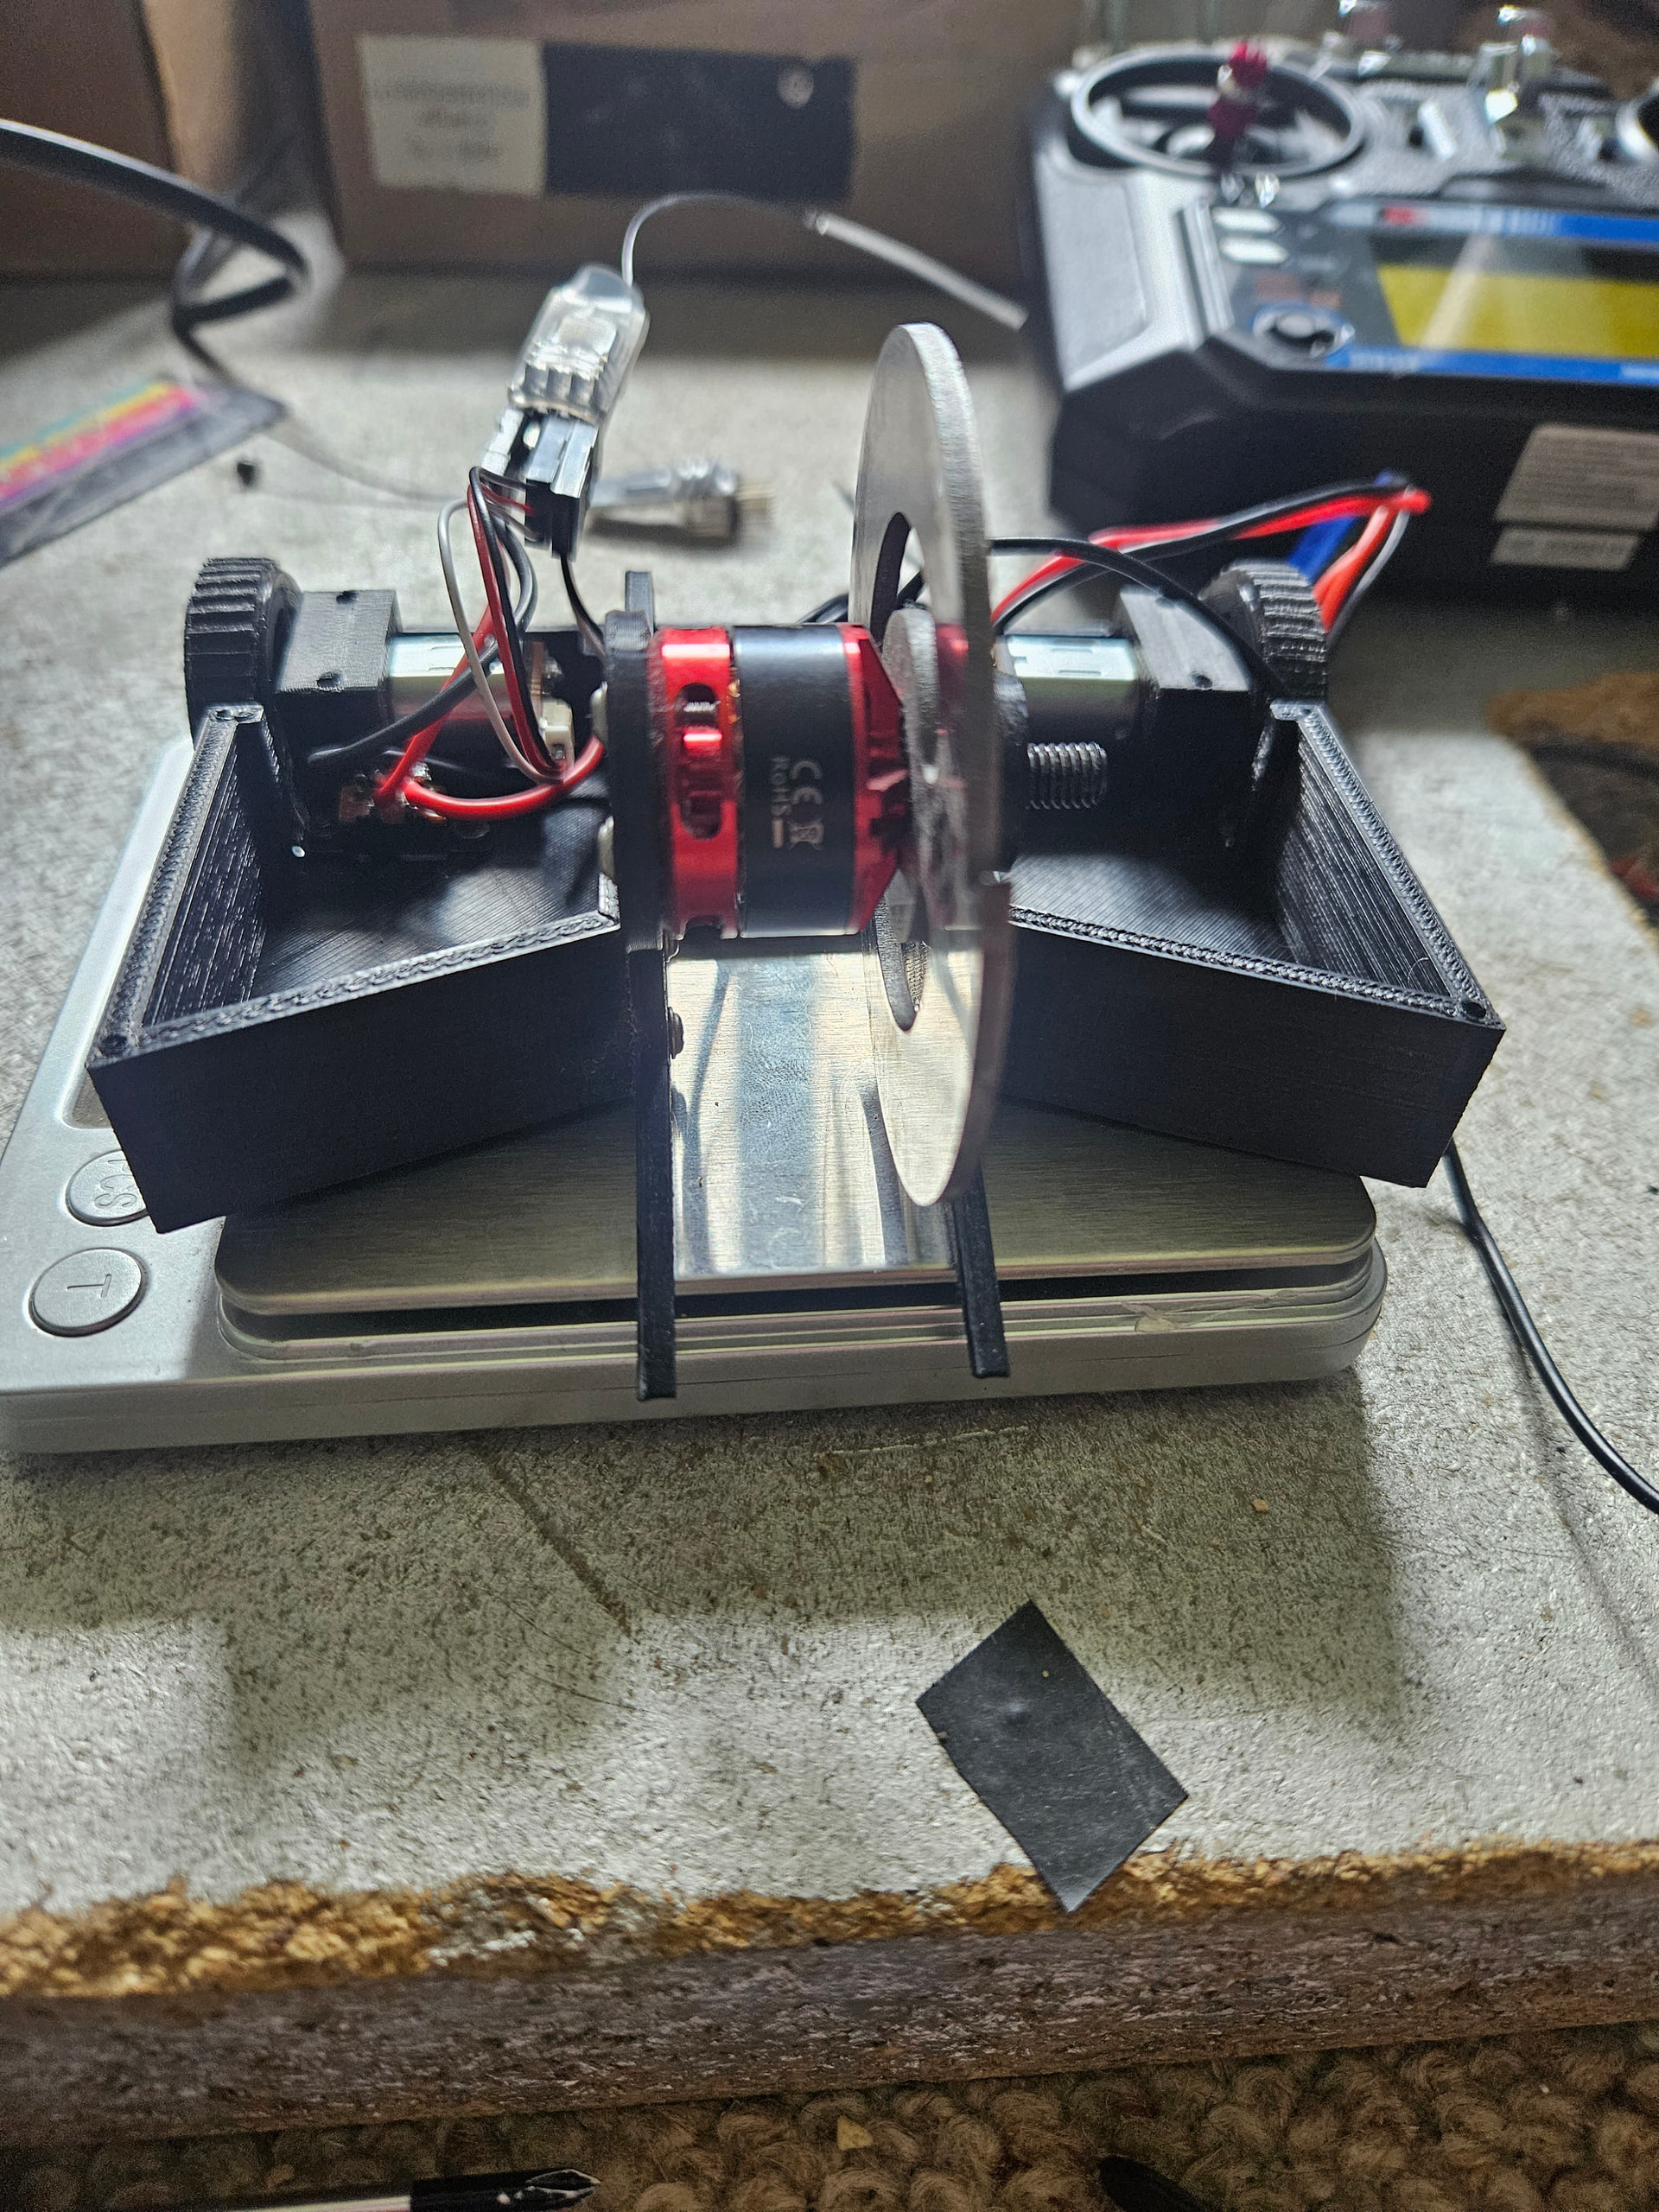
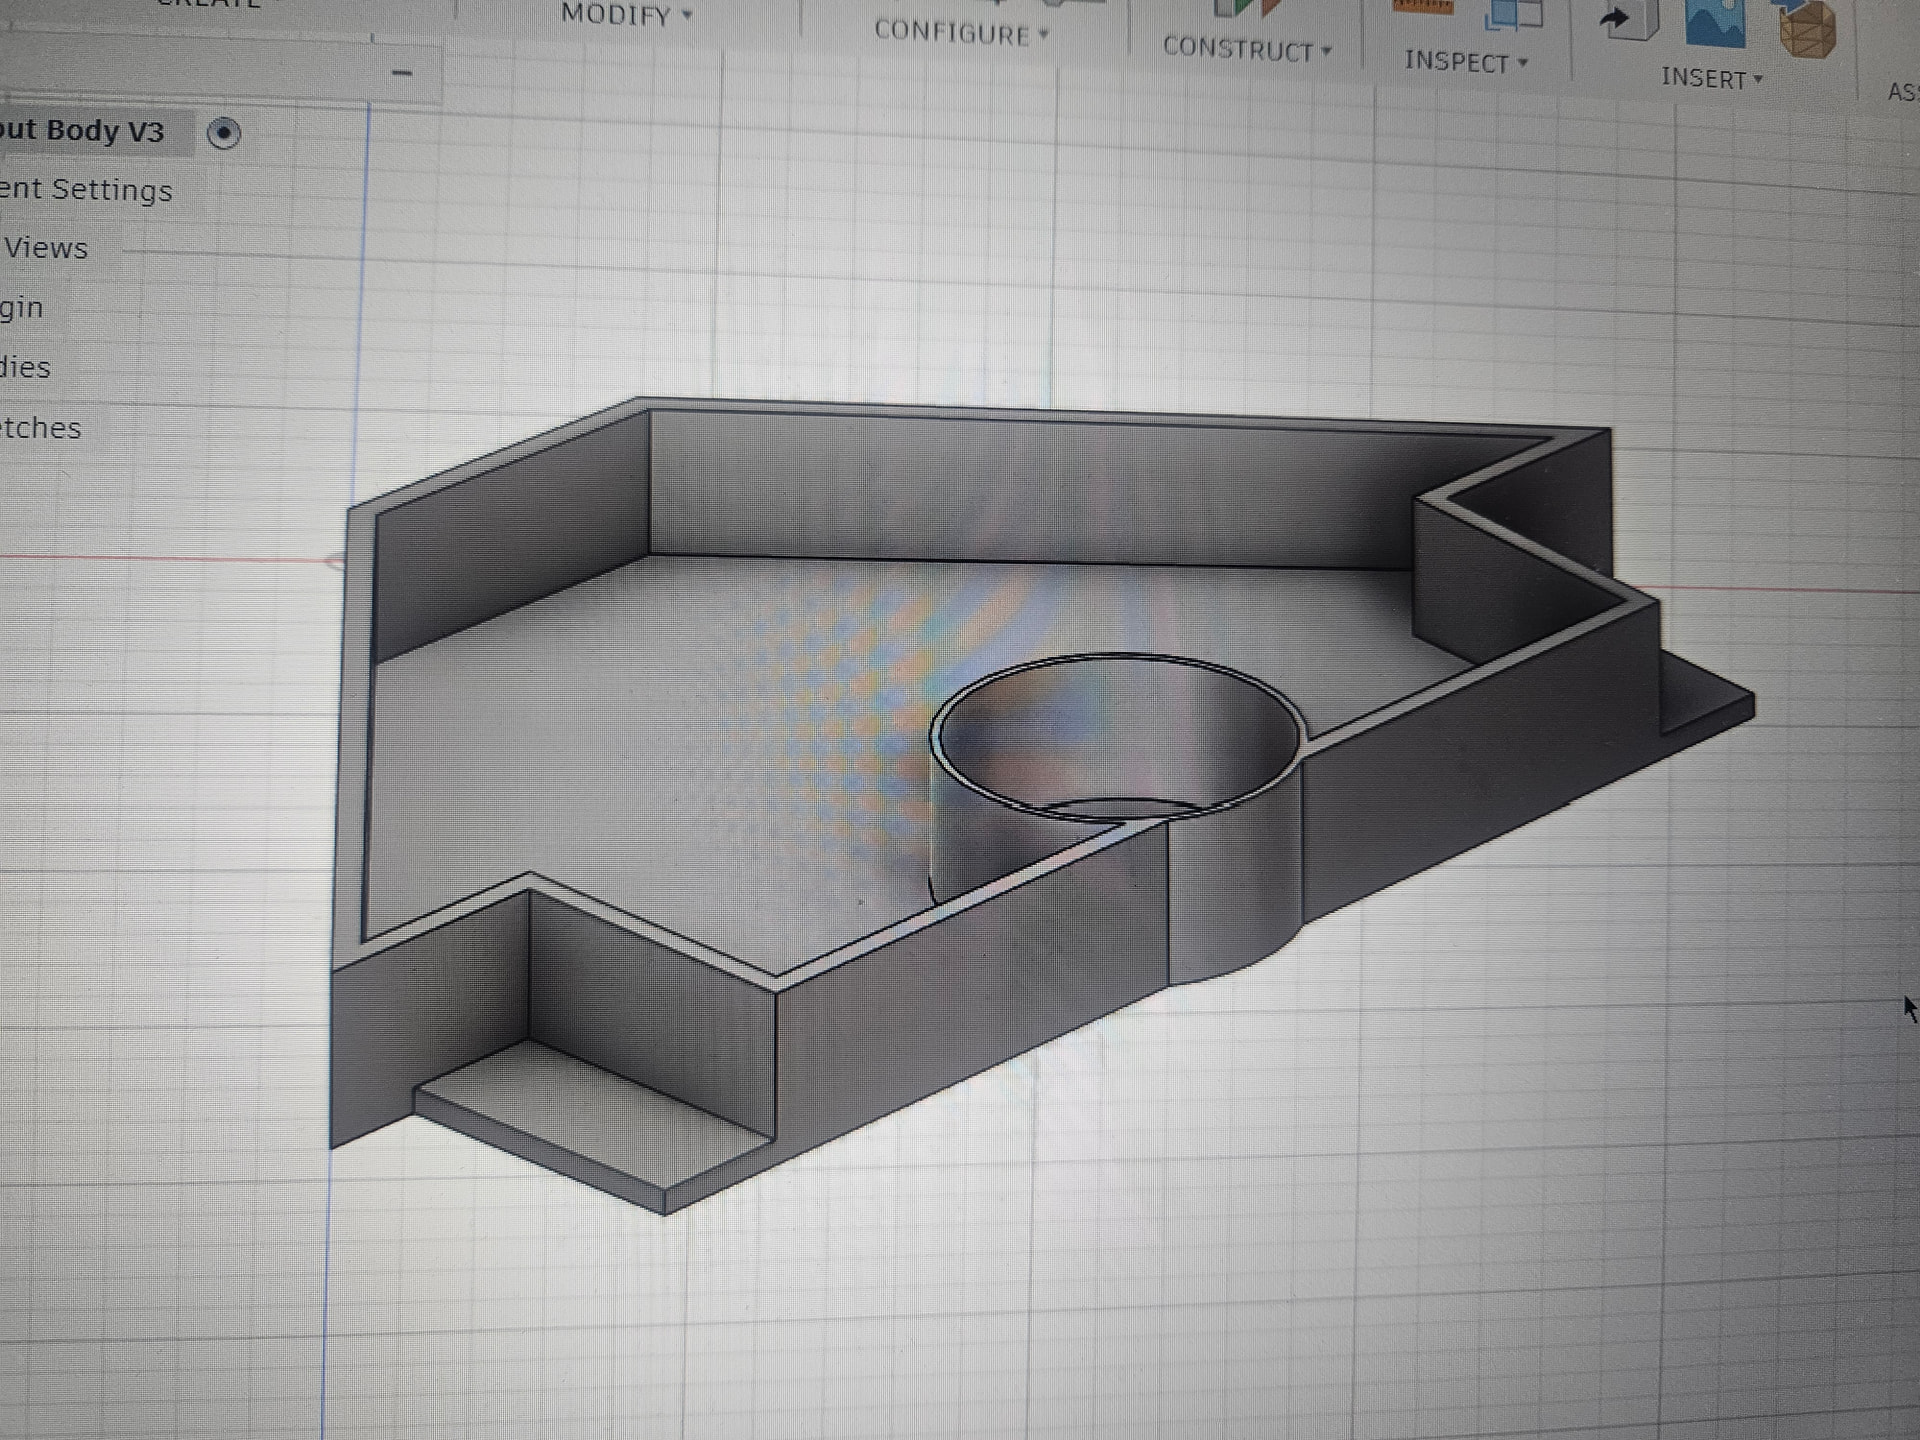
heres some random photos below, which includes a new drum spinner i’ve been desiging and also a new body design for Wipeout that gives me more space to play with, ill also be redesigning the shuffling mechanism AND the weapon bar ![]()