So during COVID, I decided to try and do one half of a FW cluster robot, with the intention of having a robot that could use many of the existing parts I have, as well as being easier to travel with on flights abroad. The end result was a four-bar lifter that’s currently 95% complete and ready to compete, with just some minor finishing touches left to do (see here: https://www.facebook.com/photo?fbid=141795934188363&set=a.141795504188406). Ultimately though the other team member involved hasn’t made as much progress with their half, and so I’ve been left waiting for the right time to find an event to go to.
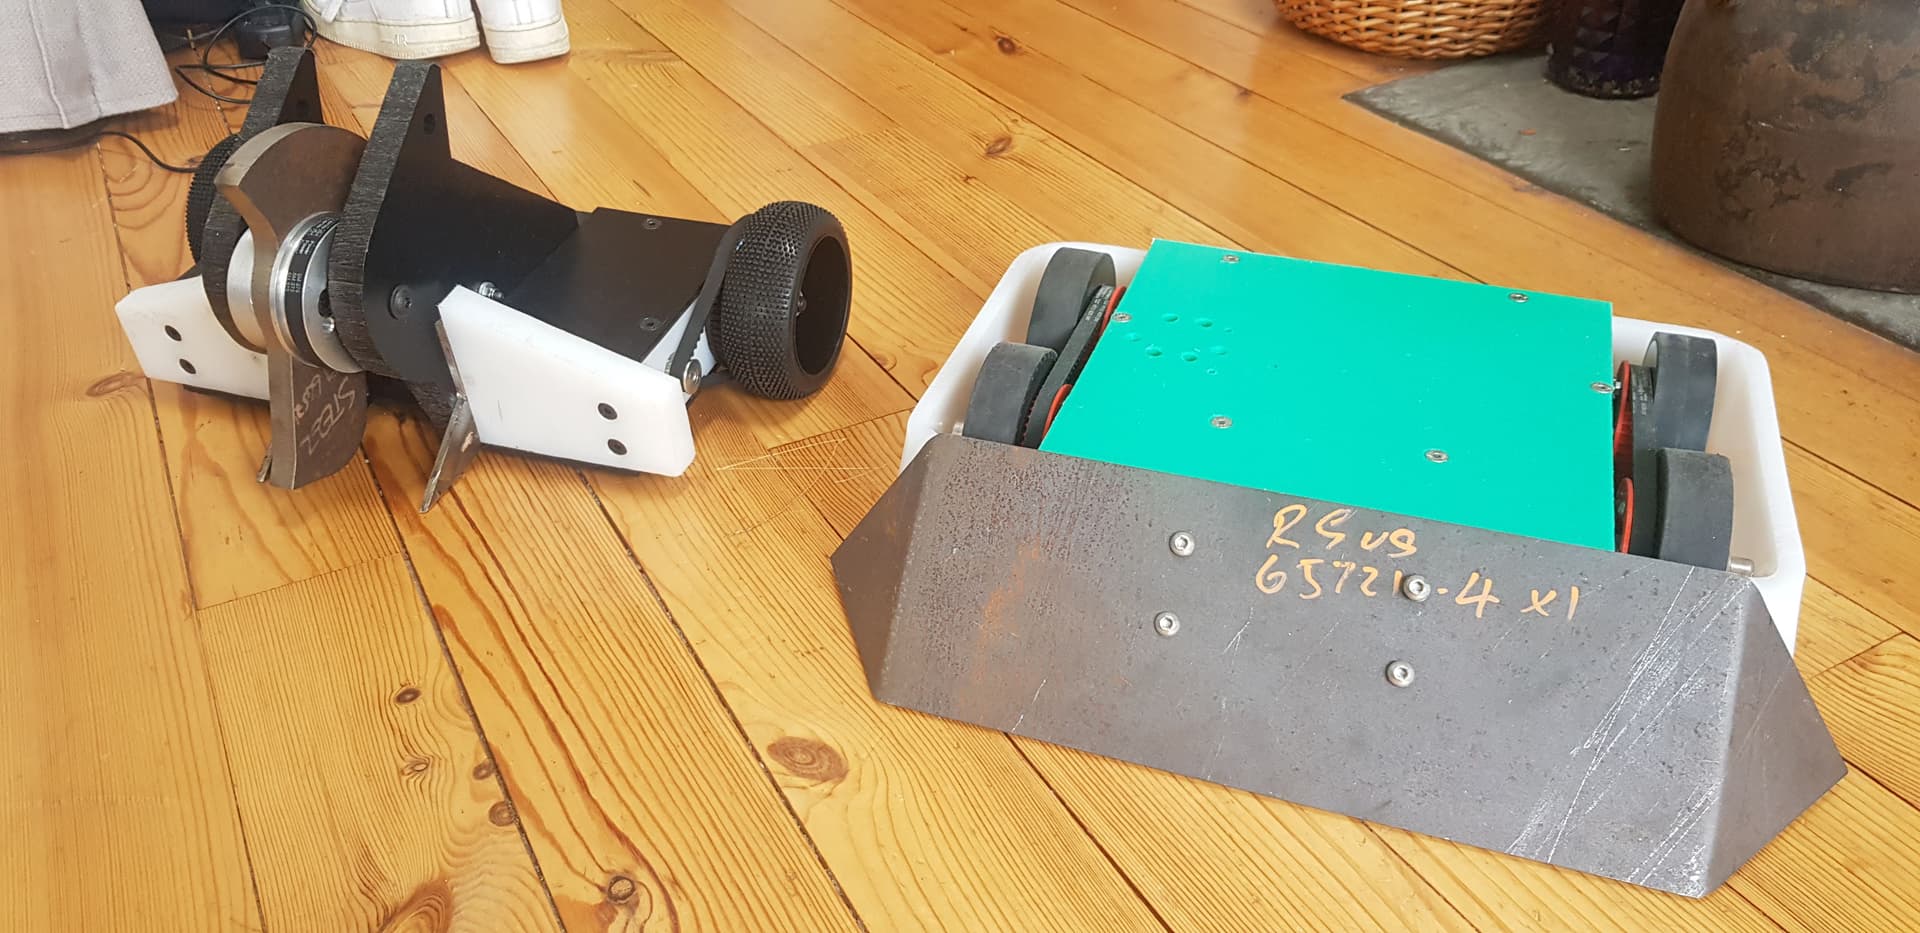
Both halves of the cluster bot, with the bot on the right being in its horizontal config.
During October 2021, Sam Price was selling an unfinished hobbyweight project that was basically a 5.4kg Get Shrekt. The robot could spin up, but the drive motors were too weak at the 4S the bot was running on to provide adequate drive. The design would need a decent redesign to get to working, so Sam decided to open it up to any potential buyers. For me this offer had many advantages:
- I had always envisioned the other half of the cluster to be a glass cannon vert to balance the tanky control bot that was the other half. Given that this bot was basically Shrekt Force’s weapon in a hobbyweight, it was perfect for that goal.
- The robot was designed for the 5.4kg hobbyweight class, but I could have a bot that was up to 6.8kg (half of a FW cluster), so I had plenty of room for upgrades.
- I had always wanted to understand how a spinner worked and could be made reliable first hand. Sam builds some of the best spinners in the UK, so his robot was an ideal candidate for this.
- Sam is also a massive advocate for plastics in his robots, so I could get to properly compare and contrast our methods.
After a rather troublesome time dealing with the post involved in getting a robot delivered to Ireland (Parcel2Go can go and do things I’m not at liberty to say here), I got the robot, and after a quick teardown, basically did nothing with it while I focused on getting my BW Babróg working reliably. After questioning for a while if I should sell it on, I’ve decided to do the proper work in heavily modifying it and getting it ready for battle.

The weapon assembly torn down.
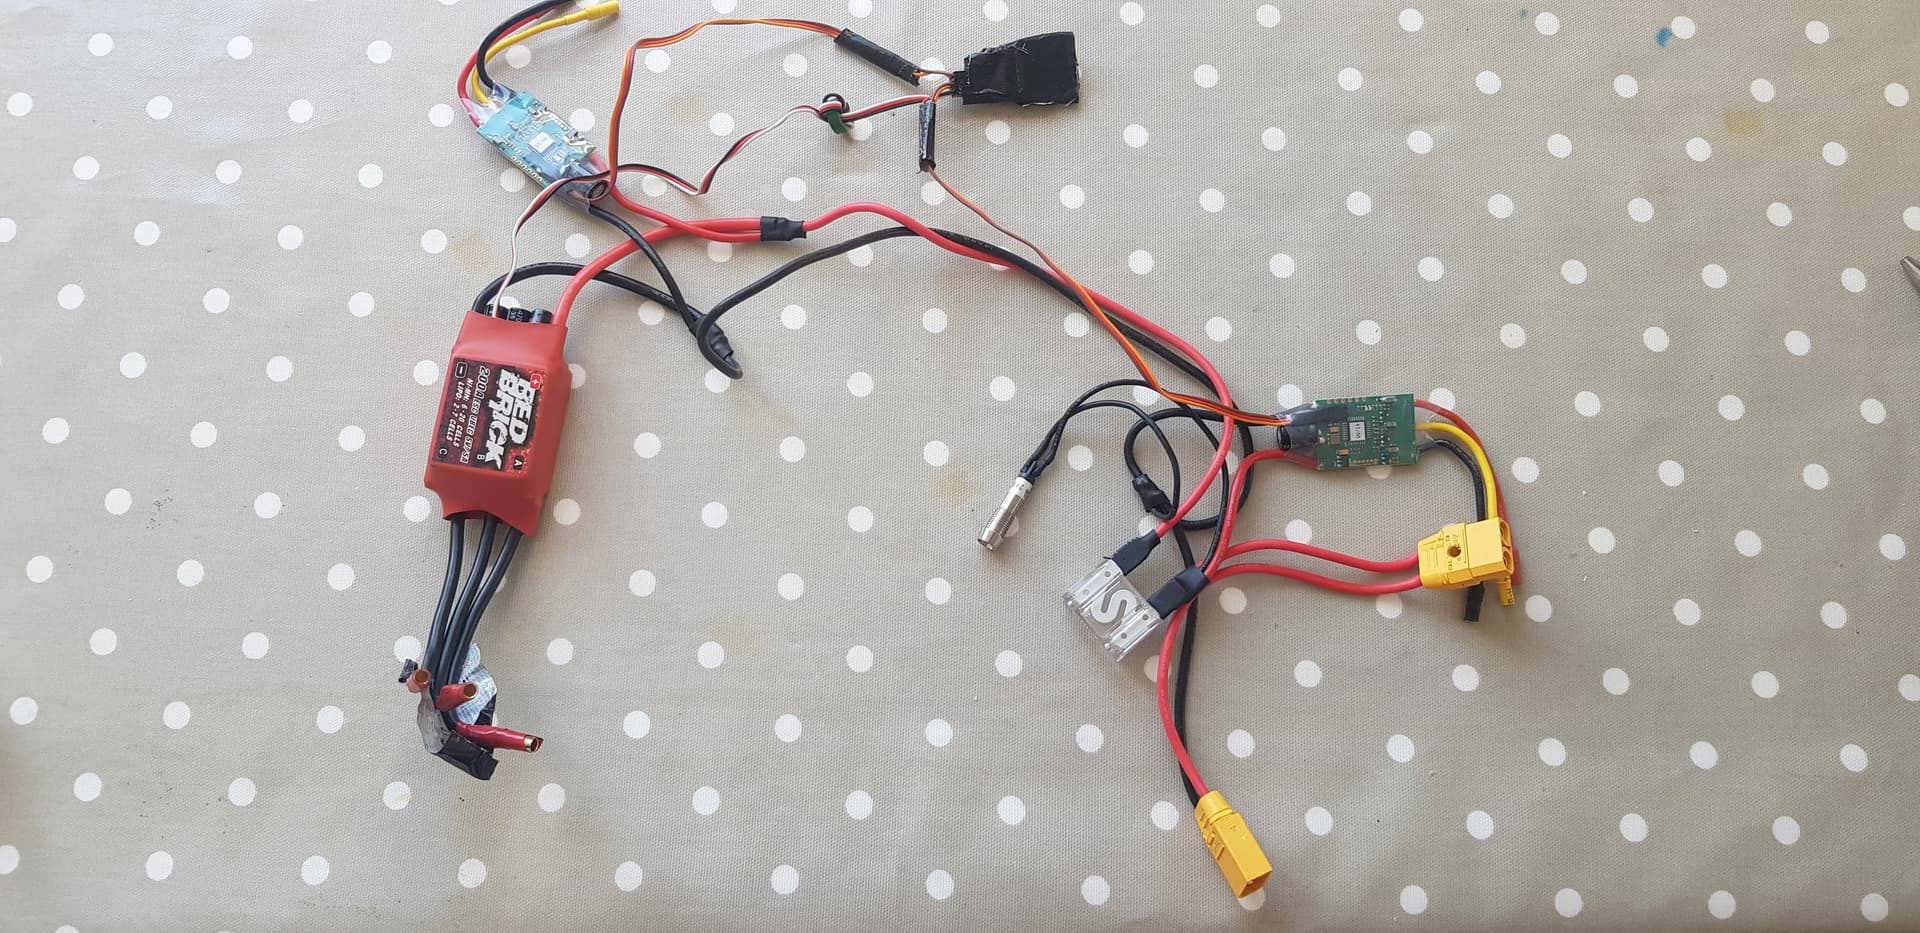
The electronics system as it came to me. The only thing I didn’t get was the battery due to obvious shipping issues.
Now before I continue, I would like to stress that Sam Price is a really excellent builder, who has built many robots that have won several events. I would also like to stress that Sam himself admitted that this was somewhat of a rushed build, and that this ended up with design decisions that he himself would change in a revised edition. I also learned quite a lot about how Sam designs robots, and there were some really good ideas in here that I’d love to adapt for my own projects (especially in some of his “fewer but thicker bolts” methods and his way of sandwiching armour along XZ axes over baseplate mounting). I say all of this now because I’m now going to go into detail on all of the ways this build fails.
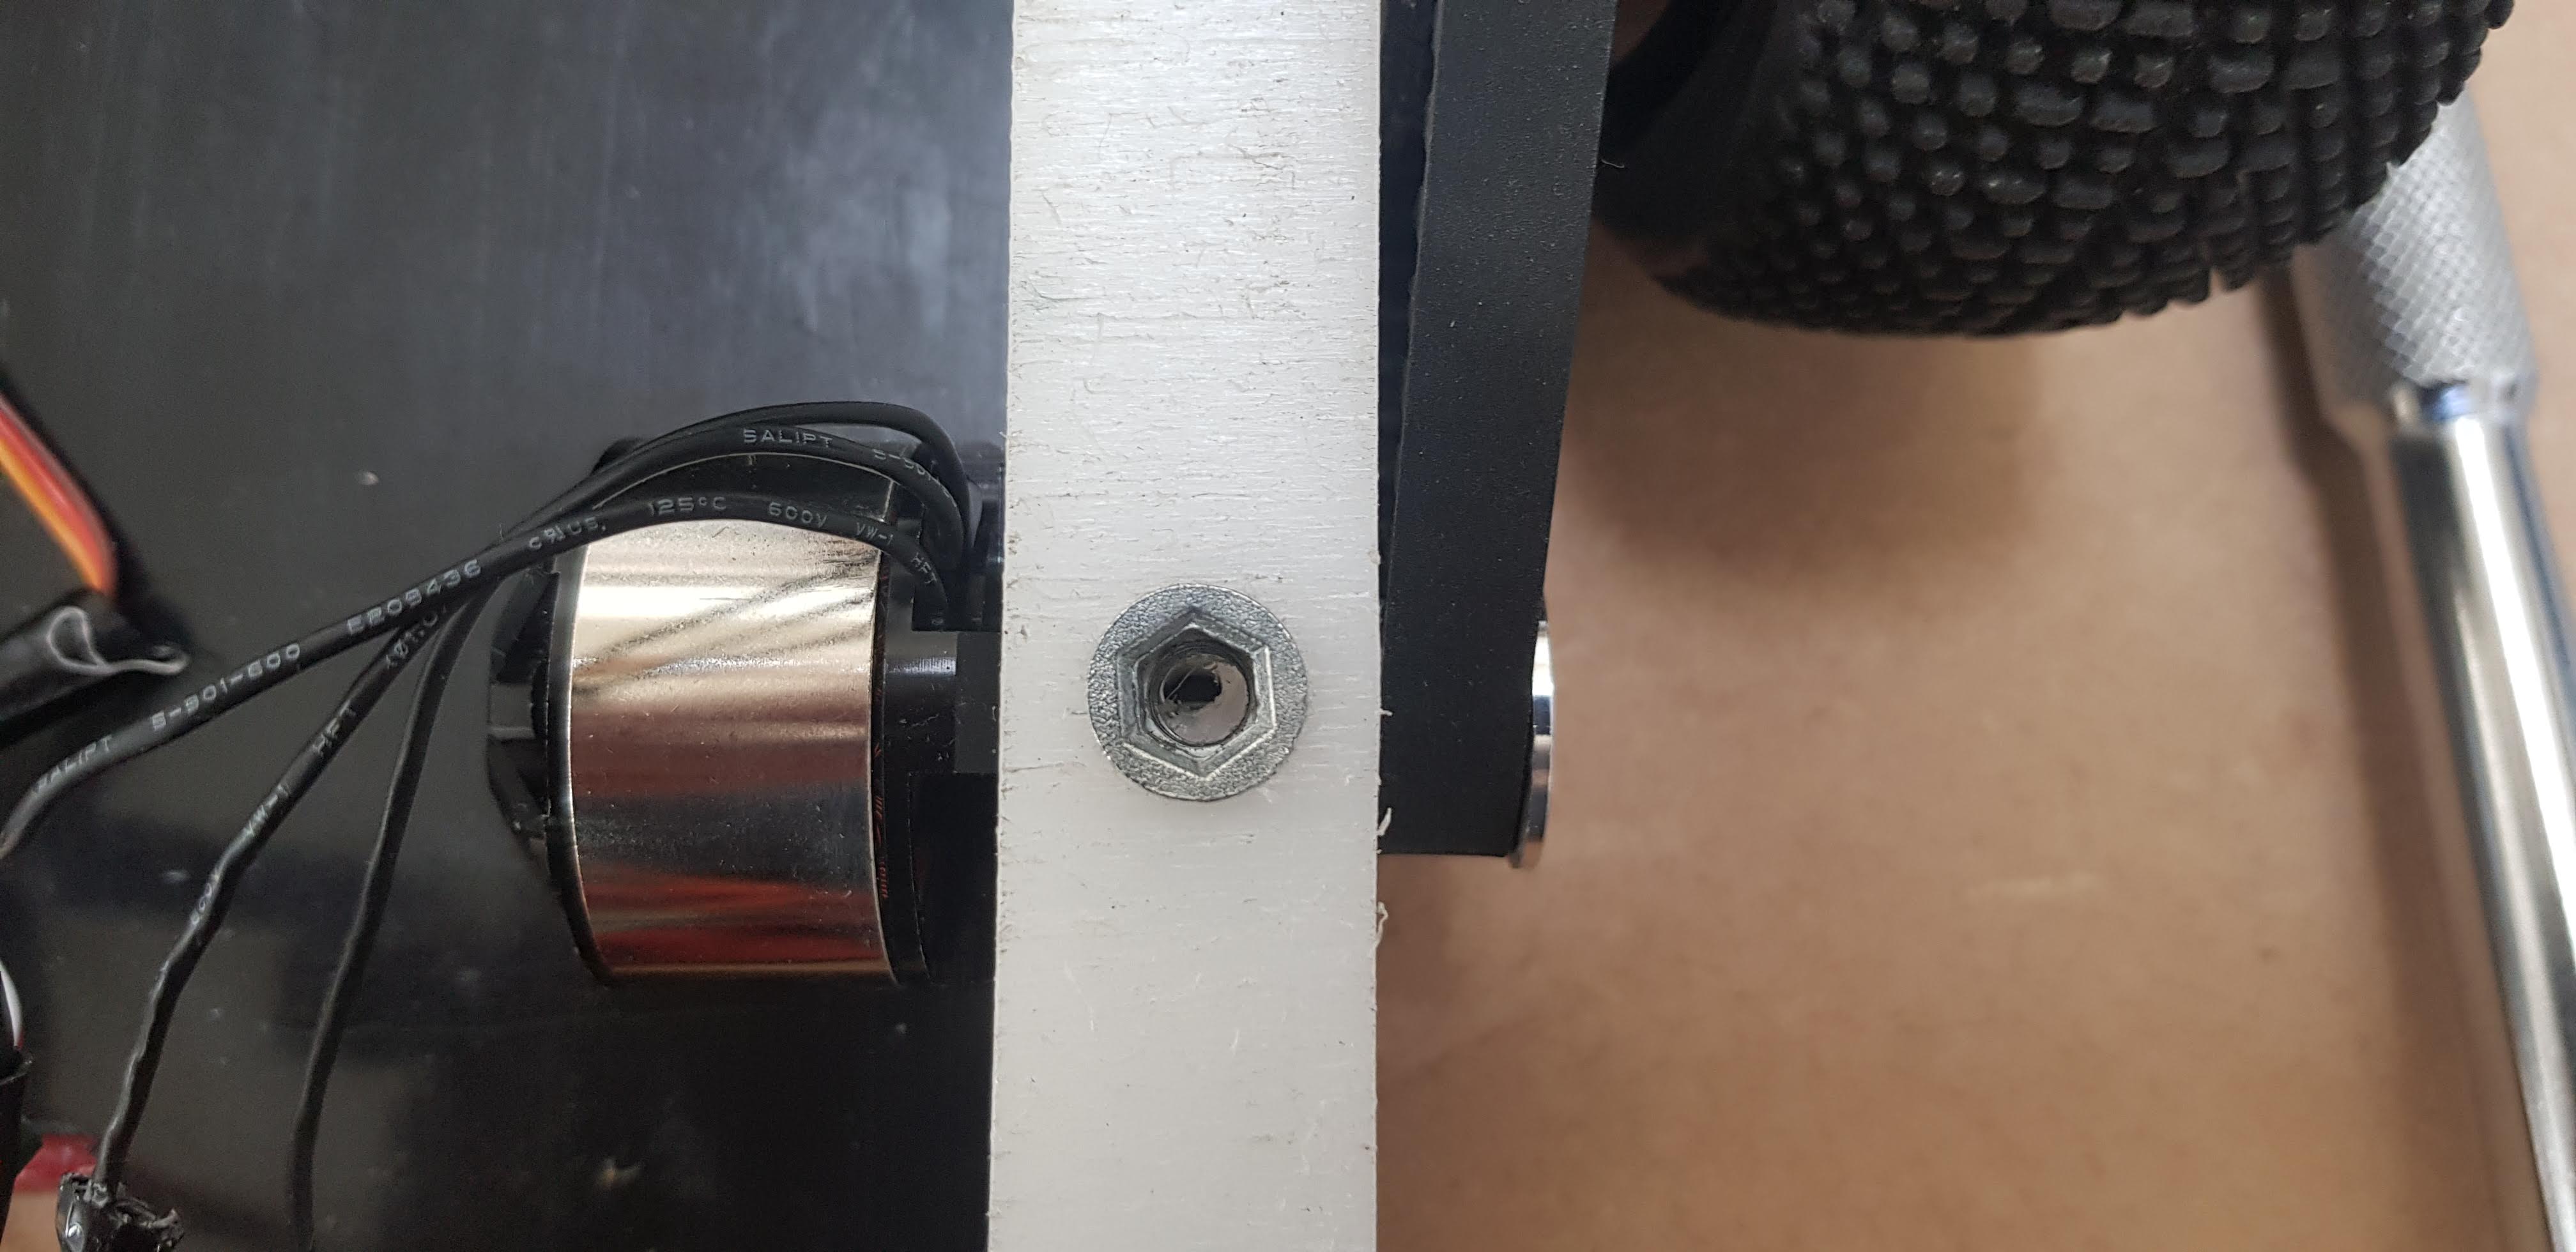
One positive note I really liked: the threaded insert that mounts a top panel to a side wall also provides access to a grub screw on the drive motor pulley.
The weapon assembly itself is probably the best part of the robot. I haven’t powered it yet, but I have seen vids of Sam spinning it up in a safe environment. It spins smoothly and along the motor. The tensioner on the belt is a little sketchy, especially how it seems to be just on the edge of a pocketed area, but that can be addressed relatively easily. The front forks are also ultra aggressive, actively digging into the floor, which does give me some concern at the risk of getting caught on arena seams. The internal space was really cramped, though just about manageable. Fitting in the weapon ESC especially was tricky, and I really would want to redo the 1mm bent polycarb motor guards, but it does all seem like it would fit in a pinch.
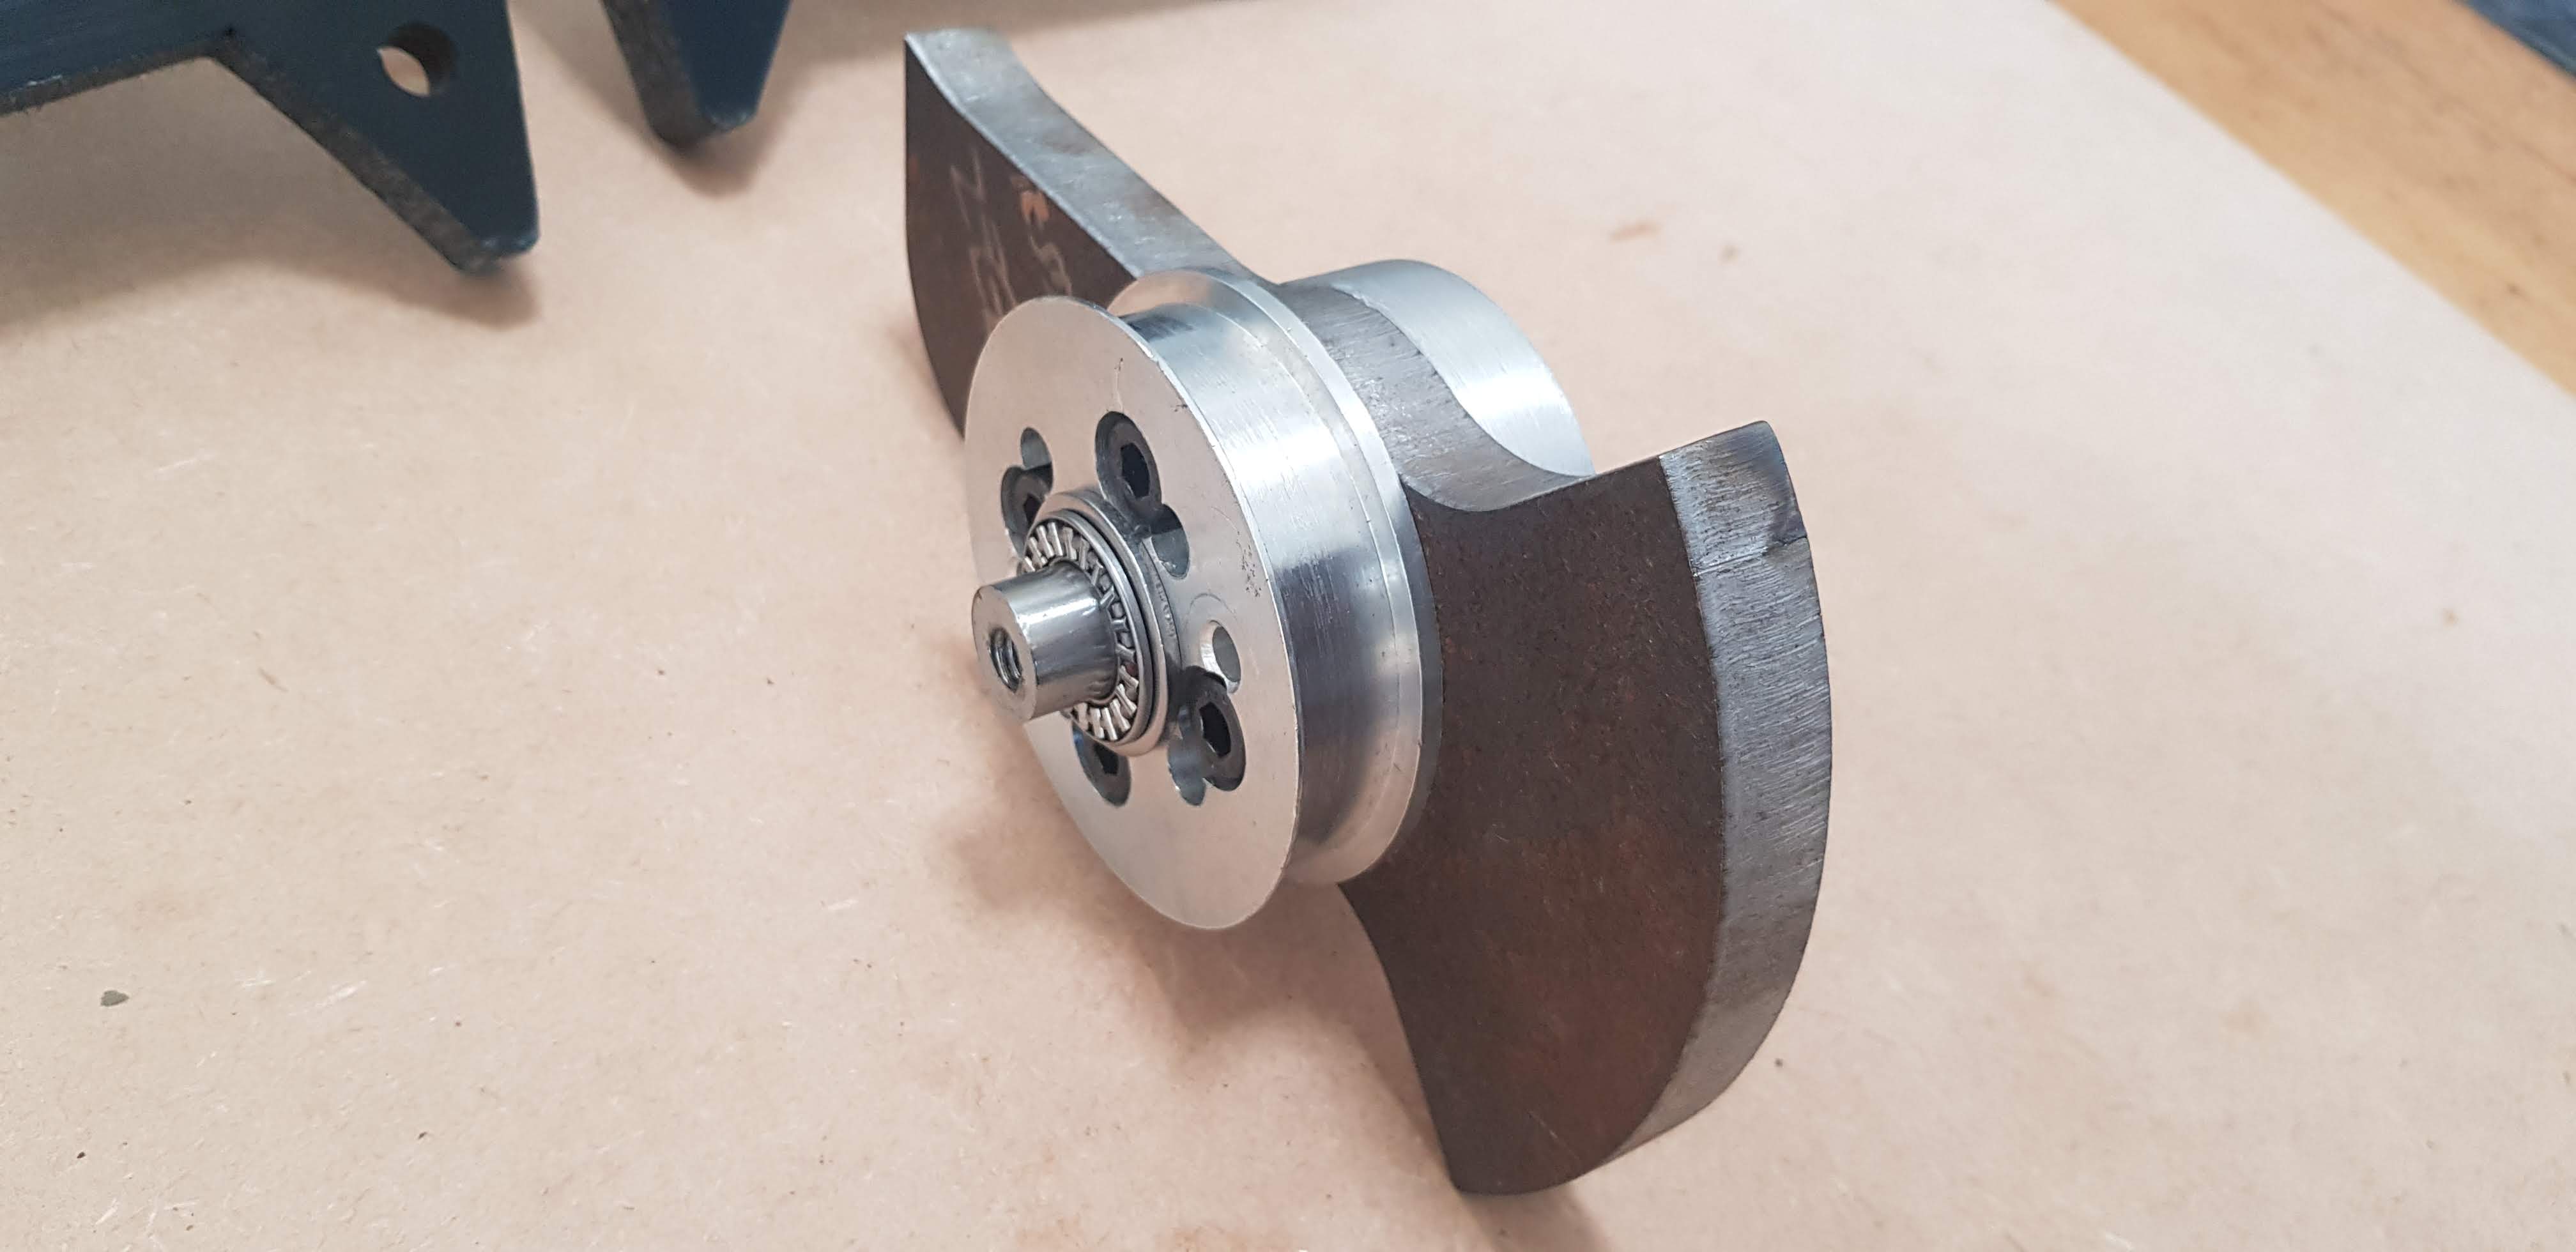
The weapon assembly all put together. roughly 2kg, 200mm effective diameter, 15mm Hardox 500.
The real problem area was the motors. Running at the 4S the weapon runs at, they are simply not strong enough to power the drive, especially with no gearbox. I briefly considered going to 5S and possibly using a BEC to drop the voltage to the weapon motor (that has to be 4S max), but that would require a bigger battery, and also beefier ESC’s than what were included with the drive motors. Getting bigger motors was tricky because the left-side drive motor was already super close to the weapon motor, and would either require the drive motor to move, or the weapon motor to move. And this was all along all of the other difficulties space wise to get all the internals in. Finally, the wheels were super spongy and grippy, but the CNCed drive pulleys are simply too big, and the belt doesn’t wrap around them fully (I had a similar issue with my printed pulleys before I started fractionally decreasing the CAD file before exporting. No matter what, the robot needed new drive pulleys as well.
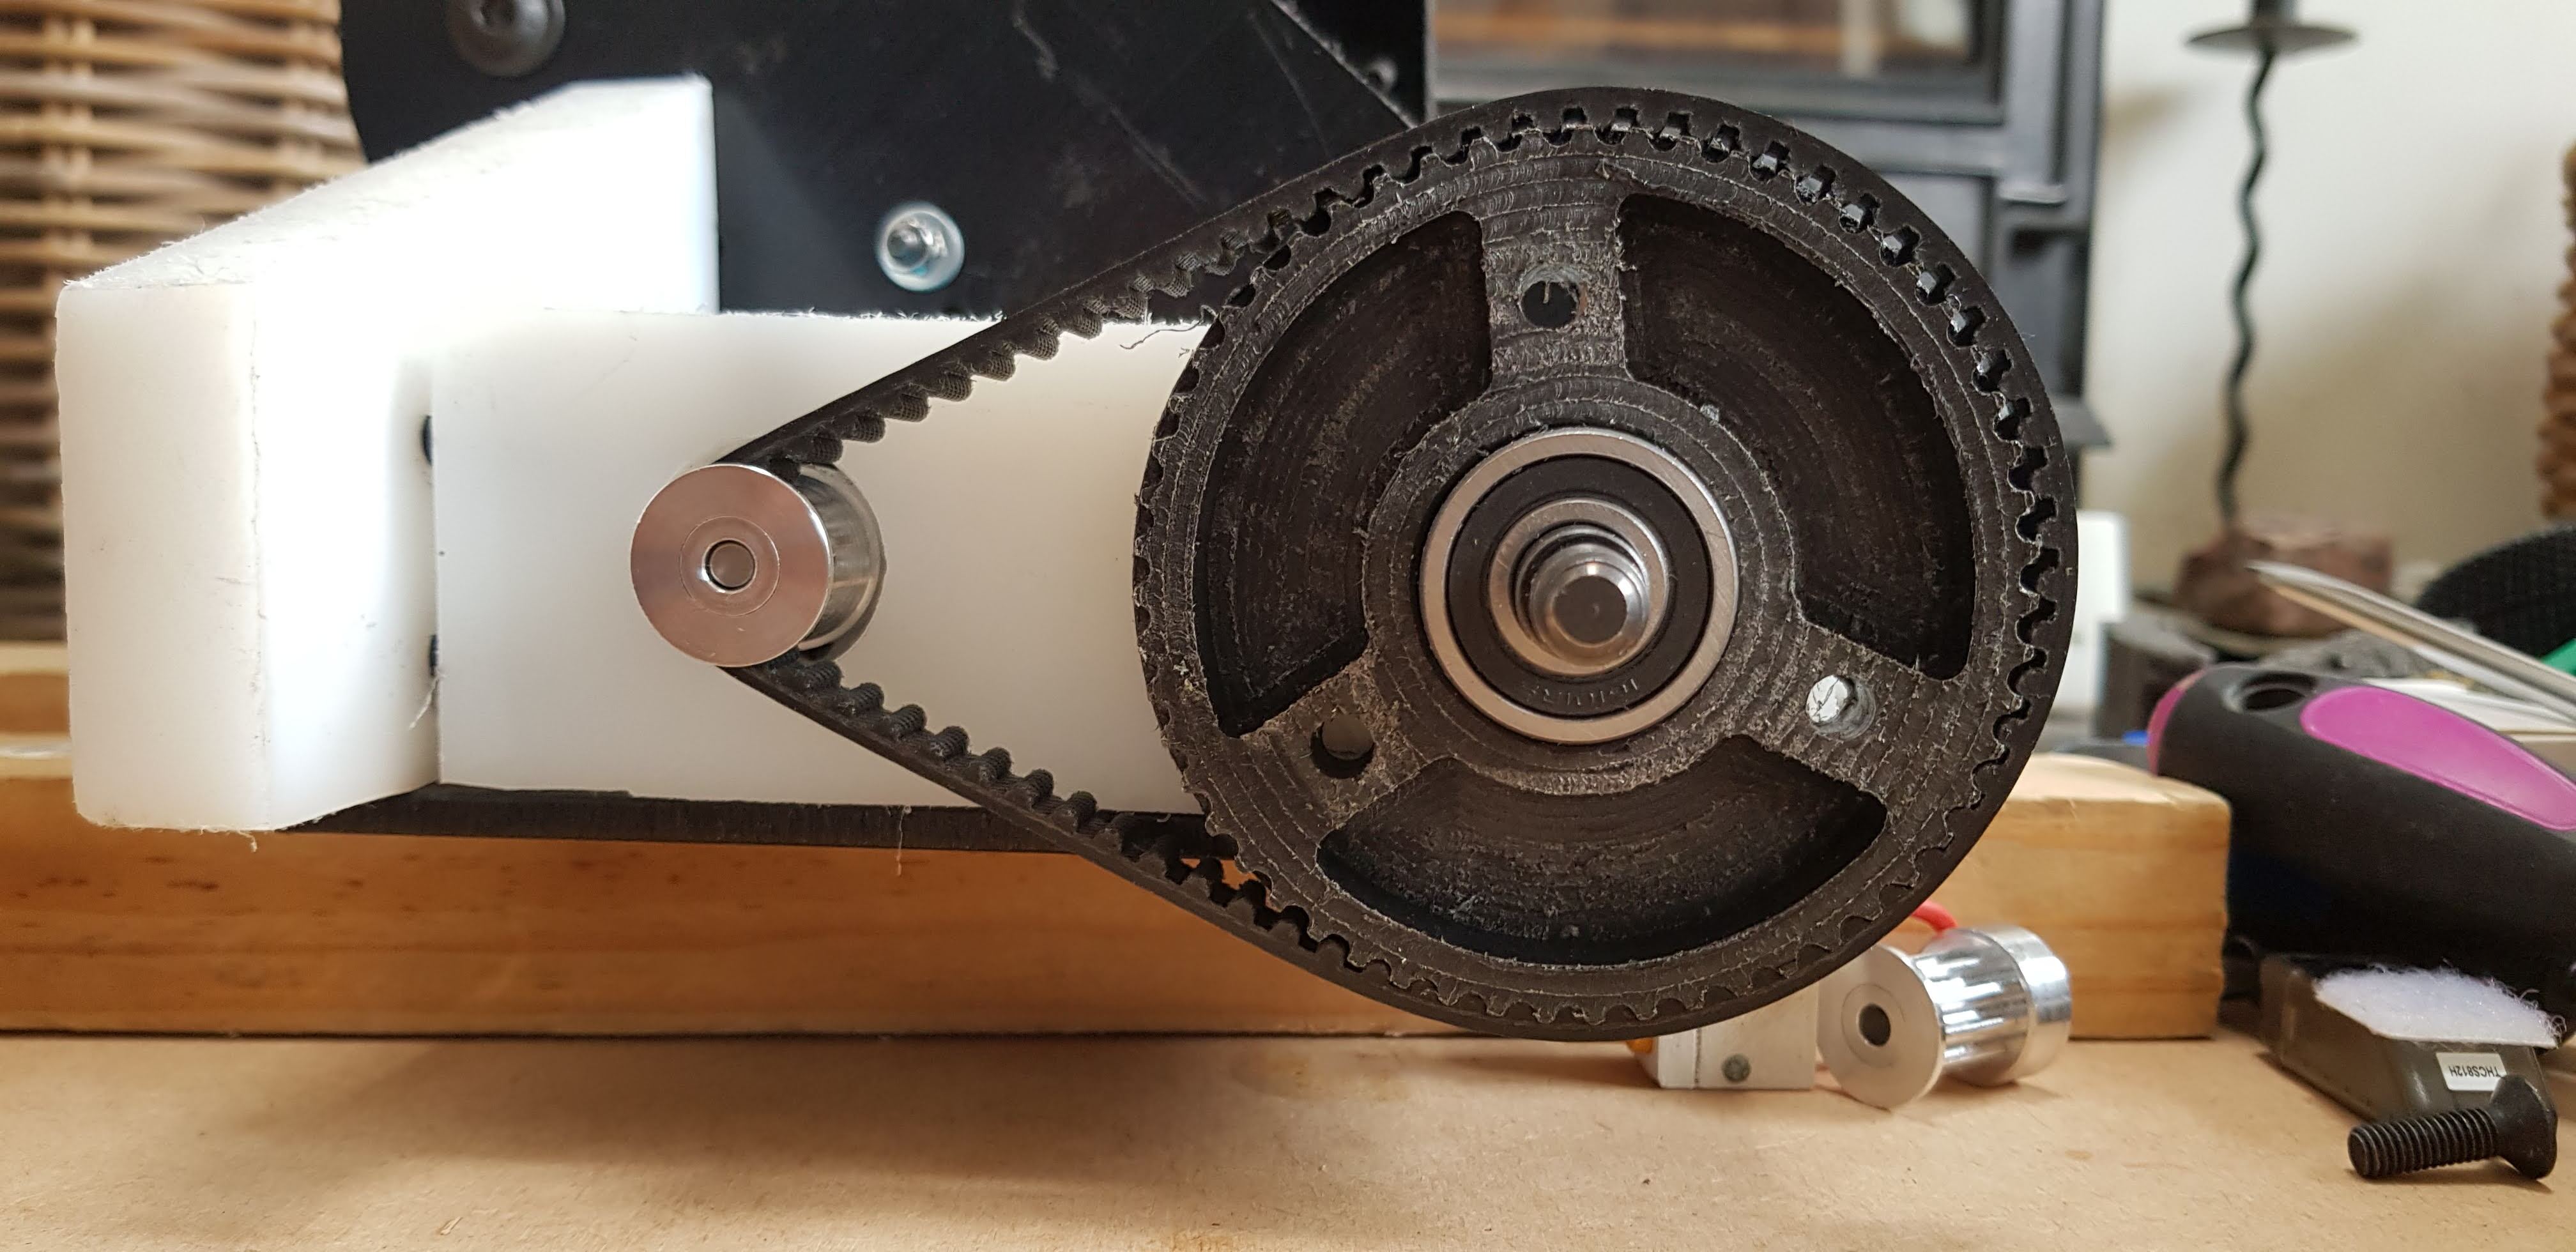
The drive without the wheel. Not ethe way the belt wraps around.
Once I finally decided to put my head down and get to work, I started looking for ways to get the design viable and reliable. I measured all the existing pieces and built a CAD model of the entire robot, before getting to work on my modifications.
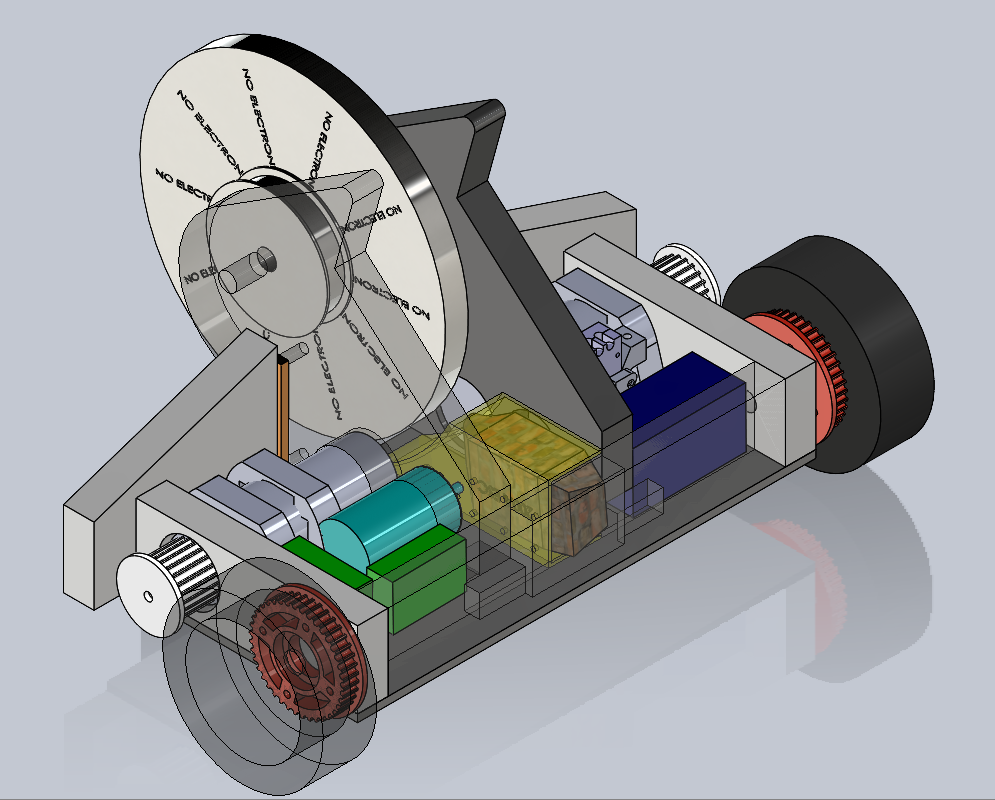


My updated CAD, with as accurate representation of the original dimensions of the robot as I could manage.
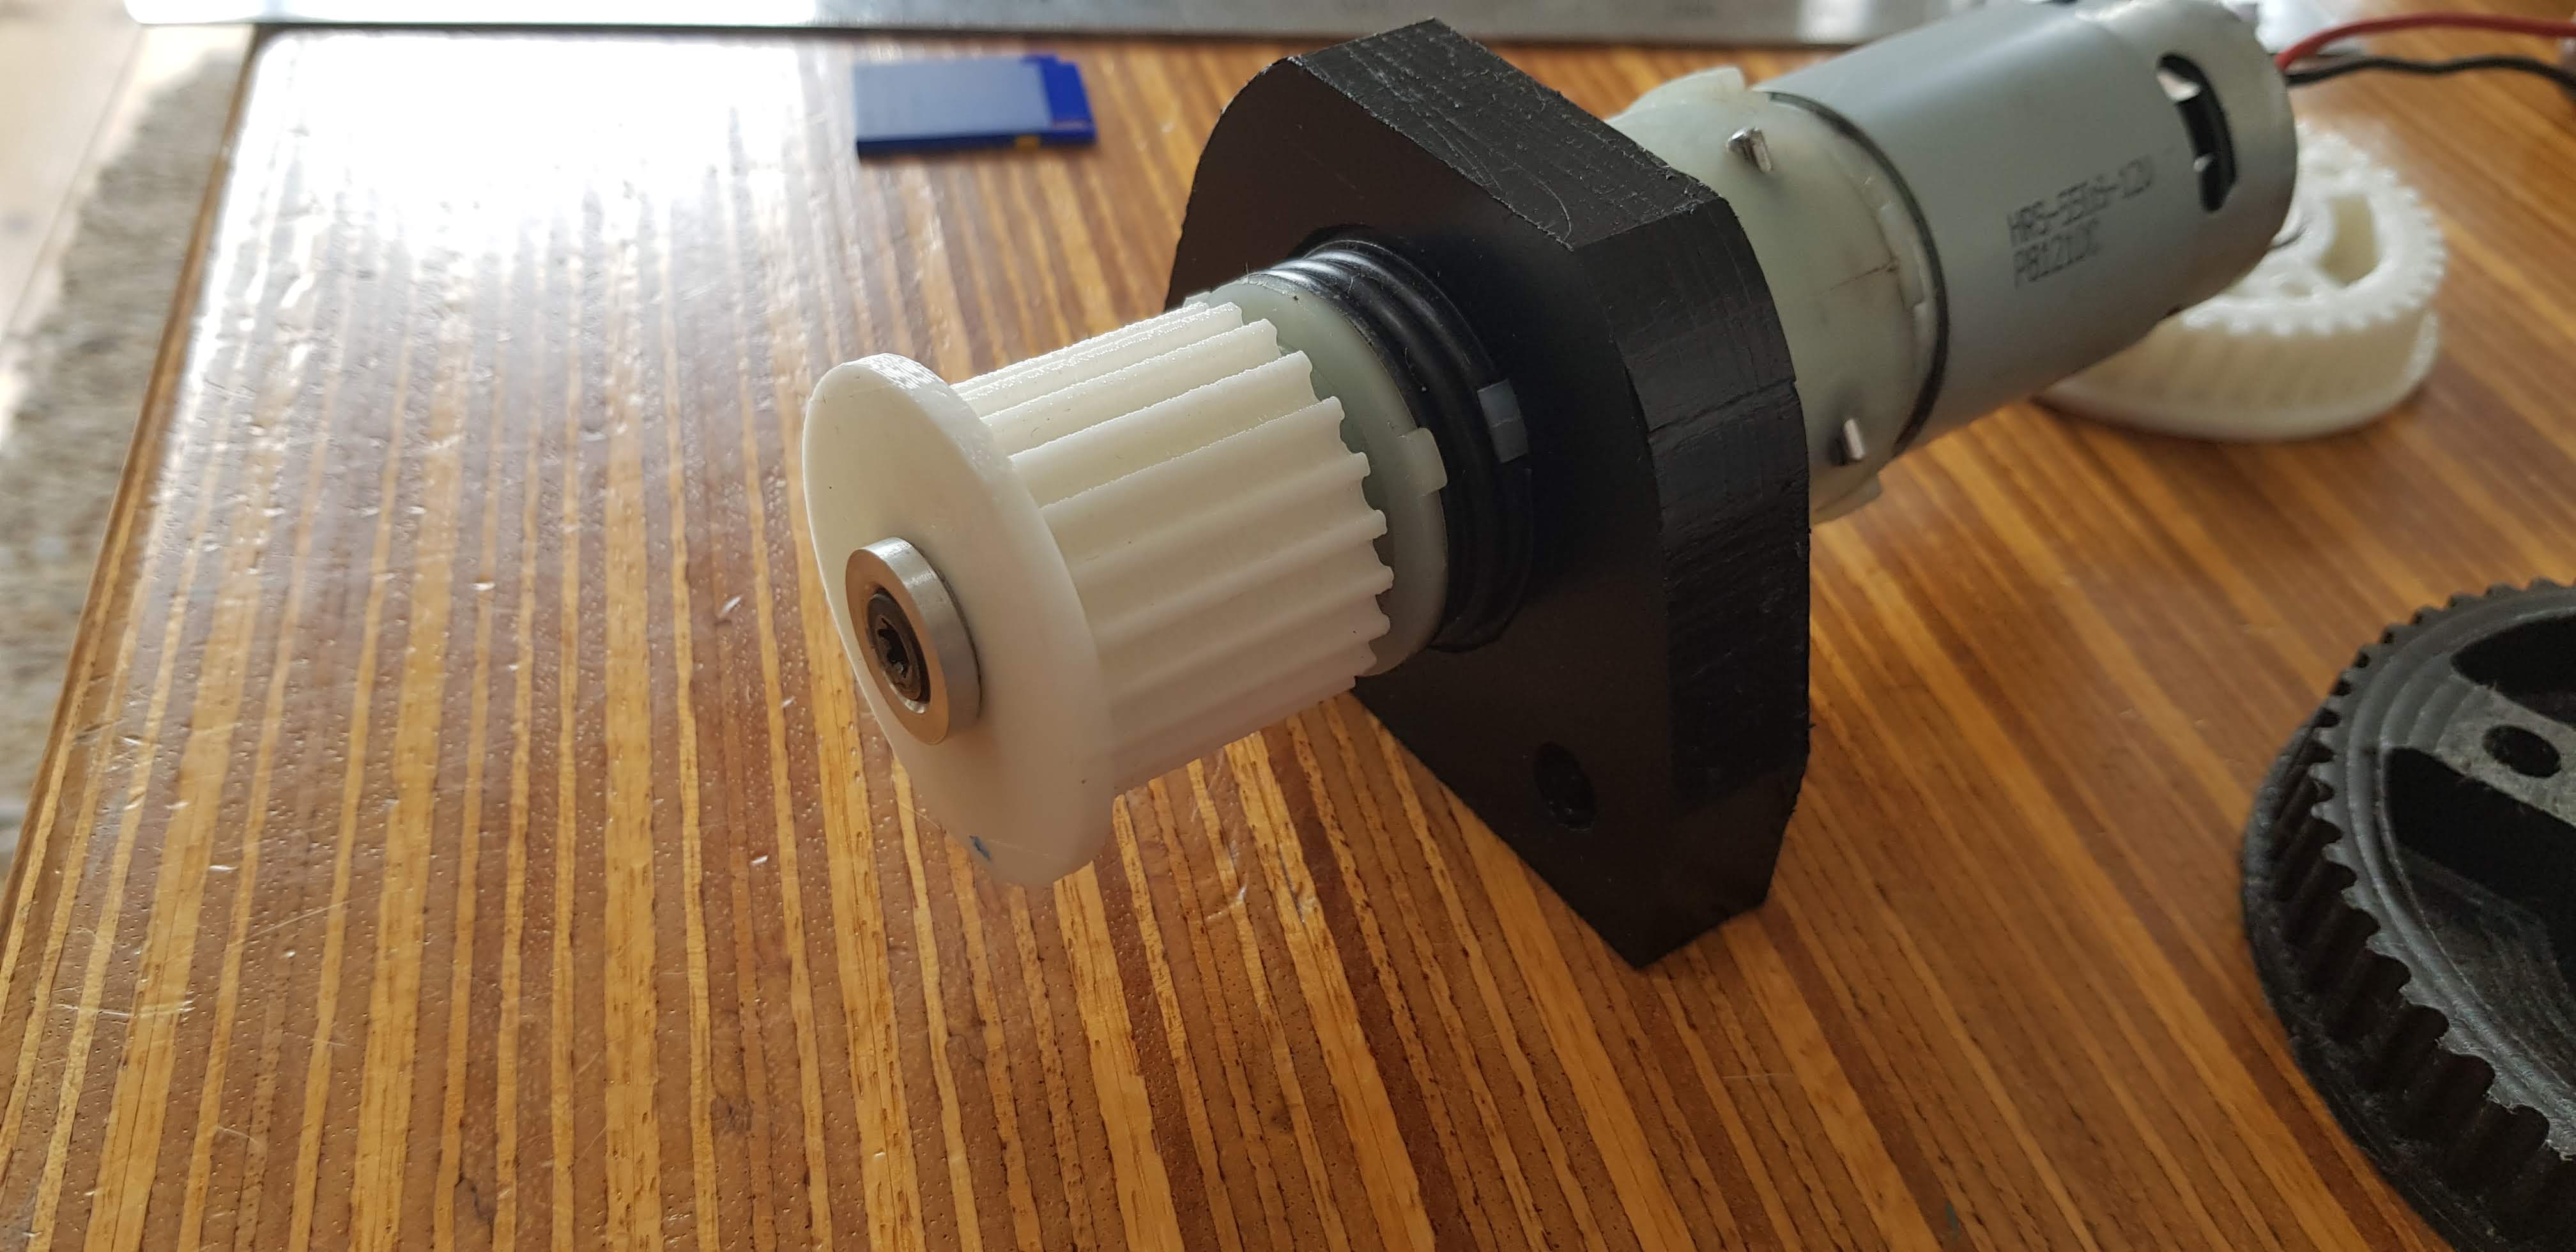
The most major change was a swap from the weedy brushless motors to my old reliable drill and gearbox motors. These would require some hollowing out of the weapon bulkheads, as well as moving the weapon motor further backwards, but they would fit with small adjustments, as well as custom mounts (easier to do now with my CNC). Using some mini wheel nuts with a 17mm hex, the pulley would press fit on the hex before being held in place with the usual reverse-thread countersunk screw. The test pieces were in PLA, though Nylon or TPU would be ideal. The new sizes for the pulleys should even fit the same belt with a tensioner, and would give a massive boost to the bots drive power.

The old pulley system compared to the new one.
The other major changes to the new robot would be the addition of some Botbitz 30A brushed ESC’s I had lying around, a Hattington Link system for power, and moving the weapon ESC to the weapon “chamber”, though with a printed guard to keep it out of the way of the weapon. I’ve also ordered new front forks that should lie flush with the ground when fully assembled, to avoid catching on any seams (these have already arrived). I’ll also do a new back piece for better wire routing, and may even add on another sacrificial piece of ablative armour if I have the weight (I should have the space at least).
A prototype for the new pulley. The mount will need slight modification to fit.
That’s all for now, I’ll try to keep this updated where possible, though I can’t see myself working on this for a few weeks at least. This project will remain exclusive to this forum until completion, so feel free to ask me any questions here!