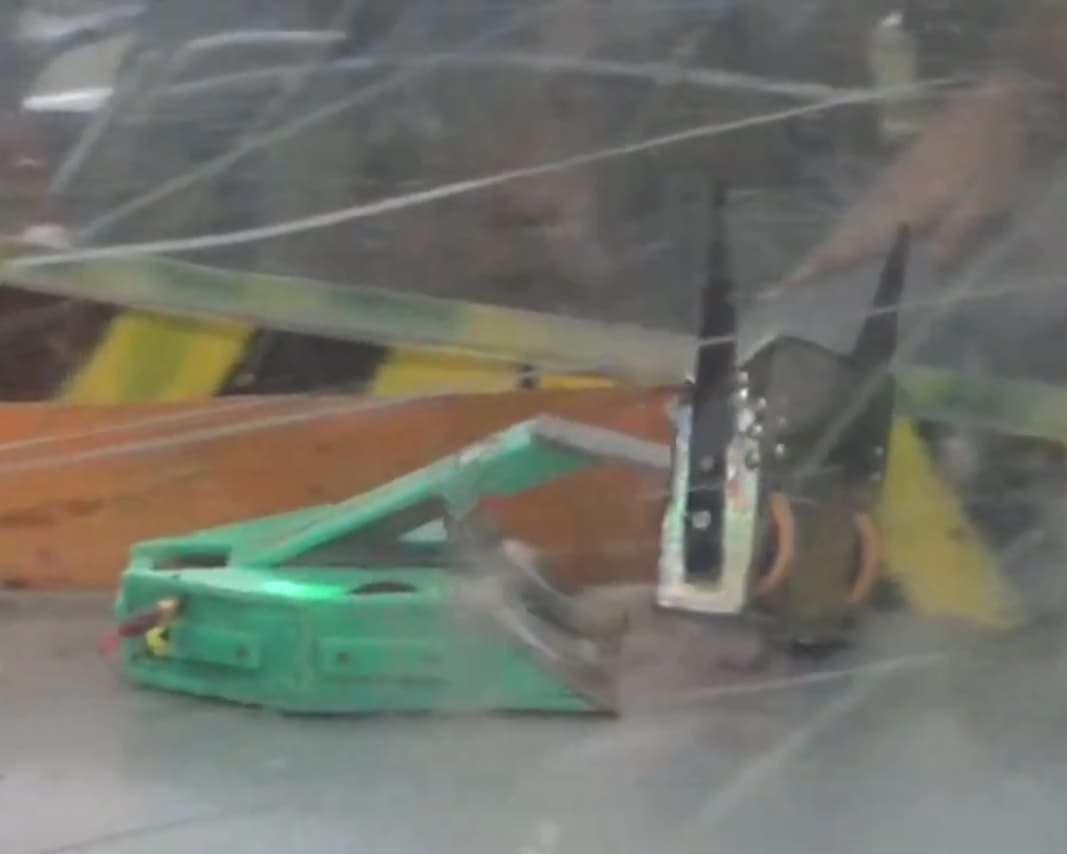
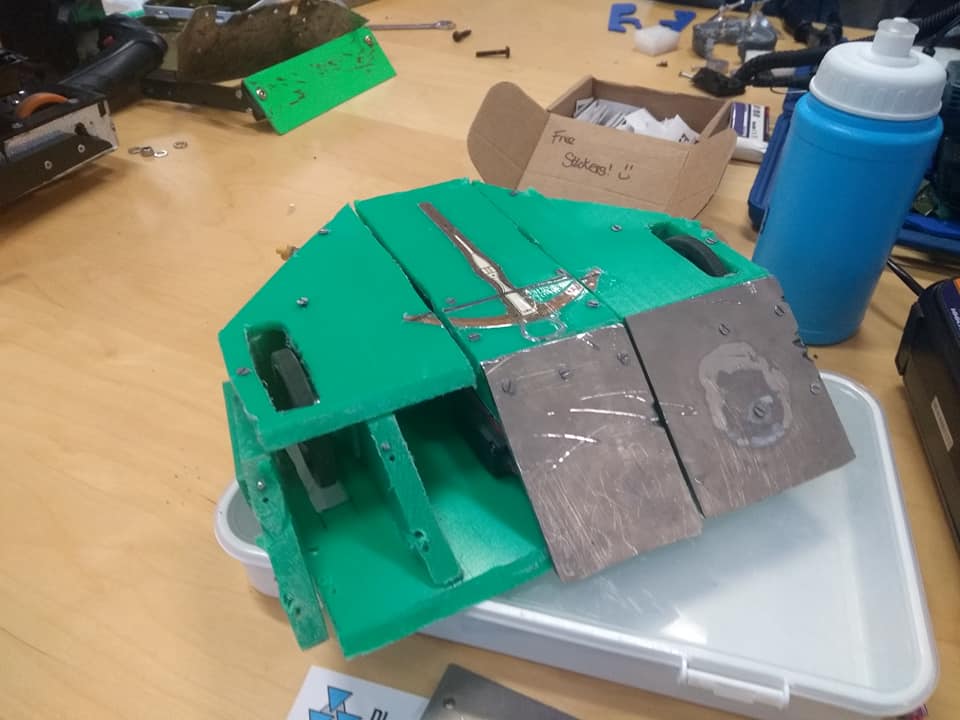
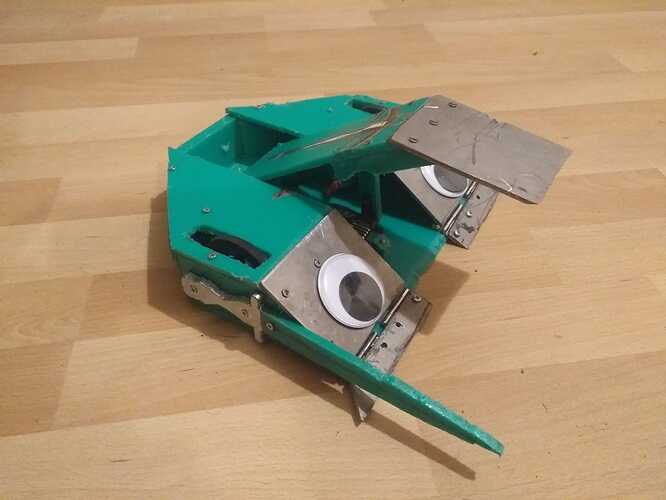
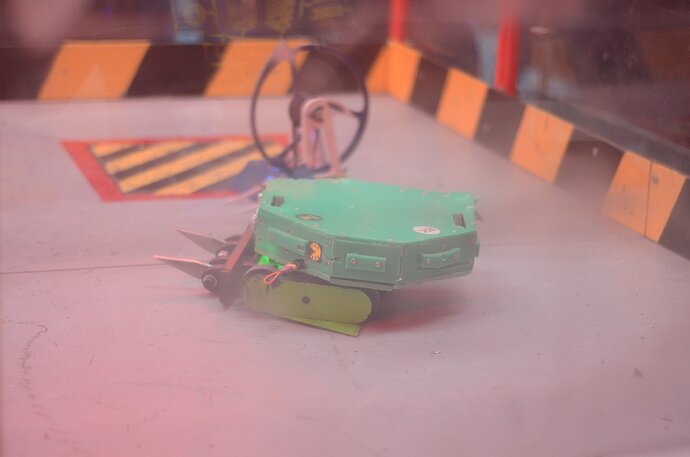
Crossblow - Life, Death and Renaissance

Oliver, here.

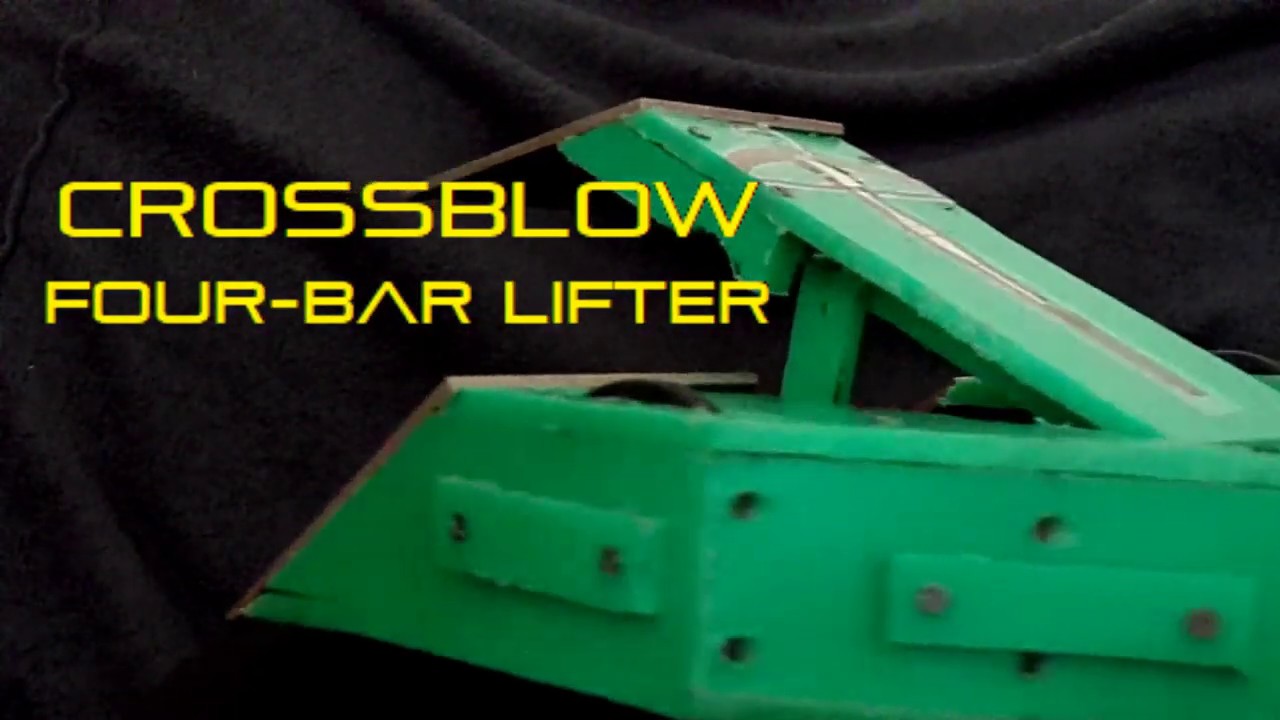
After a little break from robots, Battle in the Burgh has lit that fire in me again. I’m back to doing CAD, making designs, and lurking around the forums again. First on the agenda is CADding up a new-look for Crossblow that has been slowly brewing in my head since Rapture 22. Then I was reading all the fascinating build logs and retrospectives that have already been posted (Shout out to Rob, Yau and Nick), and figured it’d be a nice time to look back as well as forward. Hope you’ll forgive the self indulgence, and enjoy the ride. Here’s the story of the not-quite-only four bar lifter in the UK.

The Journey to Crossblow
My path into robotics was a bit meandering - I was just too young for Robot Wars on its original airing, being a Y2K baby, but I was aware of it through rare, occasional reruns. I got really into it just prior to the reboot announcement, and through the gentle encouragement of both the fan and builder communities, eventually began researching antweights in about 2017 or so.

That culminated in Kosmos, a 2wd front hinge, running 360 servos, and held together entirely by hot glue. The plan was to take advantage of the then-prevalent dropoffs in antweight arenas by selecting a weapon that could flip opponents towards the pits and trenches, rather than flipping them up and away, like a rear hinge. TL:DR it held together just long enough for a few test drives before I discovered how poorly hot glue and polycarb tend to bond.


Kosmos, my very first robot

This was followed shortly after by another aborted ant, called Tough Justice (I promise this is relevant). The old rw101 forum post is long since corrupted, so no photos I’m afraid. But this was intended to be a four-bar lifter, for the same reasons as Kosmos’ front hinge, listed above. Back in 2017, however, antweight components were far from the dizzying array of offerings we have now. Your ESC choices were a Rory Mangles built NanoTwo, available in limited quantities, every so often, or a cheap, chinese DasMikro. Since I was determined to ditch the servo drive, in favour of a ‘proper’ drive system, and that the NanoTwo was incompatible with my cheap HobbyKing transmitter, I patiently waited for my DasMikro to ship from the far east. Months passed.

At the time, I was a pretty novice solder-er, coasting off of my lessons in high school tech lessons. And my less-than-feather-light touch was enough to immediately delaminate the pads on the DasMikro as soon as I got it. At that point, I gave up. Maybe robots were just too fiddly, and too difficult for me to build. TIme passed.

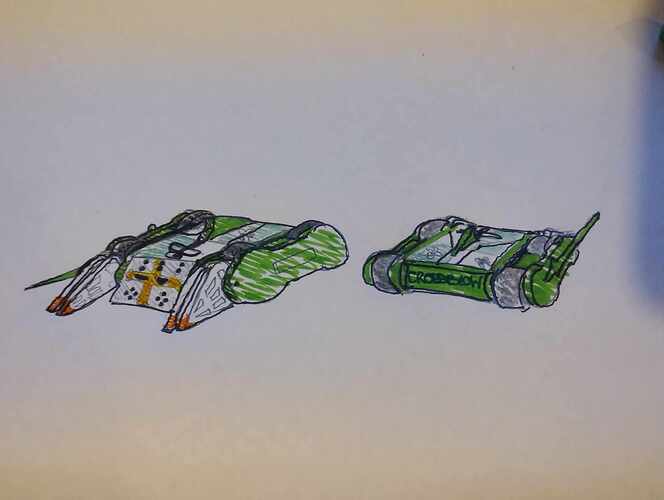
Then Bugglebots happened. My eyes were opened to the then-nacent beetlweight scene. This was exactly what I needed! Bigger robots! Not too much more expensive, either, with an accessible and established pool of parts. ANd there was a web series to apply to! (I had then just moved to Scotland and just missed out on seeing Robot Wars filmed live) Eagerly, I began sketching out new designs, revisiting the Tough Justice concept from the year before. I was very conscious that to make a strong case to the production team, I would have to build something unique. In all my research, I couldn’t find another four bar on the UK beetle scene at the time, and quickly settled on the already-familiar weapon type to design my robot around (foreshadowing).


The paper that birthed a beetle. Note ‘Counter Strike’, the antweight, which was basically a new Tough Justice

Like many of us, I owned the Hexbug Witch Doctor, and had noticed just how responsive the front-wheel drive was. So, the four-bar gained a pair of wheels, and a striking, diamond-like silhouette that I was very happy with. The rest followed from there. I’d heard great things about recycled UHMW (RG1000) as a material, and, since it only came in black or green, the green colour palette was an easy choice.
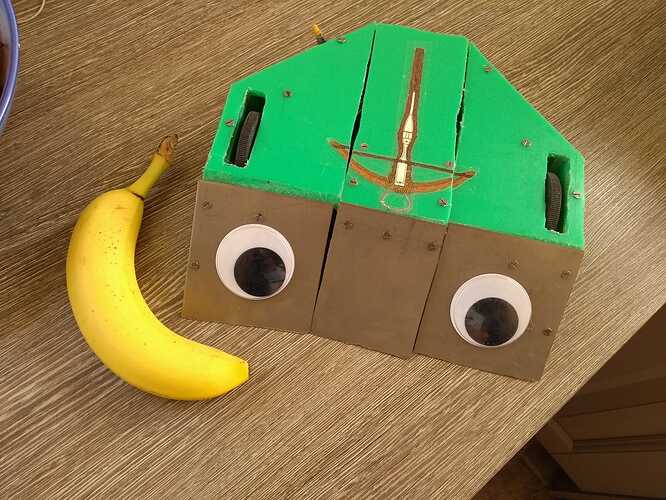
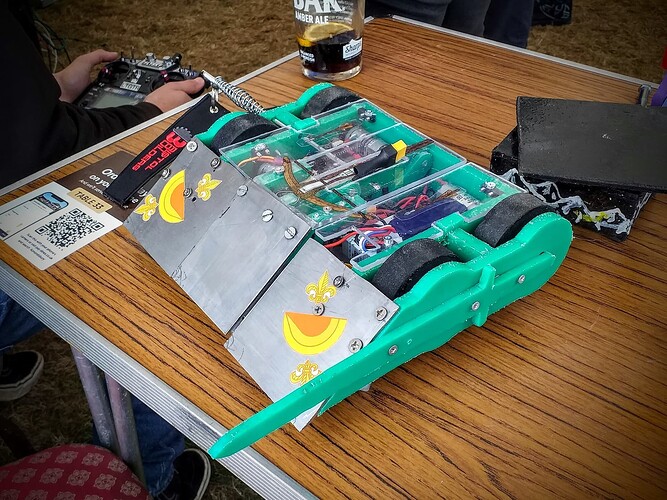
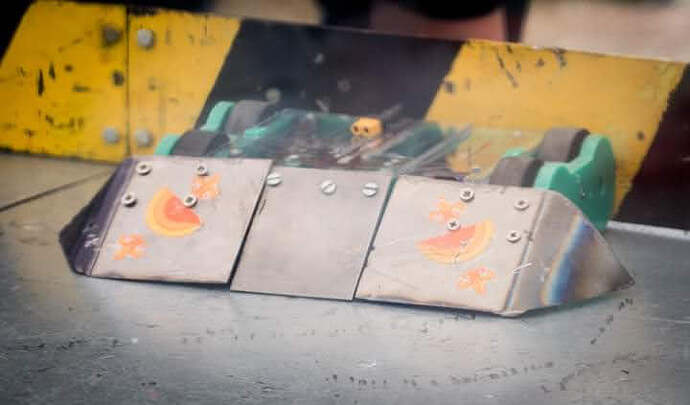
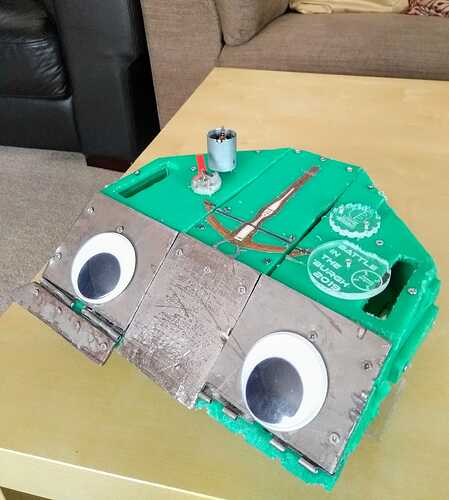
The name and theming came from an early brainstorming session. I was an archaeology student, so turned to history for inspiration. I’d already made a few medieval builds in Robot Arena 2, a game I was quite into at the time. Knighthood, Slamelot, and The Barber Surgeon were already identities created for my RA2 workshop, so I wanted something that fit the theme. I’d also recently started historical fencing classes, so worked my way through different medieval weapons, trying to find a name. ‘Crossbow’ became ‘Crossblow’ in an attempt to try and be clever, echoing the ‘punch’ of a four-bar weapon. A crossbow sticker was found to adorn the weapon. Googley eyes were the ‘in thing’ at the time, and no-one likes a plain wedge.


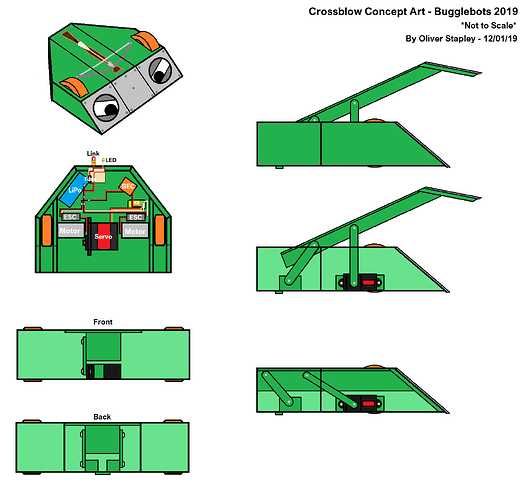
For the visual learners amongst you. This was what helped me visualise everything before the Anatomy of a Frog diagrams. Note the separate car fuse on the board

The then-standard components followed - RG1000, in 10mm and 5 mm, 25mm Brushed motors, a 25kg servo, and VEX29 ESCs. Notably, these were old spares, acquired cheaply, that had previously taken K2 to victory in Bugglebots series 1. 3mm Grade 5 titanium looked just about workable with the hand tools I had, and I spent many hours grinding away at a sheet of metal with several junior hacksaw blades. 60mm antweight pololu wheels became my choice, as, while a bit fragile, they would be enclosed and well-protected, and were far more available than the banebots equivalent.


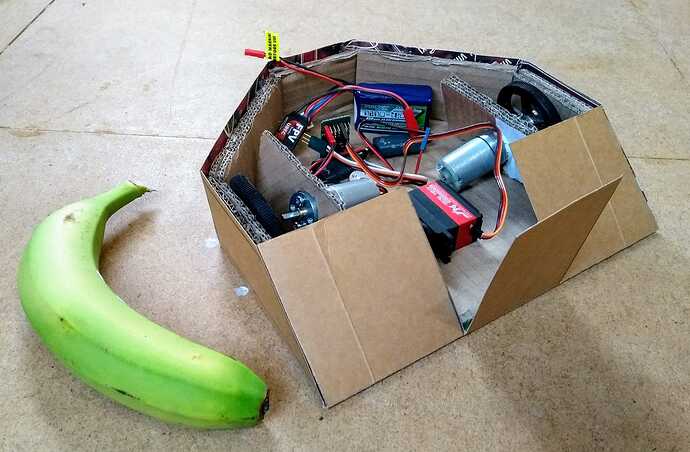
Banana for scale

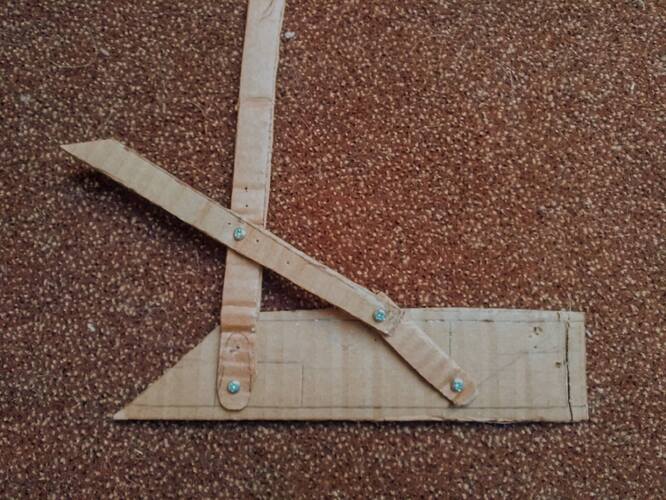
Then came the cardboard mockup, wiring, and cutting my first parts, all by hand. It was during this process that phots began to surface of a new Lance-A-Frog being built for Bugglebots series 2. It had a four-bar. The realisation hit that, by sheer happenstance, I was building a green, medieval-themed, 2wd robot that now would have the same weapon type as an entirely different green, medieval-themed, 2wd robot. Any resemblance to robots living or dead is purely coincidental, and by this point, I was too deep to turn back.


Cardboard Aided Design - Pre-RunAmok Spreadsheet


Not the only green medieval four bar in Bugglebots

By the time of the application deadline, I had a rolling chassis and half-built weapon, but put things on hold during my university exams. During the break, I discovered that I had not been accepted into Bugglebots series 2. I would later learn that, allegedly, I had been part of an early draft of the roster, but was pushed out by a forgotten Unconscious 514. Which is… fair. Because that thing was a work of art. I was undeterred, however, and made plans to attend filming, and slow down the build process, so as not to rush it for a filming date.


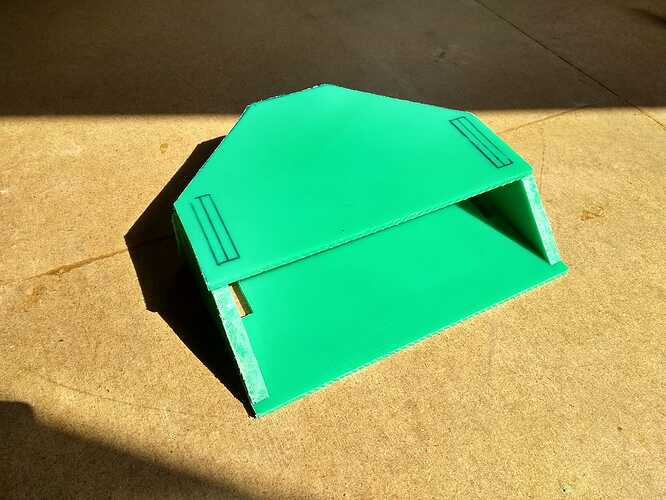
Crossblow at the time of Bugglebots 2019

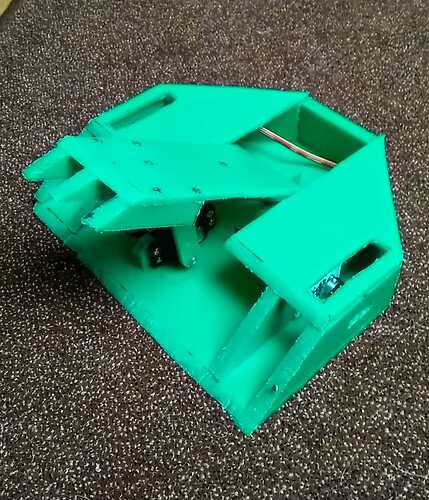
I fully intended to finish it though, and eventually, in the July, I did, complete with wonky edges, and a certain amount of jank. But it was mine. And, at last, it worked. There are definitely things that, looking back, I’d change. Many of them will be covered in later parts, but this thing had a separate car fuse, complete with it’s own holder!

The Drizzle ‘bit’ was purely a joke and I never realised how true it would actually become


The robots are ready etc etc etc

I’ll leave it there for now, but come back for part 2, covering its debut at RoboNerd, Battle in the Burgh 1, and the ill-fated SXS of 2020. Hope you enjoyed this.
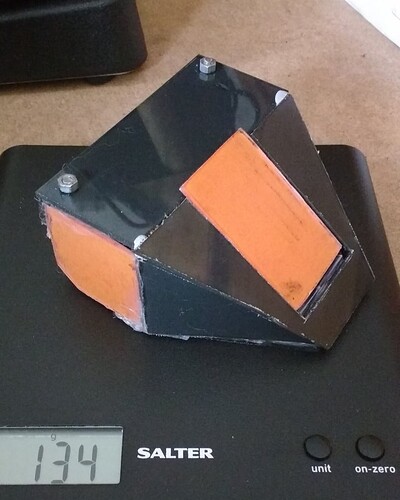
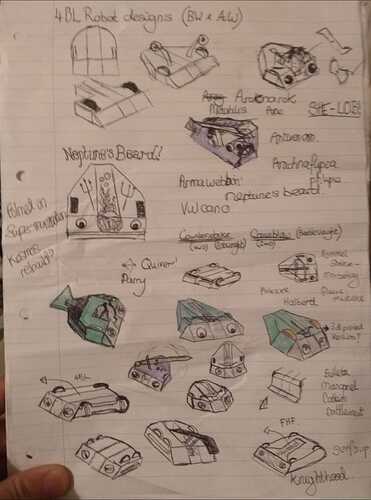
4 Likes

My First Bot

Crossblow made its debut at RoboNerd 2019 for a few whiteboard fights in the beetle arena. And one problem immediately became clear - Beetle arenas are (rarely) flat. During assembly, I had screwed the bulkheads and side armour to the baseplate, and then screwed the sides to each other. As a result, any gaps between parts had pulled and bowed the baseplate, reducing my ground clearance, and high centring the robot on numerous spots on the arena floor. As such, I wasn’t able to be that effective, but it was an important lesson to learn ahead of my first event.

robonerd
The first fight - vs Jay vs Sir-Lance-A-Frog

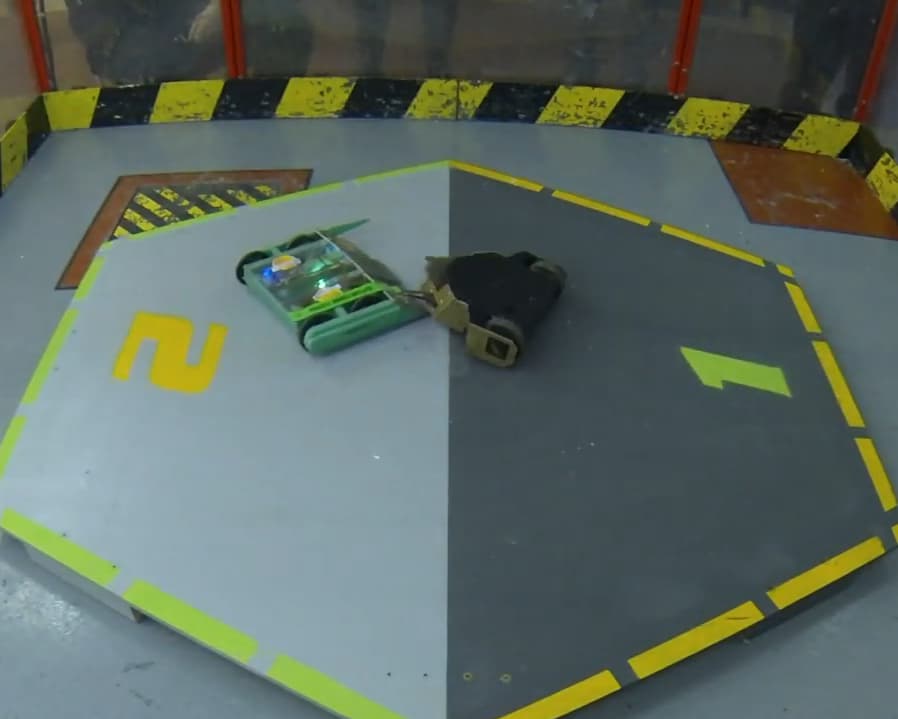
Nevertheless, it functioned. I cut a fresh baseplate after the event, with new screw holes, and signed up to the very first Battle in the Burgh in November. Fight one was drawn against successful veteran flipper, Flatulence, where a few proud screws continued to hamper my clearance and mobility. The redemption rumble became a simple drive test, as neither opponent could make it to the arena. This put me through to the heat semis against wedgebot Stormbreaker, and a chance to really stretch my legs.

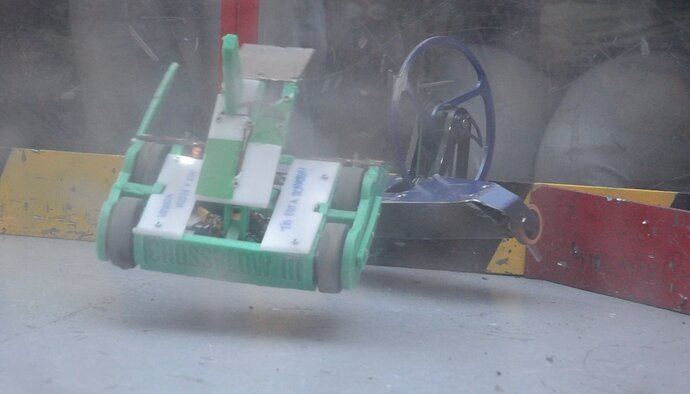
This was where I began to see the strengths and weaknesses of the robot. The low wedge was very effective, as was the lifter, though it was a little underpowered. I had prioritised lift height over outright torque. This meant I achieved several flips on Stormbreaker, but also that I didn’t have the power to fire the weapon forward if I’d pushed my opponent against a wall. Stormbreaker’s low weight probably helped! During the battle, however, I also discovered the four-bar’s effectiveness as a makeshift grabber on the return stroke, using it to my advantage to grapple and control my opponent.


A close JD, won purely on the effectiveness of my weapon (back before it was a category!)

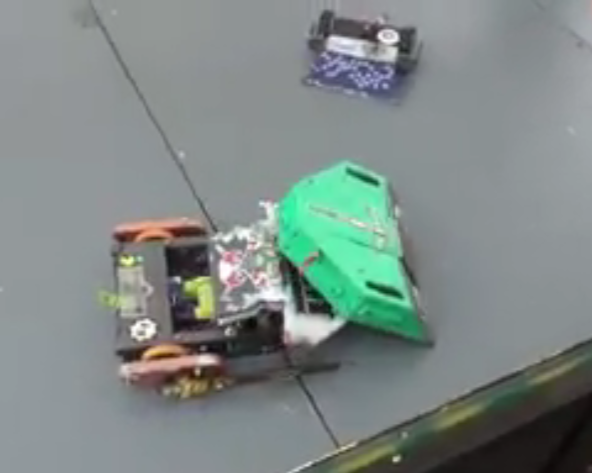
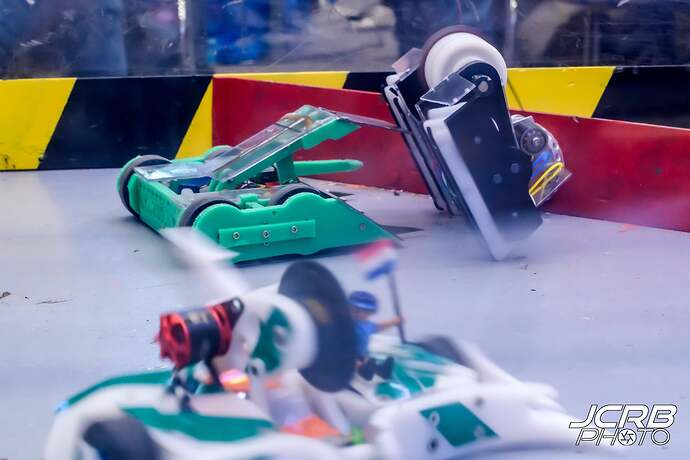
The far forward wheels meant steering was very twitchy, and with both the wedge and tail scraping the ground, I discovered that if I was outwedged, my wheels would be lifted off the ground. While the robot had a cool silhouette, there was a reason why it was unusual! The fight went to the judges, who, after quite a bit of deliberation, put me into the heat final against the terrifying Daedalus. Crossblow put up a decent showing, considering, but lost a drive motor early on. The woodscrews holding in the wedge were sheared off, and an otherwise lightly scuffed titanium plate flew into the air. But it took two minutes until it was finally subdued, and my first competition run came to an end.


Post-Daedalus damage - quickly repaired and back in for a Gladiator.

Making the heat final on your first go - even with a redemption round bye - is a great feeling as a complete newbie. I did my best to address some of the key issues with my design, however, cutting short my wedges, and trying to fashion a hinged tip, in hope of addressing any future clearance problems This was slightly shoddily done, however, as they were never quite as floppy as I would have liked. I tracked down a more powerful servo, a drop-in replacement in terms of size, that ran on a full 3S, rather than drawing power from the receiver (iirc it would end up being used on Snappy and appearing on the BBB website for a time). Lastly, after recalling a few failed attempts to pit Stormbreaker, I cut out a sword shaped lance/pokey-stick to help shepherd opponents around the box. In February 2020, I attended BBB Beetle Brawl at SXS.


Upgrades, people, upgrades!

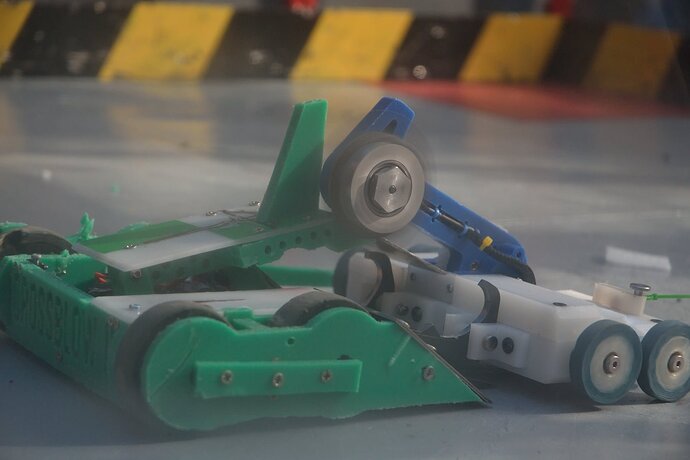
There’s not a whole lot to tell about this event. My cheap HobbyKing transmitter bit the dust the night before, so there was a lot of stress throughout the day borrowing replacements. The wedges weren’t floppy enough, but the increased weapon power did work out, aside from some stripped plastic servo horns. Looking back, the only thing worth mentioning was that moment: my first match (of many) with Drizzle. Roofed and thrown on top of a tapped-out Wedgy Boi.


The perfect KO?

You can see the bent and buckled baseplate. This would start a trend, not just of damaging fights with Tom, but of me trying to put more rigidity in the frame. Due to the servo powering the front arm of the weapon, it is difficult to give the robot any rigidity across the width of the chassis without obstructing the weapon mechanism. For my next robot, I reasoned, polycarbonate would provide a far more rigid replacement.

‘Don’t change too much at once’

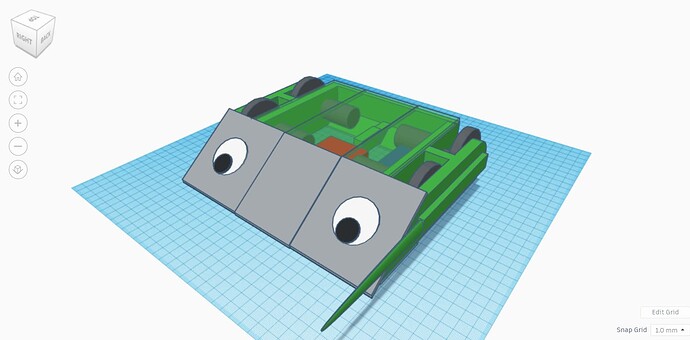
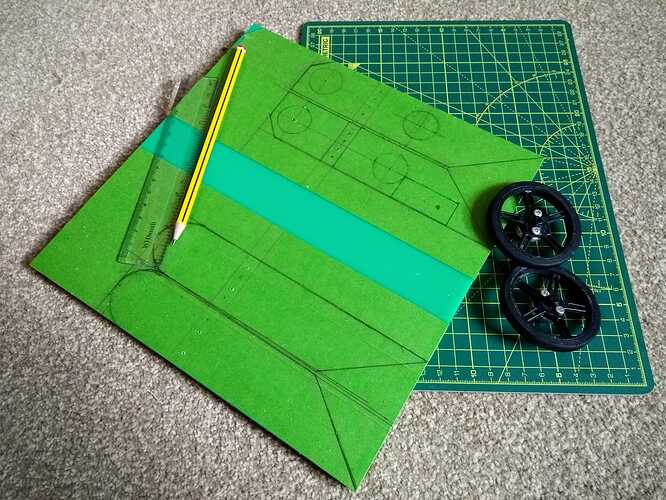
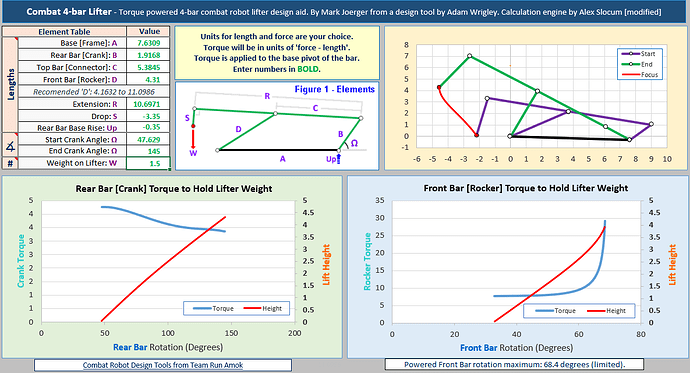
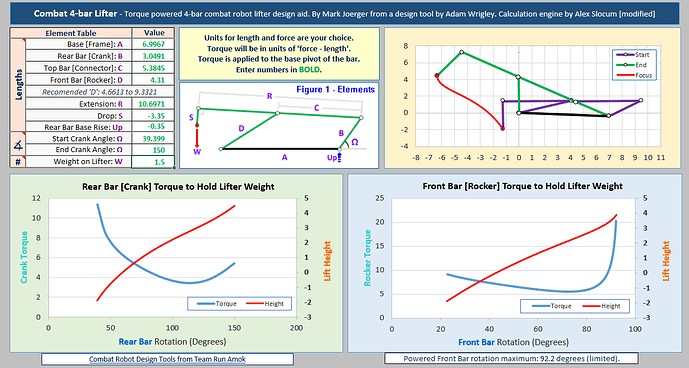
This was the advice, on building robots, (as best as I can remember it) of Craig Croucher during our first meeting at RoboNerd. Words that stuck with me, probably more than he intended. The plan was to go with 4WD, to help with all the clearance problems, and keep everything else near enough the same. As lockdown hit, I began work on Crossblow II. There was a lot more time to plan things, without the pressure of an event, and a lot of thought went into the design process. I experimented with CAD for the first time - TinkerCAD - and discovered a very useful excel spreadheet from the Run Amok website that actually calculates and visualises the outputs your four-bar mechanism! (Highly recommeded, I still use it to this day).


From CAD…


To pencil…

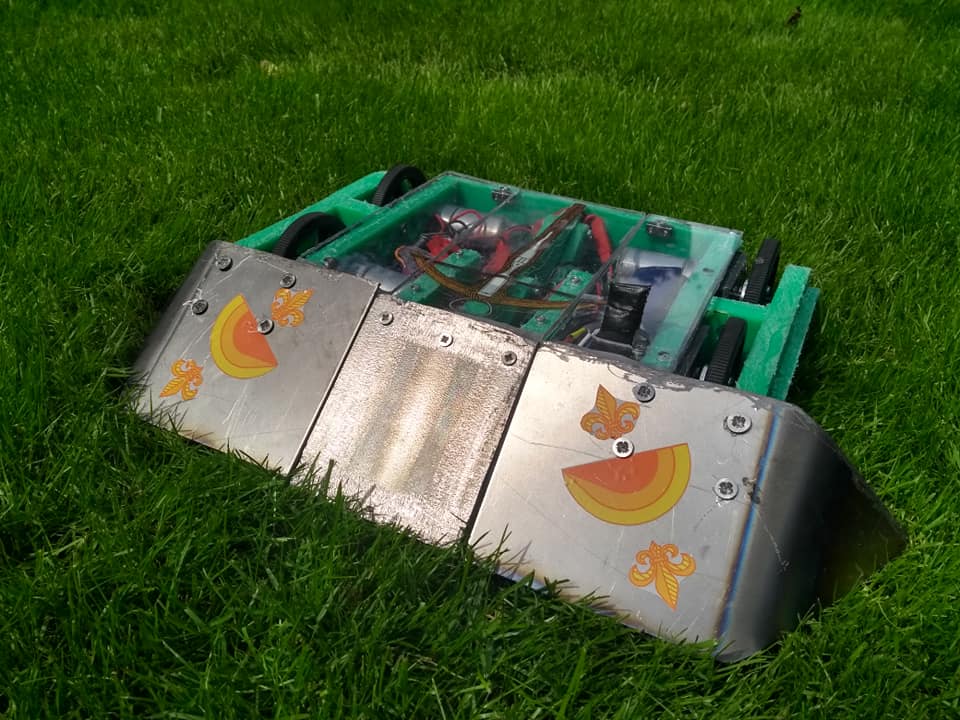
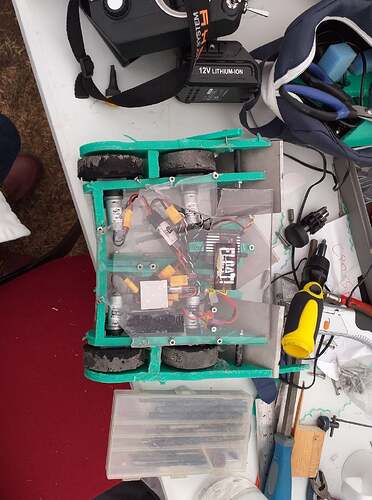
Much was carried over into version 2: 10mm RG1000, the same 3S battery and 25mm motors, VEX29 ESCs, and 60mm Pololu wheels. The 3S servo was also carried over, now with an aluminium servo horn to prevent stripping. I wanted to try and de-box-ify the robot’s silhouette, so made the rear panel out of heat bent 5mm RG1000, also with the intent of cutting weight. 3mm polcarb replaced the old 5mm RG1000 base, and some 2mm bent titanium anti-horizontal wedges were very kindly made up for me by Jeremy Hall.


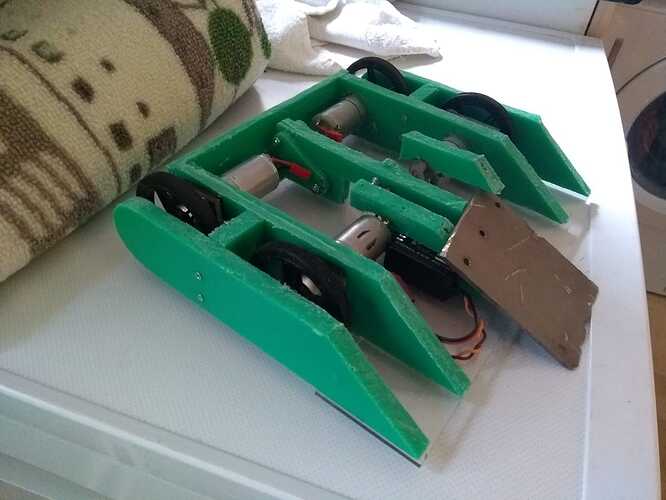
Work in progress, with some version one titanium.

Weight became a massive issue, however. There was a good amount of empty space in the robot, and the extra motors, 10mm plastic and 3mm titanium (now with larger screws) all added up. Even with a good amount of cheese-holing (Shout-out Jimmi Cottam) I couldn’t make weight for the googley eyes, so settled for making up some stickers for a final weight of 1.488kg. With lockdown still in full force, however, it would take a while for the robot to see battle, continued in part three.


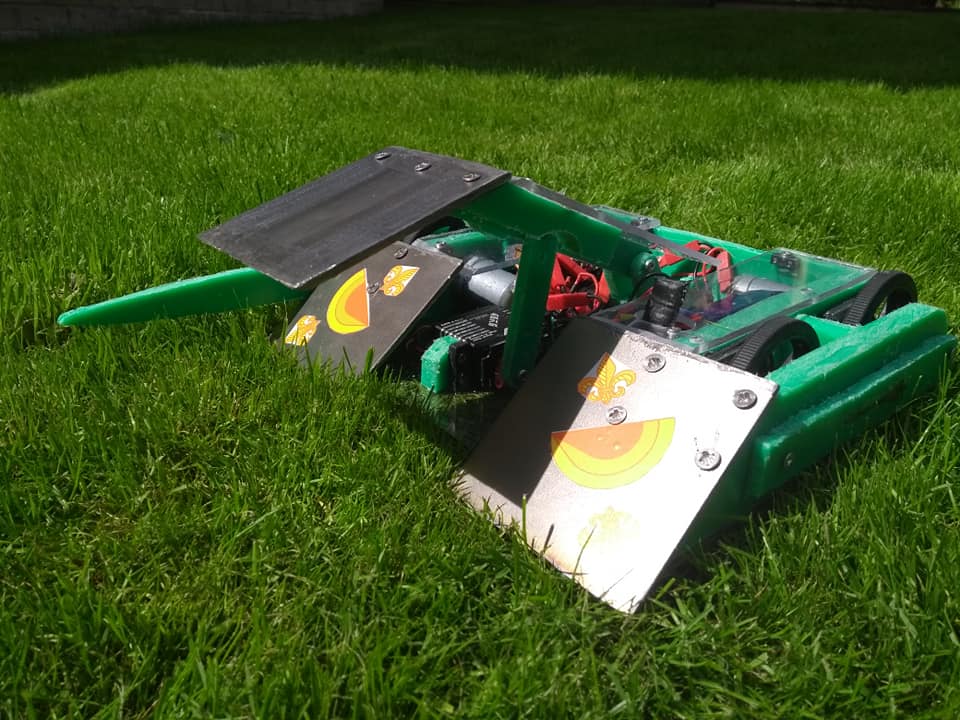
A new beginning


I still adore those bent panels.

5 Likes

Oh no! I have the sudden urge to build a 4-bar lifter! Good job, and a 4-bar seems like a nice beginner friendly option for beetles. Nice design and theme, and I especially like the extra detail on the Mk 2. May I suggest a feather called Ballista?

1 Like

Street Fighter

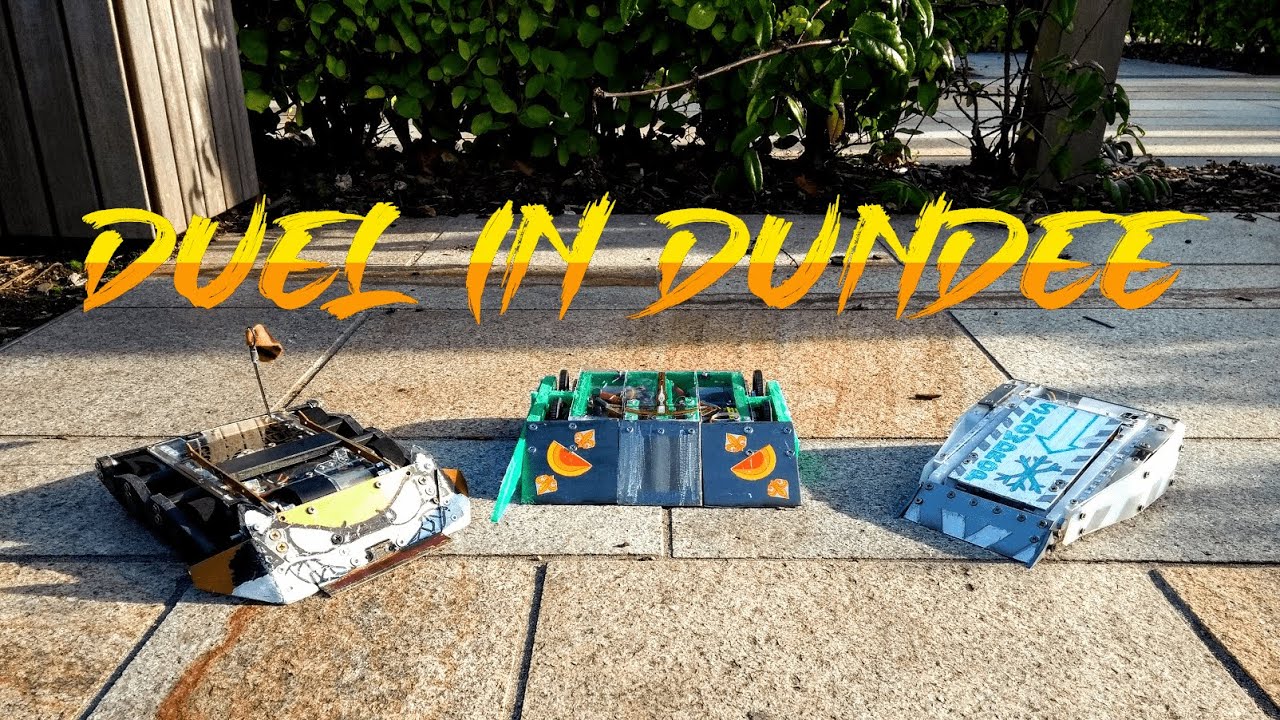
During the pandemic there were very few chances to fight my new creation, however, as restrictions eased, I began meeting up with other Scottish builders for sportsman ‘street fights’ in local parks and public places, fighting the likes of Sprocket Raccoon, Snowdrop, Scavenger and Gladius. The new Crossblow held up well against the competition, once again having a strong ground game.

Duel in Dundee - October 2020

It was also a much needed opportunity to hone my driving skills: the street fights culminated in a mini tournament in Blairgowrie, a tiny village, north of Dundee, using an upturned model railway table as an arena, and Crossblow topped the table of our mini round robin league.

The Blairgowrie Bash - or ‘That Blairgowrie event’ as Dave Weston once (generously) called it.

Electric Boogaloo

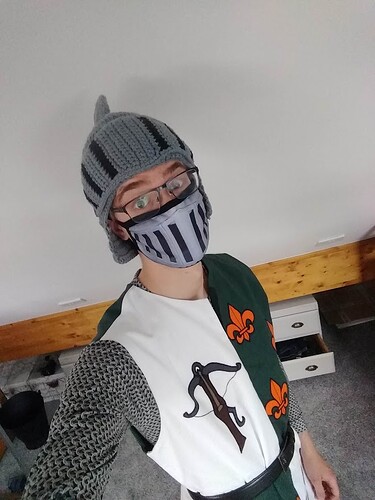
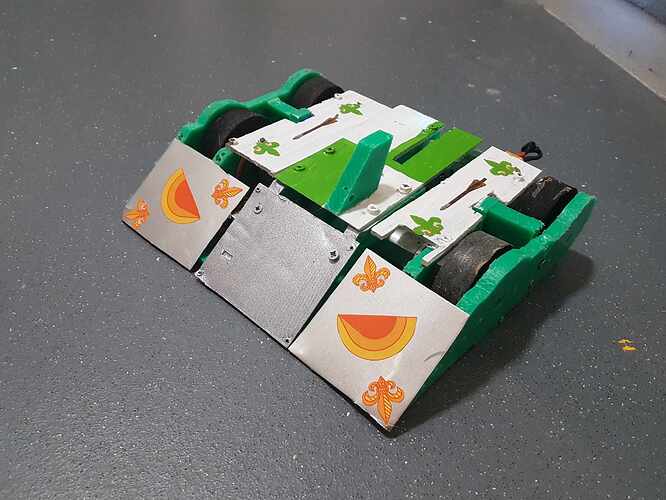
The first event back was the inaugural Rapture Gaming Festival. All the testing had left me feeling far less nervy - even confident - about holding my own. With it being a public-facing event (and Bugglebots being no more) I wanted to take the opportunity to lean into the theming of my robot and dress up a bit. I picked up a knitted knight hat from Bodiam Castle, a chainmail print t-shirt from a Youtube channel, and a matching mask. Steel Mastery provided a custom tabard, matching the colour scheme, crossbow and orange fleur de lys to my design.


Eat Ham and Jam and Spam-a-lot

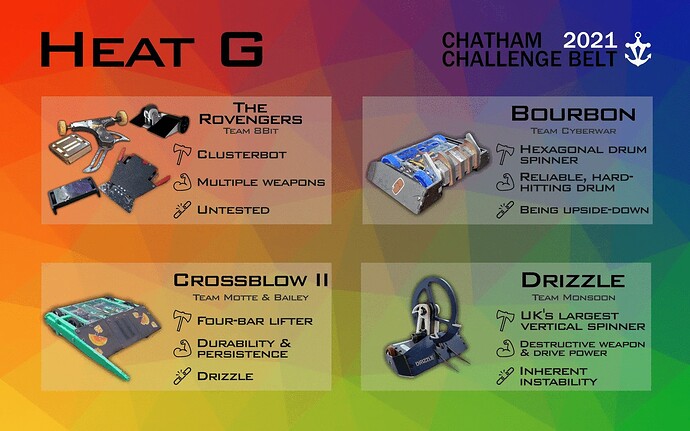
Heats were made up of four robots, two spinners, and two non-spinners. Despite this, I ended up being drawn against three KE bots:
Bourbon - By this point a well established drum.
The Rovengers - A new cluster from Morgan and Simon, that included wedges, a vert and a big horizontal
Drizzle - Somehow, Tom Brewster returns, but it would be a good opportunity to test my upgrades.


Goldibots and the Three Spinners. UK’s Largest.

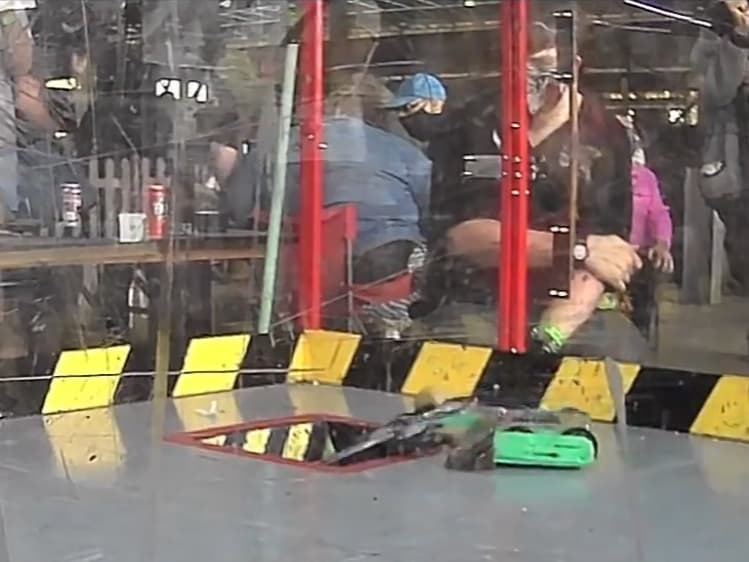
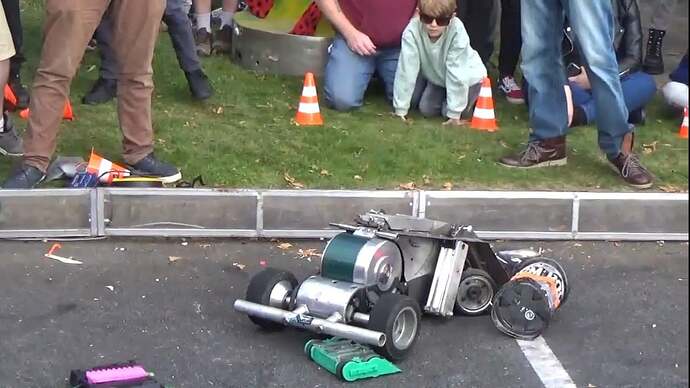
Fight one was a quick link removal from Bourbon. The mountable XT60s were an incredibly tight fit, making them hard to fully connect at times. Then came Drizzle. It had fallen over in its first fight, unable to apply the torque to self-right. Tom had fitted the disc this time, so no such luck for me. Or so I thought - on the first hit, Drizzle landed on it’s back, unable to self right. My inexperience and nerves showed, however. I was so determined to execute my strategy - open the pit asap and ram Drizzle into the walls - that I nudged it back into the fight. What followed was a well-executed strategy from me, but the damage piled up quickly. The polycarb baseplate shattered, leaving me upside down with limited mobility, eventually finding the pit.

A few quick repairs later, and I was back in the box, against The Rovengers. I opted for a half-and-half setup, with the lance on one side, and an anti-horizontal wedge on the other. Morgan and Simon fielded the wedge and the horizontal, though the spinner went down after the first big hit. Soon, the wedge found the pit, so I spent the rest of the fight awkwardly grappling with the weaponless horizontal, until a great drive, aided by the lance, in the dying moments of the fight, to pit the other half of the bot as well.
This put the heat scores into a stalemate. Bourbon, having gone undefeated, was through, but everyone else was on one win apiece.


The Rovengers fall

Initially, the heats would be decided by an internal group battle - mine wasn’t the only undecided heat. Morgan and I began to strategize on how to deal with Drizzle, the big threat. However, after some complaints, from somewhere, it was decided to shuffle all the undecided heats into a series of randomly drawn three-way battles. The names were pulled out of a hat: Crossblow… Rev 4… (Ok, I have a setup, I can deal with that)… and Drizzle. Again. You couldn’t write it. And this would be fought without Morgan’s support.

For as long as I could keep the wedge pointed forward, I did well. Rev 4 clattered off, and Drizzle was set skywards. But the two spinners used this to their advantage, as one closed in on my rear whenever my attention was on the other. The weak plastic rear wheels were snapped. Then off came the lifter panel. Drizzle exposed my battery, dealing huge damage in an excruciating wait for ‘cease’.


The aftermath.


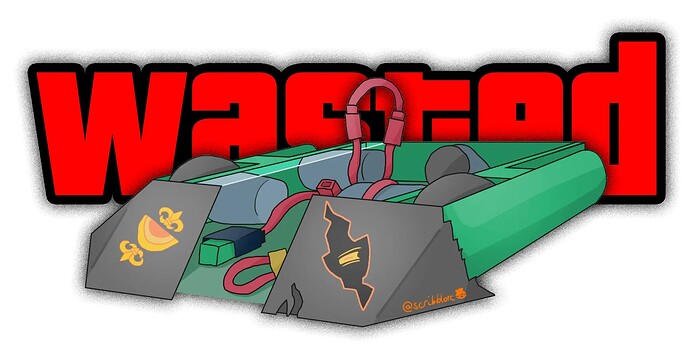
Forever immortalised. Thanks, Mitch.

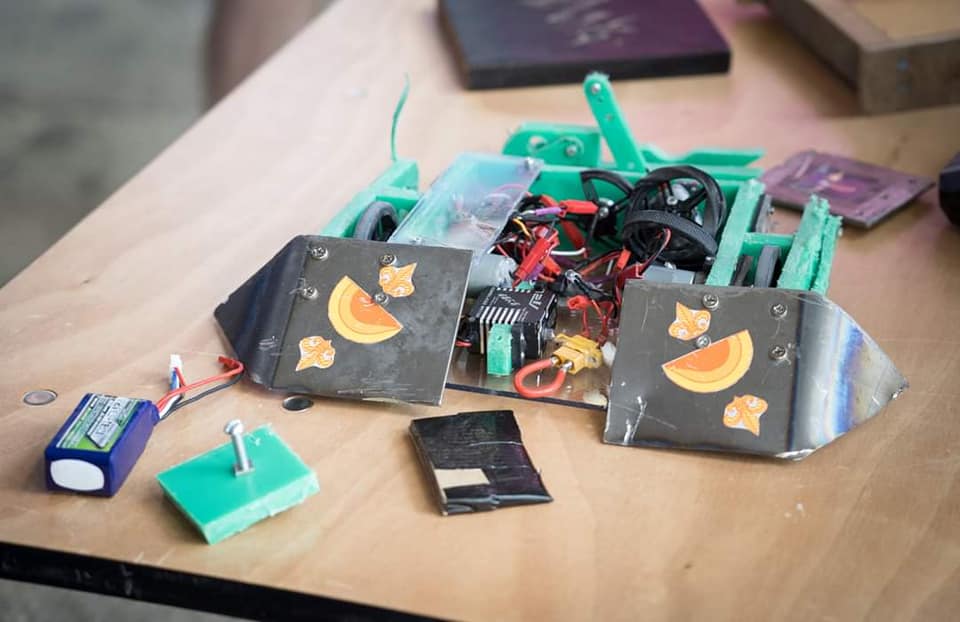
Frame rails were bent, wheels were detonated, the whole chassis was wonky. I stayed up late that night, heat bending plastic, and soldering. Crossblow returned to the arena the following day as if nothing had happened, but I stuck to non-spinner fights. Clearly this version couldn’t handle the punishment, and something needed to change. As soon as the event was over, I began a rebuild, aiming for the Summer Showdown event in mid-August, only a month away. Now was the time for a drastic change. 8mm RG1000 all-over. The far more durable BBB 22mm motors. Foam tires to avoid the detonation. A thicker baseplate. CNC machining for the first time. And an attempt to solve the chronic self-righting problem. Whereas version II had been about continuity, version III was about much-needed change. With such a tight turnaround, and so much to do, I got to work.


Crossblow III. One Month.

2 Likes

Third Time’s a Charm

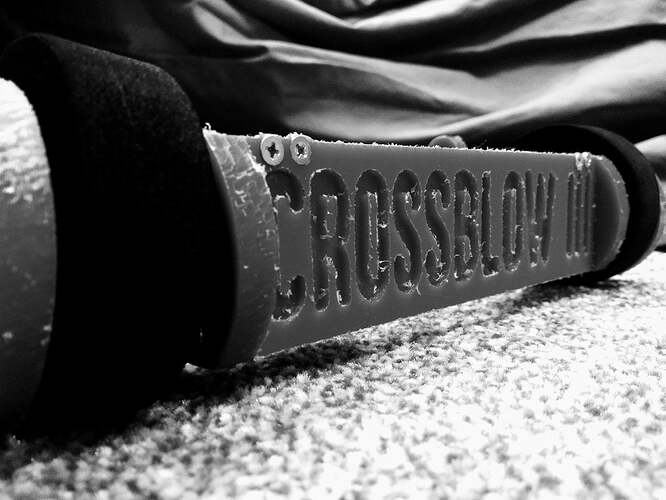
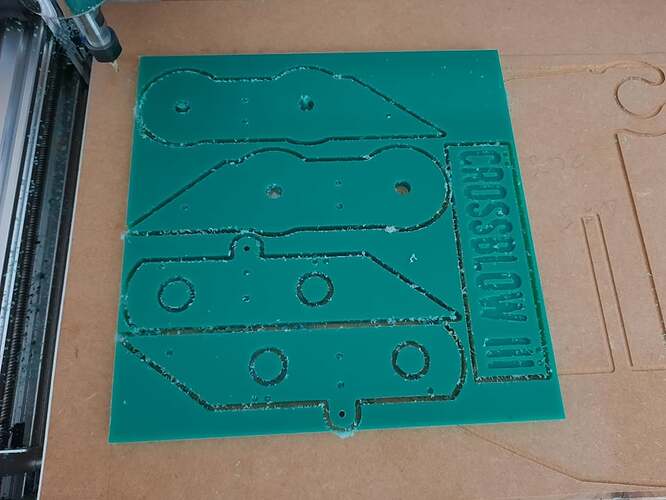
As mentioned up above, Crossblow III was my first foray into the world of CNC, with machining graciously provided by Ryan Bratley. Following their lead, I created a 2D design in inkscape. Producing a robot in this way would allow me to break away from a featureless, boxy design even further. This time, the wheel guards featured extra protection for each wheel, inspired by K2, and additional hoops would be added to the rear, to further protect the wheels from rear hits. It also allowed me to engrave the robot’s name into the rear.


A beautiful 3D jigsaw. My thanks to Ryan Bratley for ‘just the chassis’.

The baseplate would again be polycarbonate, again with the intention of keeping the frame more rigid, to it was upped to 5mm thick to )hopefully) prevent breakages. 3mm Poly lids would be held down with nutstrip, as I was fed up with constantly putting woodscrews in and out of plastic. Drive would be moved over to the lighter and more durable BBB 22mms, with matching ESCs, finally retiring K2’s Vex 29s. Foam tires would hopefully withstand more hits! The robot would still run on 3S, however, and the weapon setup would remain largely unchanged, still with plastic servo horns, as a sort of clutch, and plenty of spares.


Mid-construction, with one interesting feature that never made it to the arena…

A pair of long M4s, with black plastic spacers, filled the gap between the guards. I was already creating provision for forks later on in this design, as that was the way the meta was going. You’ll also notice a large green arm - the srimech. Over the course of this design, I made it my mission to fix the four-bar’s chronically poor self-righting. It’s always a bit of a gamble with this weapon type. The likes of Lucky can right themselves on sheer weapon power alone. Other designs have used something as simple as small trianges on the back of the lifter to shift the angle just right to turn it over. This was my first attempt, by extending the front rocker. I tested it on Crossblow II, and it seemed to work, and while Lance-a-Frog has now successfully employed this method, for whatever reason, the weight distribution, torque, or leverage just didn’t work out. I cut it off in the dying hours before the event, along with the extra lugs to use it as a weapon lock. It was right down to the wire, with a few small jobs being completed on the morning of the competition, but Crossblow III was finished, and in record time.


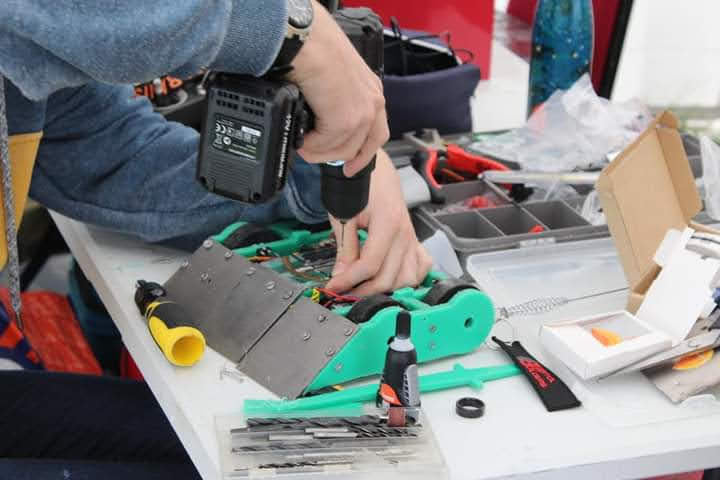
The literal final assembly


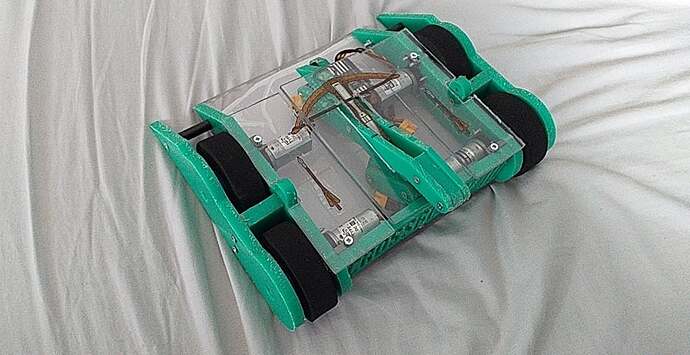
Ready to fight

Thankfully, it was a good event. First fight was the rookie Sproing!, a very cool new spring flipper. I agreed to let Will have a couple of free shots to test out his weapon power, and Crossblow went somersaulting! He was clearly having issues though, getting stuck on the wall, and the agreed-upon return flip took a little while to execute. I began trying to ram Sproing! to the walls, to get it pinned again, but Will did my job for me, racing away into the pit. This put me into the winners’ bracket of the infamous ‘ganjob diamond’ format, meaning I’d be facing tougher opponents for the remainder of the day. Next was the complex and compact ring spinner of Ergosphere.


Full horizontal armour for the first time.

It was such a pleasure to be fighting so many cool machines. It was such a good event. This turned out to be my greatest fight yet. I remained squared up the whole fight, creating opportunities for pins and lifts. I opened the pit, angling my wedge to send Ergosphere nearer, and ended up lifting it and driving it down.

This put me through into the top sixteen in the winners bracket (so technically the top twelve?) and up next was another rookie builder… Oubley. A pink fingertech beater. Although the match began well, as I got to his rear, as soon as Sam could bring his eggbeater to bear, he ripped away my lifter panel. From then, it was only going one way, as he could get underneath me with ease, and shatter my baseplate until I could move no further. What actually did me in was one of the rollover bars (pictured top right) got pinned under the wheel guard, preventing me from getting full traction. 2-1 was an excellent performance for a first time out, but clearly there was work to be done.


Polycarb just… isn’t working

The UK’s Only…

Over the following months, I finally fixed the rigidity issue. The baseplate went back to 5mm RG1000, this time with an 8mm RG1000 bar slotted widthways along the centre of the robot, so that the rear panel and baseplate was no longer the only thing holding the robot together. I also put in a servo saver, and slotted out my wedge for some titanium forks made for me by Jeremy. Testing at Robonerd 2021 went well, even ‘immobilising’ Onslaught in a Beetle/Heavy Boss Battle. (Its rear wheels were off the ground, and David Wood had to ‘fairly’ lift his machine off of mine!).


I count it as a win.

The next event would be Champs 21, and at this point, I have to take responsibility for the foolishness of my past. In the run up to the event, I made the erroneous claim to being the ‘UK’s only beetle four bar lifter’ on social media. With Leim Thart retired, and Froggy MIA, it seemed a safe claim, and if you’ve read with me this far, you’ll know that I began in beeltes by trying to be unique enough to be selected for Bugglebots. That attitude has kinda defined my approach ever since, with robots like Barber Surgeon and Hot Mess being prime examples. In hindsight, knowing what I know now, it was a silly claim that I was rightly called on. The memes were funny though.

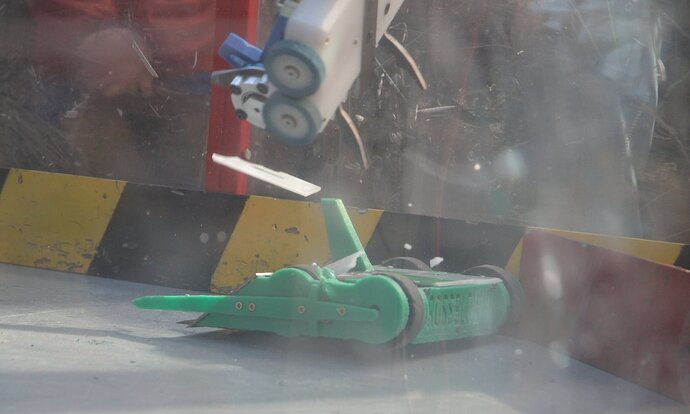
As for the robot, though, it was primed and ready, drawn against my event roommate Greg and Head for the Exit, as well as shuffling drum Let the Good Times Stroll for my opening melee. The fight began well, and my new forks went straight under Good Times Stroll. I almost toppled it over, save for the arrival of HFTE on the scene, knocking it free. On my second attack, however, Stroll’s drum caught the bottom of my lifter, ripping apart my weapon mechanism and beaching me, upside down, on top of it. Even with weight removed, the weight bonus on that weapon was crippling!


So close! JCRB still does the best photography.

It was worse, even than that. The M3s that held the linkage together were all bent and broken. And the polycarb top plate had shattered, despite not taking a direct hit. The sheer force transferred through the robot had been enough to break it, but it needed replacing, since the top plate actually held the weapon together. Some 1.5mm was sourced from Thomas Yau, and the rest of the event played out pretty predictably - a win against Splodieboi in the horizontal config, and a loss to Rust in Pieces, who just outdrove me and inverted me, With no way to get back over, I was toast.

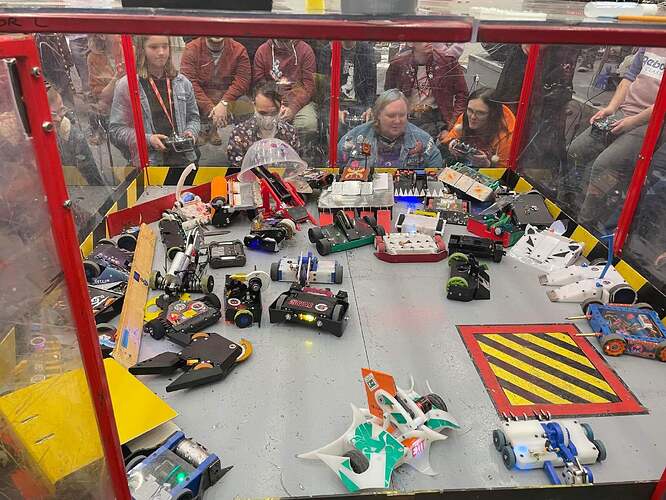
I’ve tried to refrain from covering whiteboards so far - this retrospective is already long enough - but just this once, indulge me. The event wrapped up with a Gladiator. THE Gladiator that kinda killed them at big UK events. 42 robots entered, and the fight itself ran for eight minutes, not including loading, unloading and breaks. It has to be one of the largest beetle fights, certainly in the UK. By sheer attrition, and by staying out of trouble, I survived to the final four machines, until the judges called time. As the most functional, operational machine, I was named the winner! (No gladiator trophy though - not bitter). This was a huge success for Crossblow, and confirmed the potential in the design, if only I could get the last few weaknesses resolved. Come back next time for the peak, decline and death of Crossblow.


No more gladiators… this was ridiculous. Spot the Crossblow stacked in the corner.

3 Likes

The Peak

Definitely over halfway through! The path after champs was very clear - the weapon mech bolts were thickened from M3s to M4s, and the lids were replaced with 3mm HDPE in white - with some green vinyl cut to match the tabard! More testing would be the self righting. I revisited the extended linkage concept from the summer, this time on the rear crank bar. It was just too distant from the servo to have the torque to work. Sticking to the old adage - Keep It Simple, Stupid - I decided to try something much more rudimental. Resting at the right angle, the robot had more than enough drive power to flip over, so I fashioned a support from RG1000 to sit atop the robot. Some people have called it a mohawk, but I’ve always referred to it as the Shark Fin - but that’s just the 2010s F1 fan in me. And it worked! - when flipped, all I’d have to do is run at a wall at speed, and then the robot would flip itself over like one of those double-sided RC cars. If it works, it isn’t stupid! I also braced the weapon together with an RG1000 crossbeam so that it was no longer solely supported by the top plate.


My FINAL FORM!!

The inaugural Scouse Showdown was my next event, again in the Ganjob Diamond format, with my first match against close friend David, and Aggrowobba (Smidders Edition). It was a strong start! My forks made short work of their wedge, and I used my lifter to lift and grapple to good effect, controlling the pace comfortably, and eventually pitting Smidders, again putting myself through to the more challenging winners’ bracket.


Boy finally coming good.

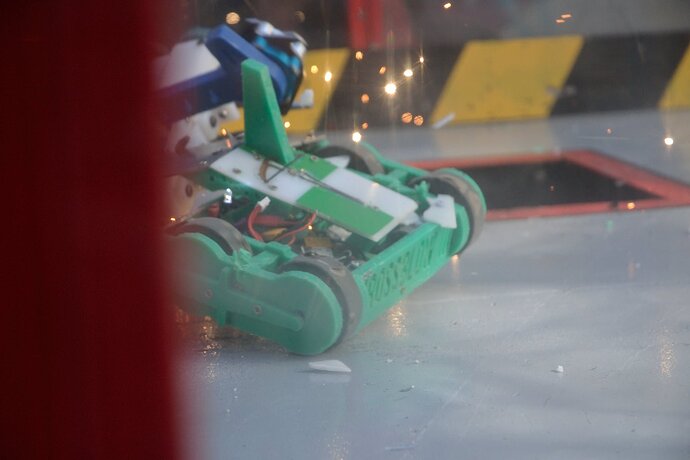
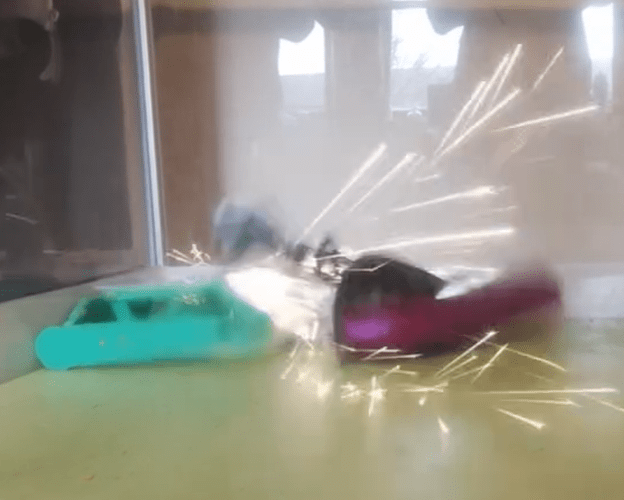
My next match would be against Saw Loser. Indulge me, this is my favourite fight of my entire time in the sport. It swung violently back and forth, as I took Alex’s machine to the walls, flipping it and nearly OOTA-ing it on a couple of occasions. I capitalised when he was slow to self right, and grappled Saw Loser, taking it on a tour of the box. But the moment I made a mistake, Alex would capitalise, trapping me on his long forks and bringing down a spectacular hammer-saw blow. Unfortunately for me, it turns out the high-quality Direct Plastics HDPE I thought I was buying was, in all likelihood, some form of LDPE, as my top panels detonated on impact!


Keeping that weapon at bay. Excellent control, imho.


Flying high, as my lids explode!

Thankfully, I’d recently switched to a smaller battery, buried deep inside the robot, and packed with foam, so the fight wasn’t called for an exposed lipo. Immediately, I was back in control, smothering Saw Loser, taking it to the walls, and avoiding Alex’s attempts to line me up. Throughout the fight he landed three good shots - one each to each top panel, and a deep gash to the top of my titanium wedge in the dying moments of the fight. Despite driving the fight of my life, the JD went against me, as the two minutes expired. I still feel like I deserved the W here, but cannot begrudge Alex the result after such a fantastic match. If you’ve not seen it yet, or in a while, I urge you to track it down. Let me know how you’d judge it?


Sparks fly on that final hit.

Should be timestamped here.

Despite being at 1-1, in the winners’ bracket, I was out, and certainly disappointed. As fun as this format was at Summer Showdown, it definitely did not adapt very well to a more competitive setting - sorry Gareth! I replaced my lids and entered some group whiteboards, the last of which featured Zephyrus, Ultraviolence and, of course, Drizzle, slightly worse for wear after it’s schedule of nasty spinners. With Tom’s talk of a new robot, this might be my last chance to put to bed my run of losses against it. I ran my hooked forks, planning to take Drizzle to the walls as I had at Rapture. Tom and Morgan span up and went weapon-to-weapon on activate, flying across the box. As Drizzle found its feet, I lined it up with the OOTA zone, and drove forward. As his weapon connected, we both flew backwards, and Drizzle went over the wall! The rest of the fight was kind of a blur. I pitted a wounded Zephyrus and tussled with Ultraviolence, even getting a chance to test my self righting in the heat of combat (it worked!). At the end of two minutes, I took the win, finally conquering my white whale matchup.


Tom is still 1-3, I suppose, but it was nice to end the Drizzle streak on a high.

The Fall

Heading into Rapture, the robot was in a great place. I made new lids, this time out of UHMW, and turned my attention to my Subterranean Showdown entry, The Barber Showdown. I’ll save a deep dive into that for another thread, but I decided to bring it along to Rapture to test out in some whiteboards ahead of it’s debut. However, some last minute withdrawals saw it bumped up to the main competition. What followed was one of my worst weekends in robot combat.

Crossblow’s first match against Blast Furnace went well, but the drive seemed a little spotty, so I swapped in a spare ESC. I’d given my spare to Mark Smith at Scouse, and he had graciously soldered me up a fresh one for Rapture. In my haste to prepare two robots, I didn’t check that the male and female connectors were soldered in the correct direction, and when powering on the robot for a test, the entire wiring loom burned itself out on the bench. Every single cable in the robot was basically useless, and I didn’t have the time or spares to sort the problem. With Barber having it’s expected new bot gremlins, for the first time ever, I gave up, and left the venue for a few hours.

It was a dark day. On reflection, I had my identity far too tied up in combat robotics. When, really, it’s just an expression of my creative and competitive traits, the things that really define me. If I wasn’t doing robotics, those aspects of my character would manifest in some other way. I hope someone will find that helpful, someday. It’s certainly been formational for me. Eventually, I returned, and rewired Crossblow, rescheduling my missed fights against CSB Echo and TINMBW Evo for the following day. I won both handily. Not that it mattered. After they’d taken place, they were ruled as whiteboards anyhow. I made my final match against Baby Shrekt, who, coincidentally, would have been my opponent had I beaten Saw Loser at Scouse. I’d checked out, by this point, and Shrekt had it’s way with me. What should have been a guaranteed heat qualification became Crossblow III’s final event. The chassis had become quite tired, and I was just too frustrated and disappointed to continue with it. On top of that, I’d felt I’d developed it as far as I could, and wanted more weapon power, were I to continue with it. In hindsight, I would have taken different steps, but that’s how it goes.

‘King’ Crossblow

This is the part of the story that I’ve covered on here before, but with fresh context, I’ll tell it again. Unfortunately, it doesn’t get any better for the old four bar. Inspired by Blip, I considered the potential a flywheel mechanism might have and began trying to reverse engineer what Team Seems Reasonable had done through careful study of the Blip reveal video, even lifting some of their maths and spreadsheets, aiming for a Battle in the Burgh II completion date.

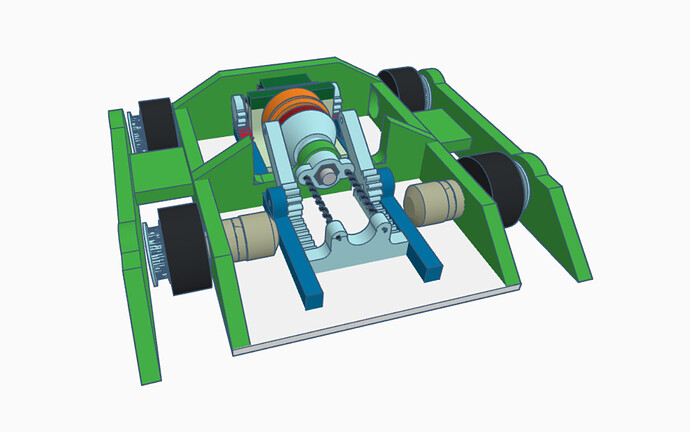
Using TinkerCAD (I cringe), I created a quite respectable looking design. A mild steel cone clutch would store and deliver the energy, kindly machined for me by Jeremy again, engaged by antweight servos on a rack-and-pinion. UHMW fishing cord would take over from there, as it wouldn’t stretch, and a second rack-and-pinion would fire the weapon as it shortened. Belted brushless drive and a Lucky-style silhouette would create weight, and I just hoped it would deliver enough power to self right. The batteries were split into 2x 2S, to use space efficiently, and the base and lids would now be 4mm UHMW. The RG1000 and titanium would stay! Drive would come from 2x 1806s with old BBB gearboxes mounted in place of the higher reduction rotalinks, simply because I had them to use.


I mean, it doesn’t look bad! Motor in orange, cone clutch in red and blue, twisting a spindle and firing the weapon.

The issue came in manufacture. I ended up having an incredibly busy semester, and ran out of time to arrange machining. Instead, the chassis was created on a band saw with the help of Scott Anderson. Considering that, it came out very well, but between that and a lack of testing, the end result was… janky to put it kindly. It managed a half flip in testing, but it soon became very clear that it was in no position to fight.


Coming together!


But not quite

I didn’t end up fighting at Burgh, though I did attend. I signed up for the second Scouse Showdown, but again, simply didn’t have the time to develop the robot further. As a result, I put a servo back in, and intended to trial the existing chassis without the flywheel system. I submitted my POM, and finished the robot, moving on to help close friend Jimjamatic with his entry, Monke Yeet Banan. After giving Crossblow one final drive test in his kitchen, I applied latex and packed up for the event.


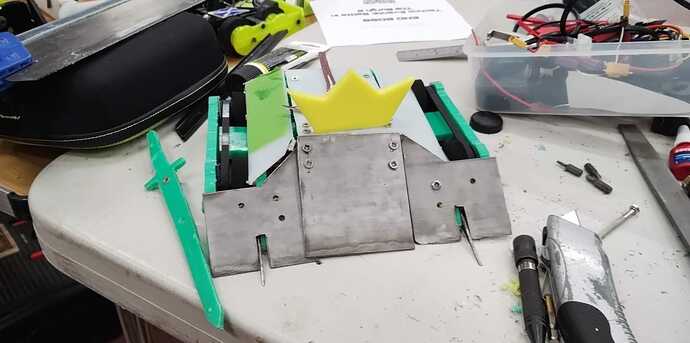
No crown. He hasn’t earned it. I technically count this version as Crossblow IV.

If I thought my luck was changing, I was mistaken. Somewhere between James’ house in Lancaster, and safety in the Cross Keys, a drive motor wire got pulled away from the central coils. and the robot refused to move. It took all day to trace the actual issue, as I tried fresh ESCs, checked for cold solders and yet again, missed all my fights. Yet again, despite coming painfully close, Crossblow failed to make the arena. I took another break to do antweights. Big up Sam Graham, and, really everyone for their support that day. But Sam invited me to SCAR 3, which was just the palette cleanser I needed.


No caption needed.

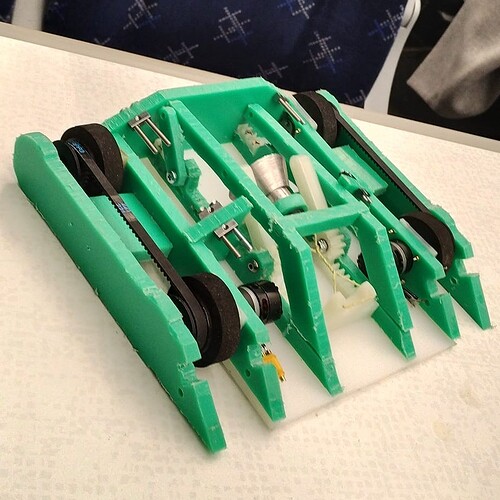
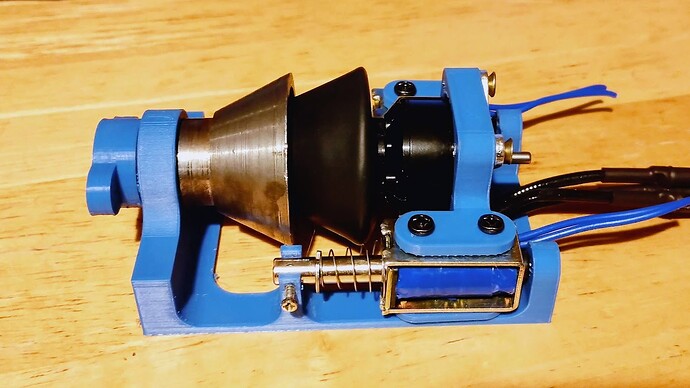
Eventually, I poured more time and money into the flywheel. I learned Fusion. I upgraded to a far higher KV motor. Spur gear racks became double helical. I trialled linear solenoids in place of servos - a far neater and more durable solution, but they just couldn’t meet the power outputs stated on the box. I learned a lot from this whole process, and improved greatly as a builder, but eventually, I accepted defeat, and moved on to iterating Barber Surgeon. Perhaps I could still make this work, with a big rethink, one day. But not for Crossblow. Watch this space. Any input gratefully received.


The 3D printed frame just never felt robust enough. I’d genuinely take offers on the clutch and motor if someone was interested enough. I ended using some massive heat shrink as a clutch lining.

Where are they now?

You never forget your first, and Crossblow I has been stuffed, mounted, and given pride of place on display in my bedroom at my parents, complete with event pogs, and a destroyed drive motor, courtesy of Daedalus.


Rest now, good and faithful soldier.

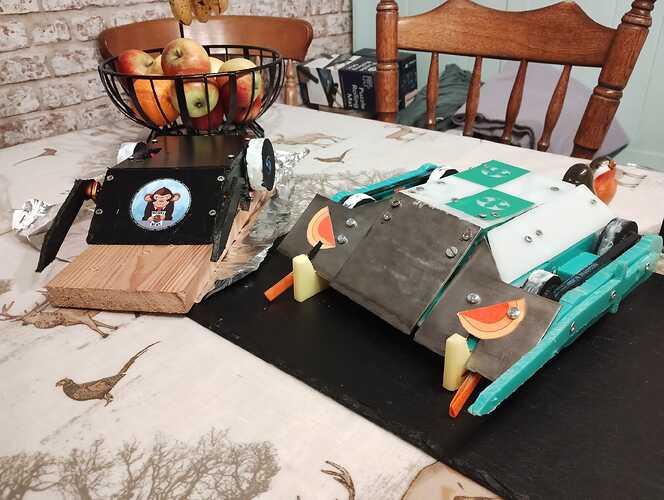
Crossblow II has had the most storied retirement. After Rapture, it was abandoned in a box for several years, the ‘unloved second child’ as Reuben and I tend to refer to it. But it was recommissioned for Battle in the Burgh 3, entering the sumo, under the stewardship of Theo. It made a few more static appearances at events, before eventually finding its new forever-home, with Anderson Hill. He was my teammate for the first Rapture, so has a far closer connection to the robot than I’m ever likely to!


Literally the only time it touched another robot. I blame Theo.

Crossblow III has found a dual home, as I actually had two chassis made up. There was only ever one assembled, which now lives alongside the original, but the spare panels eventually made their way over to Mecha Mayhem, reassembled and reactivated for Anthony Murney’s local robot show.


This is getting out of hand…

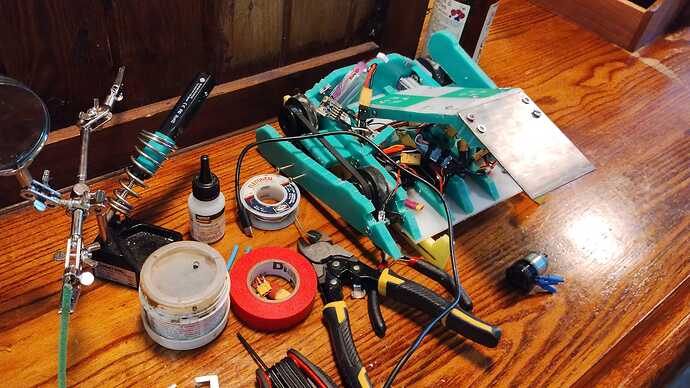
Lastly, the King Crossblow/Crossblow IV chassis exists solely as a test mule, and has been brutally mauled in various Barber Surgeon tests.


The Barber Surgeon. A great story. For another time.

I’ve always felt a little uncomfortable about leaving the robot’s legacy on such a dour note. Not that it has any personhood or feelings, but it feels like a disservice to the hard work that I’d put in since 2019. As Barber Surgeon 3 has neared the end of it’s competitive life, the robot bug has bitten me hard, and I figured it was about time to put everything I’d learned to good use, at least for a CAD. At this point, I’m hoping to turn this retrospective thread into something of a build log, seeking feedback and posting updates. But I’ll leave that for one final post in the coming days. Until then, thank you for reading, if you have been. I hope it’s been insightful!

7 Likes

It just so happens that your friend here is only mostly dead!

The logical next step for Crossblow, I feel, is to look both back to its last successful iteration, and forward to my experience with brushless technology, waterjet parts and, most importantly, Fusion360. Parametric design makes it far easier to ruthlessly eliminate unused space. I also plan to fully integrate additions, like the shark fin, into the design from the get-go.

The meta had also moved forward since the Bugglebots days - forks are now the order of business, and TPU is the wonder-material of the moment. I’d gotten to grips with all of this during the development of Barber Surgeon. I’d been stewing on a new Crossblow ever since version III retired, and this summer, with enough distance and perspective, a new design began for form in my head. I already had an unused 4S servo from Crossblow IV ready to go, so decided to opt for reliability over a complex, more power dense weapon.


I have concepts of a plan.

The first order of business was to narrow the wedge, and create some fork mounts, allowing me to experiment, interchange and maximise my ground game. I considered removing the wedge entirely, as it can be an easy catch-point for vertical spinners, but I ultimately couldn’t bring myself to do it. Robots like Boom Zoom and Bubblegum Lift already have that silhouette, and there’s a certain amount of Crossblow DNA and legacy that I want to preserve. The intention with this design is to somewhat redeem the identity, so that it doesn’t go out on such a low. I’m not yet committing to a Crossblow VI and beyond, so for now, the wedge stays. It’s part of its charm. Though I am considering a new, crusader-y looking face.

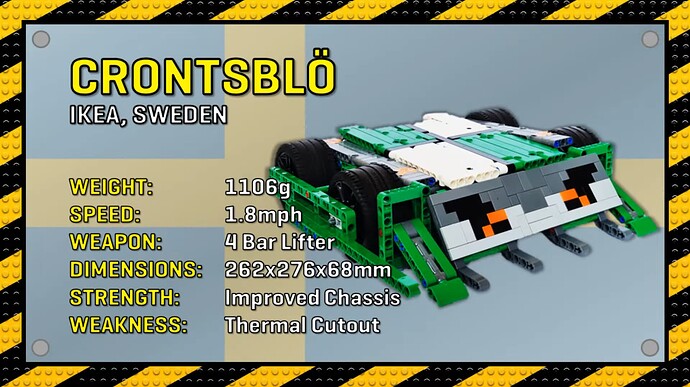
I passed the new concept over to David Harrison, as they were looking to rebuild lego crossblow - crontsblö (long story) - and were looking for some direction. Crontsblö debuted in the 2024 International special, looking like this:


David Harrison’s reinterpretation.

I wanted to use some of the new, large, brushless drive motors that had come on the scene, so, for weight, some from of belted or geared drive would be ideal. That said, the aforementioned legacy element meant I wanted to keep the wheel guards, this time printed in TPU. By now, I’d selected a TPU geartrain with PU tires as the best use of space, so I spent a lot of time trying to work out how to attach the guards securely.

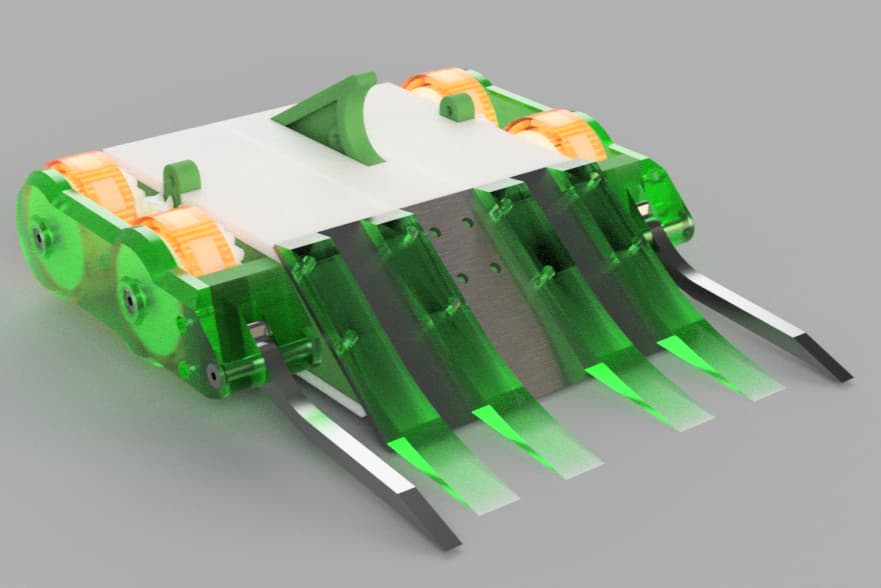
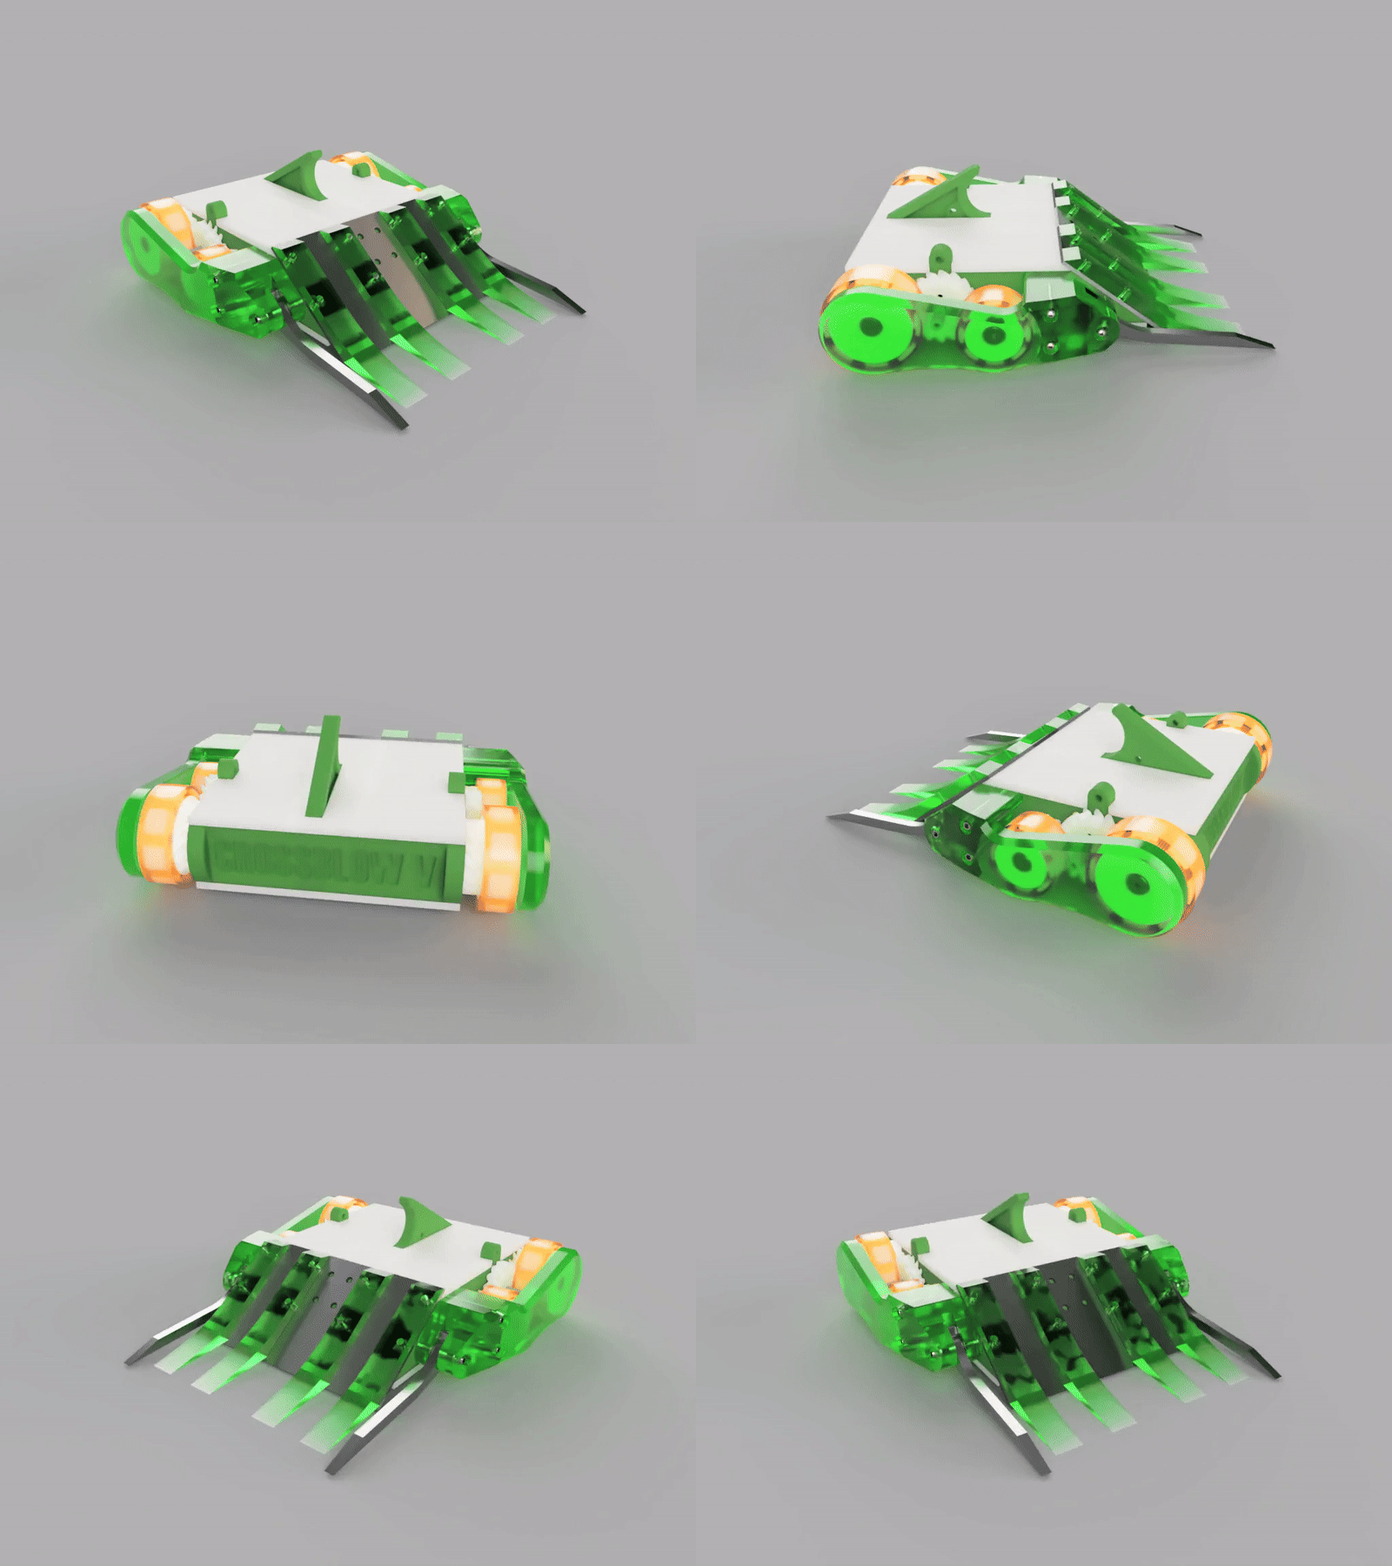
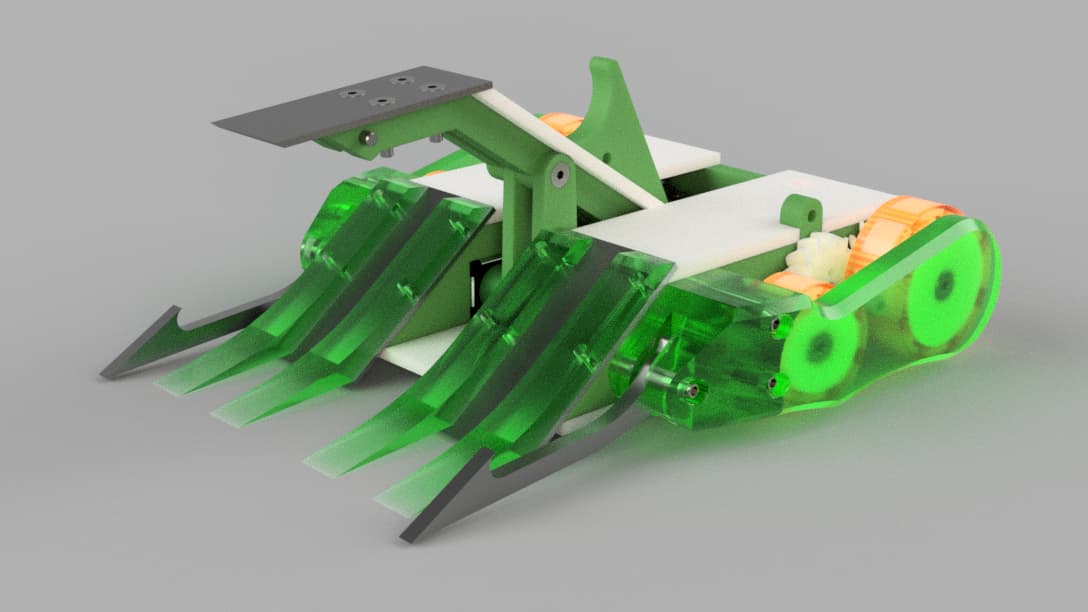
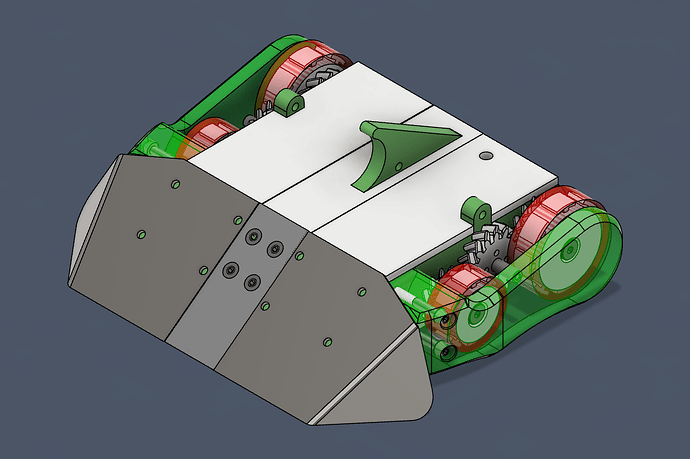
So, without further ado, take a look at the finished first draft of Crossblow V:


Pretty Render

The first detail to note are the big TPU forks, inspired my the likes of Digestive and Je Ne Sais Quoi, an idea that came from my constant design shoulder angels/demons, Rob Weston and Sion Williamson. This should hopefully help the central ground game (there’s not a ton of room there for fork mounts in the current arrangement), while providing softer catch points for verts and other forks. I’ve also removed the lance/sword, as it’s purpose will be superseded by the fork arrangements. This is just the standard setup, as I still have some weight calculations to complete. But I’m planning an anti-horizontal config, some hooked forks - maybe Dolos inspired - and a set of three big hardox drumforks.

The shark fin is fully parametric, so I’m going to double check the measurements for version III before I commit to the angle. The locking ‘lugs’ also return, and will line up with the fin to provide a safety lock.


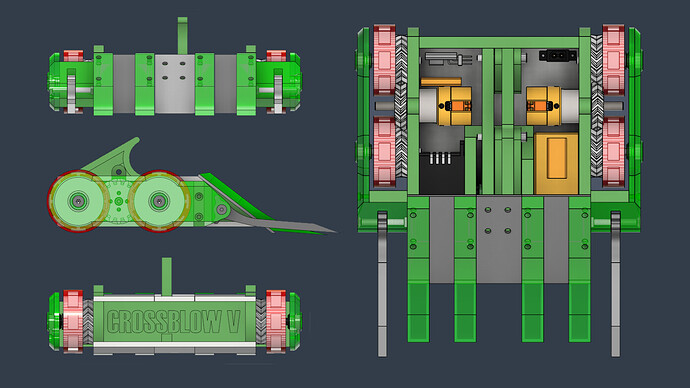
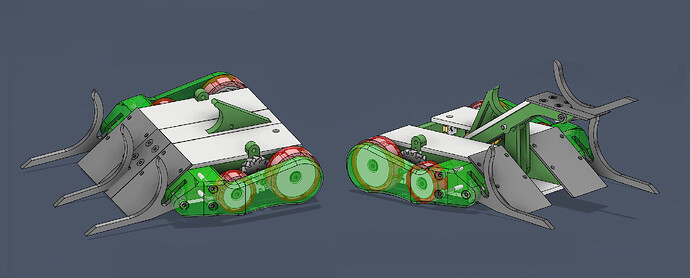
A little visual turnaround

Not visible from these angles, hidden under the weapon, some inner bulkheads and RG1000 support bars provide the cross-body rigidity introduced in previous models. Let me walk you through everything then:

Chassis

  • Machined 8mm RG1000 Bulkheads.
  • 4mm UHMW Base and Lids.
  • 8mm Thick TPU Wheel Guards (Print Settings TBC).
  • 2mm Wedge, likely Hardox or GR5 Titanium.
  • 5mm Hardox forks (interchangeable, on GR5 titanium M4 bolts + 4x TPU ‘finger’ forks.

Drivetrain

  • Moulded PU over TPU cores
  • Double Helical Drive Gears, Mod 19.4, T16.
  • Running on M6 Nylon Bushings & an M6 Shoulder Bolt.
  • Bolted into M5 woodworking T-Nuts, recessed into the frame rails for efficient use of space.
  • Shoulder Bolts run through the wheel guard, with heads recessed. The wheel guard is also held on by woodscrews into 2x RG1000 ‘cheeks’ at the front of the robot.

Electronics

  • 2x Mars Brushless Gearmotors & AM32 ESCs.
  • 65kg Diamond 4S servo (with servo saver)
  • FrSky RX4R
  • GNB 4S LiHV 660MaH Lipo (shared component with Barber Surgeon)


Measurements in cm, kg and deg. The weapon is broadly similar, trading some outright torque for lifter height.

Any feedback or suggestions gratefully received, and I’ll answer any questions as best as I can. The next job is double checking my expected weight, and making adjustments as necessary, then using that information to design alt-setups - any suggestions? My only other concern is those axle bolts. Initially, I had the drive running on much more rigid 12mm HDPE rod, but was worried about how durable they would be if only held in by woodscrews. I worry about the current arrangement - attaching them to the guards - could create it’s own problems under heavy impact, but I feel I need a way to secure the flexible TPU guard away from the wheels. What do we think? A worthy successor?

Thank you for joining me on this look back through my time in the sport. The big posts will probably go quiet for a bit, but I’ll respond to comments and post updates when I have them.

6 Likes

I had ‘Shortblow’ or ‘Longblow’ in mind for different classes, but how did I never think of Ballista? I am planning a Sportsman Feather at some point, maybe this year, and have a bunch of electronics already.

1 Like

Just been able to catch up on the entire post, this has been a really good breakdown of all of the design iterations you’ve gone though, and I do like a lot of your thinking with the newest Crossblow. It looks like you’ll have a reliable drive with a weapon capable of self-righting, and I respect the desire to keep a distinctive individual identity with your bot. I will offer some small points of feedback while the bot is still in the design stage.

The main thing I would be concerned about would be the side armour. Contrary to quite a few builders, I Do strongly appreciate the value of good side armour. No matter how good of a driver you are, you will get hit in the sides from time to time, and I often have to replace at least one side of Babróg after each event, sometimes both. My issues with your current setup are as follows:

  • The TPU is a touch too thin for me. TPU is incredibly useful at taking hits and being replaceable, but it will often have large gouges left after a hit. Some blades now are able to clear 10mm+ layers of TPU, and while you can go up in thickness, it will remain a concern.

  • There isn’t enough space for me in between your wheelguards and the wheels themselves. This is generally important because it’s common for outer armour pieces to bend (Even Babróg’s 10mm HDPE sides bend outwards pretty frequently after some hits), and while it’s not an issue if the part remains bent but still functional, it is when it bends into the way of wheels. The best compliment to good wheelguards is a nice air pocket to leave some flexibility.

  • I am slightly concerned that your wheelguards seem to be supported by the deadshafts that also run on the wheels. If a horizontal spinners comes at those sides, I can see it cutting cleanly through the TPU right until it hits the deadshaft square on, at which point it offloads a massive impact to that point. The deadshaft is the last part you want to be hit in an exposed wheel setup, which is why so many bots use larger wheels to take the hit first, but here, it’s the first part that would be hit.

All of this would be tricky to design around, but I would explore a few options. Maybe changing the gear ration around somewhat or adding some material on top to allow some spacers to connect to the side armour instead. Other than that, a very nice job! The forks look good as well, though I may leave a little space between them and the lifter arm itself, lest something jut out slightly after a hit and disable the weapon as a result (I’m assuming it’s the same thin spatula design with this iteration as opposed to the entire front lifting? It’s rather tricky to tell with these renders).

1 Like

All really good feedback, thanks, Eoin. This is good. You get so close to a design, sometimes, that you can’t see the wood for the trees. But TLDR, I share your concerns, but wanted to get a finished design to play around with!

  • Parametric design means thickening up the TPU is an easy task. It’s super thick on Surgeon - at least 20mm - and it’s looking likely that I’ll have weight to play with.
  • Again, as above. Was already something that I was playing with. Had washers in to prevent some pinching, but it’d be much easier if the guard wasn’t attached to the axles, since I wouldn’t need to worry about the axles providing support.
  • Your point about the horizontals is very true, and puts into word much better my fears about the deadshafts. I shall have a play with gear sizes and see what space I can create. A more drastic path would be to make the front wheels smaller - since they don’t have to poke out the top for invertibility. It’d be a bit of maths to get them to drive at the same speed, but it’s a potential option if I need it.
  • It is just the narrow weapon panel, yes - I realised that was unclear. Tolerance adjustments are on the list!

Really appreciate the input.

1 Like

Love the build log and bot history, and the new design looks sick. Just a comment on the maths for different sized wheels - it’s all ratios, super easy stuff. I did it on Toutatis, my first bot, and all it comes down to is matching the gear tooth count to the wheel size. If you have a 40mm wheel and a 20t gear, and you want to stick in a 20mm wheel, the gear should be 10t, and so on. Really simple stuff and it looks kinda cool to boot.

I don’t really have any suggestions other than making sure that you’ve got the ground clearance on your chassis that you need - we’ve both seen enough of Sion’s builds to know it’s necessary :stuck_out_tongue:

Looking forward to seeing how the build goes for you.

1 Like

i don’t have much constructive to add but i love the look of new crossbow!

only a couple thoughts would be running magnets if you planned on having the front tpu forks sprung to the floor, would help keep your front wheels planted if the forks are very stiff

and if your planning on hooked forks make sure your lifter can pop them off/ have them with a slight curve so you can still shake an opponent off, don’t want to imitate dolos’s forks too well and never be able to release :sweat_smile:

1 Like

I hate this MF

2 Likes

A great retrospective on Crossblow, and a very good read!

I’m liking the new look Crossblow. A tip for having the TPU survive spinners (particularly horizontals designing blades to pierce TPU) is to make the surface being hit have many layers - I presume in the case of your side armour you’d print them with the internal face on the print bed, so that would mean many top layers. For my wedge setups for example, I print with 10 walls on a 0.4mm nozzle, so 4mm of material before the blade reaches the infill. Some of the more energetic spinners are still probably going to go through that, but they probably won’t blow through the other side in that case.

2 Likes

Figured an update was due here! Progress has been a bit sporadic, but here’s the current state of the CAD:

CrossblowVSpinGIF

Changes since the last update:

  • Small wheels: Thanks Henry! Some very easy maths. The large wheels are 49mm with 16 teeth, and the small ones are 36.75mm with 12 teeth. They run on M6 Shoulder Bolts, (now separated from the guard) and Ranglebox M6 nylon bushings.
  • New Wheelguards: They’re not actually held on with any more bolts that before, but I’ve ditched the RG1000 ‘cheeks’ as mounting points - just shoulder bolts into square nuts. They’re 10mm thick, with a 3mm gap to the wheels - though that could be increased. Thanks for the printing suggestion, Thomas - I’ll definitely do that.

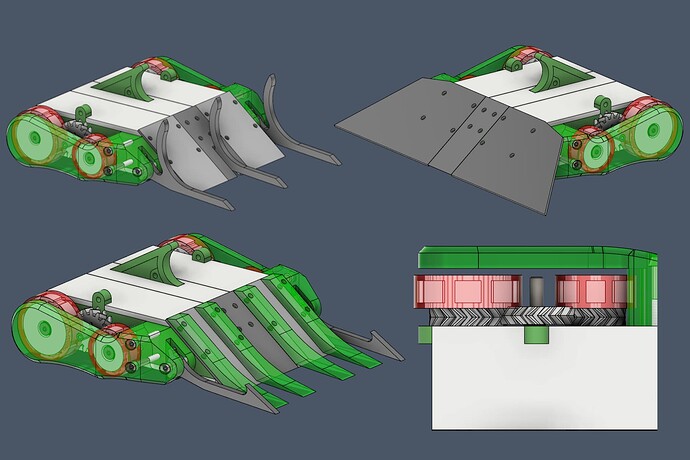
I’ve also messed around with setups - the weight calculations (minus woodscrews and cabling) is coming out at around 1100g, so there’s plenty to play with. So far, I have first passes at flat forks (5mm, 20° to the floor), hooked forks (5mm, 30°), anti-drum (5mm, 35° - with a 66mm diameter hook to match the FT Beater), and a flat anti-horizontal wedge in 2mm hardox (I’m considering bent titanium again, but need to learn Fusion’s sheet metal workspace). They’re really just first drafts, and I’ll happily take feedback. The middle drum fork should flop a little, but locks and moves up with the lifter.

I really love the way it’s looking, though. The silhouette, with the new guards and wheels, is lovely. There’s plenty still to do, and while all feedback is appreciated, I’d definitely take some input on:

  • Linkage - Is there a way to do assemblies of joints in Fusion? I’ve worked out joint types, revolutes and end points, but not how to move the entire four-bar mechanism as one. That would really help with designing forks that I can lift opponents off of. (Solved - It’s called ‘Contact Sets’)
  • Setups - lots to do here, lots of refinements, bent titanium, not too happy with the drum forks just now, and maybe some convex Dolos-style forks could be fun.
  • Magnets - Great idea, Morgan! I had considered it, but I have no experience with them. I’m assuming Neodymium? Is there a good rule of thumb for their clearance? What about moulding them into the wheels?
  • Wheelguard Airgap - More? Less? Just right?

Hope you enjoy - thanks folks!

4 Likes

From what i recall, unless i am wrong, but 2mm hardox is not very findable. you could also lasercut (or hand cut) 2mm ti wedges, should still do the job.

and if someone knows linkages, i wanna know too!

1 Like

I looked into sourcing it and couldn’t find much info, a friend called round some suppliers. Turns out they only make it to order, and the minimum order quantity is in the range of “tonnes”.

1 Like

Not like I’m short on weight! Had a few slots cut into my old ti wedges by verts and hammer saws in the past, so I’d love to upgrade. 3mm hardox it is. :upside_down_face:
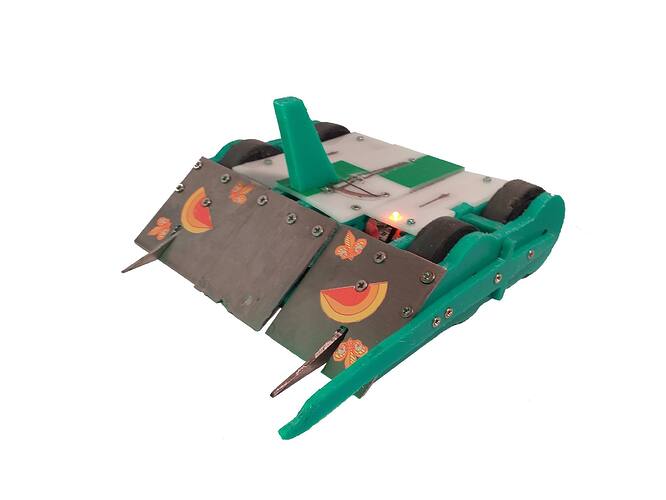
looks very sleek

magnets wise yeah neodymium is the way to go, they come in a few classes, the higher the number the stronger the pull basically (i suspect with some other trade offs like being more fragile or something but im not sure) . normally i just leave a gap for them on the frame and space them out until i get the pull i want/enough clearance, not the best way to do it but i find it works haha. typically your wheels will compress a small amount depending on how stiff they are so its kind of a matter of playing around with it and seeing what happens

Magnet Strength Calculator | K&J Magnetics i quite like this sight for giving how much downforce you will be making

magnet wheels ive not had much experience with, they seem to be effective for baby deadbod and mean you cant suck a screw to the bottom of your bot and high side yourself with the tradeoff being they can be more complex to make and are heavier than just a single magnet. id speak to tom or sion about them

hardox wise if you still wanted to go for 2mm i found these guys will happily sell offcuts https://www.stewart-trailers.co.uk/ (at least they did when i last bought a bit a year or so back) just then finding a place that will cut it to shape for you

if needs be i still have a bit left of that sheet and know a place that does waterjet cutting pretty cheap, so let me know if you wanted me to put your parts on next time i do an order

1 Like

‘Done Enough’


LIFT!

I’m calling it here for CAD updates. Not much significant is likely to change after this, so aside from following up on replies and suggestions to this update, expect this thread to go dormant until I have some build news. But basically, it’s done!
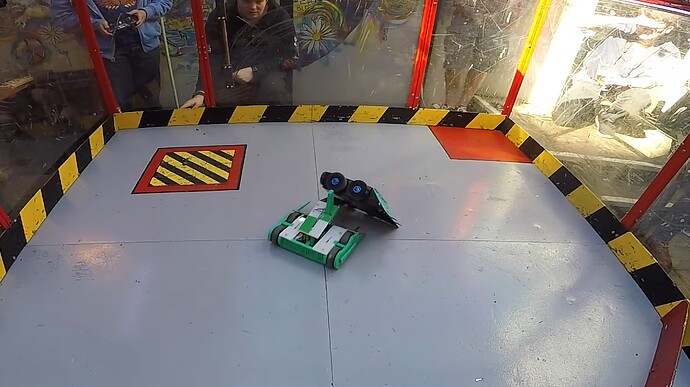
The first point to follow up on is, as you can see, I learned how to create a moving linkage. It’s called a Contact Set, and is created by putting revolute joints between each part of the linkage, then selecting all the bodies for the set. It basically simulates collision between the bodies. This has been incredibly helpful, allowing me to view a weapon design in three dimensions for the first time. I didn’t need to adjust my forks at all, but I did lengthen the rear bar to increase both the upwards and forward throw of the weapon, with minimal impact to the required input torque. It now raises by 89mm and extends 43mm.

Next up, I finished tweaking the setups, learning the sheet metal workspace to design a 2mm Bent Titanium wedge. After I made the setup for Crossblow II, the robot never lost a head-to-head fight with a horizontal spinner, so I’m confident that this will continue to perform well.


Always the sexiest setup. Could still run with the TPU forks in case of forky horizontals

The drum setup followed, and I improved the mounting on the middle fork. It flops a little, but rises with the lifter when fired, simply because that was the best place to mount it. We shall see how well that works. Since the lifting panel will be the fork’s endstop, I’ve decided to put in M4 bolts with nylocks, rather than 4mm woodscrews, to prevent the fixings from backing out. Unfortunately, there isn’t really space or material to use M4s or barrel nuts for the main wedge plates, so screws will have to suffice.

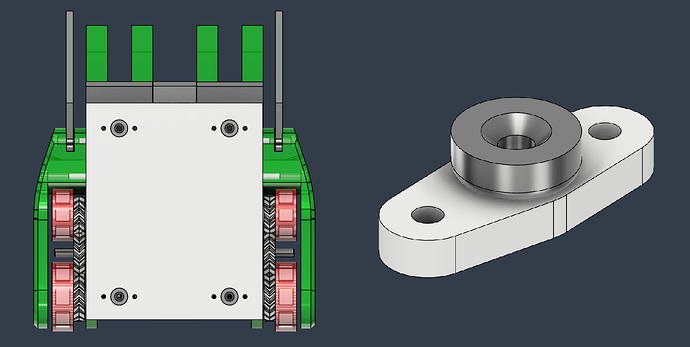
The last major change is the addition of magnets. I’ve never played with them before, so please critique what I’ve done! I selected some 12mmx4.5mm N42 Neodymium Pot Magnets, and have mounted them through the baseplate into a UHMW mount. There’s a 4.5mm gap to the floor, and a pull-force of 235 grams each. There’s one in each corner, both to pull the TPU forks flat, and to provide traction to the rear wheels when there’s weight on the lifter.

There were numerous small final jobs to wrap up the project. I’ve put a switch into the design for now, as they seem so easy to design around. I’m aiming for a Rapture completion date, which has yet to announce it’s stance on switches, so this may be altered nearer the time, and I’m currently assessing the fuse options. The weight calculation sits at 1260g (I forgot to add in the Mars motors, duh) which may not be enough for a minibot, but is certainly enough for the woodscrews, cables and other odds and ends not currently factored in. 2mm Hardox sourcing may, in fact, be possible, so watch this space, and I’m hoping to get the first parts - the forks and titanium - sent off with Jed’s metal order at the end of the week.

I think that’s everything I have to share for now. Thank you to everyone for your advice and kind words so far. An especially big shout out to Morgan, and my constant CAD critics Sion and Rob for steering me right. I plan to take my time in the build phase while I juggle adulthood, but rest assured that this thread is not over. As for CAD, I’ll be moving on to do some final bits for the (semi-retired) Barber Surg3on, before starting work on designing a brand new, hubmotor-equipped iteration.

Until then, Goodknight!

2 Likes