Data Breach Beetleweight Build

Data Breach is my 6WD Beetleweight that I first built in 2023 and competed at the Robot Rebellion 2023.

This build log will cover the original build and future versions for Data Breach.

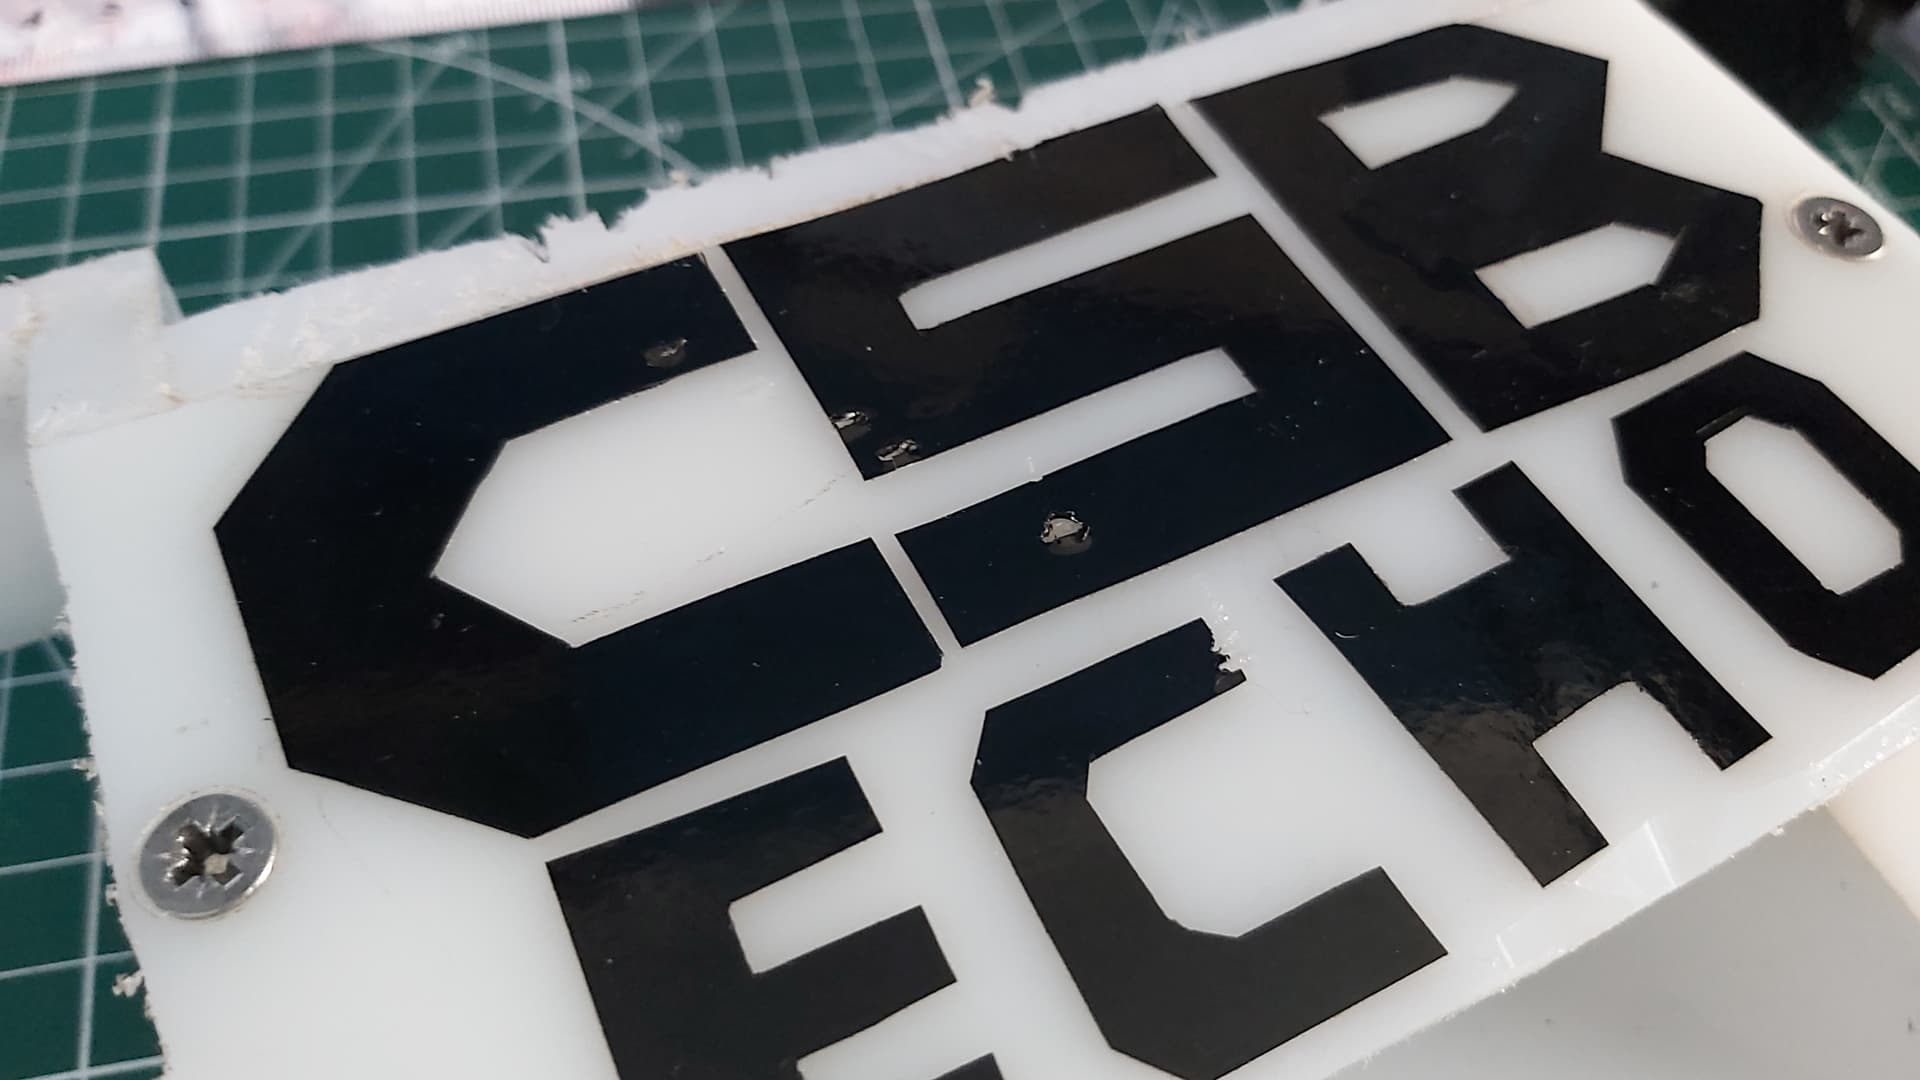
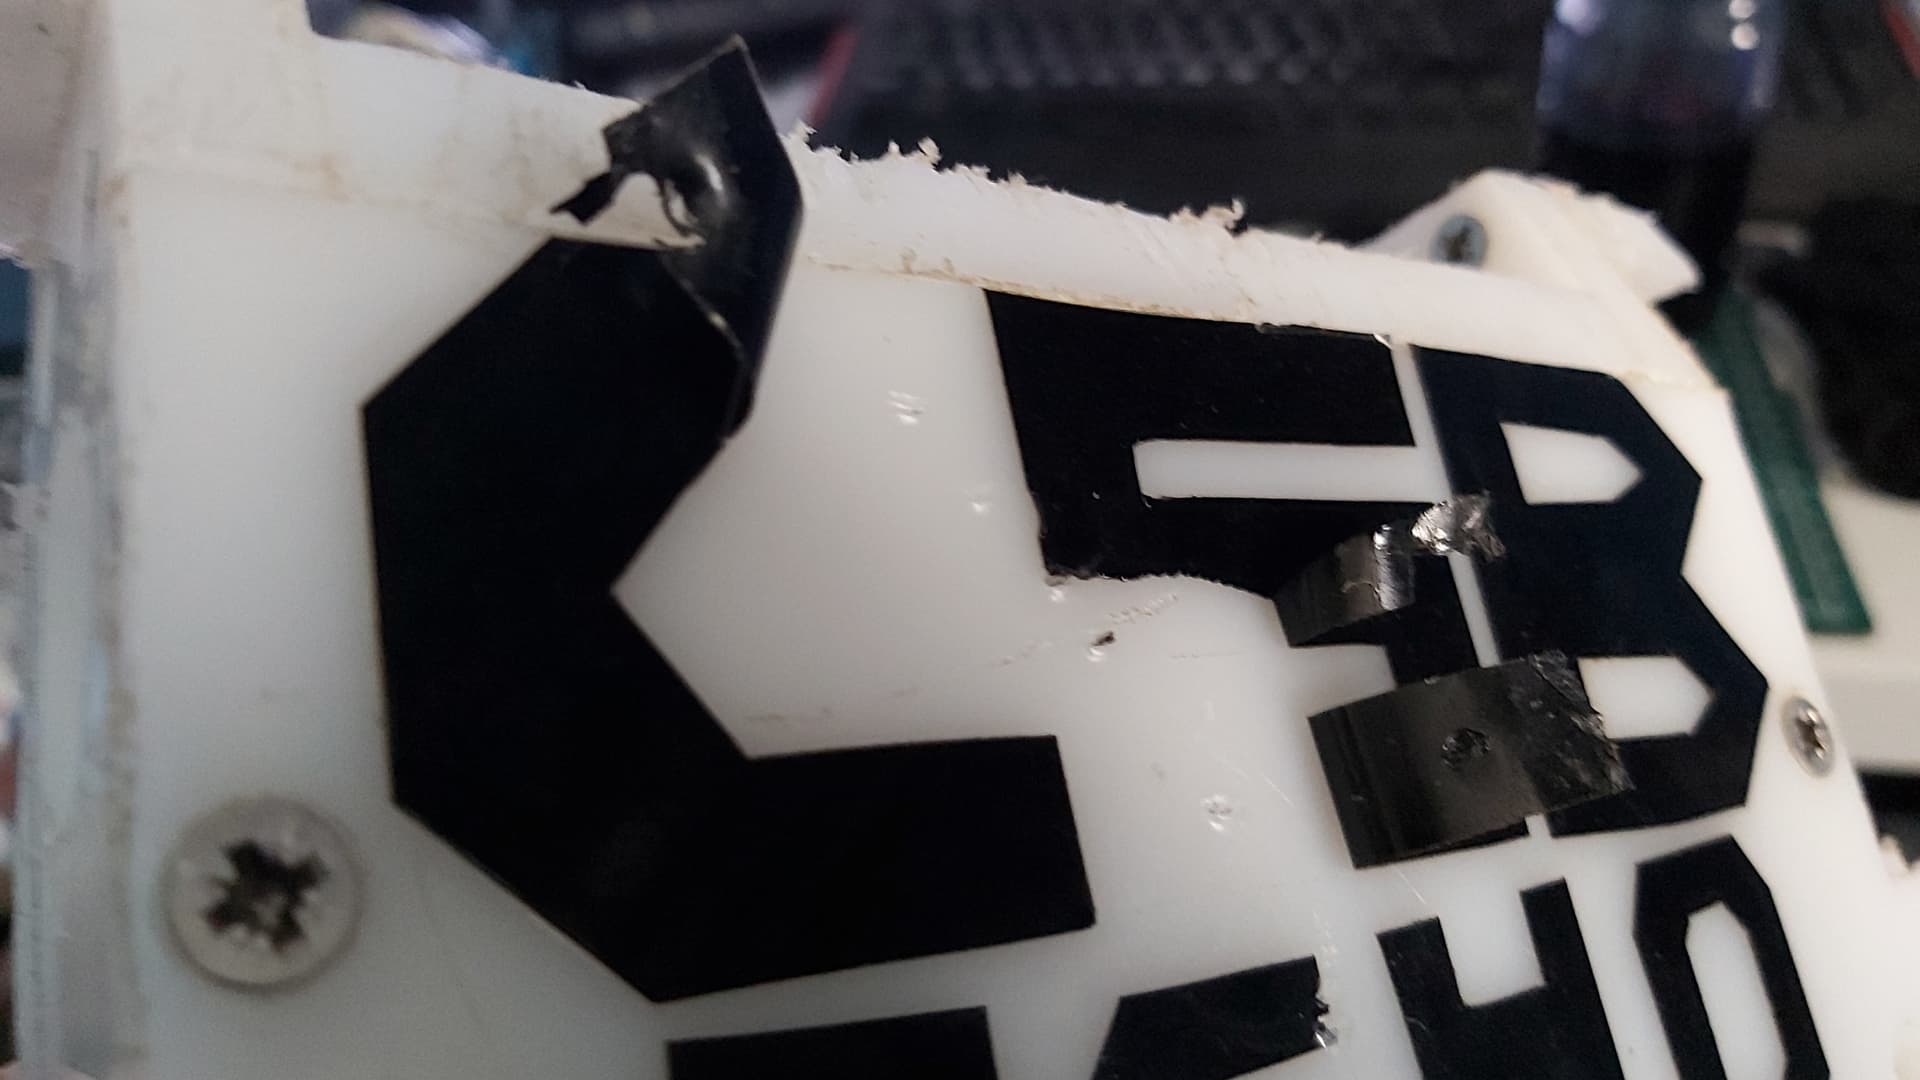
After the disaster of a performance at the 2022 Robot Rebellion with my previous Beetleweight CSB: Echo, I had to take my Beetleweight endeavours up a level. That drive started when I had my post-fight interview after Echo went 0:5. In that interview I made a big “public” claim I would return with a 6WD bot.

A bold claim to make seeing at that time there was only one other 6wd Beetleweight in the works. But I had been working on a few concepts for a 6WD Beetle for a good while. All of those were CSB: Echo 2 concepts but with my recent track record, I wanted a clean slate.

Data Breach takes its name from a blue and black vert I made in Garry’s Mod

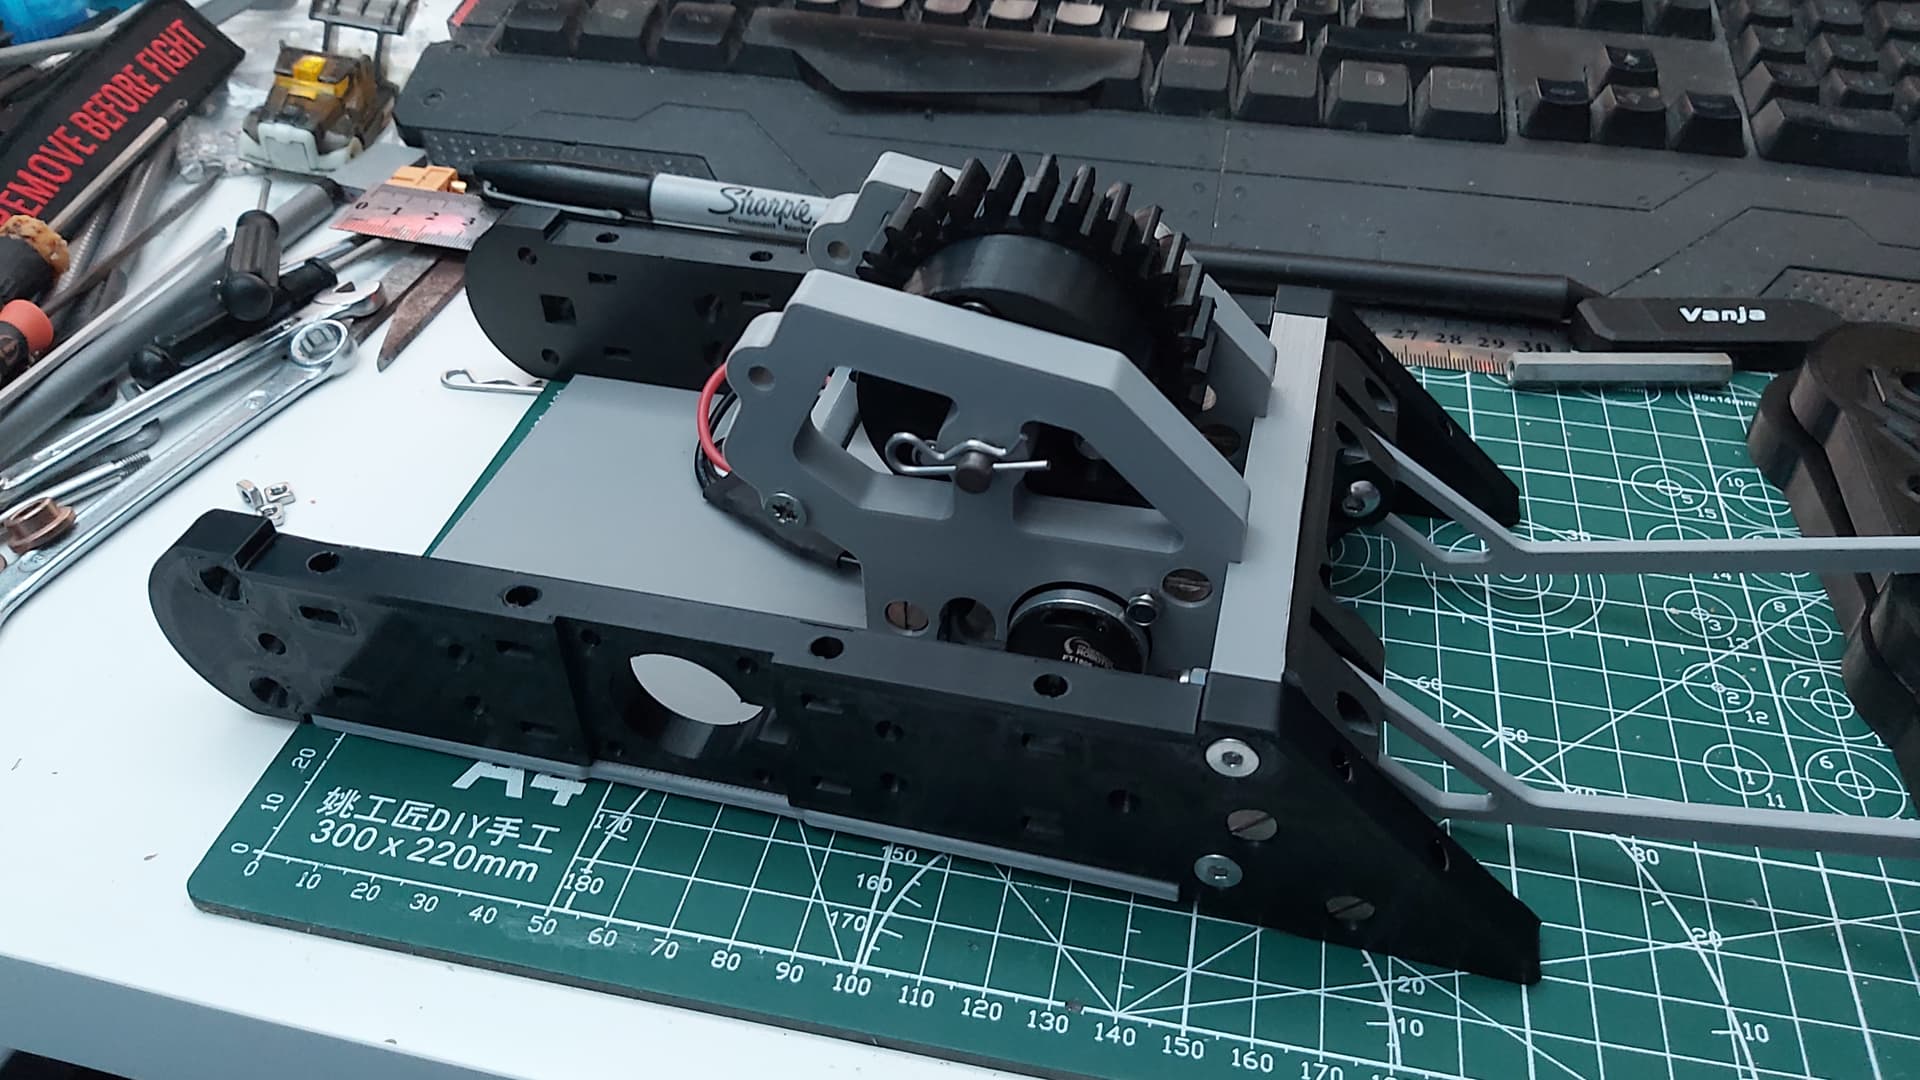
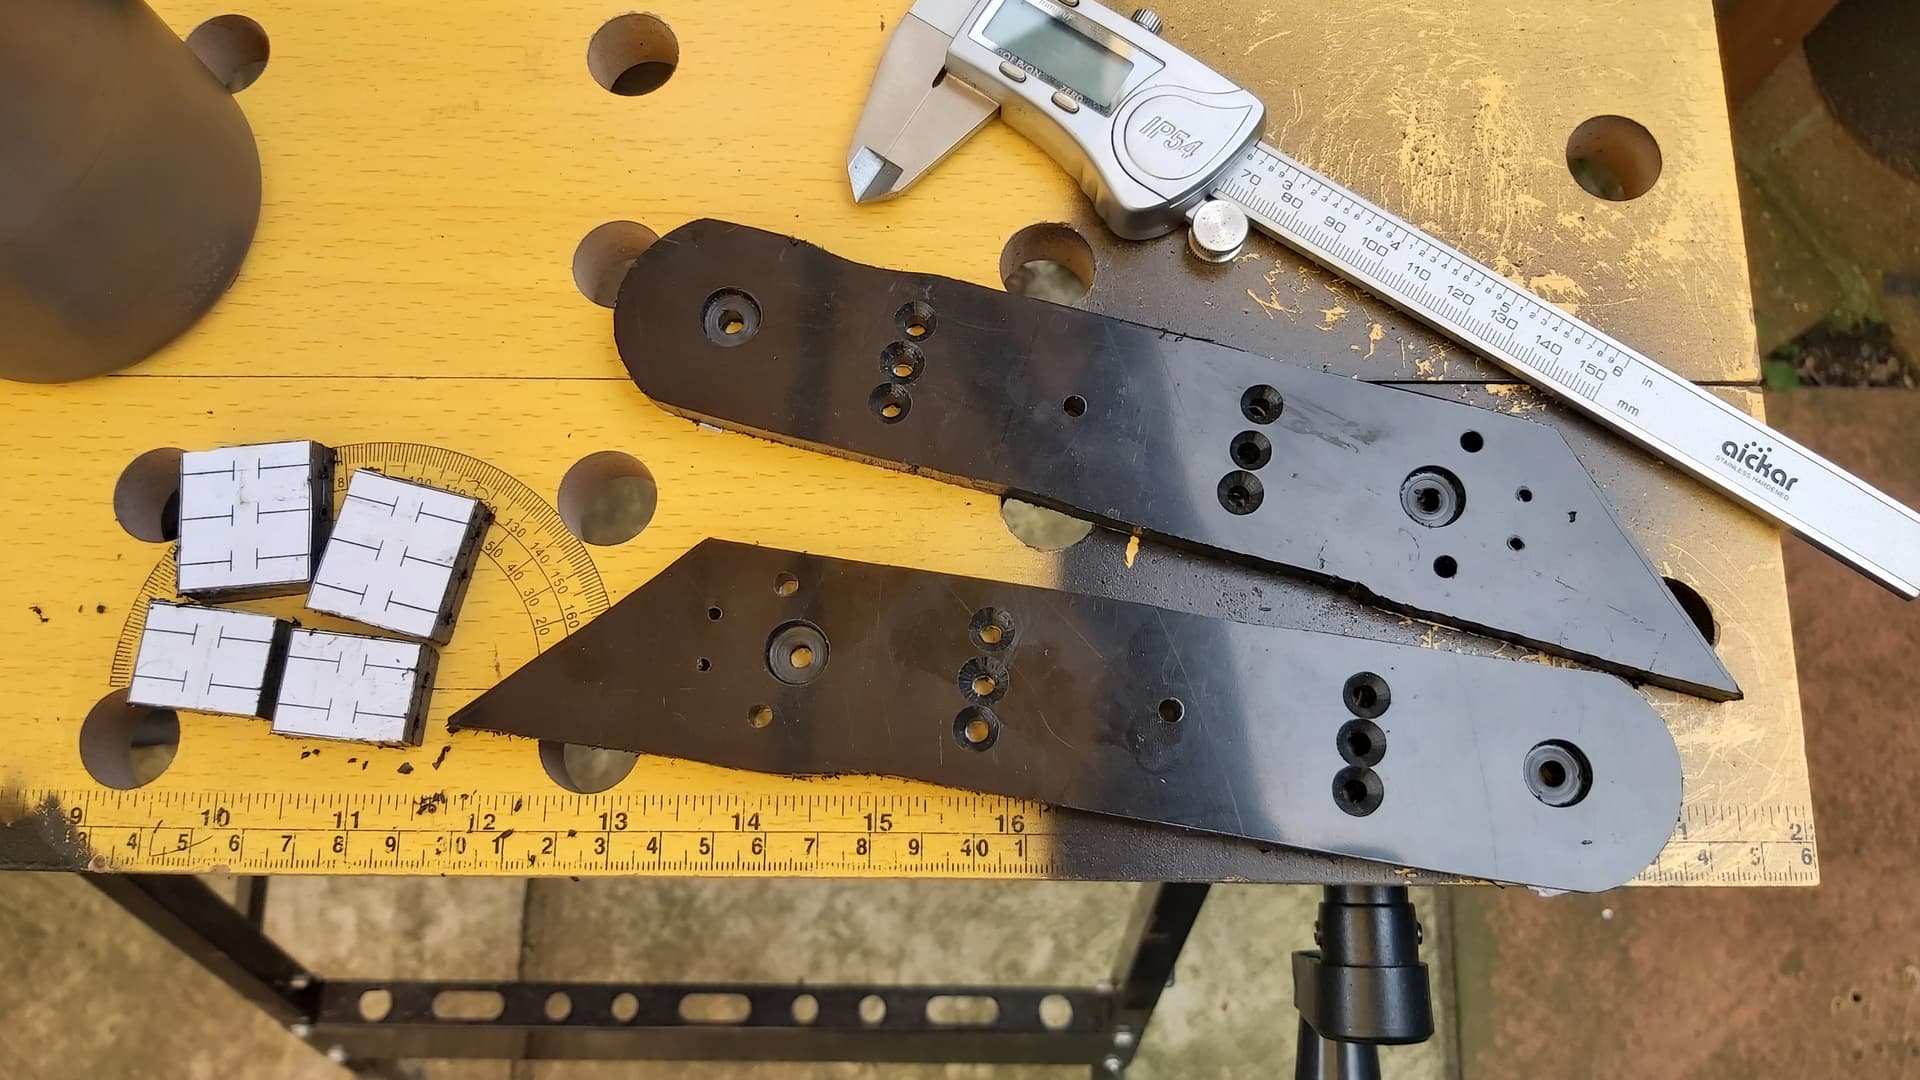
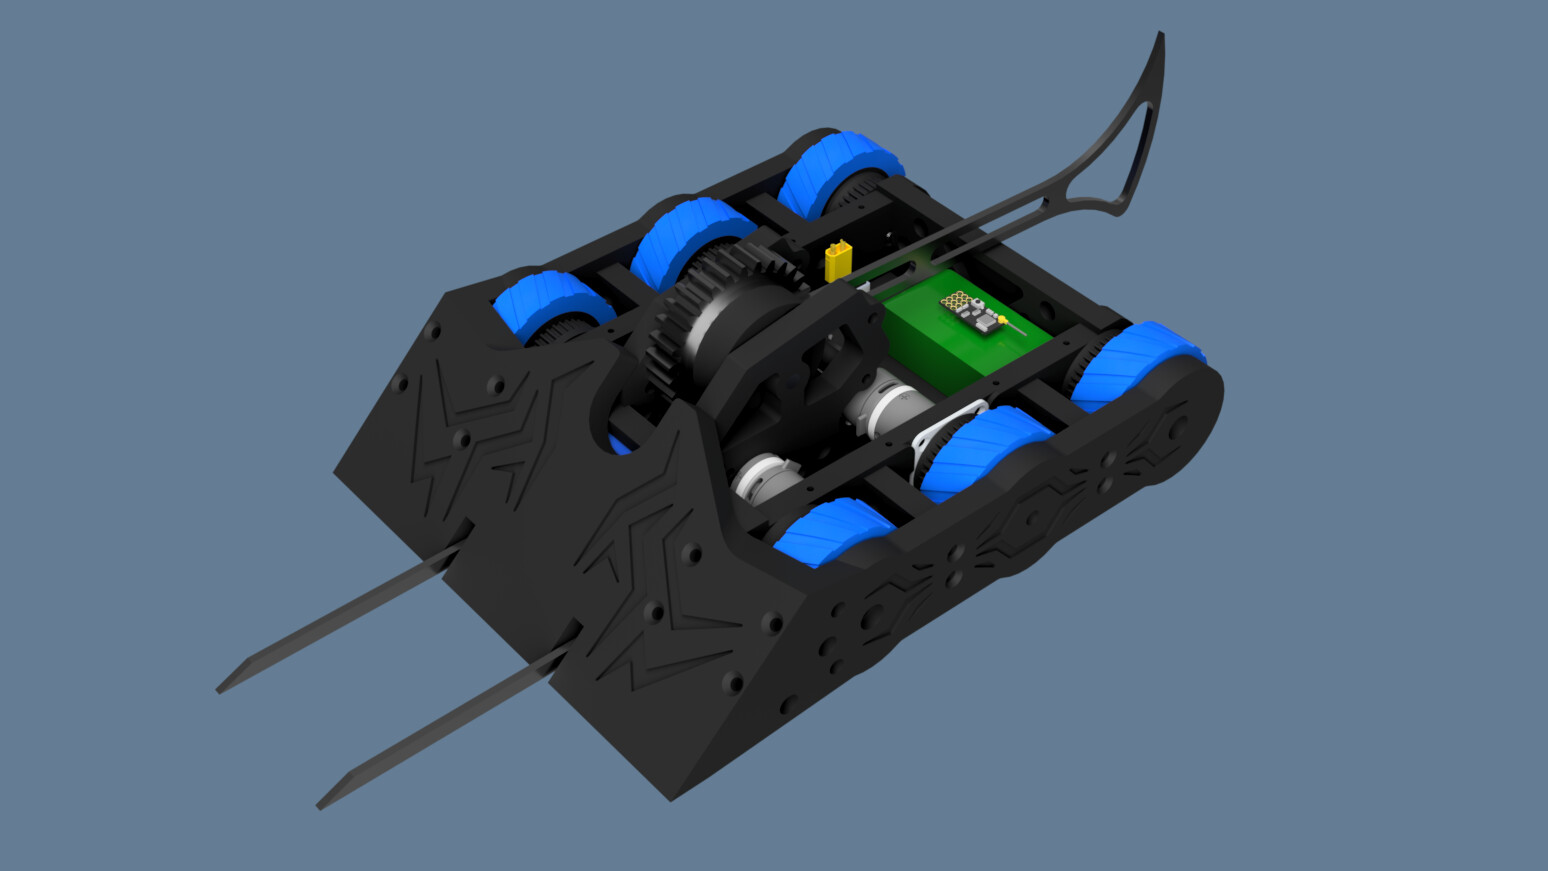
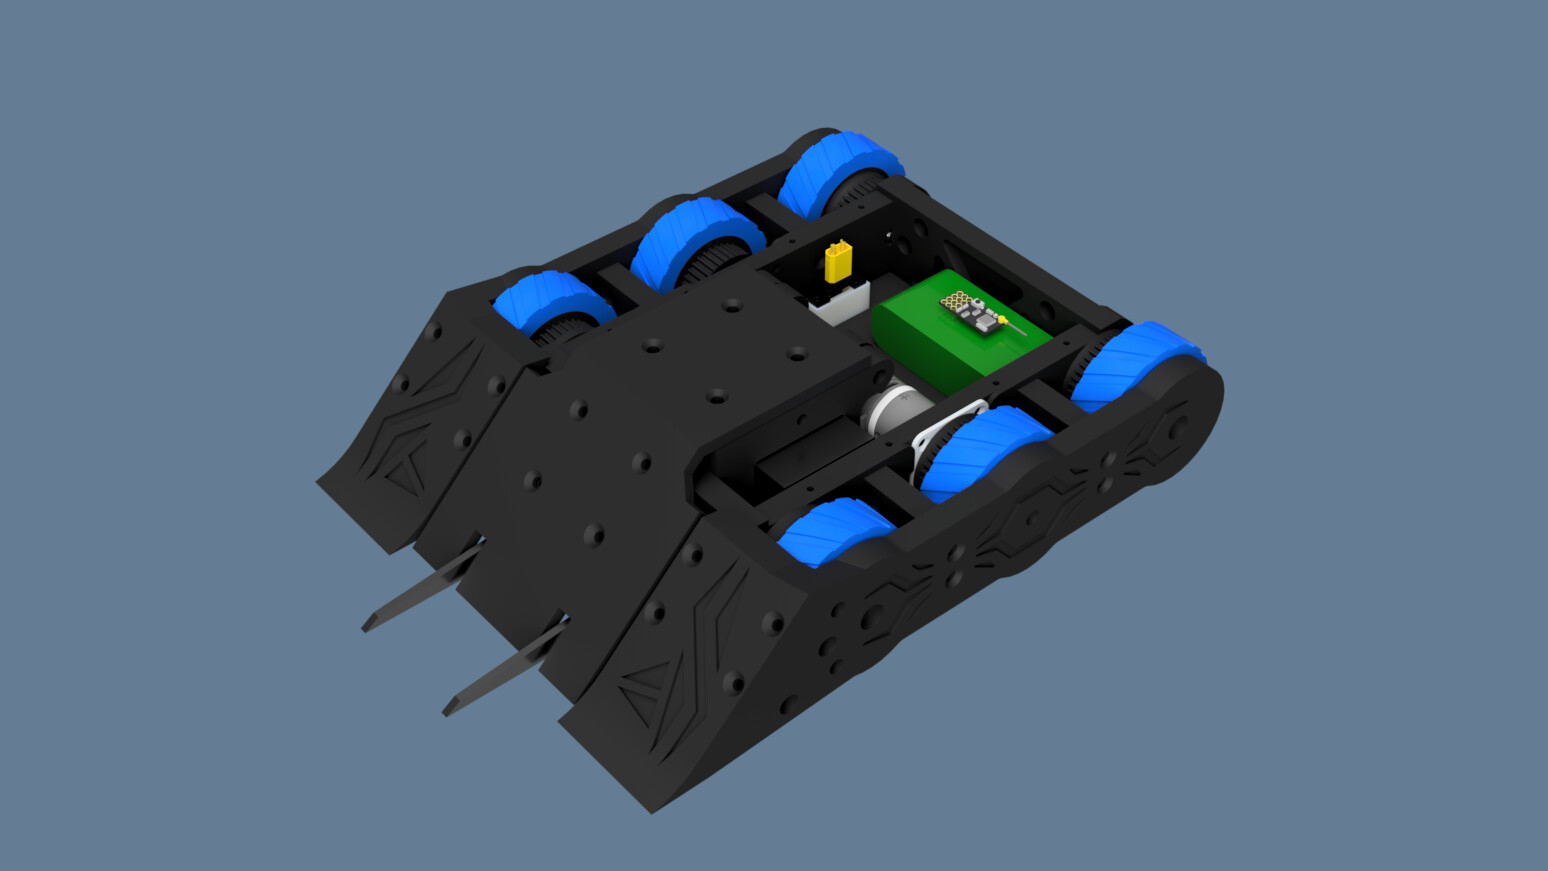
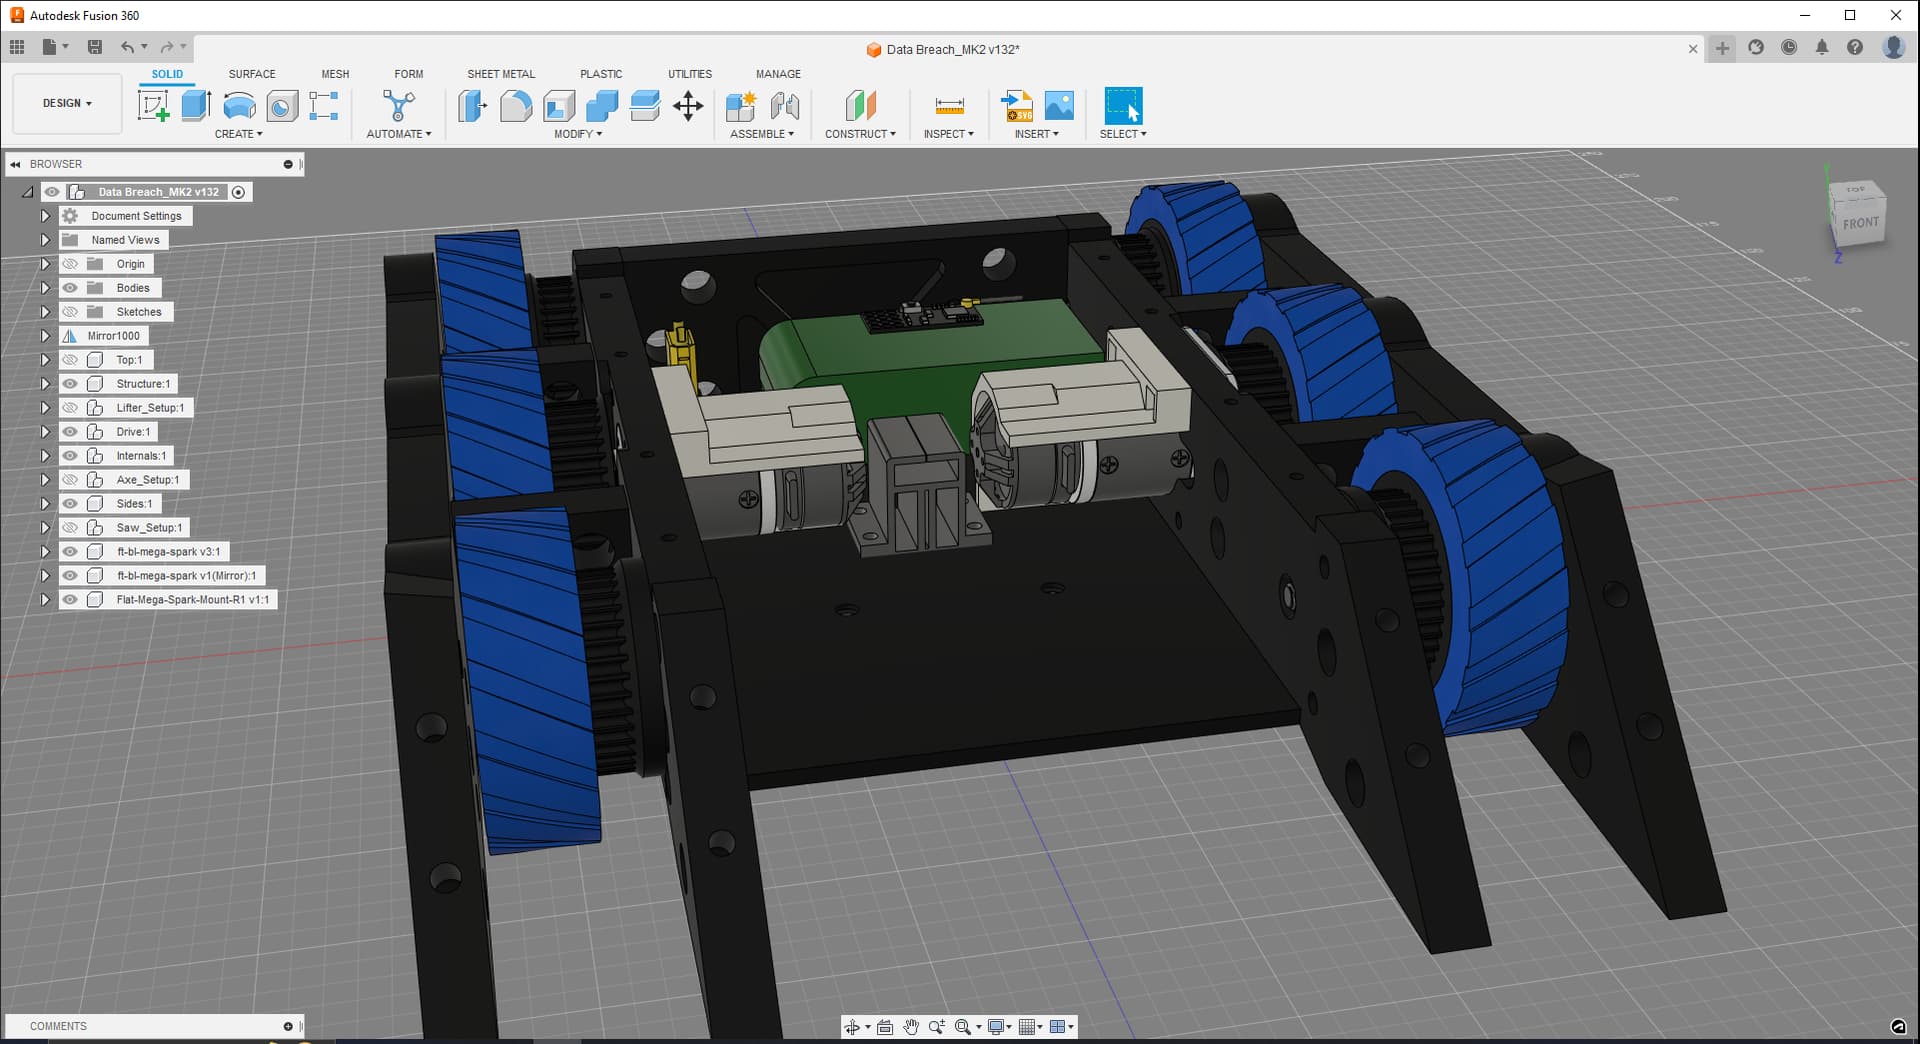
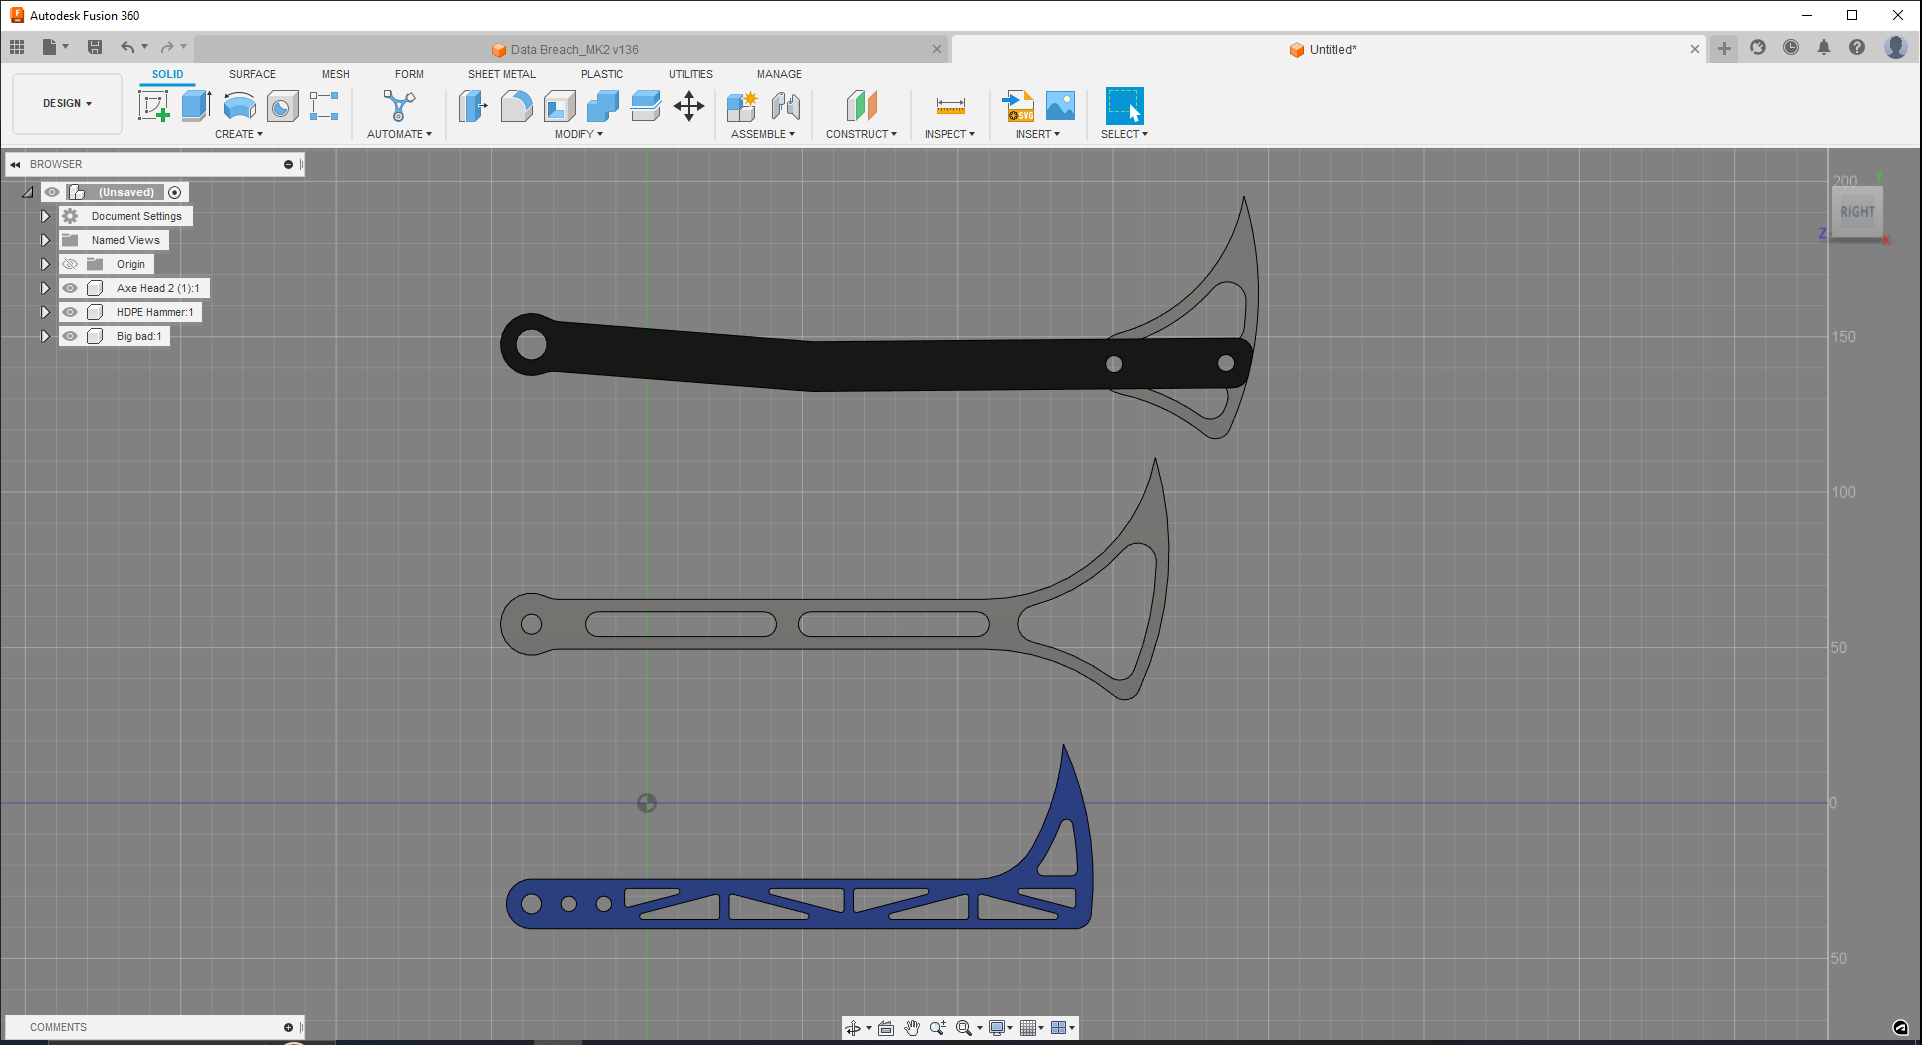
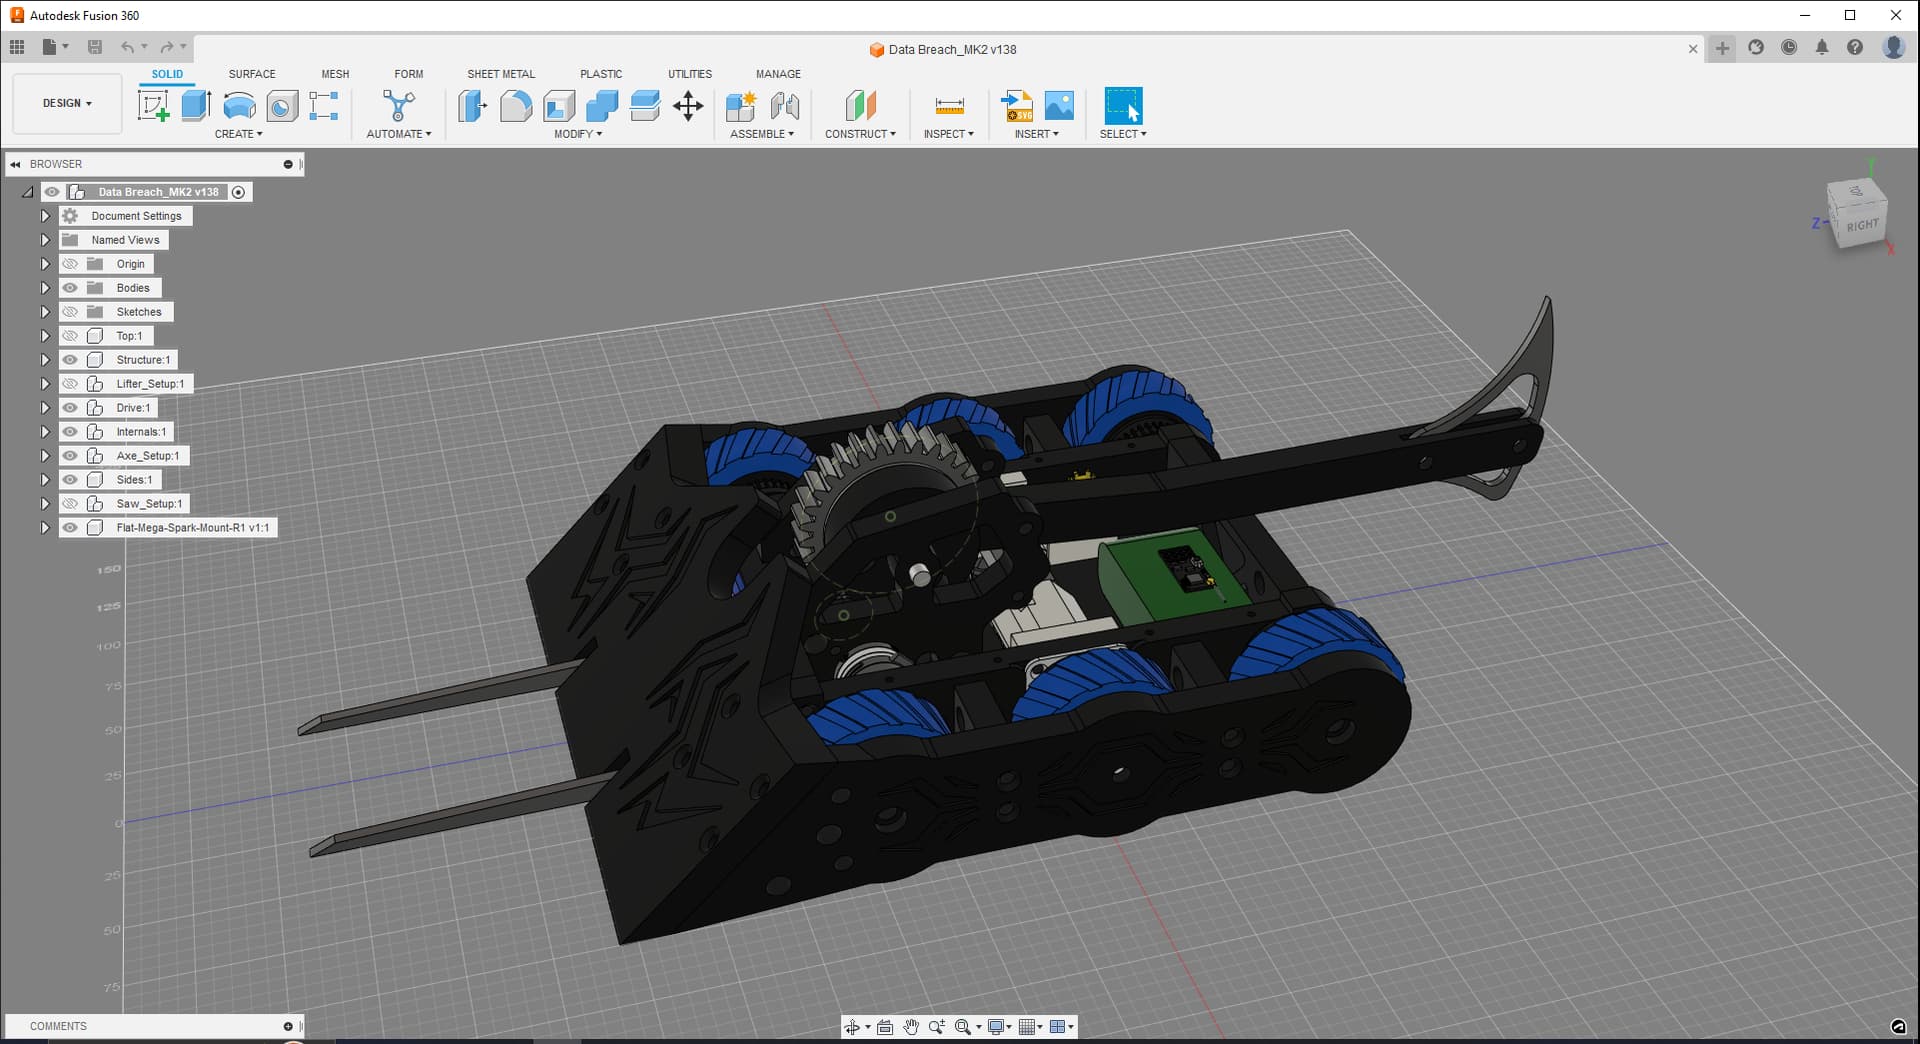
While under the working title Dust And Echos (a nod to two bots I worked on at the 2022 event.) I CADed away for the rest of 2022 and a good amount of 2023 too. Below are the 99% finished CAD renders for the Axe and Lifter modules.

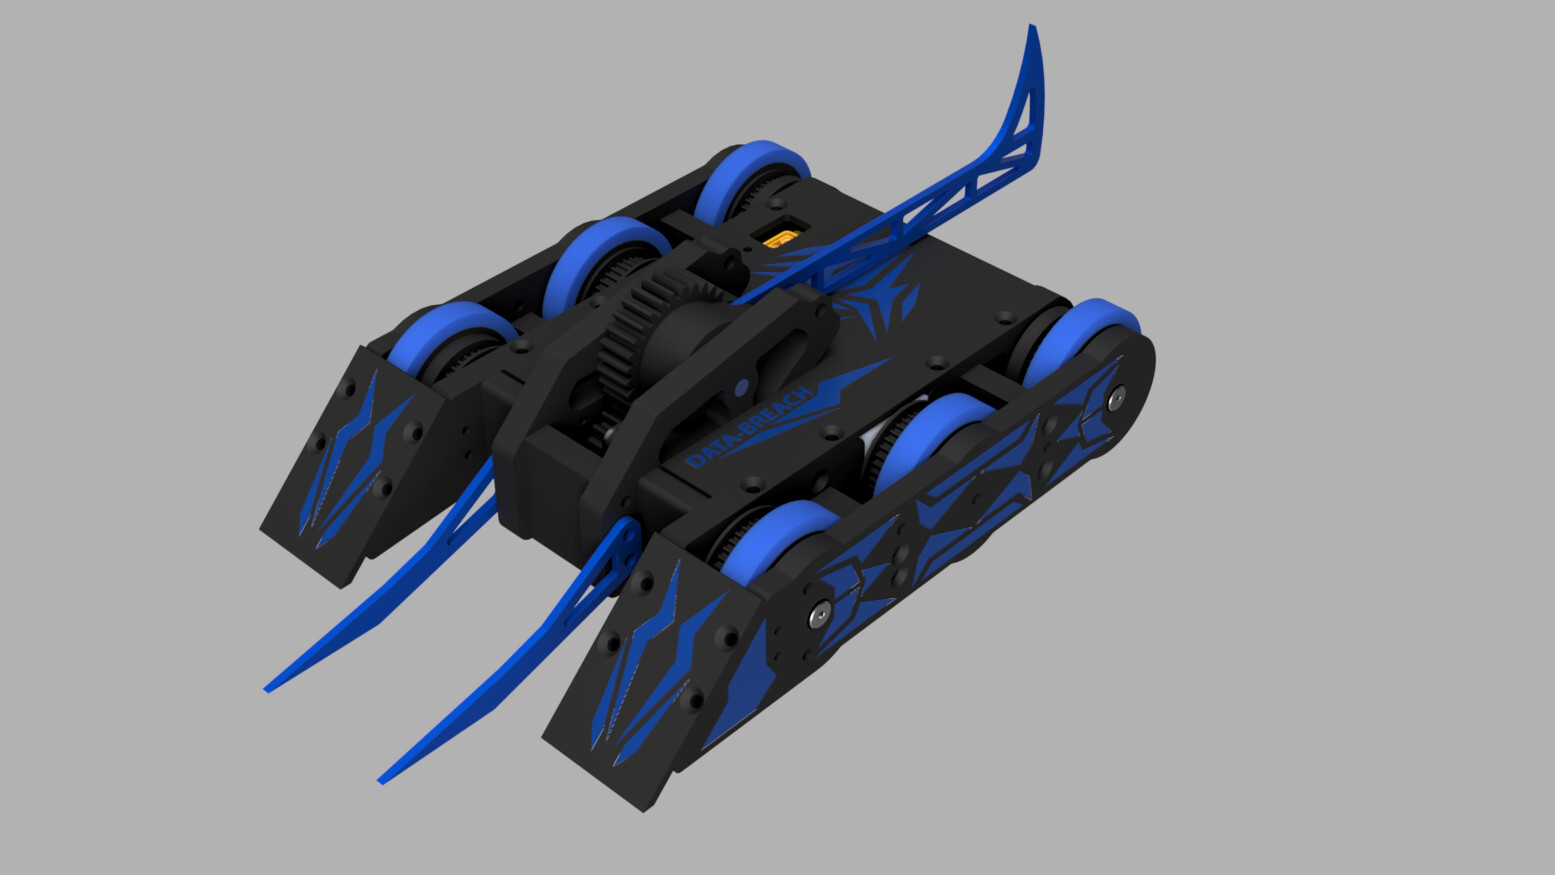
The worst-kept secret was the Swiss army bot aspect. I said I was making a 6WD bot but I never said anything about weapons. But I couldn’t keep that surprise under wraps for long.

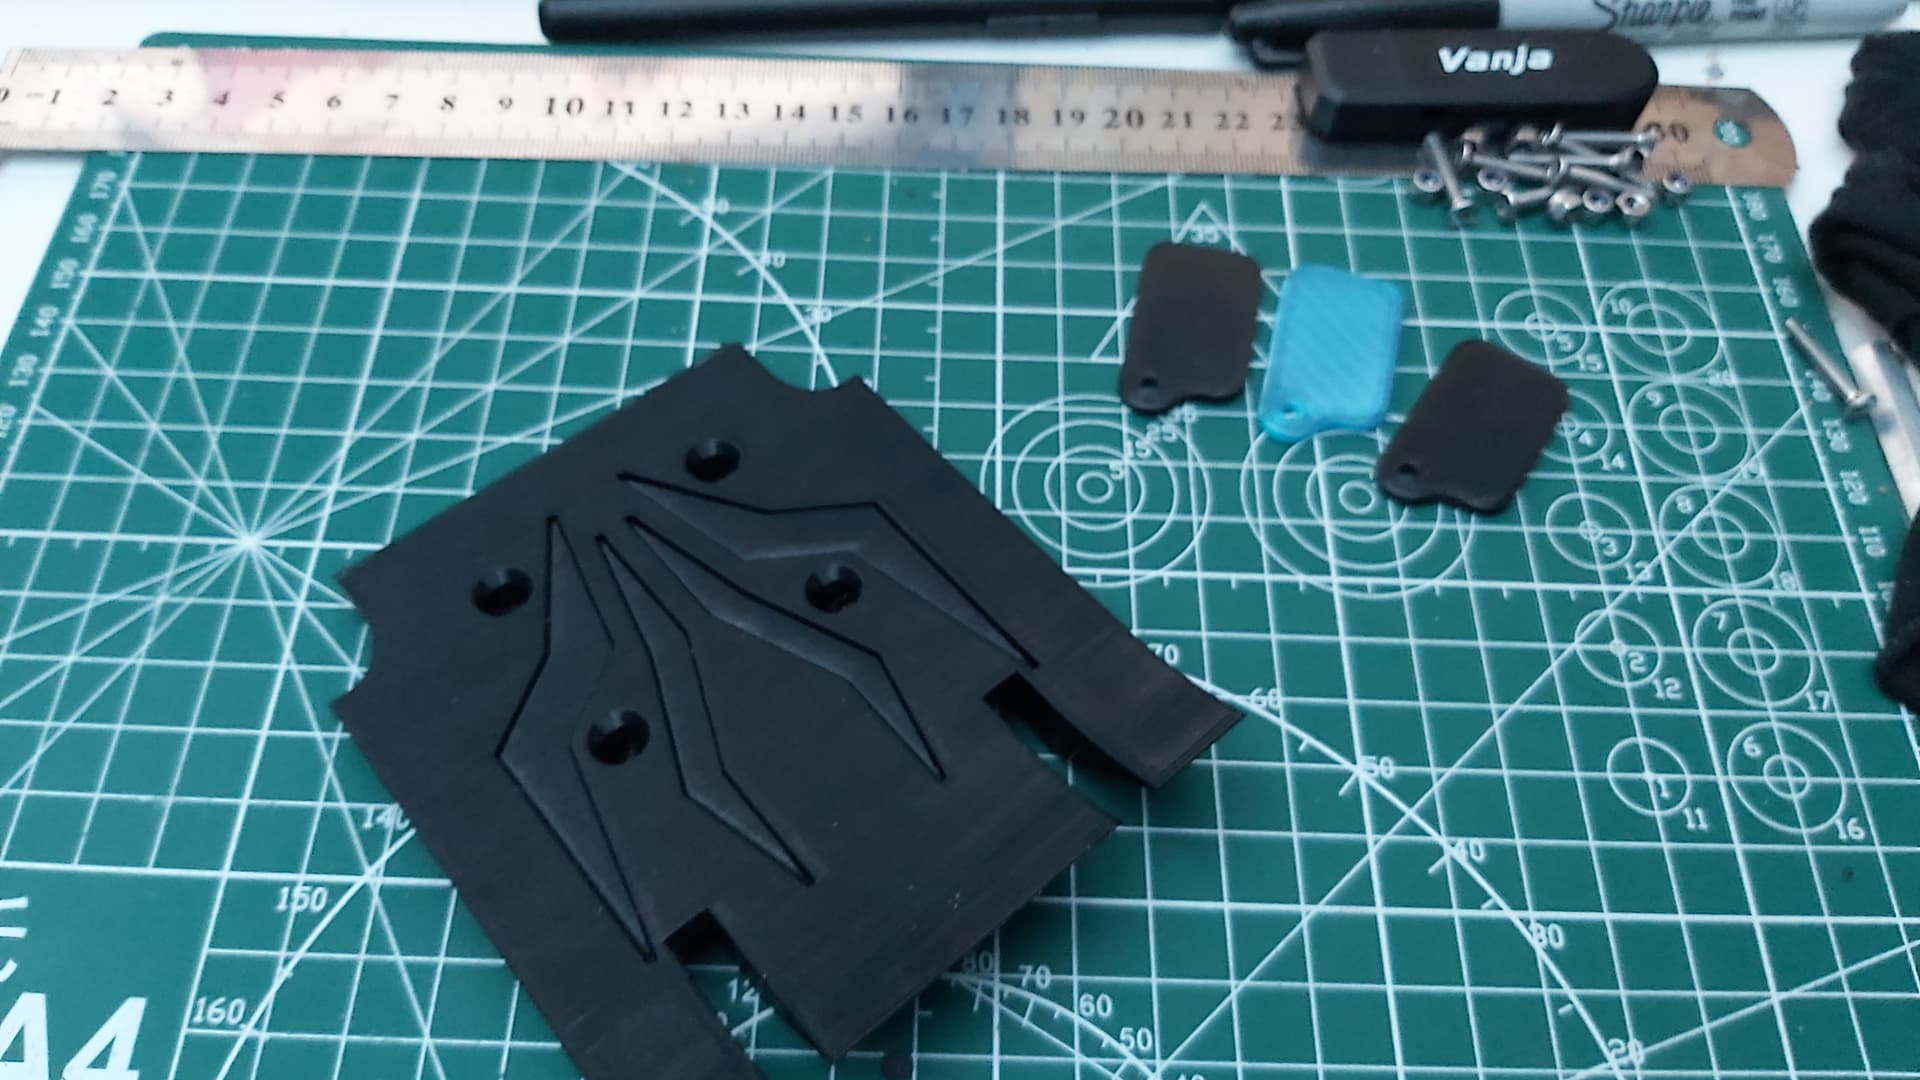
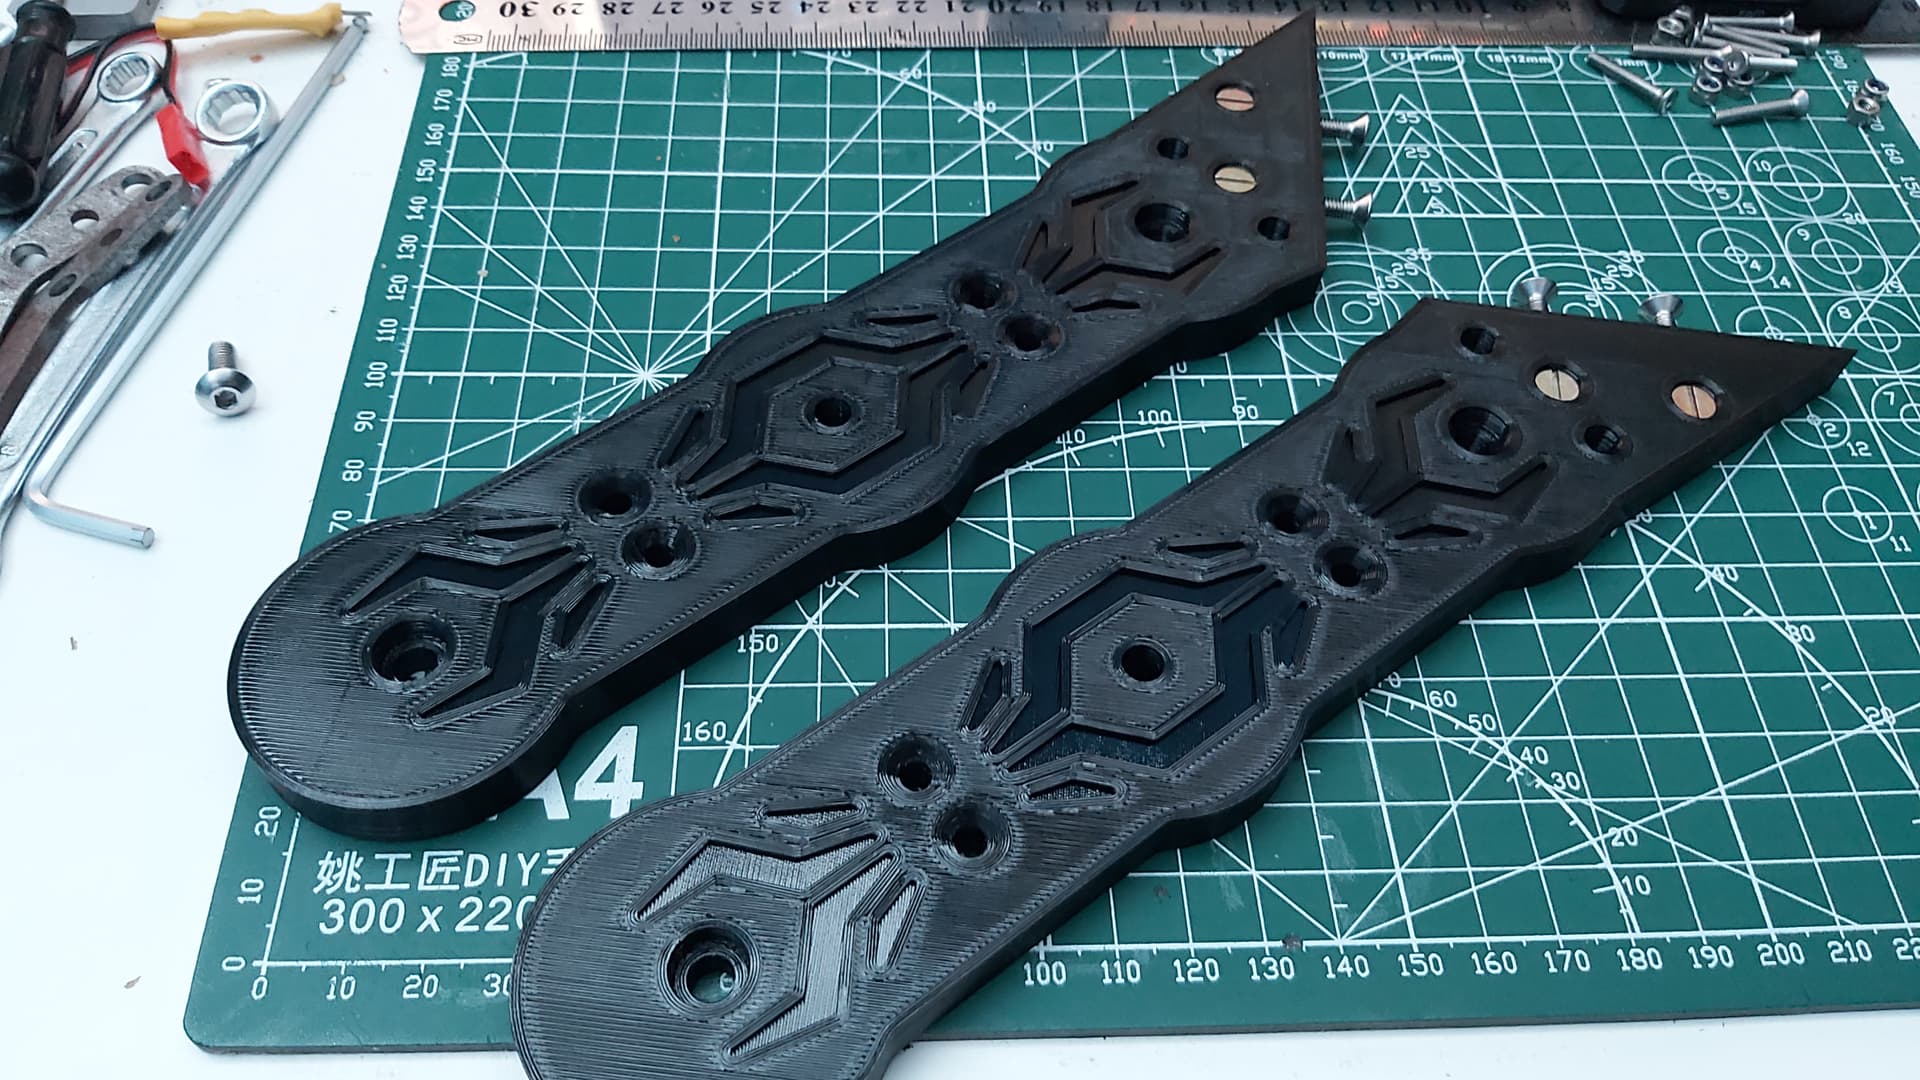
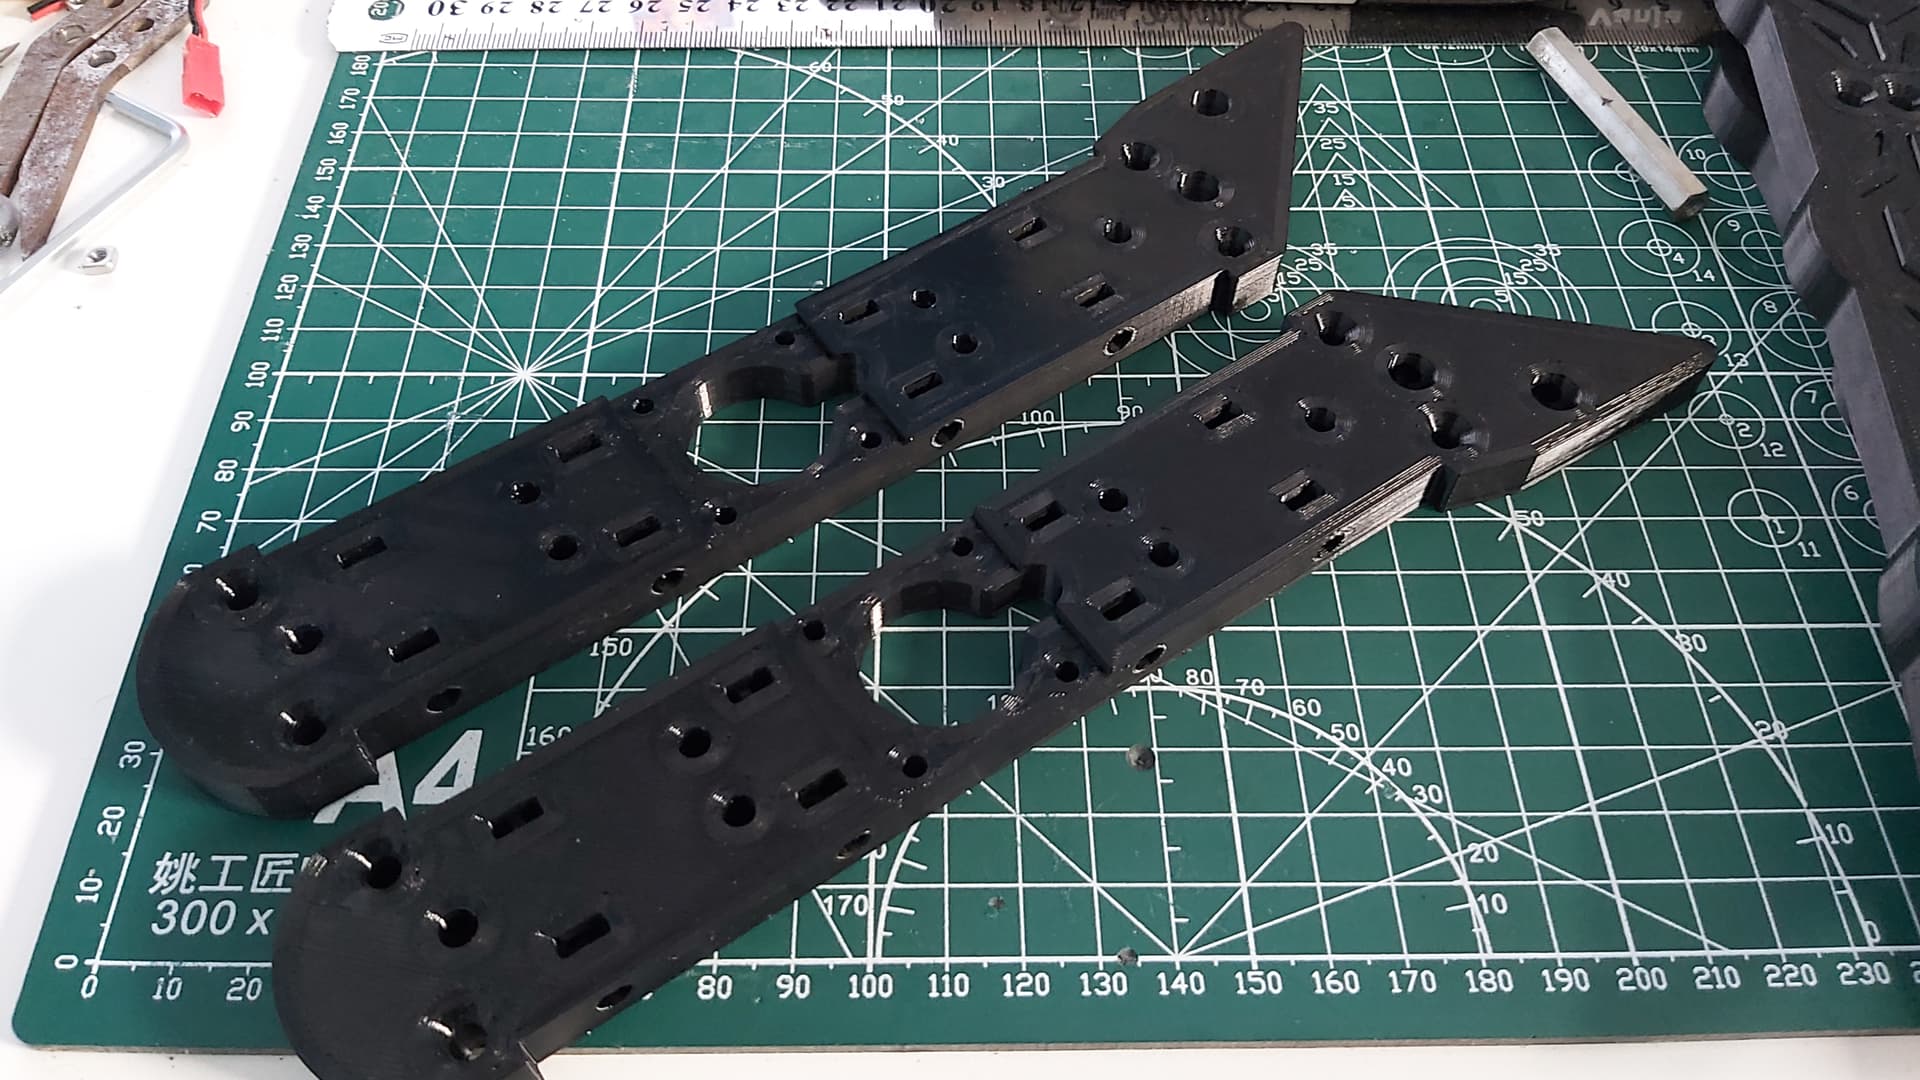
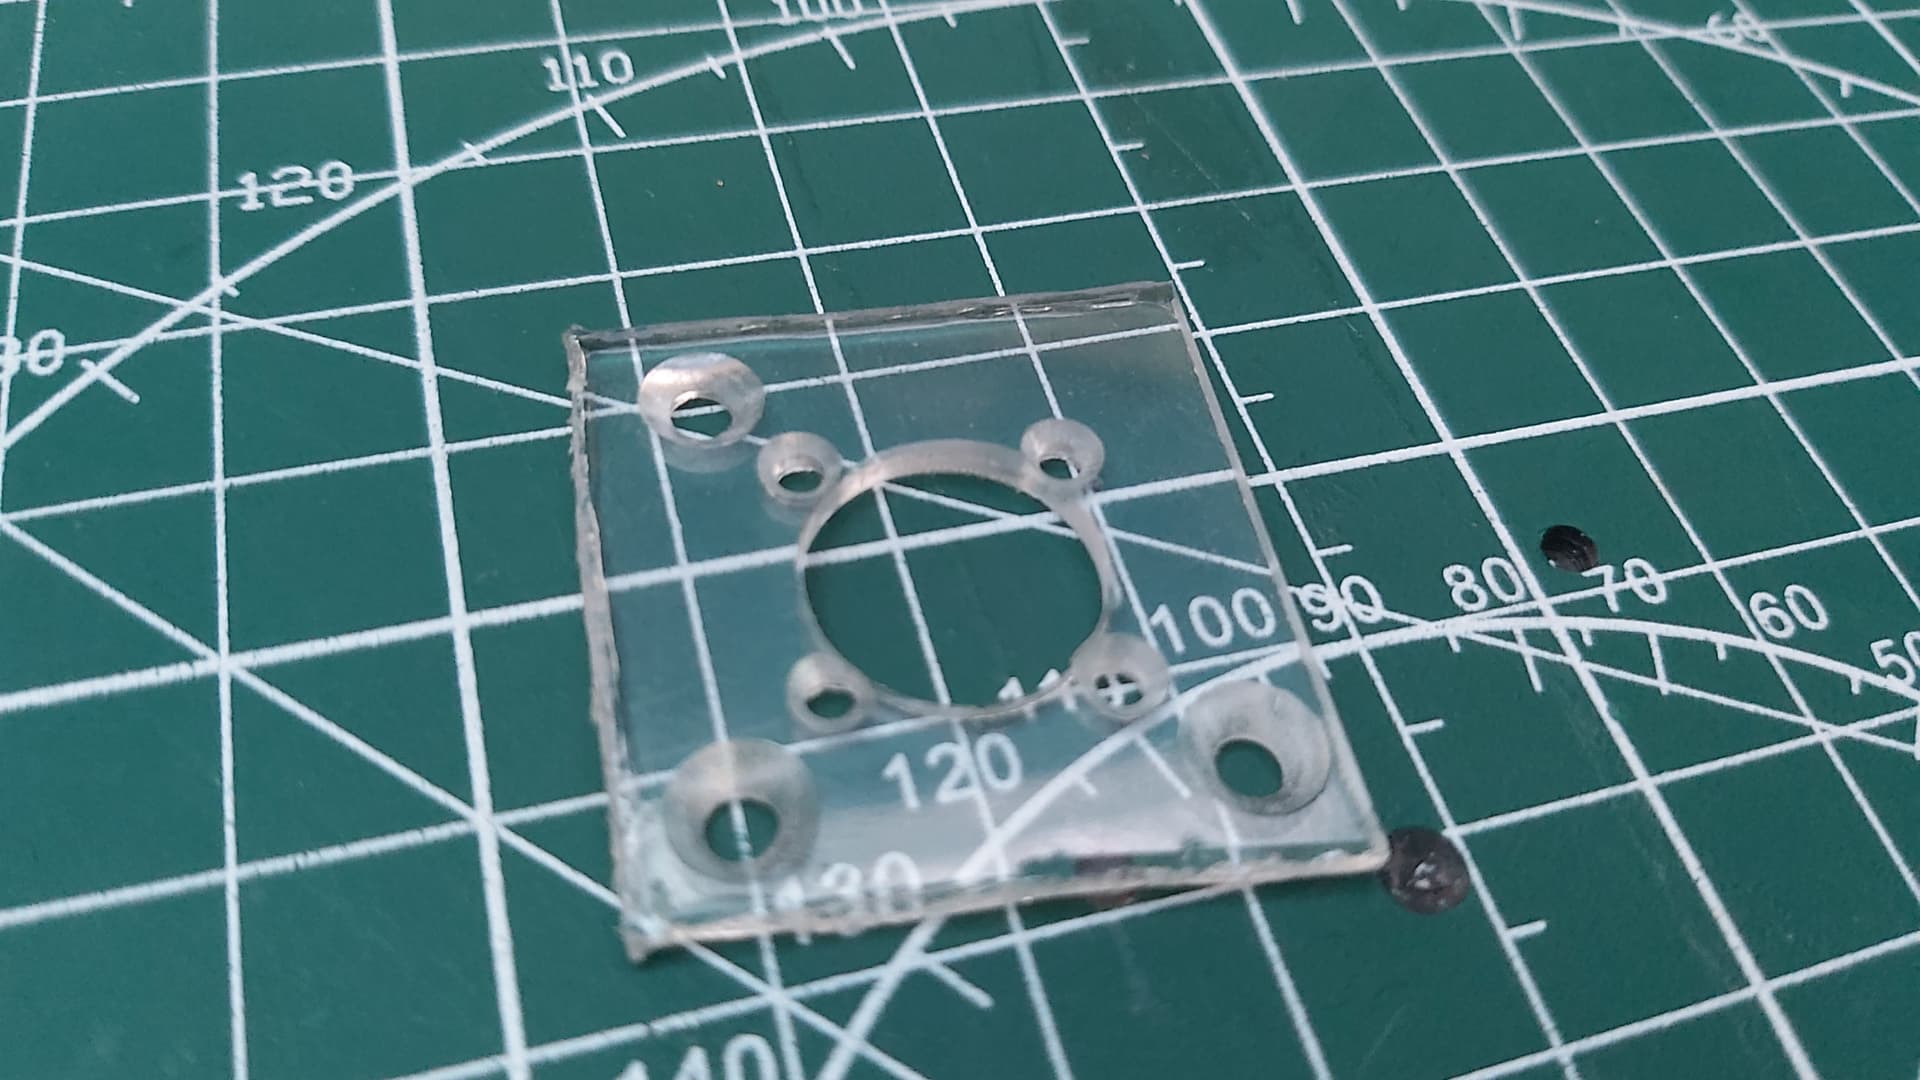
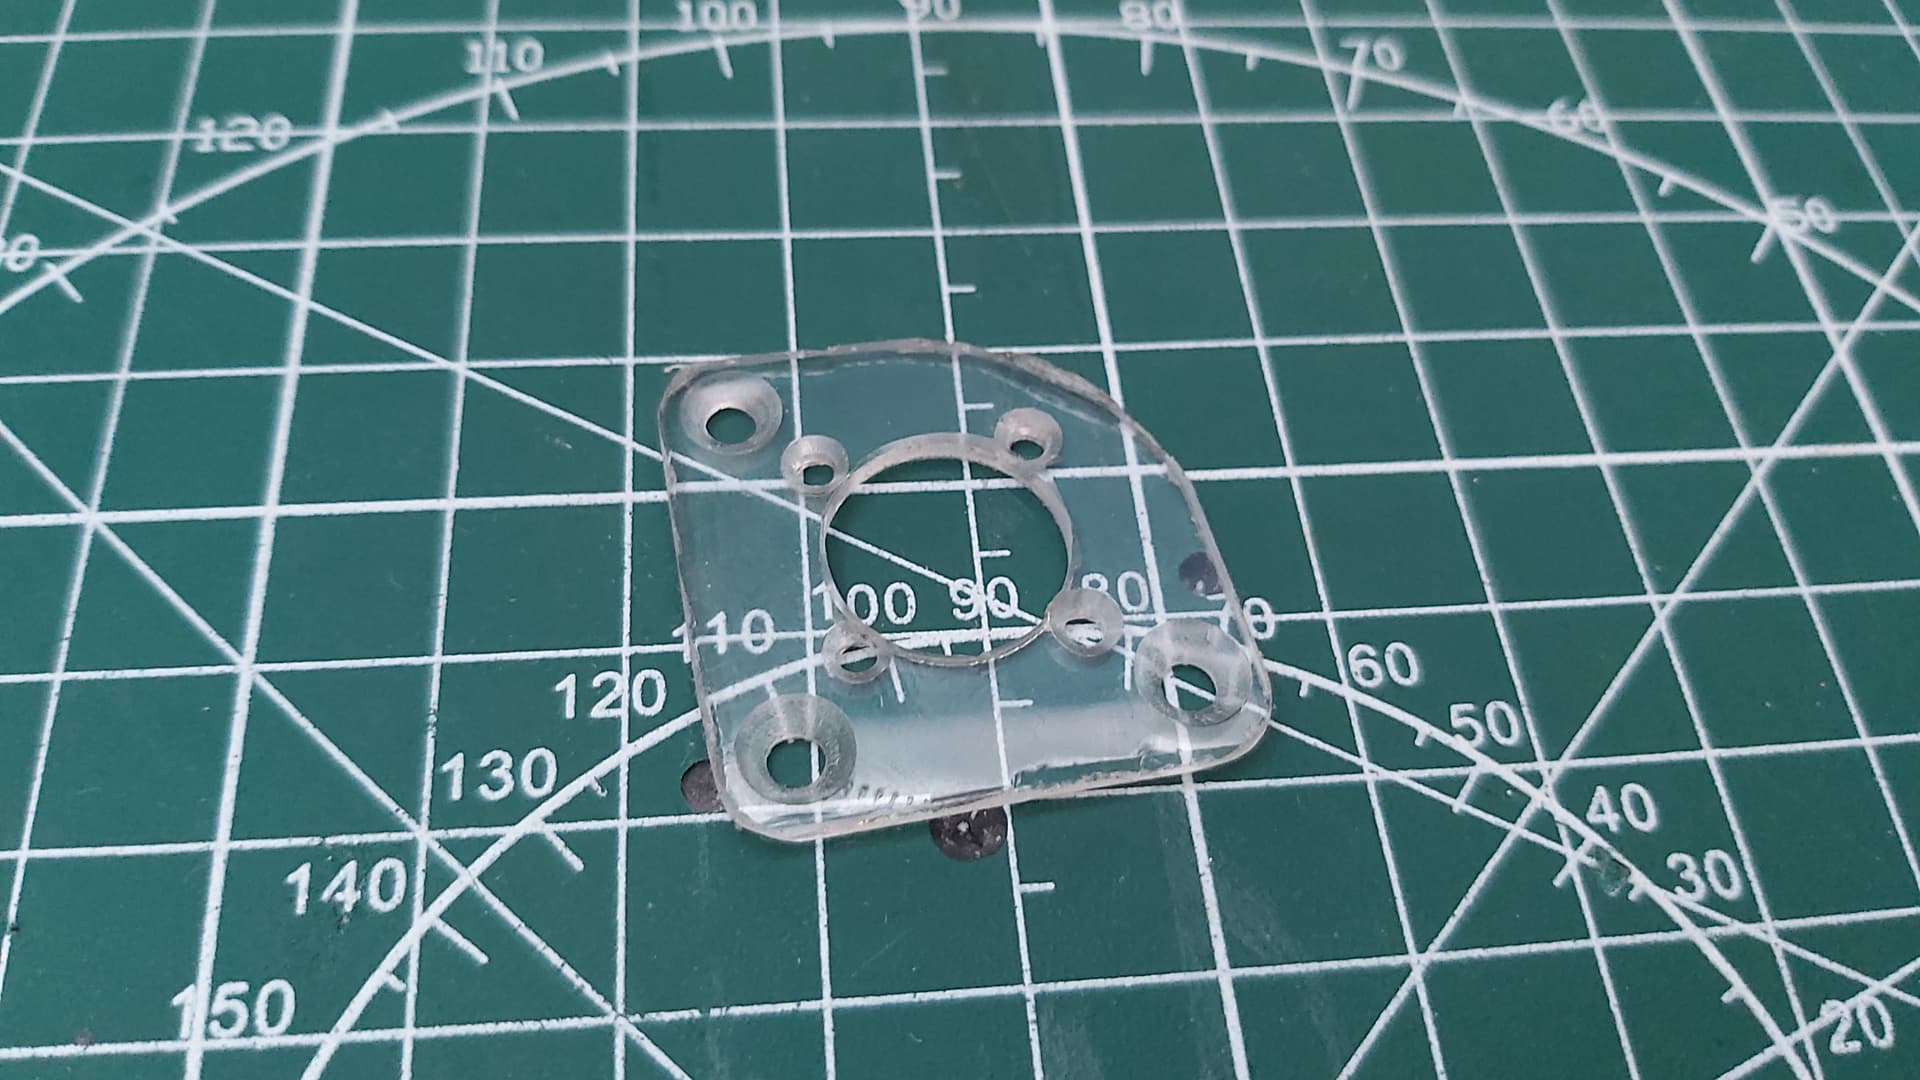
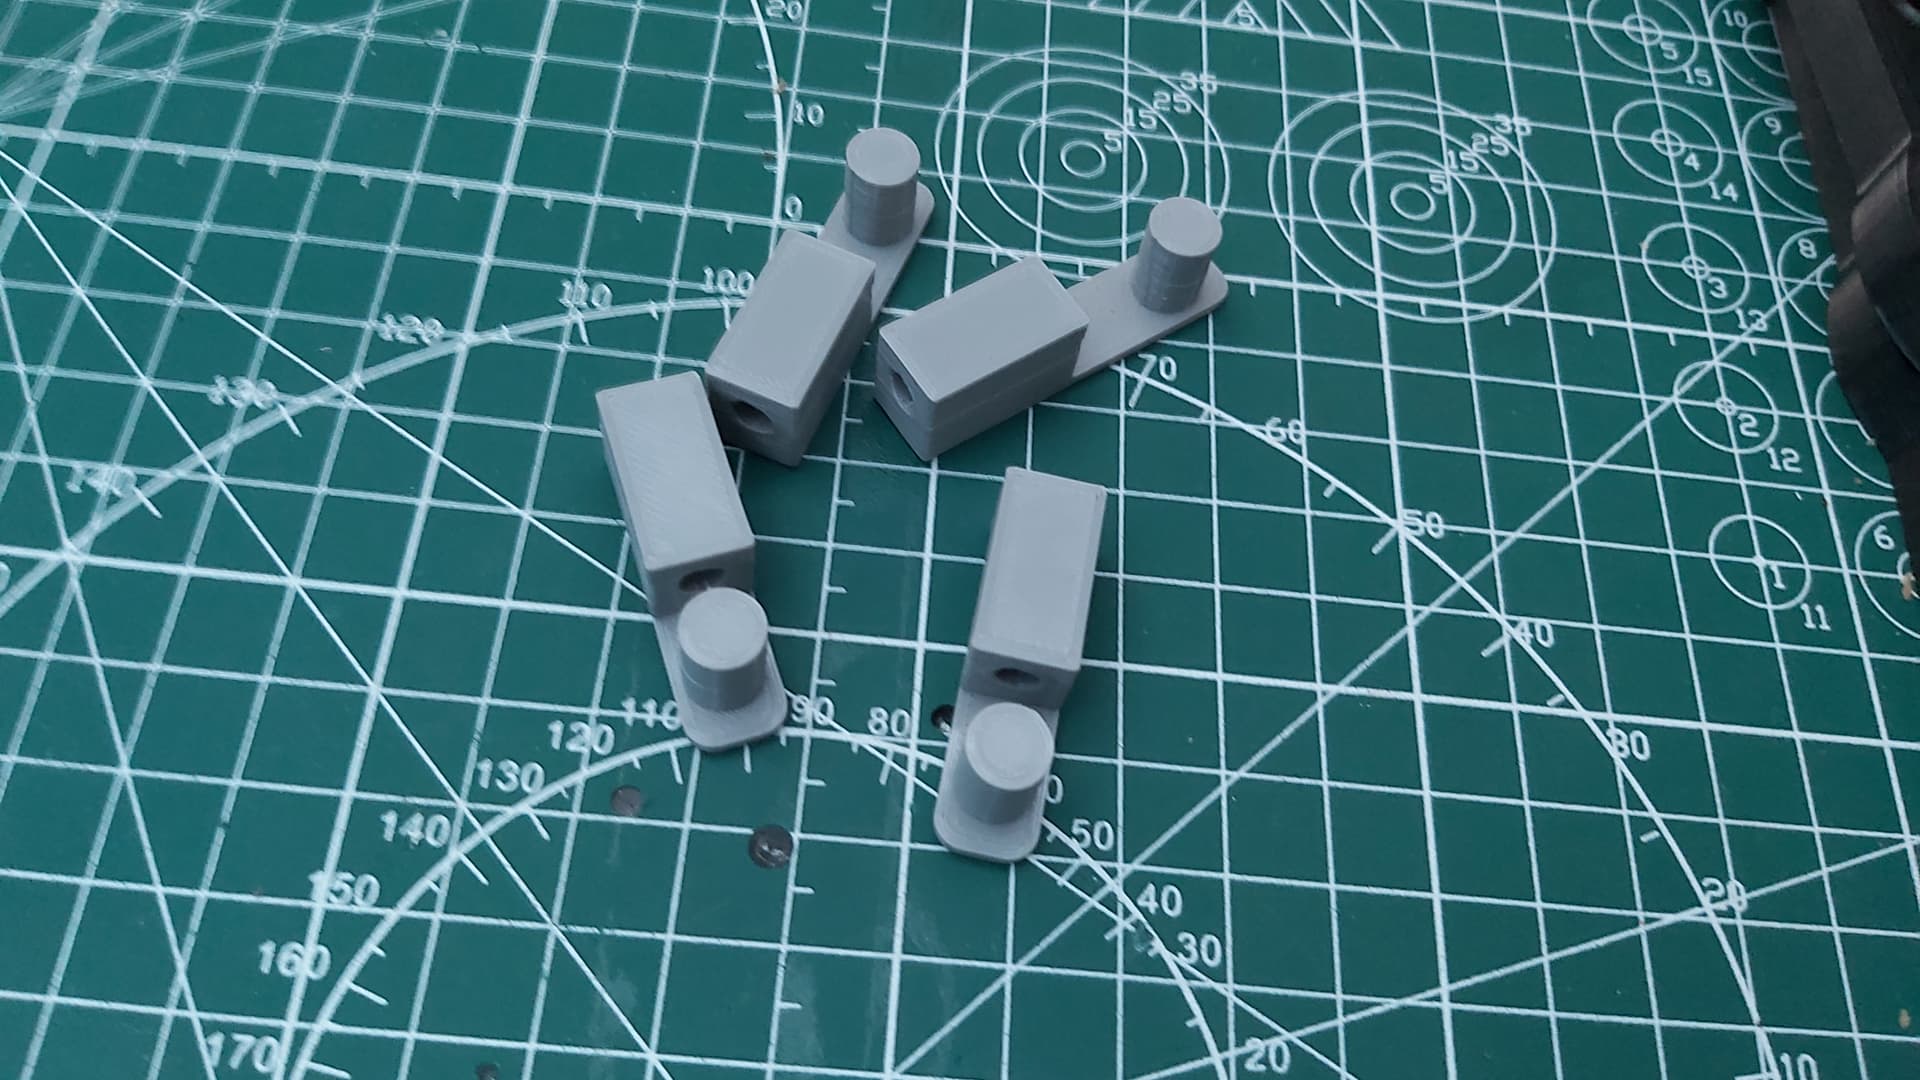
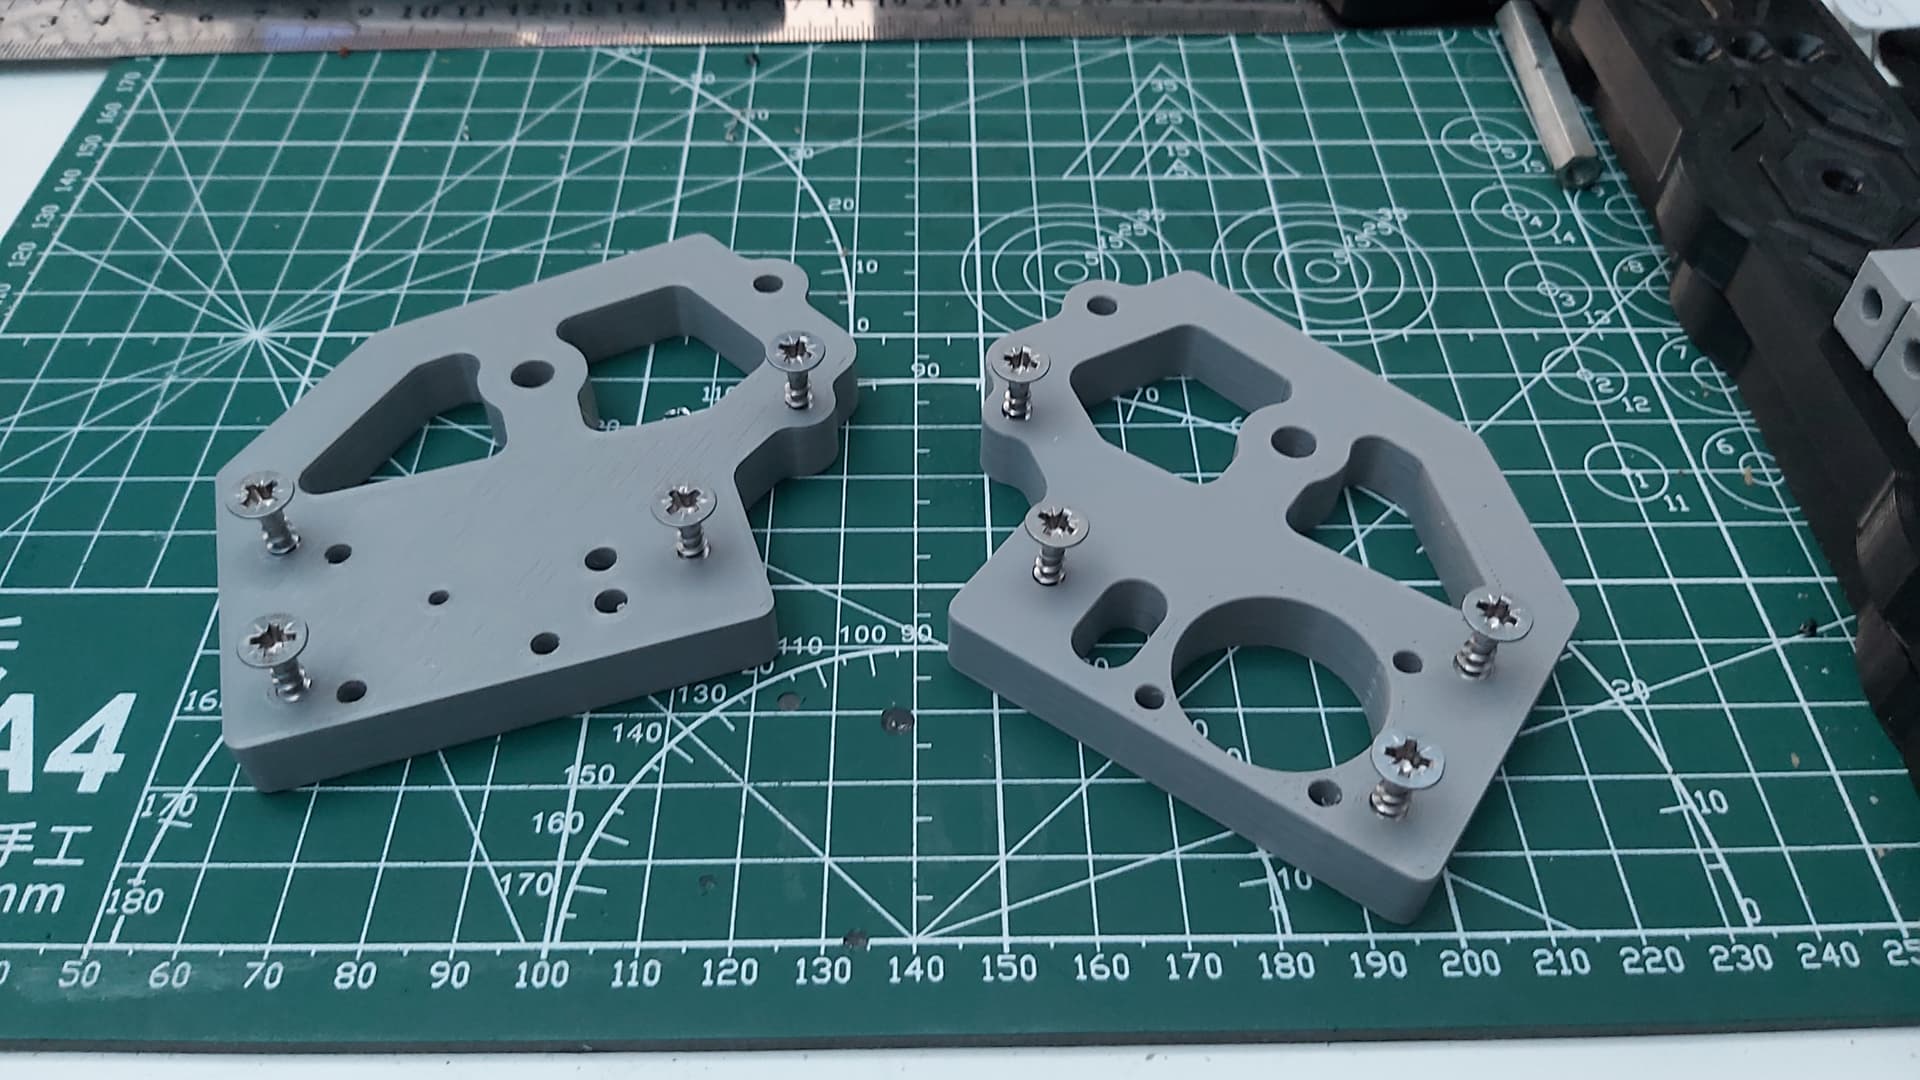
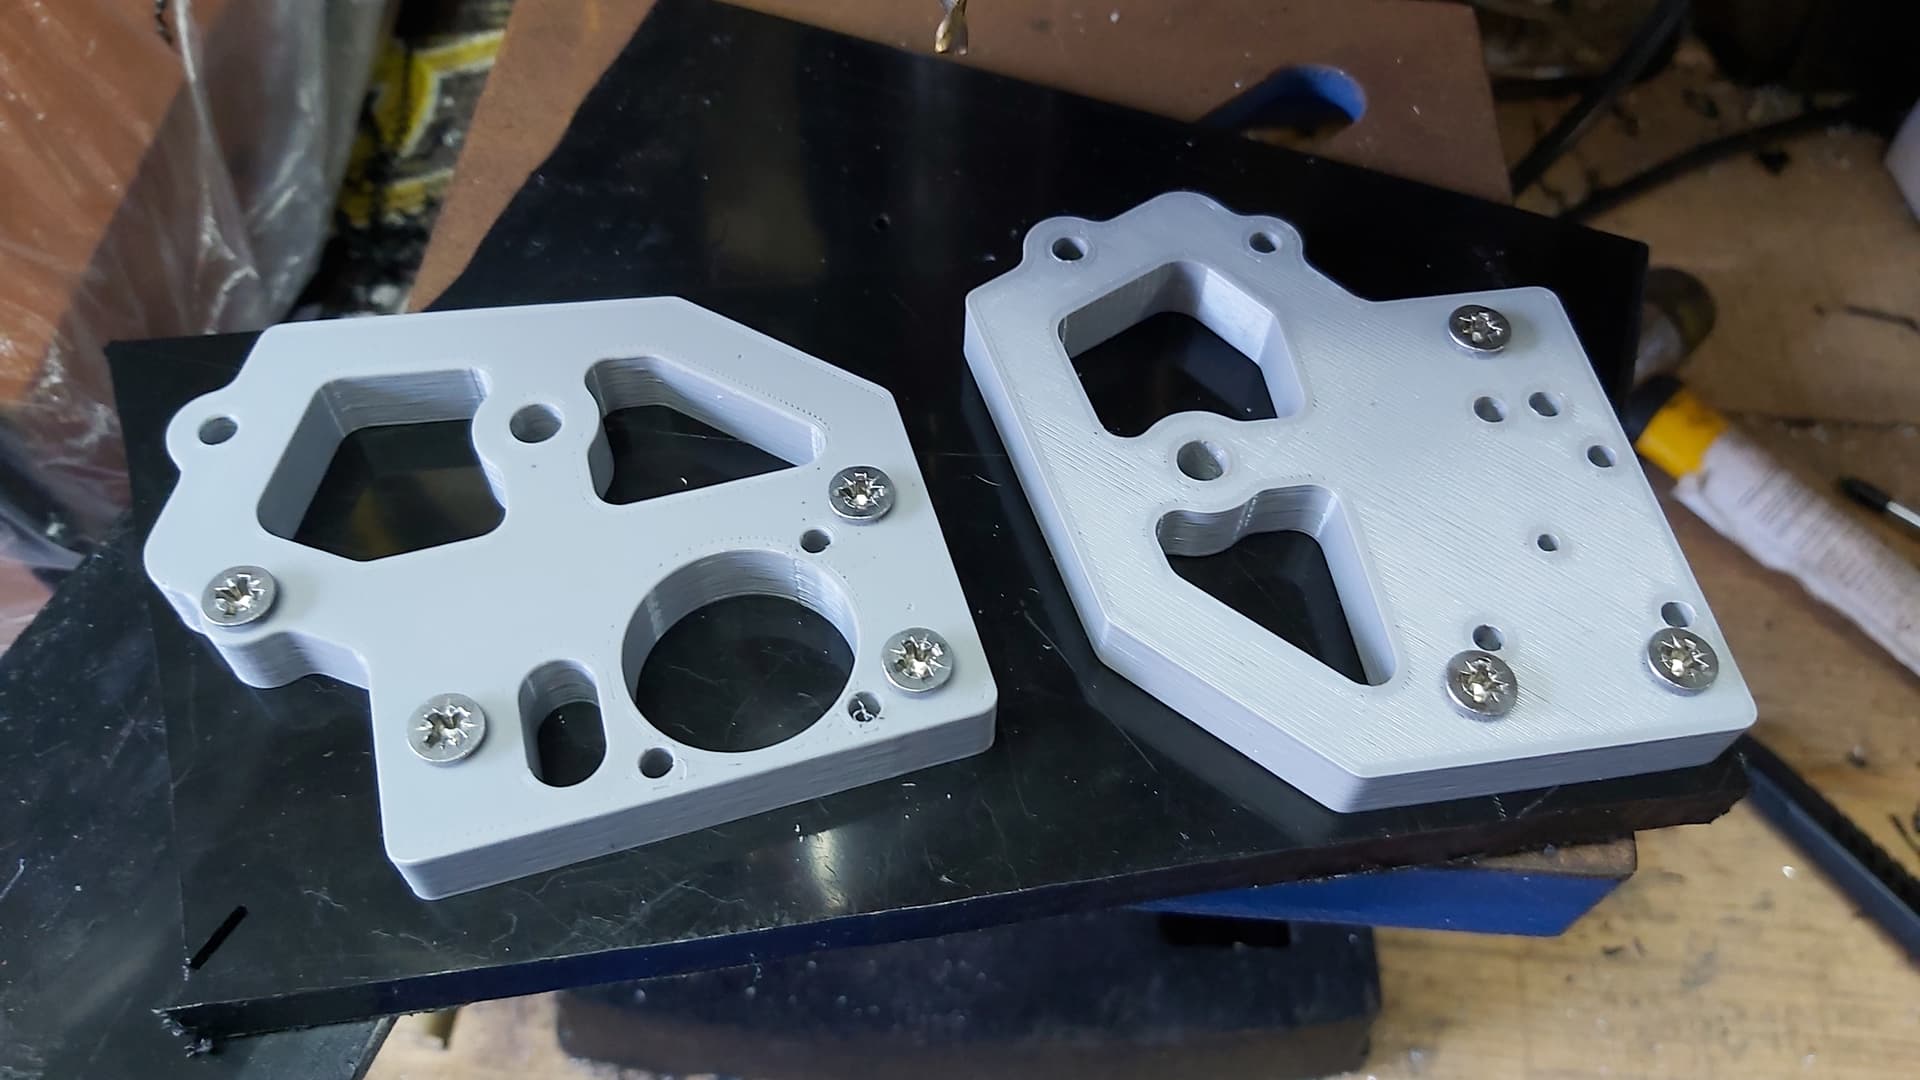
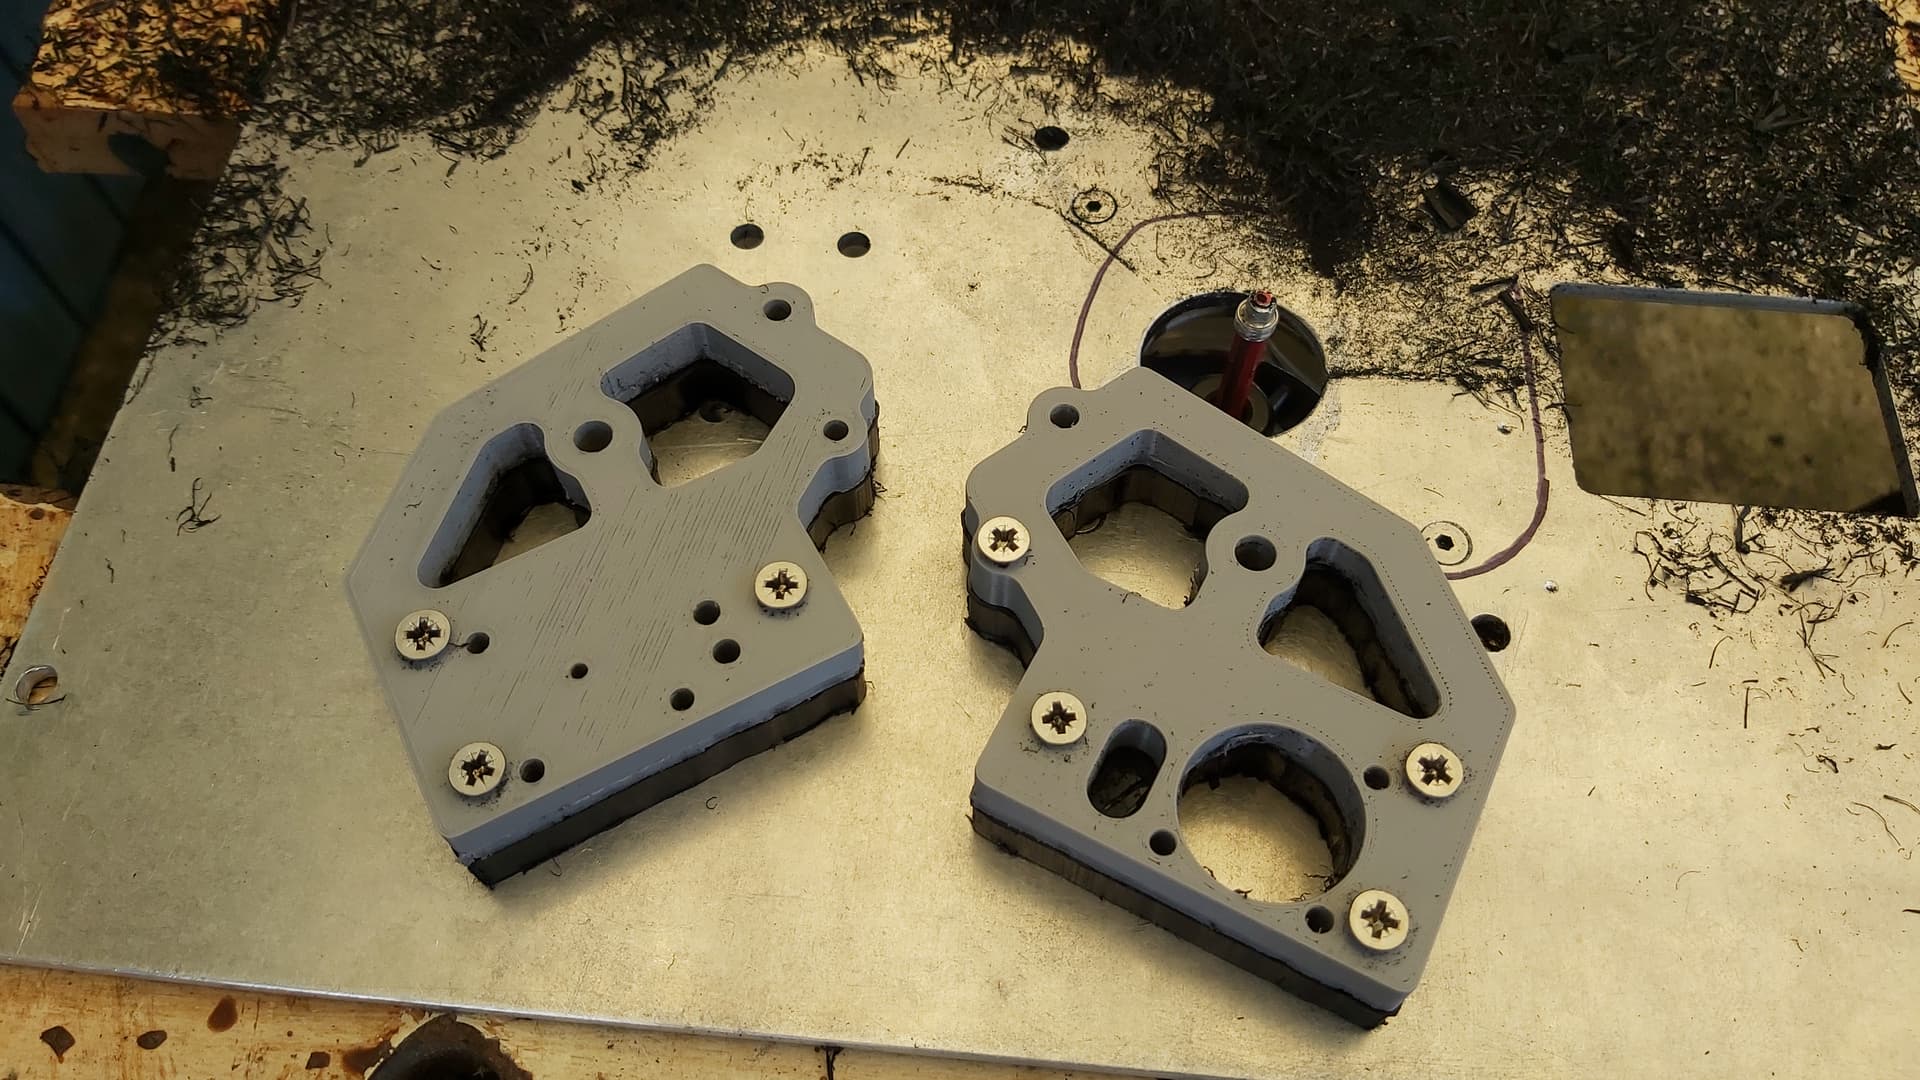
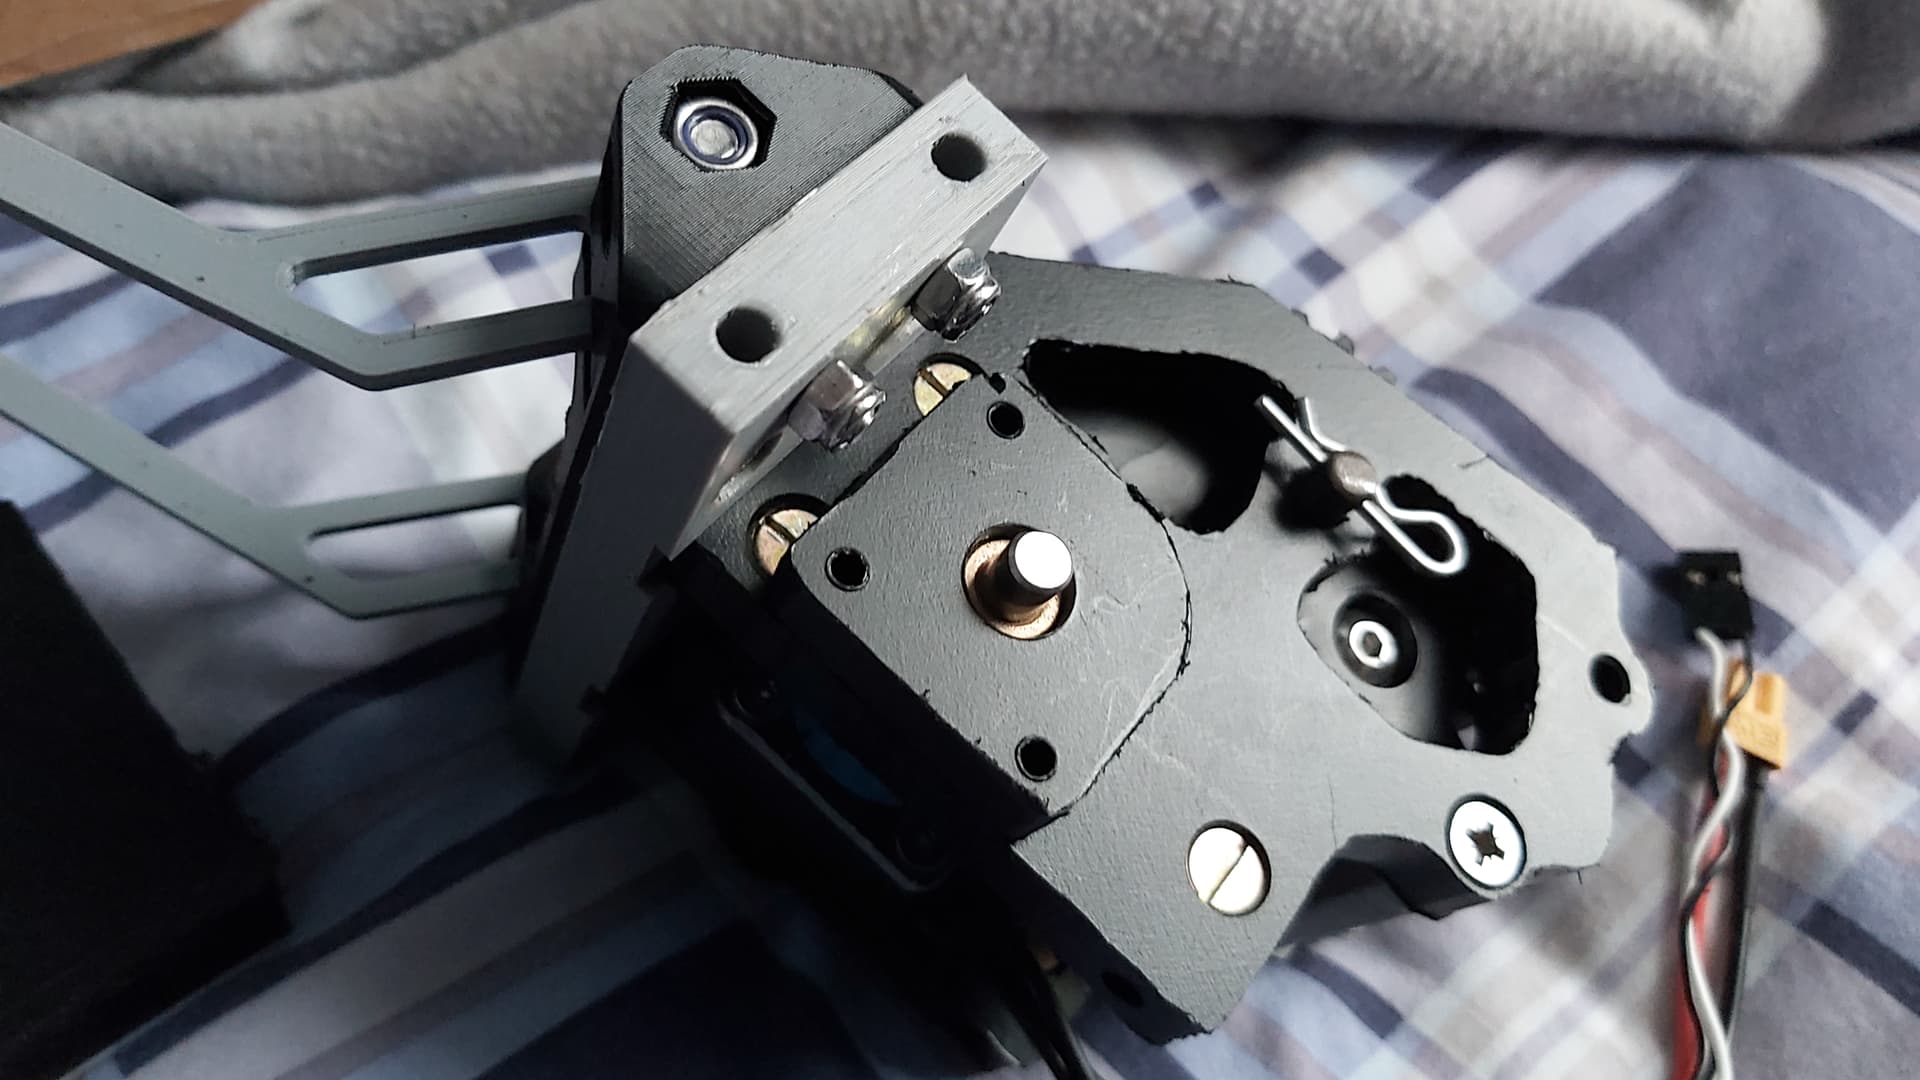
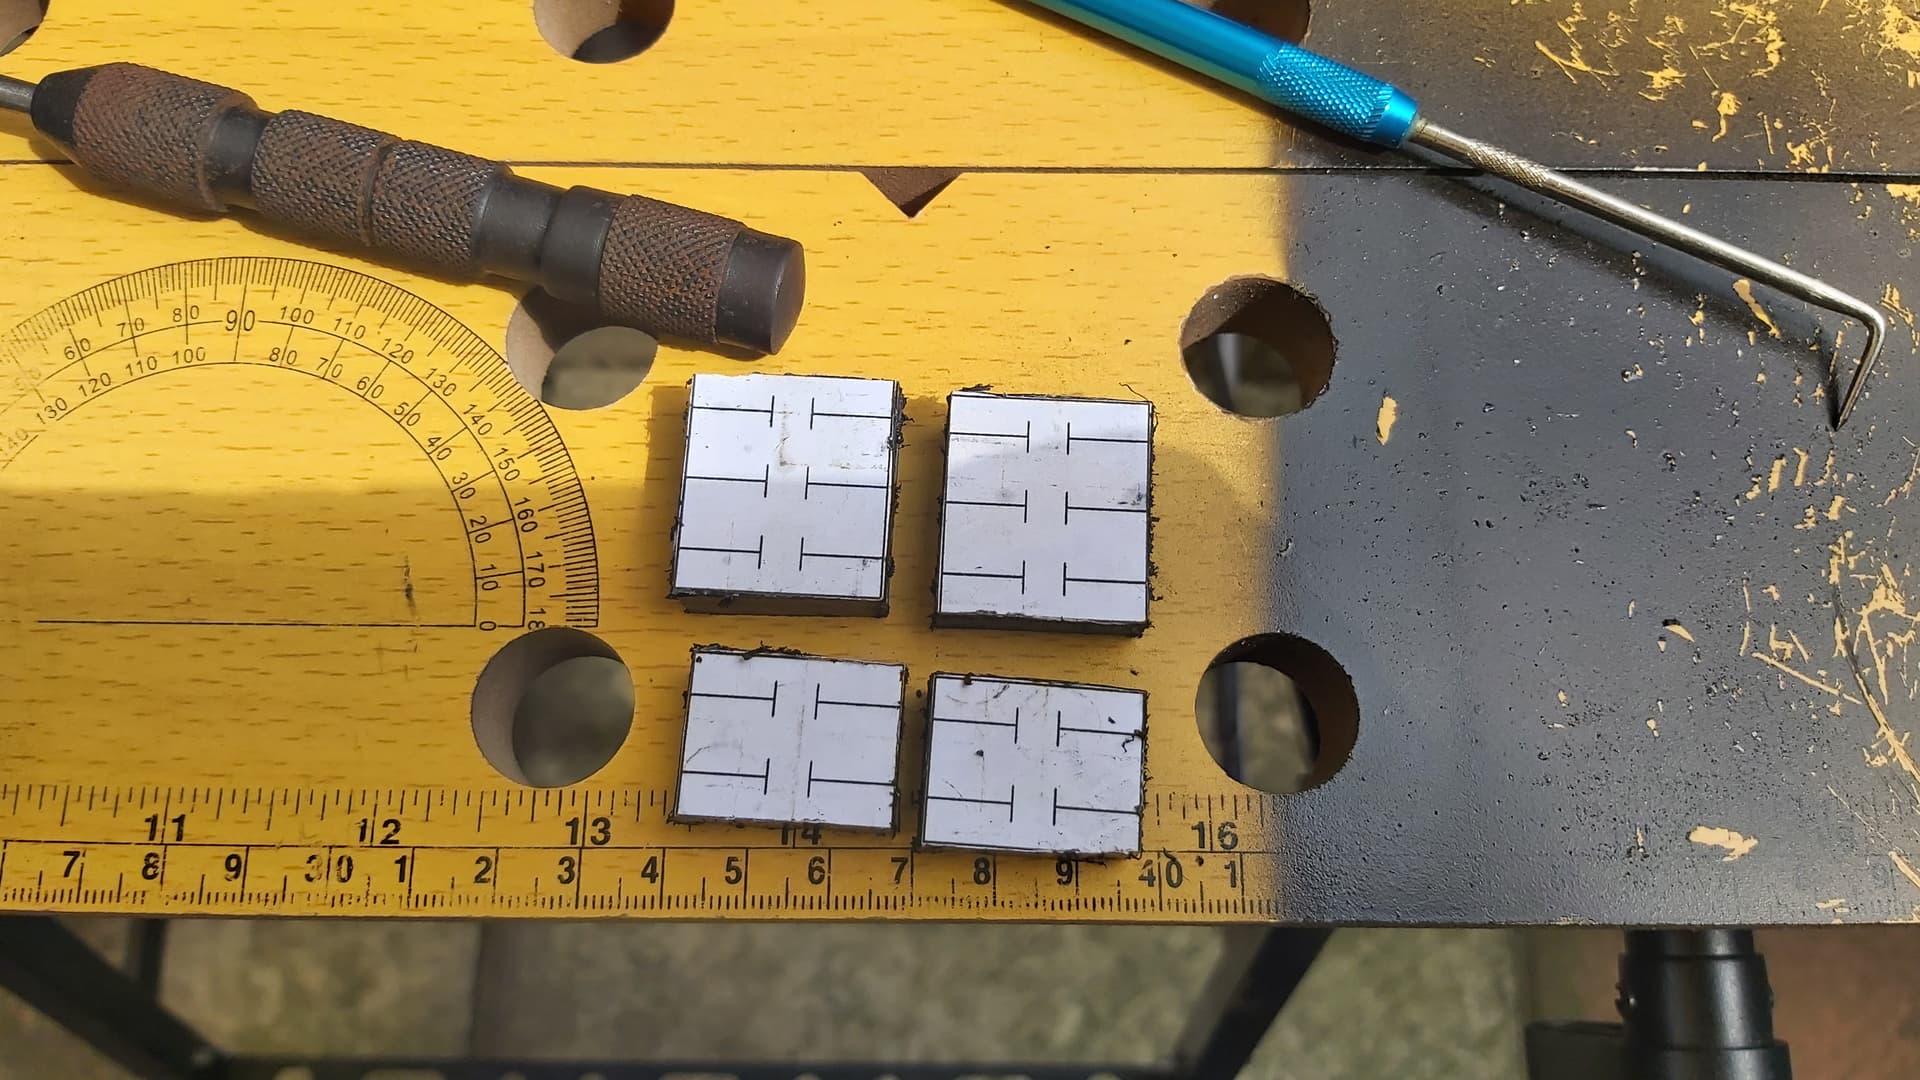
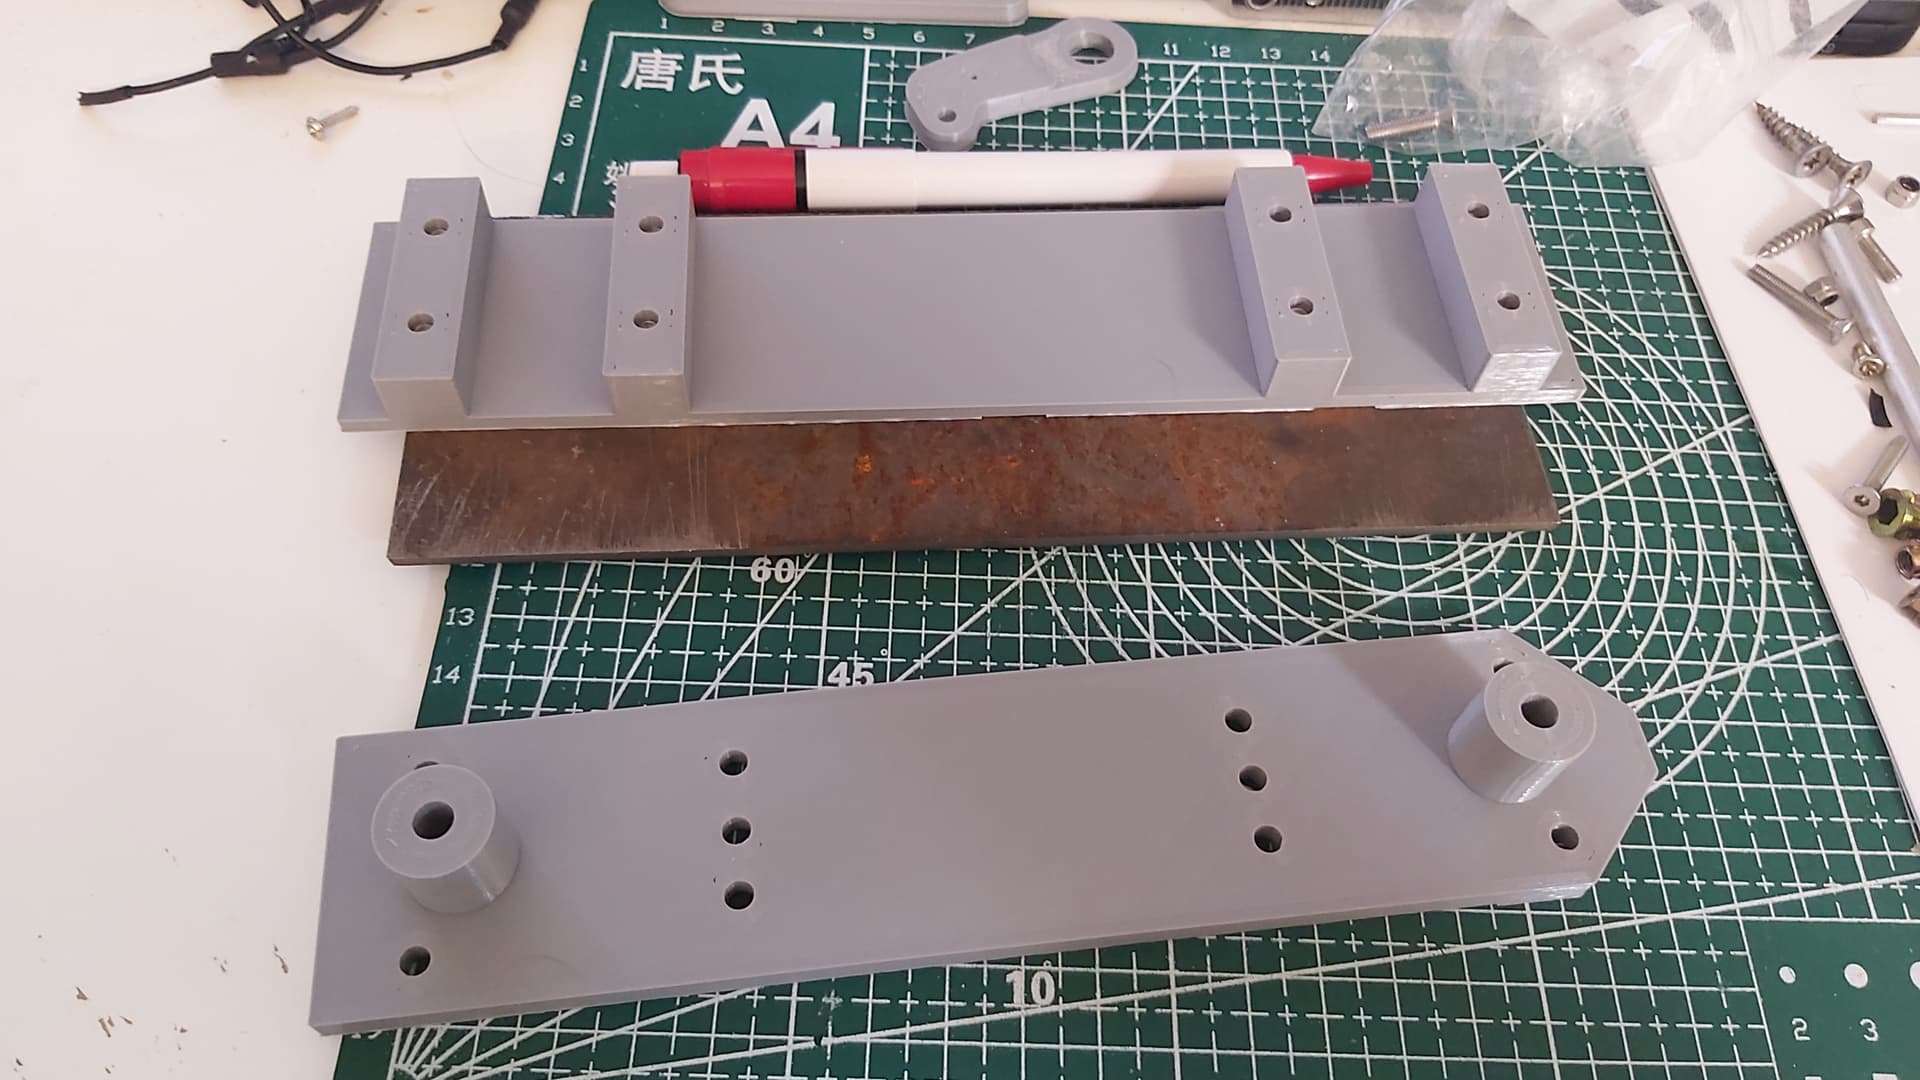
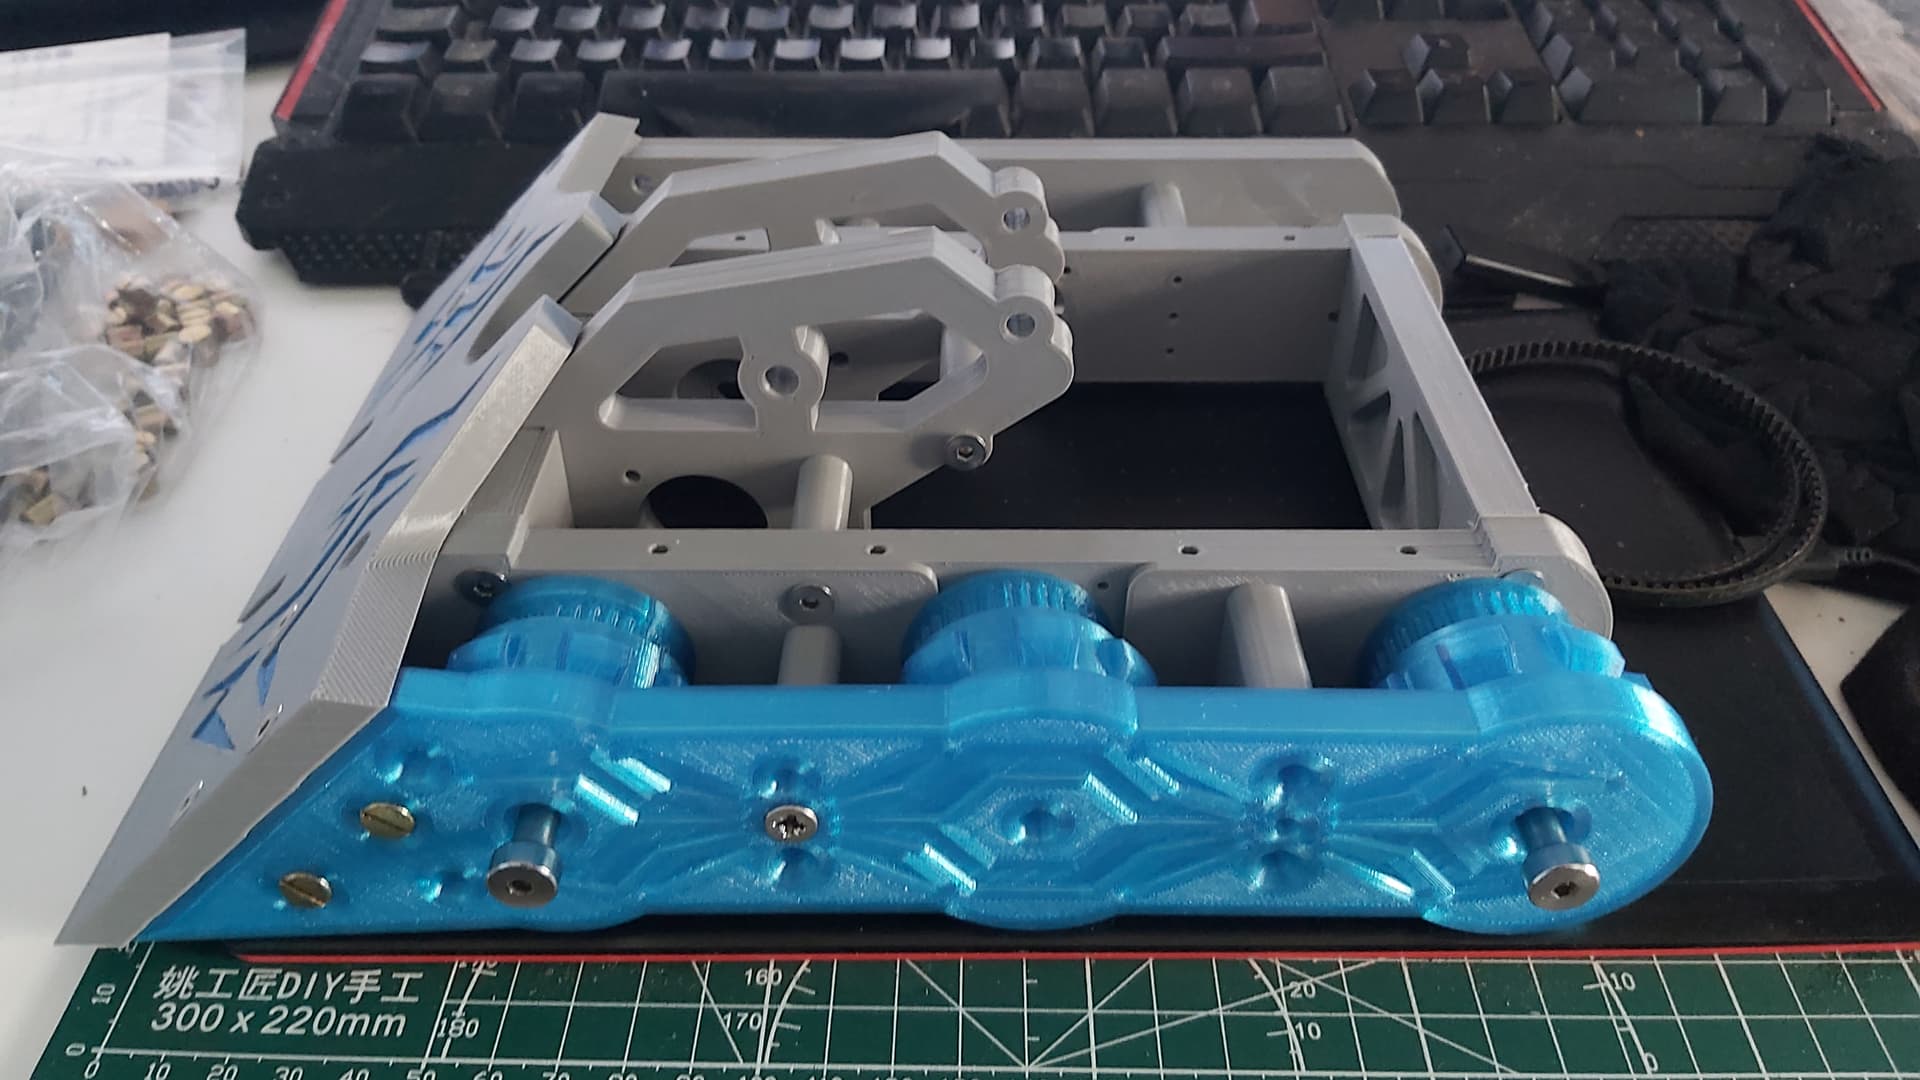
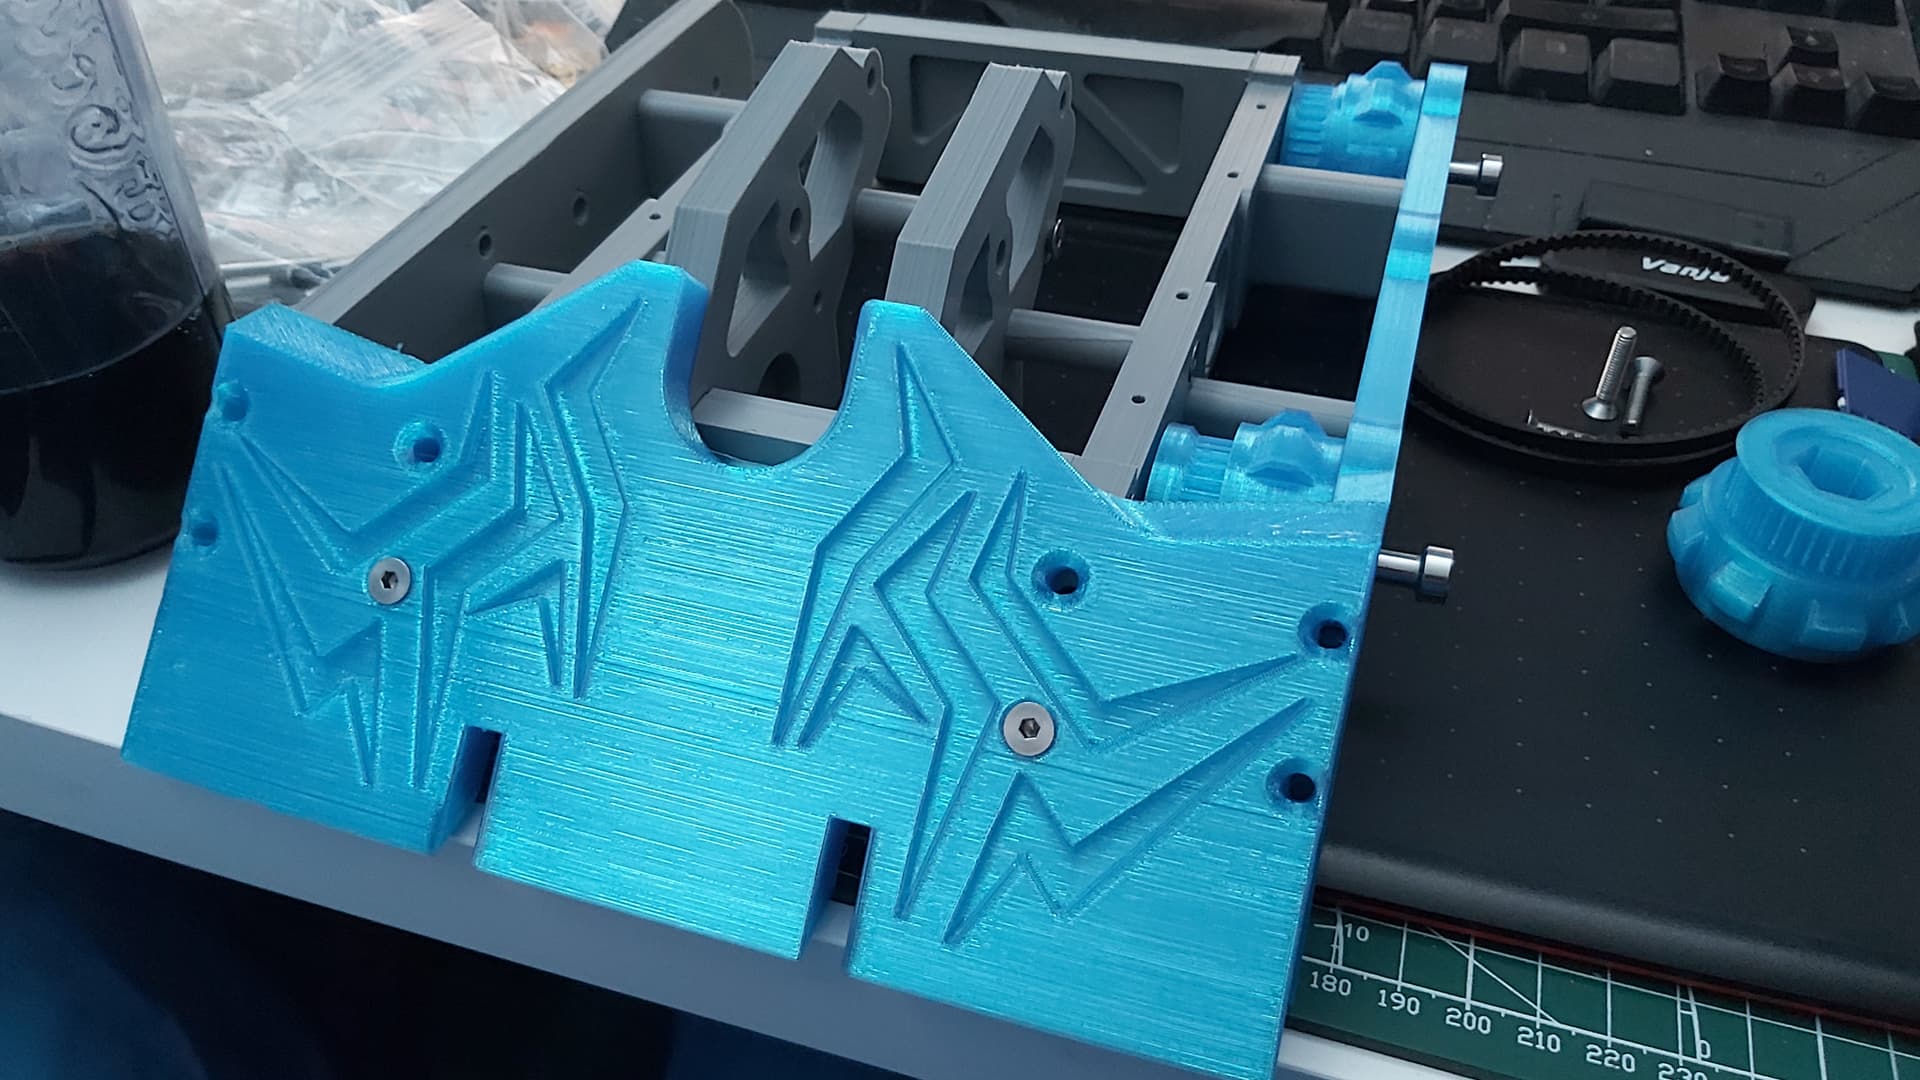
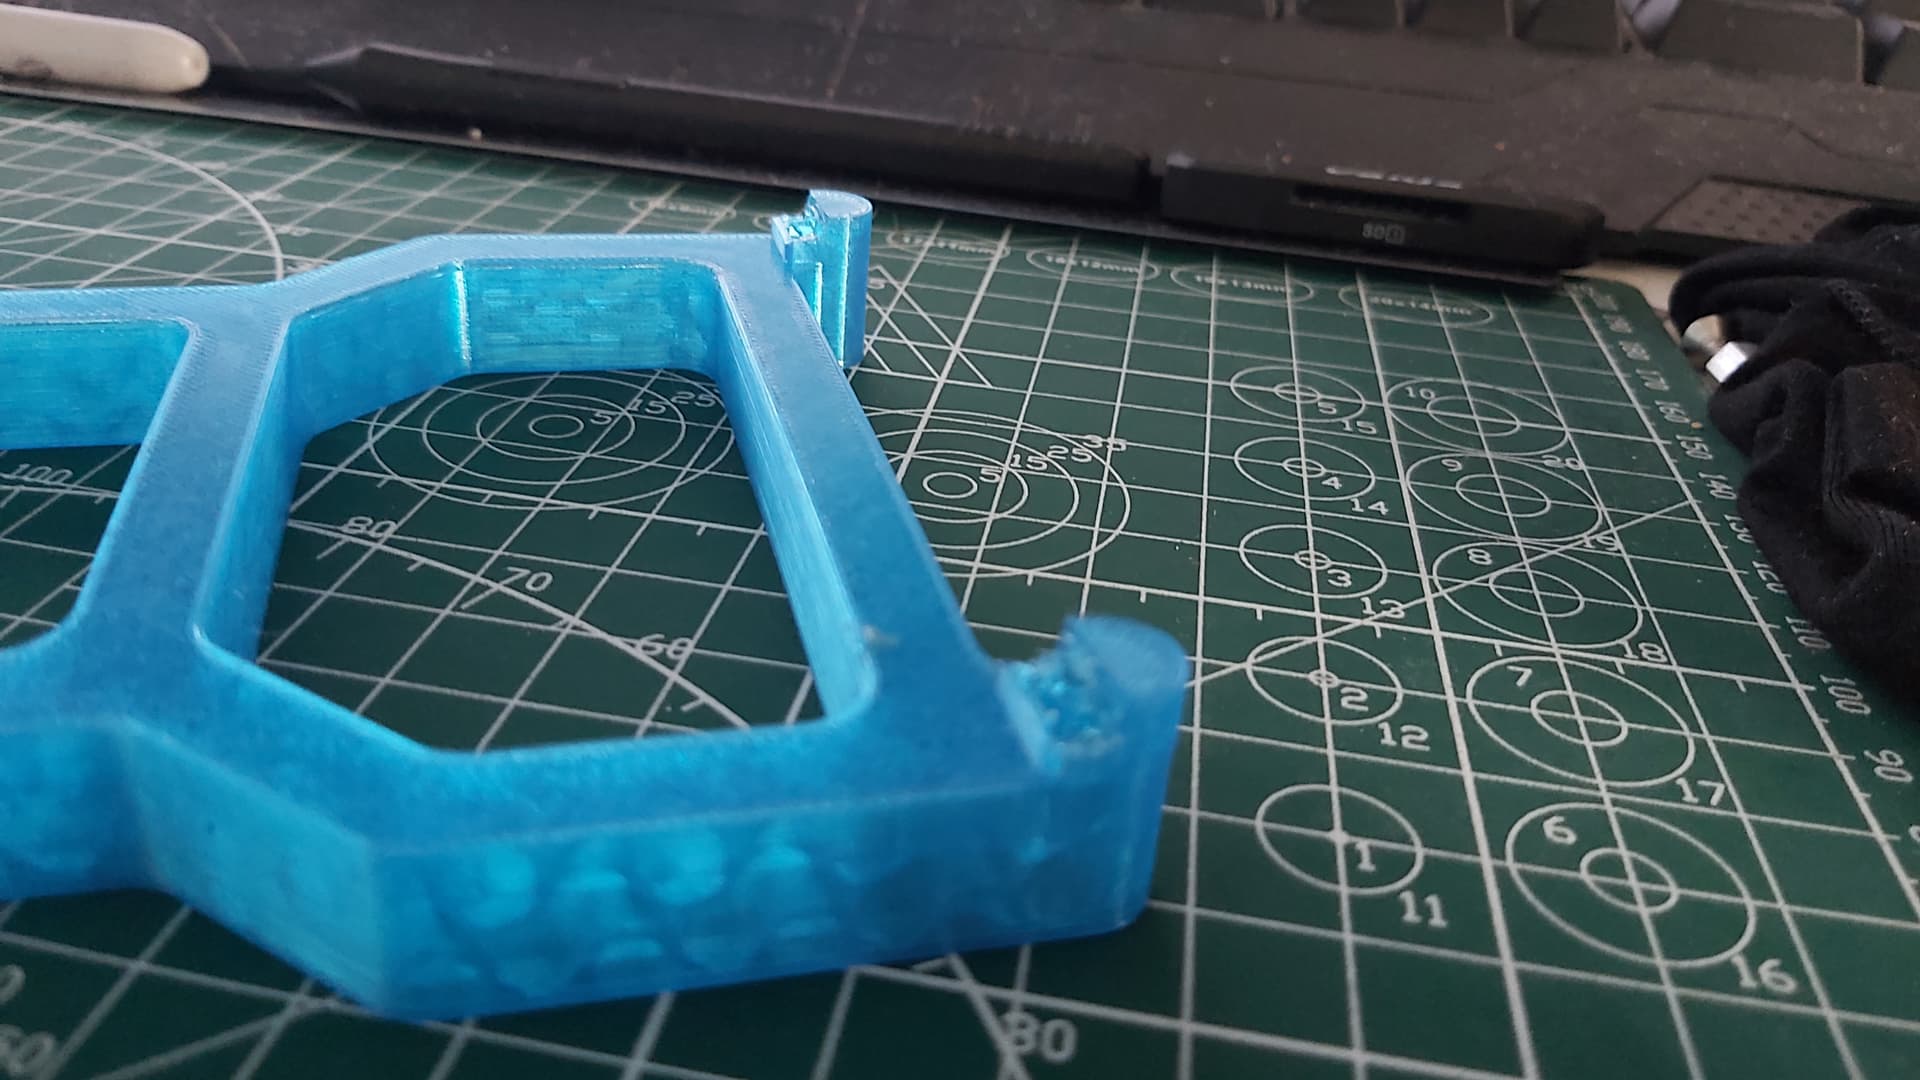
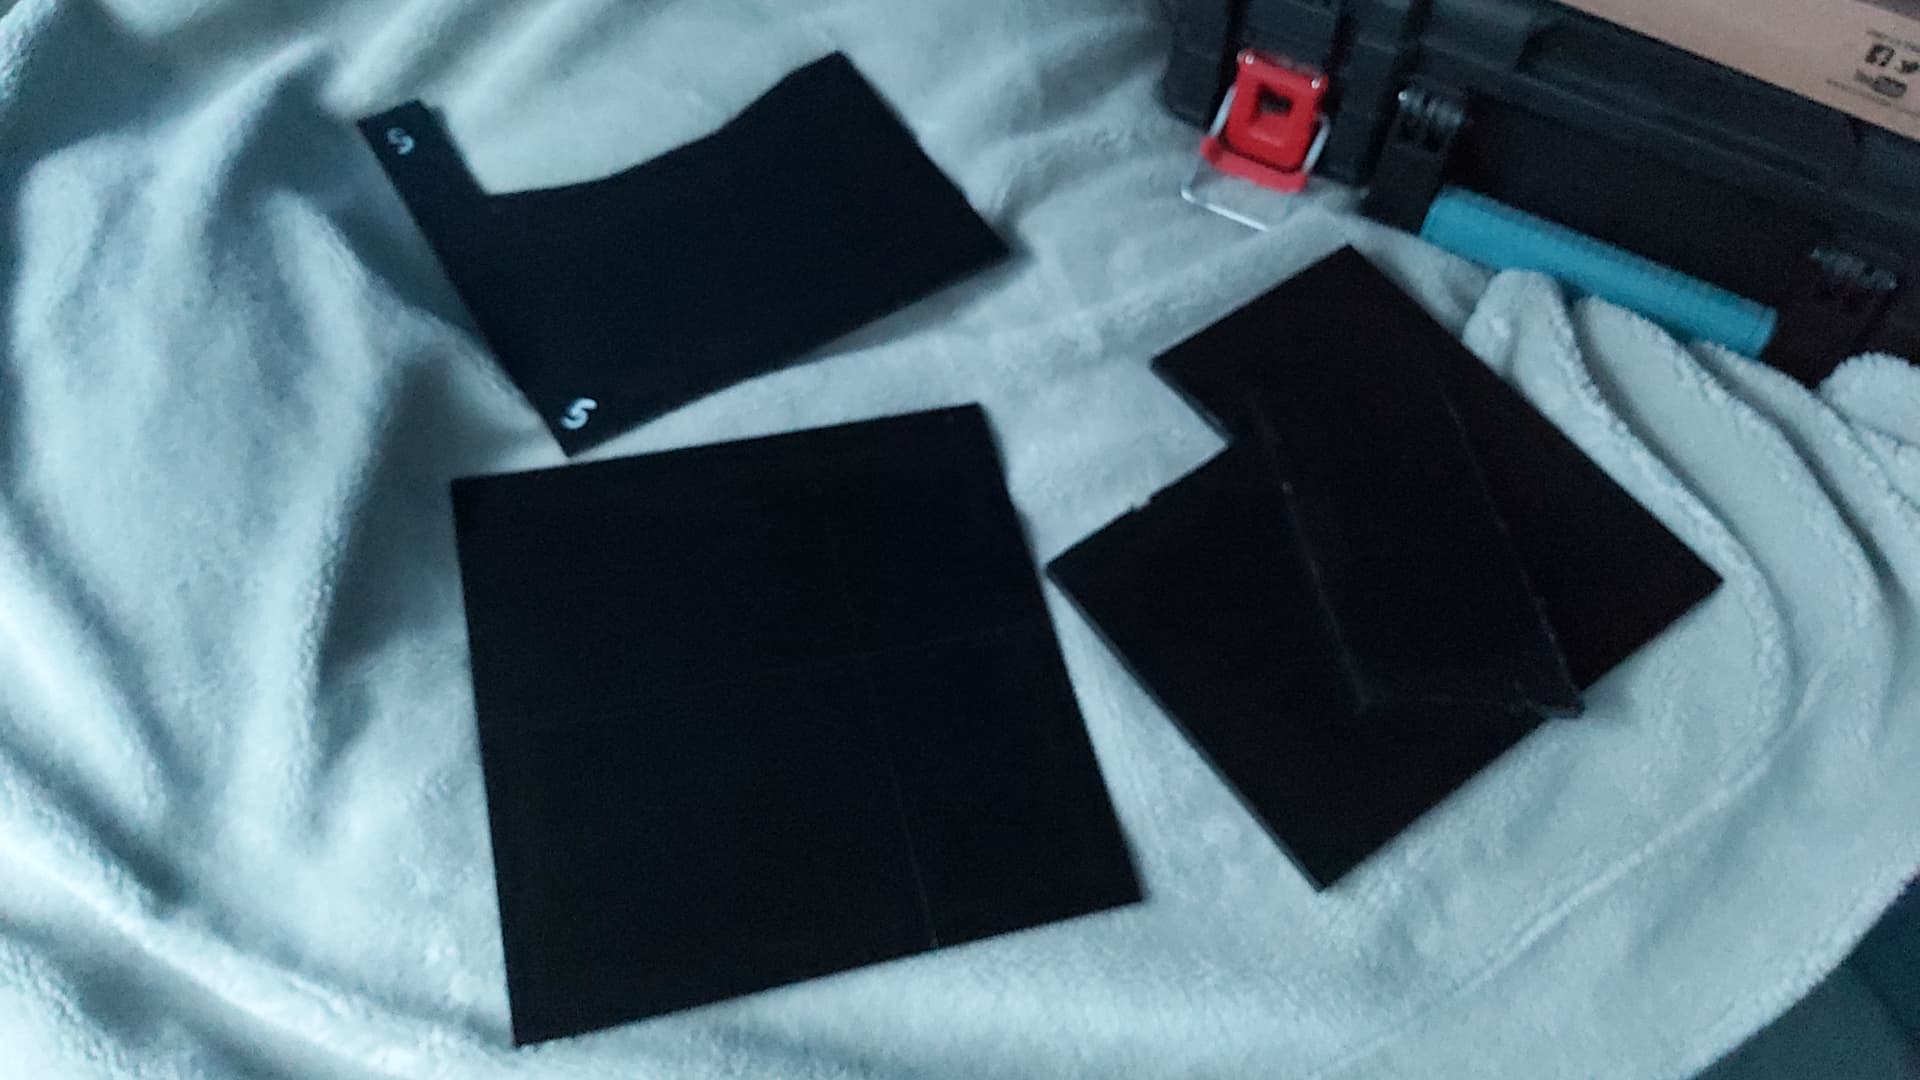
While I CADed out everything I would prototype the design with 3D-printed prototype parts made out of PLA. These helped me test fit internals and grasp the scale of the end product and test out different ideas on dead shafts, mounting patterns and how the sides mount to the bulkheads.

Below are a few examples of different PLA prototypes.

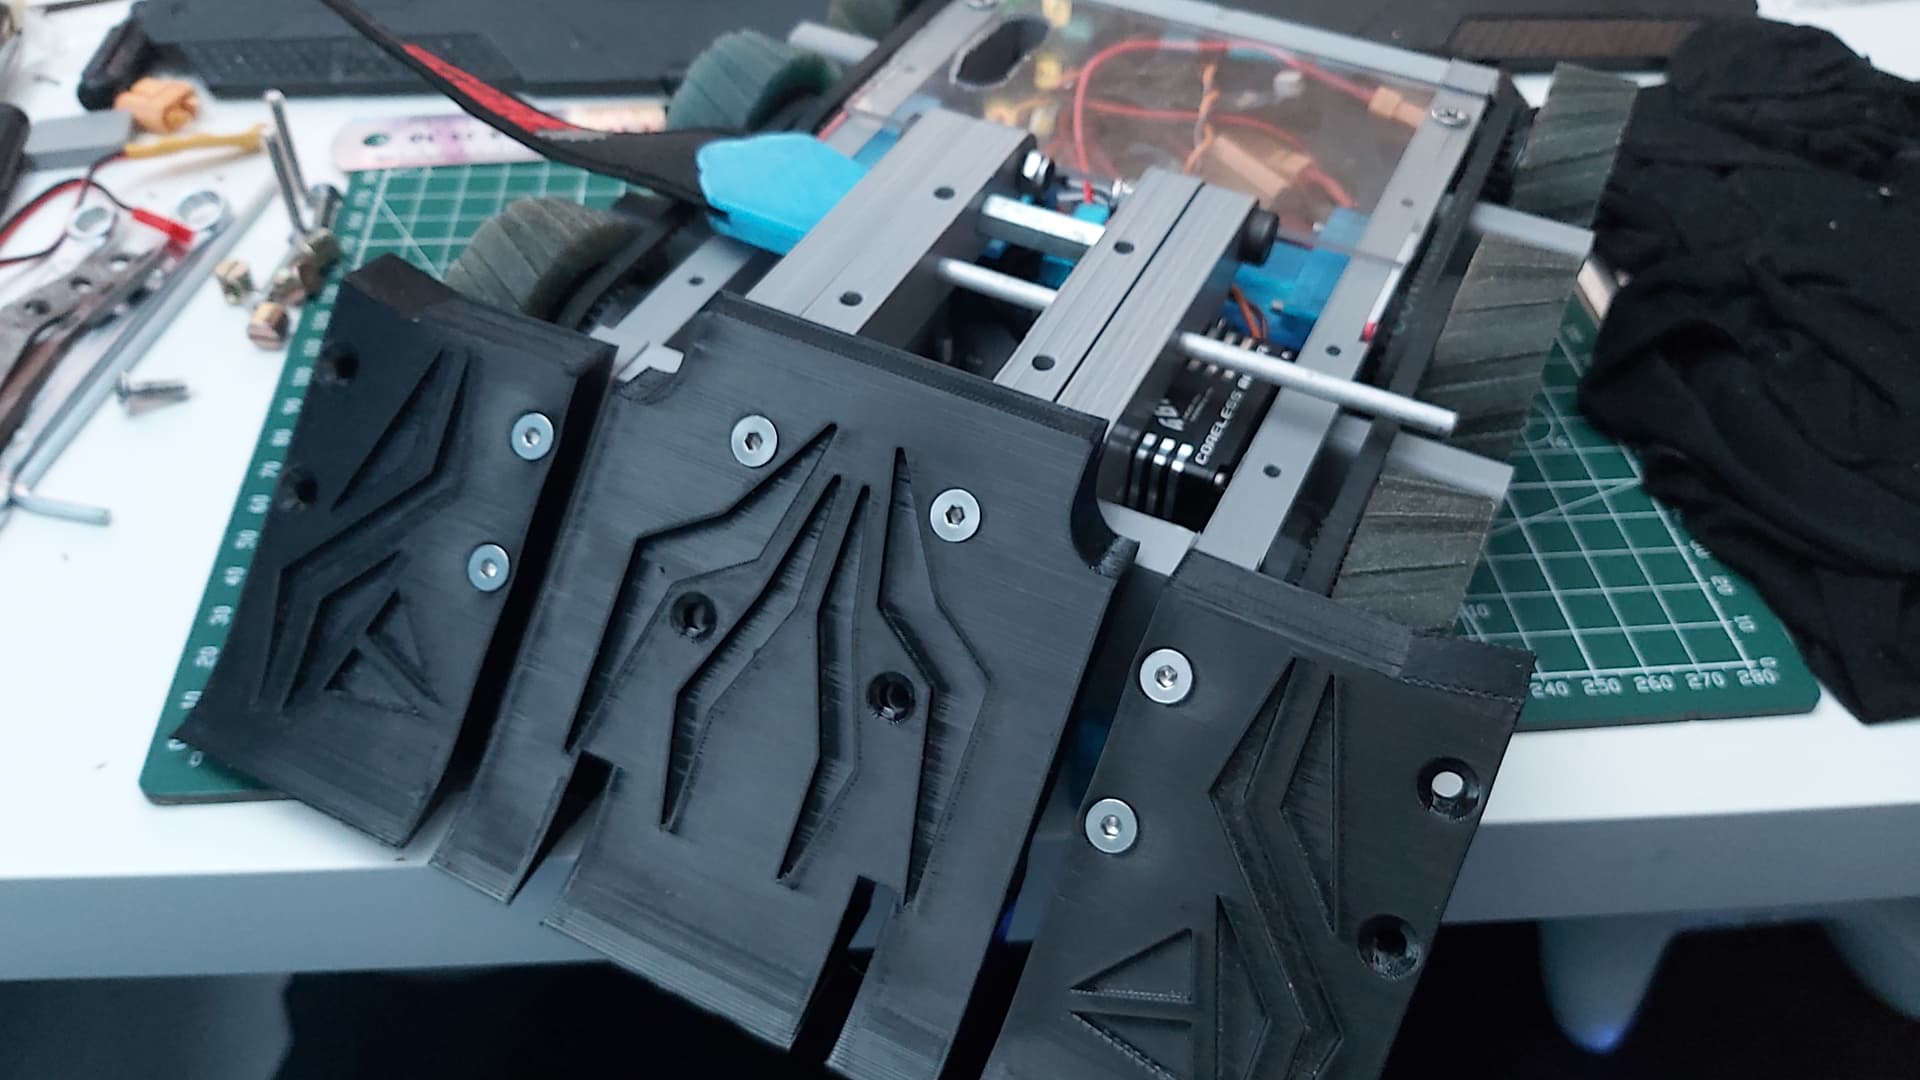
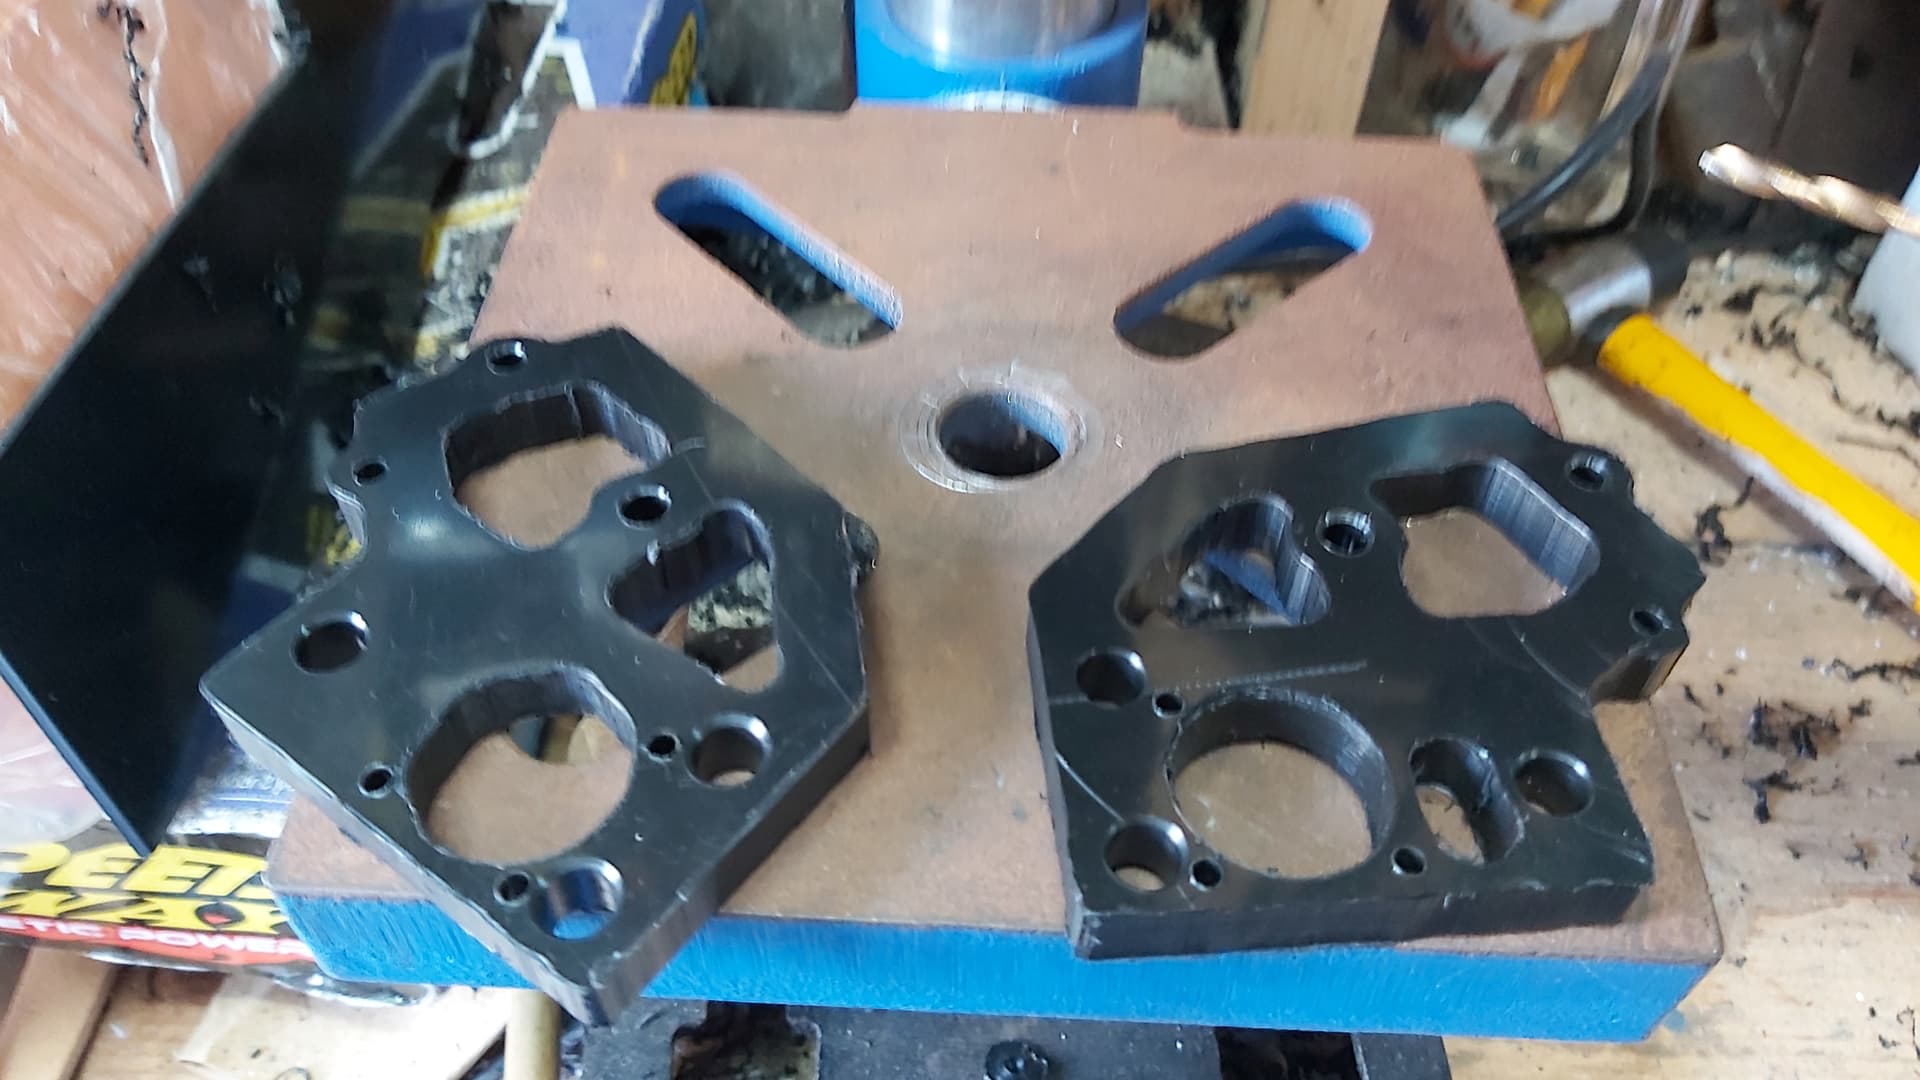
As you can see I was prototyping at lots of stages of the build as some of the 10mm Bulkheads and the 3mm top and bottom plates were already made.
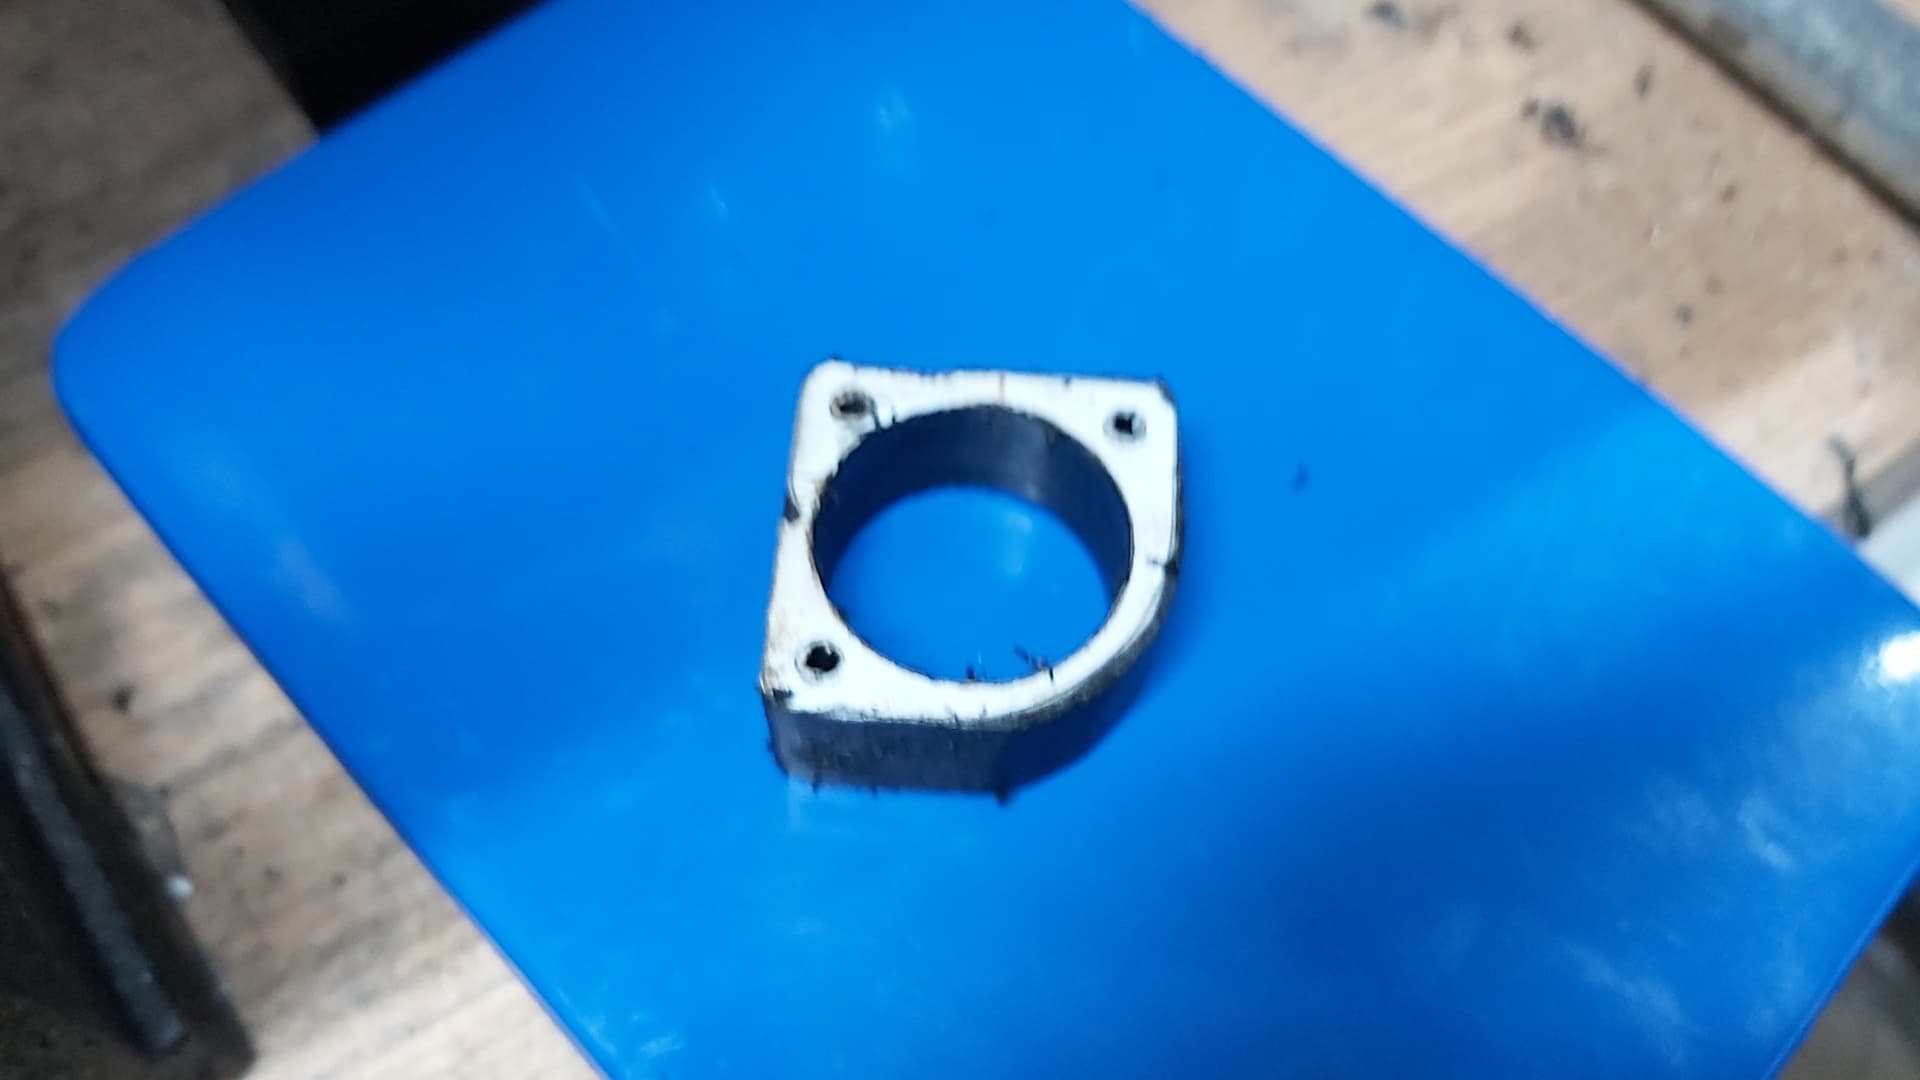
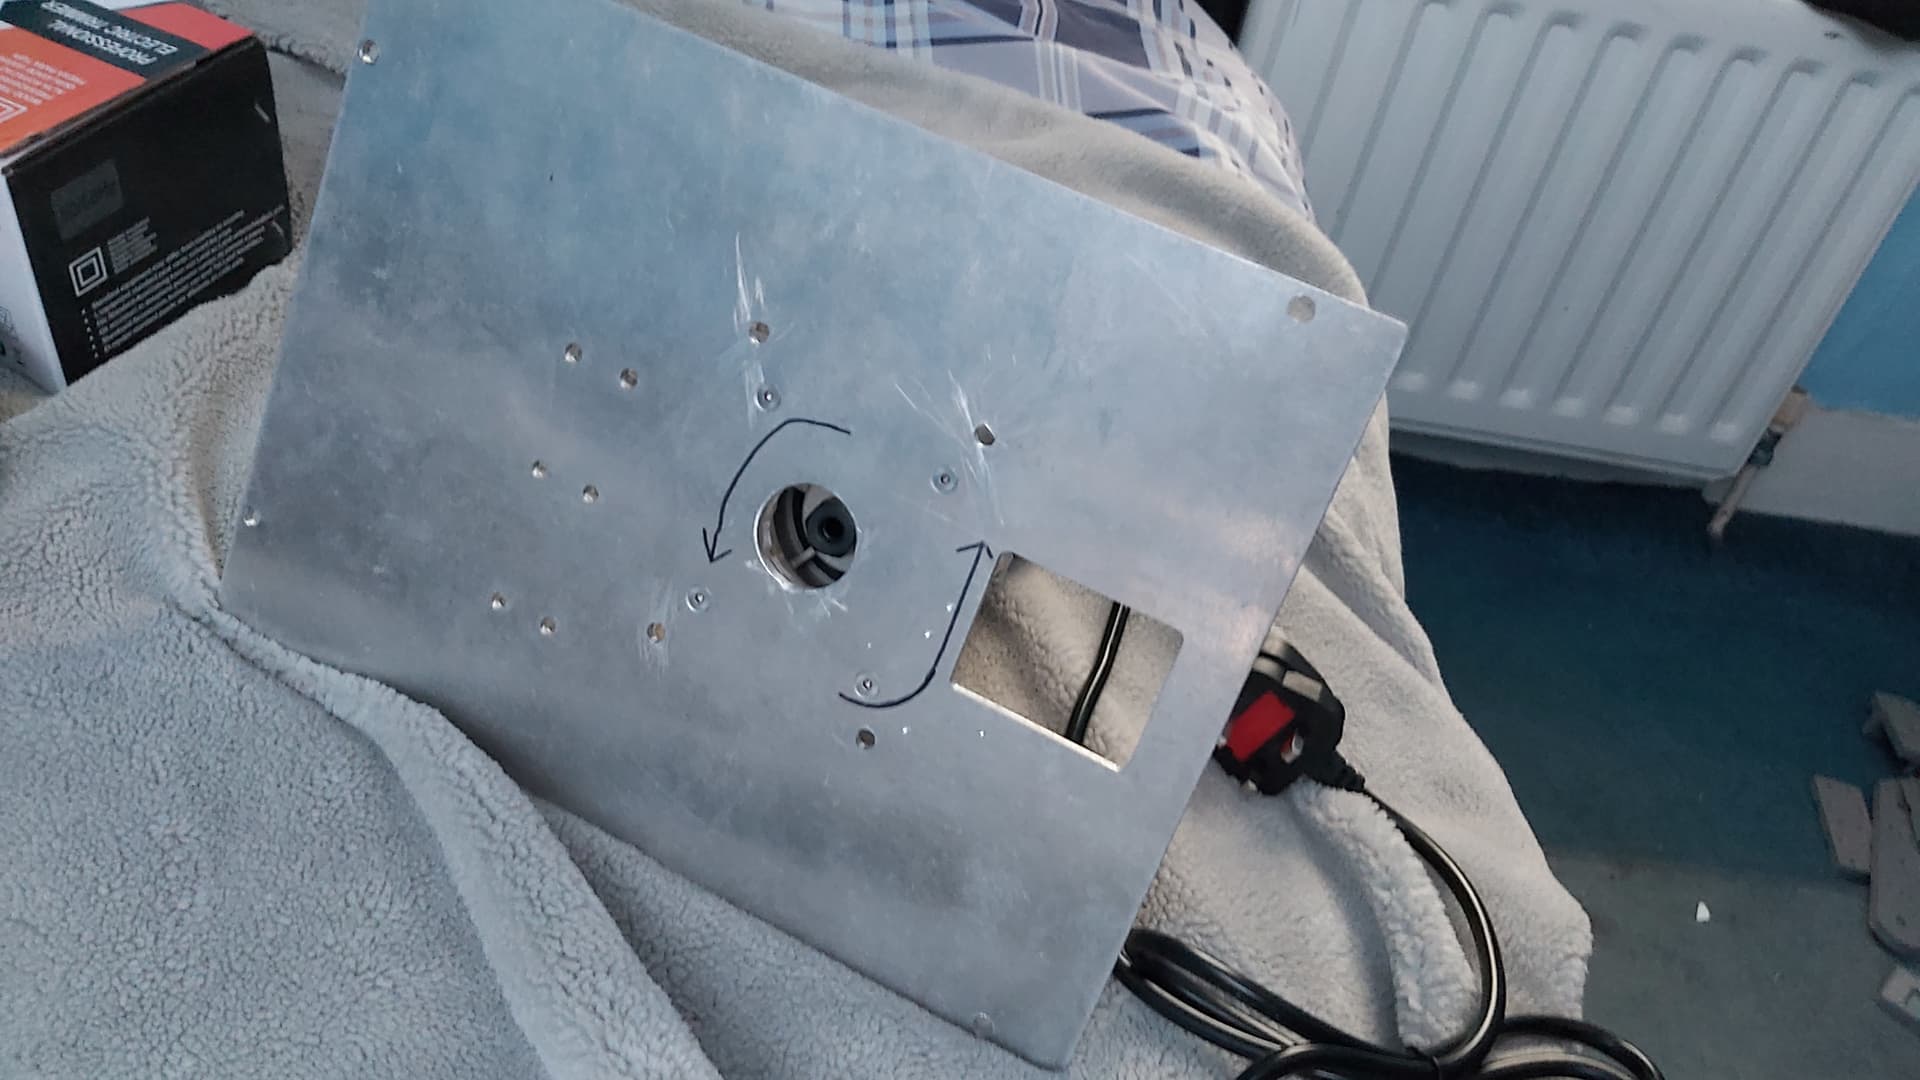
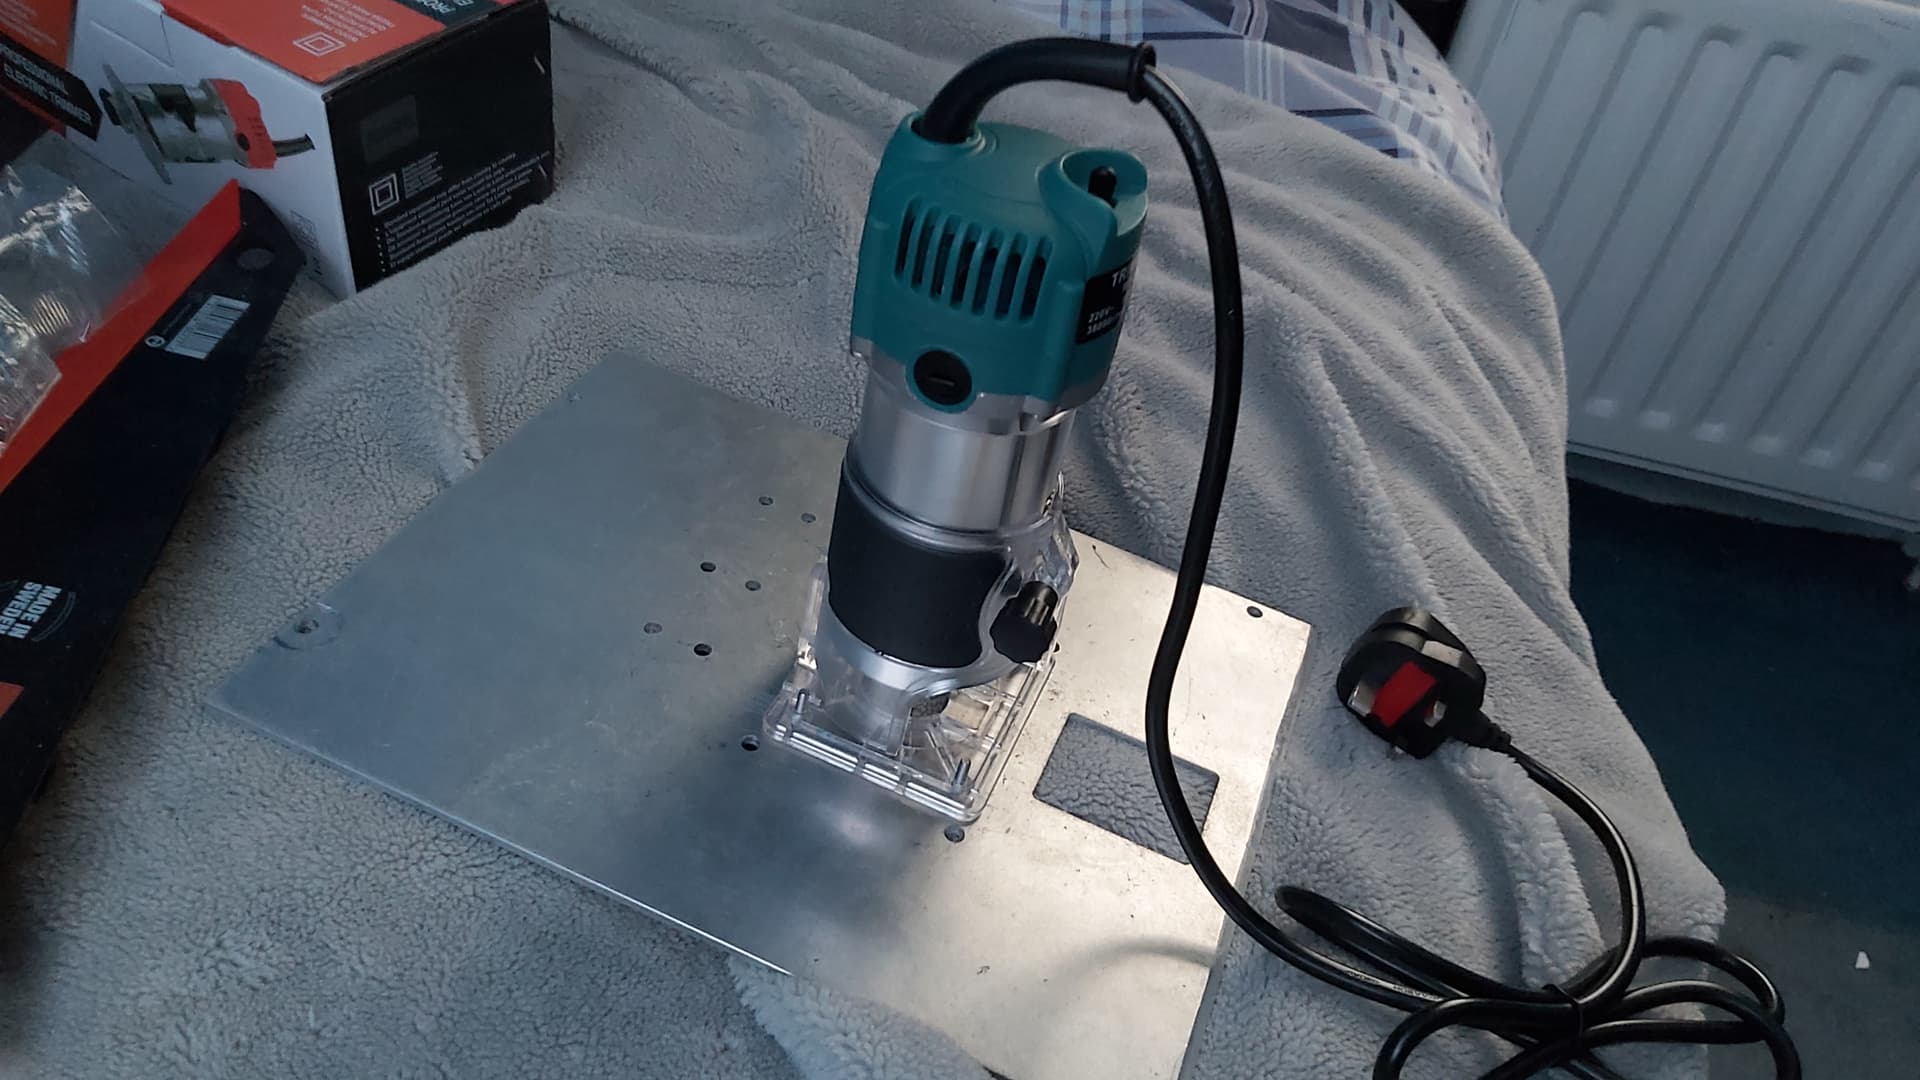
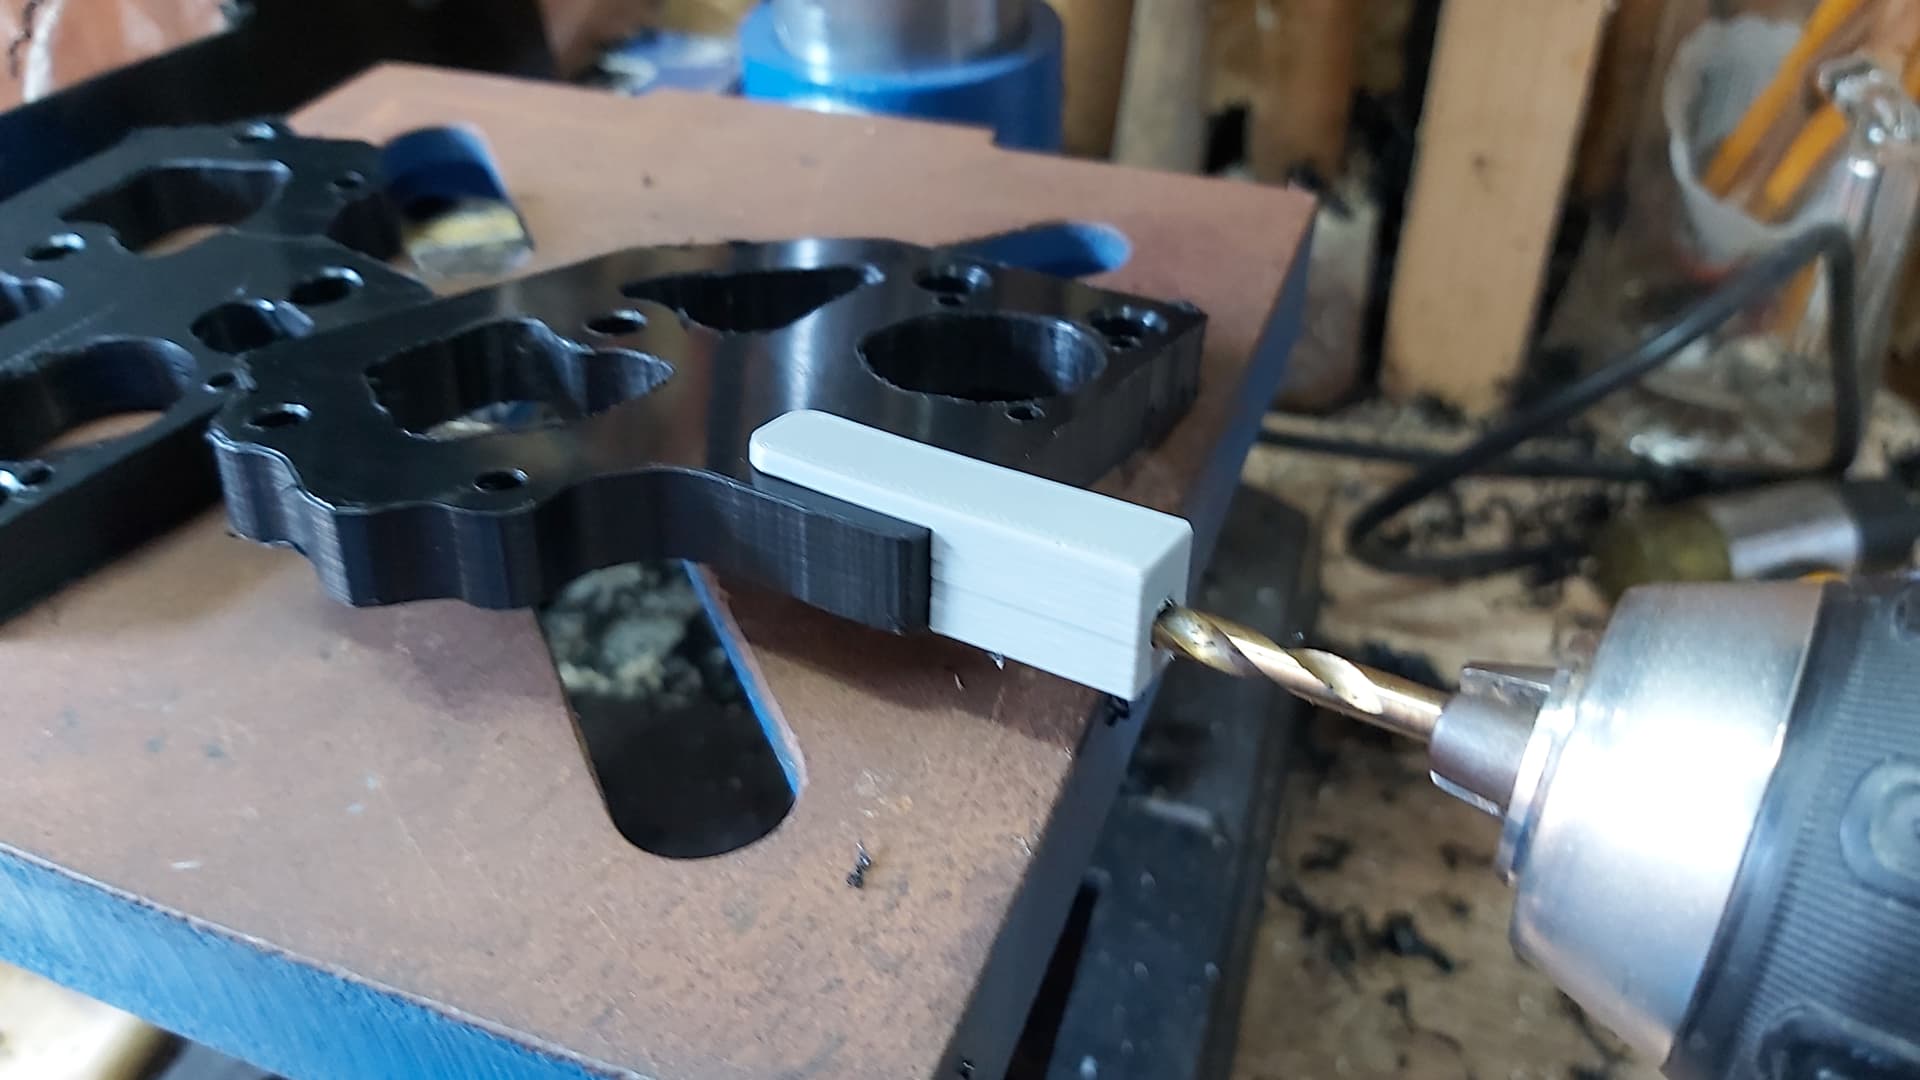
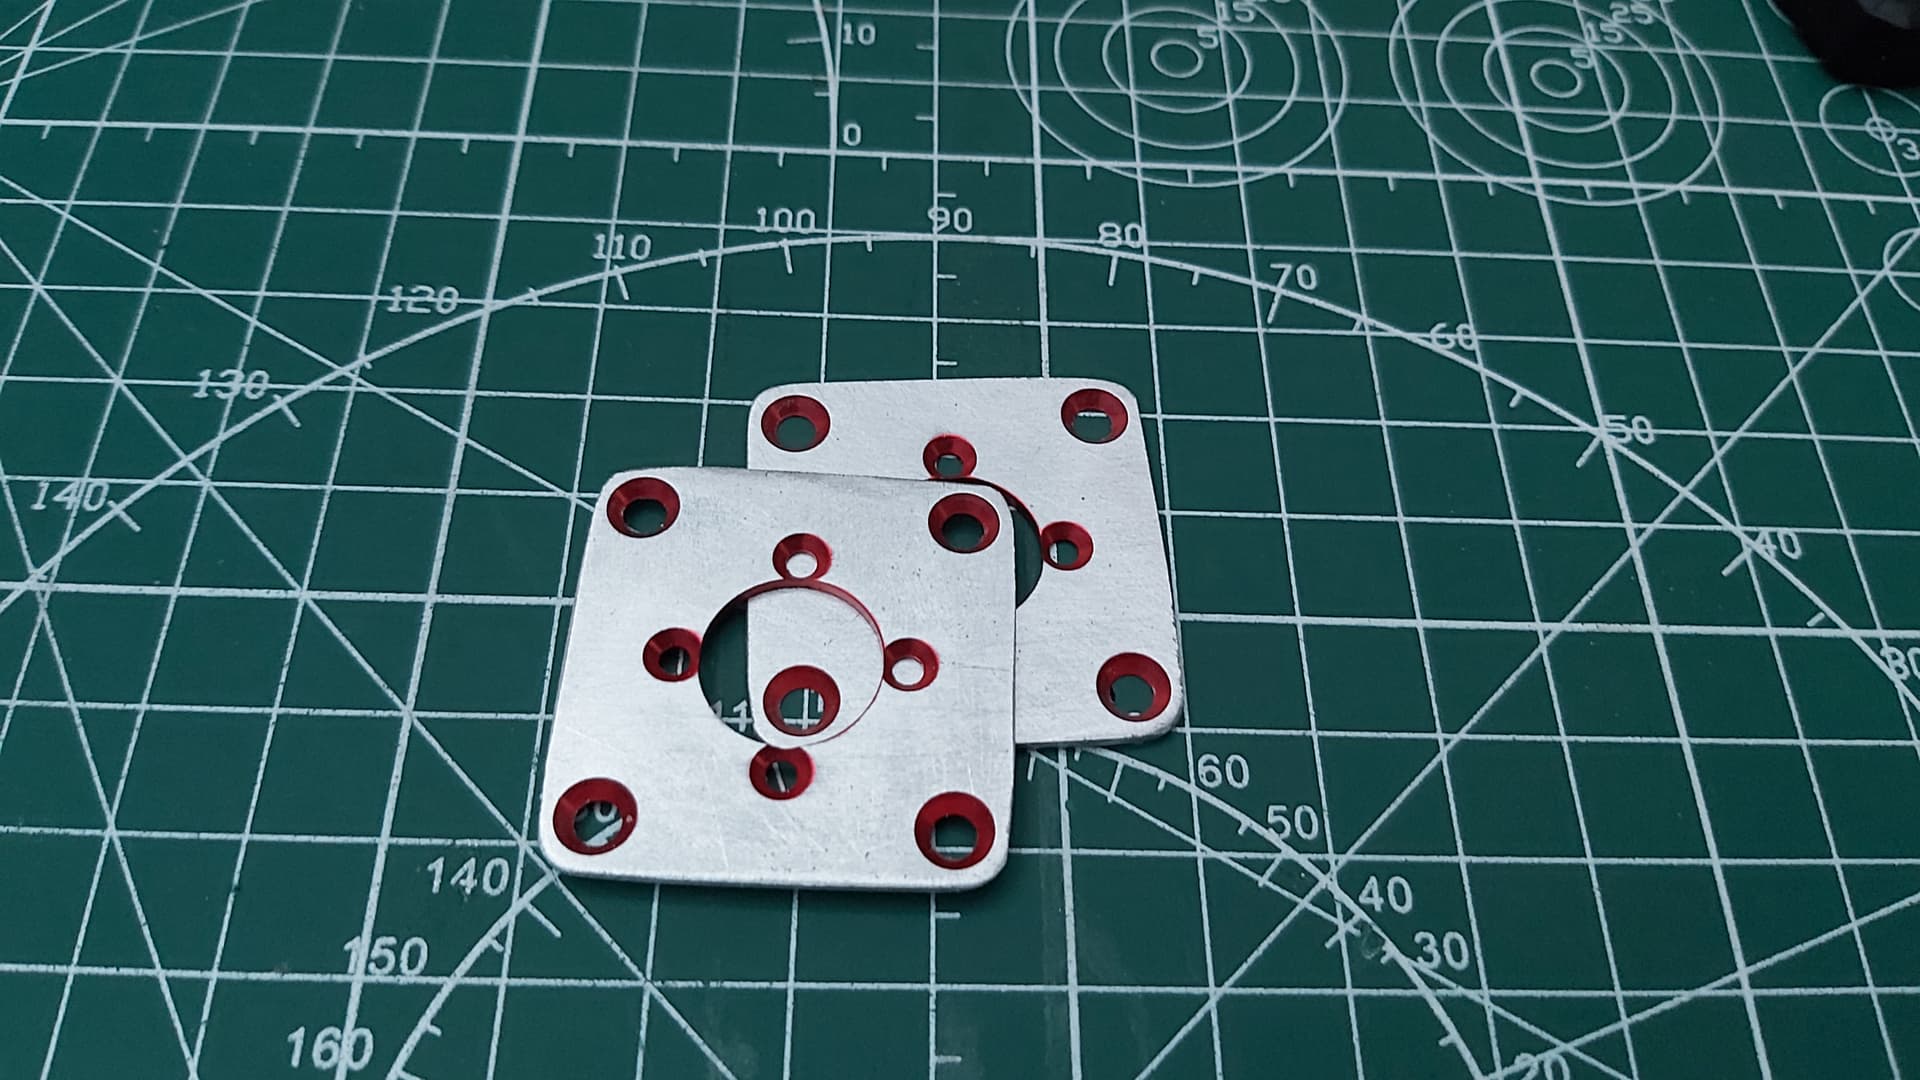
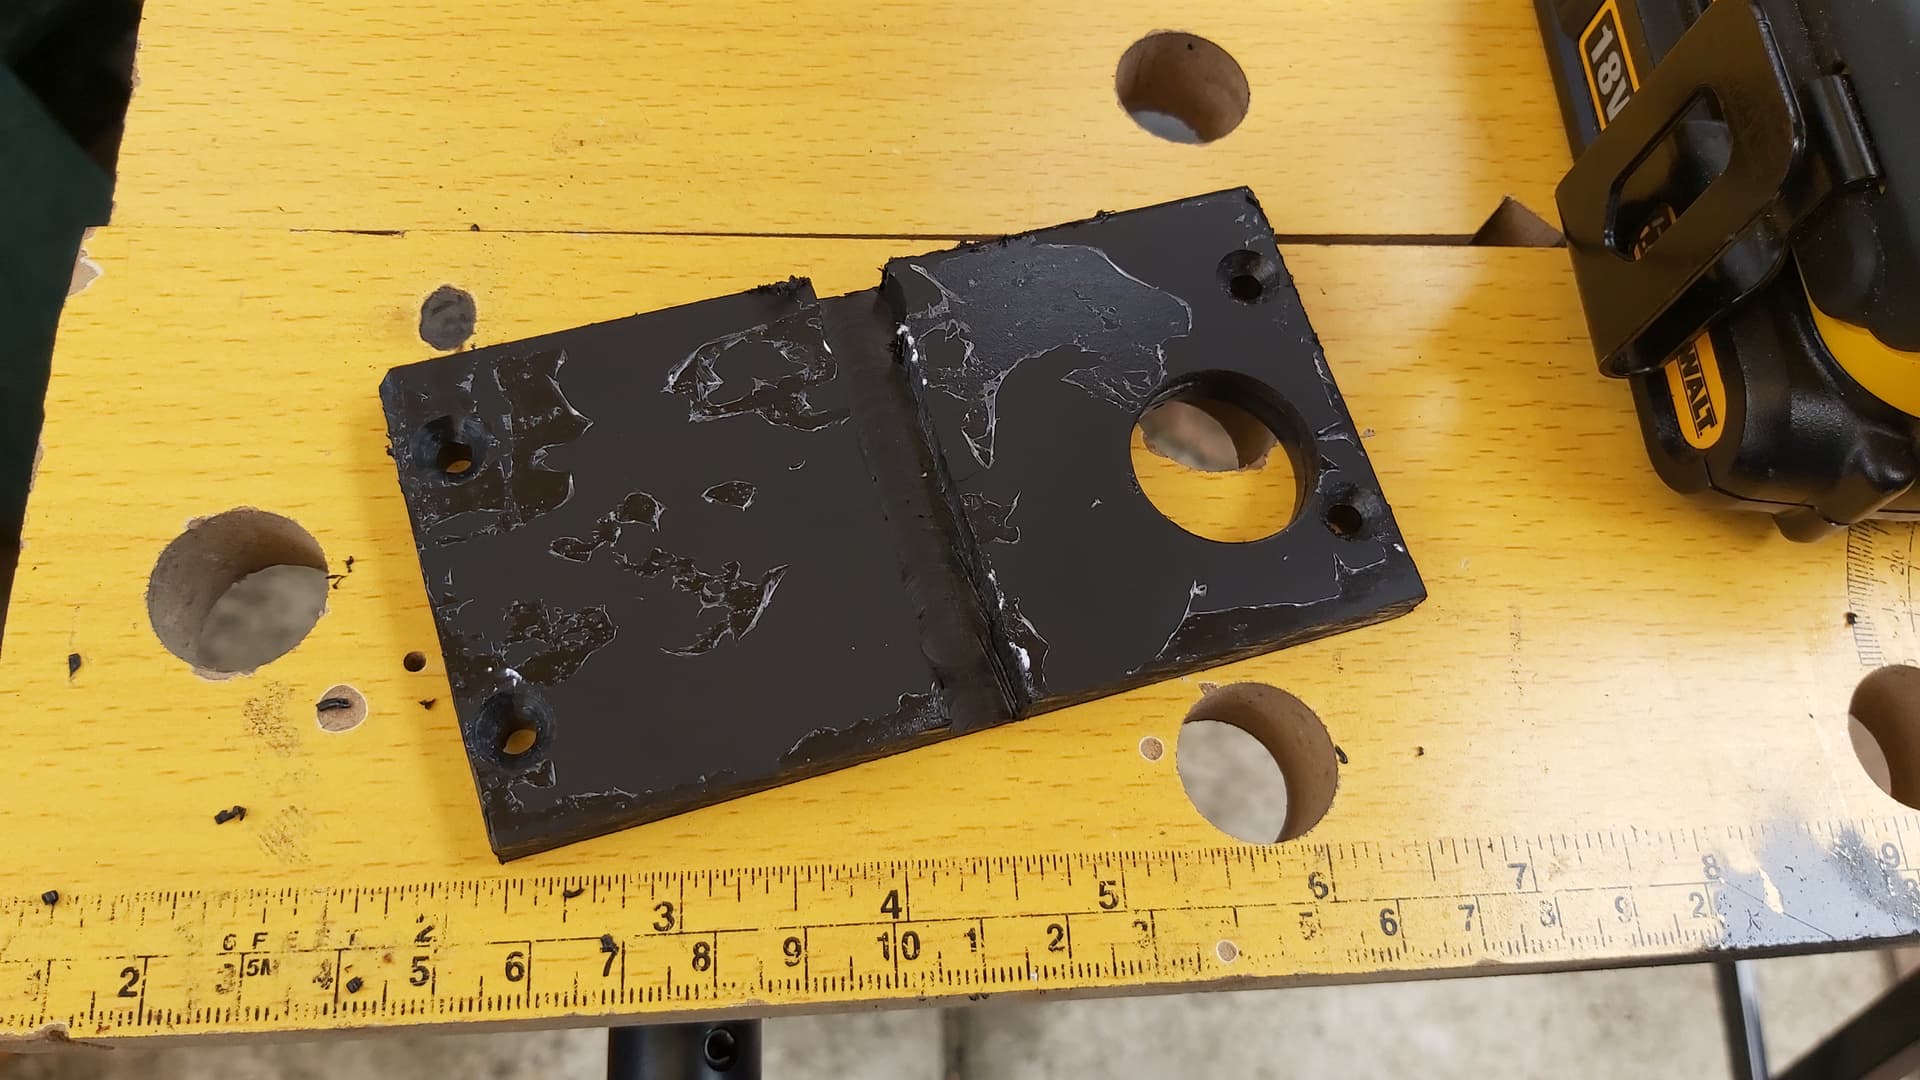
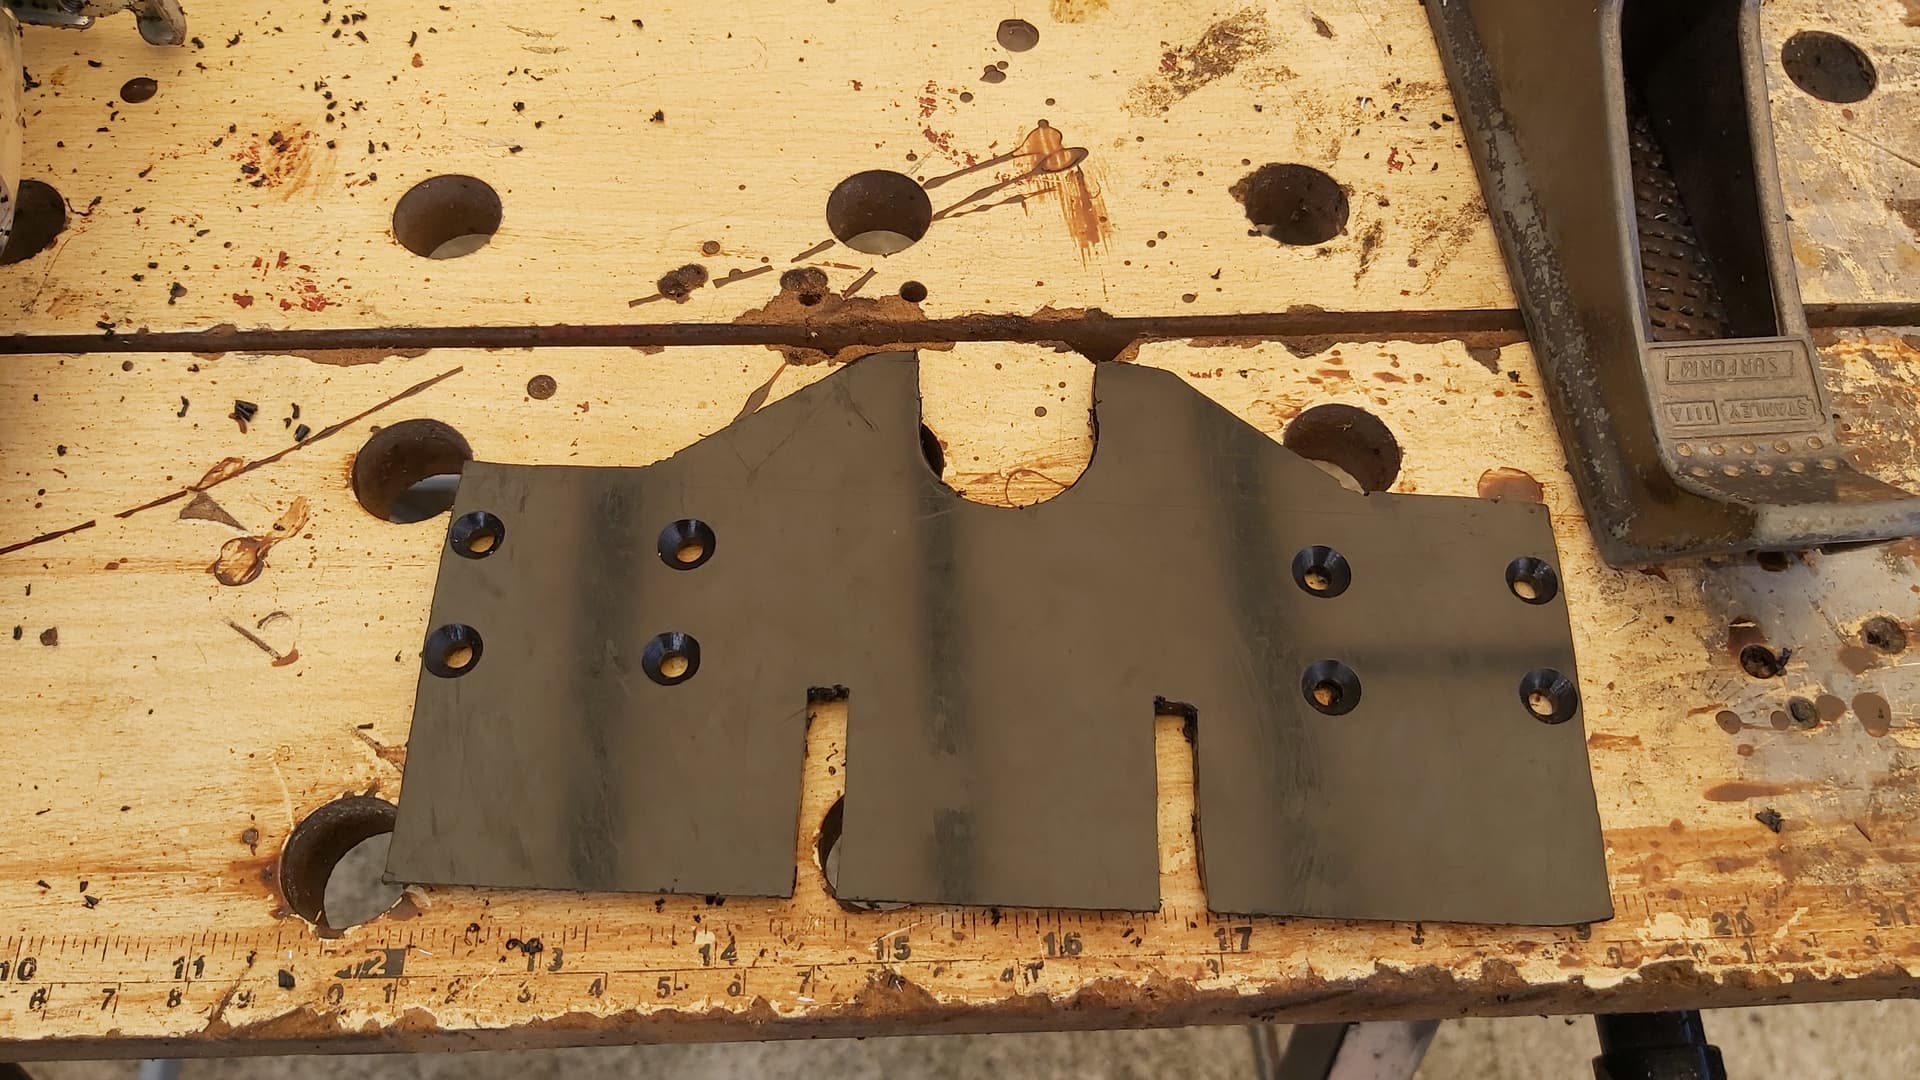
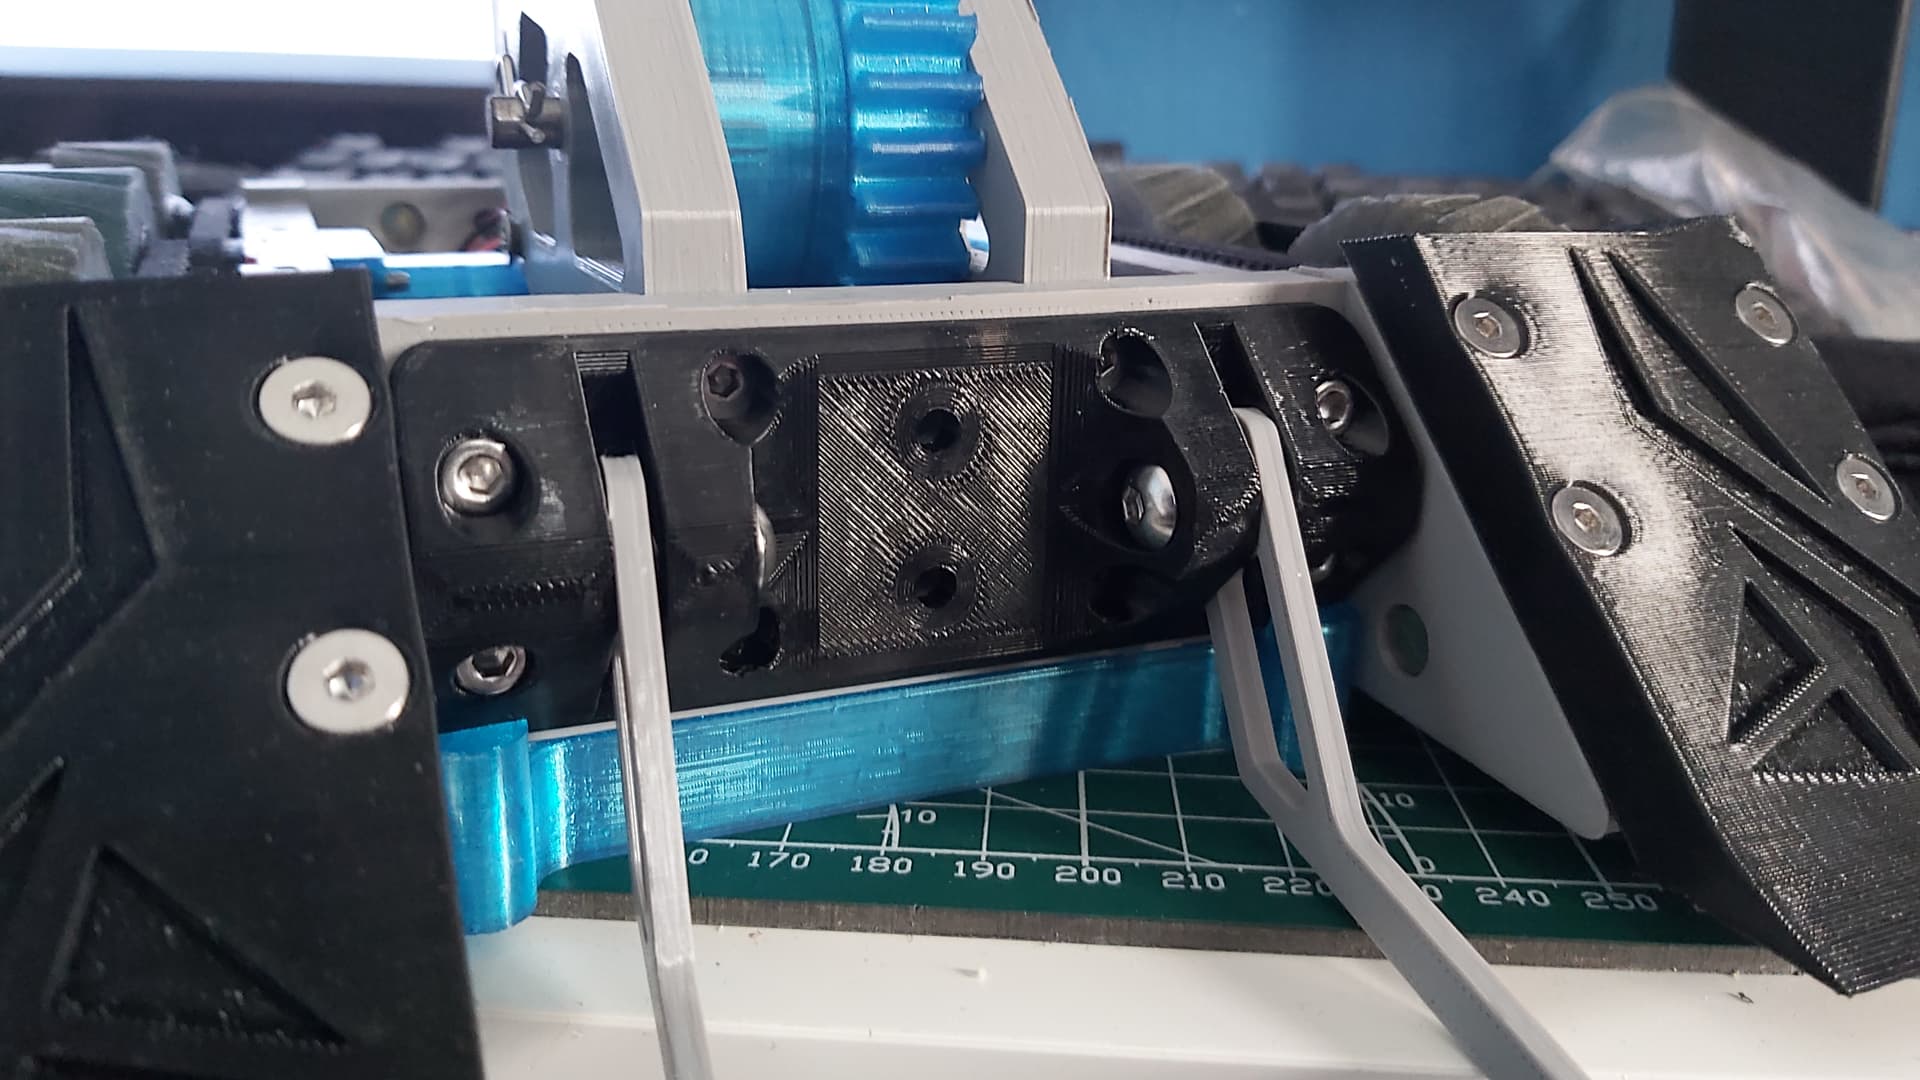
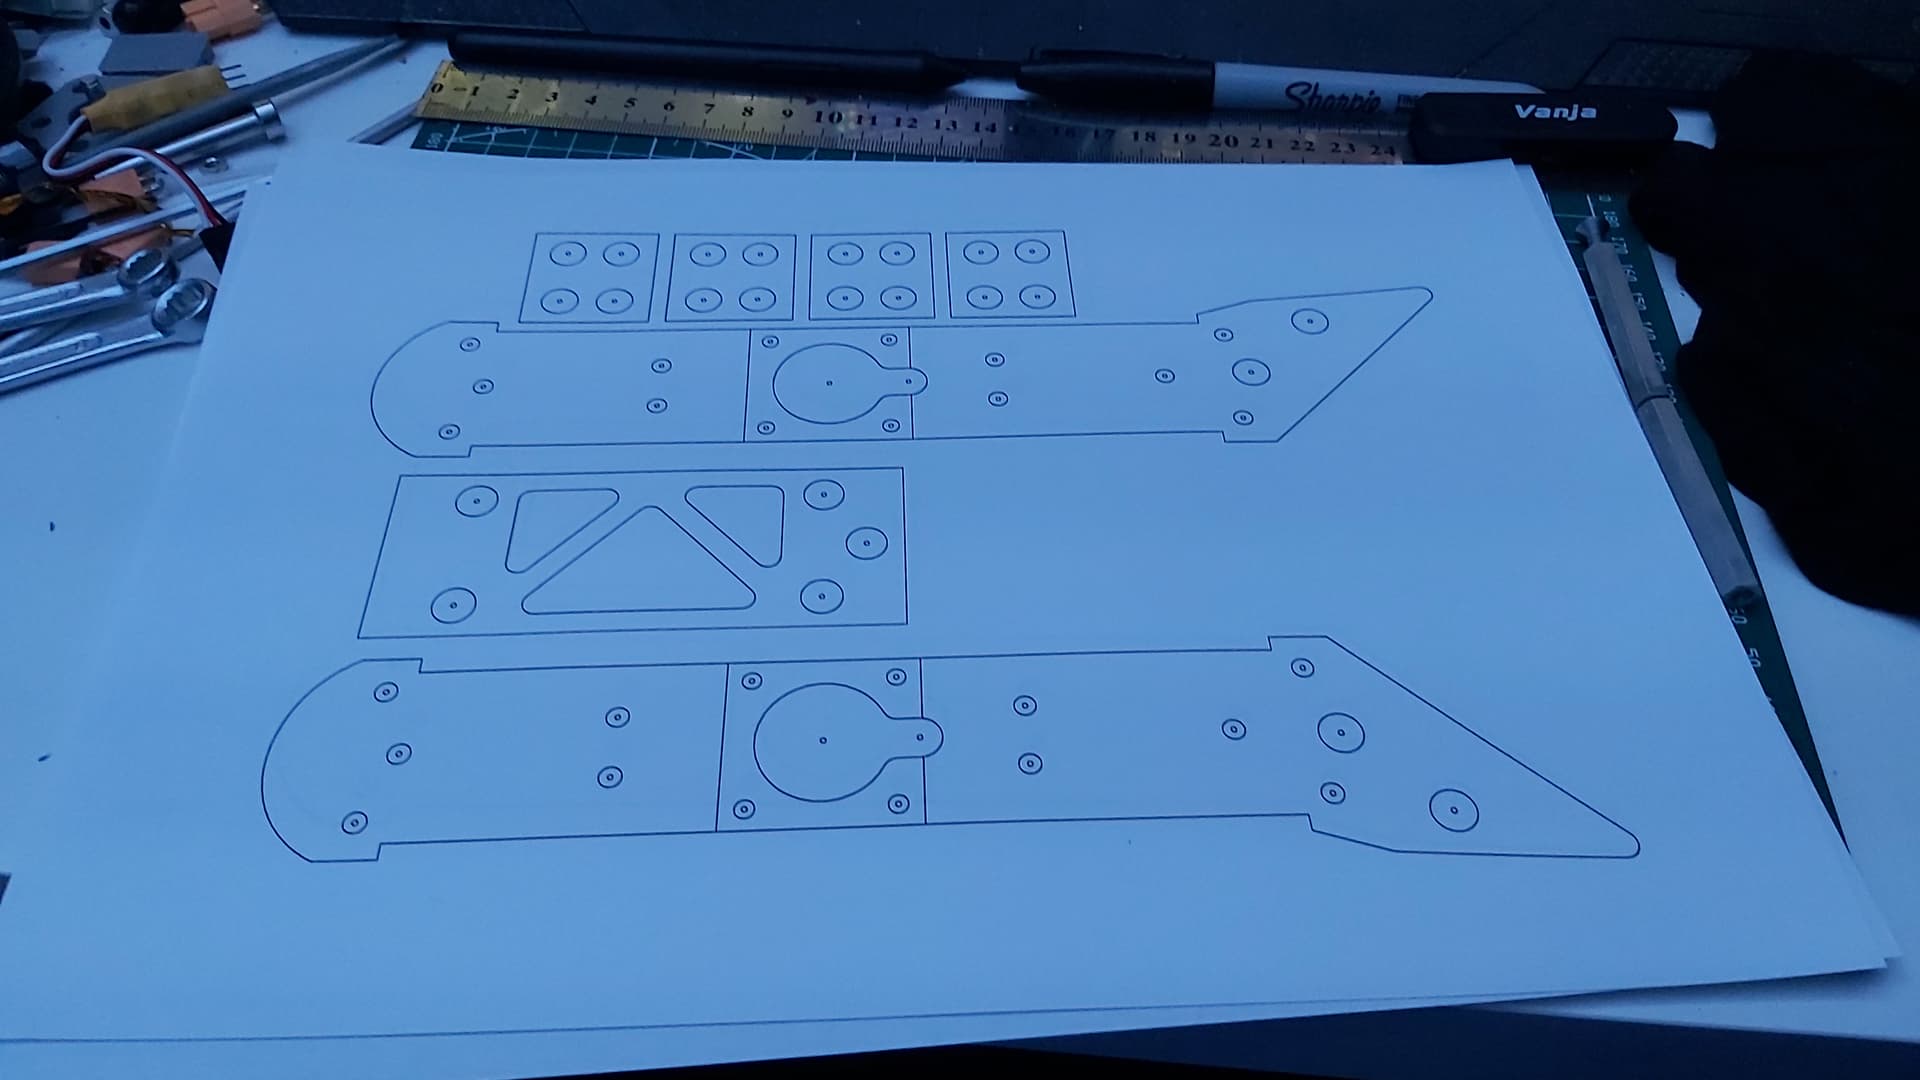
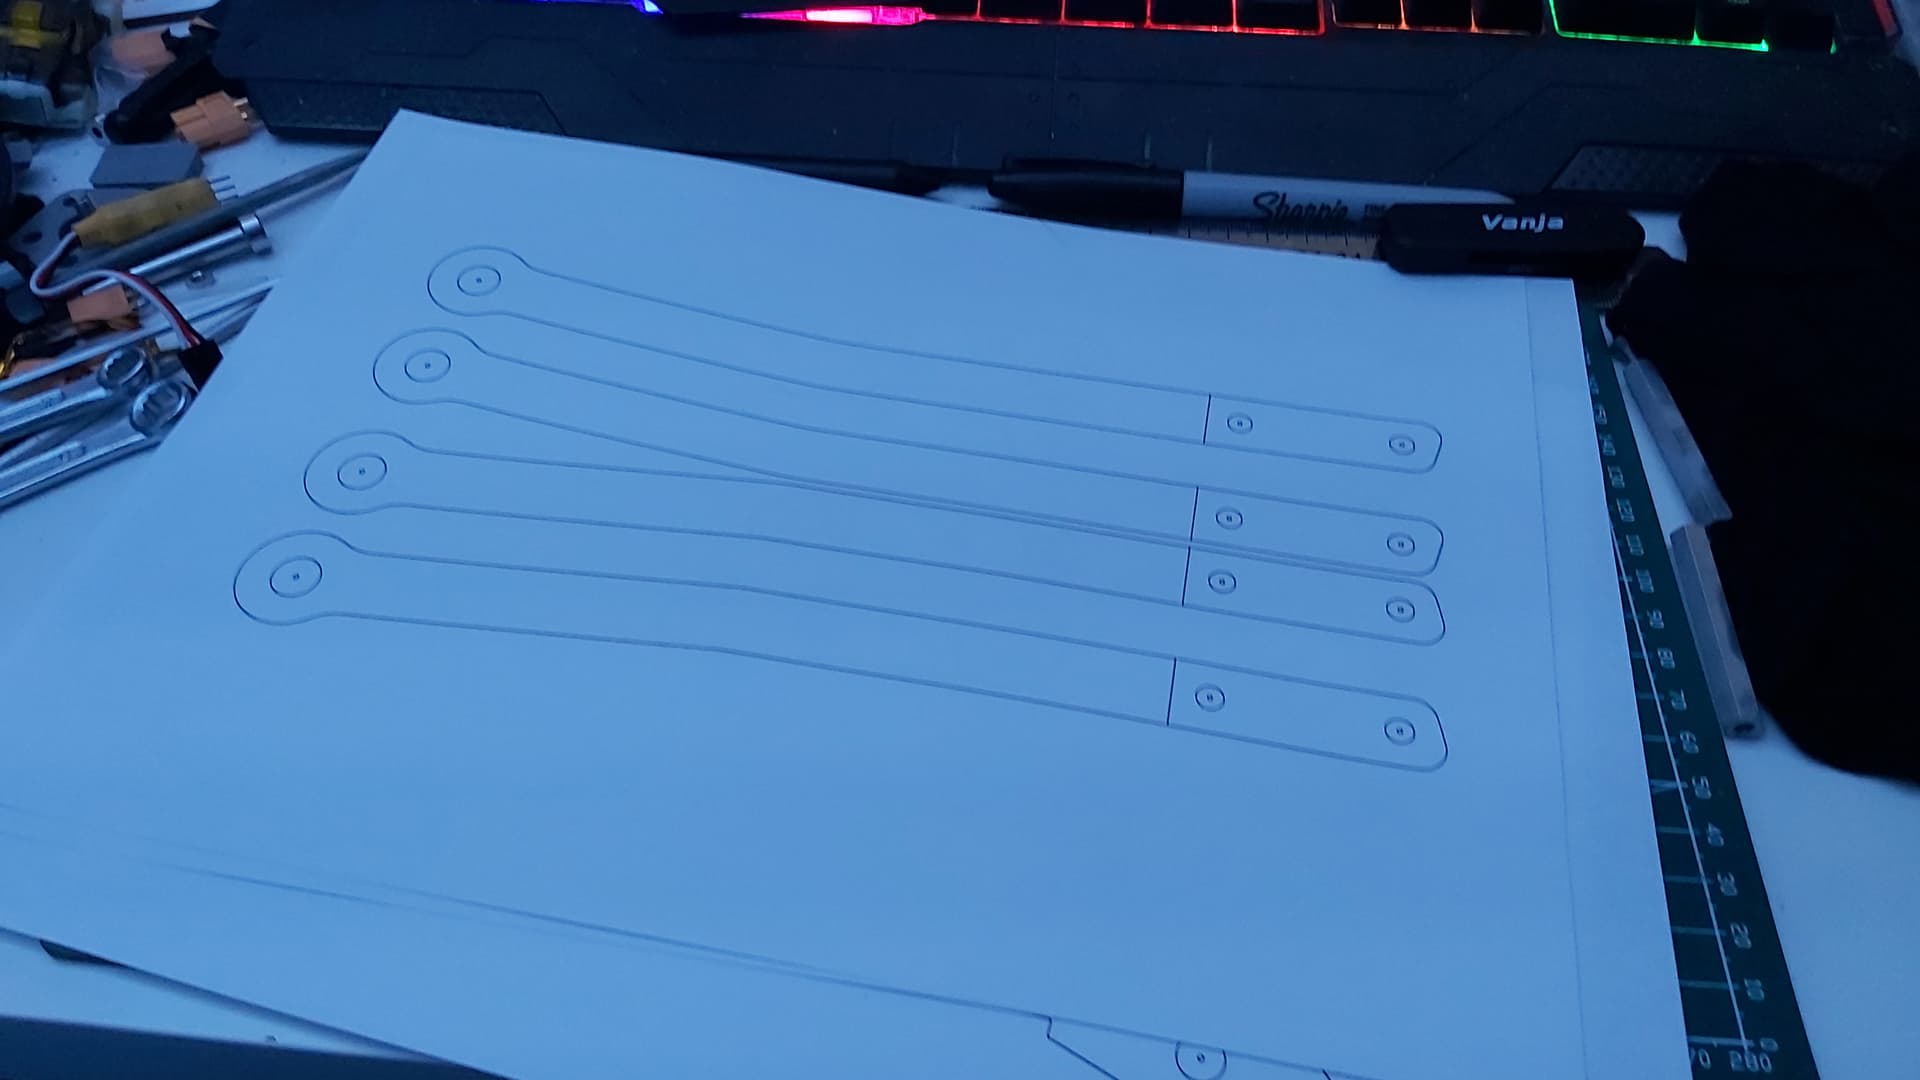
All the HDPE was hand-made by myself using my drill press, Jigsaw, my newly bought router and my go-to printed templates glue stuck onto the HDPE. I would use some 3d printed Jigs to install the threaded inserts, to cut and drill the smaller HDPE parts and to fix a misplaced hole in the Hardox wedge I had made in case the weapons died.


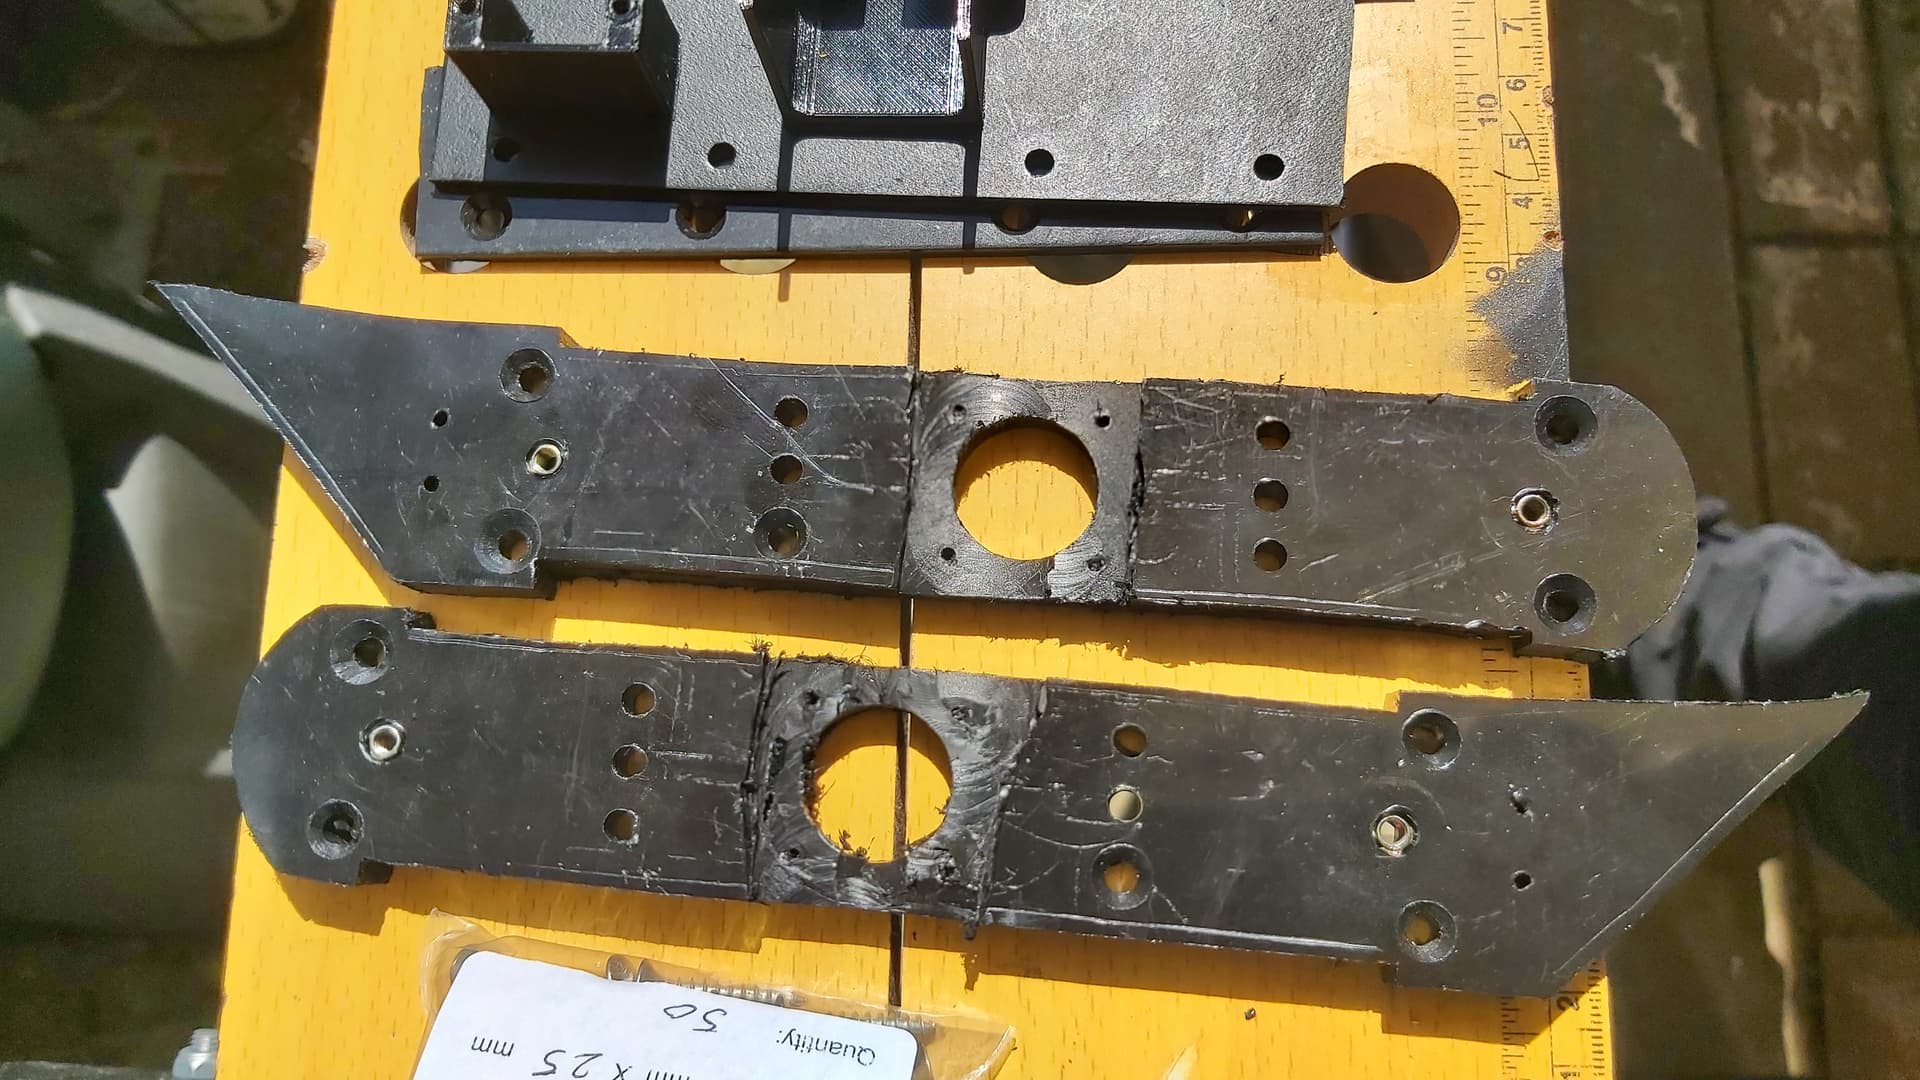
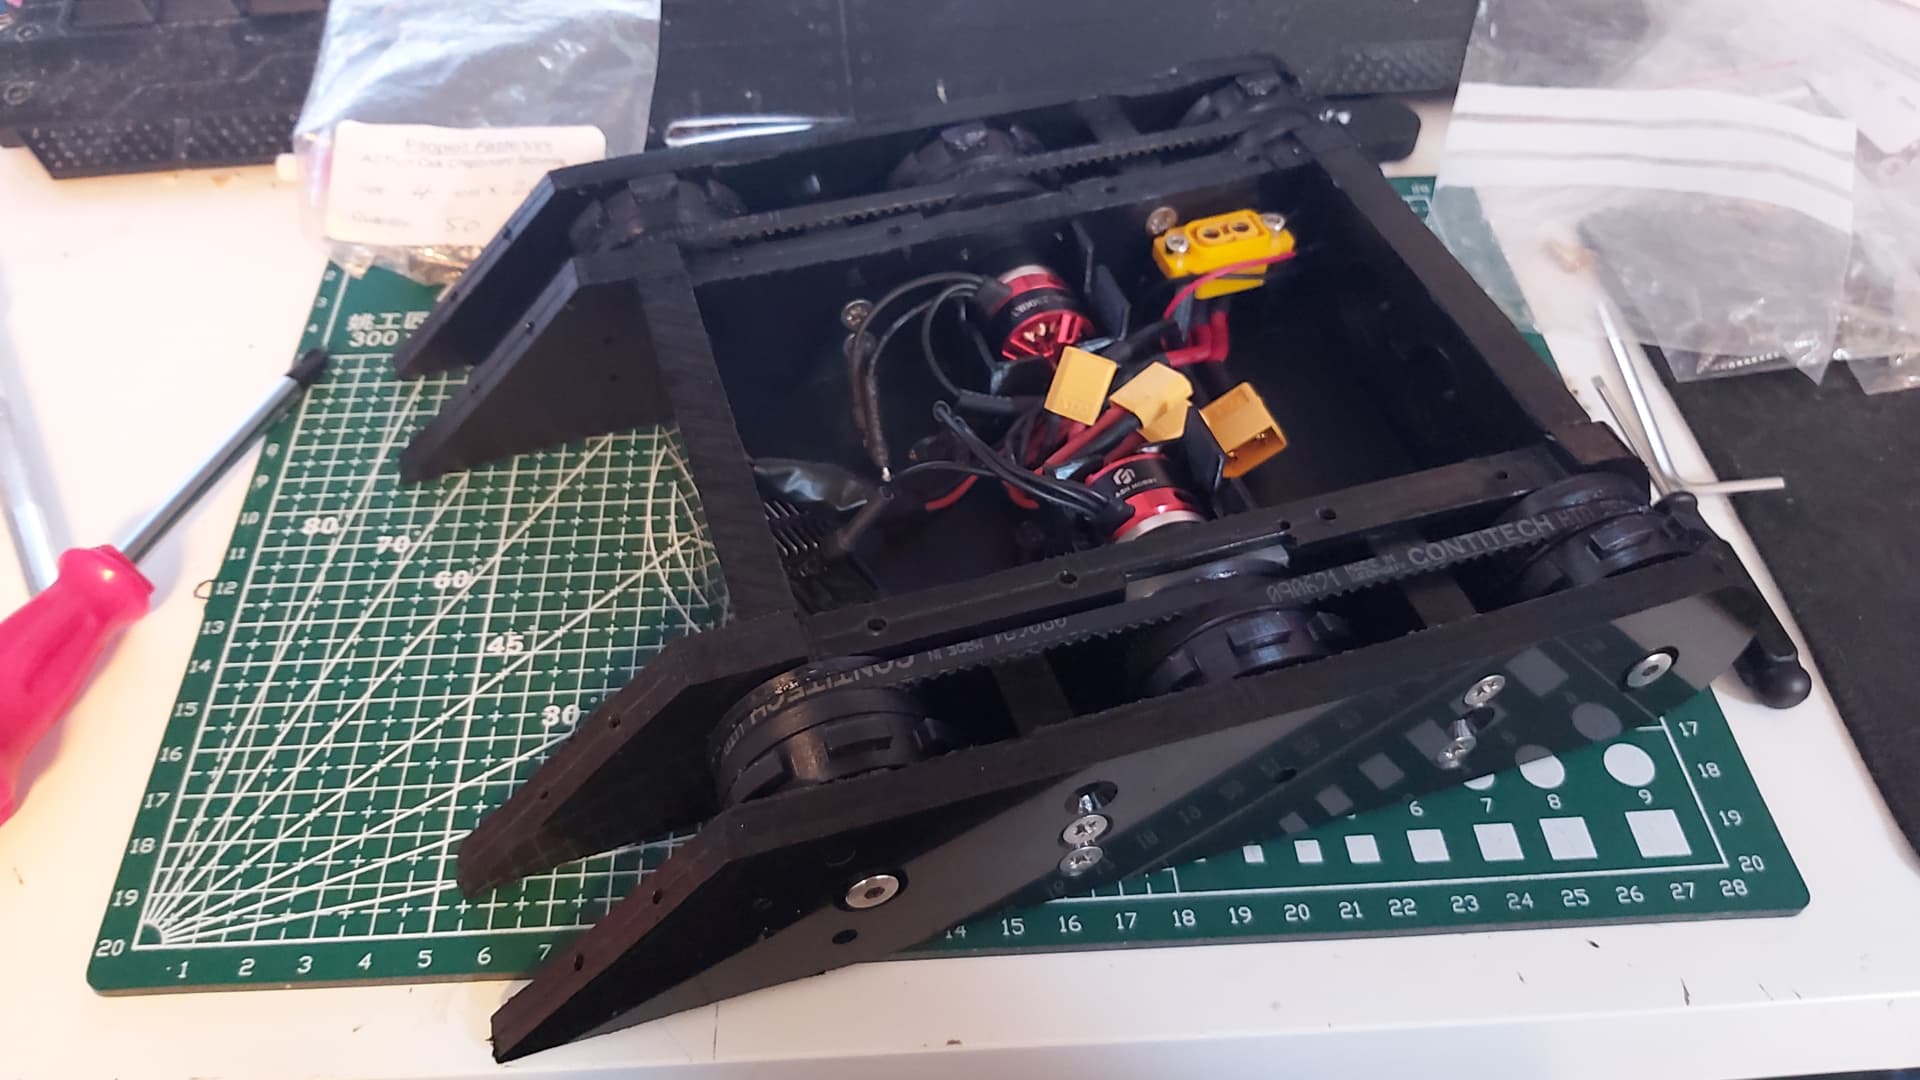
Yes not the greatest of router cuts but this provided the slot needed to fit the BBB into the bulkheads so it was entirely flush so the wheels were perfectly aligned.

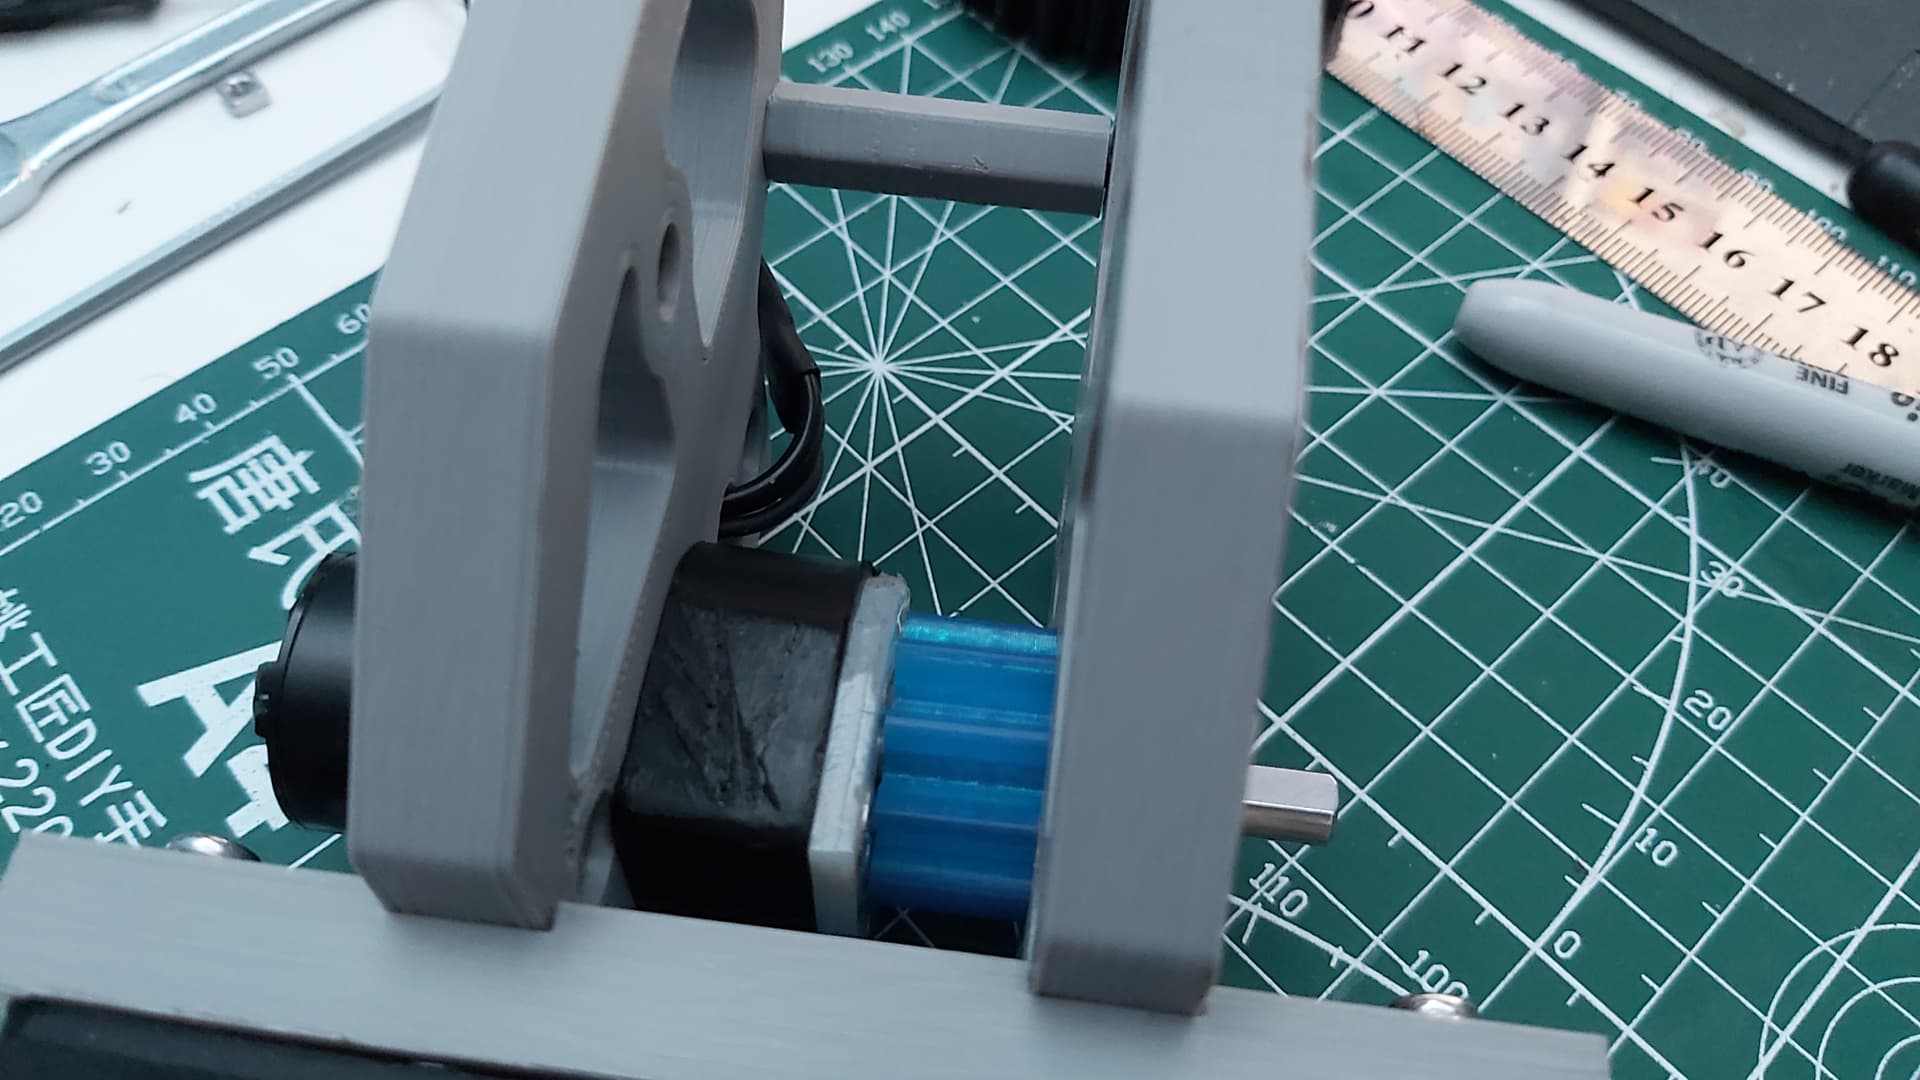
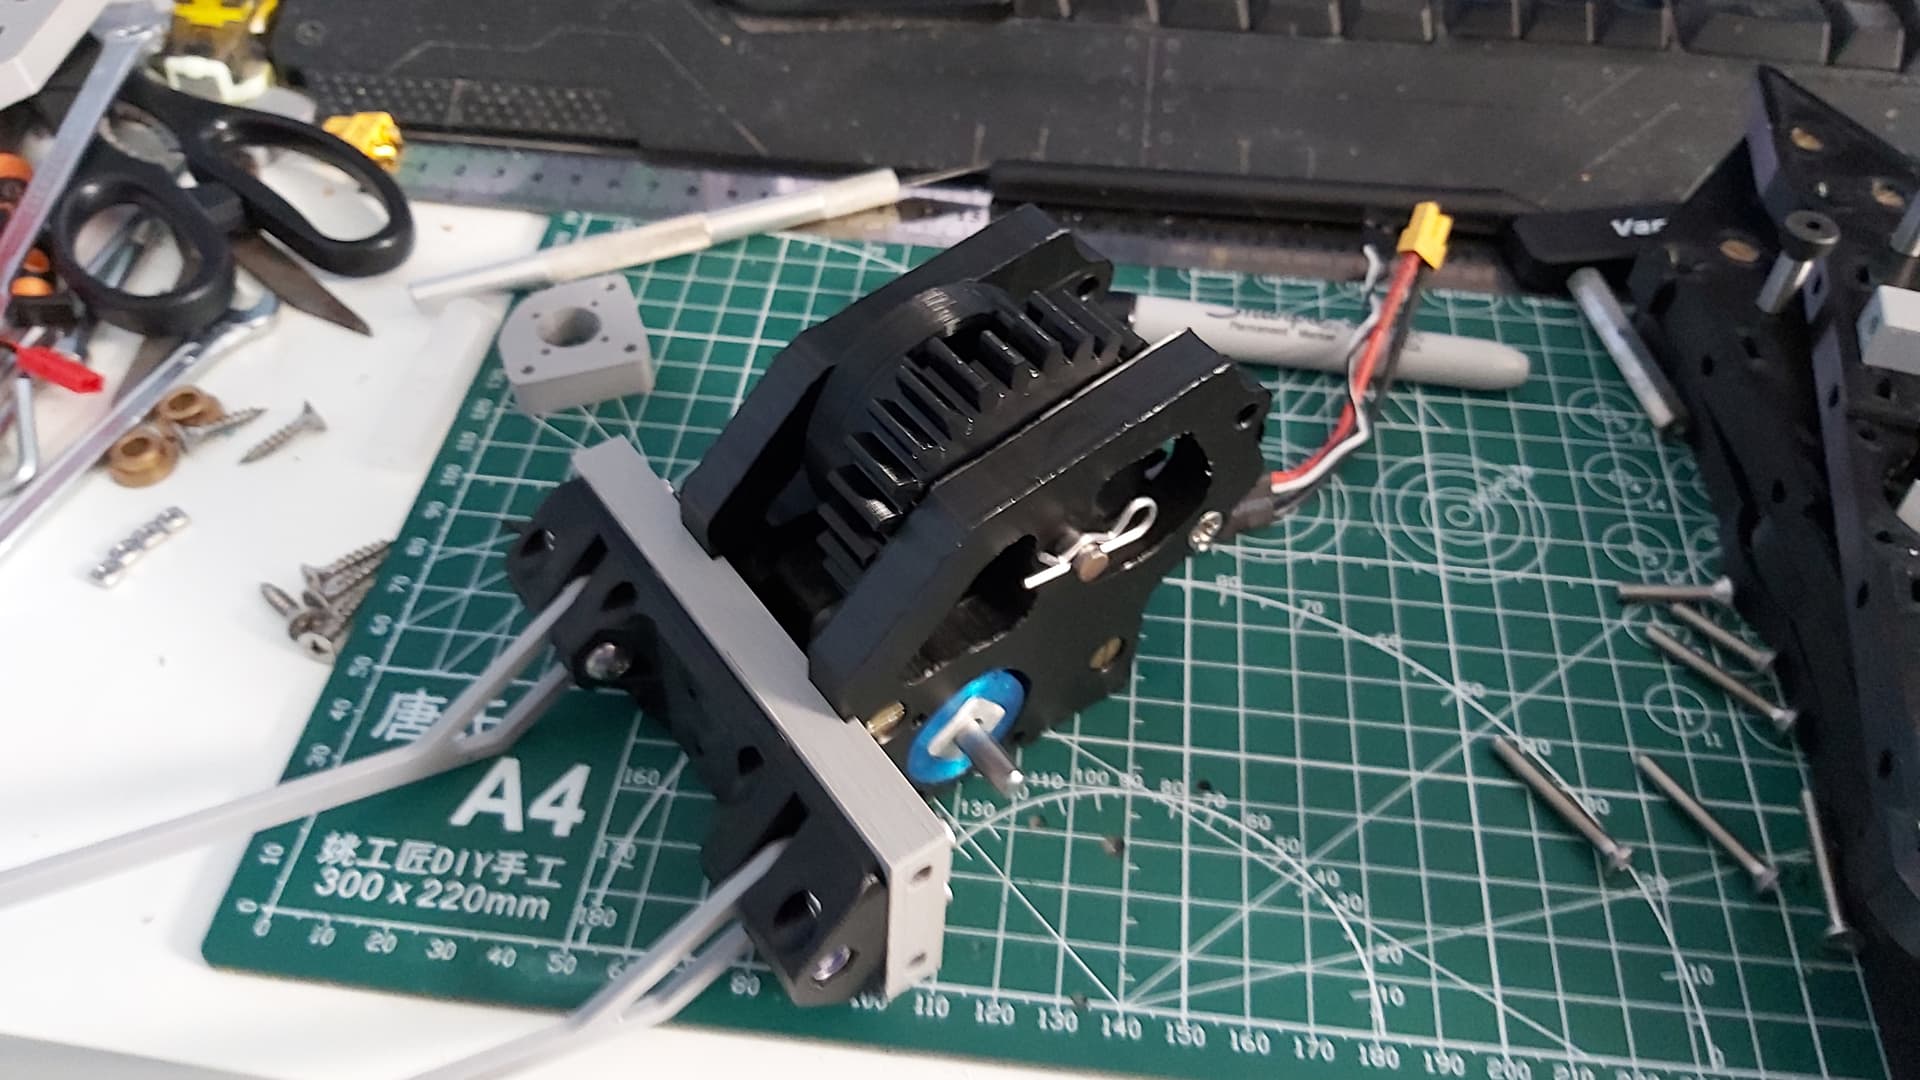
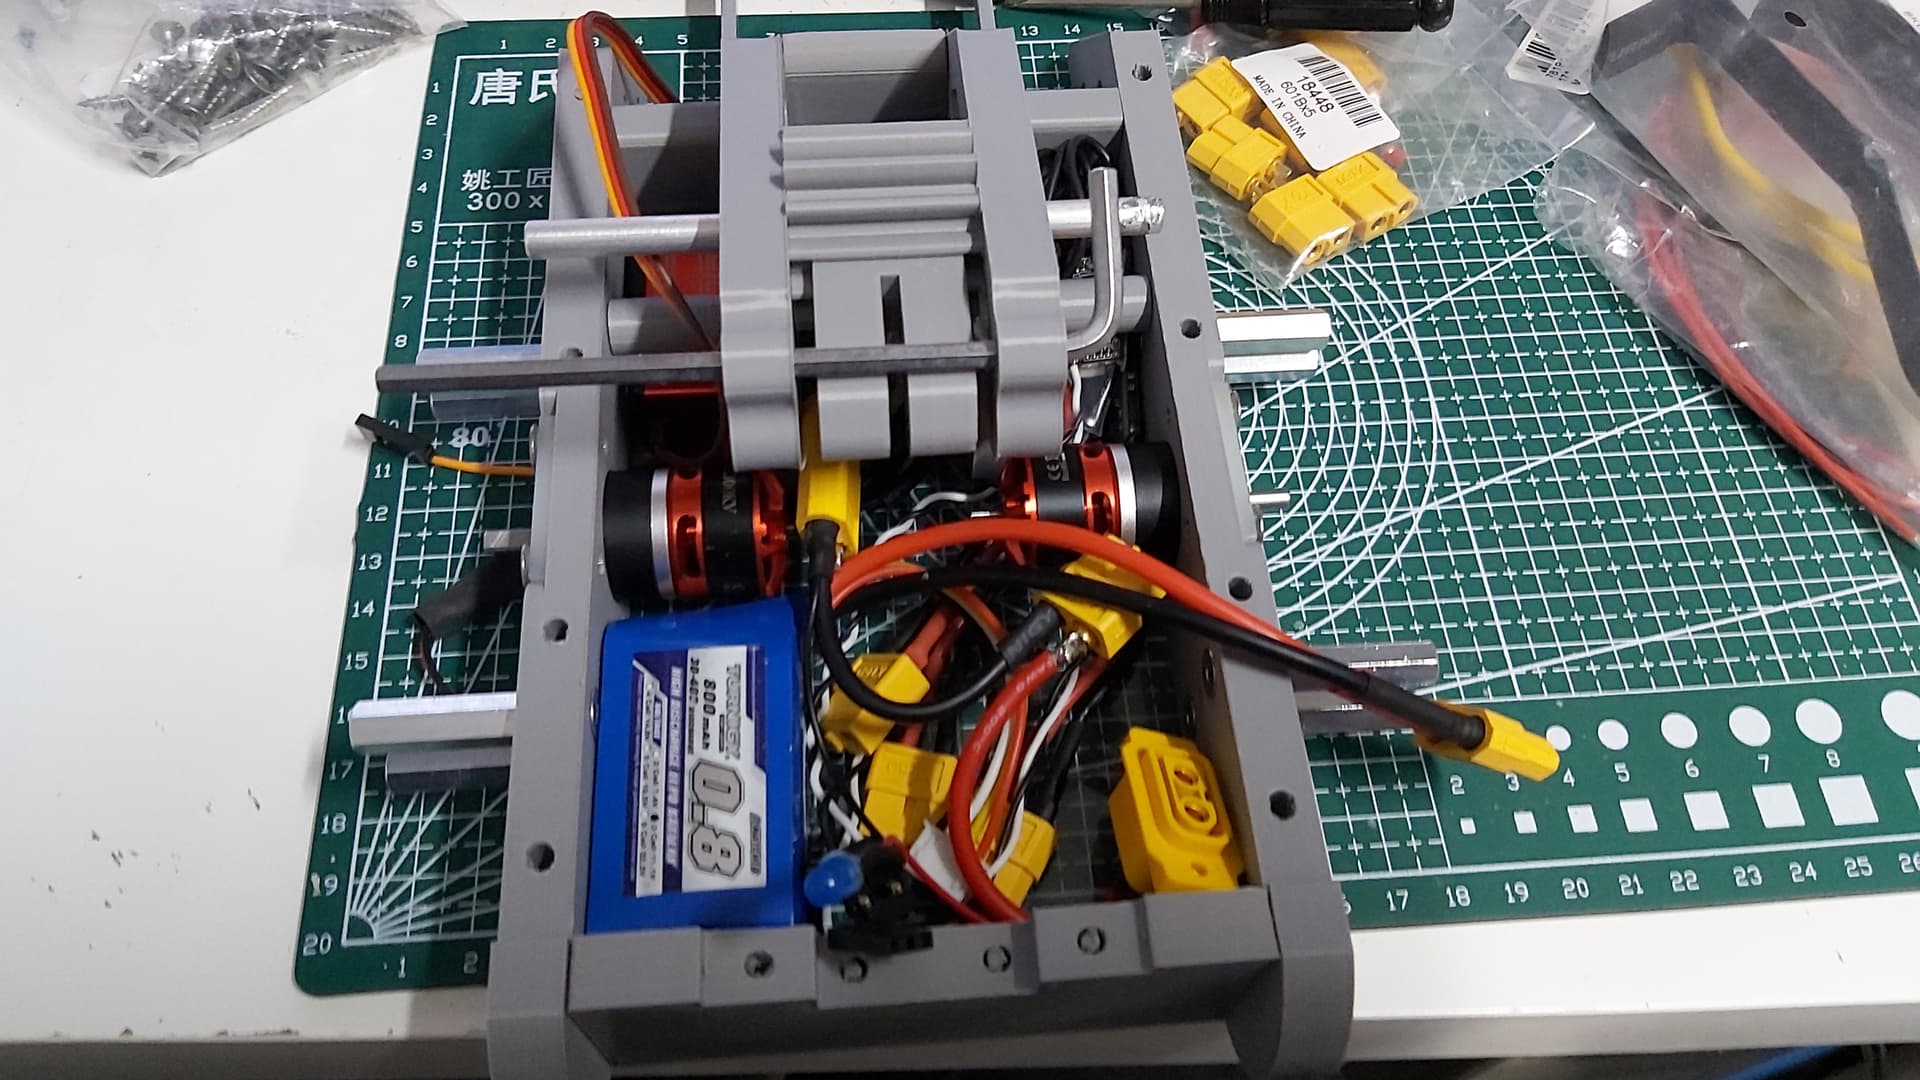
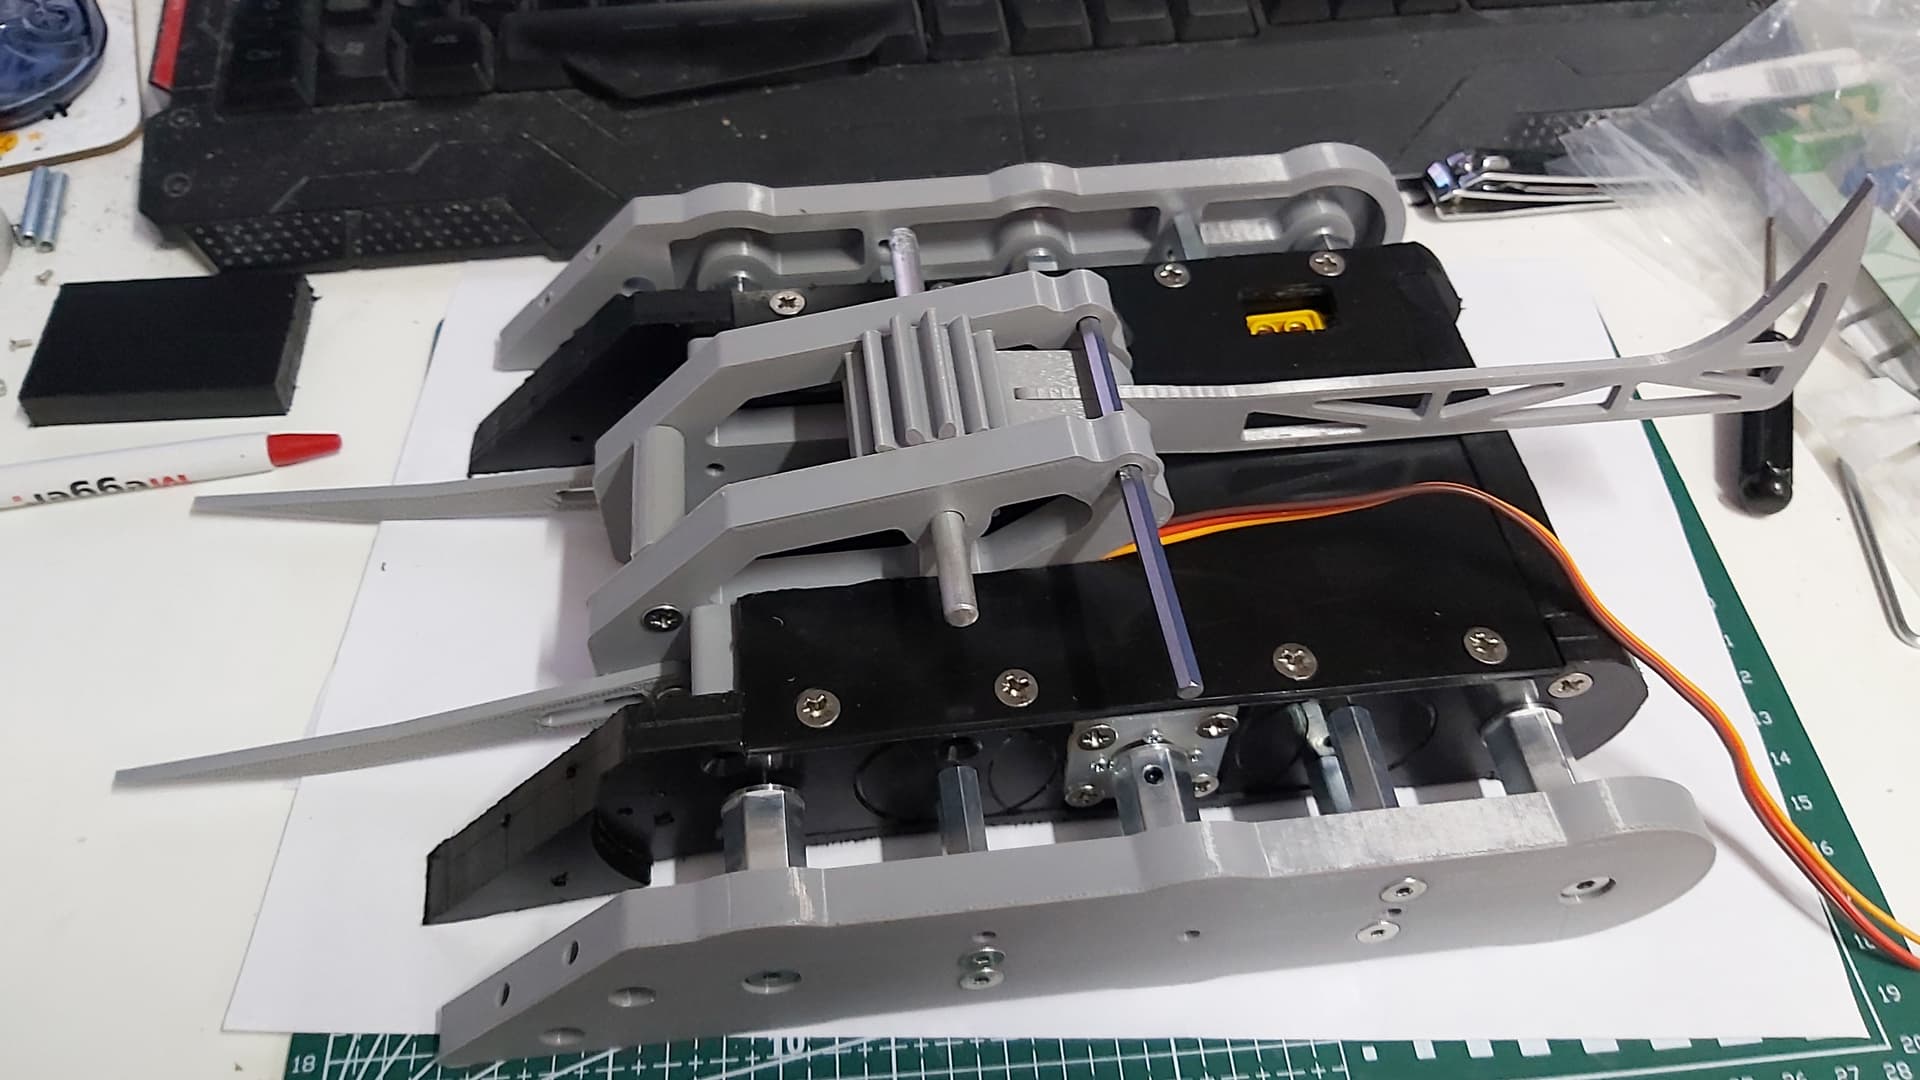
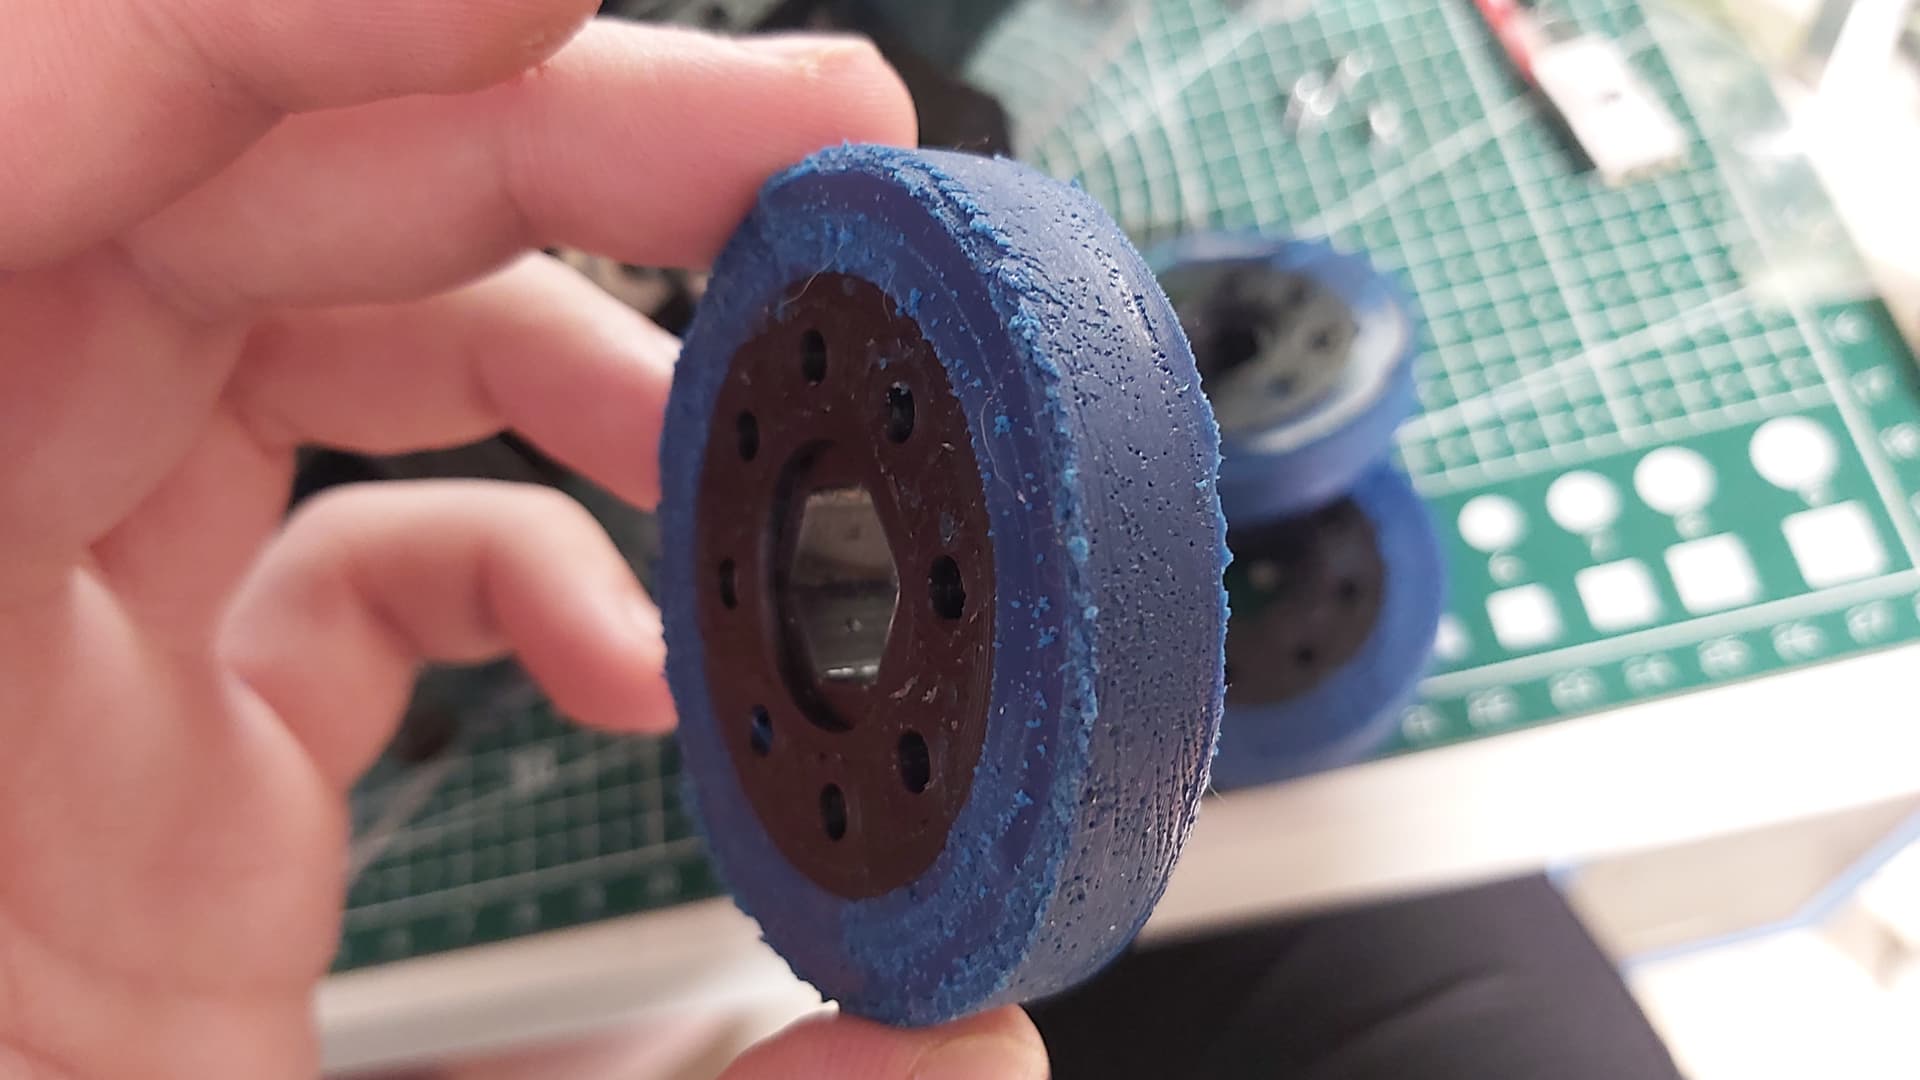
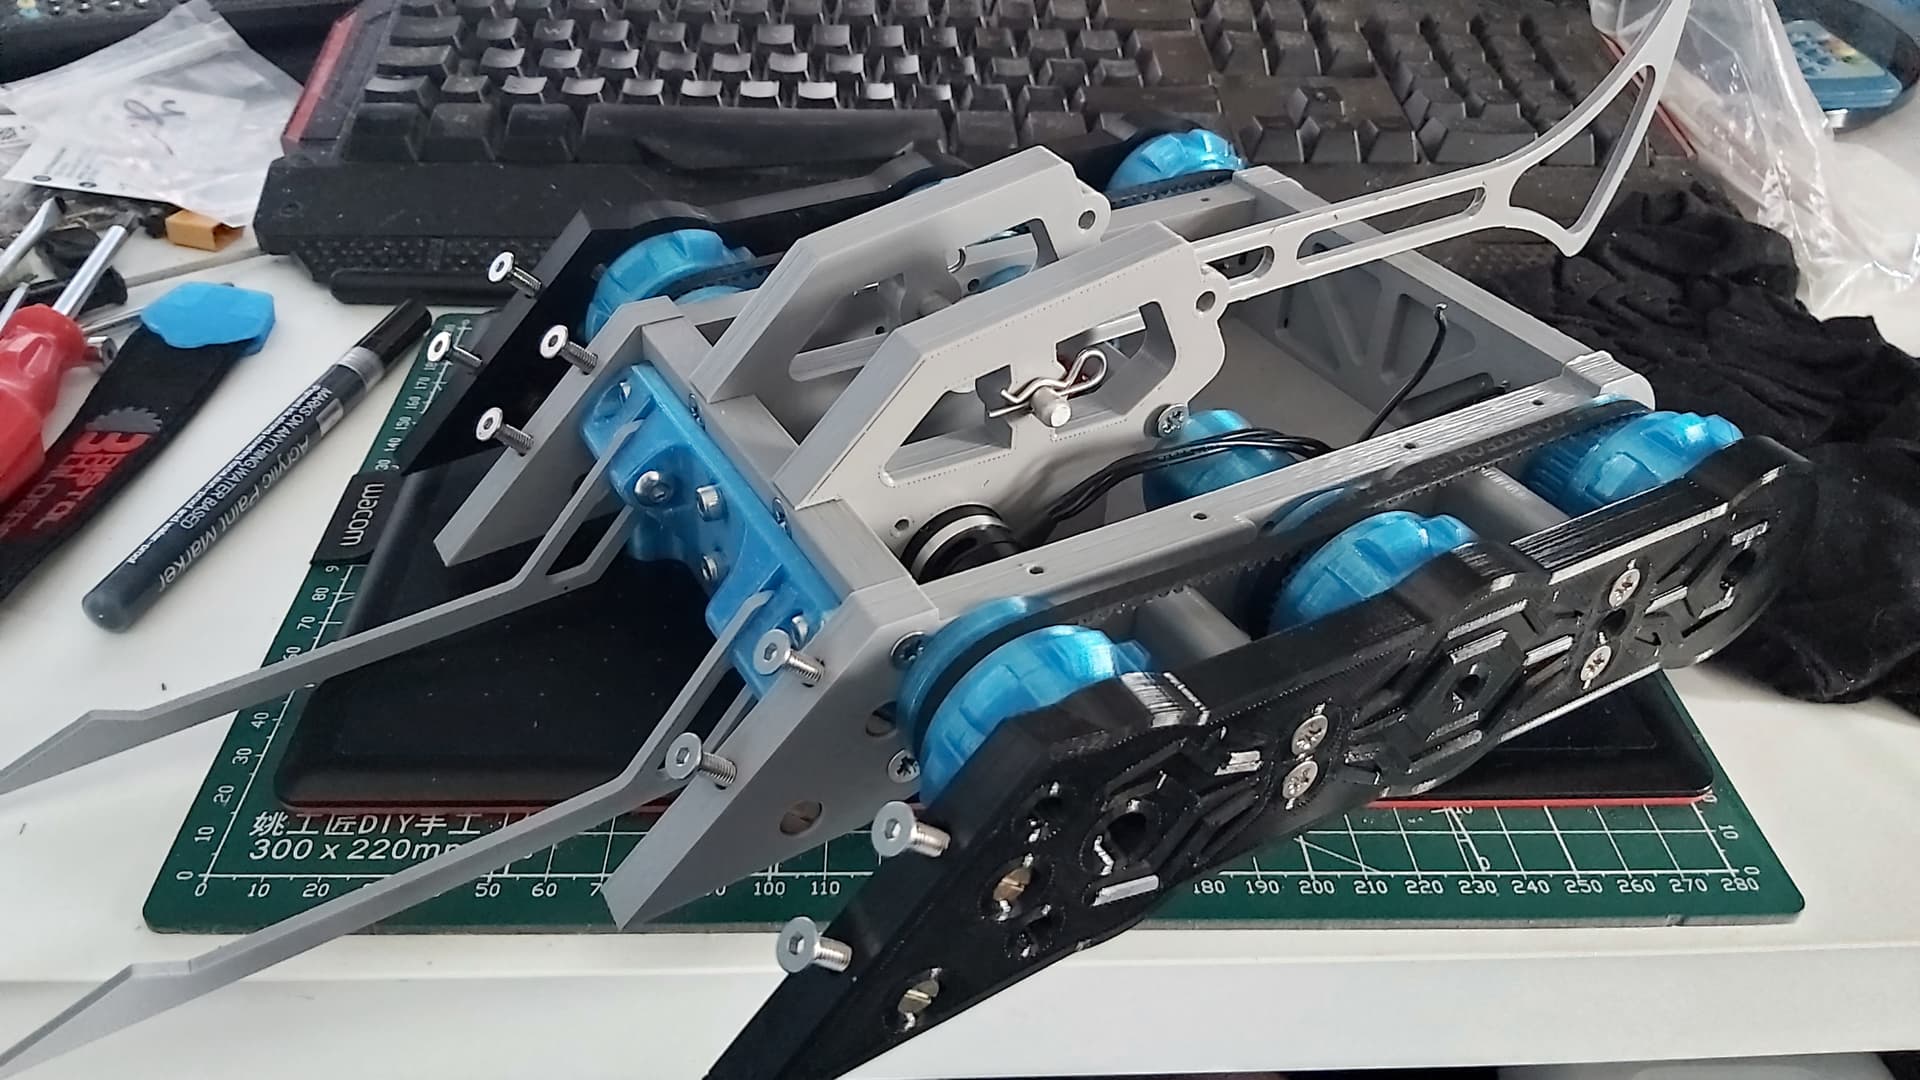
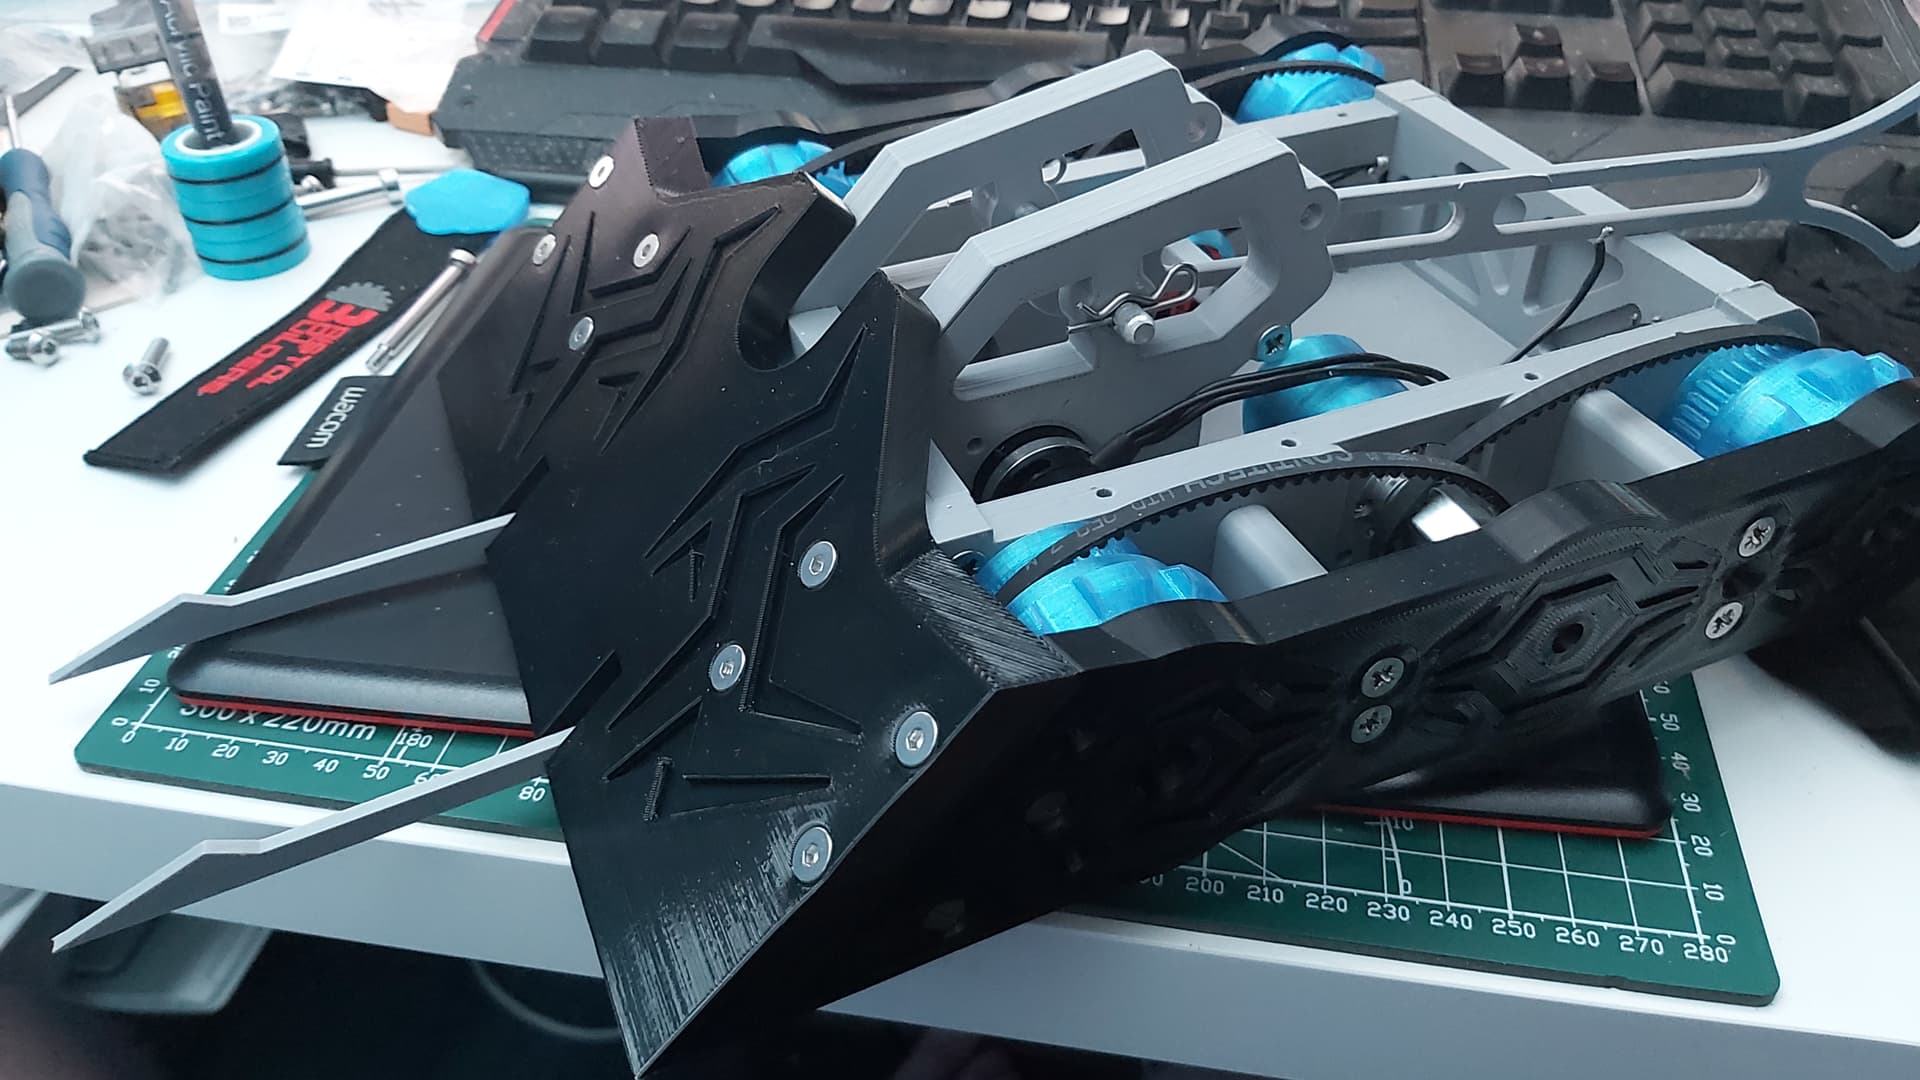
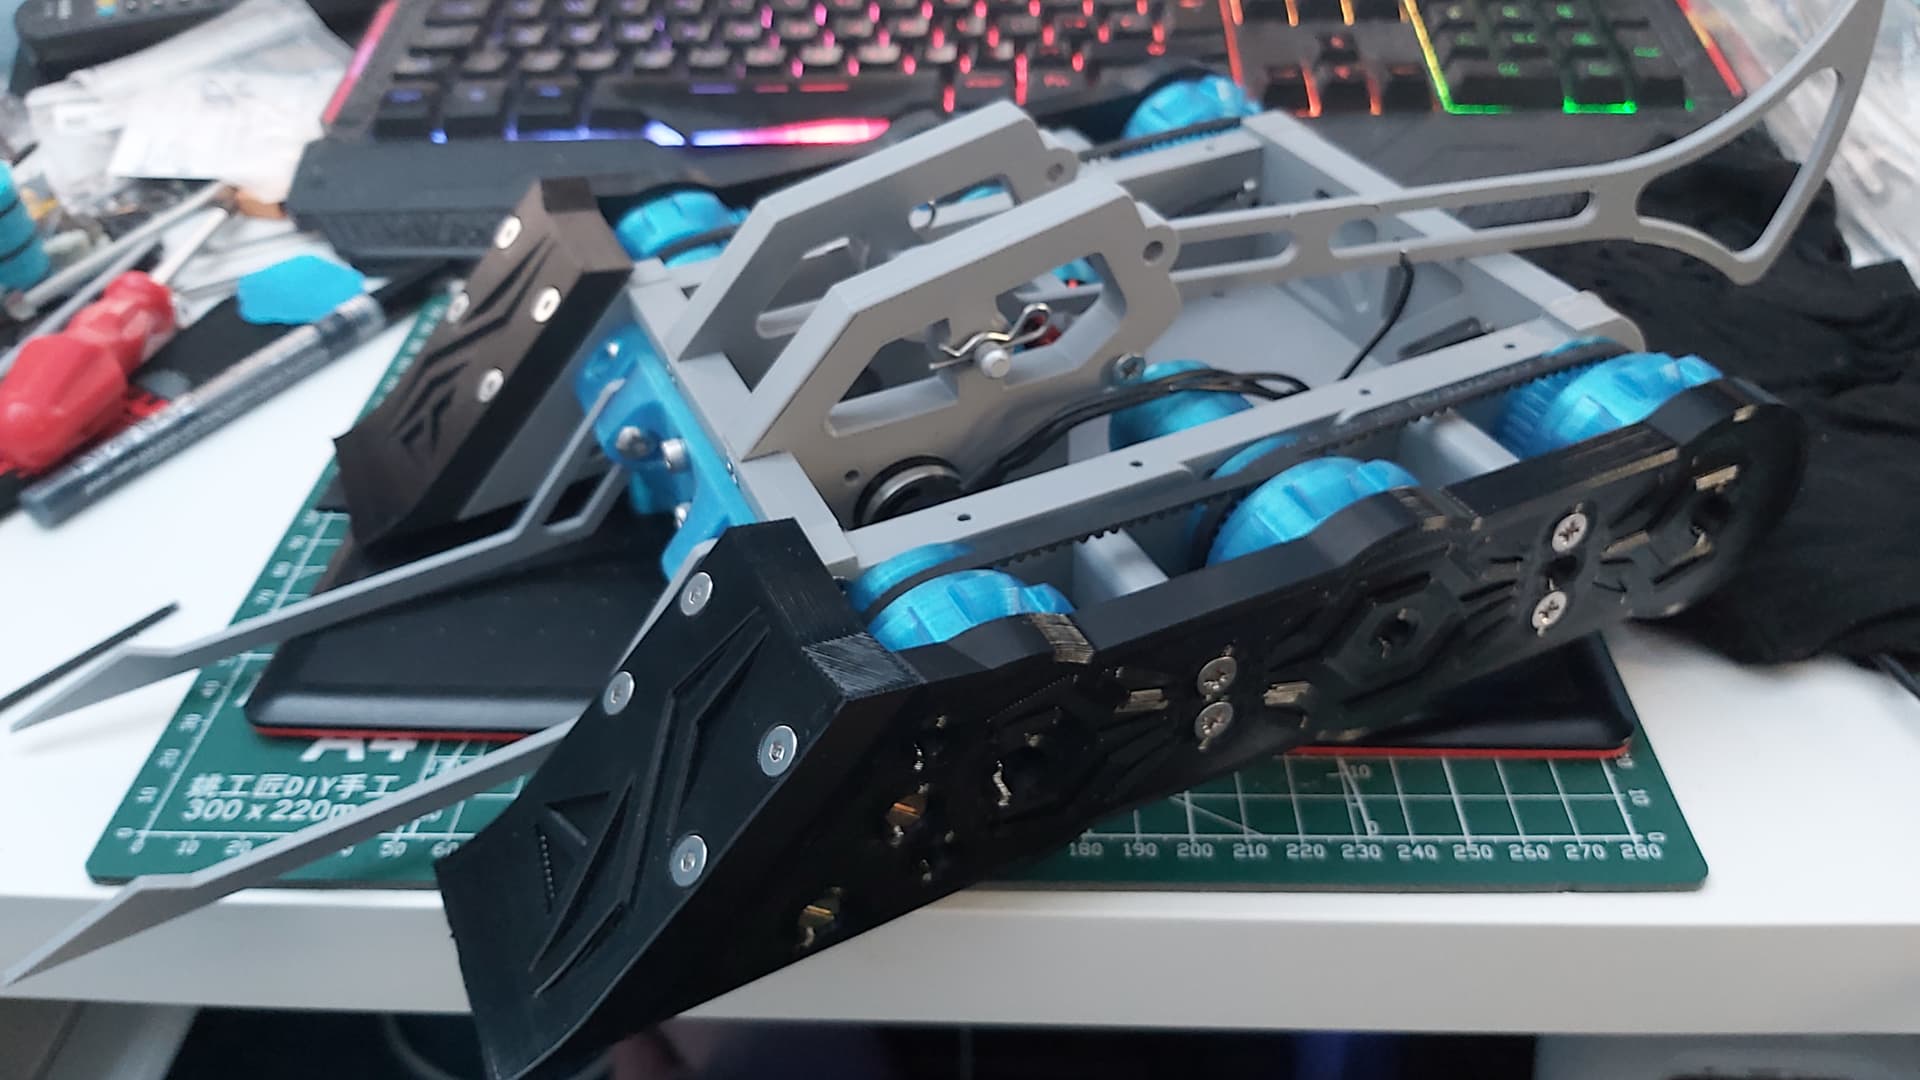
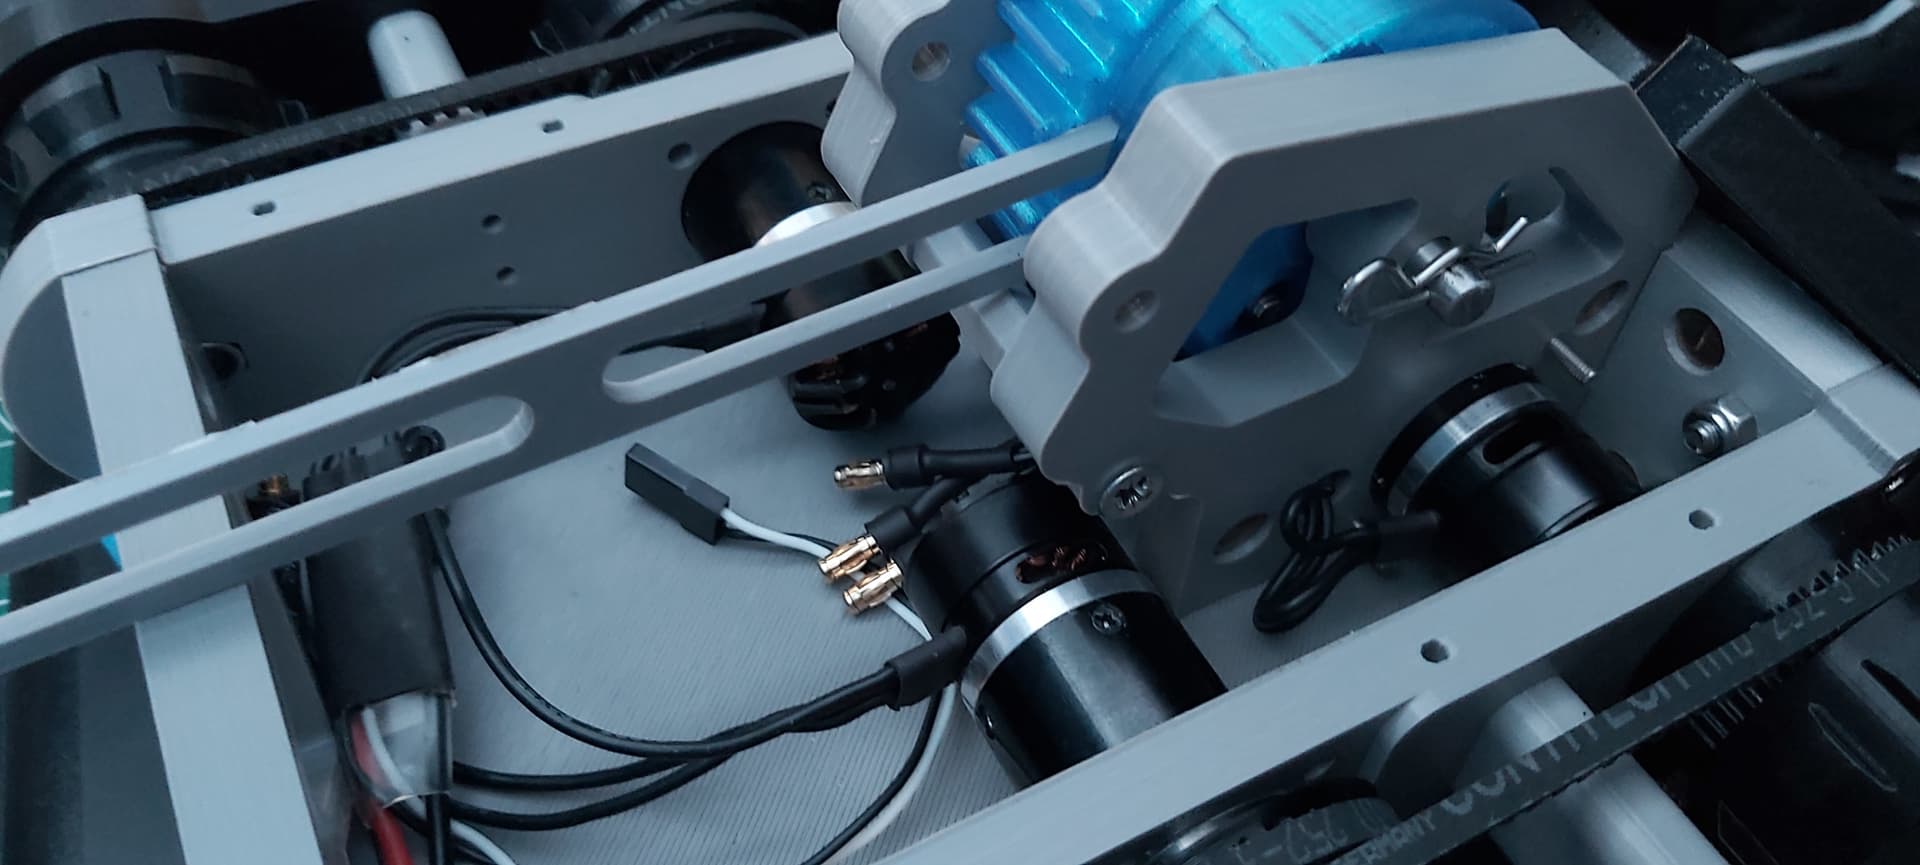
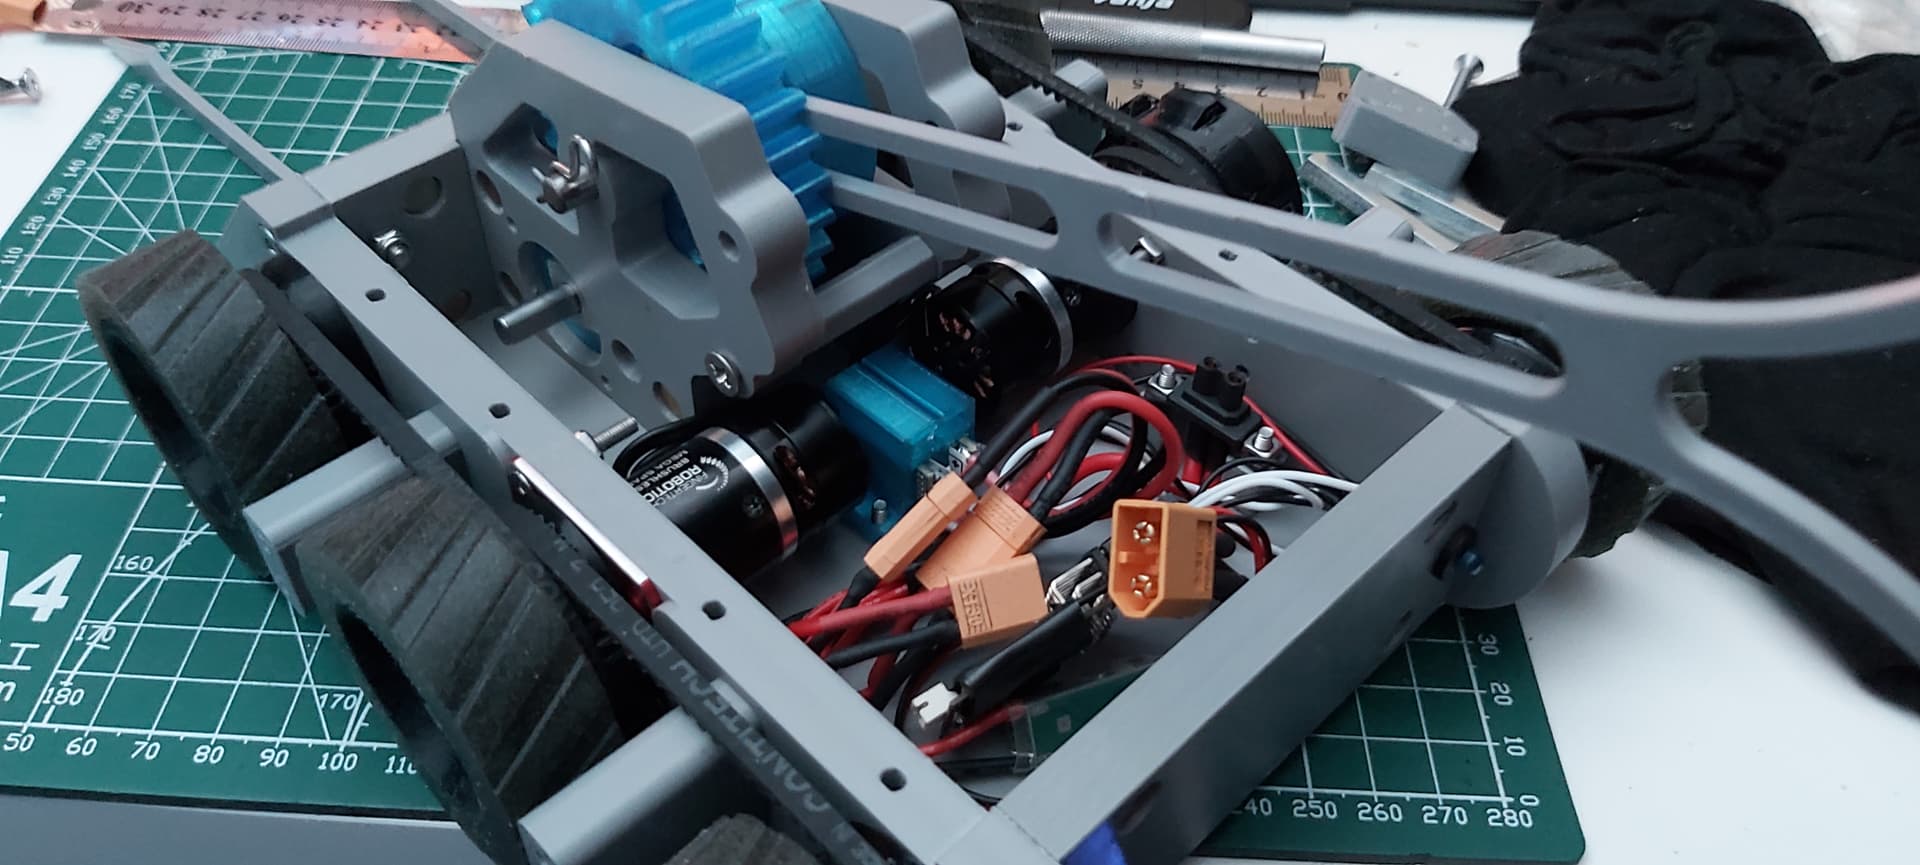
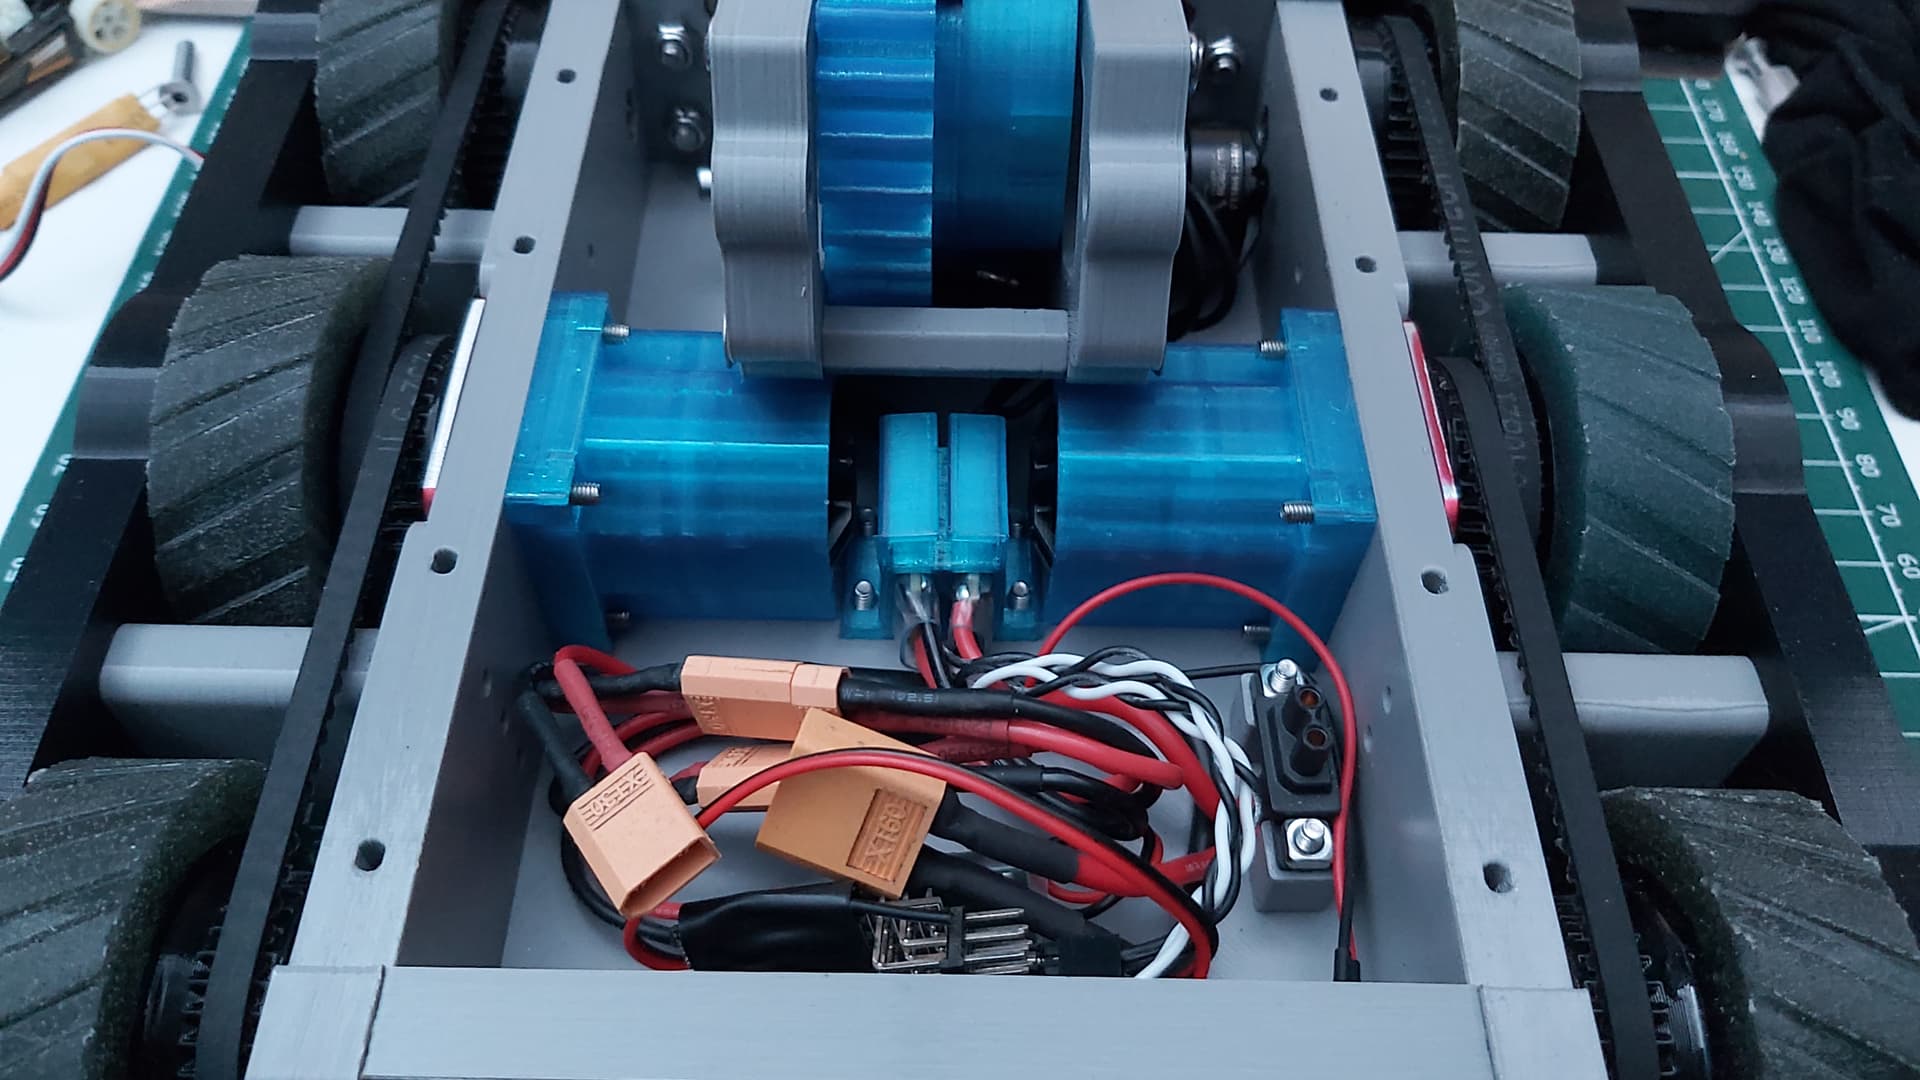
A near complete chassis. Here you can see the nylon 3d printed pulleys and wheels with the 4mm wide HTD 3 belts. A good chunk of the Nylon parts was printed by Ranglebox as my filament proved faulty.

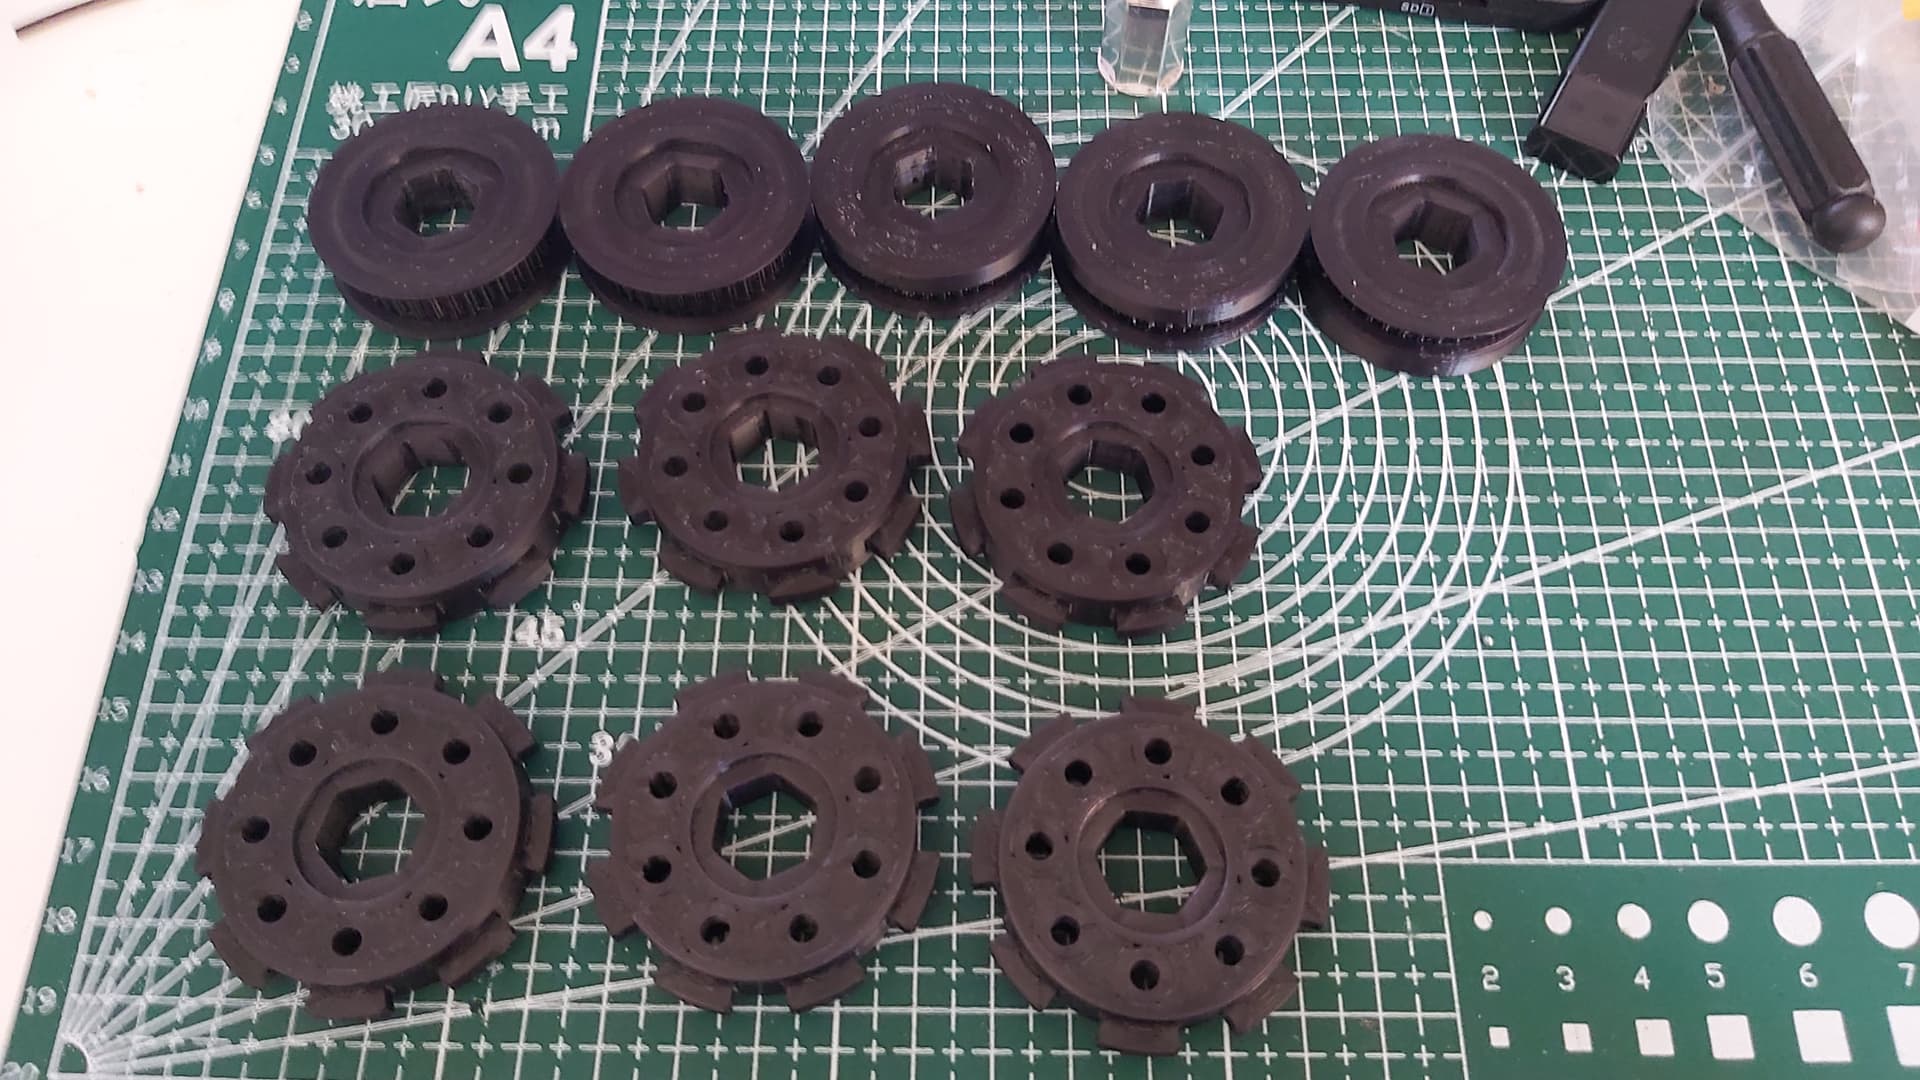
I wasn’t well-versed in designing single-piece wheels and pulleys so I just made them separate parts.
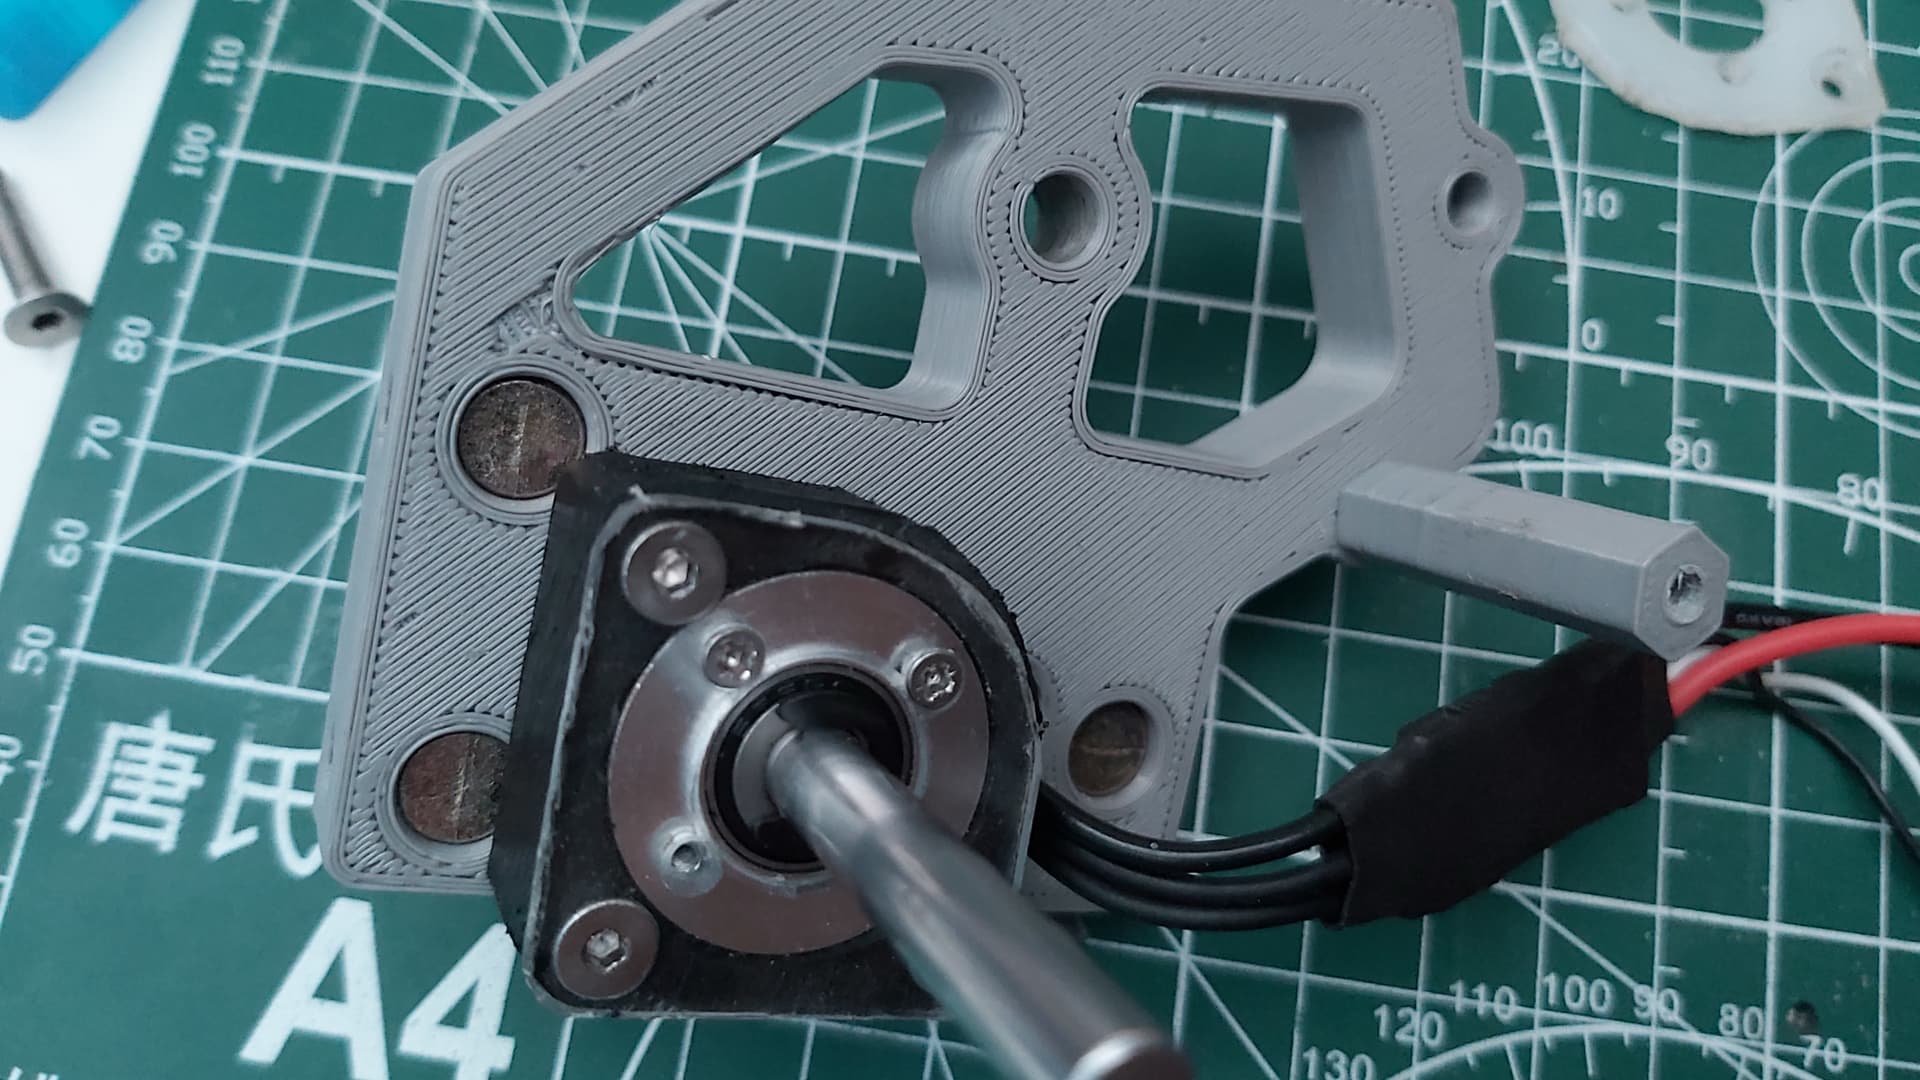
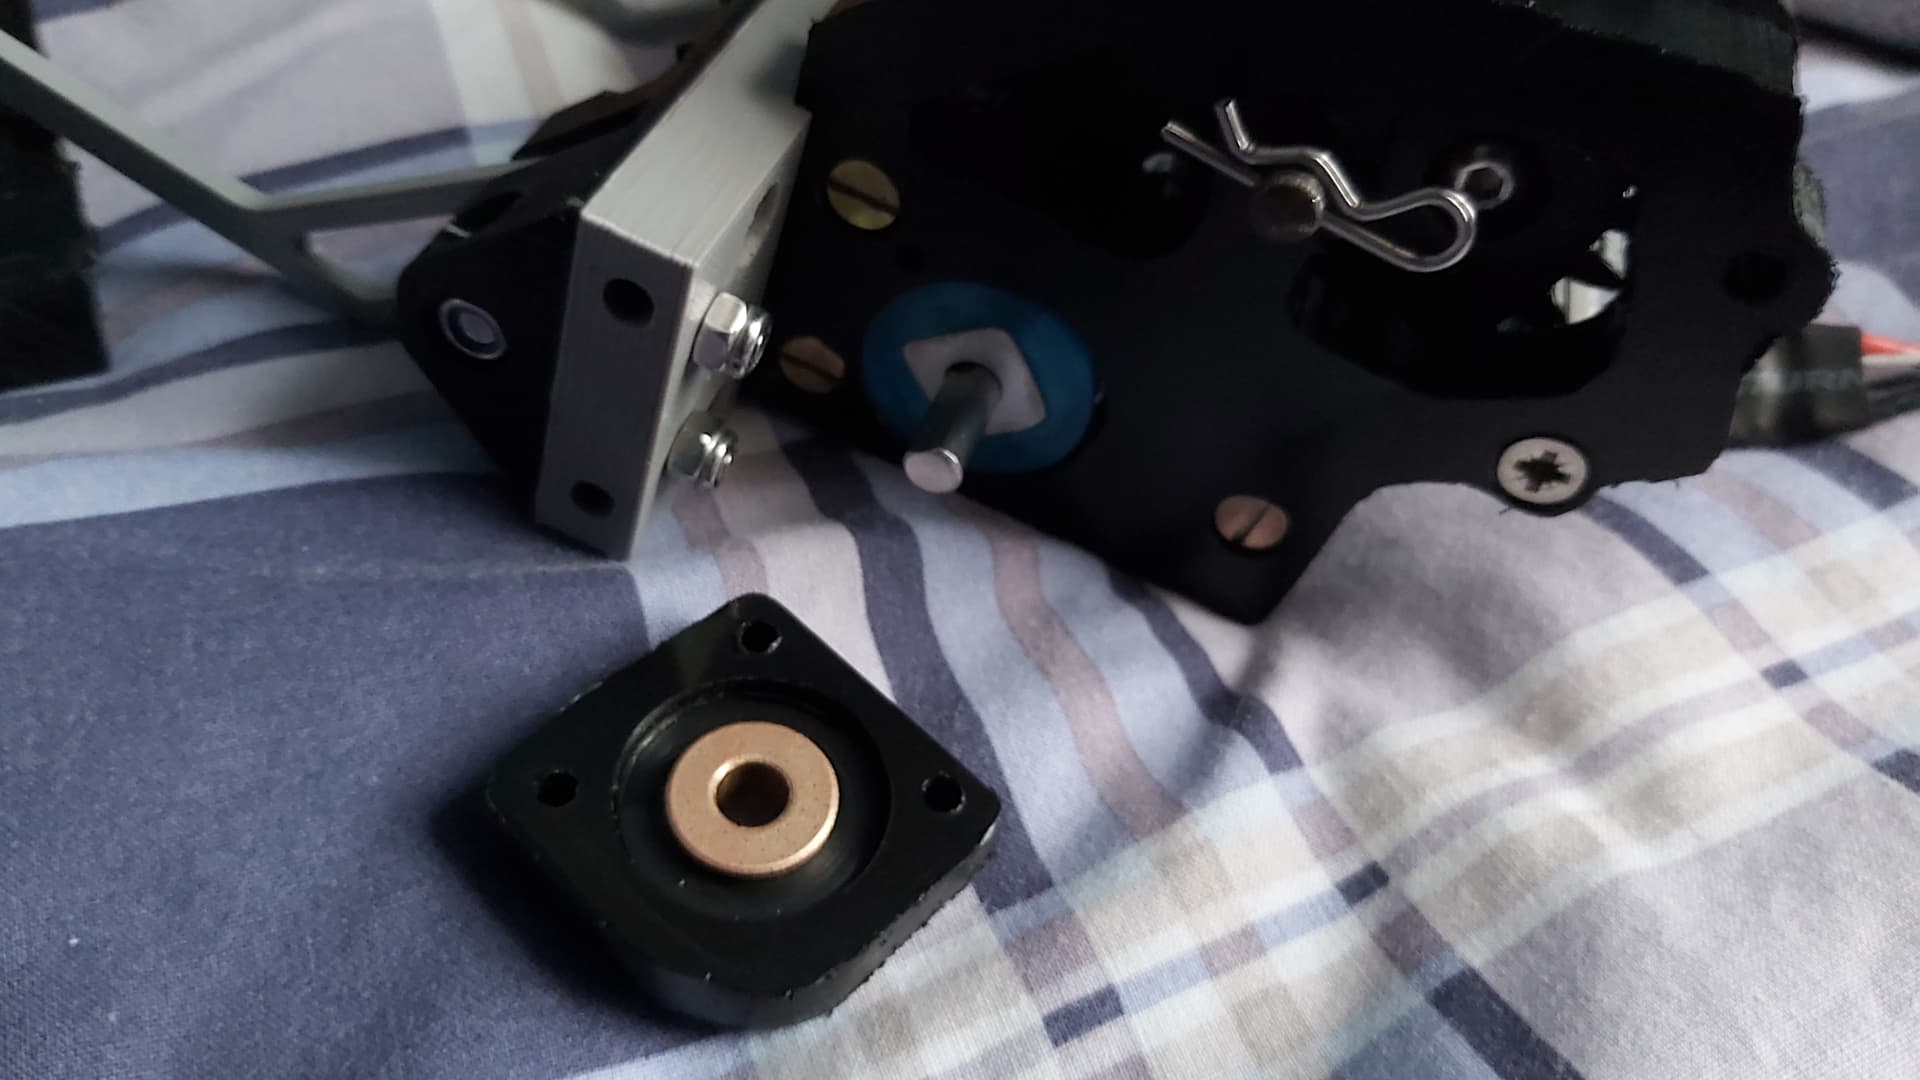
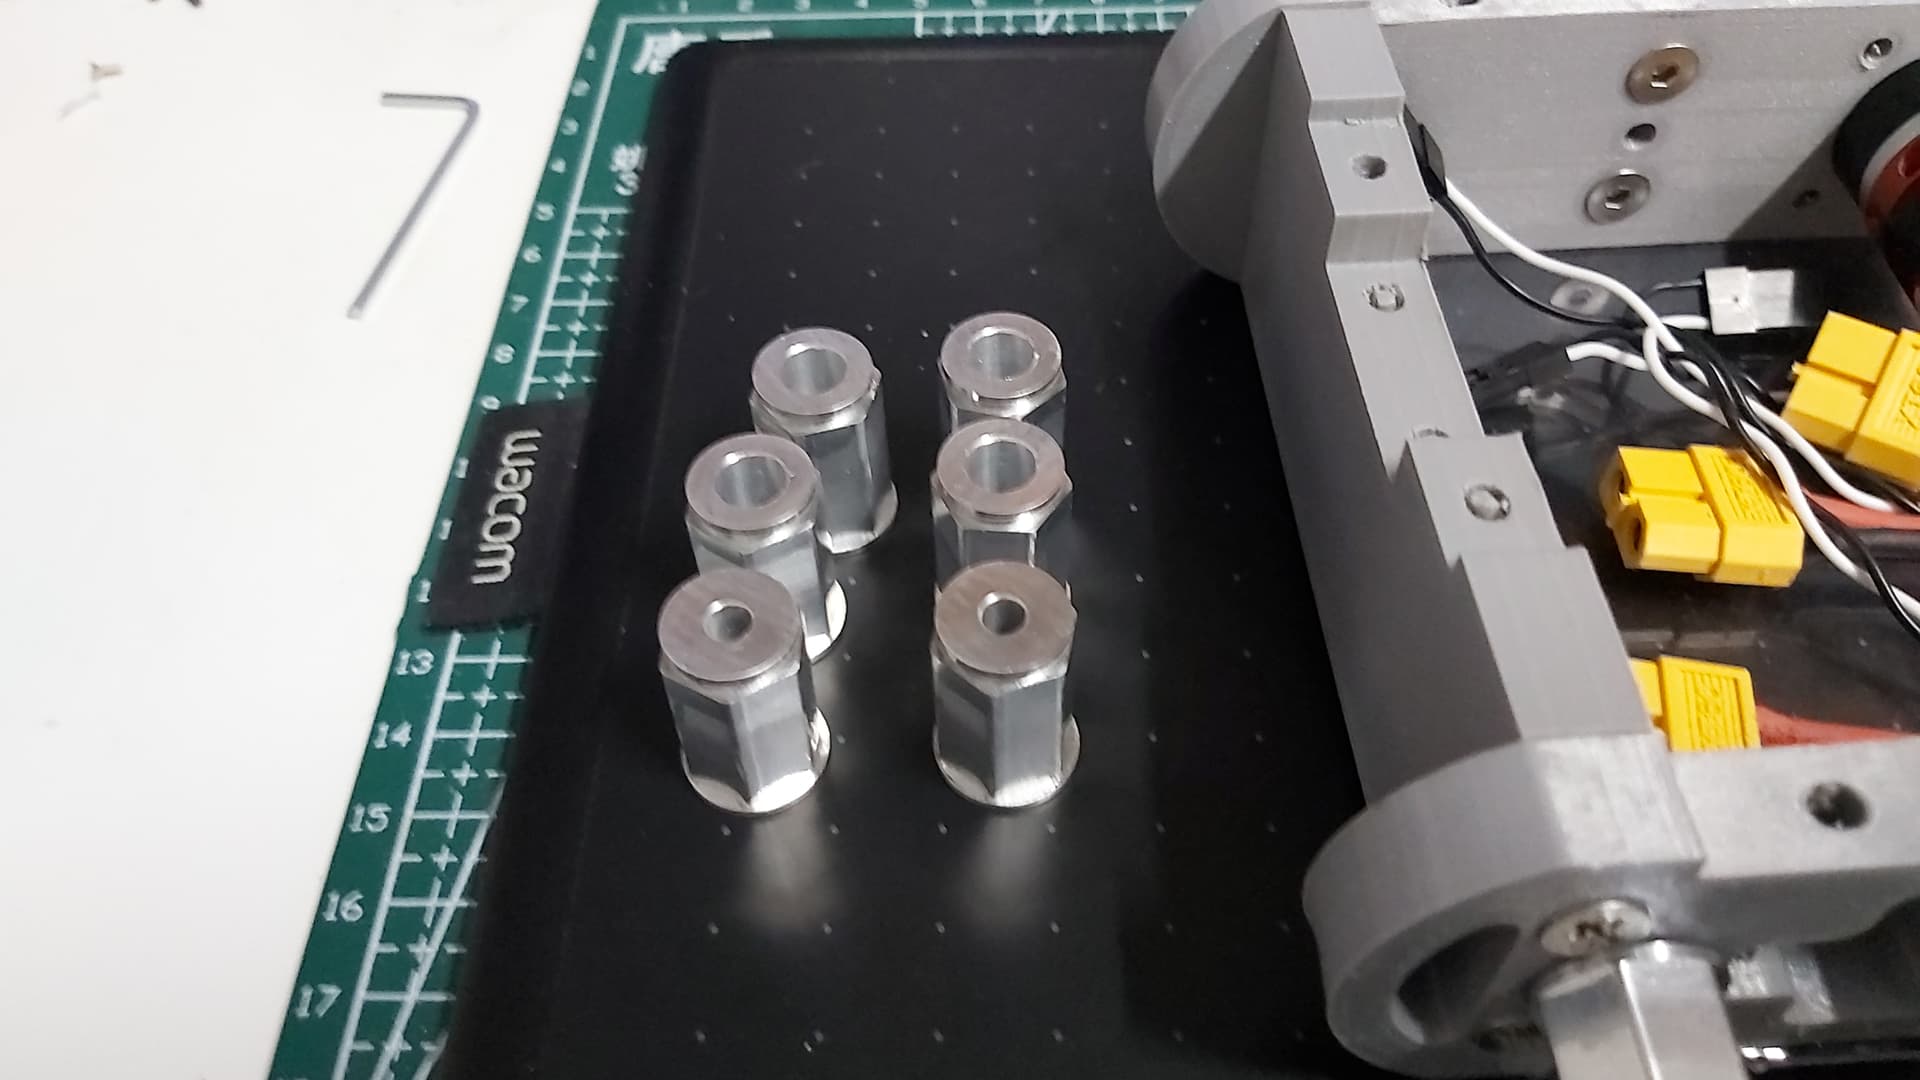
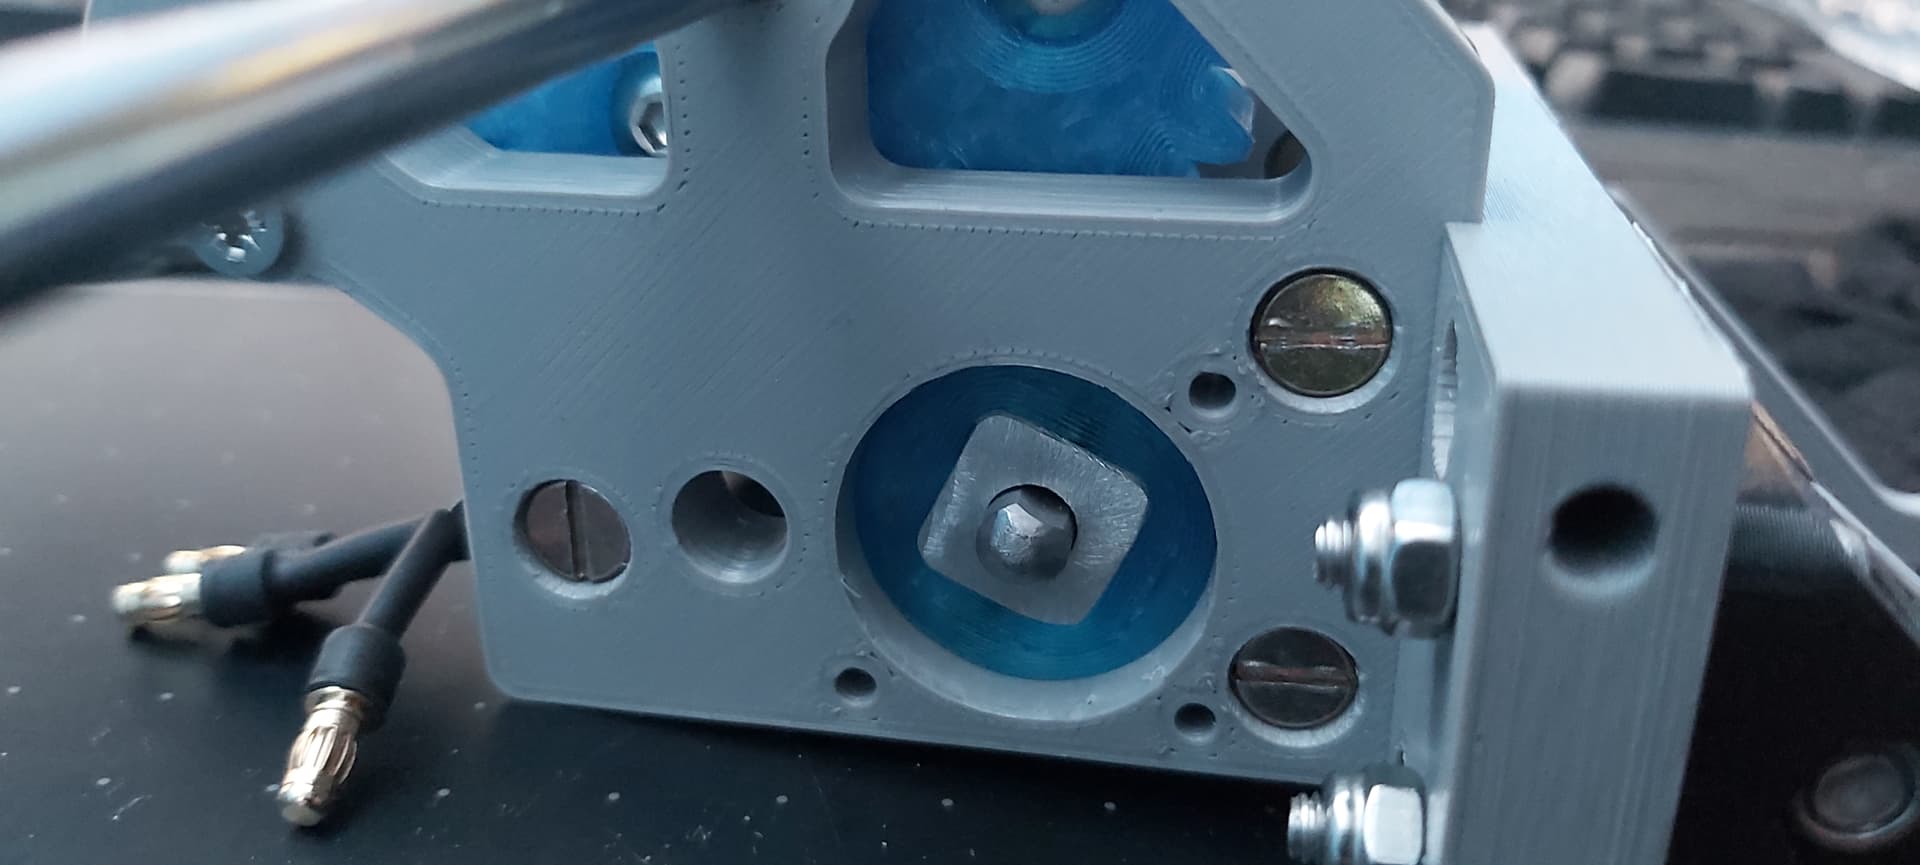
The hex holes are for slotting onto the aluminium hubs machined By SC Robotics based on BaneBots hubs. The middle, drive hubs had 4mm holes and the driven hubs ran on 5mm shoulder bolts with bushings fitted inside.

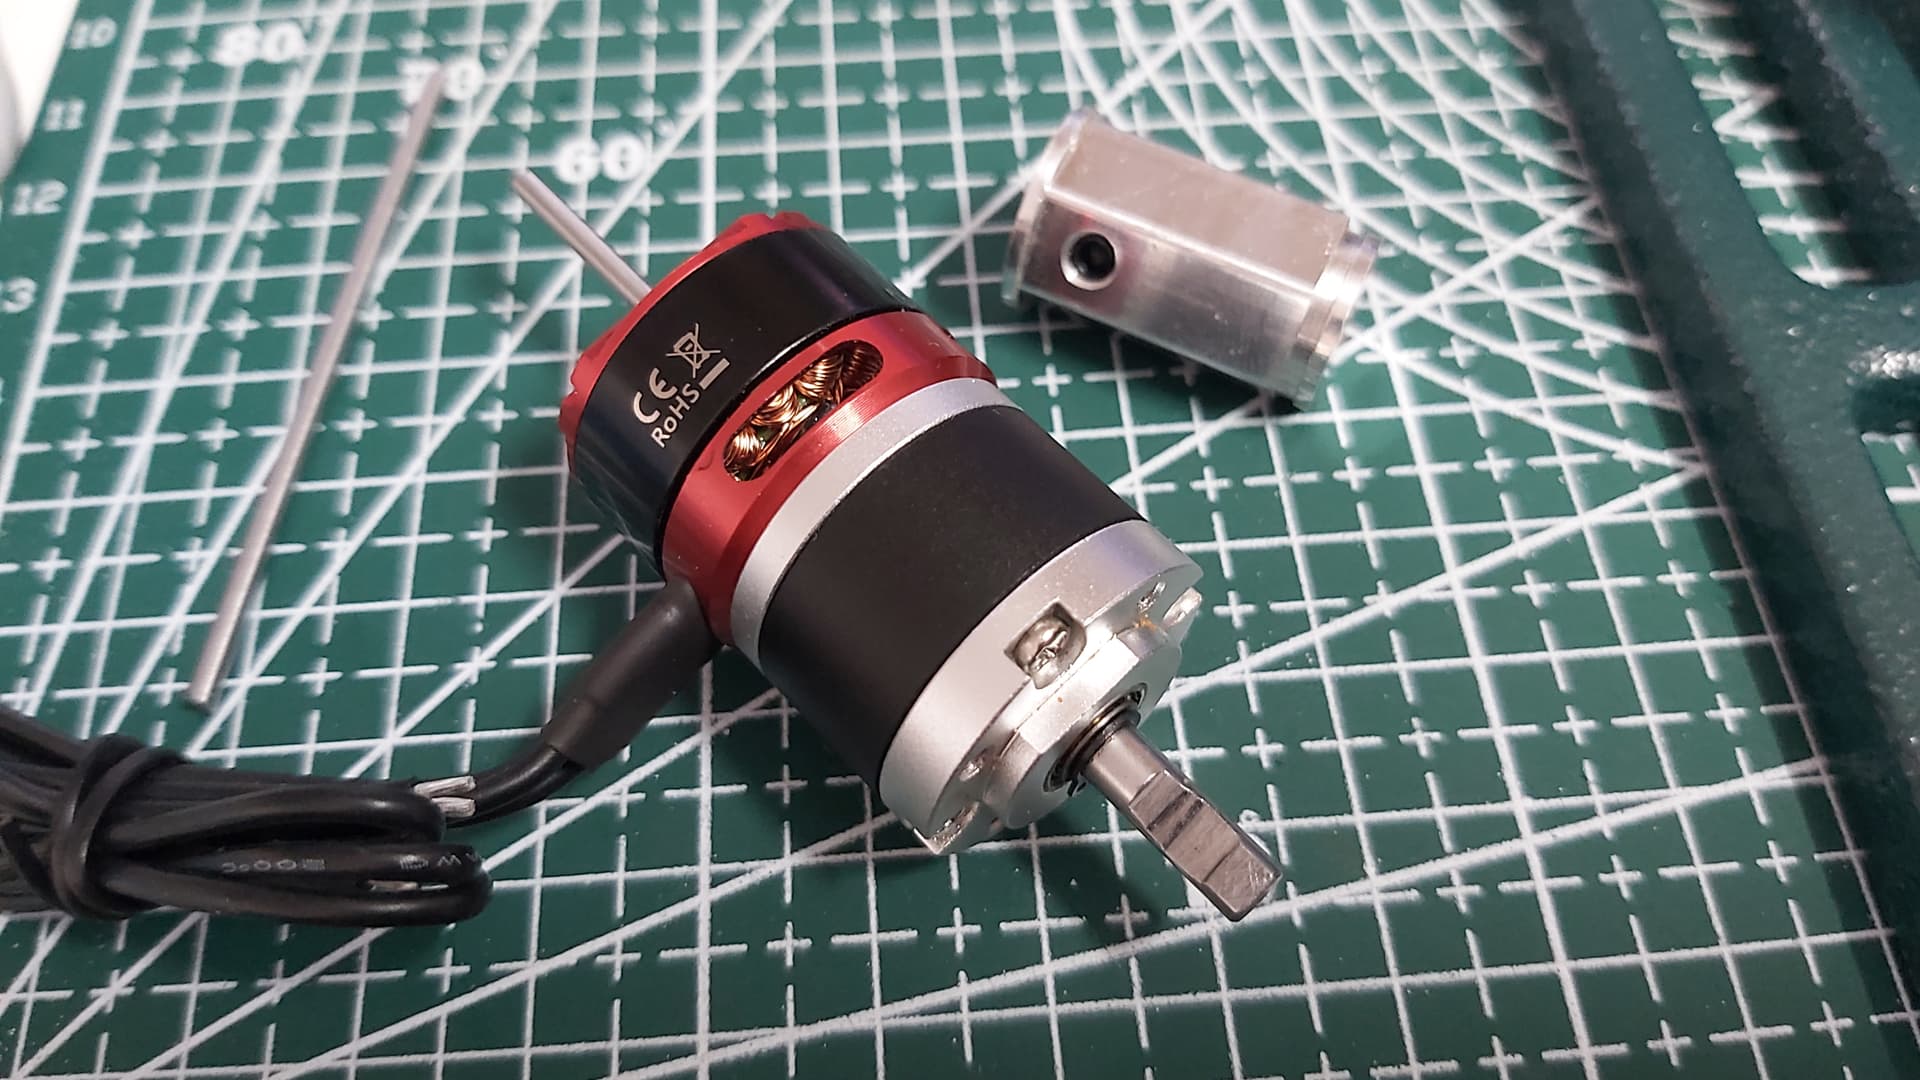
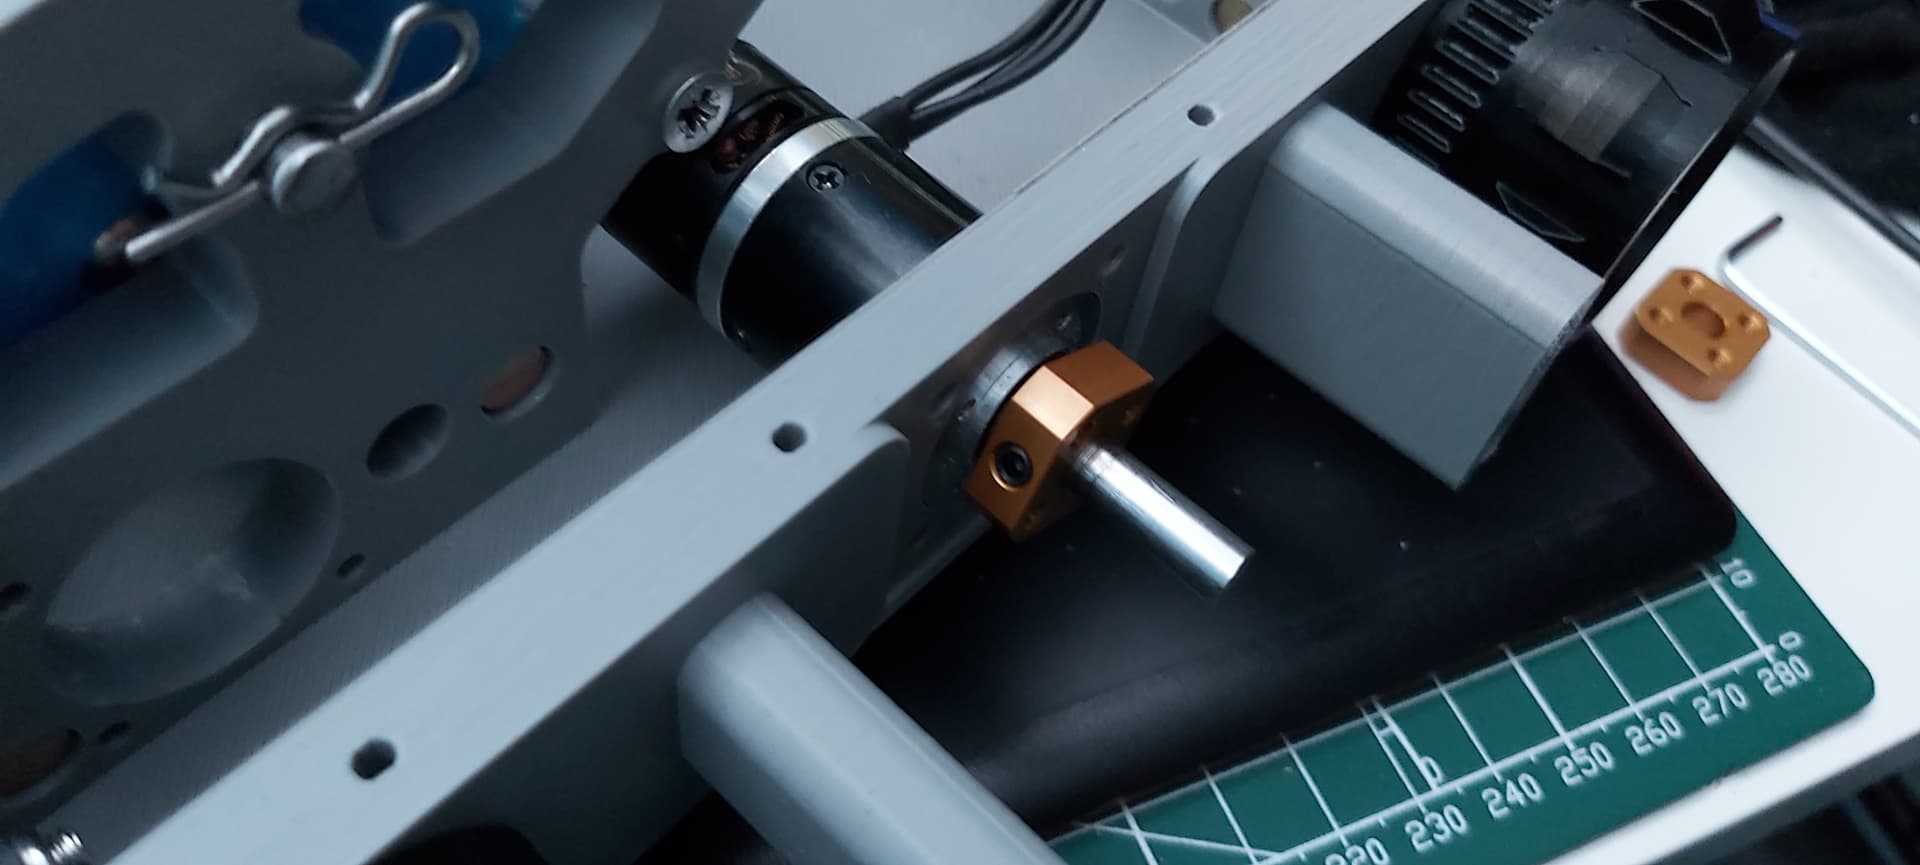
The motors were my conversions of BBB 22mm motors with 2300kv 1806 brushless motors also available from BBB. These conversions while they worked were not ideal. Too fast and as I discovered after Robot Rebellion 2023 just a little unreliable and hard to service.

This test video highlights how bad it was to control the dual rates at 100% At the event I had Data Breach at 50%

Sadly the test also made a mess on the floor the polyurethane rubber tyres I cast used a little too much pigment and shredded like cheese.

And sadly these were just some of the teething issues that cropped up.
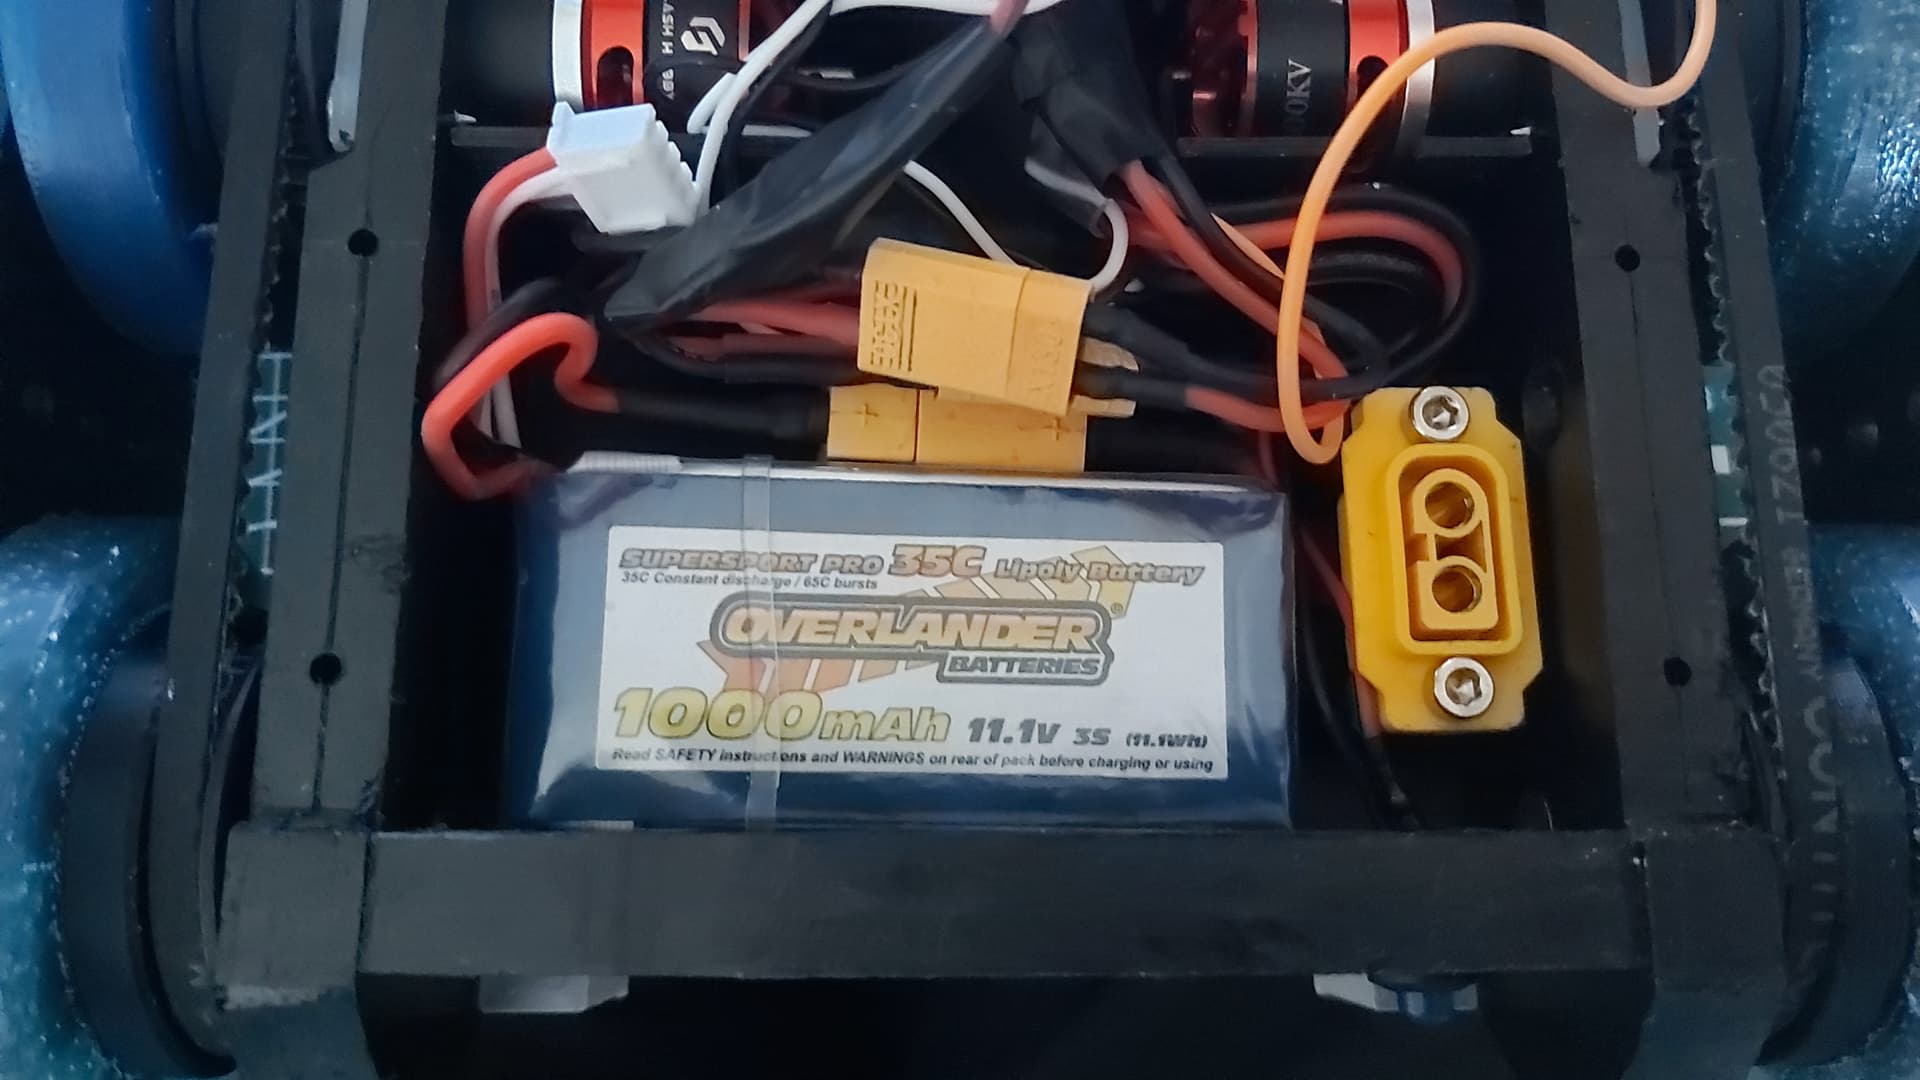
The 3s 850mah batteries from CSB: Echo were running low after just two minutes of running. I then bought some 1000mah lipos to resolve that worry.

The worst teething issue was the weapons. AHHHHHHH
Both the Axe and Lifter couldn’t self-right and the lifter couldn’t even lift.

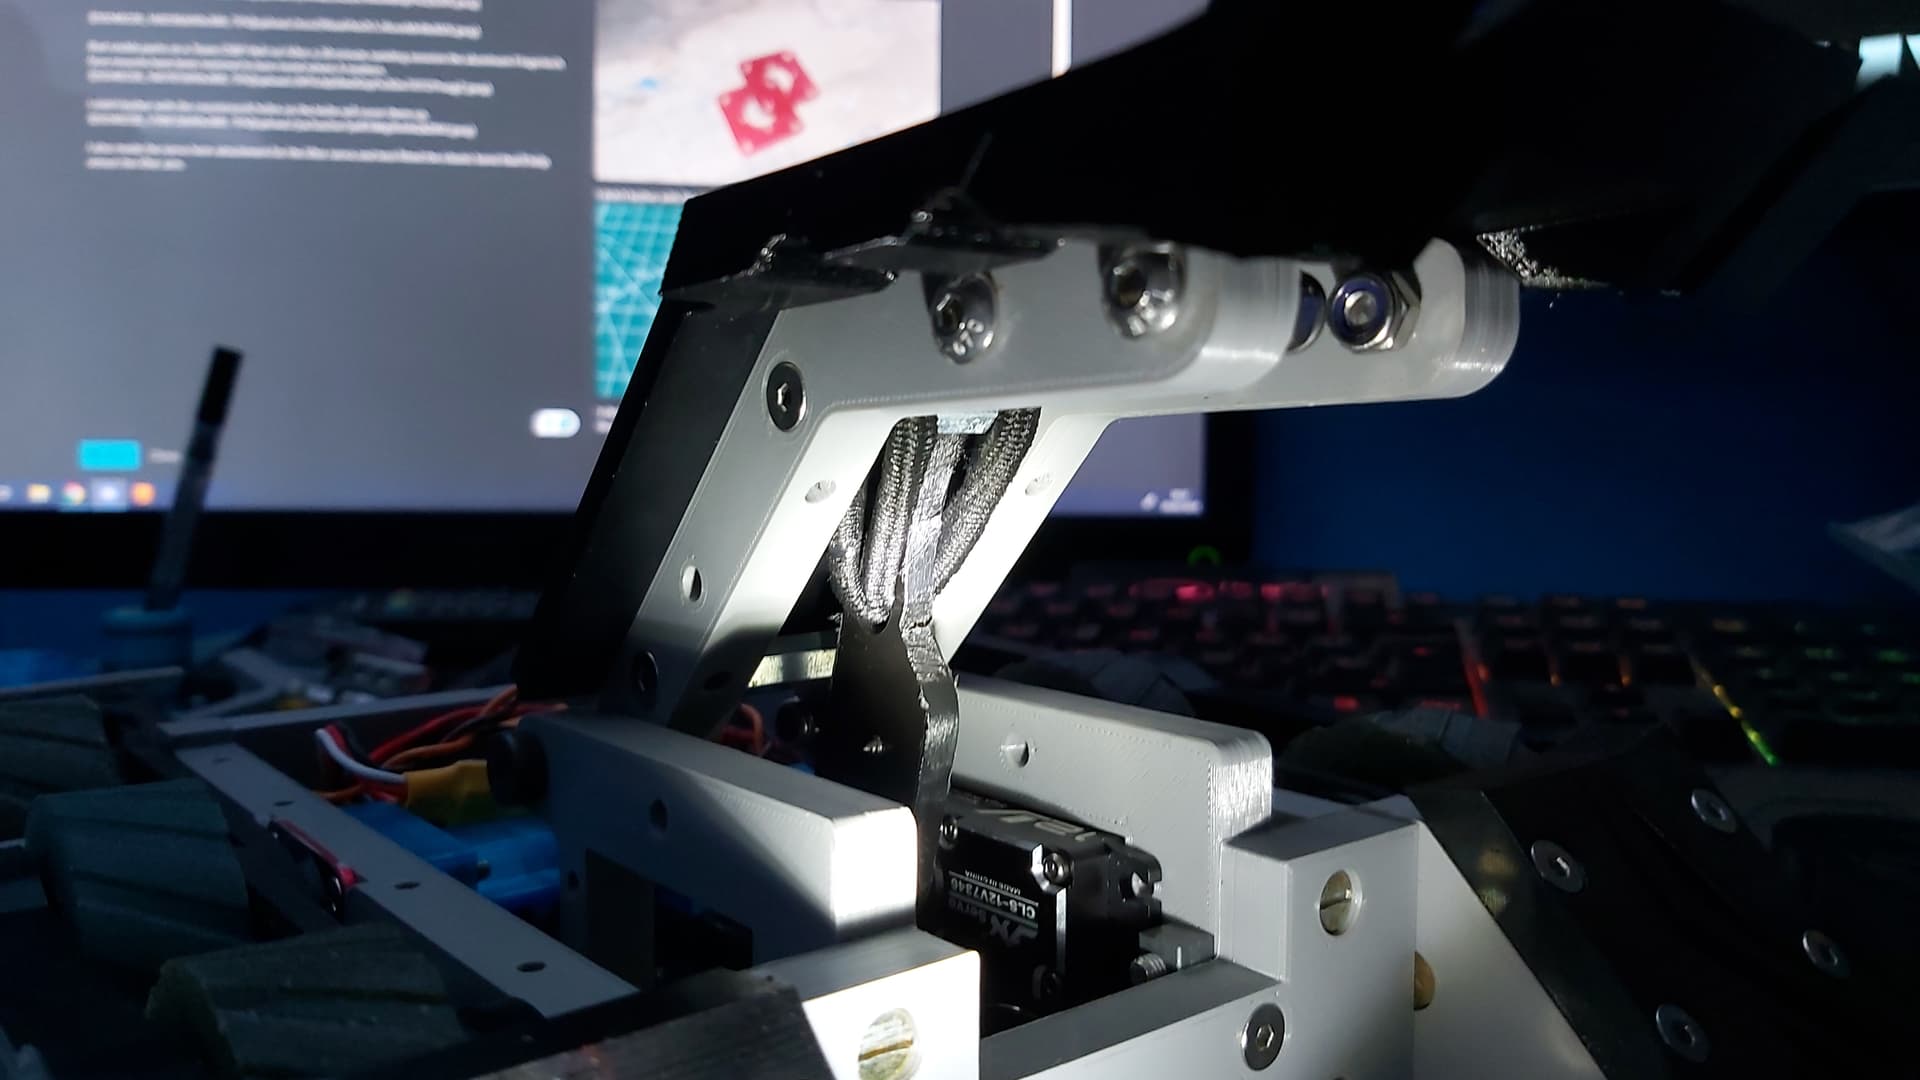
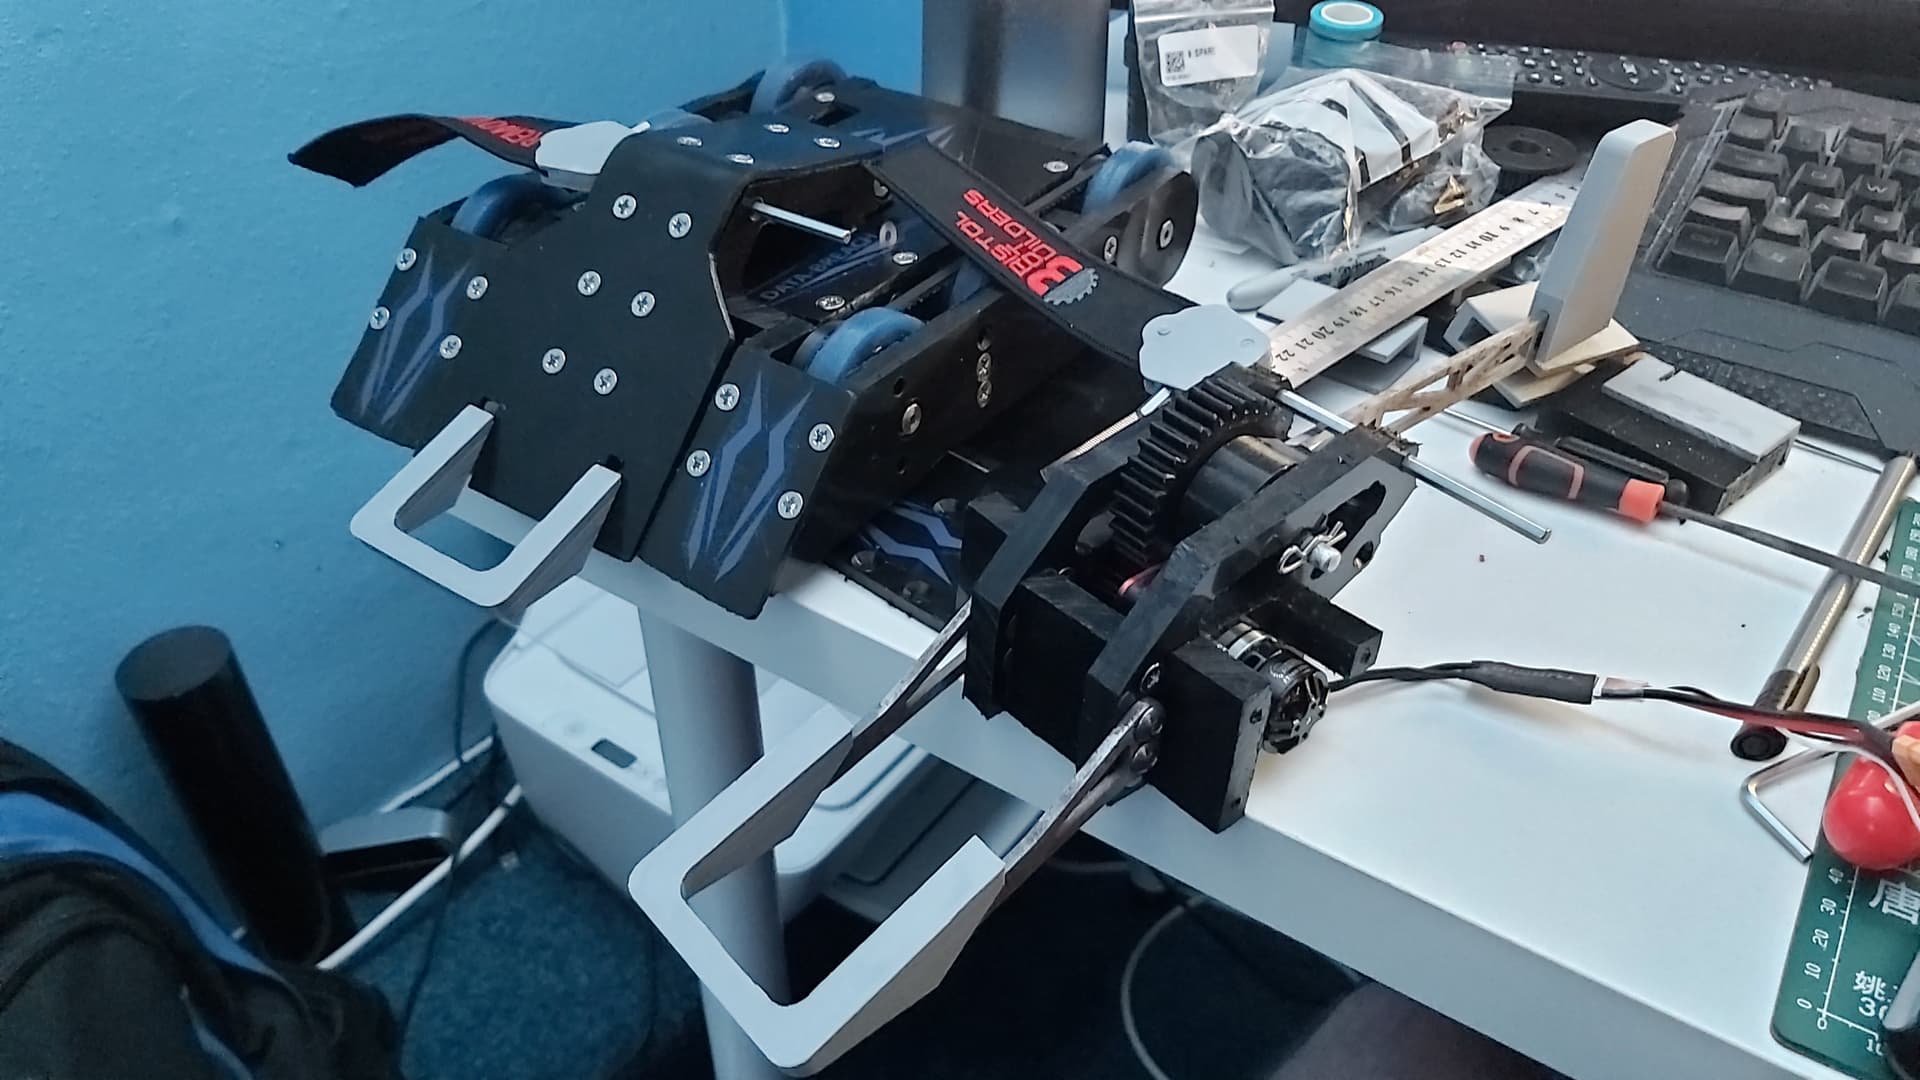
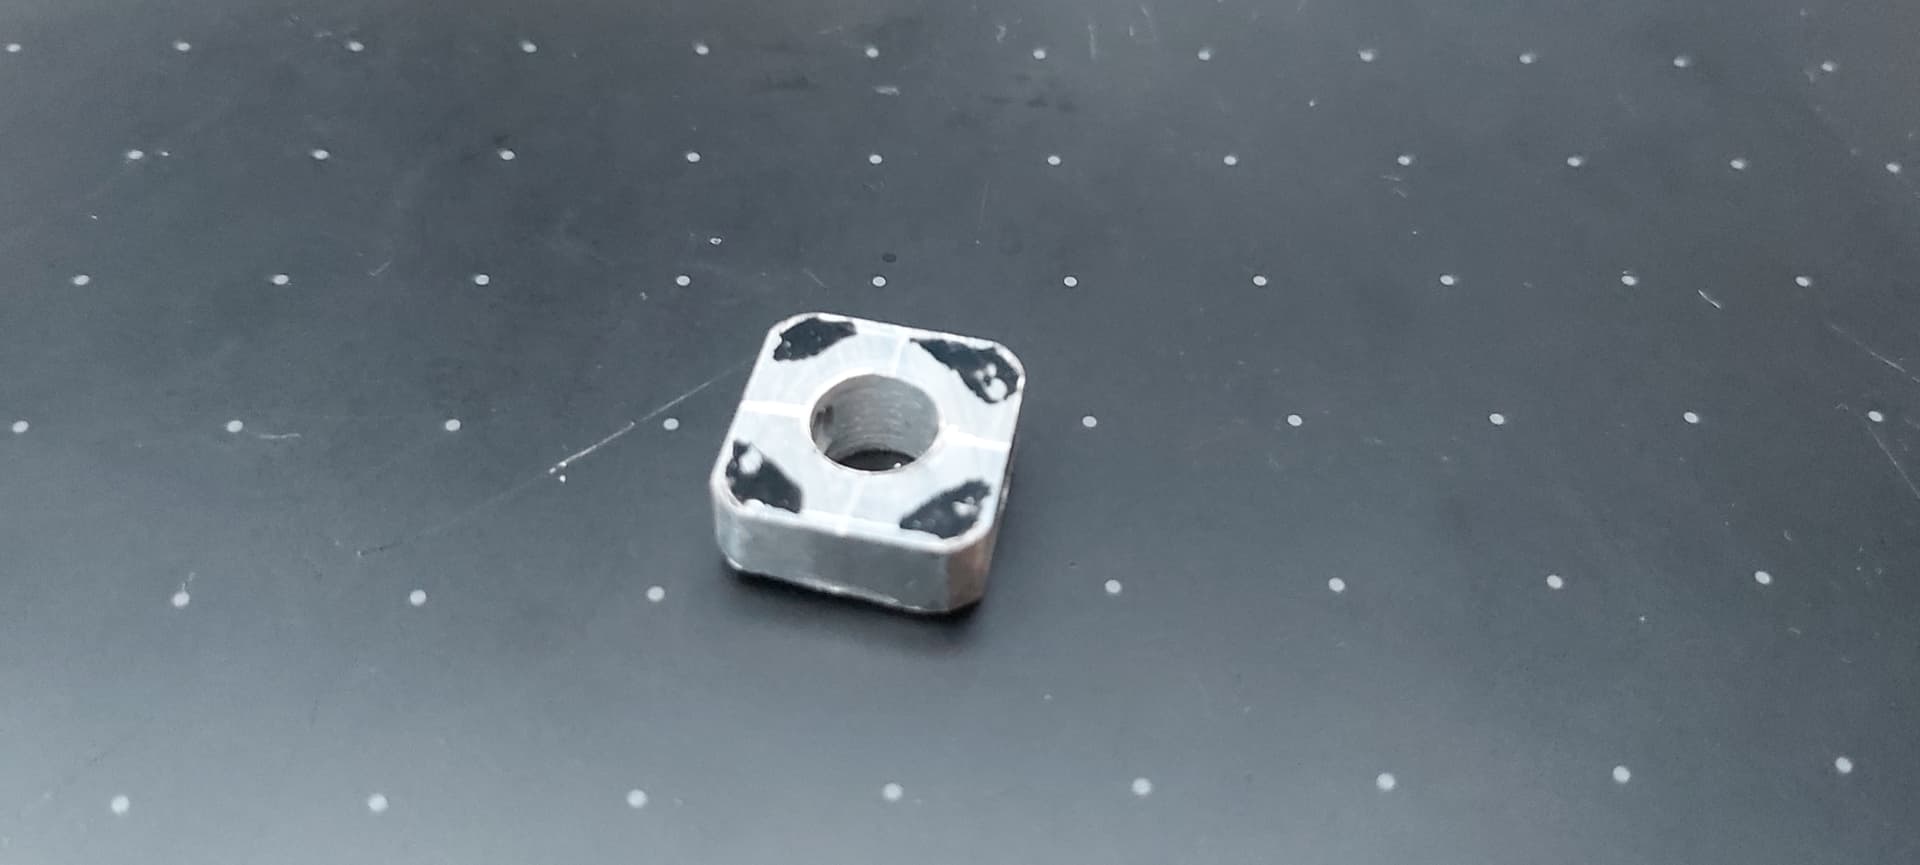
The cause of the Axe’s issue was the 3D-printed gears that made up the second stage of the Axe mechanism. The Axe uses a 2300kv Fingertech Mega Spark with 2 nylon gears in mod 1.5. The smaller gear had a recurring issue with stripping out the inside allowing the 6mm Mega Spark shaft to freely spin inside. I ended up fitting an m3 square nut inside to extend the gear’s running life (2 and a half fights to be exact.) The other issue was the gear ratio. I had the Gear ratio at 2:1 which proved not enough. I upped the ratio to 3:1 and happily it fixed the issue and now Data Breach can throw itself into the air.

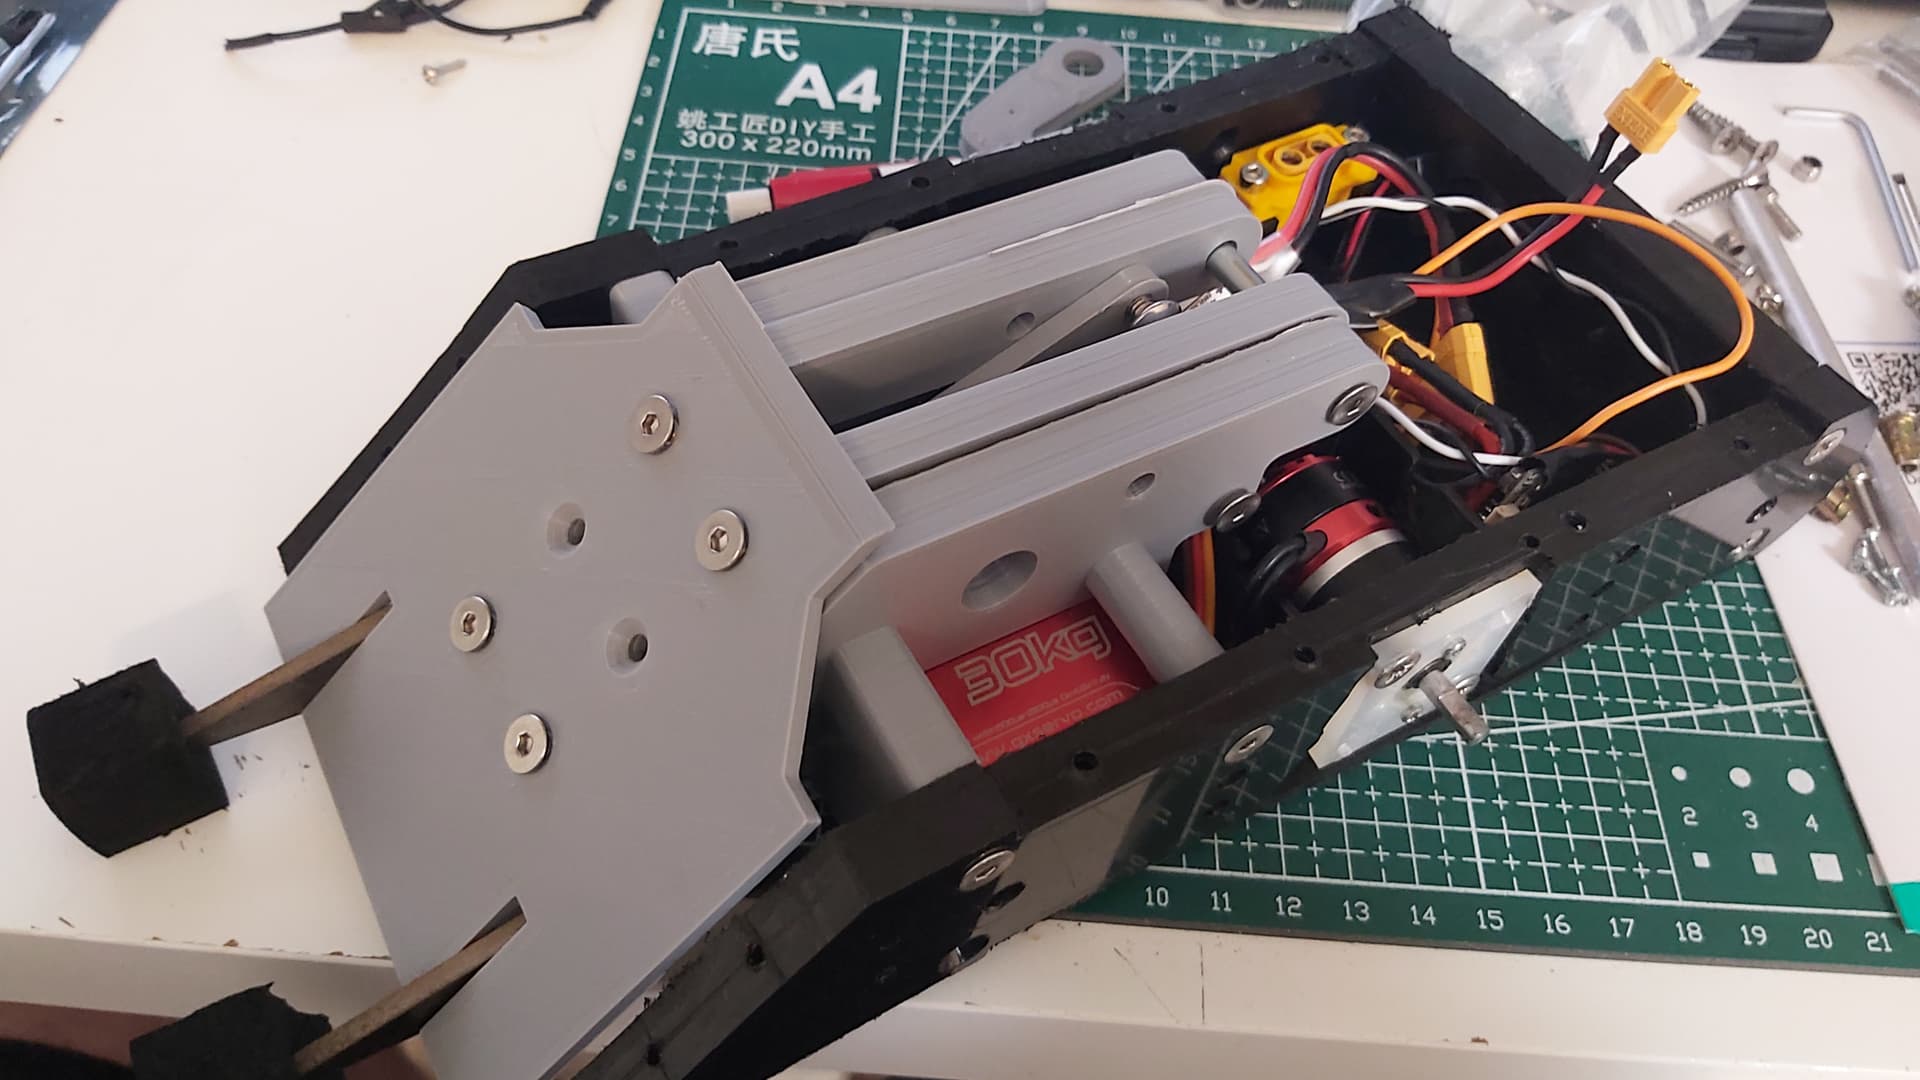
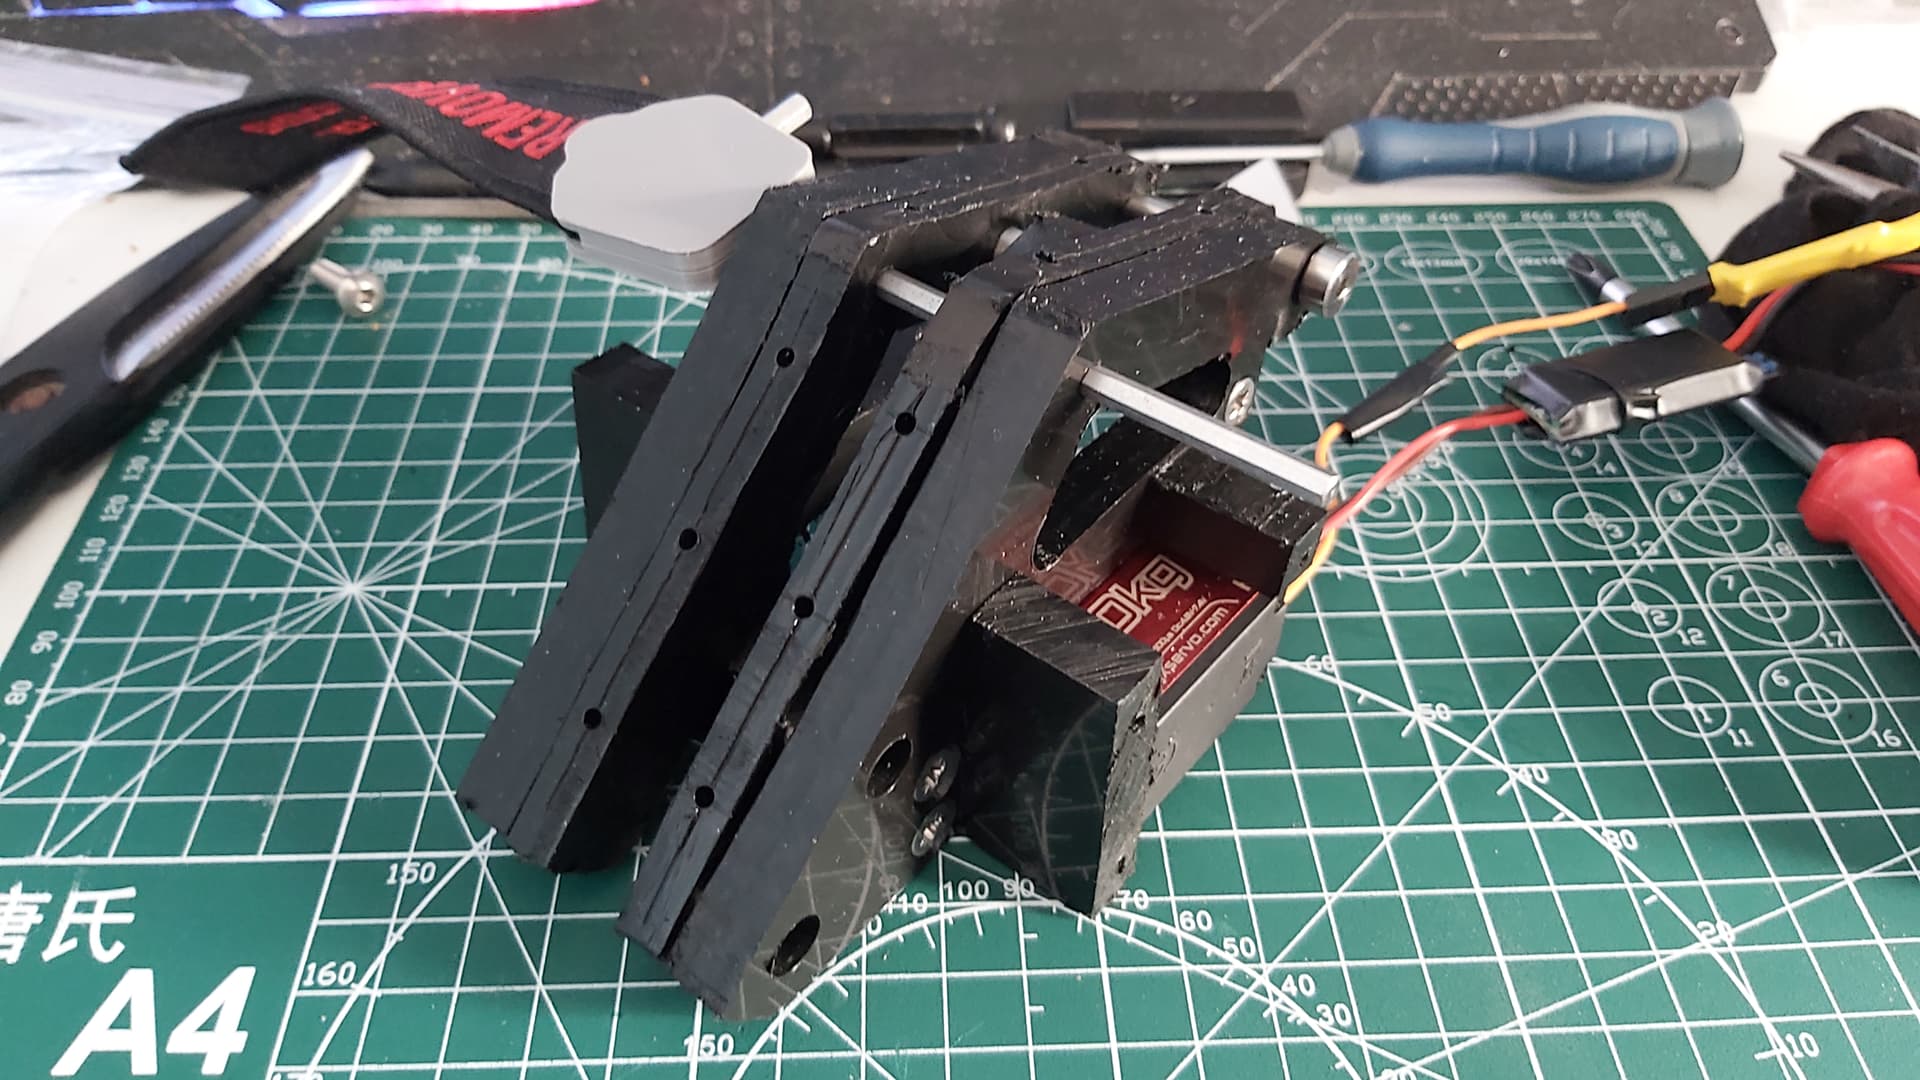
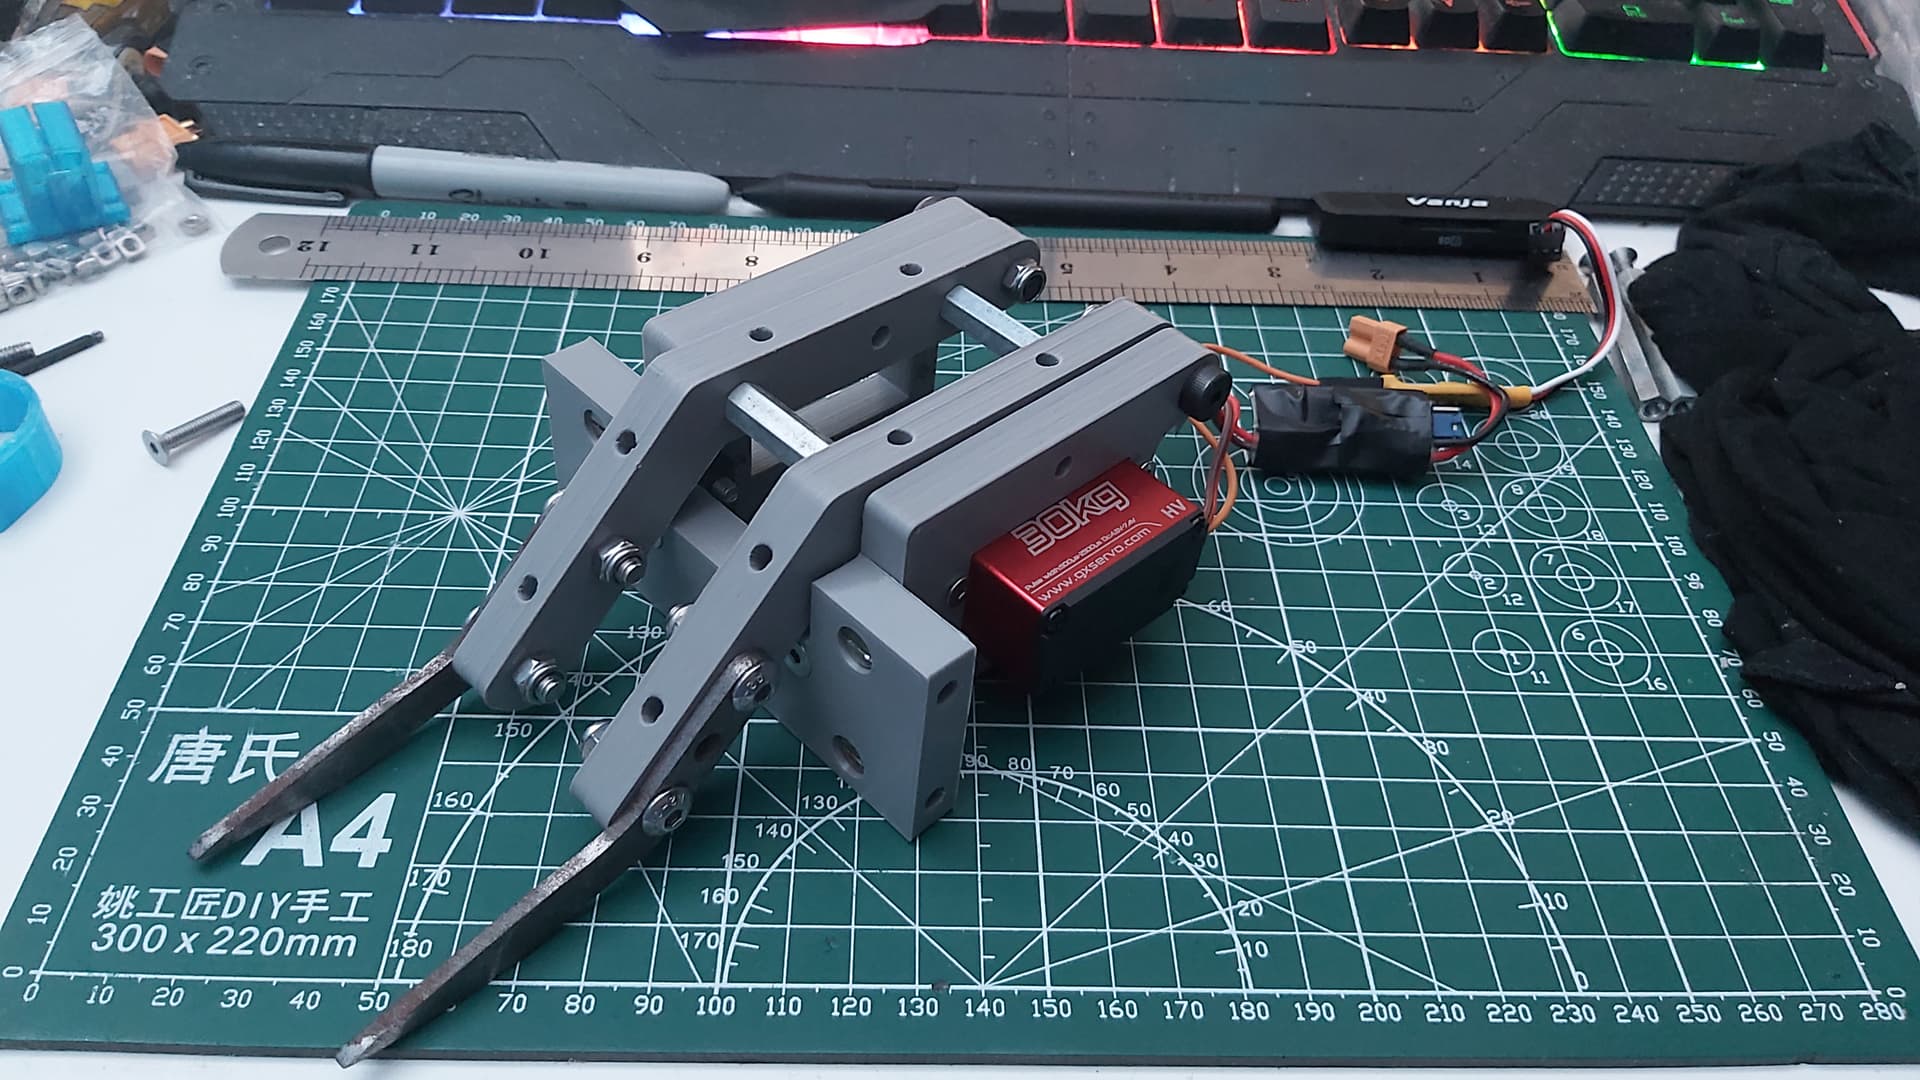
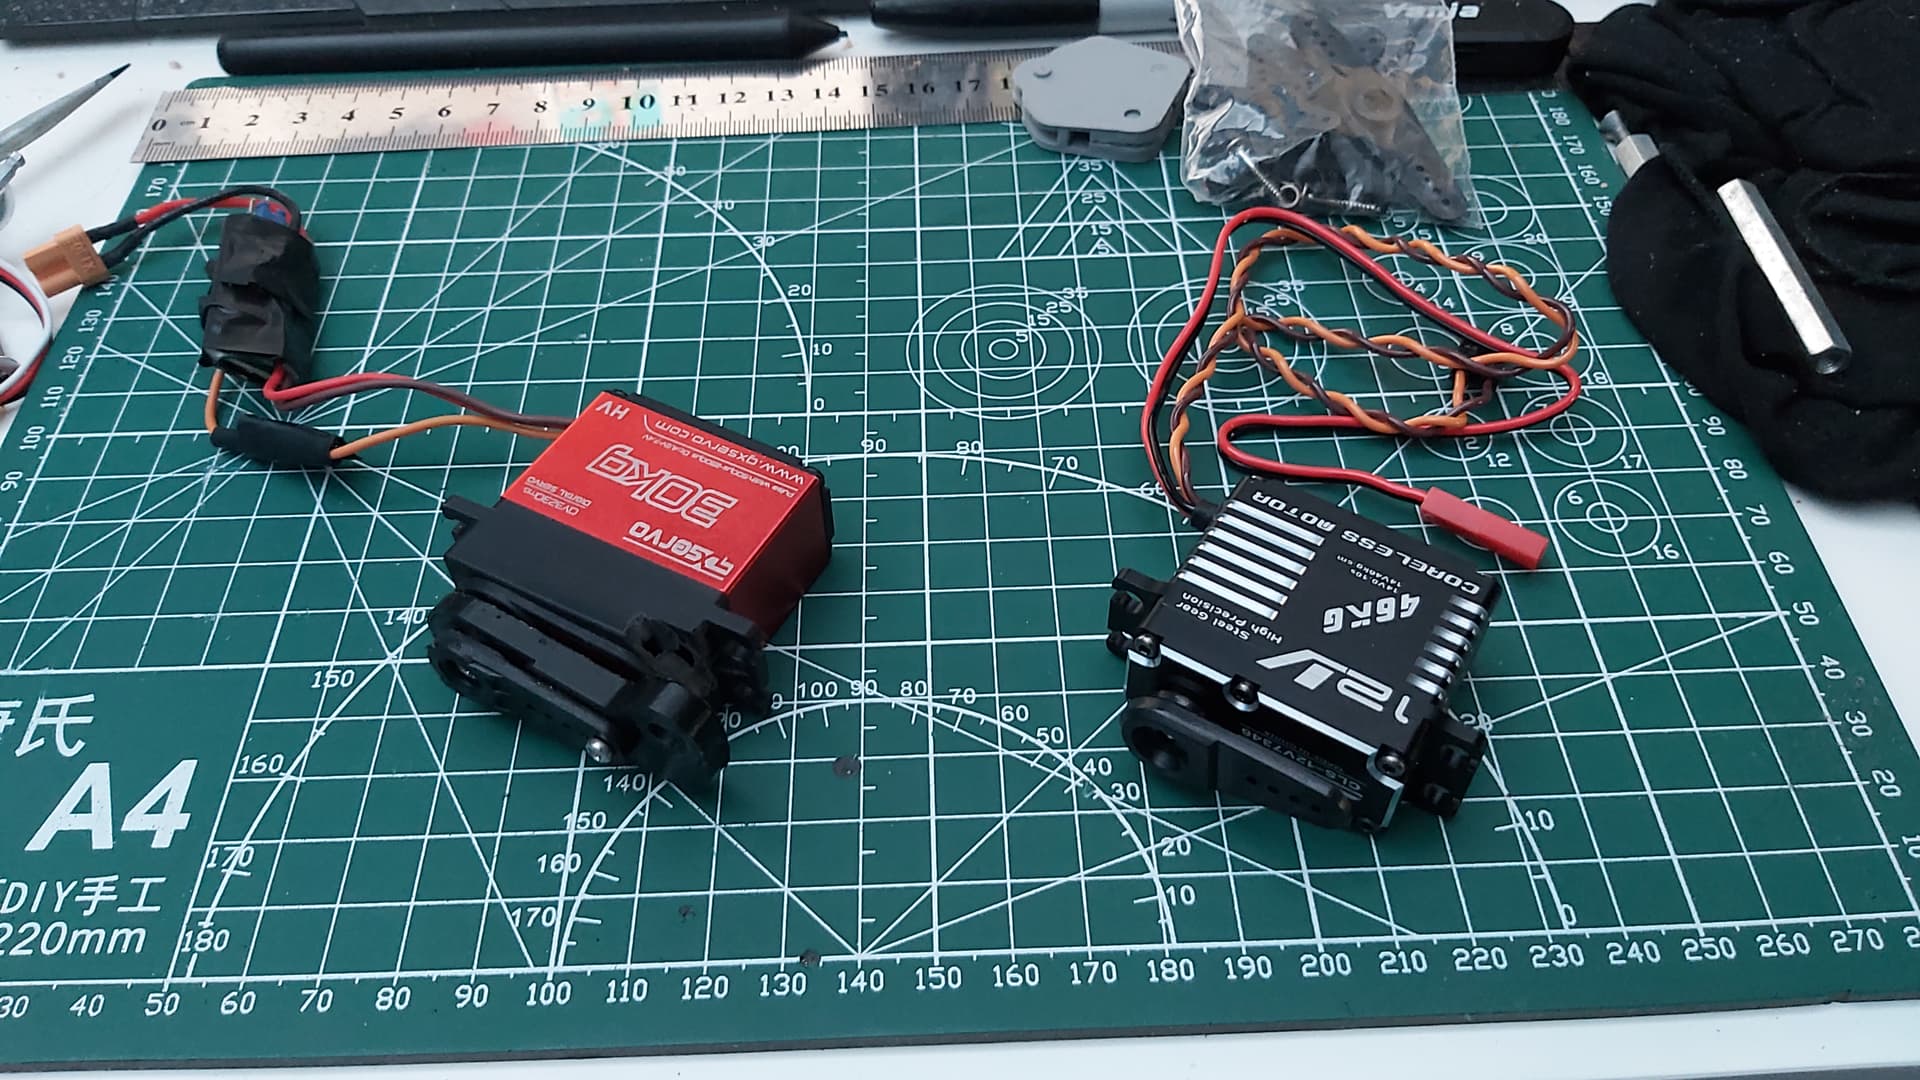
The lifter’s issues were a combo of browning out and bad geometry. The 30kg servo (I had bought for a planned lifter upgrade for CSB: Echo) wasn’t rated for 3s so needed a BEC but it was a low amp one and the servo needed more. I was directed to a better BEC so electronically the lifter was sorted.

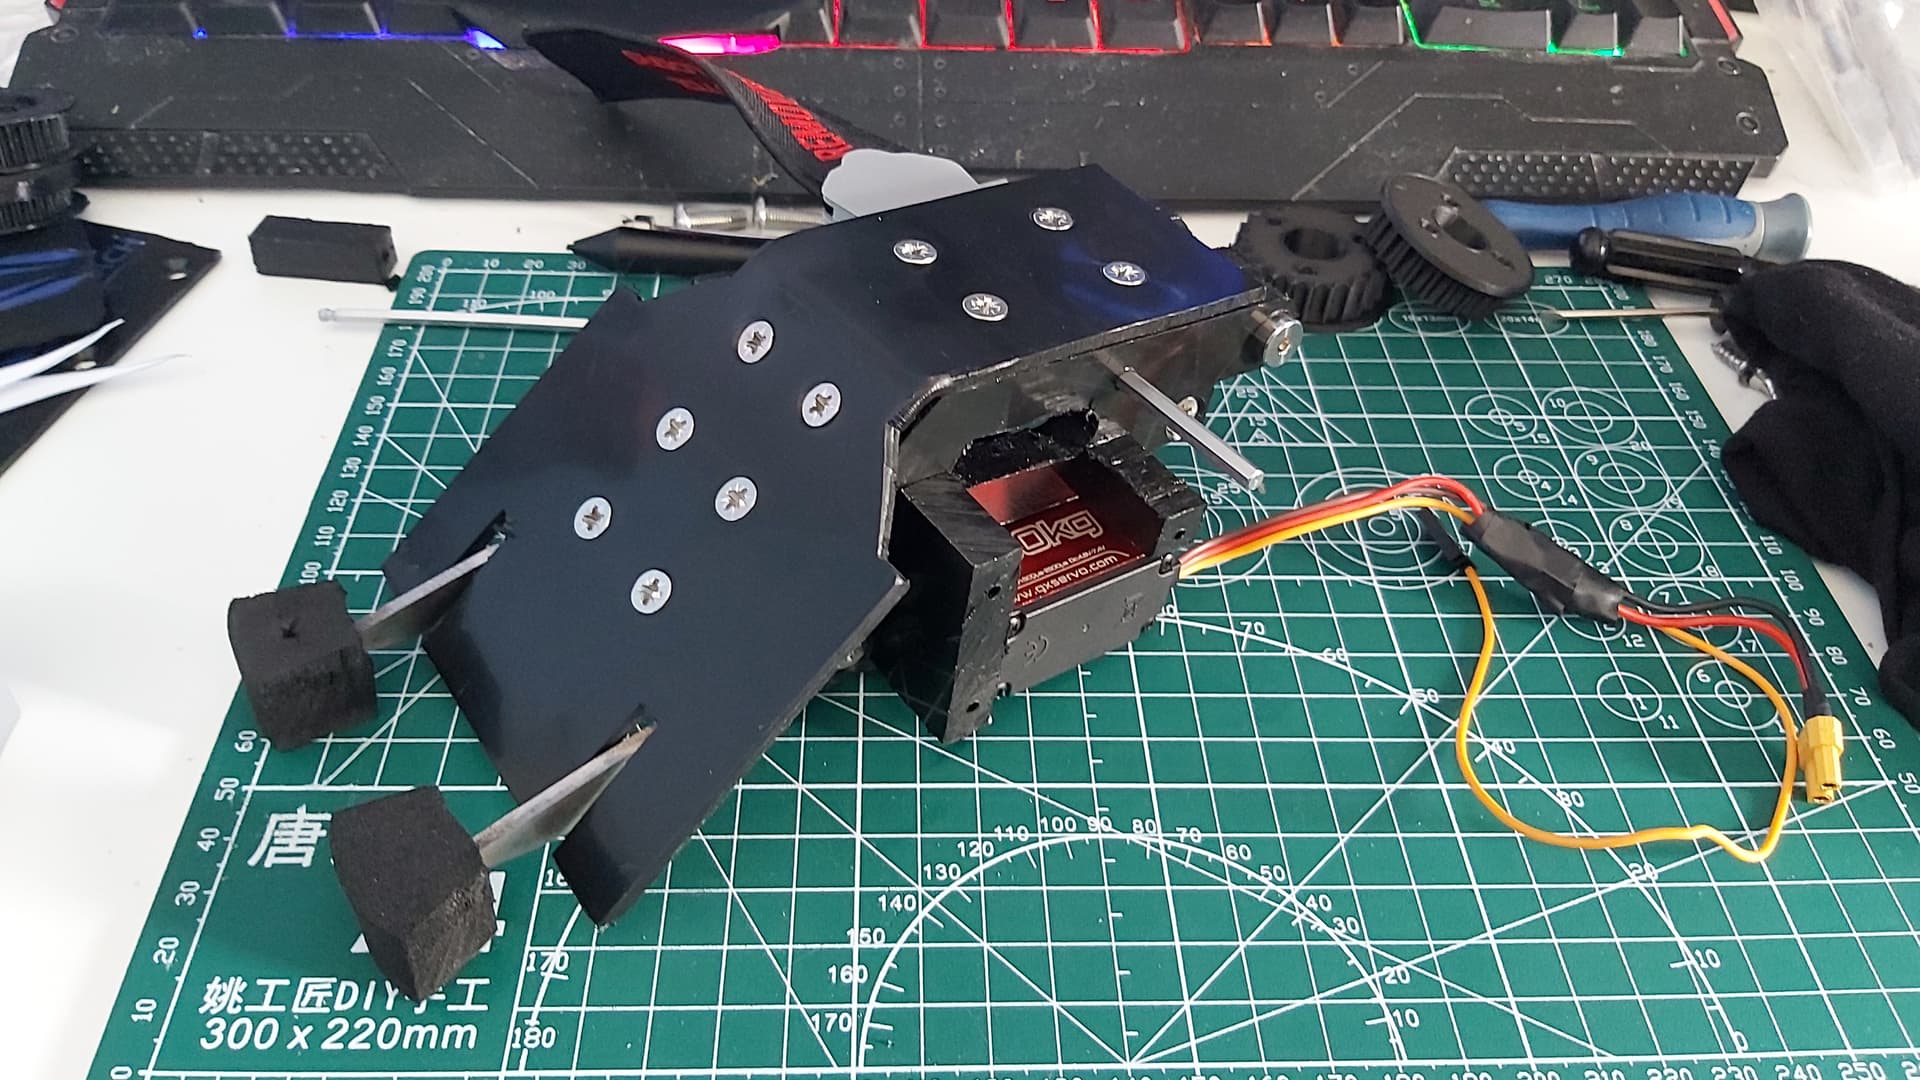
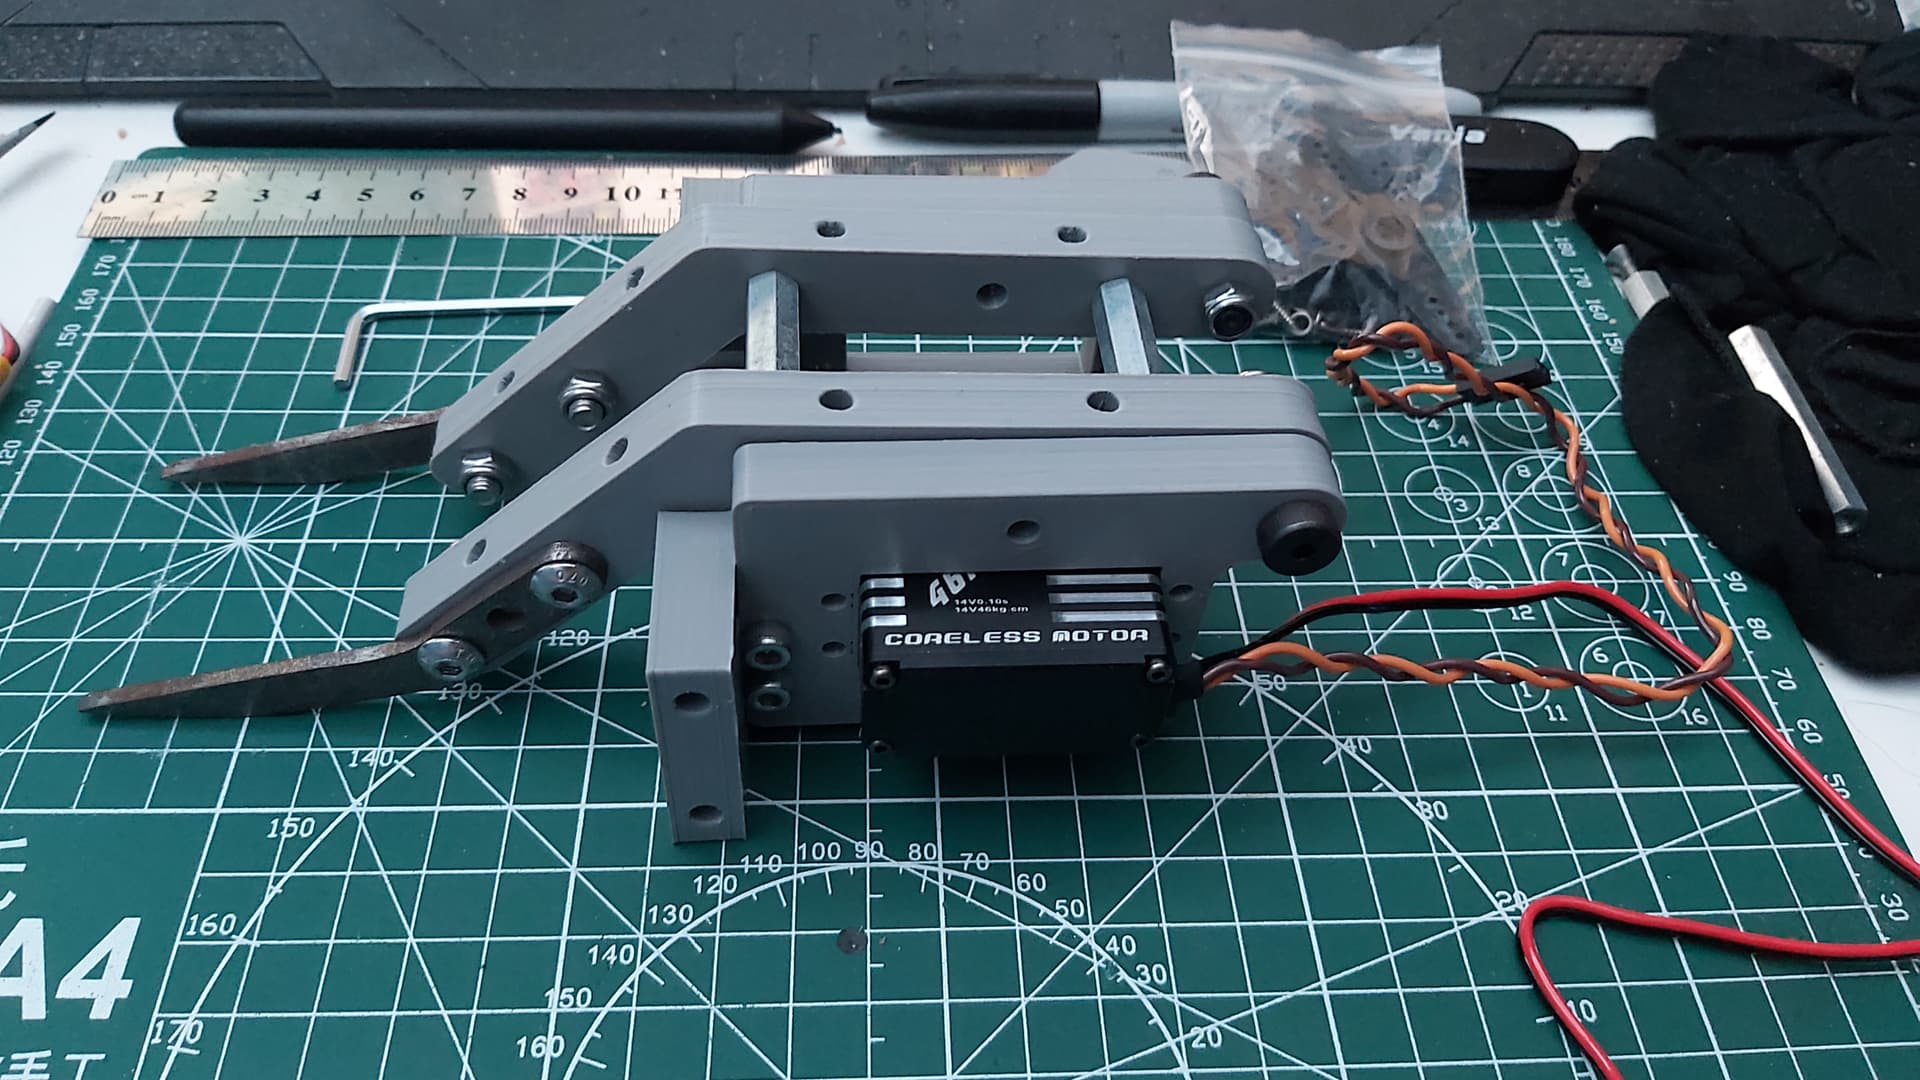
The geometry issue was the shape of the lifter arm and the points of connection for the linkage between the arm and the servo.

A redesigned lifter resolved the lifting and self-righting.

With both weapons sorted it was time for a weigh-in. The Axe setup was 1.35kg and the Lifter was 1.3kg

Around that point, I learned what robots I would be fighting in roughly 2 weeks. Using that knowledge I made an “ablative” wedge from 5mm HDPE for taking vert hits as I was worried about the weapon bulkheads taking hits. I also made an 8mm top armour for hammer saws. I would fit these onto the Axe setup to have a heavy setup of 1.45kg.


With the decals added Data Breach was as ready as could be here was its beauty shot post-Tech Check.
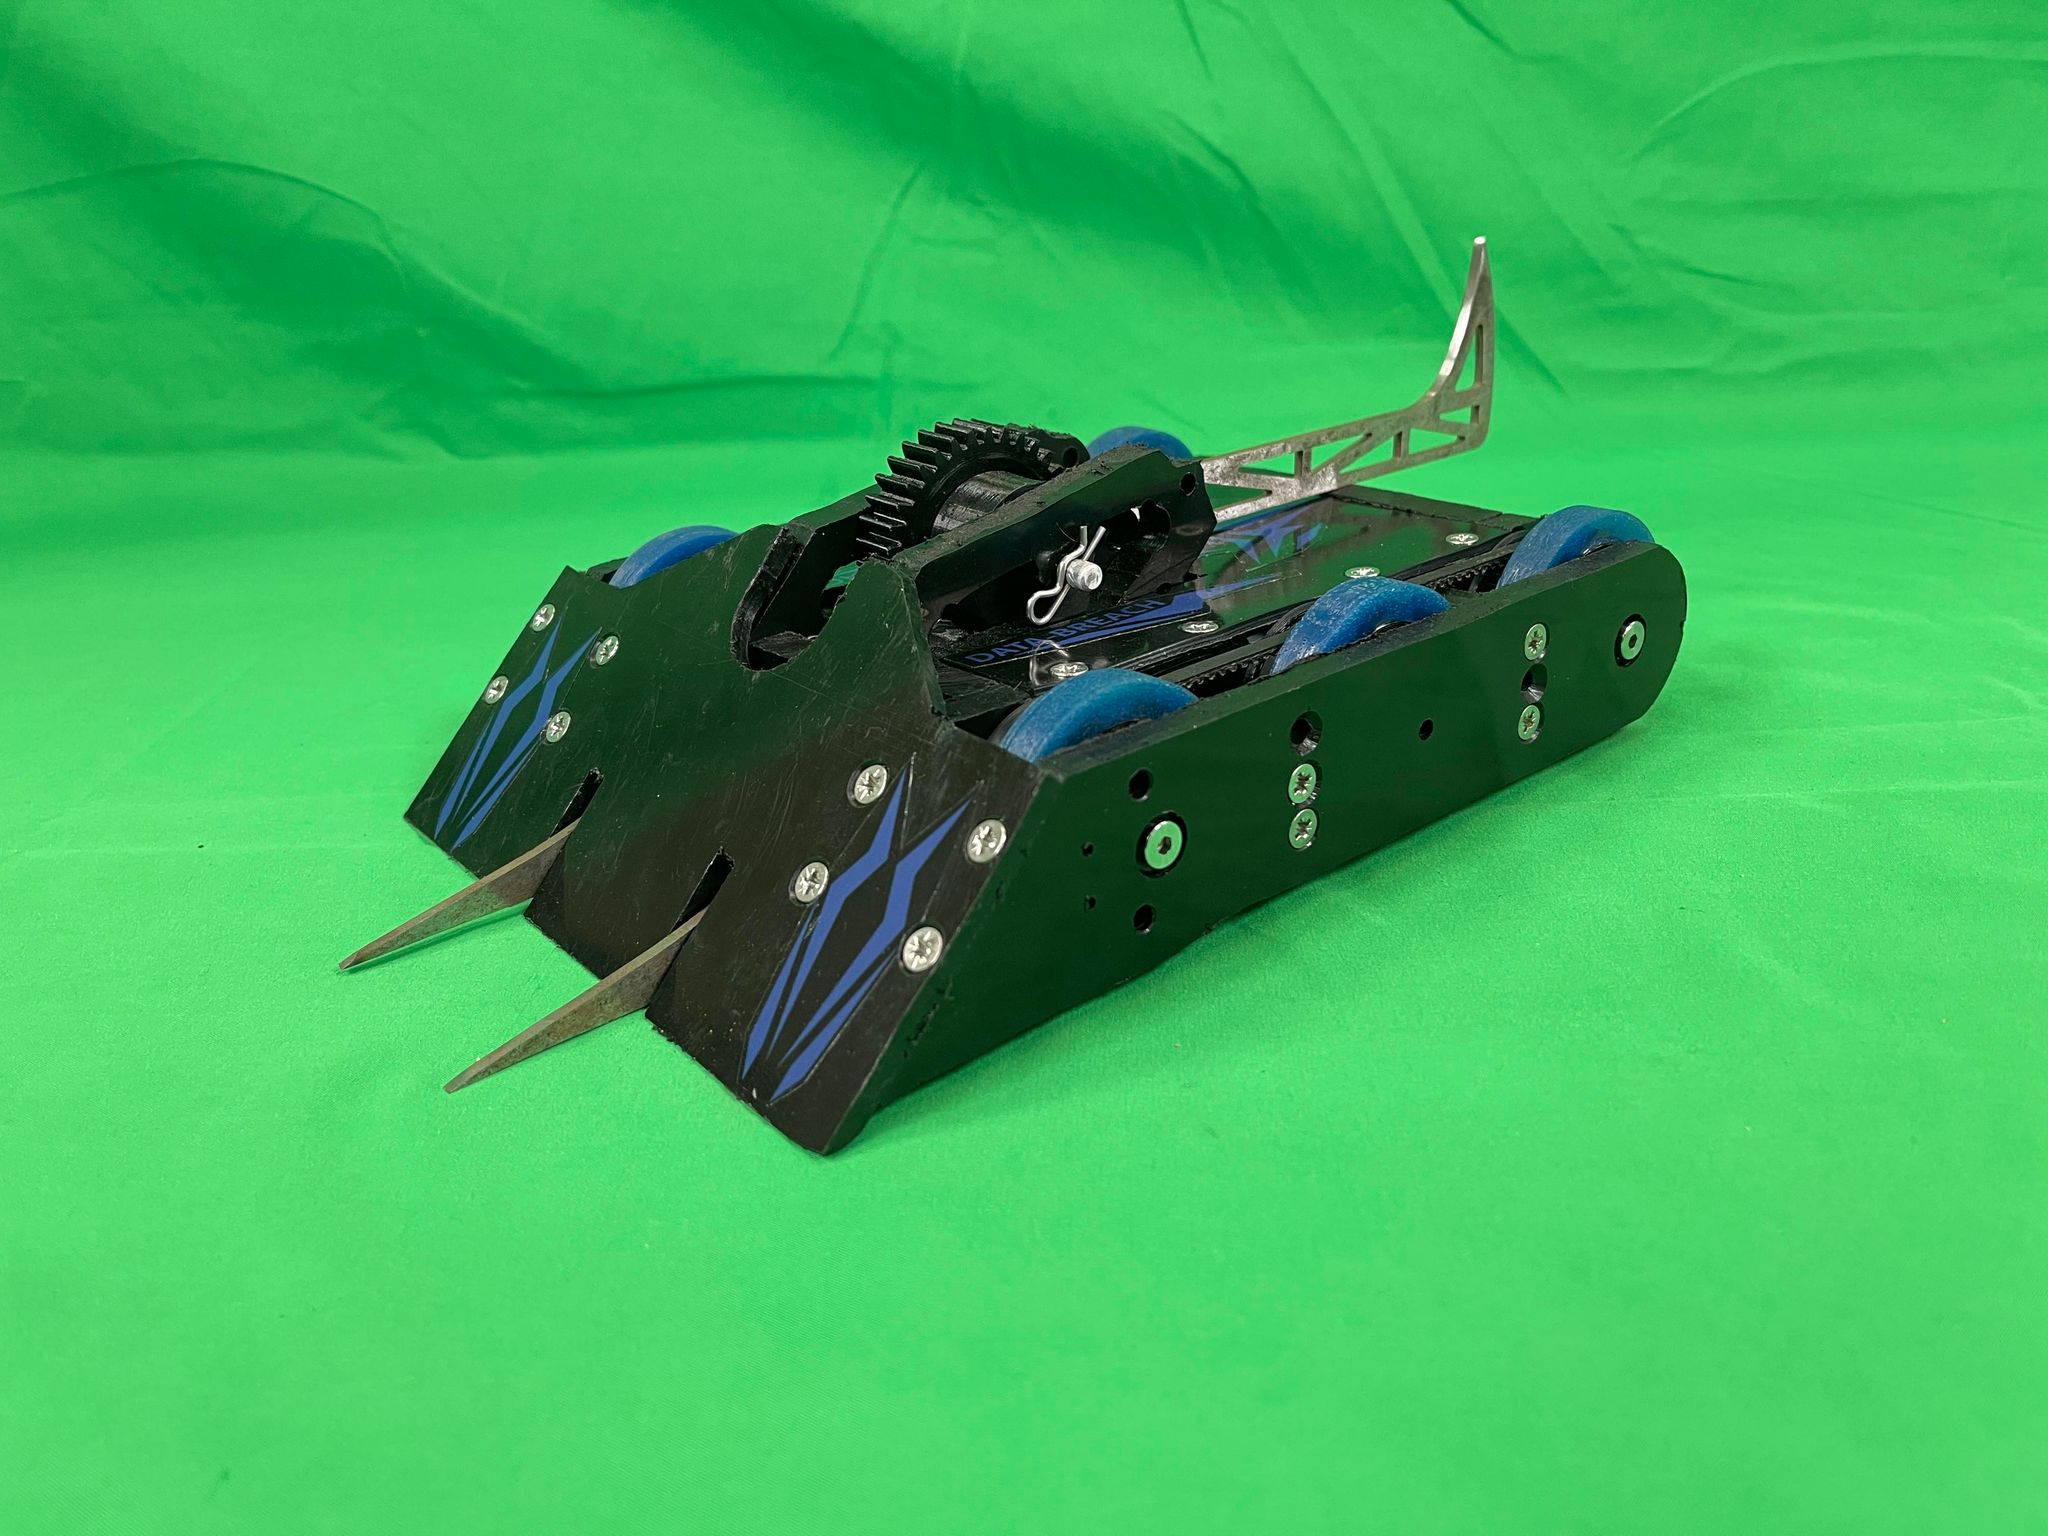
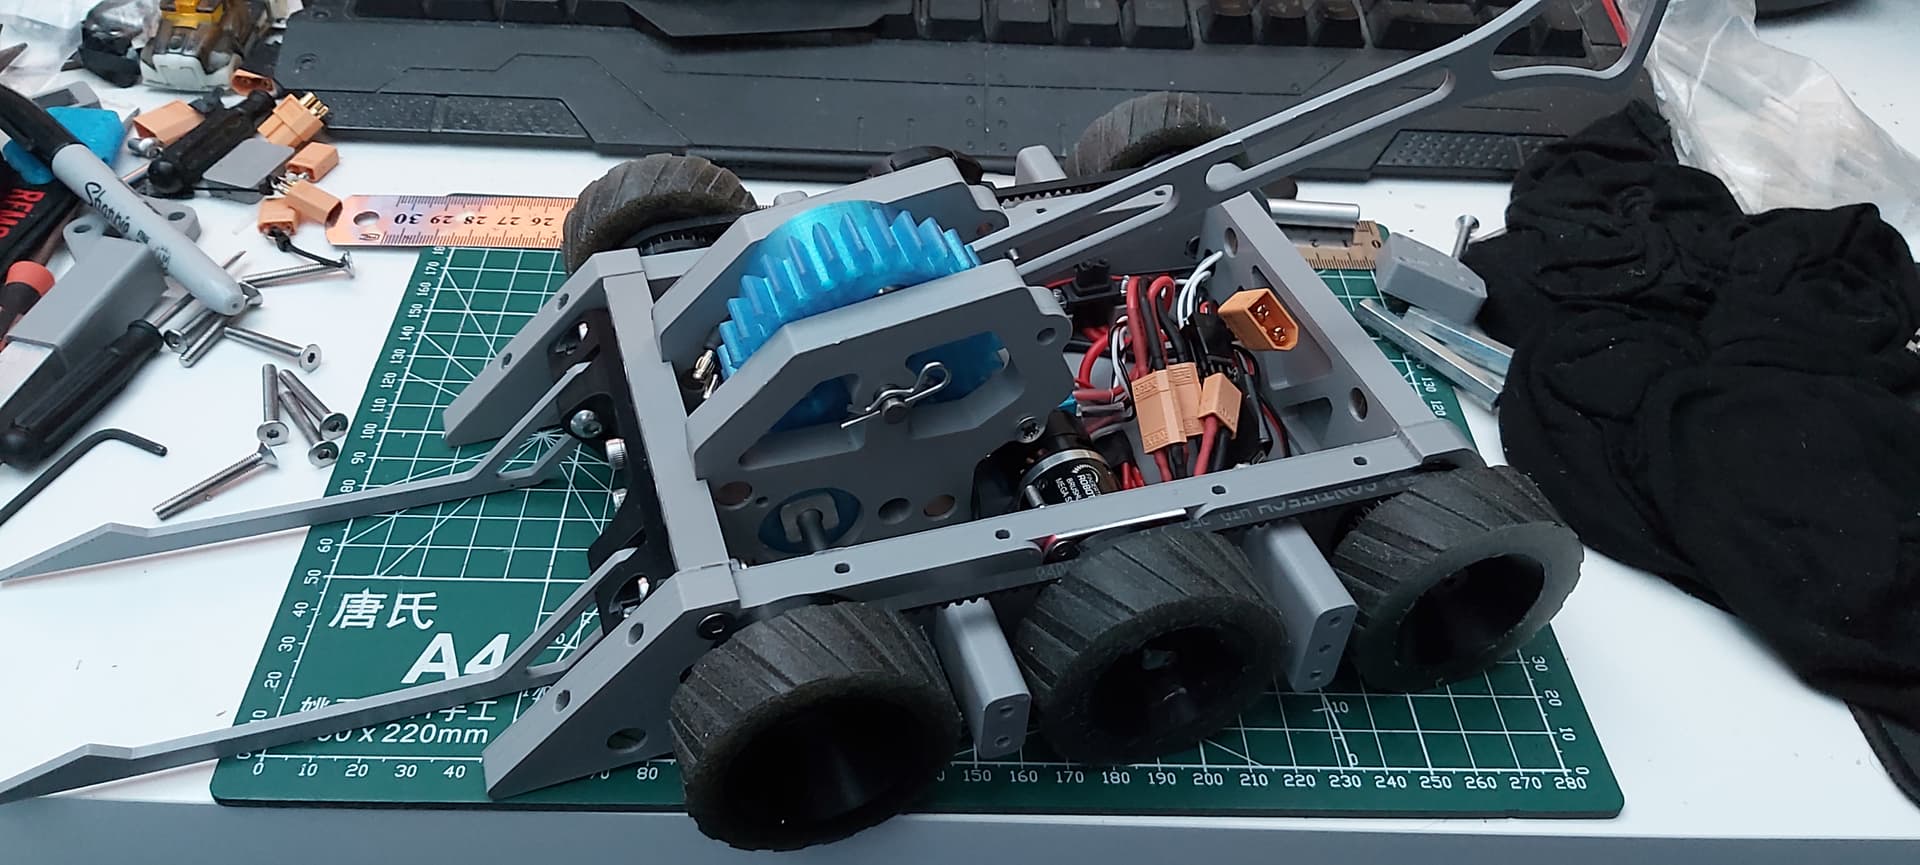
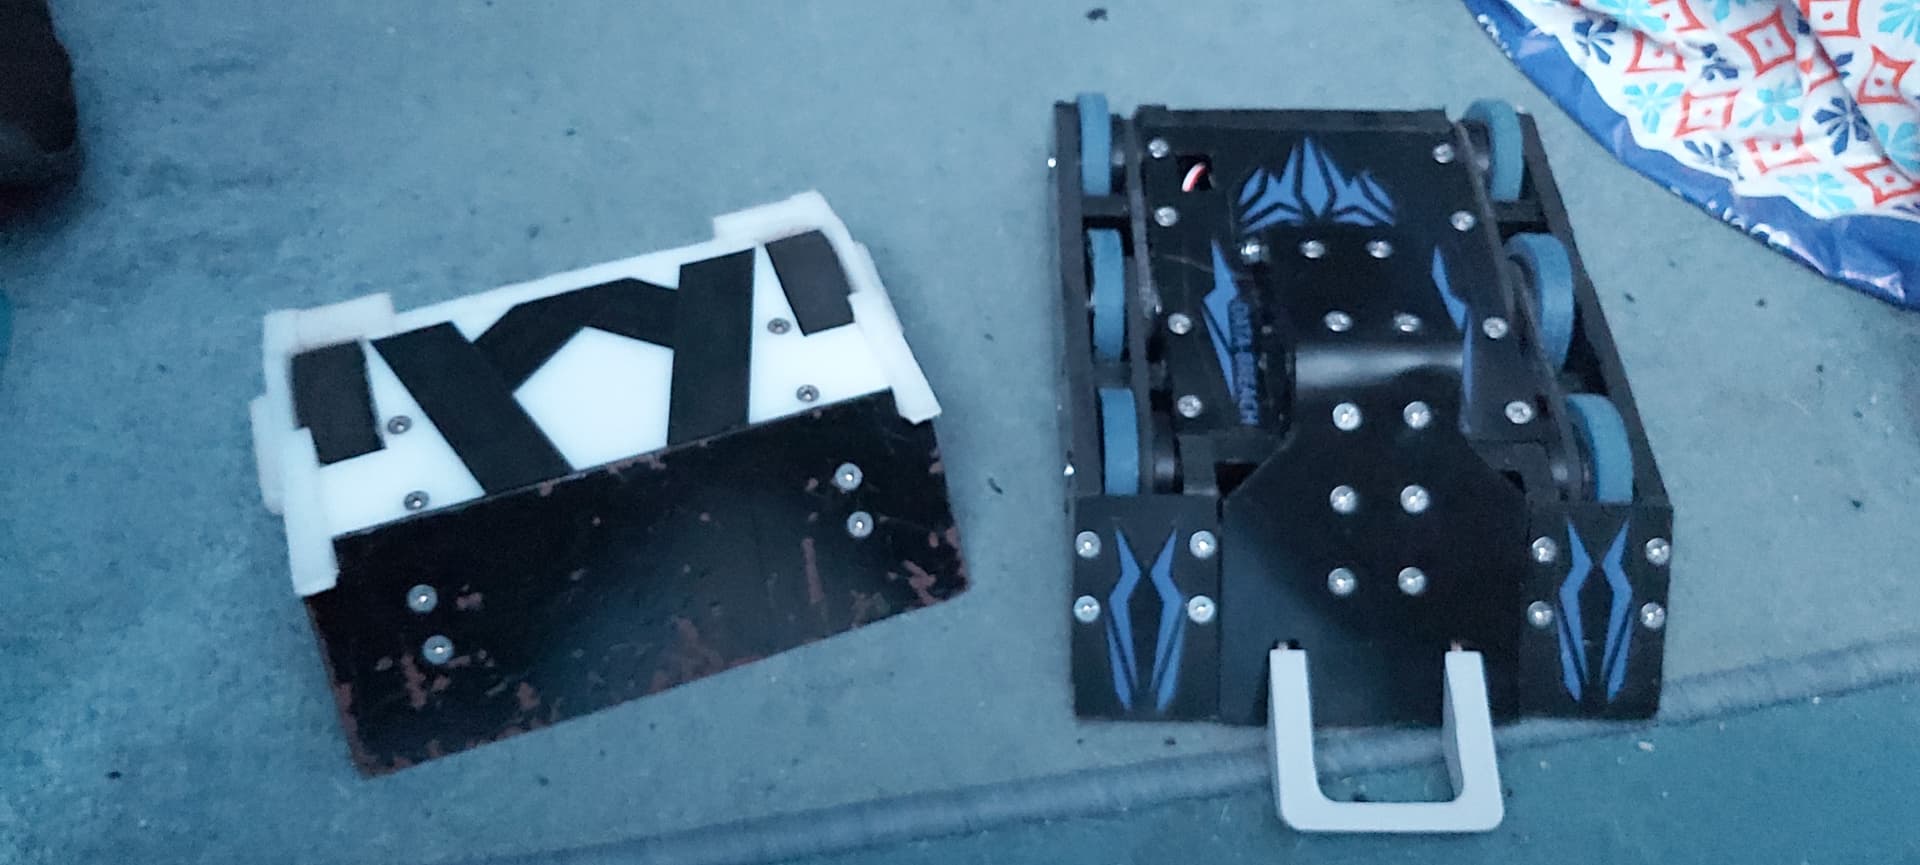
1 Like

Here is a recap of the event and below is the footage of my heat. In my heat I had Boom Zoom, Digestive and Dolos.

The first fight was against Digestive a nasty vert. But I came prepared, sporting a 5mm HDPE “ablative” wedge DB fought with its axe. The fight started and I missed with my box rush, a mix of nerves and the twitchy nature of the drive motors. After a little bit of repositioning from both bots, Digestive managed a nice push on DB that sent it flying but landed right way up. While Digestive was trying to spin up its weapon I attempted an attack with the axe which resulted in DB glancing up the wedge of Digestive and tipping myself over. It was here I had a scare and as it would later turn out first sign of new teething issues for DB. I pushed the stick to retract the axe to self-right but it didn’t move after a little panic stick waggling the axe sprung into life and self-righted DB what followed were a few attempts to attack Digestive which resulted in a few trips into the air. After that Digestive missed an attack in the corner and this gave me the perfect window to attack with my axe. I was able to land a hit into Digestive’s ABS top plate while performing a pin before a brief drag around the arena catching the pit button before releasing. Digestive managed to perform a ram on DB towards the pit. But was a little too quick/ early as we ended up in the corner before the pit opened. Digestive had a little issue reversing out from under DB’s wedge which meant by the time Digestive got free he reversed into an open pit and DB earned a win.

The wedge was destroyed and beyond any further use. The tips of the forks were a little bent but overall DB just needed a wedge change and a battery recharge and was ready for the next fight.

The second fight was with Boom Zoom and while I had intended to swap to the lifter, Rob wanted to fight an axe bot and I happily agreed to keep the axe installed. For this fight, I tried to fiddle with the transmitter settings to make DB a little faster but even going up 10% made DB harder to control. After a good back-and-forth with a good pin on Boom Zoom against the OOTA zone, the fight sadly ended with one of my forks getting stuck under the wall. The fork as I later realised wasn’t as filed down as I thought it was meaning the damage from Digestive was still present and may have aided in the fork getting stuck under the wall.

The third and sadly last fight in the main competition was with Dolos. I returned the transmitter to the settings used in the fight with Digestive. I stuck with the axe setup as it had more reach than the lifter. When the fight began the bot decided to lerch too much to the left and gave Dolos ample time to attack. Dolos managed a single hit on the weapon assembly and got stuck giving me ample chance to attack with the axe.

Eventually, an unstick was called and the bots were freed. Upon the fight restarting I attempted to go on the aggressive with the axe and while I managed to avoid a second hit by Dolos, the axe was growing weaker as the fight progressed. And despite my 6wd and slightly higher ground clearance DB couldn’t escape Dolos’ forks and would eventually end up down the pit.
After the event, I found that the ware issue for the inside of the small gear returned even the m3 square nut wore down meaning no real axe power.

As for the issue with the axe struggling to fire at times. It was down to the weapon motorcogging because the acceleration was too aggressive for it to handle. Scott from Attitude Adjuster suggested I look at adding some Exponential settings to the Rudder channel to reduce the cogging.

After that DB only managed to enter one whiteboard event but sadly it
didn’t go well. DB took part in the Annihilator at least was meant to. During the qualifier fight, DB suffered drive issues on one side after a side hit by The Chilly Daddy left DB crab-walking for the rest of the fight. DB had the lifter installed but the lifter never got a chance to lift anything. Despite qualifying for the Annihilator DB had to be pulled out as the fault with the left side drive took too long to find and fix. It turned out that the pinion gear in the gearbox had come off the motor shaft and while I did manage to later fix the issue it identified just how unreliable the brushless conversions were and combined with poor design choices meant the drive was too difficult to service as it needed too many parts removed before the motors can come out.

Overall I was happy with Data Breach but there is plenty of Data to process and many areas of improvement.

It was time for Data Breach MK2.

Following Robot Rebellion 2023, work began on Data Breach MK2. For the past 5 months, I’ve been working on CAD and prototyping.
A lot of thought has gone into the redesign. As there were quite a lot of things to resolve, some of them were:

  1. More robust axe mechanism.
  2. Better fork mounting.
  3. Simplified weapon module assembly.
  4. Increase the width to improve turning.
  5. Use TPU.
  6. Swap to more robust motors to reduce the risk of failure from build quality.

Below are the most up-to-date CAD renders of the Axe and Lifter modules. I had planned a saw setup but I’ve since reconsidered and dropped that setup. The robot is 16mm wider 6mm of that being the internal width between the bulkheads and the remaining 10mm being the wheel housing to allow for wider wheels. The chassis is assembled with m4 bolts and barrel nuts this time just so repetitive assembly and disassembly don’t damage the HDPE with busted threading. The wedges and sides are going to be TPU to improve impact absorption and hopefully be better ablative armour for Data Breach

So not wasting time it was time to fire up the printer and print out prototype parts and test print TPU parts. You will see throughout I was planning to reuse the old drive motors, aluminium hubs and dead shafts. But I later opted to replace it with better approaches.

Here you can see the new weapon module assembly, a single 10mm HDPE cross-section replacing the 3-part arrangement of the old modules. The weapon uprights slot and bolt into the cross-section to improve alignment and hopefully make the structure more sound. Like on MK1, the weapon modules are mounted by 6 bolts 4 at the front just behind the front wheels and two near the back of the module but this time the rear bolts mount through the base instead of mounting across to the main bulkheads. this was to simplify the design and allow for more room in the weapon module area.

The new TPU wedges 10mm thick with embedded decoration cause decals love to fall off.

You can see the TPU mount for the forks. This time the forks can finally freely hinge to maintain contact with the ground. The forks on MK1 were static.

In an attempt to prevent weapon failure on the Axe. I made a small aluminium hub from a spare 1/2-inch square bar. It sits inside the new mod 2 gear (currently made in TPU to test how it handles compared to nylon.)

The Fingertech Mega Sparks in with Repeat Robotics hubs replacing my brushless conversions and the aluminium hubs. This pair are the original weapon motor and spare in MK1 but as their shafts are too short for the new Axe module they get to become the new drive motors.

The new wiring was installed, motors were properly mounted. The wheels are wider them before with the fancy tread. The wheels are arranged the same as before but this time the wheels and pulleys are printed as a single part to remove the slop the old wheels developed and shed weight by removing my knock-off BaneBots hubs. Each wheel is a gram lighter than its original counterpart. This time the front and back wheels run directly on new bushings that run on thicker but shorter shoulder bolts to better isolate the shafts from hits on the side panel.

The old bots after a bit of wiring catabolism BEC from Echo and the main wire loom from MK1

After the new wire loom was made it was time to give the Mega Sparks a test run. And I am super happy with the result I’m able to run at full power on the dual rates this time around Plus the width increase makes turning much better than before. I have since replaced the BBB ESCs with Repeat Robotics ones to improve the low-end control as suggested by a few people.

The prototype lifter for MK2 is in the early phase of assembly. This time the lifter is more in the style of Boom Zoom and Snappy with the servo pushing up under the lifter arm with a rubber band/ hair band tether to help retract it. The main reason for this is to better protect the servo from spinner hits to the lifter arm. This now means I can use the lifter for spinners if I want to. The forks are mounted to the lifter arm this time to provide a lip to lift stuff as in testing the old lifter everything slipped off the lifter panel with ease.

That is everything up to date on the build so far. I am hoping to have the weapons wired up and tested and depending on how well they function I can shift to having the HDPE machined in the next few months.

3 Likes

Data Breach now runs smooth as butter with the Repeat Robotics ESCs. I need to remember to thread-lock the grub screws.

Last night the new TPU motor guards were printed. They double as holders for the m3 nuts for the motor mounts. These guards are designed to stop the main wire loom tangle on the motor cans but their C-shape allows me to comfortably remove the motors through the bulkheads should I need to repair or replace a damaged motor. This picture also better highlights the ESC mount with the drive ESCs held gently but securely in place with the top slot designed to hold the weapon ESC of the Axe or the wires from the servo of the lifter. I have ordered a new 45kg 12v servo to help with the revised wire loom by taking the BEC out of the equation.

4 Likes

I’m sure the max + am32 must drive like a dream with all that grip! Big fan of the motor mount + motor cover combo!

It sure does, I had it running on 100% dual rates on the transmitter and it drove around so lovely. I couldn’t go full speed cause I didn’t want to crash into something and damage the kitchen more. Shame I was too eager to drive the bot to set up the phone to record it. It was even driving well when the grub screws loosened.

The motor covers were a late-night lightbulb moment while browsing through Beetleweight build logs here and over on Facebook. After seeing a few examples of motor covers that use the motor mounts as part of their mounting solution I opened up a new CAD window and after 30- 60 minutes the parts were ready for the printer.

A revised fork mount with clearance holes to make disassembly of the weapon module much easier and it can now fit the 4mm forks I have designed. It does come at the cost of a little butchering of my fancy TPU cradle to adjust the fit.

This is so, so cool!

Absolutely a fan of that construction method, always works super well for me. Your TPU prints are excellent too from the looks of things, probably one of the cleanest assemblies around.

That looks like some pretty heavy pocketing/cutouts on the axe, especially for the ‘handle’ aspect. Potentially a bit vulnerable to bending. Could be worth seeing if you could incorporate a thicker solid TPU/HDPE handle with a steel head. Same sort of weight but a bit more resilient.

Excited to see it finished!

Thank you.
I tried designing an HDPE Axe arm but couldn’t design a suitable arm that wasn’t heavier than the single-part Hardox Axe.

I’ve toyed with an HDPE arm with a Hardox head again. I got a setup that is roughly 10g heavier than the mark one axe. But I’m unsure if a 12mm x 16mm HDPE would handle the forces with minimal flex.
Here are the mark 1 axe (bottom) and the possible versions of a mark 2 axe.

I’m planning to reuse the old axe and spare for select setups but the new designs I’ll keep messing with till I find a good medium.

I’ve been running HDPE arms with a hardox head on PMXL (2 4mm thick arms, 20mm wide tapering down to around 12mm), and it’s only been damaged twice, both from firing it directly into a vert. I’ve taken some slo-mo test footage and I haven’t seen any flex on the arms.

I feel like using the HDPE/Hardox combo axe will help store a bit more energy, as you’re concentrating the mass towards the end. It also lets me swap out different axe heads more easily.

Oh, nice. Based on that I might opt for the HDPE arm gives me room to play with weapon reach and better repair options.

The HDPE is coming out of storage and more sheets are ordered. It must be time to get the main construction made. It’s totally not because word of the next Robot Rebellion event is going around making me jump into action stations. :sweat_smile:

The tried and tested printed templates are ready to cut out and stick down to the HDPE to drill, cut and route out most of the HDPE parts, the weapon uprights I’m going to get CNCd because I need the precision. Maybe in the future, I’ll invest in a desktop CNC router like the cool kids have.

Talking about upgrade investments I bought a 12v 45kg servo to replace the old 30kg servo in the lifter. The 30kg servo was fine but the freedom to remove the BEC for the servo and having a slightly stronger and slightly smaller servo was too good to pass this time. I still need to swap the connector for the servo power and adjust the cable lengths to remove the excess wire before the lifter is fully wired up.

1 Like

Hot on the heels of last night’s post, today the axe module was given its first test with the new TPU gears and the tweaked transmitter settings. I had to use a BBB ESC as the Repeats have only just come back into stock. It may lack the penetrating power but it’ll ruin the finish of people’s top plates.


2 Likes

The printer has been churning out lots of TPU parts recently.

Link covers, the front and top for the lifter arm, new sides with refined mounting pattern, revised Axe gears for the new axe arm (not pictured) and test bulkheads

The TPU front for the lifter. A chance to have an ablative front to the lifter with more indented decoration.

The lifter front is partly mounted on. The PLA prototype arms had the bottom holes misaligned.

The new sides are the same as before but with uniform mounting to the supports.

The sides are mounted on from the front and the top of the lifter is installed. The bent HDPE I used on DB’s old lifter was ok but I couldn’t get the bend right so I opted to use a two-part TPU arrangement to get alignment right and not have to risk burning my hand with the heat gun.

Now I should say these are an experiment for me to better understand designing TPU bulkheads/ chassis the likelihood is I’ll still use HDPE for MK2 but if I can at least get a head start on a potential upgrade for a potential MK3. The Bulkheads have been designed to take captive nuts and once they are here I can better see how more ridged they will become when fully bolted into place.

Hopefully, the weather clears up more so I can crack on with the HDPE parts.

I had to mention the weather didn’t I :sweat_smile:

Despite jinxing the weather I was able to get out to the shed to remake the spacer/ support and face mount for the Mega Spark powering the axe. The TPU support was too squishy when I tightened the bolts and the modded BBB mount was too thick to provide proper clearance for the big gear. Solution make the support out of scrap HDPE for less squish. The face mount is made from 2mm Polycarb I bought a while ago to attempt to make my own face mounts. I used a handy PLA jig to drill all the pilot holes, and then I drilled them out to size with the middle being enlarged with my new step drill bits. And after the holes were countersunked I cut the mount to the right shape and then gave the edges a quick sanding to clean them up.

Seeing as the axe module was sitting around while the lifter was installed on DB I thought I do a partial test assembly with the TPU Bulkheads.

The new (blurry) support. I used some scrap 15mm HDPE which I then reduced to 13mm with a large forcener bit. Then with the help of my template, I drilled out the 3mm mounting holes and the large 24mm hole for the motor to slot into. I used one of my sanding wheels (I think that’s what they are called) in the pillar drill to smooth my cuts and create that curved corner.

Test fit with the old face mount. Being 3mm thick meant the new big gear was being slightly pinched so I needed to make a thinner face mount.

It looks a little rough but thanks to my jig I was able to get the holes drilled with functional accuracy.

After some cutting and smoothing with some sandpaper.

Installed. And well 1 misaligned hole out of 7 holes total isn’t bad.

The reassembled axe module is attached to the test TPU bulkheads. I need to sand down the underside of the Mega Spark support as it’s sitting a little proud under the weapon bulkheads.

I still need to make the little shaft support for the Mega Spark. A little HDPE plate with a bushing embedded in it will be mounted to the other side of the assembly then mechanically DB’s axe will be complete, leaving only the weapon bulkheads and axe arms to be made.

1 Like

Now that the weather offered a day to comfortably work outside I began the bigger build work.

Nicking an idea from Harry Hills’ build log for Motherloader, I acquired a small router and new router bits with a guide bearing. I mounted it to an old aluminium baseplate from CSB 2.

At the weekend I printed out some PLA drill guides to align the holes for the bolts and barrel nuts.

Quickly following that were the drill and router templates for the left and right sides.

This morning I successfully screwed the templates to the scrap 10mm HDPE and got to work drilling and “cutting.” Note the fact I mounted the templates to the shiny side of the plastic. That small error meant the shiny finish was on the inside of the assembly rather than the outside. Sadly the bulkheads are not identical by design.

The new axe bulkheads post the first drill phase and run on the router. The PLA did struggle a little from the friction of the bearing at points but the finish was great. I would never have gotten that with the jigsaw

The bulkheads post the 2nd to last drill phase enlarging the barrel nut holes with the help of a step drill bit.

My drill jigs worked a treat and got the last of the drilling done with ease.

Bye-bye proto parts hello real versions. Here the bulkheads have been assembled and fit like a glove. I must admit this was more of a test but the result was good enough to put it in the actual robot.

The next lot of templates are ready and waiting to be printed (just letting the filament have a run in the dryer.)

1 Like

Looking fantastic! It’s almost too easy isn’t it? You will be finding little slivers of HDPE in your pockets and down your socks for a while but that is the only downside. Love the little plugs to guide the cross drilling of the barrel nuts. Very neat.

That’s fine it’ll join the slivers already there from the past 6 years of cutting HDPE with a jigsaw. :laughing:
Although today I managed to avoid getting slivers all down me.

Some smaller parts have been whipped up.

The support bushing for the Mega Spark shaft has been made and mounted onto the module. The template used to make the axe bulkheads coming handy to get the drilling done. Then a quick cut with a saw and here we are.

Red visible parts on a Team CSB? Hell no! After a 20-minute sanding session the aluminum Fingertech face mounts have been restored to bare metal where it matters.

I didn’t bother with the countersunk holes as the bolts will cover them up.

I also made the servo horn attachment for the lifter servo and test-fitted the elastic band that’ll help retract the lifter arm. I must admit I may need a slightly stretcher band in there. I still need to make the bridge the servo horn will push against to move the lifter up.