Fatal Deviation, my over-engineered beetleweight

Hi folks, new here. Been watching robot combat from the sidelines (unless you could a plywood antweight I built years ago) for a while and I couldn’t resist it any more and fired up the CAD. After watching a lot of NHRL and BBB streams I realised I wanted:

  • Fully independent, one motor per wheel 4WD
  • Custom electronics to allow independent control of said motors
  • Space to play with different weapon and armour configs in future without a full redesign
  • Easy to fix and maintain
  • As compact and integrated as possible, so that I can have
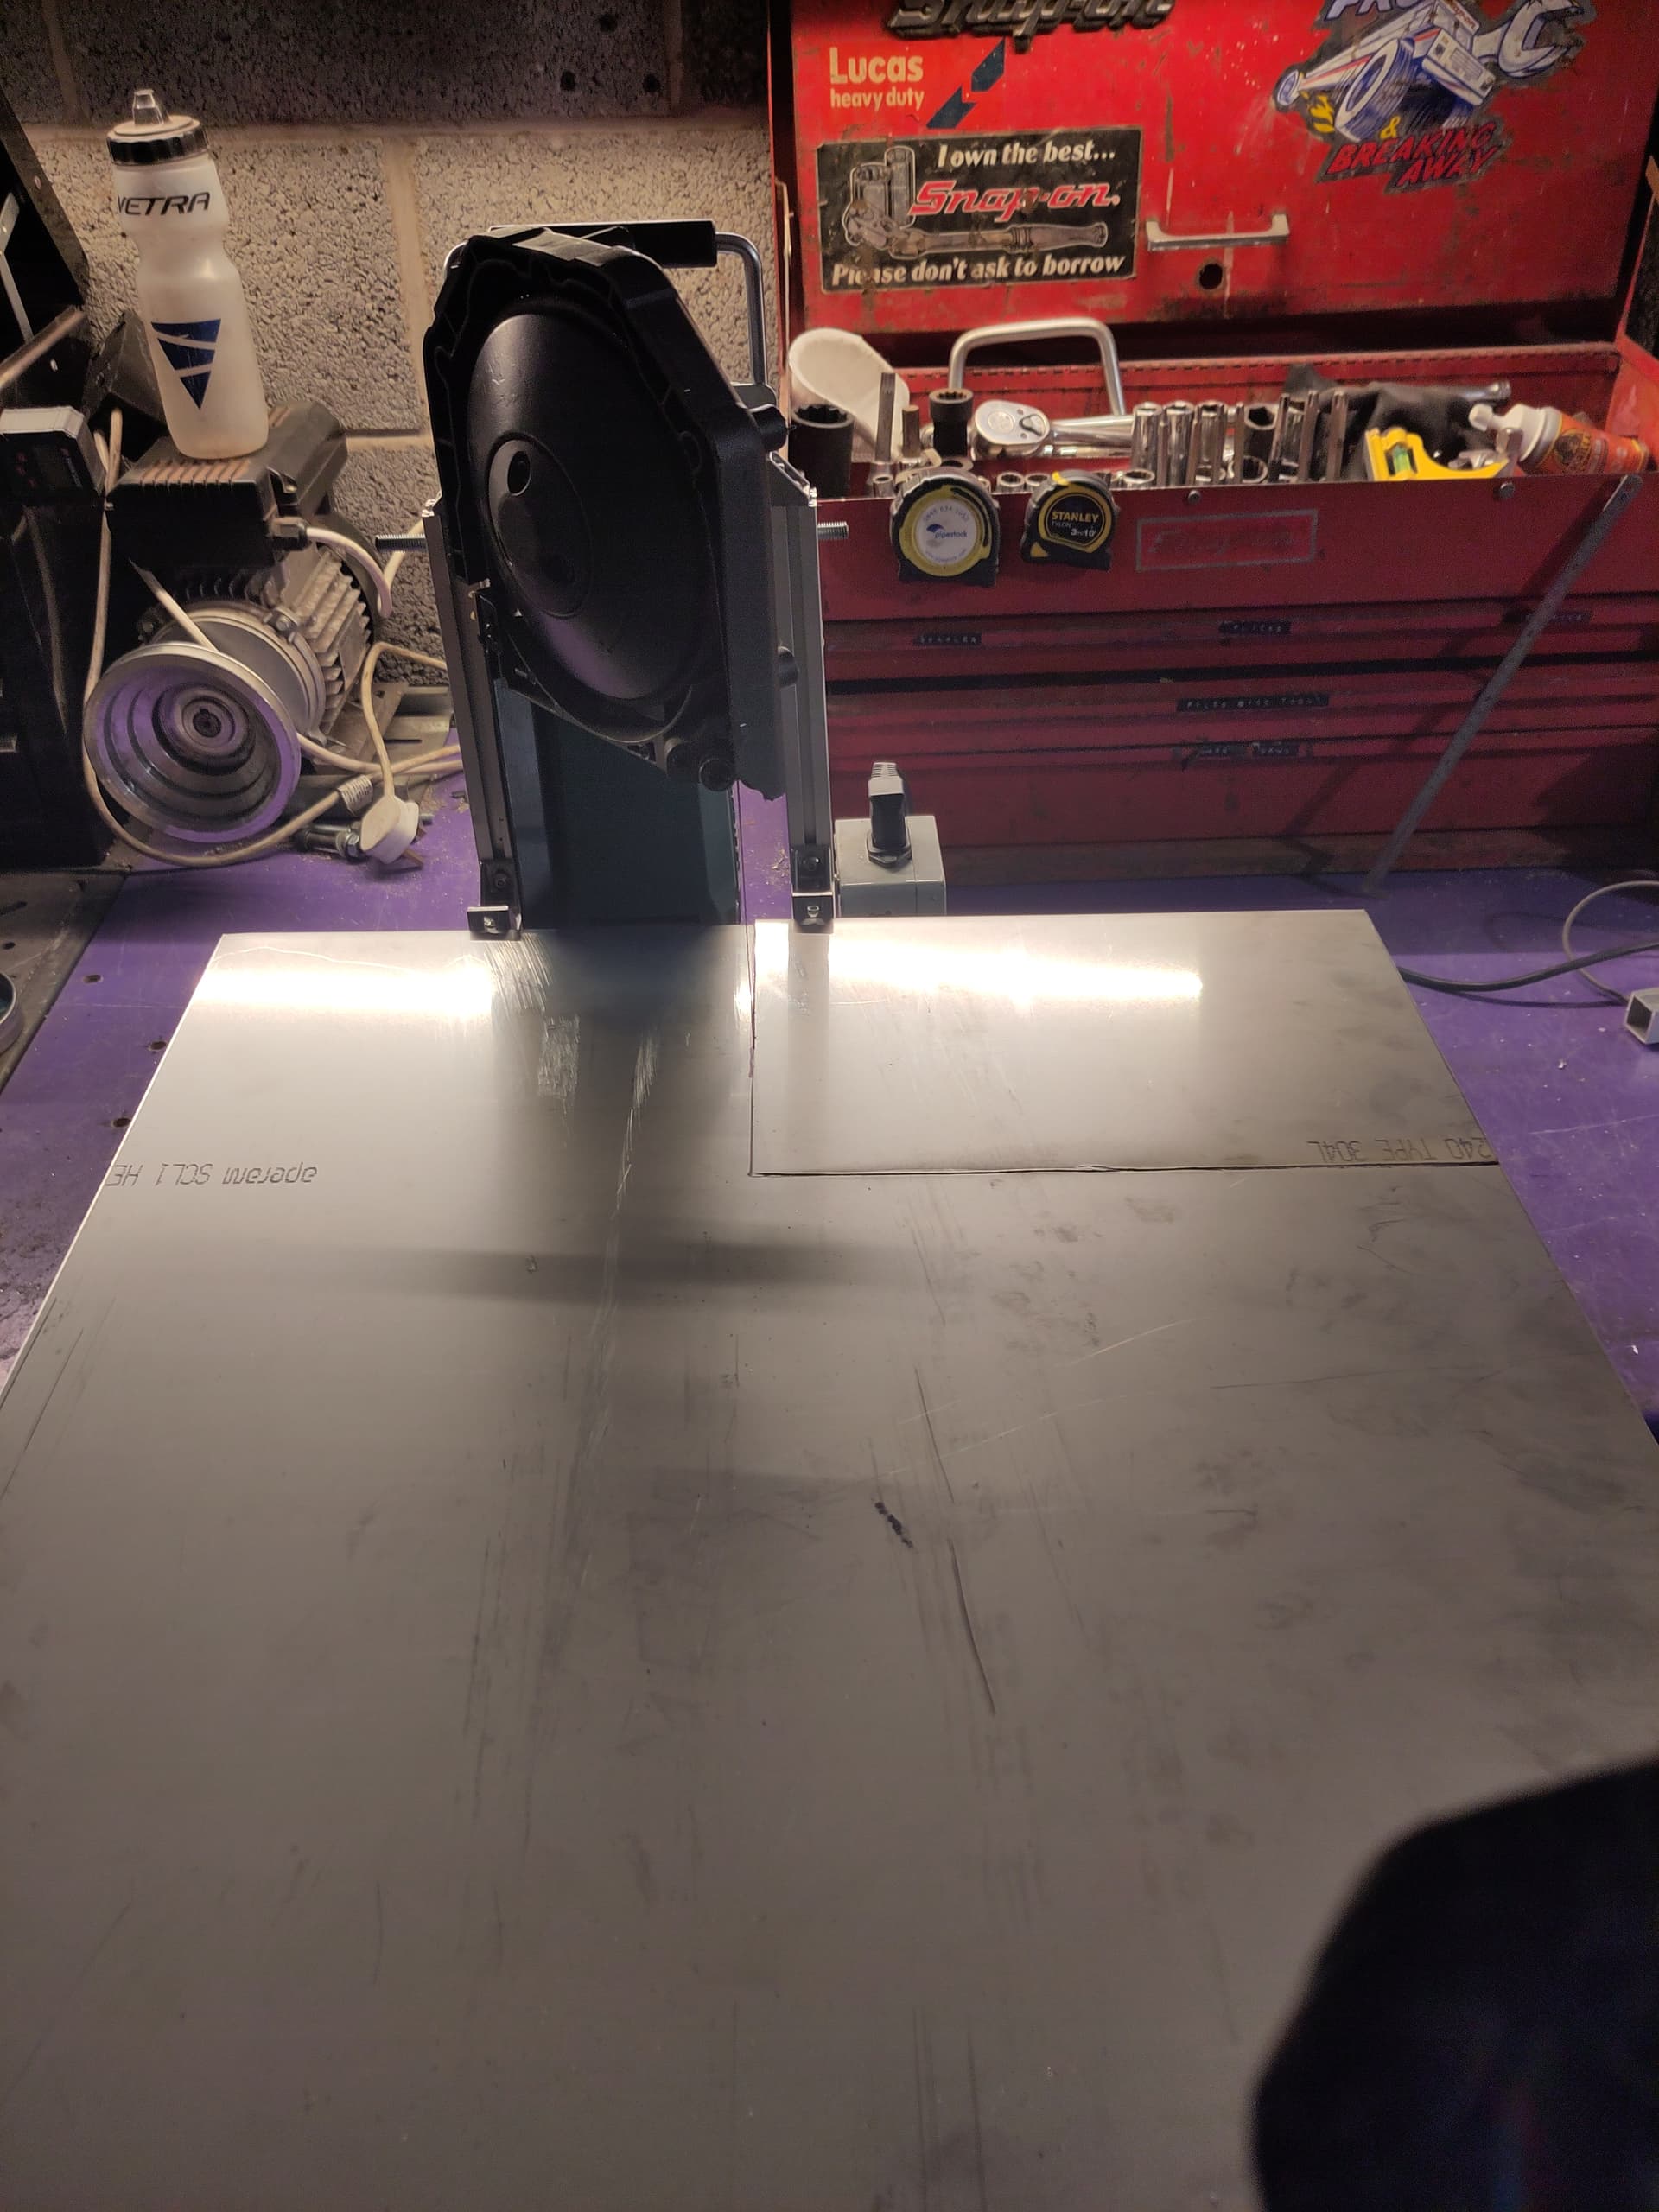
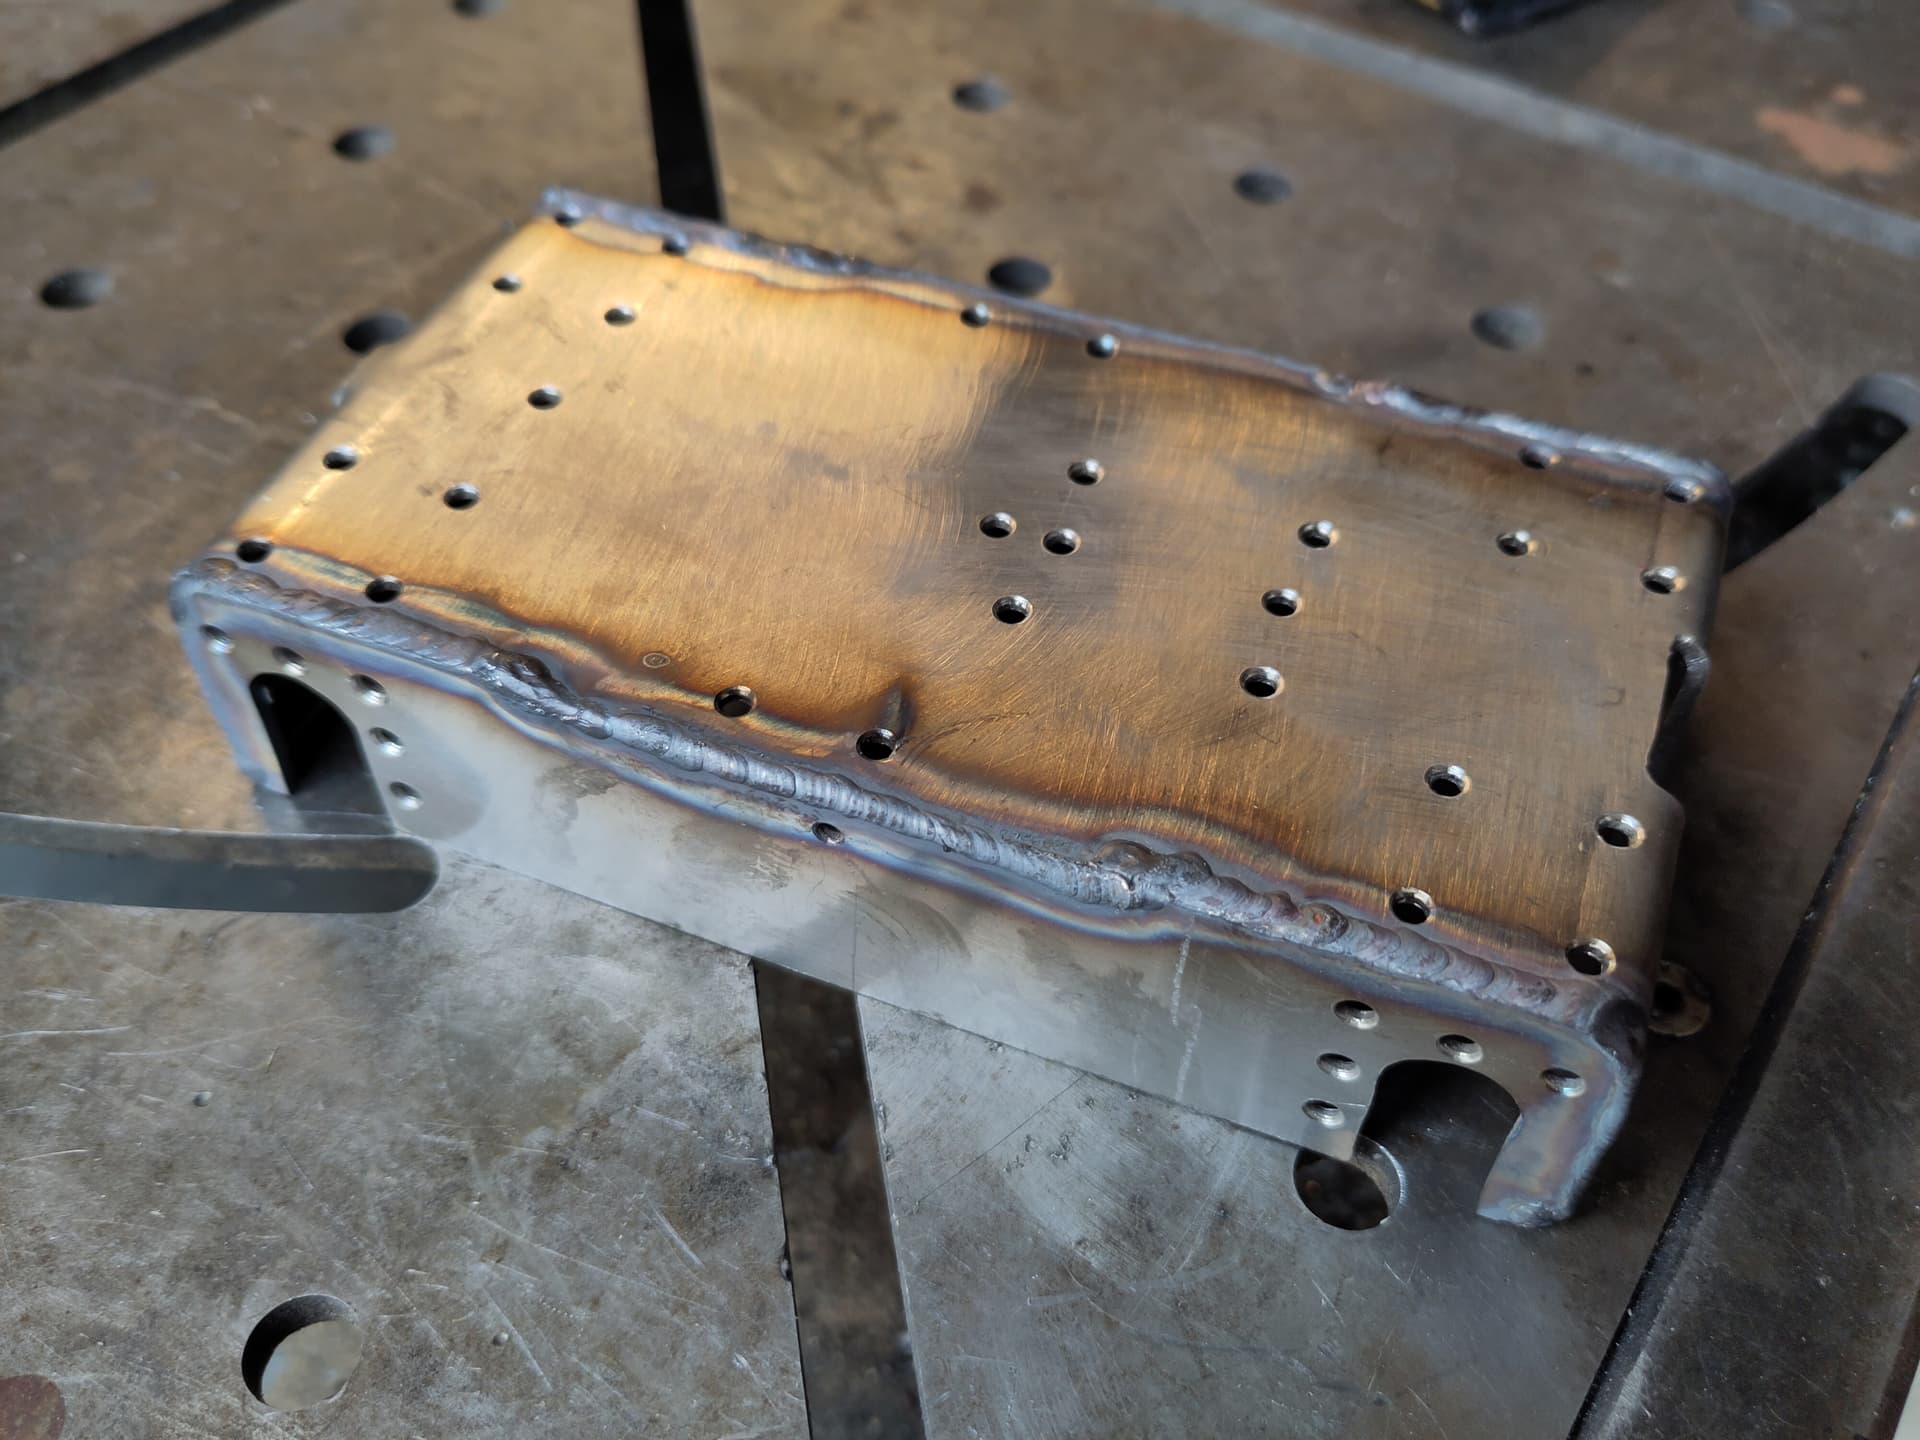
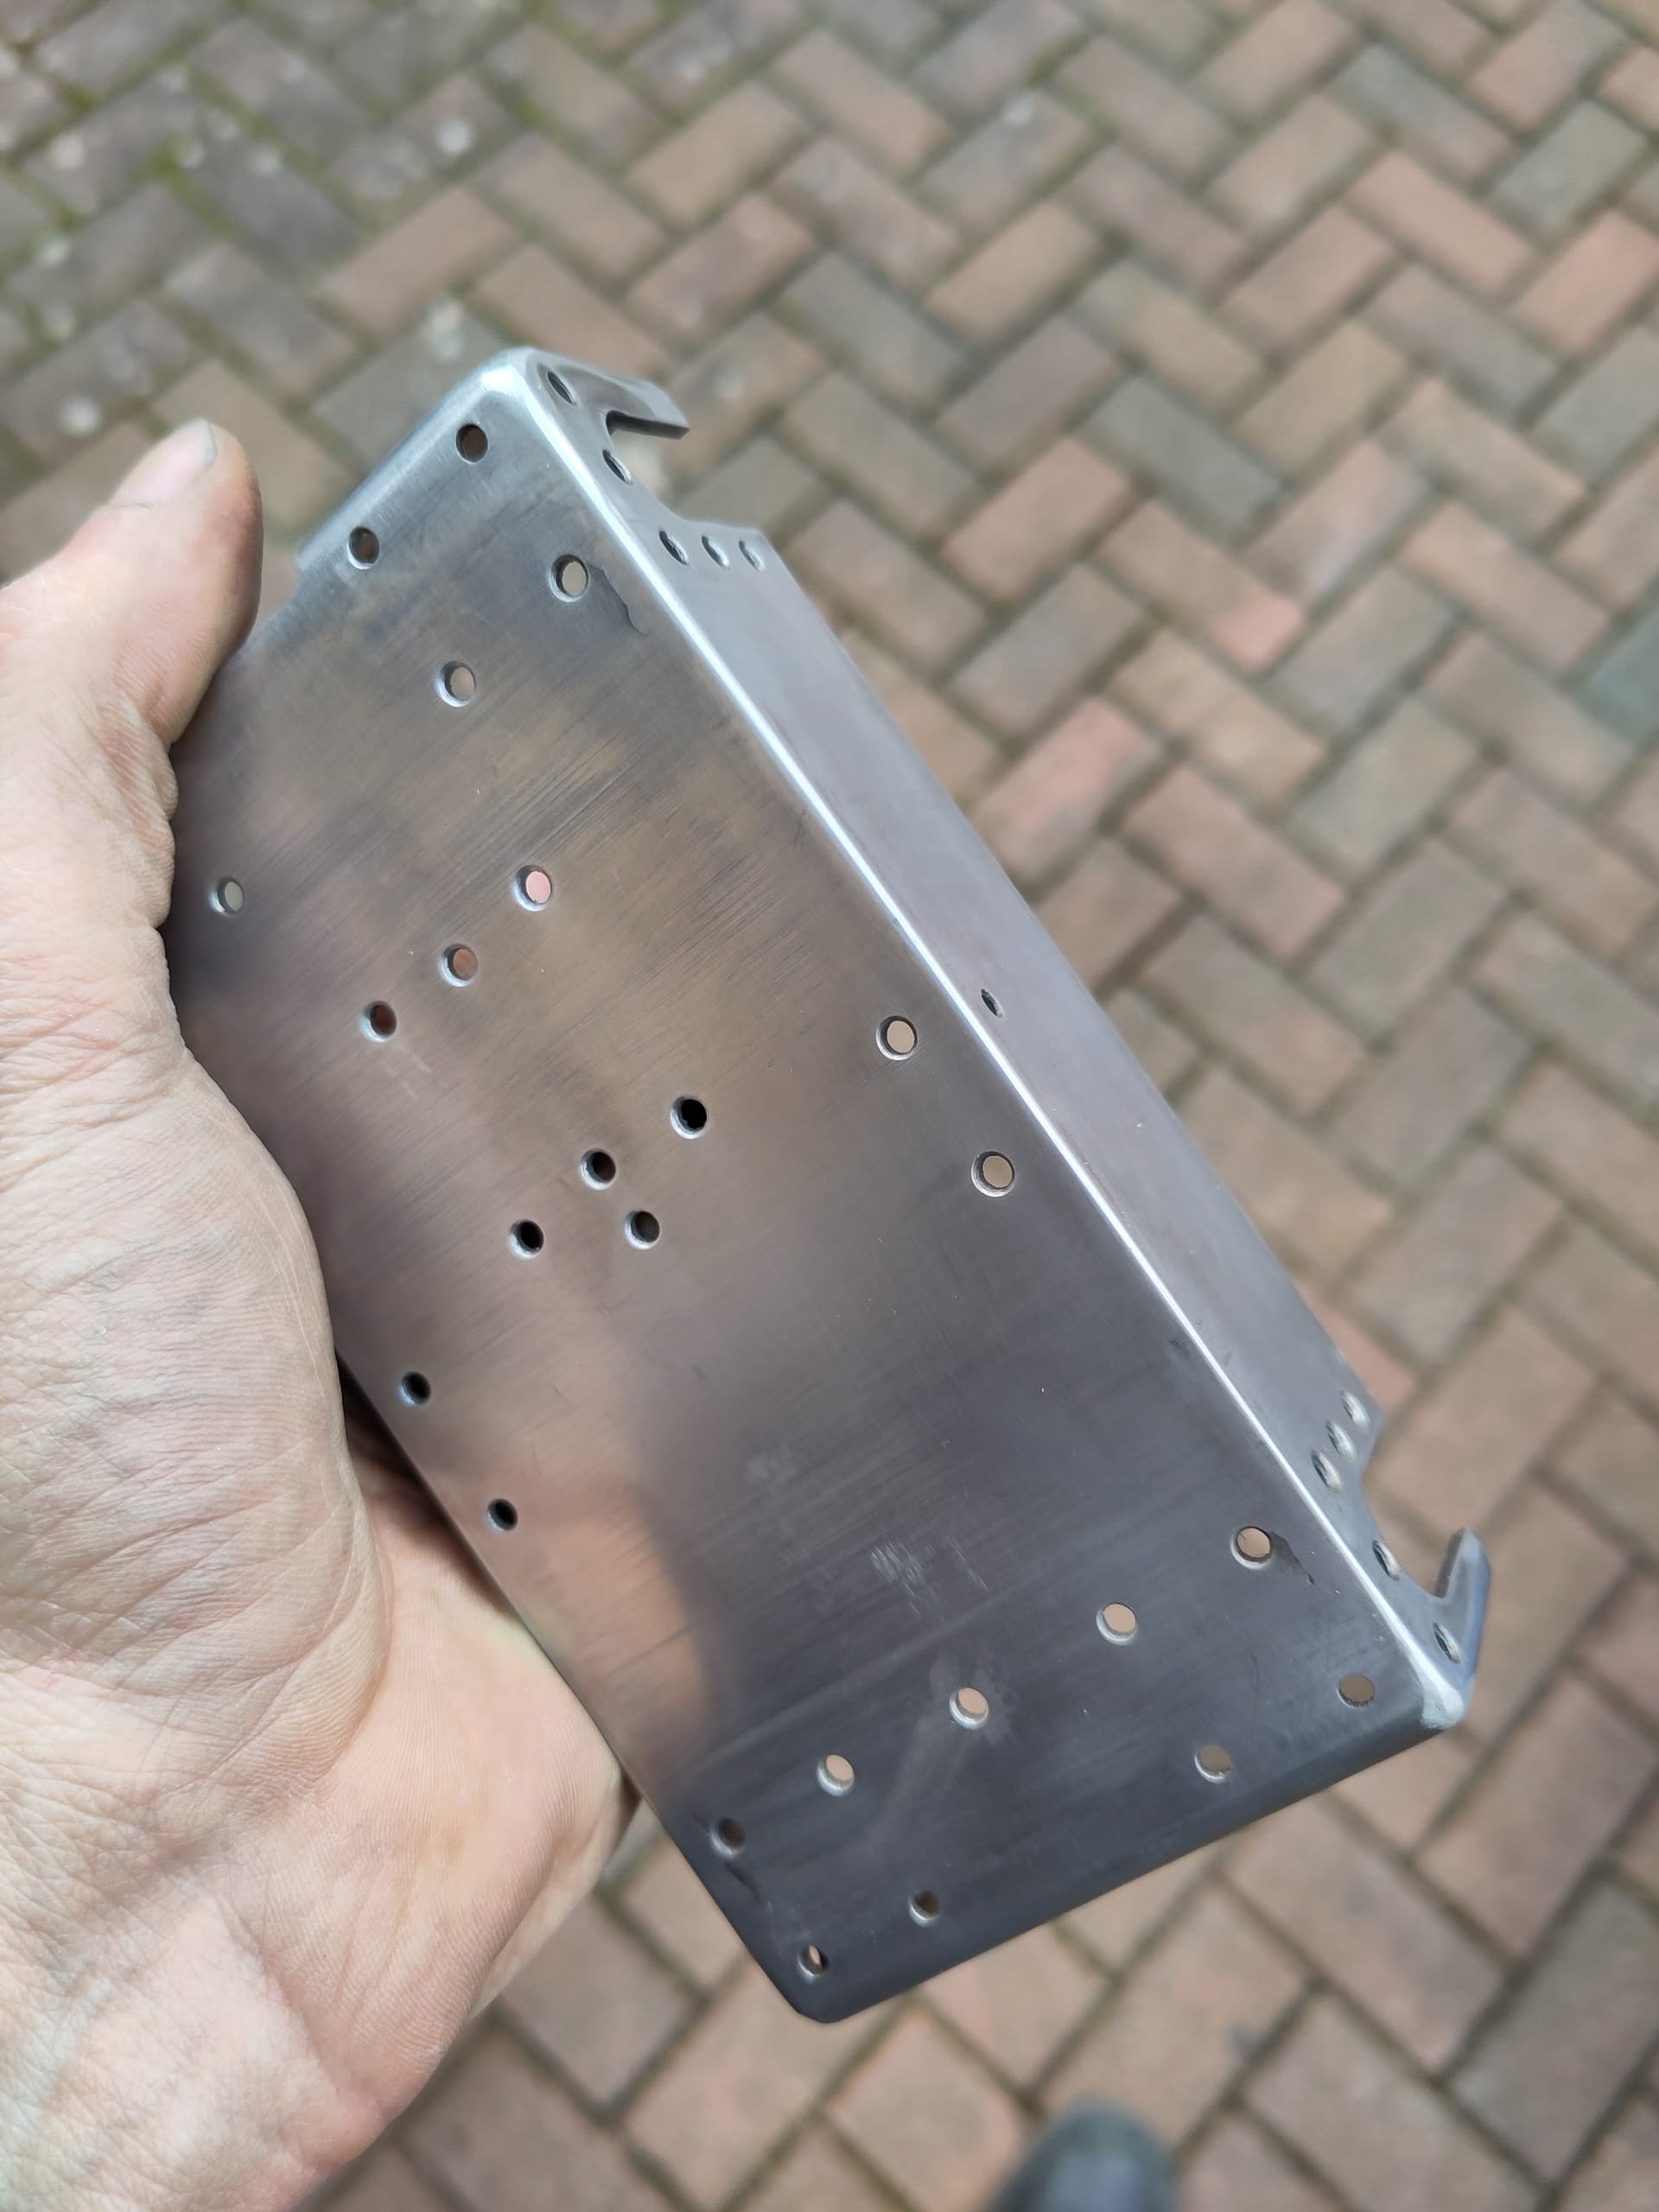
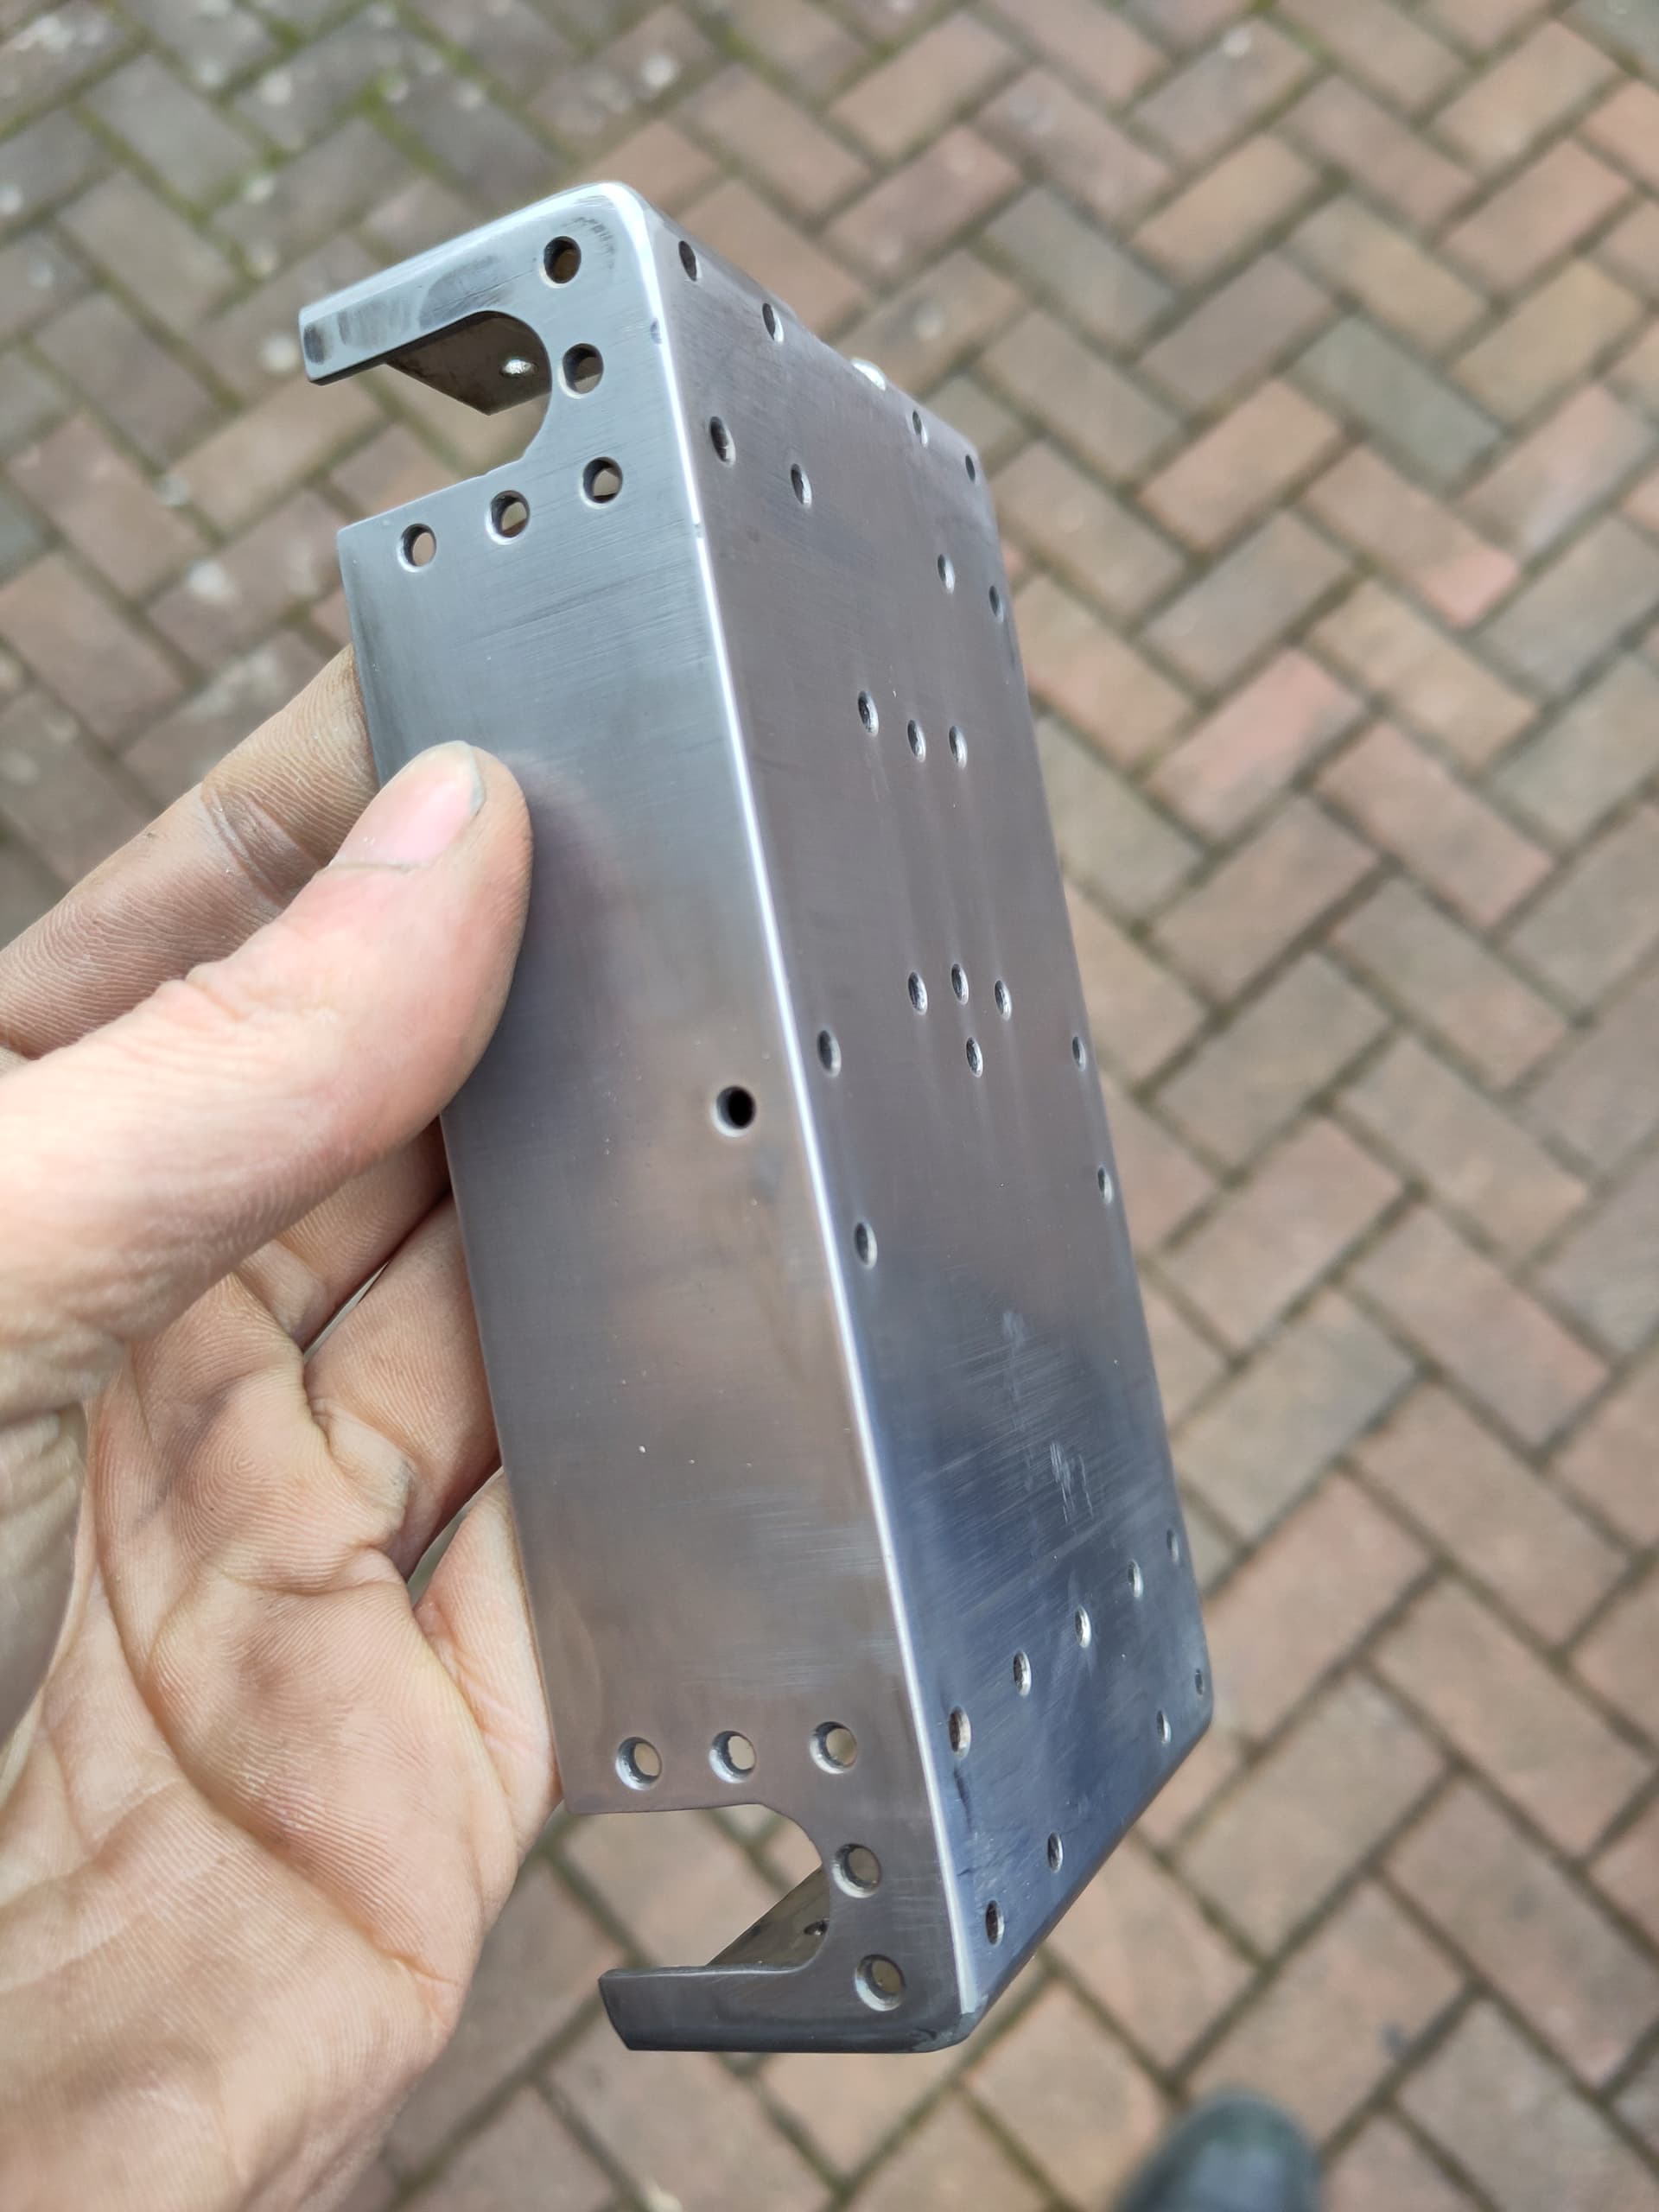
  • As much mirror polished stainless steel as possible, for the bling (also I need to justify the TIG welder I bought in Lidl somehow…)

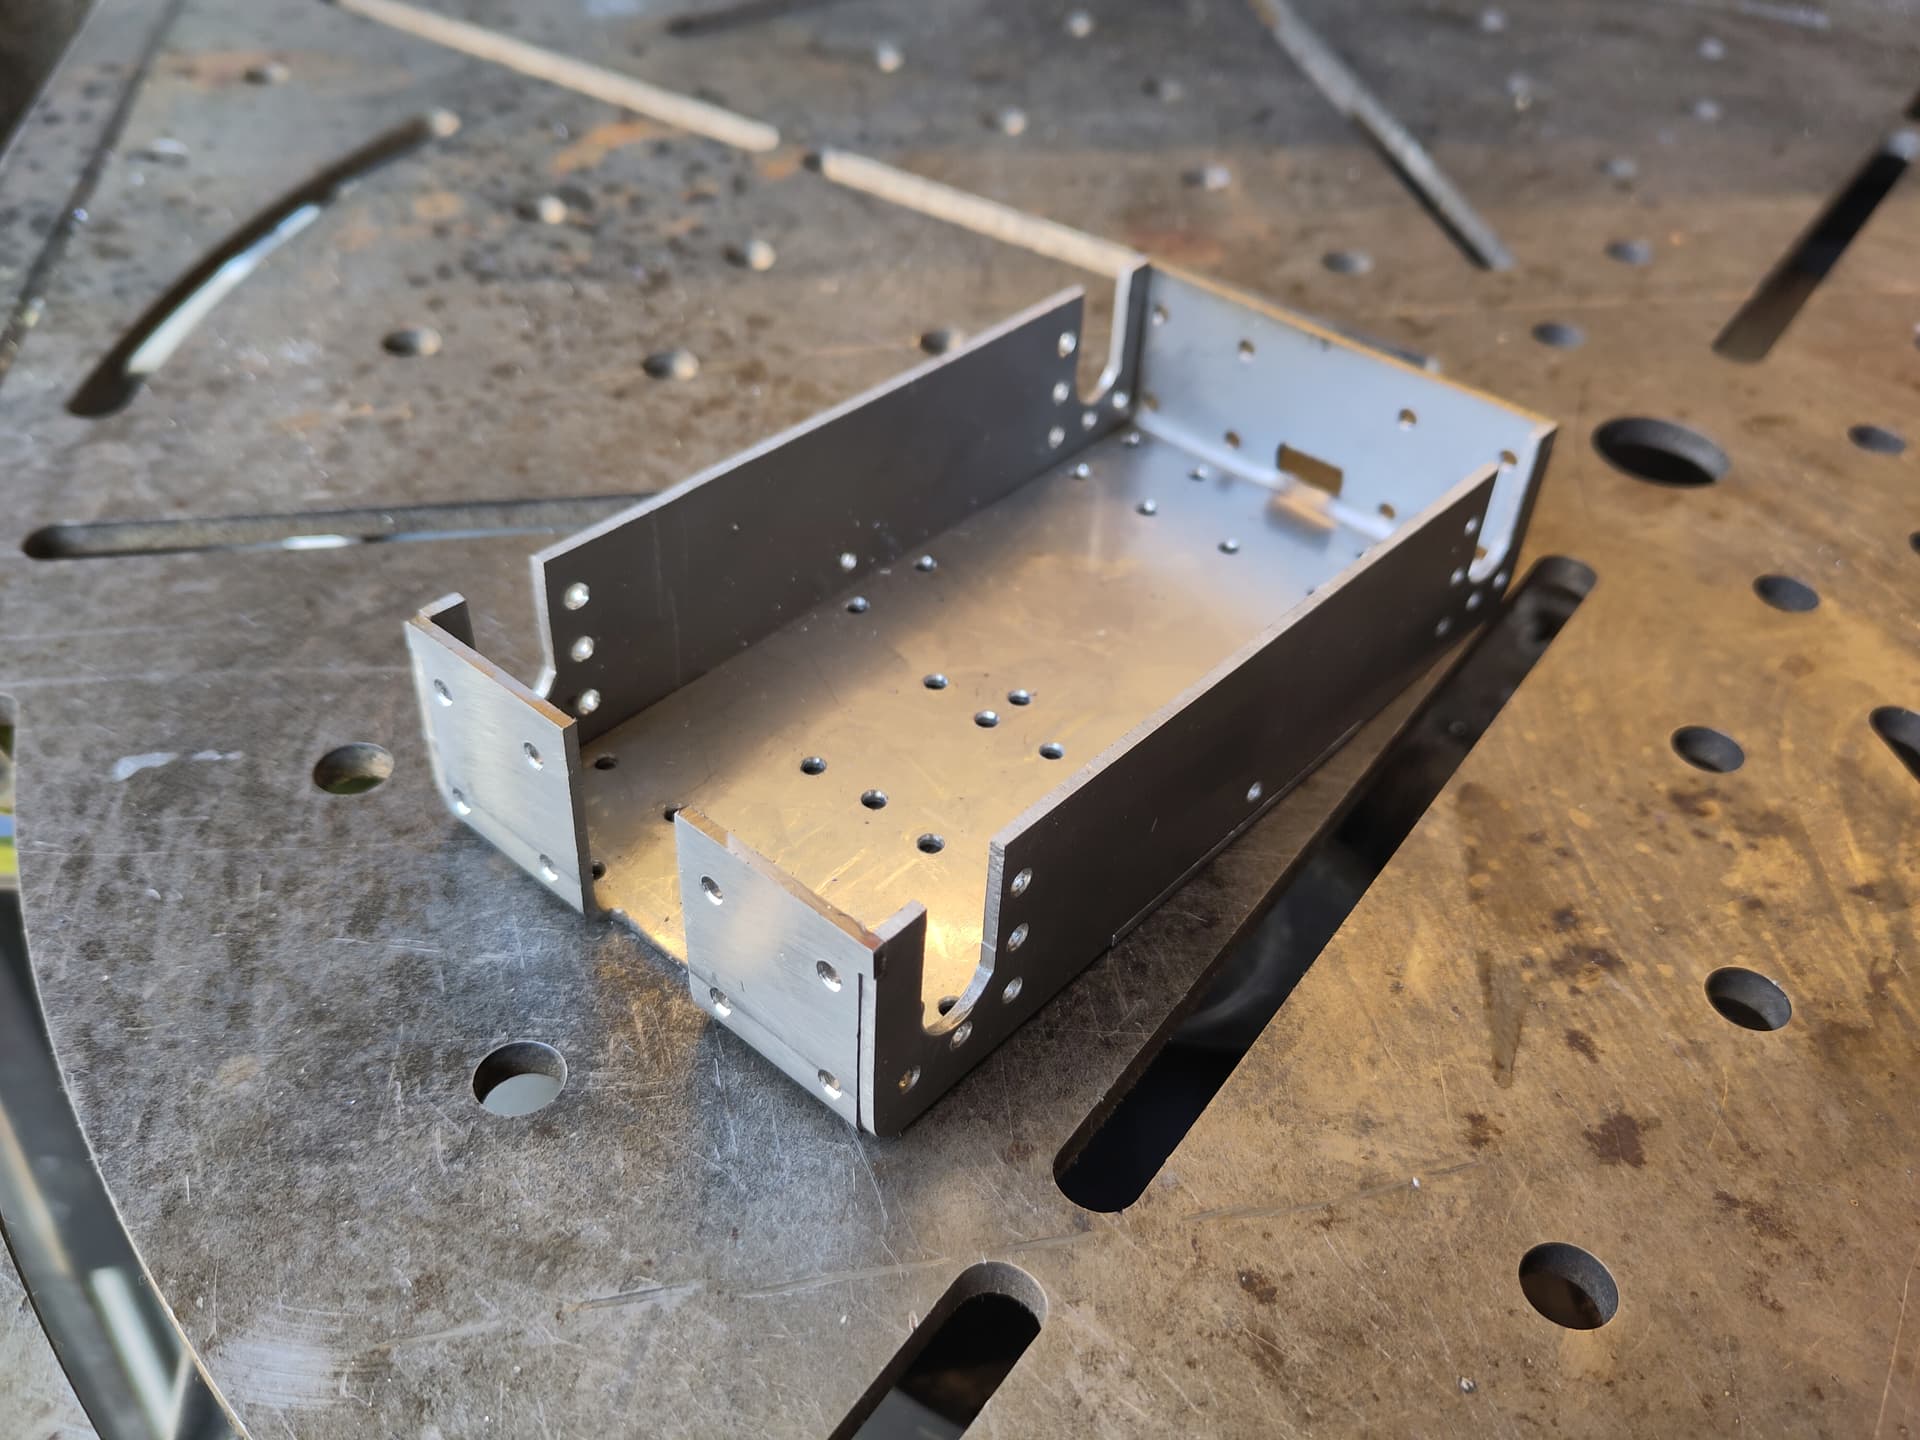
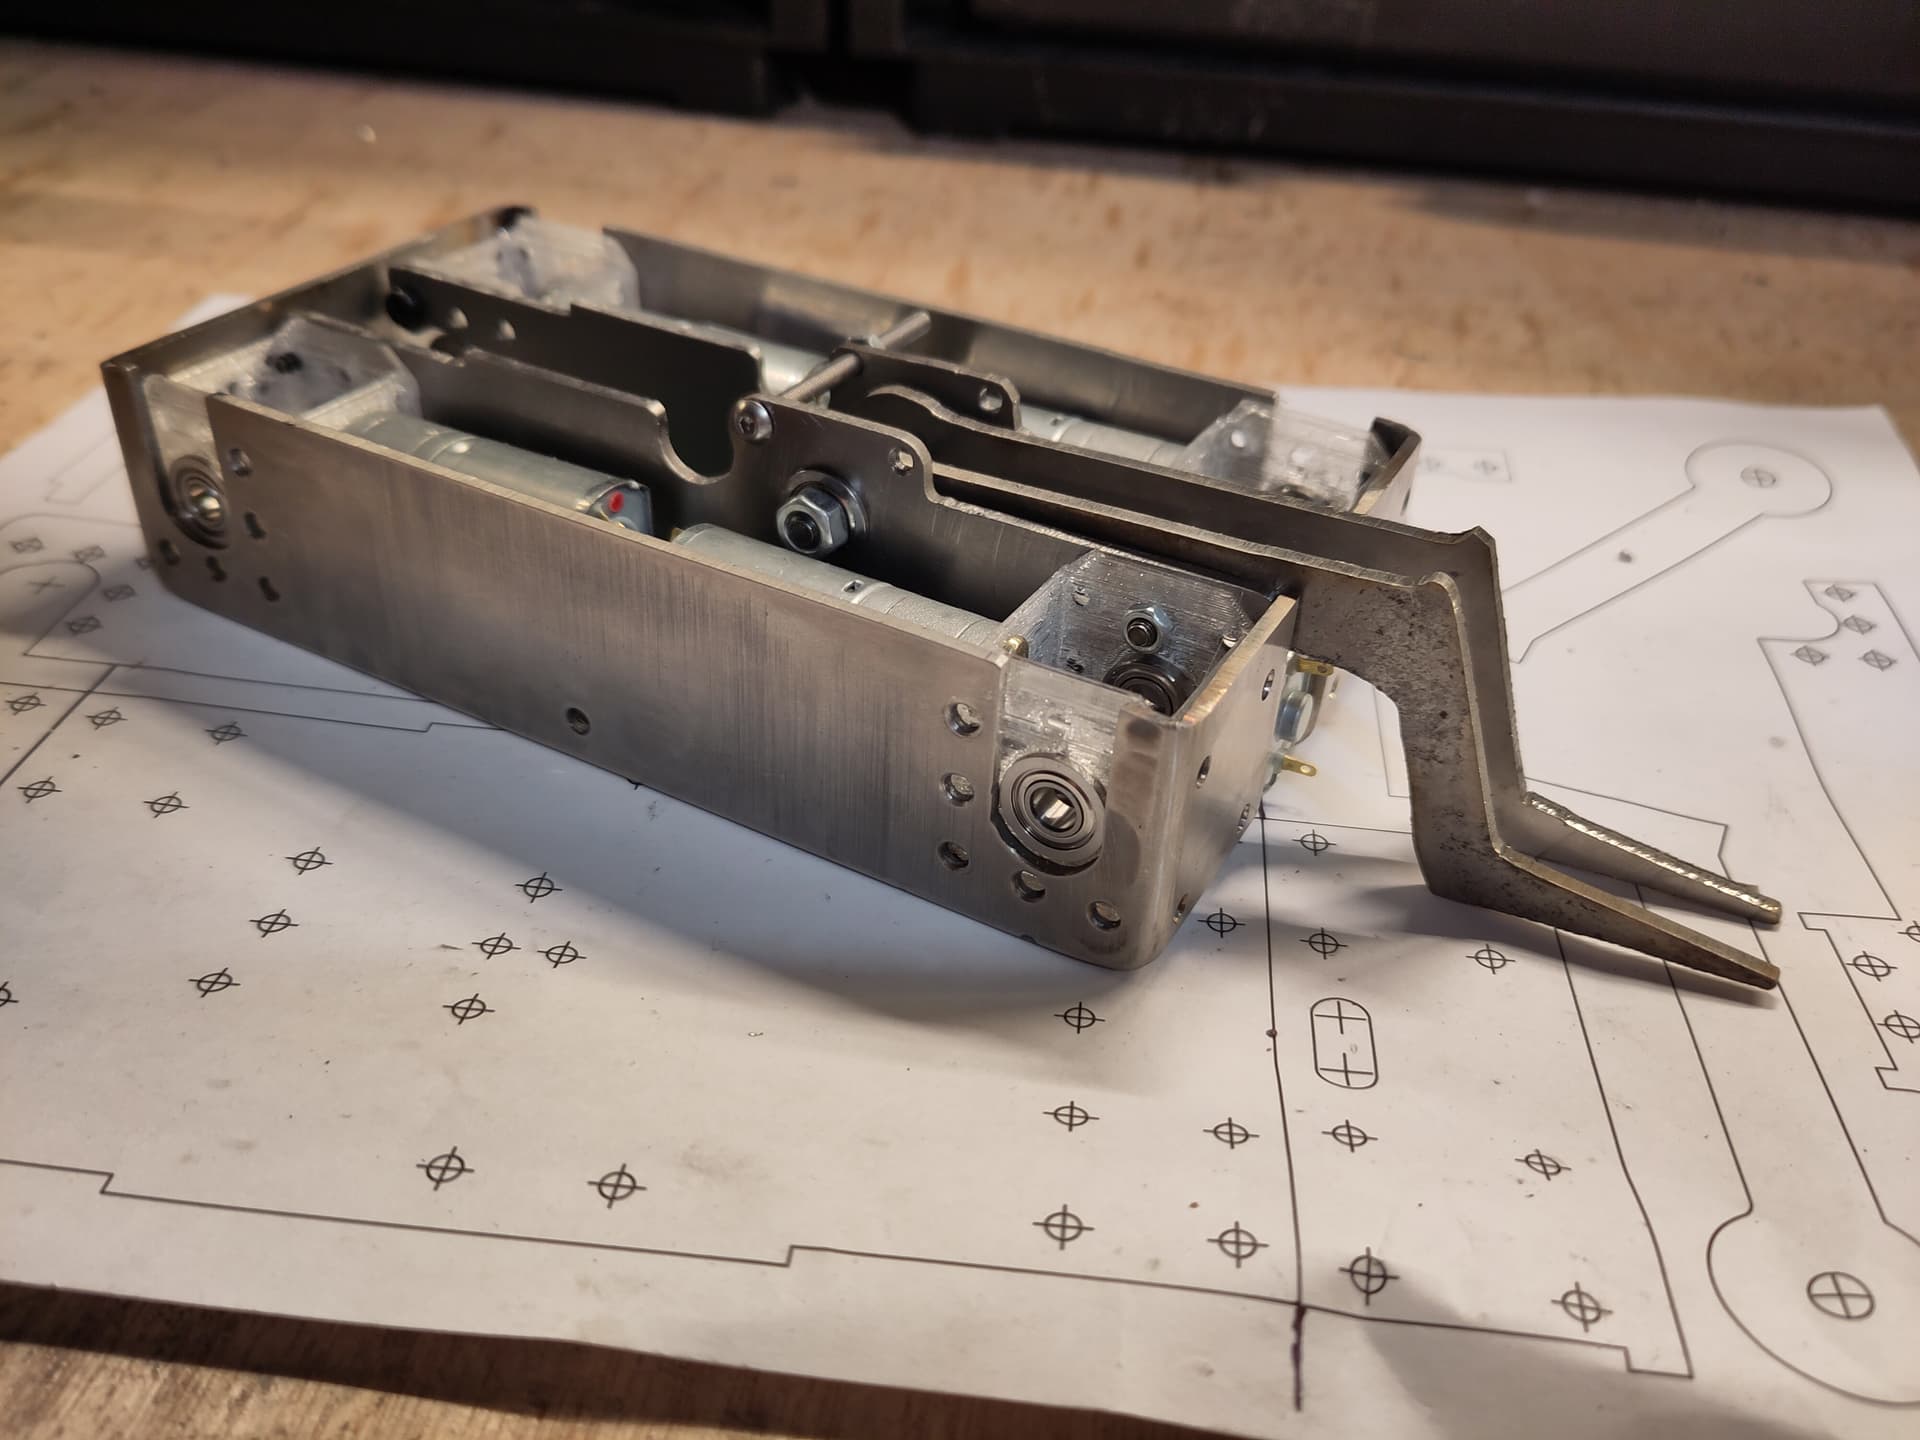
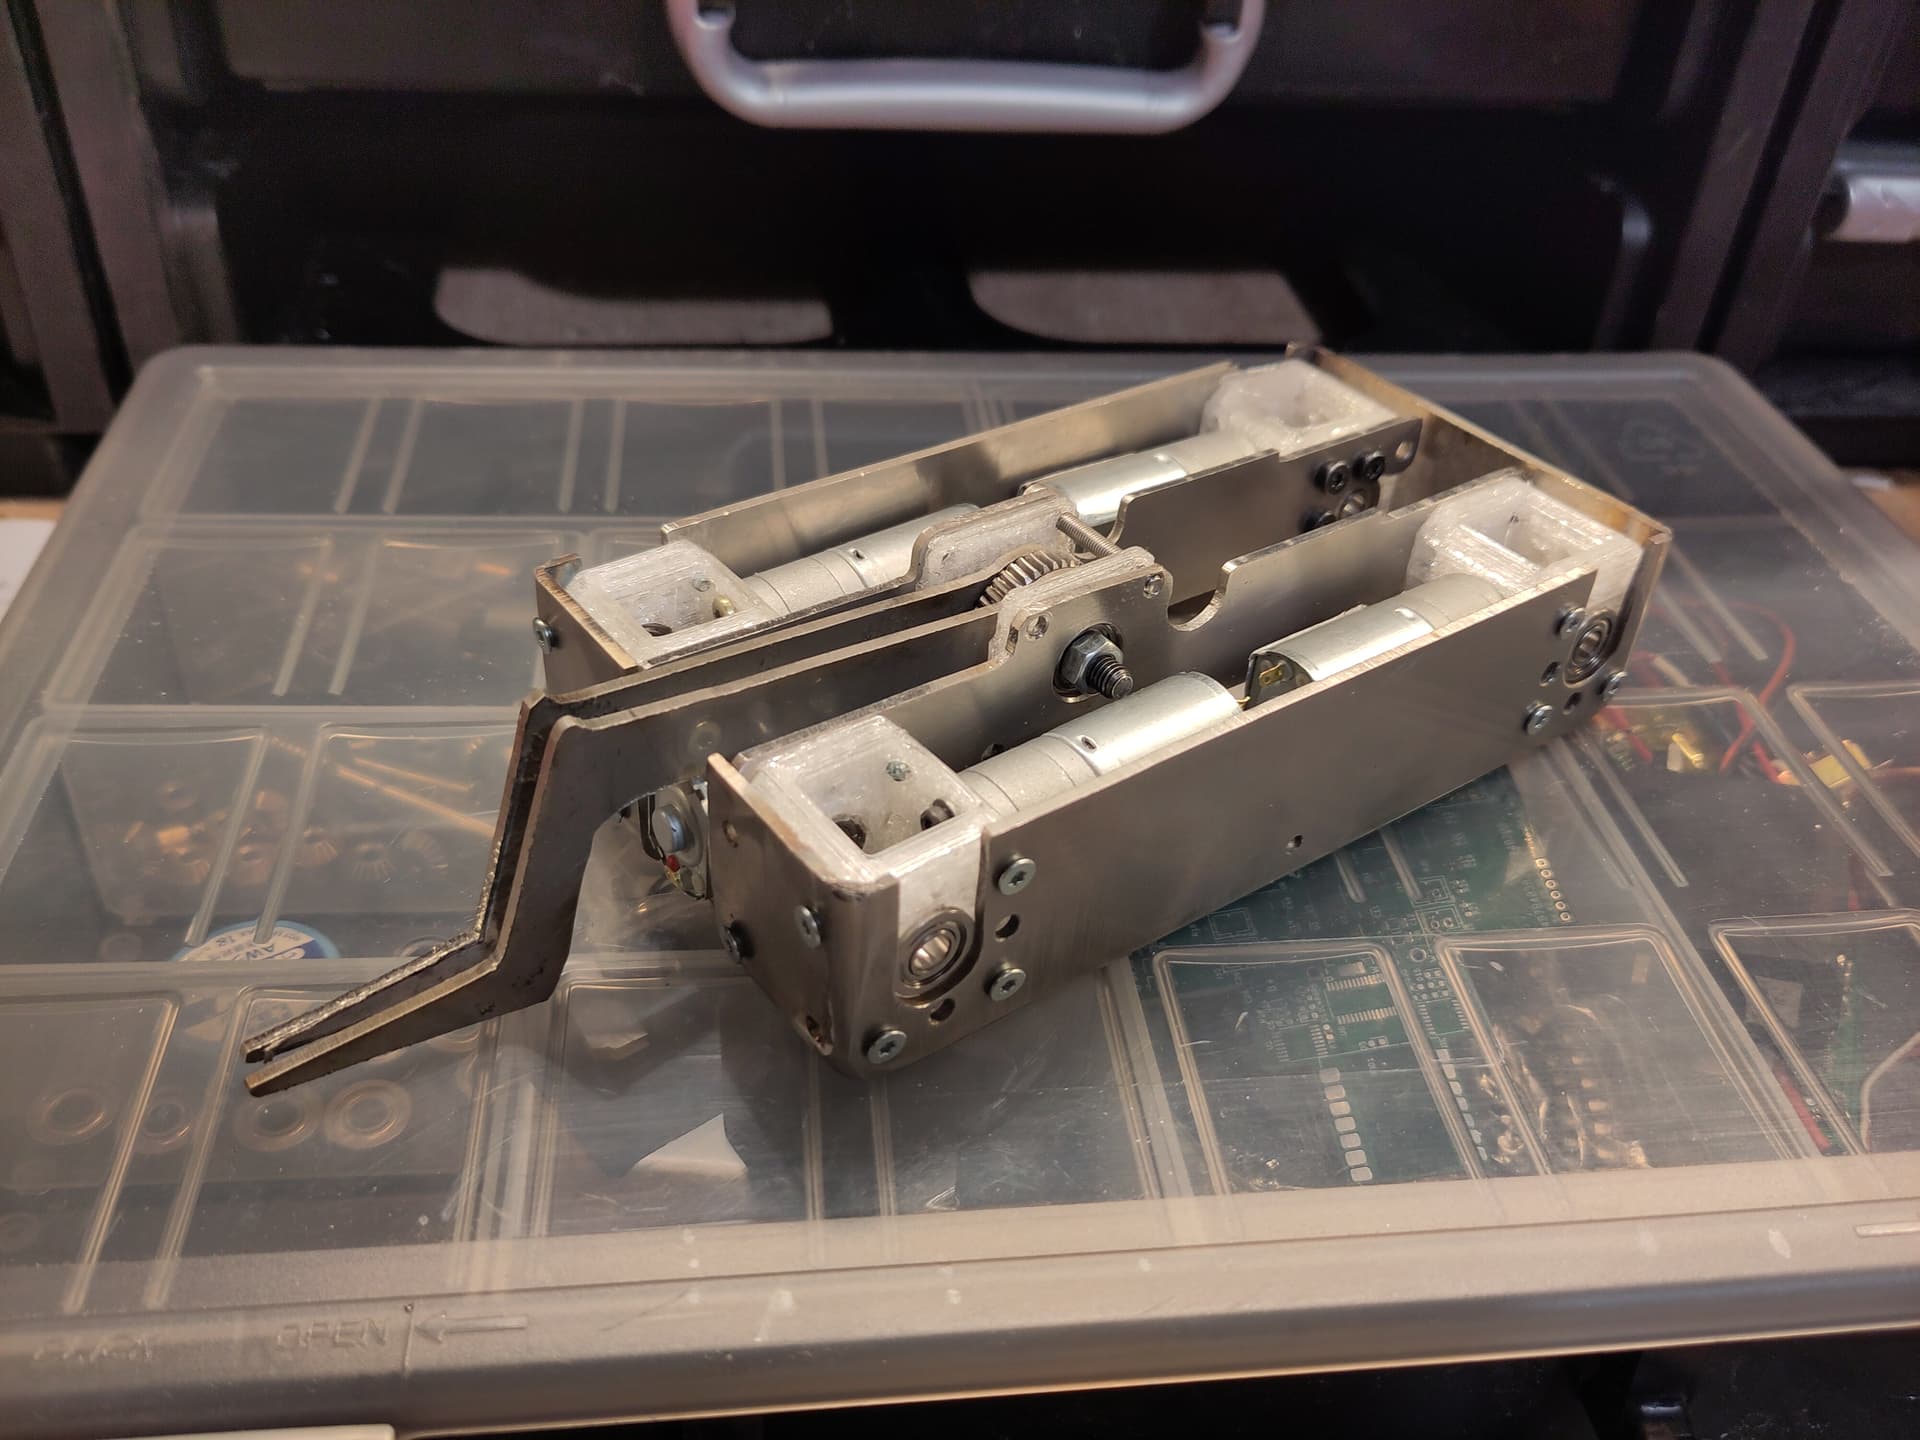
After weeks or months (time is immaterial, there is only robot) here’s where I’m at:

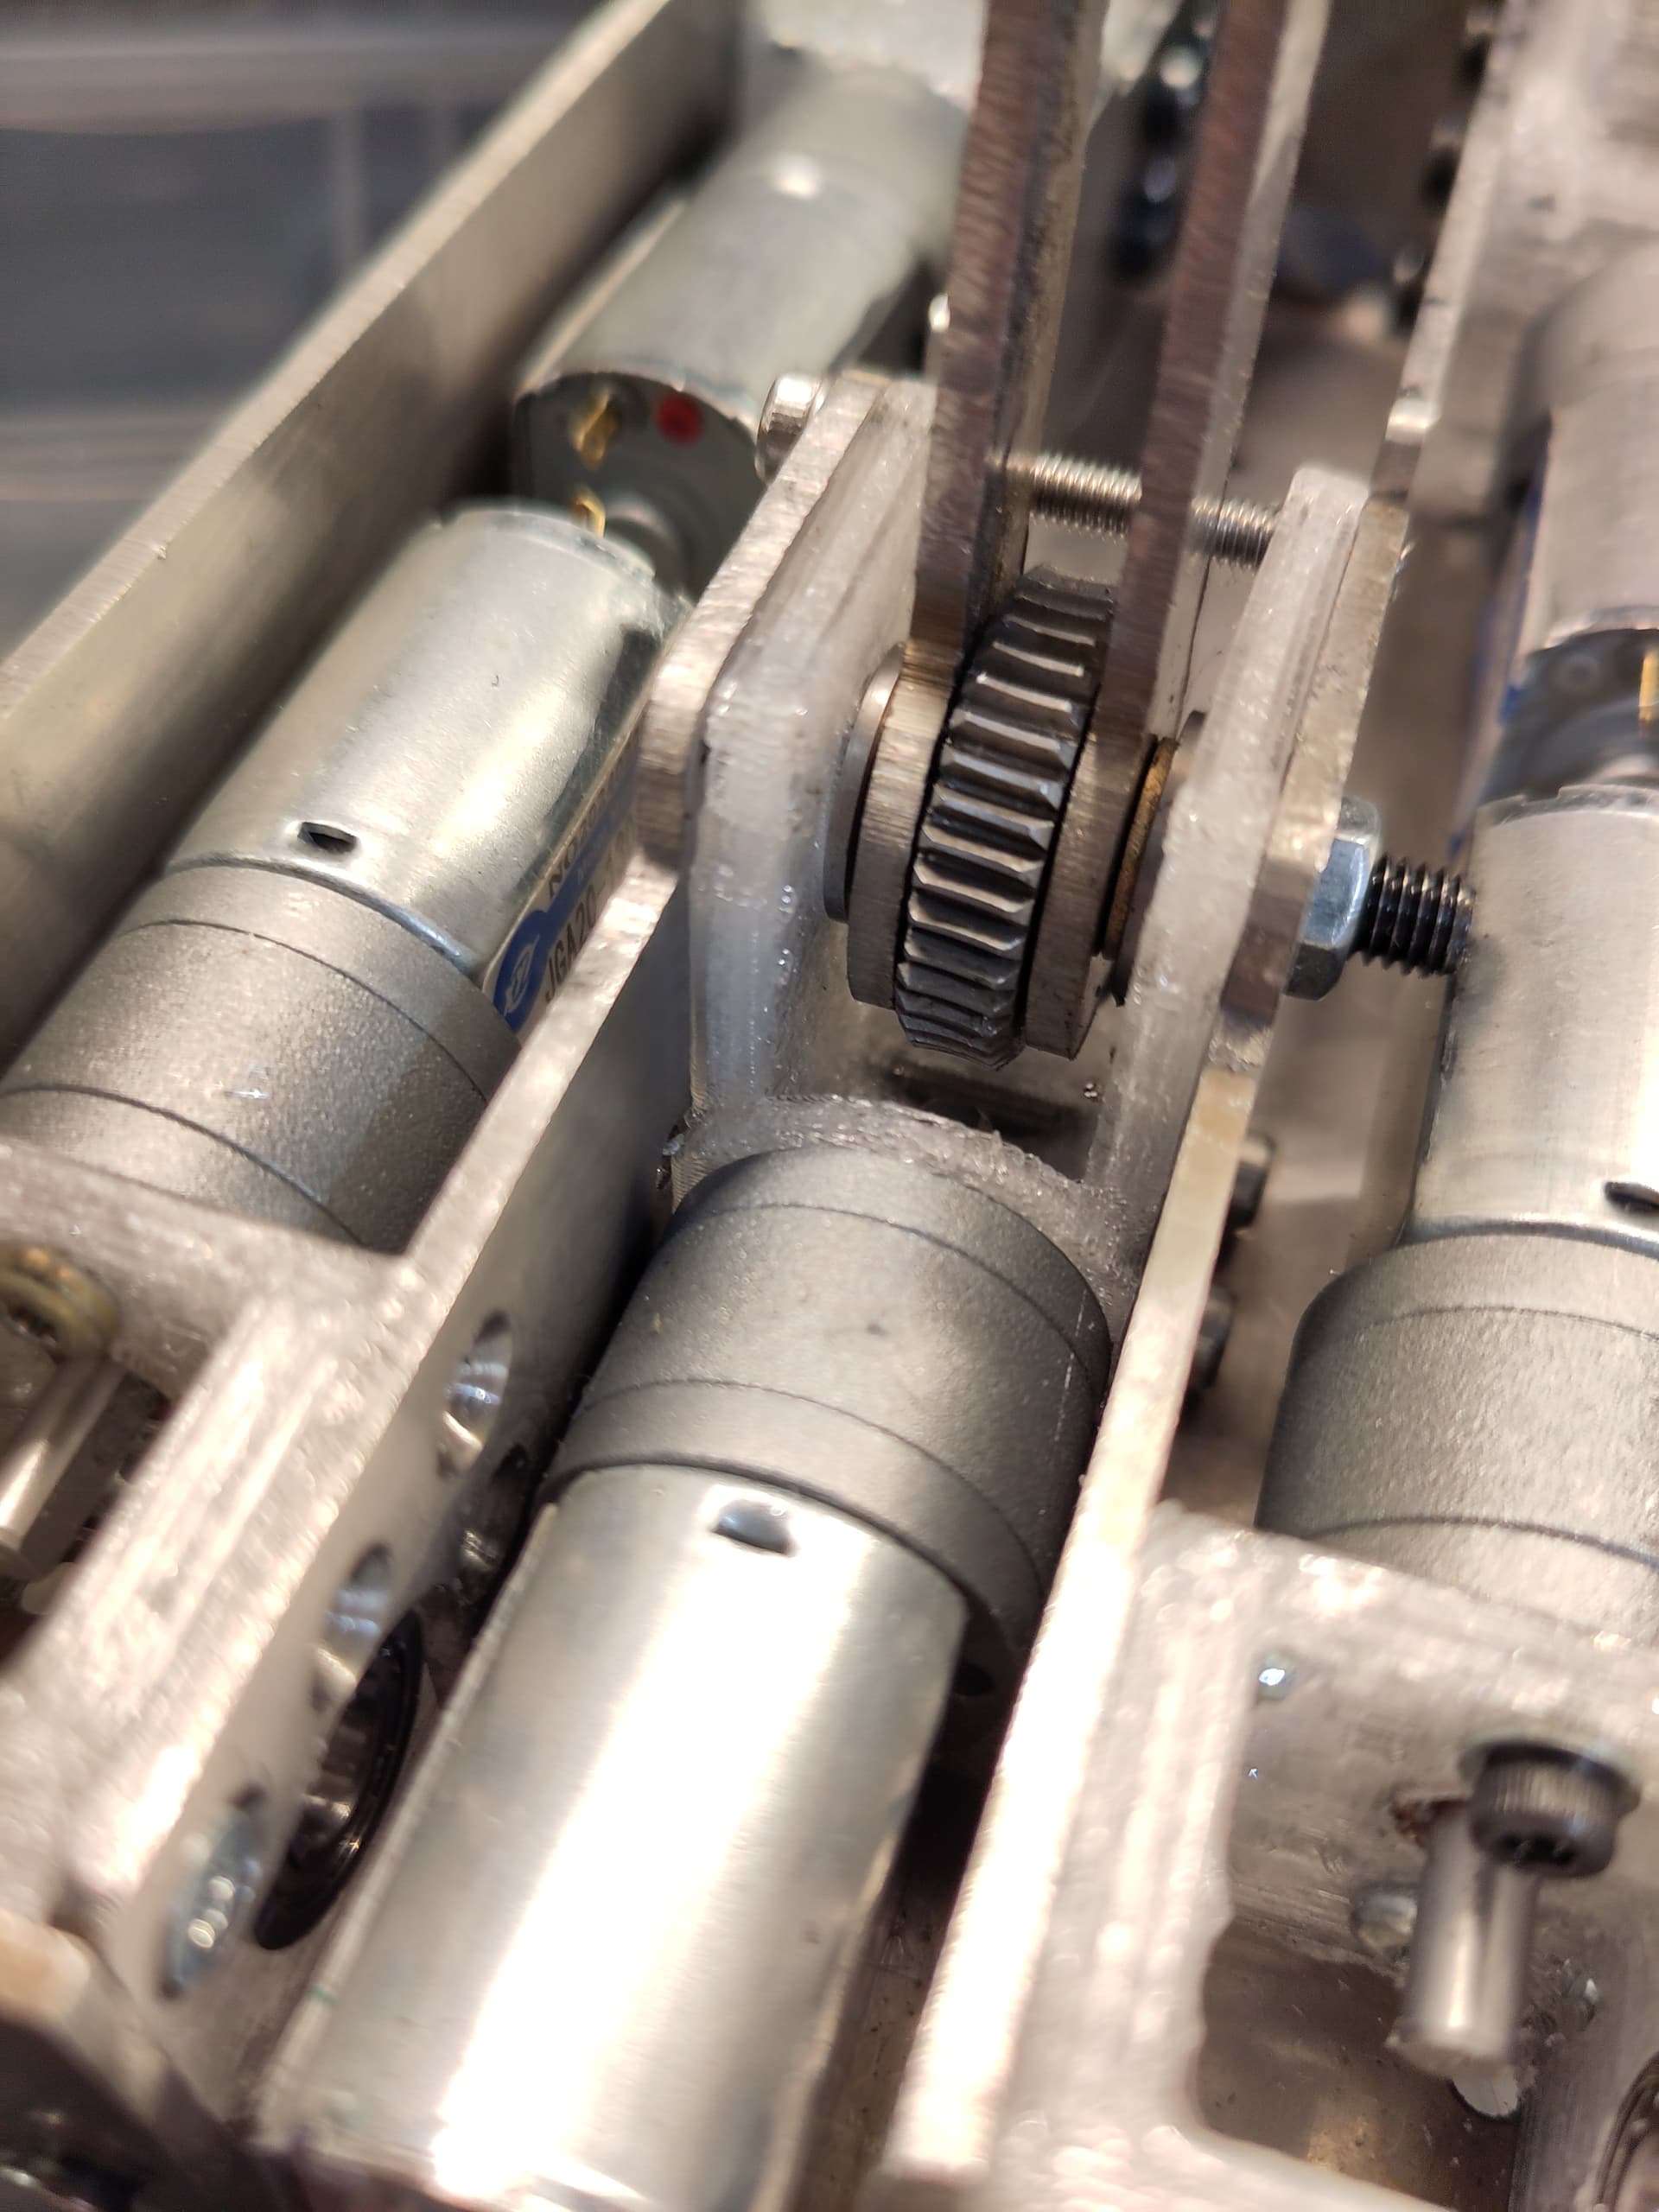
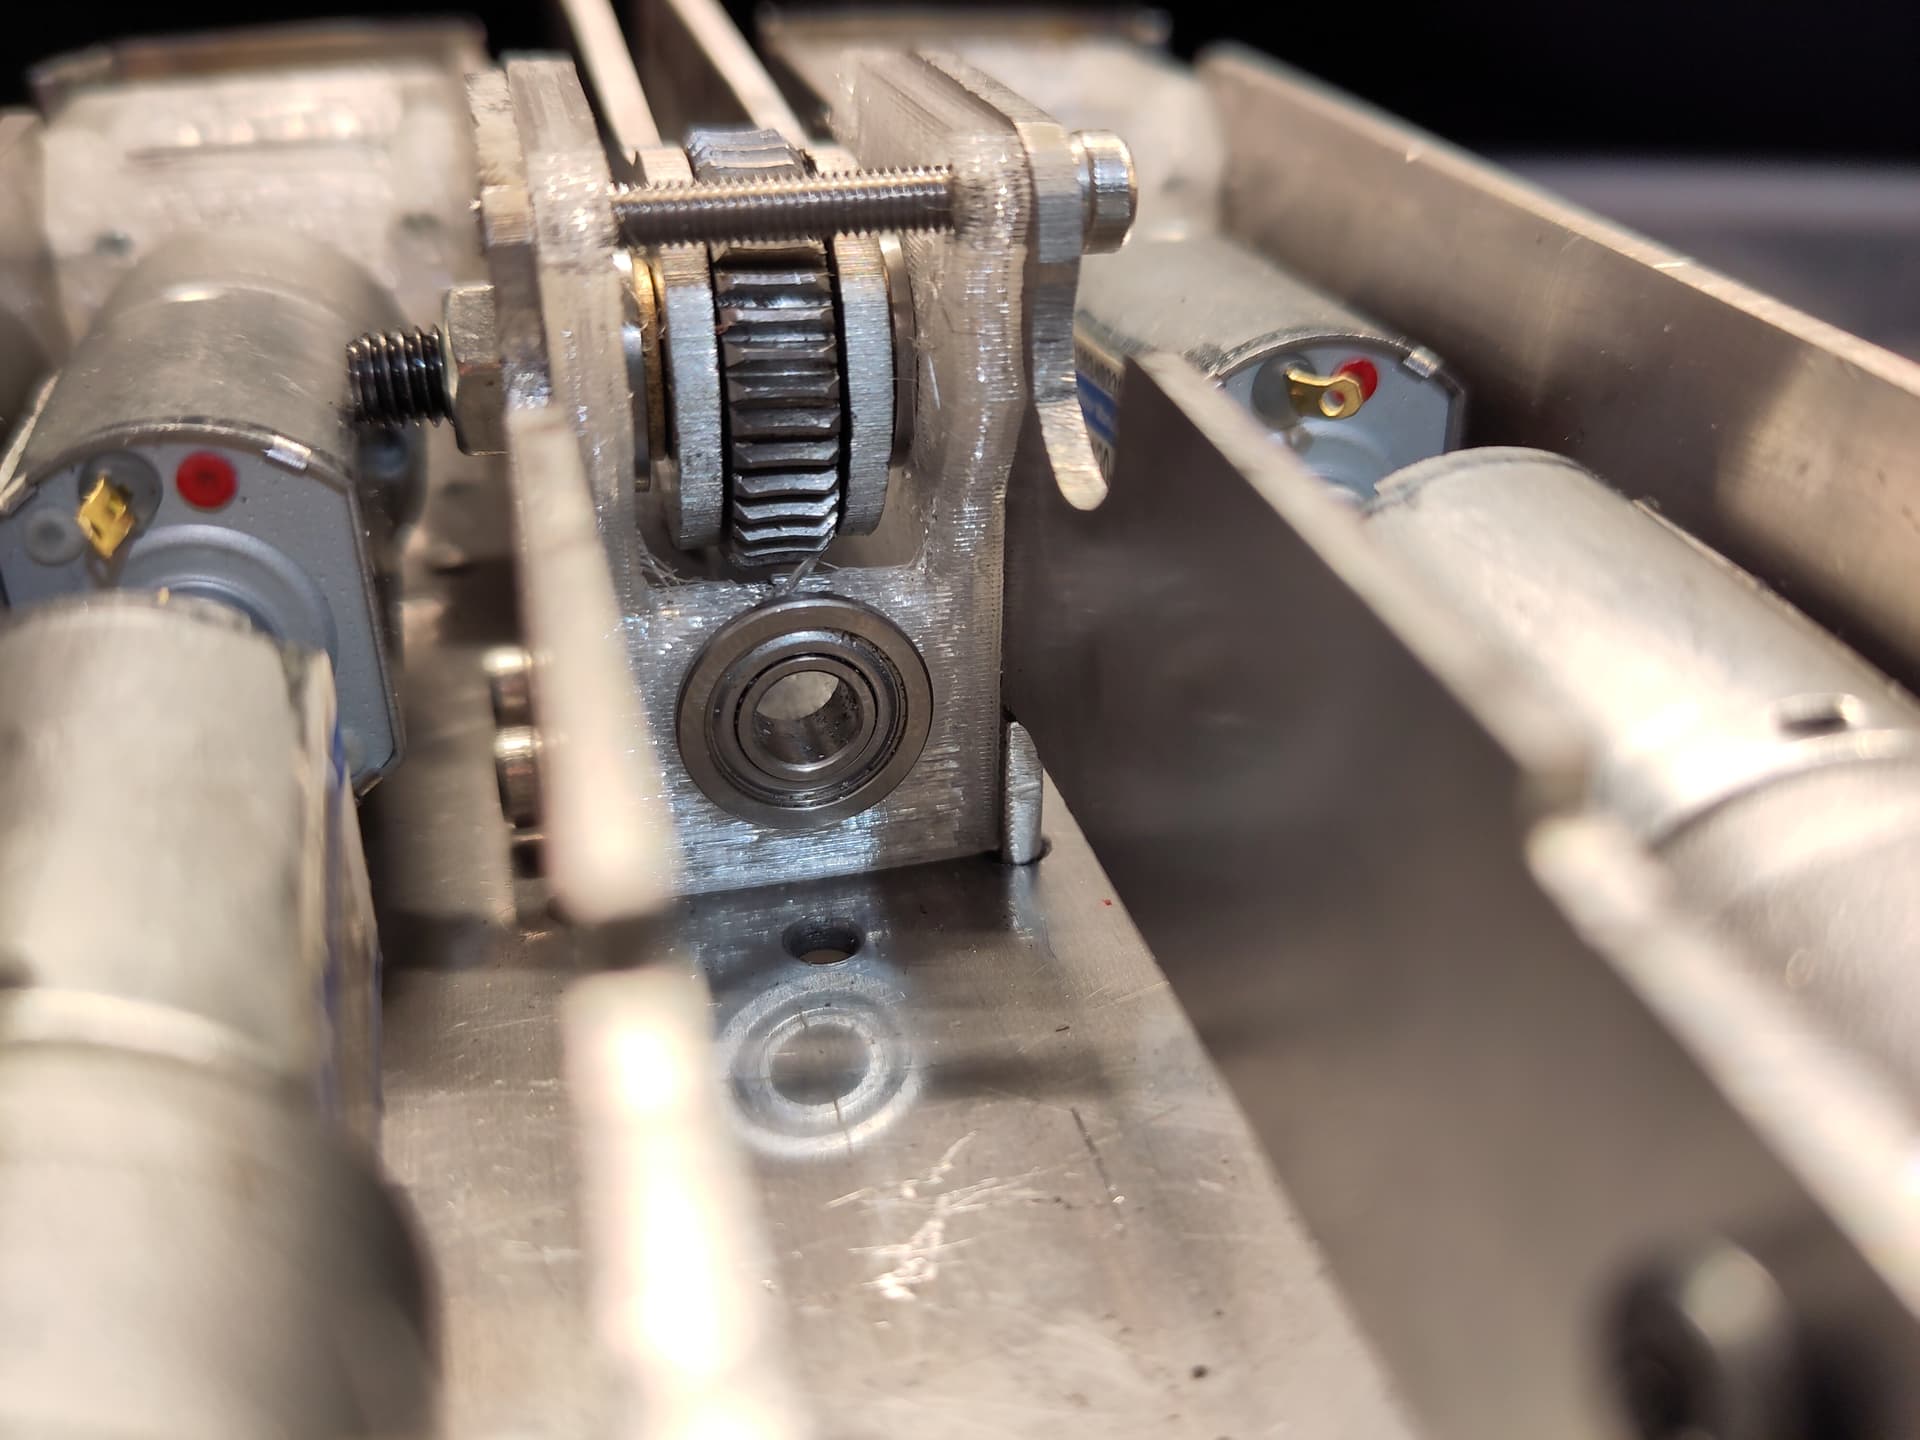
I’m very pleased with what I’ve been able to come up with. I’ve got 4x 20mm gearbox motors (the 130 short kind, as opposed to the longer BBB kind) driving 5mm output shafts via bevel gears, all connected directly to a custom PCB (which I’ll get into later) which sits on the bottom of the bot. There’s just about enough space left over for a 3s 530mAh lipo, an ELRS receiver, and a 20kg/cm worm drive lifter that uses the same motors as the drive (but with space for a longer one if I need the torque). I haven’t got a weapon controller yet, but there’s ample space (honestly!) for something small and custom somewhere dumb.

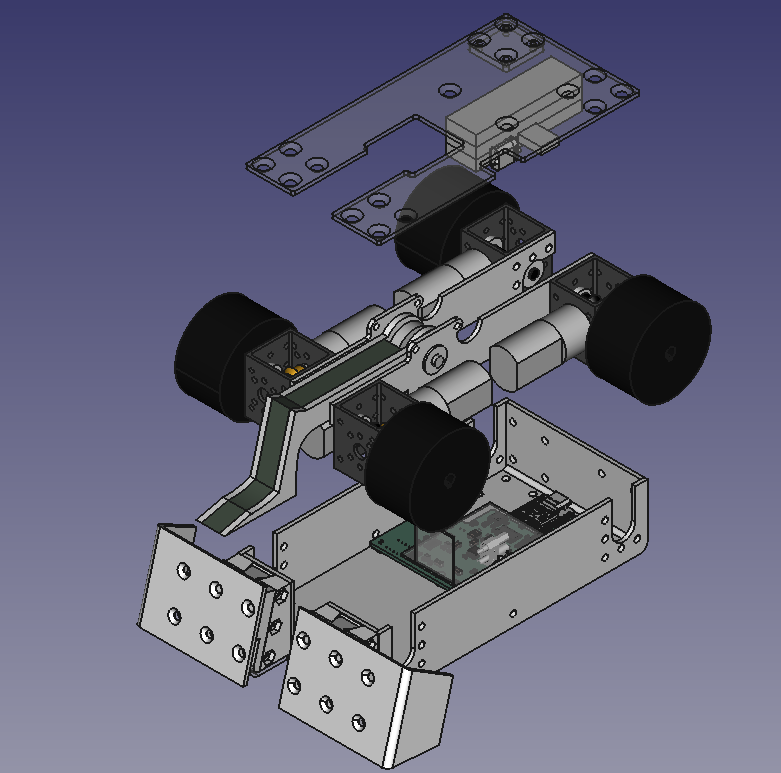
In terms of maintainability, the weapon and drive are connected to the central bulkhead, so that the whole assembly can be lifted from the chassis tub after removing a few screws and disconnecting some plugs. As many parts as possible are are symmetrical, both so I can use them in any orientation to cut down on spare parts and also avoid mistakes like making six left wedges and zero right.

How much stainless steel did I manage to incorporate? According to my weight spreadsheet I’m allowed to make the chassis tub, bulkheads, lifter arm and wedge all out of 2mm stainless. Final external dimensions for the brick shaped main body (not including wedge attachments etc) is 79x150x34mm.


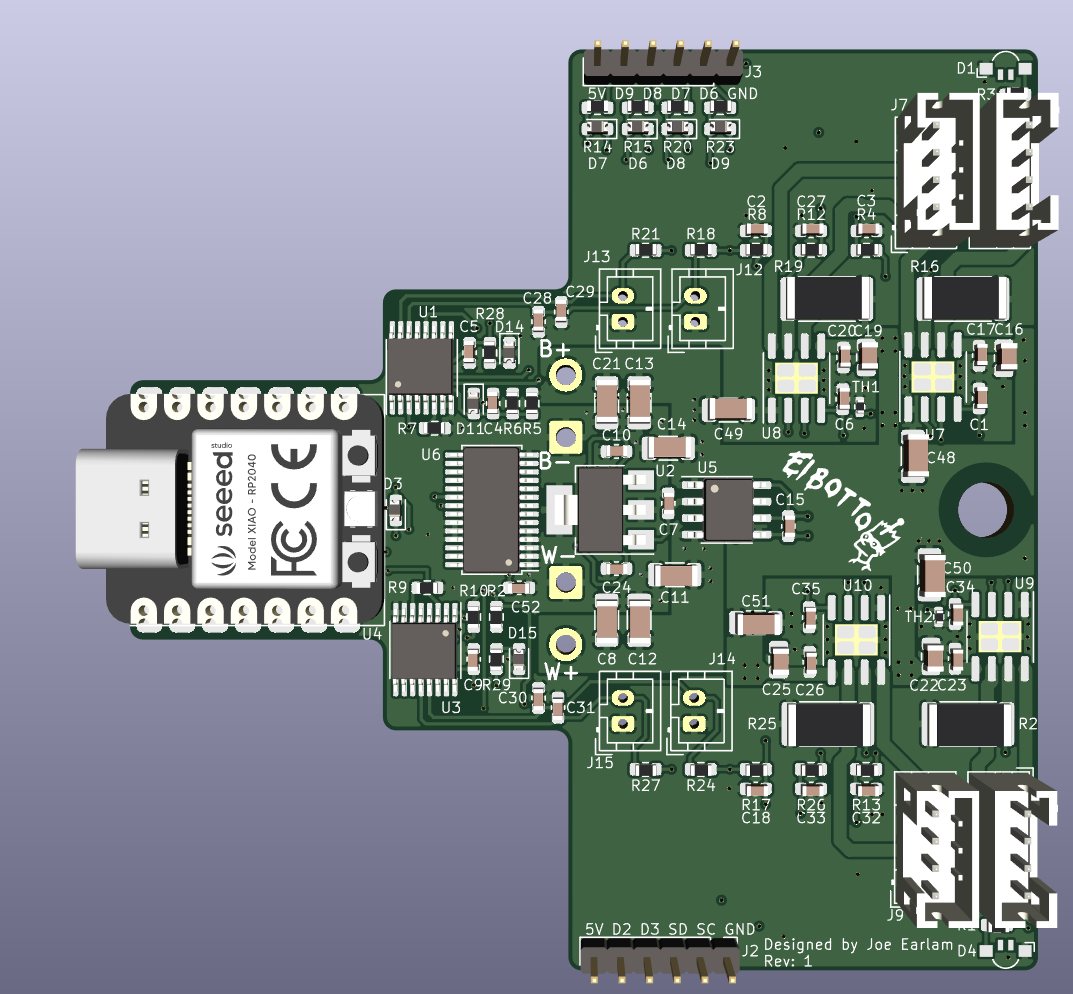
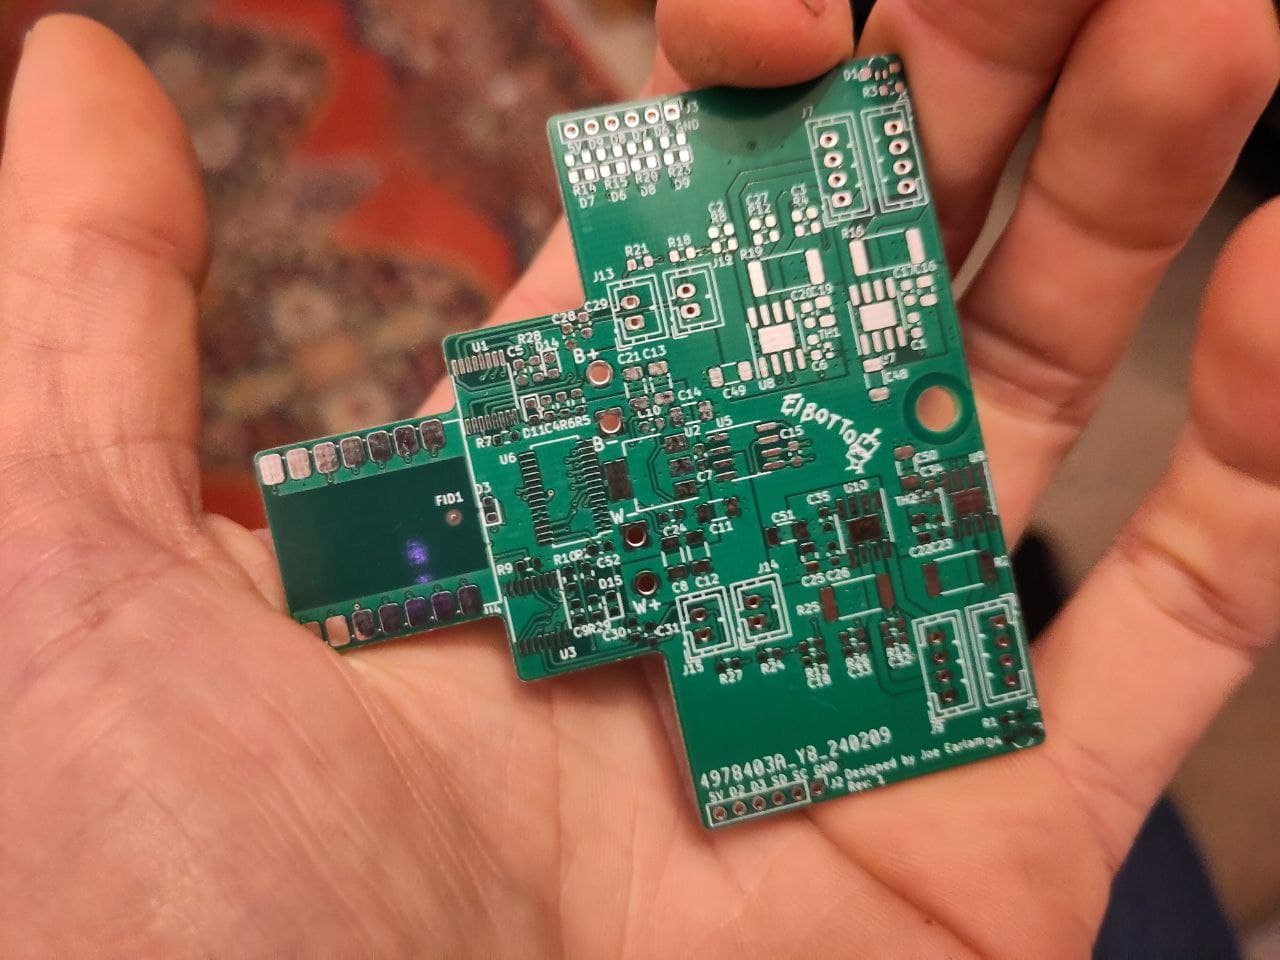
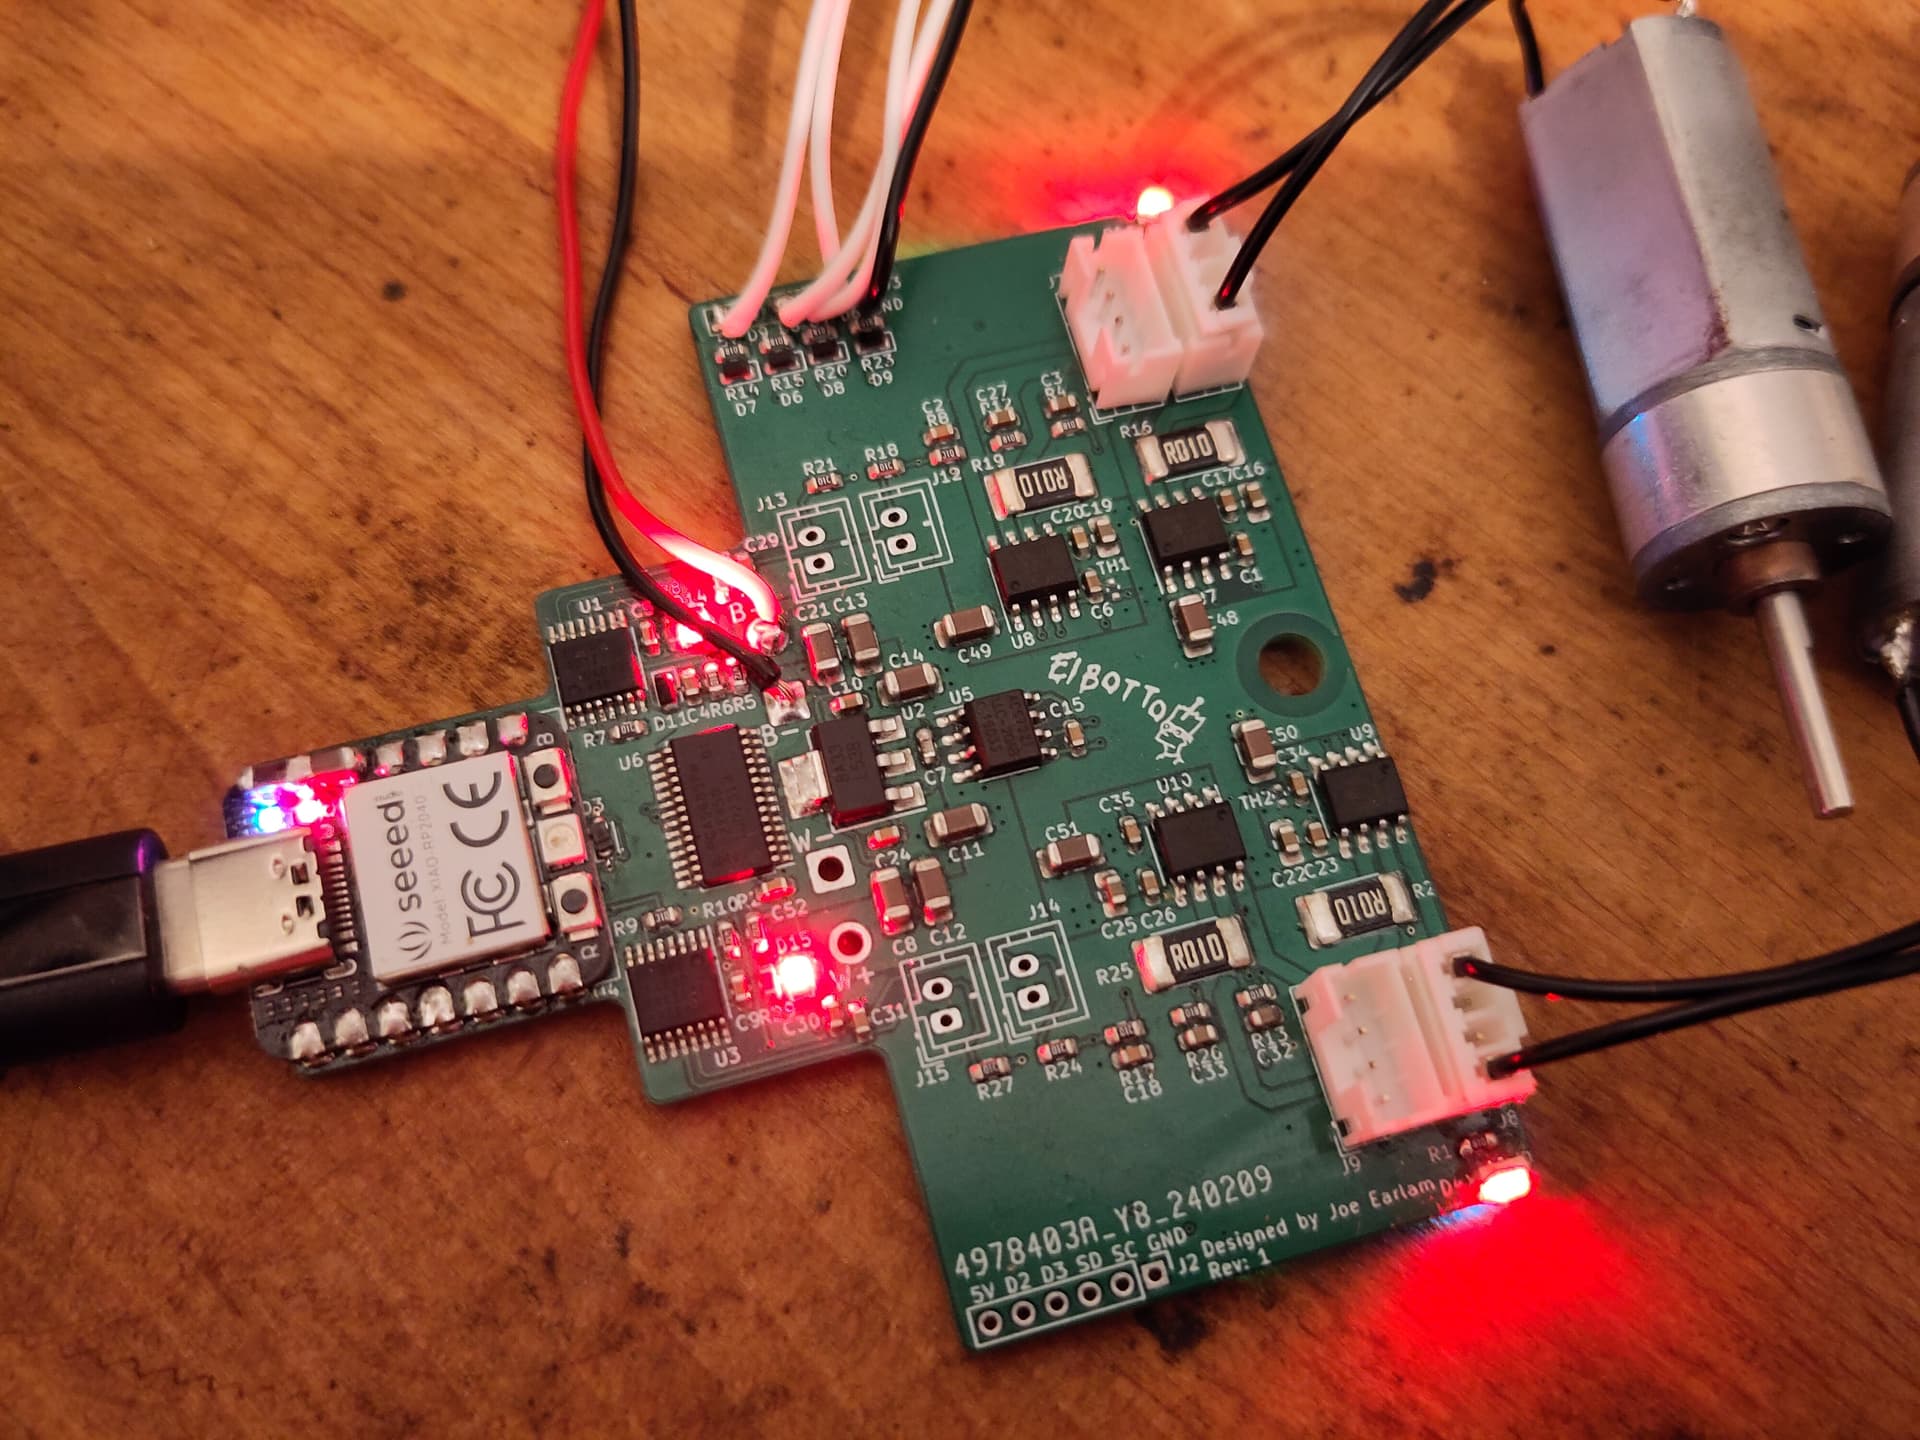
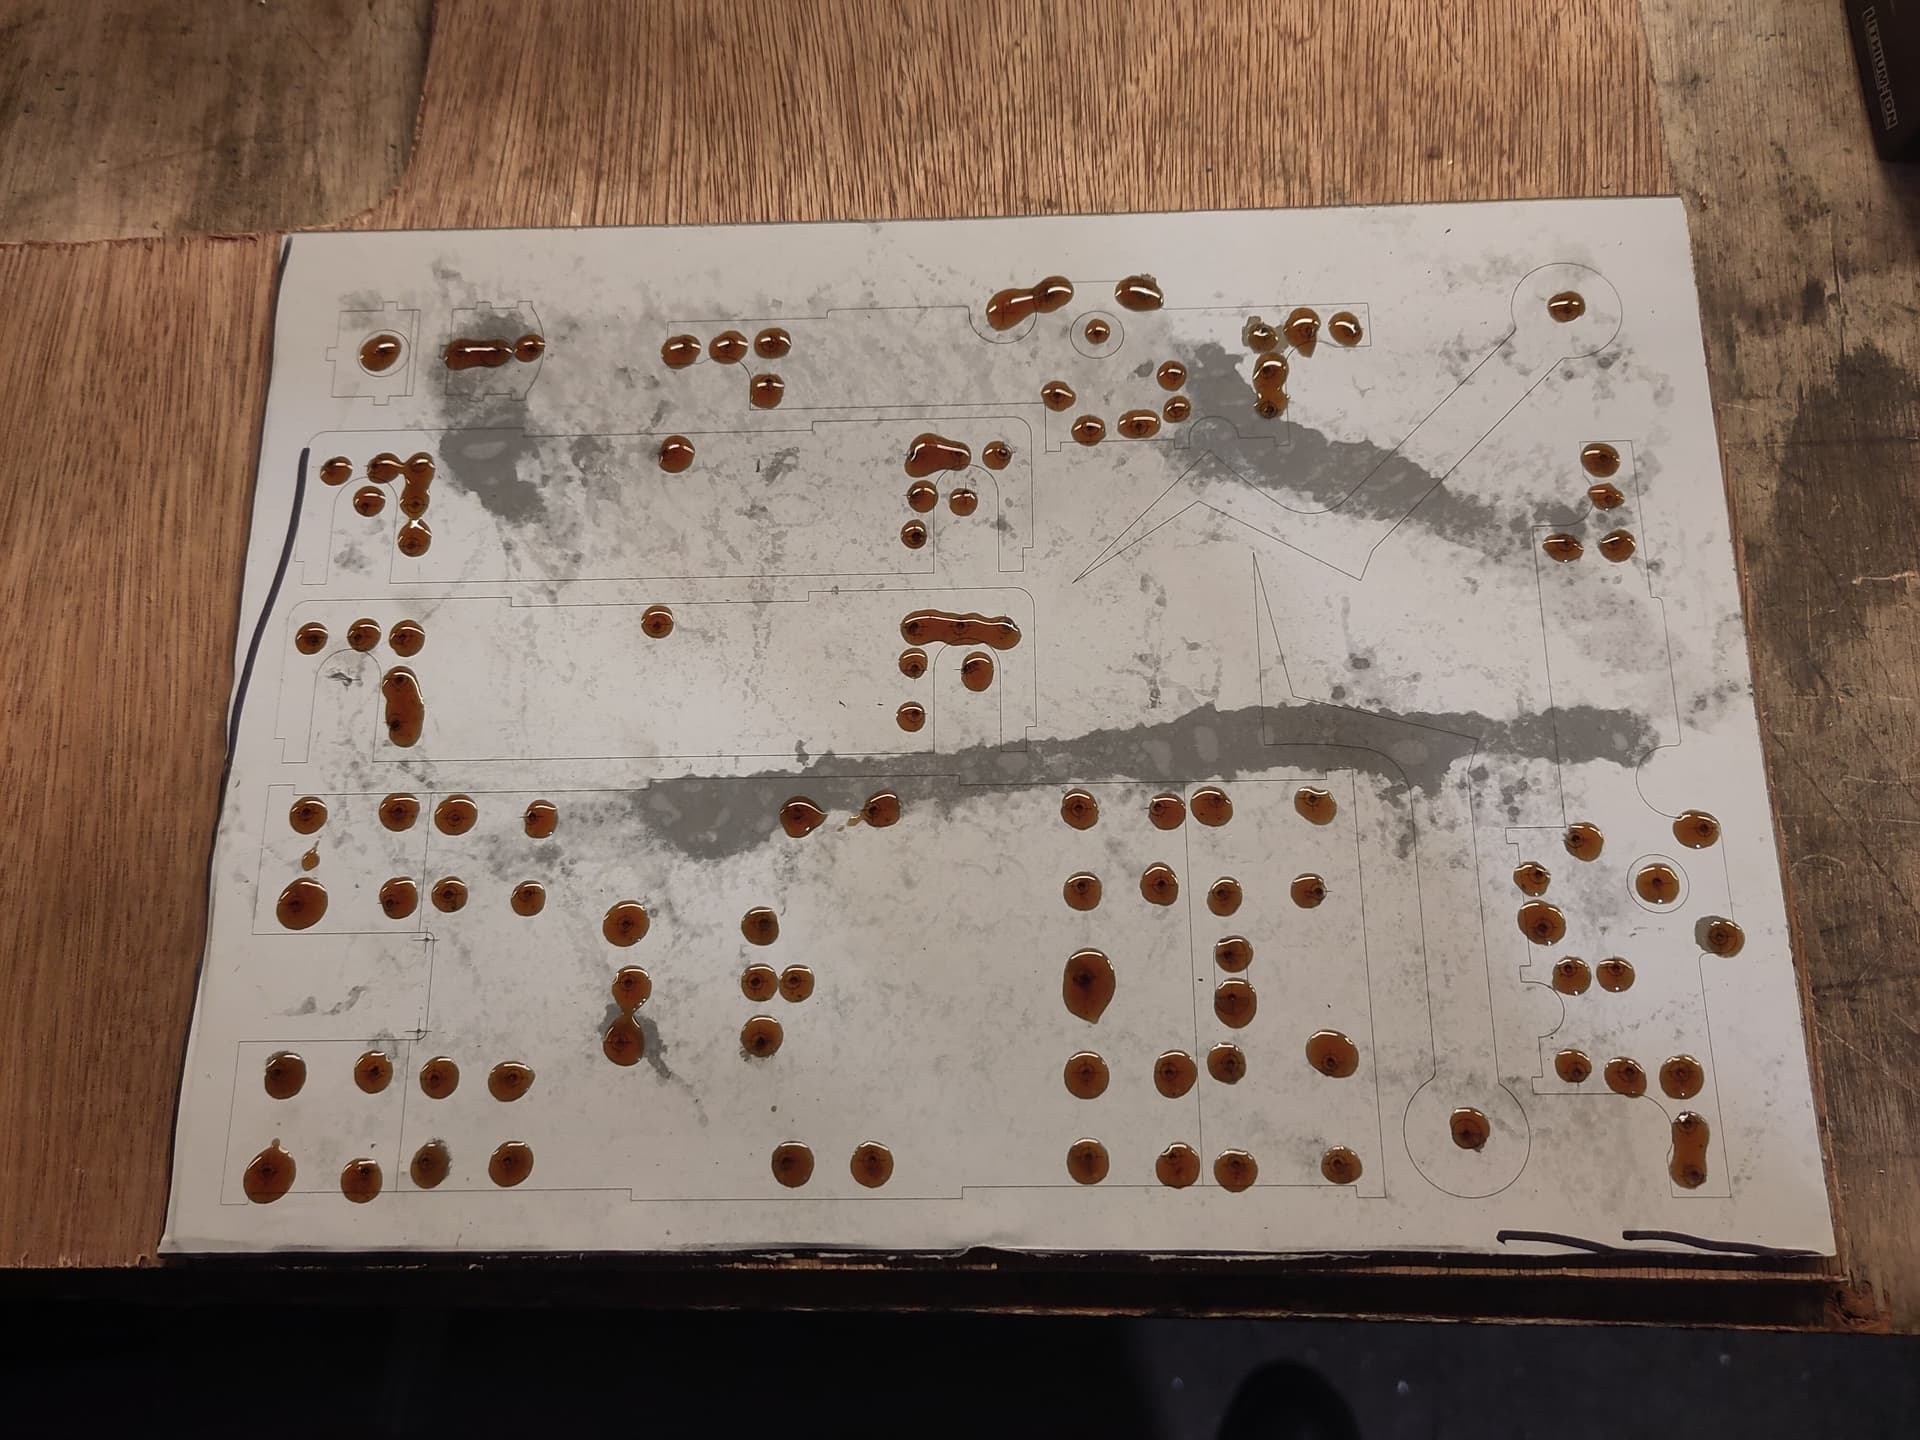
The PCB exists and should be soldered by the end of the week, so the bot is officially in progress now and I can post this as more than just a vapourbot. I’ve managed to squeeze onto the PCB a dual core microcontroller, 4x 3.5A brushed motor drive outputs, and a bunch of analogue stuff for things like drive and weapon power measurement, temperature monitoring, and also some IO for connecting a receiver and weapon controller(s). Rev2 will probably be a lot smaller as I remove bits I don’t use.

The goal with the custom PCB is mostly to handle the control mixing. I want a robot that can drift, or rotate on the spot around a single wheel, and this should allow me to handle all that in software. It also allows me to do things like motor stall detection and current limiting. I’m also a data nerd, so I’d like to stick and IMU in there somewhere and do some datalogging. I think it would be cool to watch the graphs synched to a fight video.

So that’s where I’m at! I’m actually a little apprehensive about posting because I feel somehow like I’m splitting the difference between noob and tryhard, so please don’t hold back with feedback, I probably won’t cry. I have a few ideas where the design is lacking and which bits are going to fail, but I’d like to hear other people’s opinions too.

Thank you for reading!

PS. If anyone gets the reference with the name, please let me know where to get Bristol Bad Film Club stickers.

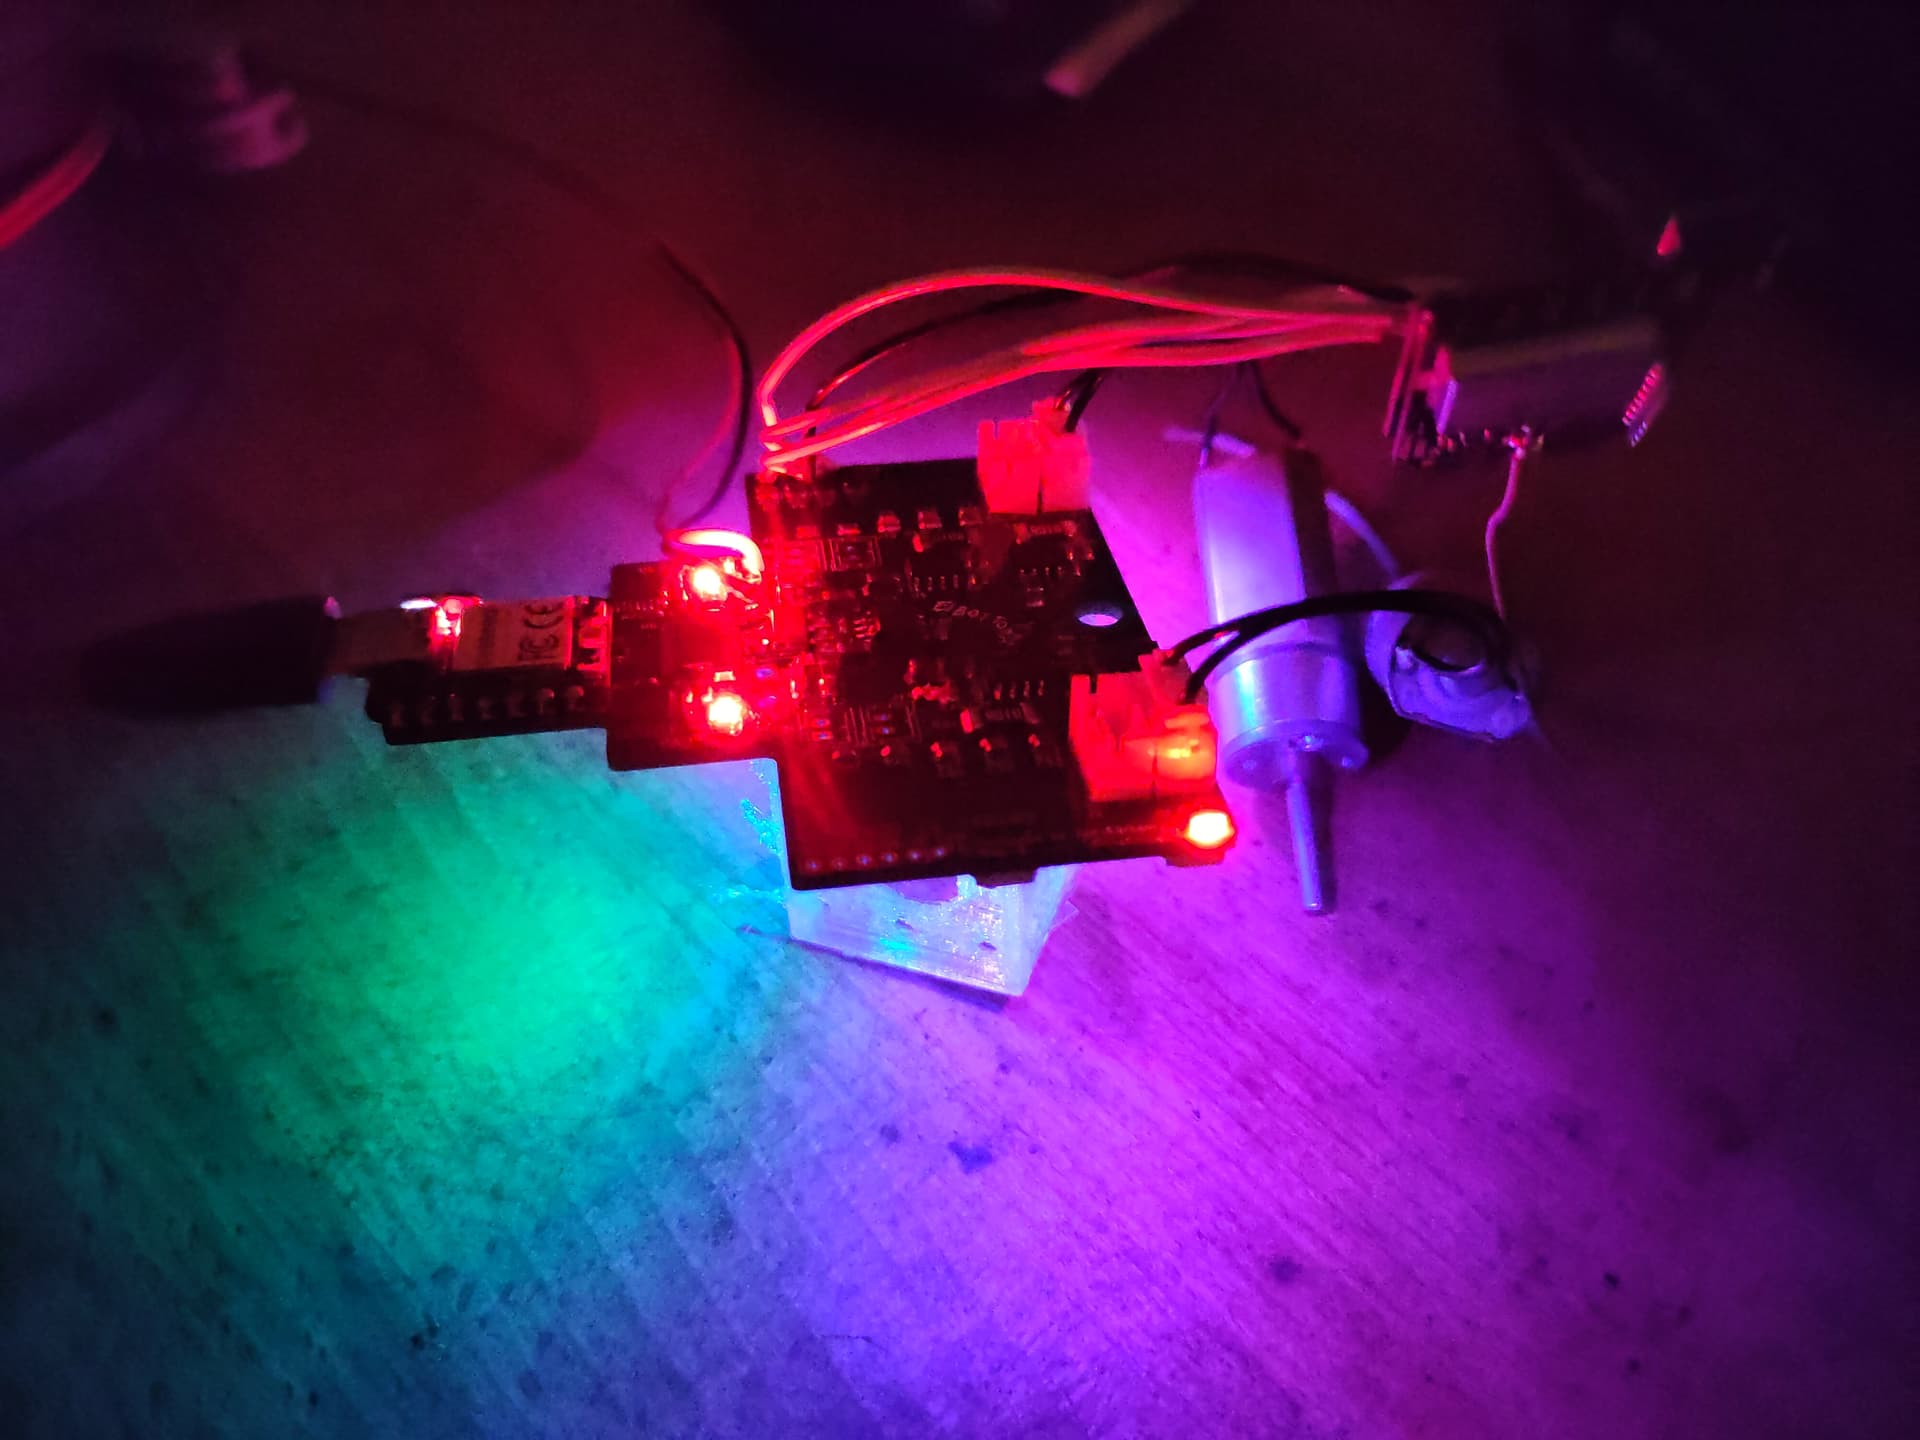
PPS. It has RGB underglow, of course.

6 Likes

Hi, lovely to see something new. Thank you for sharing

I always say there’s no such thing as over engineering.

The custom electronics are super impressive and I can’t wait to see how that all turns out. That’s an impressively small space you have filled with robot too. Small is beautiful.

It’s not designed along traditional UK ethos and that’s no bad thing. I think you’re far enough along and realistically committed to make this version of your robot as it stands. I can’t see anything that flat out won’t work so probably the best is to build it and go from there. It’d be a dull world if we were all the same.

Here’s what I think you’ll find (reality may vary)

Underpowered drive, potentially extra points of failure from the bevel stages. Turning may also suck a bit with the length to width ratio of the wheel base. It looks like it will go laser straight however.

Chassis and armour will suffer at the hands of any spinning weapon. I see a lot of potential bending and buckling and shock transmitted quite hard. 2mm stainless is a bit lacking, no matter how shiny.

I don’t want to discourage as, like I try to get across diversity is great and I have the feeling you’re pretty set on this version done this way. The non standard choices for components and construction feel deliberate and considered.

Best of luck! Following with interest.

I always say there’s no such thing as over engineering.

I think it applies when the perfect becomes the enemy of the good! Thankfully my ethos is “it’s not just good, it’s good enough” :smiley:

The custom electronics are super impressive and I can’t wait to see how that all turns out. That’s an impressively small space you have filled with robot too. Small is beautiful.

Thanks! My day job involves a lot of electronics so it’s the bit I’m most confident with, I tried to package the mechanical components with the same kind of density that I’ll do a PCB and it took a lot of time but I think it worked out.

It’s not designed along traditional UK ethos and that’s no bad thing. I think you’re far enough along and realistically committed to make this version of your robot as it stands. I can’t see anything that flat out won’t work so probably the best is to build it and go from there. It’d be a dull world if we were all the same.

The engineering is the fun bit, I won’t be sad if it gets rekt by a 12 year old with a kit bot.

Underpowered drive, potentially extra points of failure from the bevel stages. Turning may also suck a bit with the length to width ratio of the wheel base. It looks like it will go laser straight however.

Agreed, I realise now a chassis like this needs way more drive and it probably deserves brushless, but sunk costs mean right now I’m committed to the rev1 PCB with brushed control. I might pick up some 6V motors and see how long they last on 3S, I have the benefit of being able to find how much is too much and run them at like 80% of that in constant current mode.

The bevel gears are a necessary evil for packaging so tightly, but I’m hoping the big squishy EPDM wheels and TPU hubs soak up any big hits. The shafts, gears and bearings are far chunkier than you see inside a 20 or 25mm gear motor and plenty of folks just bolt a wheel to the output shaft of those and stick it out the side of the bot just fine, so fingers crossed it’s up to the job.

WRT manoeuvrability this is hopefully where the control mixing comes in. If it doesn’t turn enough I can brake or even reverse the front inside wheel while overdriving the rear outside, this should give me some extra rotational control without losing that straight line control.

Chassis and armour will suffer at the hands of any spinning weapon. I see a lot of potential bending and buckling and shock transmitted quite hard. 2mm stainless is a bit lacking, no matter how shiny.

Agreed again, maybe I could maybe go full tryhard and weld the tub from hardox but that doesn’t polish up nearly as nicely! I’m losing a lot of weight to the bottom of the tub so maybe I can shift some material around to get some more weight where it matters.

I don’t want to discourage as, like I try to get across diversity is great and I have the feeling you’re pretty set on this version done this way. The non standard choices for components and construction feel deliberate and considered.

You got it, it’s partially the challenge of making weird design choices work, partially that I’d prefer to work with materials and techniques I understand and enjoy working with, even if they aren’t the meta. I’m also still pretty inexperienced at 3D CAD so that’s a limiting factor!

Best of luck! Following with interest.

Thanks! Now that I’ve posted here I have to finish the thing so there will be updates as and when.

Looks very cool. Lovely to see something going all out on unconventional build materials and methods. Look forward to seeing more! :smiley:

Love the design. You might be able to gain a bit of power back by using slot car motors which come in a variety of sizes and power levels - they’re typically 180 size, but do also come in 130.

You can get some pretty powerful 180 size motors meant for nerf blaster modding. There quite affordable reliable and fast.

Really cool stuff for a first robot, and I’m always happy to see a mention of one of Ireland’s greatest films of all time out in the wild!

Hey all, thanks for the kind words and suggestions. @Strang_H , @Cosmosrobotics , I’ve got an eye on some nerf and slot car motors, but also on some brushless solutions that I might be able to squeeze in. I think I can get by on the motors I have for now but it’s nice to have options.

@Shooty you absolutely bet it’s getting “You made me look bad, and that’s not good” written on the bottom.

I’ve been busy for a while but didn’t have much to show off, but I now have actual, tangible physical progress!

The first PCB is built, and I bodged on a receiver and some spare 16mm motors. I’ve been writing code and have most of the hardware working and only one or two dumb rev1 bugs so far. Also, the most important feature is working and the robot is basically done:

I exported all the metal parts as DXF and printed them on paper, which I spray glued (bad idea) to a comedically large sheet of 2mm 304 stainless (it was on sale!), and put through my tiny lidl bandsaw (pun intended)

Every single hole centre punched, centre drilled, and pre-soaked in cutting fluid to make the paper really gross and the lines hard to see. The smears are from the blocked spray glue nozzle (the other half of the stream went all over my parts boxes behind)

Six drill bits later (aliexpress carbide, never again) and realising that I hadn’t considered how I’d get the saw blade round the parts I’d just drilled I had rough cut parts.

Some quality time on the belt grinder, a few hours of filing, and a little love with my extremely sketchy home made vice brake I have a chassis tub that I can dry fit together, in (almost) any combination of orientation with the side plates, whose holes also line up with each other.

Next up is welding, but I’m going to need to pick up some 1mm filler rod first. I’m also going to hot glue the PCB and motors to some cardboard so I can drive it around and test some weird drive kinematics in a safe* and controlled manner. I’ve enlisted the help of a maths nerd friend because I had a whacky idea about torque vectoring but the numbers got away from me.

*I’d better go write that low voltage cutoff routine…

7 Likes

Update: Welded

Half assed streaky 600 grit pass on the belt grinder.


Fit check! Using 3D printed gearboxes just to mock up for now.


No banana for scale so a USB-A plug will have to do.

I’ve been driving a PCB on wheels around my flat and I’m getting a feel for the software side, and I’m keen to have a chassis I can drive round, so next up I need to re-design a gearbox housing specifically for 3D printing*, and machine all the parts that need a lathe (shoutout to Swindon Makerspace).

*there’s this whole thing with an unfinished CNC project that means the aluminium gearbox housings depend on my to desire to either finish the CNC machine or punch and drill many many (more) holes very precisely by hand.

2 Likes

Looks great, very different seeing it in the flesh (metal)

Interesting to see how a welded single piece bathtub chassis holds up.

Wondering if you haven’t already paid for machining whether or not you could forego the metal gearboxes and just go down the printed route.

Looks great, very different seeing it in the flesh (metal)

Interesting to see how a welded single piece bathtub chassis holds up.

Thanks! Me too, it’s going to get yeeted off a loading dock a few dozen times during testing so we’ll see what happens.

Wondering if you haven’t already paid for machining whether or not you could forego the metal gearboxes and just go down the printed route.

Haven’t paid for any machining, the plan is to do all that myself. The gearbox housings use 25mm box section, so it’s just a case of drilling all the holes and taking the corners off. I’ve considered printed gearboxes but I’m only set up for PLA and TPU; PLA is going to be too fragile I think and TPU is going to be too flexible for the gear mesh tolerances.

I have printed some bits and assembled the subframe around a printed weapon gearbox. It holds all the right bits in all the right places but there’s plenty of improvements to be made.

Adding the stiff PLA parts has given the thing a solid heft it didn’t before. This is going to make such a satisfying noise when it inevitably hits the roof of the arena.


The clearances between the back side of the gearbox and the lifter gear are tight, and that part only just worked to support the bearing when this part was stainless. Some CAD work to add material where it fits and maybe a bushing that needs a smaller hole should do the trick.

Weight check! My spreadsheet says it should be 914 grammes in this configuration, not including PLA parts and fasteners, so I’m in really good shape - not sure what the disparity is but probably the motors.

Apologies for the condition of the scale. I’m not a drug lord I promise, I just bake a lot of bread.

…is that a robot in your pocket, or are you just pleased to see me?

A friend has offered me some kind of fancy filament printing (CF nylon maybe??), so I’m going to have him print the little weapon gearbox dingus, and also some drive gearboxes to see how that works out. Otherwise, just lathe work and some printed bits before I have everything I need for a running, driving chassis. I have blunted the forks in preparation.

1 Like

I mean, they’re not mutually exclusive.

Loving the progress still. Quite nice to see something that’s so dense and metal in the scene of airy fairy plastic bots.

Have you got end stops or positional control on your lifter or is it just going to be judgment based?

I mean, they’re not mutually exclusive.

No comment

Loving the progress still. Quite nice to see something that’s so dense and metal in the scene of airy fairy plastic bots.

No shade on compliant designs, that’s what my wedge mounts and wheels are for, but as I said I need excuses to play with my tools :smiley:

Have you got end stops or positional control on your lifter or is it just going to be judgment based?

I’m going to make it behave like a servo, either with its own little controller board with an encoder or pot on the shaft, or I just tear the guts out of a servo, hook it up and see what happens. Leaning towards the latter! It will run into that screw or the gearbox housing at the end of its travel, but I should be able to software limit it to keep it away from that.

Good news! Wheels are on the ground and it’s driving!

Bad news… It’s extremely slow. I wasn’t expecting miracles from the aliexpress motors but it can barely get out of its own way, and has very little pushing power. I’ll pick up a couple more brushed motors to test with in the mean time, but I think brushless is on the cards…

what RPM are the motors? We tend to go for about 1000RPM at the gearbox output on 12v (3S).

They’re 833RPM motors, but at the wheels I’m only seeing 650rpm (probably a combination of load from the gearbox and 11.1v vs 12v). I might try over-volt the 6V versions and see if I burn them out.

I think it’s just a question of power, that is the roadblock you’re coming up against. I think a motor swap might see you right without drastic changes if the gearbox is up to snuff. What is the pinion bore/stock motor shaft size?

Those motor/gearbox combos have a 2mm motor shaft and a 4mm gearbox output shaft, although I bought bevel gears with 3mm bores and have been reaming them out on a lathe to suit.

Ideally I’d like to find a Good Enough brushed solution so I don’t have to respin my control board, but I keep having flashbacks to my first ever brushless RC car and how crazy powerful it was after running brushed motors for so long…

Something like this should be a straight swap but much more up to the task.

Or you could look at nerf mod motors. https://www.uknerfwar.com/product-page/kracken-motors