OK, been working on this idea for a while and things are finally taking shape IRL, so time to go public.
Some of you from the Antweight scene will know of my obsession with something called Nitinol… This curious Nickel/Titanium alloy , developed by the US Naval Ordnance Labs in the 1950s, has a couple of different superpowers, depending on how it’s prepared. Better known of the two is the shape memory effect, whereby a Nitinol wire can be bent or straightened at will, but then ‘magically’ pings back its original (‘remembered’) shape when heated above a ‘transition temperature’. Far more useful for me though is its ‘super-elastic’ form; widely used in industry and medicine for things like unbreakable spectacle frames, dental braces and stents.
I first came across Nitinol when looking for a strong, light but very flexible wire to use as a sri-mech for my Antwight full-body spinner, “Rapid Unscheduled Disassembly”. This needed to be something stiff enough to flip the bot back over - but elastic enough not to get permanently bent out of shape each time it got hit by another spinner. The answer came in a length of 1.5mm Nitinol wire, found on eBay - which does the job perfectly. You can bend this stuff into remarkably tight curves and it just springs back again. Of course if you bend it far enough, it will eventually undergo plastic deformation (creep) and get kinked but the range of elasticity is somewhere around 10-30x that of other springy metals.
Ever since I first got my hands on this stuff, I’ve been trying to think of other innovative uses for it in combat robotics. Inspiration finally came when reading about the “pike square” infantry formations developed by 14th century Swiss Federation troops, and subsequently adopted by various armies throughout medieval Europe. Basic idea was you’d have a solid phalanx of men with 5-6m pikes sticking out in any direction, making it impossible for cavalry, or other foot soldiers to get close enough to engage with their own weapons. The pike-squares were trained to move en-masse in any direction, pushing their opponents before them.
Well, I figured - if that strategy was good enough to defeat Philip the Bold’s Cavalry at the Battle of Nancy and dominate combat the 30 years’ war, then maybe it would work as an “offensive armour” on a beetleweight? Specifically, it could be used to keep spinners, hammer-saws and grabbers out of reach - and if combined with a sufficiently powerful drive system - slam them against the walls or into the OOTA. A single 1.5mm Nitinol wire on its own won’t quite stop a 1.5kg beetle - but once 2-3 wires are engaged… it ain’t going anywhere. Cut off square at the end, the wire isn’t sharp enough to be a major health & safety hazard, but it should be fine enough to get under most beetleweight wedges. A mix of different length spines, some scraping the floor, others angled upwards, should suffice to stop almost any opponent - I could even throw in a few extra long spines angled upwards to deal with Stratus/BigBoy types…
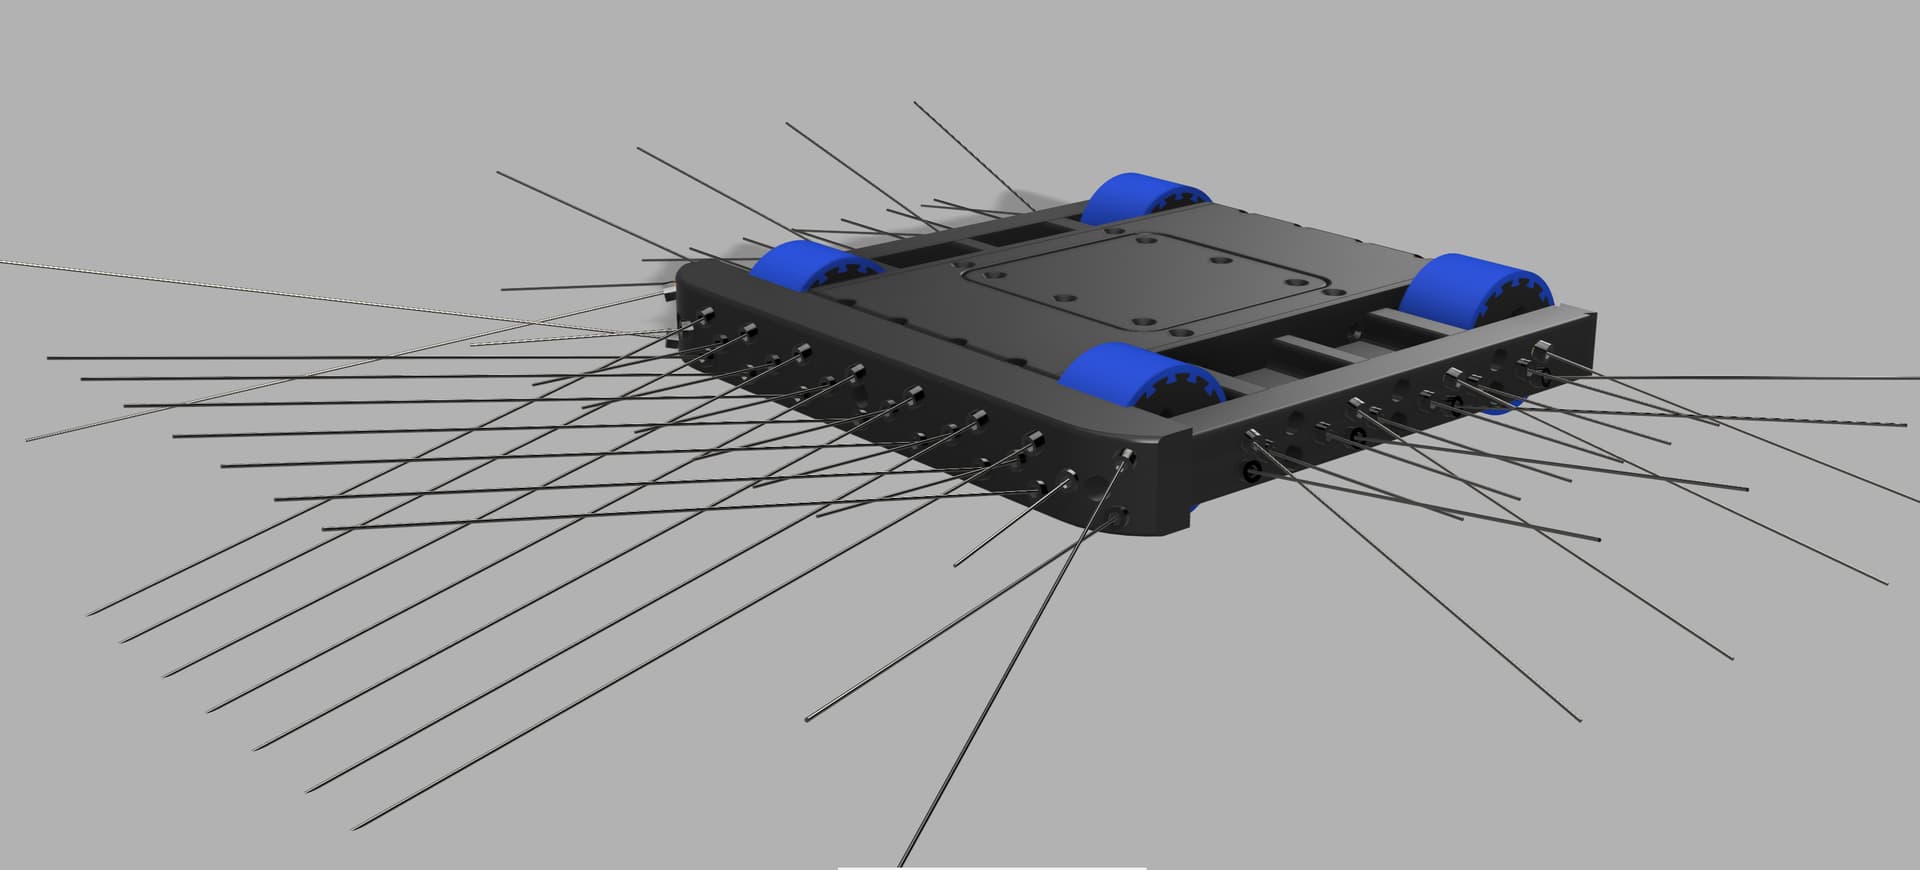
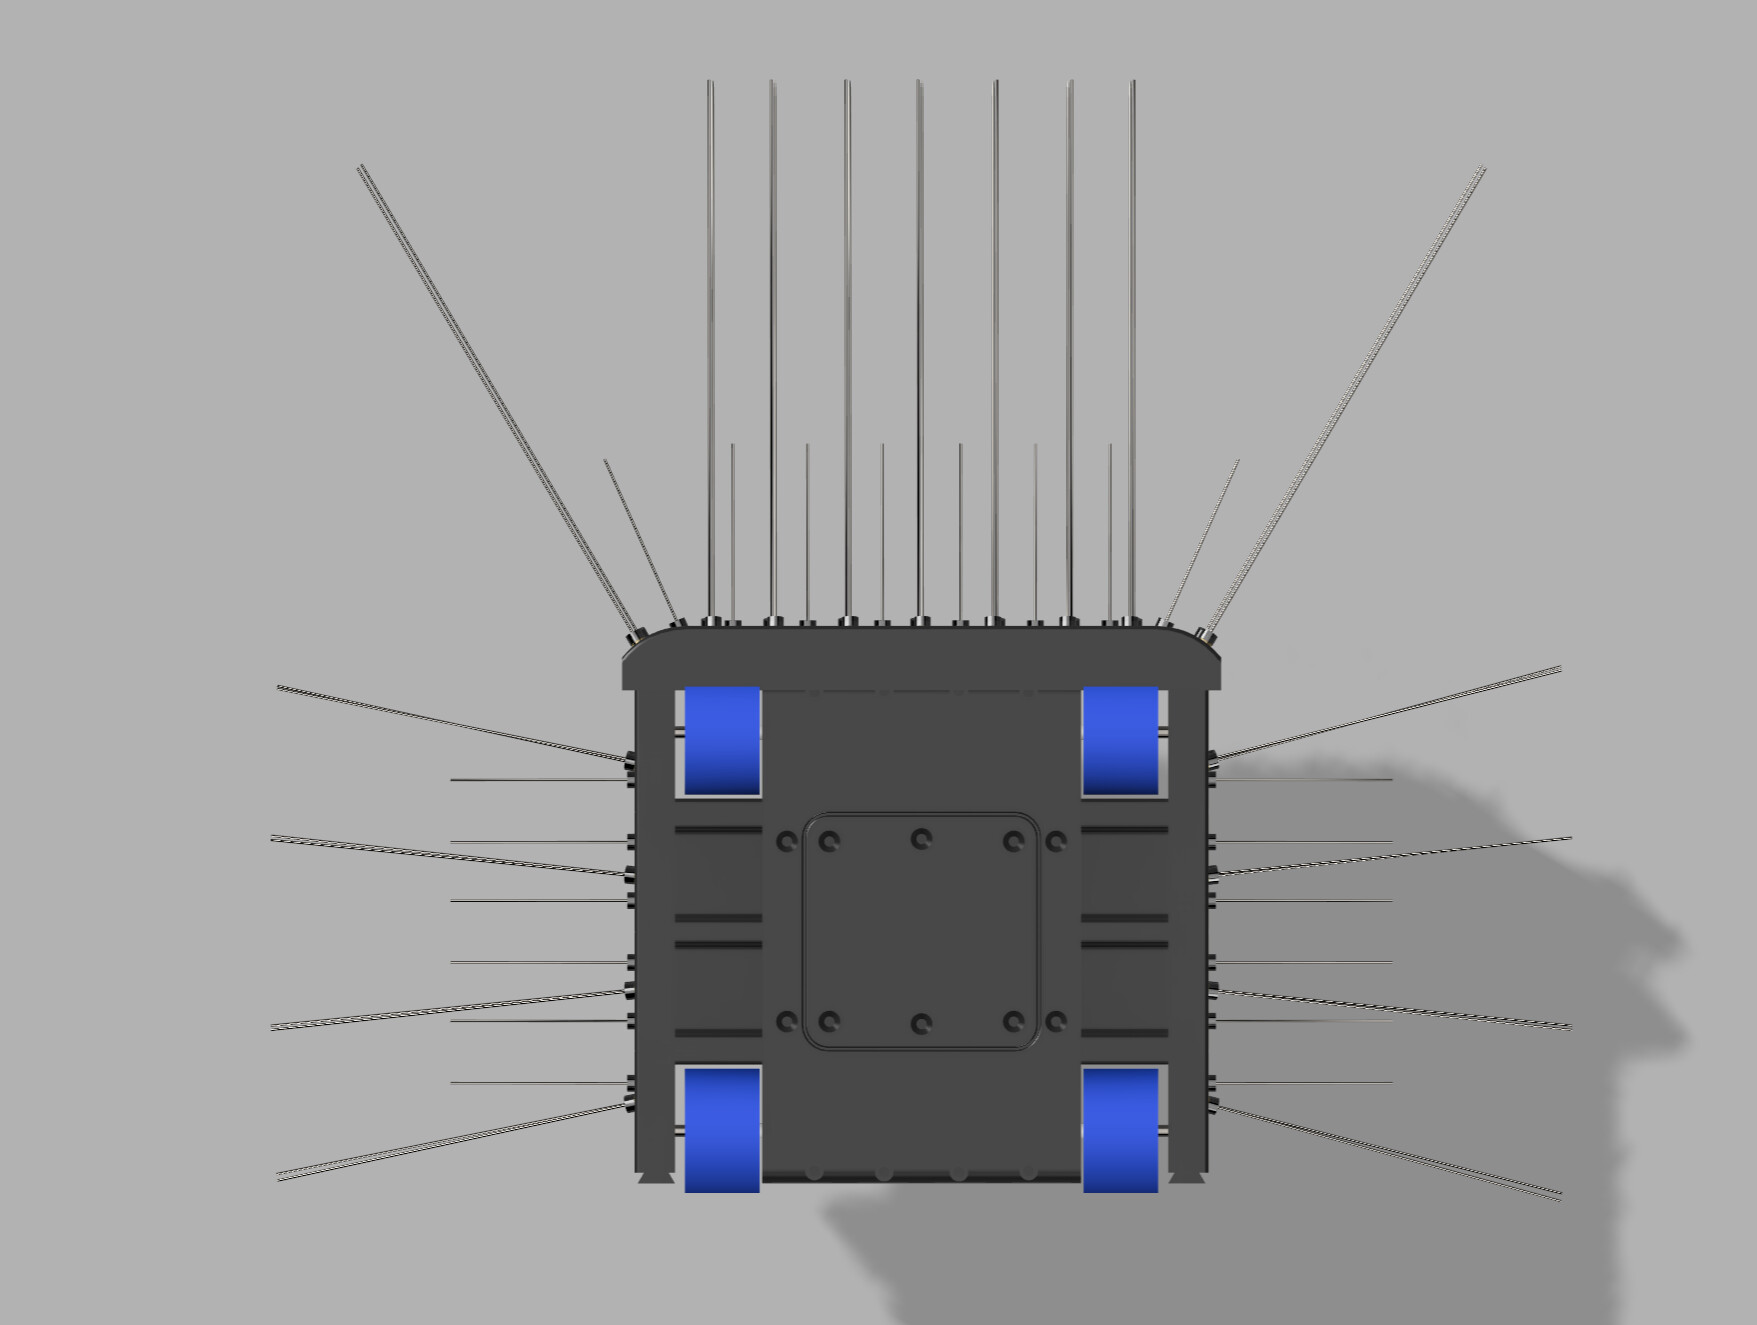
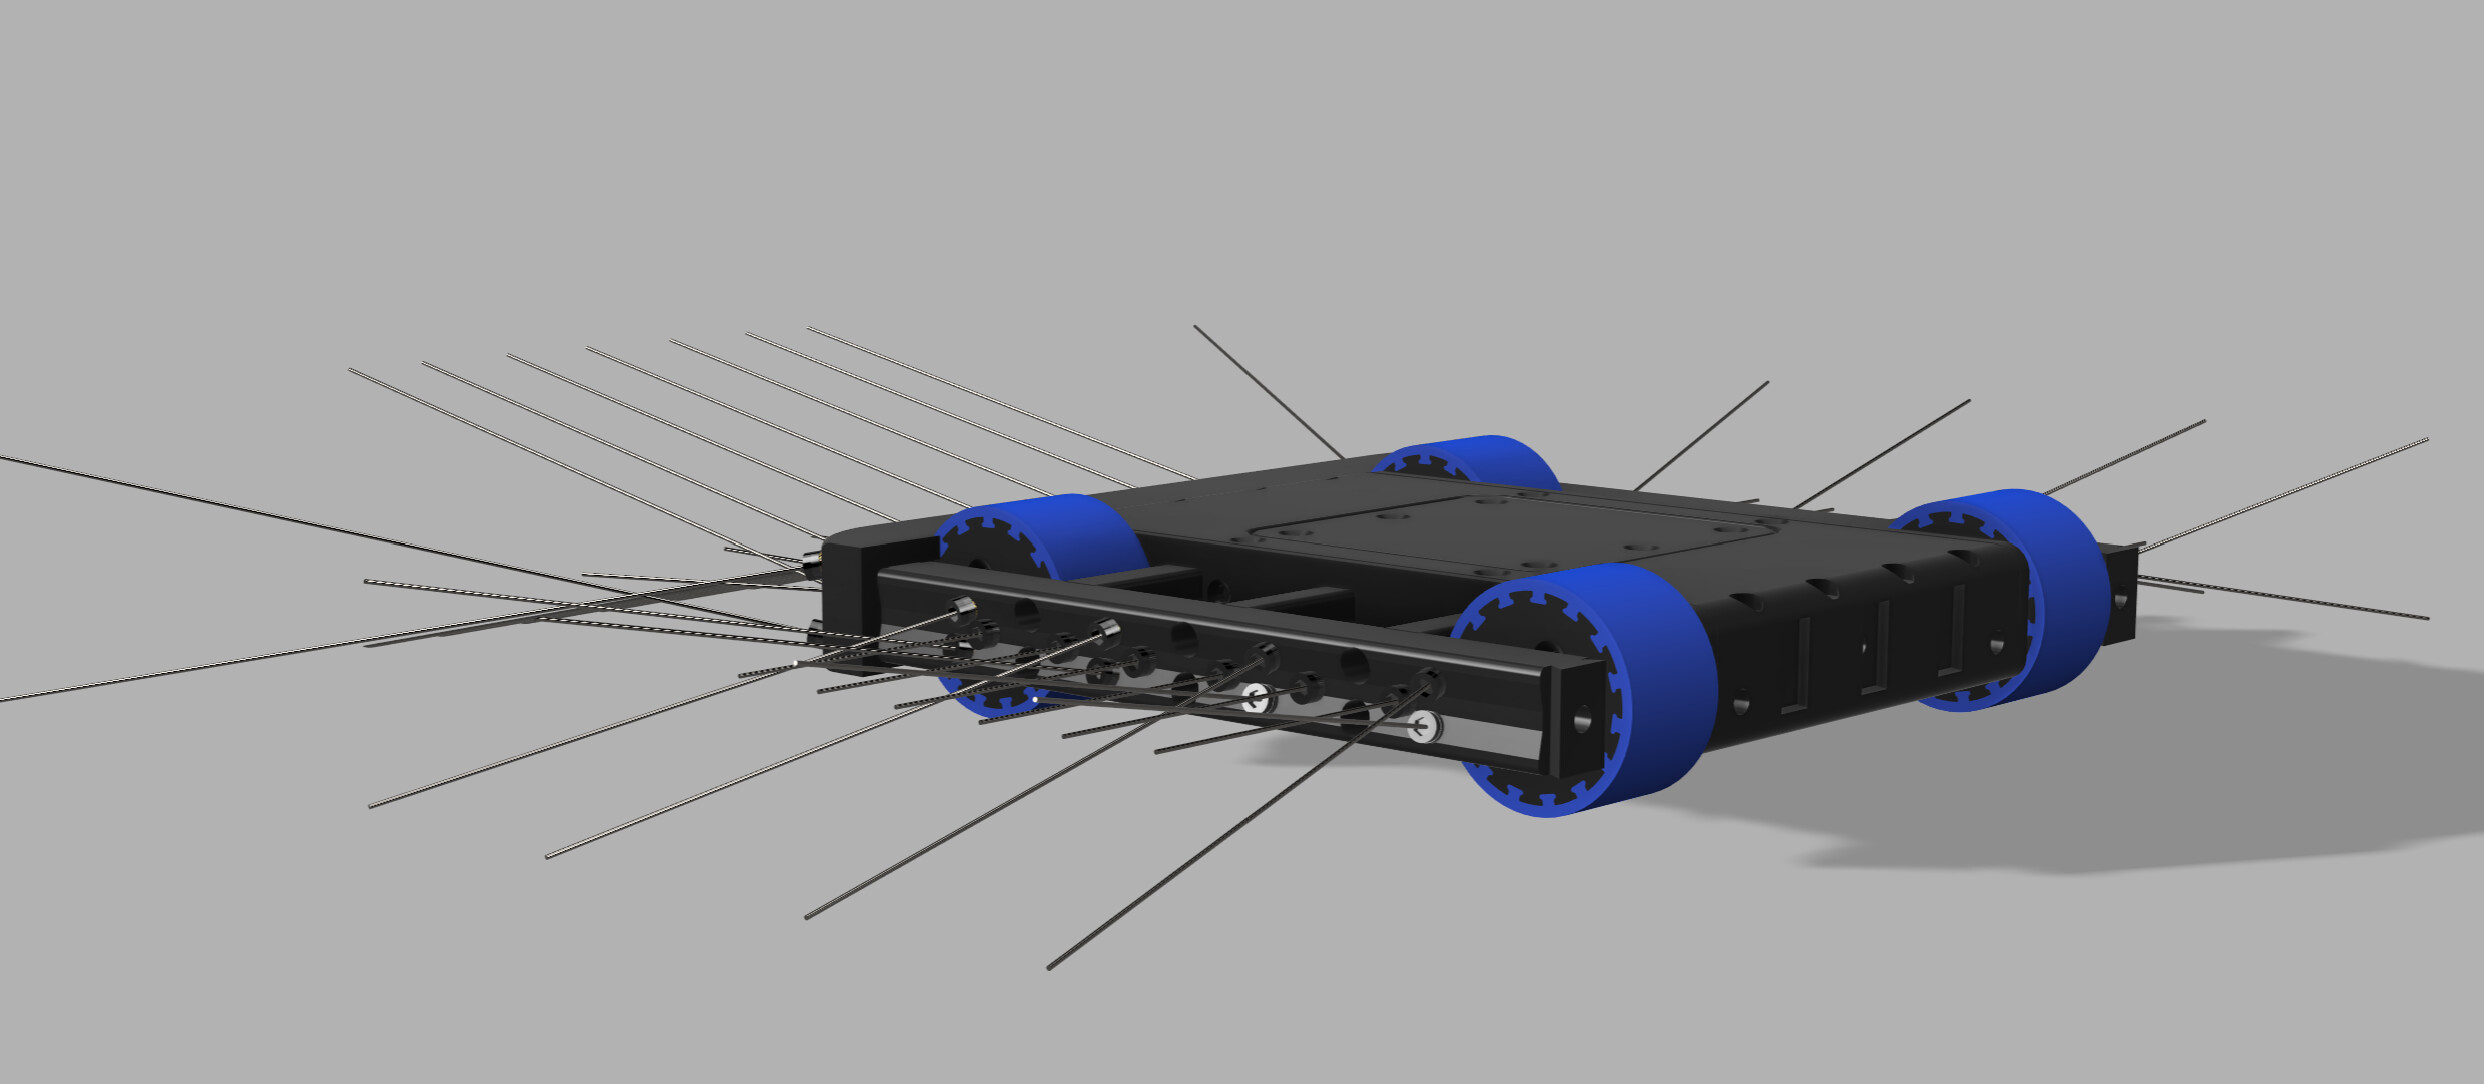
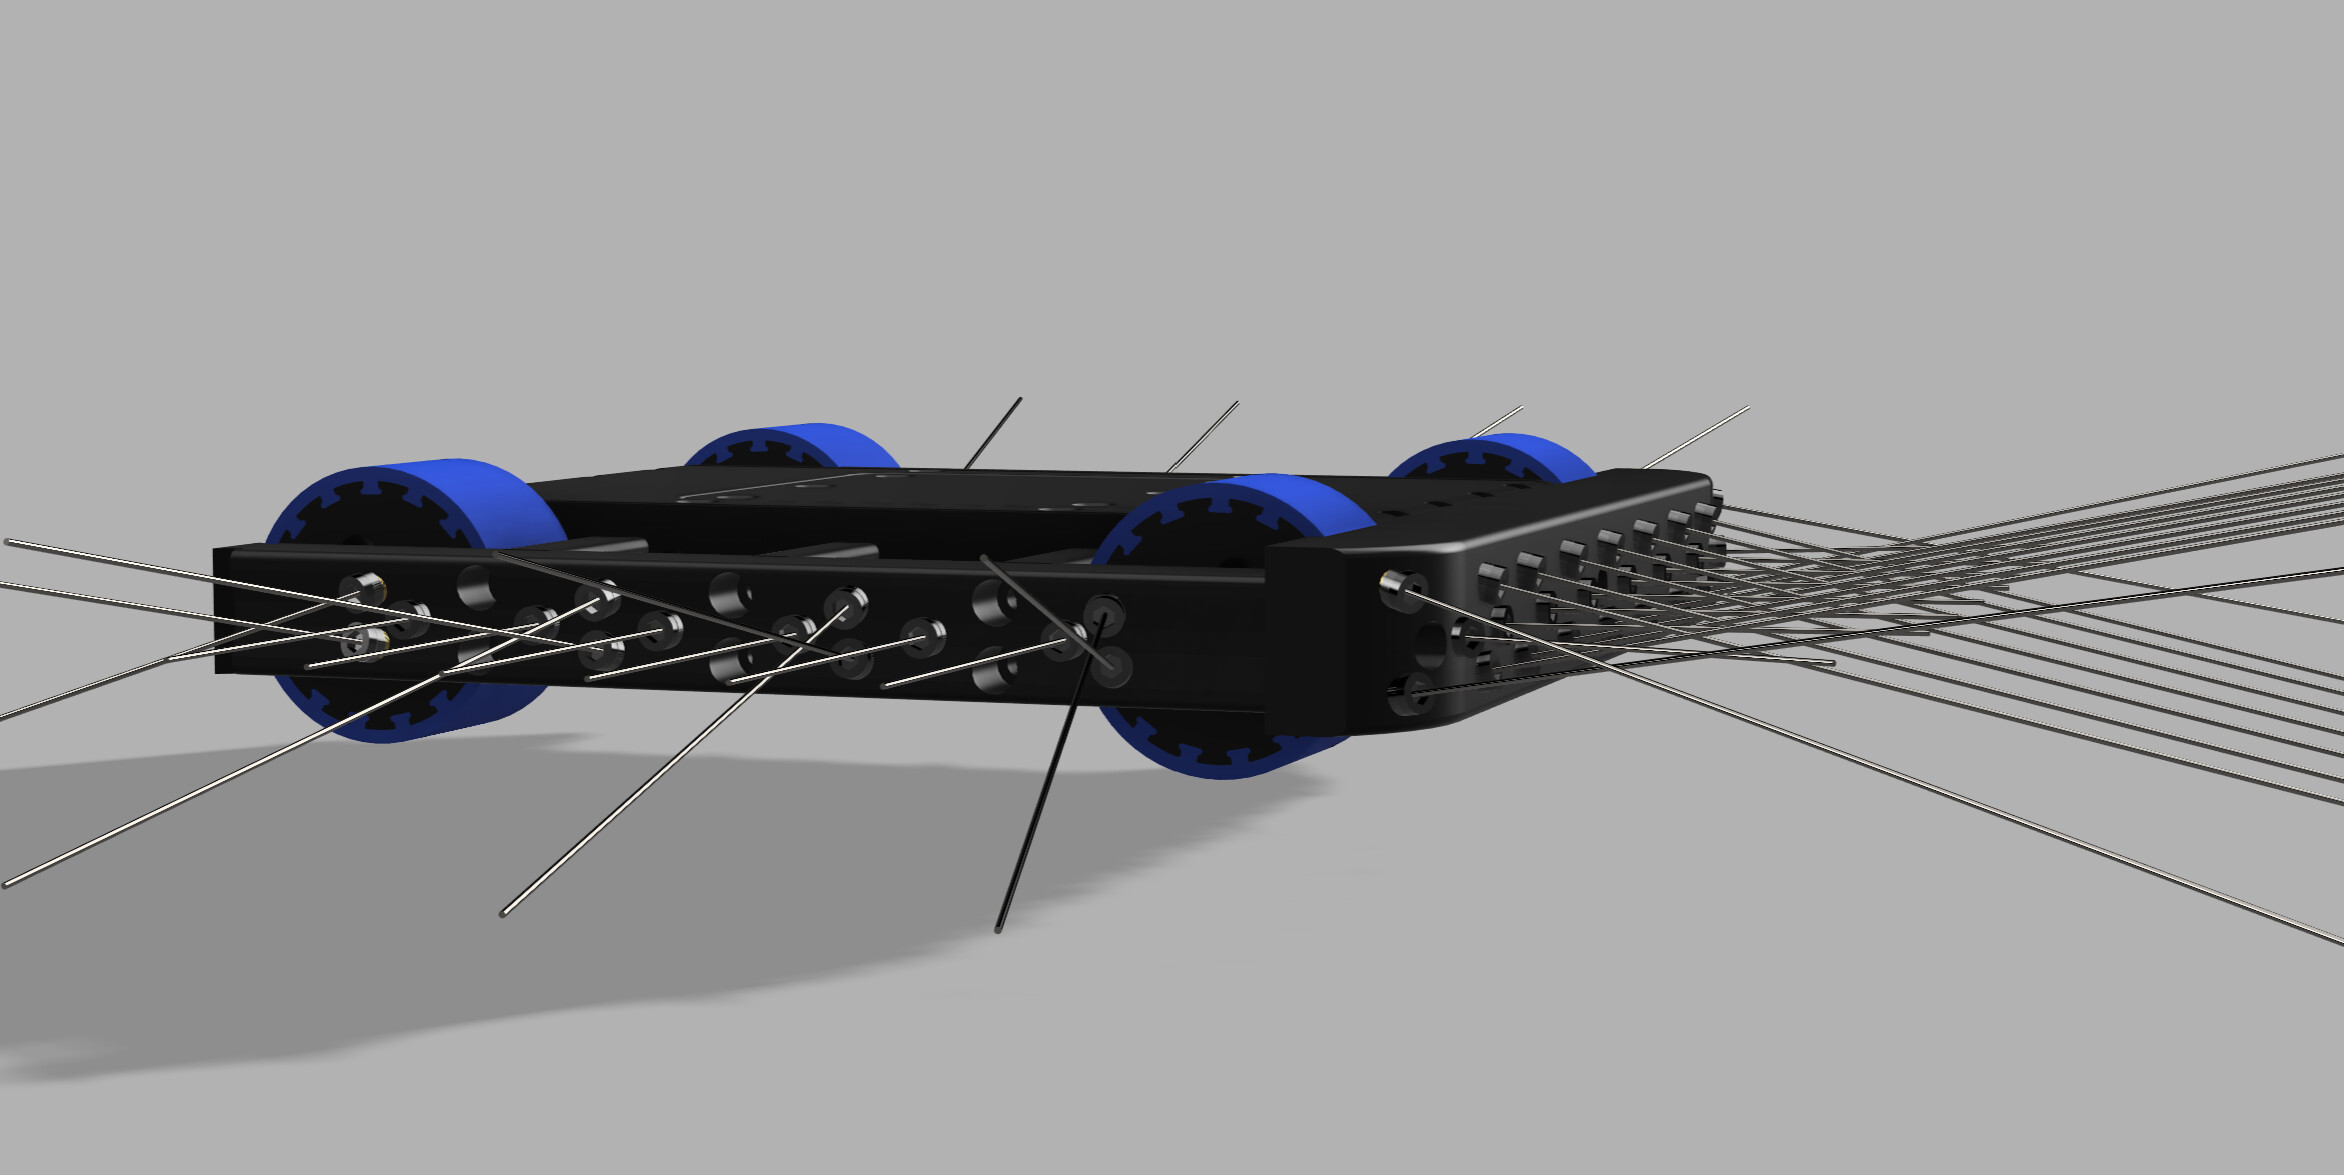
So, that was the design inspiration/thought process. And the result?
When time allows, I’ll follow up with detailed posts on the drive system, body construction, spine mounting, etc - but in summary, it’s printed (currently) in CF-Nylon (BambuLabs PA6-CF to be precise - mainly because it was on special offer), motors are my own DIY brushless combos, using some fairly heavy duty 22mm planetary gearboxes and 1806s, driven by AM32 ESCs. Wheels are 1" wide, mainly TPU, but with custom CF-Nylon mounting hubs and Shore A15 cast silicone tyres. I’ll probably make some alternate wheels with rounder profile and heavier grade silicone, in case these prove too fragile, or too grippy to drive well.
Overall chassis design is based around an exact square to the centre of the wheels, for optimum handling.
The spines are mounted into M4 aluminium cap-heads (centre drilled for the wire, which is then Araldited into place), which screw into an array of brass threaded inserts. Plan is to have far more inserts than I need, pointing off in every possible direction, so I can swap spines around quickly depending on the opponent. For fighting dangerous spinners, or in melees, I’ll have (longer) spines all the way around - against other control bots, I can remove the rear bumper to ensure better grip if the front gets lifted up.
Current plan is to run on 3S but may go up to 4S if I need the extra speed. Will know for sure once I’ve finished the prototype but currently looks like it should end up about 200g underweight… in which case I might chuck in a 200g prickly mini-bot for laughs.
Drive will have beans! Lower than 30A shore may wear a bit too quickly FYI? Just a few beetle rules things to consider:
Sharp edge protection will be a bit of a faff - I’d have like a pool noodle you can quickly wrap around all the spikes in one go
Is there a risk of spinners hitting one of these wires and entangling in it?
Consider most events are running one bot-on-bot unstick then going to the judges. We’ve had a couple other bots in this style, and they tend to get stuck with other bots beached on top without being able to separate
I’m sure you’re right about the soft tyres but I’ll give them a try anyway - if my antweight record is anything to go by, I doubt I’ll survive long enough in any competition for things to wear out. Planning to cast some extra wheels of the same design with 28A tyres, as well as some with more durable rounder-profile tyres for practice driving. Key thing is to have options, so I can swap and change on the day.
As for the rules…
Looking into options for sharp protection (you mean I can’t just spend 20 mins sticking a cork on the end of each spine after every fight? ). Current ideas include a large wedding-hat box, or possibly a cymbal carrying case. Last resort would just be a large shallow builders trug, with a strap or something to secure the bot in it.
wrt entanglement, there’s zero chance of the wire getting wrapped around a spinner or egg-beater as it’s far too stiff for that. At full spin the wire should just flick/bounce off; it would be like trying to shove a bendy stick into fast-moving bicycle wheel spokes. If an egg-beater was going slowly, it could jam it and stop it moving - but no more so than long forks, or the prongs on a forked lifter.
Unstick could be an issue, though on the whole I think smooth wire spines will be much less of a problem than those glorious Dolos-style barbed forks some people use. My bigger worry is getting stuck under the arena wall. Generally though I’m hoping the powerful drive will be enough to pull free of most entanglements, or else to spin on the spot and/or shake free.
Interested to hear there have been similar style bots in the past - being relatively new to Beetles, it’s always hard to know if an idea is original of not!
looks really cool! giving me serios robot wars 98 vibes. seem to remember there being a video of this RC car covered in a aluminium shell which was covered in nails, not nearly as long but Kinda the same look
its a cool strategy for sure with the keep away but i do worry if you will fall foul of your own spins if they get caught in the floor and bend underneath you high siding yourself
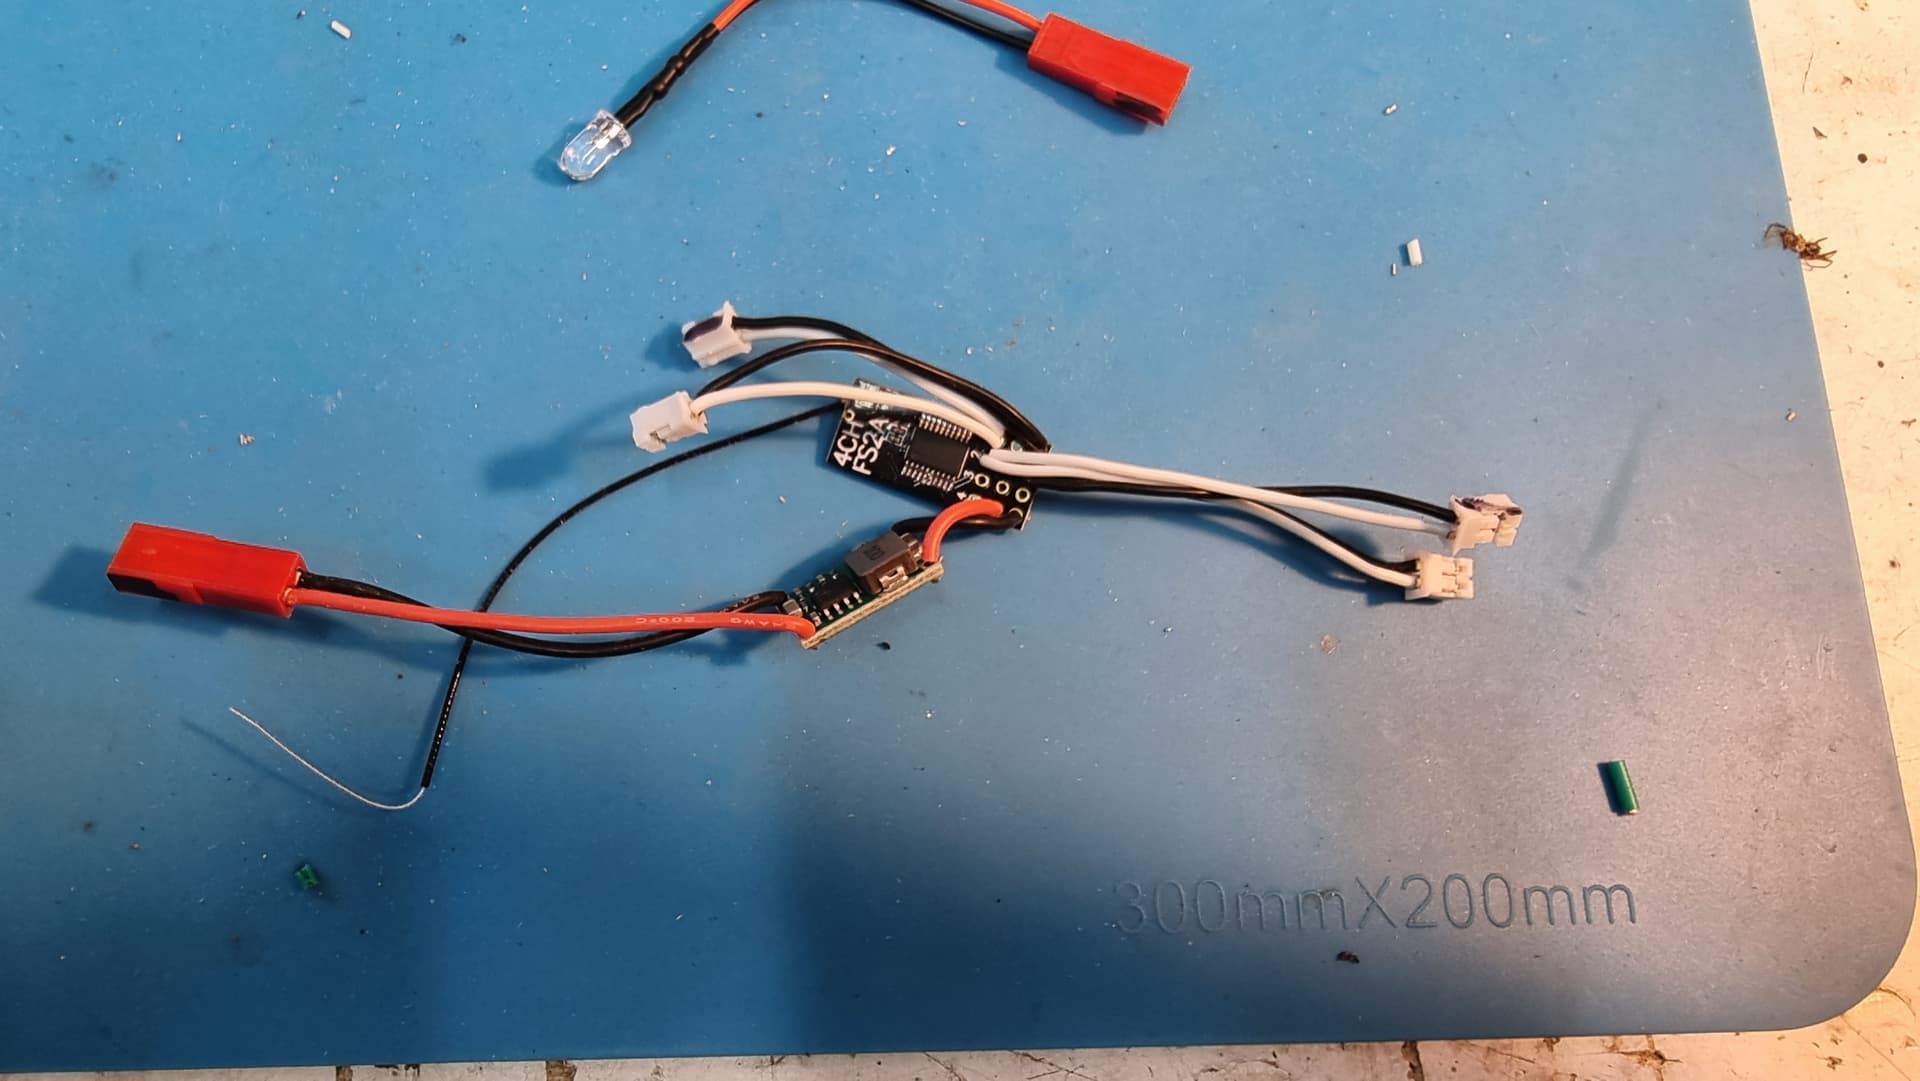
For the Rx itself, i’m using little 2-pin JST-PH (2mm pitch) crimps for the signal connections to the ESC. A little unconventional perhaps but I use these a lot in ants, so it’s what I’m used to.
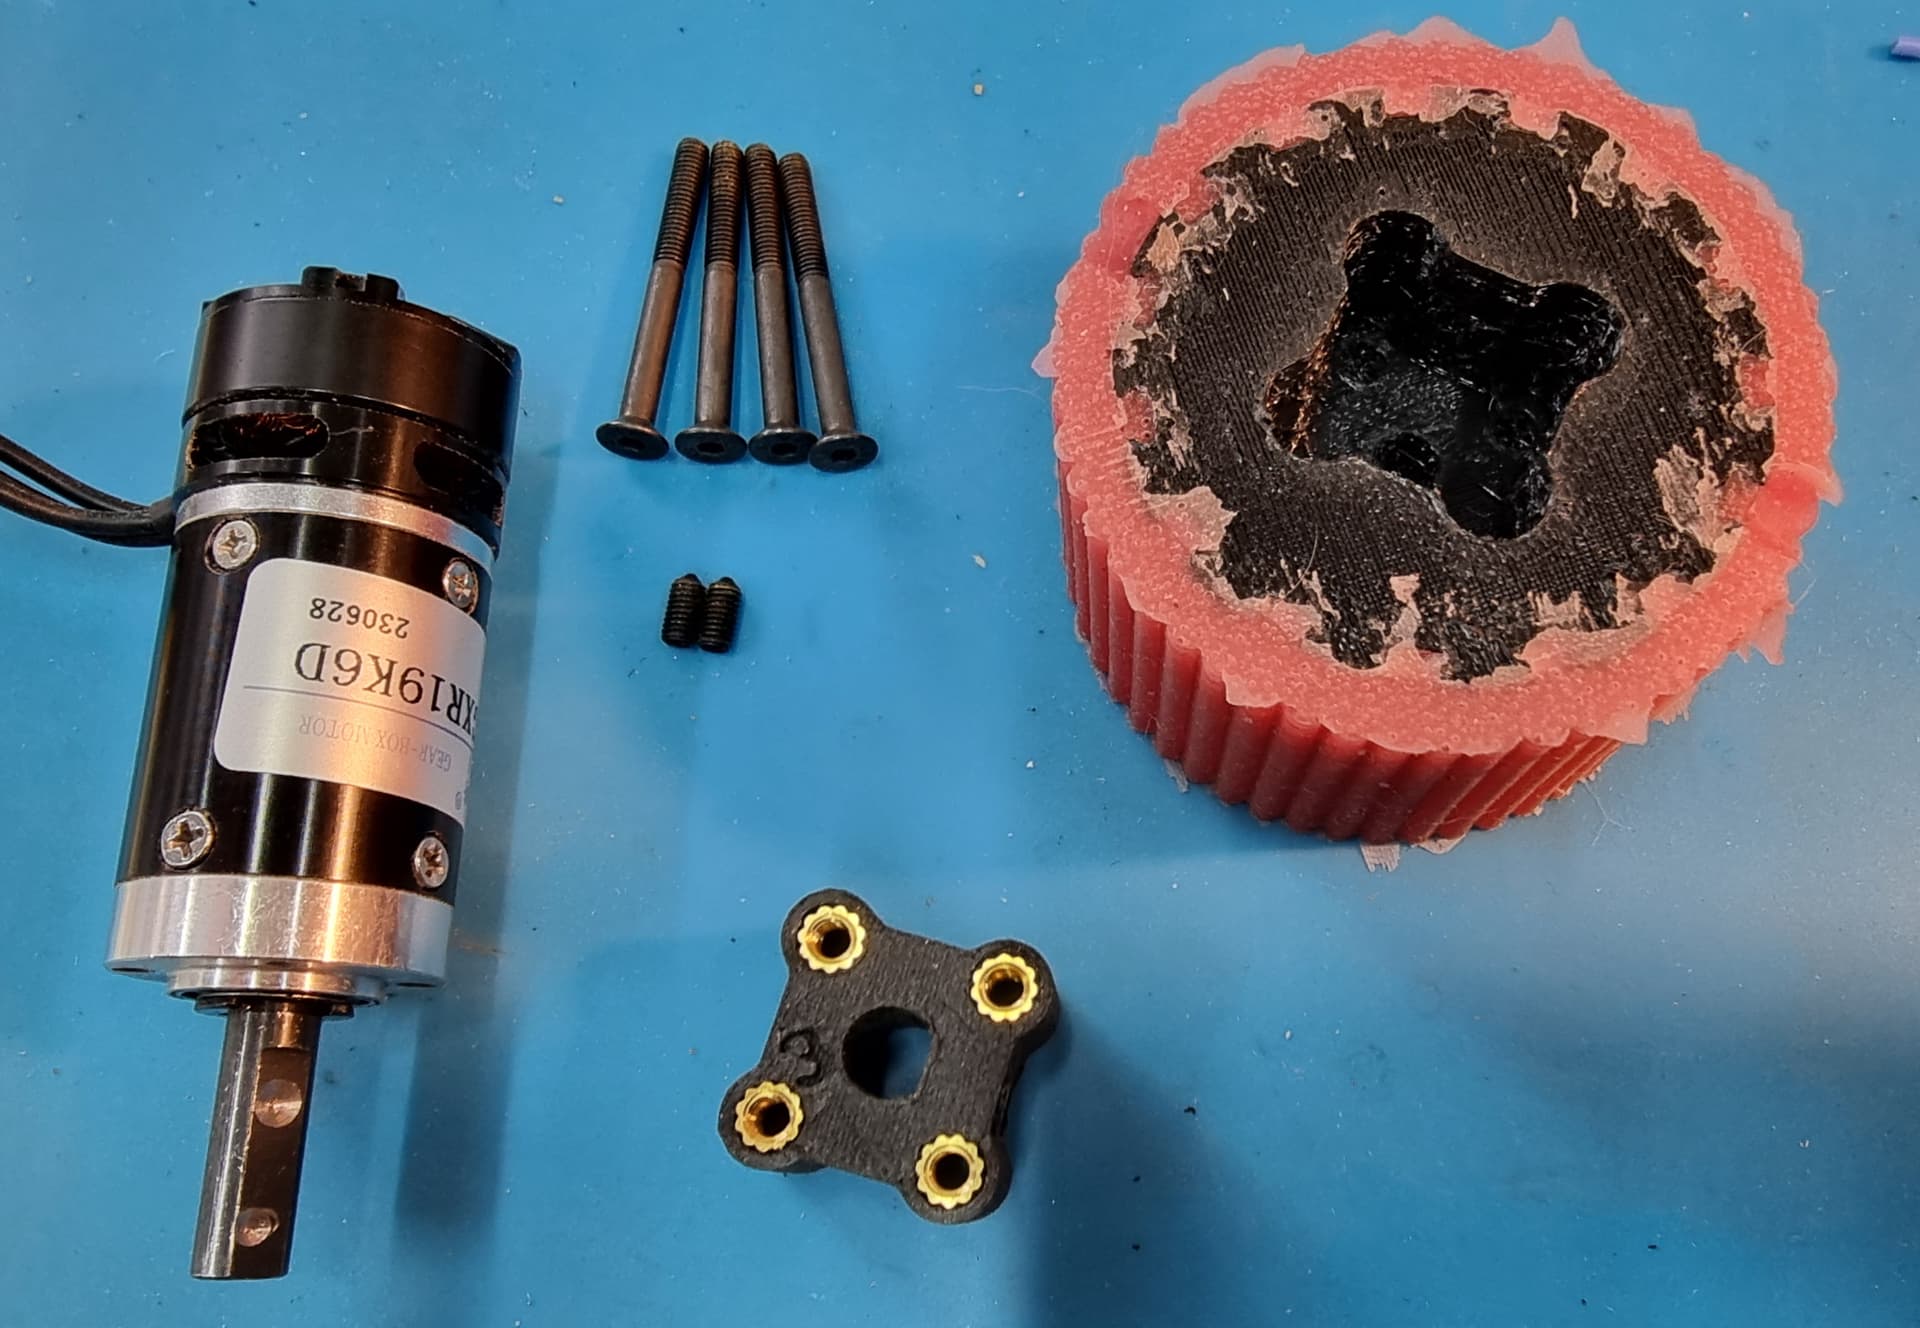
Drive train business end… BE1806 motor (£12) + 22mm planetary gearbox from Aliexpress (£10), making for a relatively inexpensive DIY brushless drive.
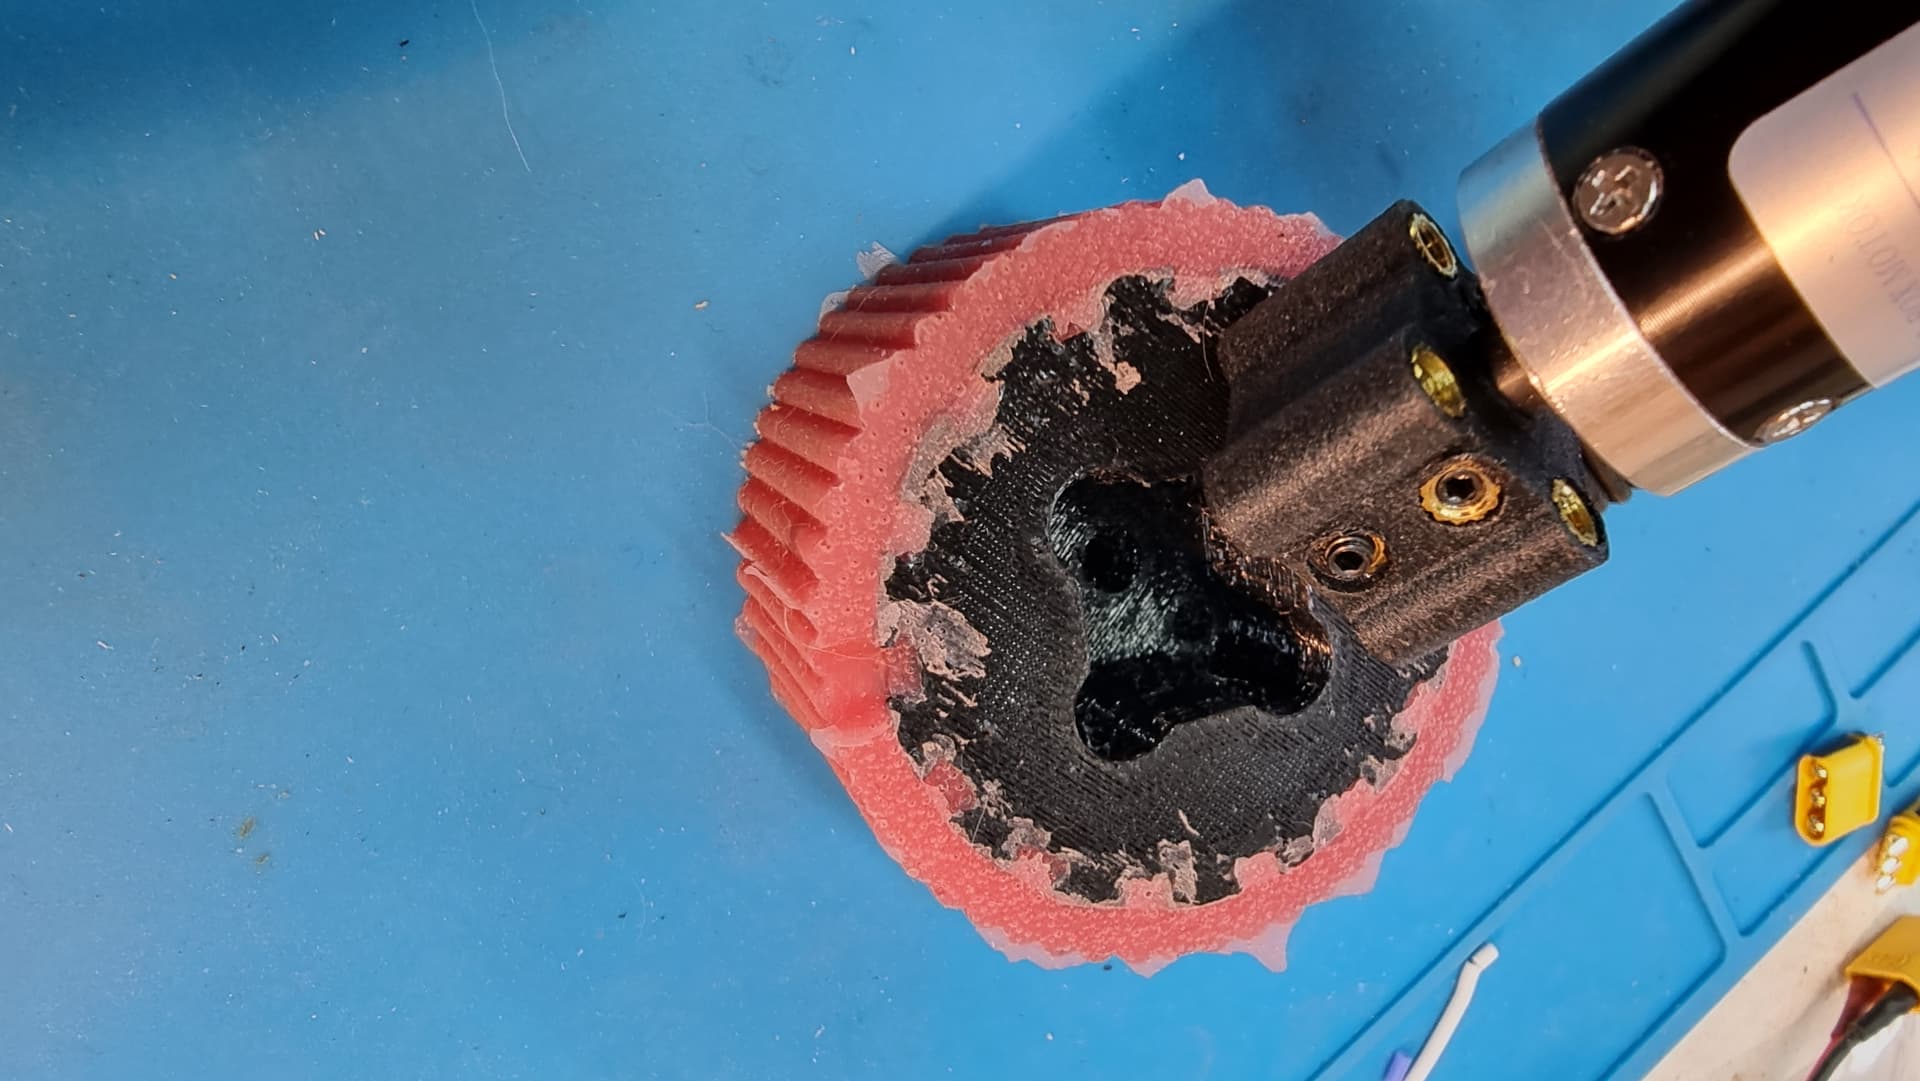
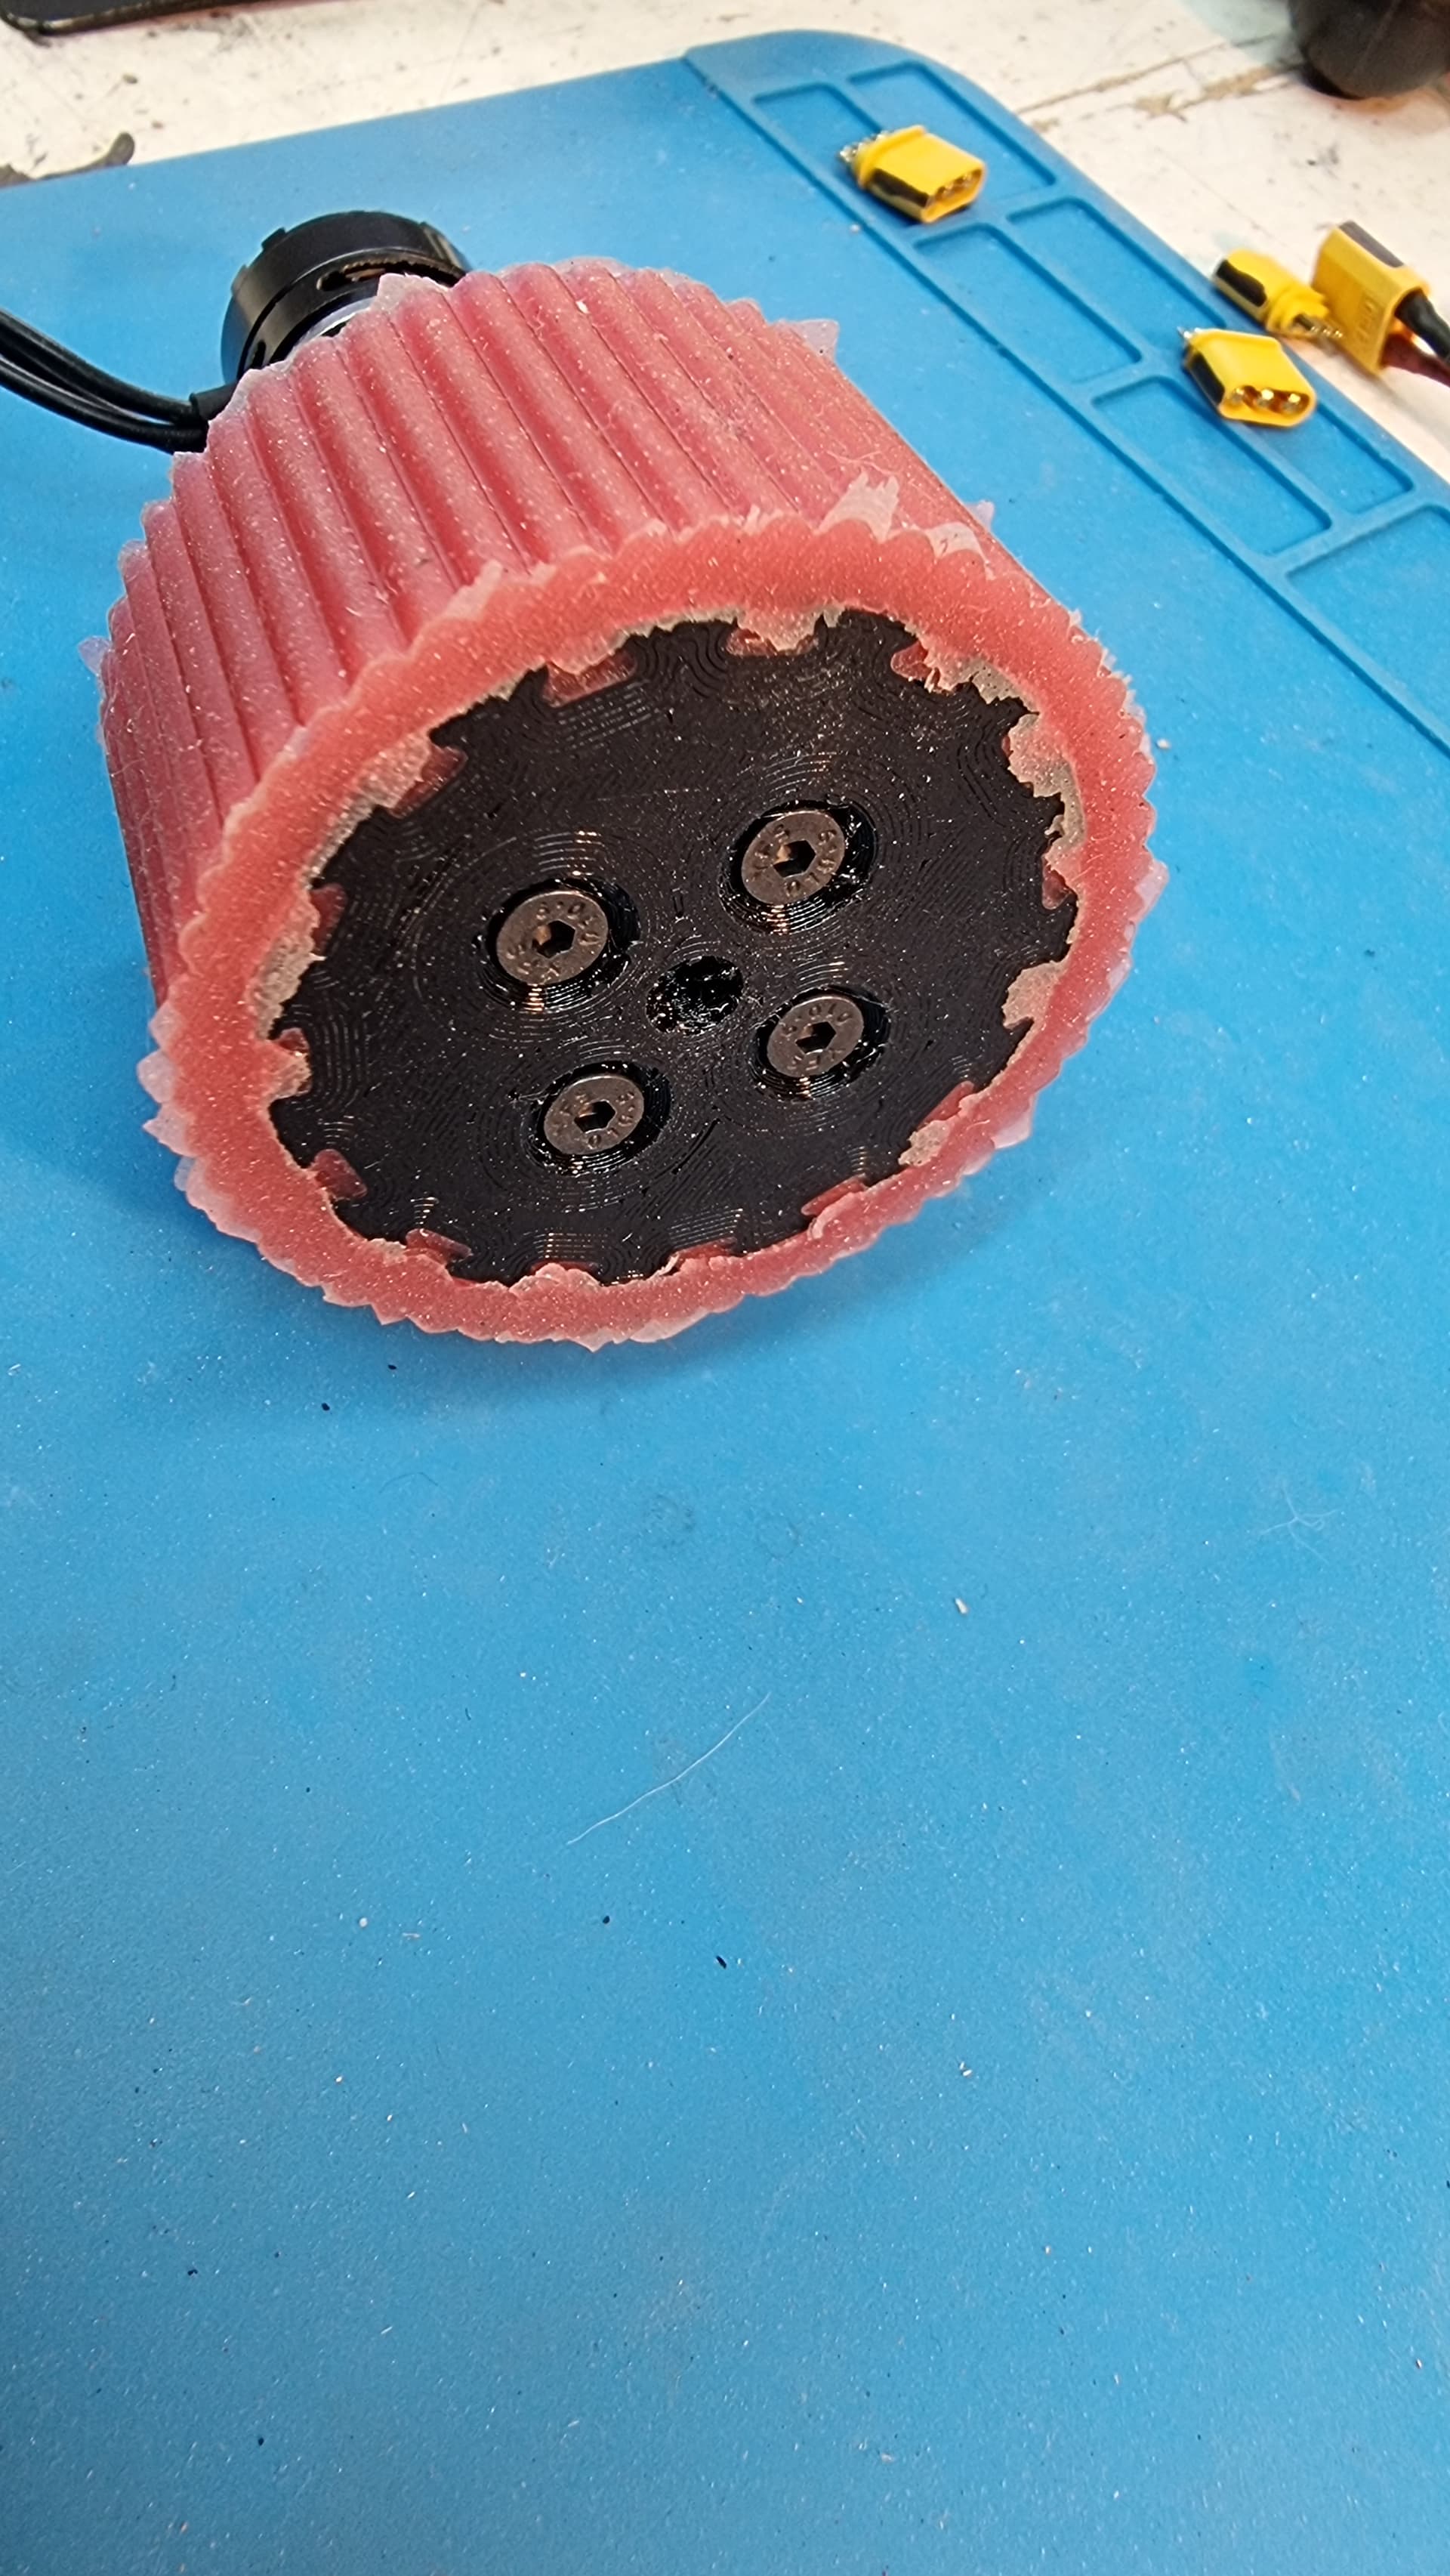
Onto the 6mm shaft slides a 3d printed hub, with 2x M3 grub screws to lock it on…then the wheel just slips onto that and is held in place by 4xM4 screws.
The central hub is printed solid in PA6-CF, the main wheel is TPU (95A) with 20% infill, to soak up the bumps.
The hole in the middle of the wheel is to take a short length of 5mm rod, which will then fit into a bearing in the outer chassis pod, the help minimise twisting forces on the gearbox.
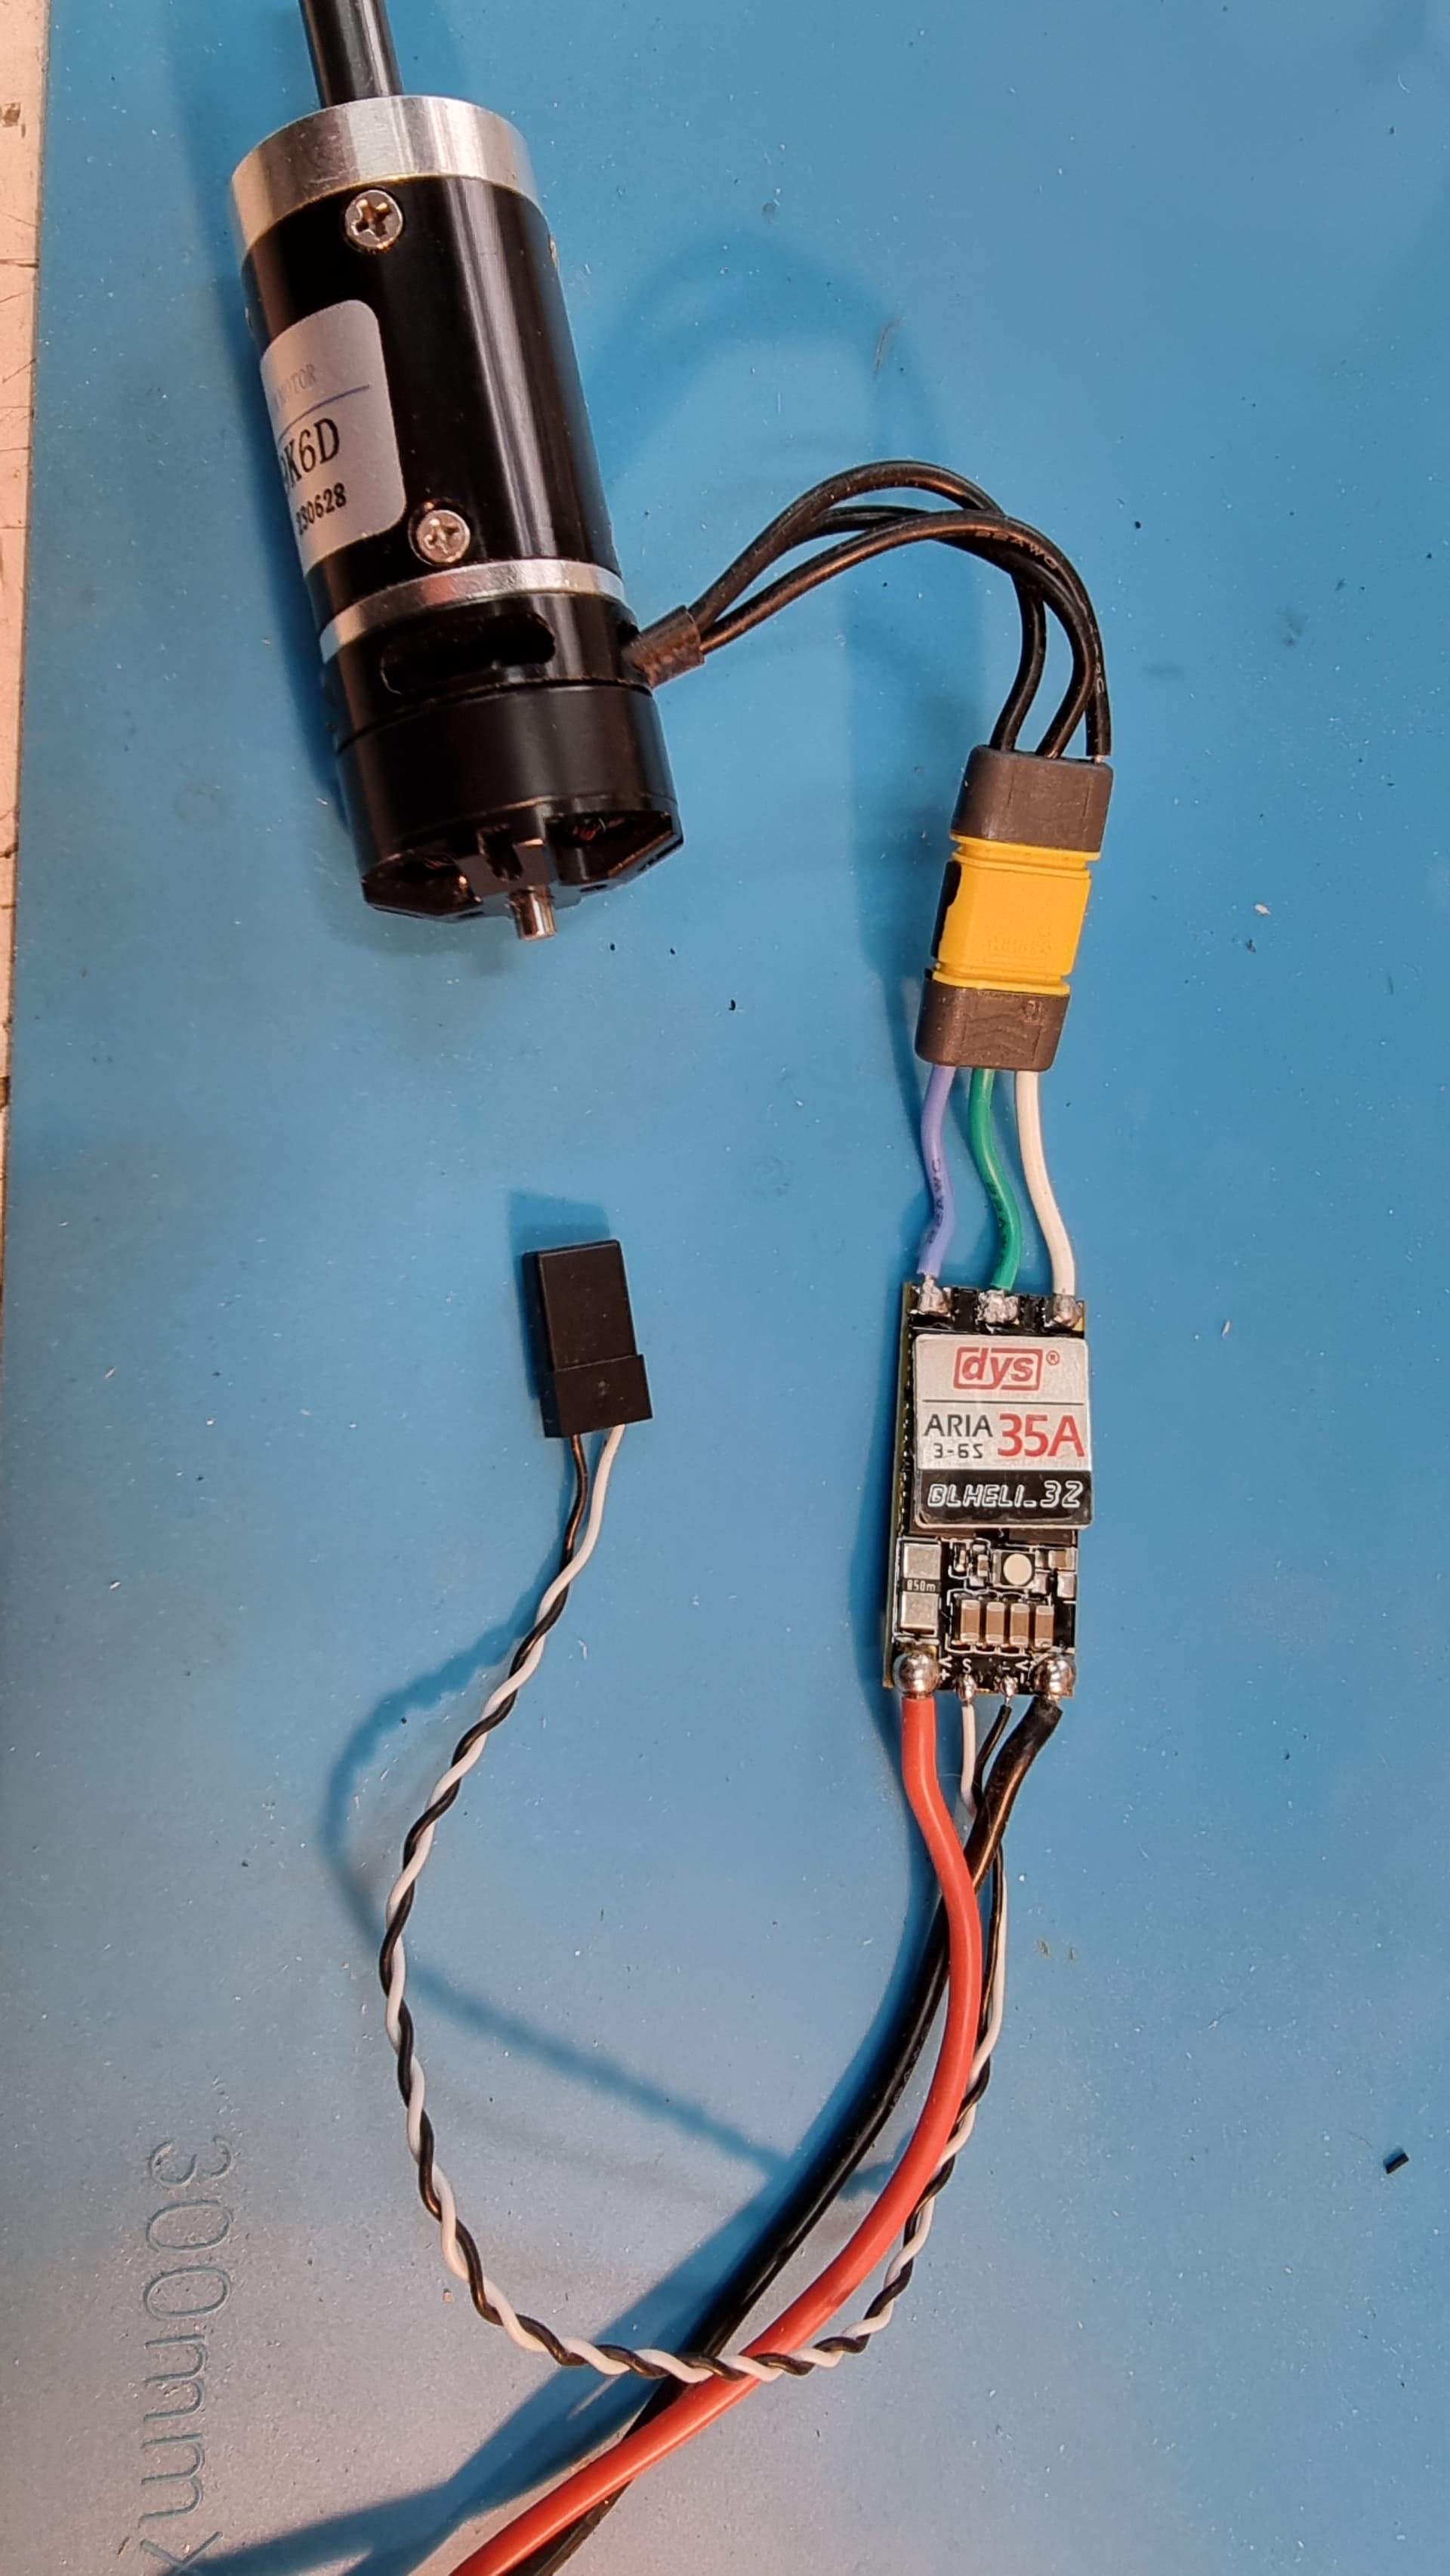
Drive ESCs are Dys Aria 35A’s. Got these from Aliexpress with AM32 preinstalled and configured for bidirectional drive. I’m using MR30 connectors for the motors, just to keep it simple.
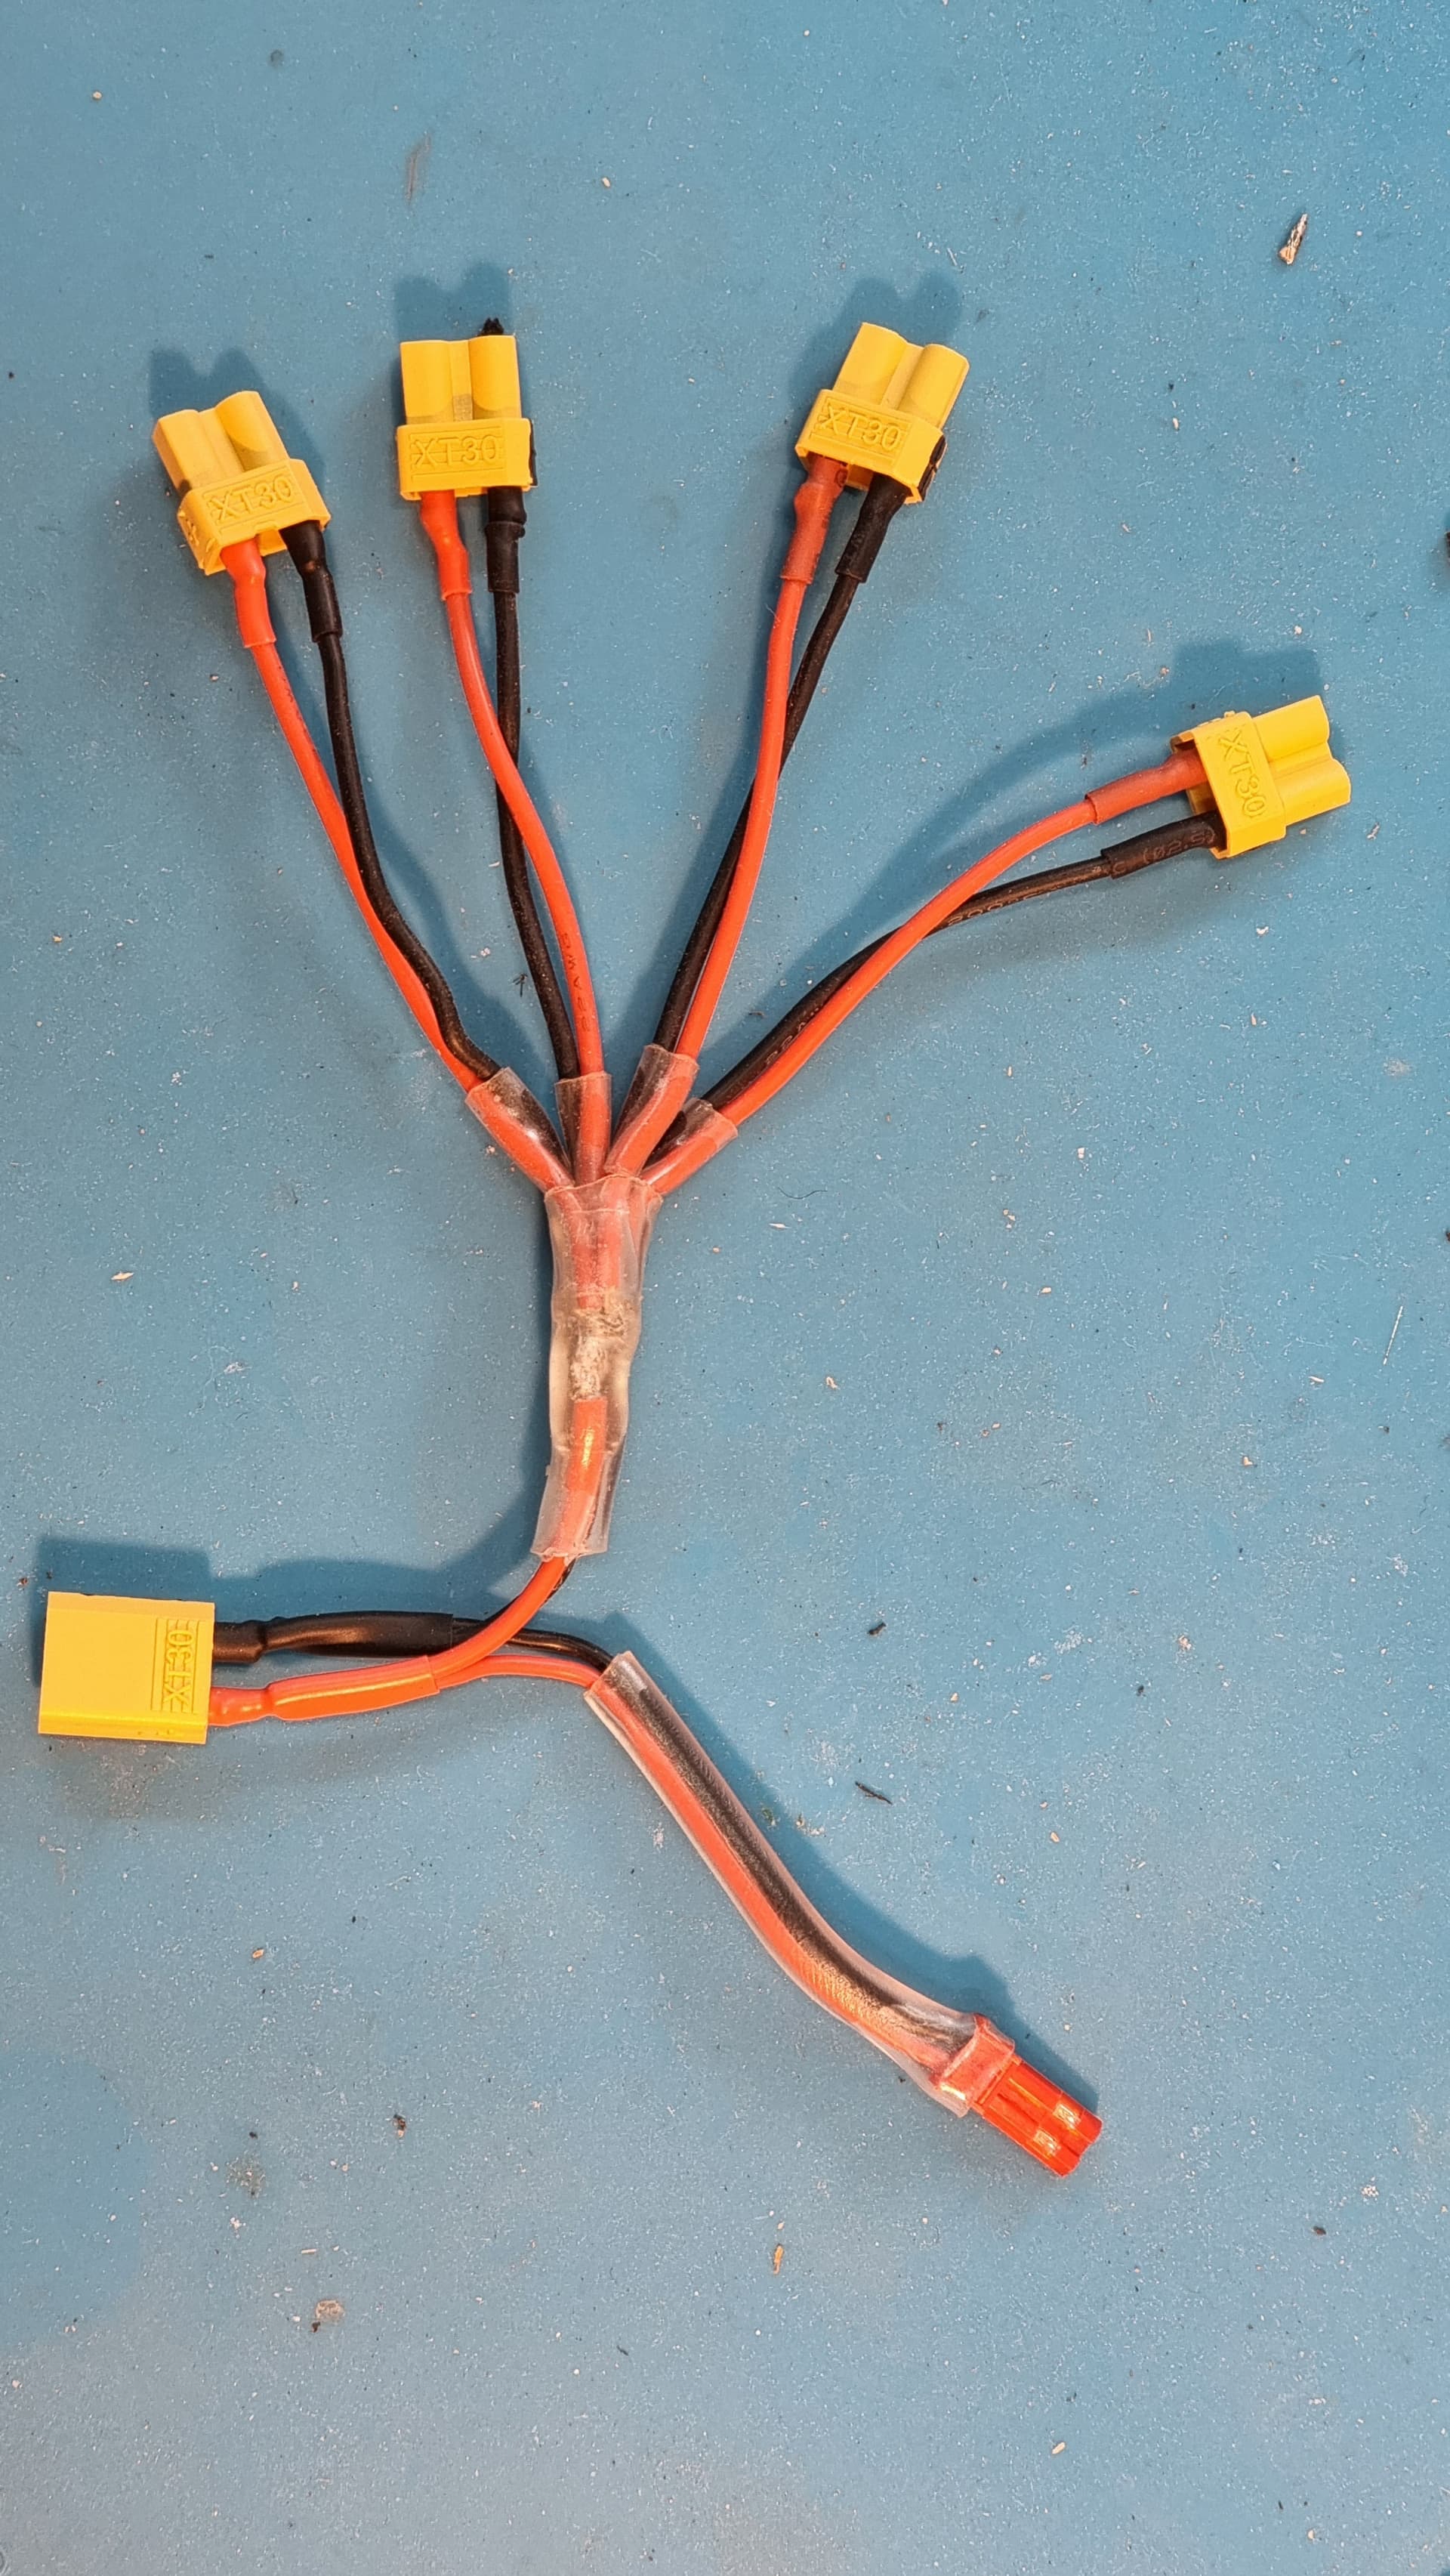
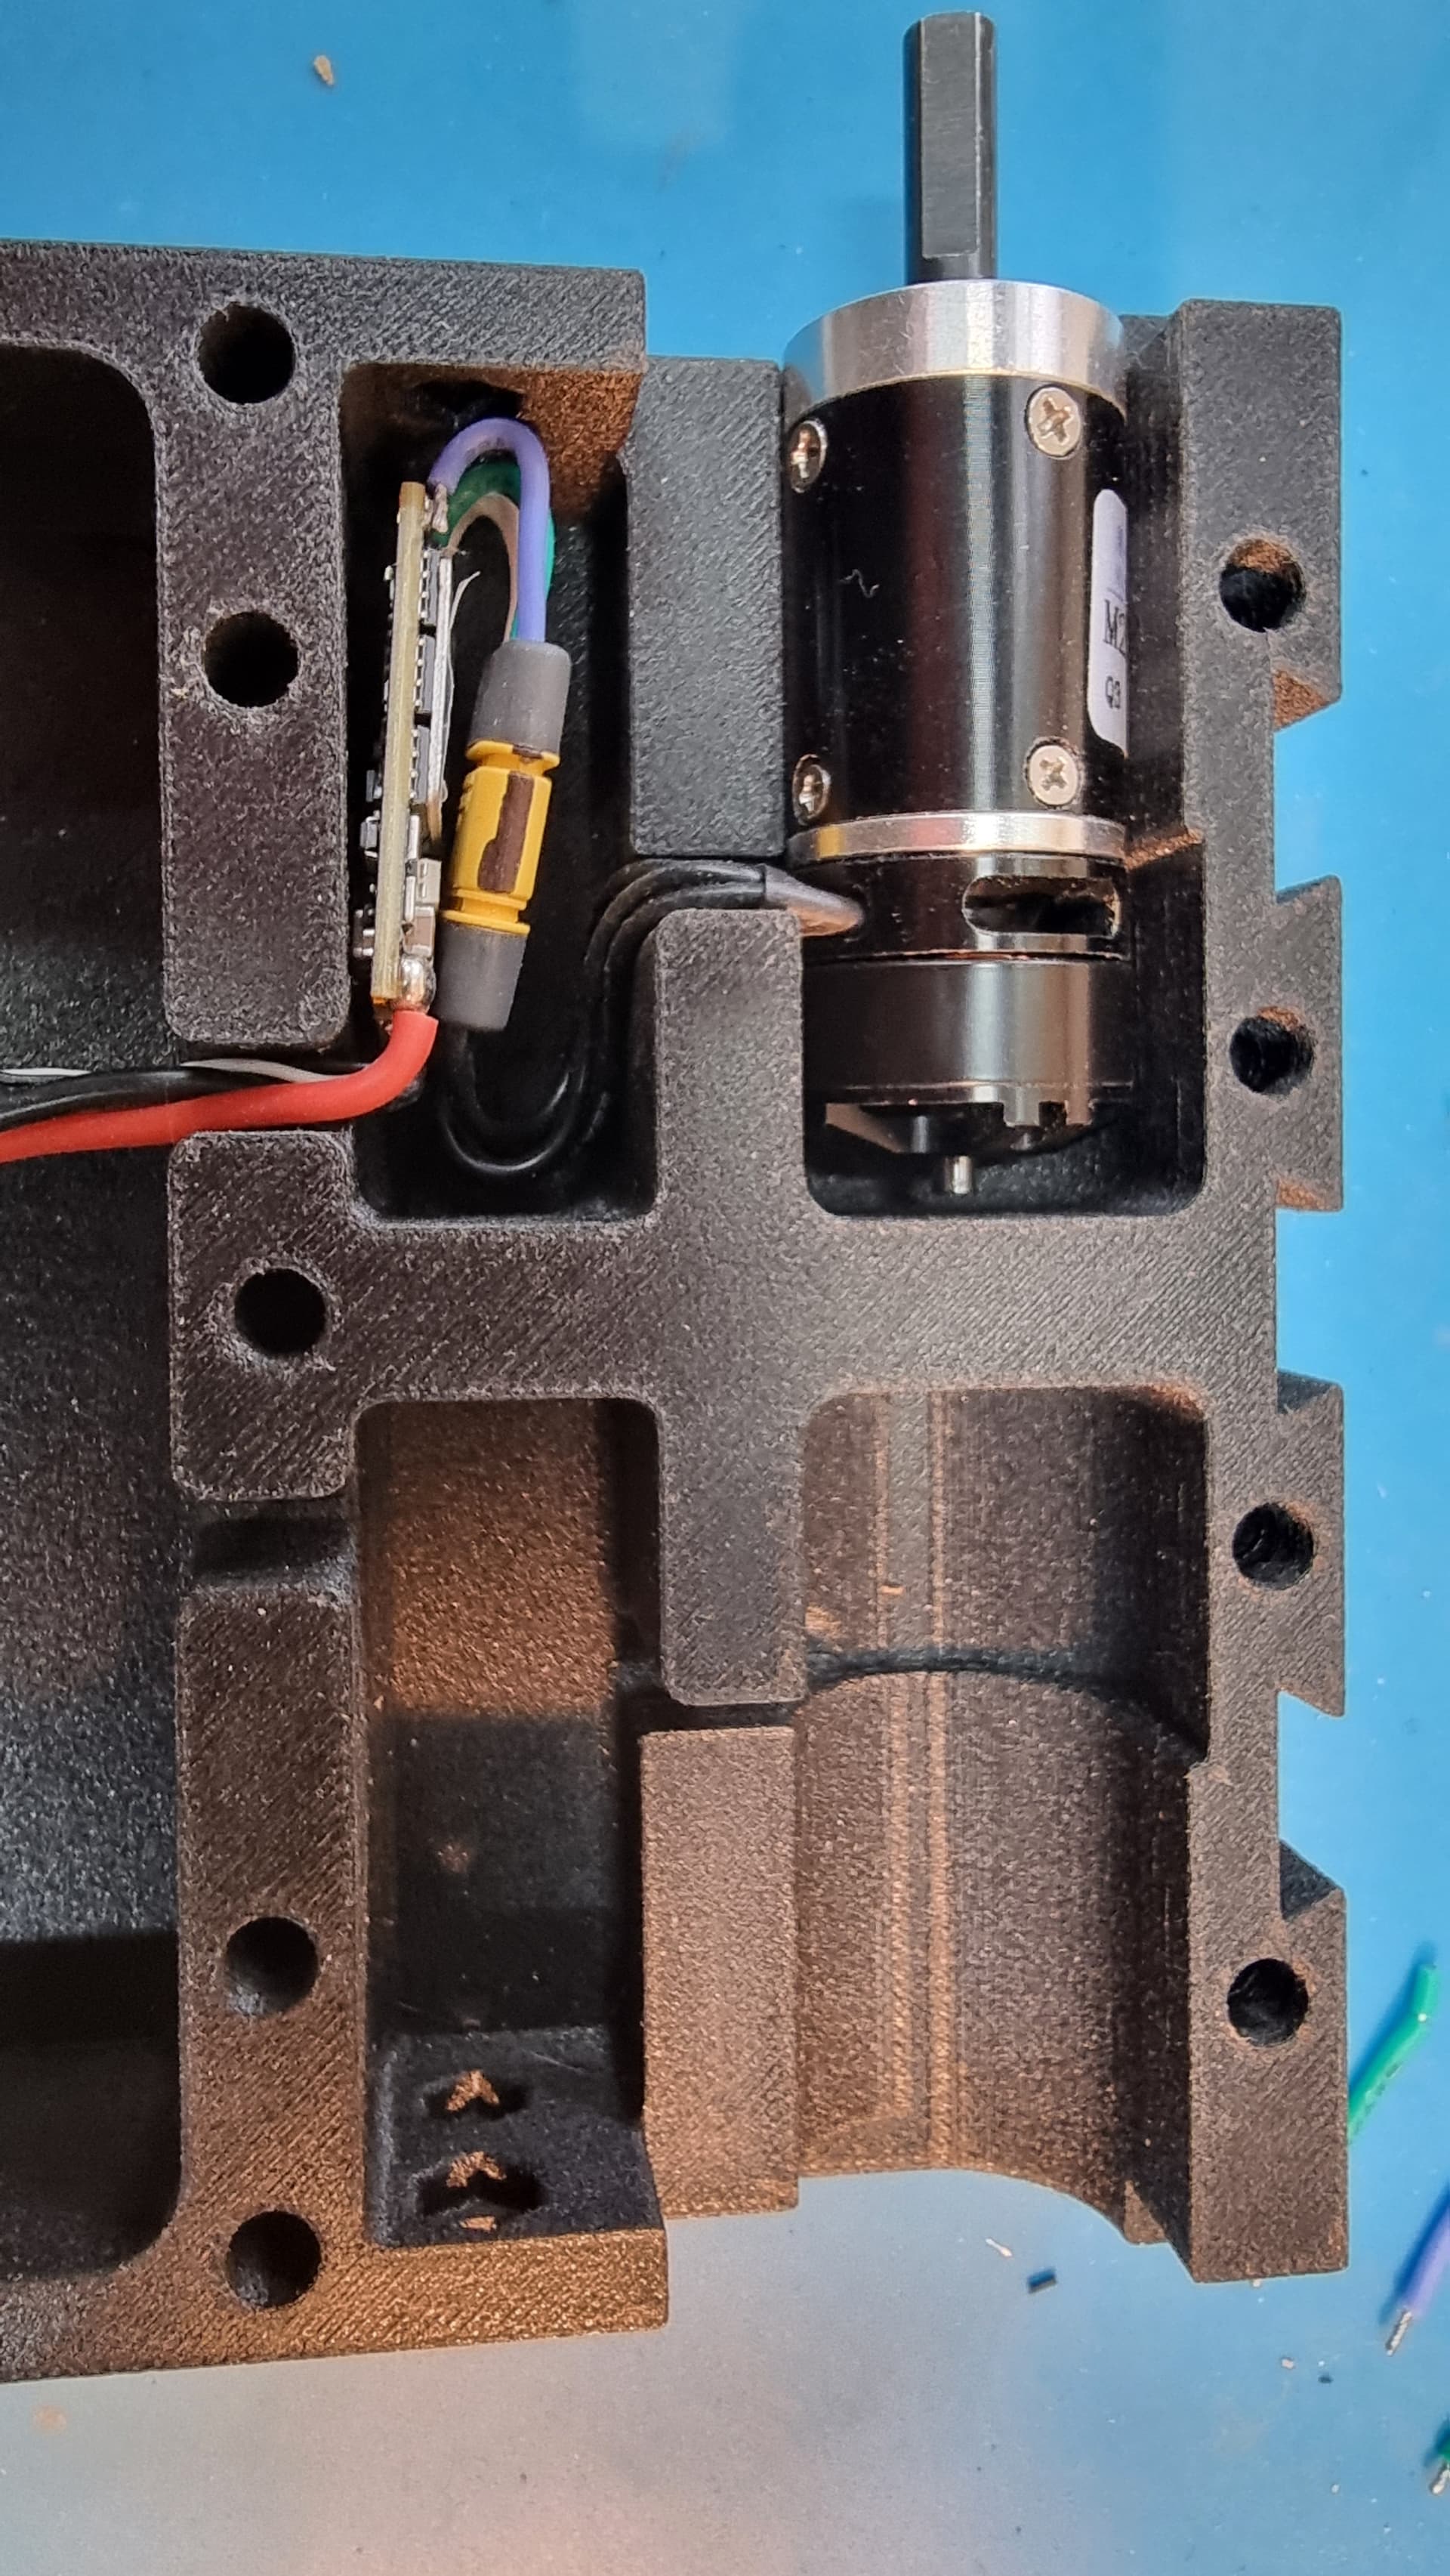
First fit of the completed wiring loom (all except the link connector) and… well, it does all fit but it’s an ugly mess - and I want that lipo centred for balance.
One thing I realised is that if I make the bulkhead between the motor bay and the ESC pocket thinner, the there wd be room in the latter for the ESC power XT30 too, which will neaten things up considerably in.the central bay. So… need to make some tweaks and back to square one with the wiring (also realised the ESC are using a common ground, so I only need the signal wires from the Rx.
Also want to reprint the body in Filamentum’s Flexfill 98a, which is a fairly stiff TPU I’ve used for ants. Should be more durable. I’ll start by printing just one quadrant and seeing how everything fits before committing. The joys of prototyping l!
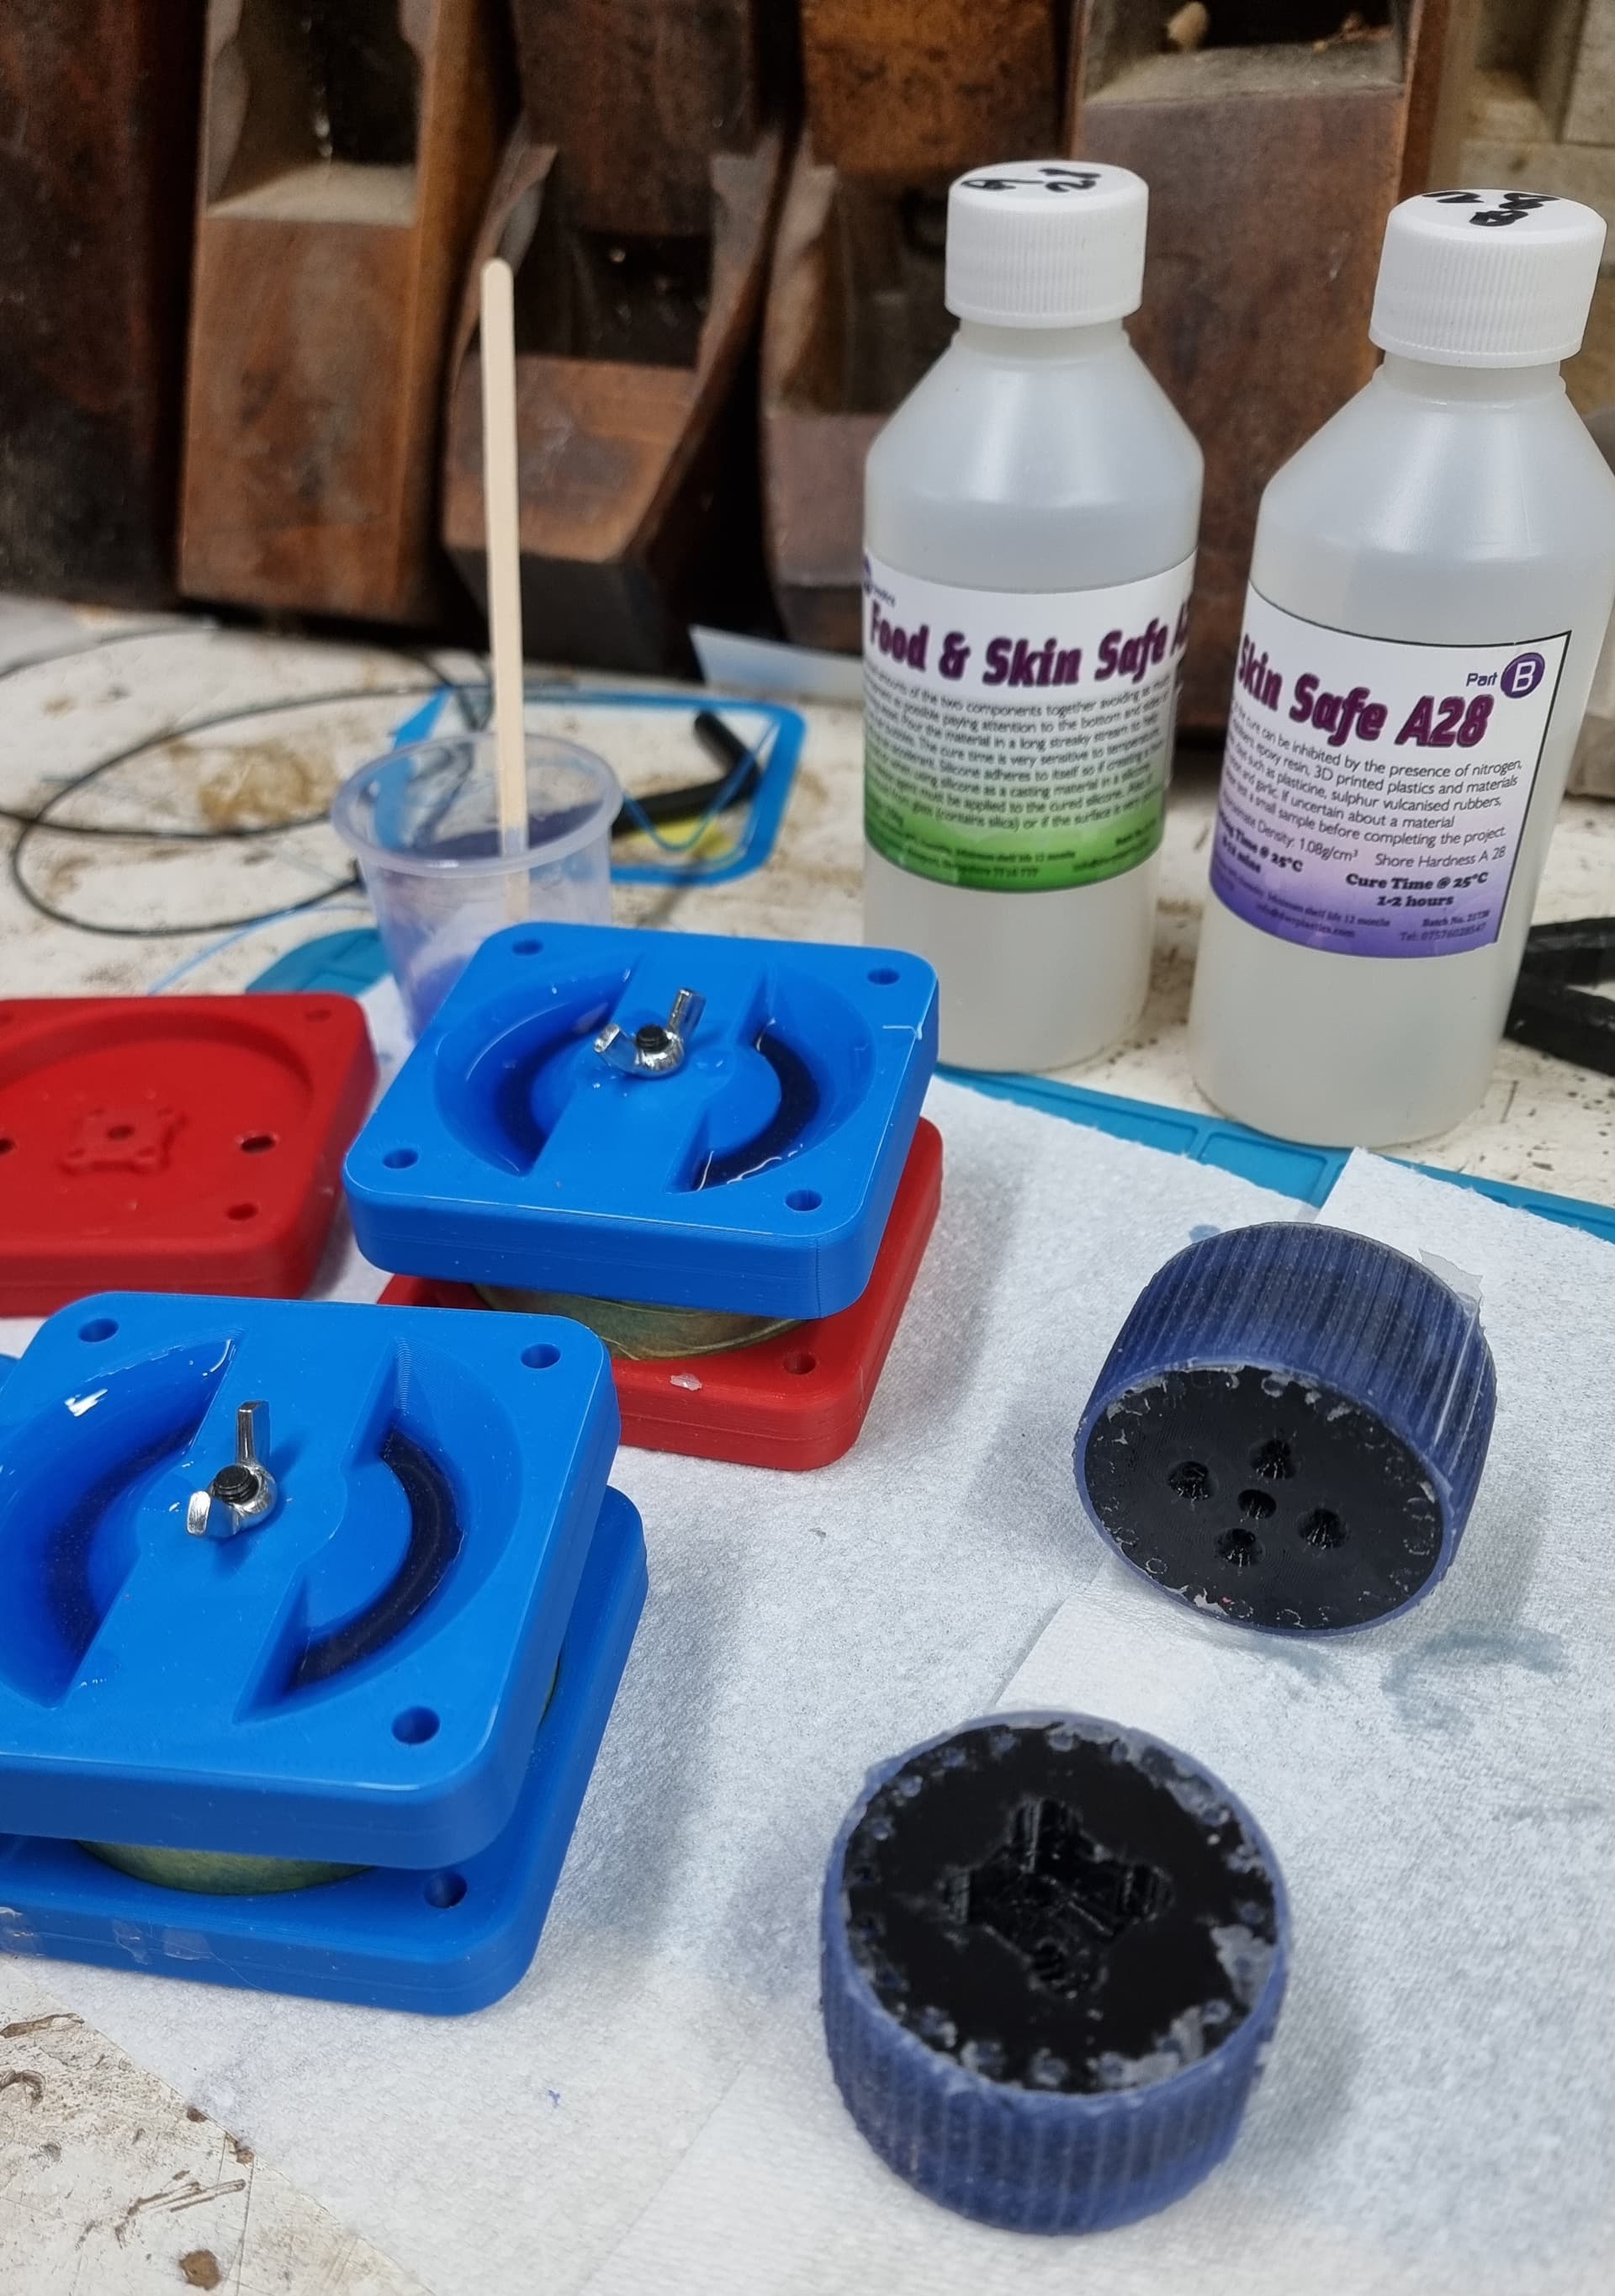
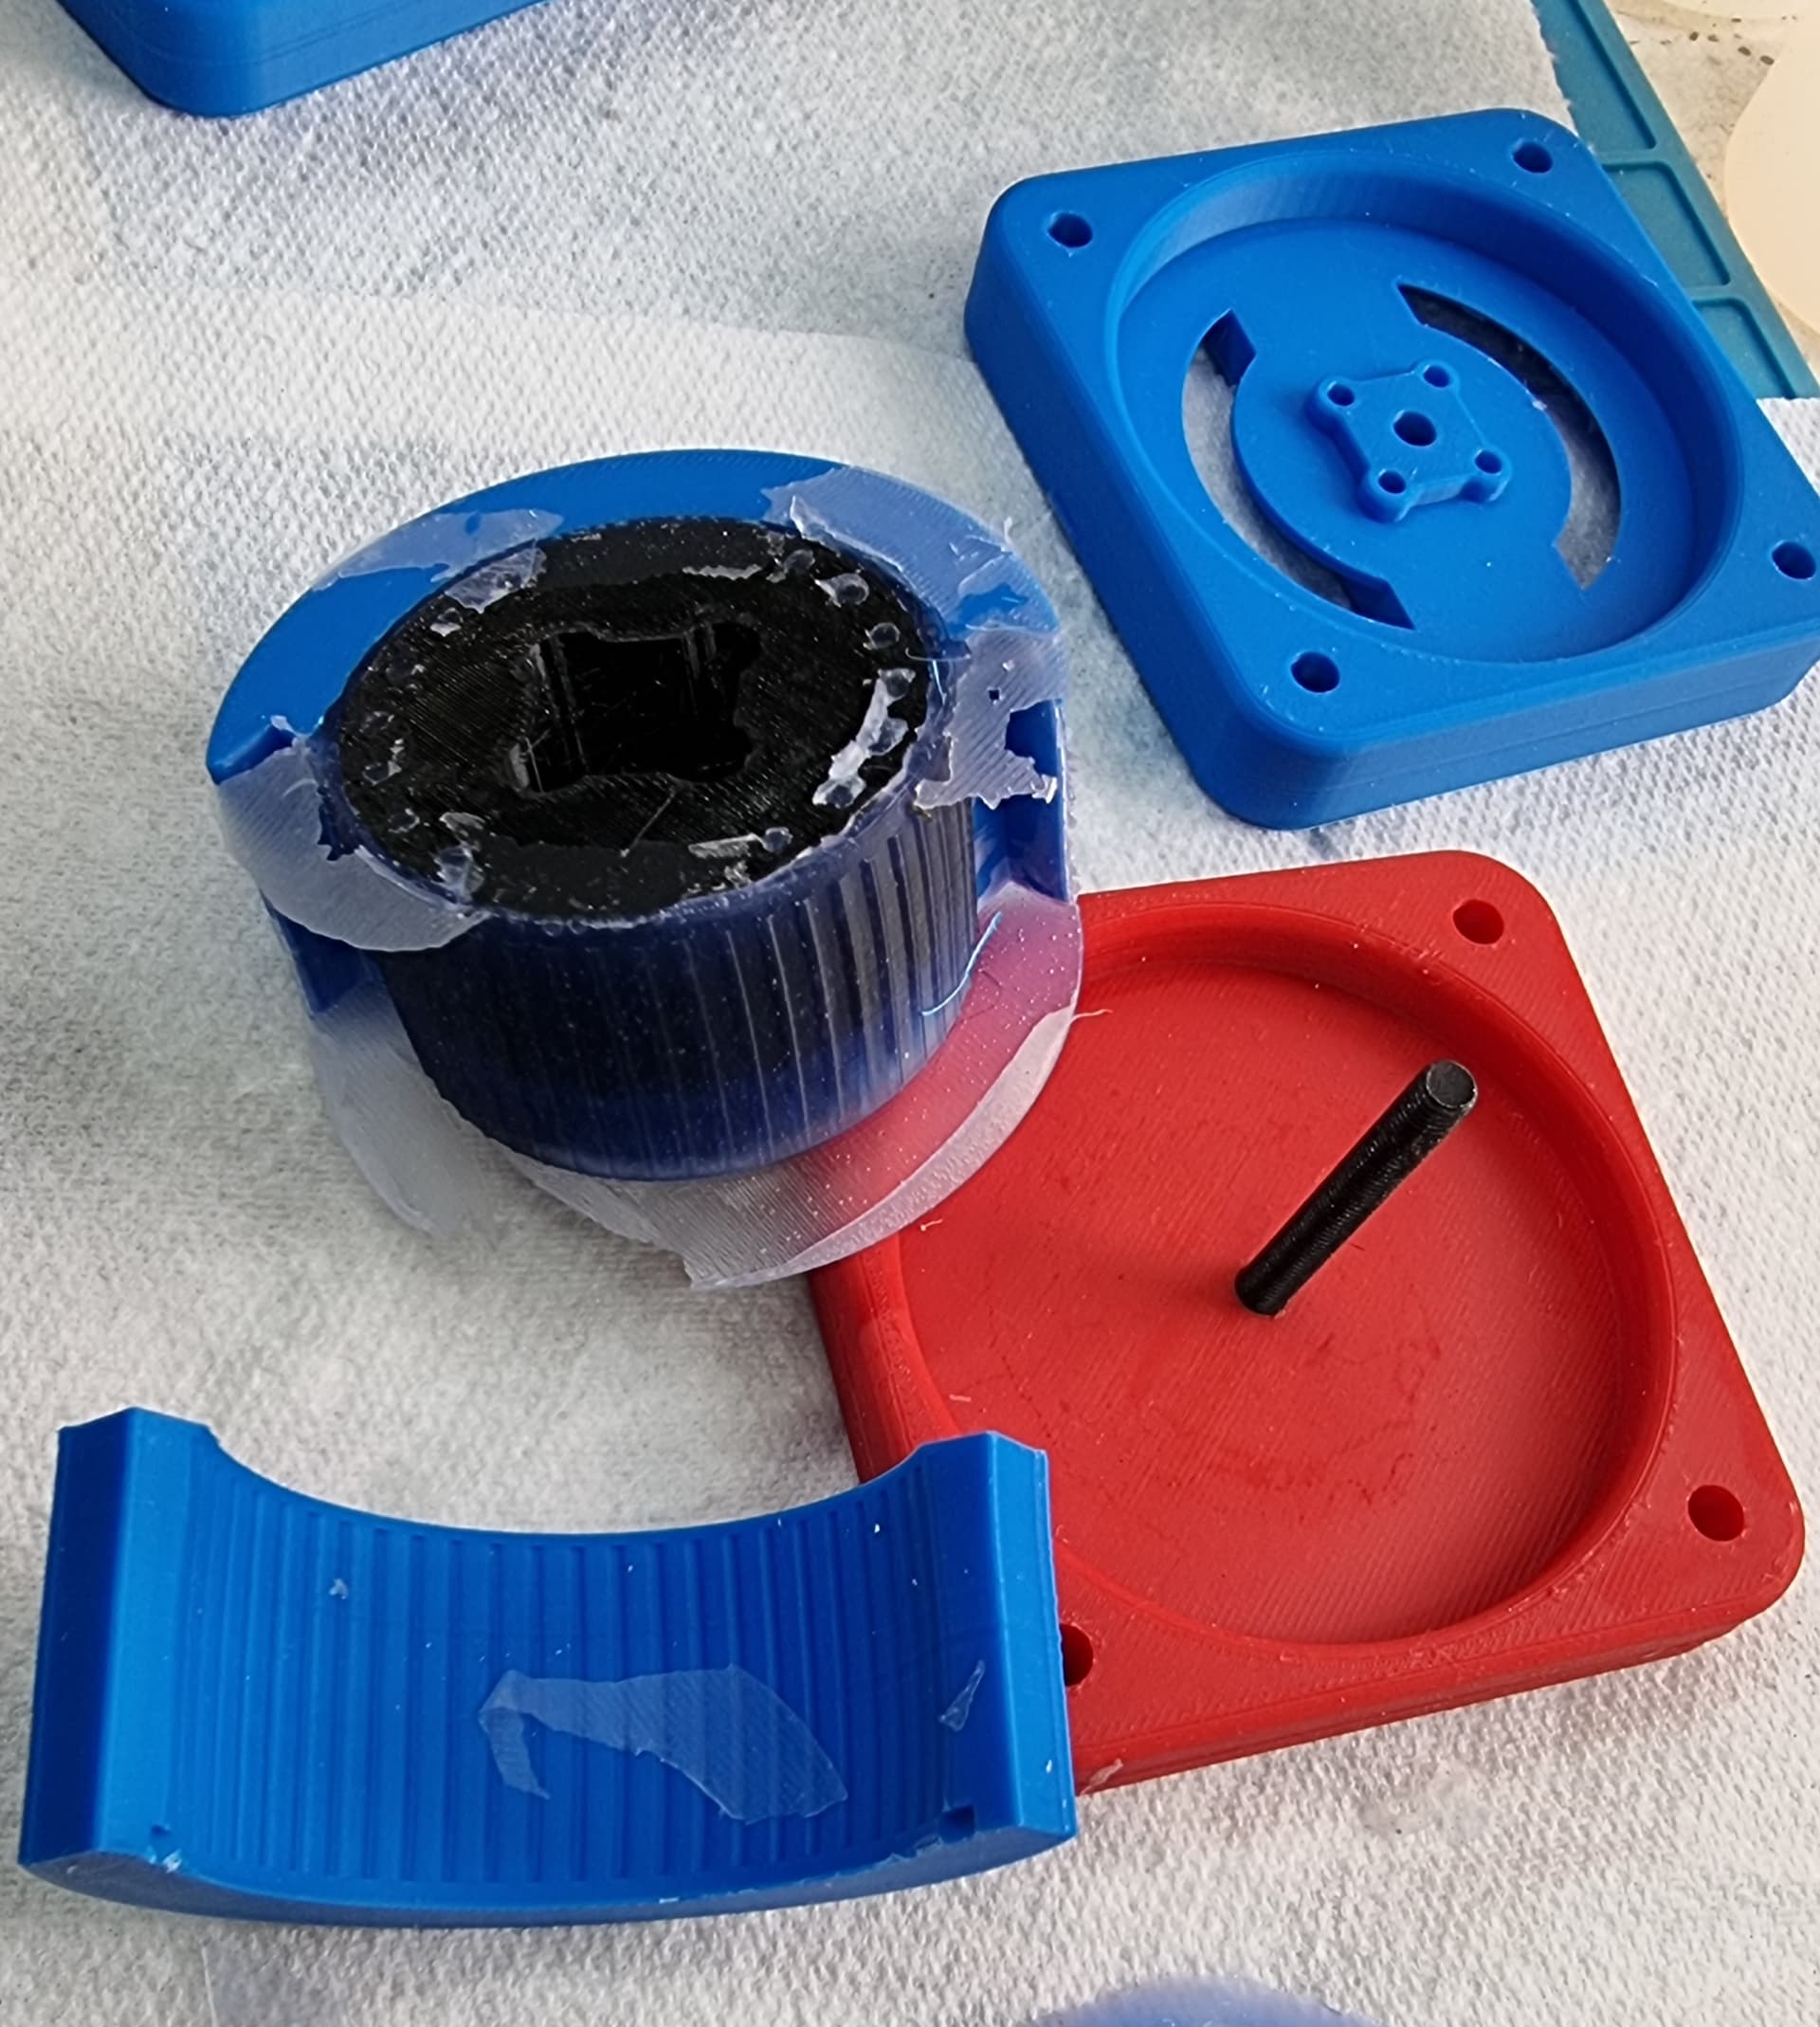
Mr Prickles tyre shop, round 2…
Although I’ll be going in with the soft fat tyres shown in a previous post, I also wanted something tougher as a fall-back if they get shredded (as Joe said, Shore 15A is a bit soft for Beetles). And I want something I can happily use for practicing driving with on any surface, without worrying about messing them up. So… the mark 2s are Shore 28A, lower profile and with a slightly curved section, which should improve handling at the cost of some traction.
Seen here are 2 I made earlier and 2 more in the moulds. Thankfully now the weather is warming up, RTV silicone does actually set in my unheated workshop!
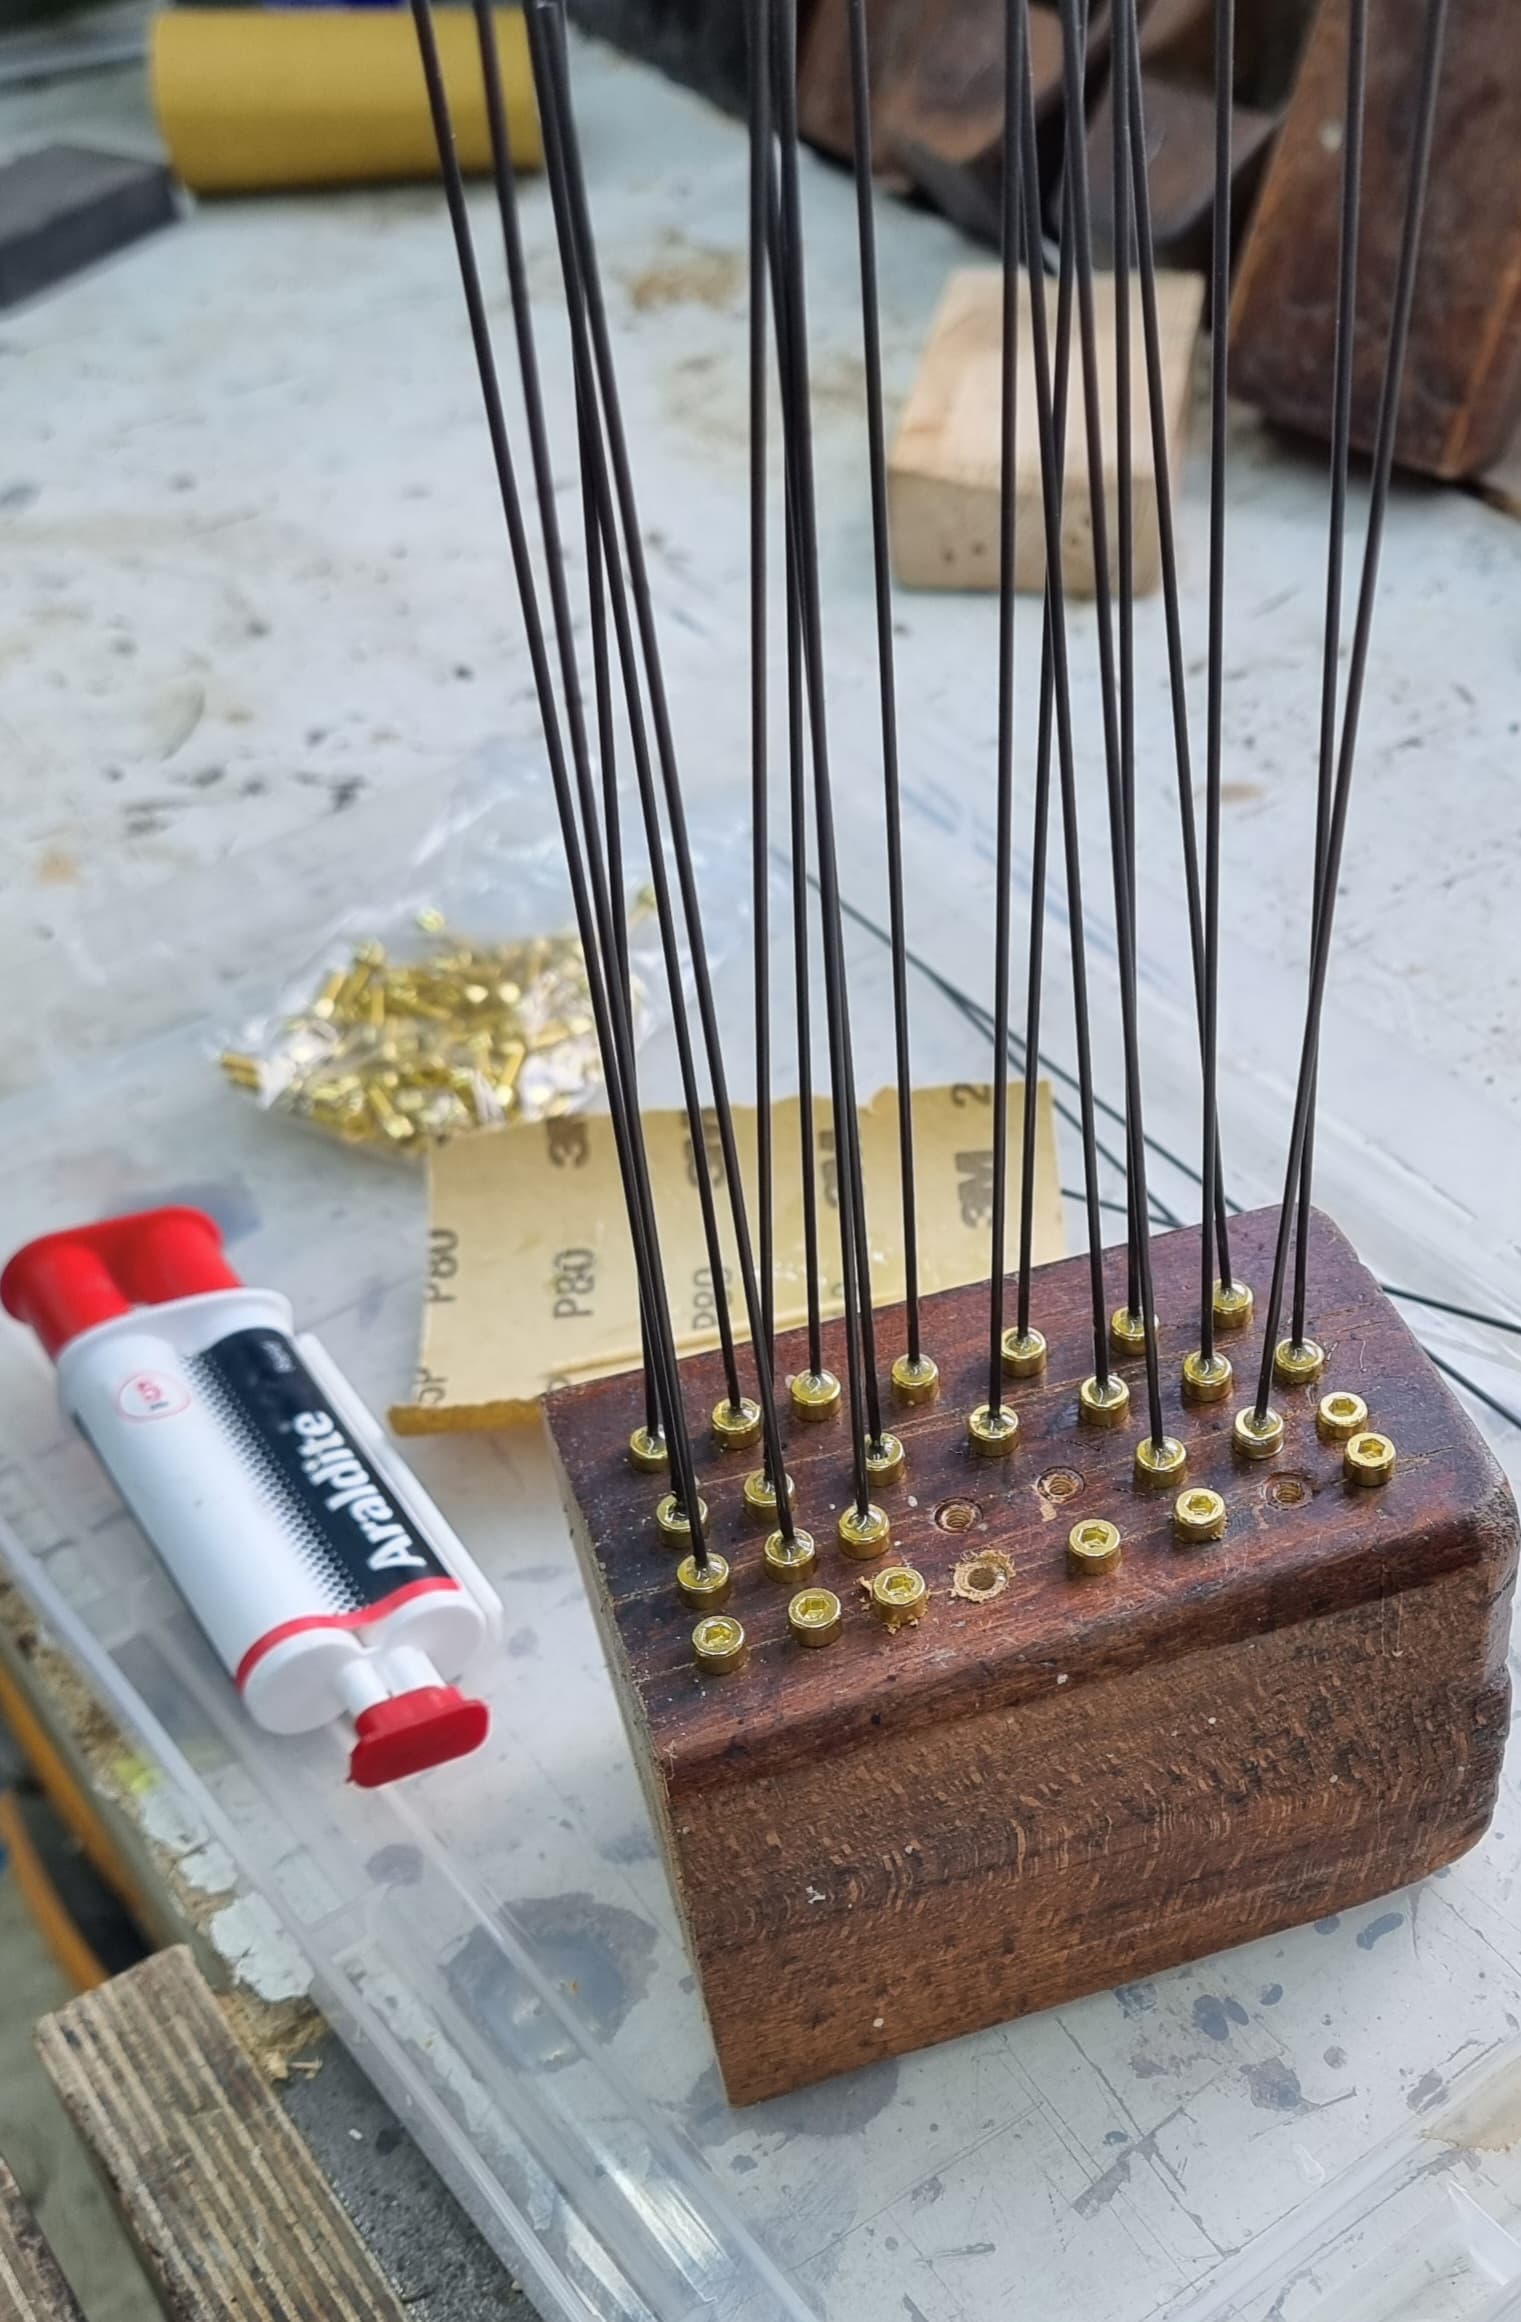
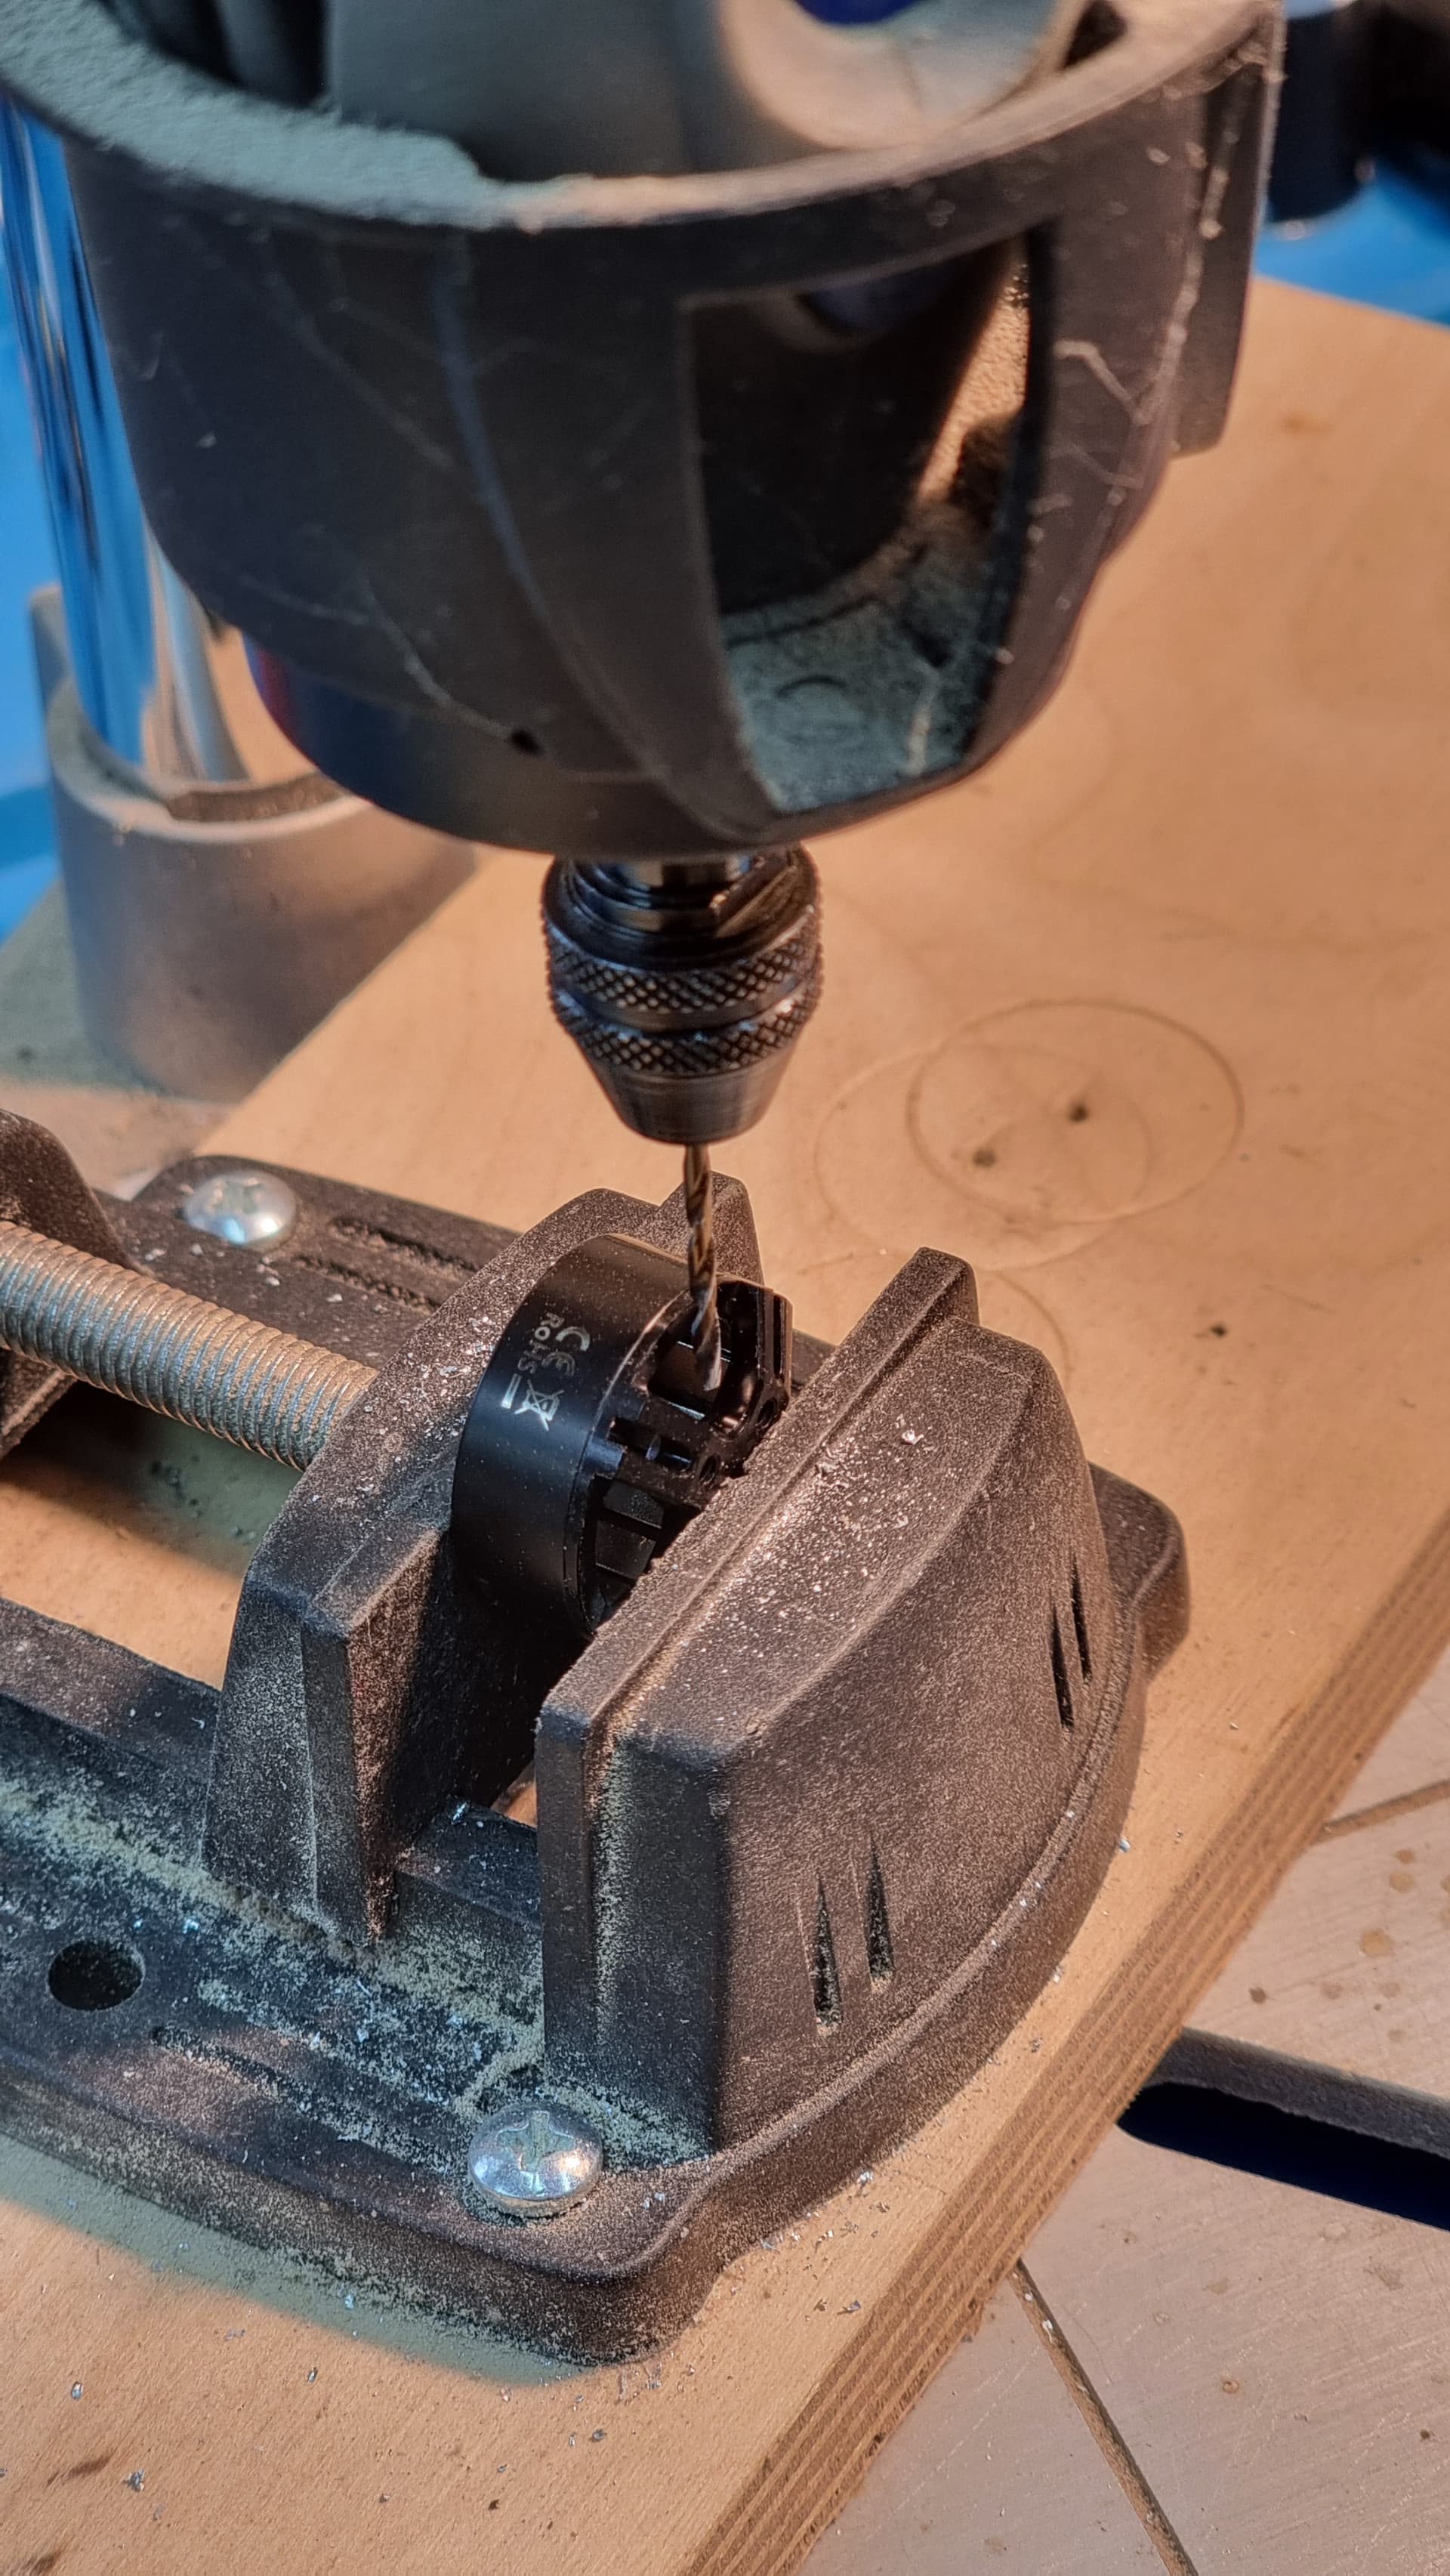
With the tyres sorted, it’s on to the prickle production line. I drilled and tapped a load of holes in an old block of beech, screwed in some aluminium caps heads, drilled them half way through with a 1.6mm bit, then glued a load of 20cm and 30cm lengths of 1.5mm nitinol into the holes.
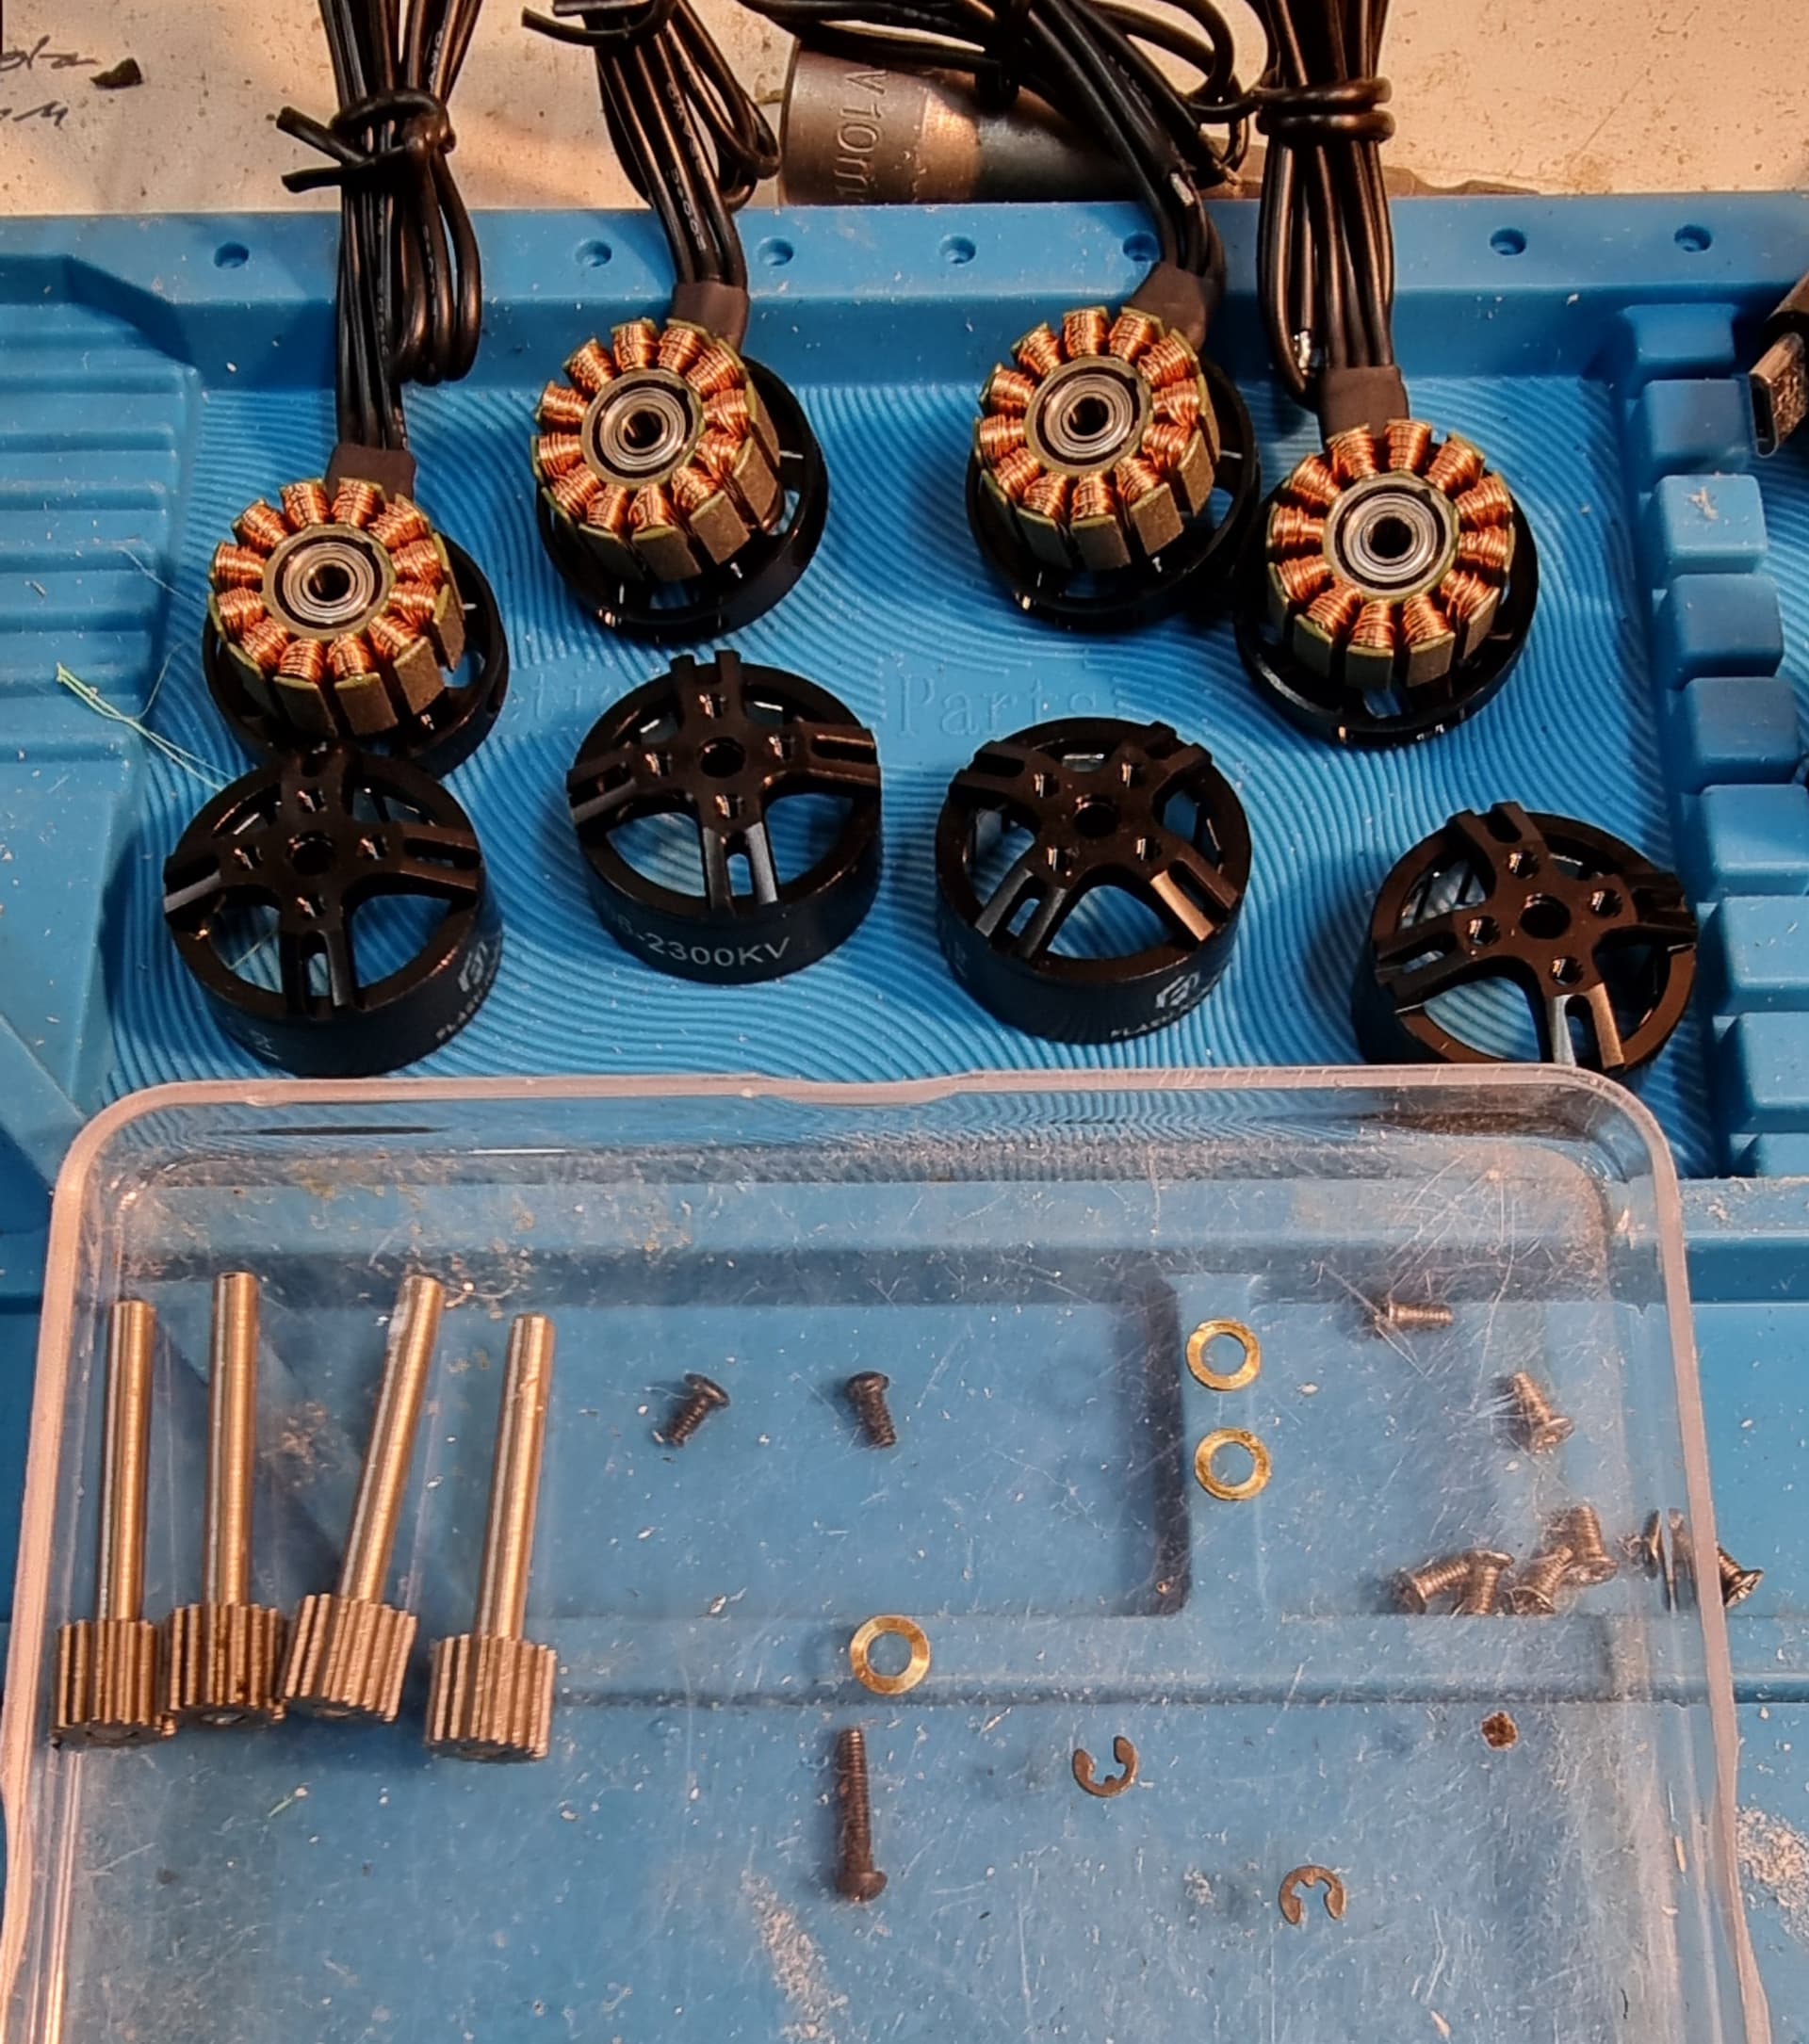
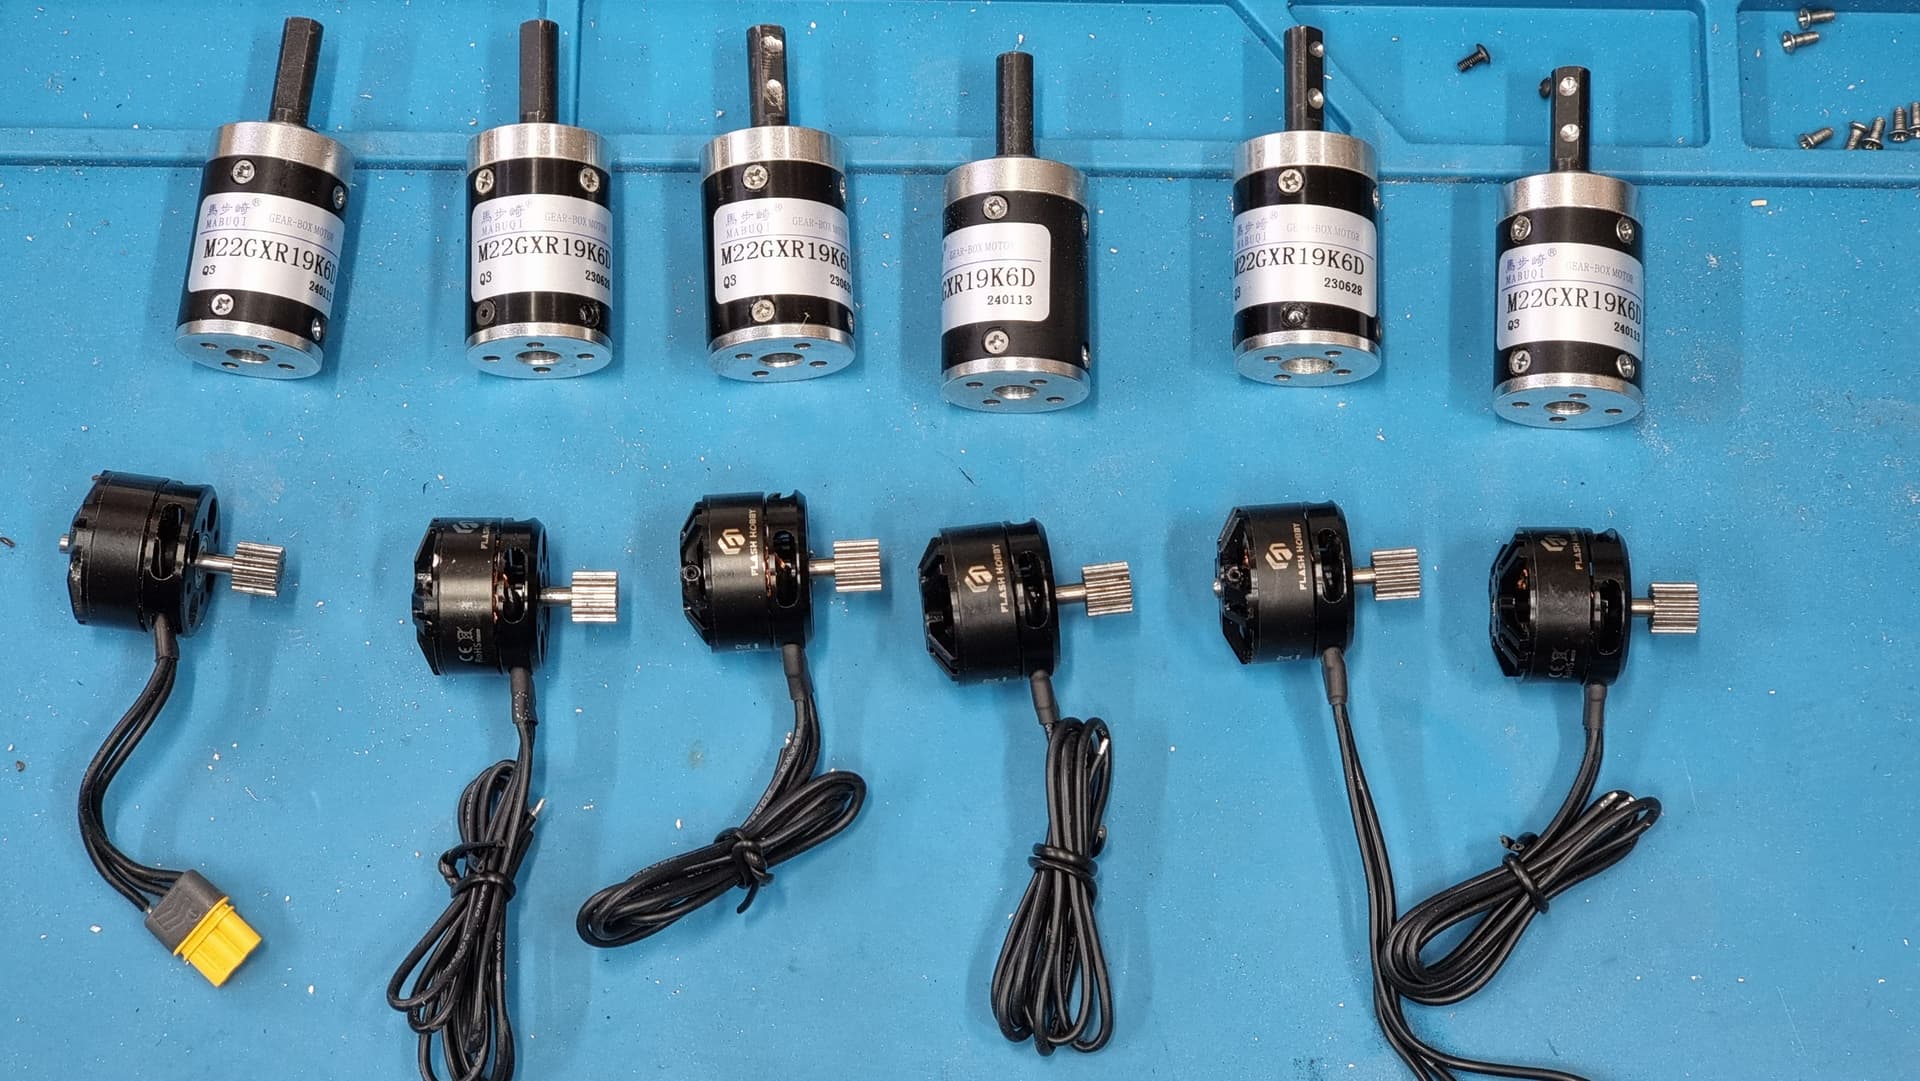
Finally, the bunch of BE1806 motors with 3mm shafts I ordered from China have arrived (they have 1.5mm protruding shafts but 3mm internally). Annoyingly though, the shaft is only gripped onto the bell by a little flange- so when I pushed in the new shaft, it rotates easily. Worse still, there’s no grub screw to hold it in place…
So, having measured and cut suitable lengths of 3mm Ti rod, and mounted the pinions, I then had to grind flats on t’other end, then carefully (clumsily!) drill and tap holes innthe bell for a couple of tiny M2 grub screws either side to lock them in place.
Starting to wish I’d bought off the shelf!
All ready to assemble tomorrow (the one on the left was my prototype, using a different make of 1806 but i should end up with 4+ a spare identical drives, and an extra one as fall back)
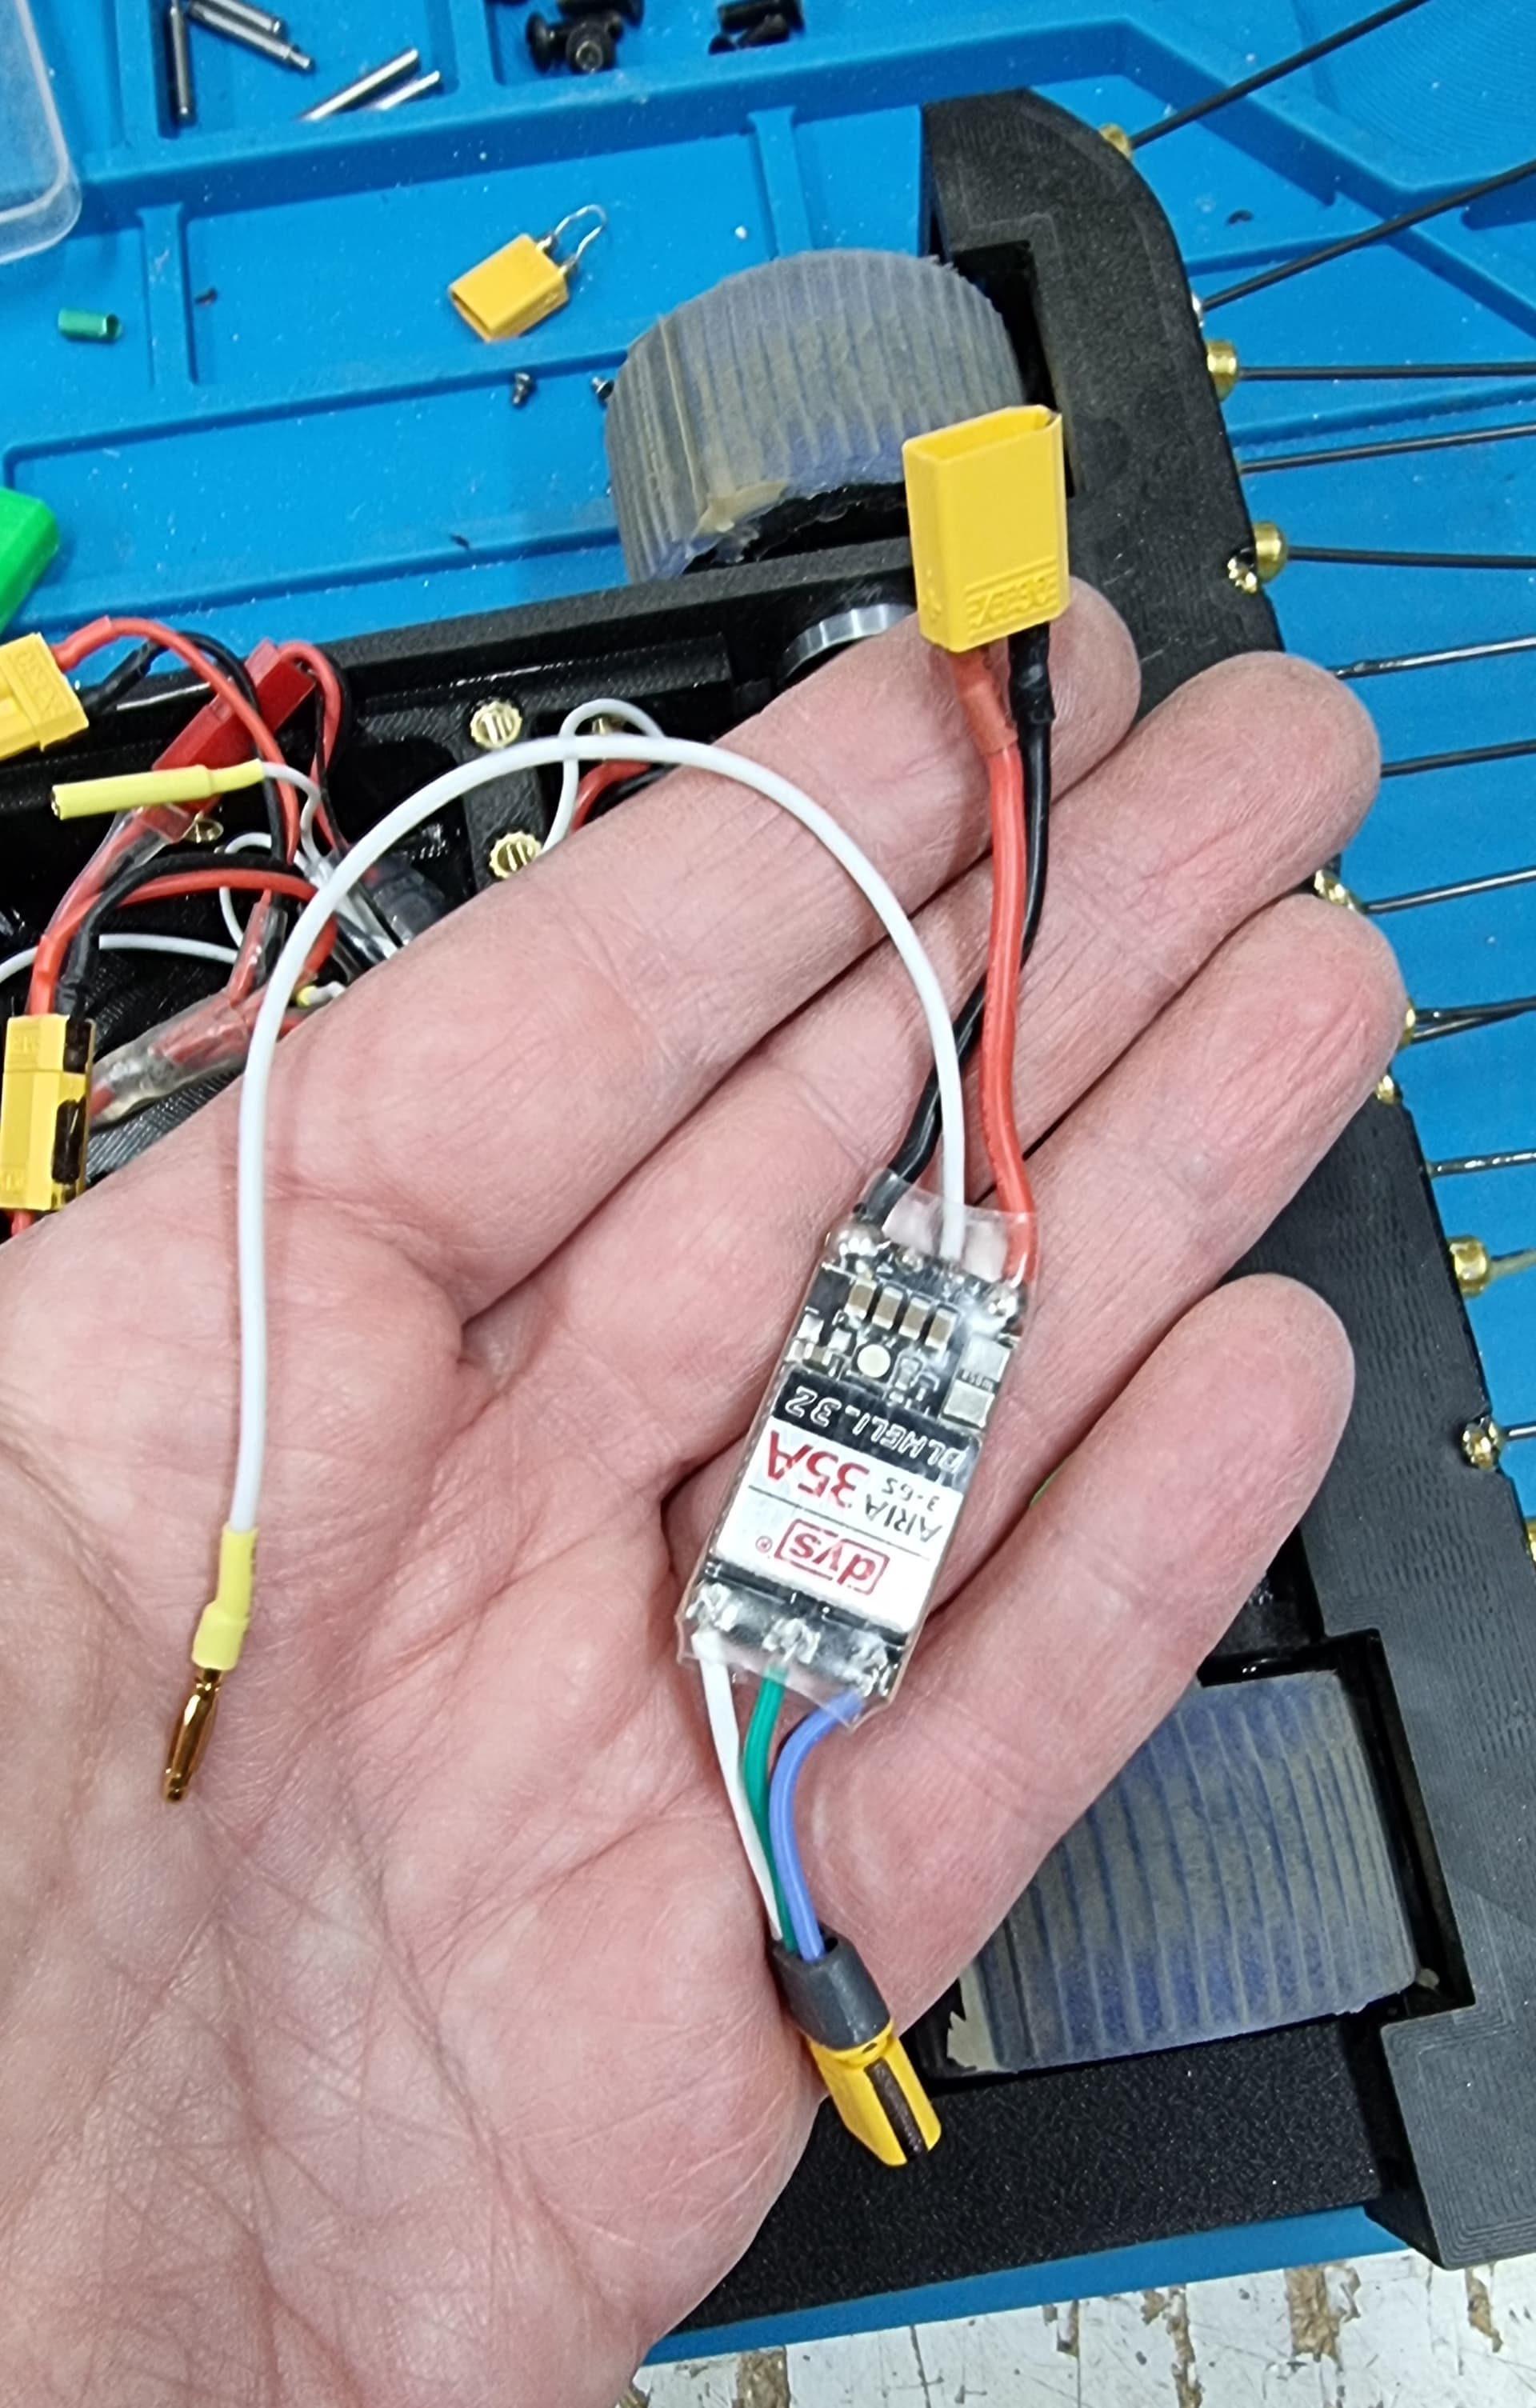
Wiring loom still.looks a bit.messy, so for starters I’ve redone the ESC modules; still got the XT30 and MR30 connectors for power and motors, but now a single lead, with 2mm bullet connector for signal.
Finally putting it all together with some practice driving on my (filthy) workshop floor.
That floor is OSB, with lots of dents, dings and cracks between the boards - but no problems with the prickles getting caught, so the arena floor.shoild be fine.
As a quick push test, I tried it against one of my wooden bench planes; this one weighs just under 2kg.
It’ll be good to see you again! It’s been a while since we’ve both been at an event together, excited to see you step into beetles.
Seems like it has plenty of pushing power. How heavy is one of those drive motors? BBB brushed motors are around 61g, Repeat Maxes are 69g, and I think my Rotalink conversions are around 45g, so it’ll be interesting to see how it stacks up to other common drive setups.
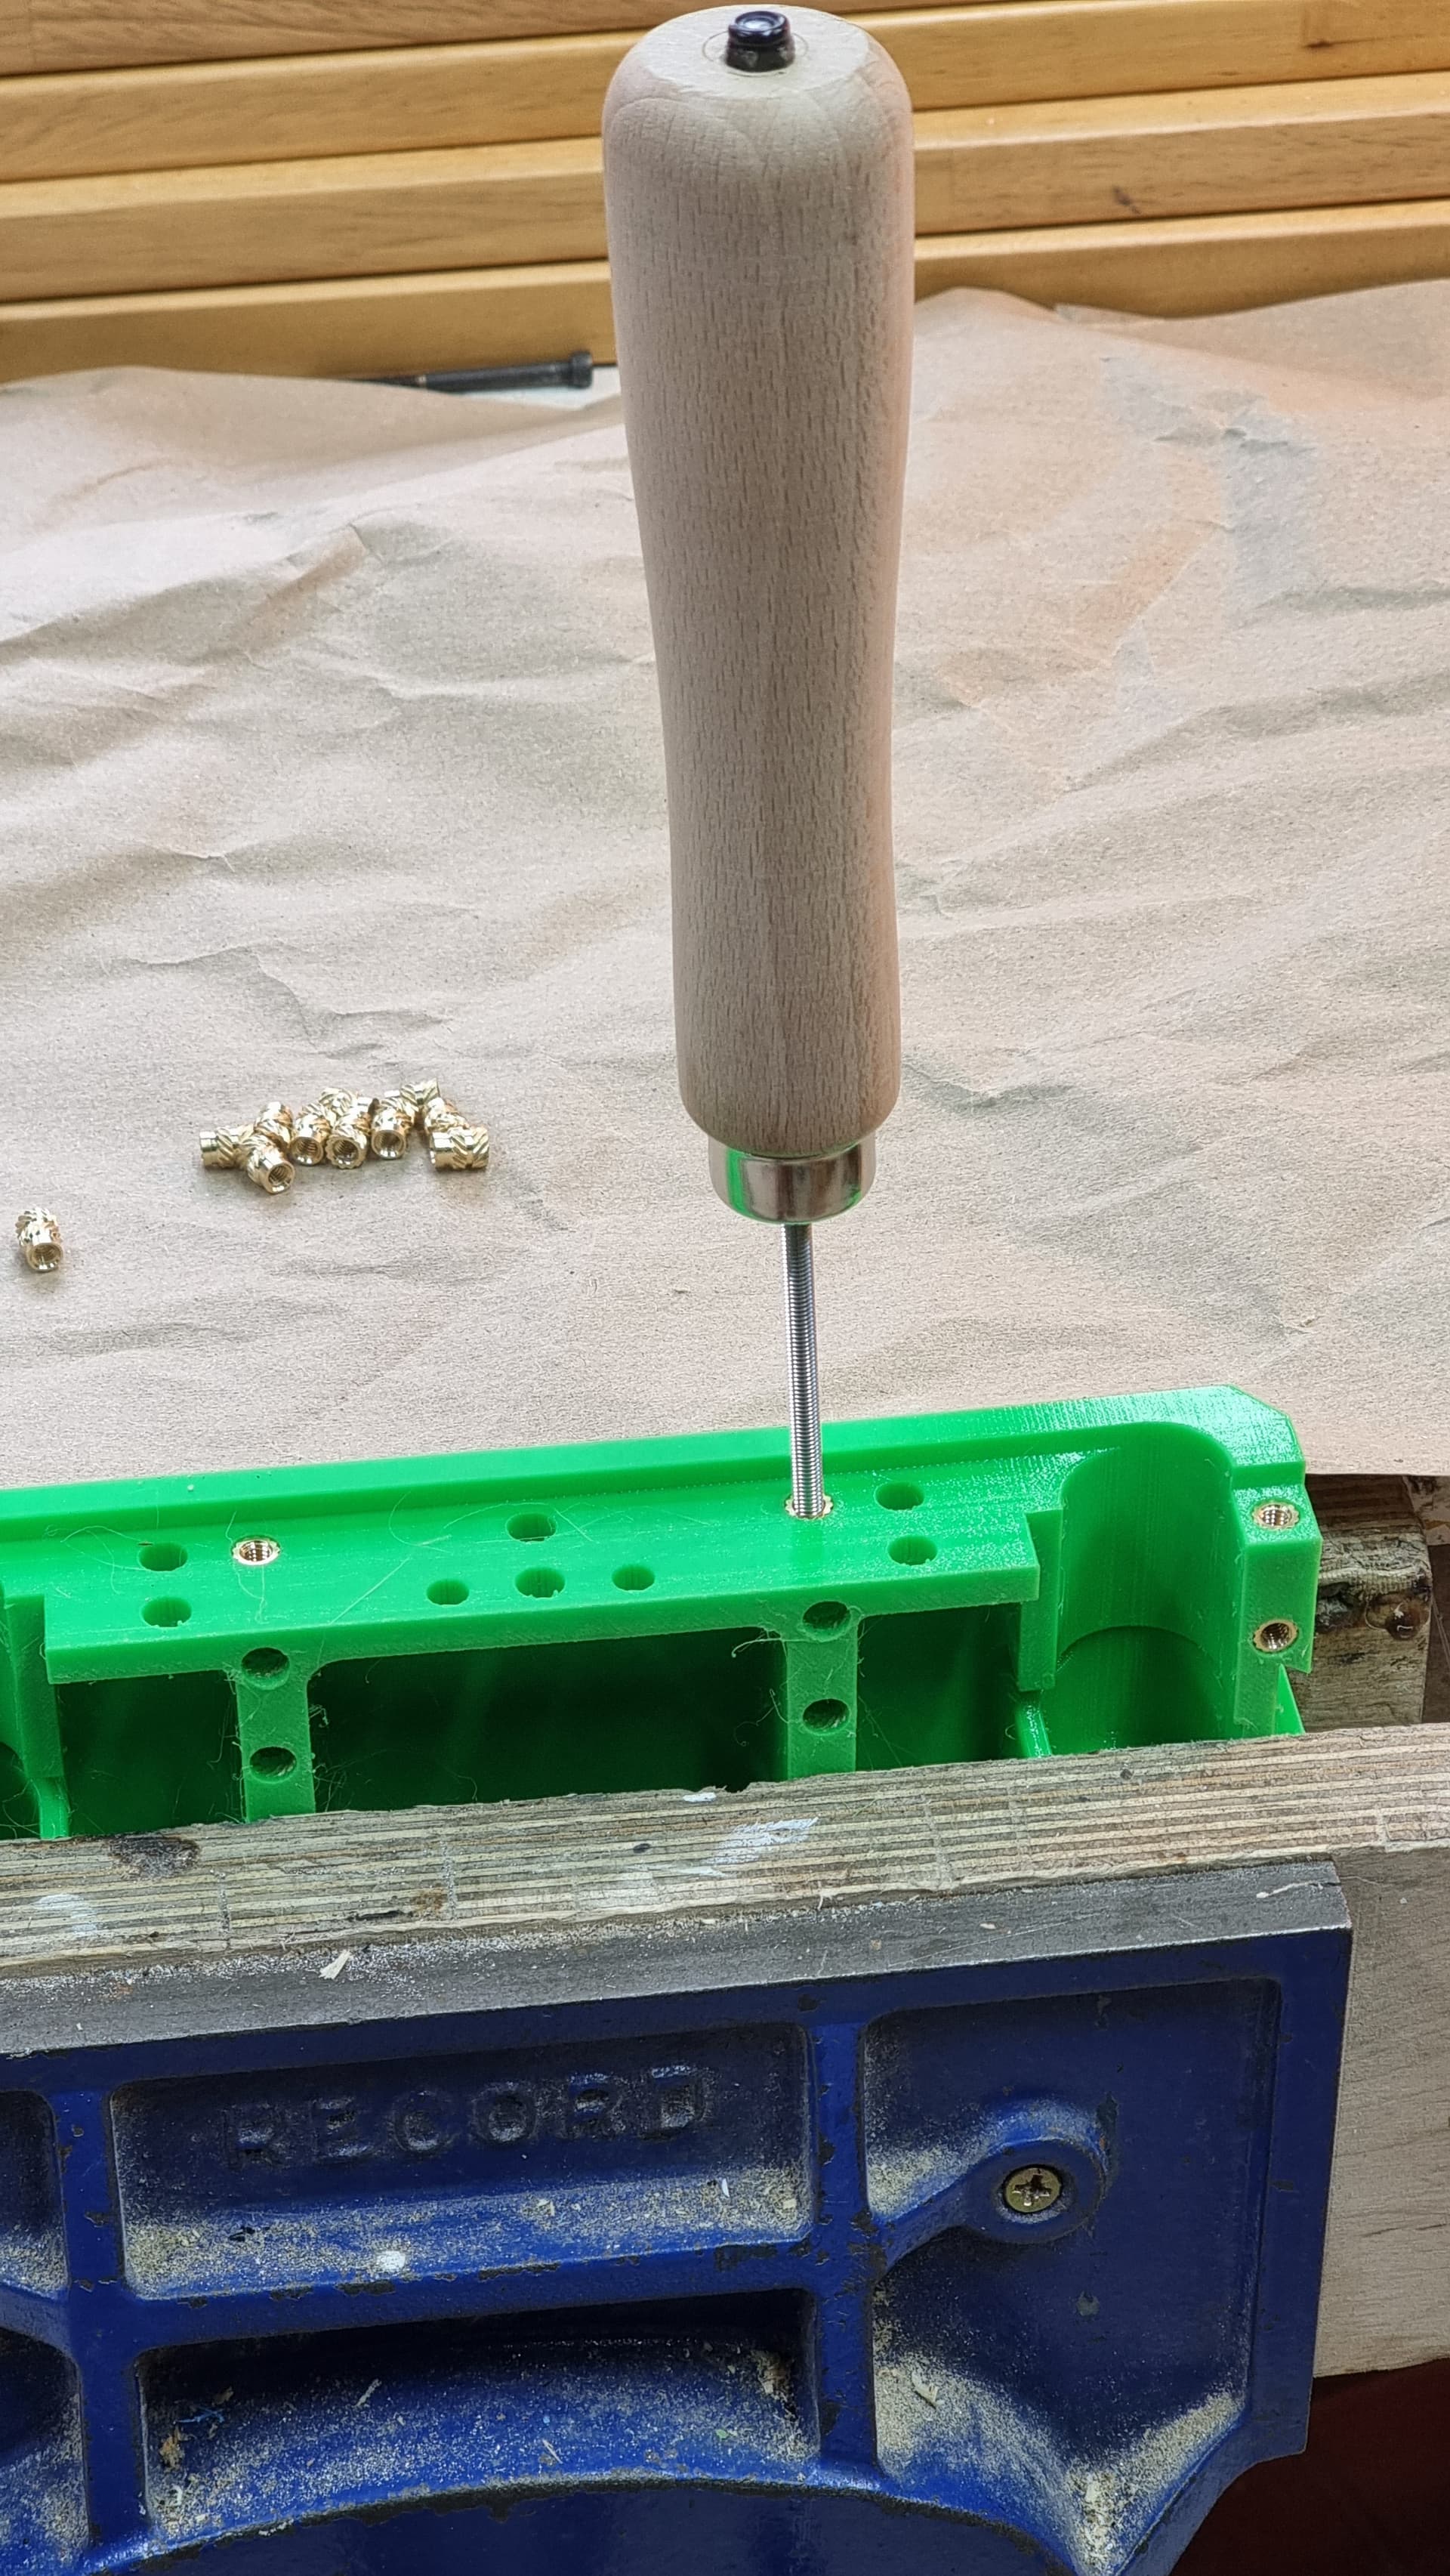
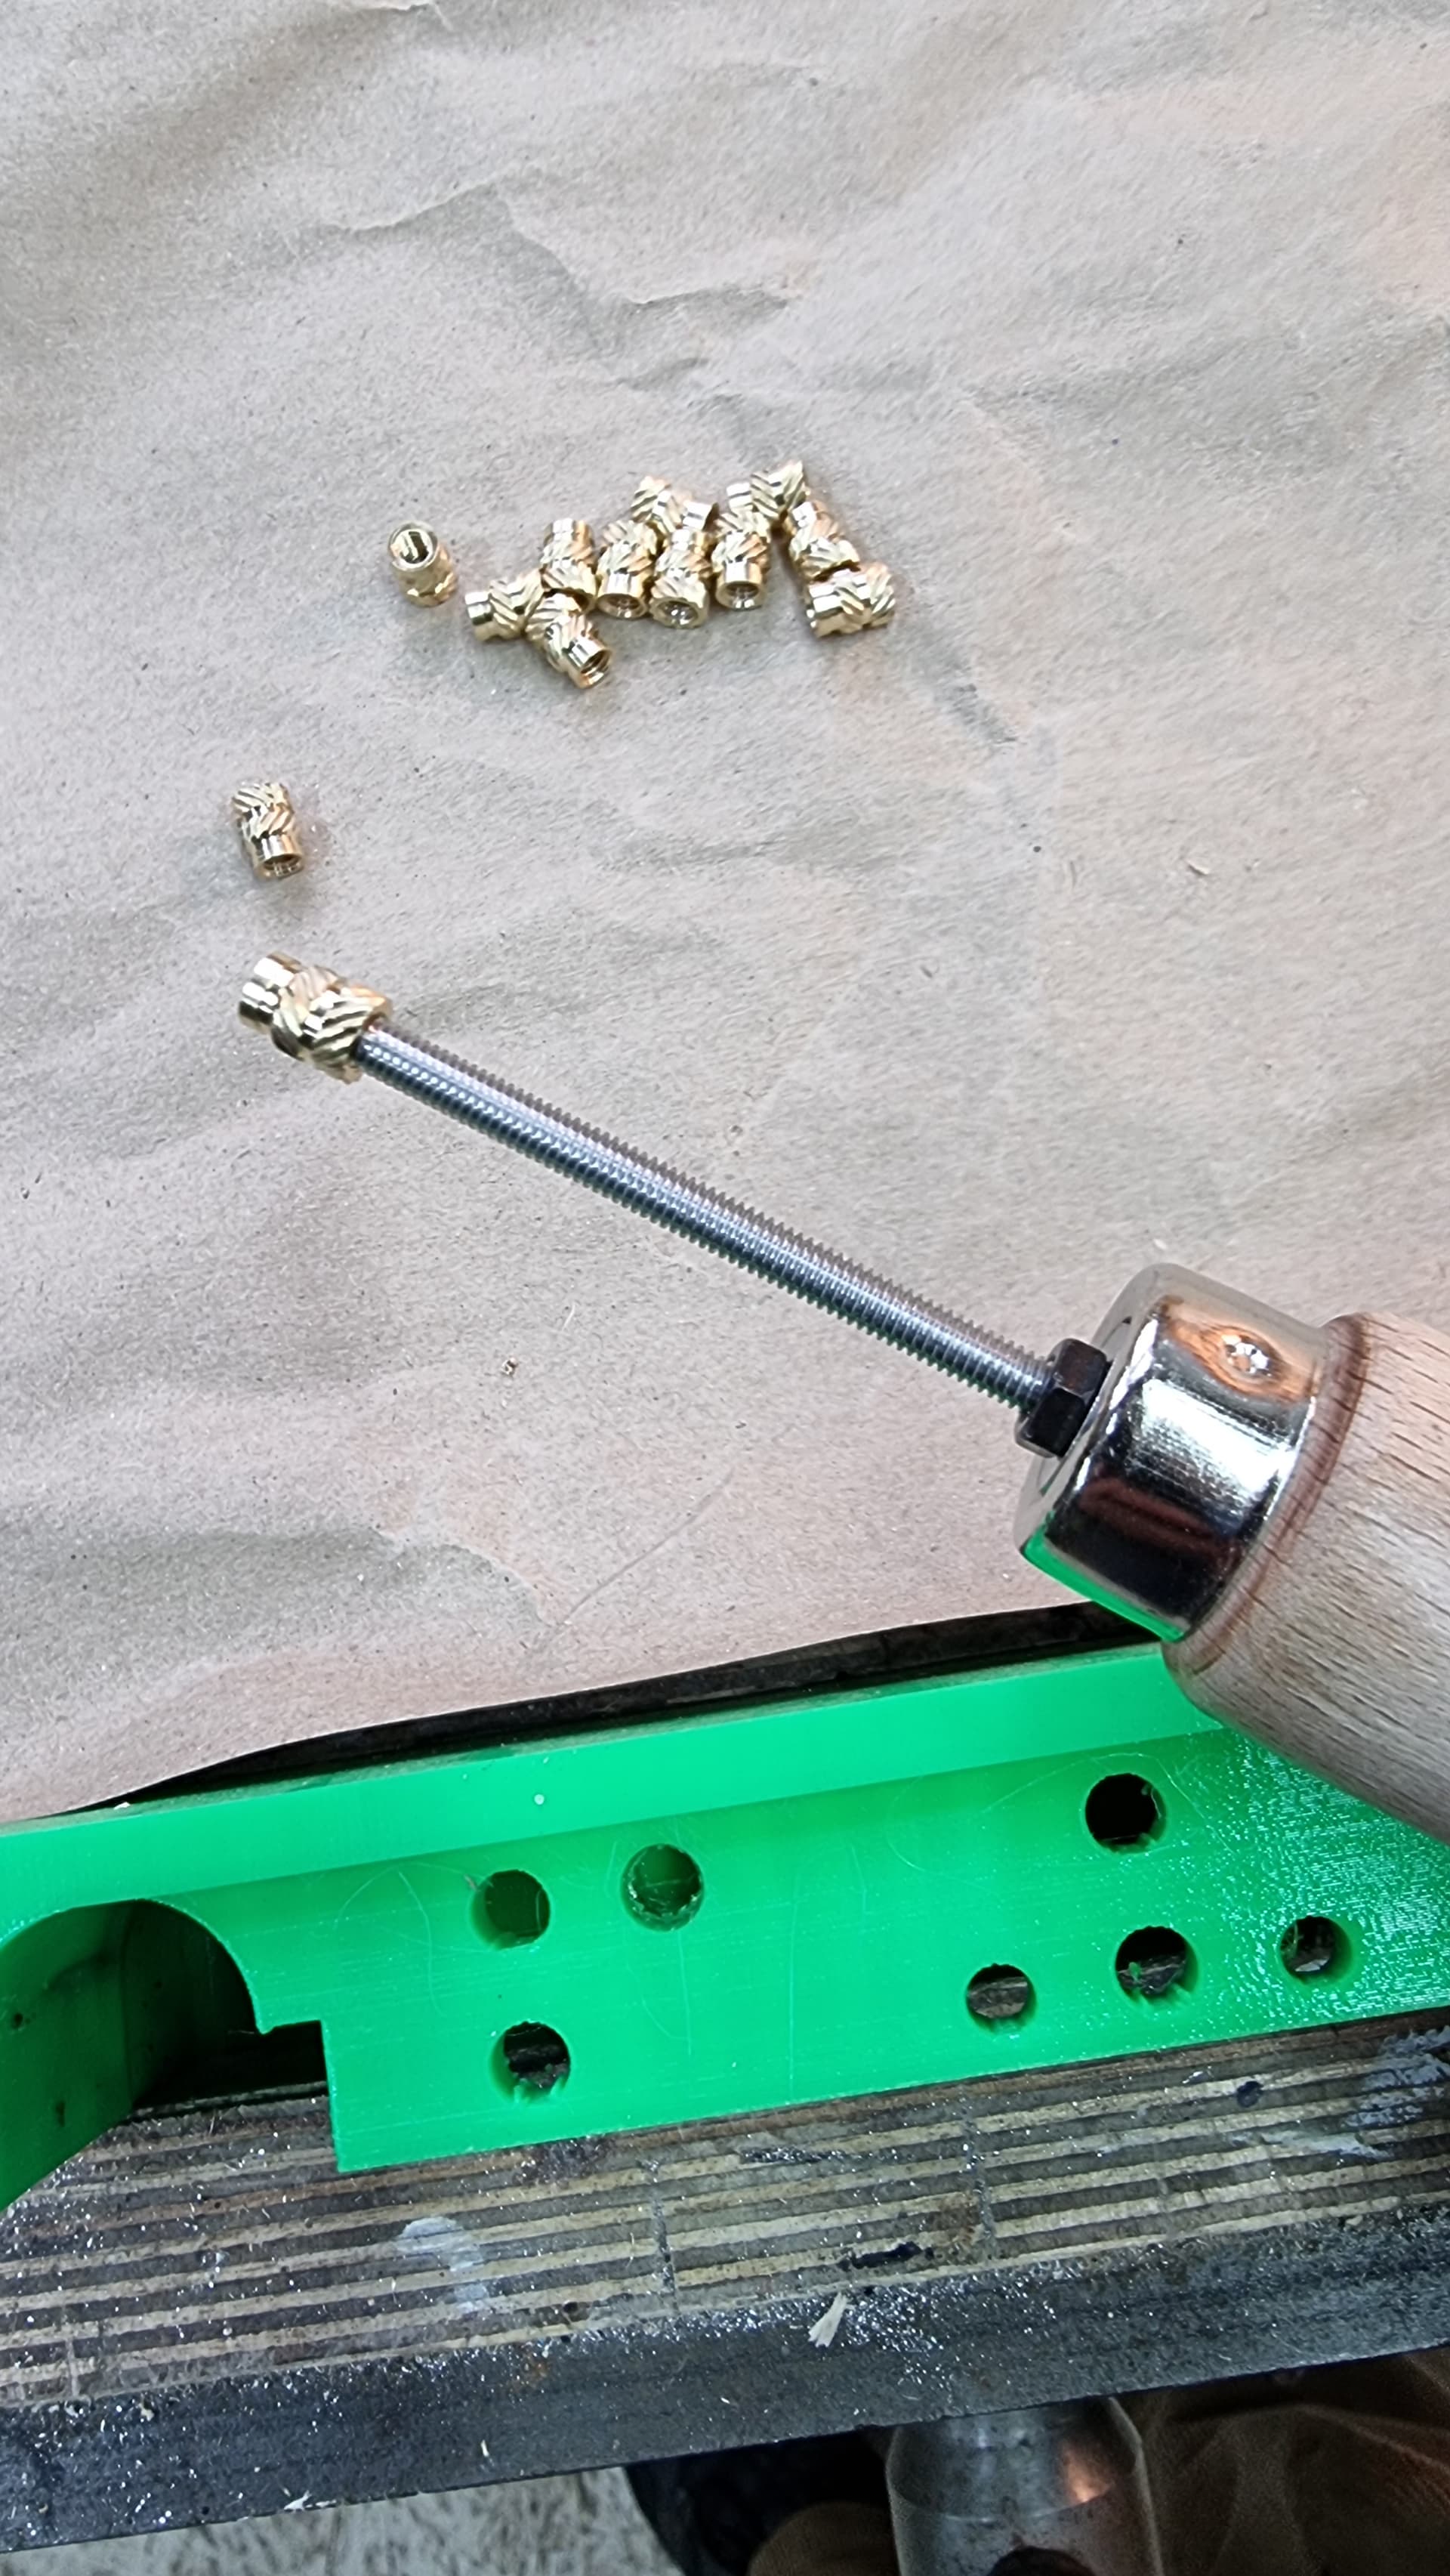
One consequence of having been through a few prototype chassis’ is that I’ve got through a heck of a lot of threaded inserts. I didn’t want to waste them but getting them out was a bit of a faff… until I came up with my new, non-patented “Threaded Uninserter”.
Basically, it’s just a wooden file handle, drilled right through and fitted with a length of M4 threaded rod. Just screw it into the insert, waggle it around a bit to break the bond, then pull like hell.
One thing this has revealed is that threaded insertsnin TPU come out very easily but those in PA-CF really don’t. In fact I’ve largely given up trying to recover the latter as it’s just too much work and tends to damage the insert.
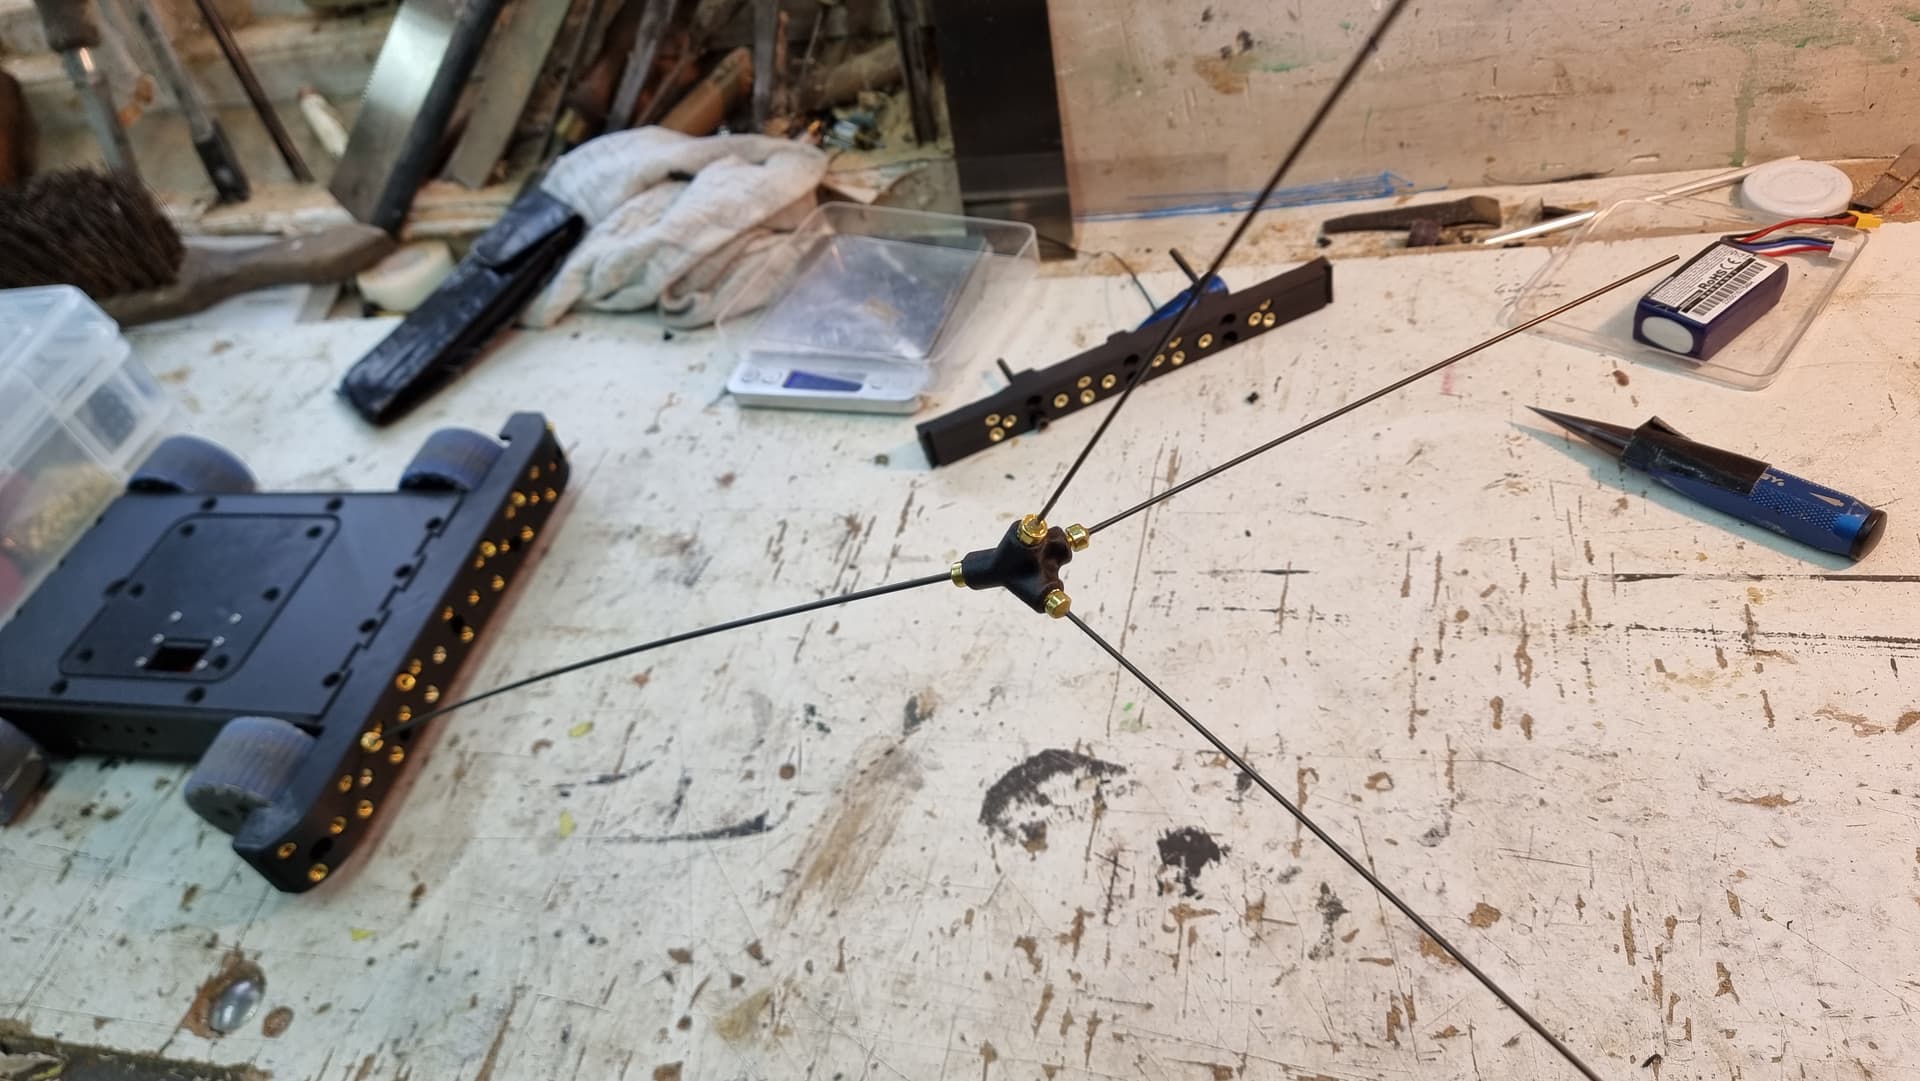
I’d always planned to have a few spines angled sharply up to counter big-wheel spinners - but then it occurred to me that the mounting mechanism I use for the base of a spine could also be applied on the other end, to make special case spines, like this 3-way splitter. In theory this should be able to catch a Stratus- style bot and push it around the arena, while keeping yhe spinner at a safe distance.
Sadly the rules prohibit explosives, corrosives, adhesives, electrical weapons, and Pym particles; so I won’t be able to create a Clint Barton style quiver of ‘trick spines’ - but a few fun options like TPU hands, of googly eyes on stalks, may be in order.
Very nearly finished (just waiting on some square nuts which will be used to secure the side pods.
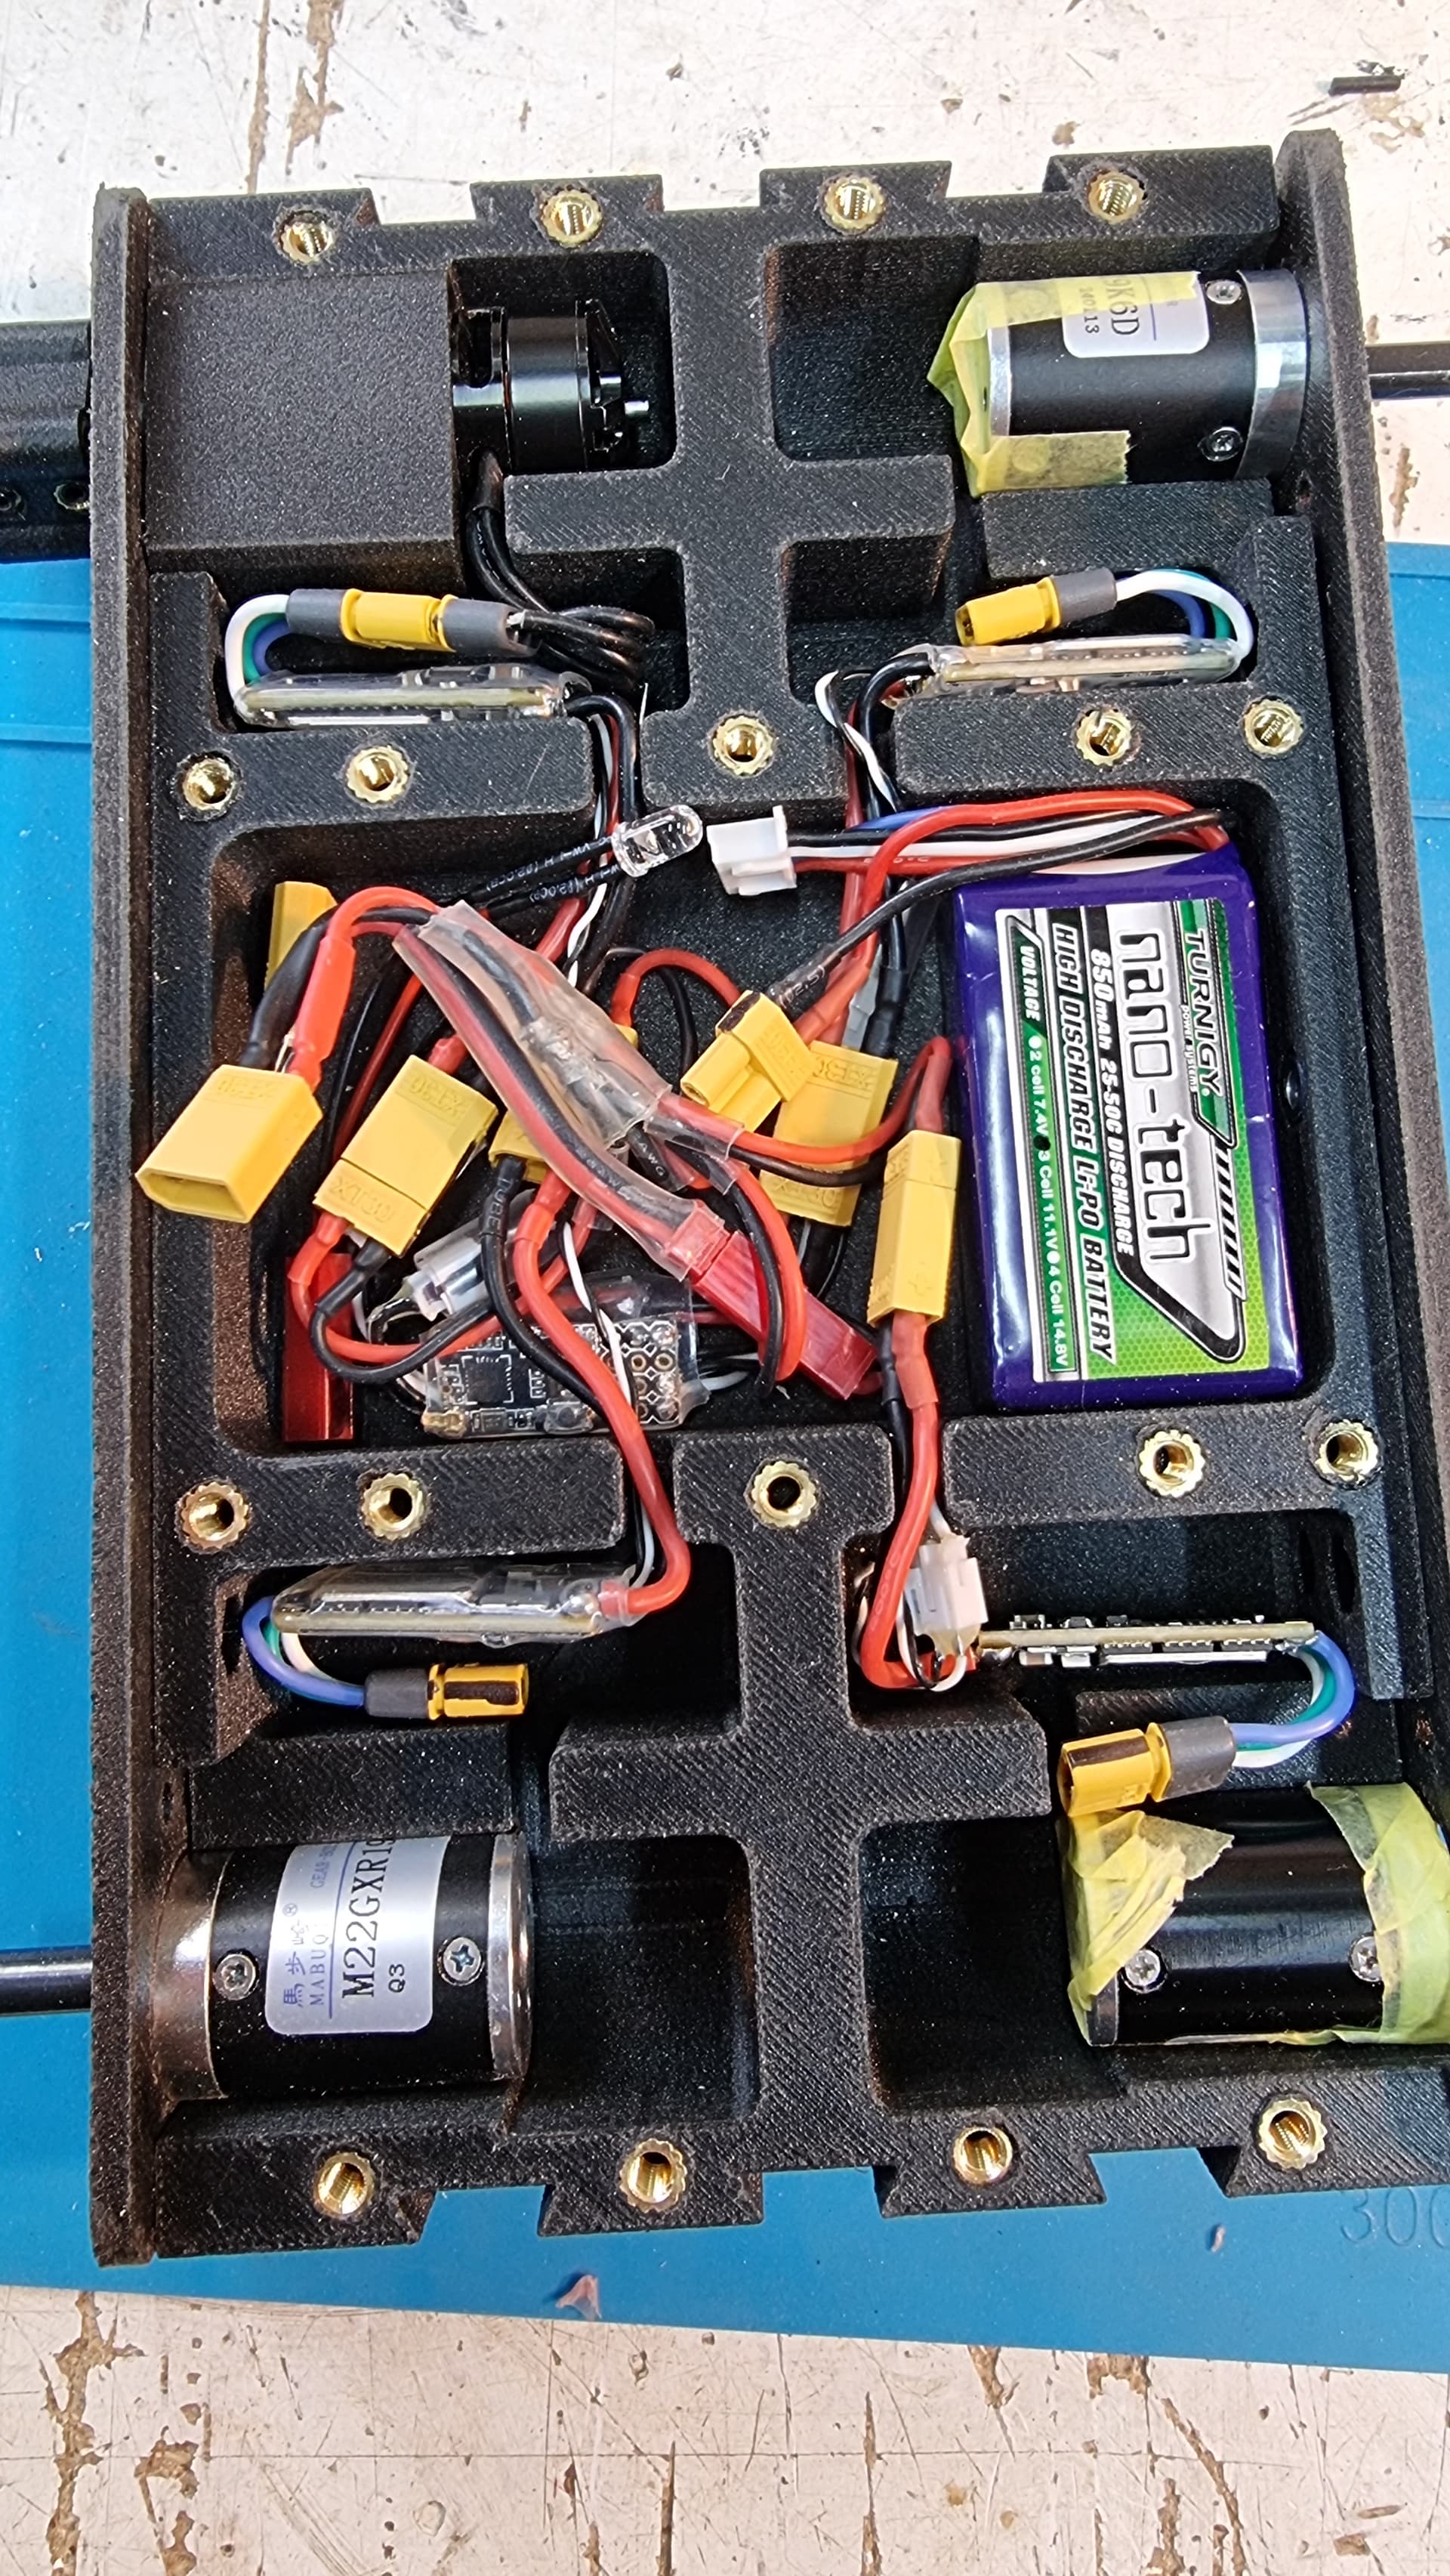
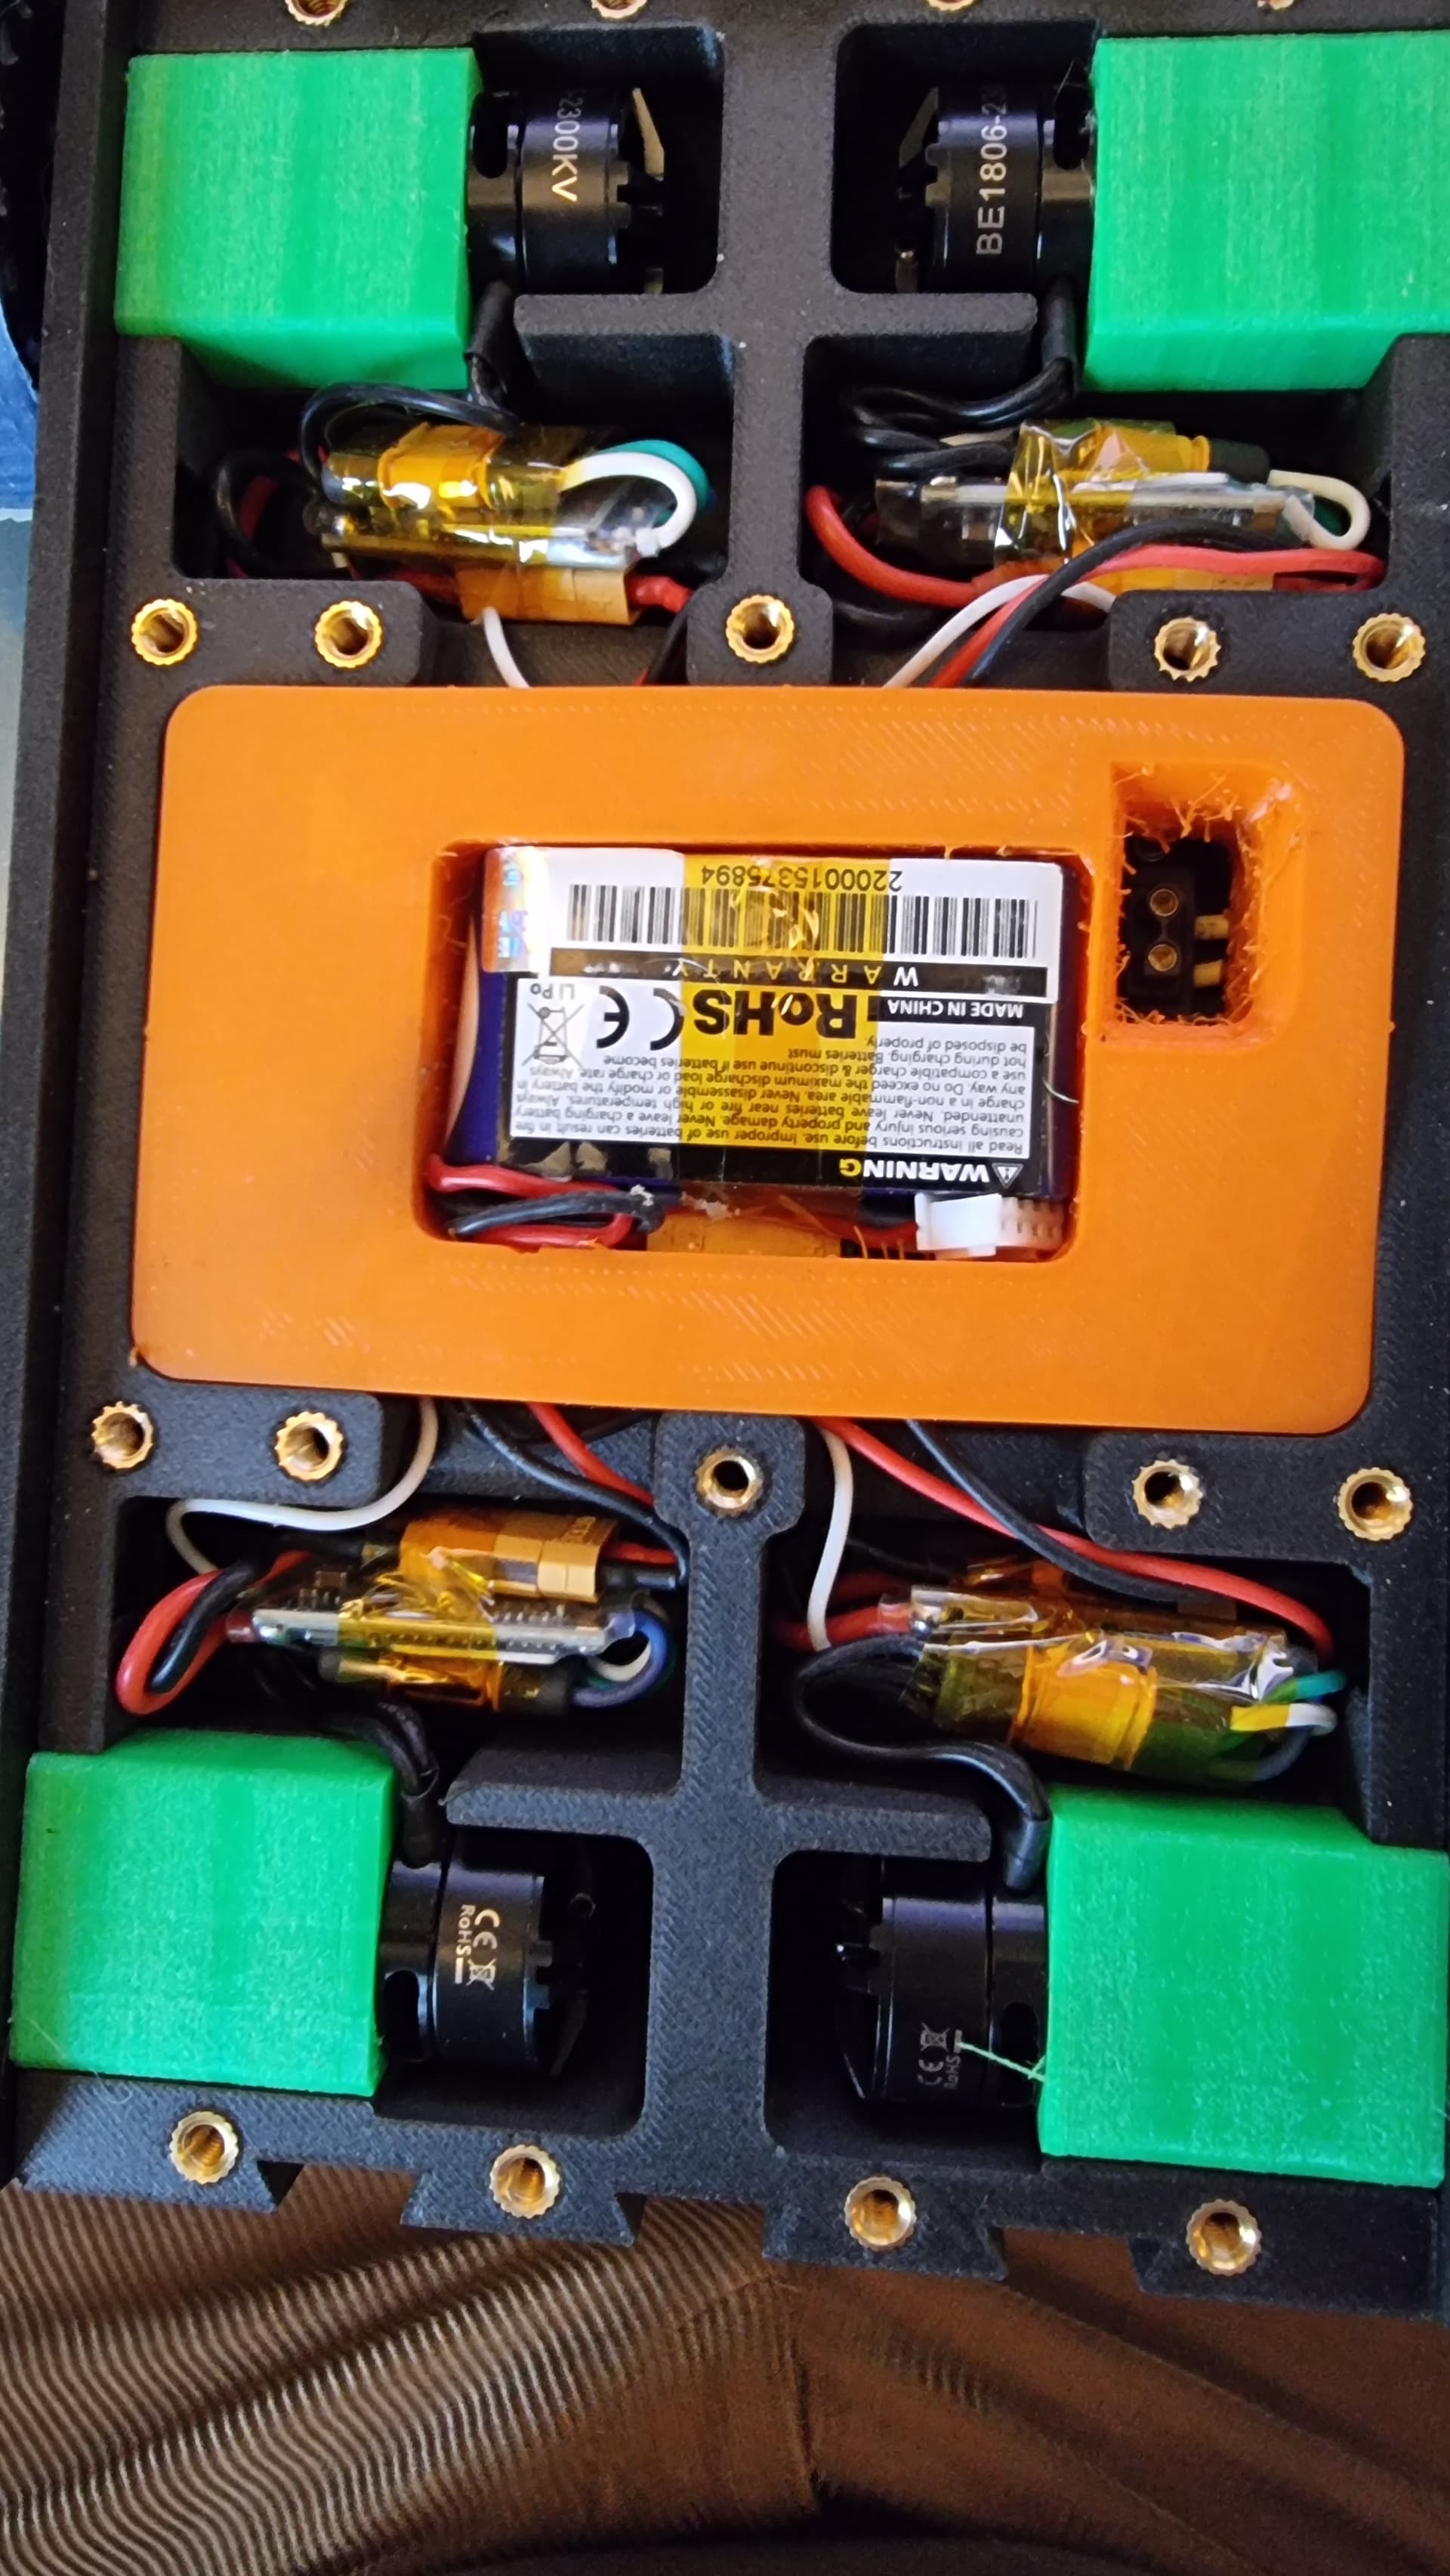
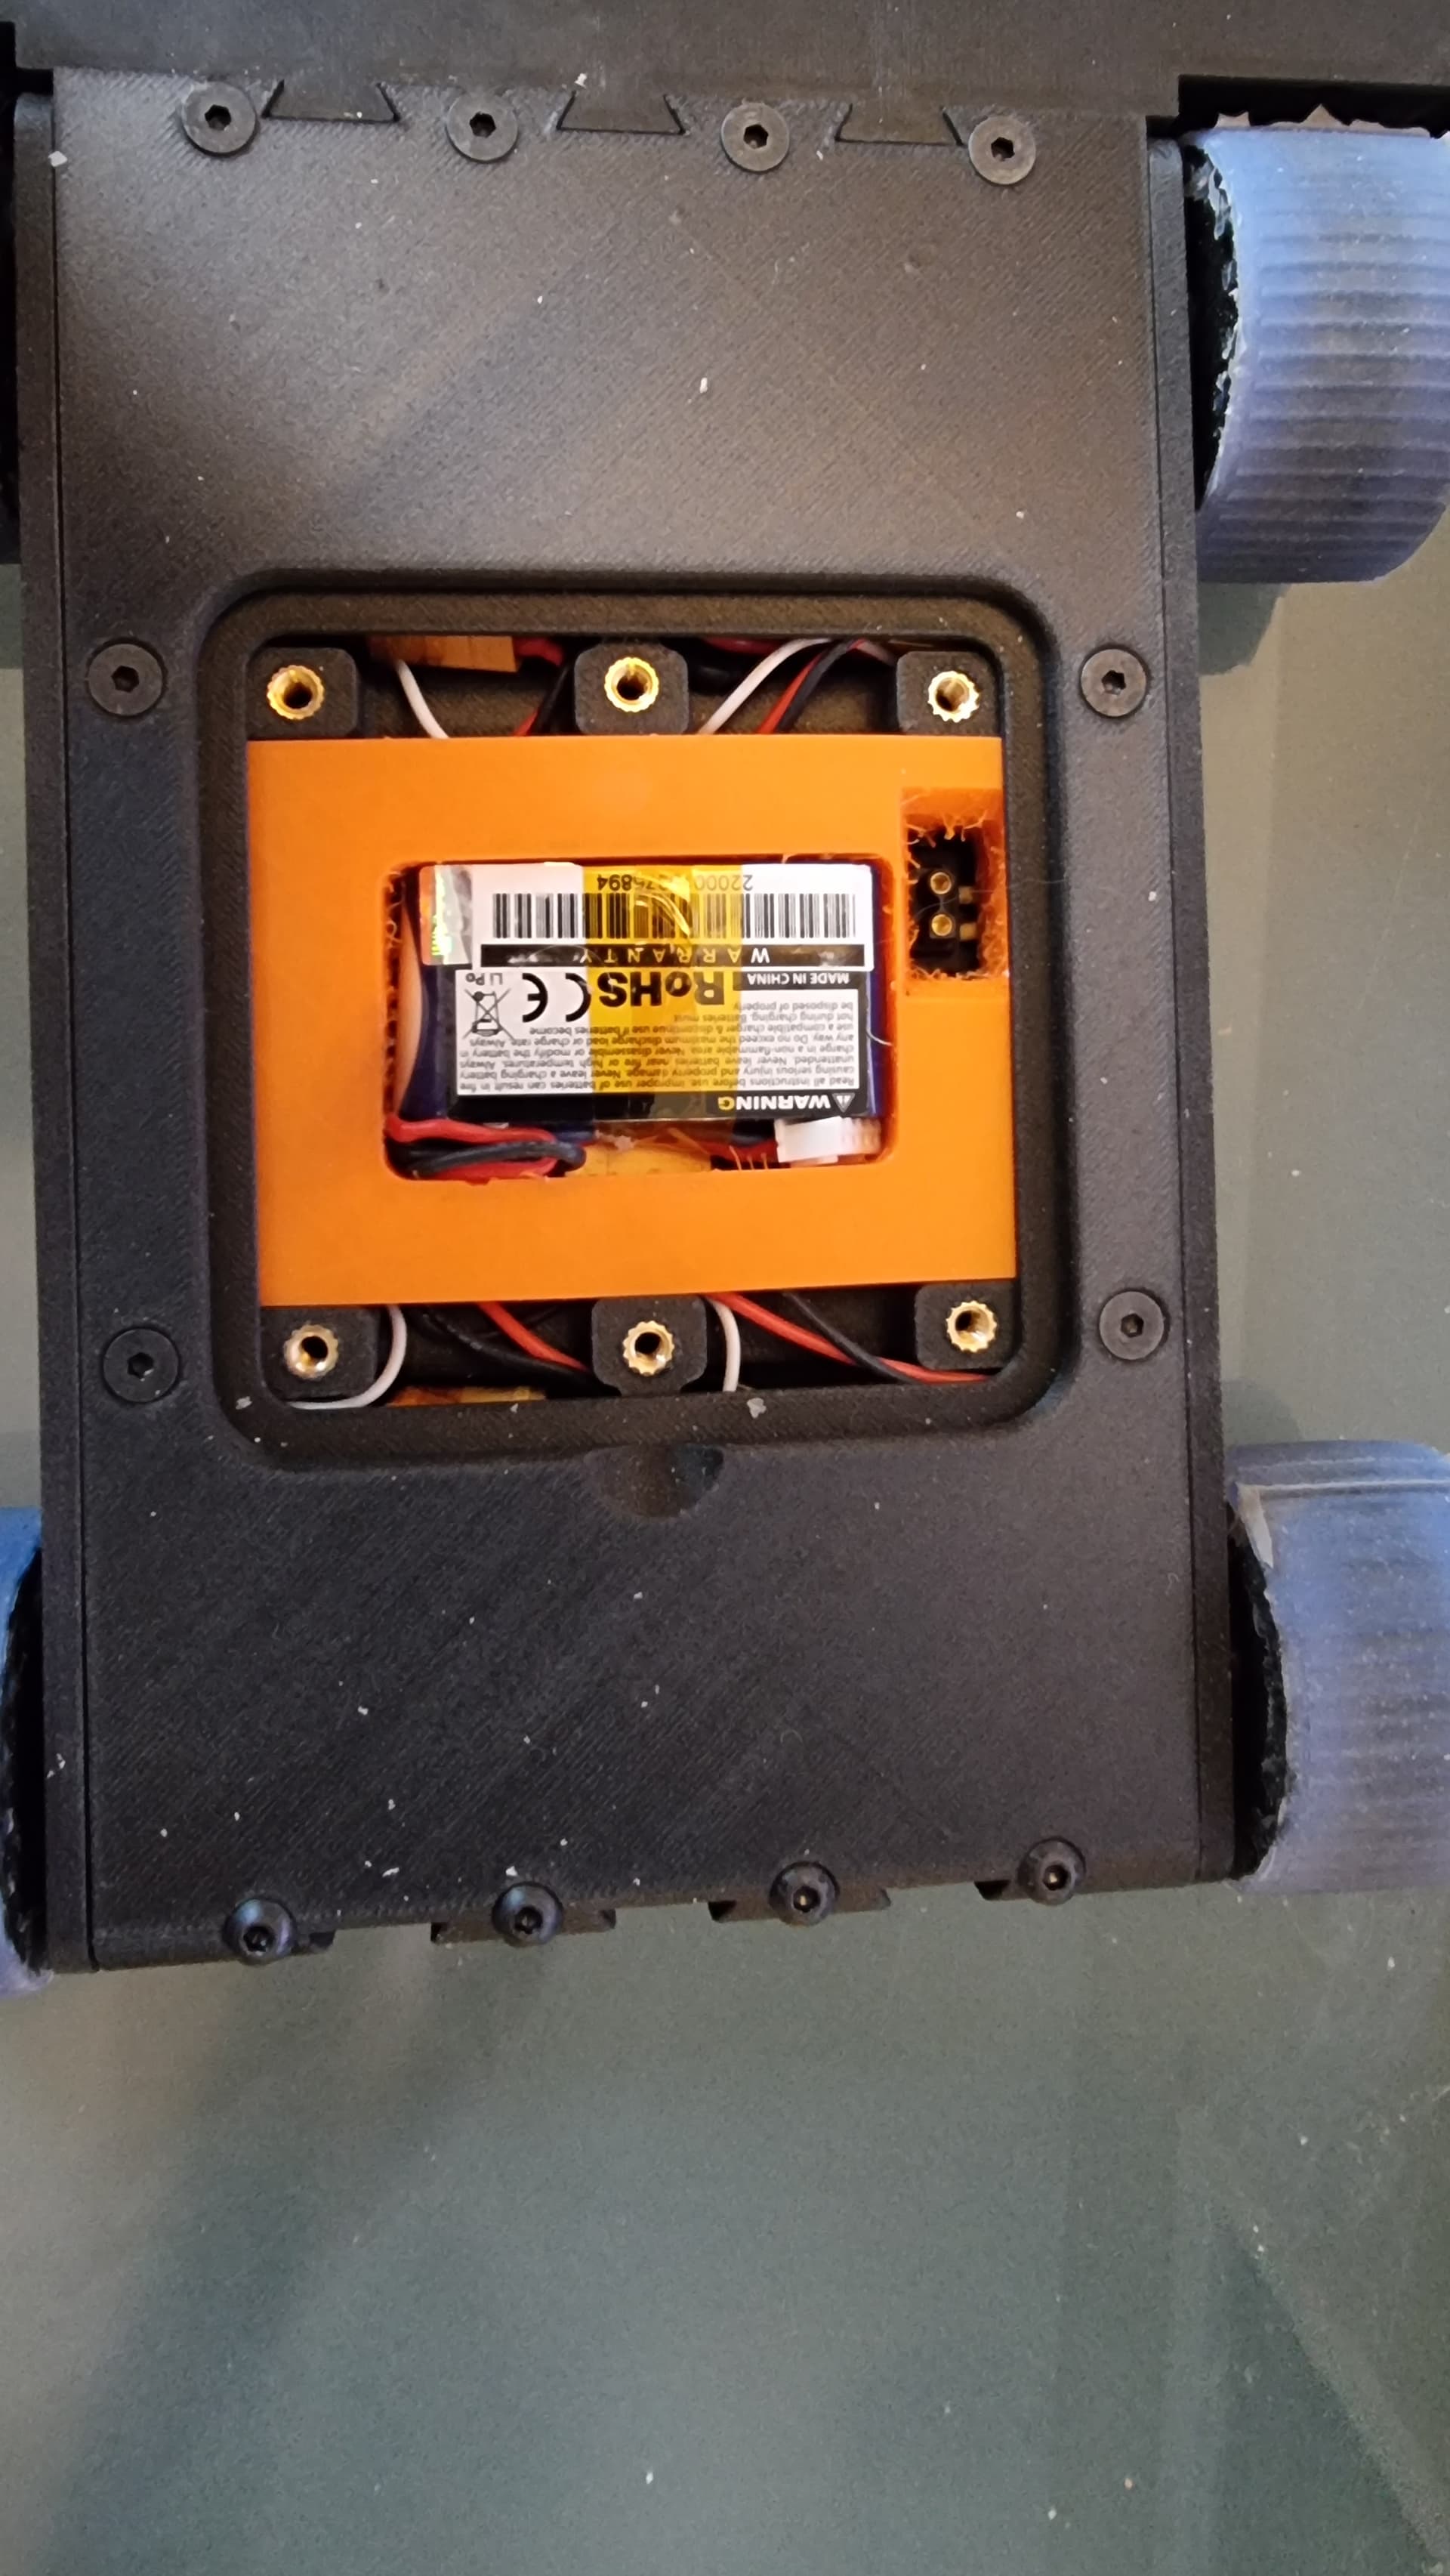
One thing that was really bugging me was the mess of wires and connectors, even after I remade the loom to fit better. Just knew that with the lipo rattling around, something was sure to come loose… so for added protection, i printed a simple drop–in lipo bay organiser in extra soft TPU (95A, 2 walls, 15% infill), to hold everything in place and cushion the lipo…
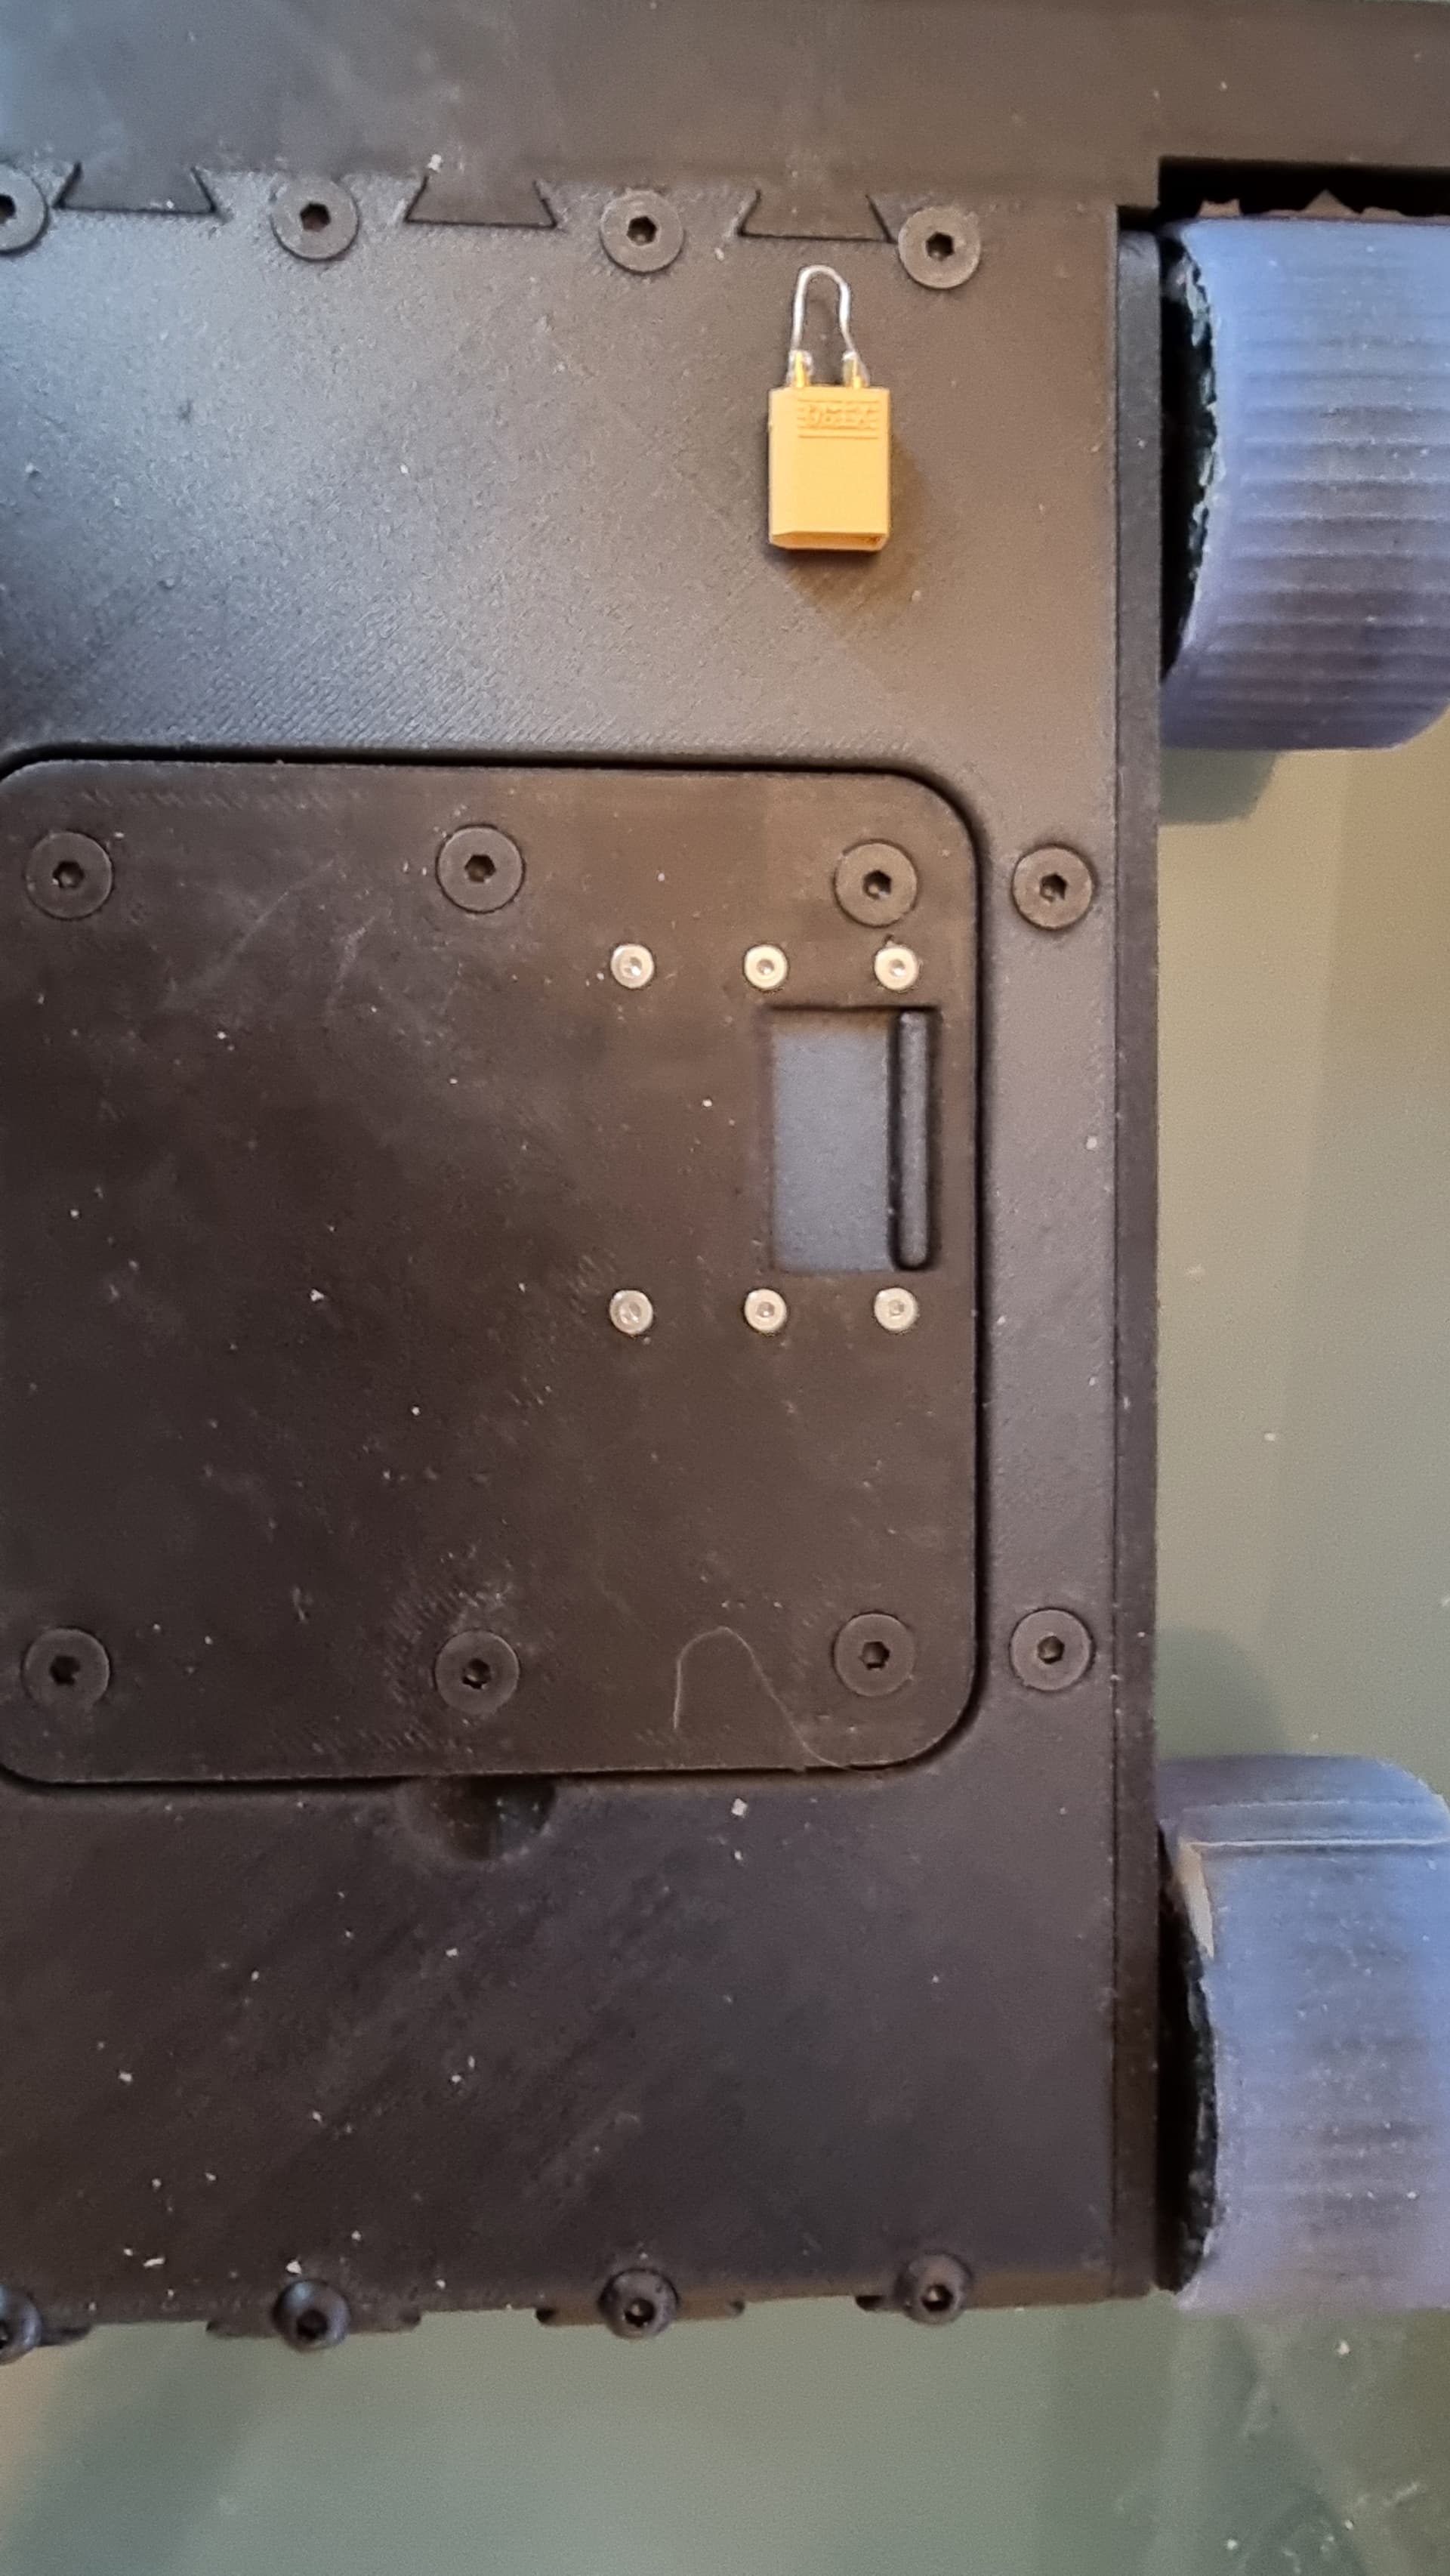
The inner-lid has a sliding cover for the removable link. Still need to fiddle with that design a bit to make it easier to access - but it’s getting there!
Internals look really neat! Also extra fancy with that sliding link door. Do you have anything keeping the door closed from big impacts (but still easily opened for disarming)?