Grey Area - a 4WD beetleweight "reaching" vert

This is Grey Area, a meta 4WD vert gone wrong.

I’ve been running Attitude Adjuster for many years now, and over the last year or so I’d started to feel like I had mostly optimised the design pretty well as far as it could go and wanted a new challenge.

I first had the idea for Grey Area around Rapture 2023 when I noticed that sometimes with AA I could pin other robots against the arena wall, but not quite reach them with the hammersaw. Instead, it would sort of prop them up and expose their baseplate but be unable to hit it. I wanted to build something like a pop-up wedge from Robot Arena, that would be able to hit some baseplates.

image

The next puzzle piece was designing a hubmotor for Attitude Adjuster, for Brawl 2024. I wanted the design to be generic enough that I could use it for a little vert, or other vert-on-a-stick shenanigans. Once I had this and tested out its effectiveness at Brawl, I was confident designing something around it.


After Brawl last year, I started seriously thinking about how this would work. I realised I would need some sort of “punching” action to get the motion that I wanted, with the spinner finishing as close to the ground as I could get. I looked at Shrapnel Mine’s flippersaw arrangement, but couldn’t figure out how to get the flip and chop action without it just being a hammersaw. I looked at using linear rails, but they’re heavy and the mechanism to make it work is tricky with a single servo rotation.

I finally settled on a “reverse” 4-bar mechanism like Dead Metal and Head For The Exit. This would allow me to run the mechanism off a servo for simplicity and positional control, save the weight of linear rails, and control the motion so it would finish with the spinner as far down and out as I could get it. As a bonus, with an extension on the rear arm it would also work as a self-righter.

With that I had some fun with various 4-bar linkage simulators and Fusion constraints before getting a rough geometry I was happy with. I made the early decision to kink the front arm of the 4 bar so that I didn’t have to have the front wall of the chassis be too open, as I knew that I wanted this to be a TPU unibody like Attitude Adjuster.

After some playing with the simulator and a 2nd hand servo from BBB’s own Joe Brown, I had a prototype weapon assembly! Stay tuned to see how I designed a robot around it.


9 Likes

A weird design, but it could be interesting. Looks safe from overhead attacks, good ground game. Just keep the front facing the right way and I don’t see any glaring issues.

1 Like

Dw I think Scott knows what he’s doing

2 Likes

I take it you haven’t watched this year’s Beetle Brawl then :stuck_out_tongue:

1 Like

Very cool to get a good look at the four bar.
Its an awesome bot that I really enjoyed watching at Brawl :slight_smile:

1 Like

answer: it was interesting :stuck_out_tongue:

a 4 bar vert has always been an idea you go hmmmmmmm by. love the design, love the concept, may rip off

2 Likes

It is a weird design, and was interesting!

When I set out to design a robot or a new revision I set myself some constraints and freedoms to help guide the design. I knew I wanted this to have roughly the same platform as Attitude Adjuster, gear-driven 4WD with wheels that stick out the back. I had some large wheels from my beater bar robot, “Limiting Factor” which looked cool, so I wanted to use those on the back. I briefly considered making the punching mechanism an alternative setup of Attitude Adjuster, but the compromises and weight needed were enough that I decided to make it a standalone robot.

Other constraints - I wanted to print it in one piece on my printer, so that set the maximum width. I wanted to reuse the same fork architecture and wedge, if possible. I wanted to make it a TPU chassis with HDPE top and bottom, and try out Repeat Compacts. I had never needed to replace a separate armour mount on Attitude Adjuster, so I decided I’d integrate them in the chassis.

On the freedoms - I decided fairly early that I would need to make this asymmetric to allow the self-designed hubmotor to be close to the middle of the bot, and I liked that it would make it a bit odd to look at.

Here’s an early sketch - I haven’t worked out where to put the servo, and the battery was hanging out in the path of the hubmotor. I was trying to work out whether to make the weapon bulkheads part of the TPU unibody or to make them out of machined HDPE. I eventually decided to make them TPU for simplicity.
ezgif-4e007bbcfbed10

Here’s one that shows the ground game. I wanted to make it similar to attitude adjuster, with long forks that ride along the ground but have a keep-away element and a shallow radius closer that acts like a scoop. I designed the keep-away element to be taller to protect the spinner, so it could spin up before it strikes.

Here’s one from a bit further along. I was still experimenting with the idea of directly attaching the rear arm to the servo horn, but I didn’t like how far it stuck out the back.
IMG_0595

I eventually decided to go for driving the arm with gears. This let me move the servo closer to the middle of the robot for protection, while expanding the range of motion of the servo. A few iterations later and I was ready to make the first of many hollow PLA prototypes.


4 Likes

I absolutely love this idea for a robot! Definitely inspired me to add a similar design to my long spreadsheet of potential beetles.

1 Like

I got stuck when I designed myself into a couple of holes that I couldn’t get out of and put this project down for a few months. A few things happened that got my motivation back.

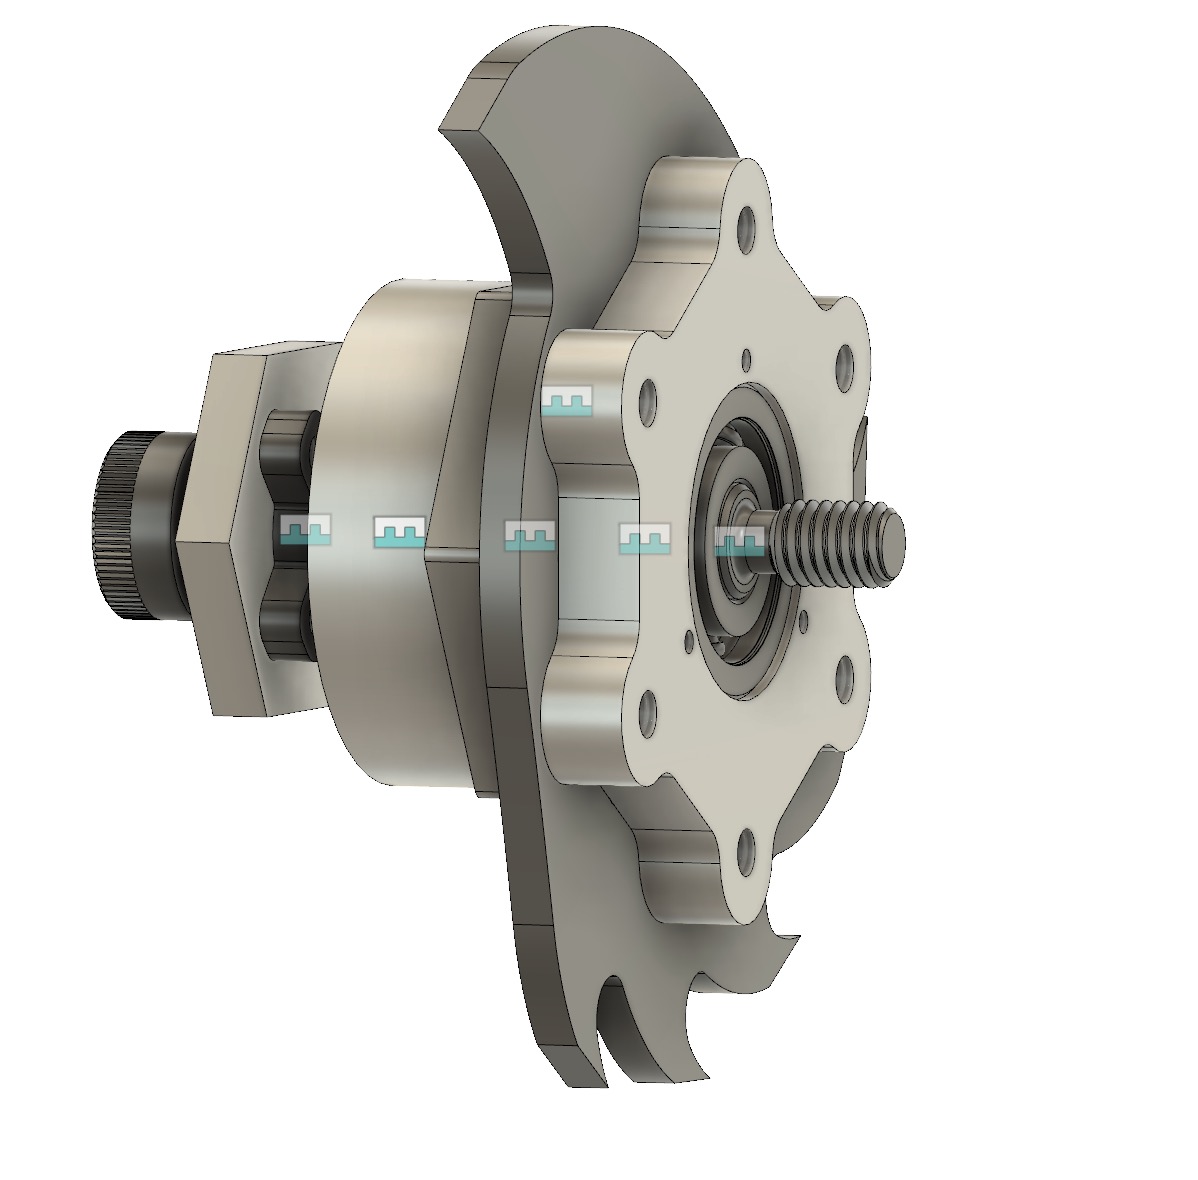
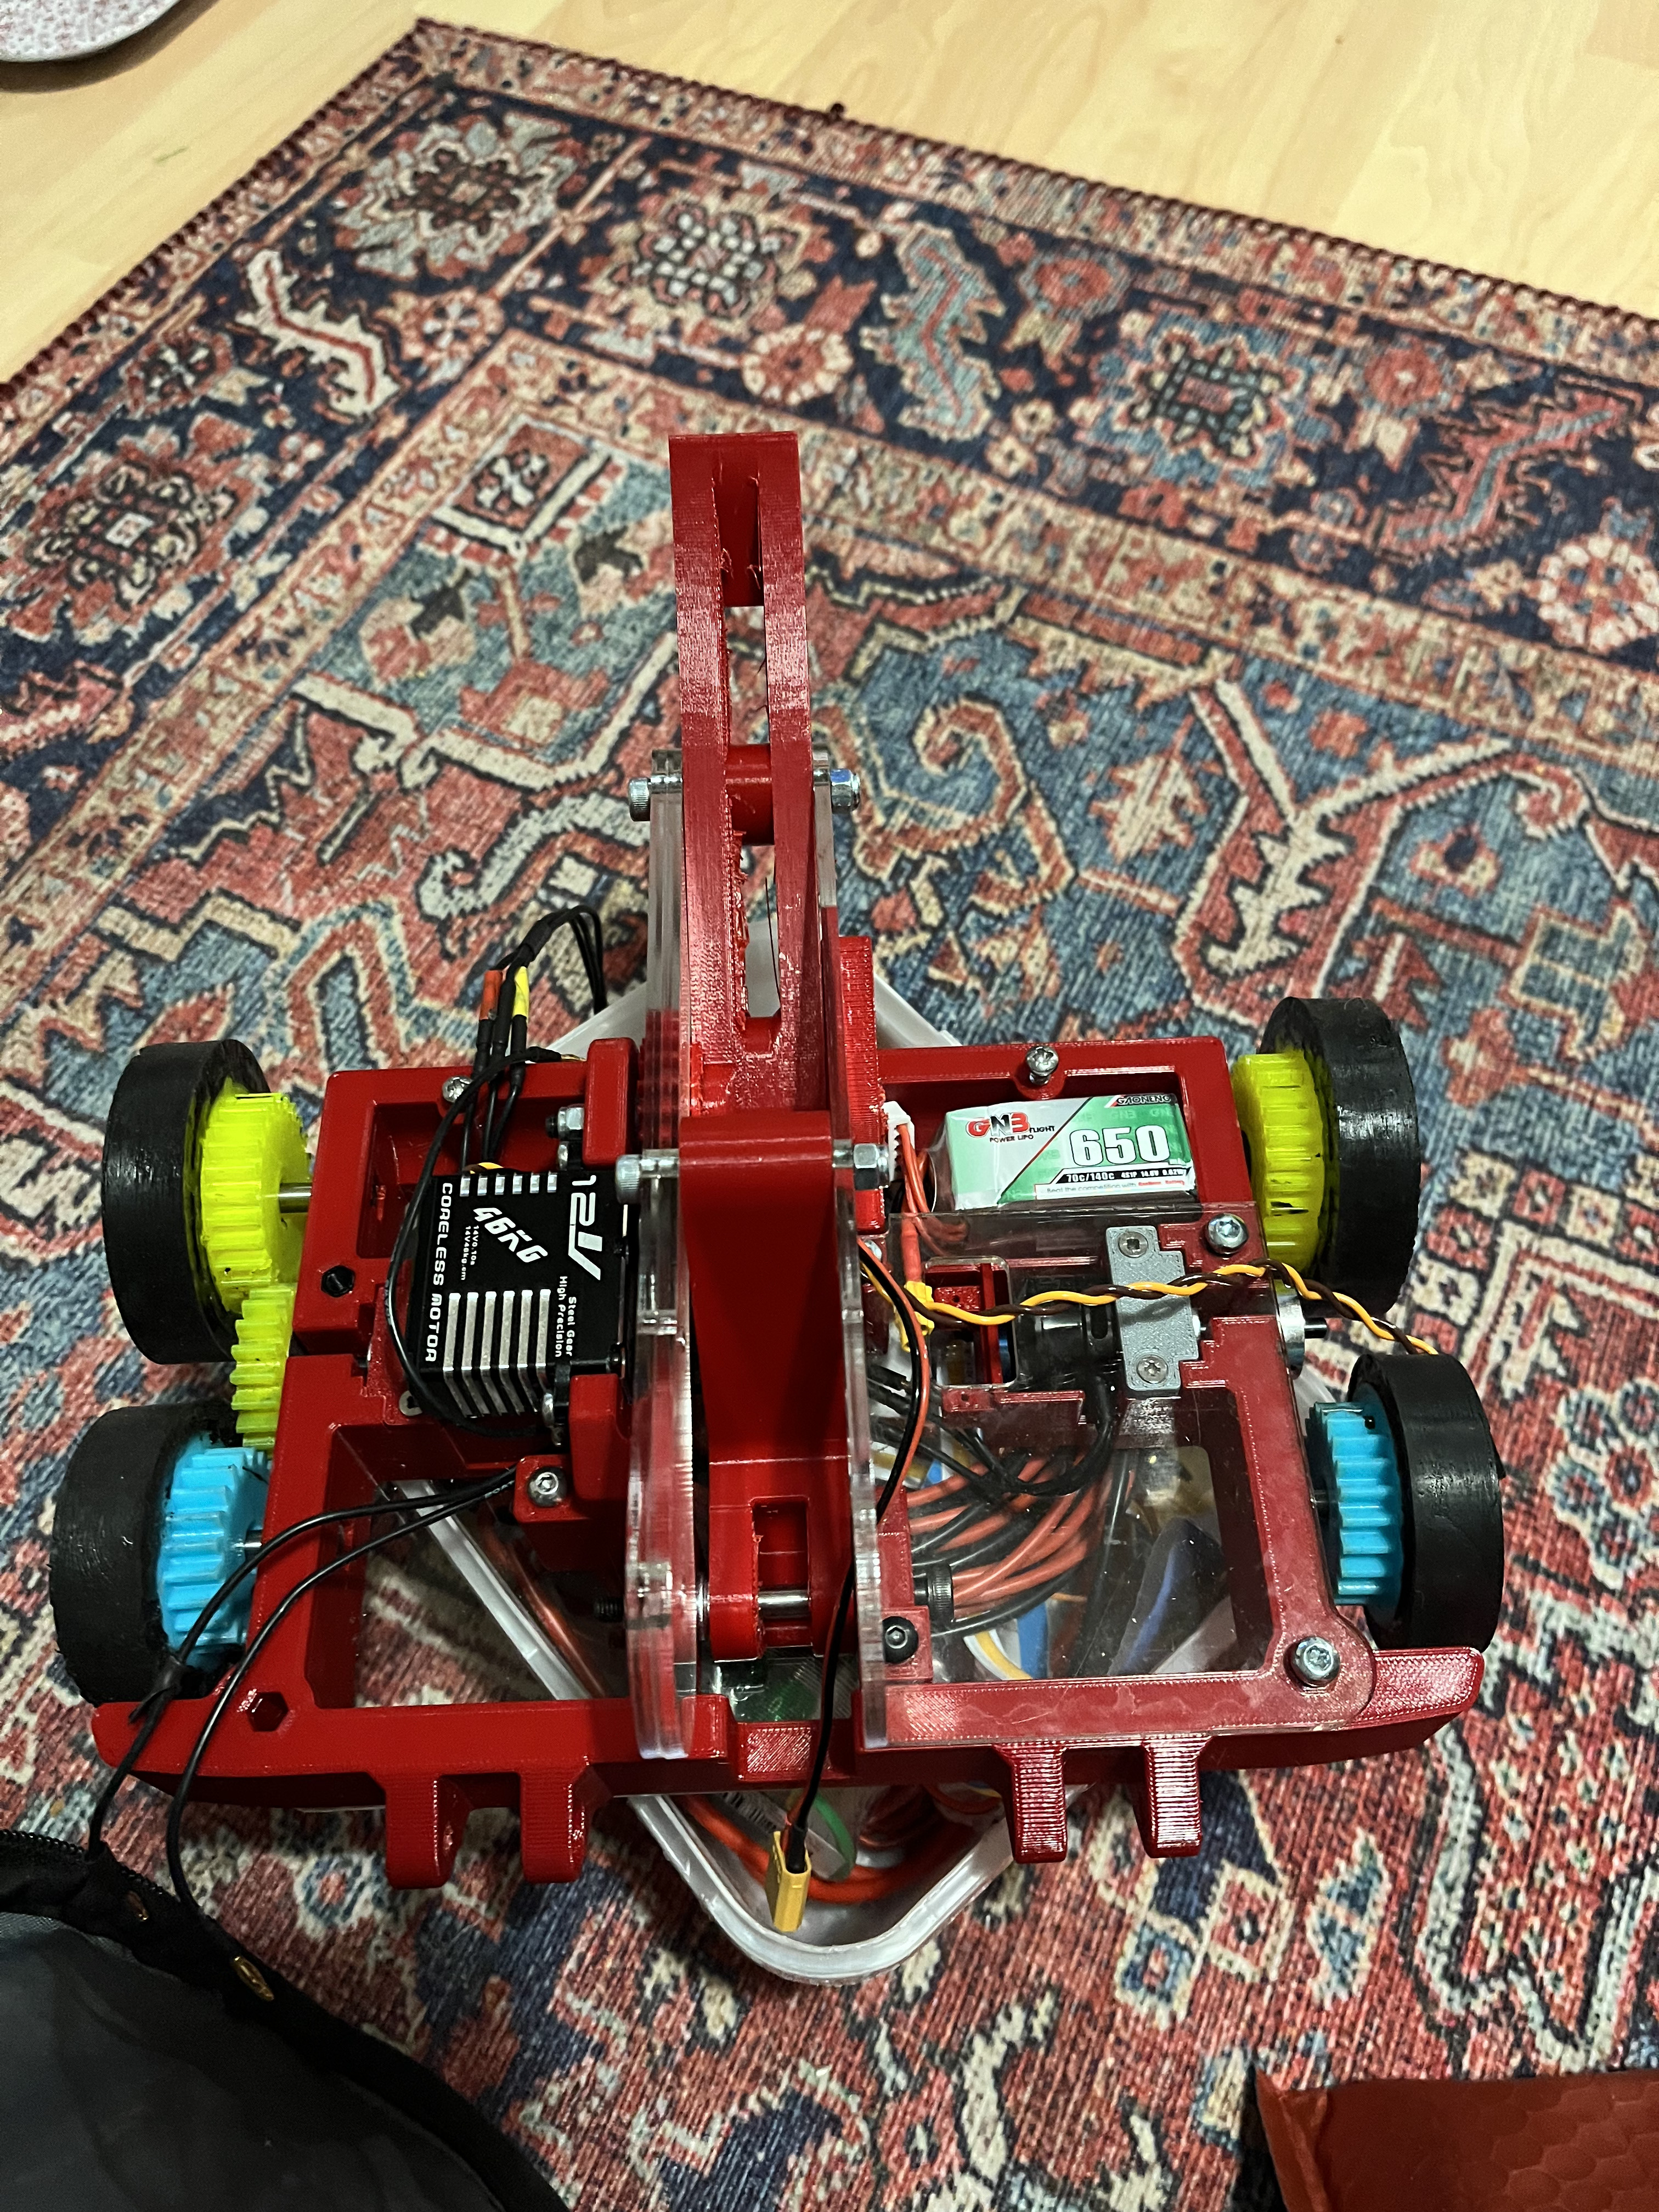
First, Repeat Robotics released their antweight hubmotor, which was lighter, cheaper, and way less effort than the custom hubmotors I designed for Attitude Adjuster. They also have a lower kv, which let me go to 4S and still be under 250mph with a 100mm blade. This also unlocked the second thing I was stuck on, which was finding a battery. Sion pointed me towards some 650mAh batteries that were exactly the size of the space I’d left that was previously too small for a battery.

Finally, I got around to flashing the old Aikon 35A 4-in-1 ESCs I had lying around with AM32. Mega shoutout to AlkaMotor for helping me through the process, I have no idea how they have time to help all the n00bs like me.

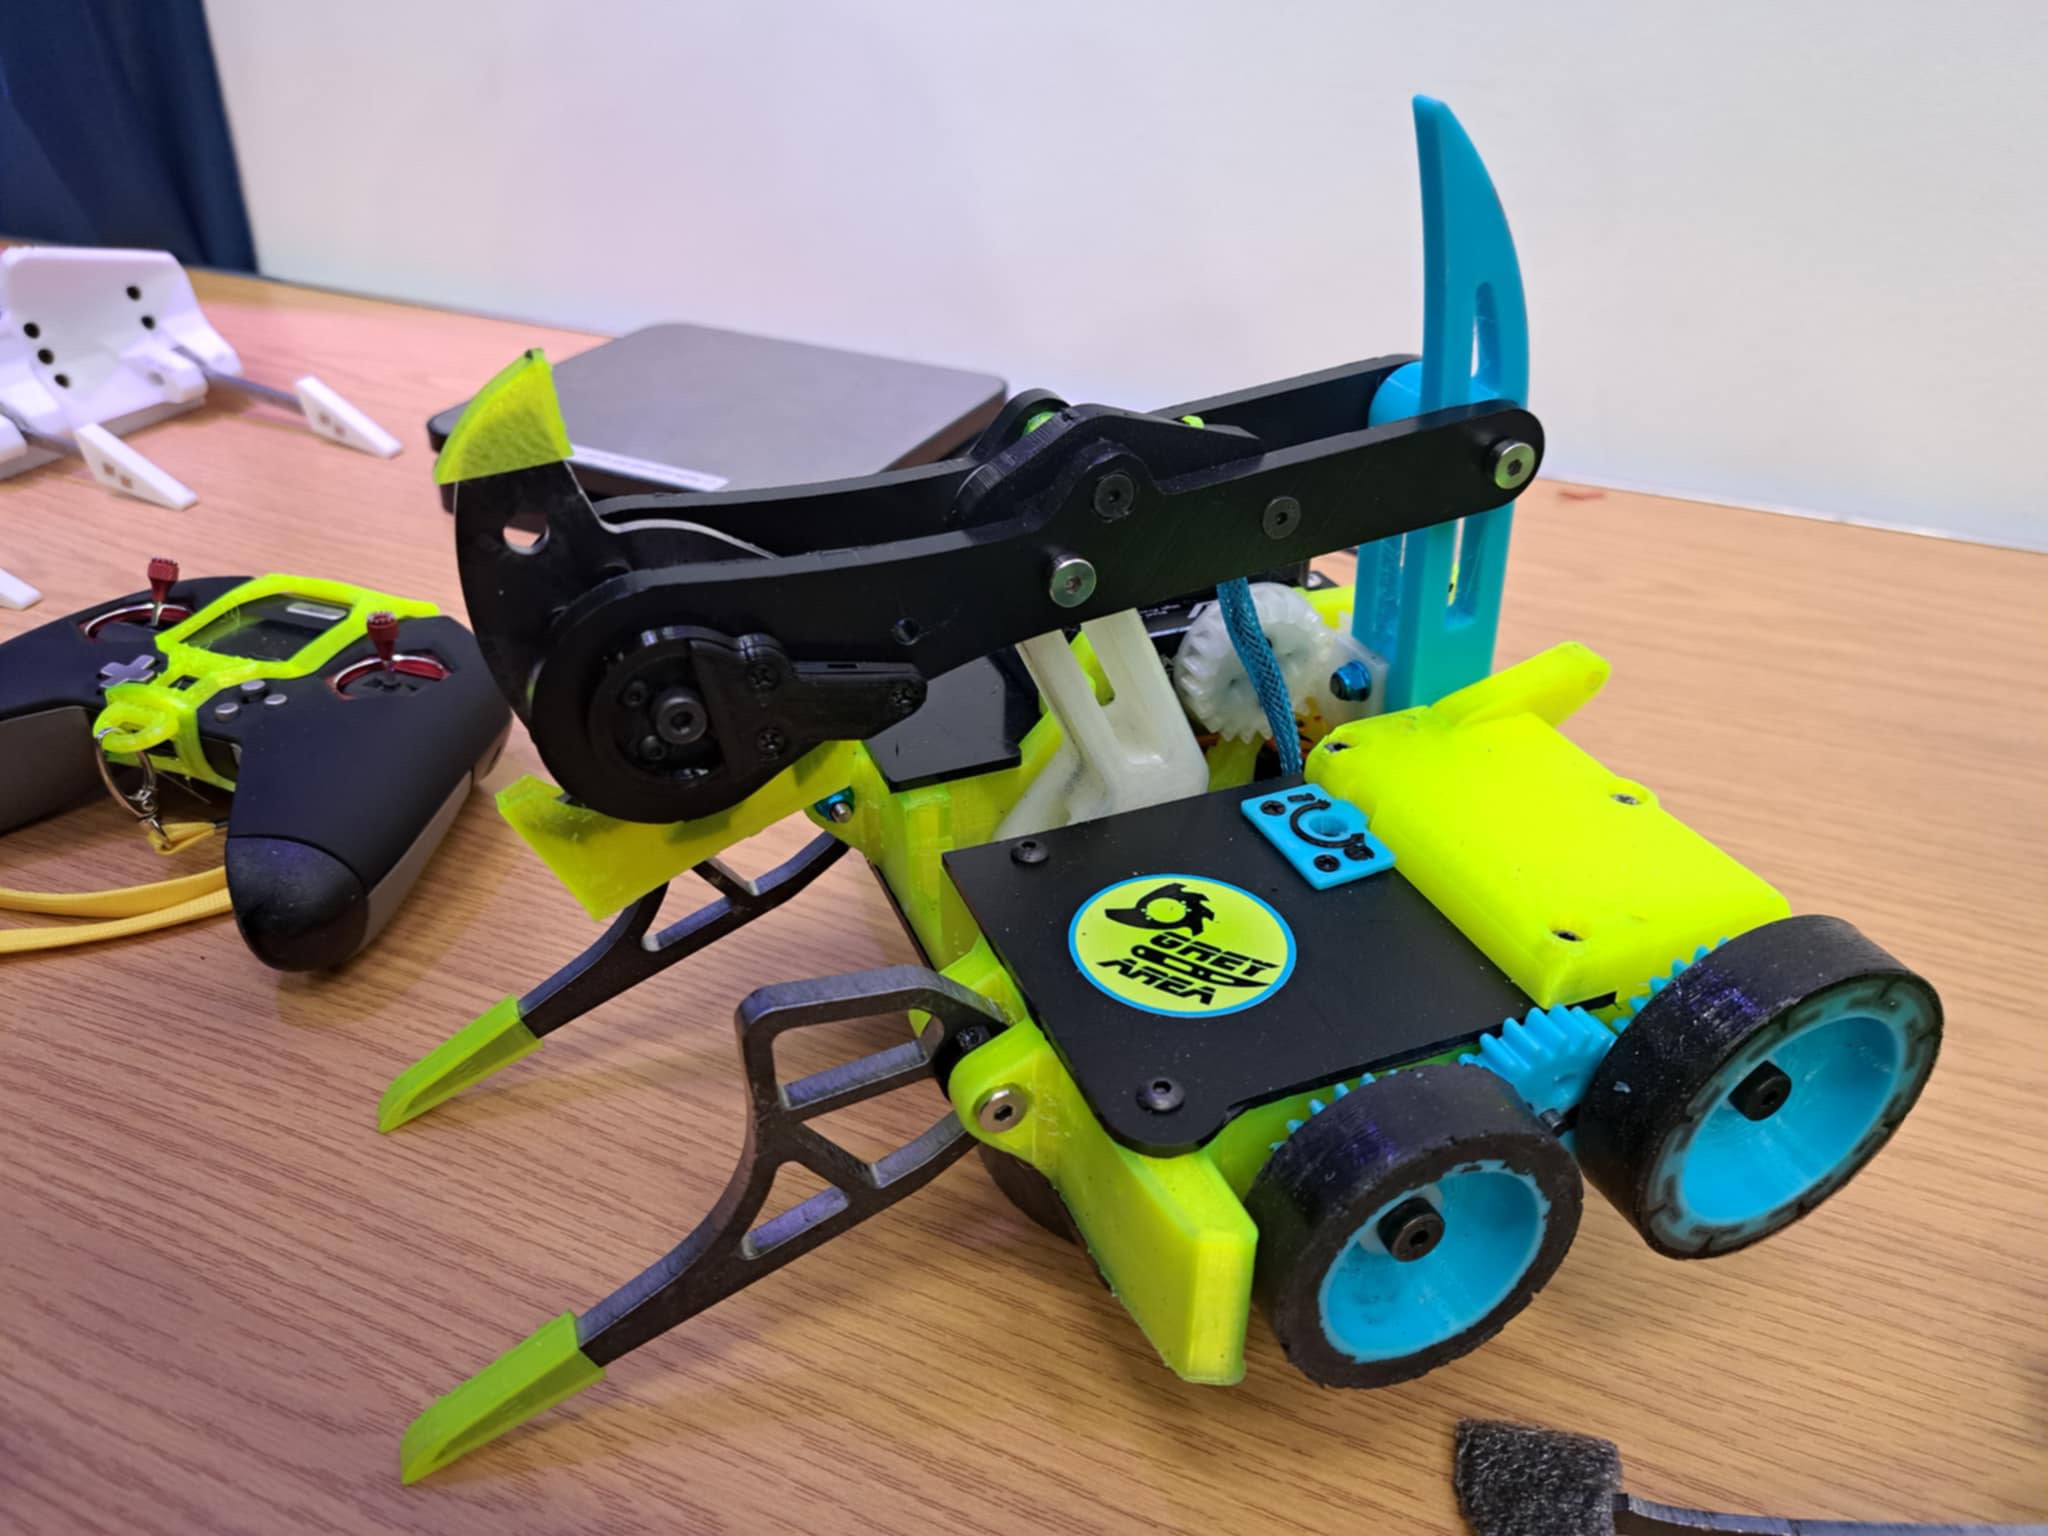
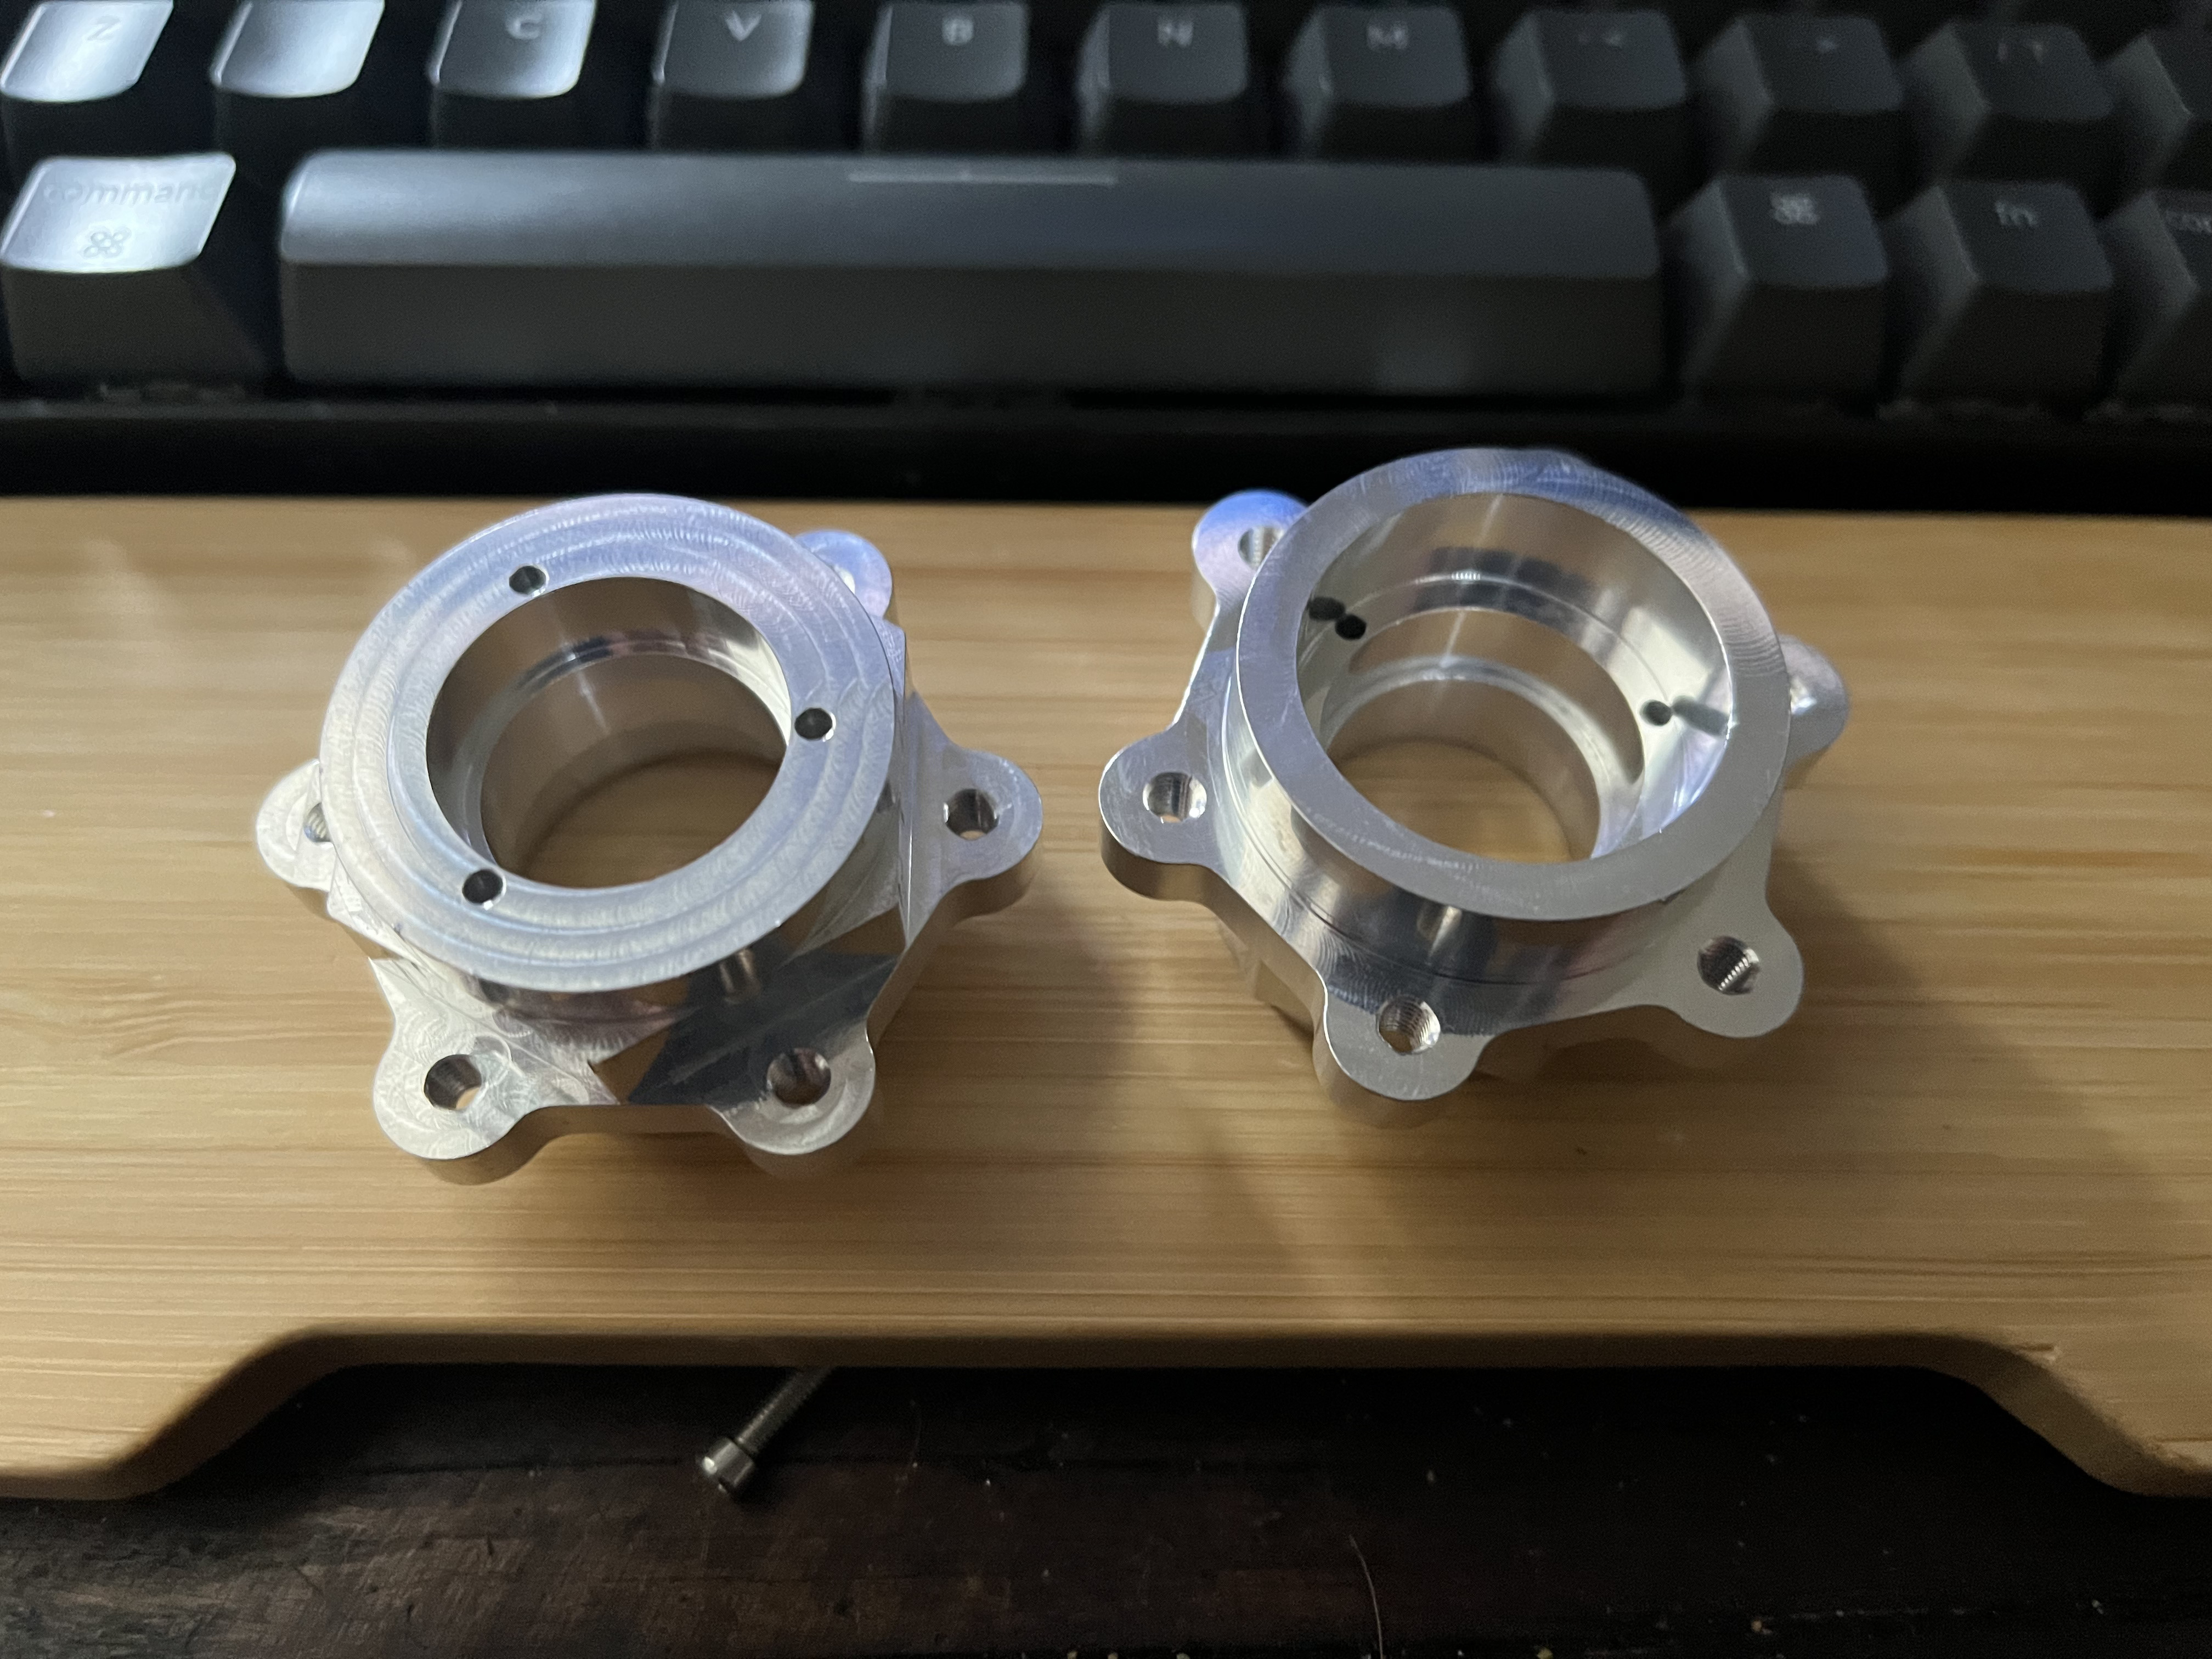
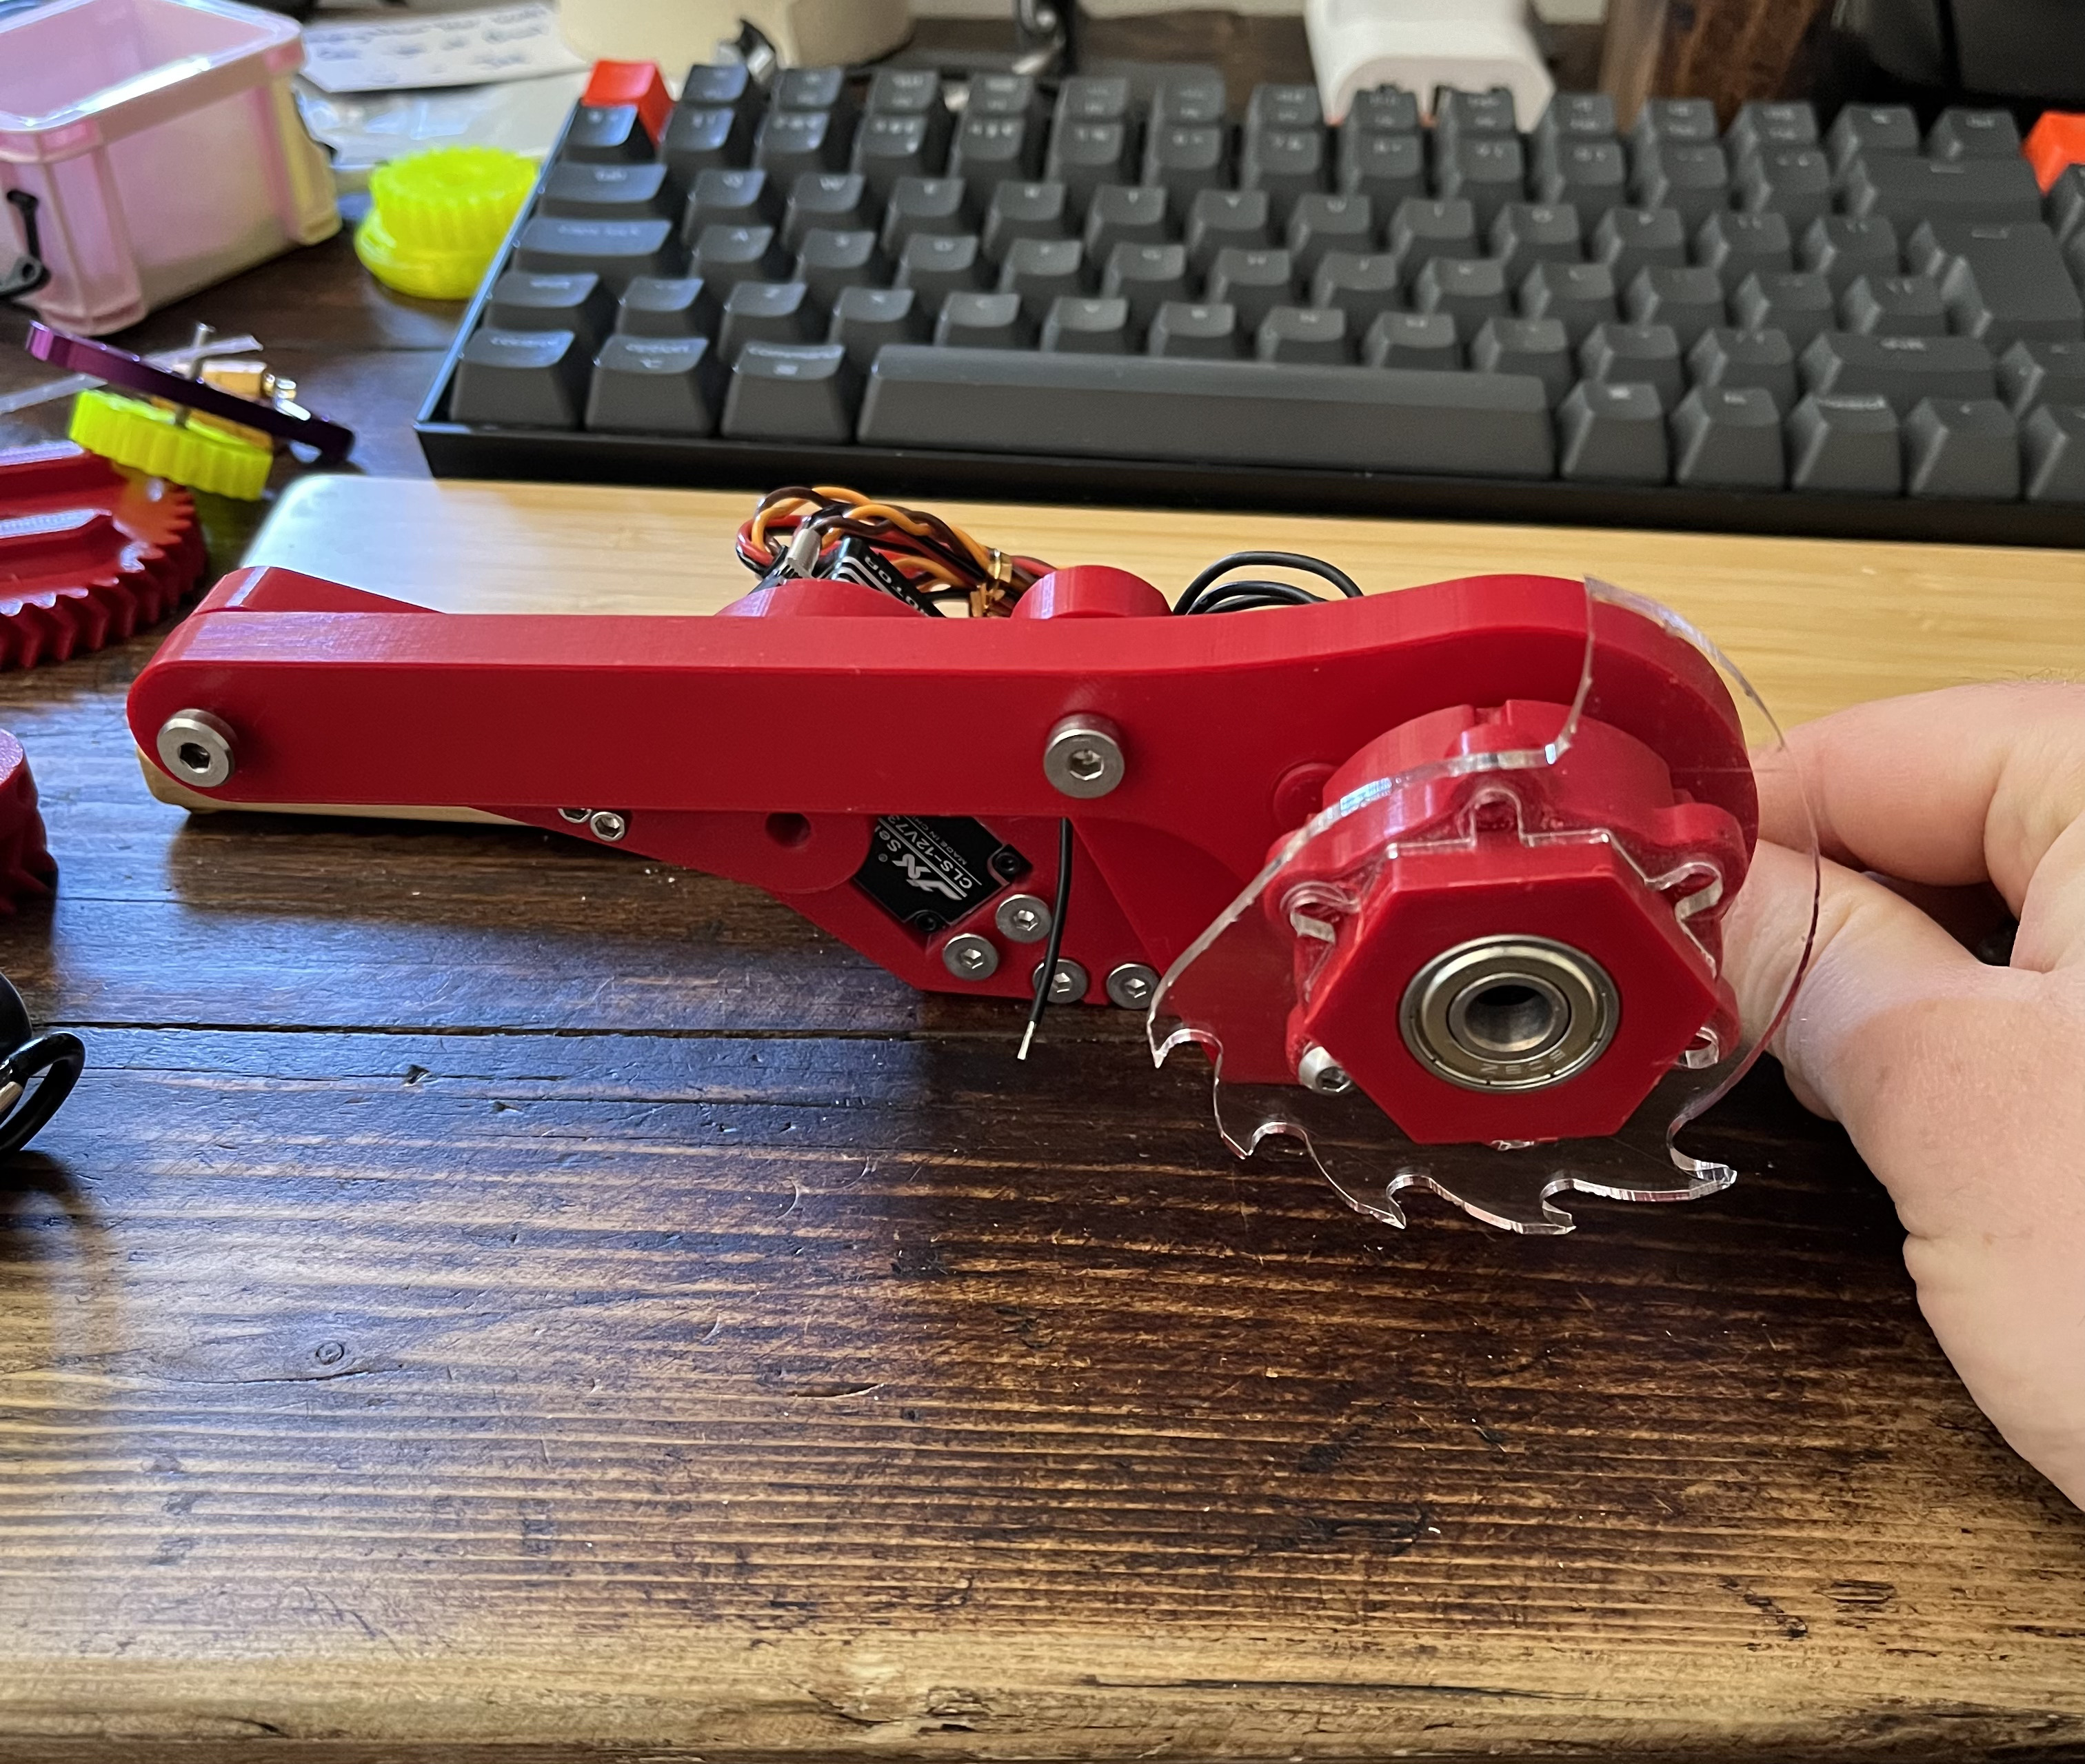
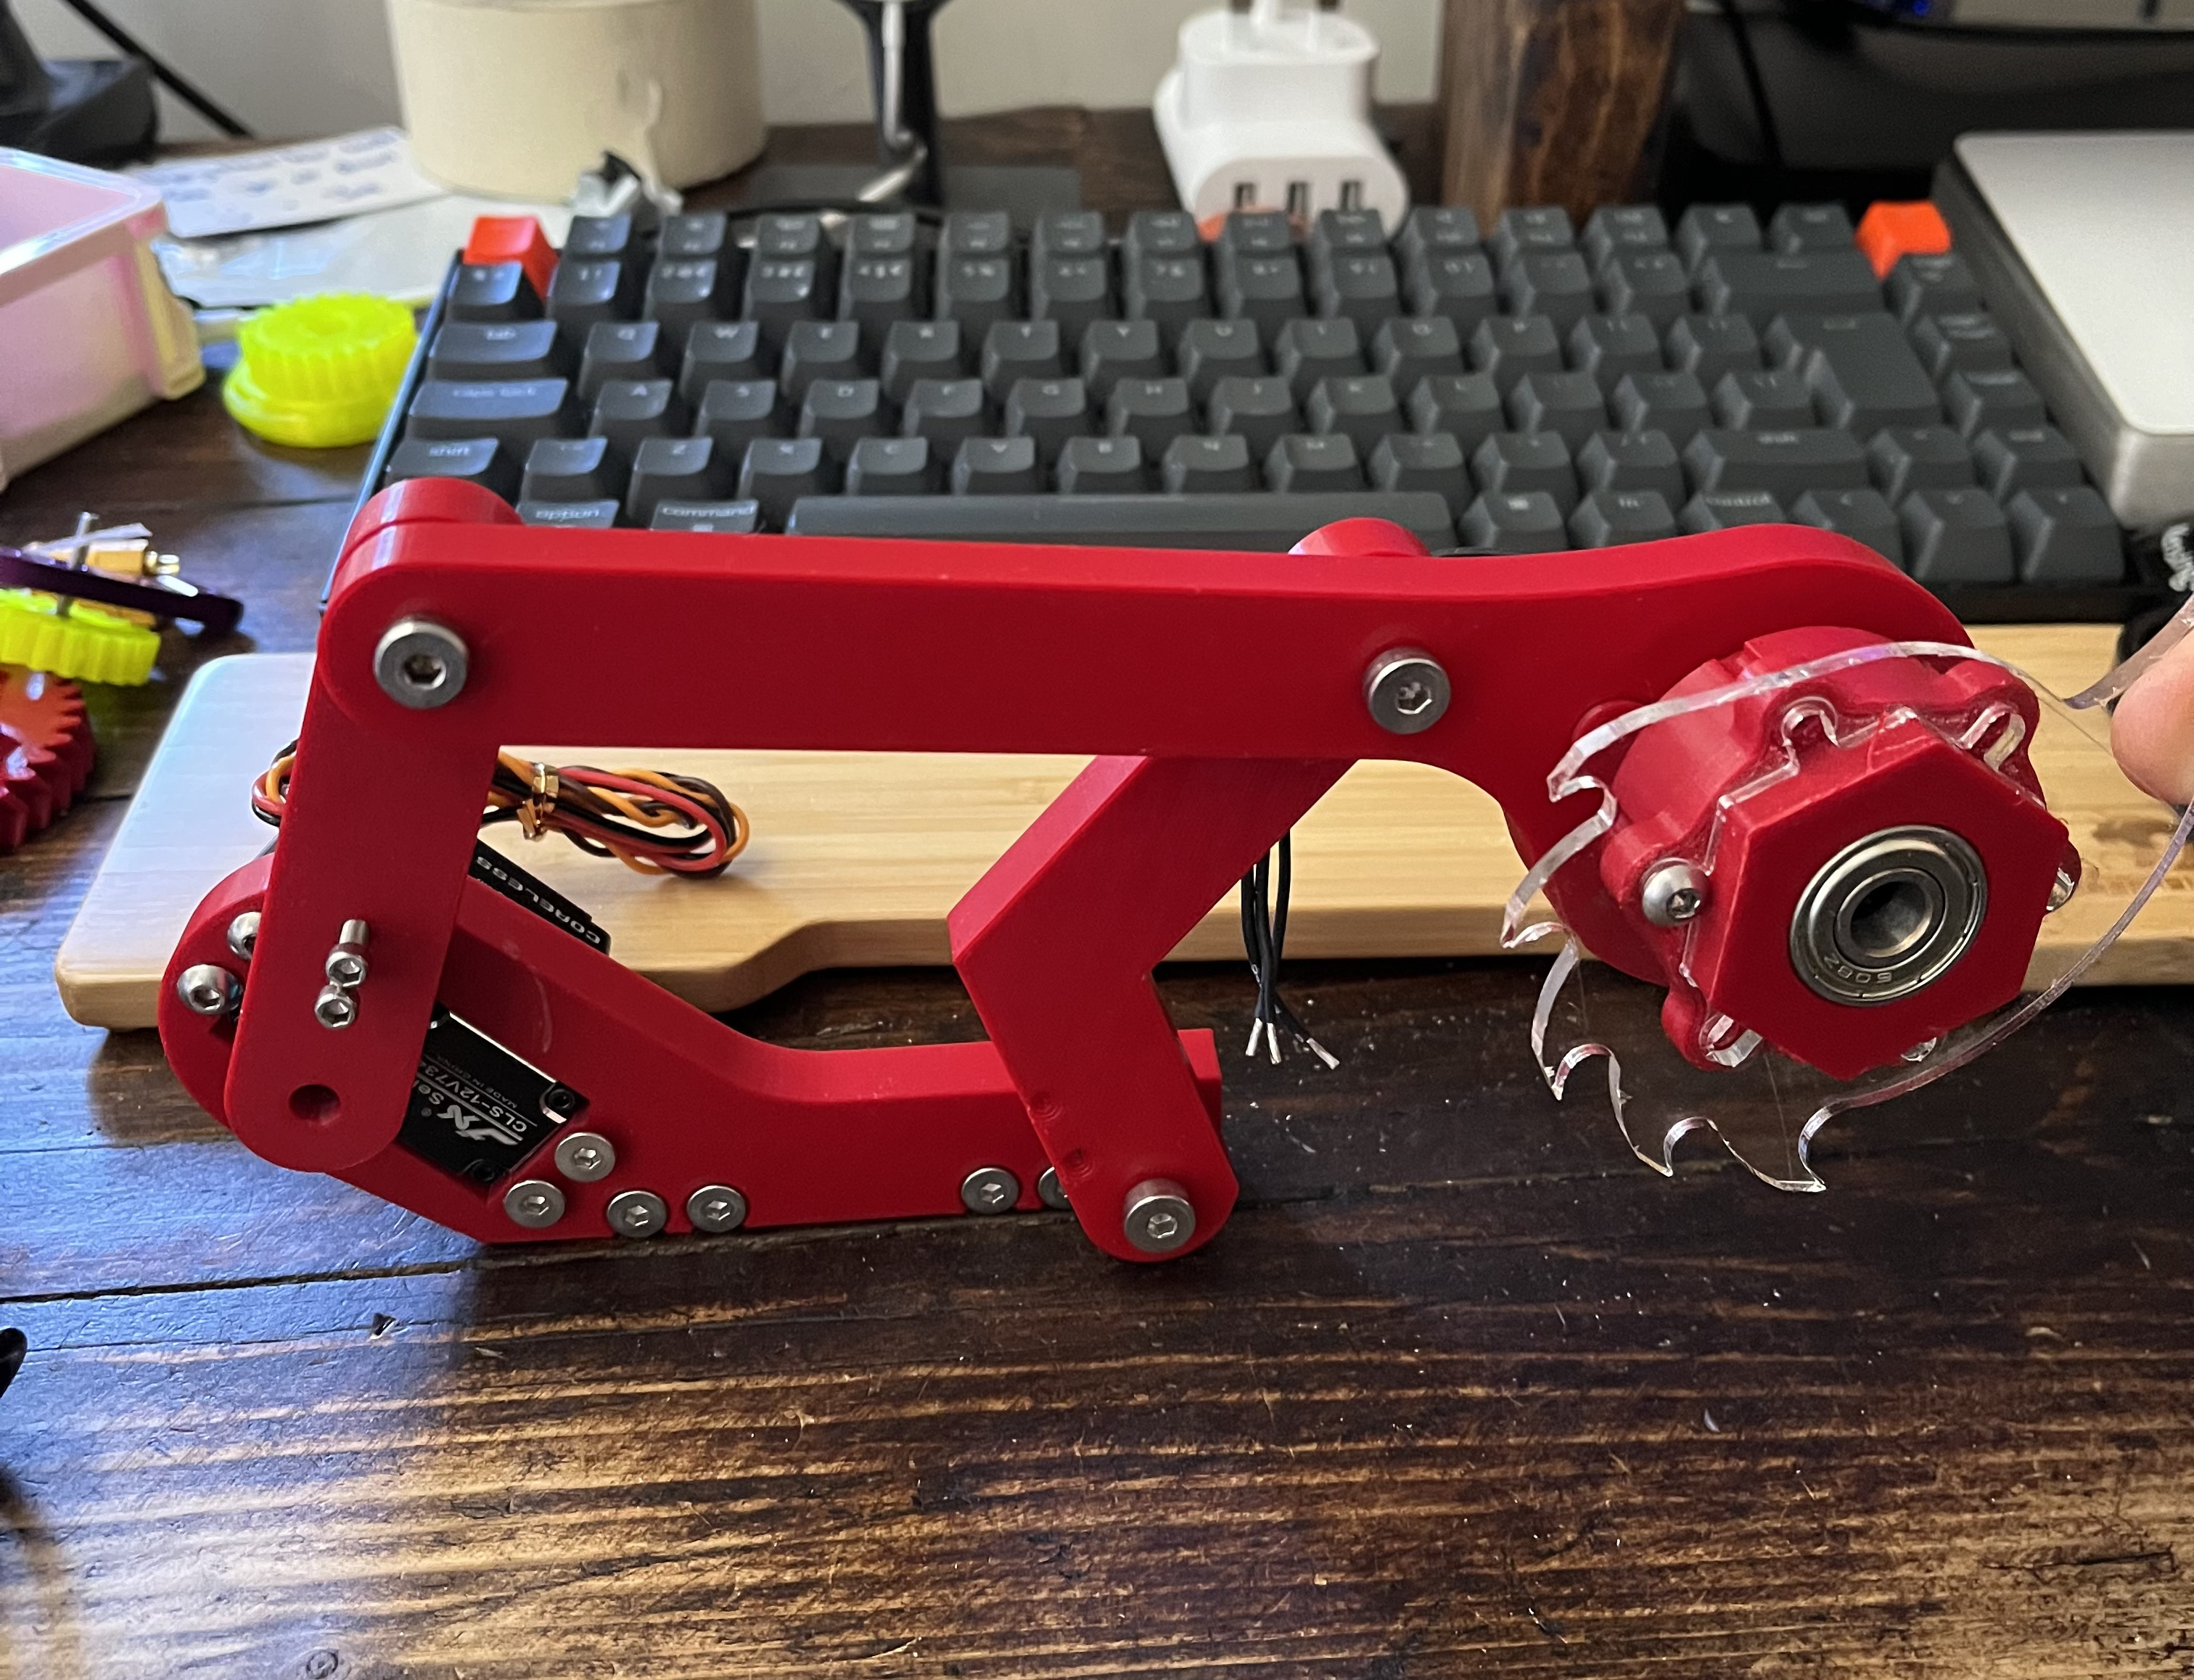
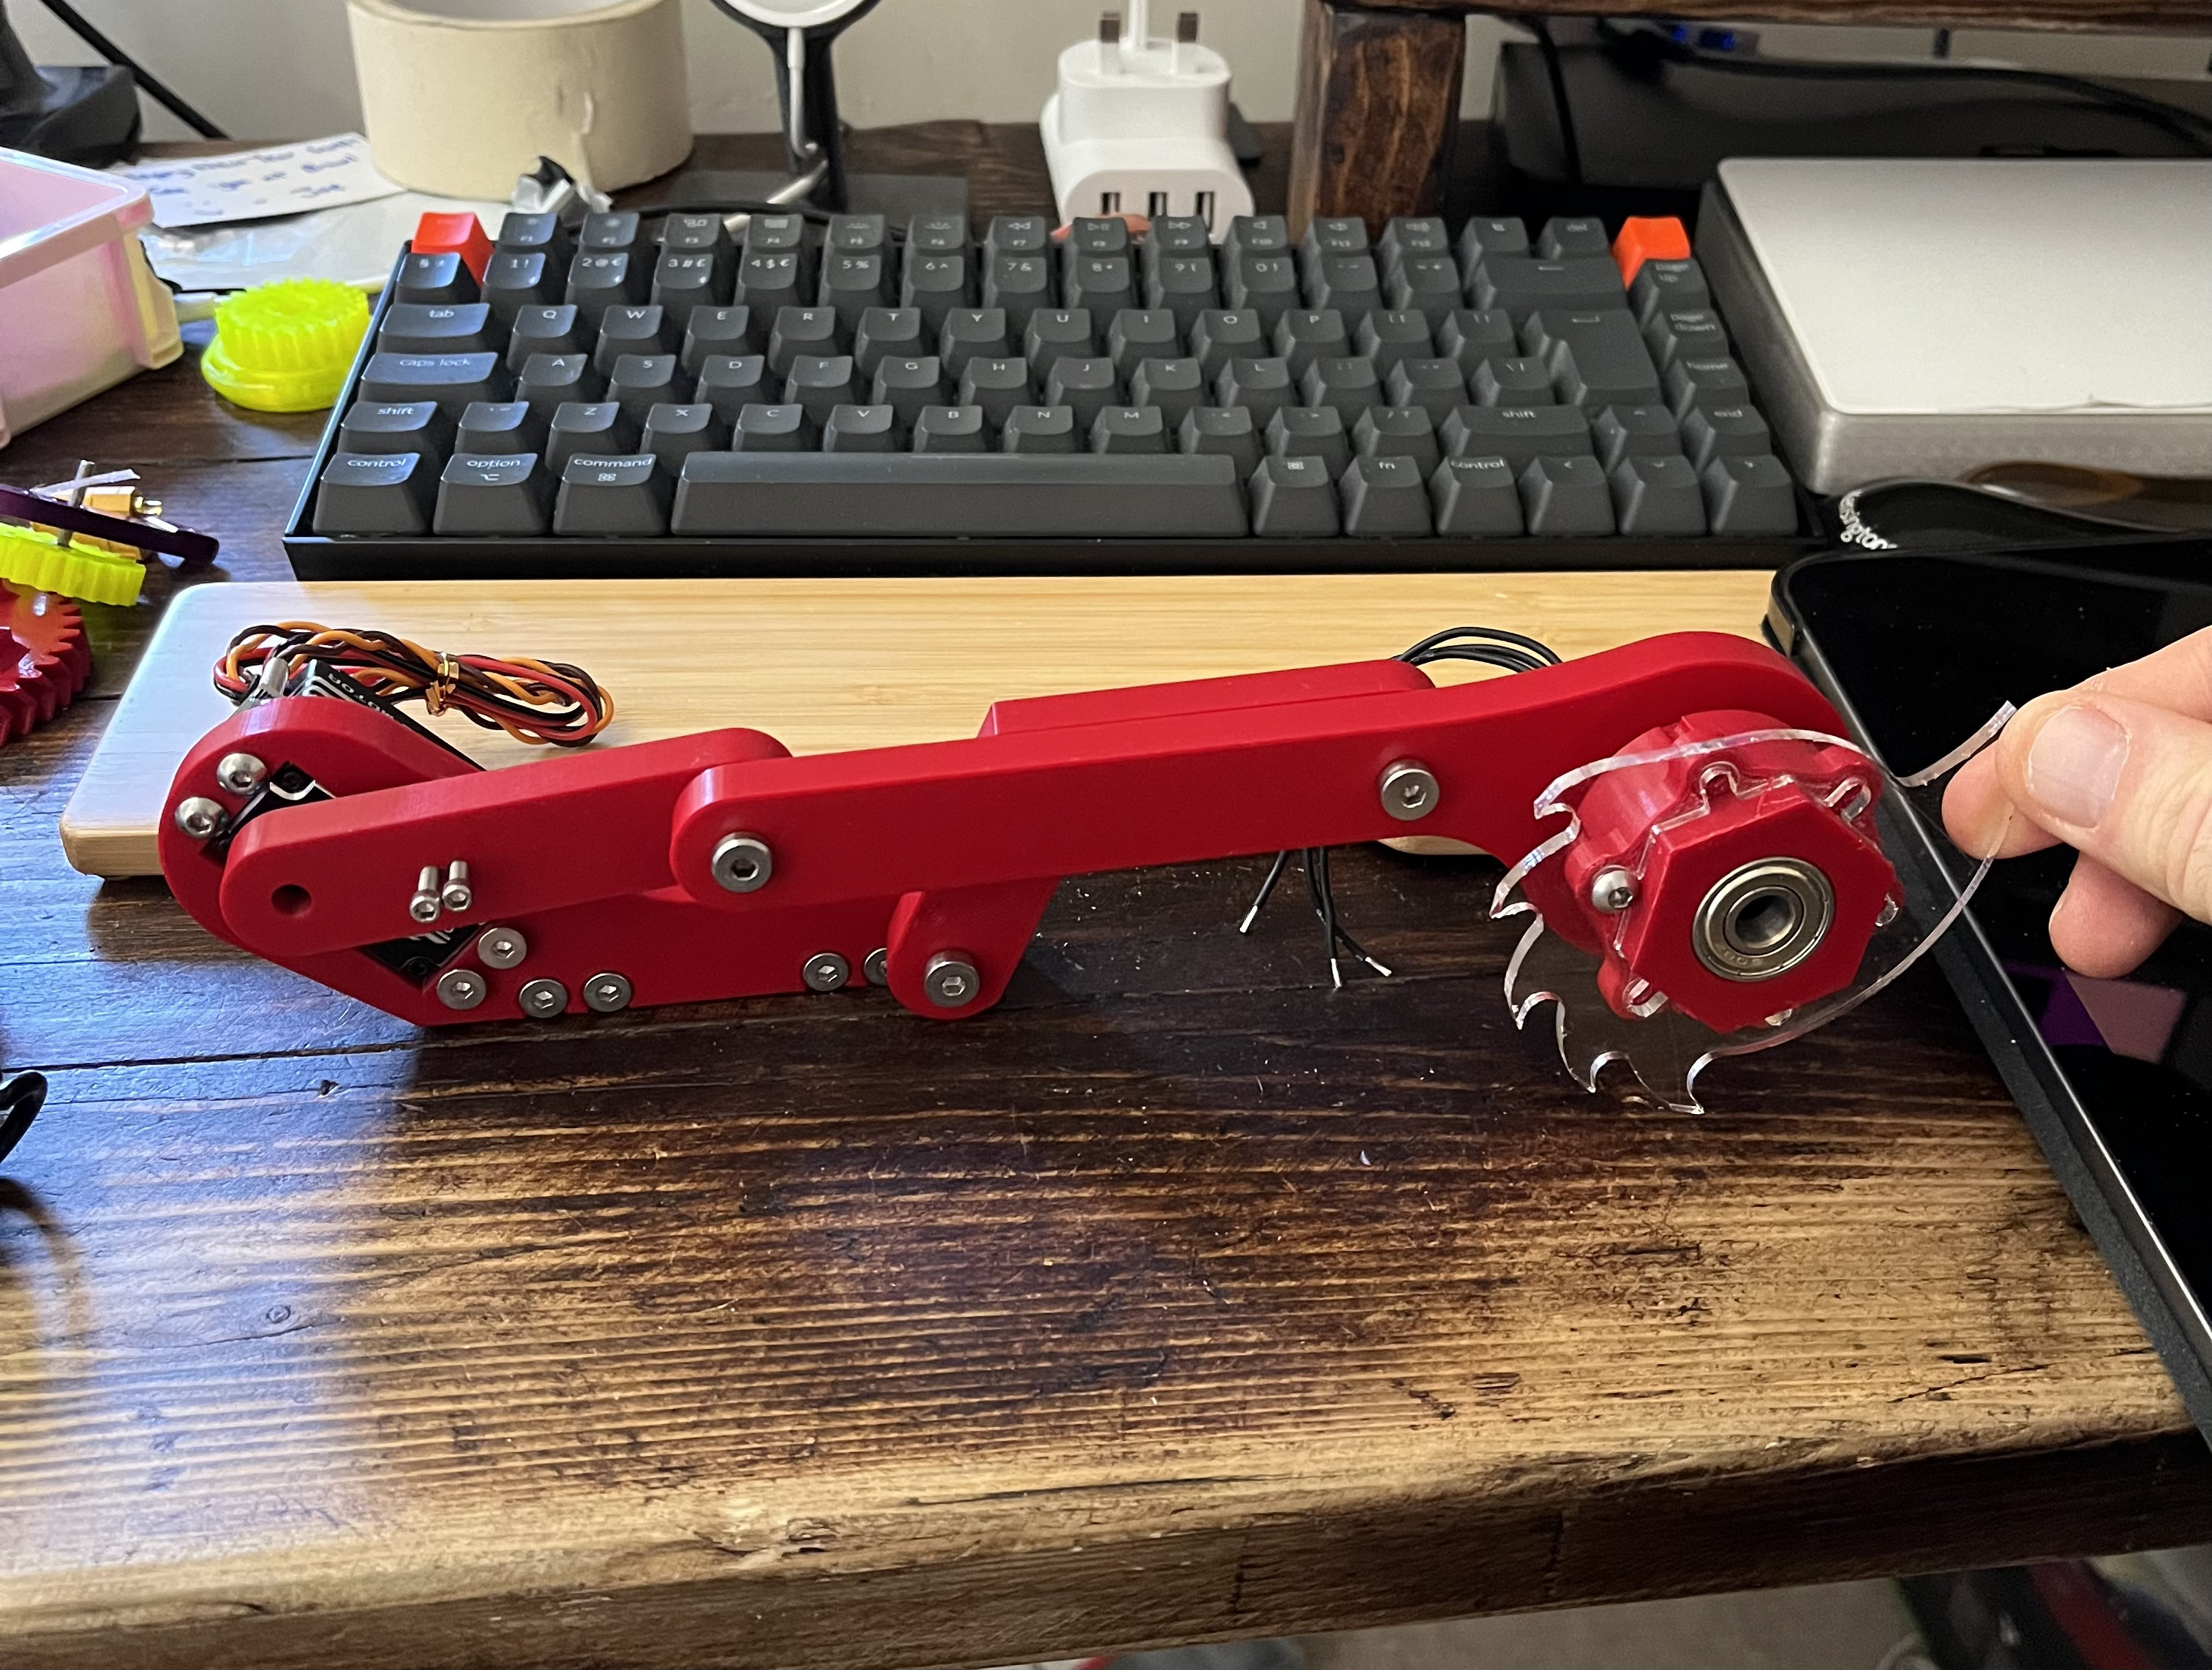
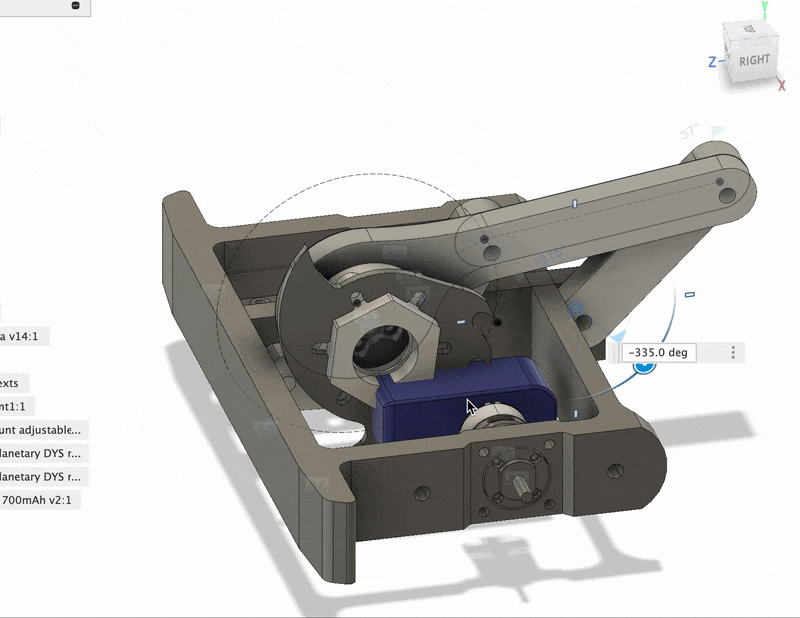
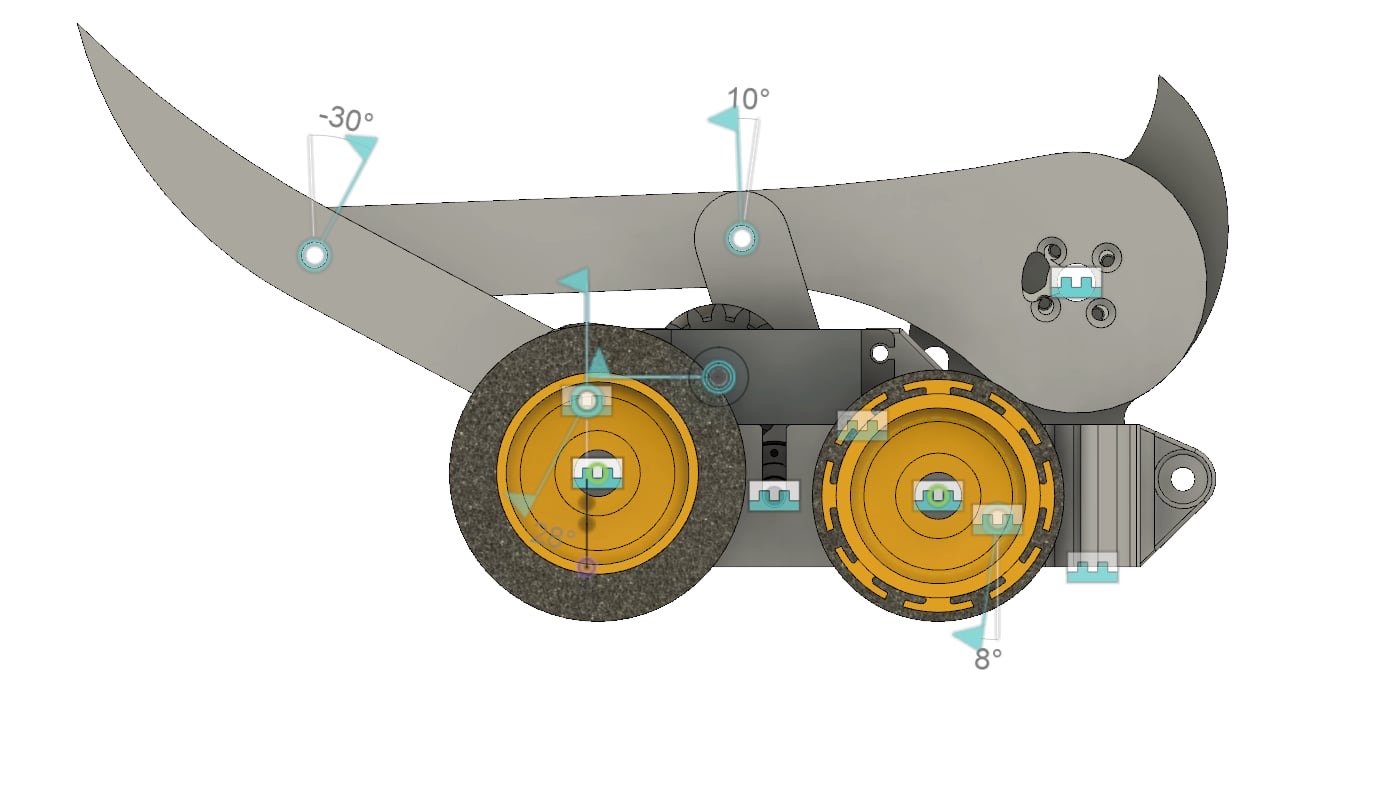
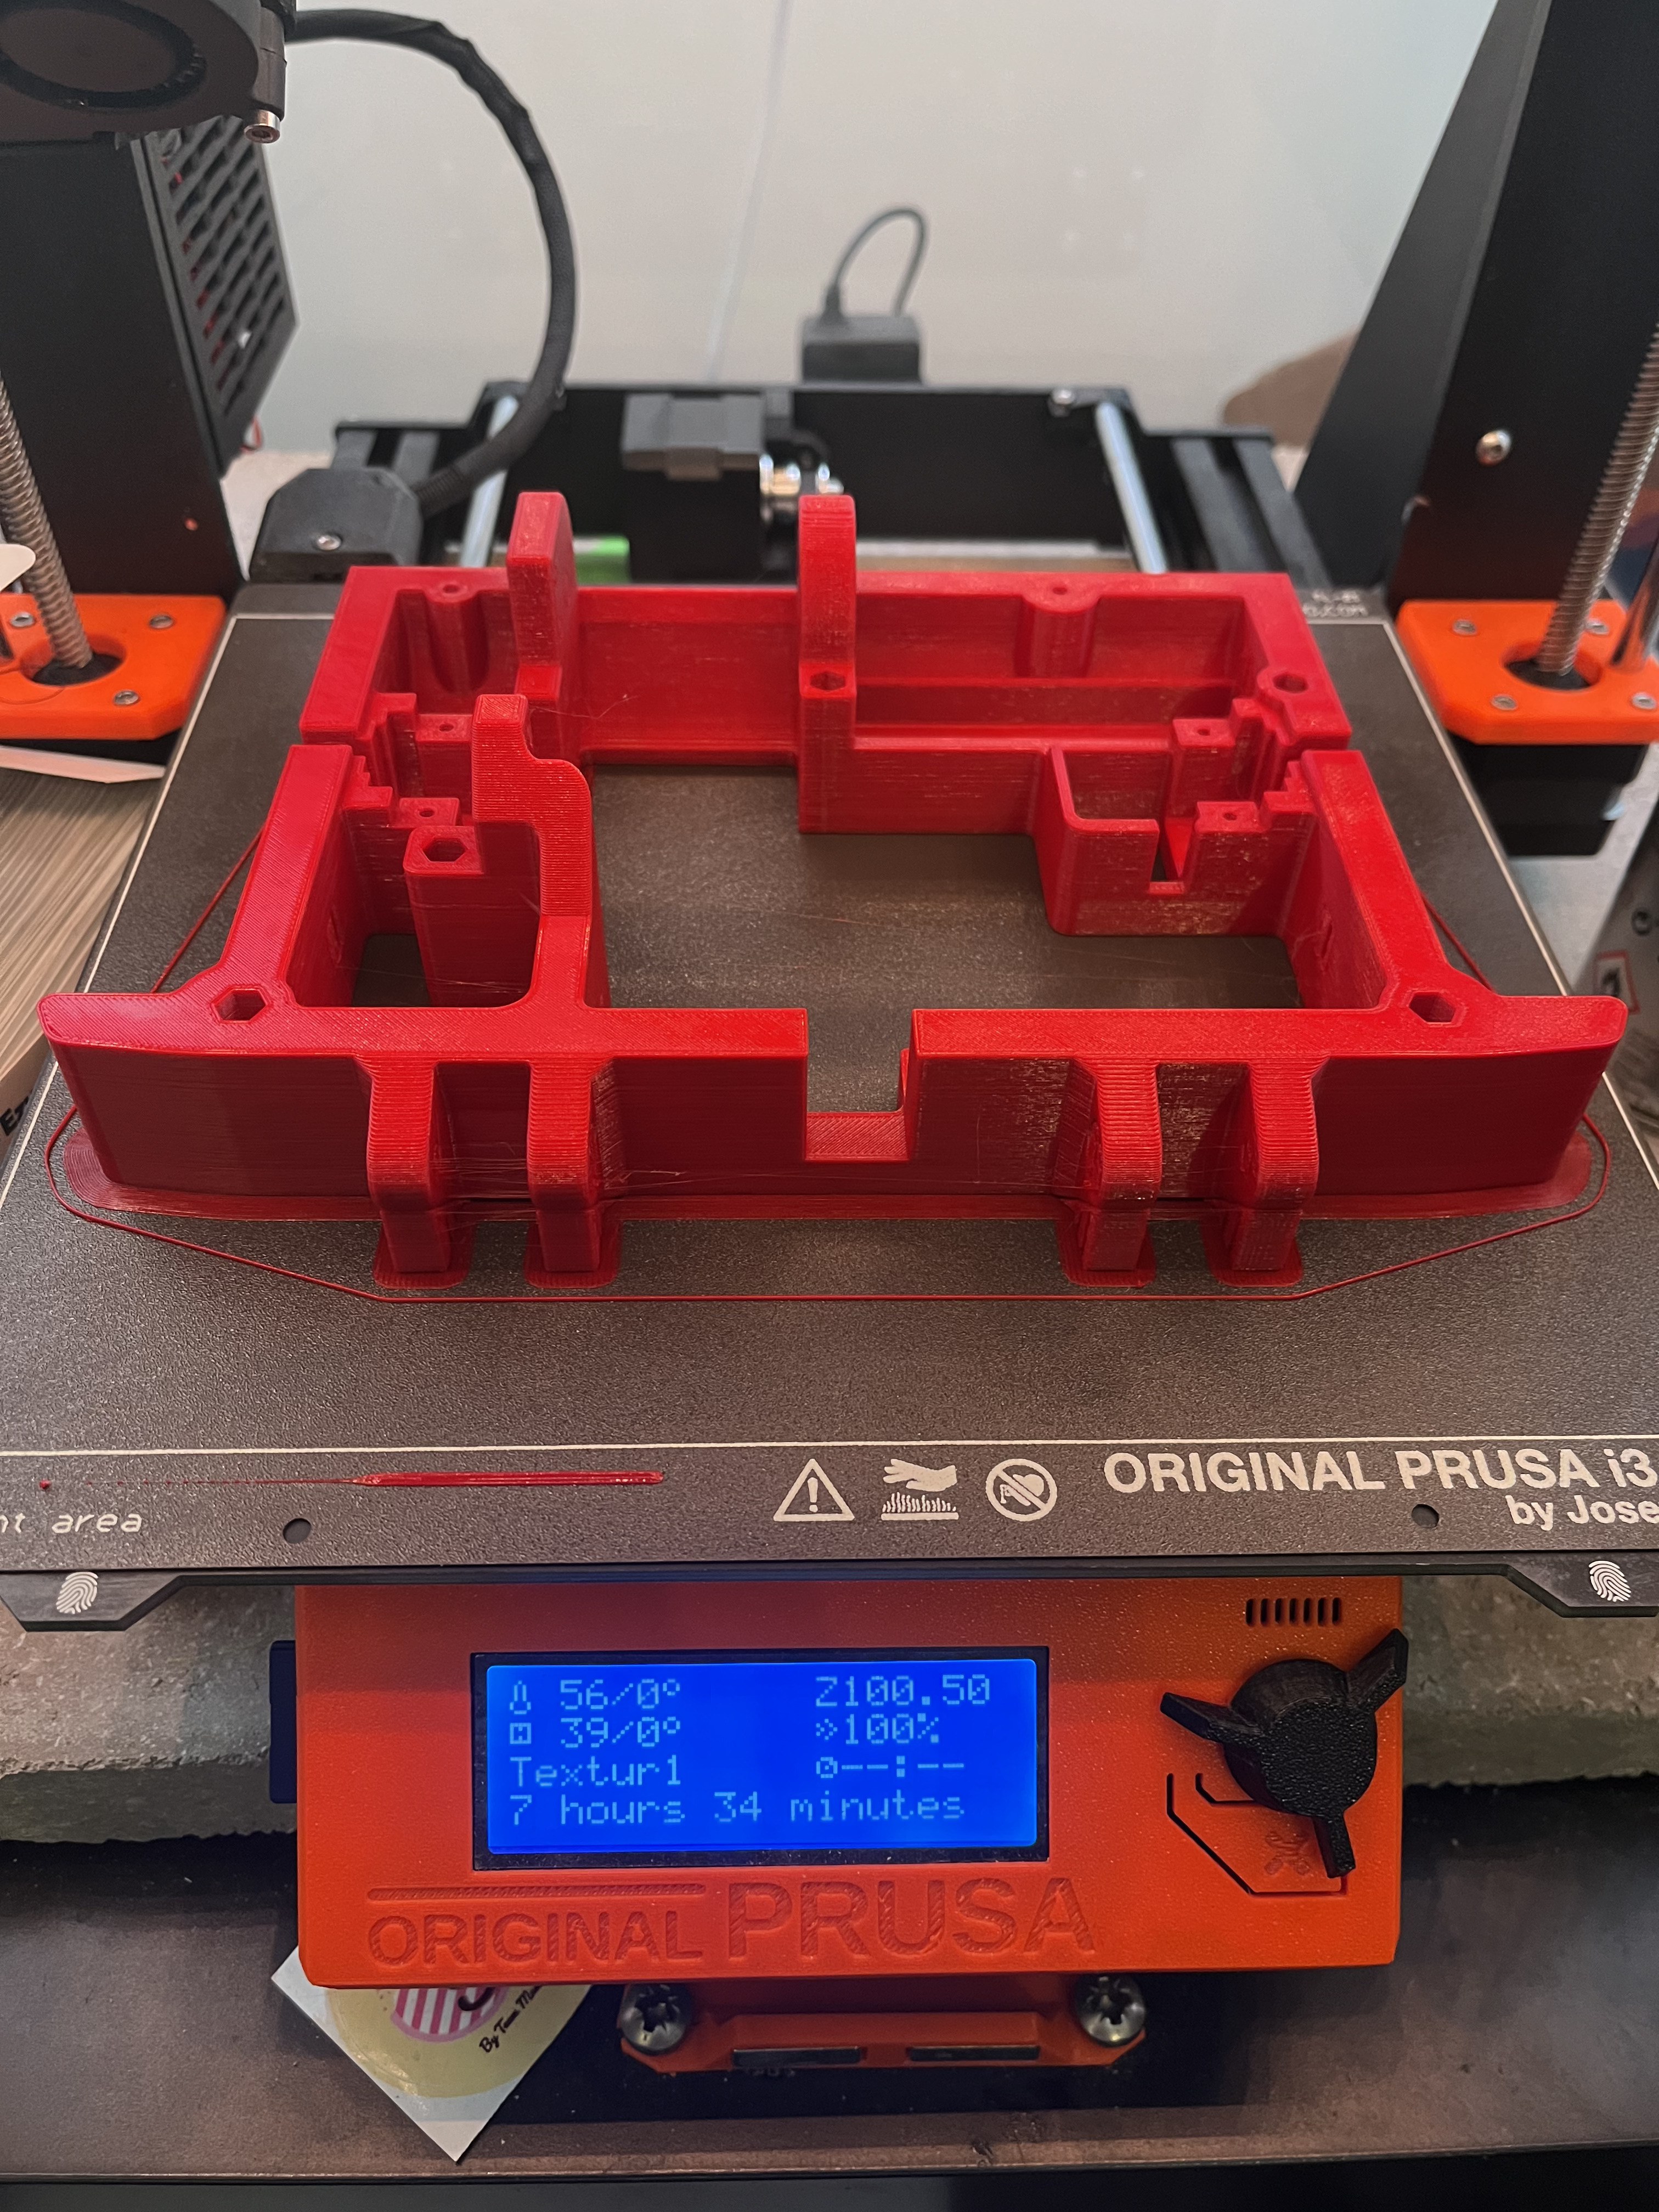
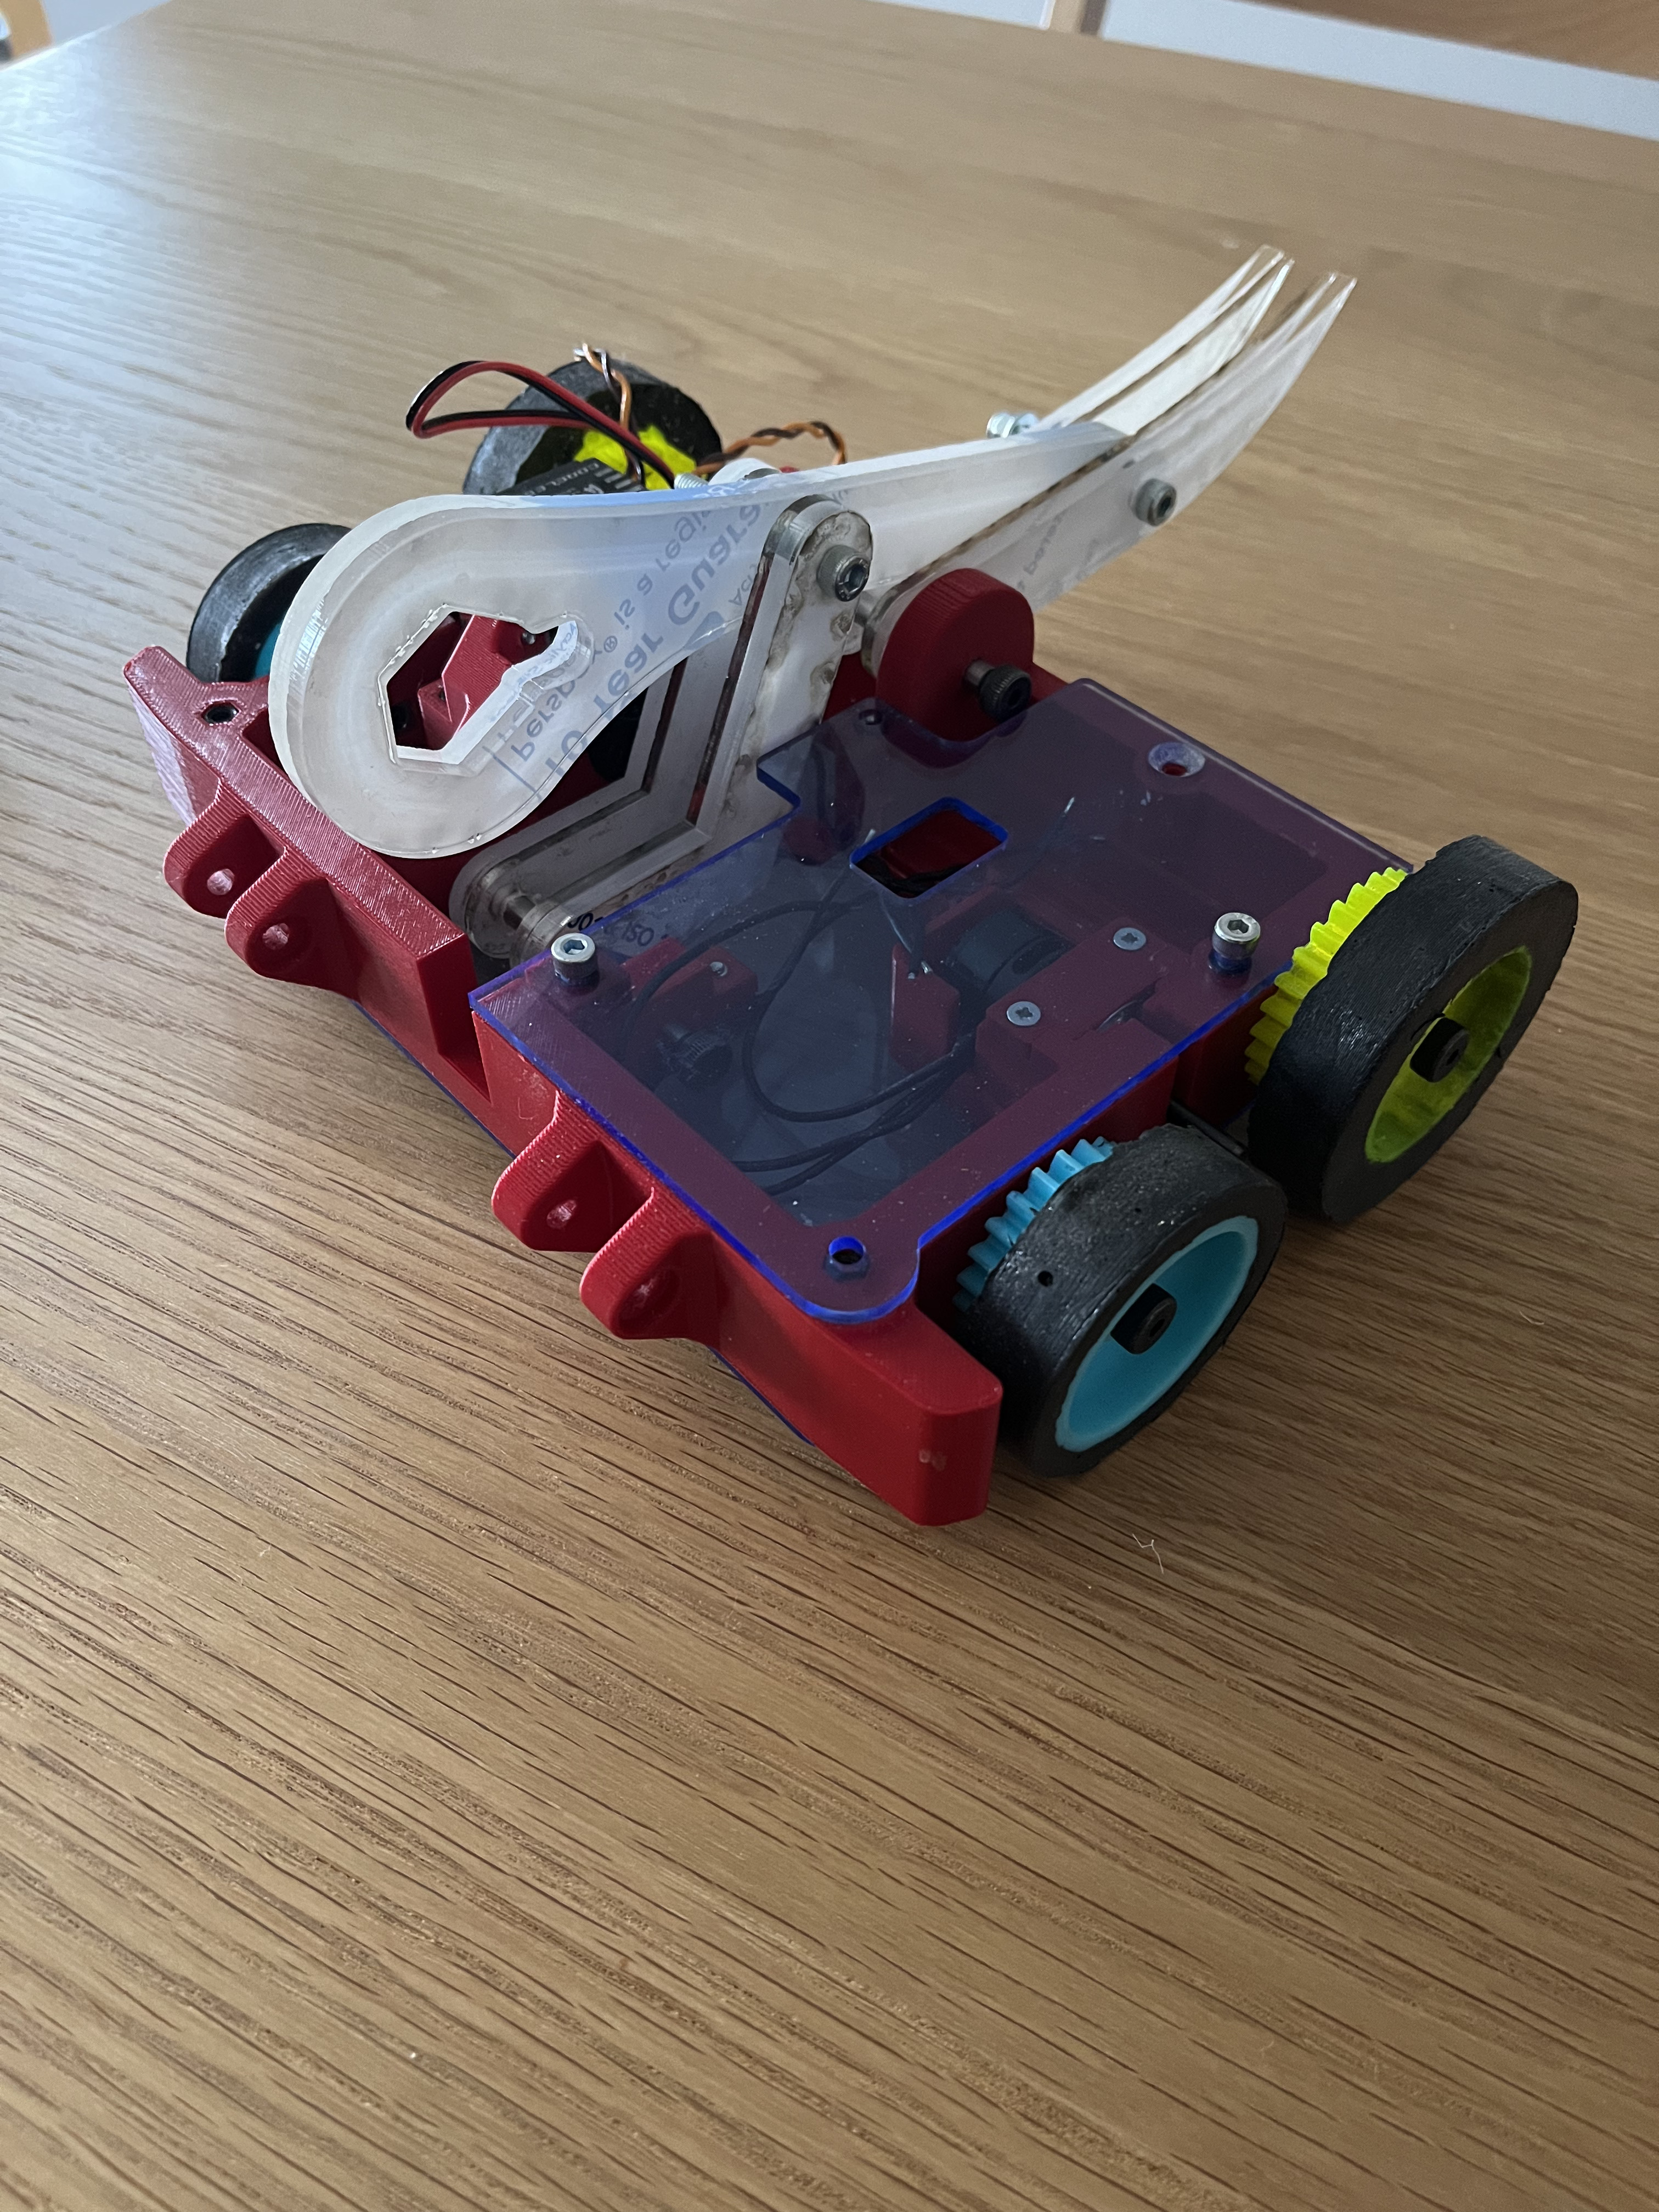
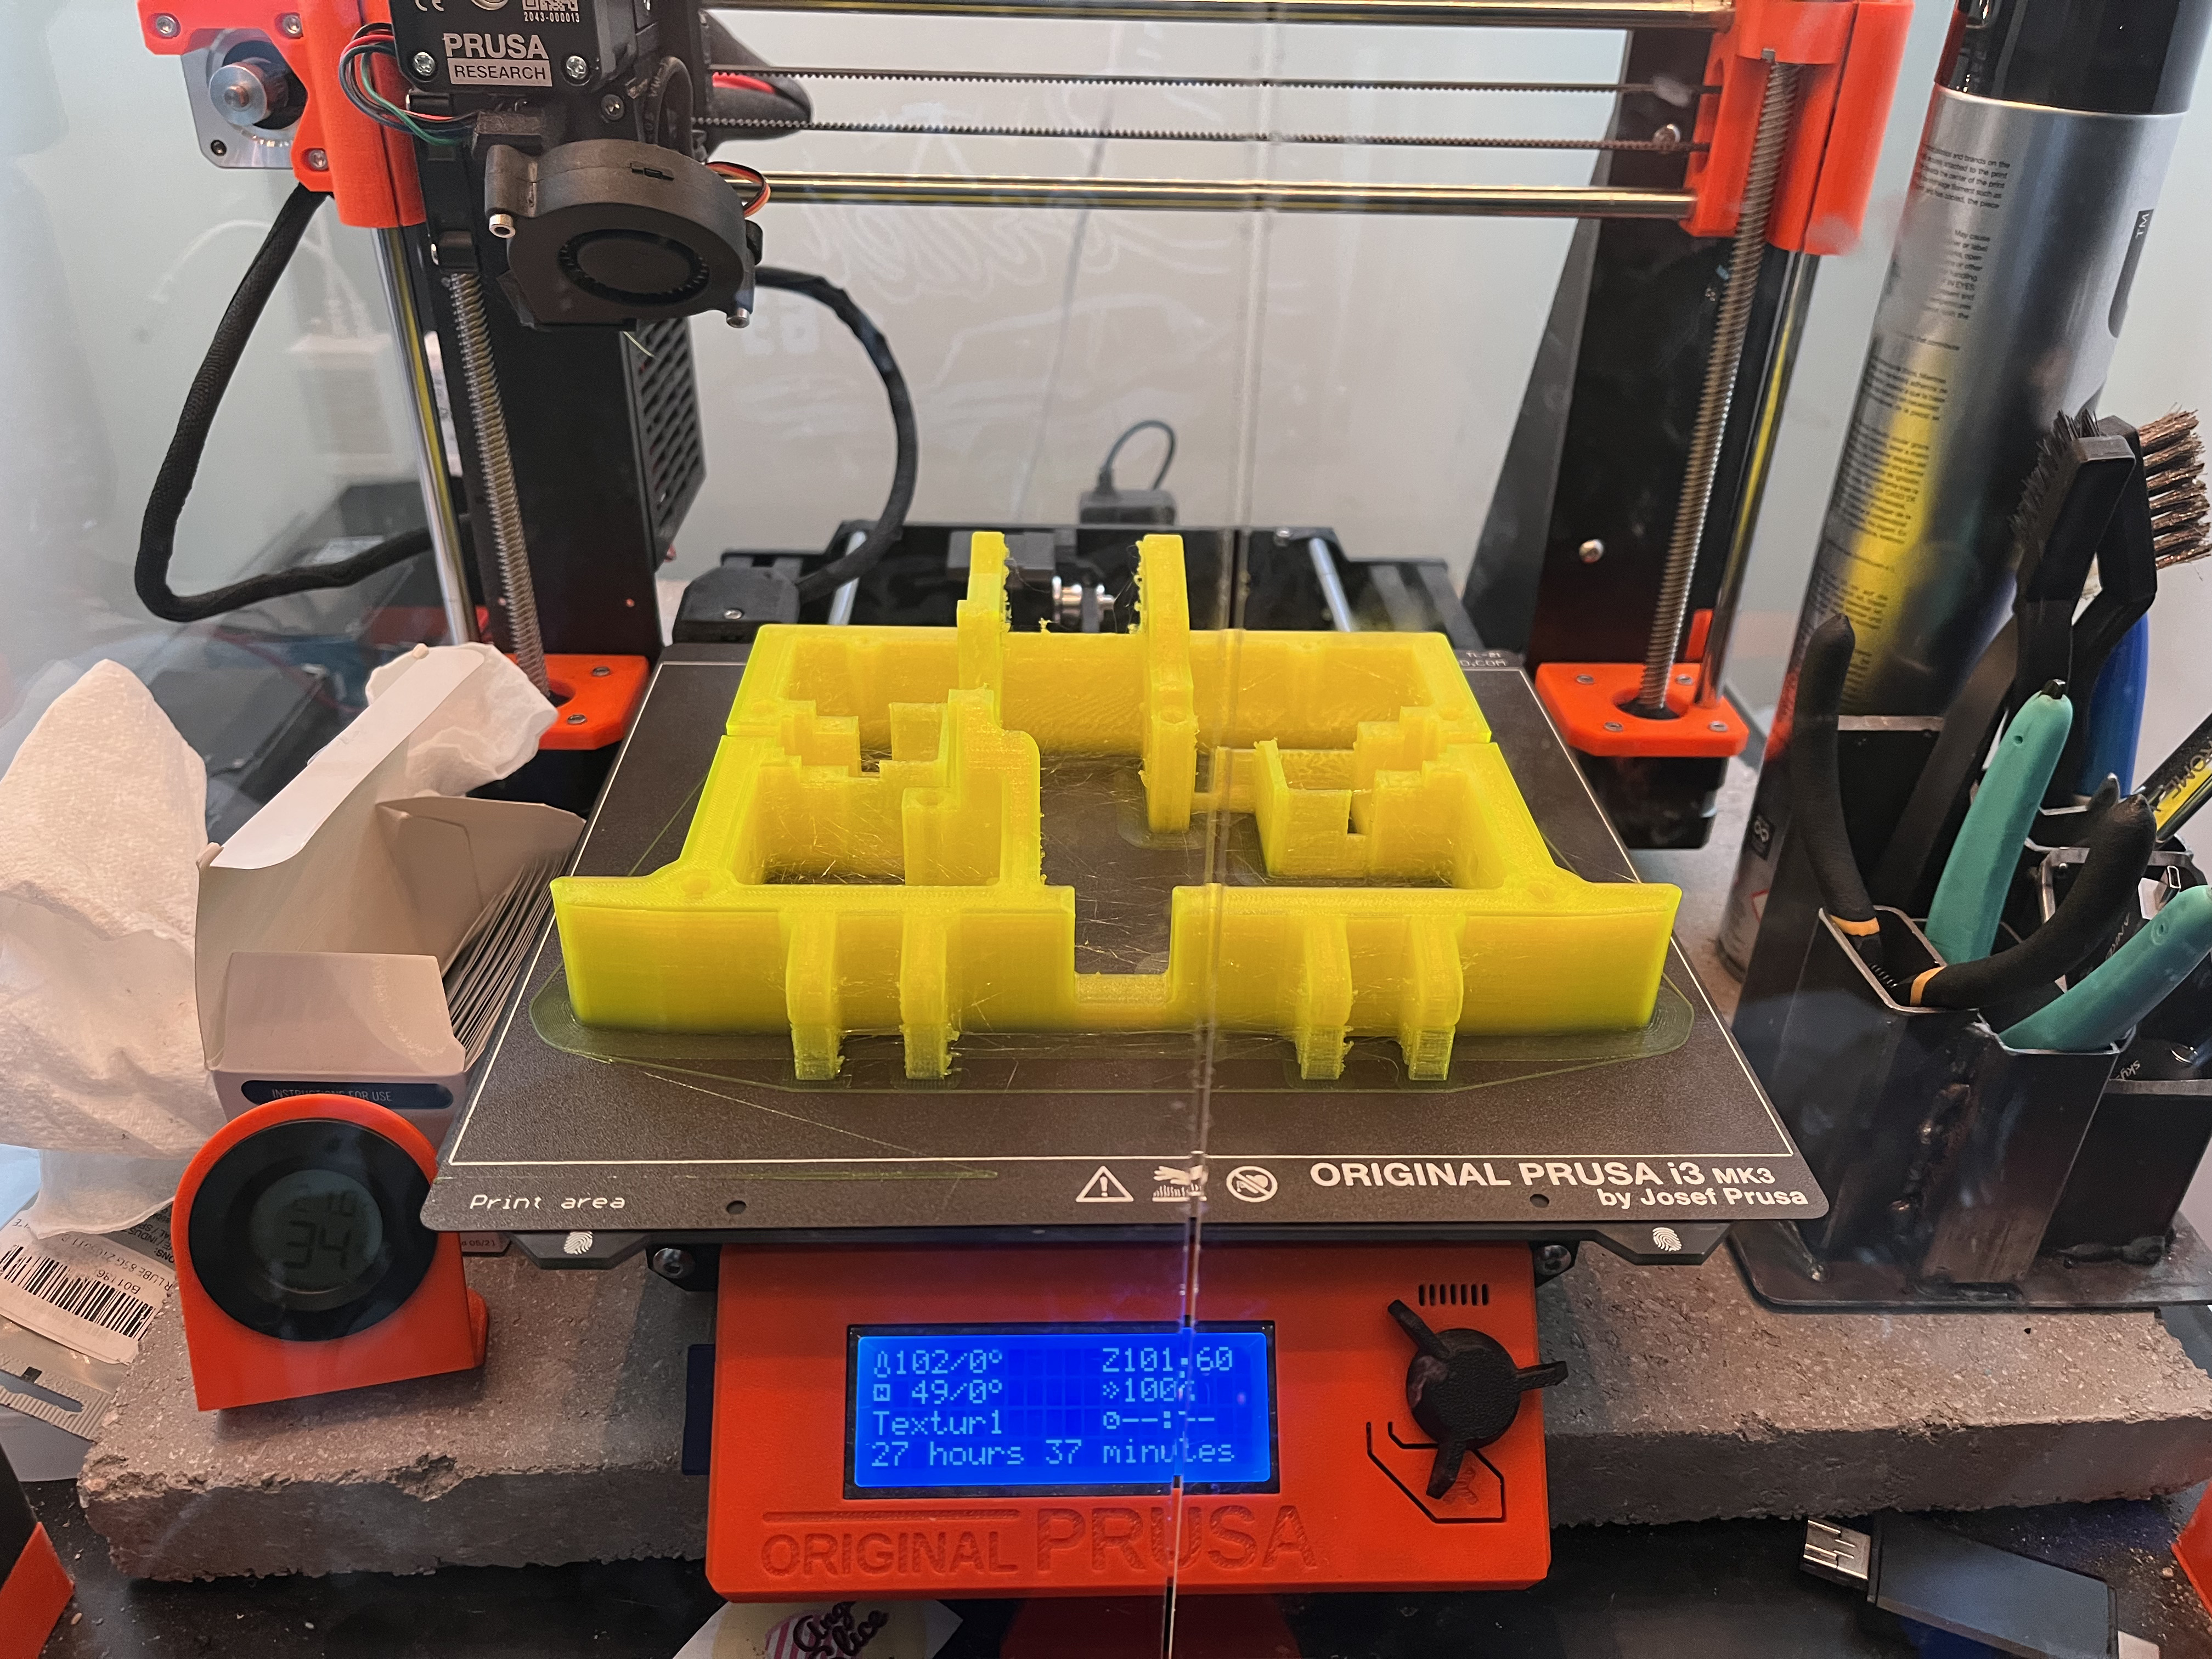
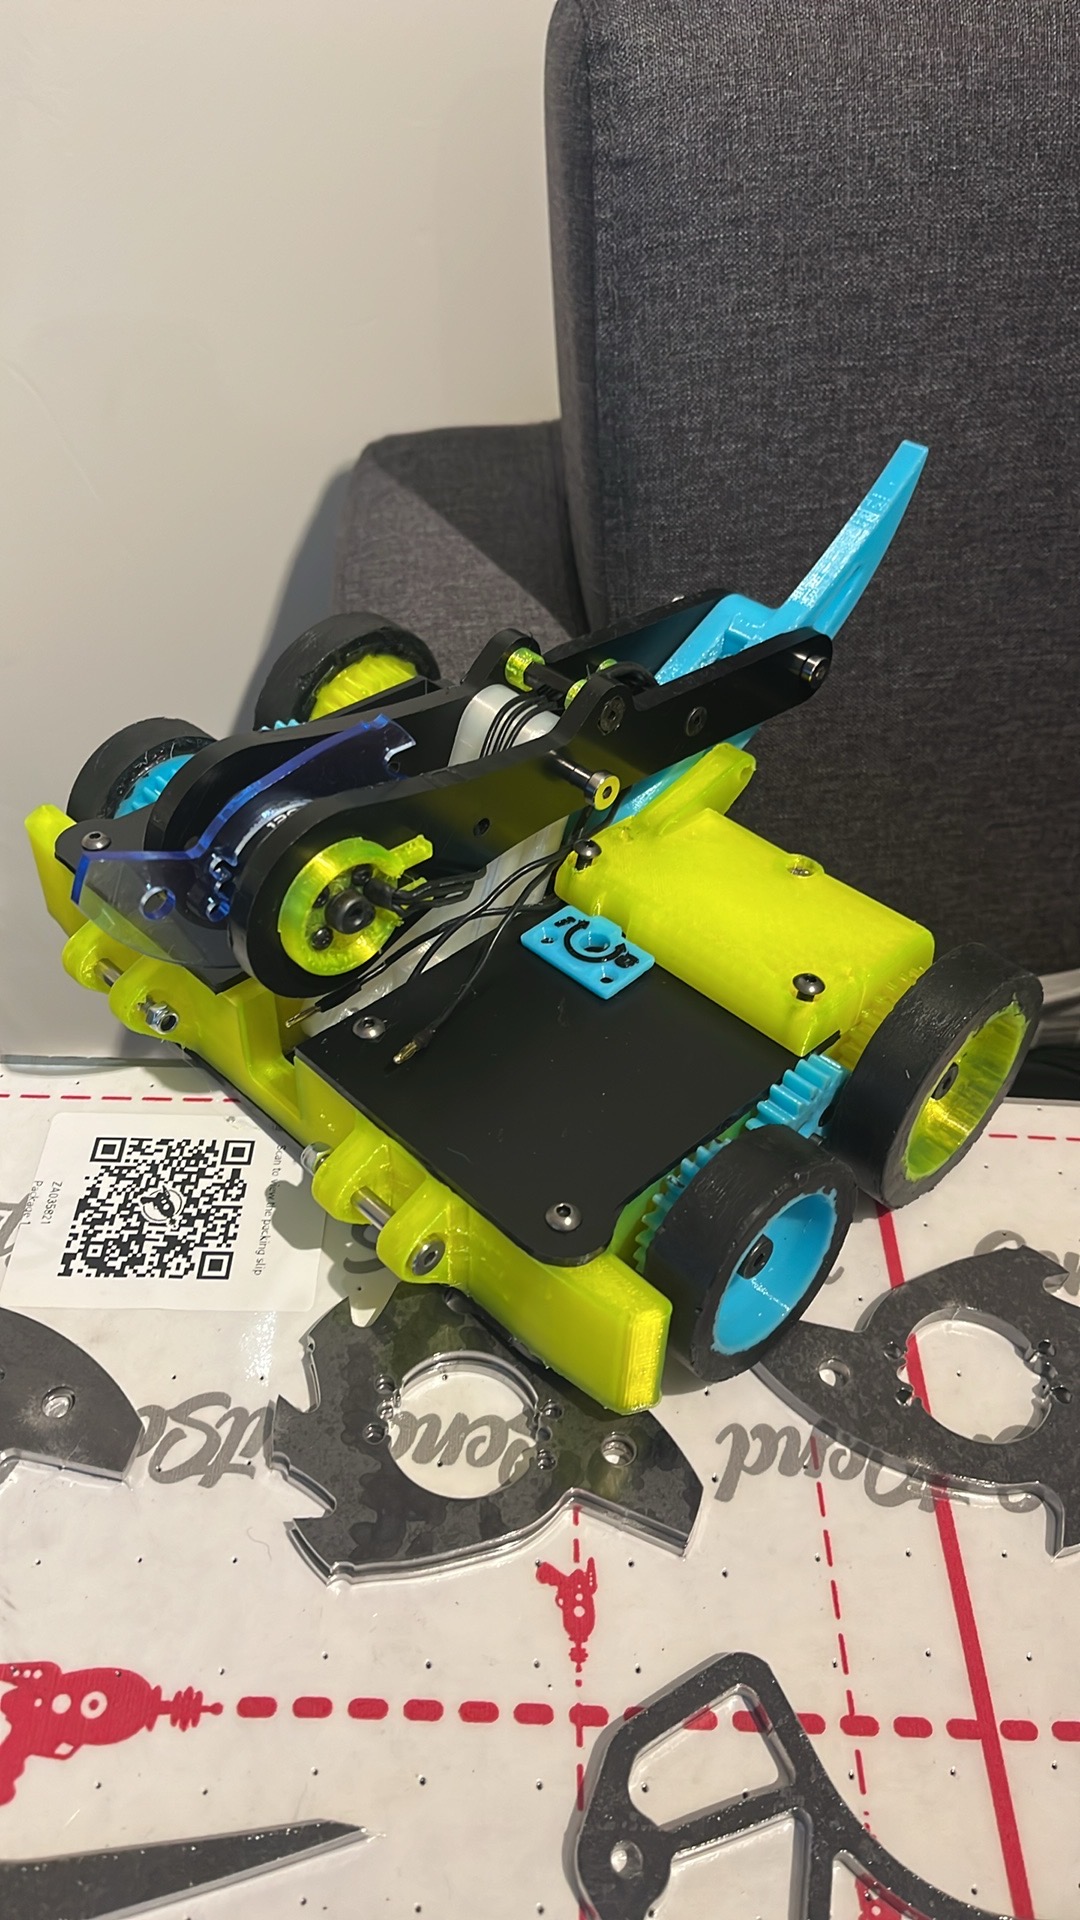
This let me print a final test fit prototype. The big constraint was the size of my print bed, I didn’t want to split the chassis in two like I did for Attitude Adjuster since the weapon uprights were integrated with the chassis. I used a combination of the 30mm aluminium hex inserts from eBay, and thread-forming plastic screws. The Repeat hubmotor allowed me to make the chassis a bit more symmetrical, as it didn’t need the arm to be as offset as my custom hubmotors. It also likes being double-supported, so that made the packaging a bit nicer, having arms on either side on top and arms in the middle below.

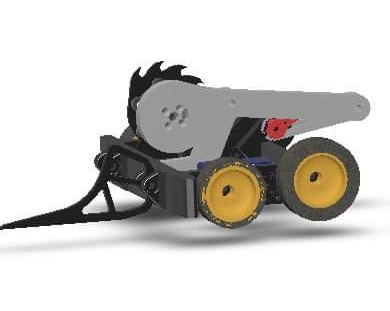
I decided to definitely enter Grey Area into Brawl as it was on my bucket list to compete with something that wasn’t Attitude Adjuster, and got cracking with the rest of the build.

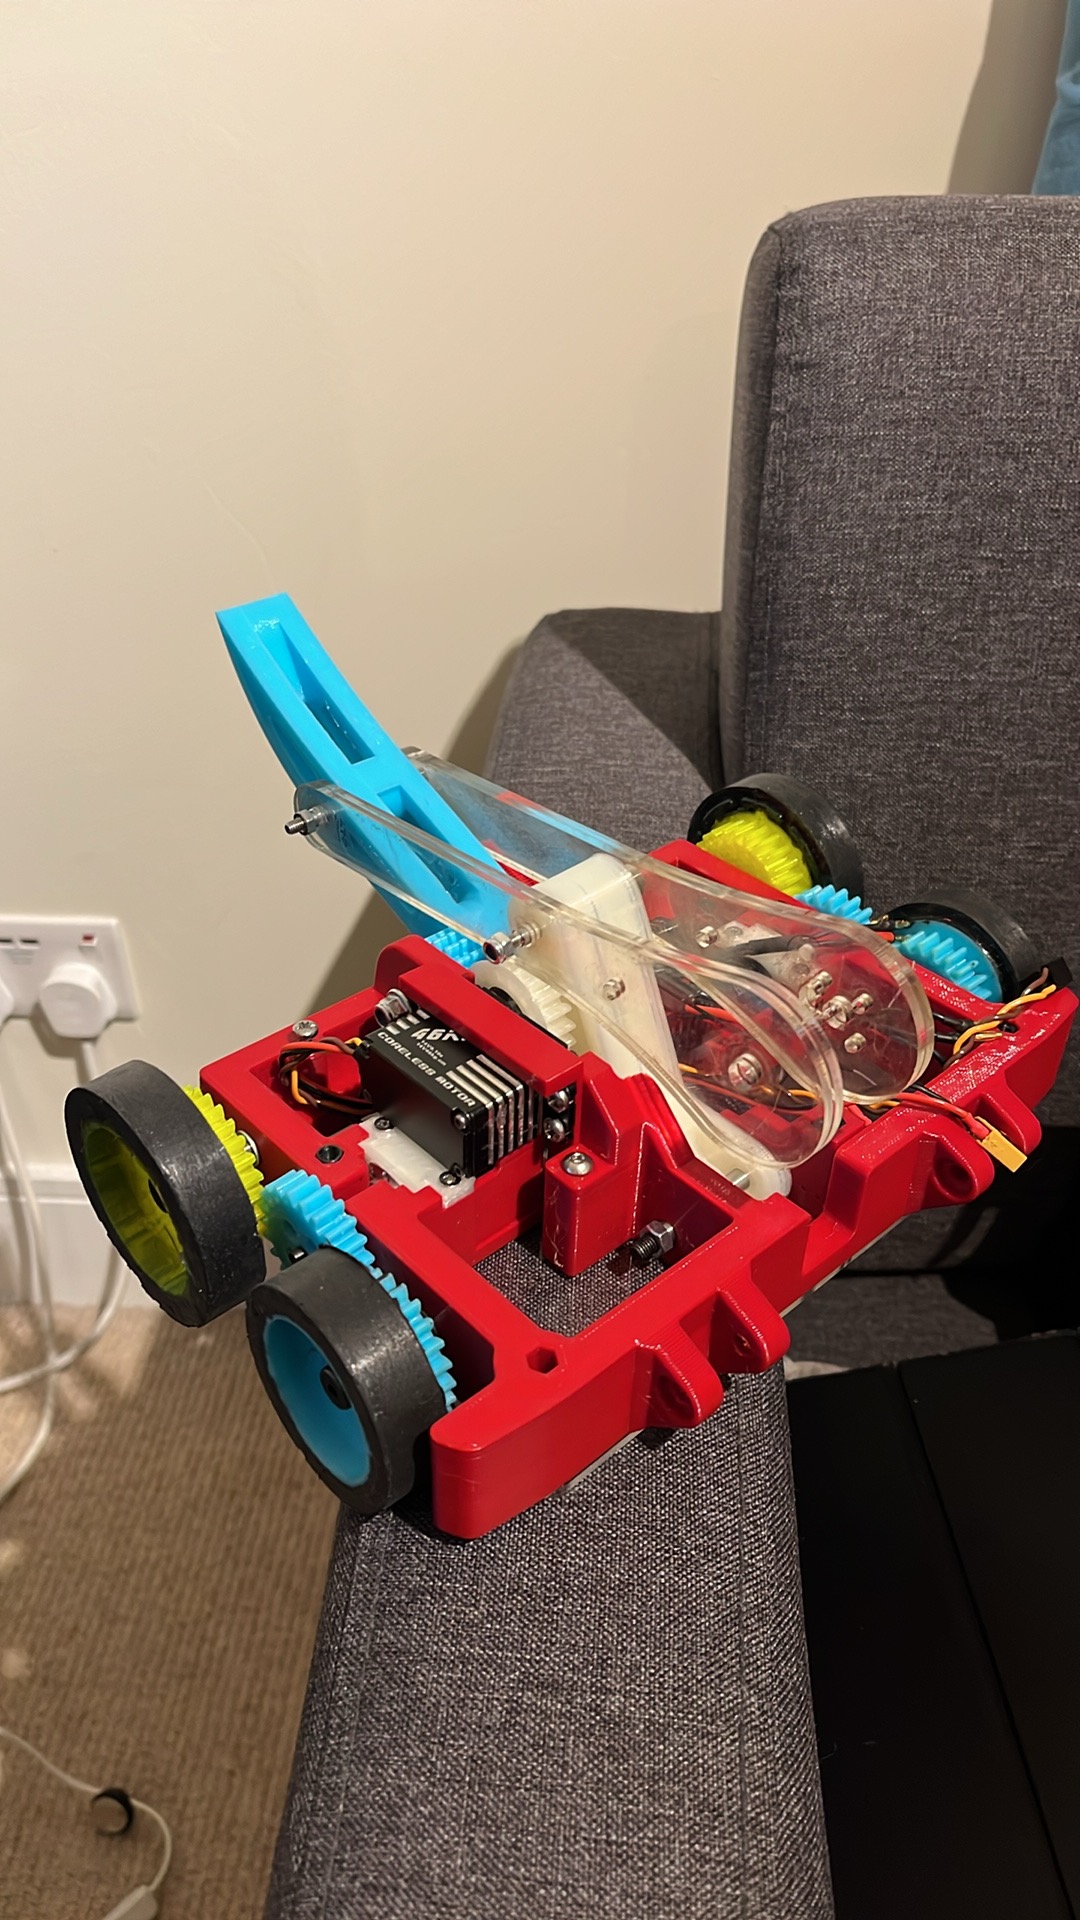
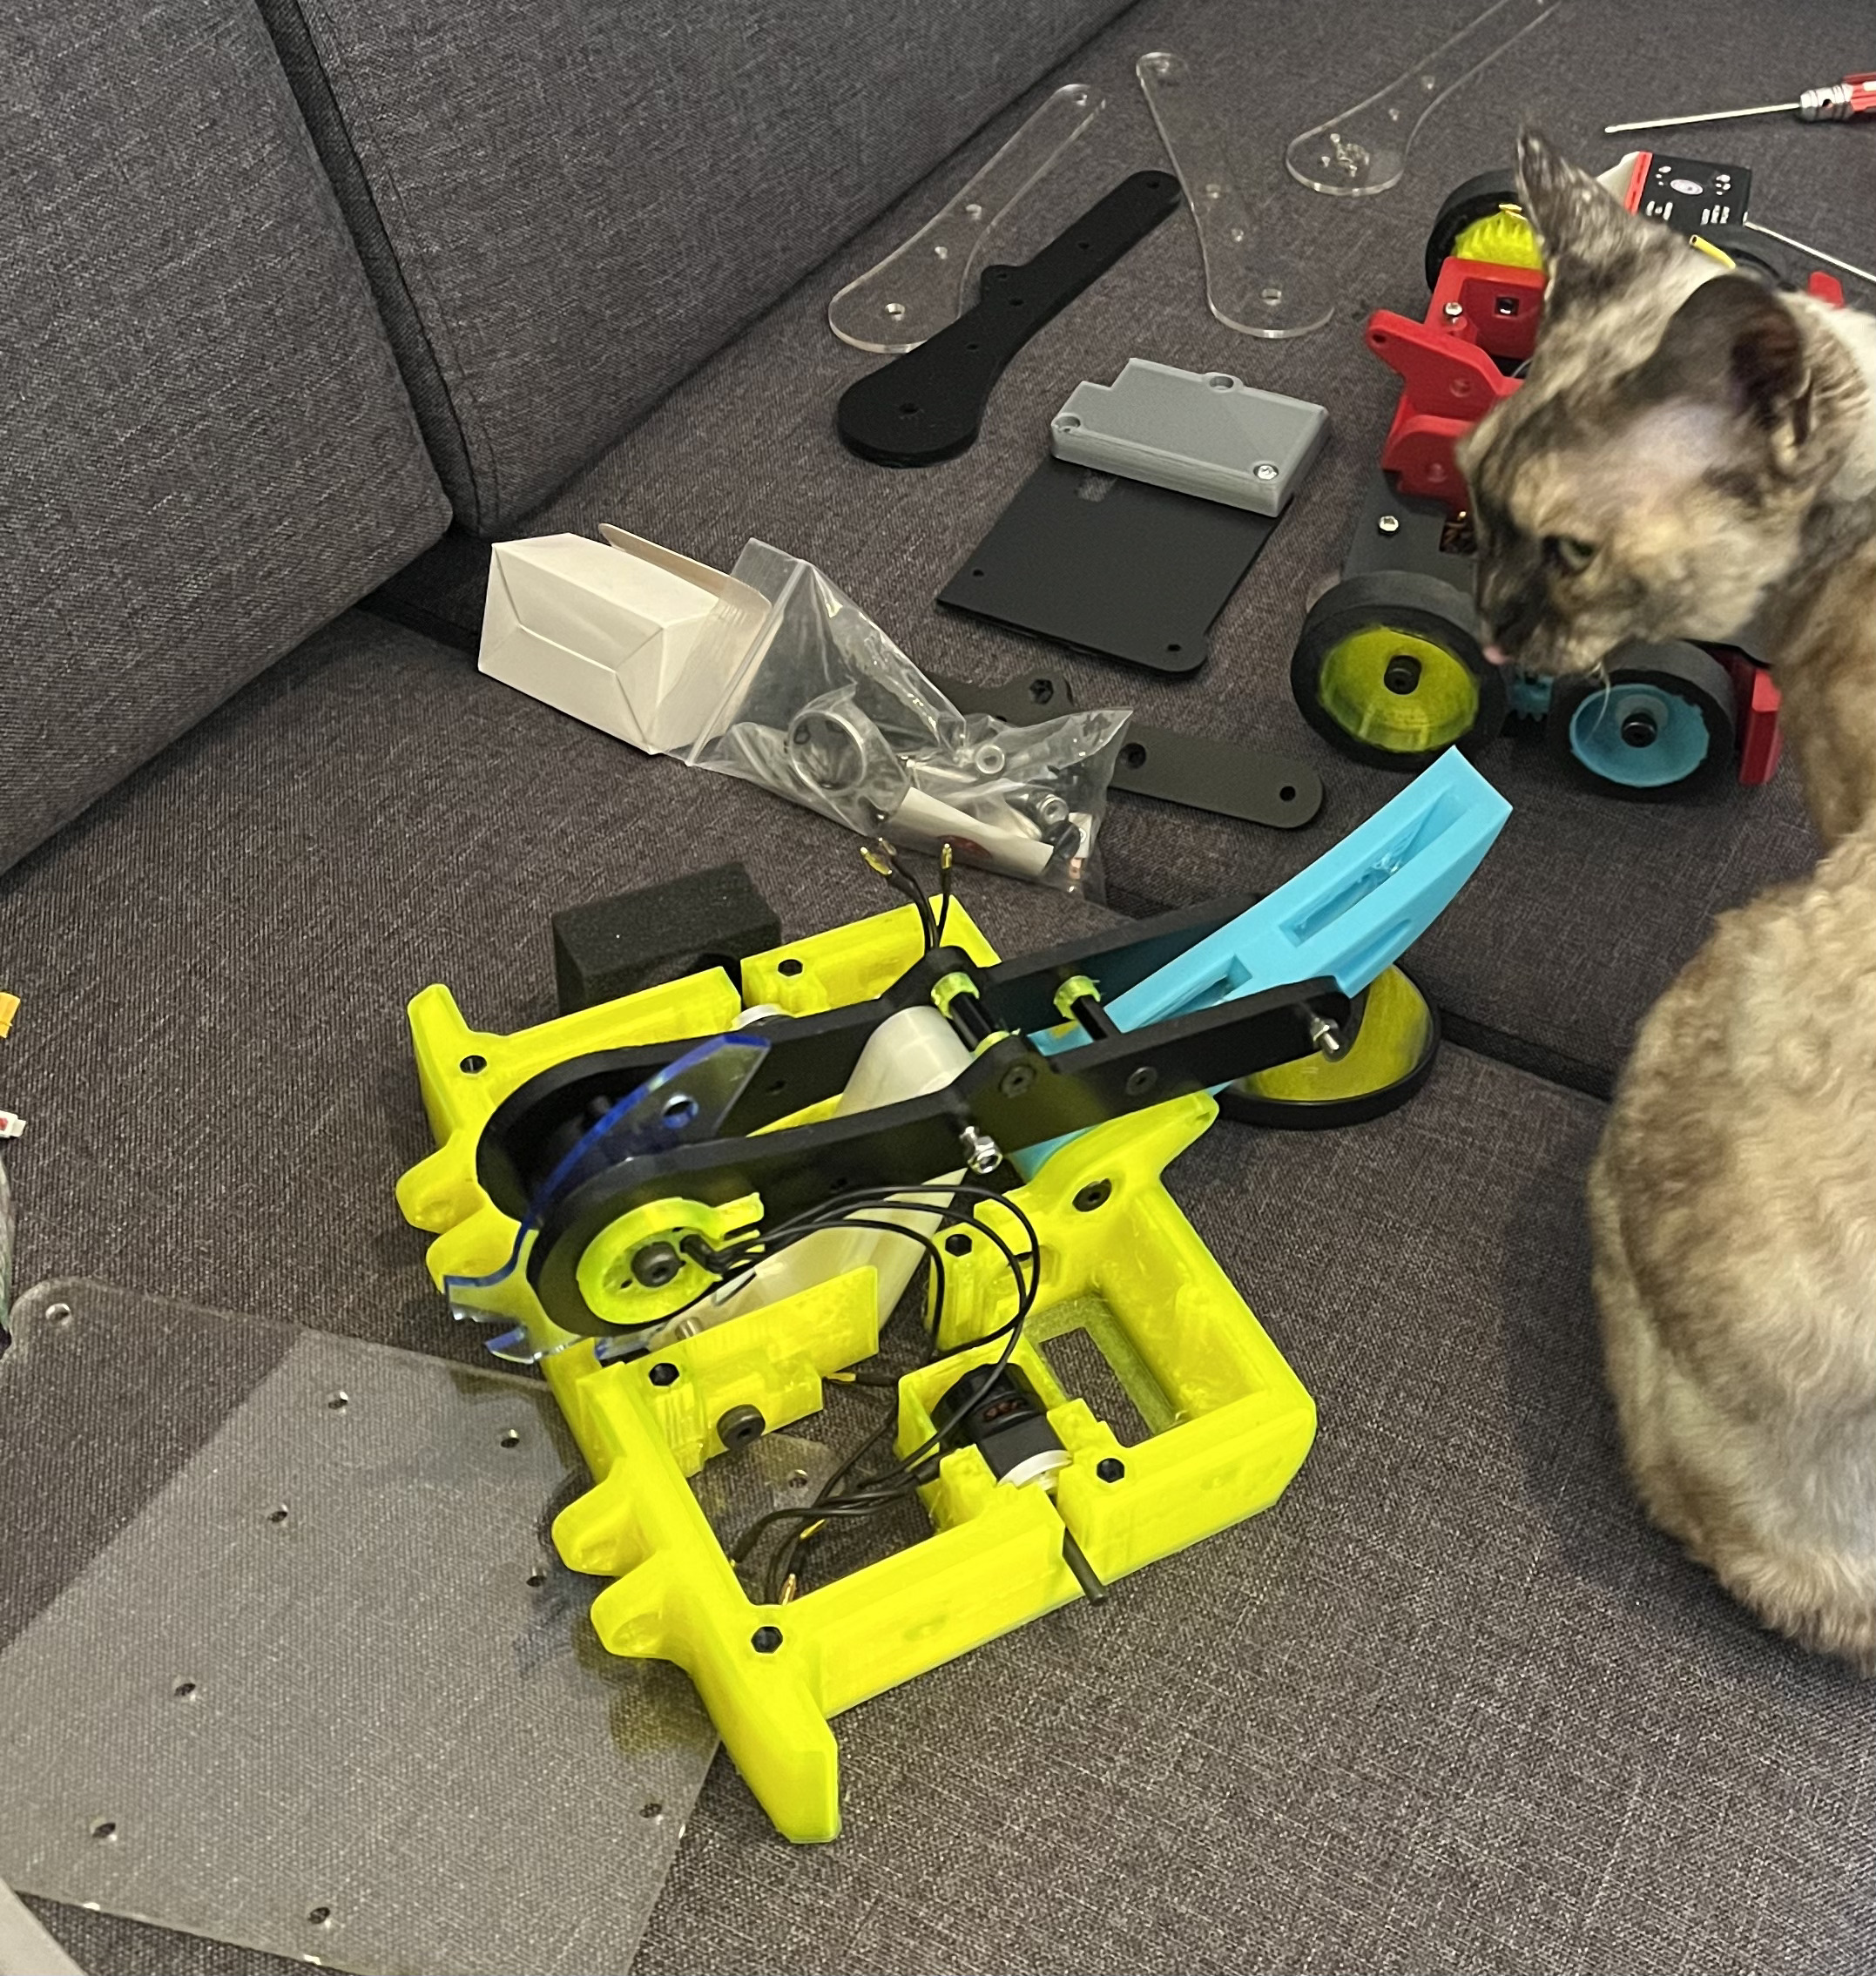
As I locked in different parts of the design the robot went from prototype red to black, blue and yellow. I was going to use HDPE arms for the 4-bar, but decided to try a printed nylon piece for the front for strength and TPU for the back to give it some flex. I was particularly worried about the nylon piece, I thought it would either explode when I hit something or explode if/when it was hit. I printed a spare and also brought a backup PLA-ST to the event.


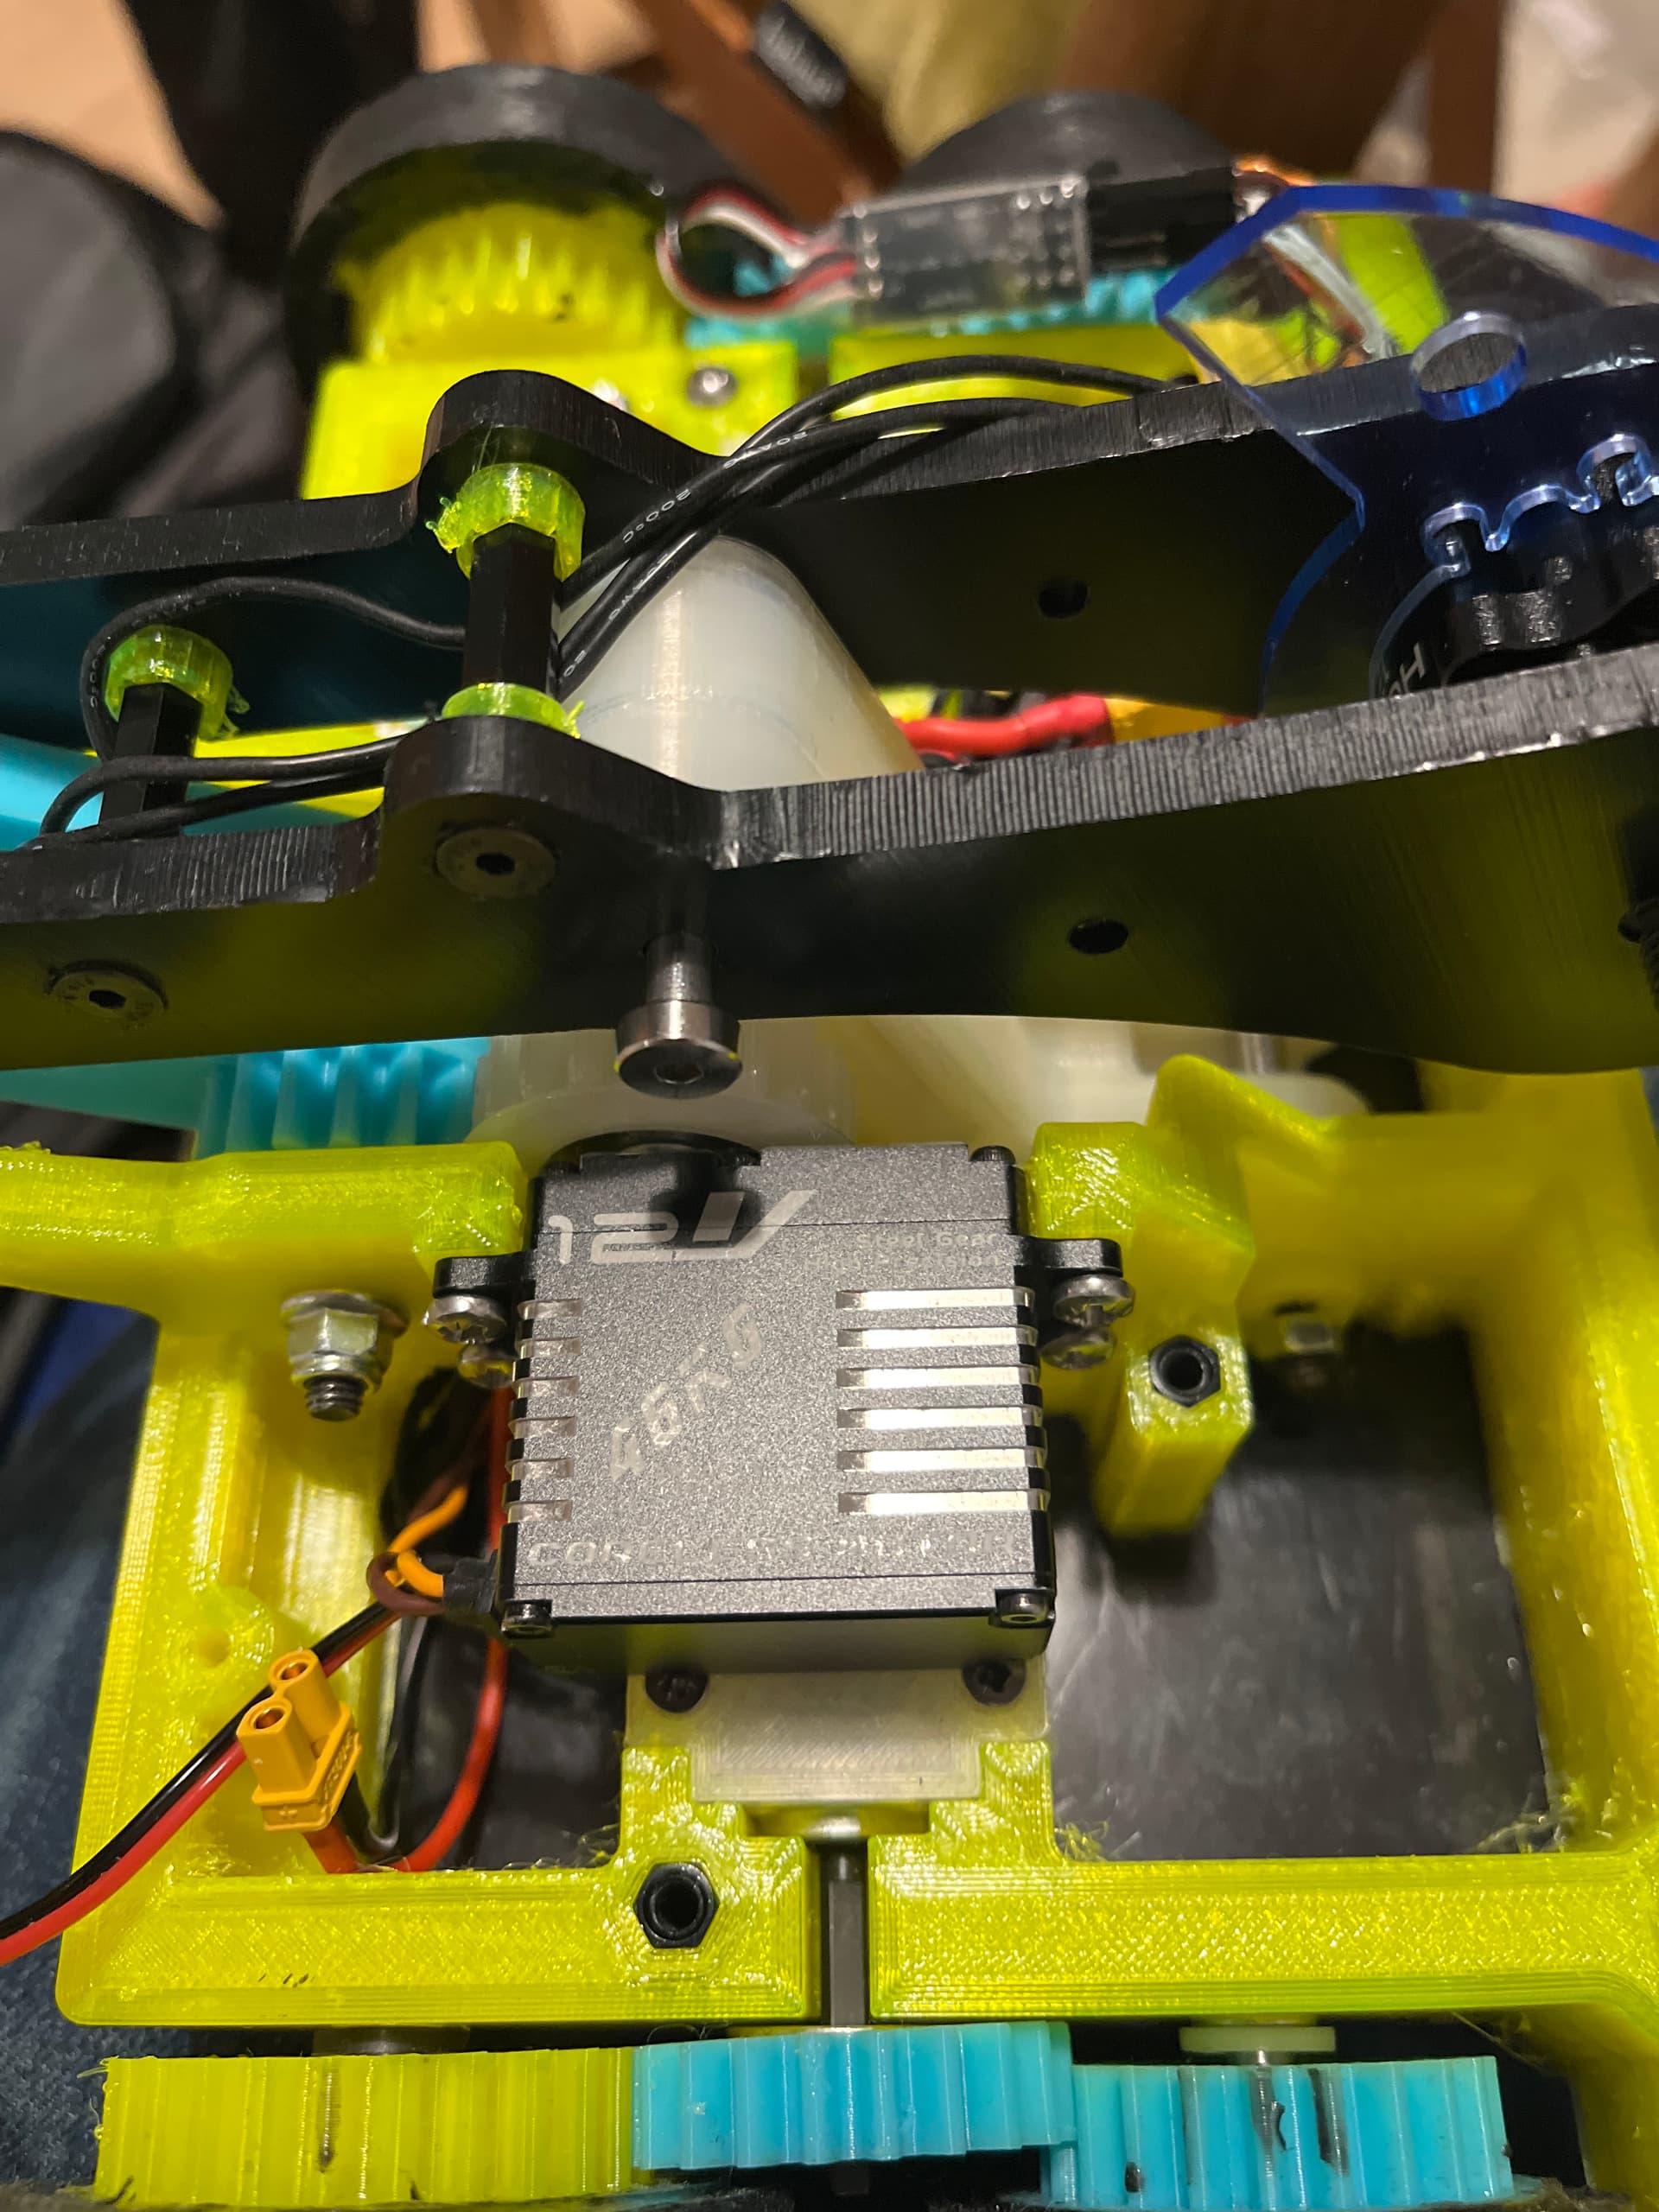
I printed the final chassis and put it together with the UHMW arms that I CNC’d. I got stuck on the wire management for the hub motor so decided to just go with what I had, so it wasn’t really well considered until the last minute and was super exposed at the top. I printed some sort of TPU channel, but they were still exposed on the top and this would come back to bite me later on.

I decided to go with a switch this time instead of a link, since BBB were going to allow them for Brawl. I did give myself an out, and designed the bot to use either a switch or a link if I didn’t like it.

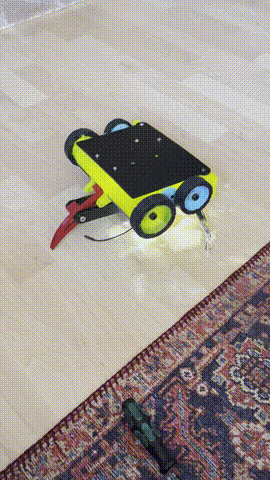
By this point, I had enough for proof of movement! The self righting was a bit unreliable, which would also come back to bite me in the event.

Punch mode demonstration

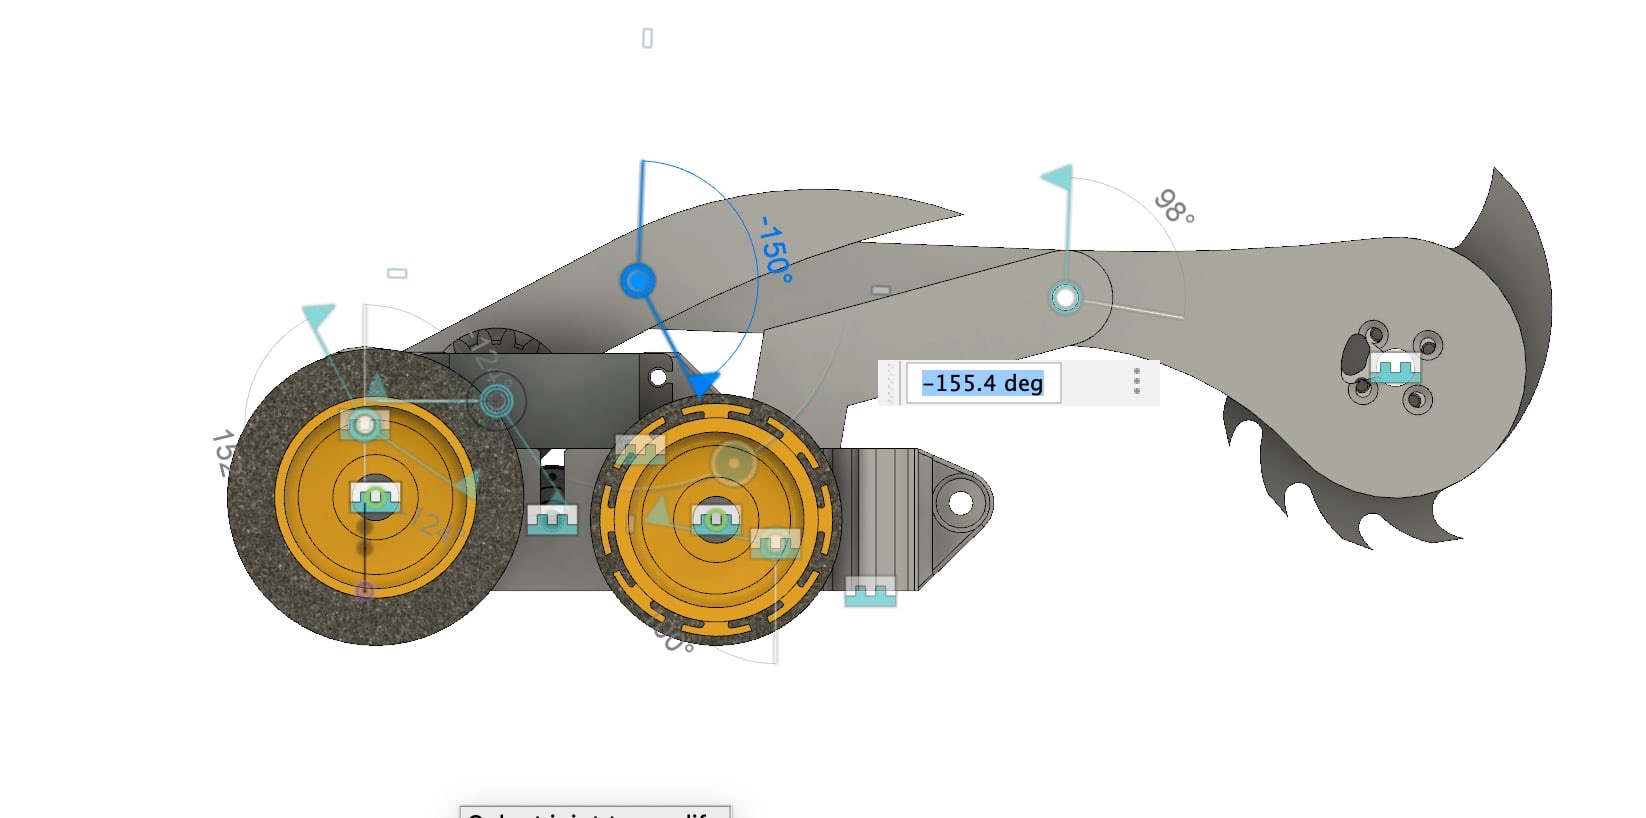
One interesting thing is I did some funky openTX programming for the servo. The throttle is used for the spinner, so that left the rudder for the weapon. This was my preference anyway, as it’s how I control the hammersaw on Attitude Adjuster. The servo is at full retract when the stick is centred, and moving the stick right extends it proportionally. However, I wanted it to punch, so I programmed in a “punch mode” so that when one of the switches is active and the stick goes past 20%, the servo goes to full extension. I left it in this mode for the whole of Brawl.

But enough worrying about important stuff, I took some time to print some cool locking bars.

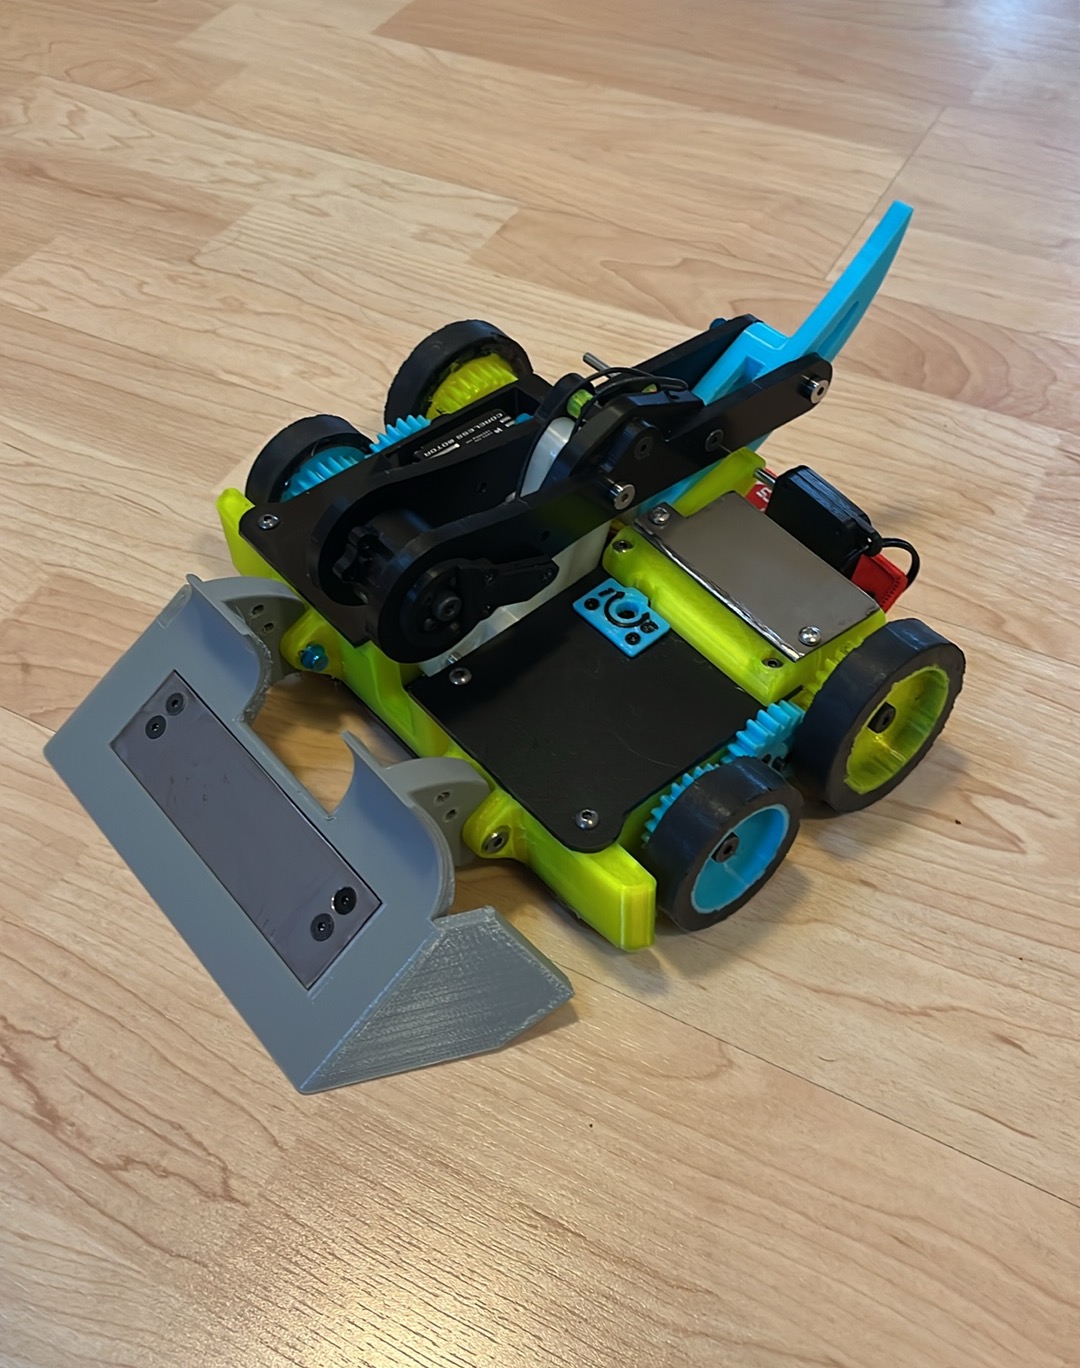
The robot was mostly complete. I had to go for a TPU printed lid as the battery stuck out over the top of the black HDPE lid. I embraced it and totally ditched any symmetry, to Jack Tweedy’s horror. I also cut half of the “tail” off in the name of weight saving, which further compromised the self righting (foreshadowing).

The thing that really compromised the self righting was that the TPU chassis was so flexy that the servo was moving and causing the gears to skip when it was under any load, such self righting. This is workable in a motor-driven hammer saw but not a servo driven arm, where the position matters.

Flexy flexy

This was an absolute pain to solve, and was the single biggest problem with the robot. After much iteration and a full week or so, I solved it in a few ways:

  • I left too much clearance between the servo gear and the arm gear. I had to experiment with funky gear mods to reduce the backlash. I think I ended up with something like mod 1.64.
  • The TPU gear was flexy, which is good for absorbing shock, but was too flexy so it was causing slippage. I ended up separating the gear from the arm and making it out of nylon. I should’ve done this anyway, as I printed so many TPU arms that had to go in the bin.
  • Adding a PLA-ST stiffening brace, which also doubled up as an armour mount to put a bit of TPU over the servo.

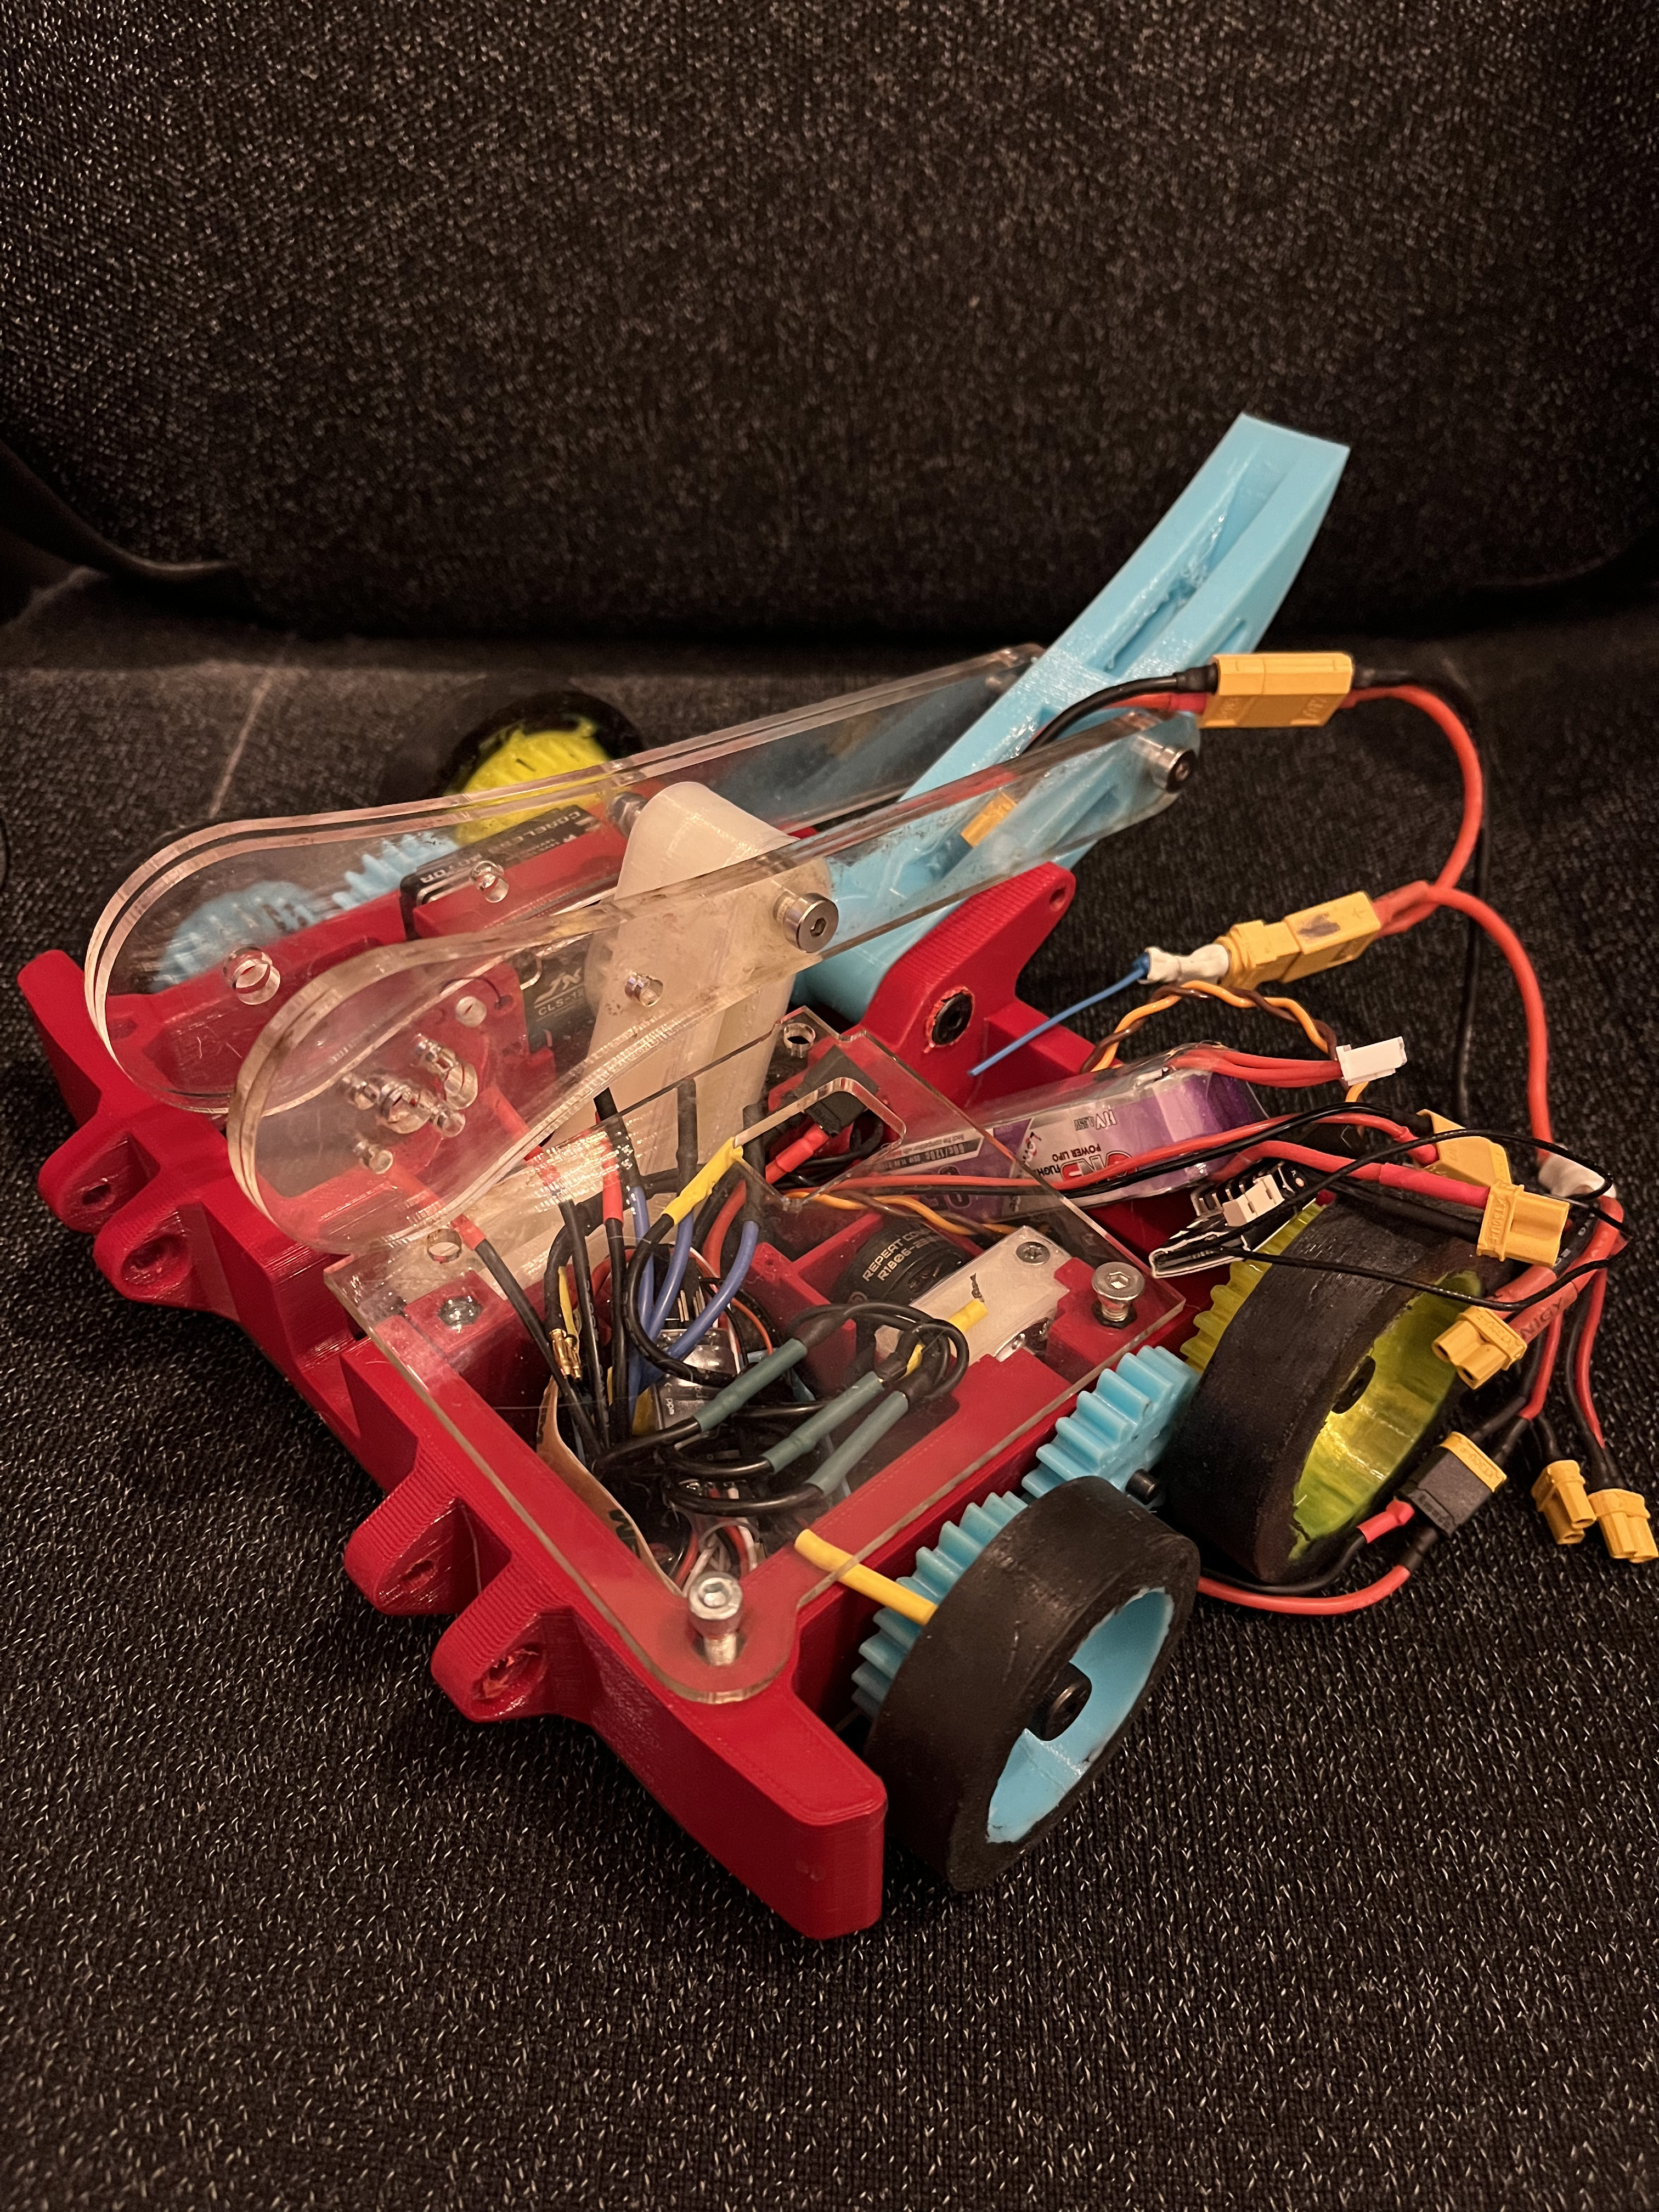
Grey Area was too heavy to reuse the trusty 2mm titanium wedge from Attitude Adjuster so I decided to design and print a new one out of TPU. I was wary of horizontals like Baby Dead Bod slicing through TPU, so I put a 2mm titanium panel on the front for deflection. I was also wary of saws or hammersaws going through the TPU and hitting the battery so I panic-cut a lid out of 2mm titanium too.

And then after getting some sweet stickers, getting some cool blue cable sleeving, and casting some blue wheels, we were ready to go!

6 Likes