Harry's Beetles

Right, that’s 3 different threads of all the weight classes I assault with my presence. If people would rather they be combined to one fat dumping ground that’s fine I’m happy to oblige but I figured splitting them class by class works best for general interest.

For the last year I have been chucking out various lumps of yellow plastic in the form of the MotherLoader line. Starting with a fairly solid wedge and (d)evolving into a dual weapon axe lifer combo.

Continuing the concept I idly started playing around with some interesting gearbox and motor designs to free up some internal space inside. I picked up a 24mm planetary and a strange little motor from aliexpress and found them to be an amusing combination.

What I planned to do was swap the drive around so the front pulley is driven and can be better protected by the wedge. By mounting this over the gearbox shaft I could save space and pretend to have a 24mm dead shaft on a beetle.

Like so. It also lets me pop the esc in the outside of the bulkhead and just have it come away as one self contained tanky unit. With a hard mounted xt30 all it needs is a pwm line to slip into the main body of the bot and it is a really clean albeit silly solution.

Theory tested in PLA for the time being.

Some cheap 30mm bearings sit inside the pulley and ride on a printed boss that bolts to the bulkhead with m2 countersunk bolts. The hub is a 6mm one from pololu. the imperial was about half the price of the metric one so I bought the freedom units and rethreaded. Penny pinching always.

Self contained unit working pretty well! Even though it features a larger wheel, with the new gearbox and motor system it should be about the same speed as the current ML. The other change is I’ll have to go back to a wider track (25mm) so it doesn’t look too odd. This whole assembly is barrelnut’d, captive nut’d and threaded insert’d into place. I am looking at creating a folded plastic or sheet metal main chassis to have something as light and rigid as possible.

Also over this slightly rum sodden bank holiday weekend I caught up on housework (hence the day drinking) and then consumed an entire season of Battlebots. Although slightly outdated (2018) it was inspiration nonetheless and I opened up Solidworks and once Dassault Systèmes had been shouted at
and the £8 they said they had taken two days prior transferred I could muck about with ideas.

A bit of a parts bin special and a low hanging fruit extravaganza on show but I am pretty pleased with how this little cutie is looking. Complete departure from the MotherLoader line but this may actually function as a result. Making a little use of the new dual brushed ESC I just snagged a beta version of from BBB it is fully brushed bar the token tickle saw which is run off one of my many 1806’s.

Featuring a lot of plastic both printed and sheet. I think I can get away with only needing the arms getting lasercut and the rest done in house. It would be nice to have something fairly simple that is just reliable and ready to jump into all threats.

6 Likes

oh man that’s stunning. absolutely love the saw but also the mount looking like the ol’ axe! so sick

Very interested in how the gearbox-in-pulley design works out, could definitely save a bunch of internal space doing that on a few of my designs!

Lil’ bit of test printing done on the new lad with ebay parts rocking up all at once.

Got some £1 saws, some funktastic polyurethane belting and bearings waiting in the wings. I was pleased to find a BBB package in there too which featured the super cool fresh and new dual ESC.

As I am determined to run brushed motors on this project to shift some of my Empire Of Dirt into service I jumped at the chance to grab one of the beta run units and pop it through its paces. I’ll likely hardwire a 4ch RX straight to it just for minimum serviceability and then hard mount the brushless ESCs in a little nook near their corresponding motors and just run power lines and a signal back to base. I really want to tag in better discipline with wiring this as it could prove tricky due to size and the realist in me knows I will have to hot swap weapon motors as they are basically a consumable.

Went full send on the model and just chucked out some quick n’ dirty test prints to get a minimum proof of concept. Pretty pleased with some of the guesswork clearances and such. Overall vibes are cute and angry so I’m well on track. Made myself a quick test belt and was pretty happy with how it turned out. Just seven more to make hah.

Slowly adding more detail and mounting points. Using all the favourite tricks of fasteners and hardware (although no shoulder bolts are present yet in a shocking turn)

1 Like

Had a quick crack at making the wheels and I am pretty pleased with the result.

Washed out pink supermould filled to the brim with 30a Sunny Delight. The hub is just plain Jane ABS for now but I may branch out to TPU or nylon when I get into the swing of printing all the chassis parts again. They just take a 12mm hex bore to be super standard and easy to swap out. 41mm OD and 18mm wide.

Looking pretty cute in the squishy flesh. It will fully harden over the next few hours as it is still a little pliant at present but I am loving the potential grippage and pleasing orange squish of it all. Who needs Banebots?

The tread profile is base purely on aesthetics but I feel it will work pretty well and be quite resilient. Please ignore the pound of pork sausages masquerading as a hand.

Definitely spicing up the colour palette with these!

3 Likes

Oooh, that wheel came out very nice! And the space-saving pulley over a gearbox thing is very neat.

The sheer number of belts is quite baffling, to the extent it may well be a weapon in itself. Against me anyway.

Looking fantastic as always Harry!

Looks like that axe profile will severely limit any penetration the saws might achieve tho? - planning to tweak that at all?

Excellent point - it is intentionally limited.

My theory being that I am rather under gunned on the saw motor (1806 rather than the ~28mm more traditionally used for a beetle saw) I want to limit the cutting depth in order to stop the motor getting too bogged down. it’s currently set at 6mm but I can probably reel that back to 8 or possibly 10 while still keeping the desired visual.

If I like how this guy goes it may make the natural transition to hammer saw or full bore overhead saw

Currently becoming a wheel factory and I am loving the monster truck vibes I get from 6wd. Shame it’s not super feasible.

2 Likes

Ah ok, interesting approach. Guessing the belts have a bit of slip too? I was playing around with ant saws a while back and found the arm pressure was another big factor in not stalling the saw

So I am casually approaching a robot shaped lump instead of a collection of parts and I took this afternoon to knock the arse out of some odd jobs that were holding up testing the thing.

As I started it rather looked like this. I had revised some of the prototype print geometry and rammed them through pretty roughly to start working around. My goal is to have a wiring loom mostly completed with this as a driving test bed that I can then transplant into a nylon/TPU chassis once parts are finally printed up.

I set about making a baseplate and some armour which involved trying out my latest deathtrap, a hot wire bender to fold up the rear making it all one piece of 3mm HDPE. Whilst it worked on 12v it lacked a bit of pep so I jammed one of my ole faithful Lidl Parkside 20v lithium packs and sat back to watch the fireworks. Big thanks to late, great Dale Heatherington for the idea.

With that in hand I went about cutting and getting a rough idea of how I wanted the front panel to look. The wedge will mount loosely on two mounts between these printed pivot points to give me some chance at riding the floor. Forks aren’t off the table but they are a lot of work to make them work well.

Cut needs clean-up but that will come with top armour fitment I think. As it stands here it is weighing 811g on the incredibly well calibrated kitchen scales so there should be enough room to play around with setups should I wish to.

2 Likes

Didn’t take me long to flip up into some interchangeability! I was looking at this and trying to run through how it will fight in my mind alongside rumbling around MotherLoader ideas. Without going too far to the damaging darkside I do see hammersaws featuring in ML in the future. Being able to flick people up with the lifter then give them a gentle knock with a spinning lump would be a neat tactic. With this in mind I put together a minimum effort (spares, spit and slight modification of the existing hammer arm) module to try out on the new lad.

Featuring a single tooth hardox disc I had for my antweights mounted on an Emax 2205. Much like the dual saws off a 1806 I am not expecting miracles it is just the minimum viable product for my nonsense. R&D on the cheap.

The orange hub houses a suitably phat ball bearing so the motor might last out the first impact. I have some connectors, wire and hubs on the slowboat drifting lazily from china and some nicer bits being swiftly flung over from BBB to get the arm working.

I realise that the disc is the ‘wrong’ way round for a hammer saw - part accident but I may test it this way round as it potentially could act as a terrible pokey vert stick lance if left in the fired position.

6 Likes

Always a big fan of ya builds and no exception here. That orange pops so nice and the idea of the control bot with just a little damage potential is a cool thing

Finally got this lump up and rumbling under its own steam. Still a bit rough and ready but I have a fairly finalised module that I can transplant into the real one

I love living in the future. That is the dual brushed BBB ESC, one 33a brushless controller for running the weapon, a bidirectional 20a esc to pop the arm up and down and the receiver all bound up into one 20.8 gram tumour. This gets wedged down the centre portion of the robot, buried deep under the axe mechanism. A neat, nifty not-yet-designed belt guard stops the pulley from sucking the wires in (which is what happened on the retract in the video!)

Such a shame to see but China wins out over the locals once again. I could have bought these hubs locally but for less money and about a 10 day wait I got hubs, some gears for MotherLoader and a bunch of xt30’s shipped 9700km. I still need to shorten the drive motor shafts and clean up the threads on these brass bits but I couldn’t help but slap it all together for a quick and dirty test.

Also worth noting I have been working under the running title of KLAUS and since the time has come to chuck it at a competition and inspiration has completely failed to strike I will be running with it. Makes a welcome departure from trite _Loader traditions for now.

4 Likes

Slowly replacing the PLA with nylon and tightening up a few design wibbles.

Klaus is just happy to be here

4 Likes

Still rumblin’ along as August draws closer.

I squeaked out a sliver of steel from work and wrote a super quick and dirty program on the press brake so I can make a few hundred of these easily should I want to. Spares game on point. It won’t be great as I only think its S450 base steel and its galv coated as is 80% of what I make.

Printed some nylon mounts that bolt onto the front with captive nuts. I’m hoping they’ll be strong enough to form a decent method of attachment. I don’t think this will be a vert facing wedge - horizontals and non spinners for sure.

It has a decent amount of movement without being able to fold under the robot or form a point of extreme stability - I.E. the dreaded ‘thing’

Looking pretty swish, serving 2008 K2 realness. The whole mounting system was test printed in PLA-ST like everything else but have swapped over to nylon. I am hoping there is enough toughness but if it is going to feel shady I may swap them out for TPU. I am thinking about what sort of attachments I can have also - forks feel like a bit of a cop out but I might have to bite the bullet and try at least a little to have a chance of winning a fight.

Got it all swapped over to the cheap and cheerful esun nylon. Quite like now it looks with the white as it’s a little different for me and it helps that orange pop just a tiny bit more. Managed to sort out my drying setup too and after a few false starts I managed to get some pretty respectable parts. I also bumped the speed right down and I am loving the results. Parts feel great after a few days sucking up moisture in the oppressive humid jungle of Yeovil.

Note the difference in the bulkheads. The far one was sopping wet by comparison. It will be relegated to spares duty. I popped a few more plugs in to the wiring so swapping out panels and parts is a lot easier than the MotherLoader series. Planning on driving it hard into dangerous places so I expect to have to repair a lot more!

Weight is also looking pretty good! I am hoping to have a substantial lid in 4-5mm polycarb with an alu backup for fighting hammersaws and the like. Planning to have the saw arms lasered out of stainless or mild come payday.

Just a little taste of Klaus. It should be a laugh.

3 Likes

Klaus is reaching that ever illusive stage of being a functional combat ready robot. It now ticks all the boxes for going into the arena such as physically existing and having all the safety requirements!

I was planning to have a simple little life just laser cutting out the arm parts and replacing the prototypes in a relaxed afternoon but due to unintended financial penalties (i.e. being temporarily embarrassed as its near the end of the month) the quotes I had returned were reasonable but untenable. Go Go Gadget backup plan!

It wasn’t too serious in the end as I managed to cobble something together for some pocket change using some aluminium flat bar and gratuitous 3d printing. It still has the bearing support pushed into a printed axe head.

The whole assembly doesn’t look too dissimilar to the ideal and who knows, it may work a little better (and be easier to fix due to alu’s easy bending nature) It’s a tad longer than the originals which was a tweak I think will help it with the reach. The semi structural smile is still in place. T’ain’t nuthin can dull Klaus’s sparkle.

I plucked out the last of the wet printed bulkheads and installed the final ones. The whole robot comes apart pretty easy so swapping out parts won’t be too painful. I am pretty proud of the weird captive nuts I have jammed in the back where space was at its tightest. The front has a little more meat so it has screw in inserts.

The lid has finally been made - I went for a slight risk with polycarbonate. Even at 4mm it probably won’t be the most robust or impact resistant but everyone loves a clear lid!

Will get a little link cover made too just for belt and braces to keep it trundling while you nasty people whack away at it with your proper robots.

Also in my poverty inspired laser cutting drought I did away with metal forks and have elected to run with plastic ones. While they won’t be as pointy , spikey or resilient as their steel counterparts these should have a bit more give while still letting me cheaply poke around under people (and their robots har har)

4 Likes

So, Subterranean Showdown has come and gone. Firstly, what a venue. Super cool vibe and also about 7 minutes from stepping outside to stepping onto a train home (handy as I had about 6 minutes and forty seconds) Everyone brought their A game and had some really impressive ideas on show. I didn’t socialise overmuch which I always regret but a good time nonetheless. I’ll breakdown some of my performance once I have scraped up the dregs of my build report.

I made a distinct push this time to go in and polish up all the little bits I was unsure about or had a little niggling feeling they’d fail. I have an awful tendency to get complacent and gloss over fairly glaring flaws in my robot, even with available time to address them just out of pride (admitting the infallible narcissist made An Mistake) or fear that I’d make something worse so I leave it. Well this time, motivated by a Schwarzenegger documentary I knuckled down and started fixing all the little horrors and quirks I could in the days remaining.

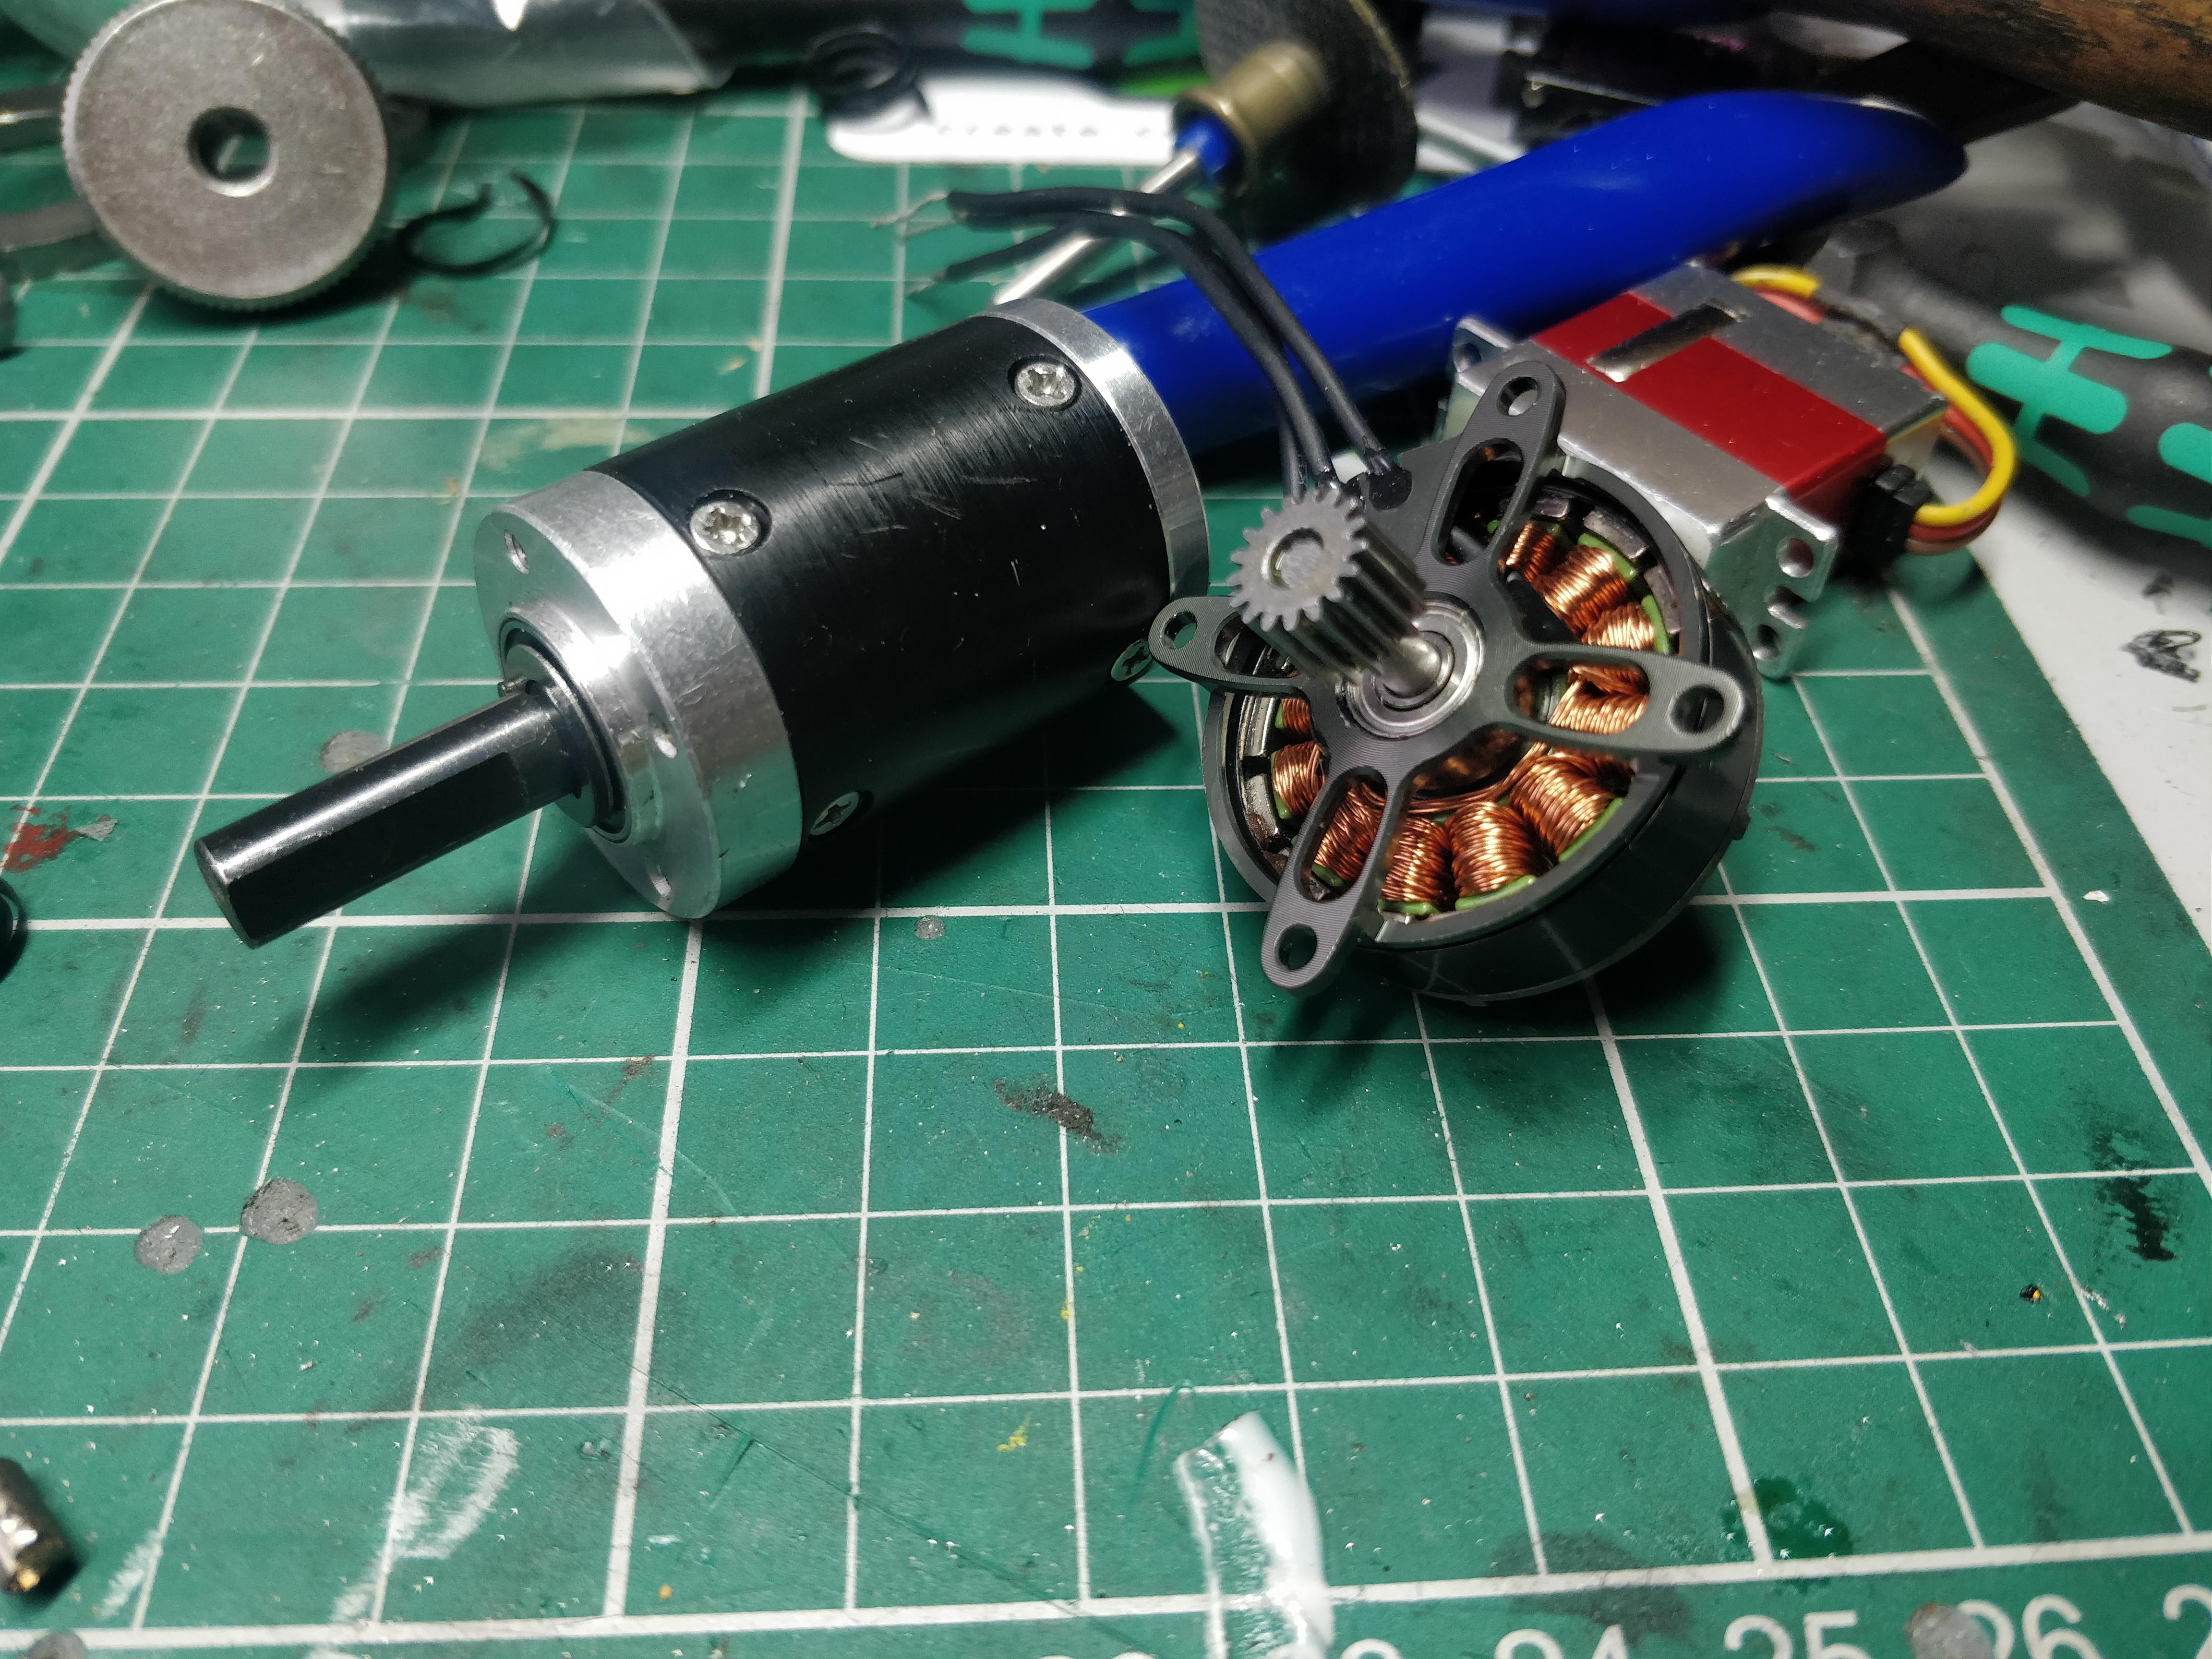
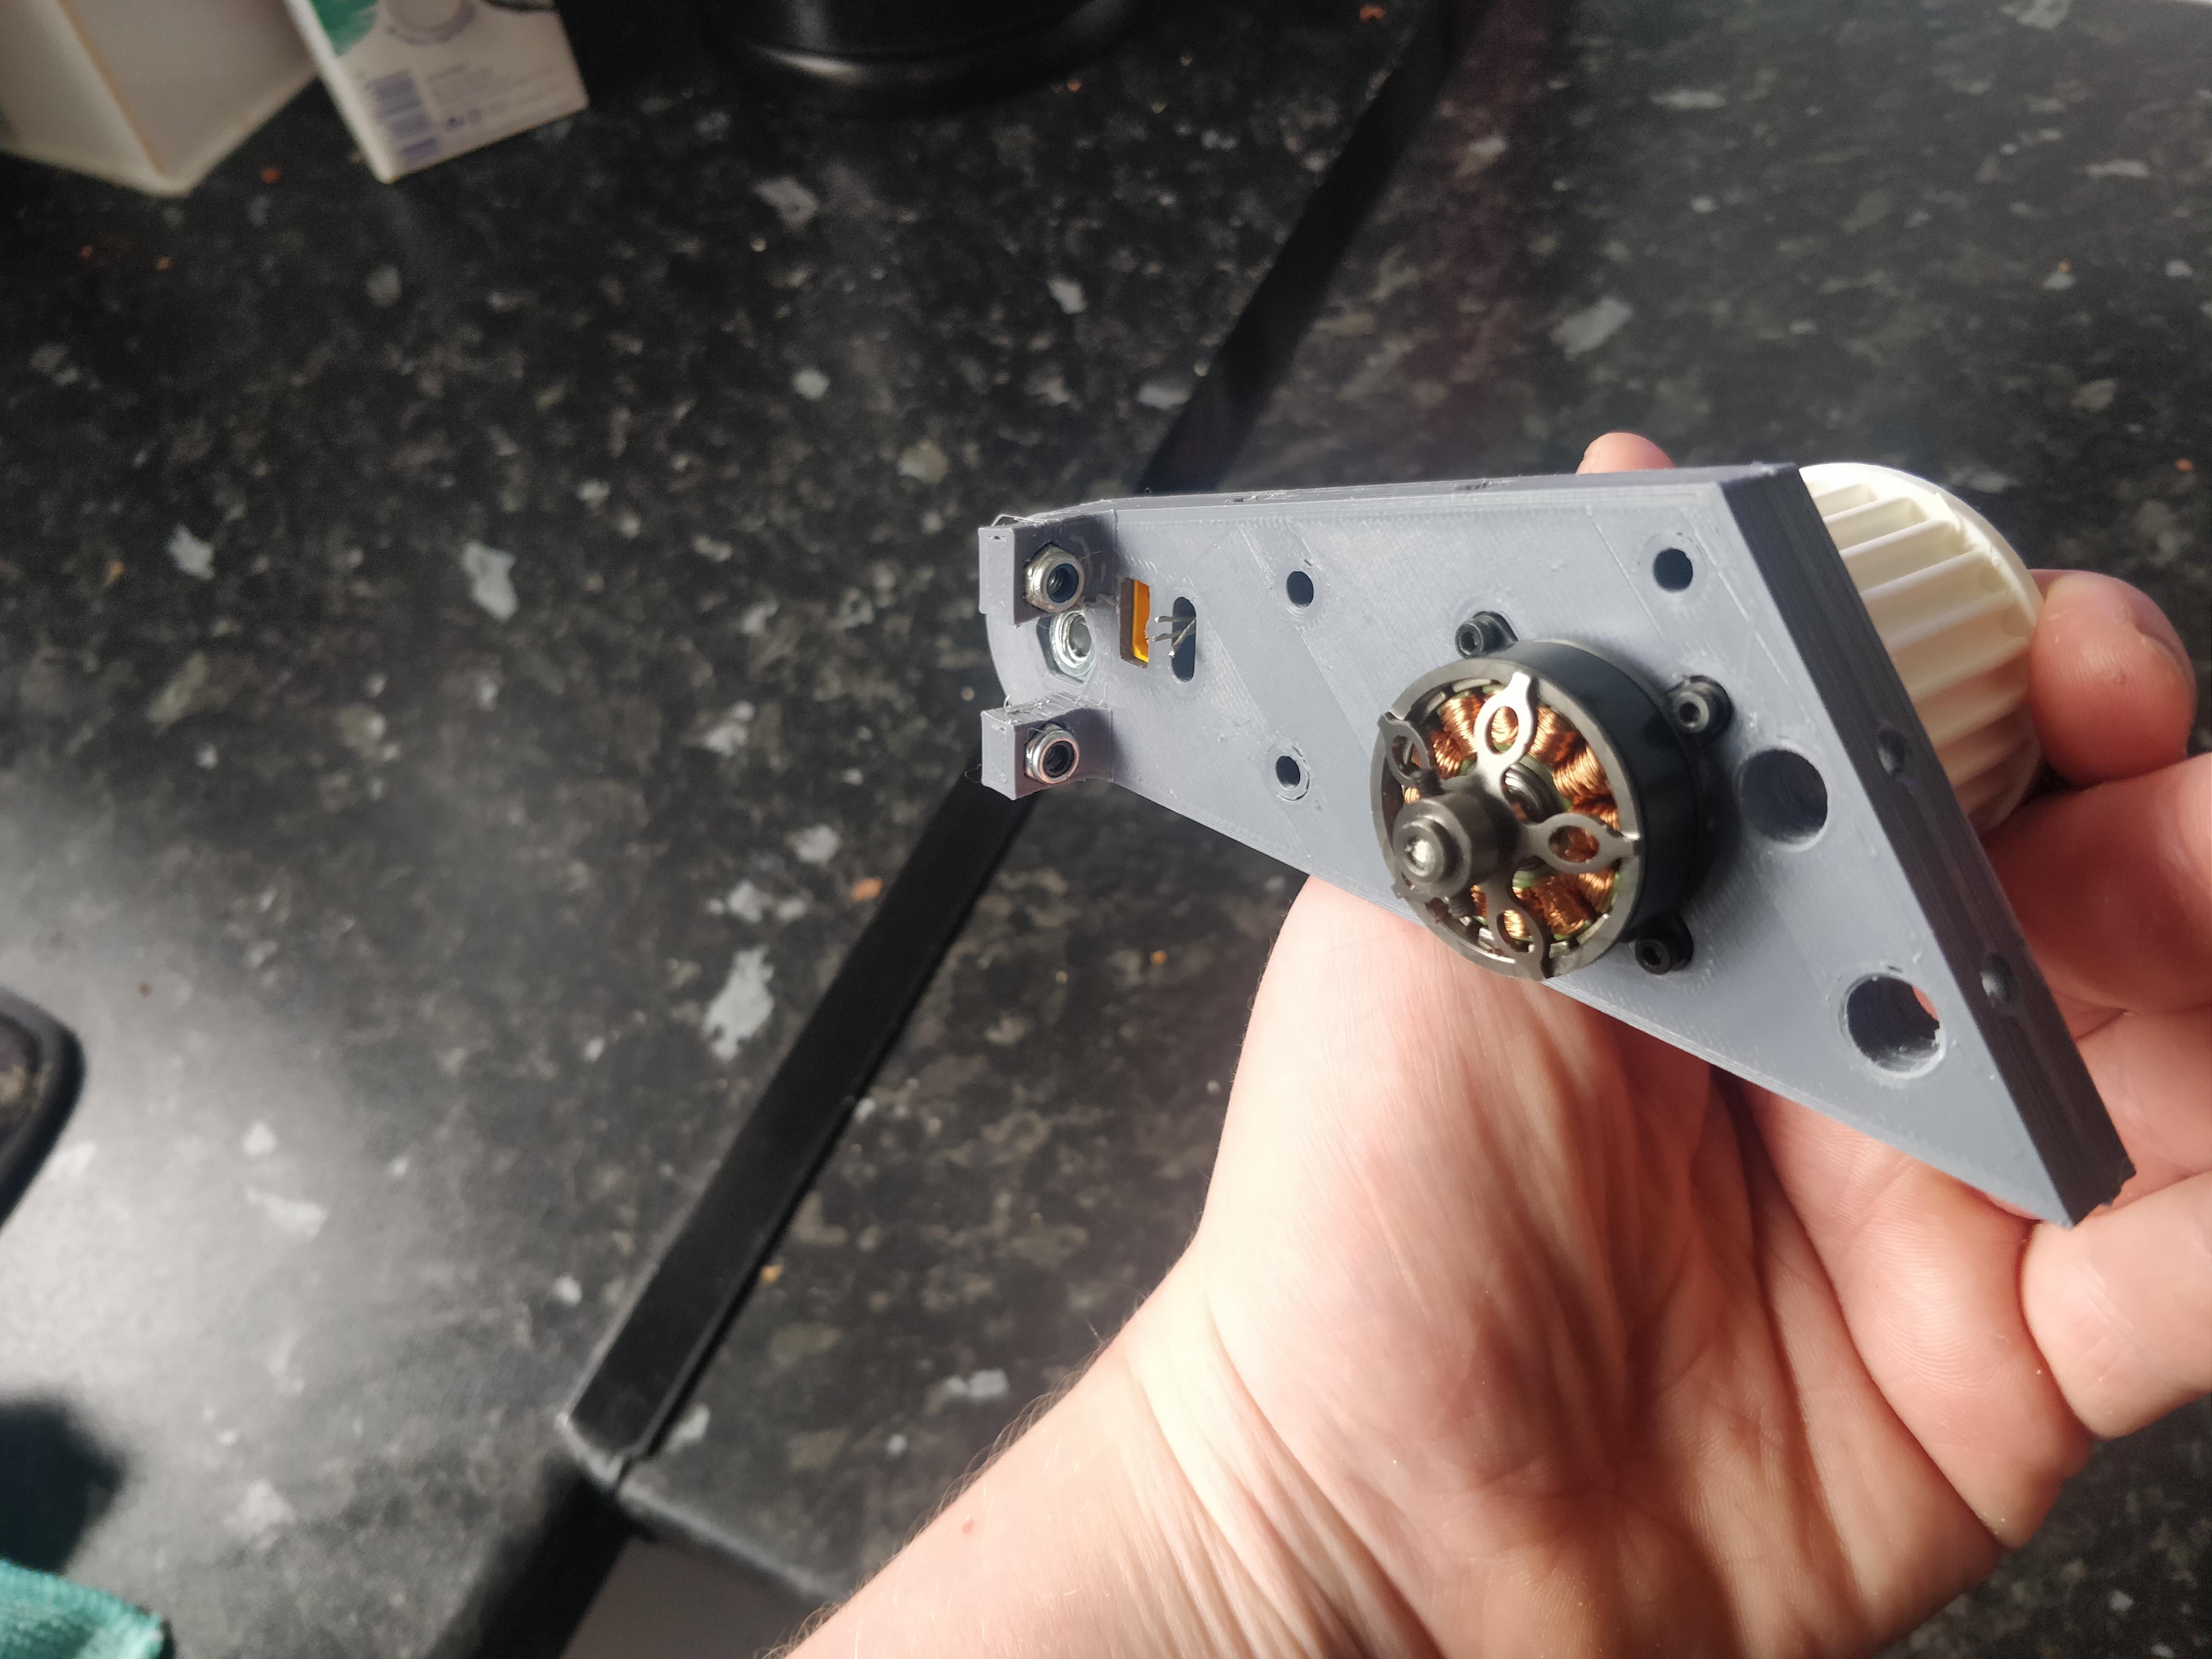
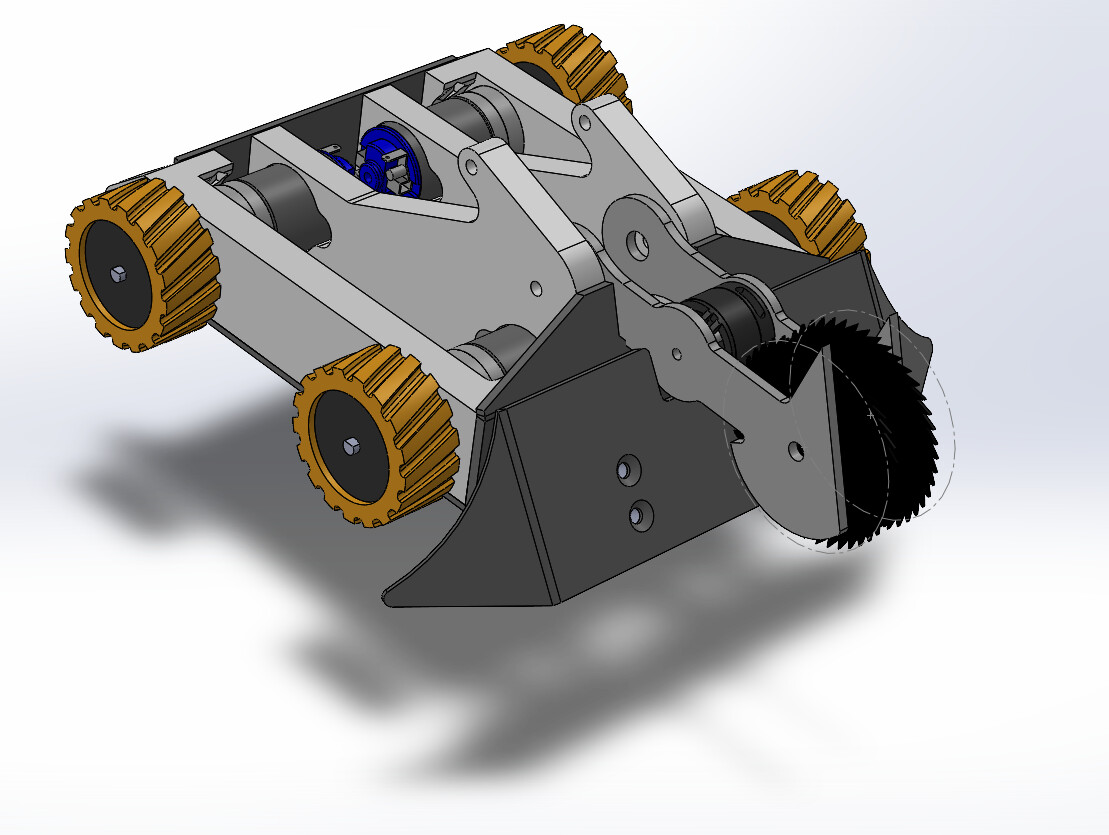
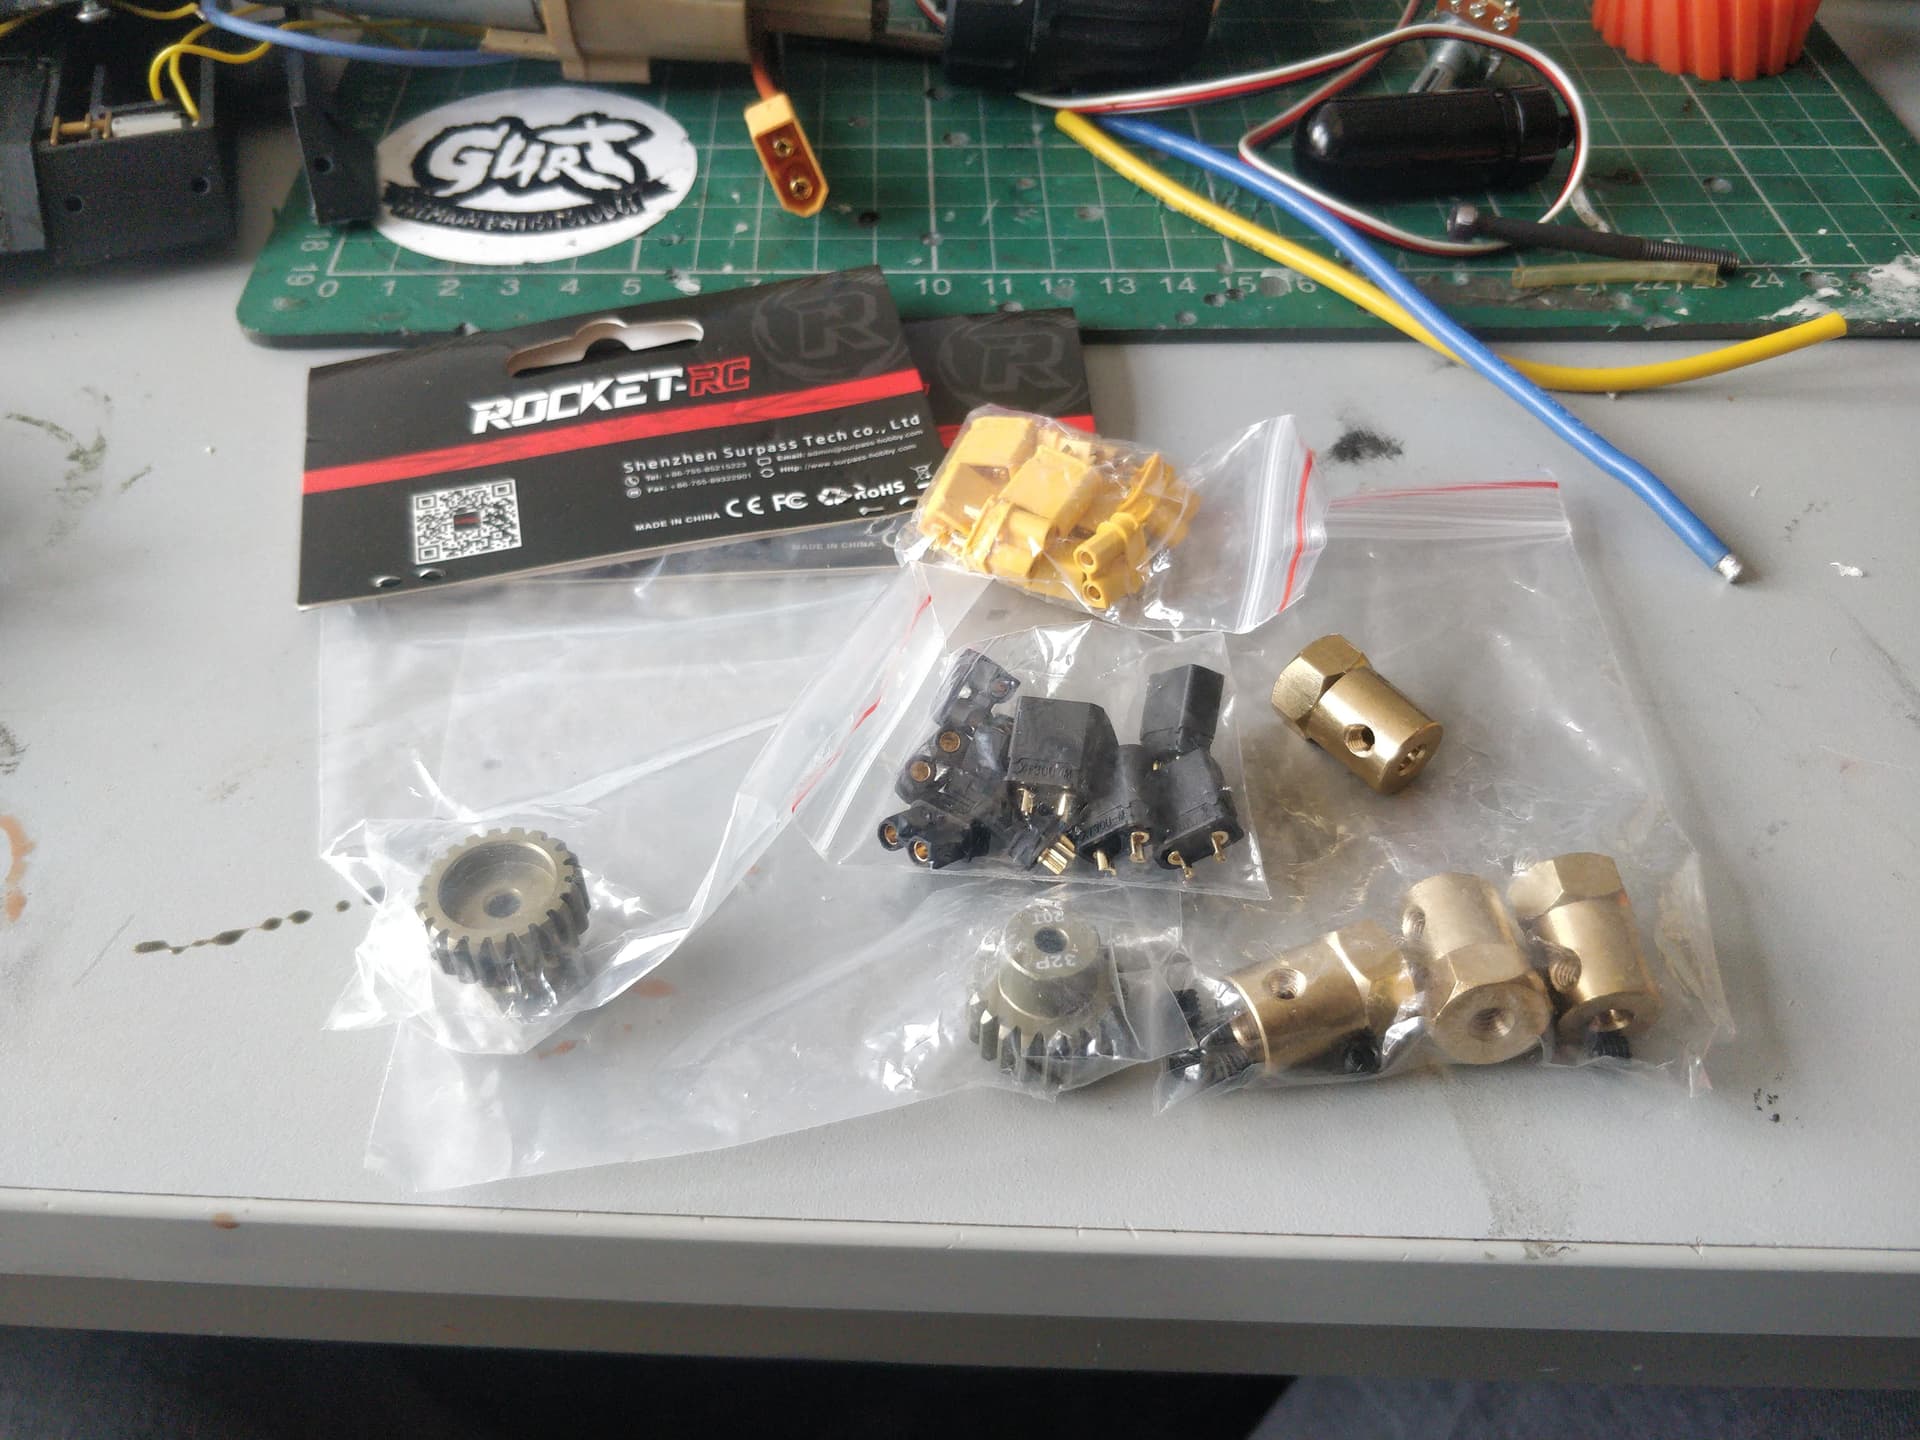
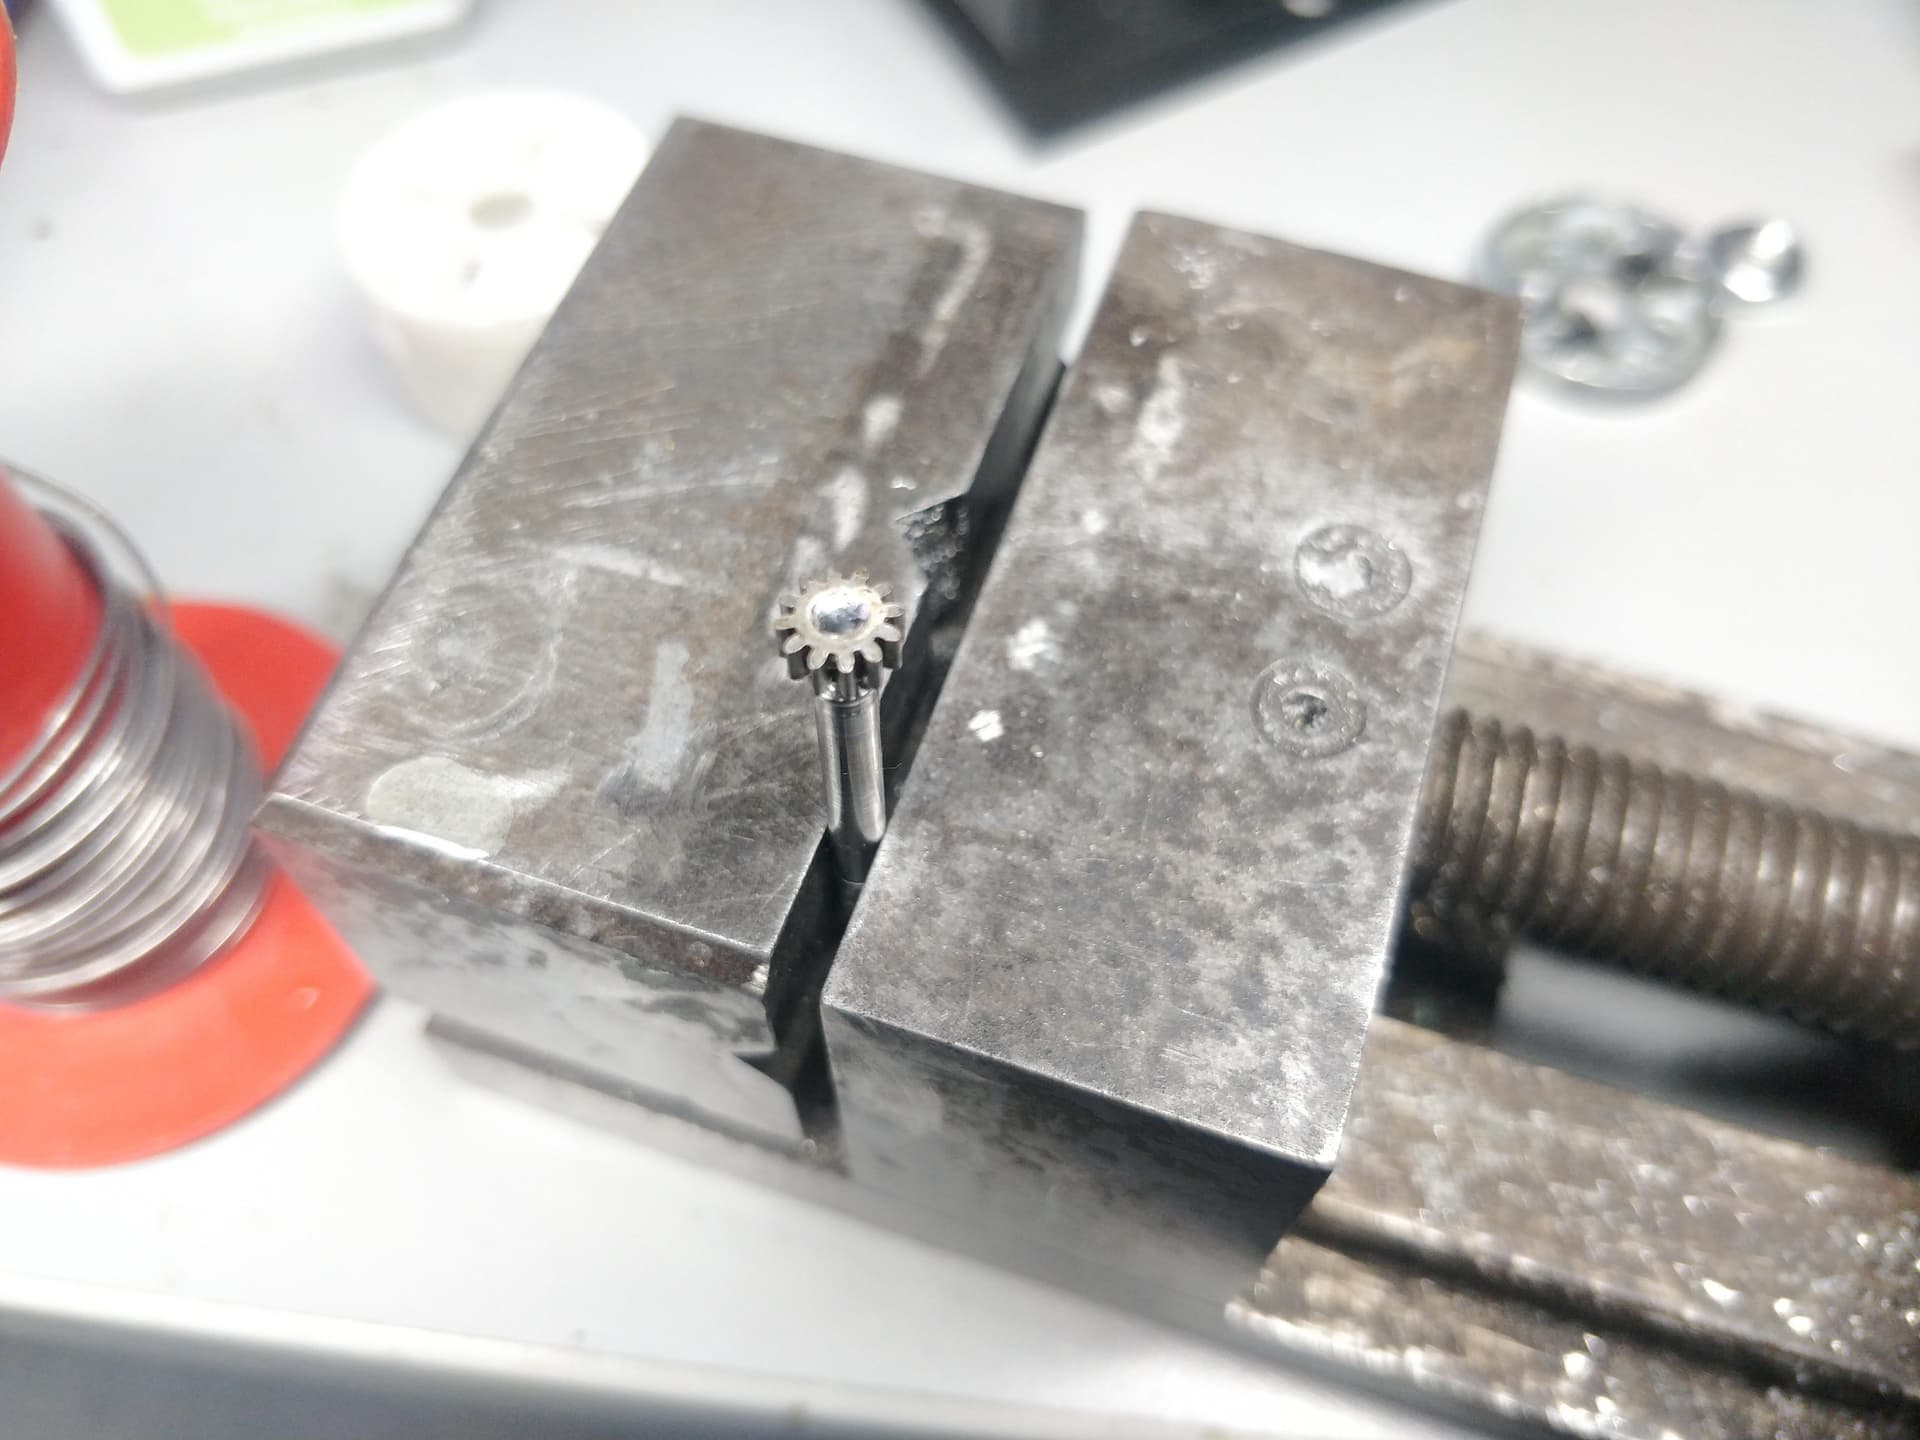
The arm was the biggest point of contention. Firstly I was worried about the motor for a couple reasons. Anyone who has dabbled in the fickle business of DIY brushless + gearbox knows that pinion slip can be an issue (as well as an embarrassing medical complaint) As this motor was going to have an even harder and more brutal life than normal with the blunt stops and direction changes I elected to go belt and braces and have a go at silver soldering the pinion on. It worked really pretty well and I got a nice clean joint - only inhaling a small cloud of vaporised acid as a by-product.

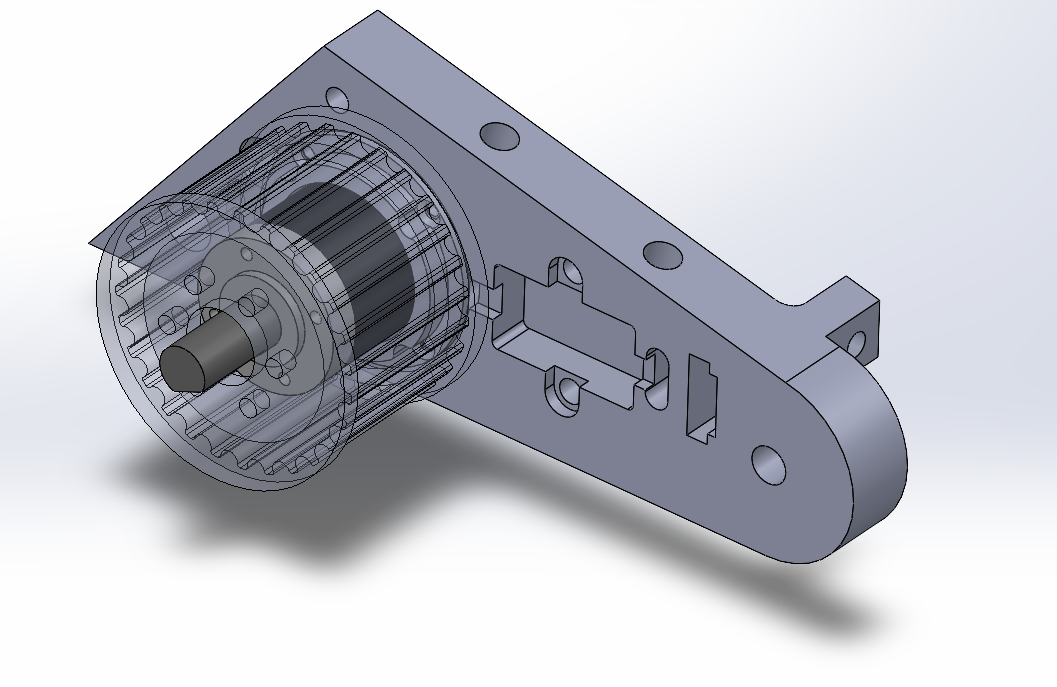
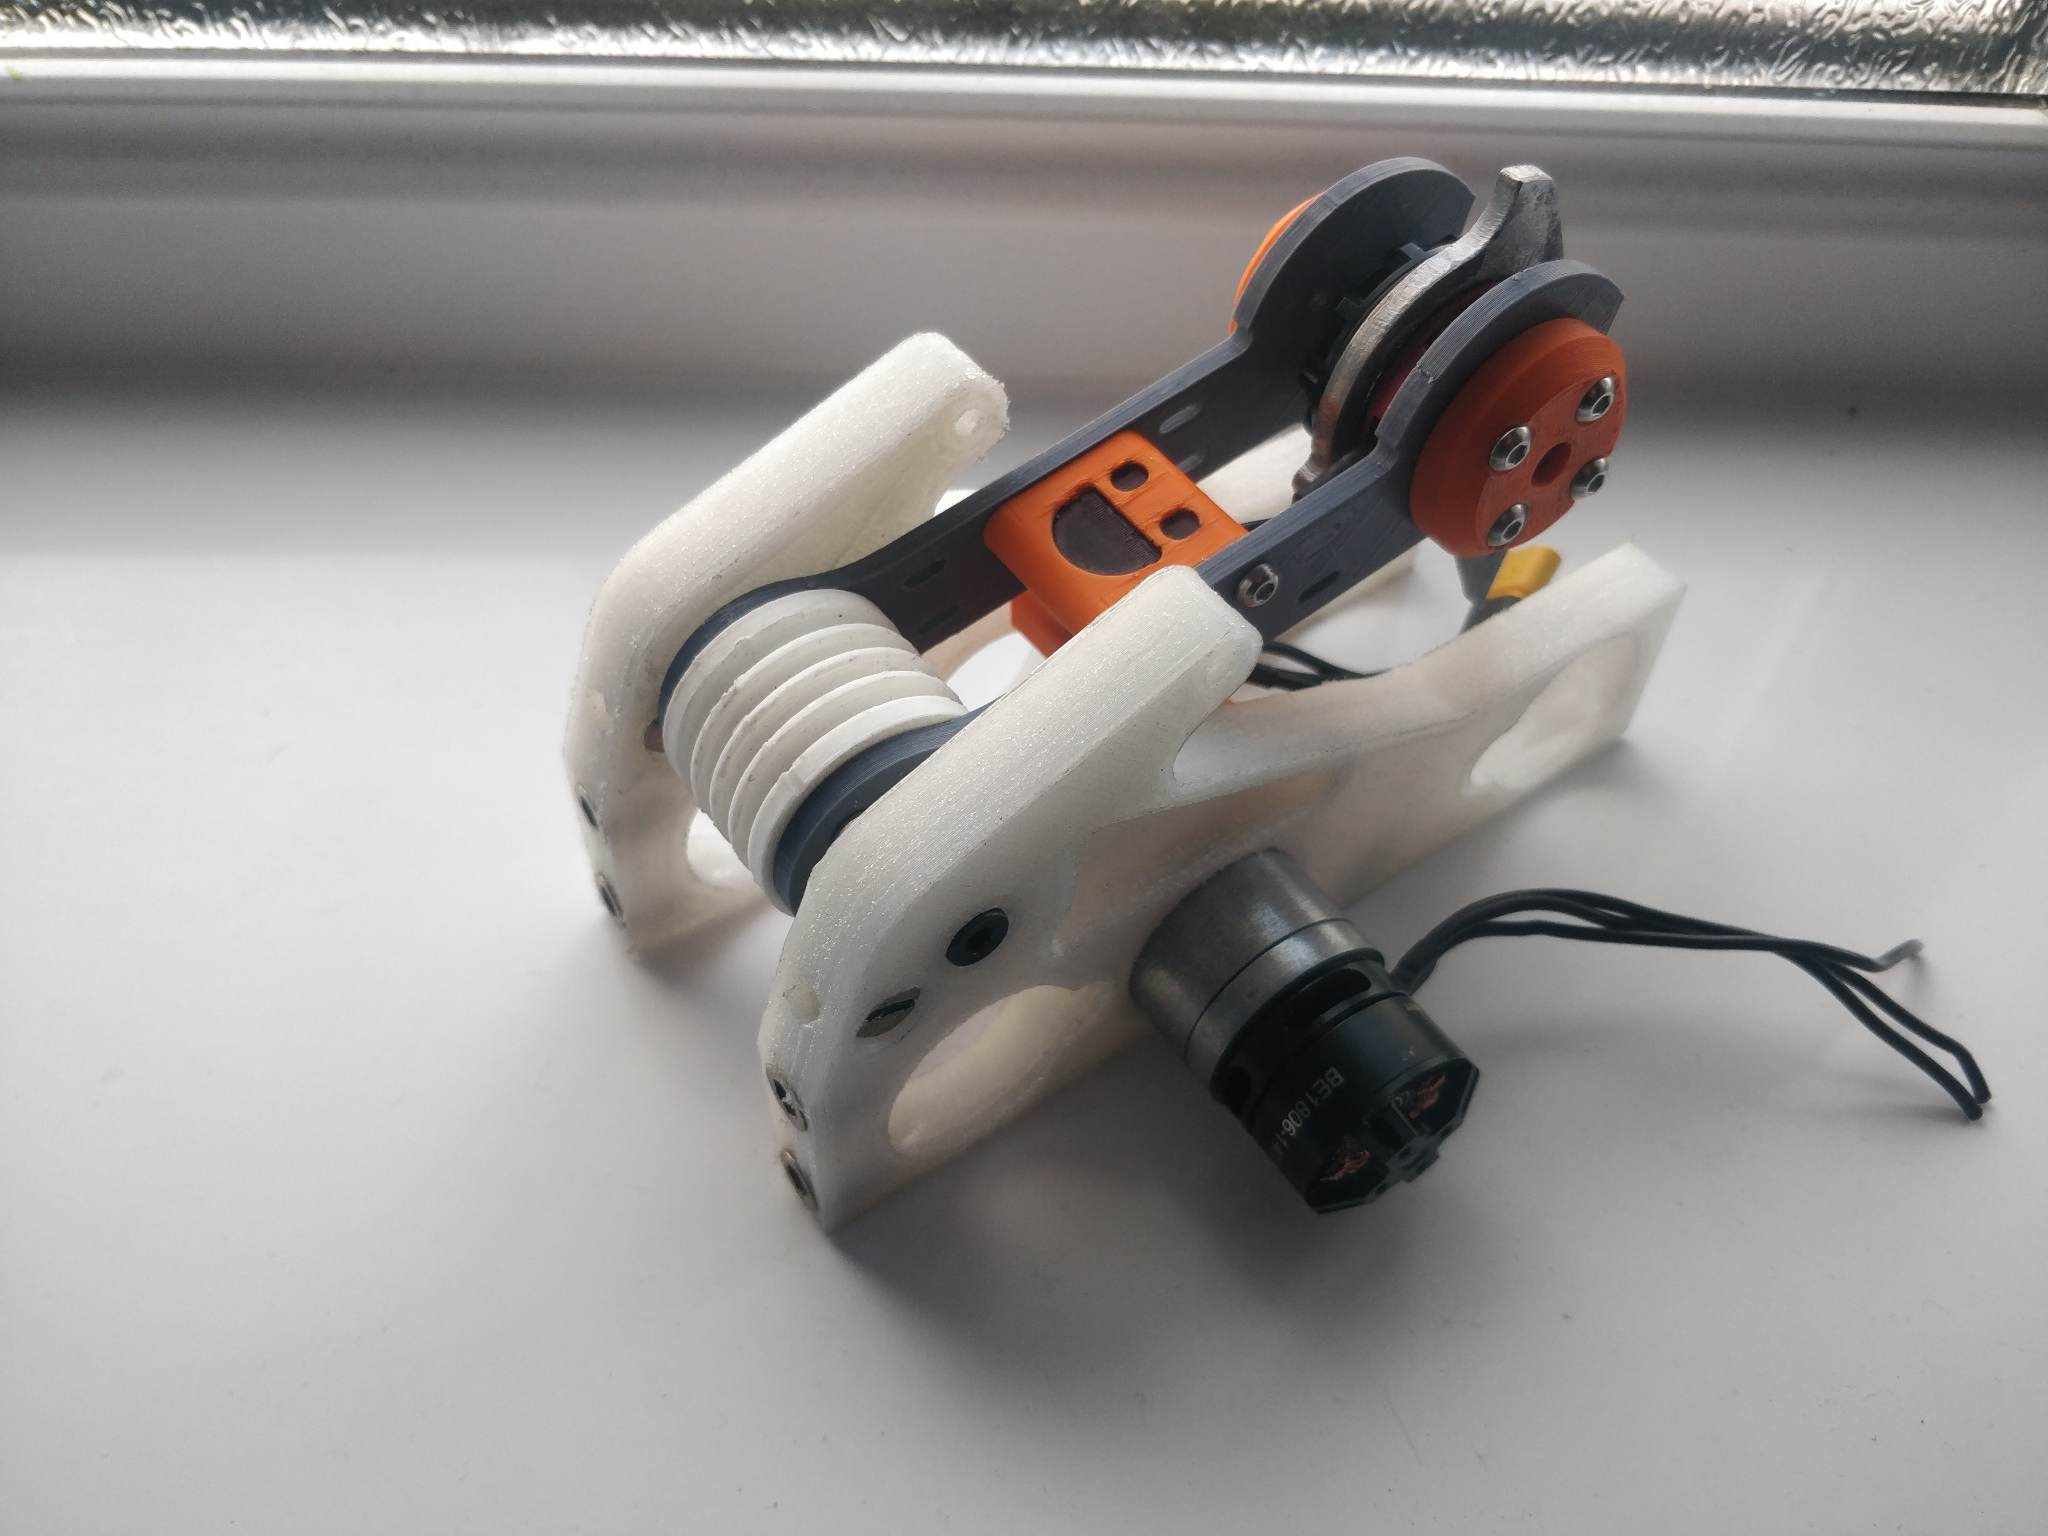
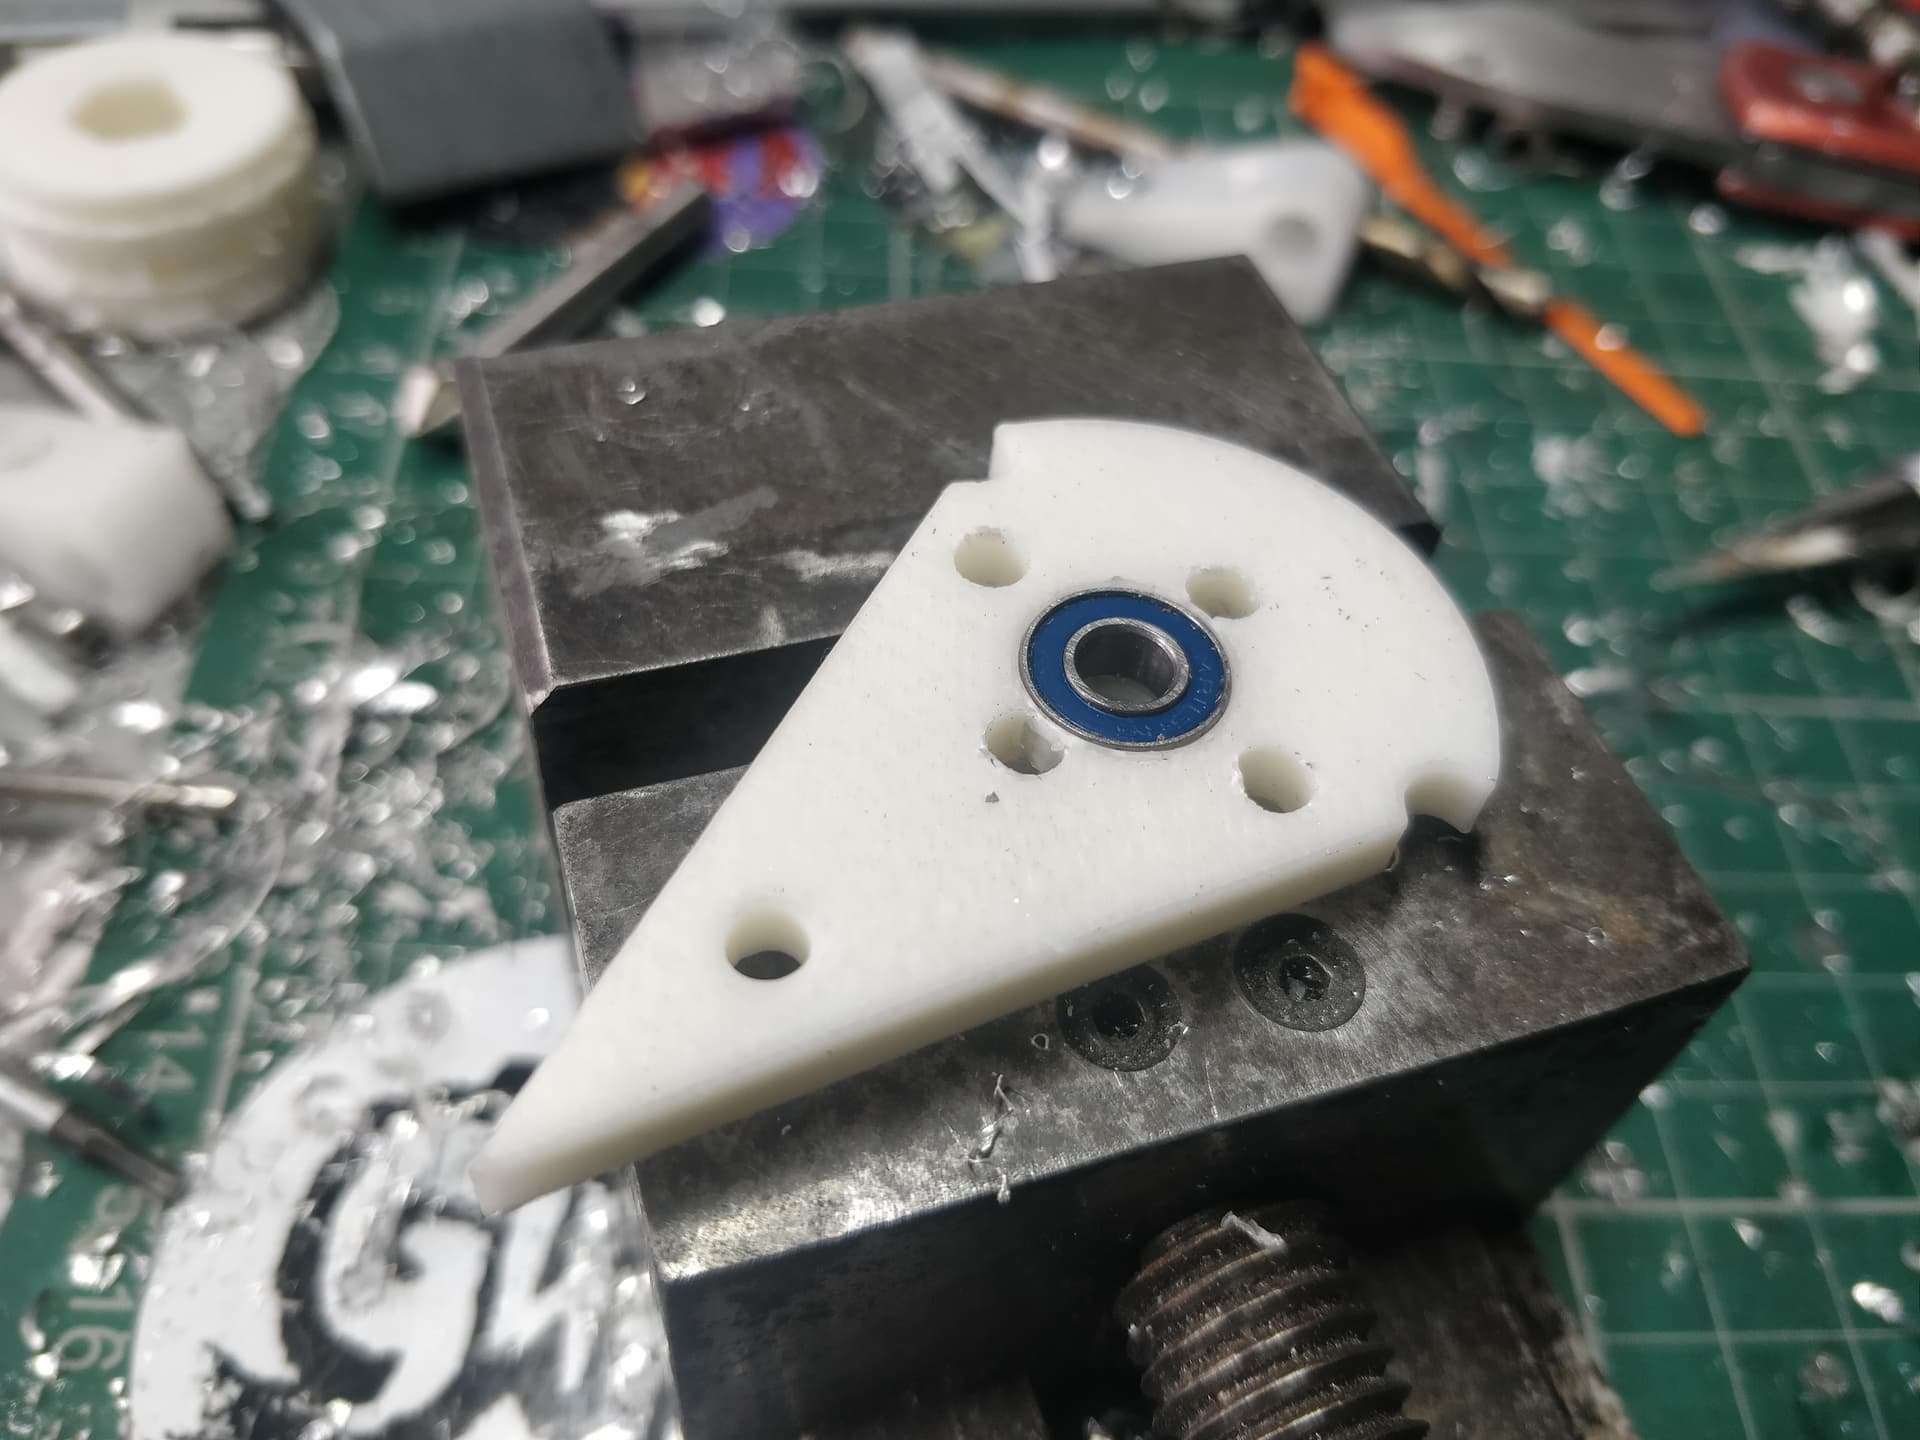
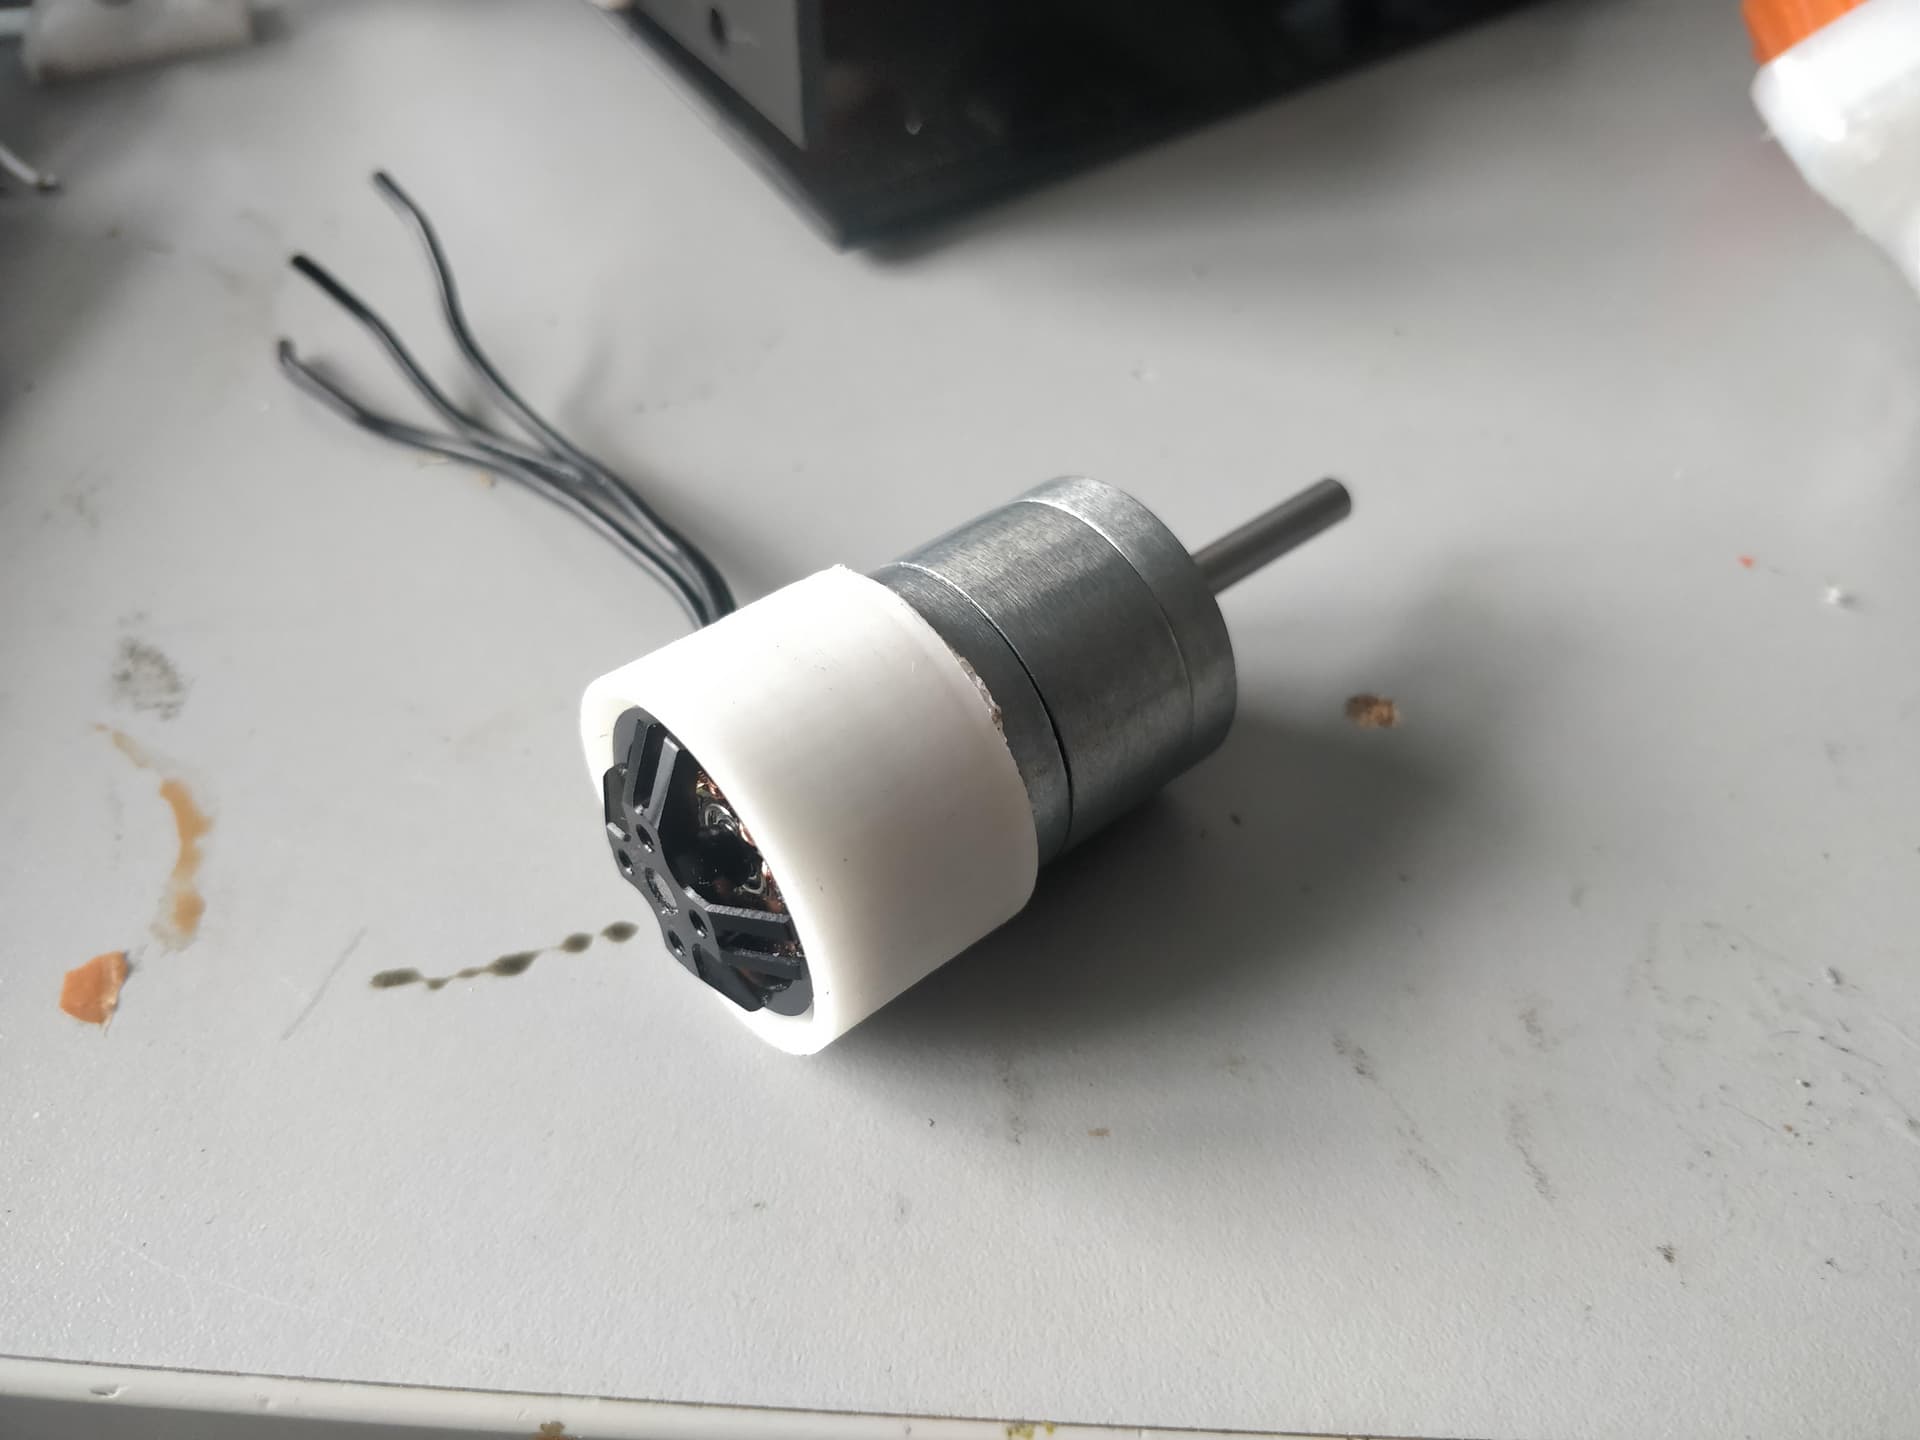
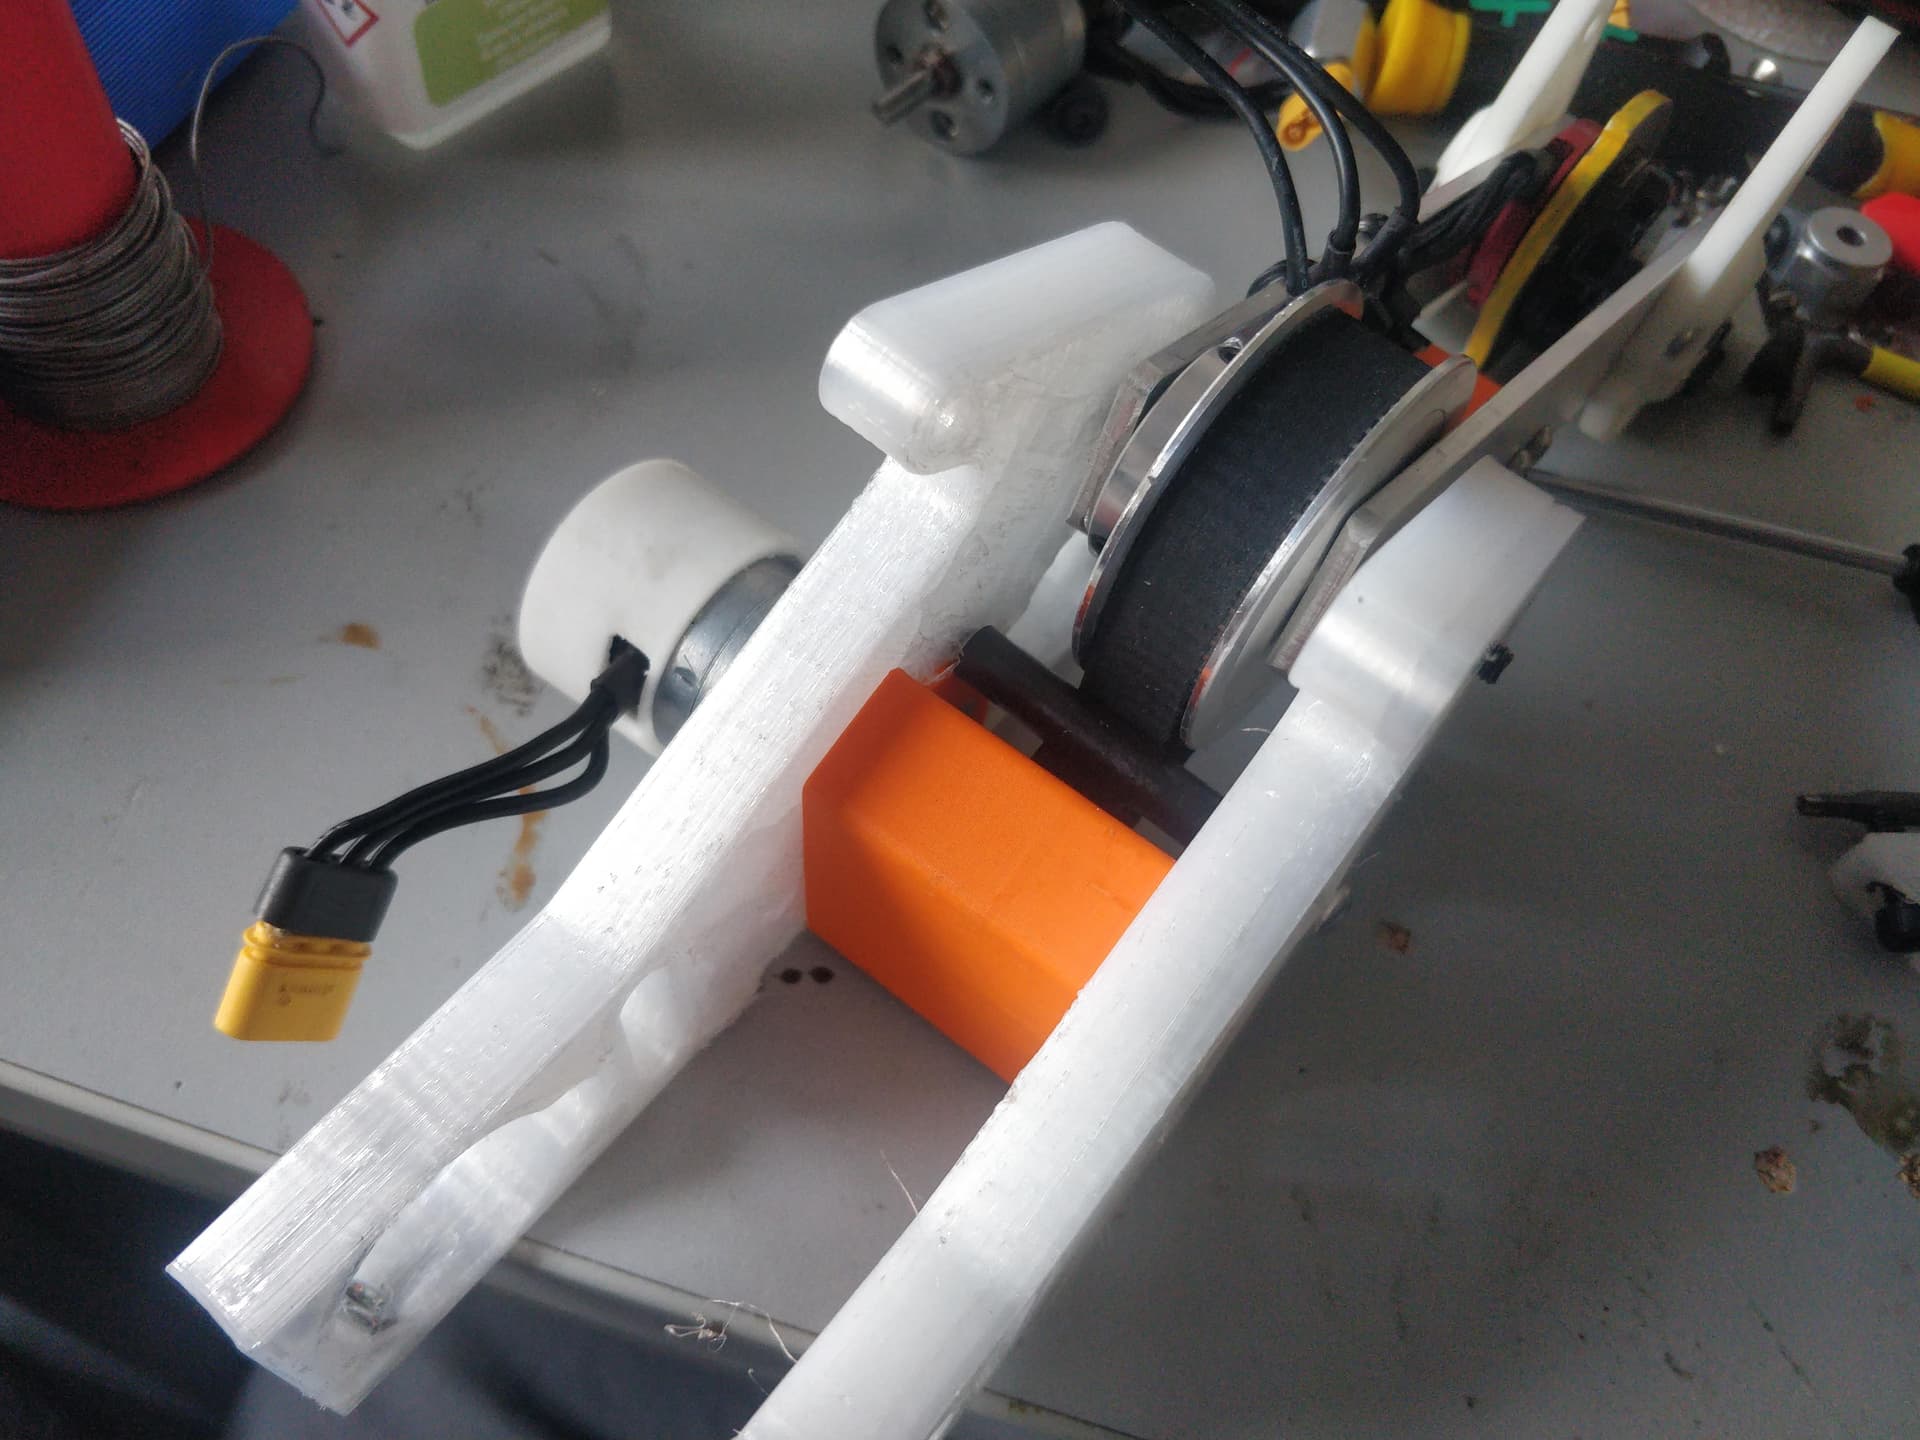
I was also a little worried about wire eating from the rotating back end of the 1806 and wishing to brace it back against the frame to keep it in place. I drew up a quick motor guard and slotted it over the motor while I had it apart to secure the pinion.

You can see how nice and snuggly it sits in the bulkheads. No silicone munching allowed!

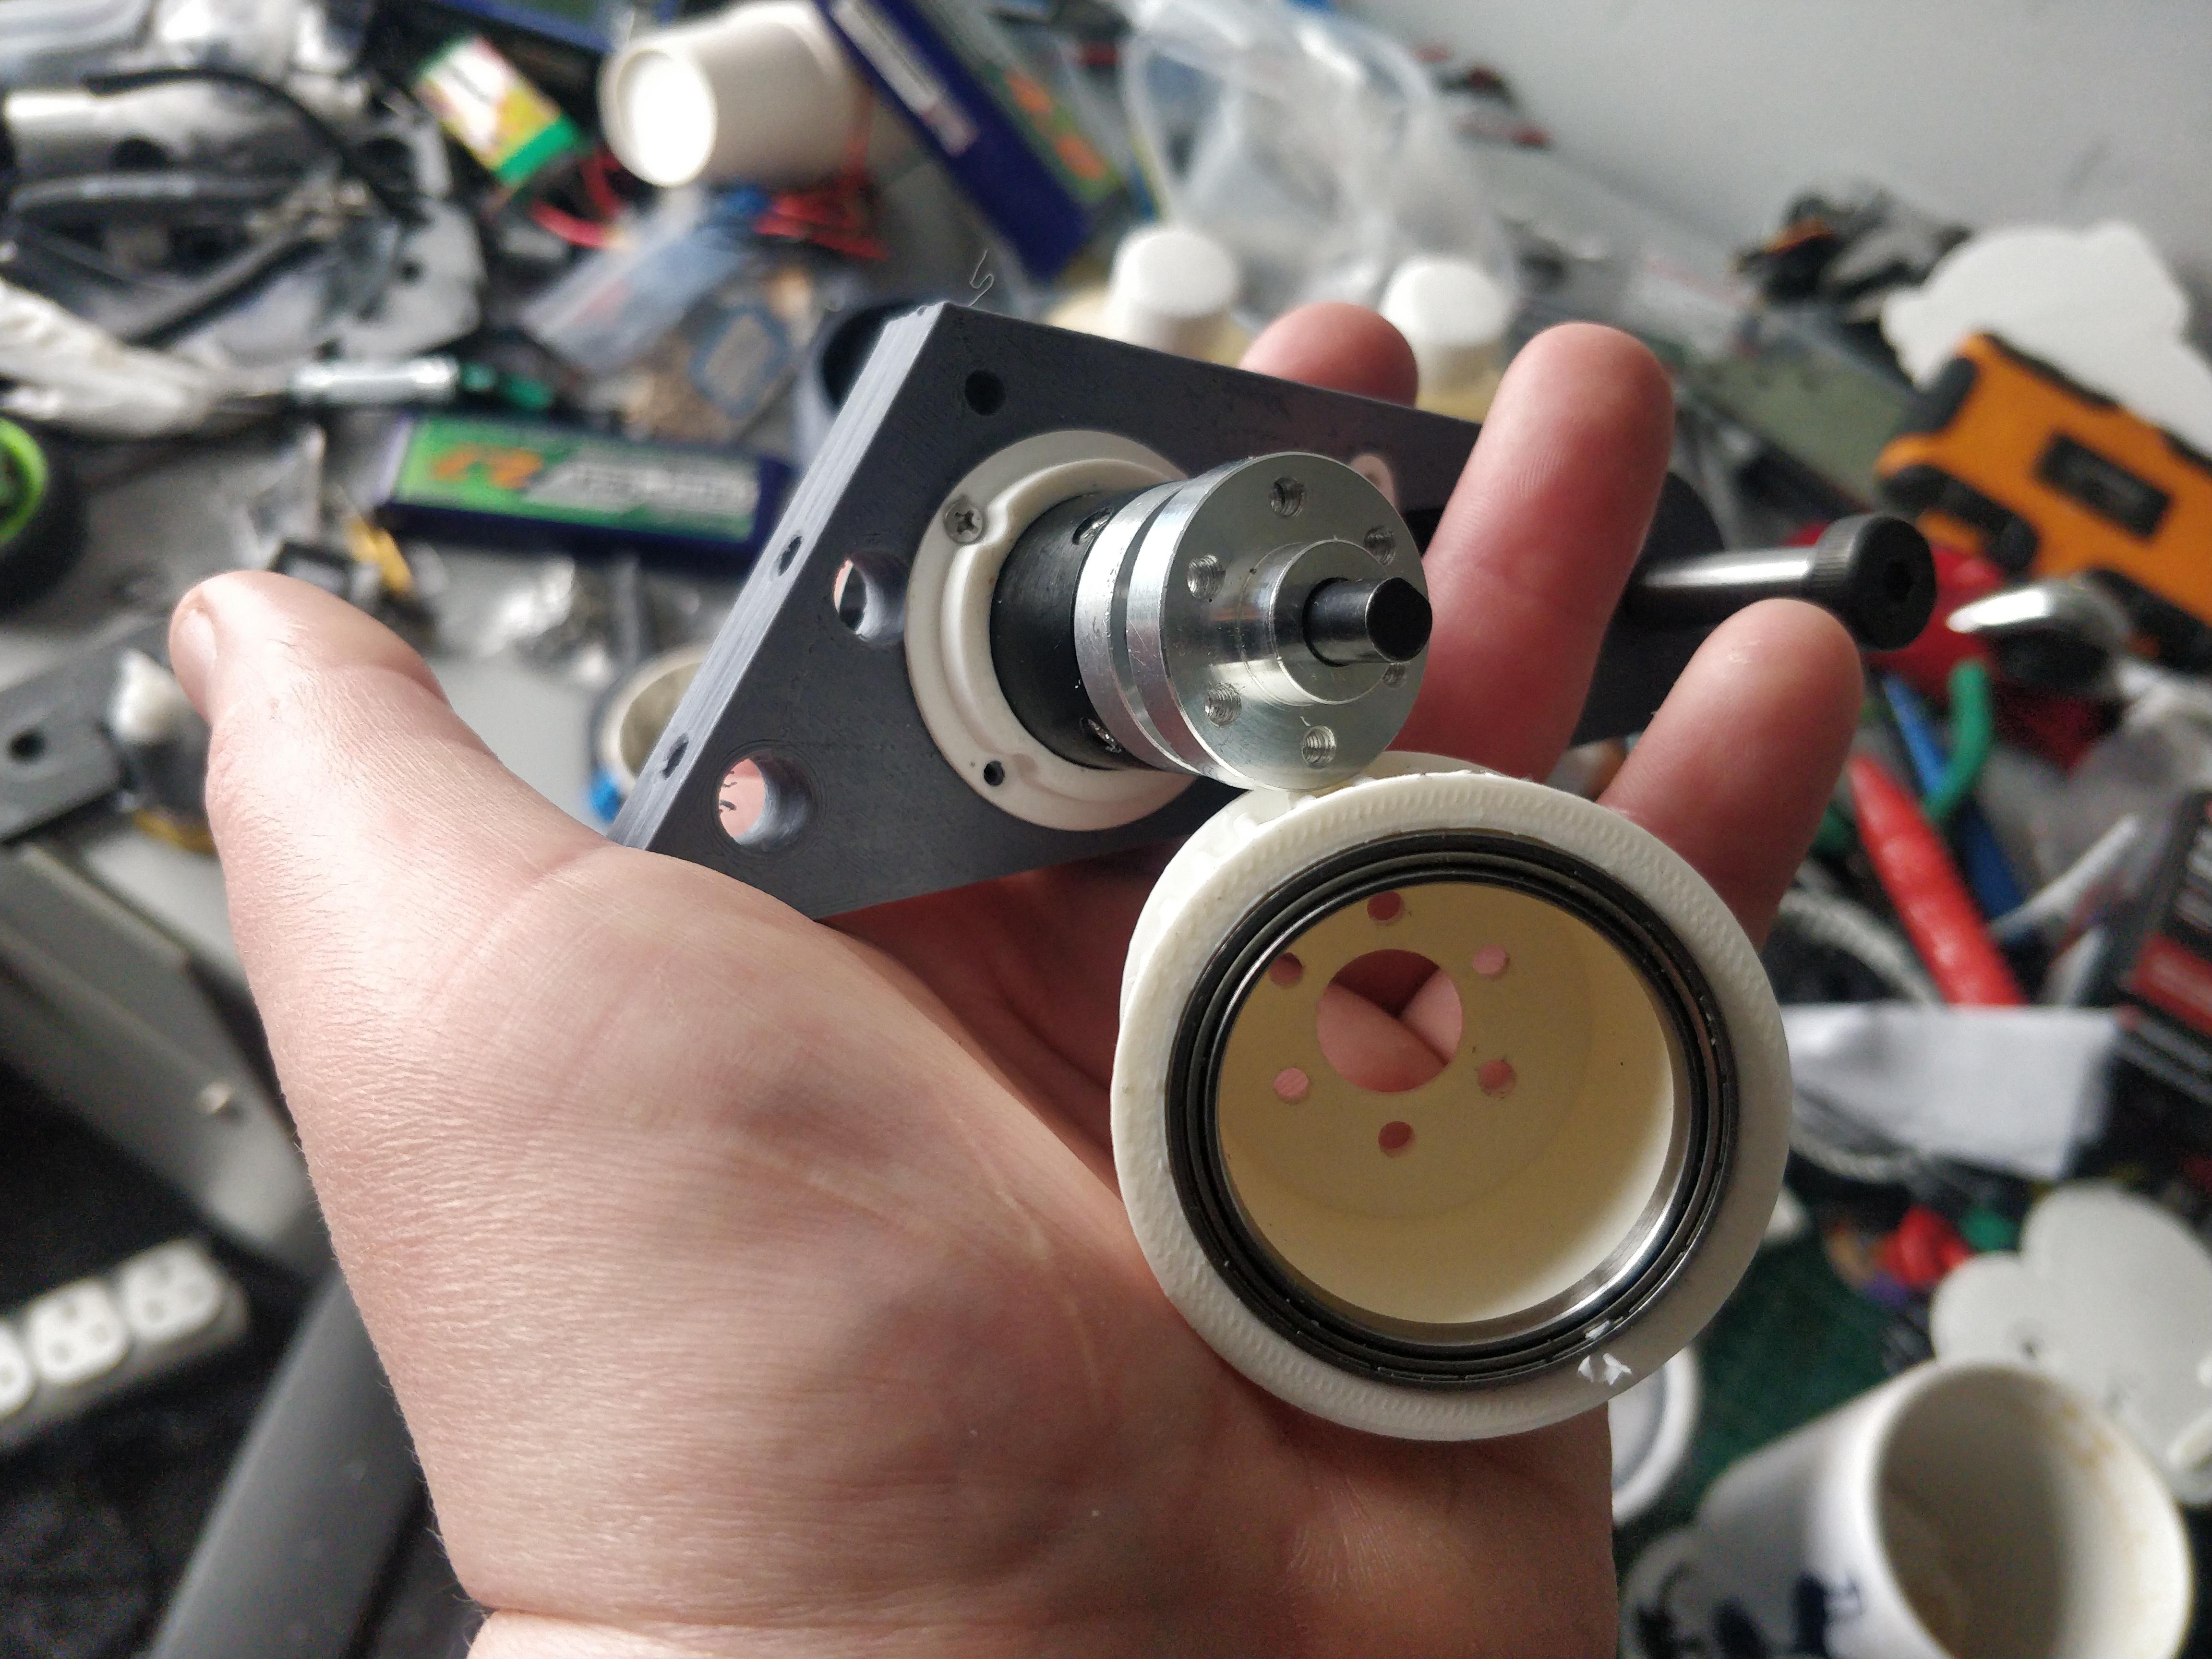
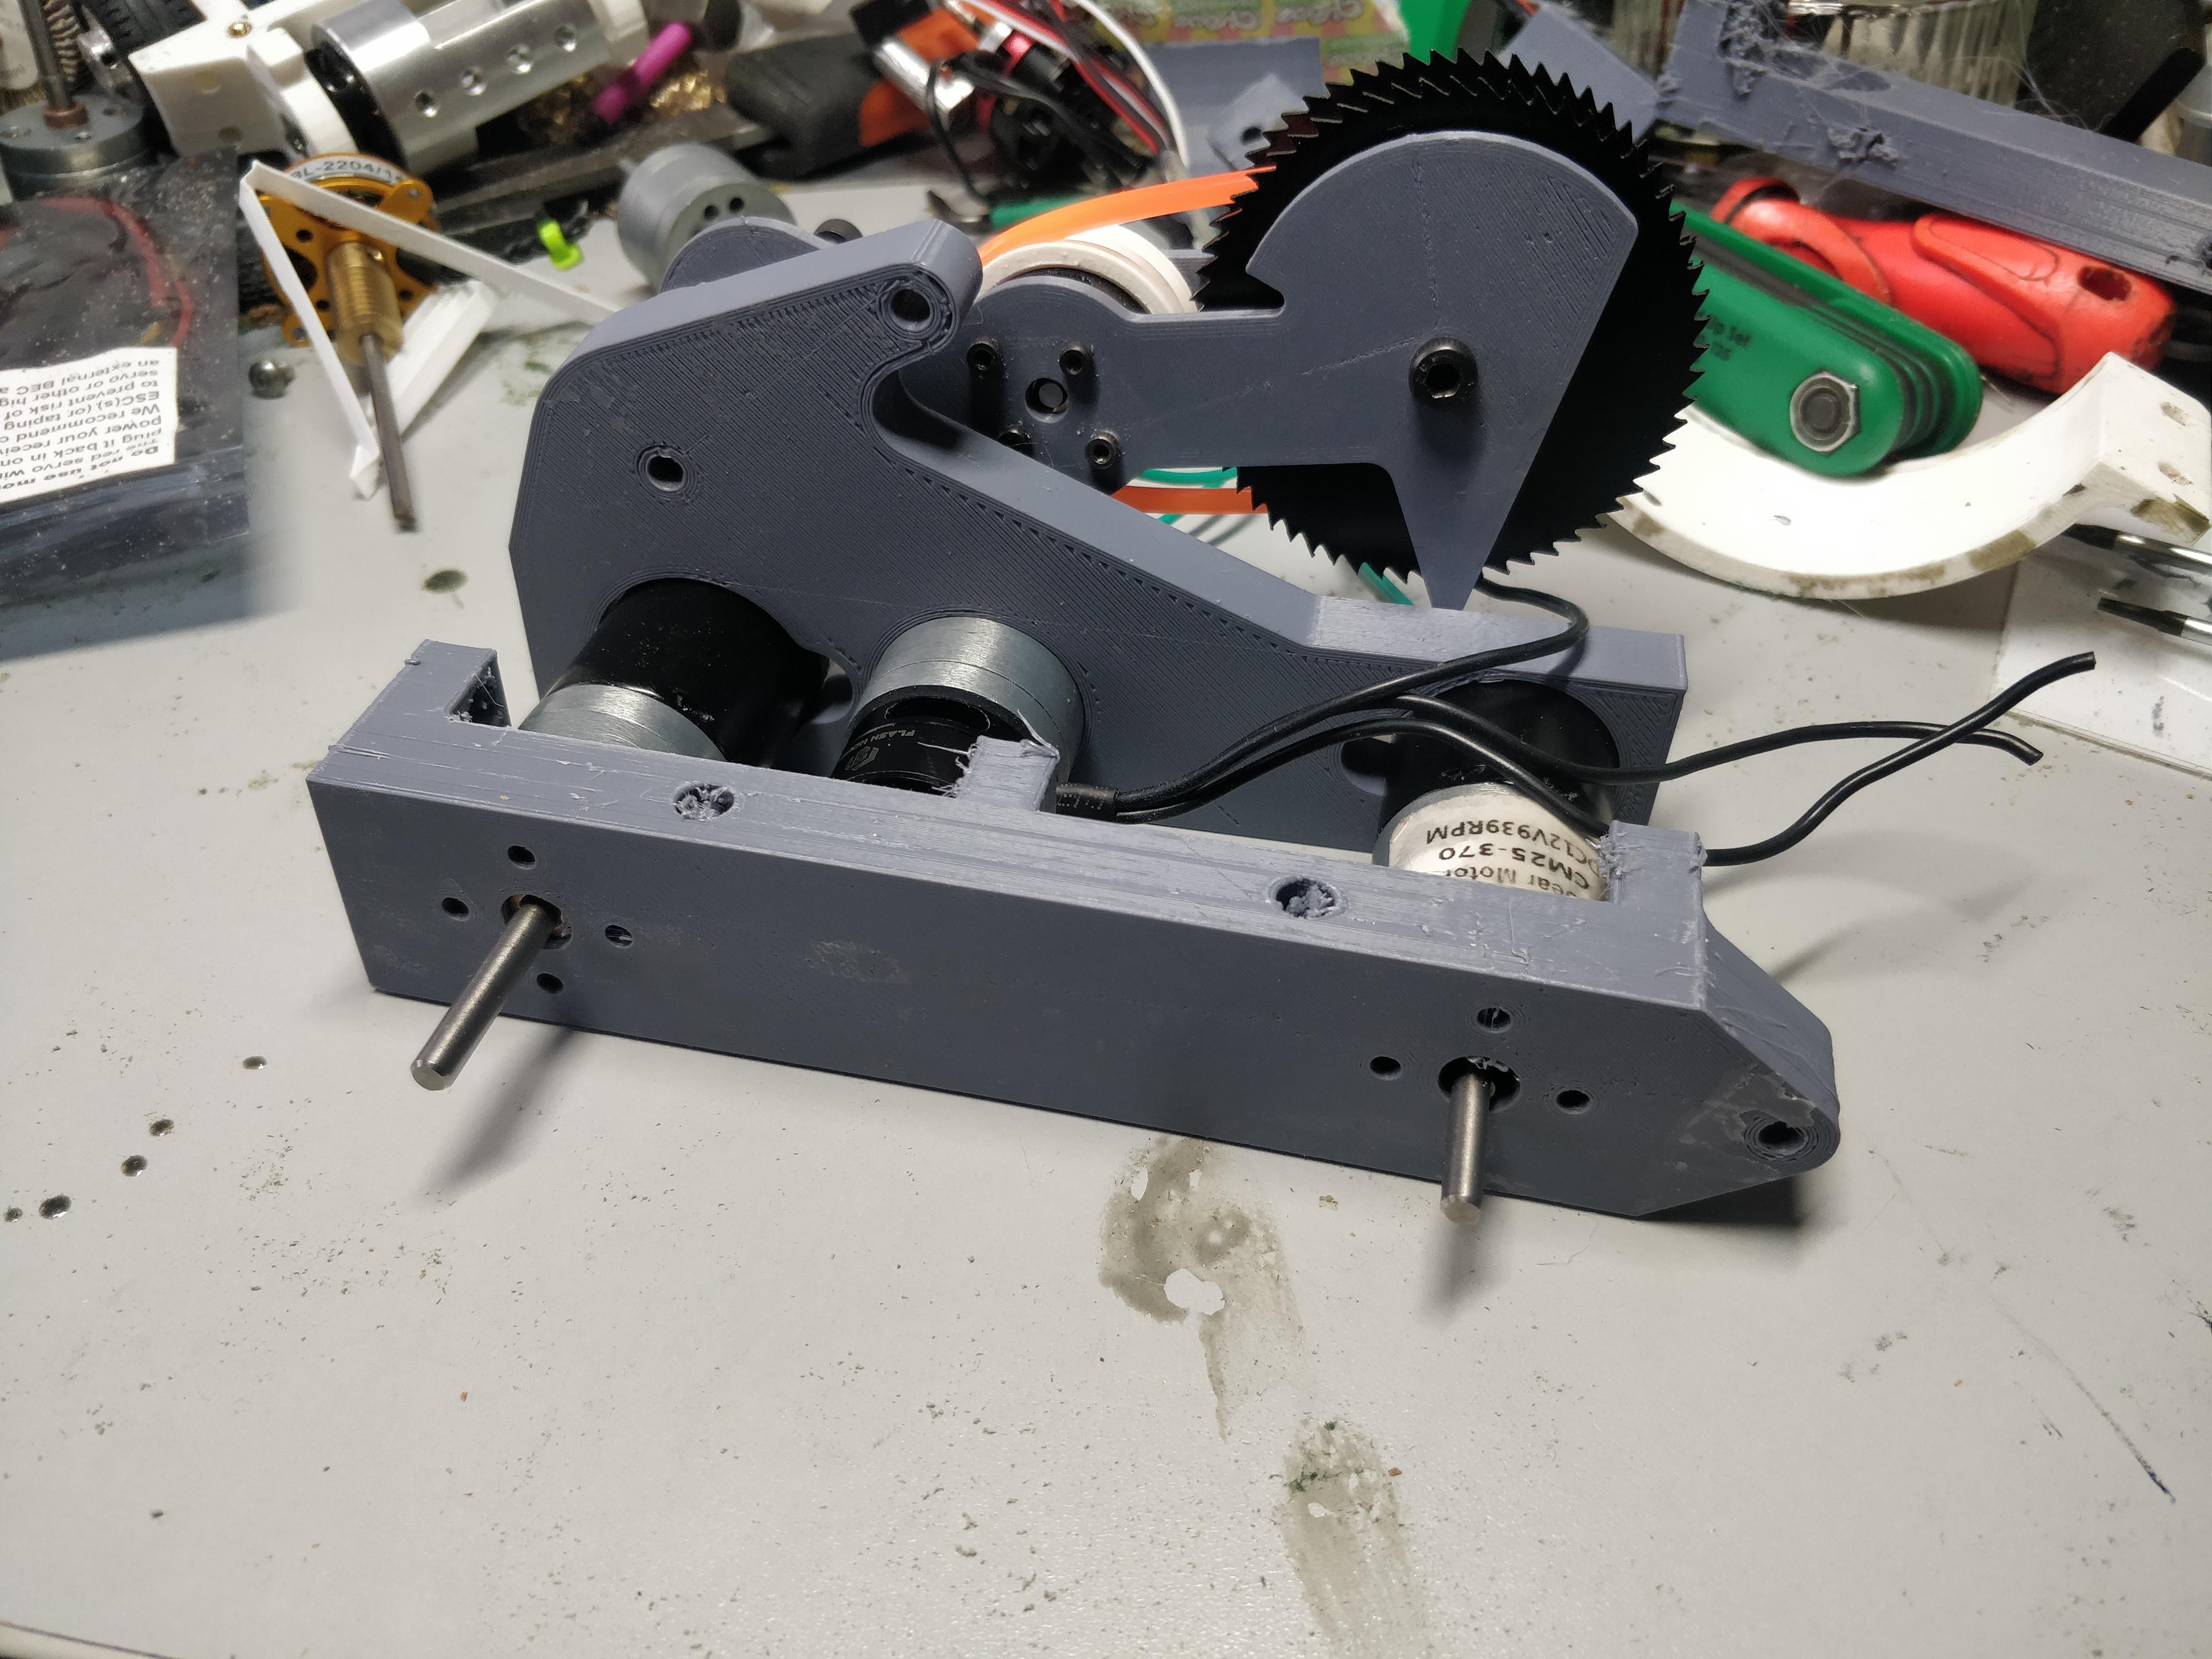
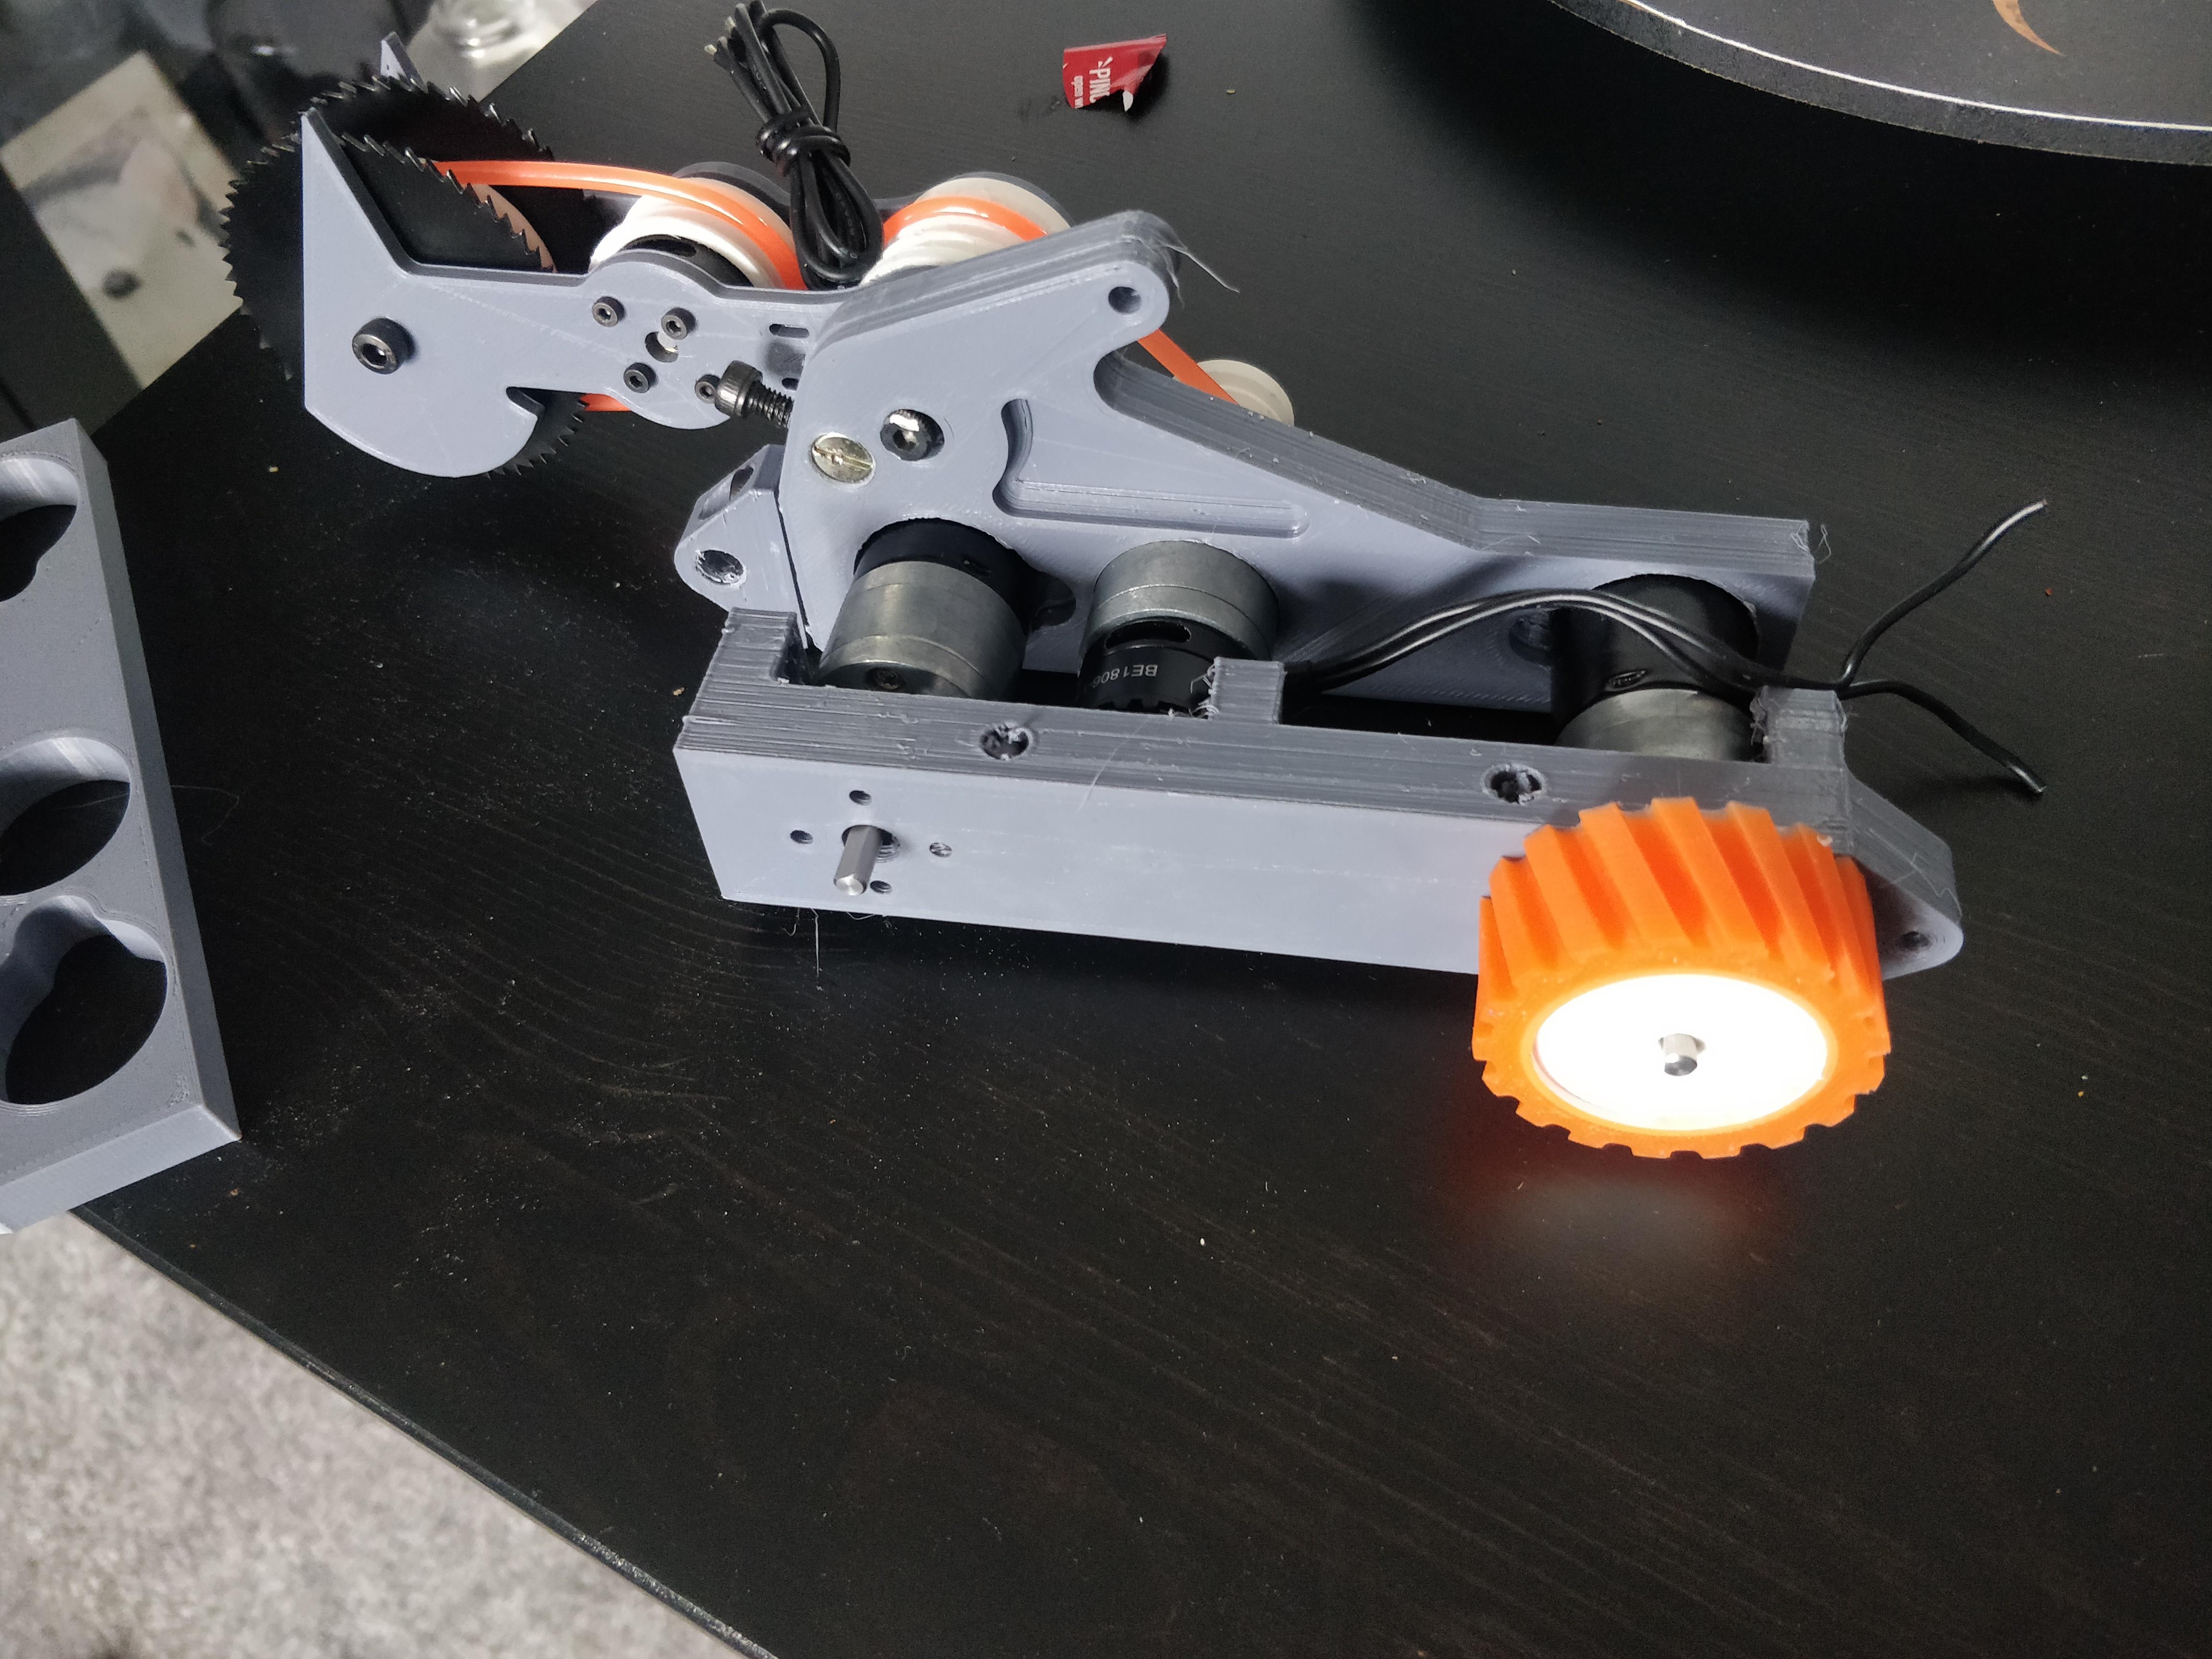
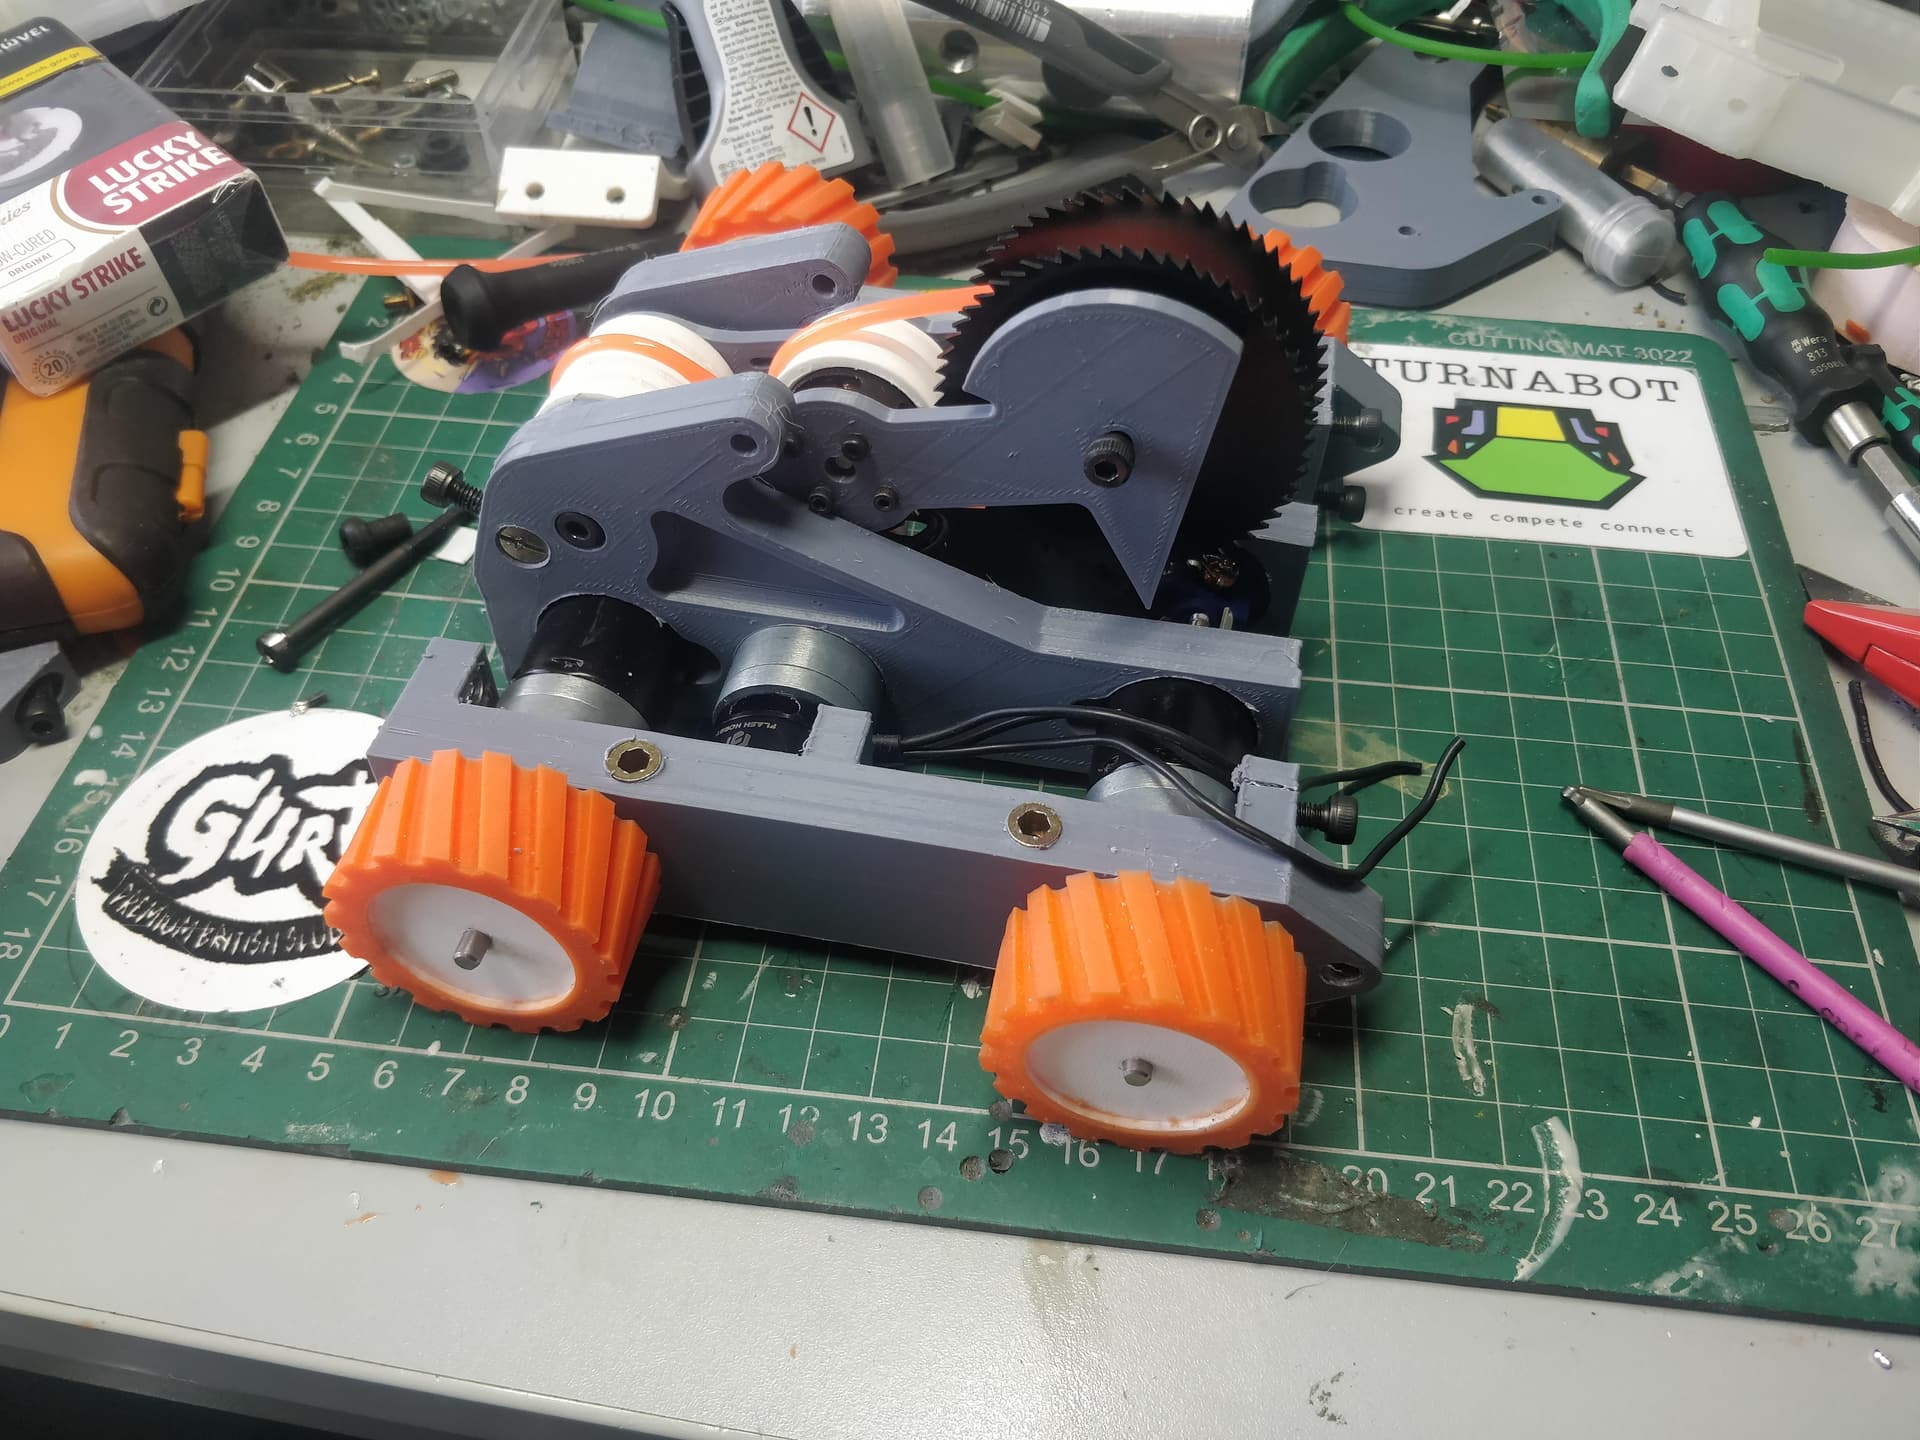
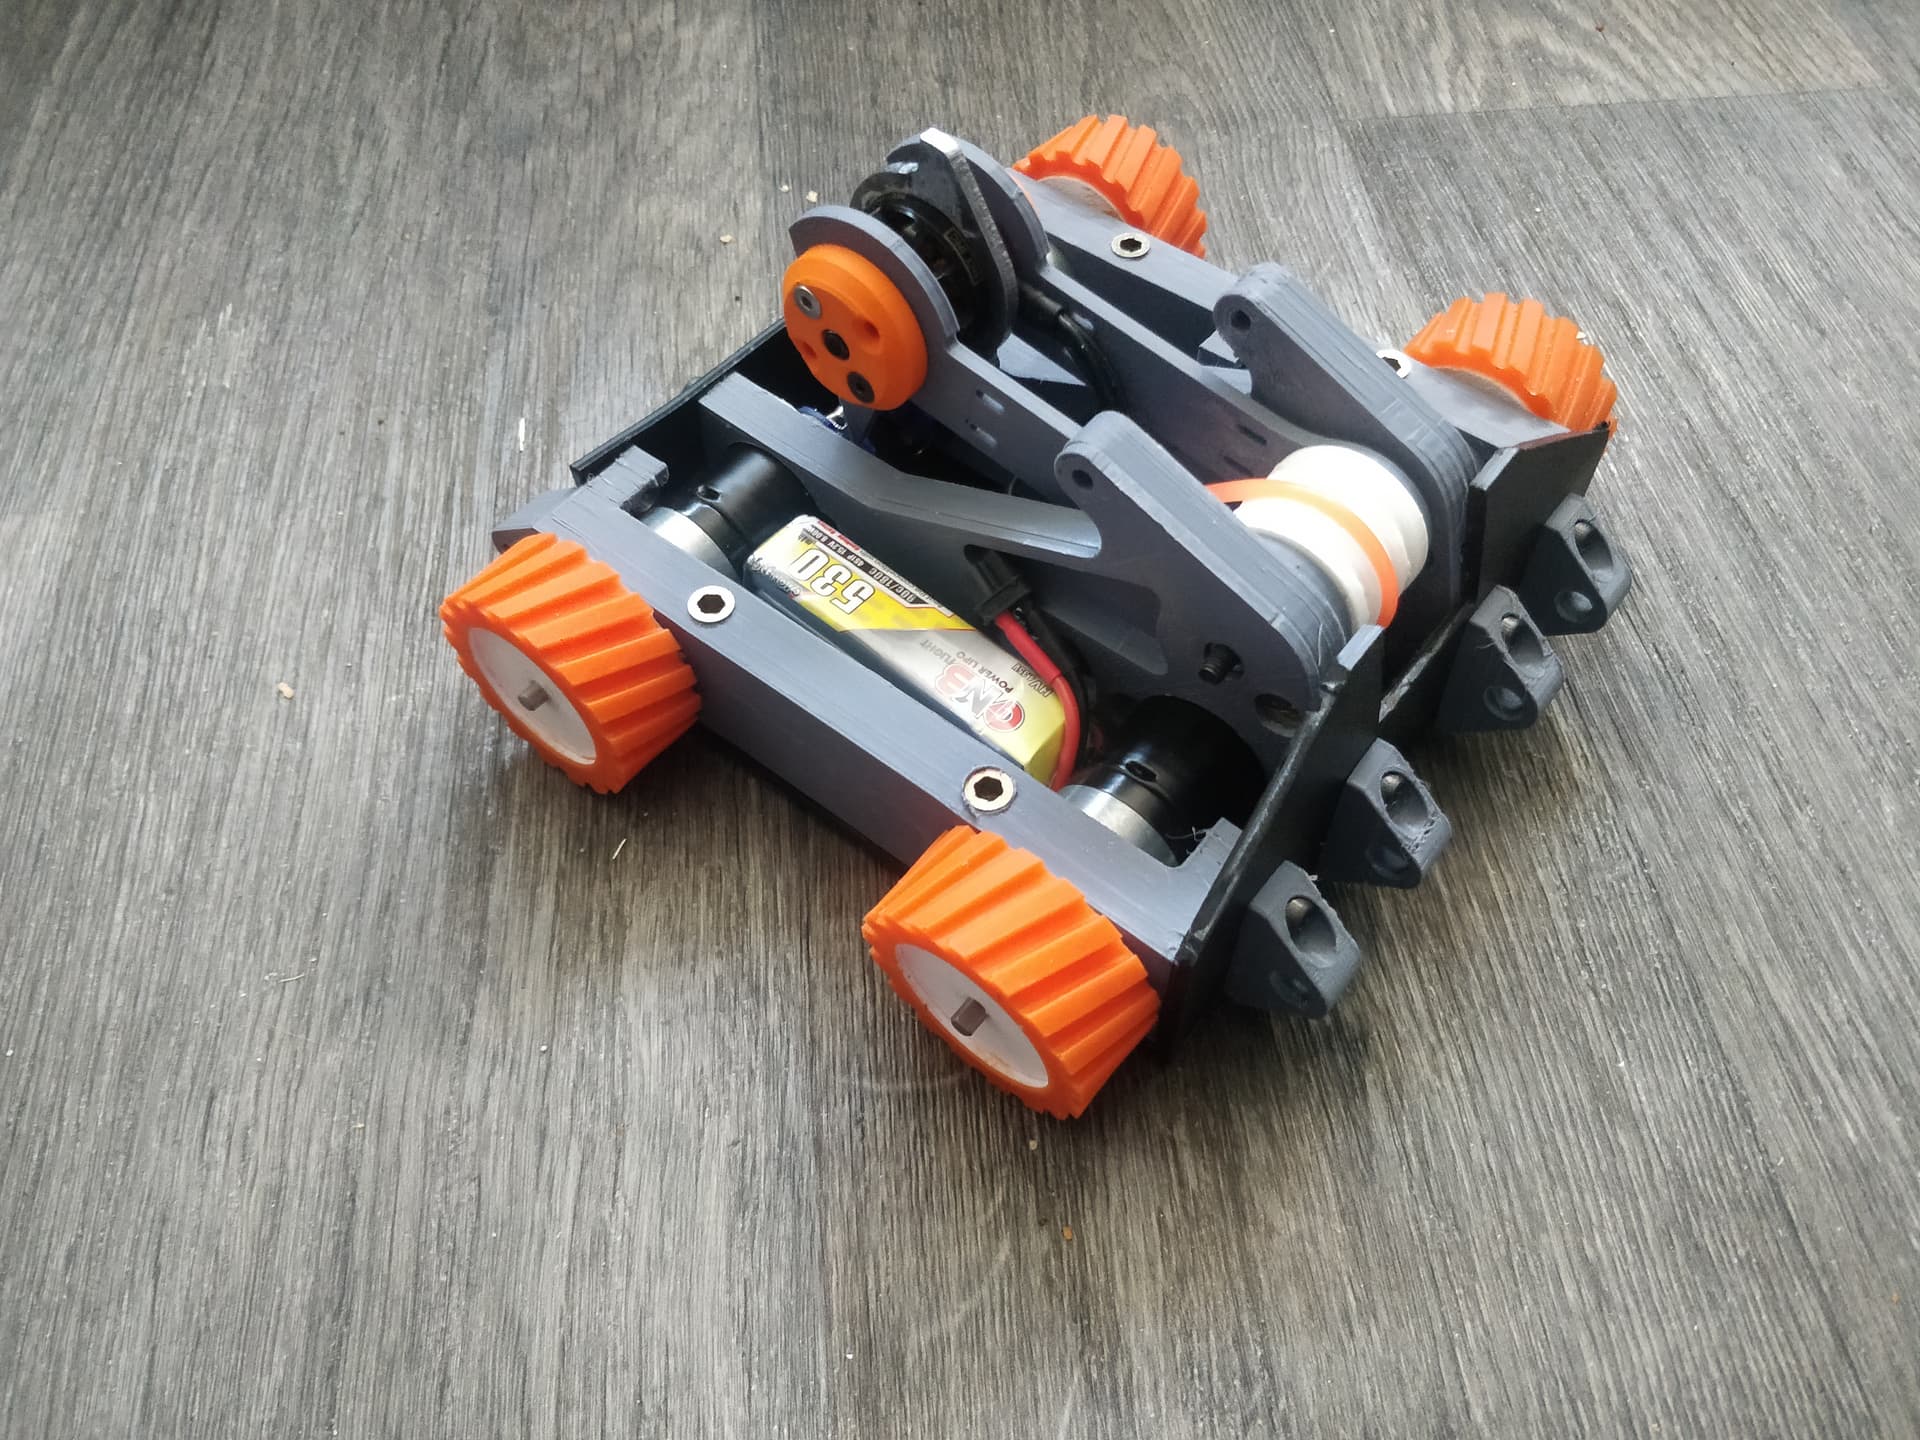
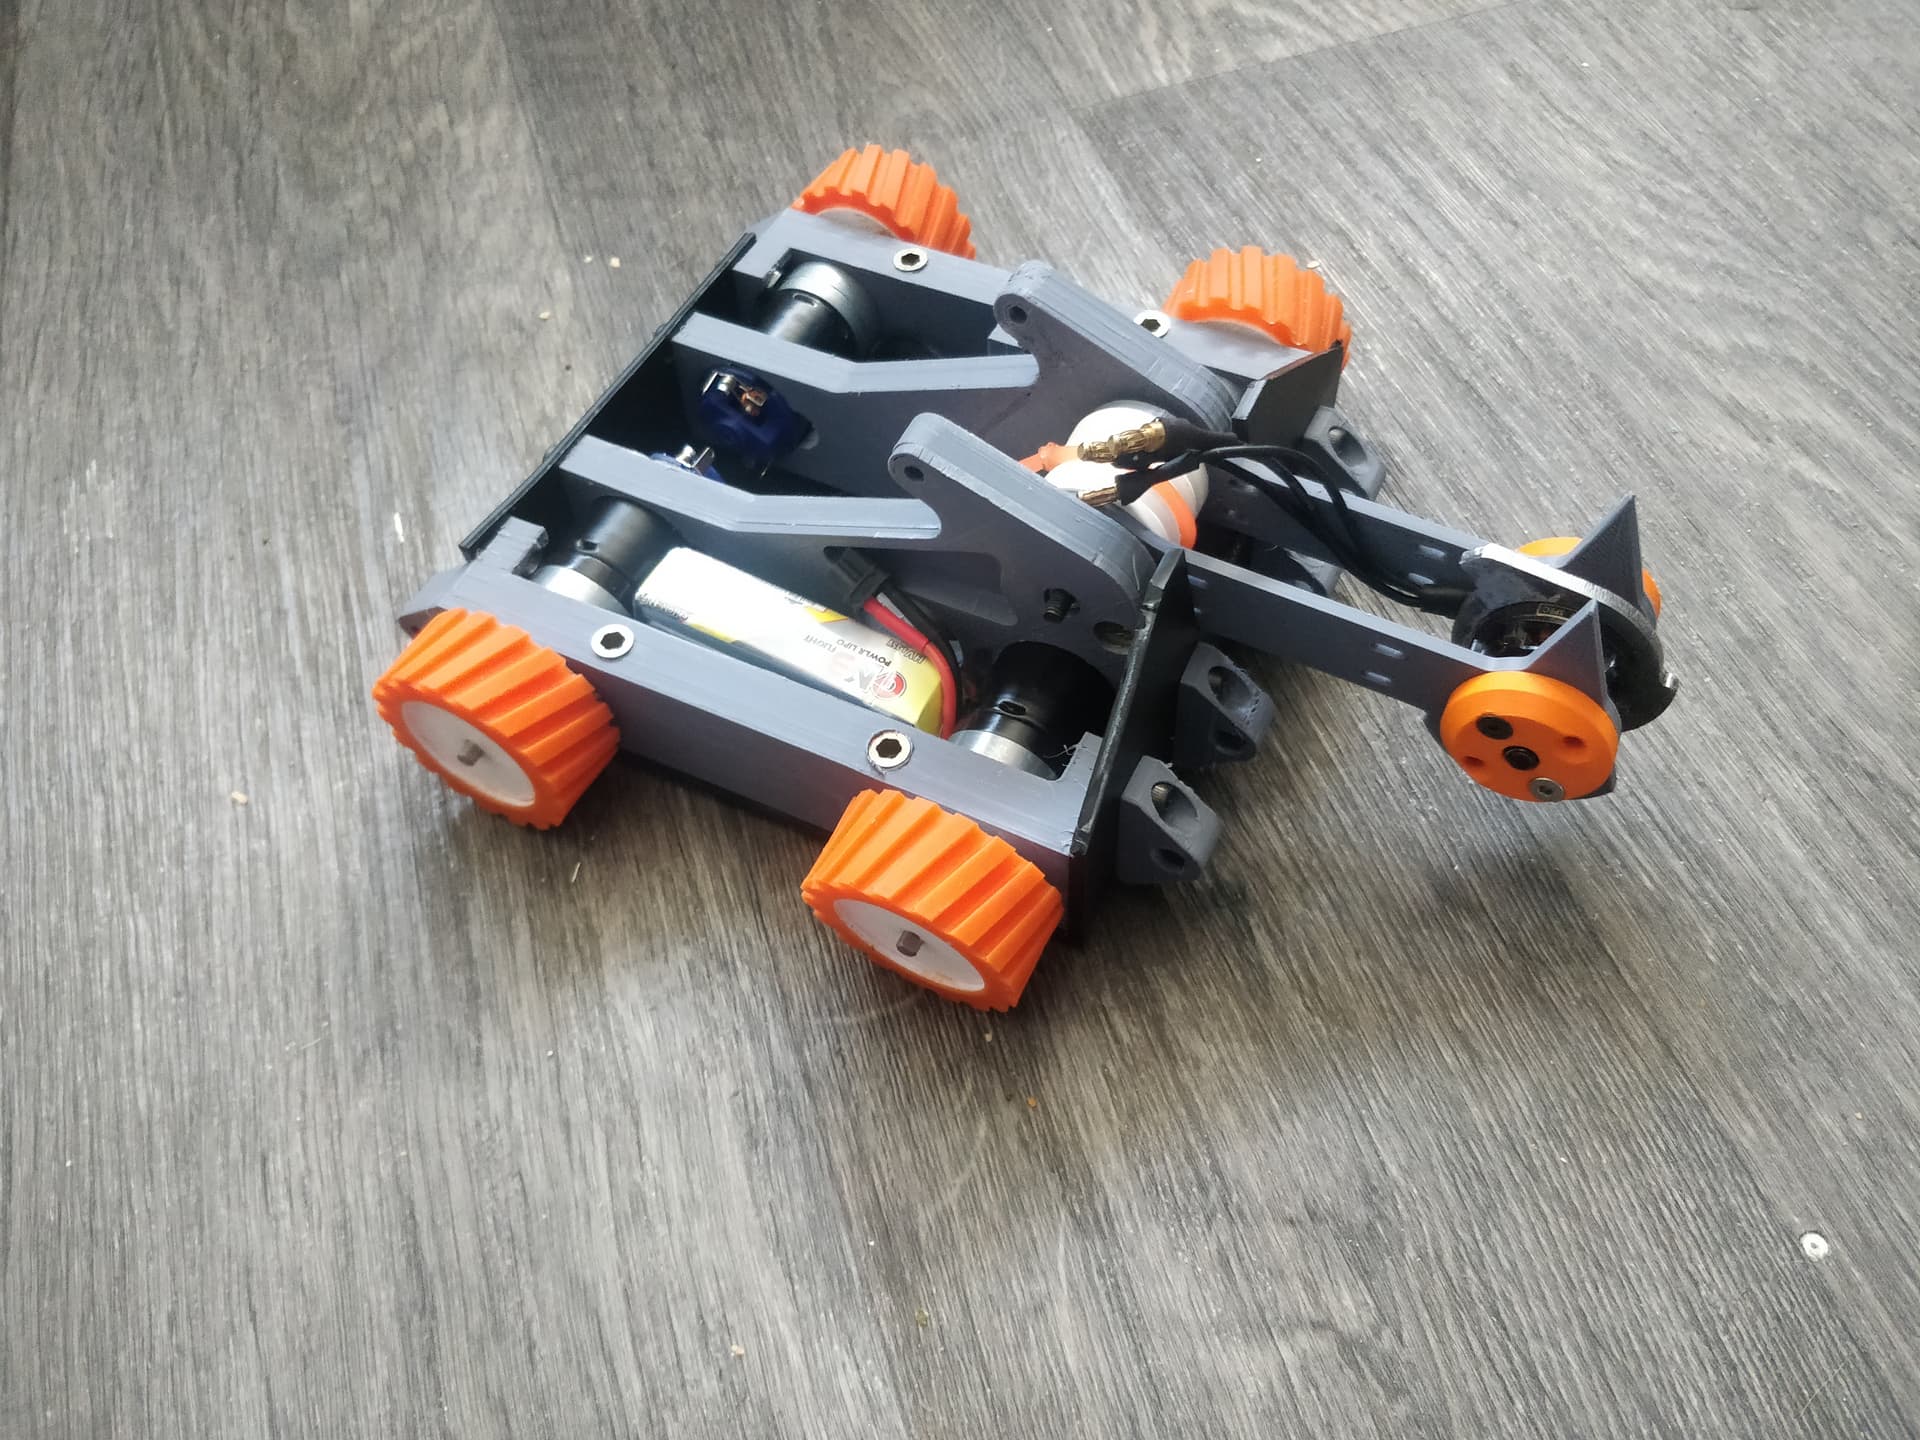
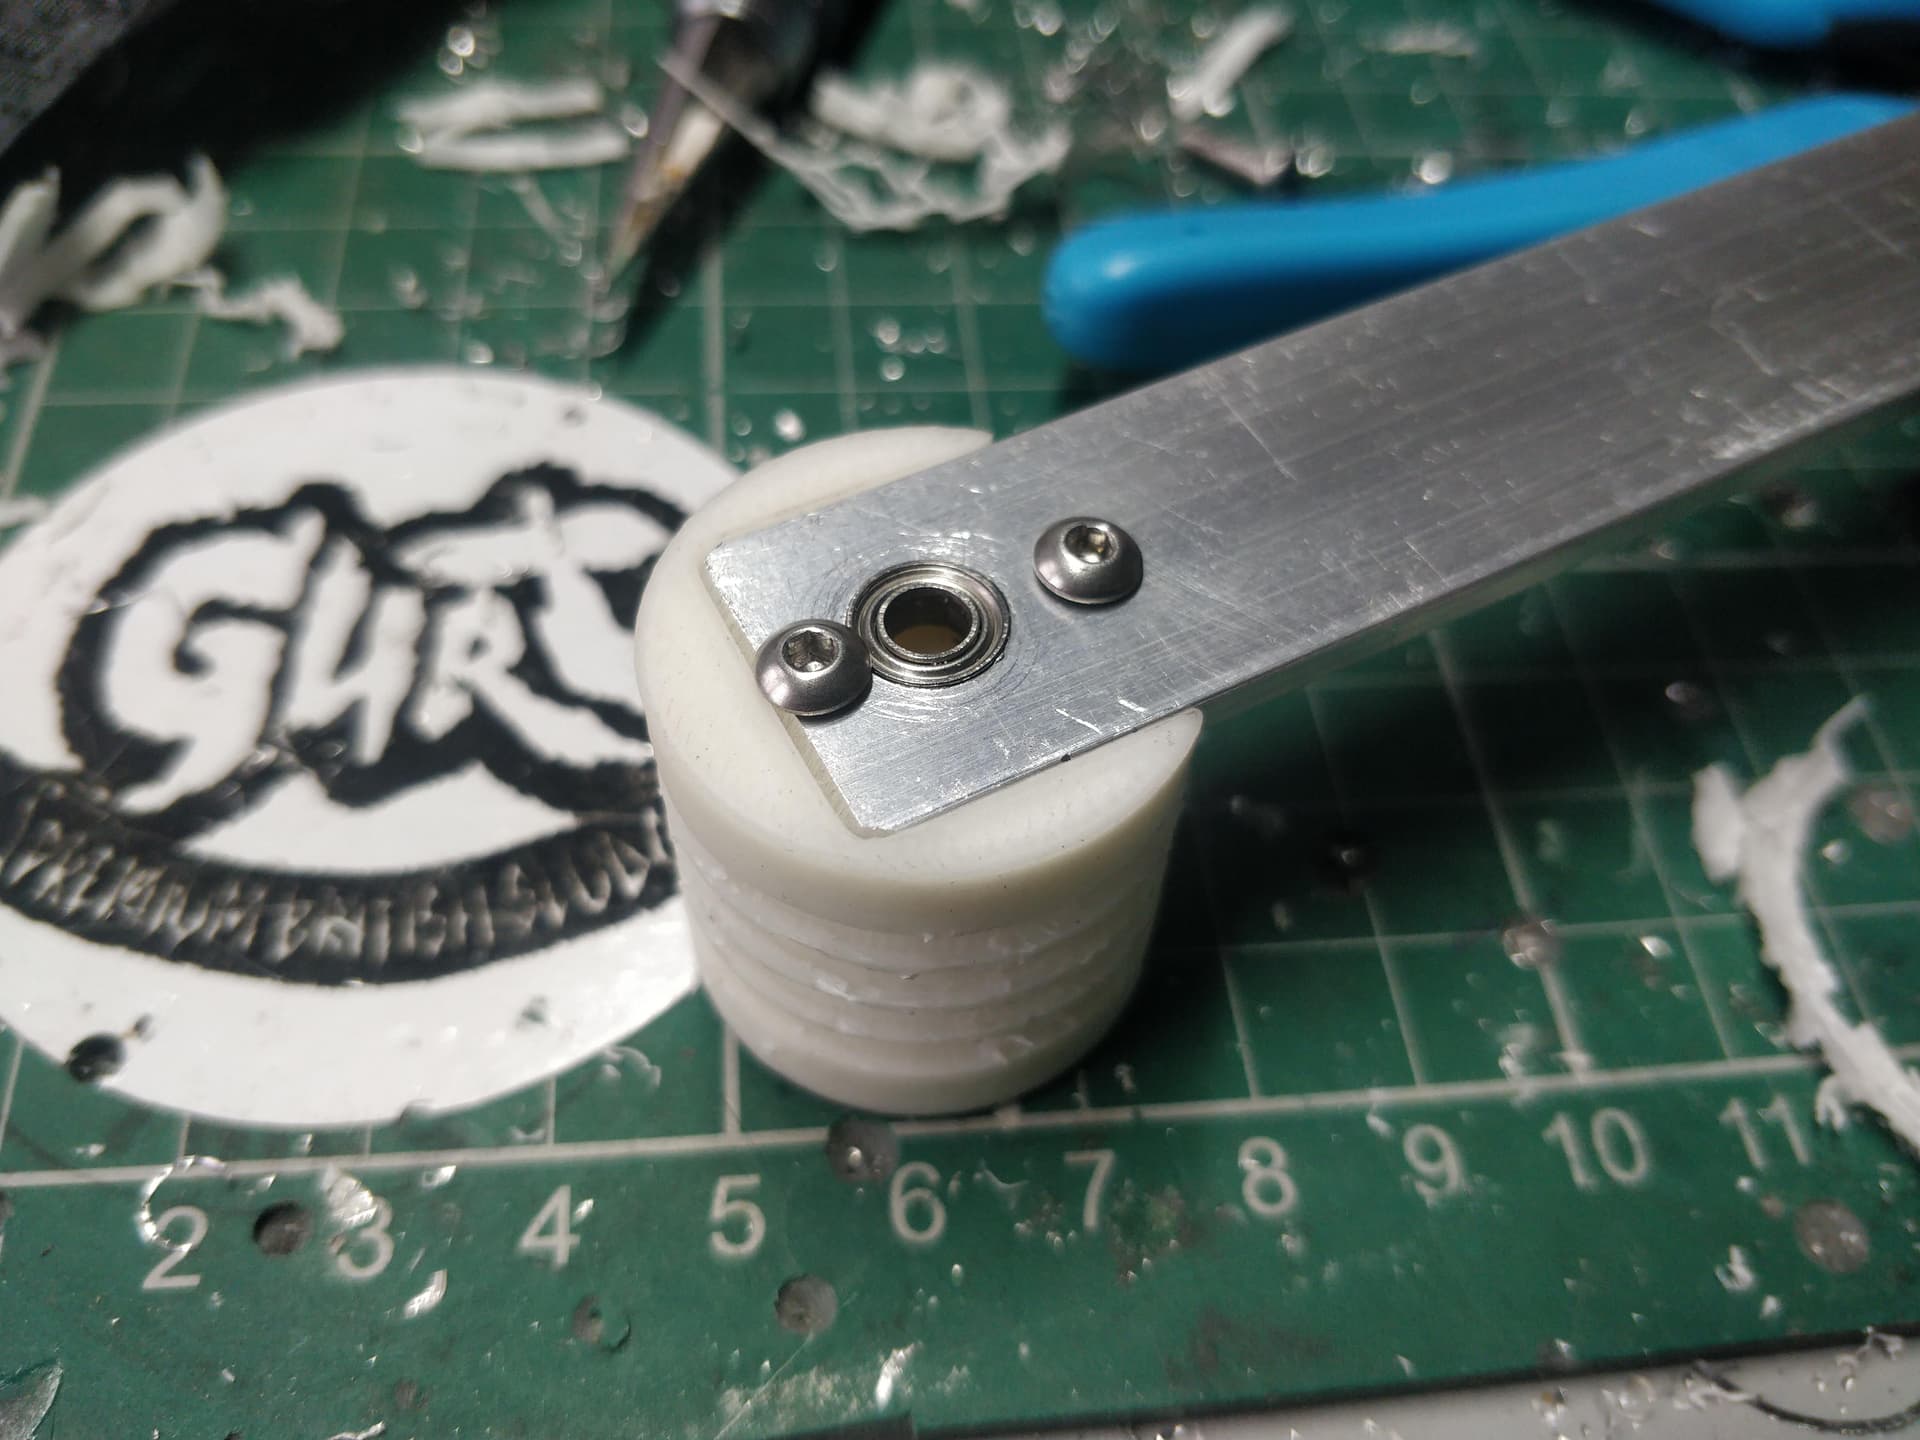
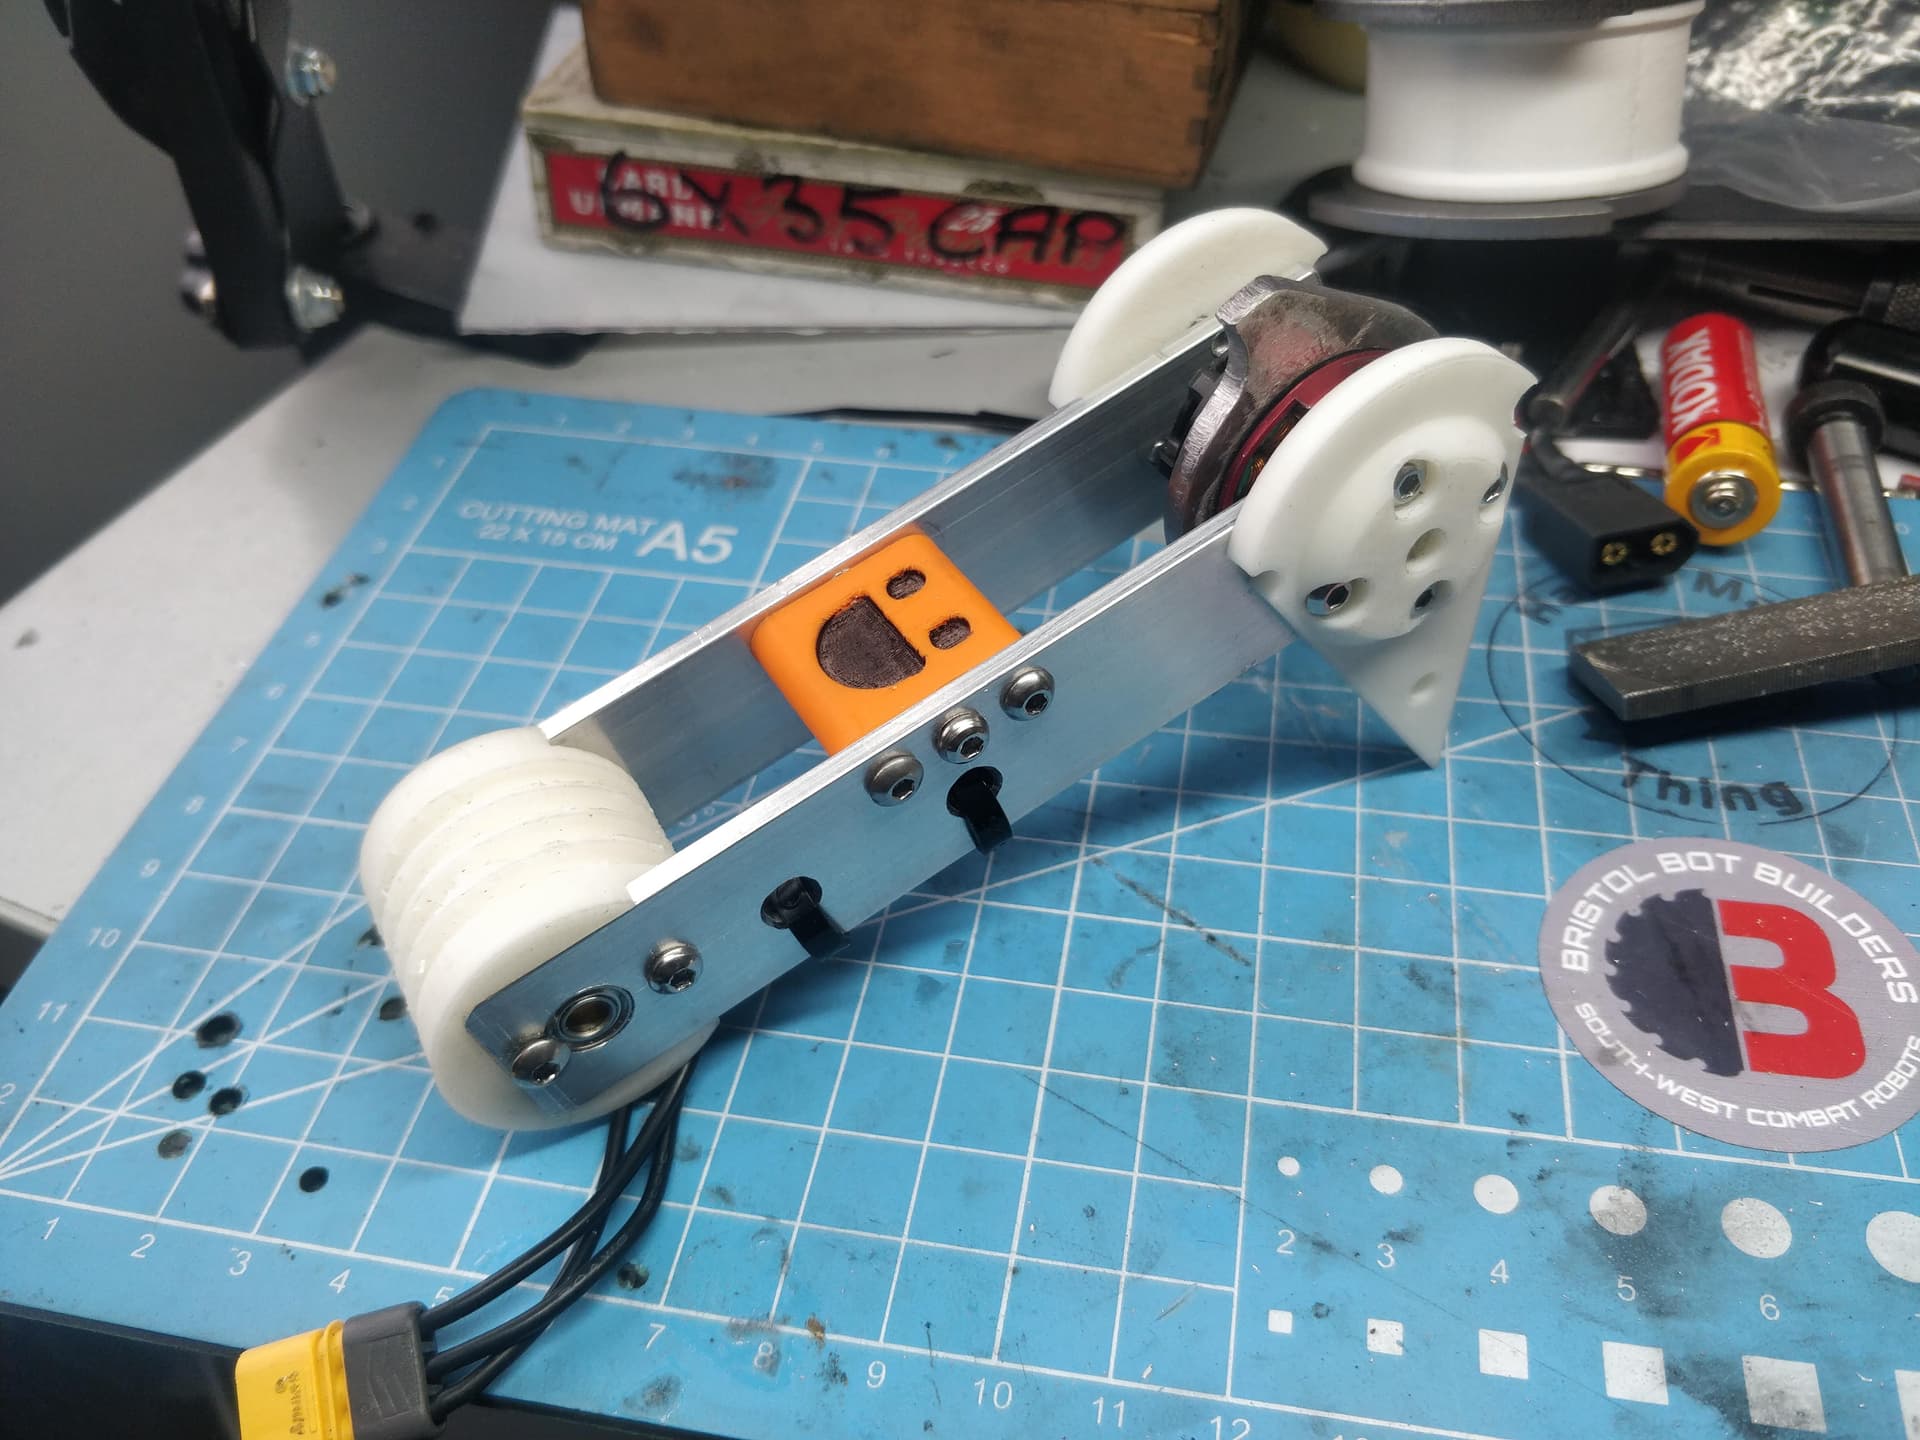
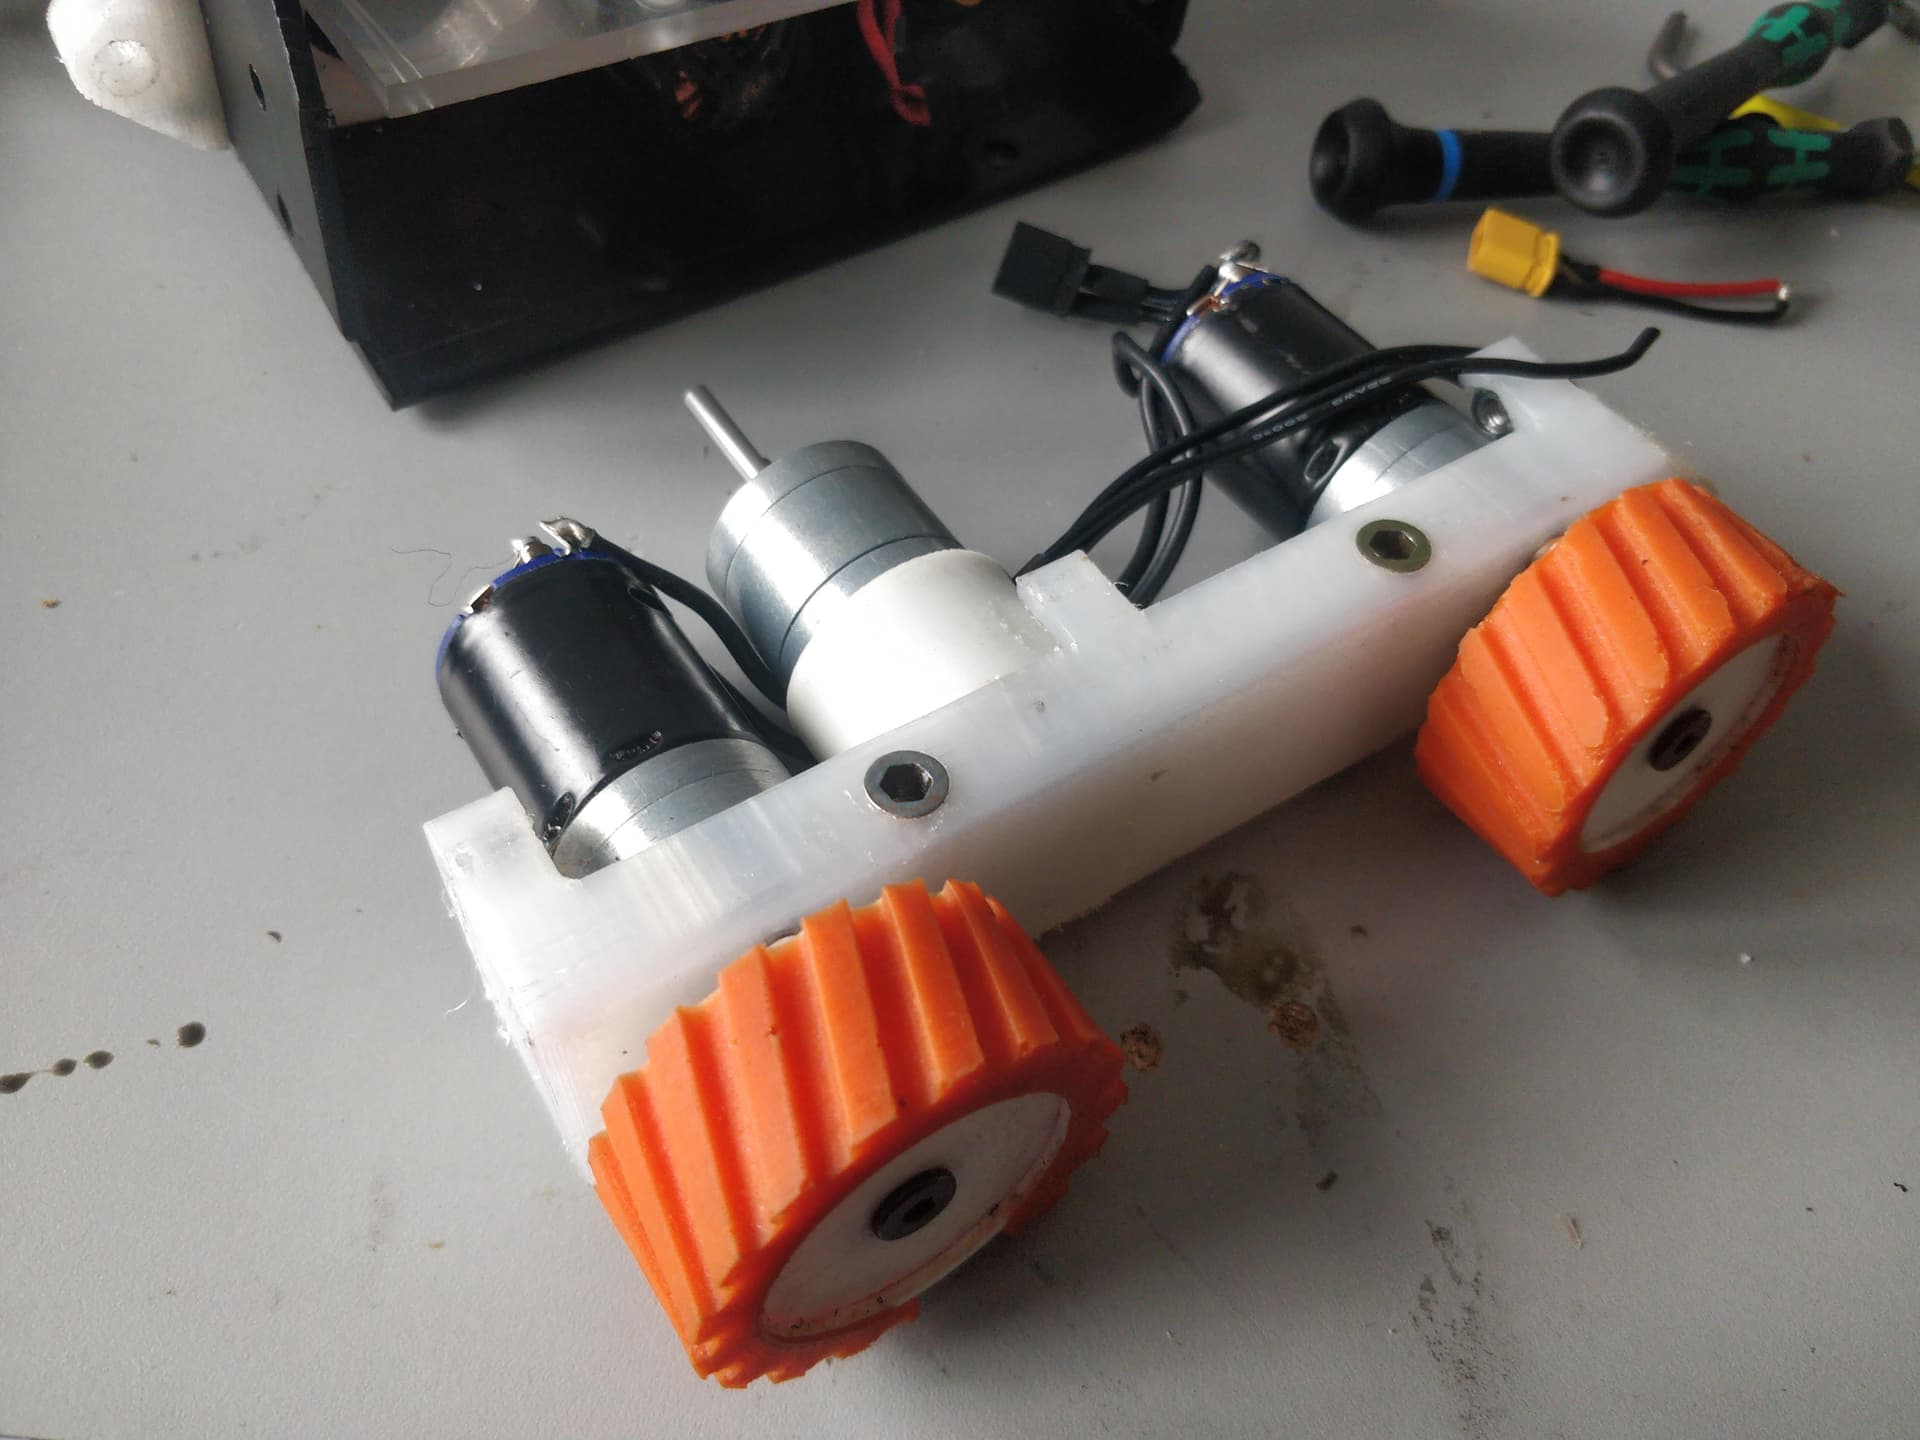
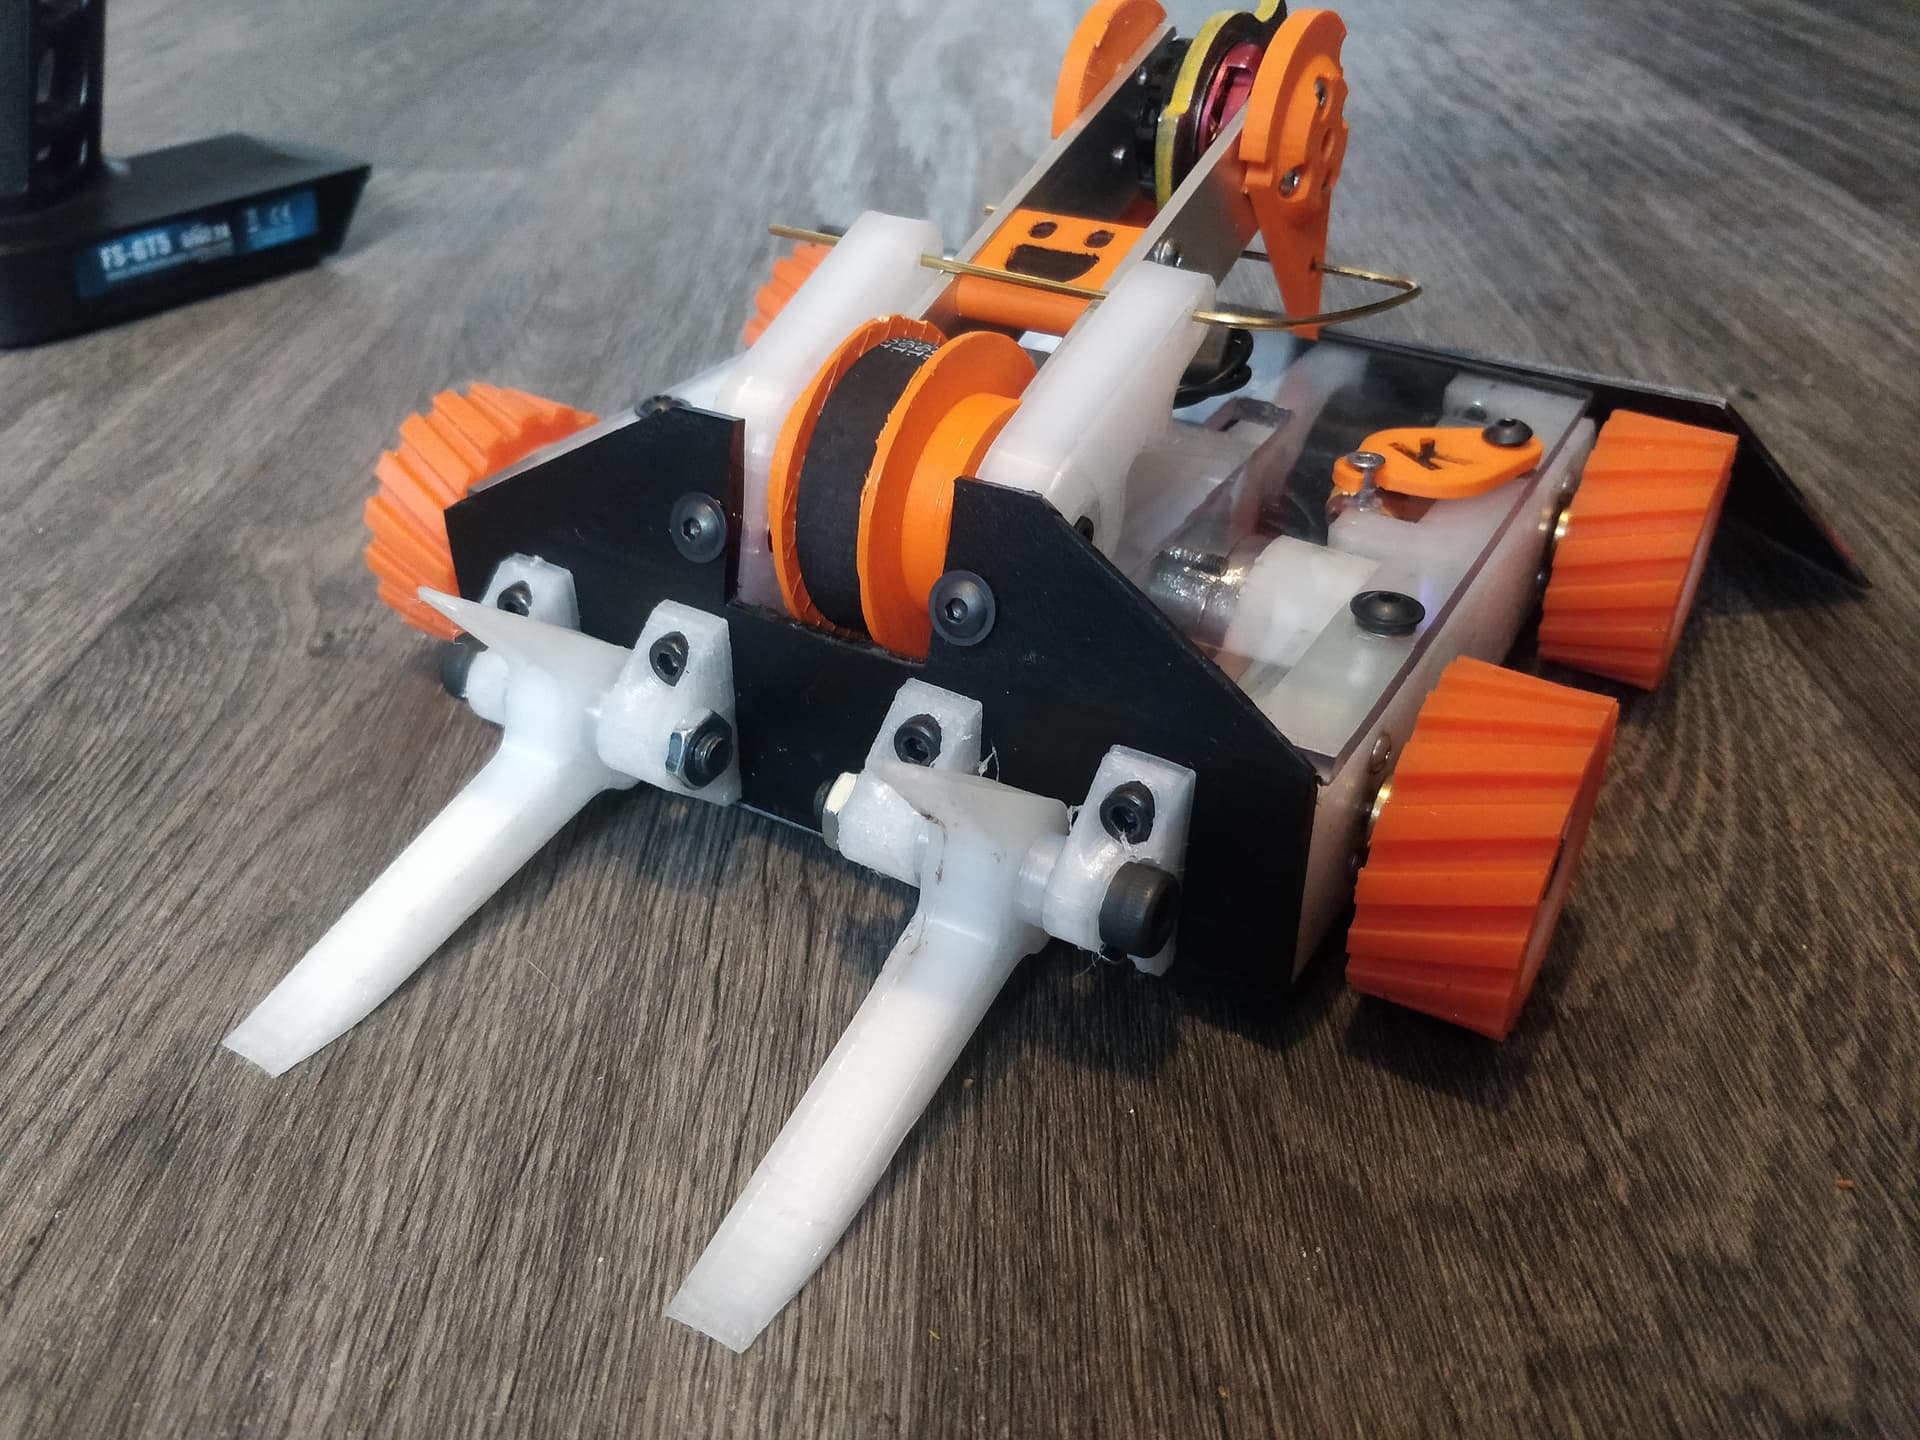
as while the O rings were great for style and acting like a clutch they slipped way too much to be consistent and reliable at self righting. After a brief consultation with the void at large I found I could scab in some GT2 timing pulleys in without modifying a thing. Technobots has these phenomenally cheaply so I just hit go and ran with it.

They needed a back breaker tensioner to get enough wrap and synch up the centre distance but other than that it was pretty much a drop in solution. I drilled and tapped the aluminium pulley for the aluminium arms I made previously and had a quick play. Very responsive and much more grunt.

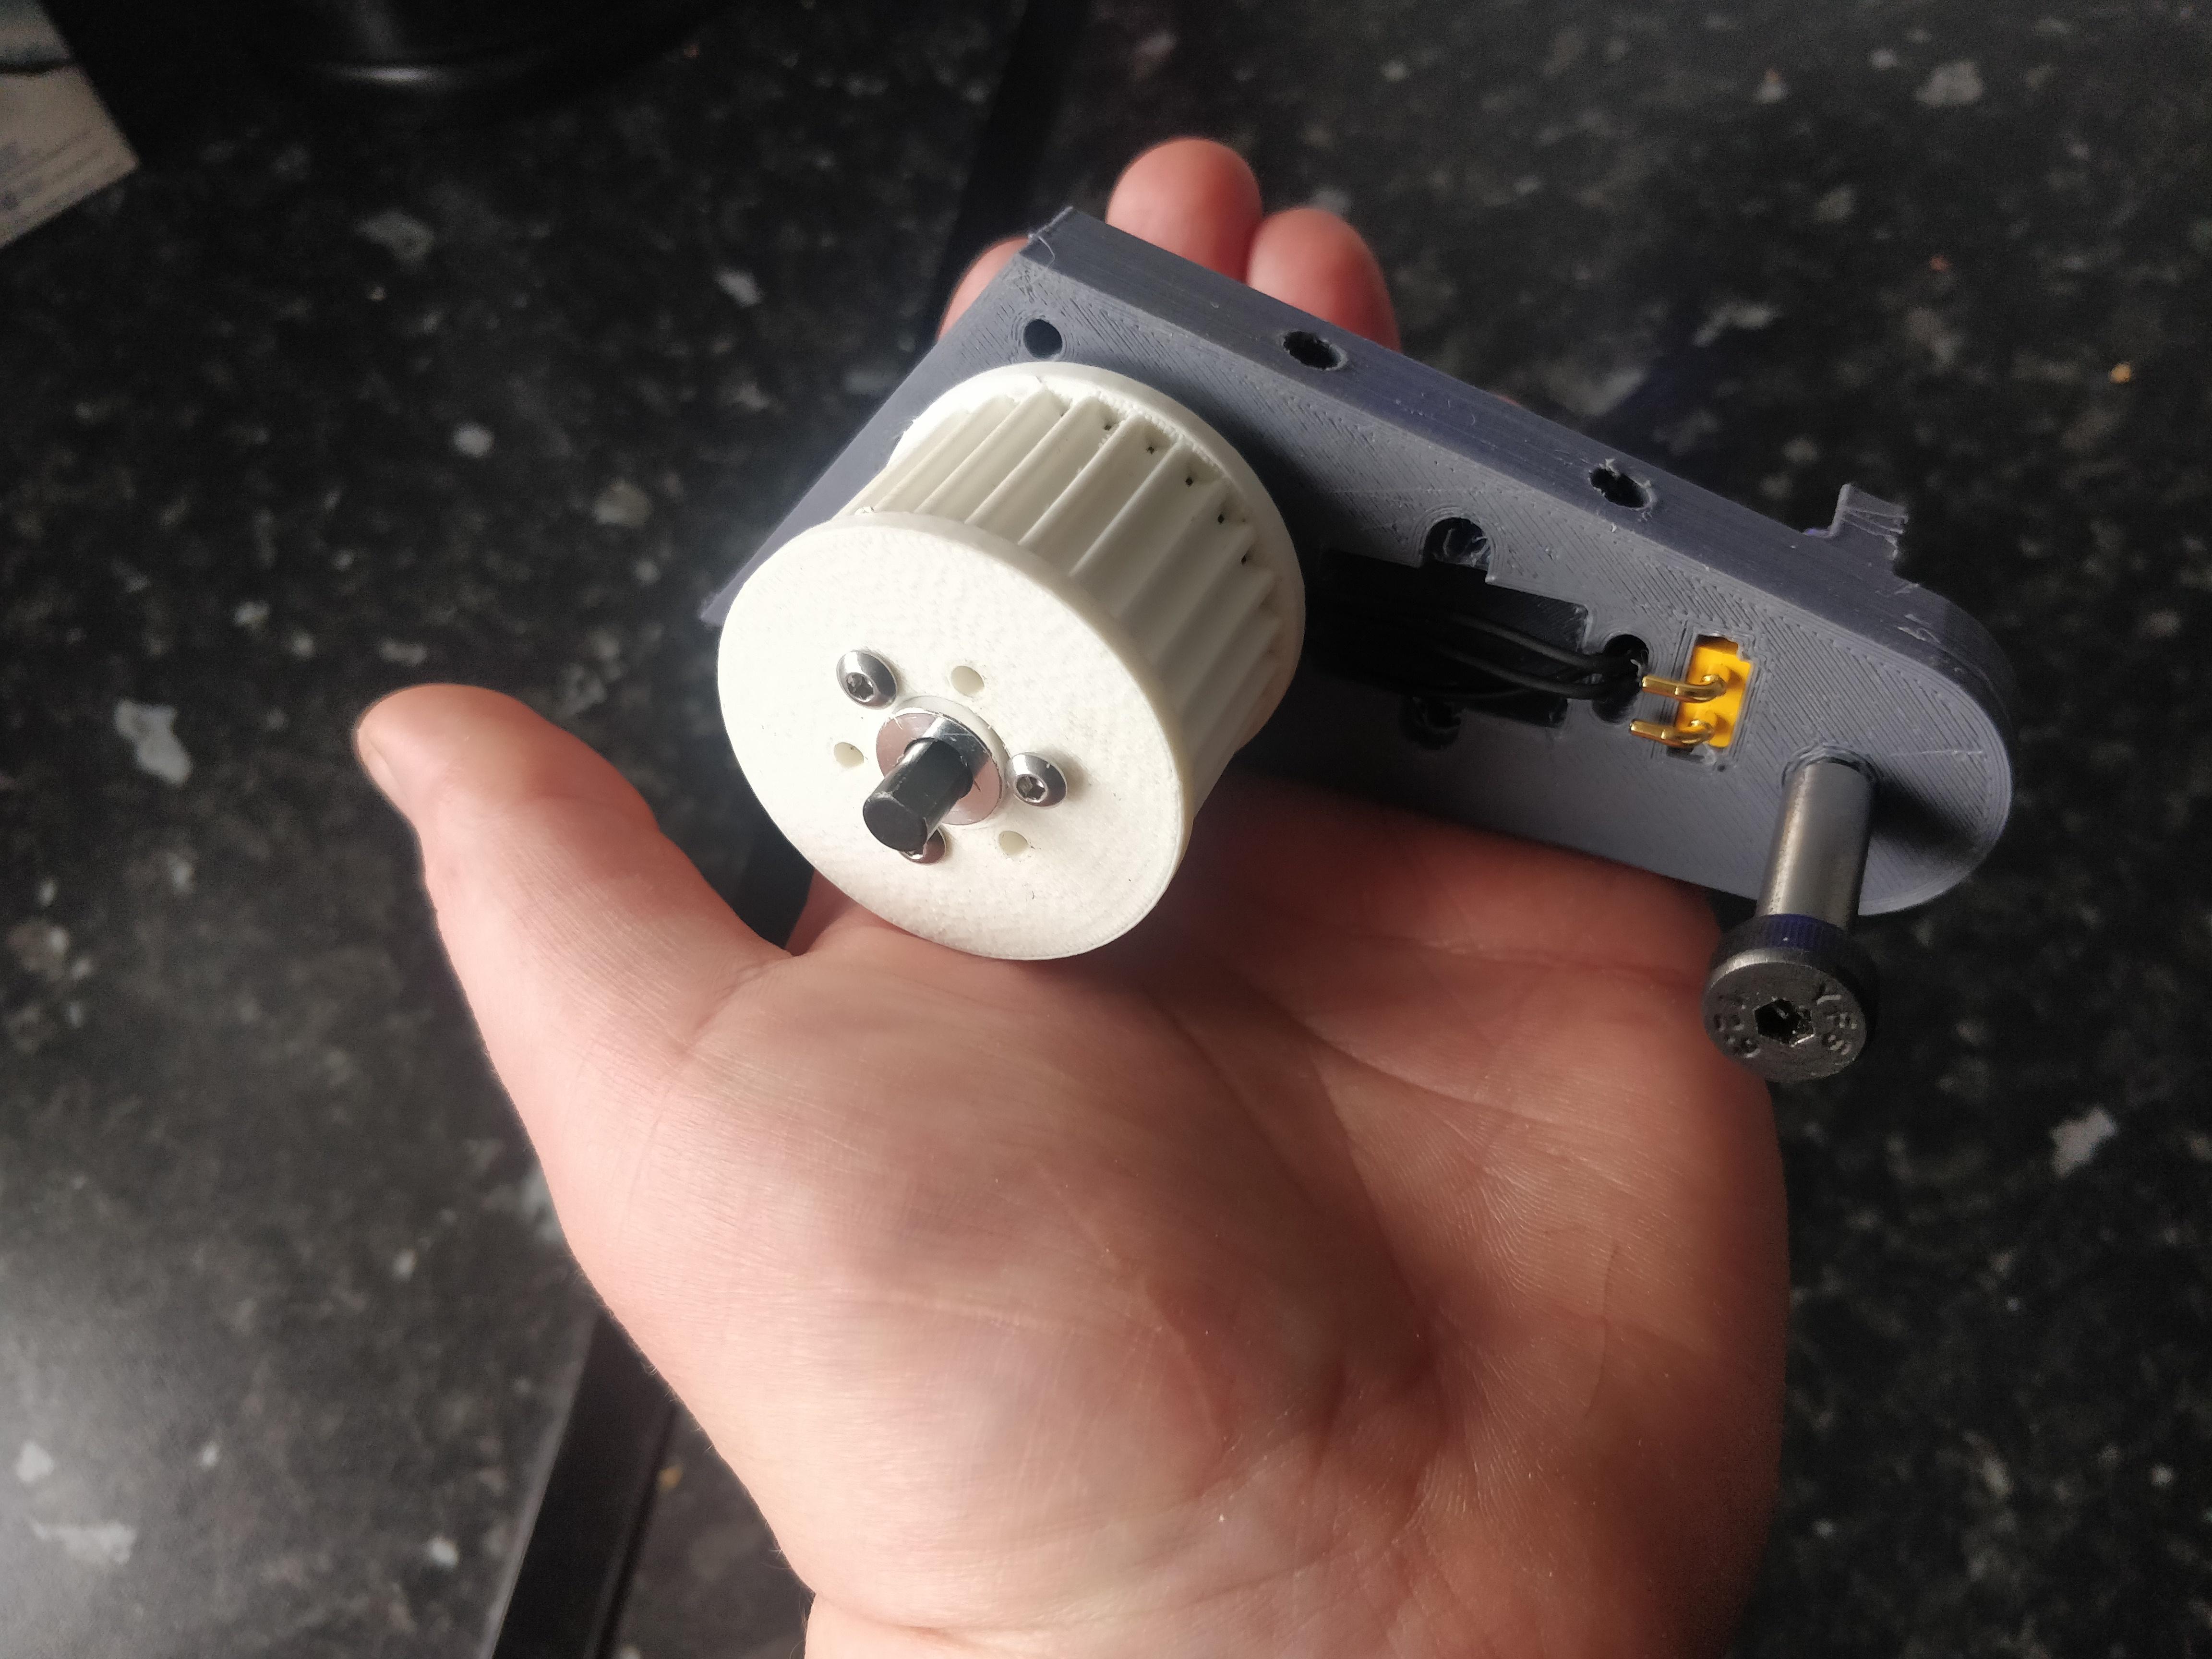
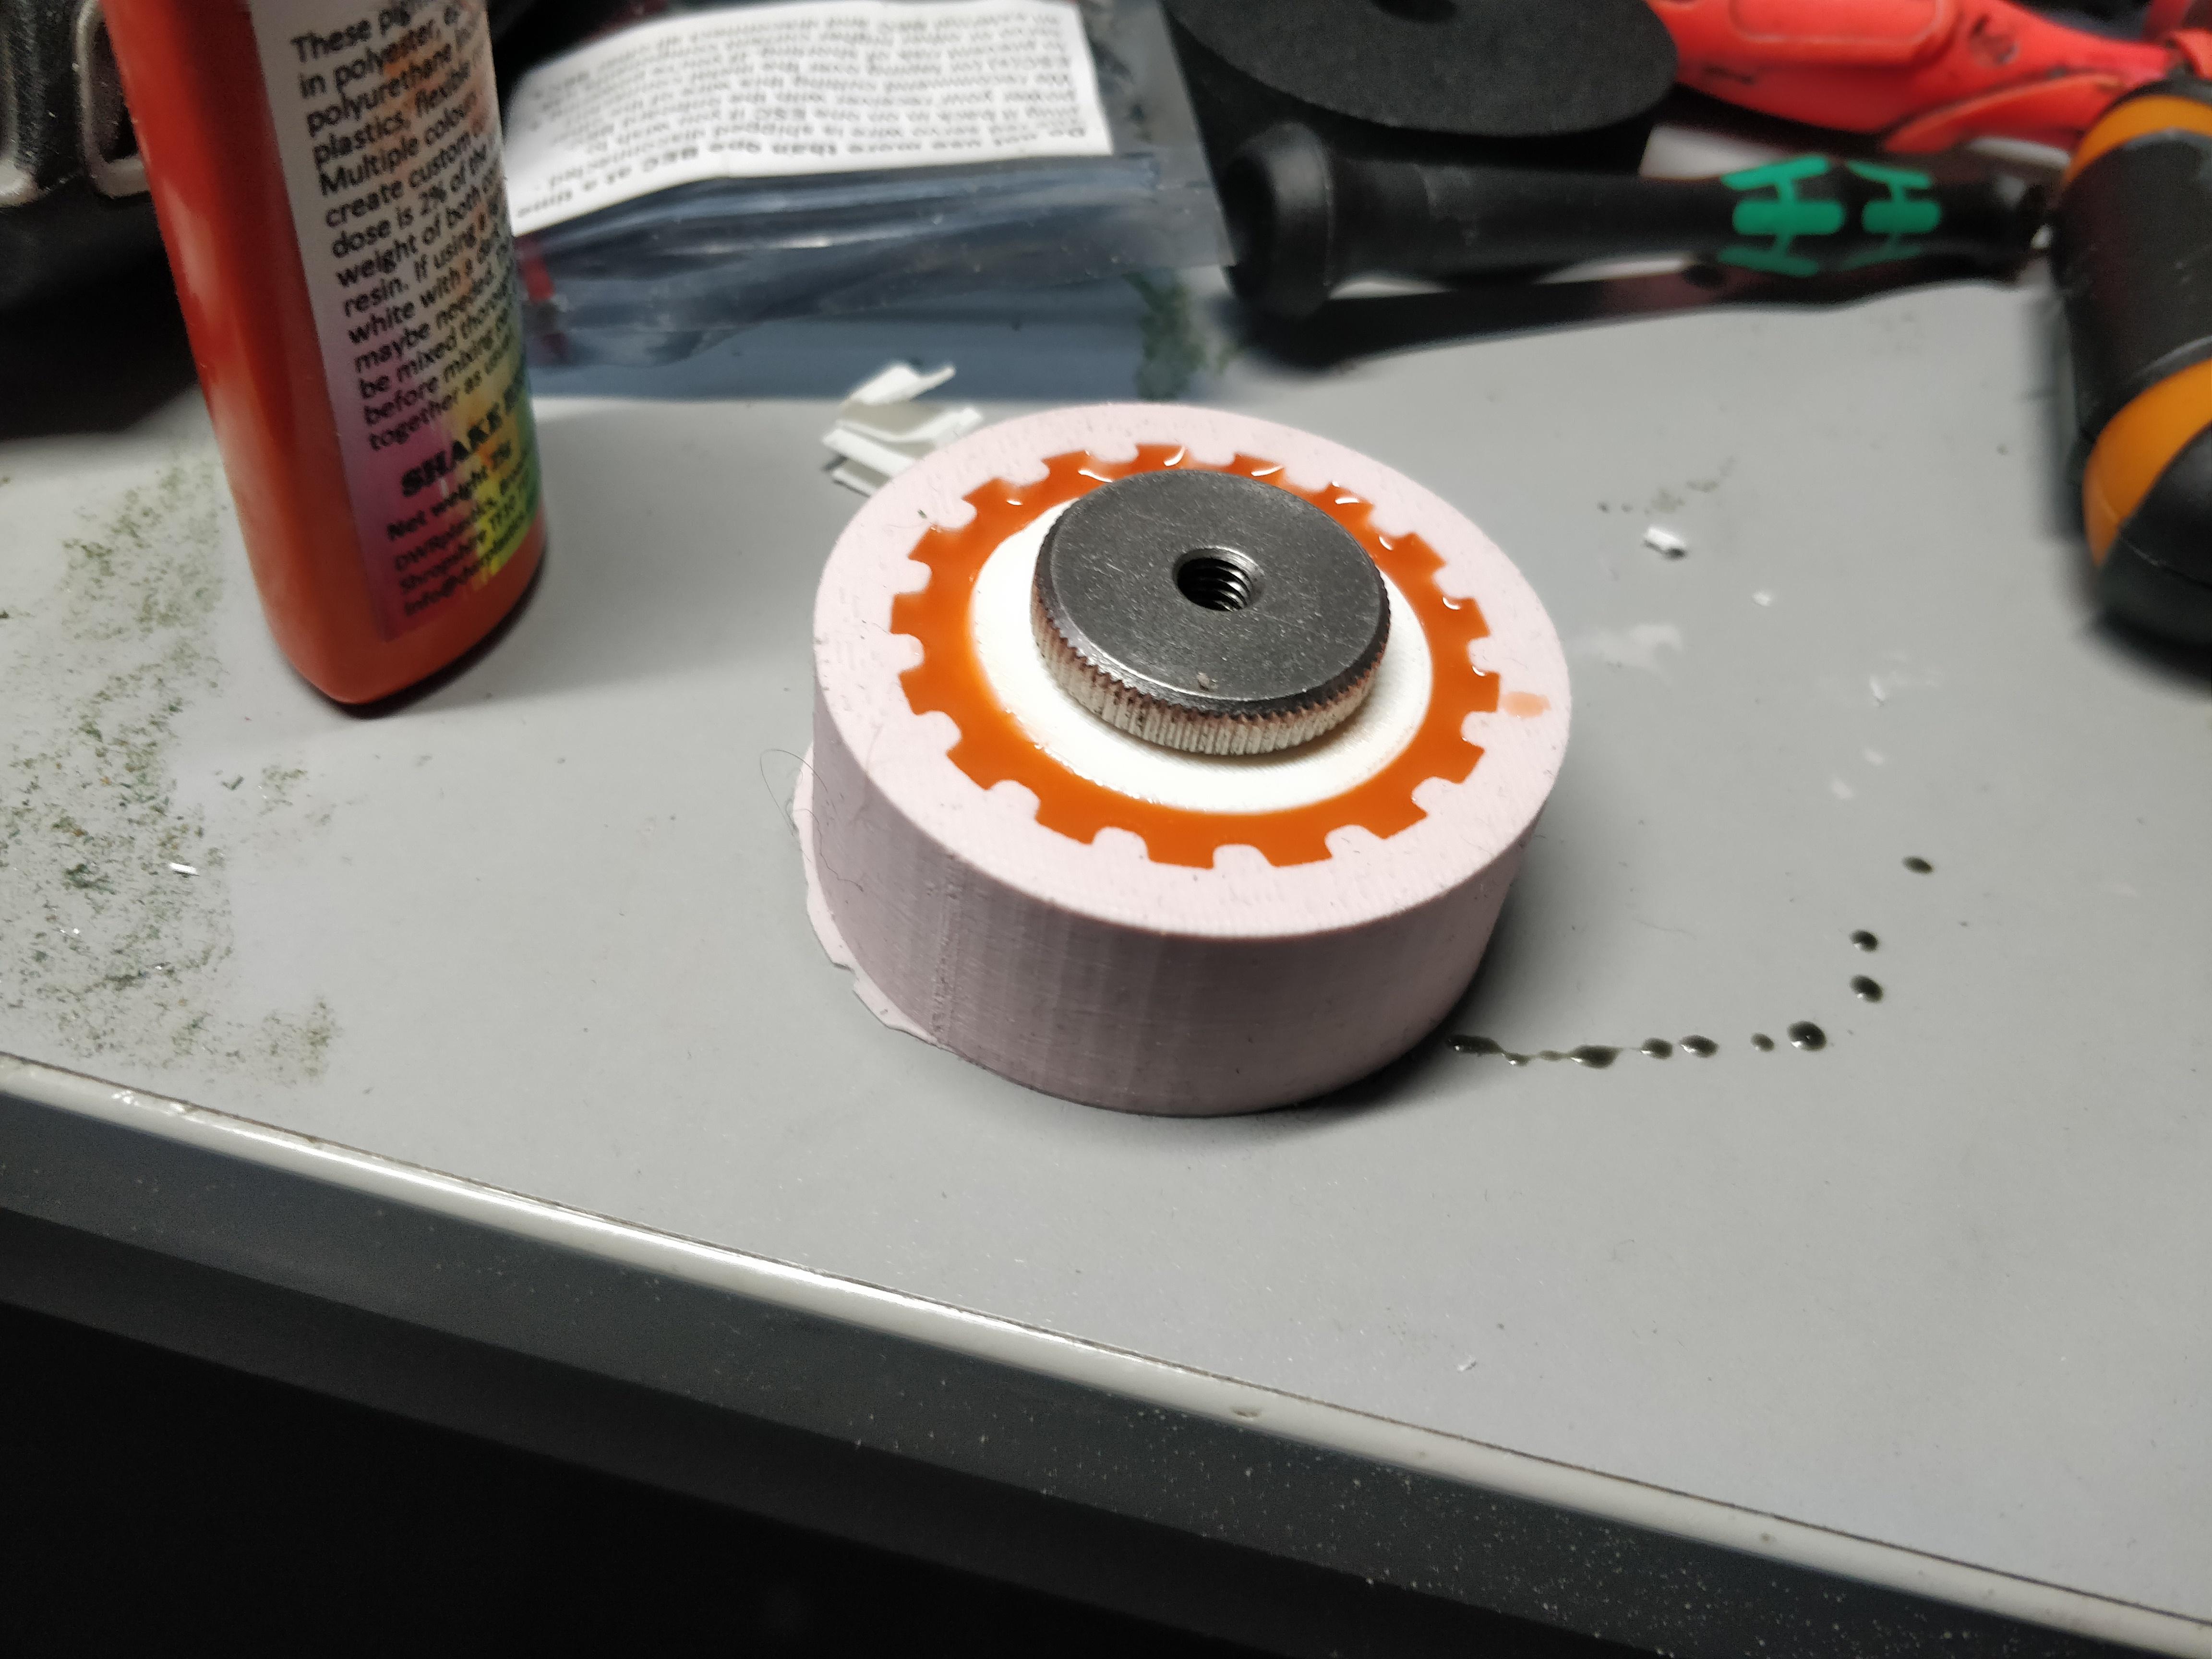
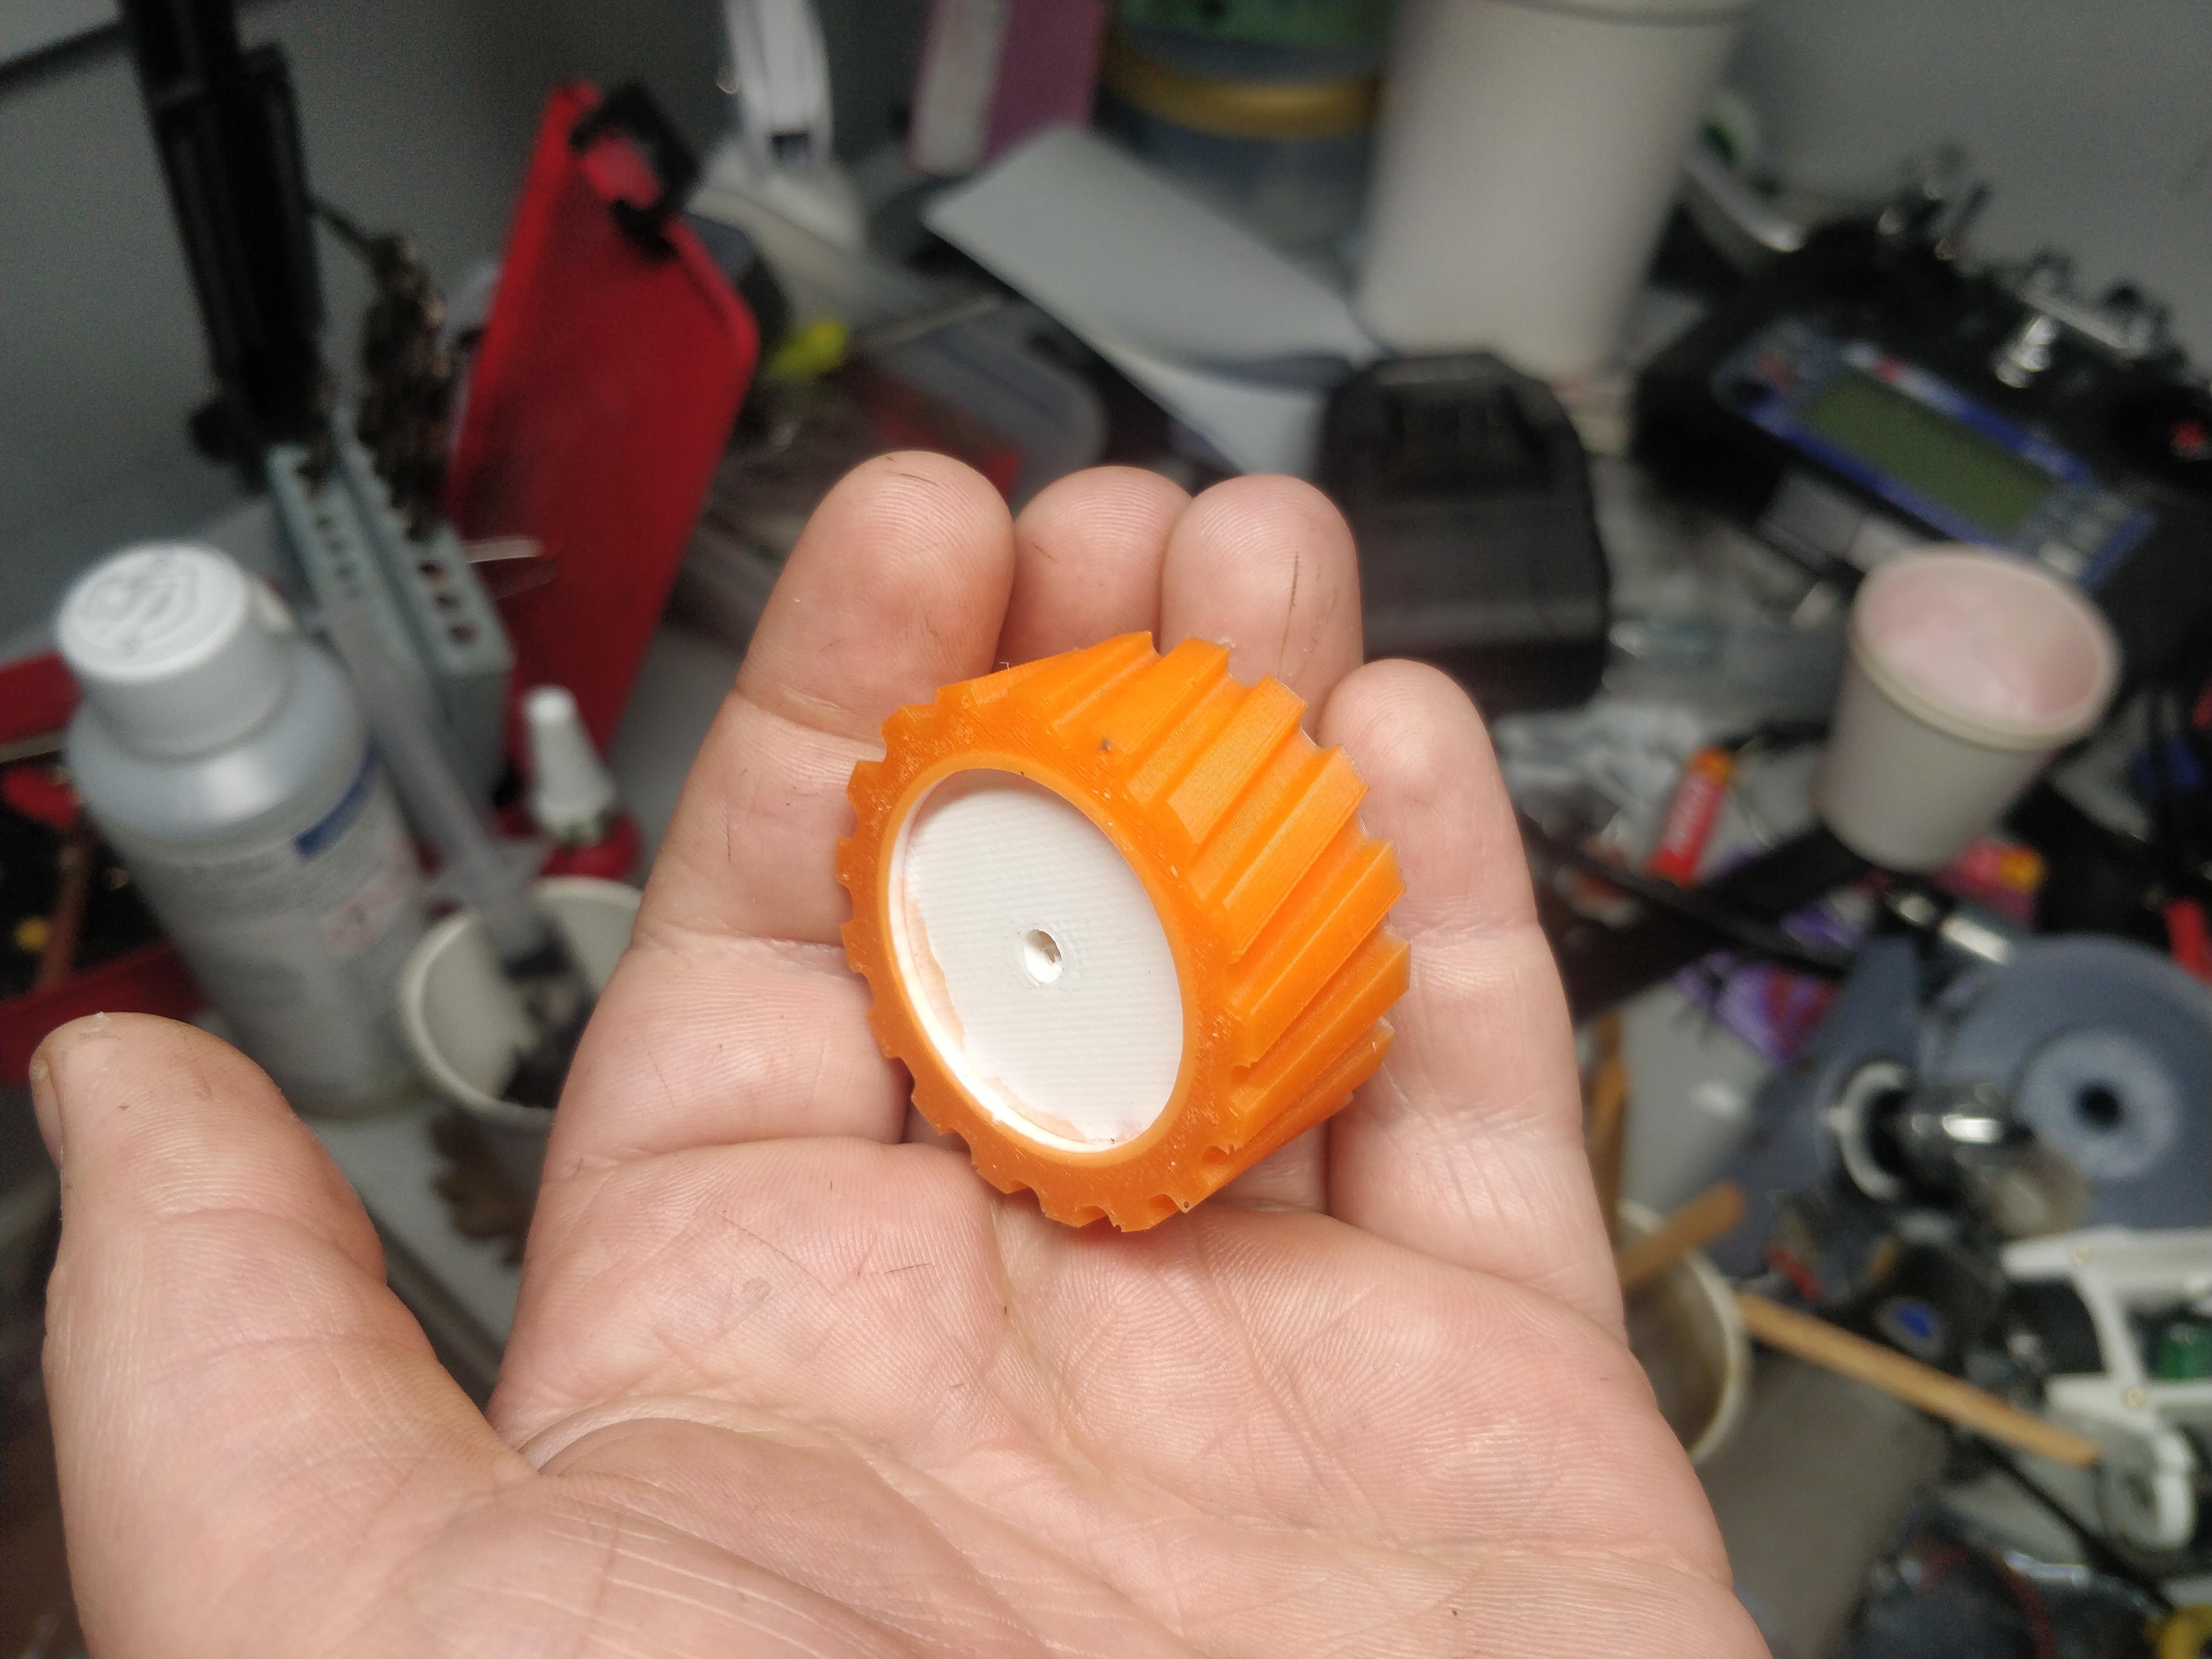
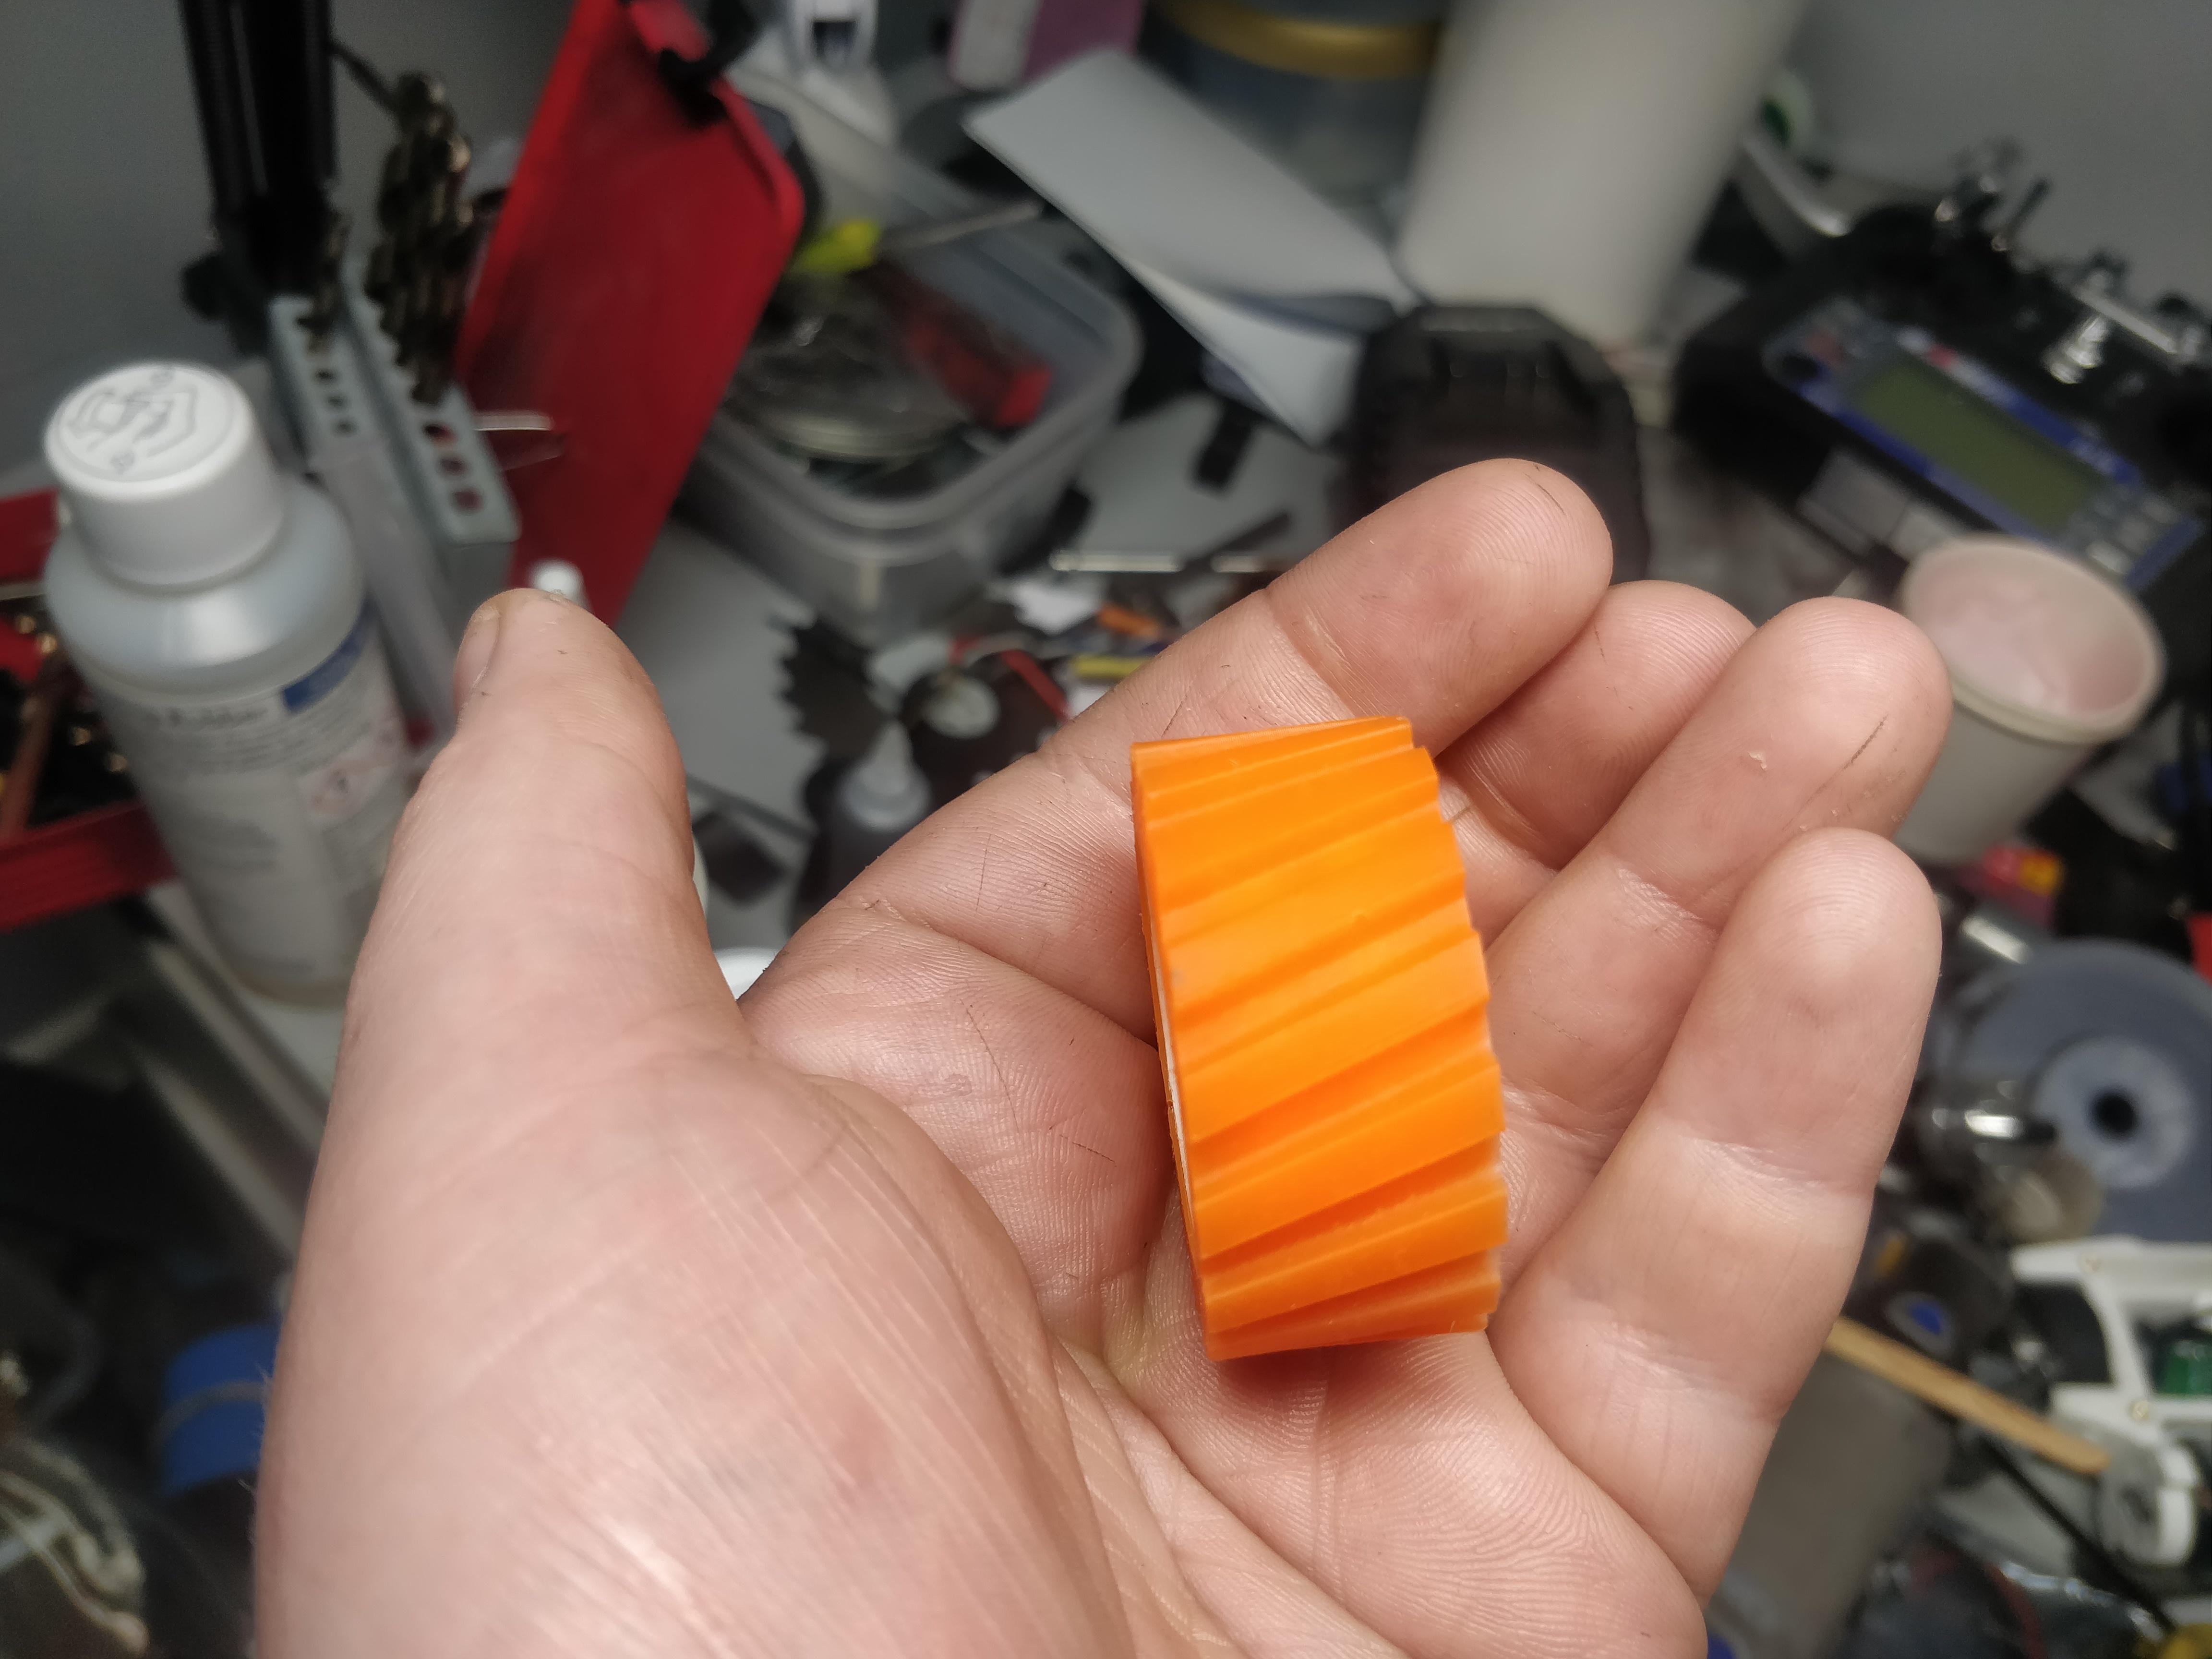
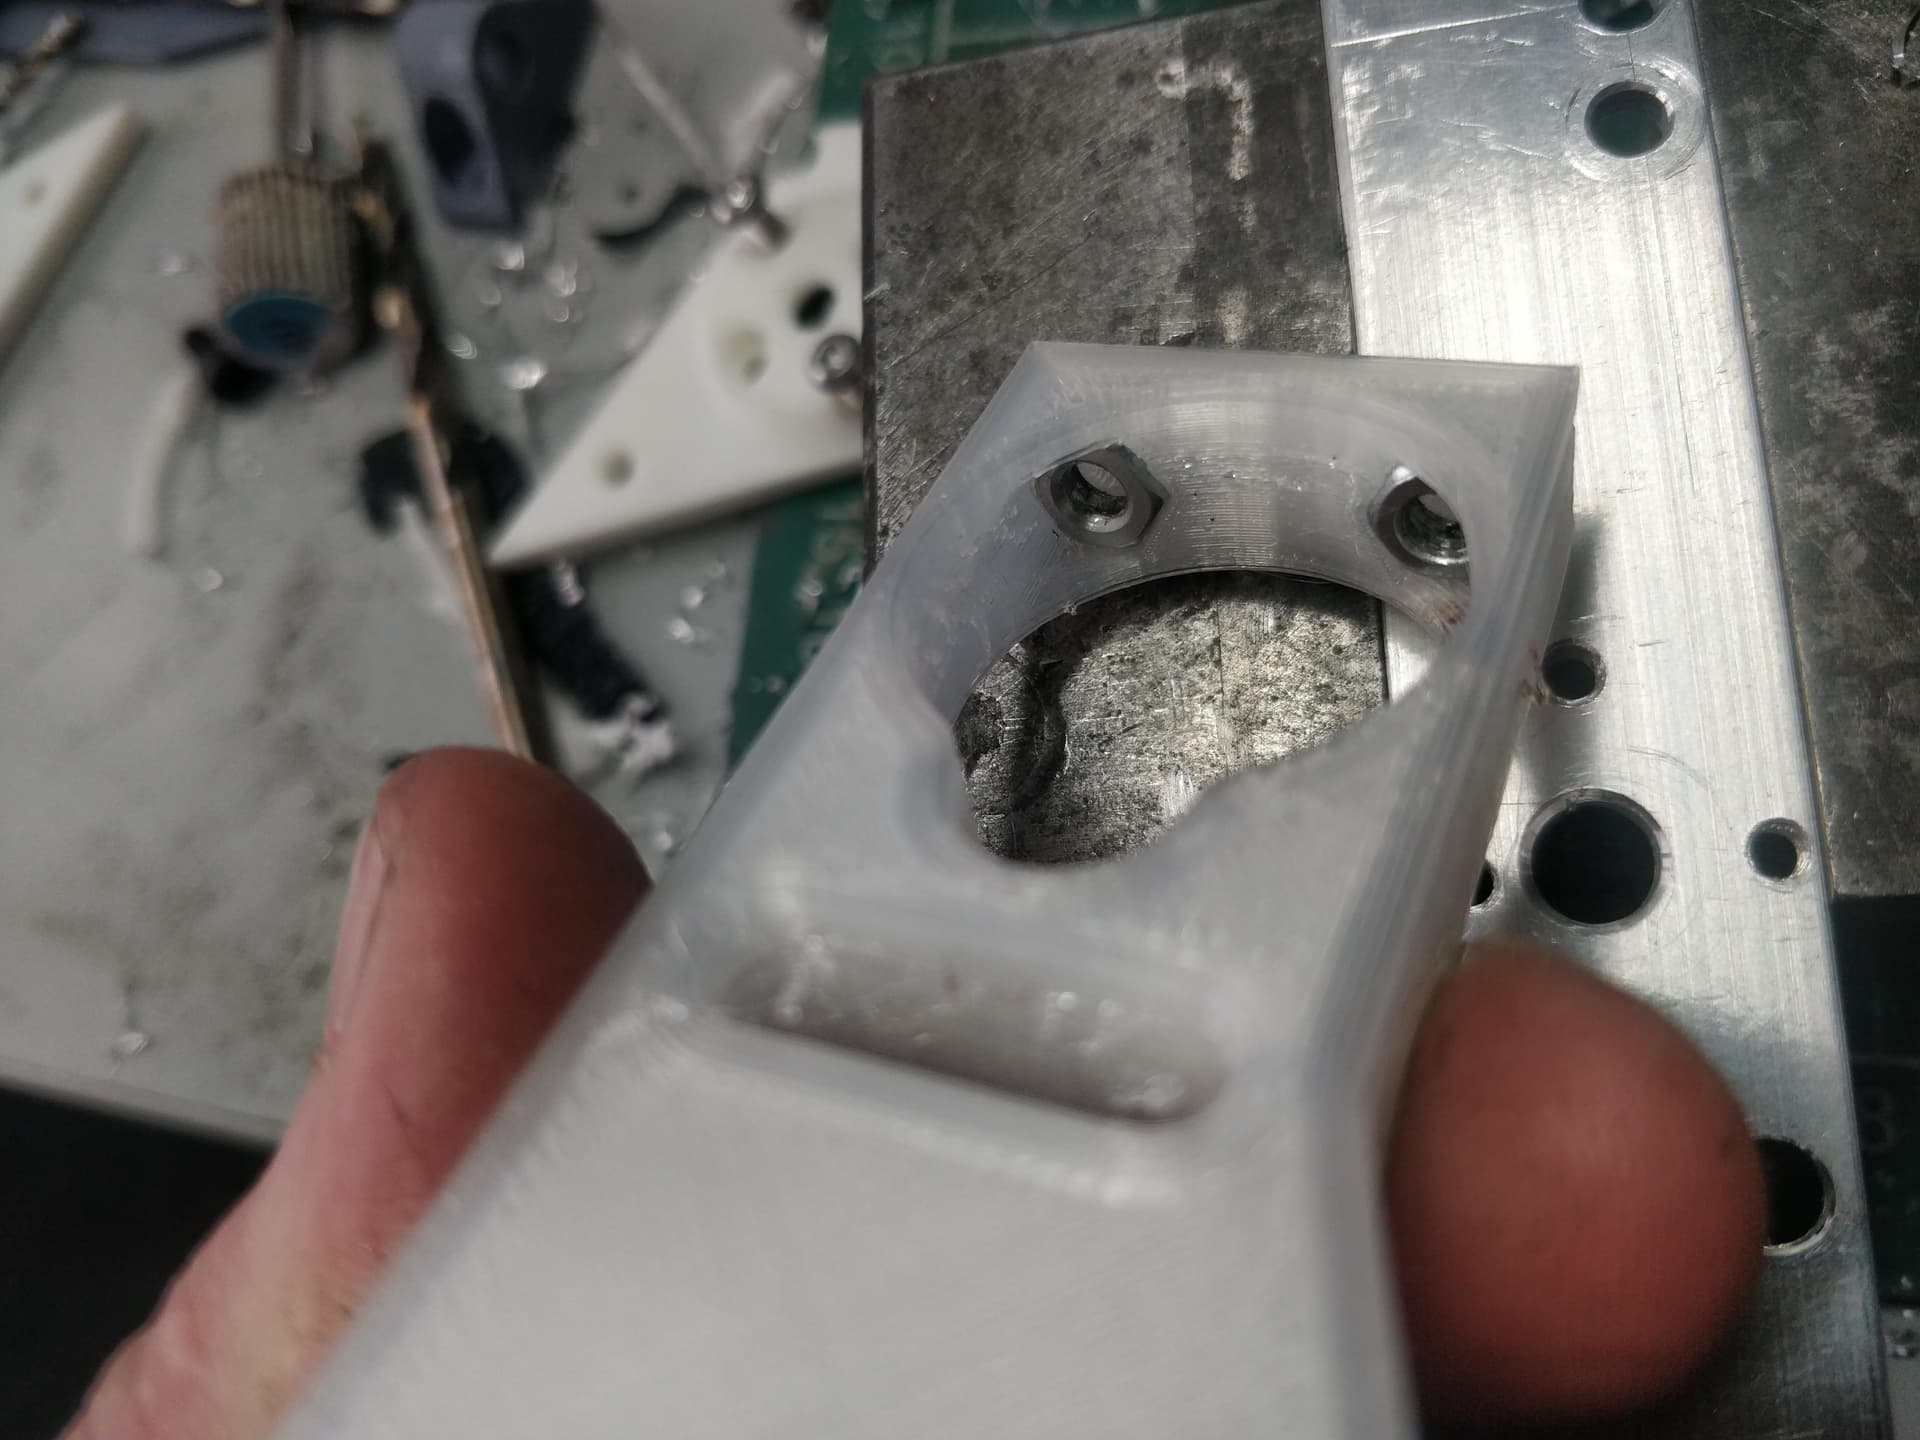
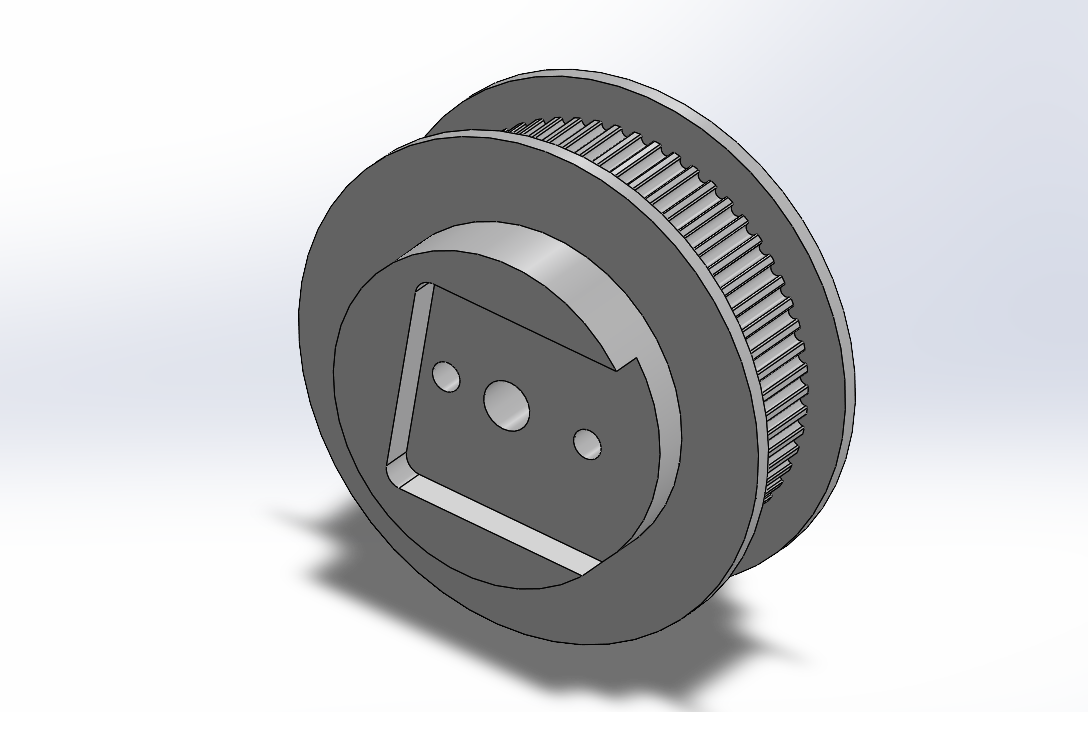
While the stock pulley was great, my lathe-less existence was hurting me that I couldn’t knock a bit off the boss then make up a spacer and have it central. Luckily I live in the future where you can just hit send on a part and get exactly what’s on your screen in mere hours. I drew a 59 tooth GT2 pulley (just to ease some of the ANGRY tension I had foolishly added) to replace the 60t aluminium one and printed it in ABS. It has the interlocking geometry for the arms. I just threaded direct to the ABS which works really pretty well (it shouldn’t, though)

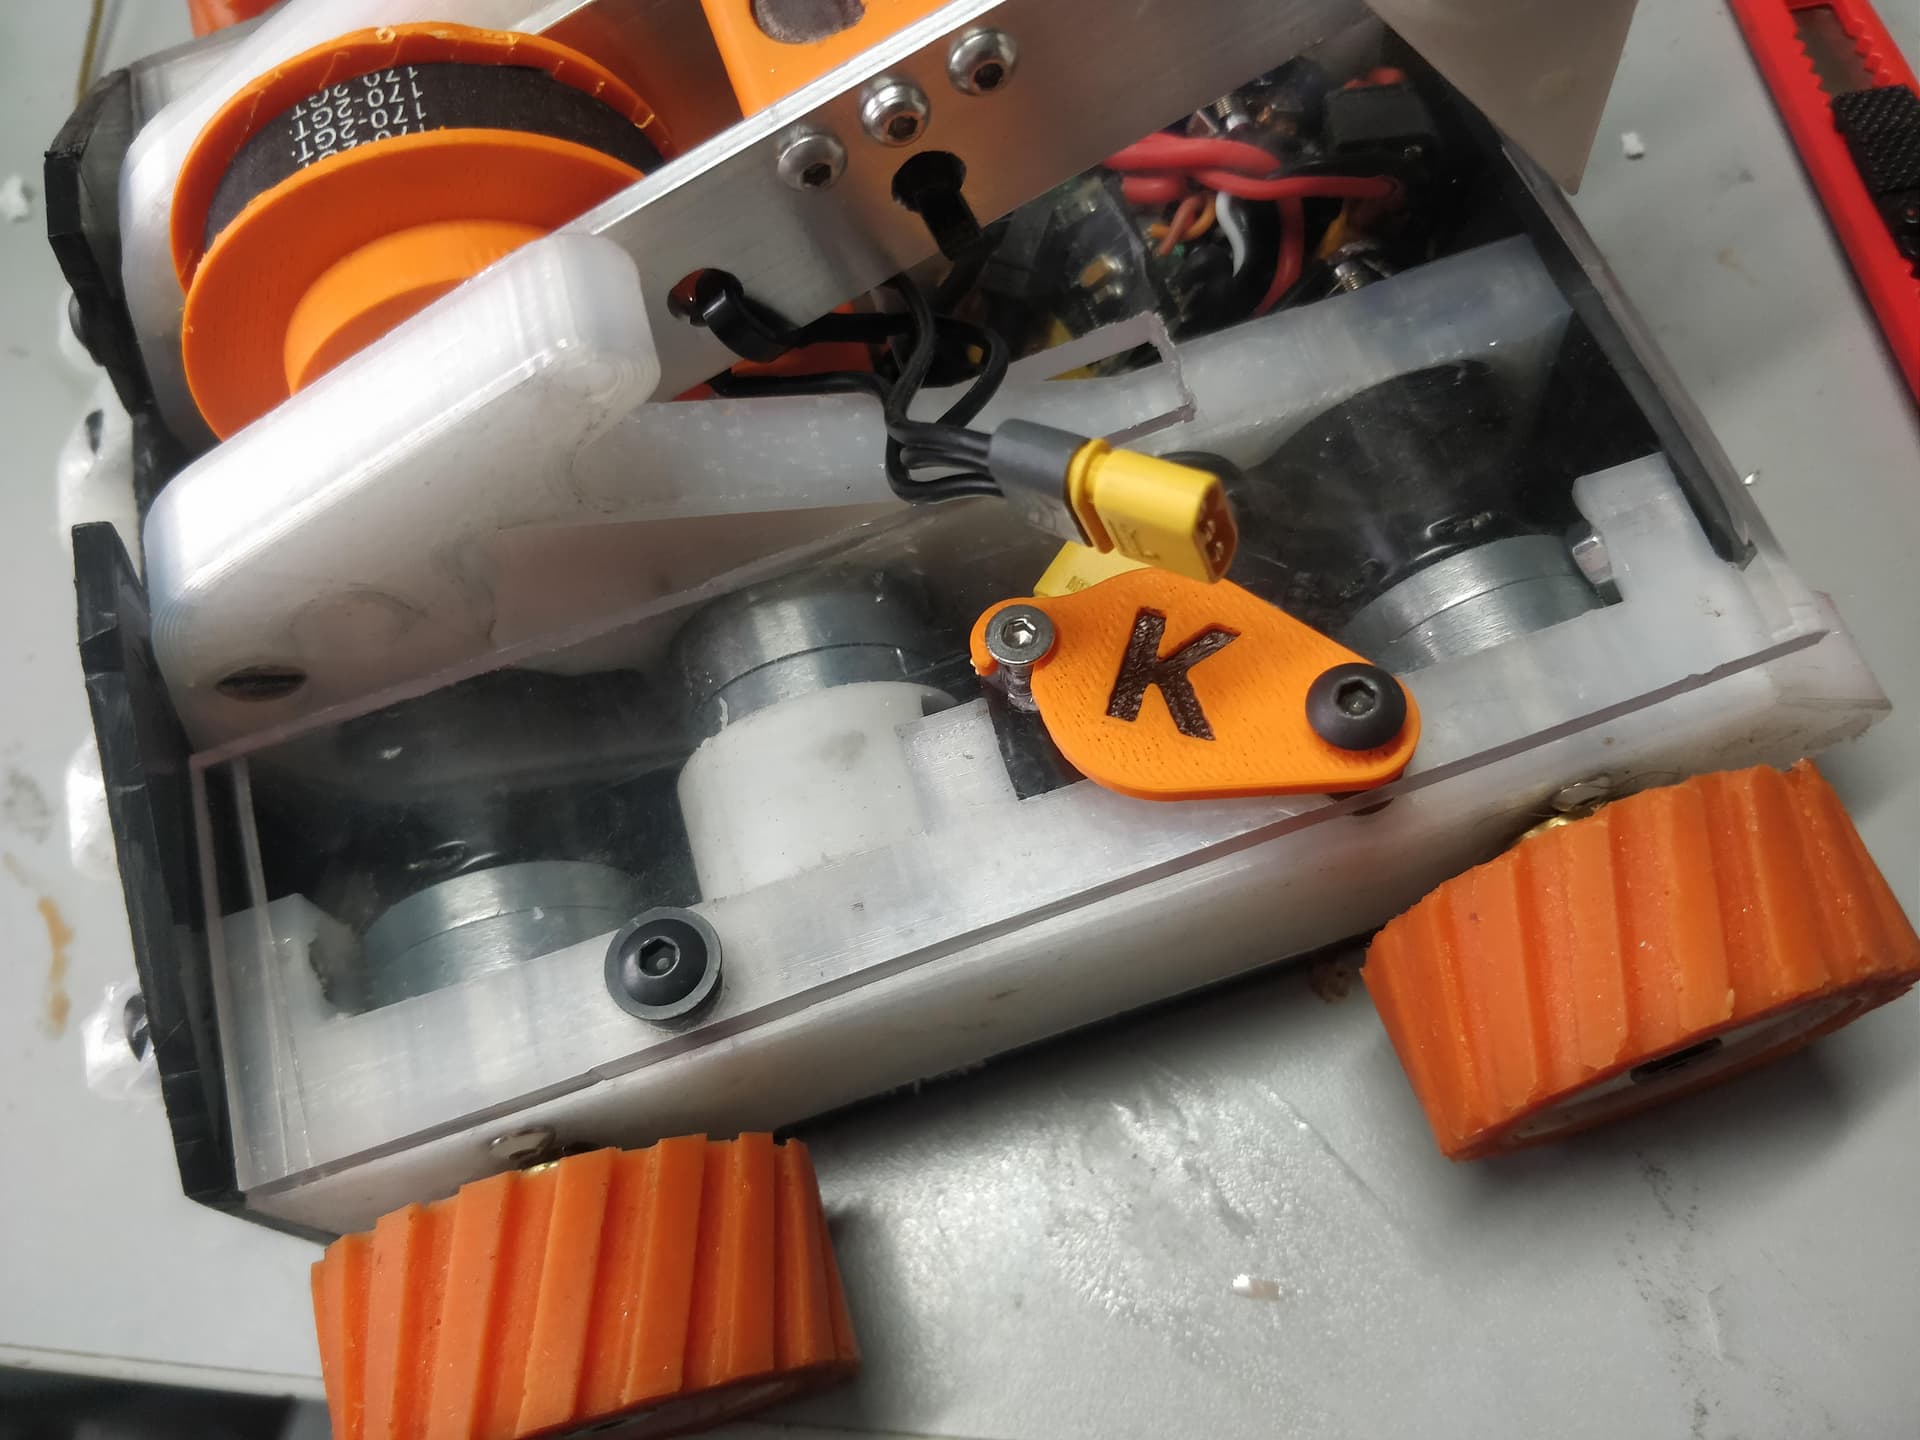
I also knuckled down and printed something to give an extra little bit of security in the form of a link flap. Again just ABS it piviots on one of the mounting bolts for the lid and latches on an M3. With a little bit of Klaus branding to, after all the link can’t fall out if its stuck in a K-hole

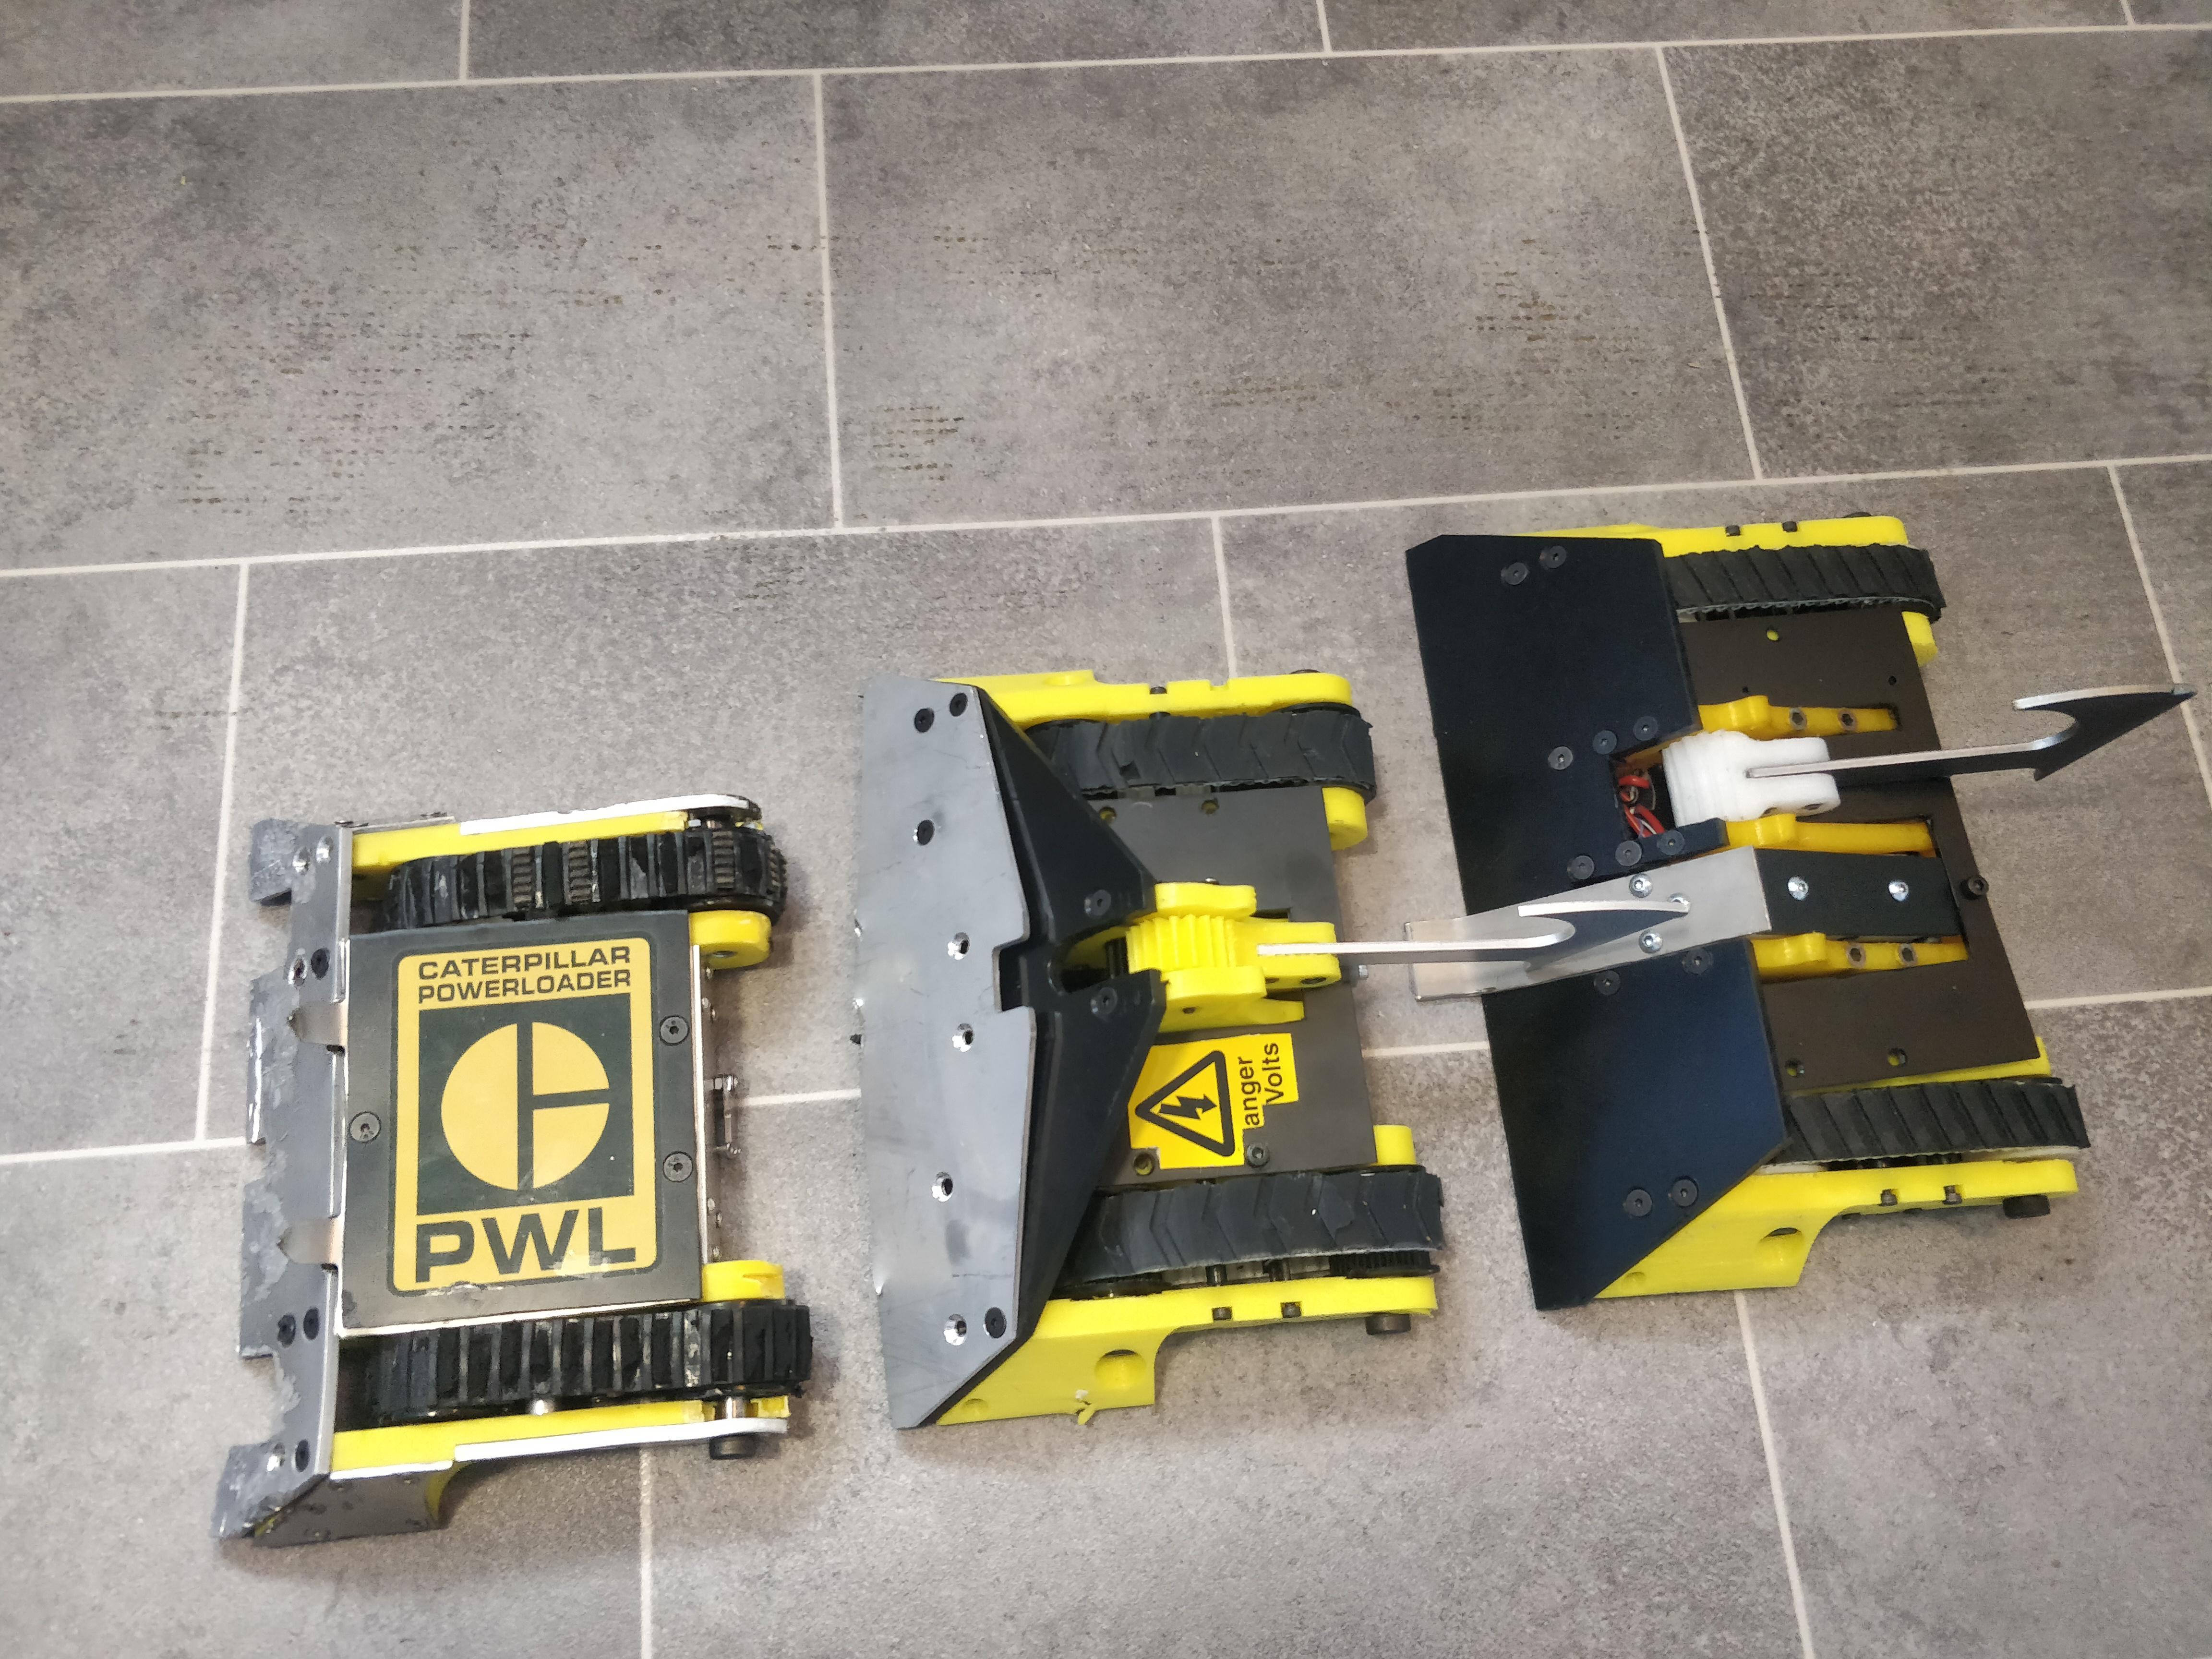
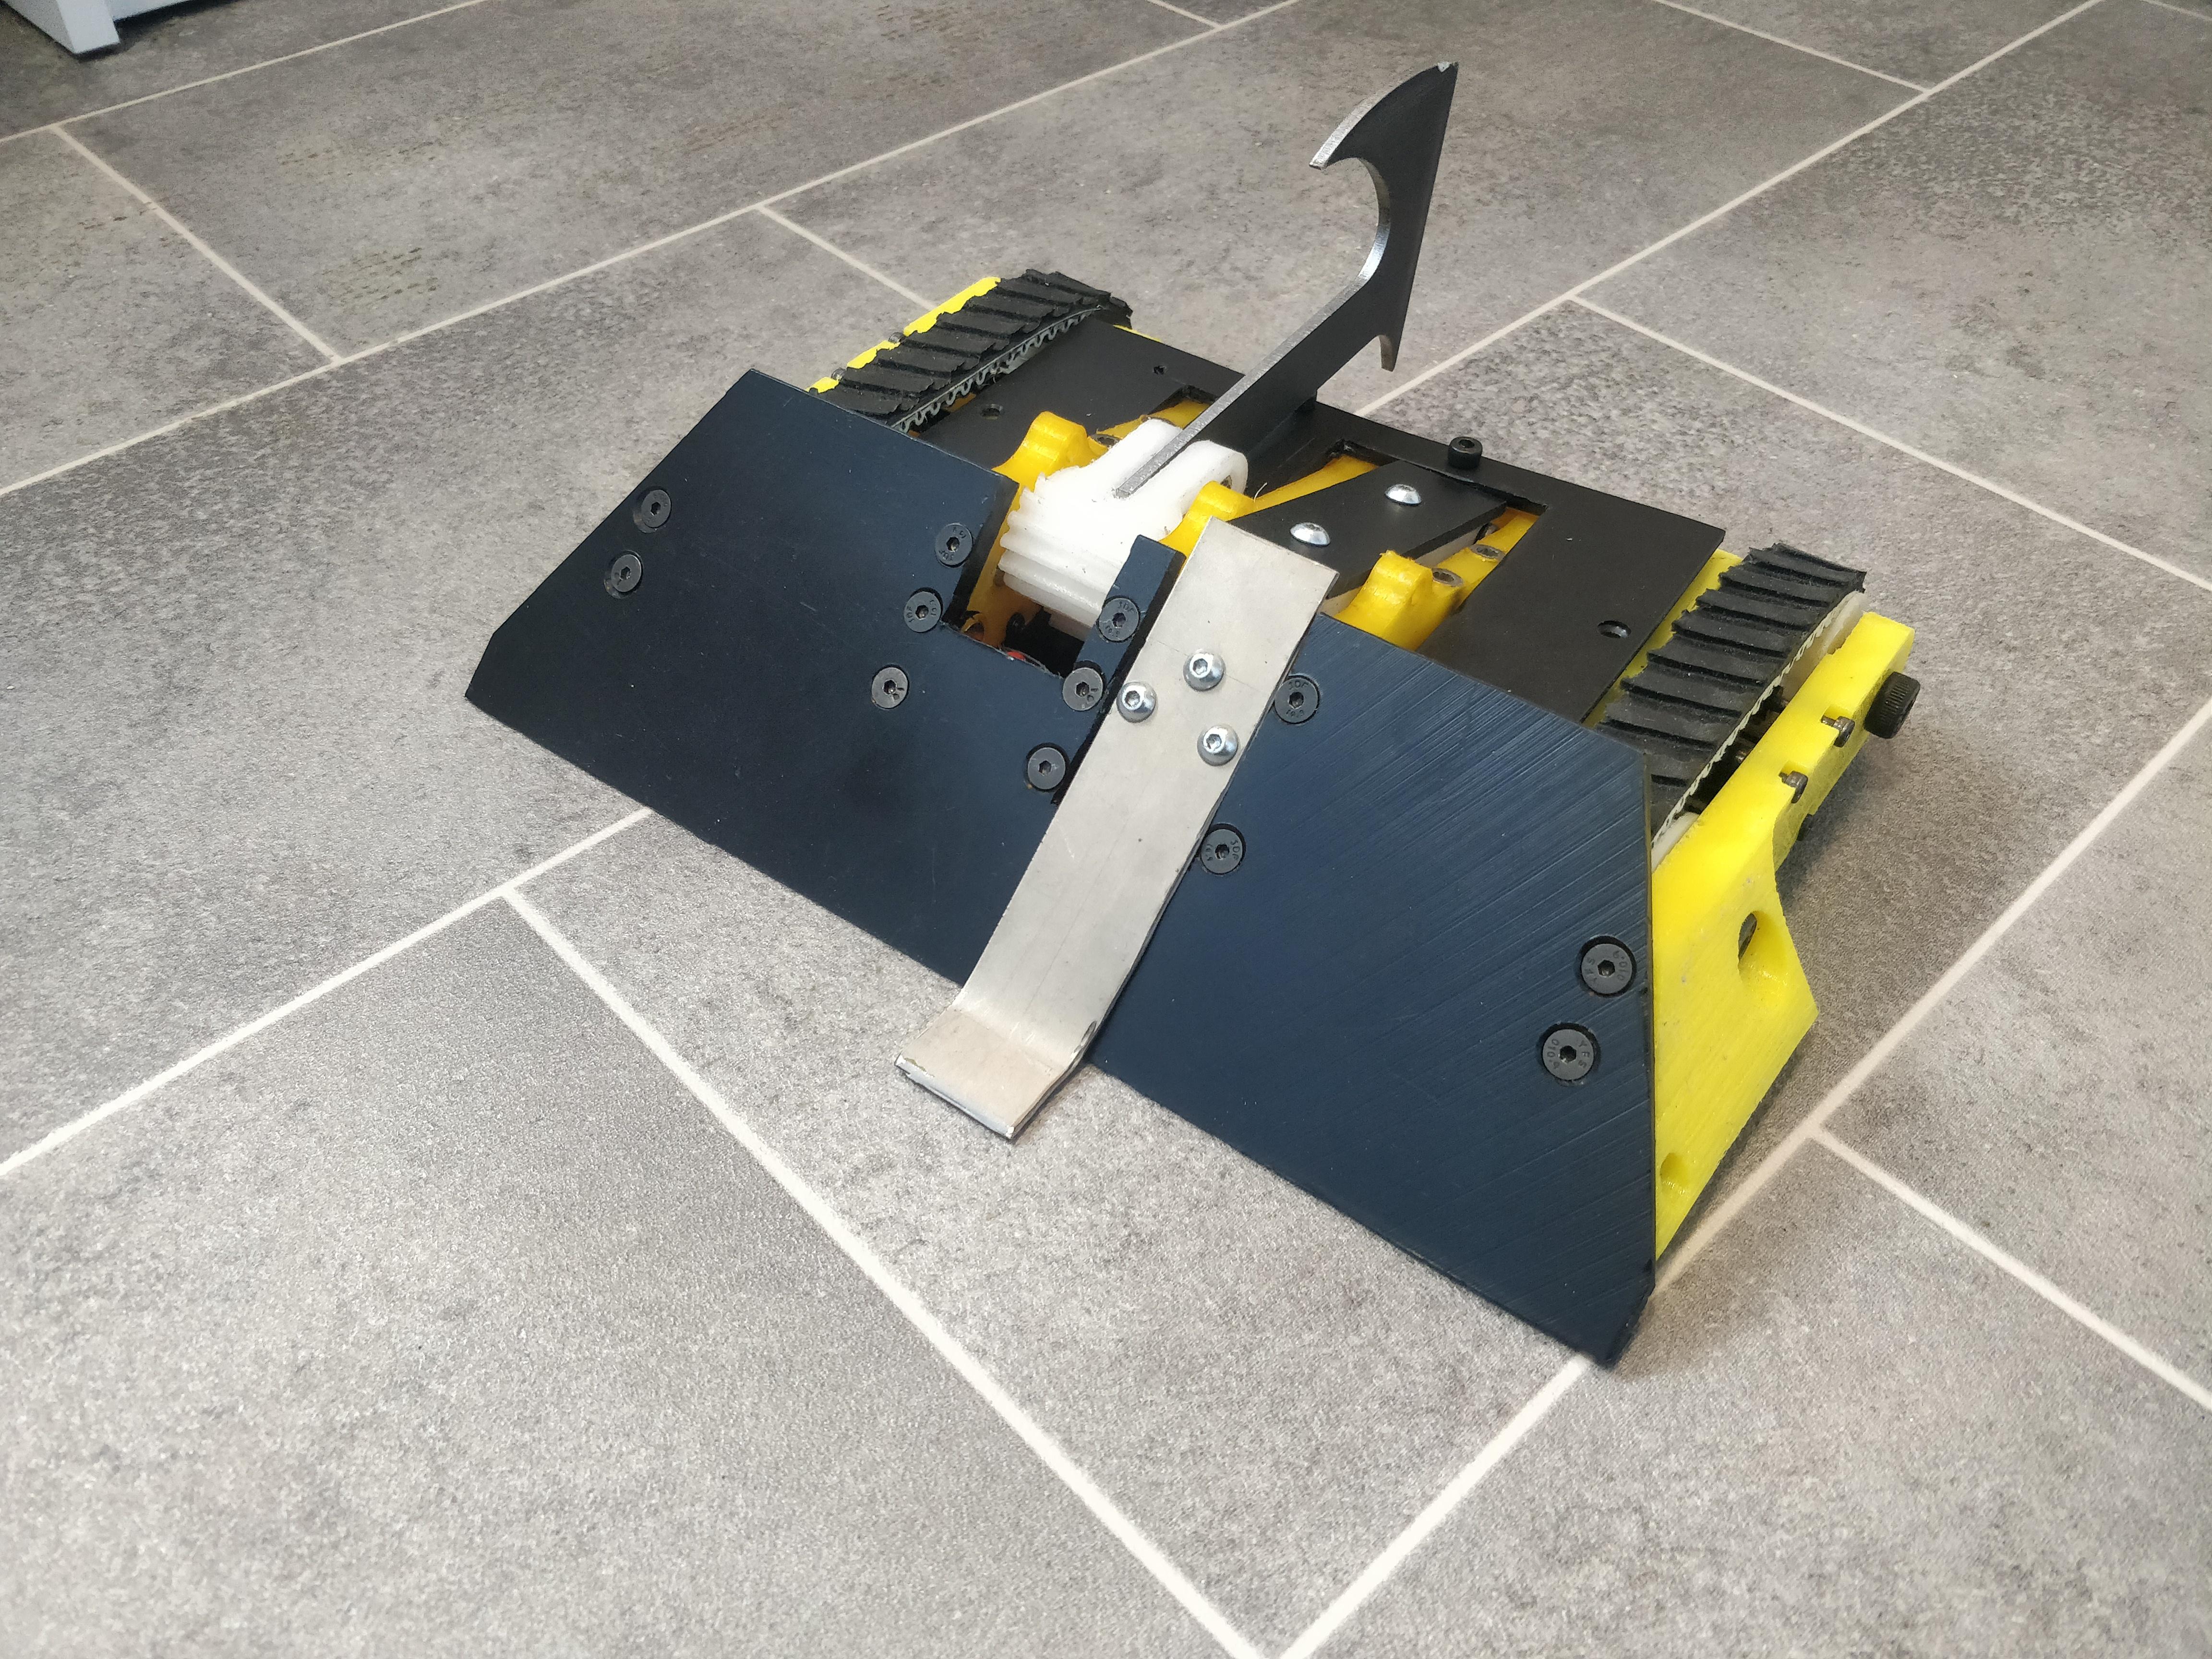
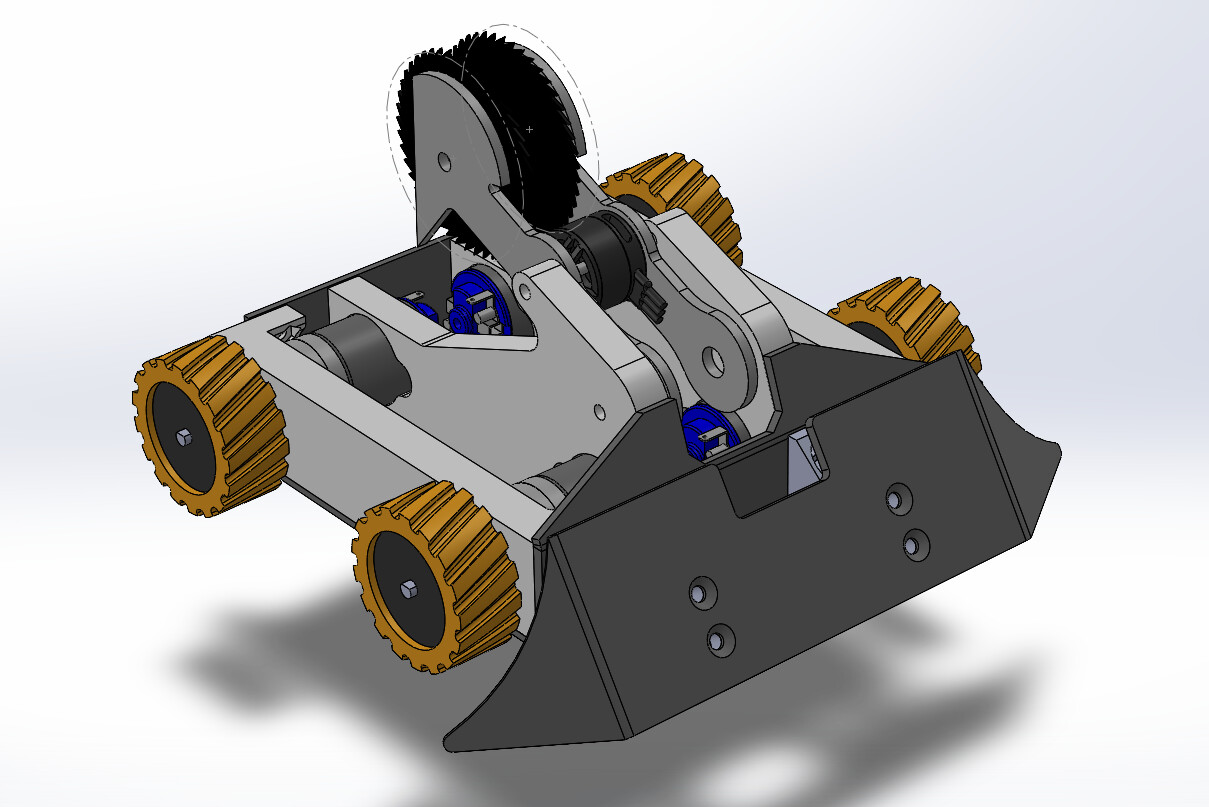
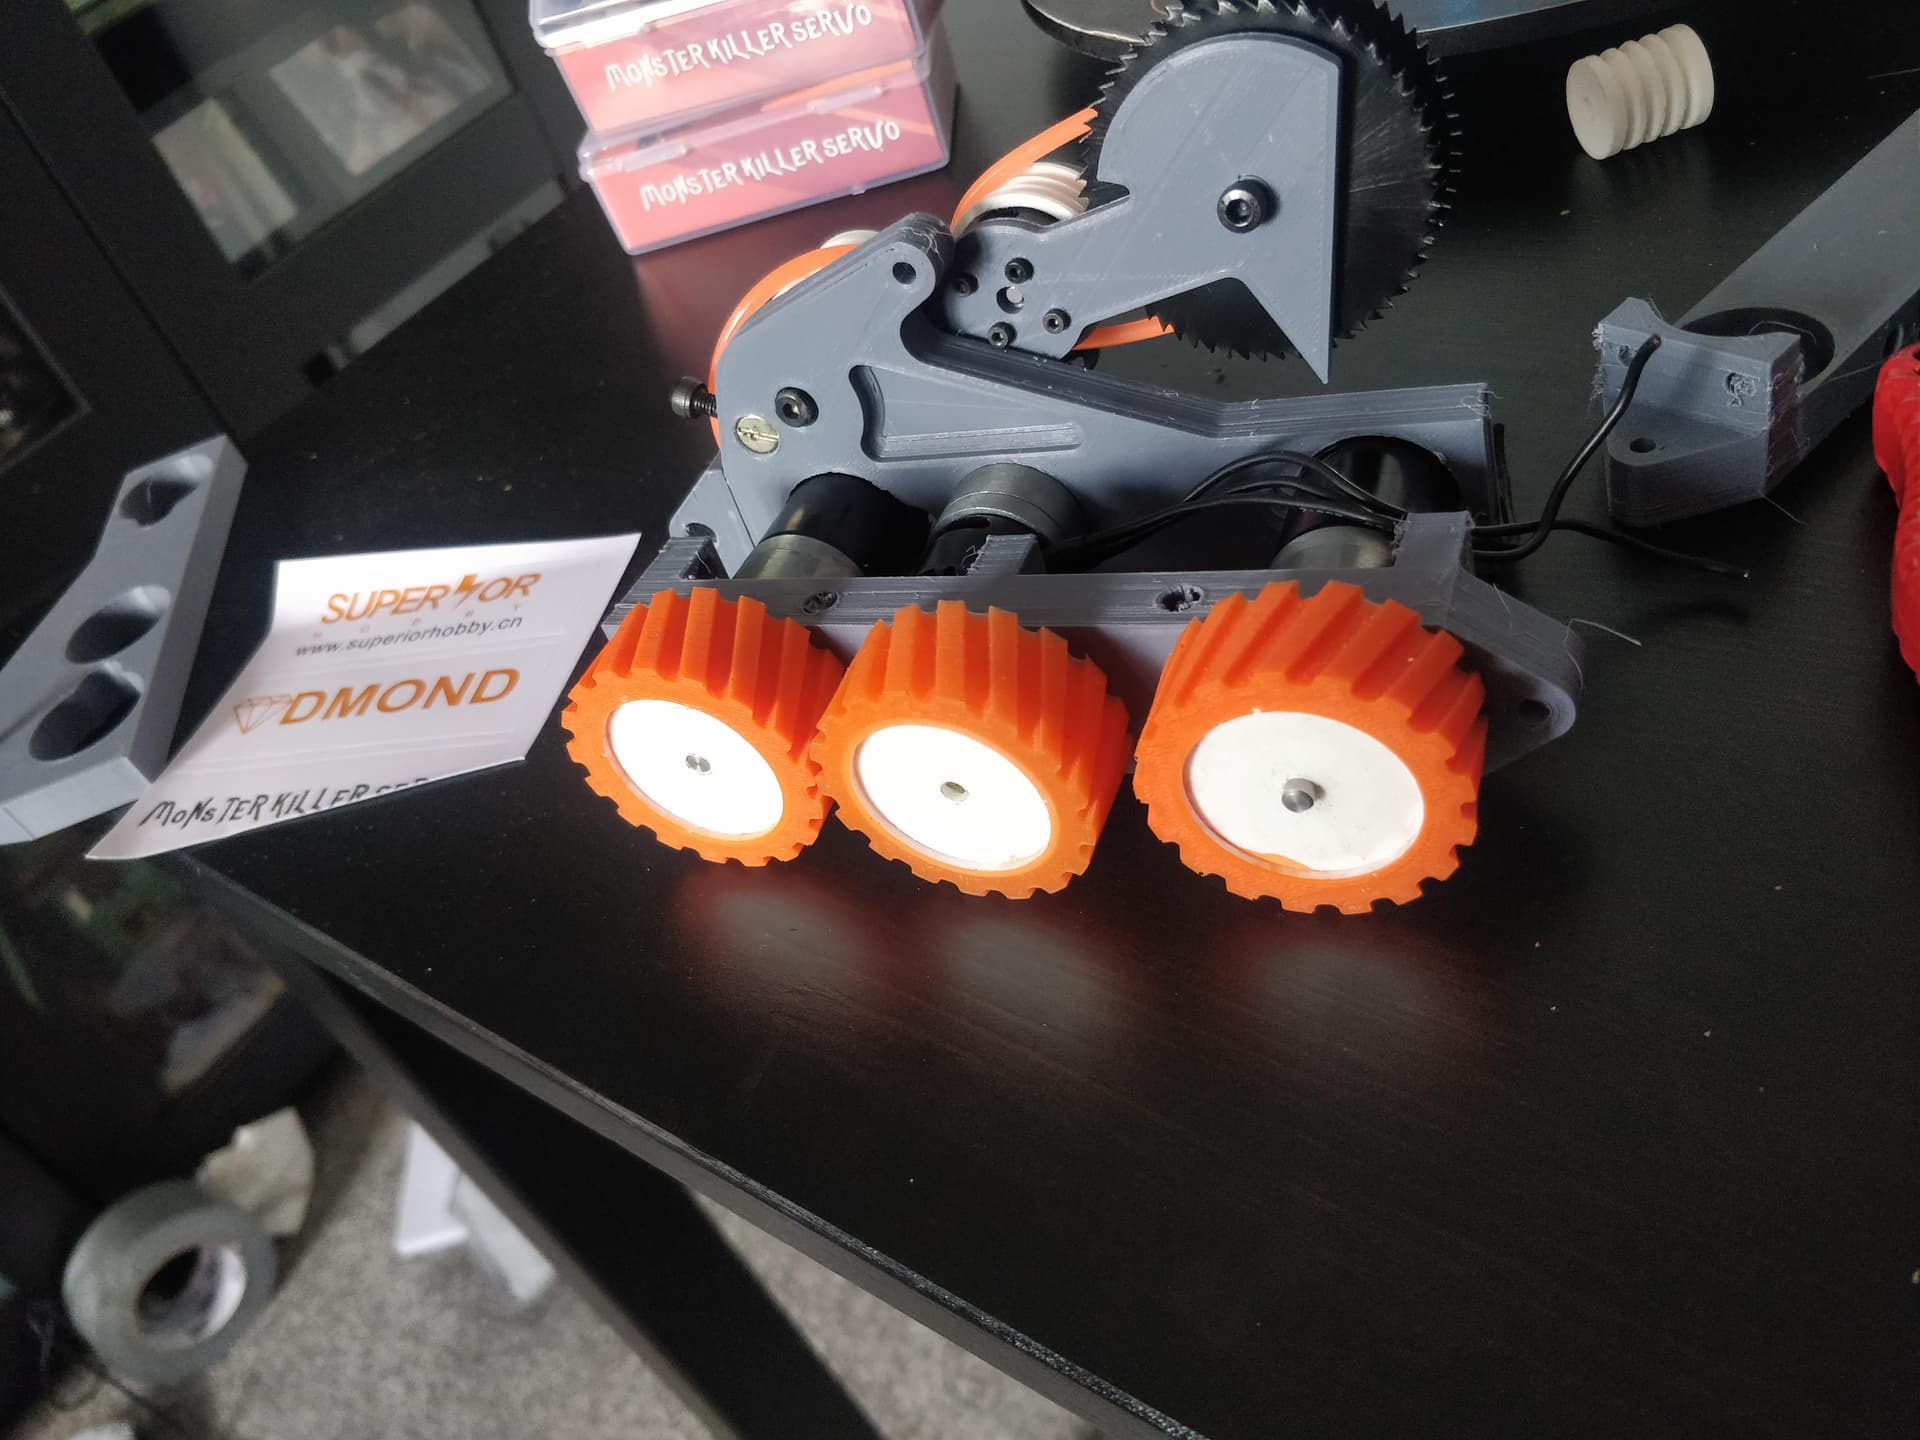
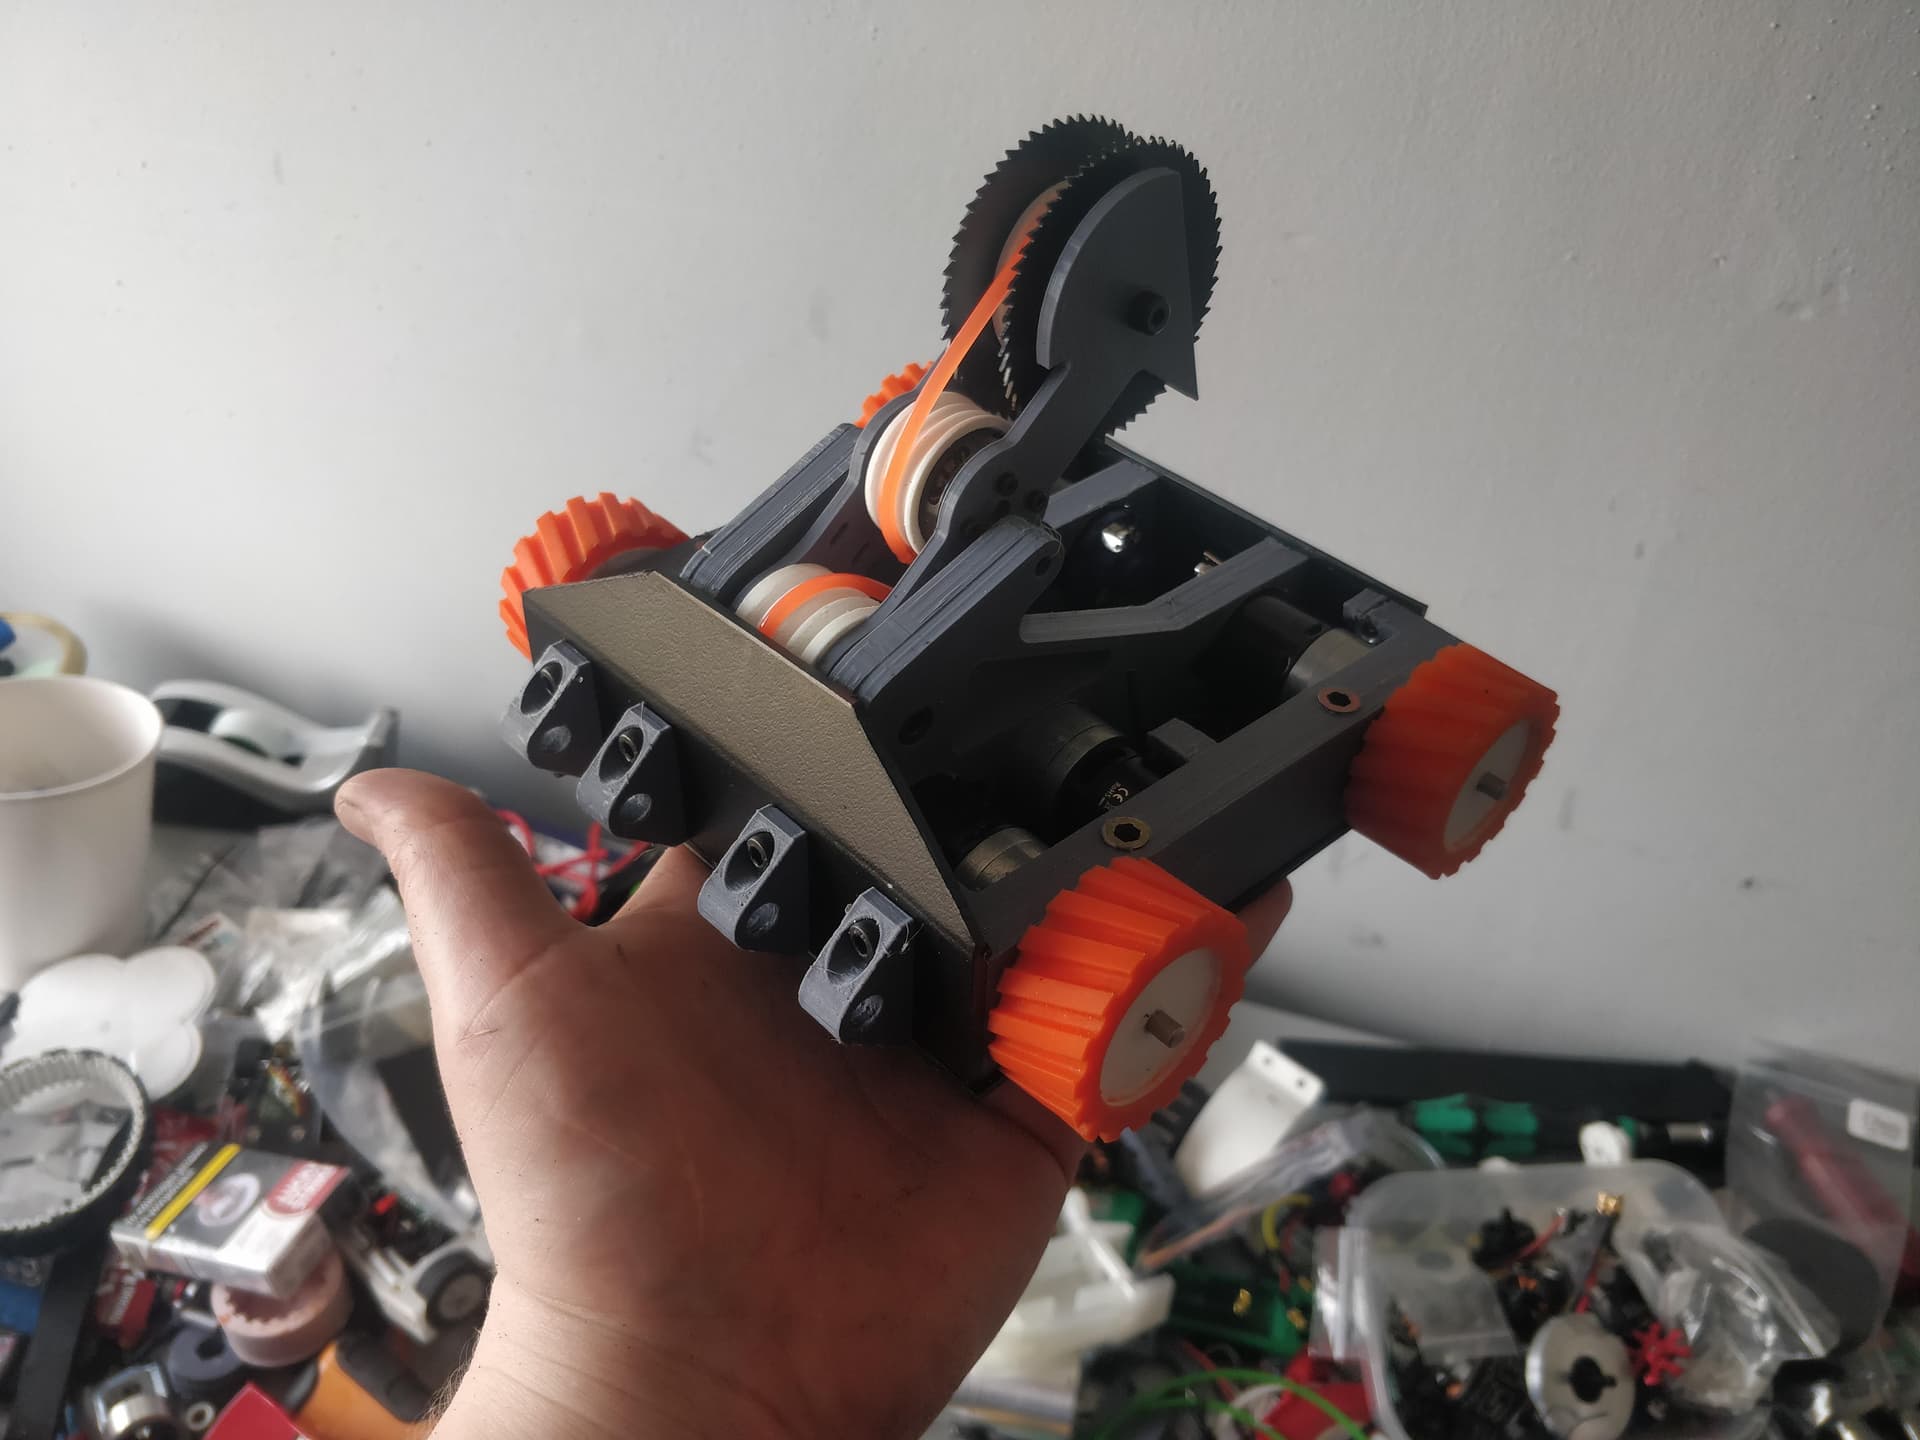
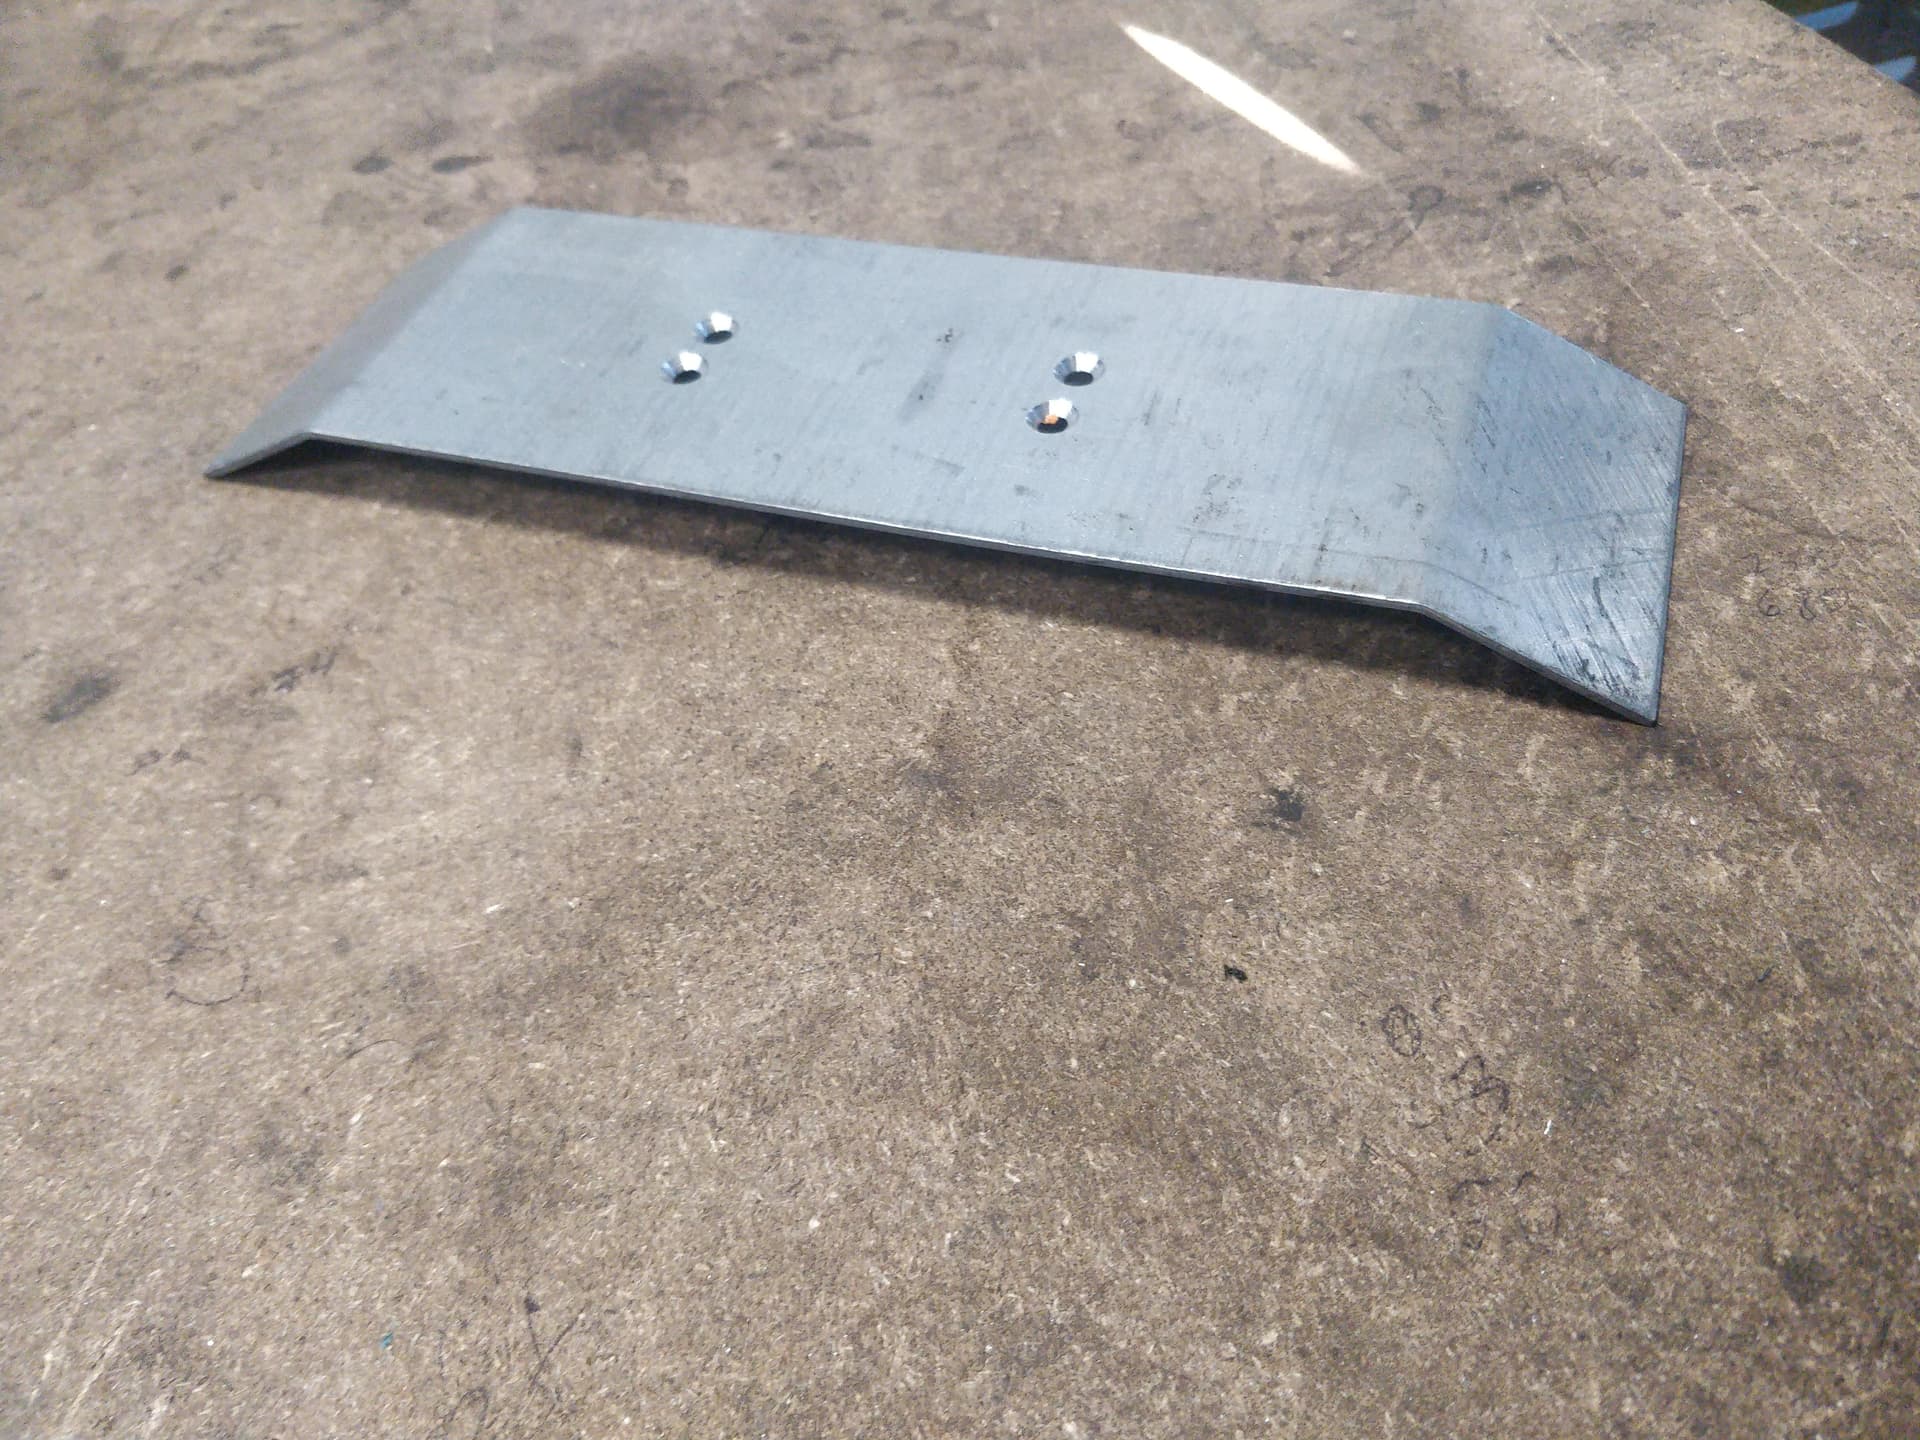
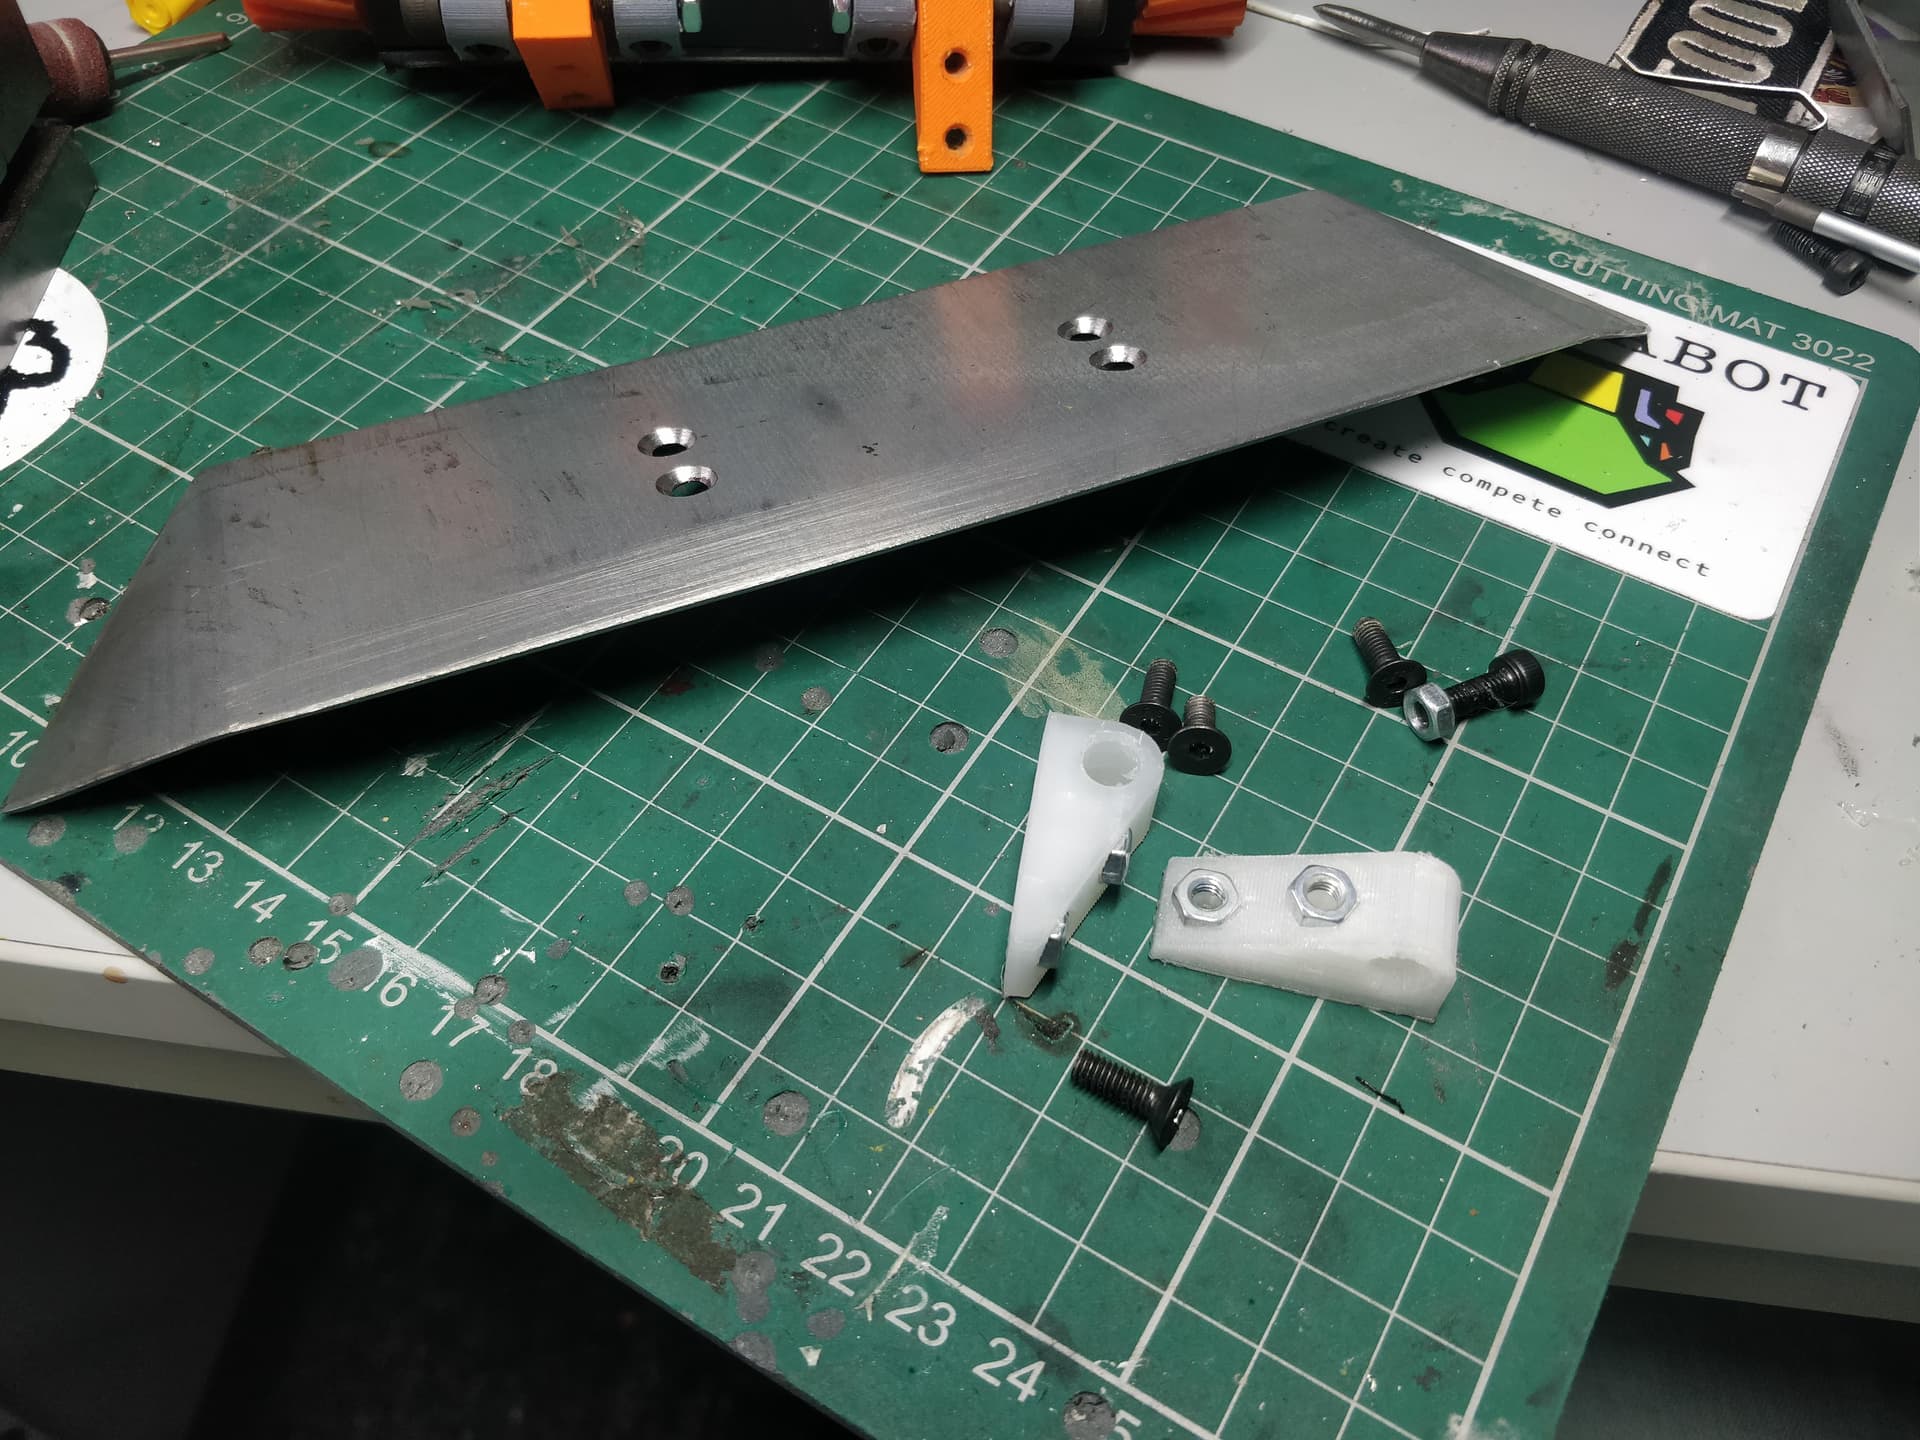
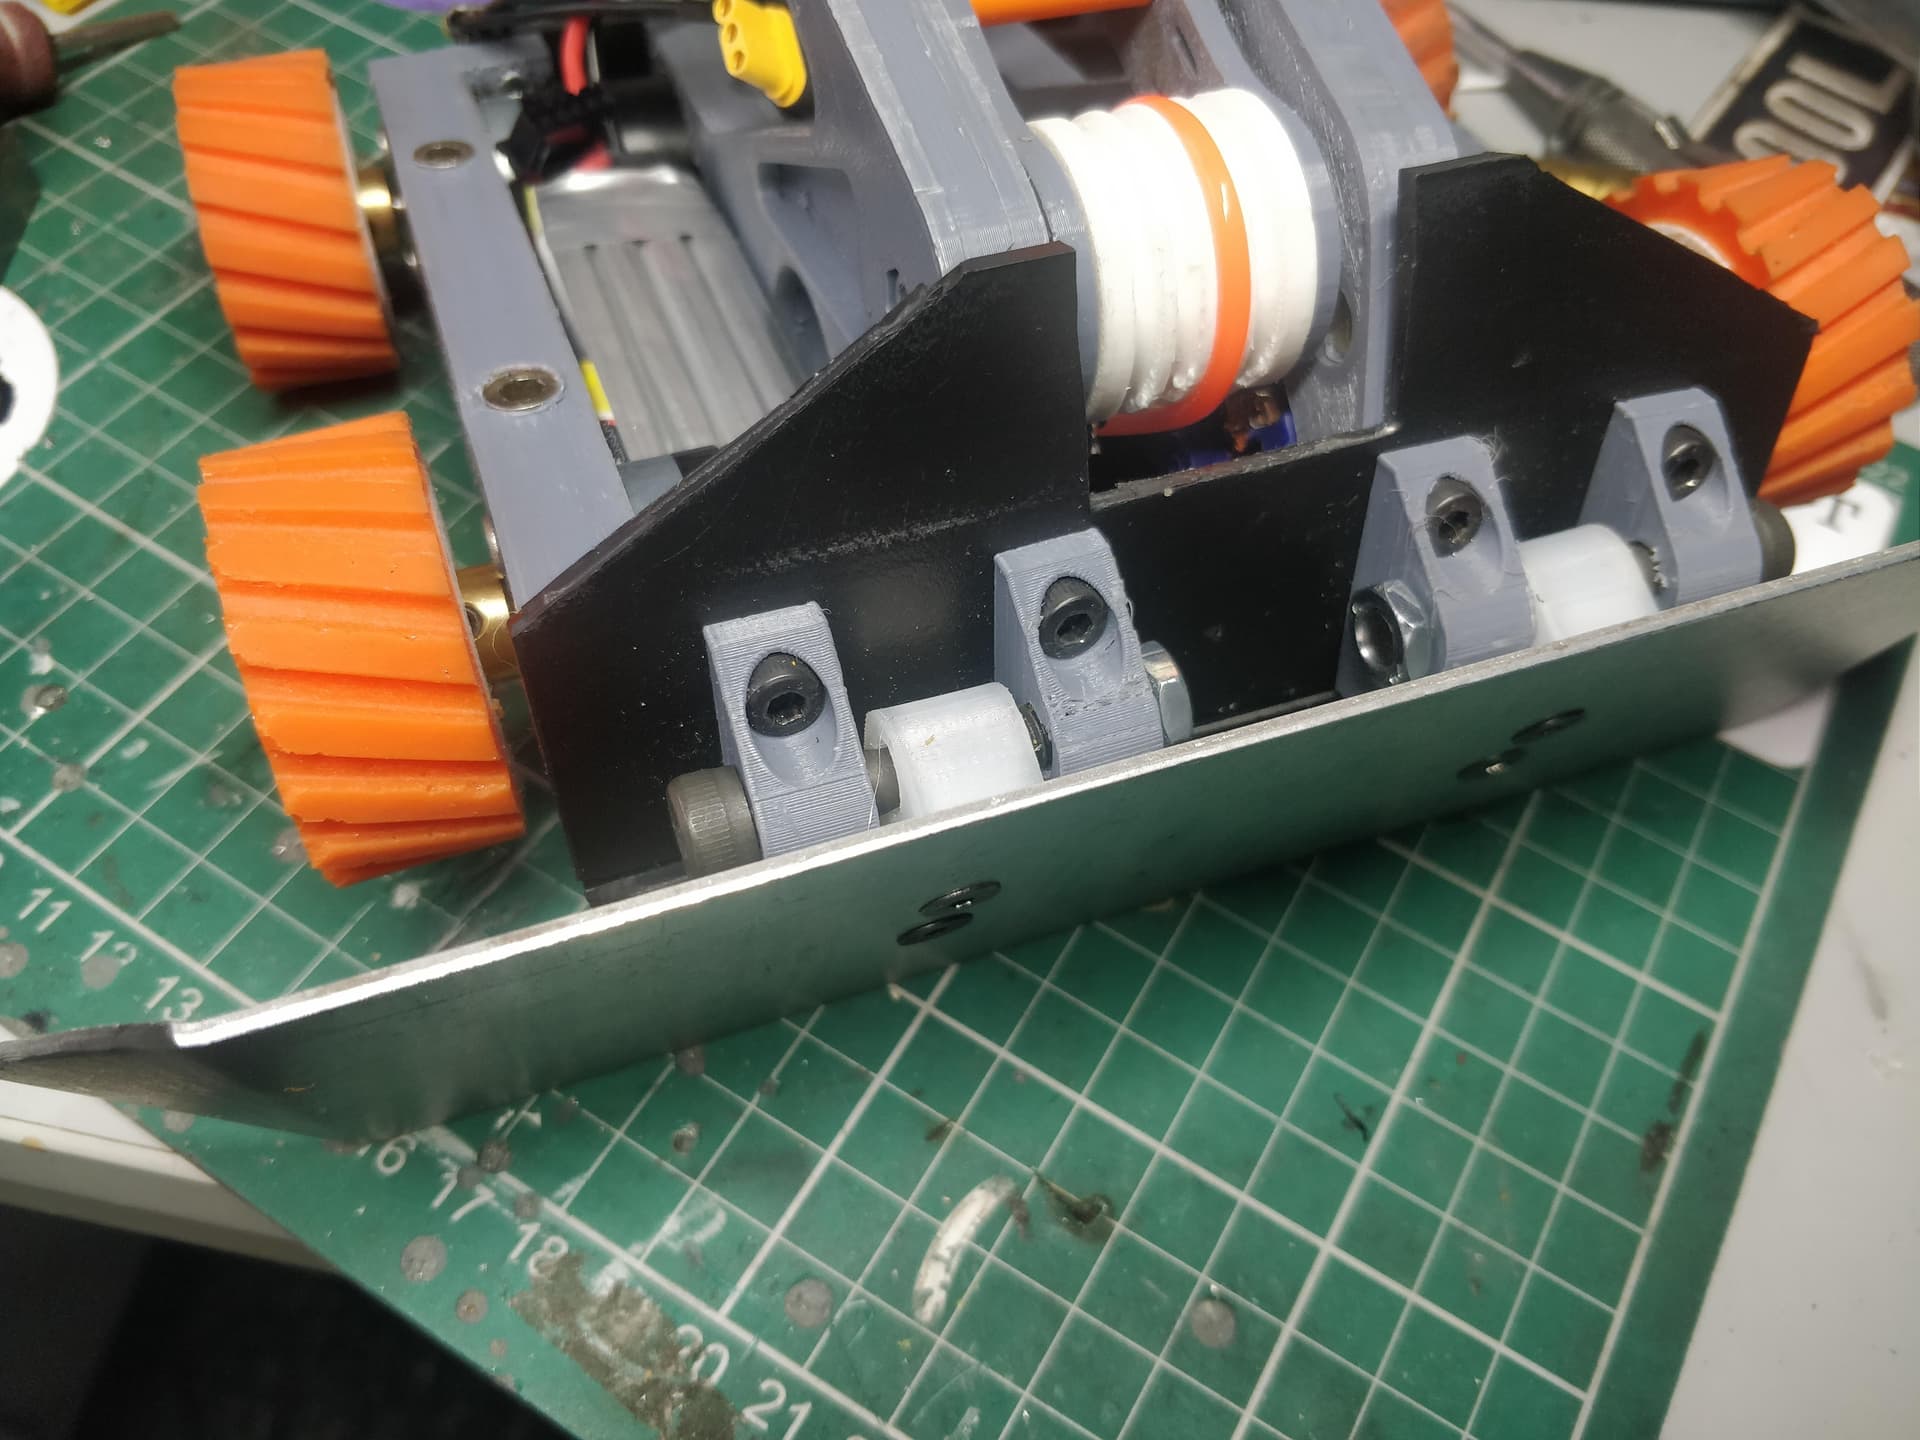
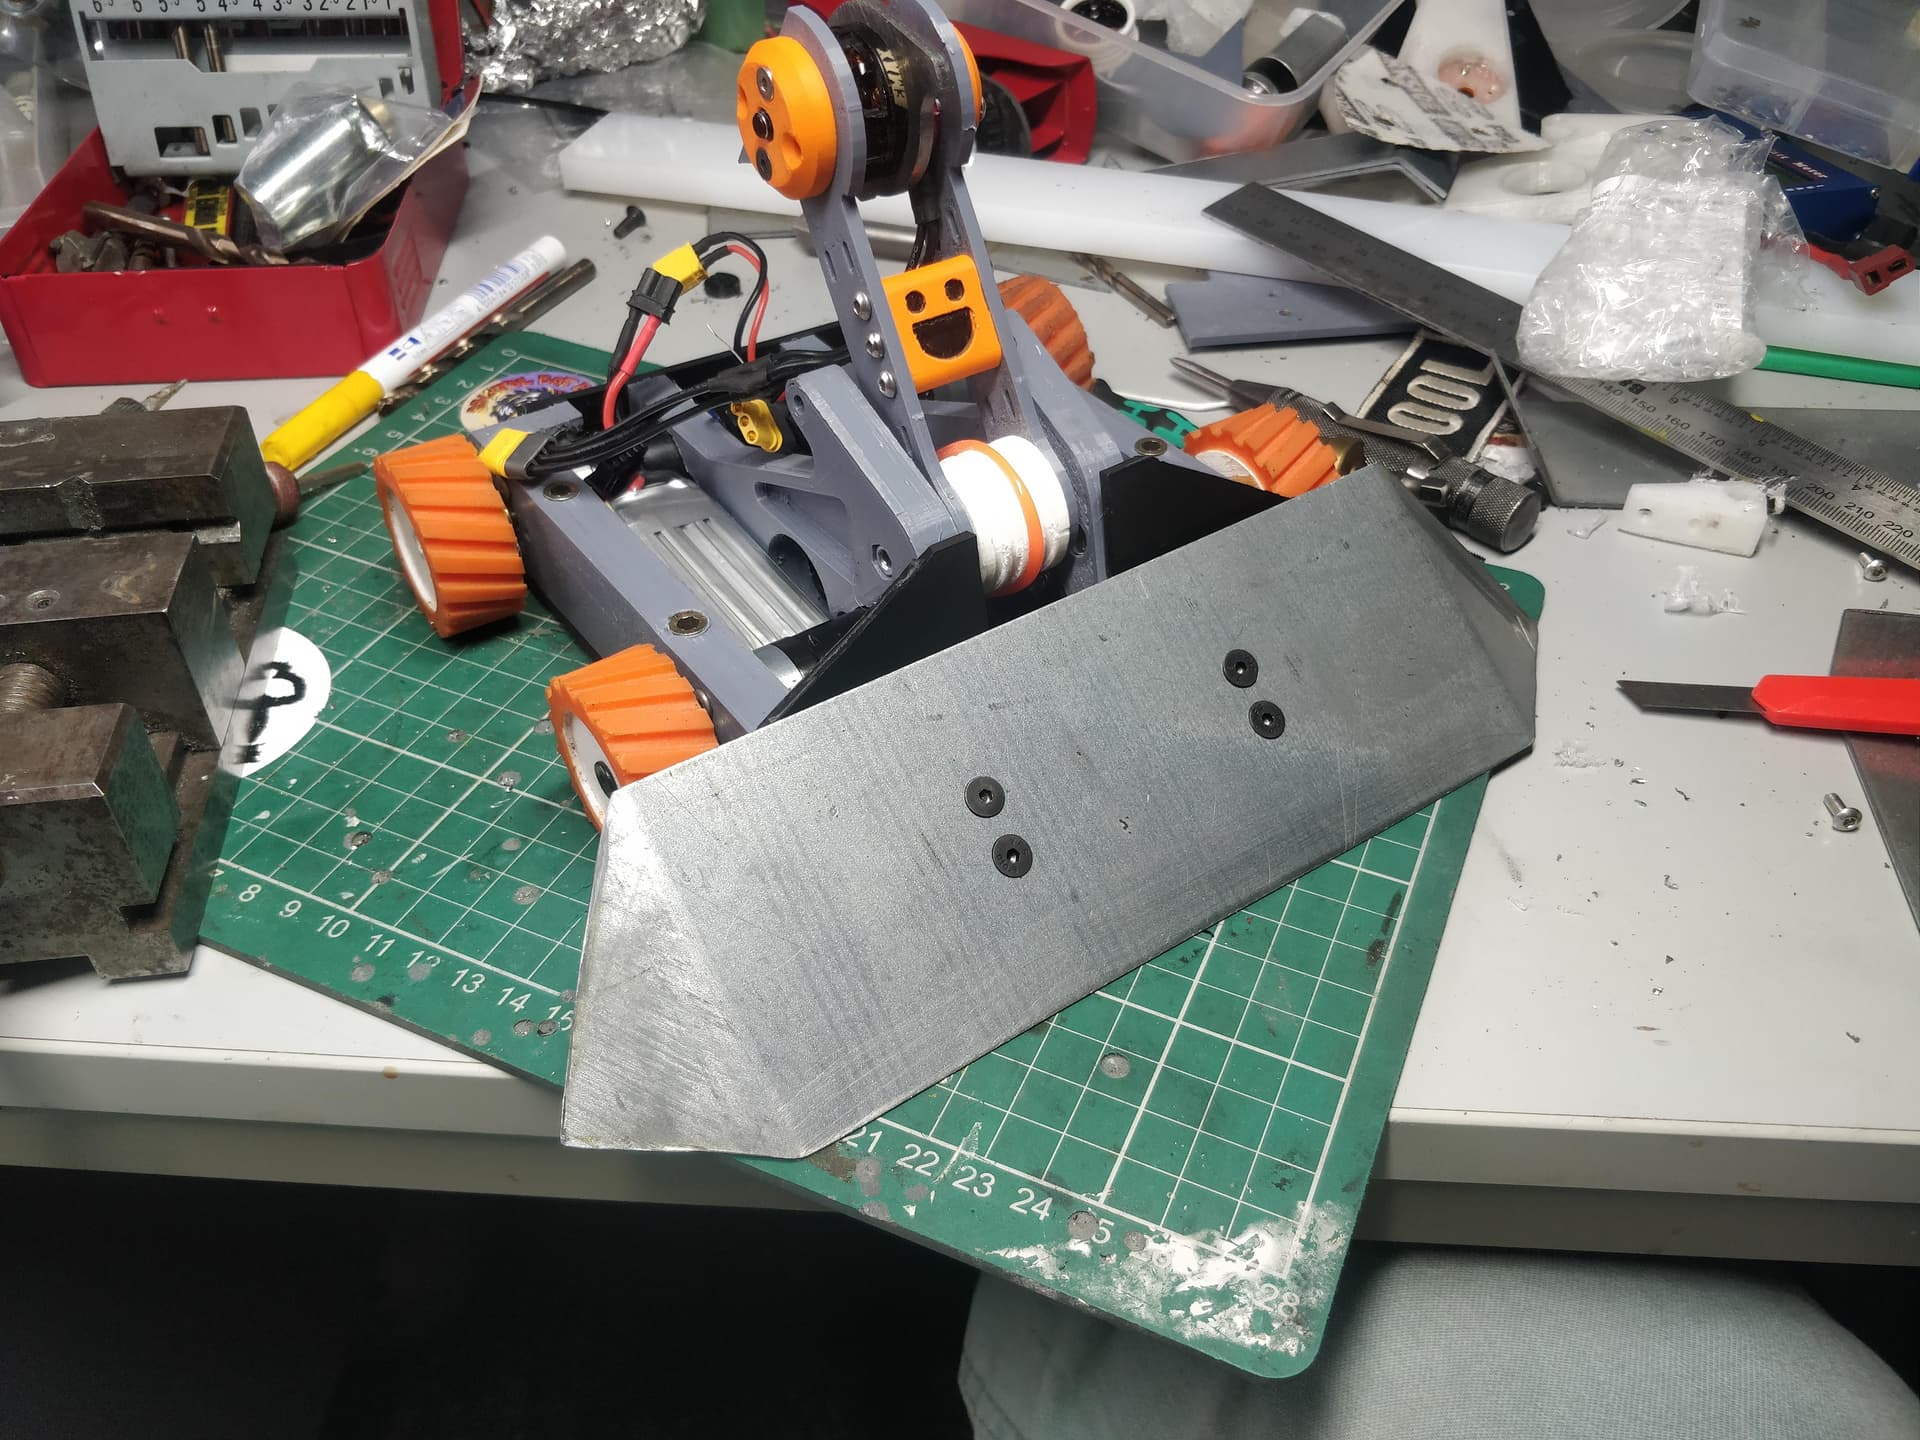
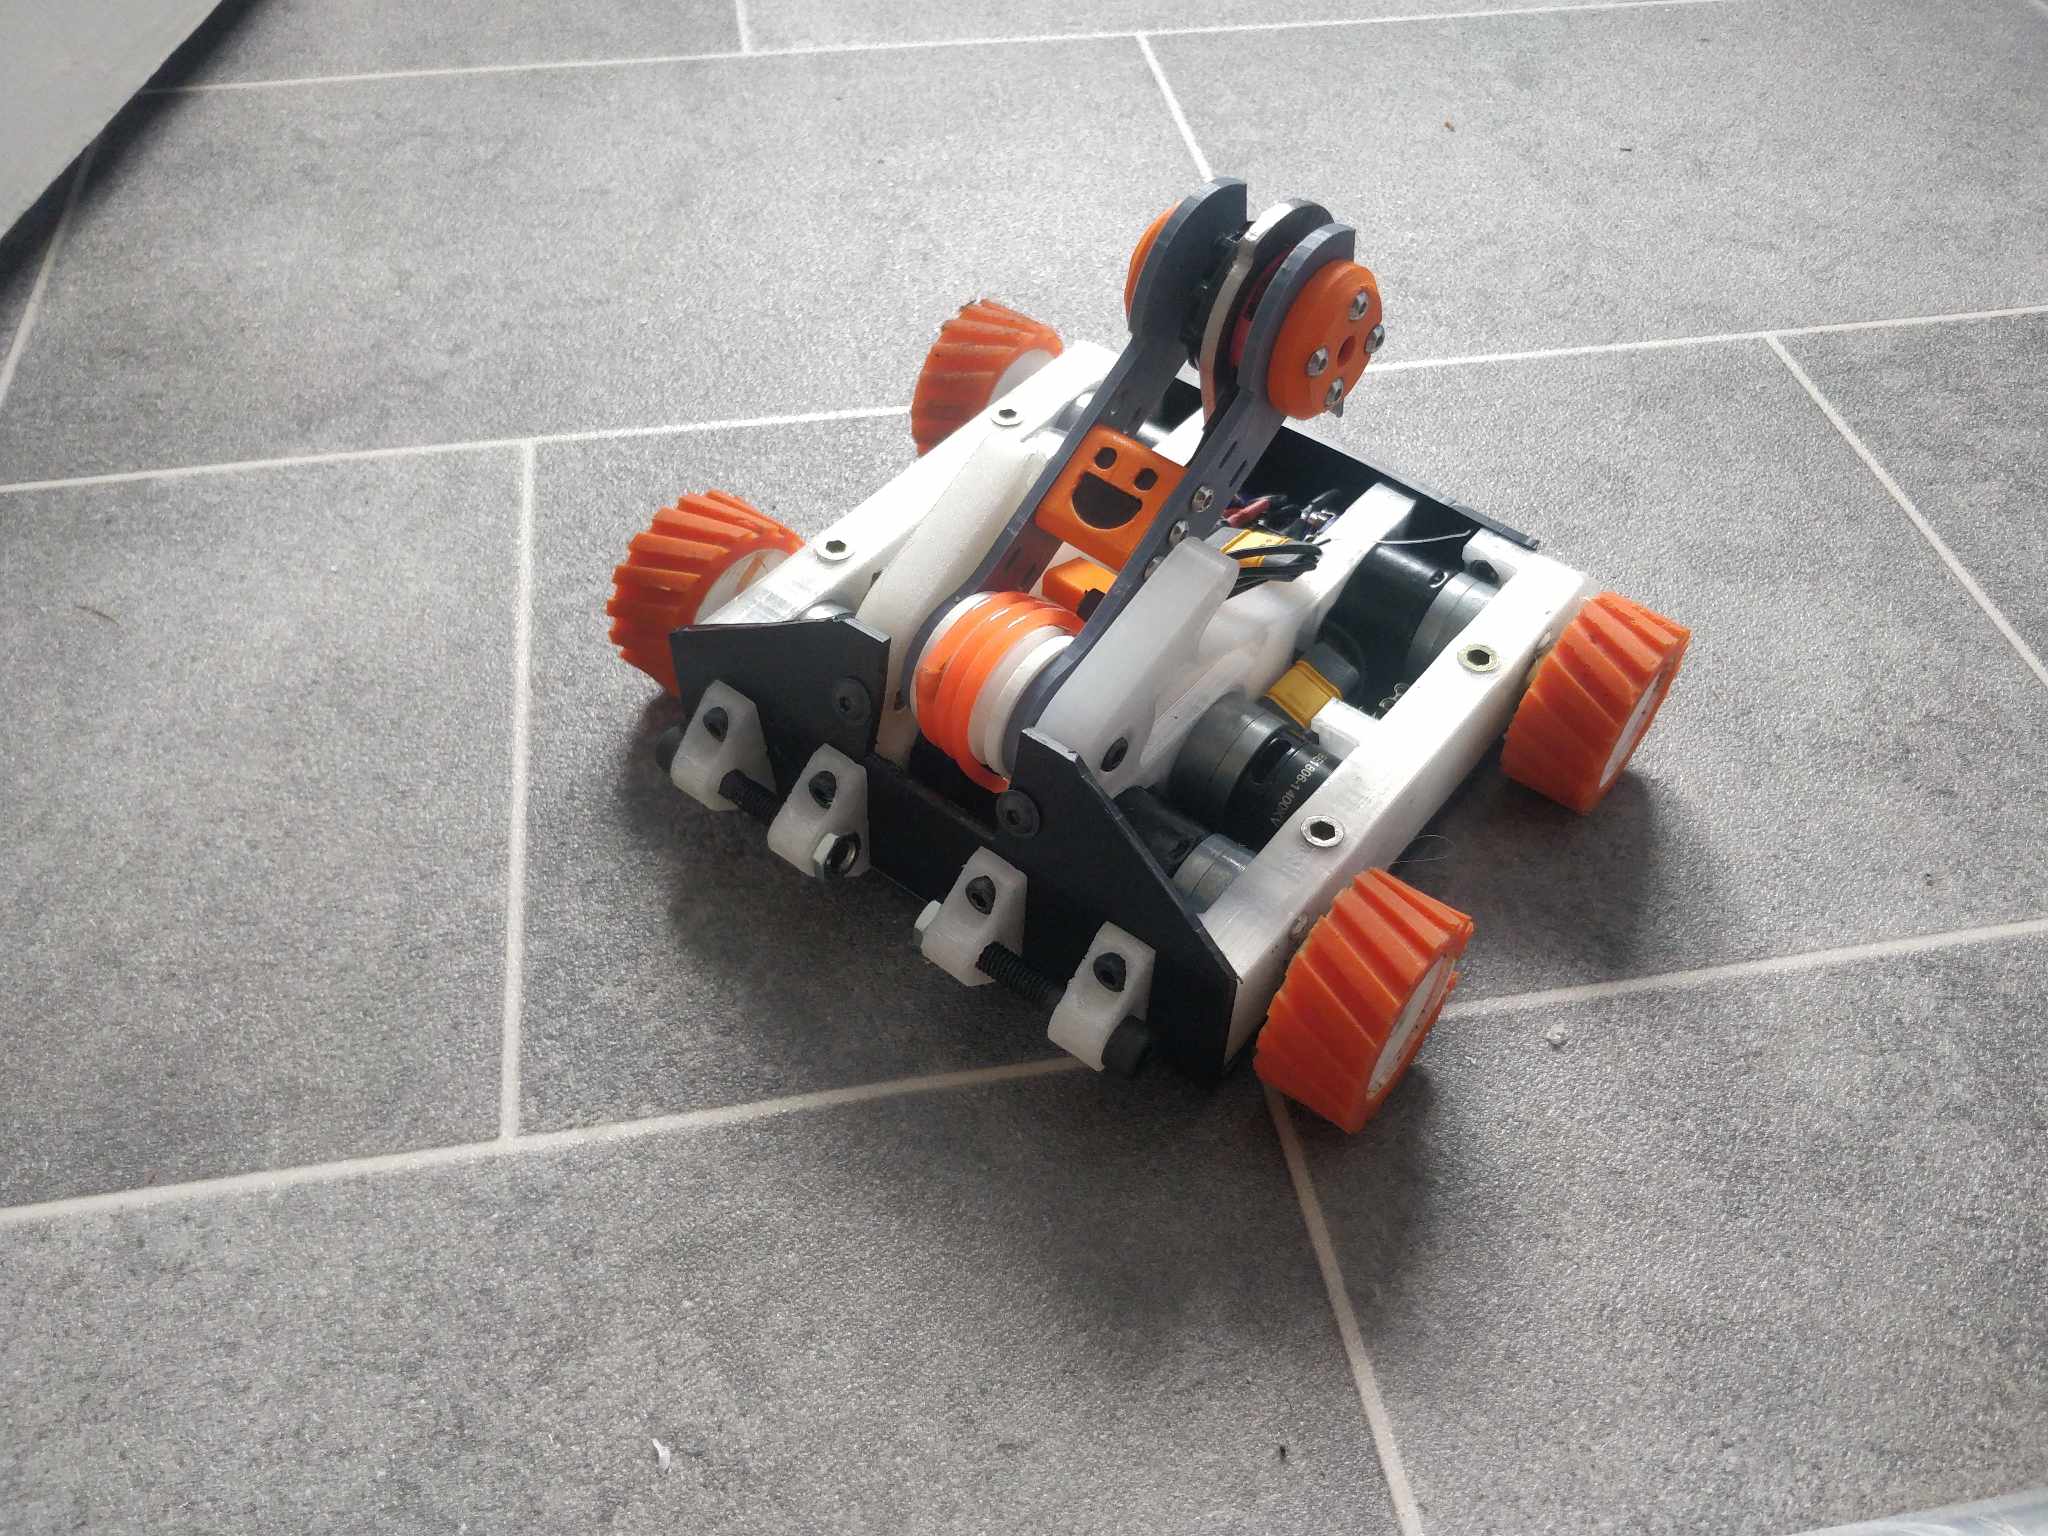
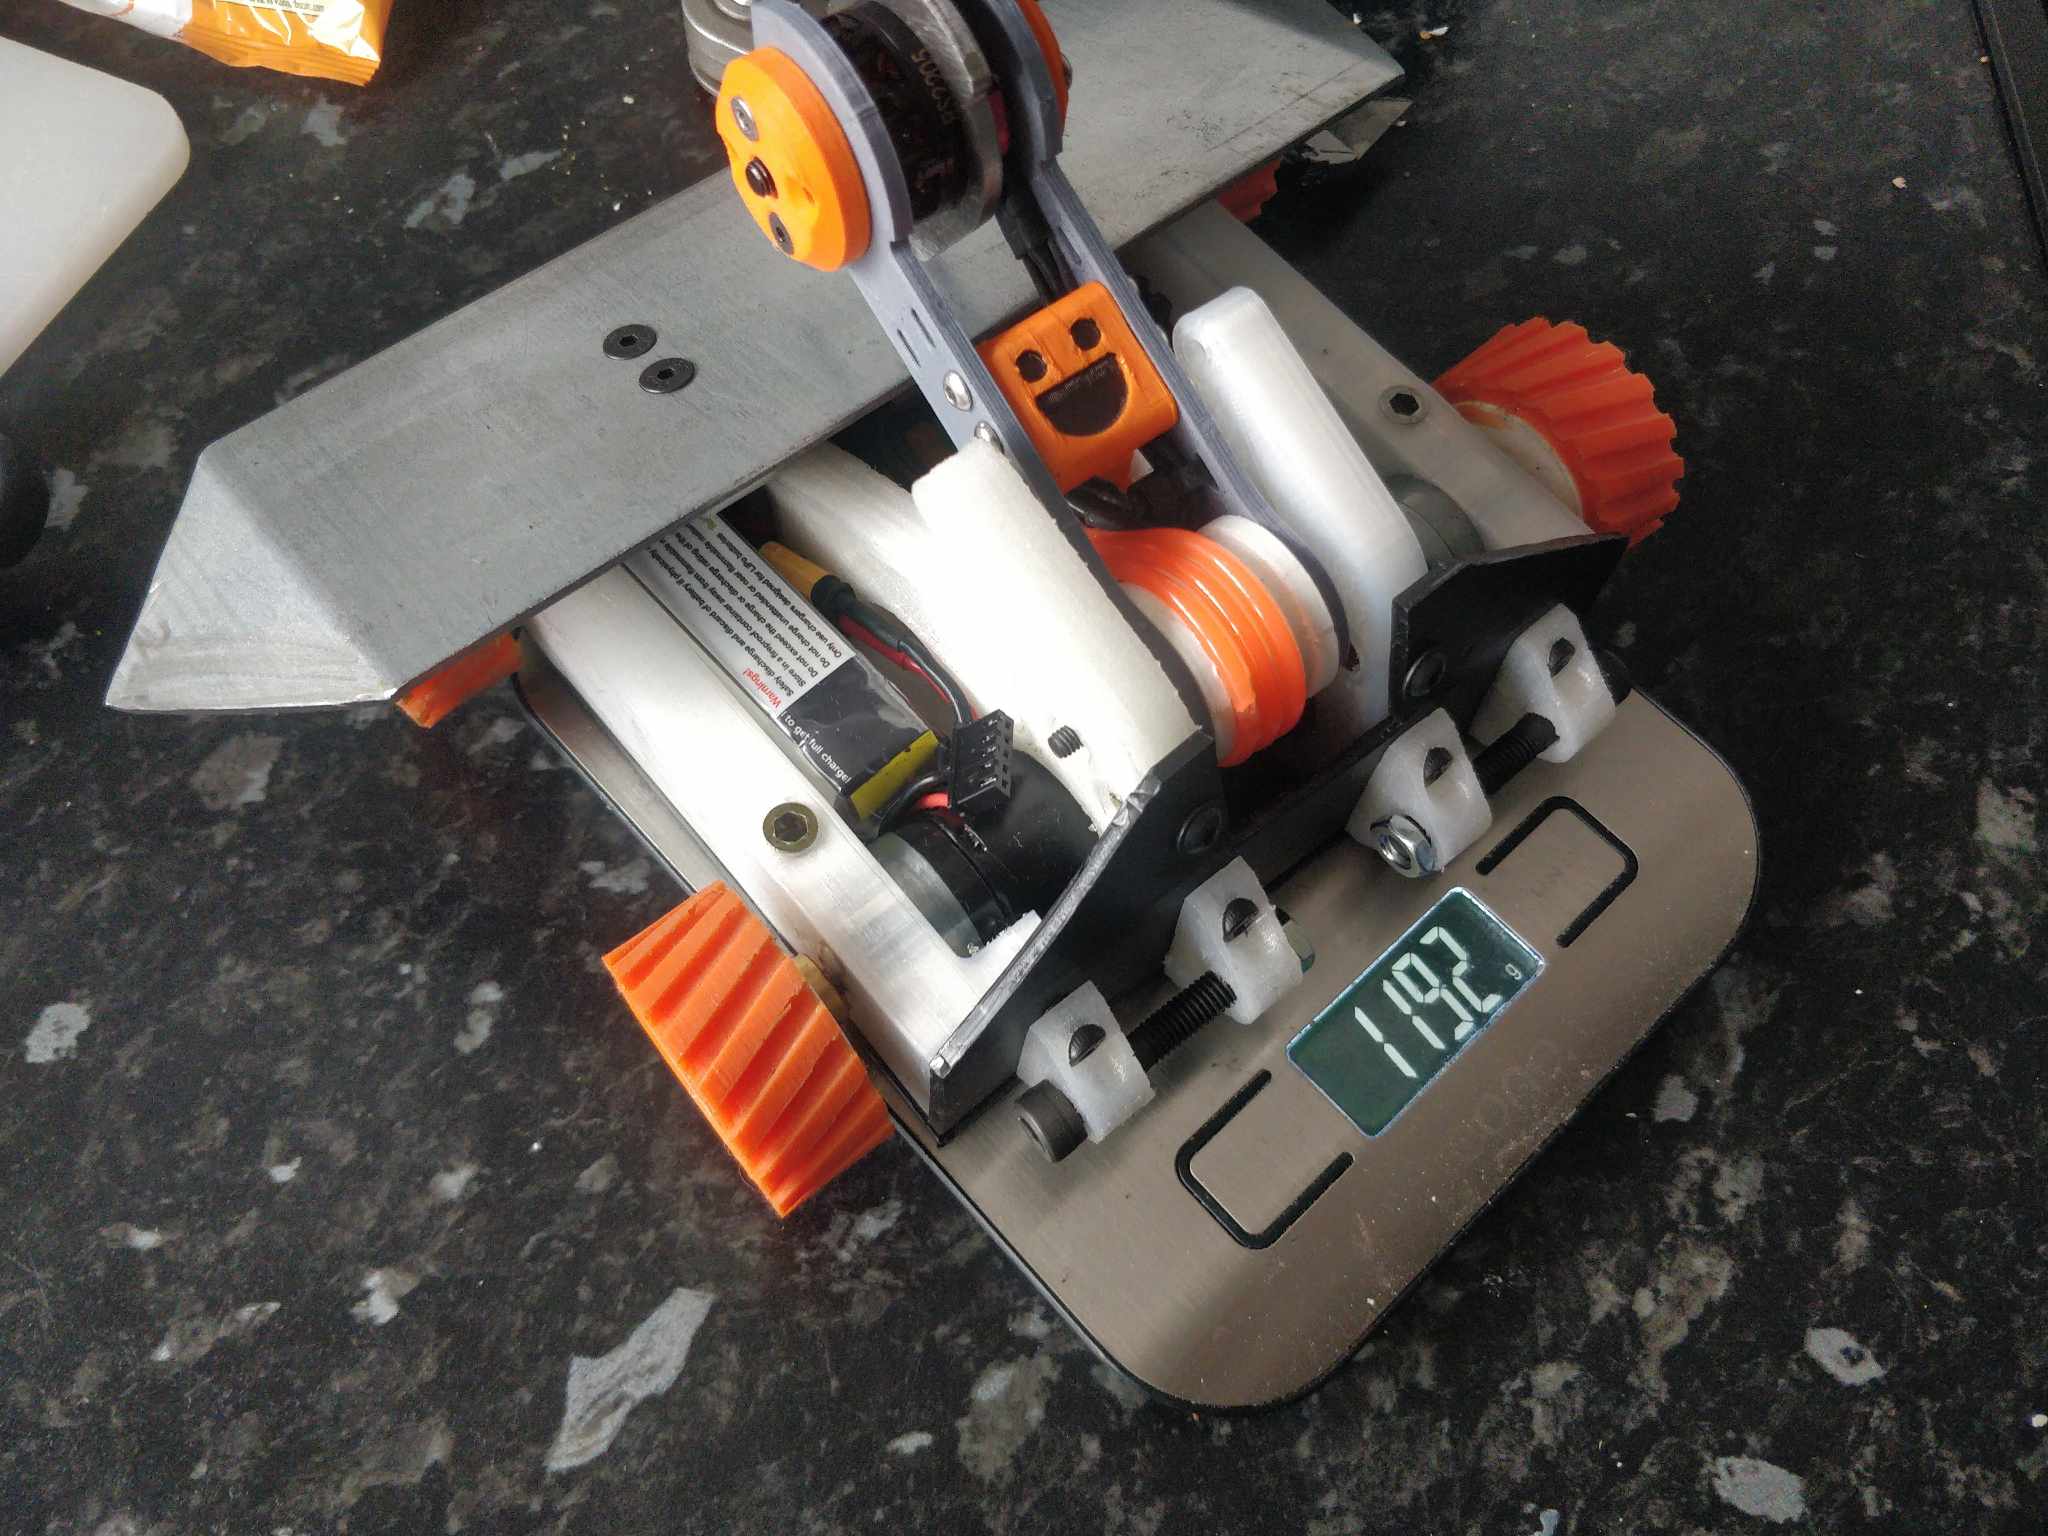
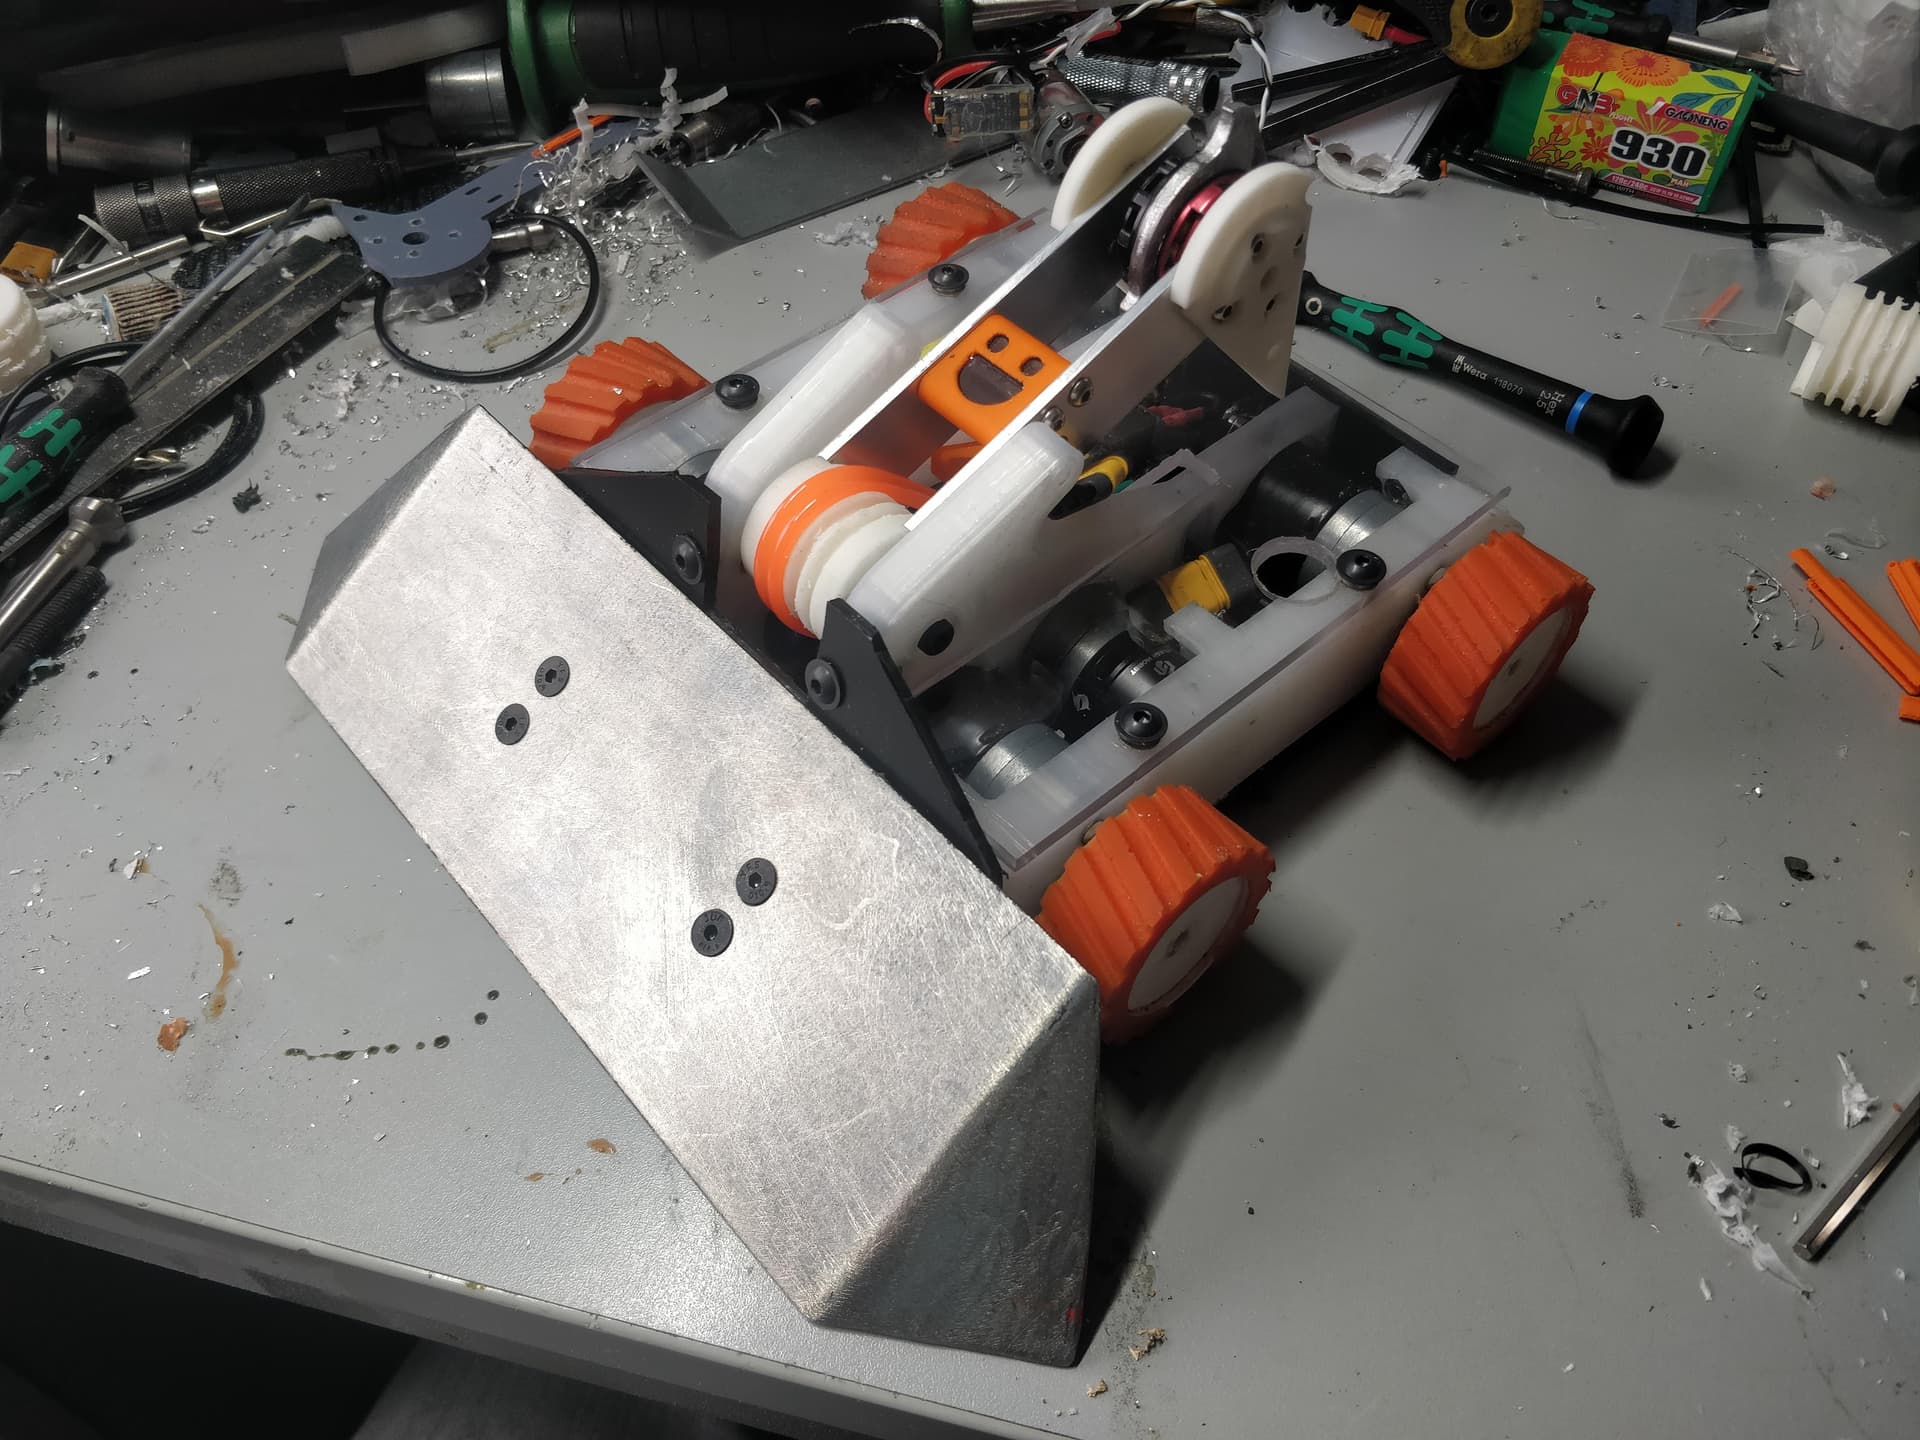
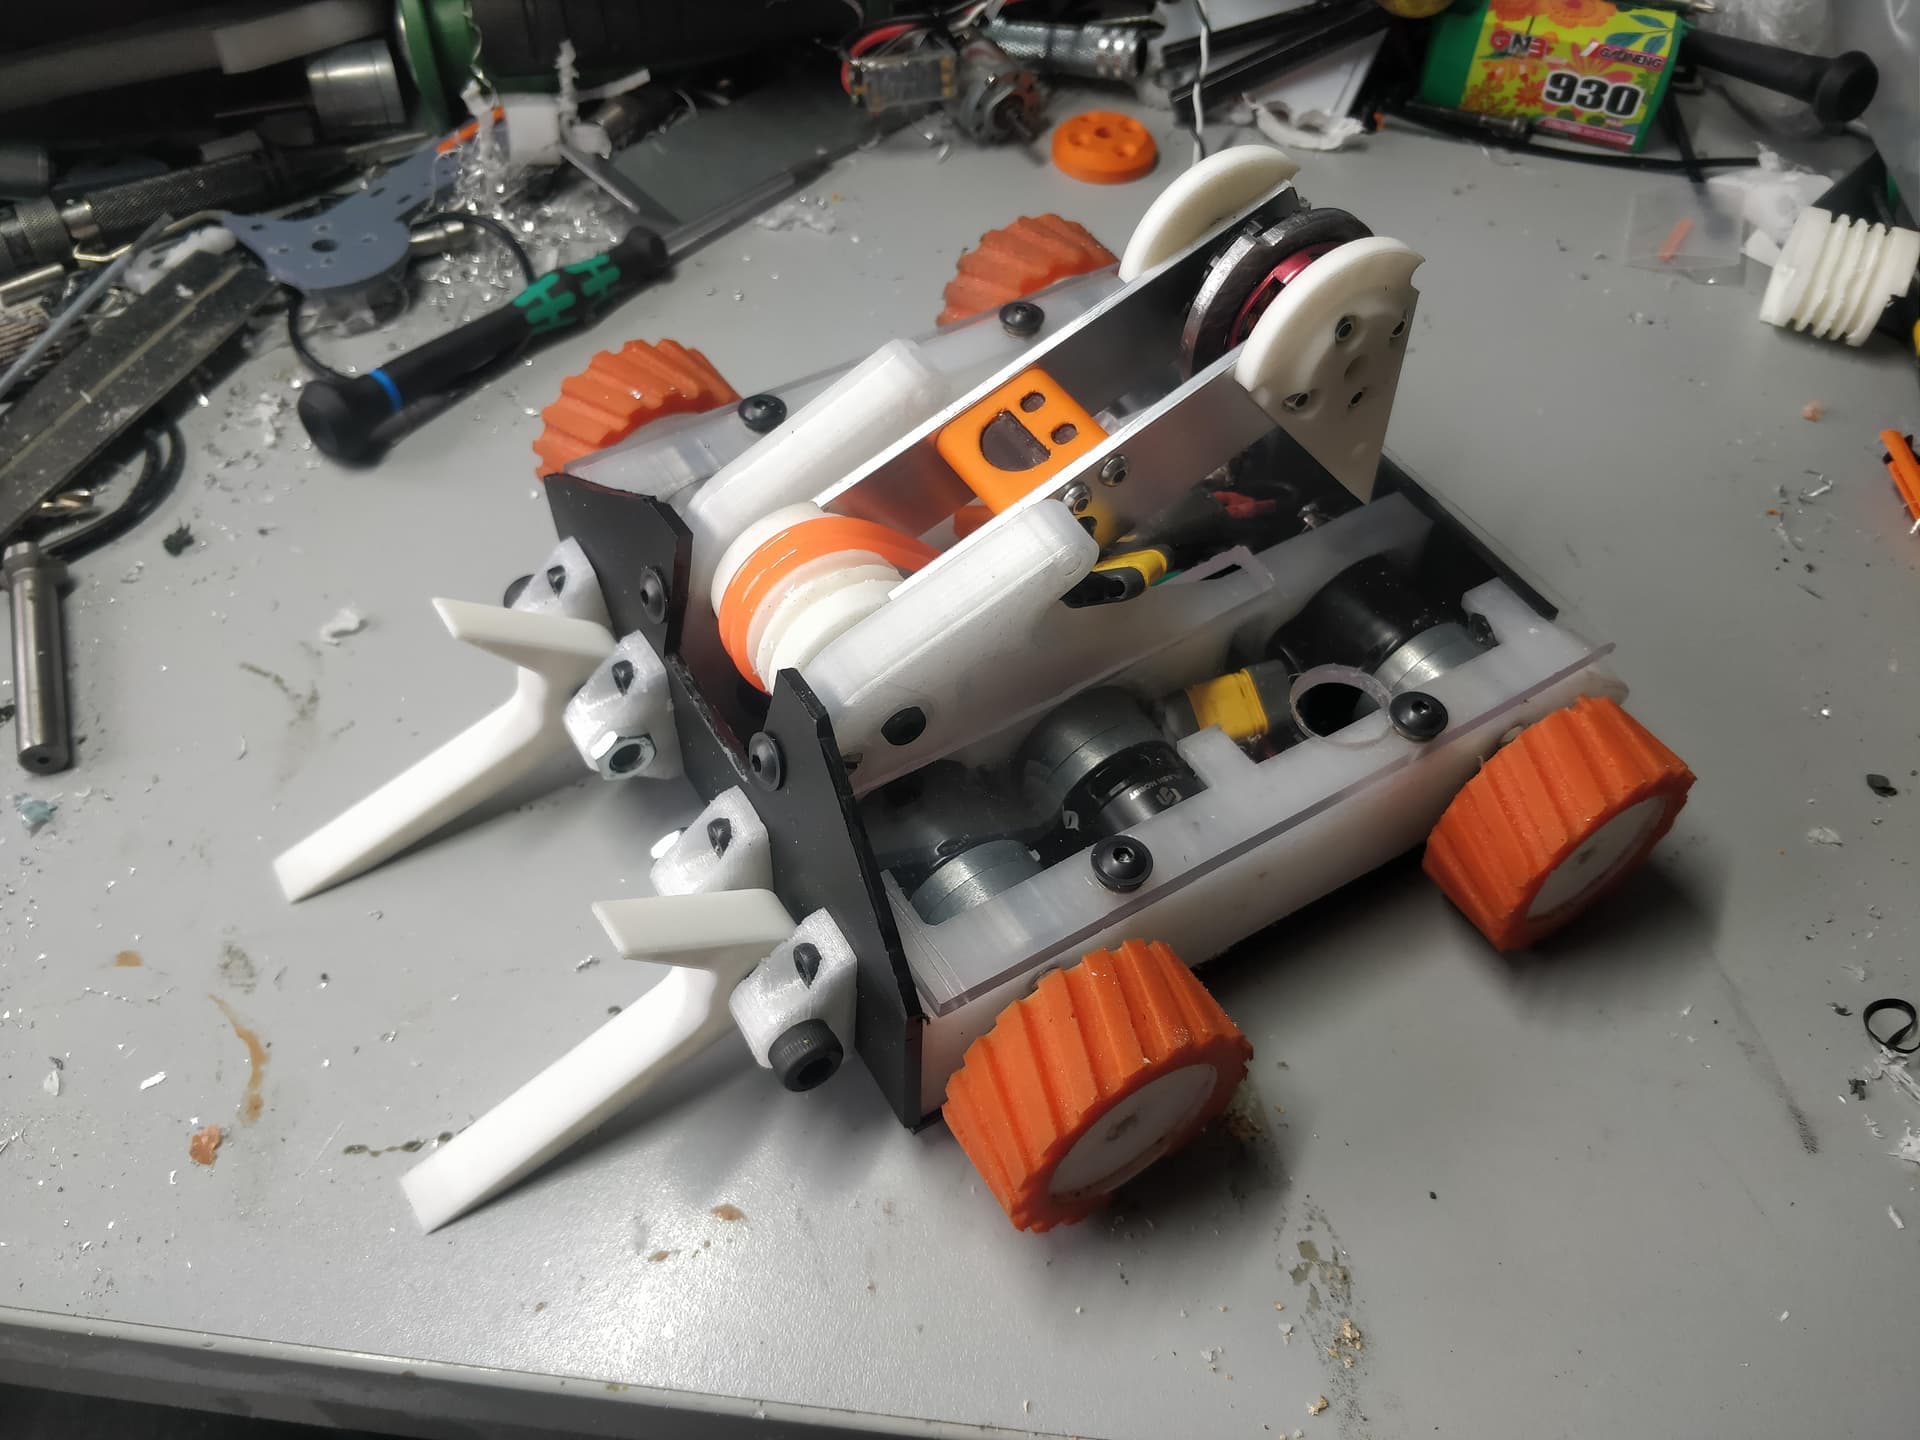
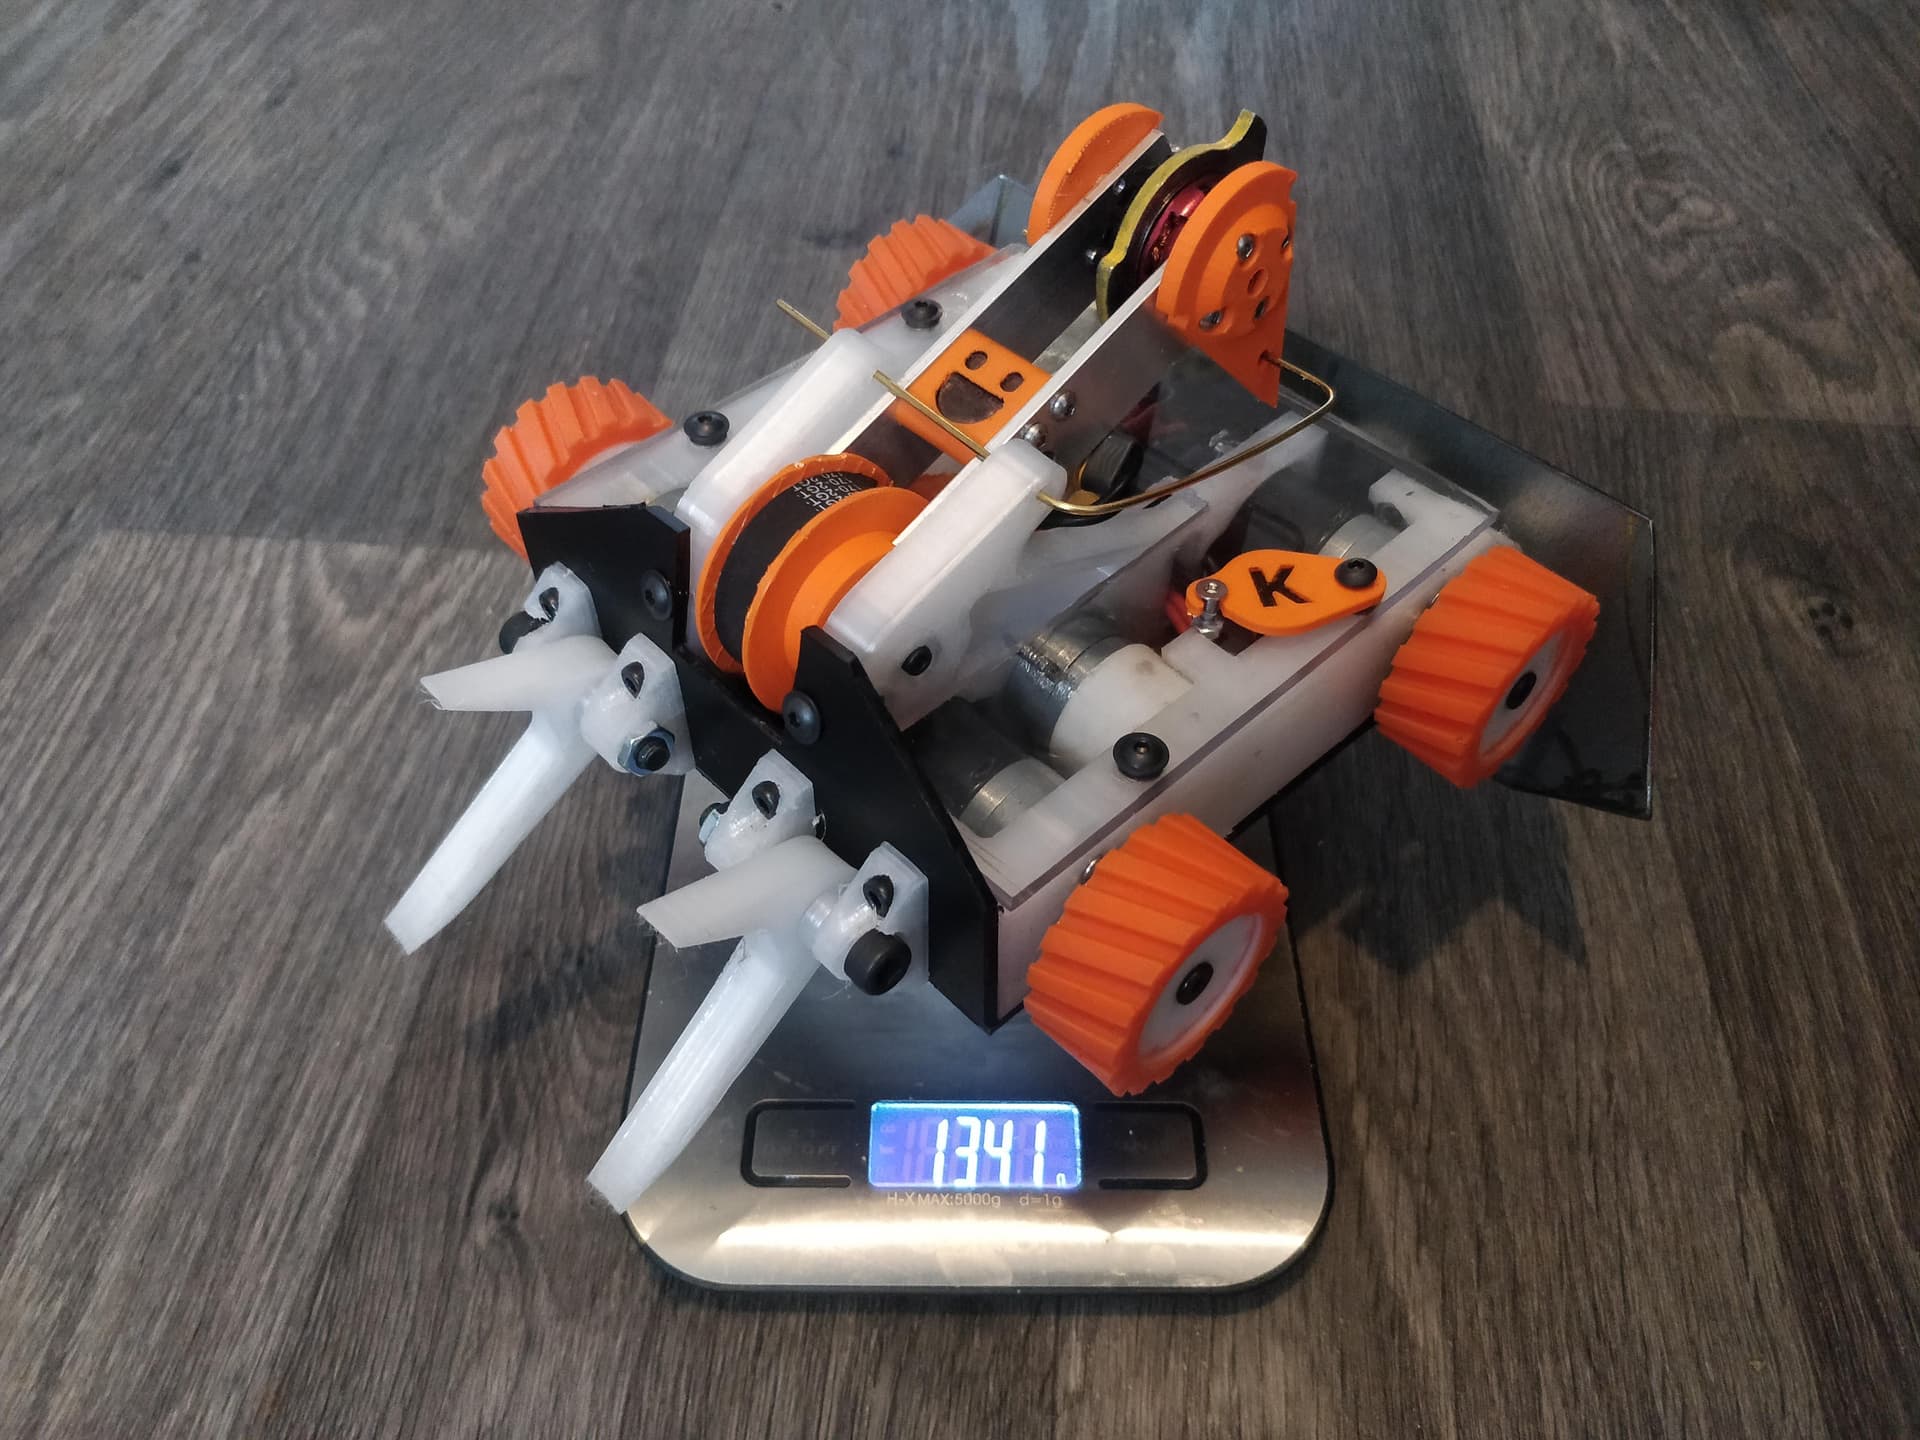
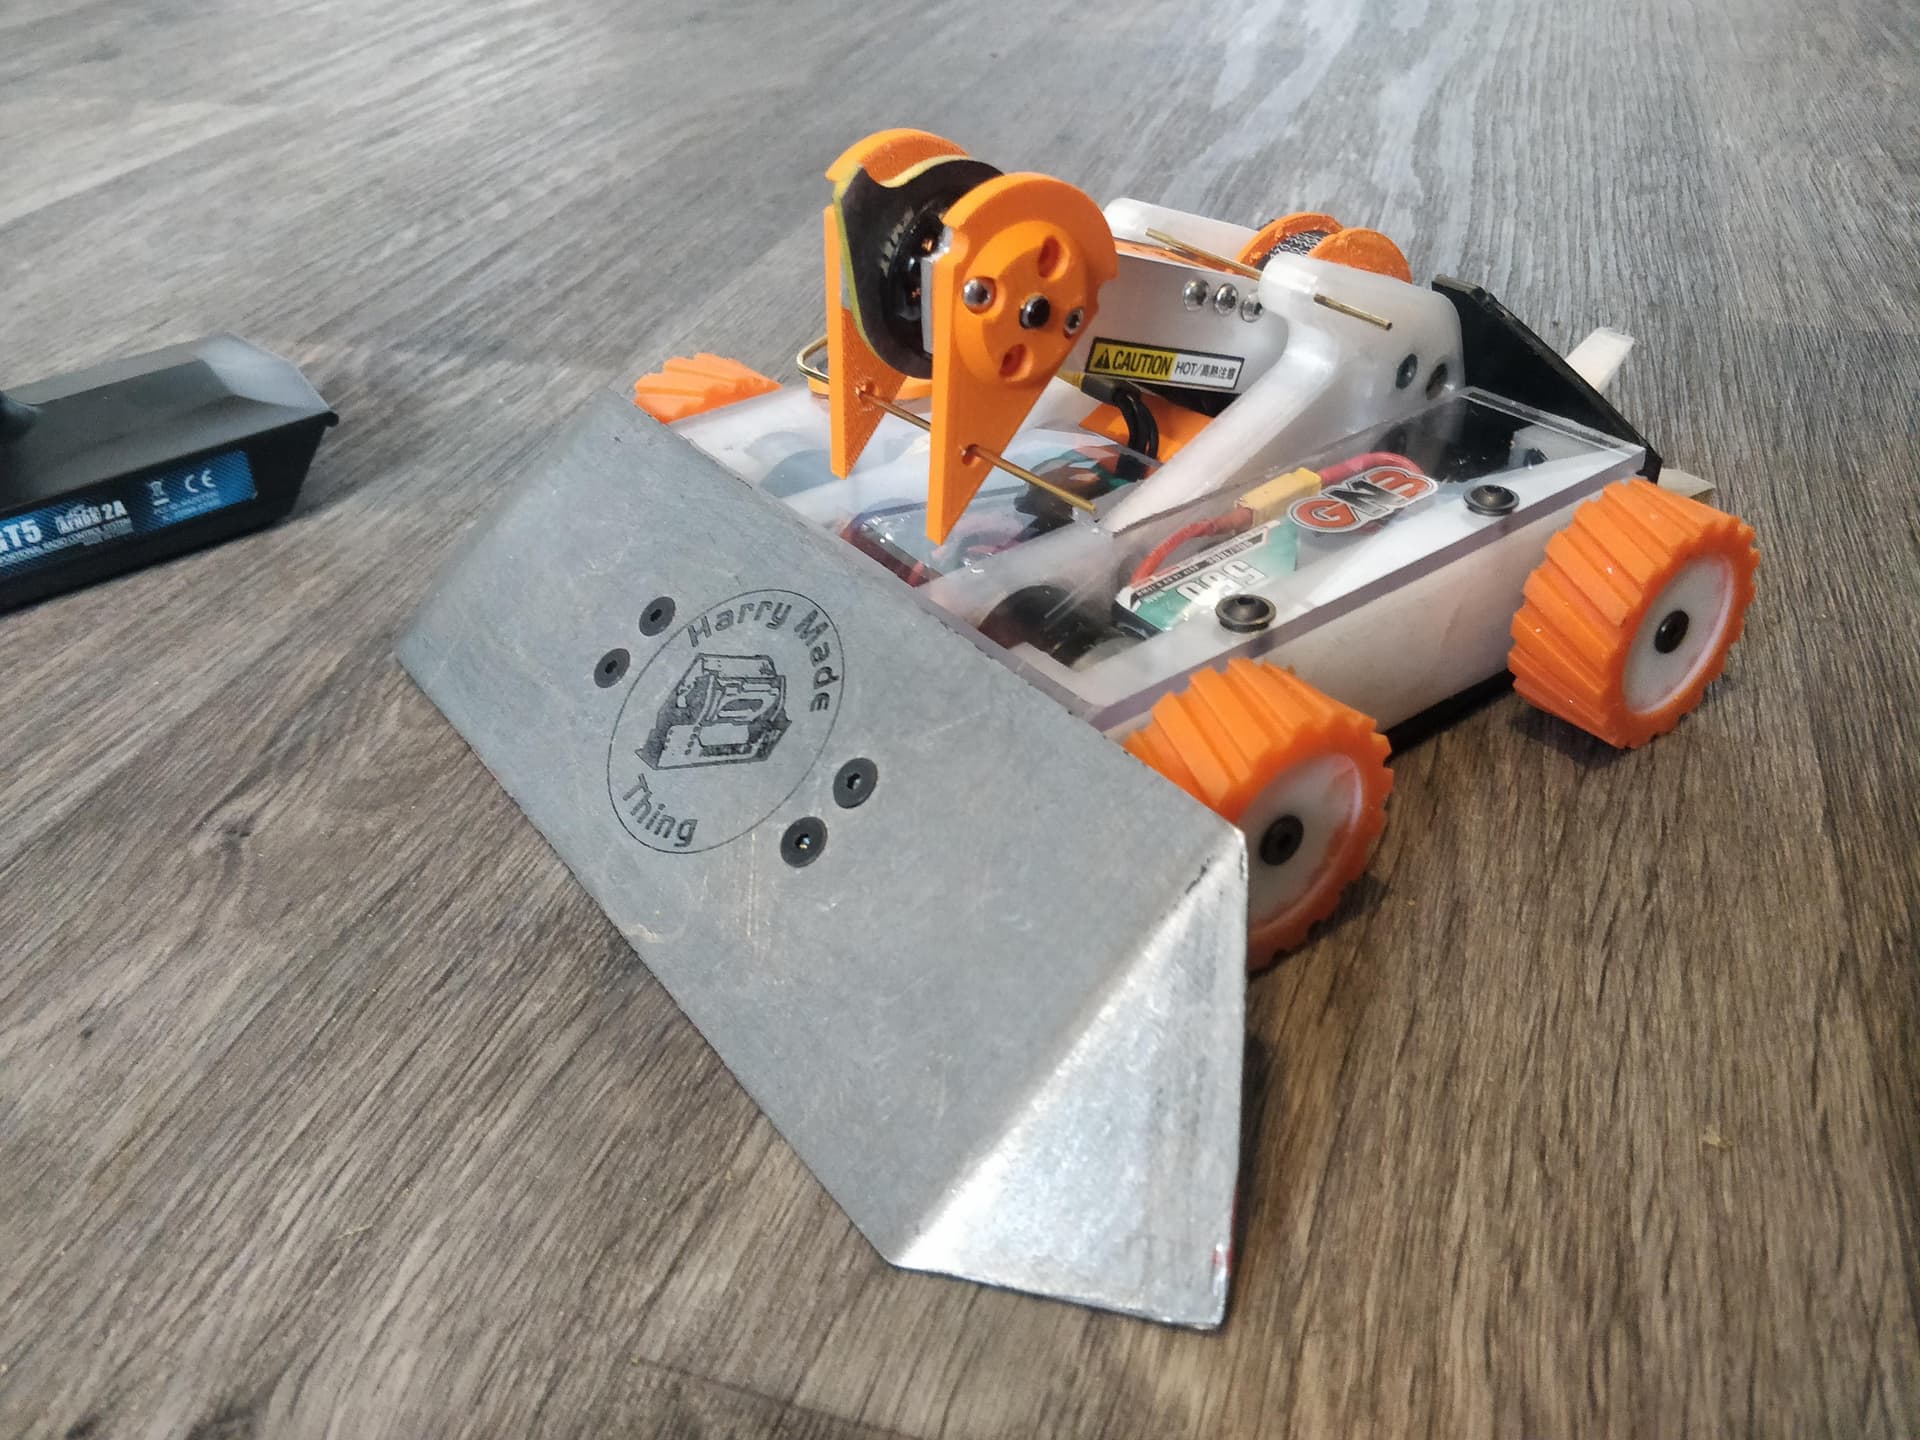
Getting to a finished state here and I was pretty happy with how it was setup. I had a good deal of options, wedge could be mounted front or back and I could have up to 4 forks on the front. I fitted two with magnets and the rest were just free floating. Weight was pretty tidy as I flew well under even fully laden with the kitchen sink setup.

Pretty mean stance - even if is a bit of a wet blanket in reality

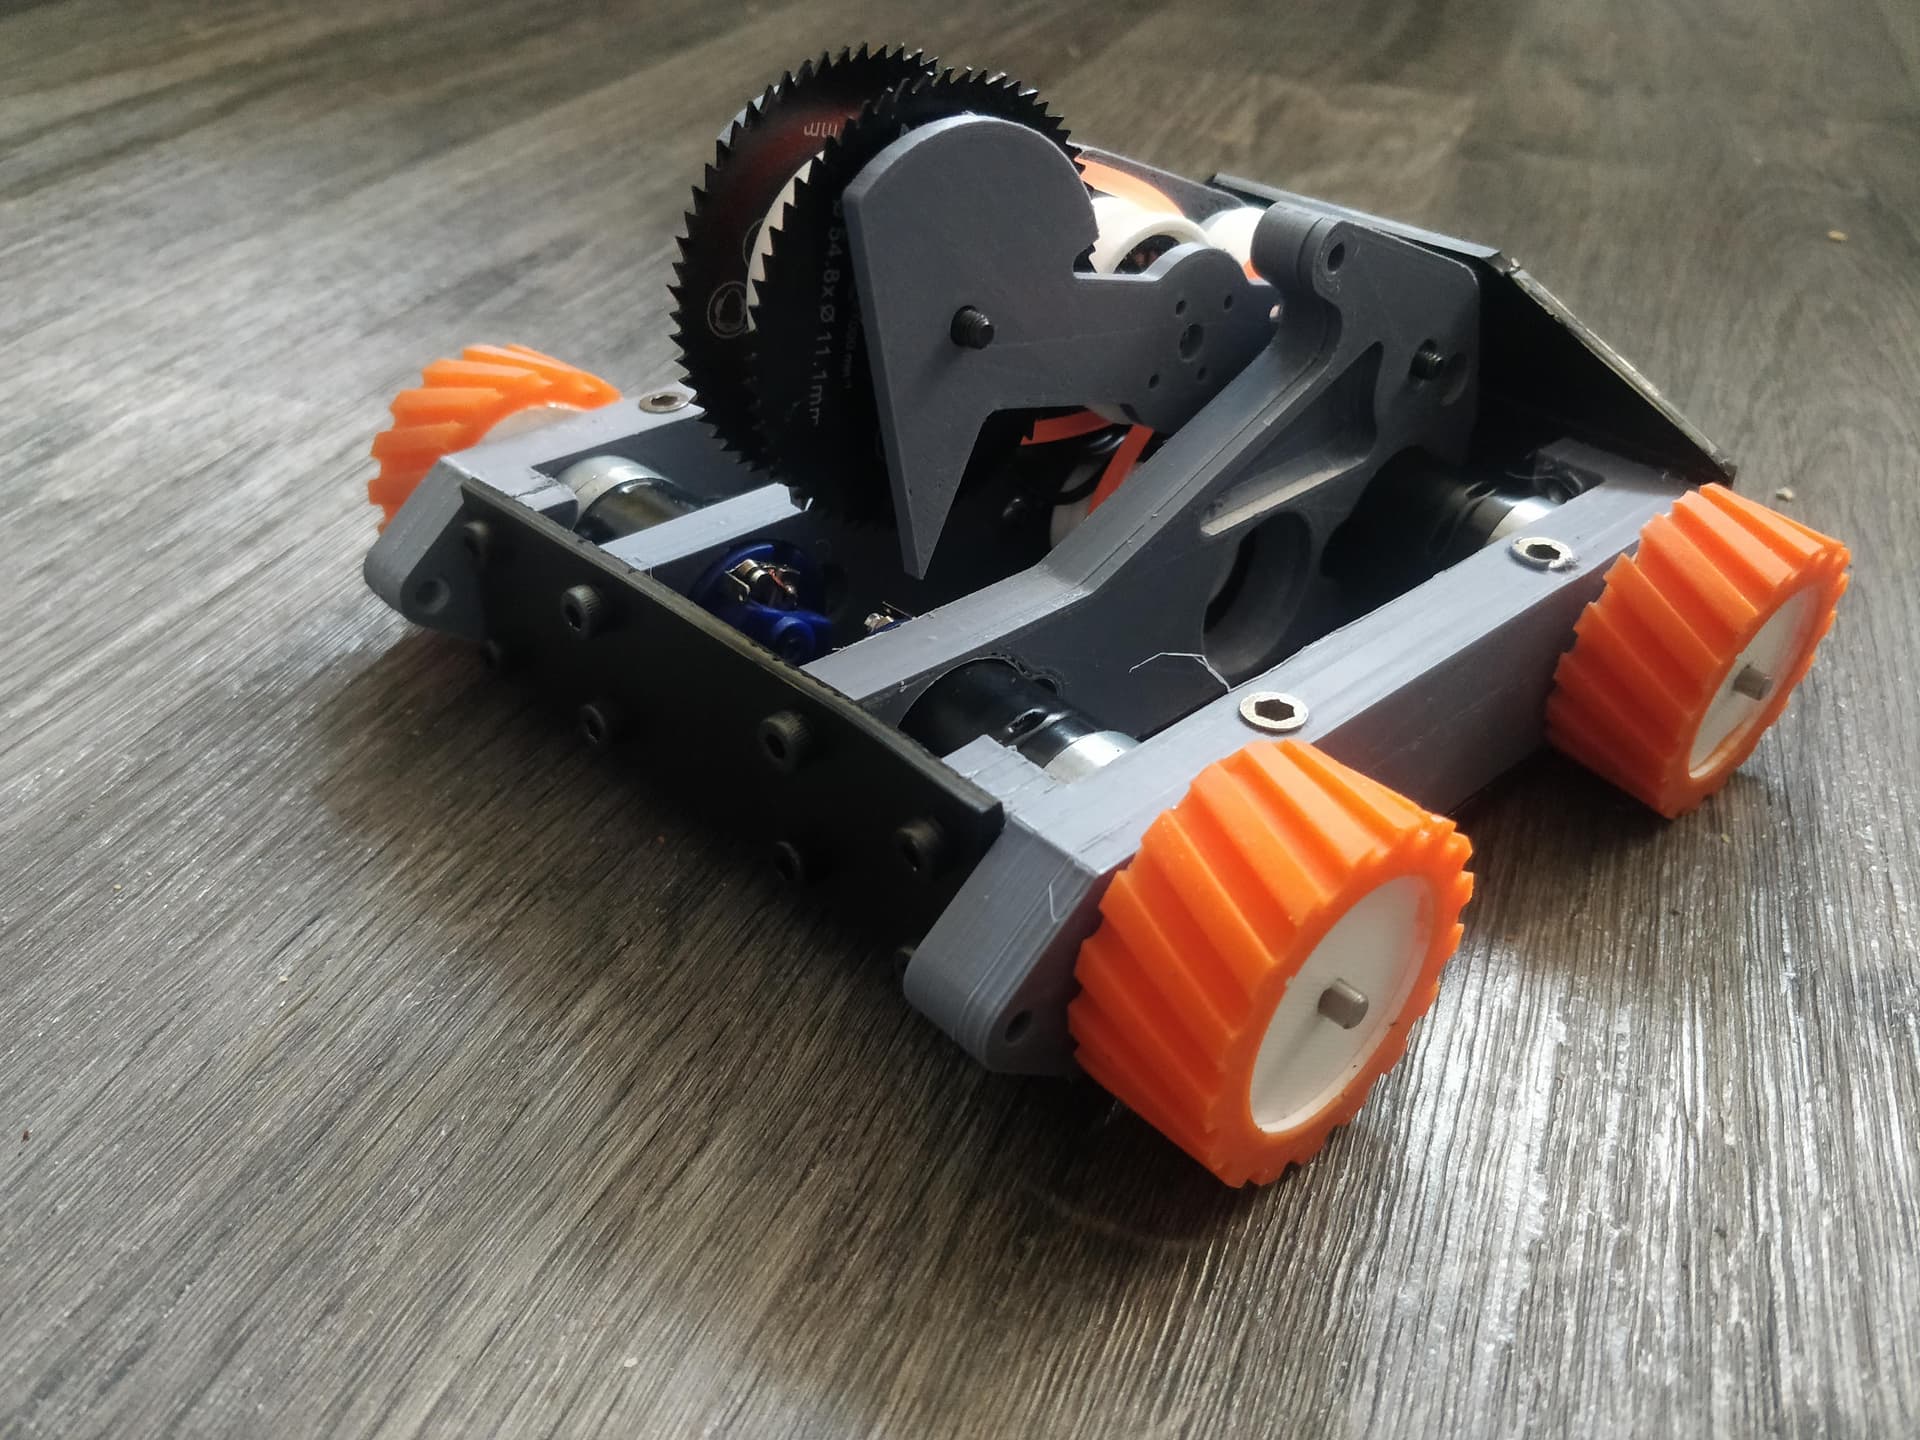
Can’t beat a bit of branding either! I actually found I quite liked the wedge on the back. Might be something to design in to any later versions. The idea of being able to fend off attacks from the back while I poke around with my forks at the front is pretty appealing with the culture of 3 way melees.

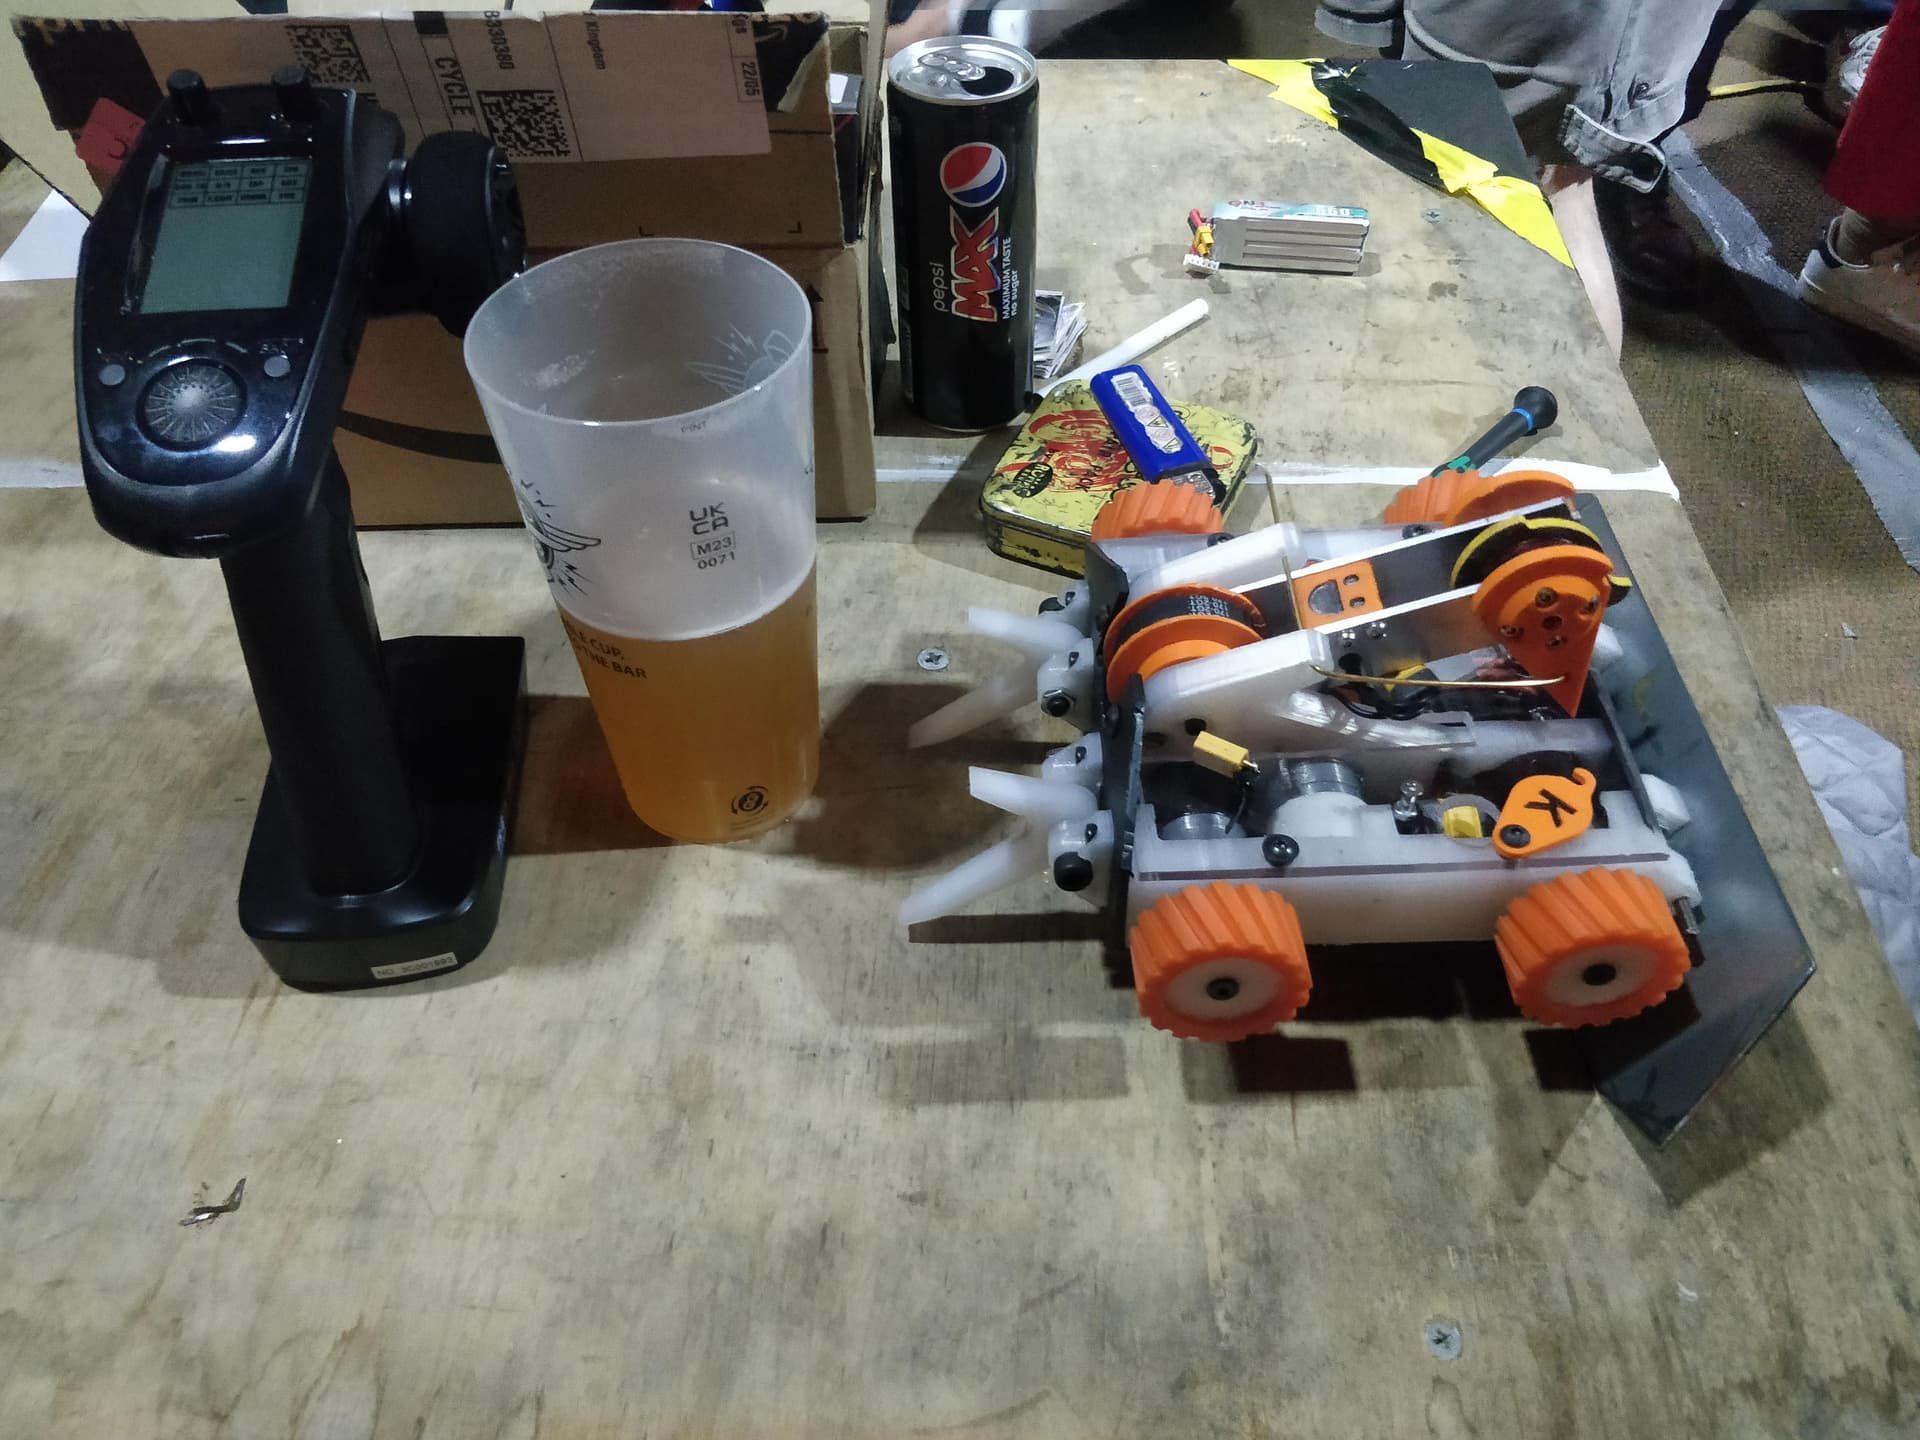
So ends the build of Klaus which was a pretty laid back affair - even with the mad rejigging of the weapon arm at the 11th hour. I had some goals in mind for the bot, principal being “Don’t be MotherLoader” which it isn’t and therefore is infinitely successful. I wanted something that could drive hard and BOY did that succeed. The robot drove beautifully, was blisteringly quick and respectable in the power department. This was dulled slightly by the fact I drove it horribly. Just normal fat fingers and poor responses. Slow and steady would have been the best approach but that just was not on the cards. I had it doing figure 8’s and such on the kitchen floor quite handily but obviously this doesn’t compare to actual combat or proper target seeking. I took the dual rates down progressively in each of my 3 fights and by the last one my throttle was at 90% forward, 75% reverse and my steering was down from 80 to 60%. Must have worked as I went the distance - even if I lost.

The self righting was a let down in the end BUT I will take a slight victory here as even working the handful of times per fight before the grubscrews slipped and galled the shaft is a couple times more than it would have done without the extra effort which probably bought me a collective extra 20 seconds of invaluable fight time.

The direct drive motor was never going to make it past the event but I gave up after the second fight expecting it to do anything. It is not a write off as it stands but it is very, very unhappy. I will not be doing this again. I think it counts as a hate crime at this weightclass.

Overall a messy performance but not without valuable data. I liked working on Klaus and thinking about how to make it better. Simplifying will help (though it is already fairly brutalist in its approach) I can’t wait to not touch it for a couple weeks though - then I’ll start improving with fresh eyes and a brain on the cusp of it’s use by date.

LOVEYOUALLBYE

6 Likes

Klaus looked great tazzing around the arena! I can understand it was a hefty learning curve getting the hang of driving, look forward to seeing the next iteration!

Think Klaus showed a ton of promise. And was a blast to watch

Get the self righting more reliable and redesign how the weapon works a bit (proper hub motor perhaps?) And I think it could be fantastic.

Thanks gents,

Absolutely it just needs to be better all round in the weapon department. I’m junking most of what’s there (let’s be honest, it junked itself) and will be going in a completely different direction, though aiming at the same end goal.

Hubmotors have been on my mind, that’s a high risk high reward option I feel. Simplifies the rest of the robot, wiring and such but it’s a non trivial expense and quite a daunting engineering challenge. I hear nylon helical gears are what all the cool kids are doing these days…

3 Likes