Harry's Beetles

Got nothing but good things to say about nylon double helical personally.

Does naturally mean keeping your motor relatively close to the weapon tho - but if you’re happy keeping the motor on the arm could be an option for sure.

Hub motor does feel like the optimal option here to me, but big workload as you say.

Some prototyping is, and will be going on for Klaus in the background. I will share what I have when I have something of substance or I crave the dopamine hit of posting progress - whichever comes first.

Turning back to yellow tracky territory I have had a couple of parts drop for MotherLoader Mk3.1. While keeping the cool & funky gearbox-in-pulley version on the backburner until I get my monies worth out of the current style 1806 driven setup.

ML was pretty ropey to drive and lacked a lot of the driveability I need in order to have a fighting chance at… well, fighting. As an easy set of fixes I just bought some higher reduction dual gear 25mm’s. I started on 19:1, went up to 26:1 for the robot. I bought some 36:1 and 45:1 versions to really nip down the speed and up the controllability. I am going to fit the 45’s and see how it goes with the option to get a bit of speed back if it is too glacial. Weirdly these arrived and had been dipped in some thick blue paint. They’re otherwise normal and function is unimpeded but it was an amusing couple seconds when I found my gearboxes came slush puppy raspberry flavoured.

I also have stepped out the slightly shady chopped up steel MOD 1 gears on the output down to some aluminium 32DP RC car pinions. They’re an easier fit and as I have to redraw the drive pulleys anyway so a little change in pitch is easy to swallow. Though it looks slightly more Industrial the blue may have to go. If I can’t get the paint off without ingesting (more) toxic Chinese chemicals then I will just paint over them.

I also wanted to rejig the axe mechanism as I didn’t feel I had enough ‘pick up’ from the brushless setup. While this is potentially treatable with the same remedy as the drive (more reduction, twice daily) and a bit of a firmware fuss around I was having some problems with the construction of the flashhobby 1806’s causing slip. They have a slight taper on the end of the shaft where it interfaces with the can. This is fine if you are using them normally but as I popped, locked and reversed mine they no longer have that great tight fit. I have shimmed the gap and bridged it with loctite which is great for drive but for the constant shock loading of the axe it really isn’t happy. To get shot of this problem I have gone for a brushed option - NERF motors. With the ever popular 22mm gearbox it is only a fraction longer than the 25mm/1806 option and I don’t have to worry about rotating can wire munching syndrome (RCWMS)

Really impressed with them so far. I have chopped the shaft down and silver soldered a pinion on so it should be quite happy. Blipping it back and forth on 3 and 4s didn’t seem to generate the masses of scalding heat I was lead to believe but the current draw does seem to be non trivial. Brushed also opens up the option for really easy limit switches - something I already have mounting brackets for in the existing chassis!

4 Likes

Odds and sods of work being done as I’m gutted to be missing the main BEV’s comp next week so I cheered myself up by pricking about with MotherLoader 3.1 to get it ready for November.

Continuing on with my rather Violet Beauregarde-ey gearbox saga I have redrawn my rear drive pulleys to match up with the RC car pinions. They’re a 32DP gear with an HTD5mm pulley mashed together in a little plastic metrimperial nightmare. They’re a two part assembly with the flange sitting over a hexagon and screwing down with M2’s. They still run on a shoulder bolt as per.

Running the numbers I thought I’d try a 2300kv motor in there. On 4s with the 46:1 gearbox and a 1.5:1 spur gear stage that spits out about 580 RPM which gut feeling says could be my slow, sedate sweet spot. I am amusing myself that I found the best way to achieve what I want is getting china stack of a multirotor motor run though a rc tank gearbox, driving a track made out of TPU and polyurethane via an RC car pinion. It is a wonder I am still allowed to call myself an engineer or tie my own shoes. On the bright side it costs about 9 quid per side.

It is coming together fairly well I think. The outside bulkheads will be printed out of nylon as TPU has way too much flex for the smaller pitch gears and boatloads of torque the setup produces. Twist and wobble are great - everywhere but right here.

I also did a smidgeon of work on Klaus - rejigging the hub design to make it less awful and slapping on my second favourite timing pulley pitch (GT2) up on there.

The wheels also come in green apple flavour. I was hoping for lime or toxic waste but the cool calm green that is only slightly unnatural is pretty cute too.

2 Likes

Hello nasties, I have rattled forward and ticked a few jobs off the list and so you must suffer a progress report because of it.

Let’s start with the irrelevant and poke at a funny that happened. I had to add product to an AliExpress order to get it over a threshold in order to save a great deal of money. I chose to spam a couple of RC wheels in there thinking they would be good for interesting tyres for robots or even a nice novelty to stick on an RC car should the opportunity present itself. Big wheeled Klaus was the natural test bed. It was a very aggressive tyco rebound and even more uncontrollable but what an amazing stance that big beefy wheels afford. It’s positively Brazilian or Portuguese in its raw aggression. Slap on a vert and send it.

Second up on the silly slab was this rather charming cheap slice of brushless nonsense. These 35mm 700kv motors have popped up in great numbers recently and that speed puts them on the borderline of single stage drive. They have the 5mm/ M5 nub so you can slap an RC pinion on them with negative effort. The smallest I have found easily is 15t 0.6MOD which gives you a pretty decent range to choose from.

To test this out I made myself a little block of ABS and modified my Klaus wheels to have the largest spur gear I could reasonably fit on there. Output RPM is ~1900 so that is pretty nippy but potentially usable. 2 staging it is on the cards but I love this little 4wd bolt in block - hey this could be a super low effort cluster bot! The idea behind this experiment would be some kind of crusher but that is way down the list for now. It just scratched the itch in terms of concept.

Going off the silly drivetrain I banged together in my last post I wanted to make another to actually test if it was going to be worth going forward with. I had bought a handful of those 2300kv 1806’s but they were all spoken for. One was in Sad Ken (which works so I am loath to strip it), one was already mated up to a Loader drive module and the last one was in this Big Vert Drizzle Clone I named Dribble. It wasn’t really very good at all so that had the motor ripped out and the remaining viscera plopped back into parts bin circulation.

I have been printing LOTS of nylon much to the chagrin of my ever patient wife (“Why is there plastic in the oven AGAIN Harry?”) And have built up most of a MotherLoader MK3.1 chassis. Note the funky smooth drive pulleys up front and the armour bracing points on the bulkheads instead of the pointless rollers.

Every part has had a bit of minor tweakage but It is still fairly backwards compatible so if push comes to shove I can recycle parts of the old frame back in. This will all be dyed yellow when it is completed.

To have a little break from the TPU I am going to the arguably worse material of HDPE for armour. I will be keeping the UHMW front armour but wanted to go for some sheet plastic for my sides too - it just feels chunkier. I printed up some templates and through a ghetto router table made out of a chopping board I found by some bins I had a go at making a part.

Not too bad I will say! The only bit of damage I did was not on the router strangely. For the first time in donkeys years I very carefully and purposely drilled a 4mm hole in the palm of my hand. Be careful out there kids. Don’t Do What Donny Don’t Does.

Phwoar, what a chunk of weight is wasted in this lad. I have flown gracefully under before now but I think those days are well and truly over. Will have to keep an eye on this I think! especially as there is another 15mm chunk of HDPE to add up in there!

Hopefully for the next update I will have all the frame components printed and I can start testing it electronically. I will be aiming to keep the ball rolling on this and get it buttoned up so focus can turn back to Klaus who needs a lot more reworking, care and attention. The soundtrack to this ML update has been mostly Venjent and the chosen beverage has been lemon squash with a tonne of ice to break through the damn heat of babysitting two printers constantly.

3 Likes

WARNING: gratuitous photographs of fat fingers

MotherLoader is on for the BBB champs this year and I am super excited. The pressure is on to perform to prove the concept has legs (tracks)

I tried to knock out some of the main bits of electronic work in order to get ahead of the curve before panic sets in. As I’m going to brushed on the weapon and making some other worthwhile changes to the loom I can’t transplant it like for like so its getting redone to make it less awful. One of the new BBB escs is slotted in the bulkhead and retained with a little clip. the output wires are whipped out one side to go to the motor and the input are split going through the bulkheads to get to the power circuit and split off the signal & 5v line from the BEC to my second RX.

We’ve had one, yes. What about second RX? I don’t think he knows about second RX… Yes in the continued quest to tryhard I am sacking off weapon duties to another pair of hands and eyes. The power circuit is unchanged so its still on one link just the axe & lifter are on one controller and the drive is on the other.

The chassis is coming together well and is waiting on a dye job before I can start fitting it out properly with hardware and running wires from side to side. I remembered how hateful sorting out the loom on this was - once it is together it is quite a neat little thing but until that point it is a huge pain in the plums.

Taking a note from Jacks work on The Chilli Daddy I made up some brass spacers in order to stop my pinions moving or the shaft slipping back and disengaging from the gearbox and killing the drive.

Just a simple bit of tube and it should all be okay in that regard. No doubt it’ll create some new interesting problem further down the line. I also took this opportunity to sand some of the blue paint off the gearboxes.

I also started on the most interesting and important bit - new tracks! I changed up from the diagonal tread to lots of little square nobbles. I feel they’ll be better at scrubbing out traction in pushing matches - plus I can loose them or they can wear with less consequence. The central core is TPE over TPU because it was easier and cheaper to come by in a pinch. it is 83a and seems super pliant and grippy. The core is unchanged from the last version - I just made a new mould for the tread.

As you can see the tread is much fatter than before so theoretically it is more robust.

I also am experimenting with a bit of colour. A little bit of yellow pigment and I have a funky yellow lego-esque track to run with. I’m not sure which I prefer the black or the yellow so I might have to make a full set of both and swap them around when the robot is completed.

Just for a little bit of bonus content I committed a mild crime and used a bit of spare silicone so I cast one of my favourite Lego tyres so I can make softer polyurethane copies of them - no real solid plan for them but I’m sure they’ll come in handy eventually.

Thanks for reading as ever! The soundtrack for this particular update is Ministry and the drink of choice is scissortail rum and ginger.

6 Likes

Tire piracy! :astonished:

Looks like some great tweaks!

For reference, my motors have been practically faultless since adding the brass spacers - and TCD has taken multiple big beatings! - hope it works as well for you

Ello. November draws near so this robot needs to exist pretty sharpish.

As we left off my parts were still decidedly white. This is acceptable for a slick, progressive young man like Klaus but wholly unacceptable for such a lumbering Neanderthal like MotherLoader. The yellow must endure.

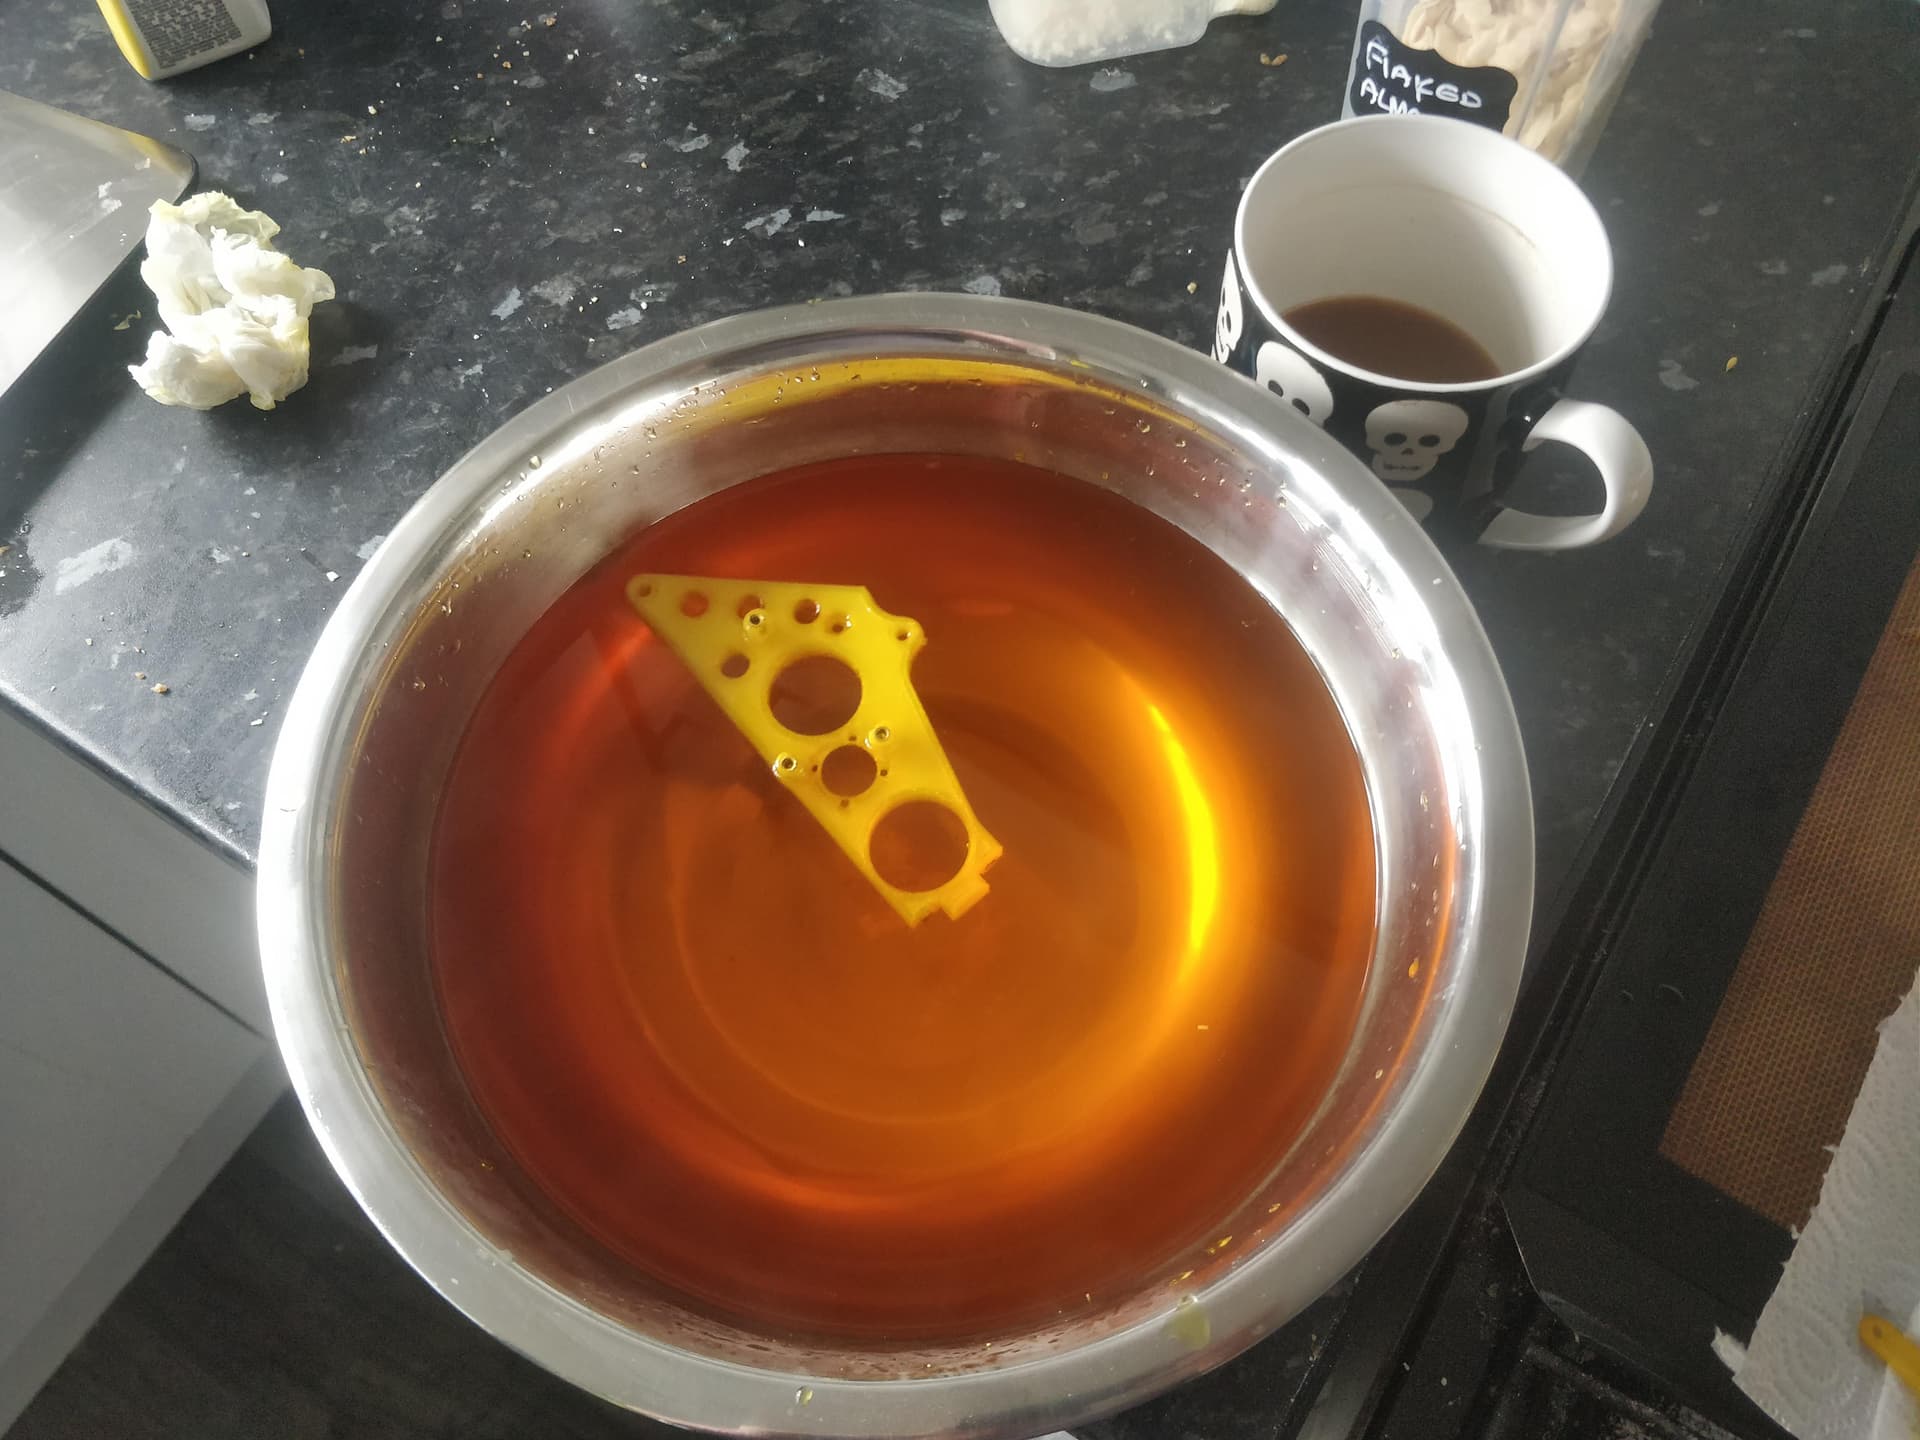
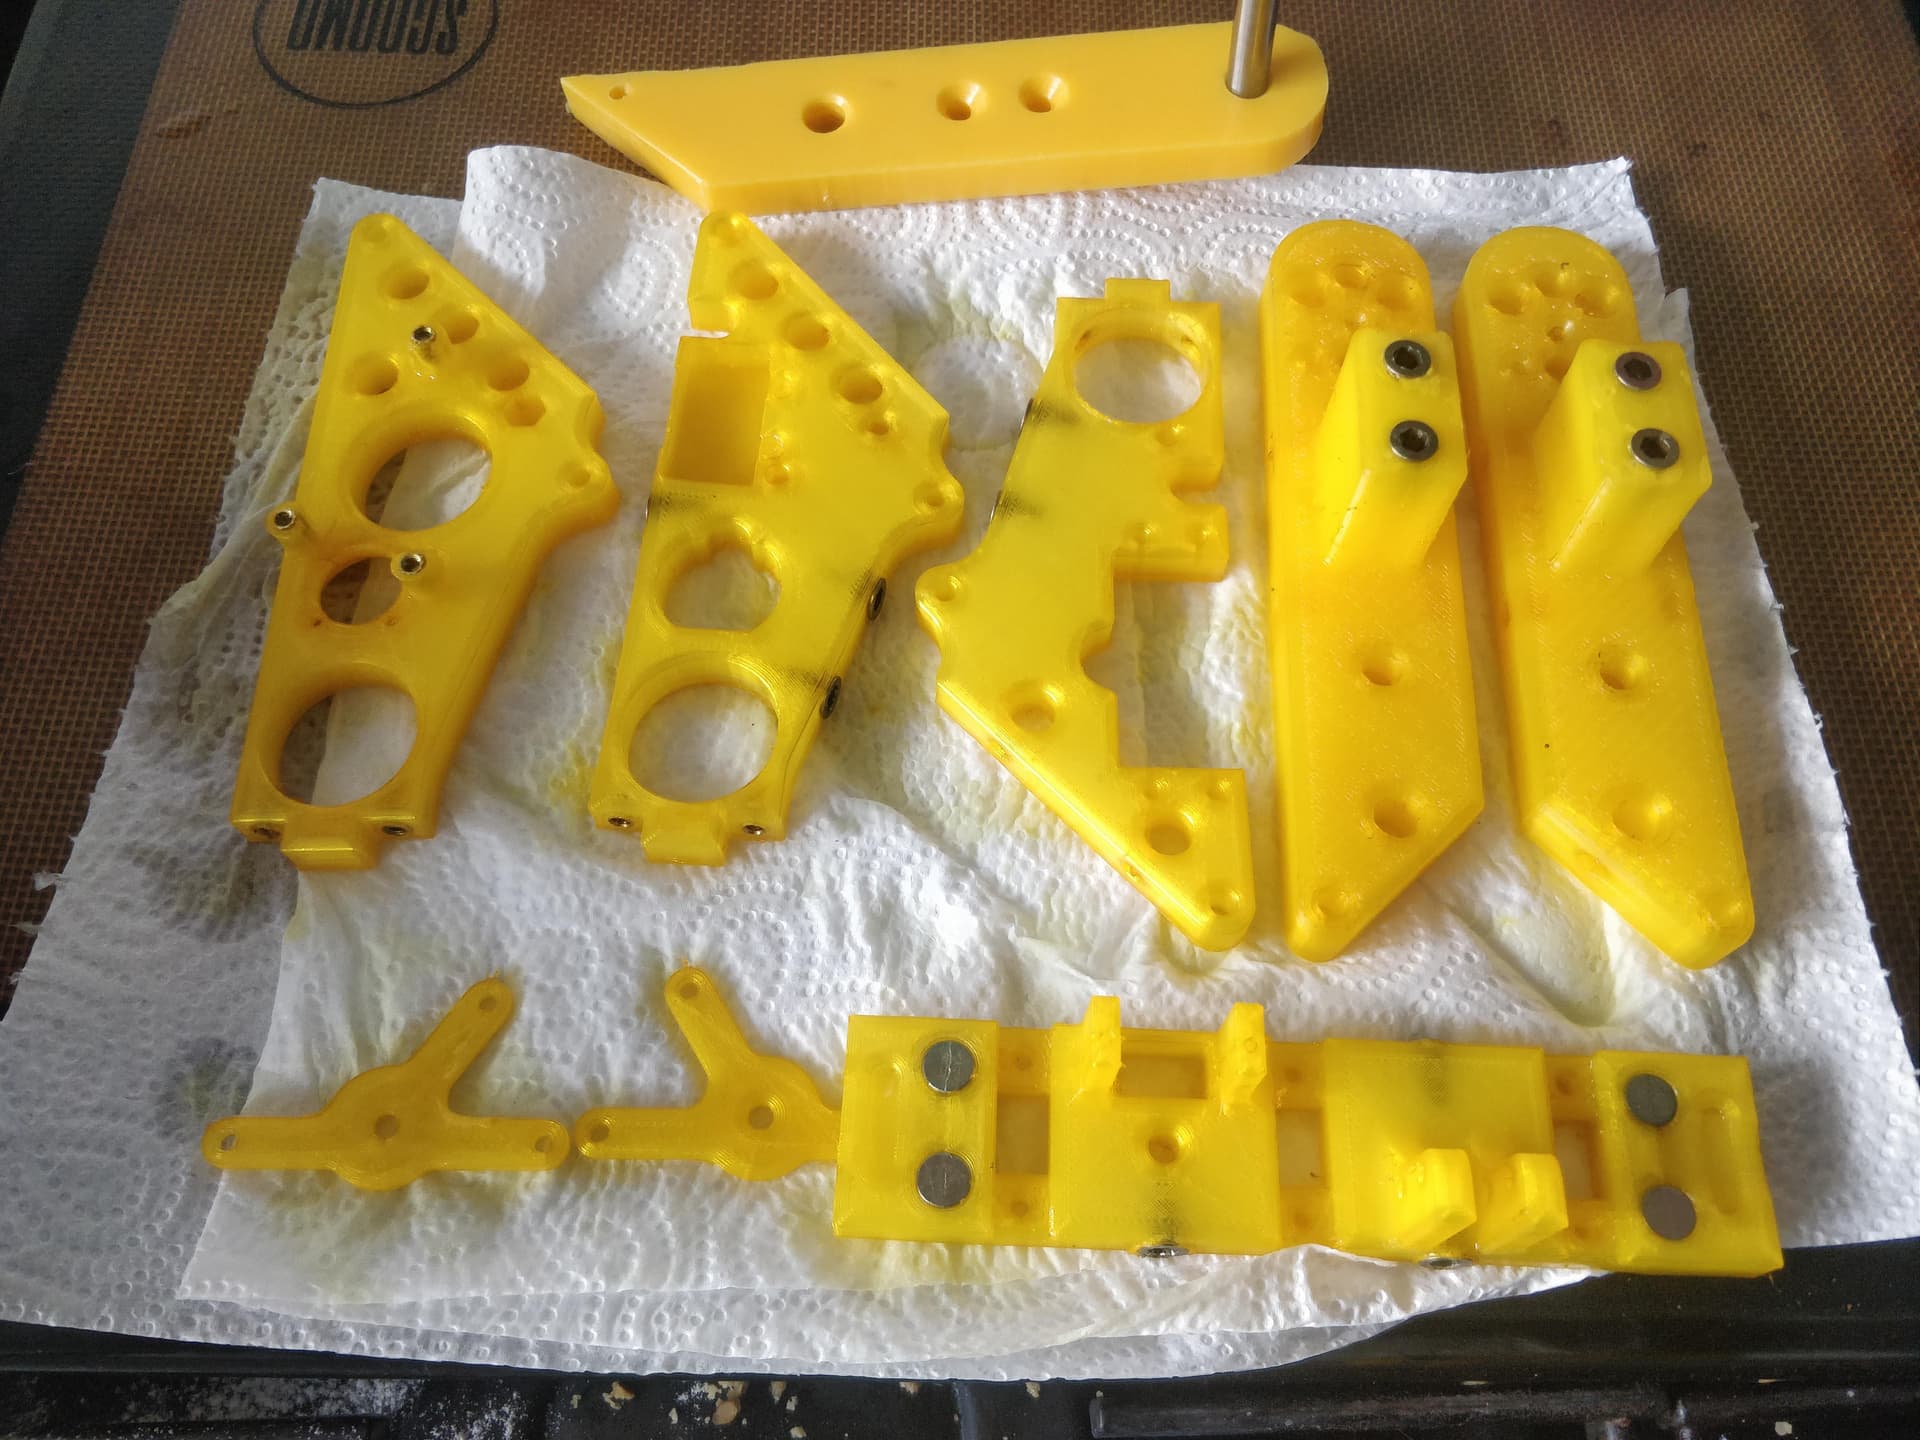
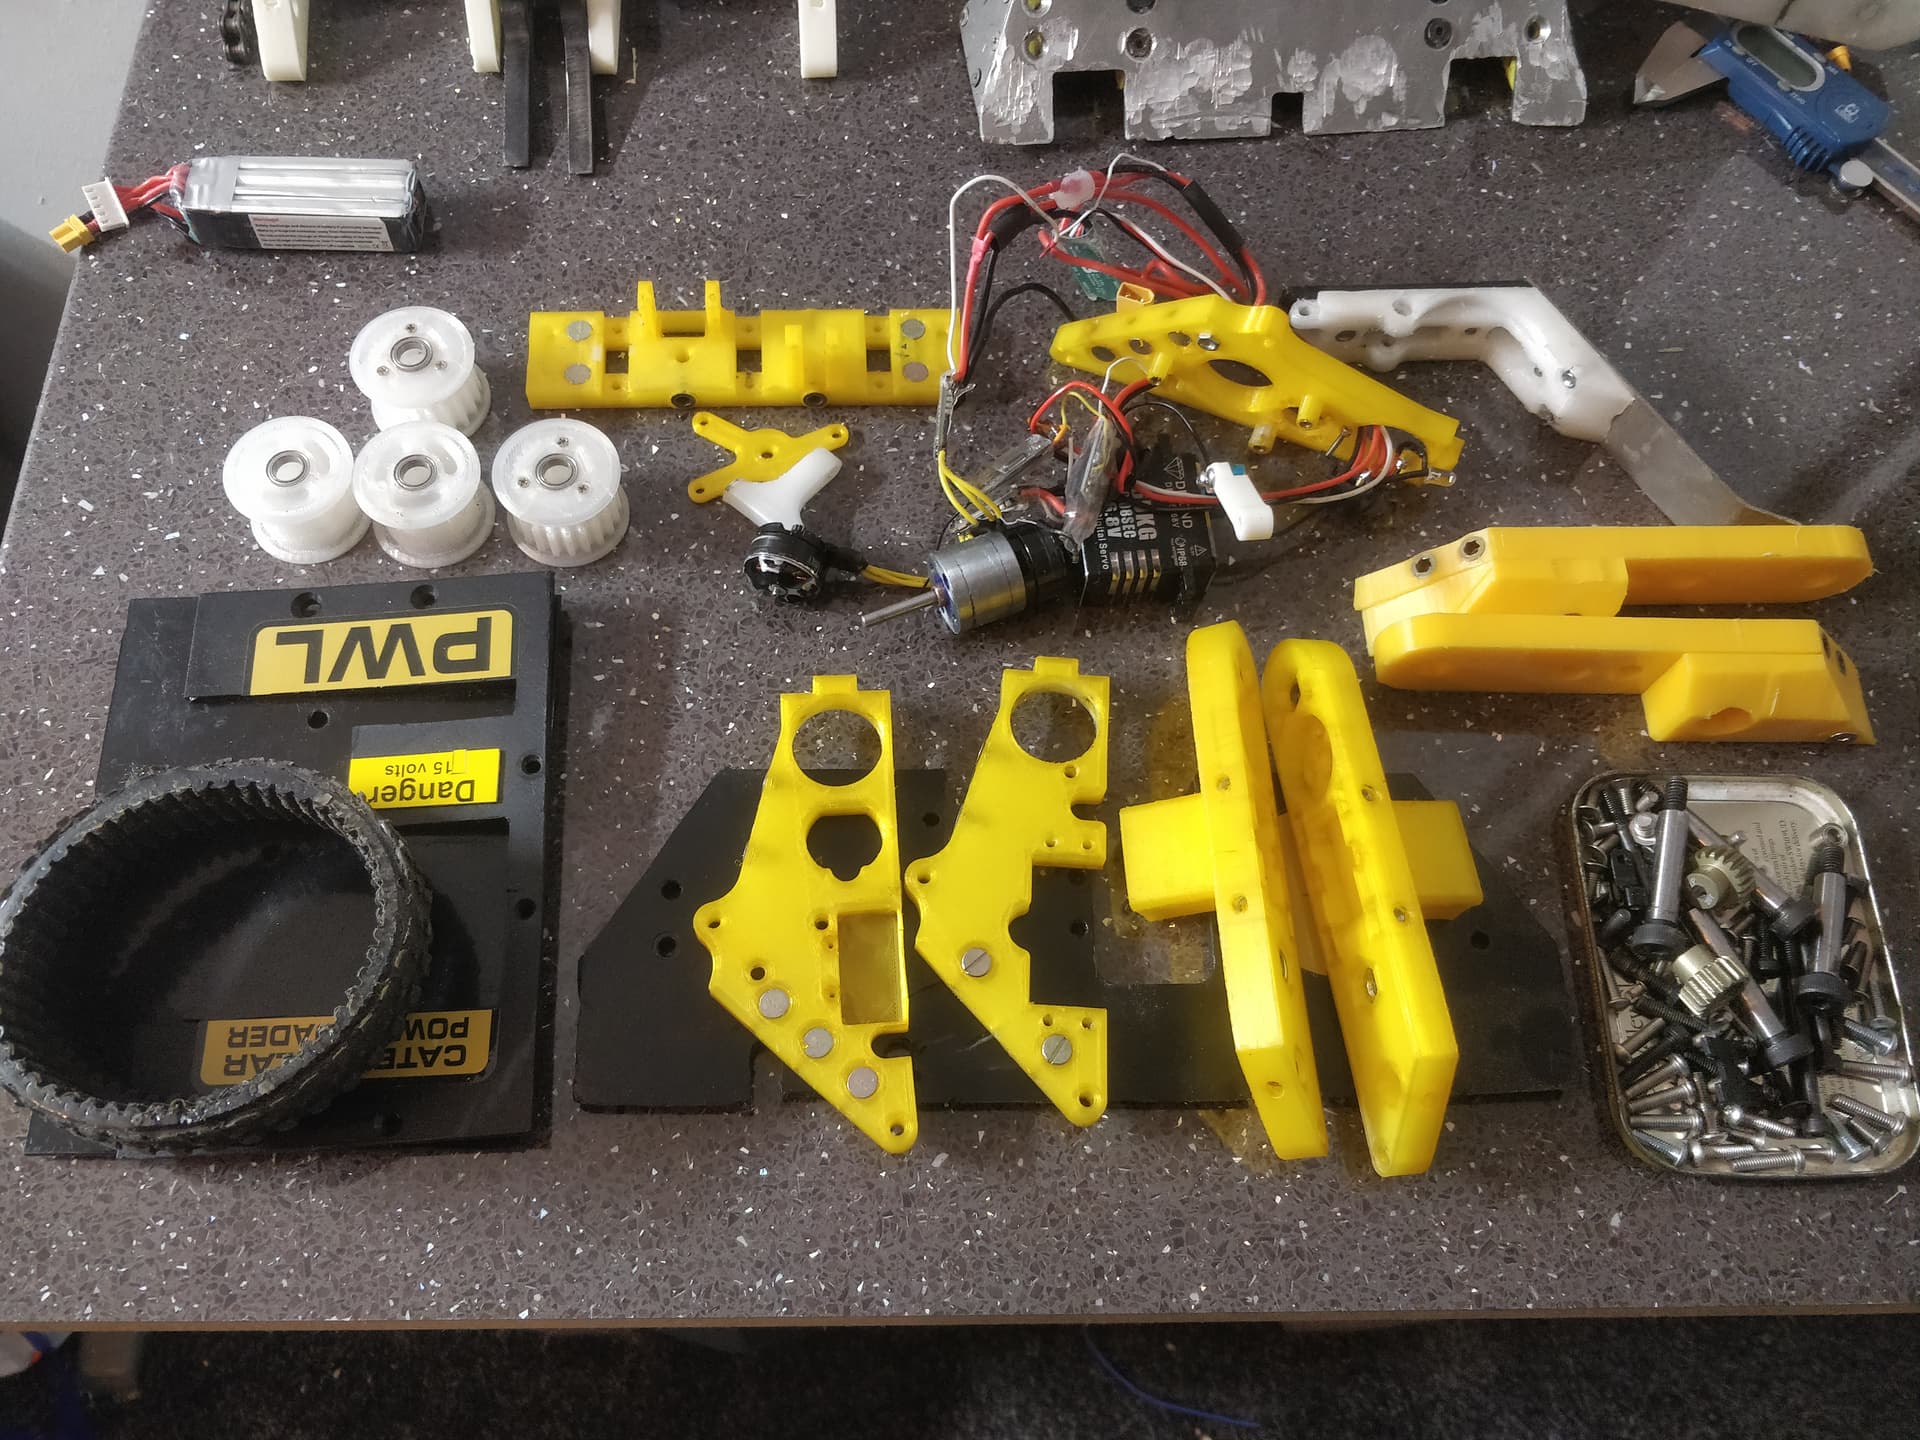
No, I don’t need to drink more water*. I pulled the sneaky RIT liquid dye trick again and gave all the chassis parts a relaxing bath taking them from alabaster to buttercup.

The final colouring didn’t come out too far off the yellow HDPE so it’s not completely jarring. It is a lot less gold than the last version which I can put down to a better mix ratio of dye and a longer soak time. Also less awful and therefore more consistent prints.

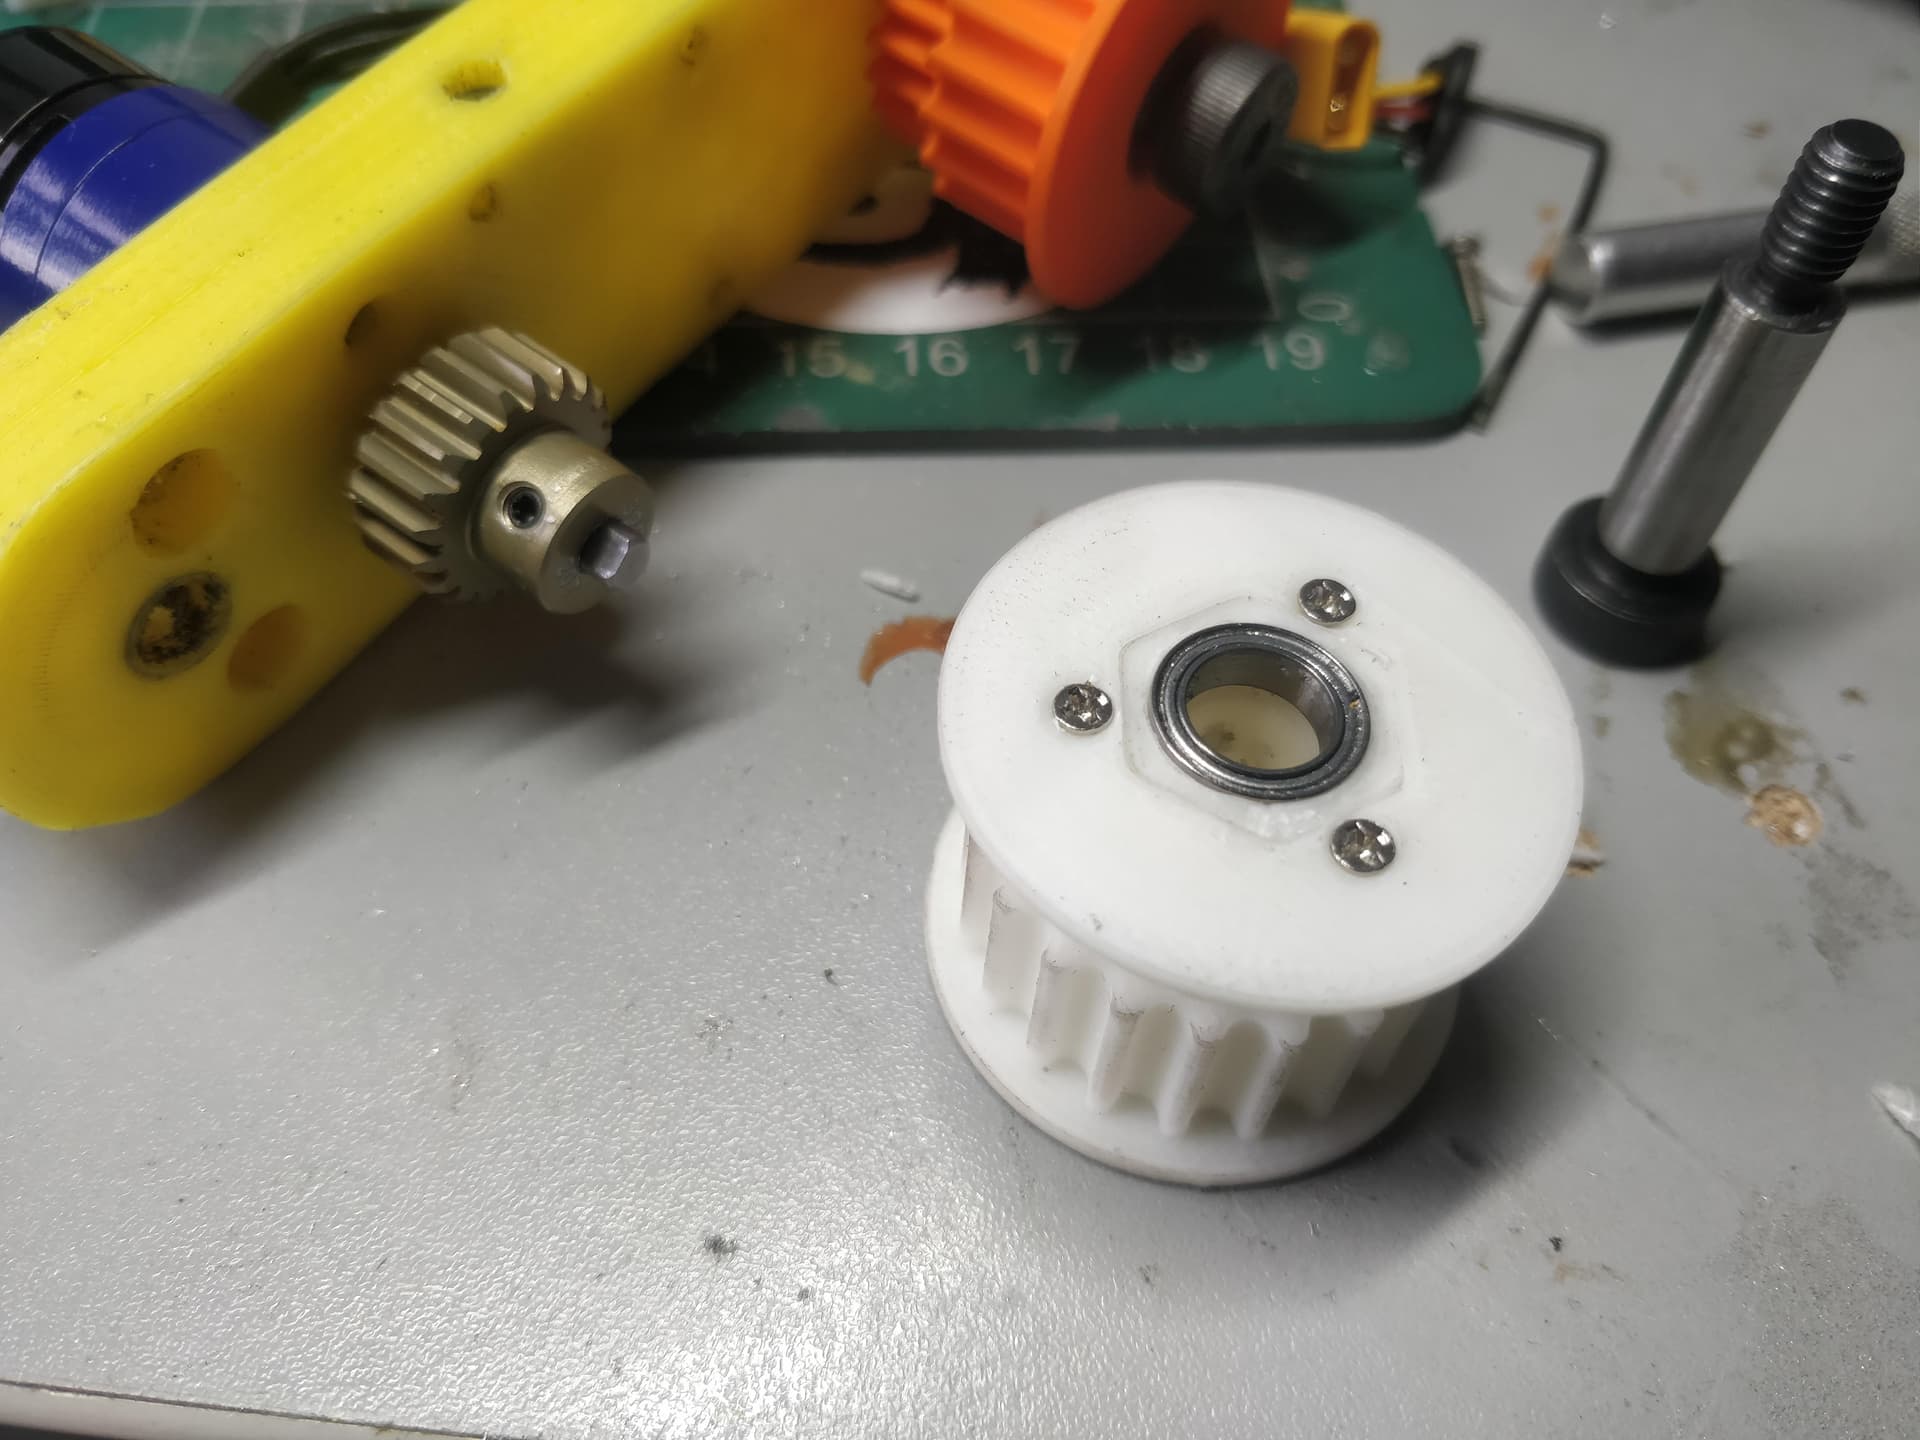
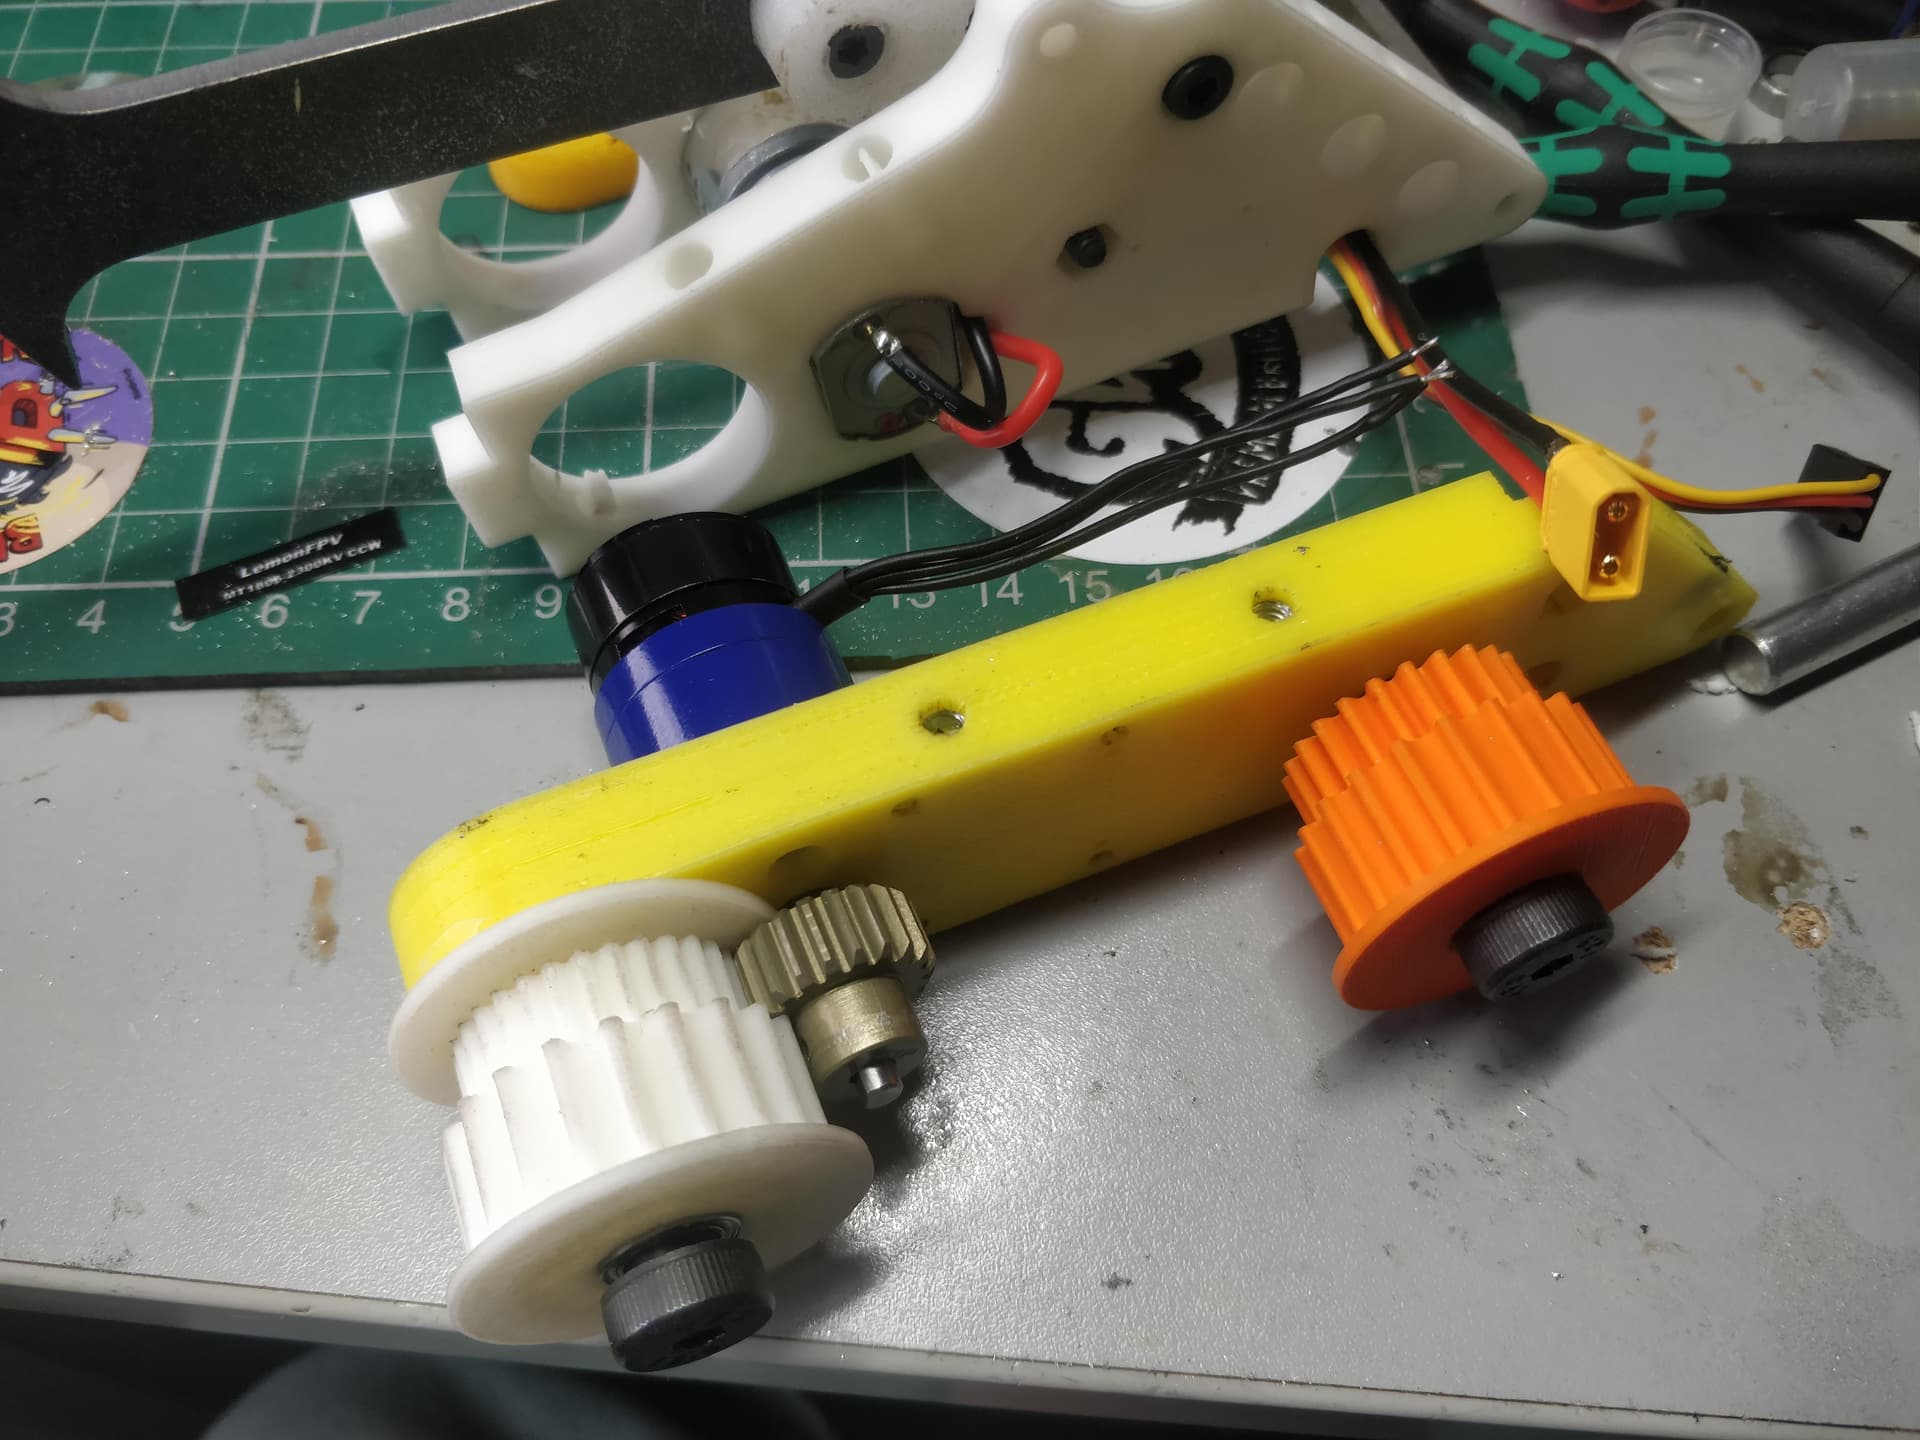
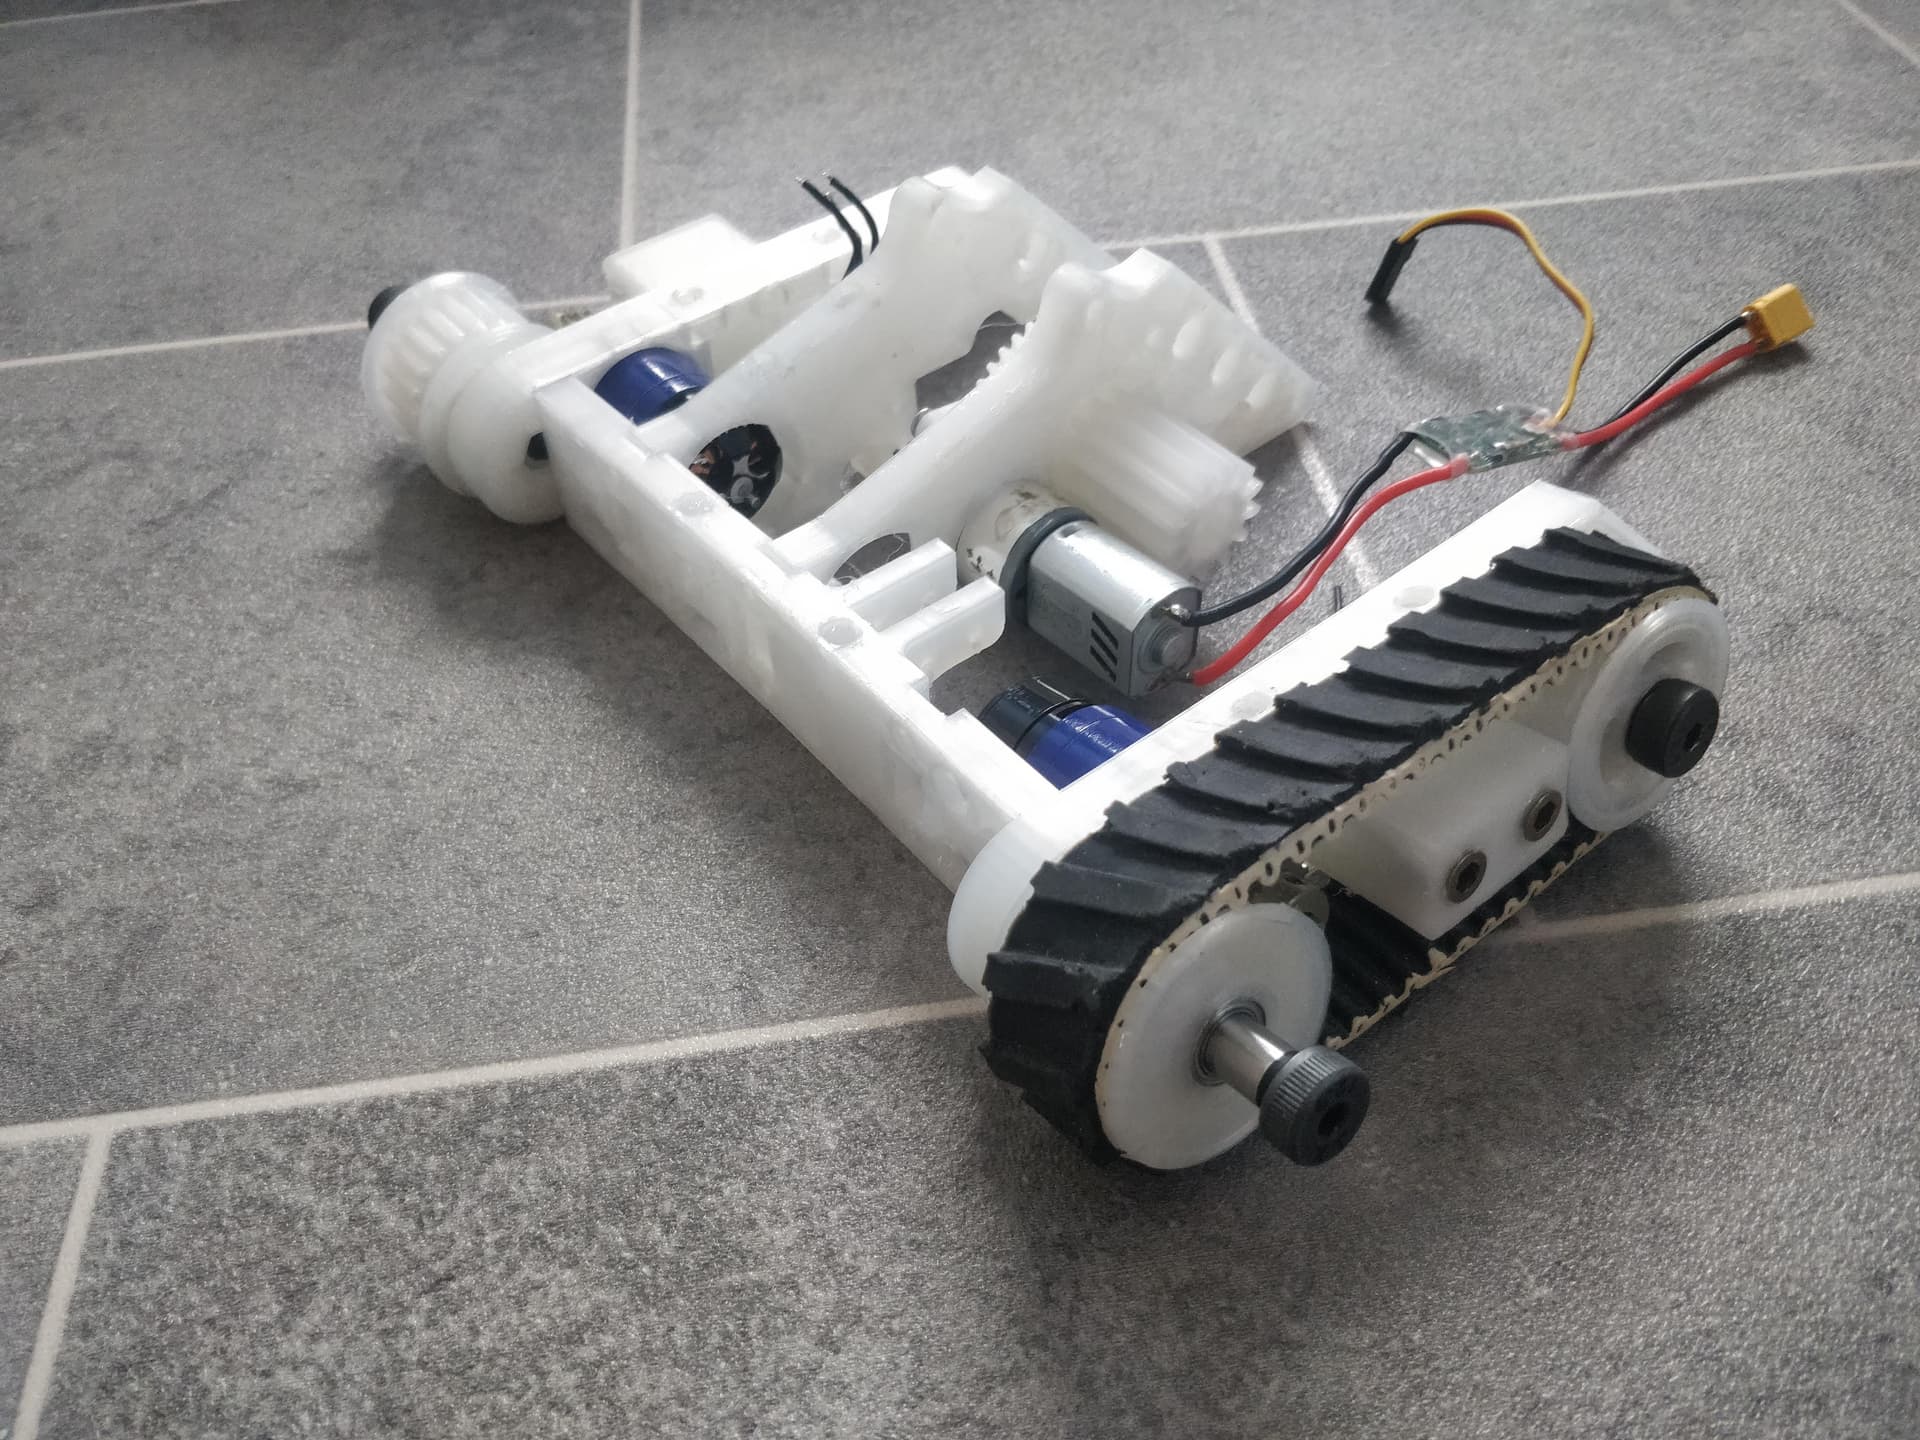
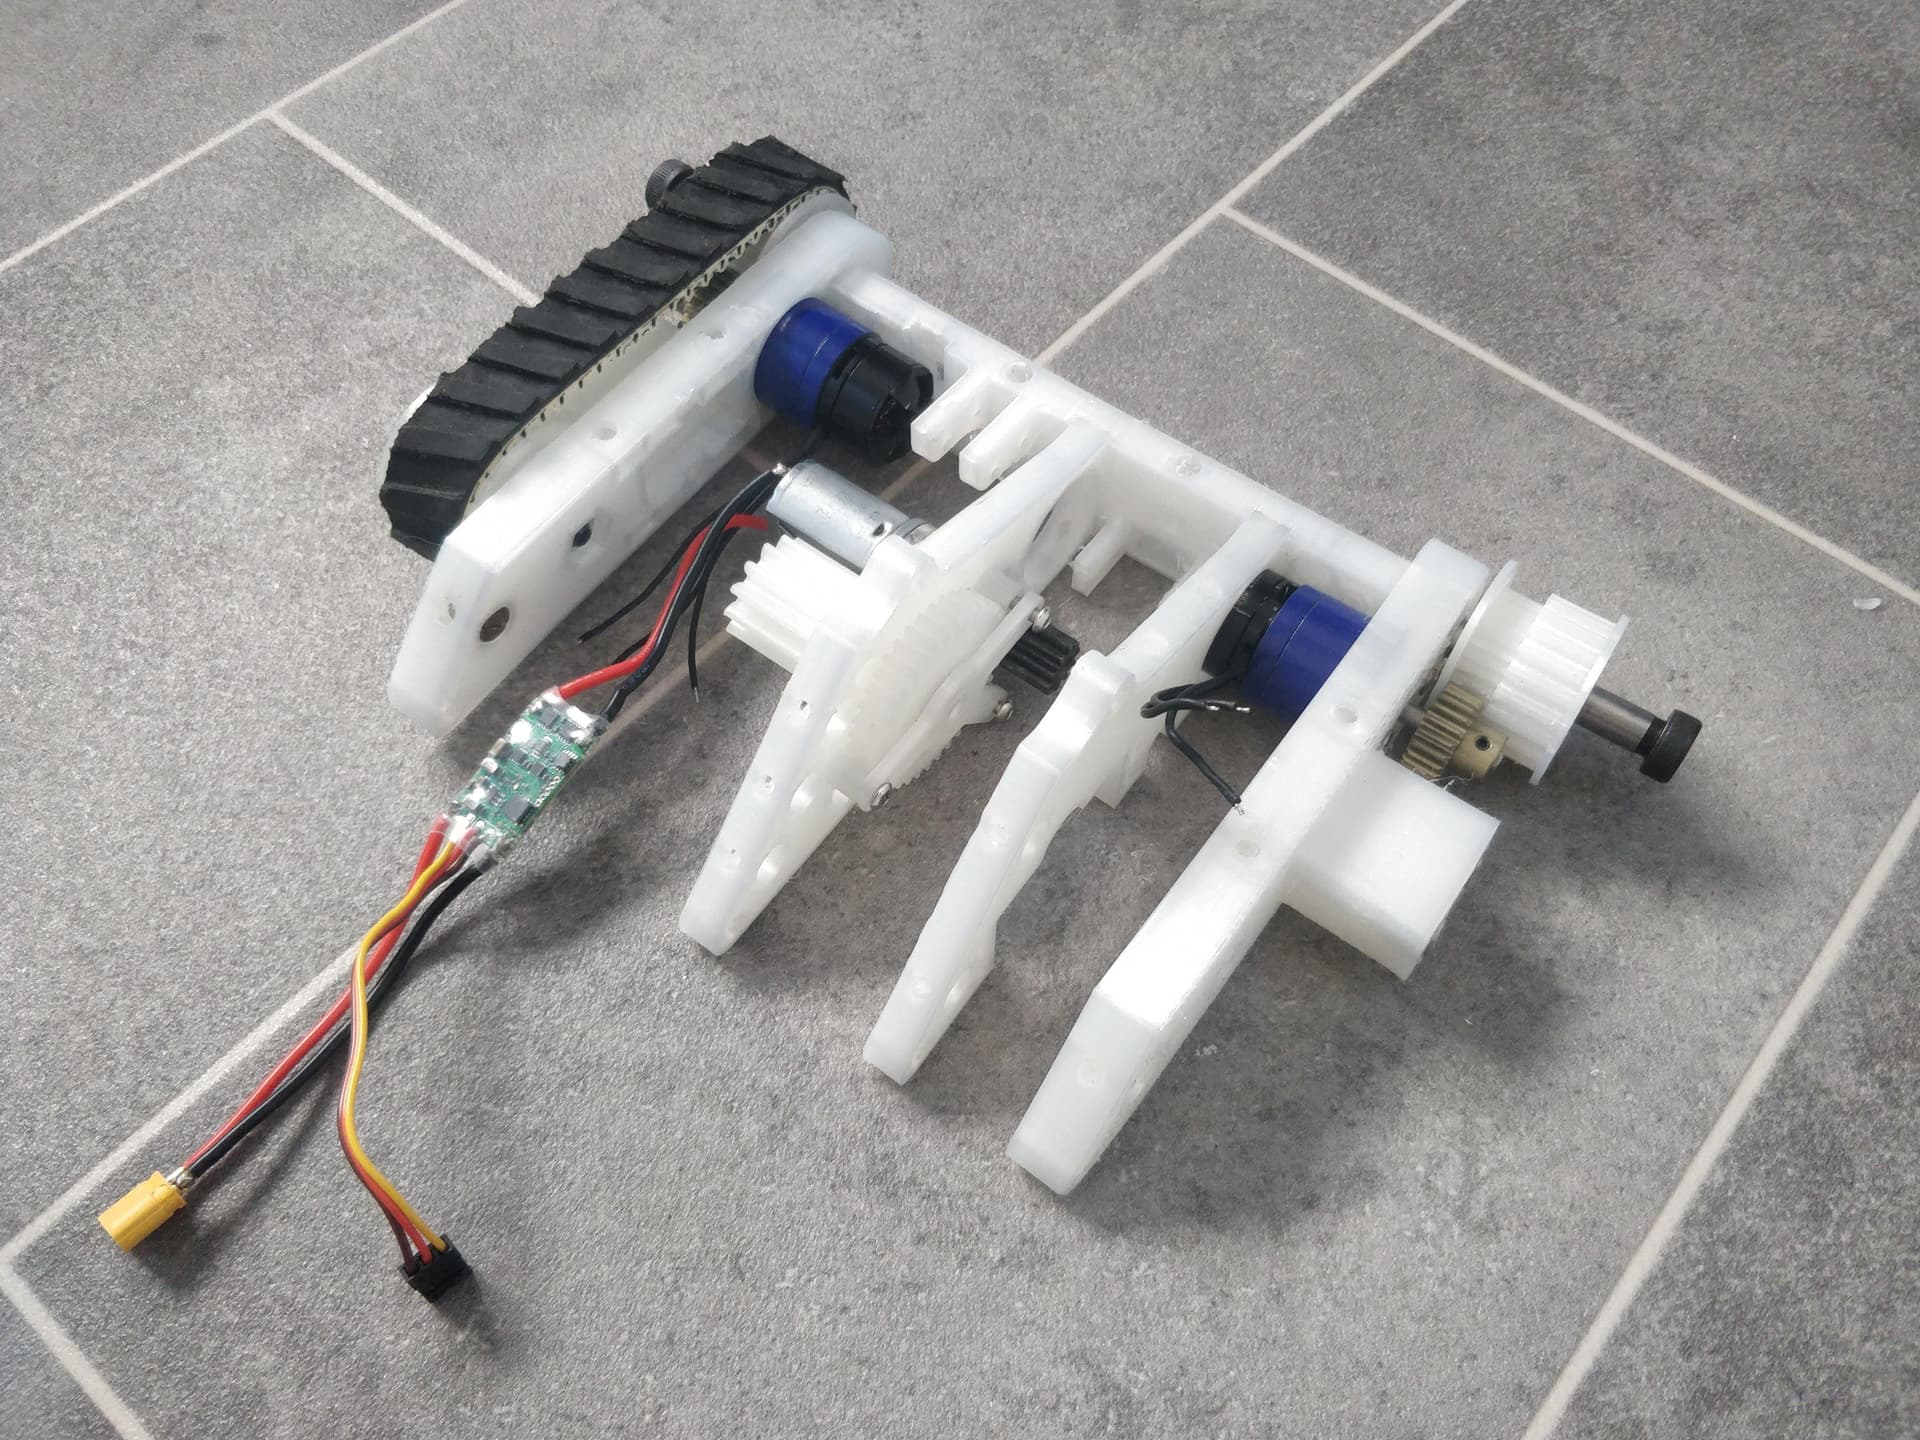
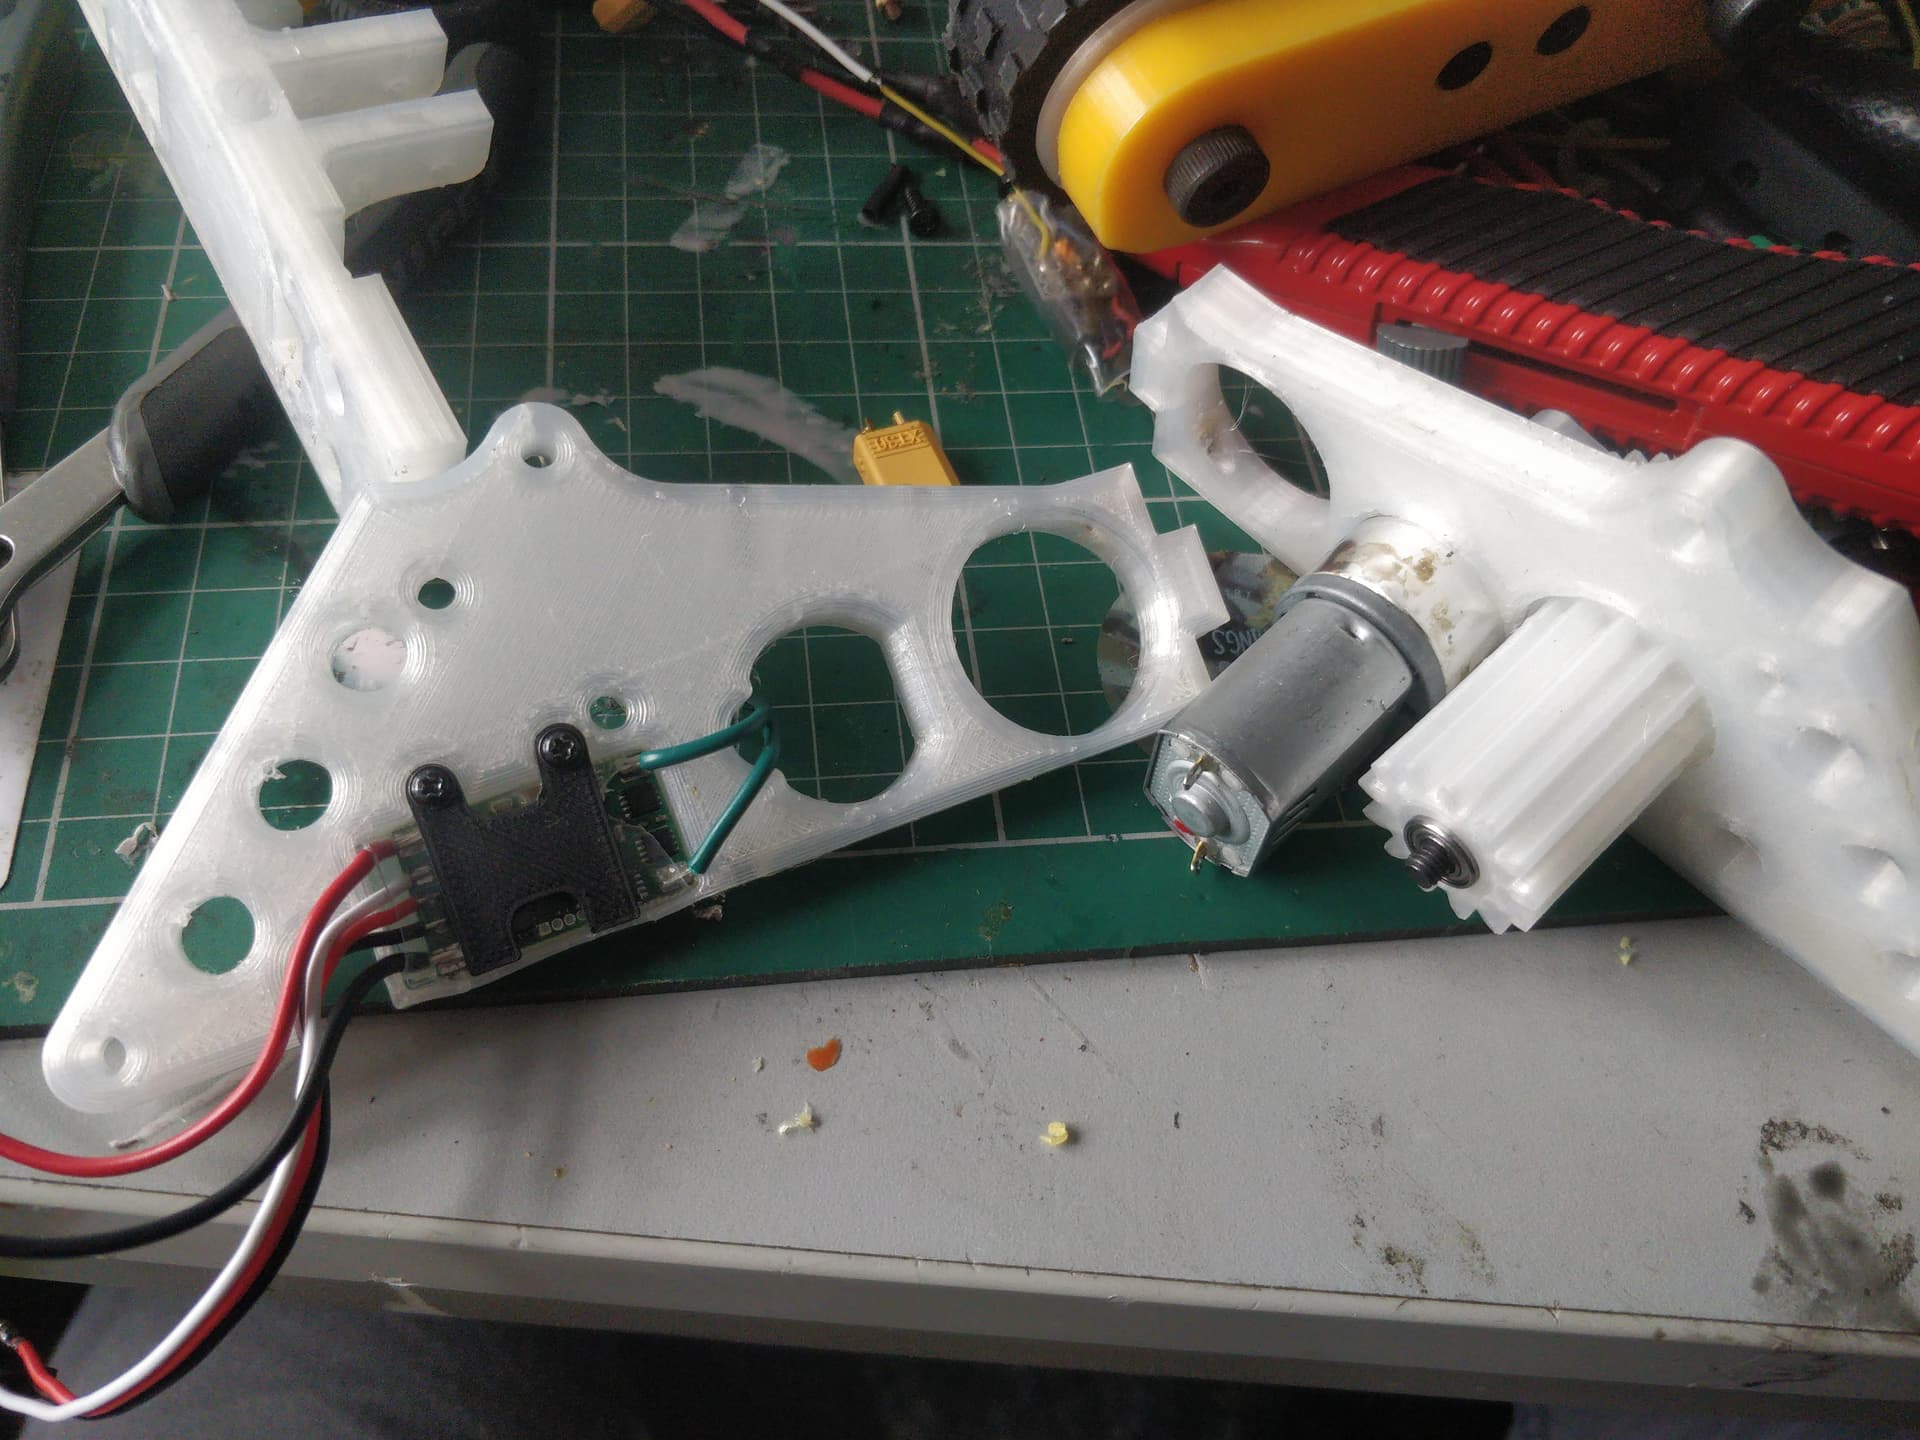
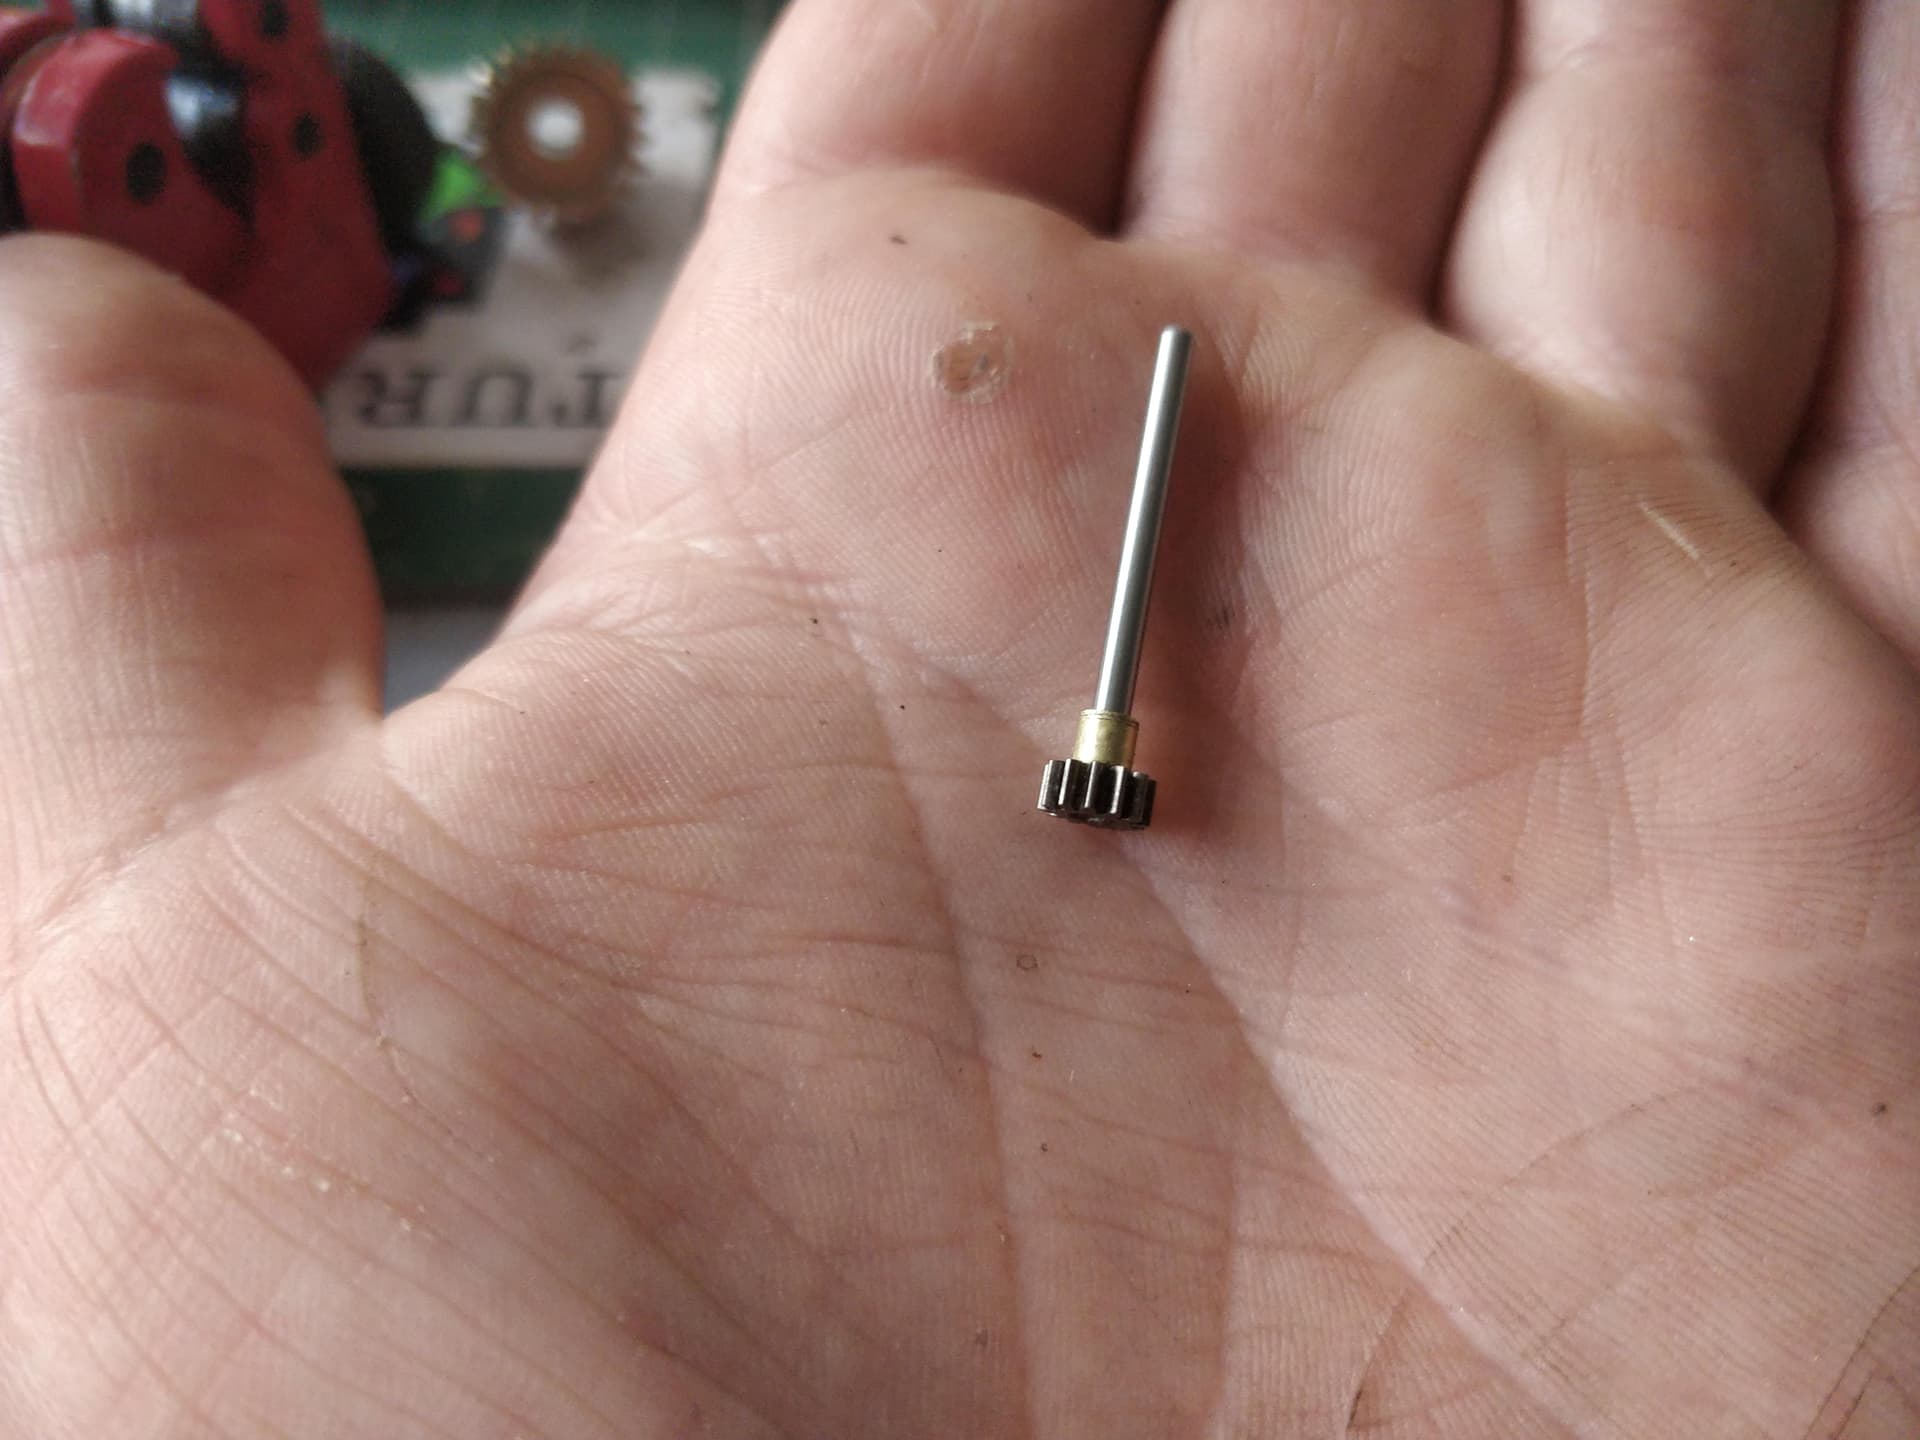
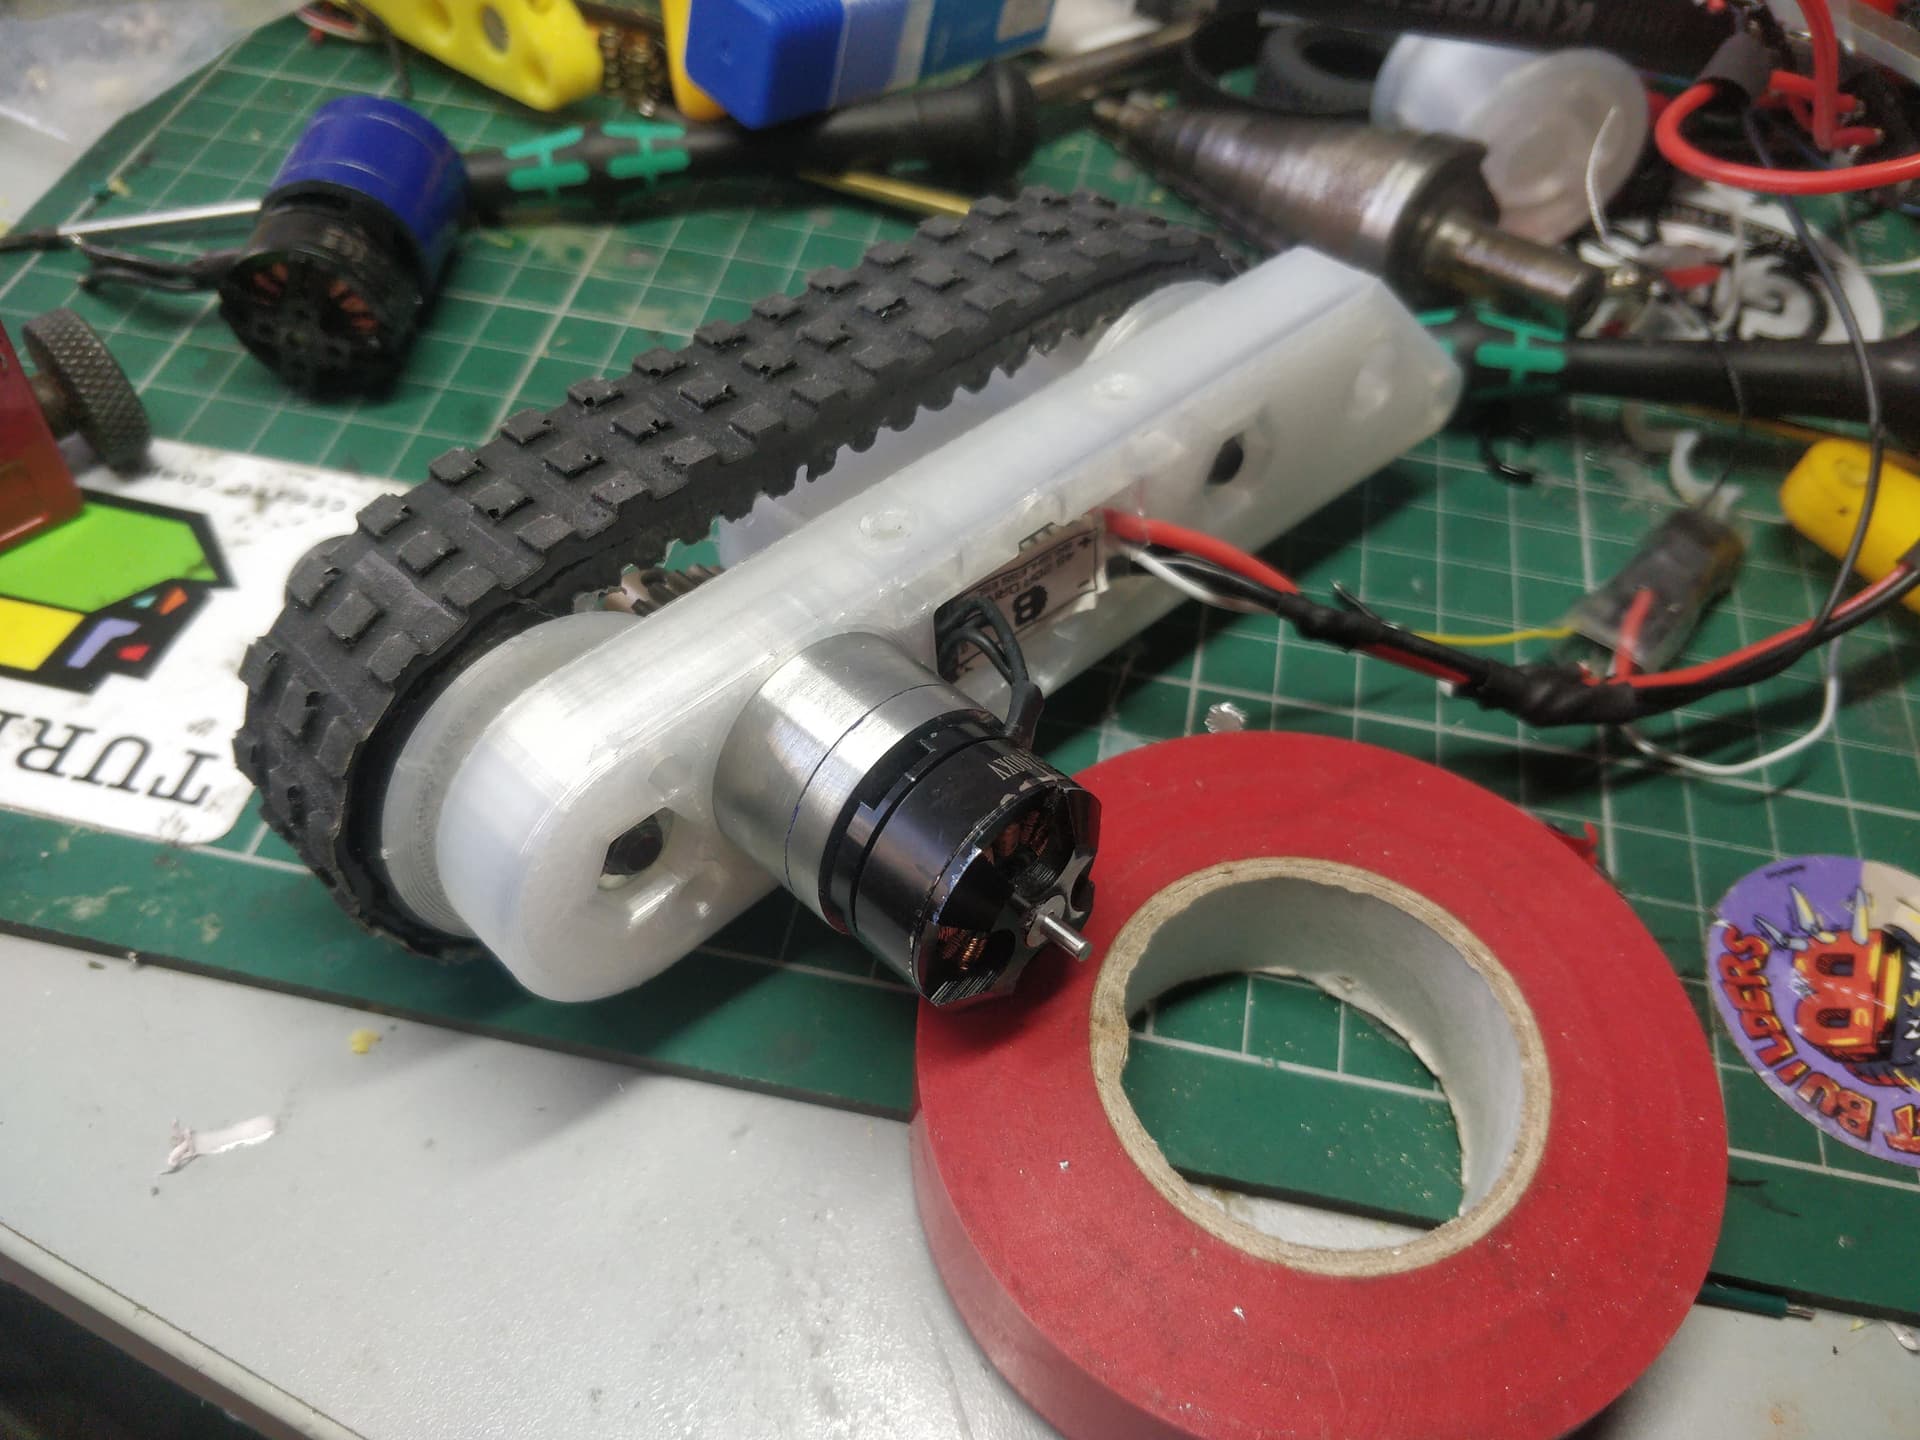
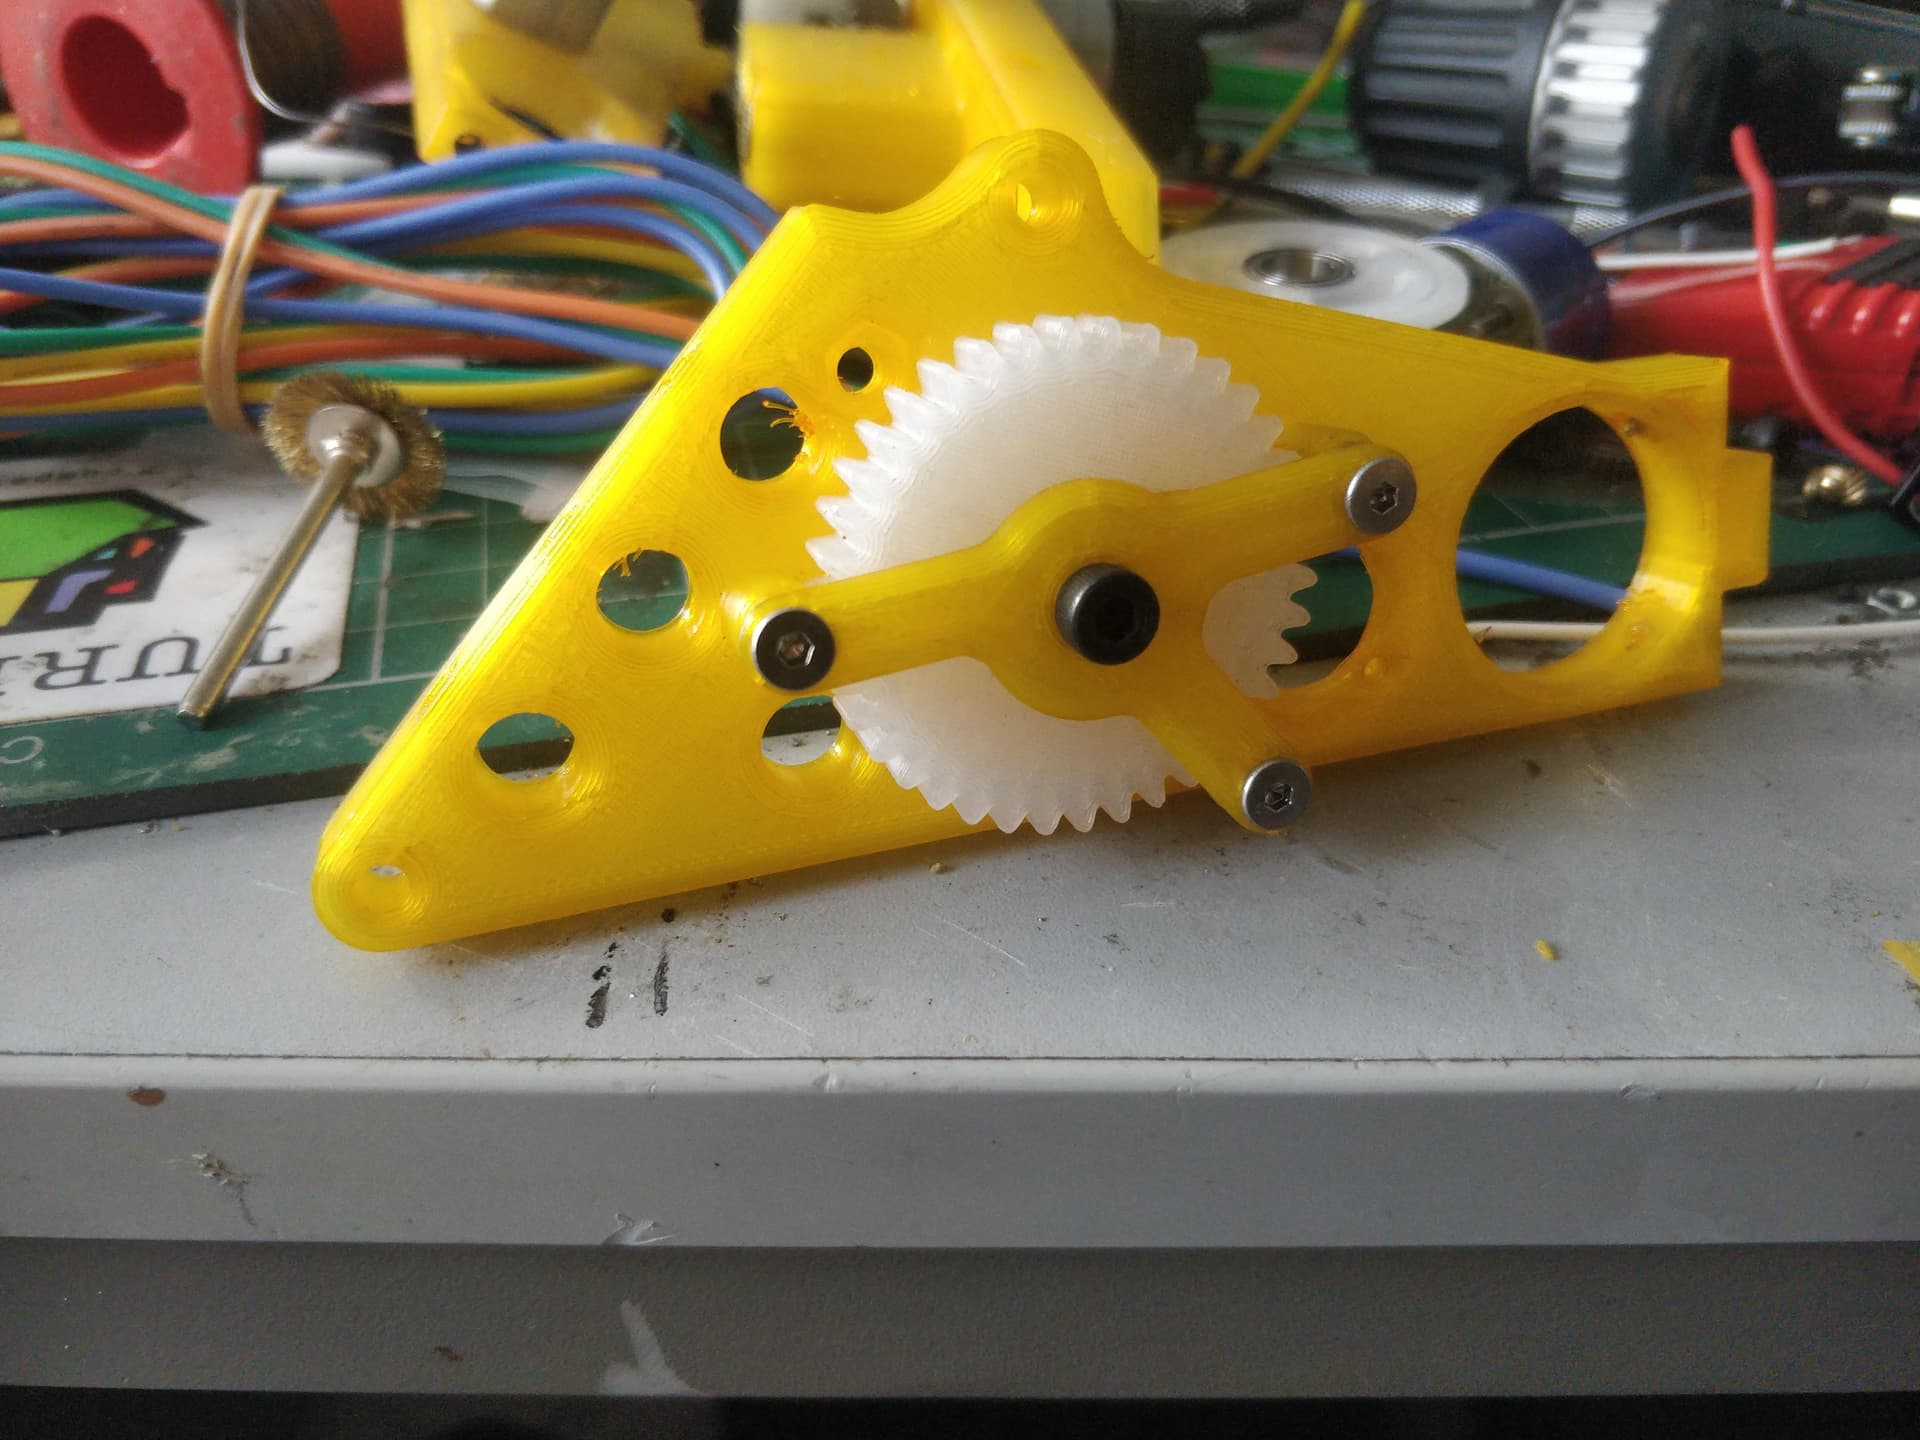
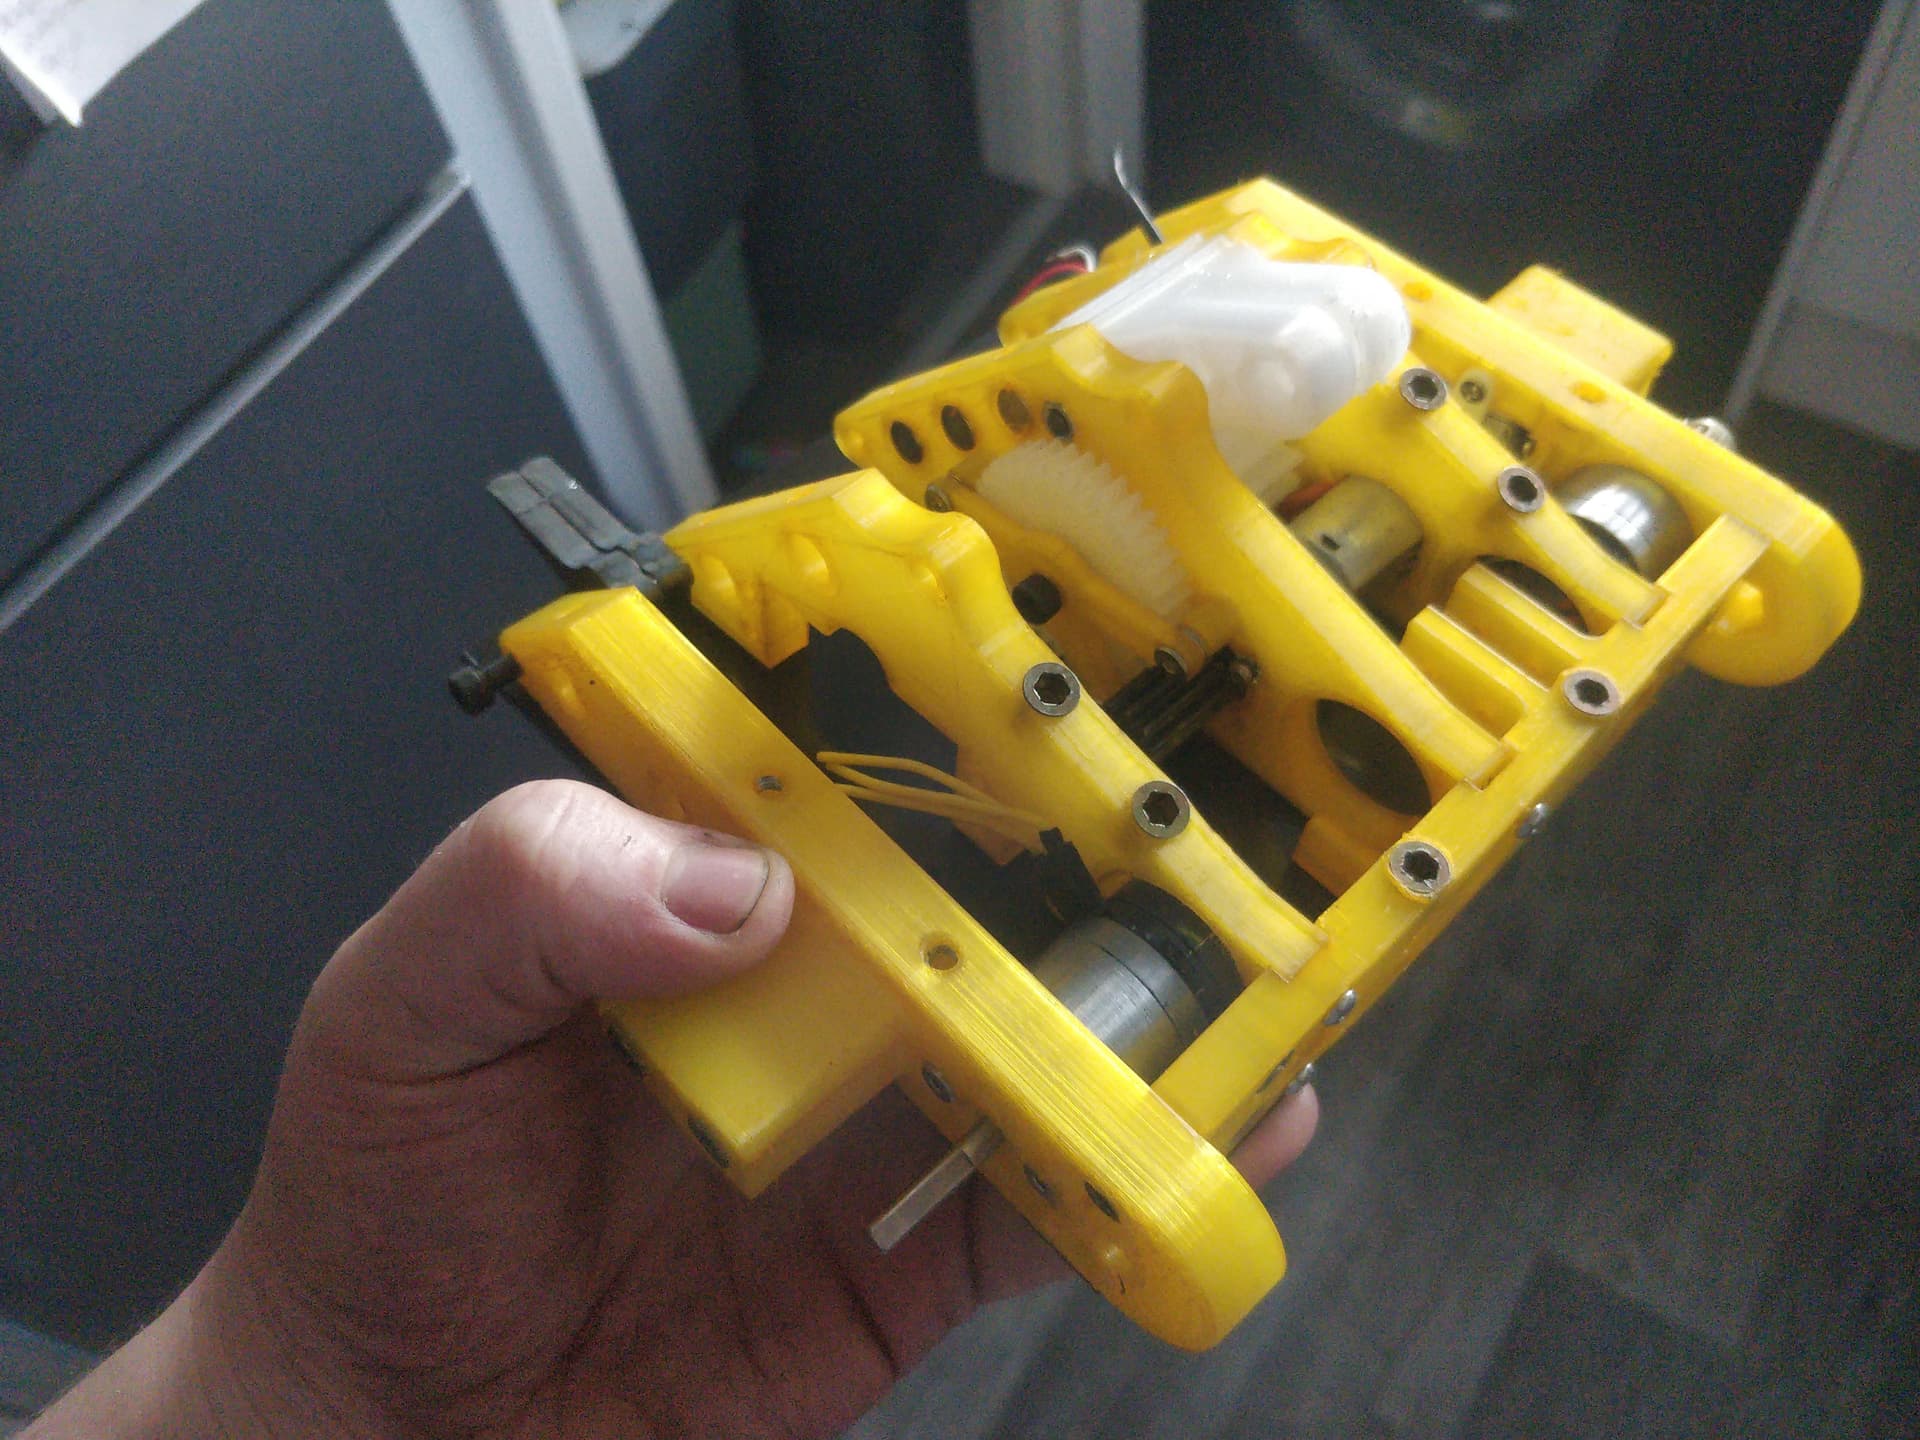
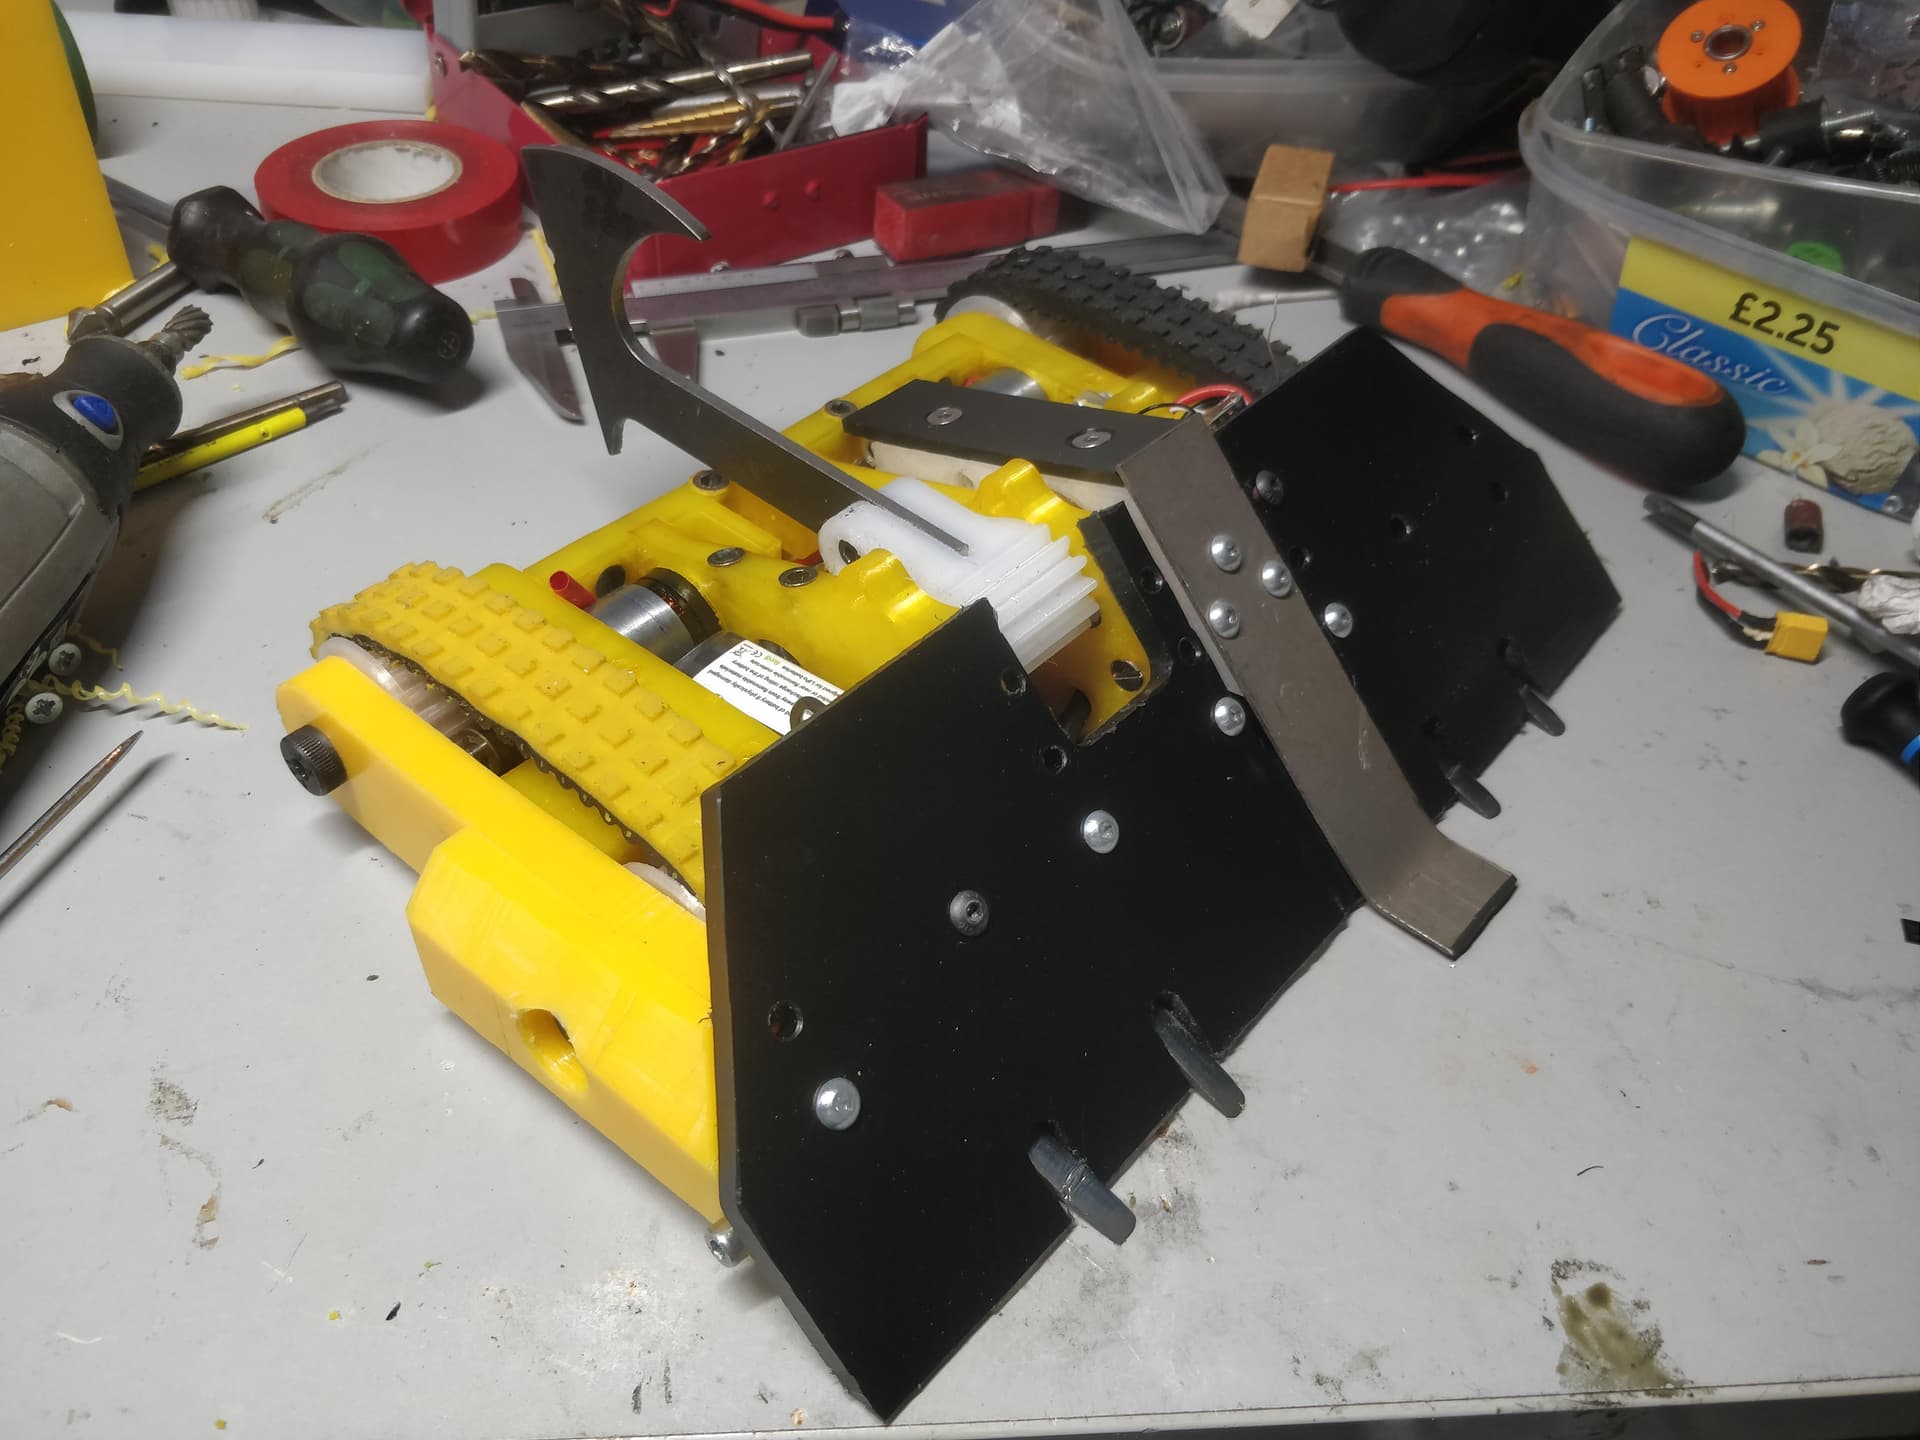
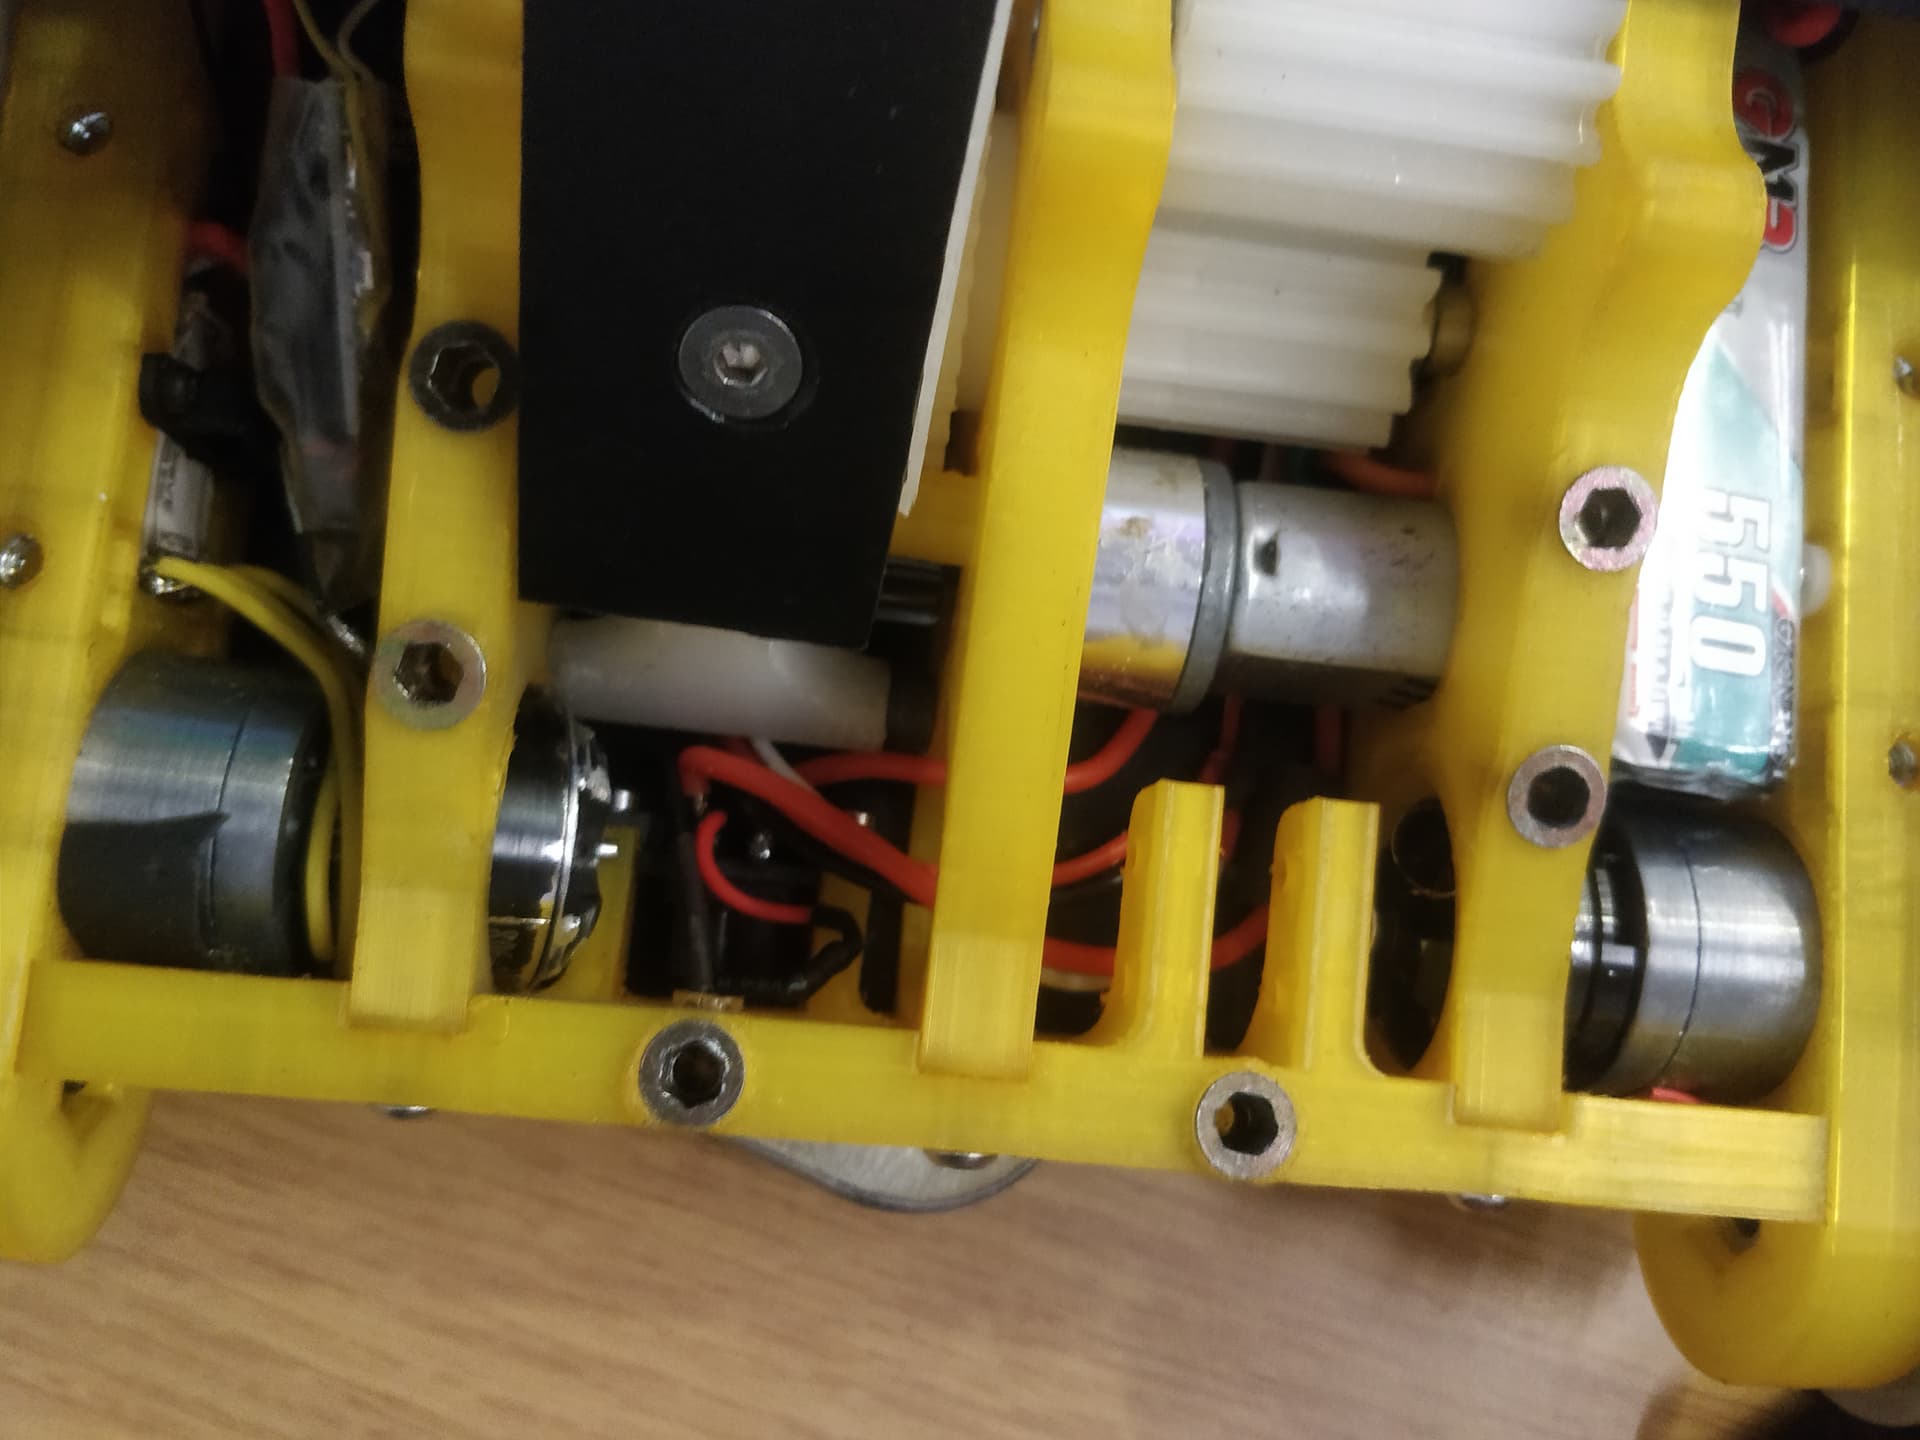
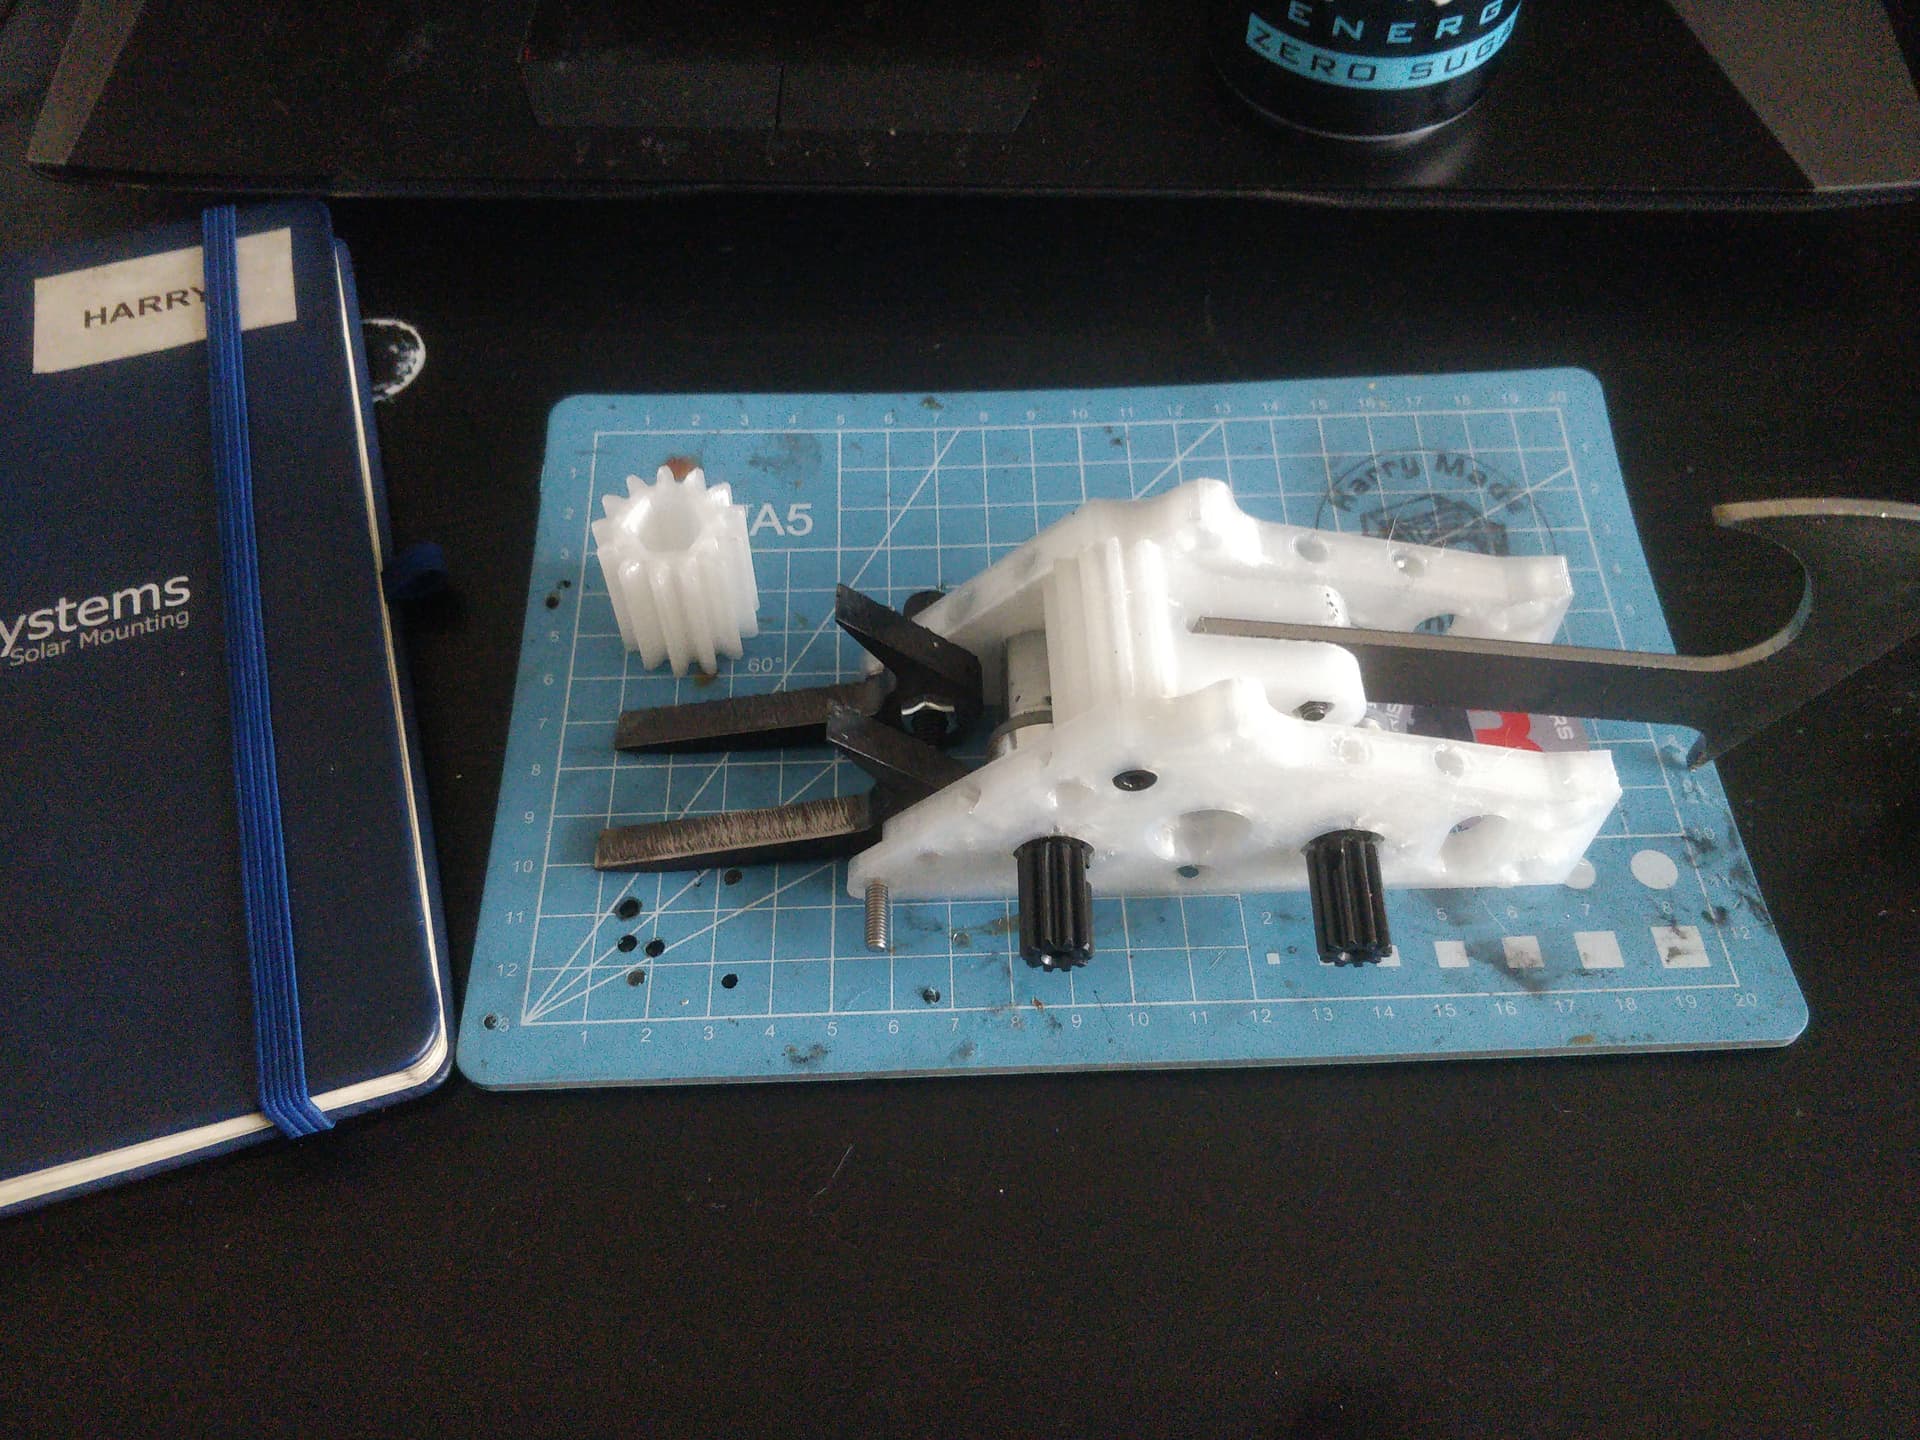
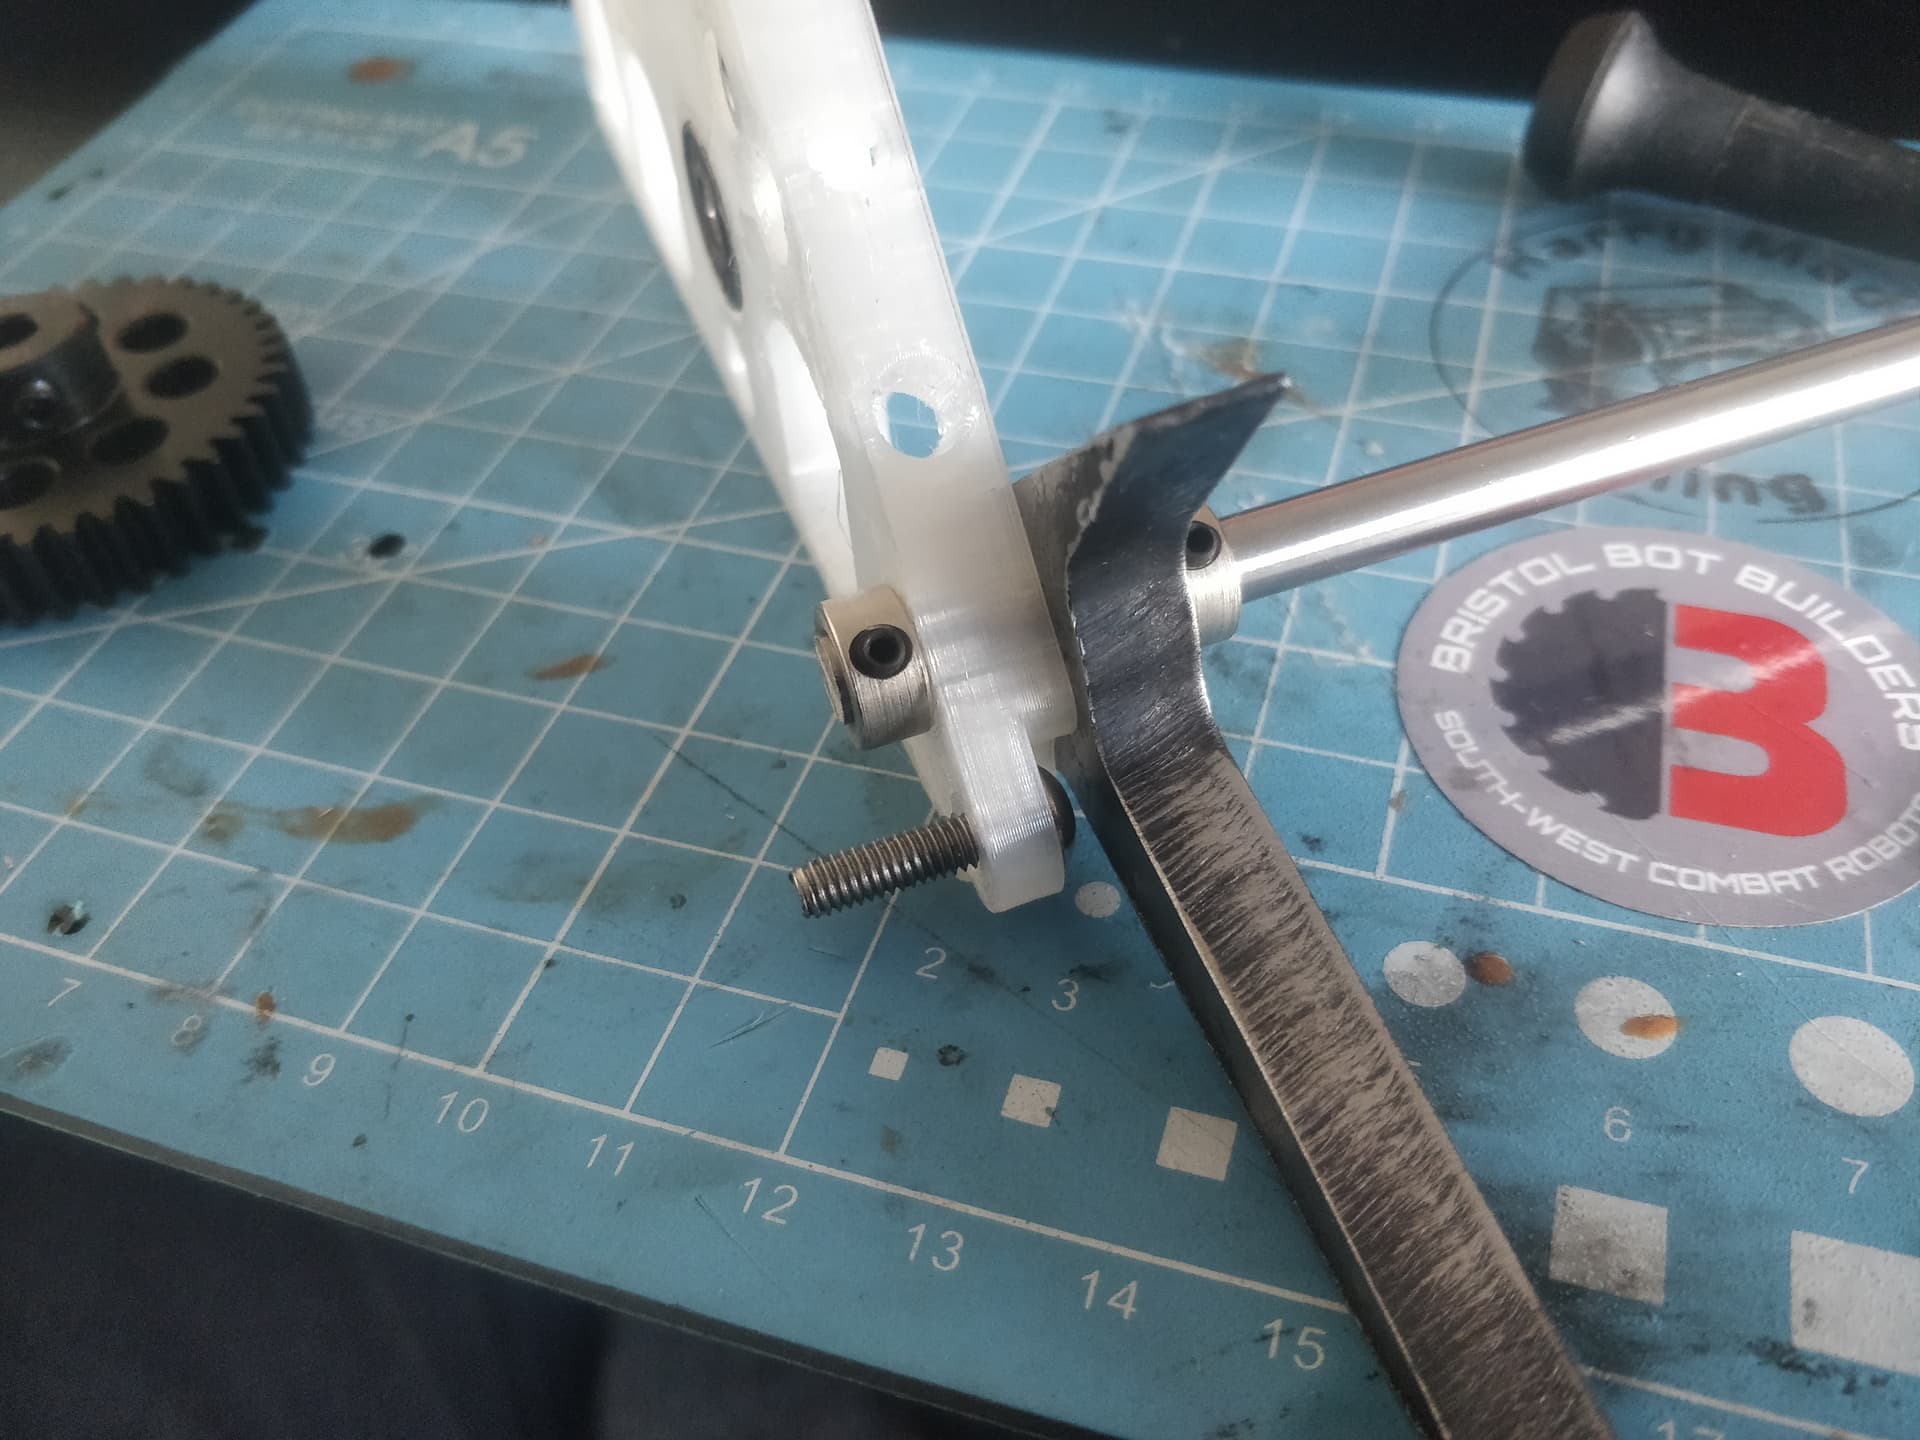
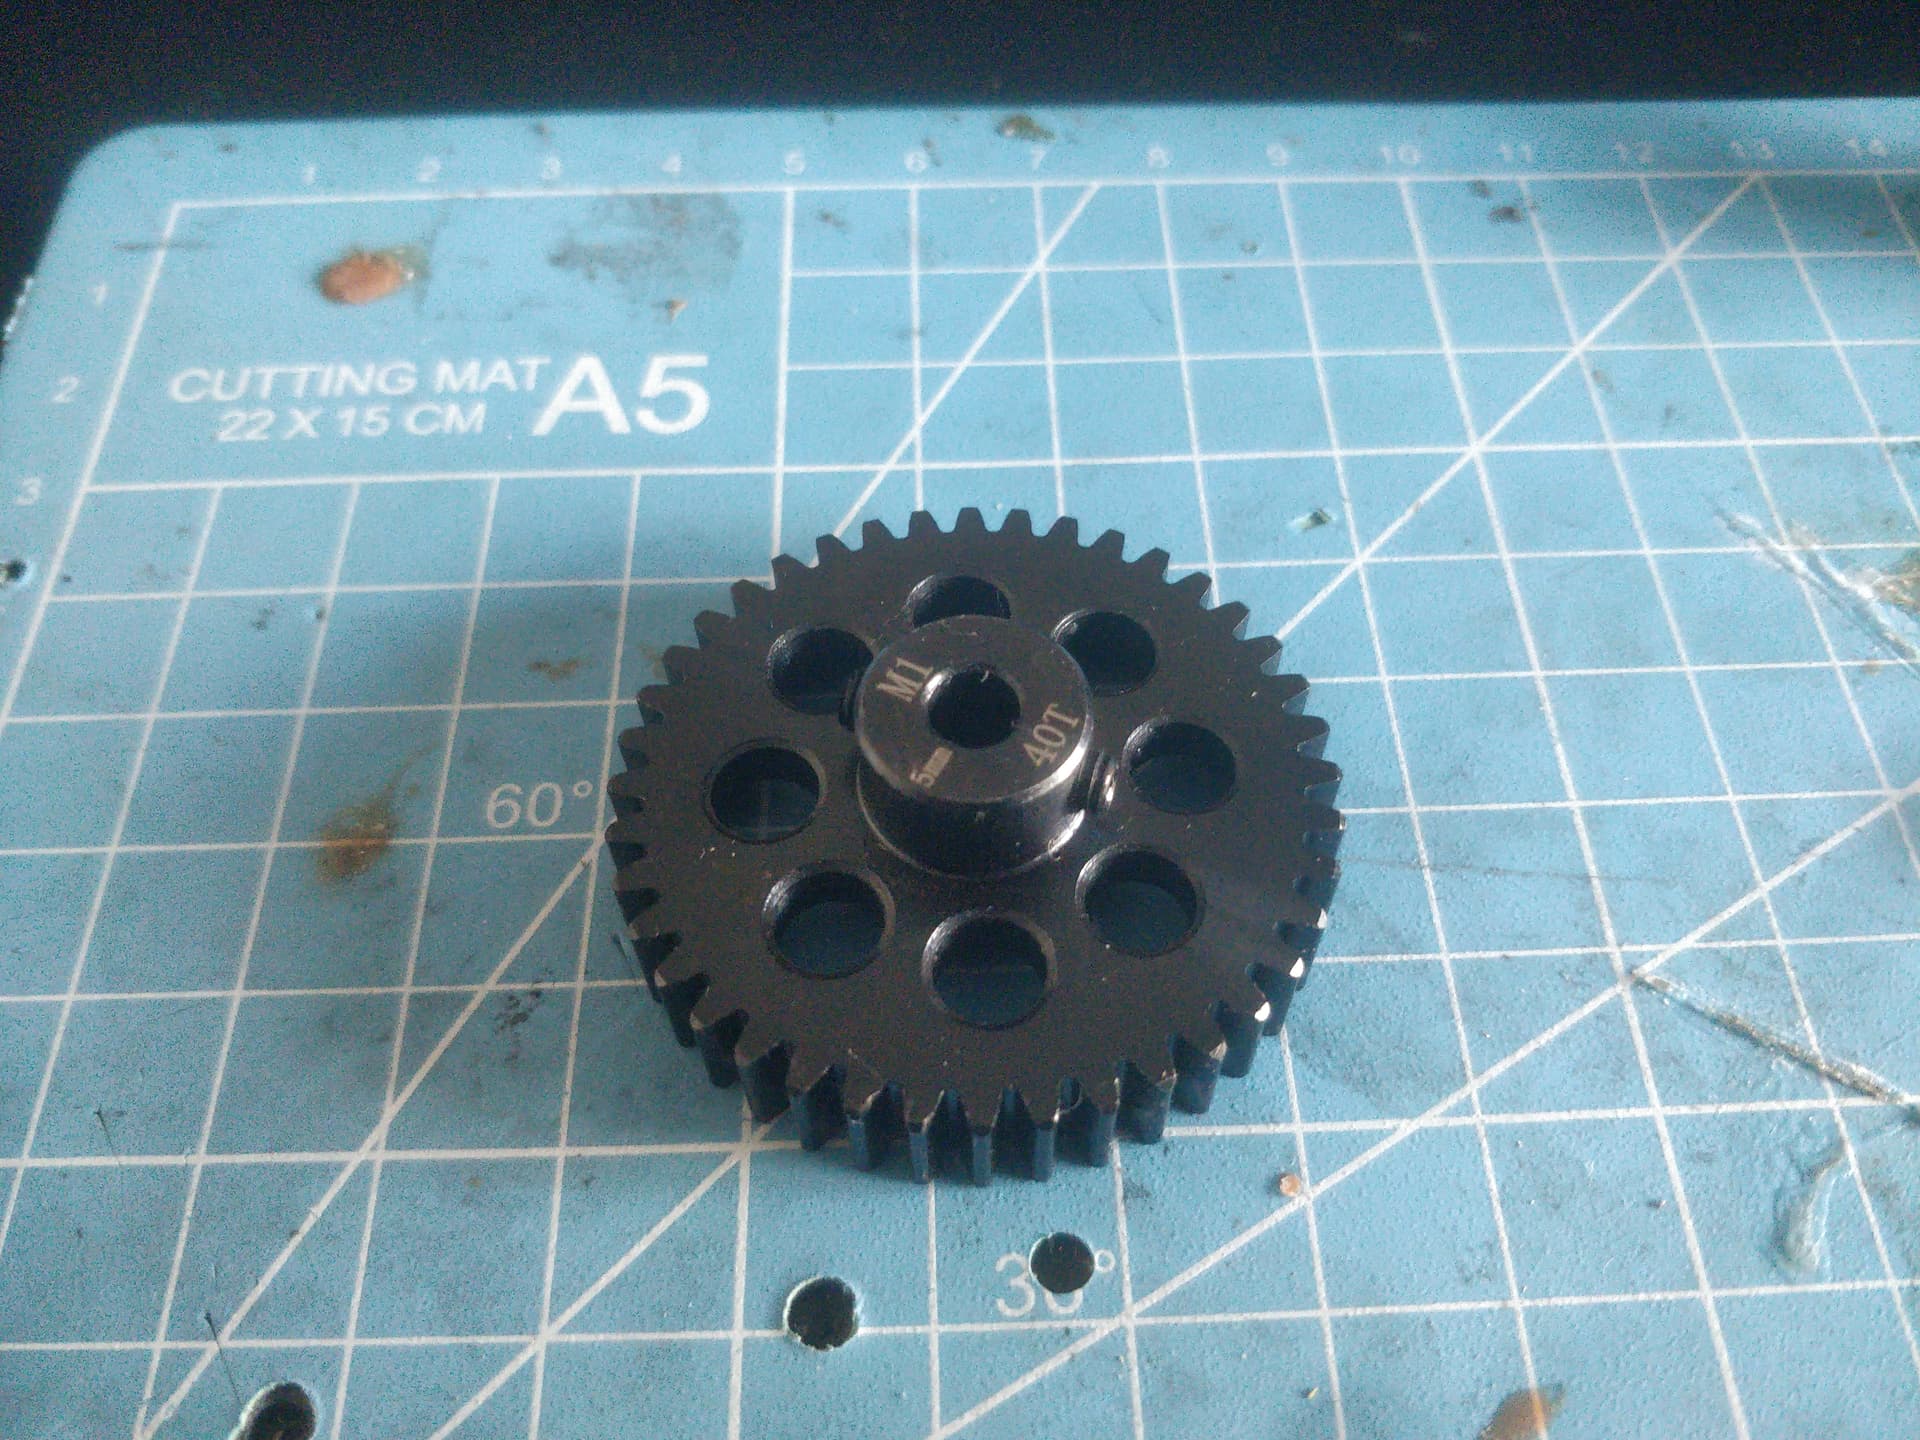
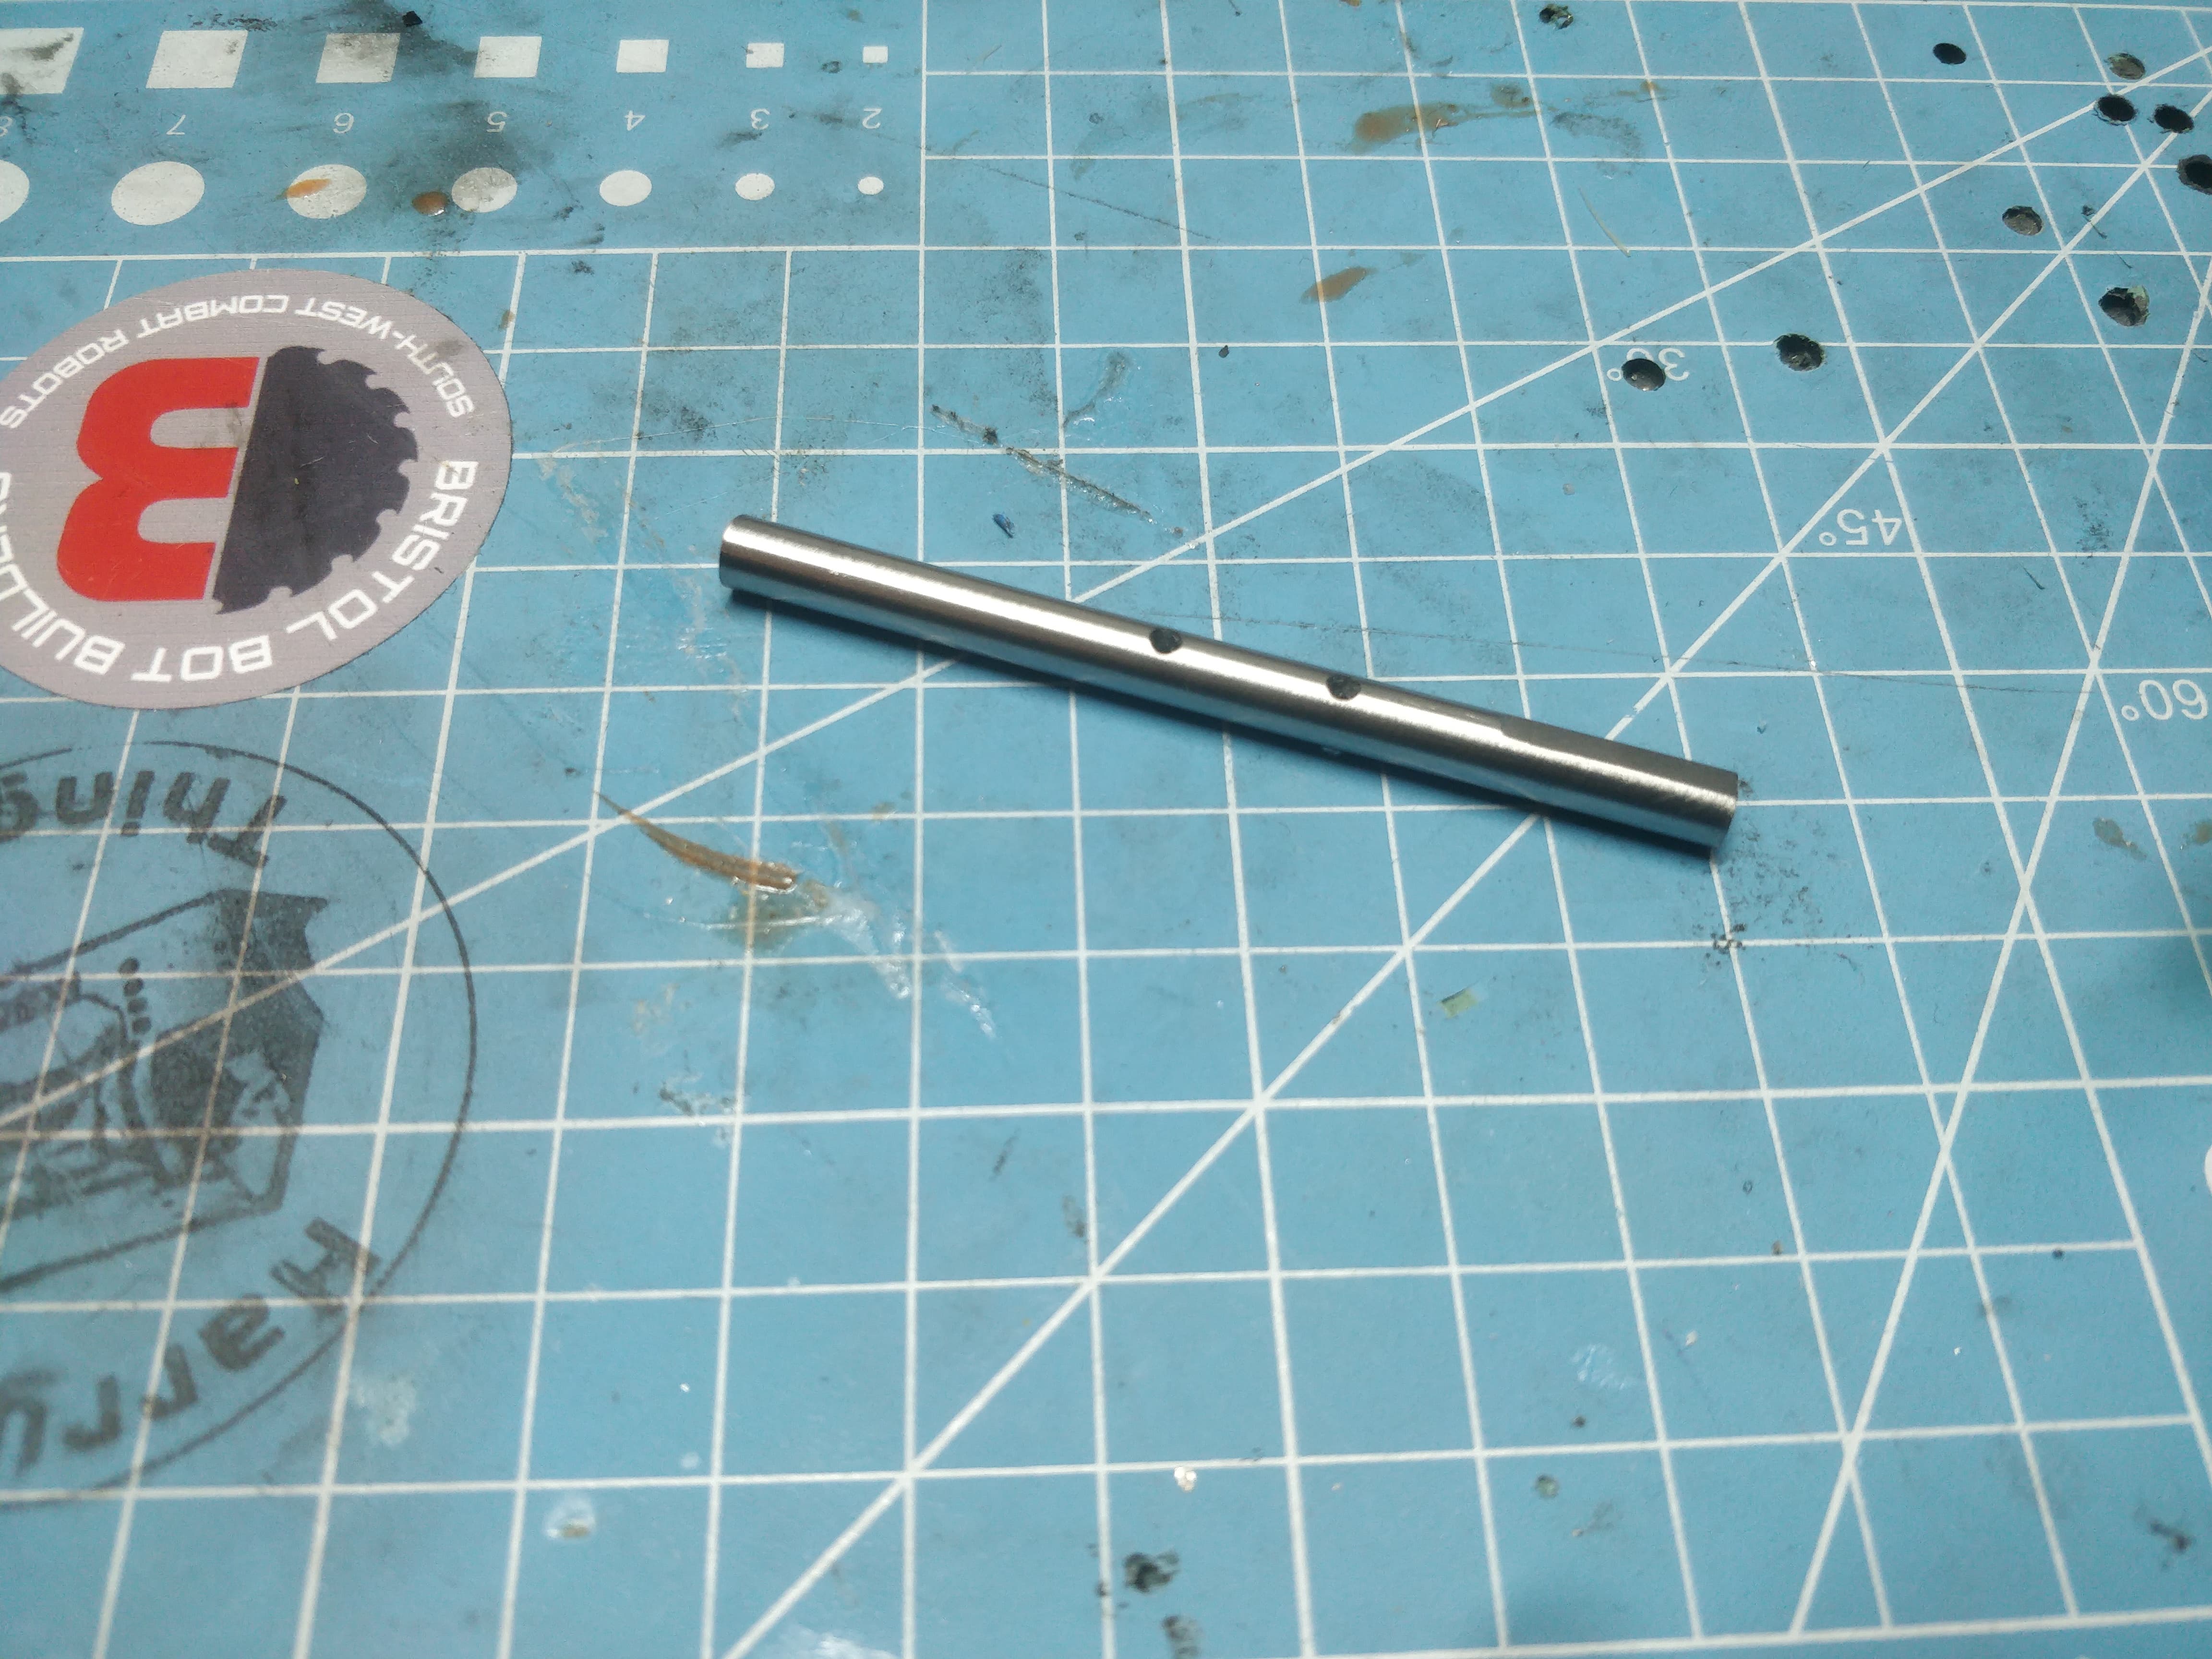
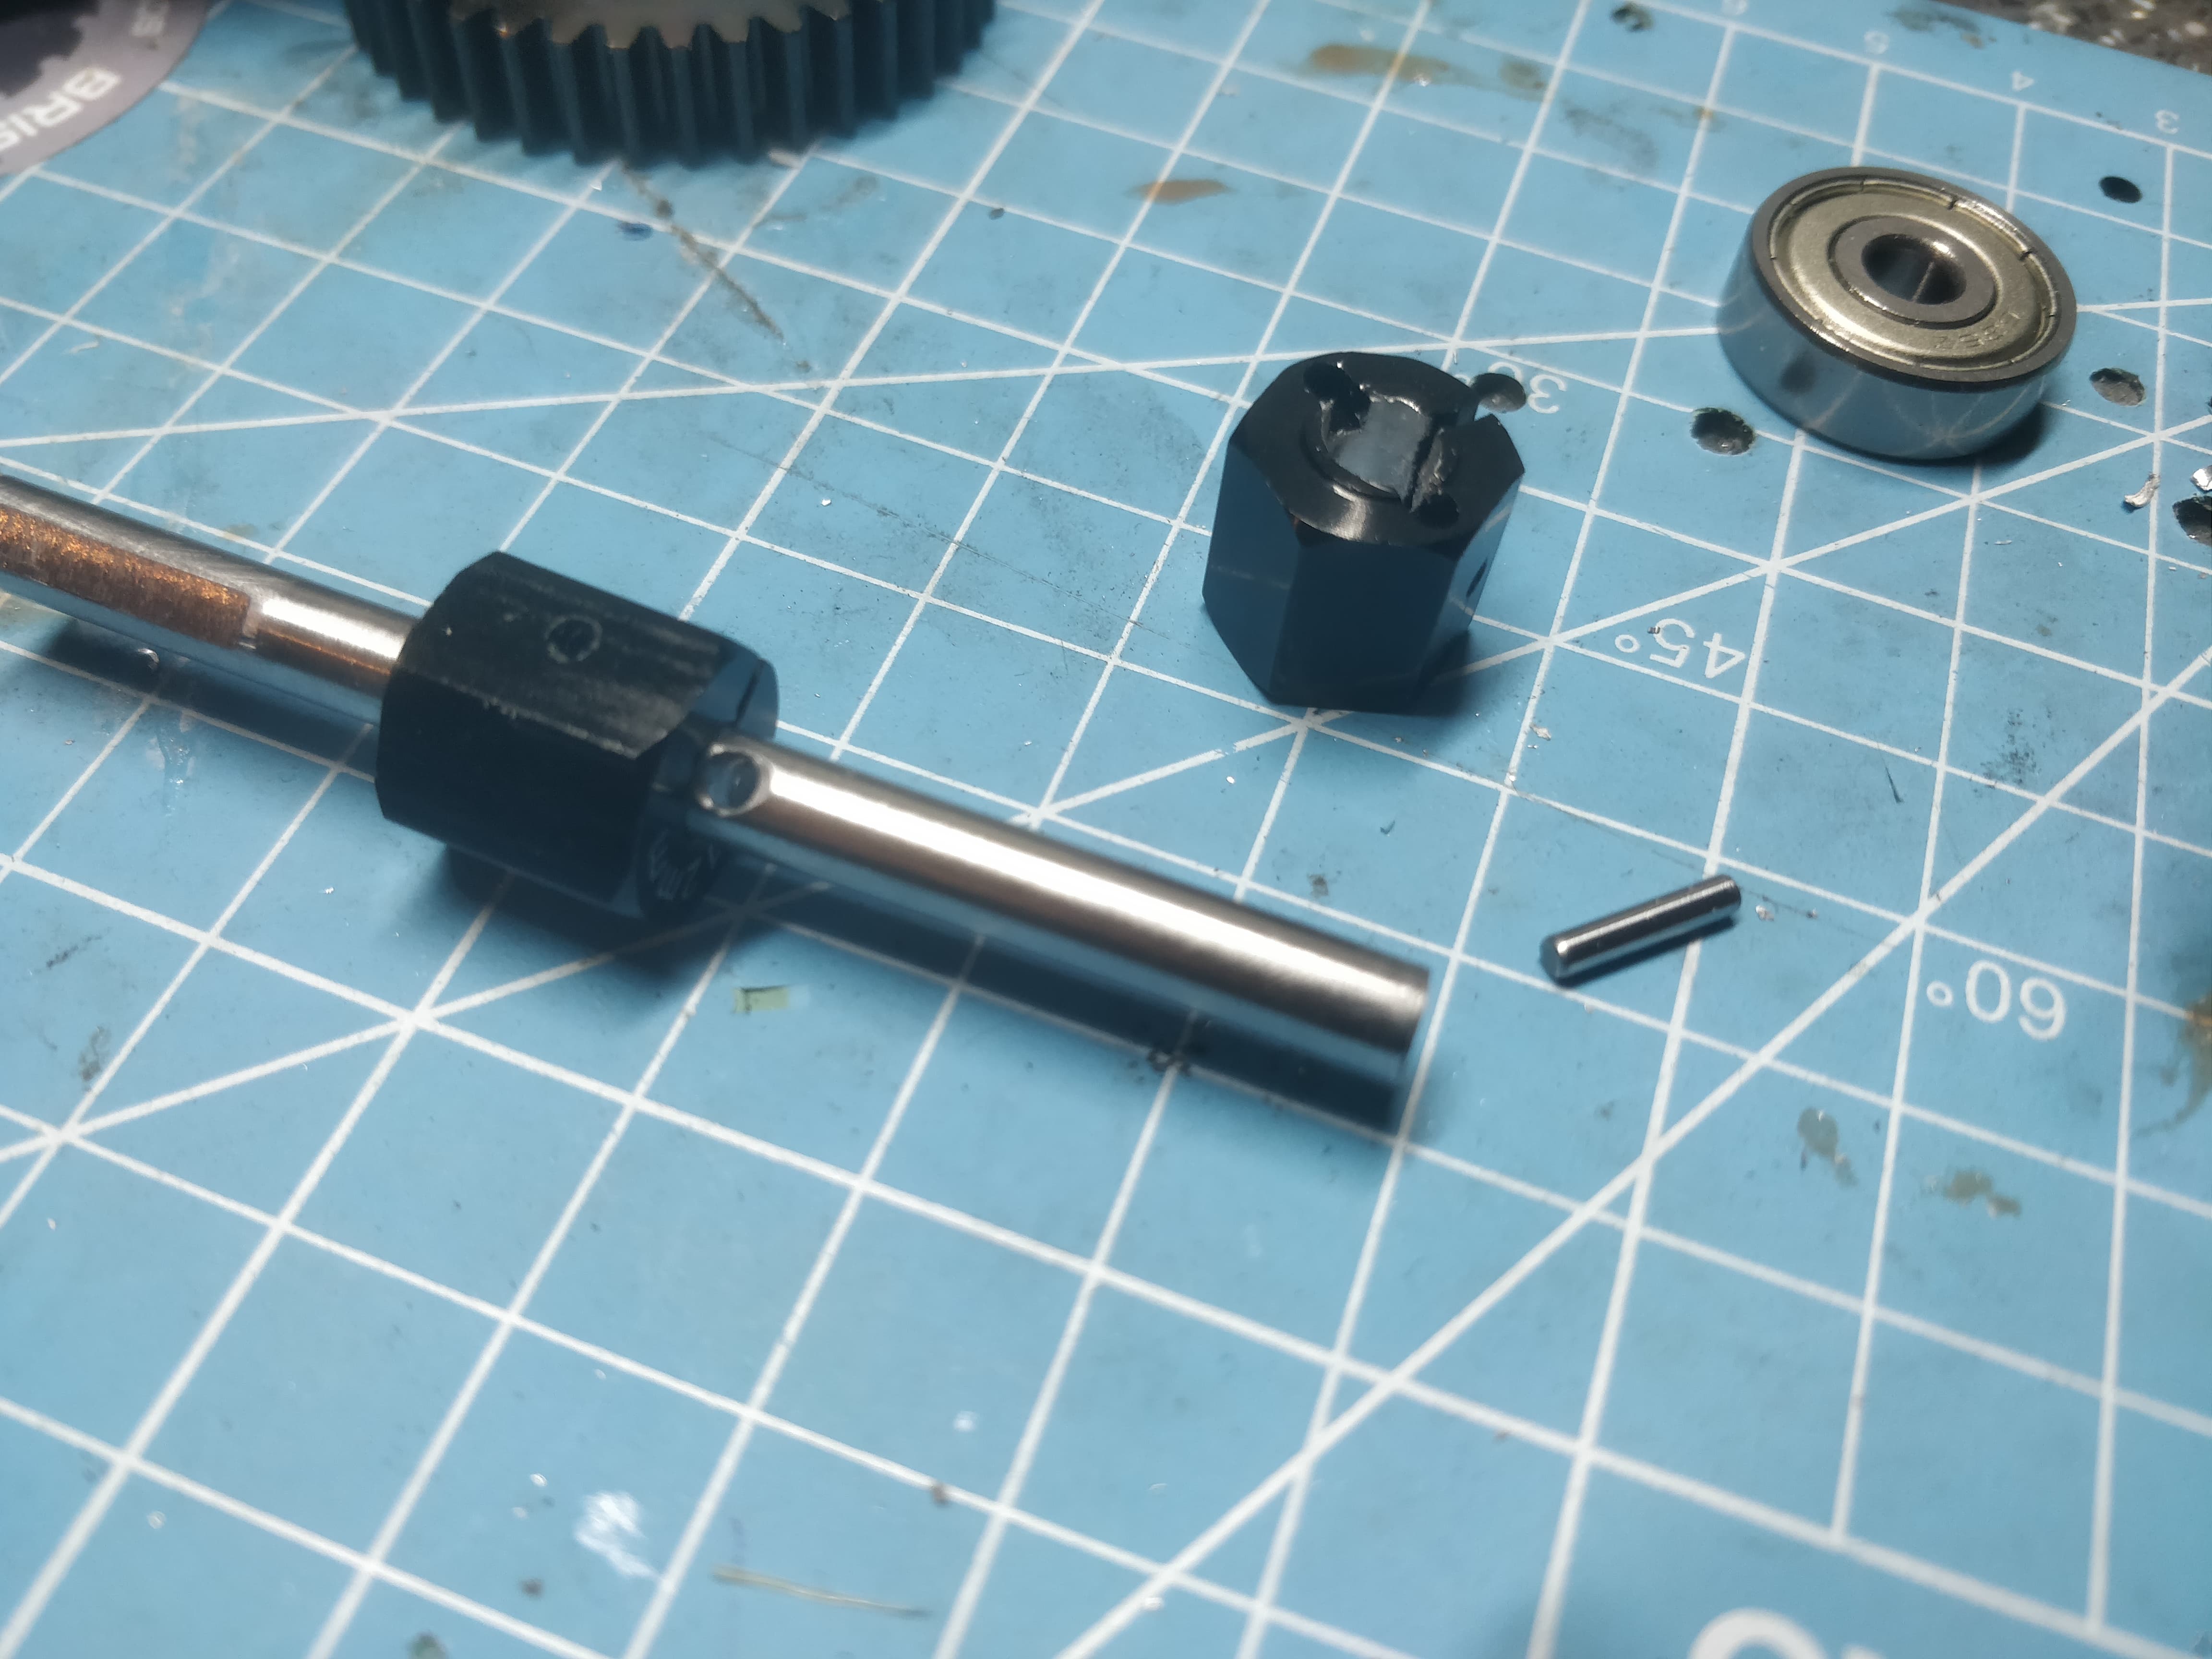
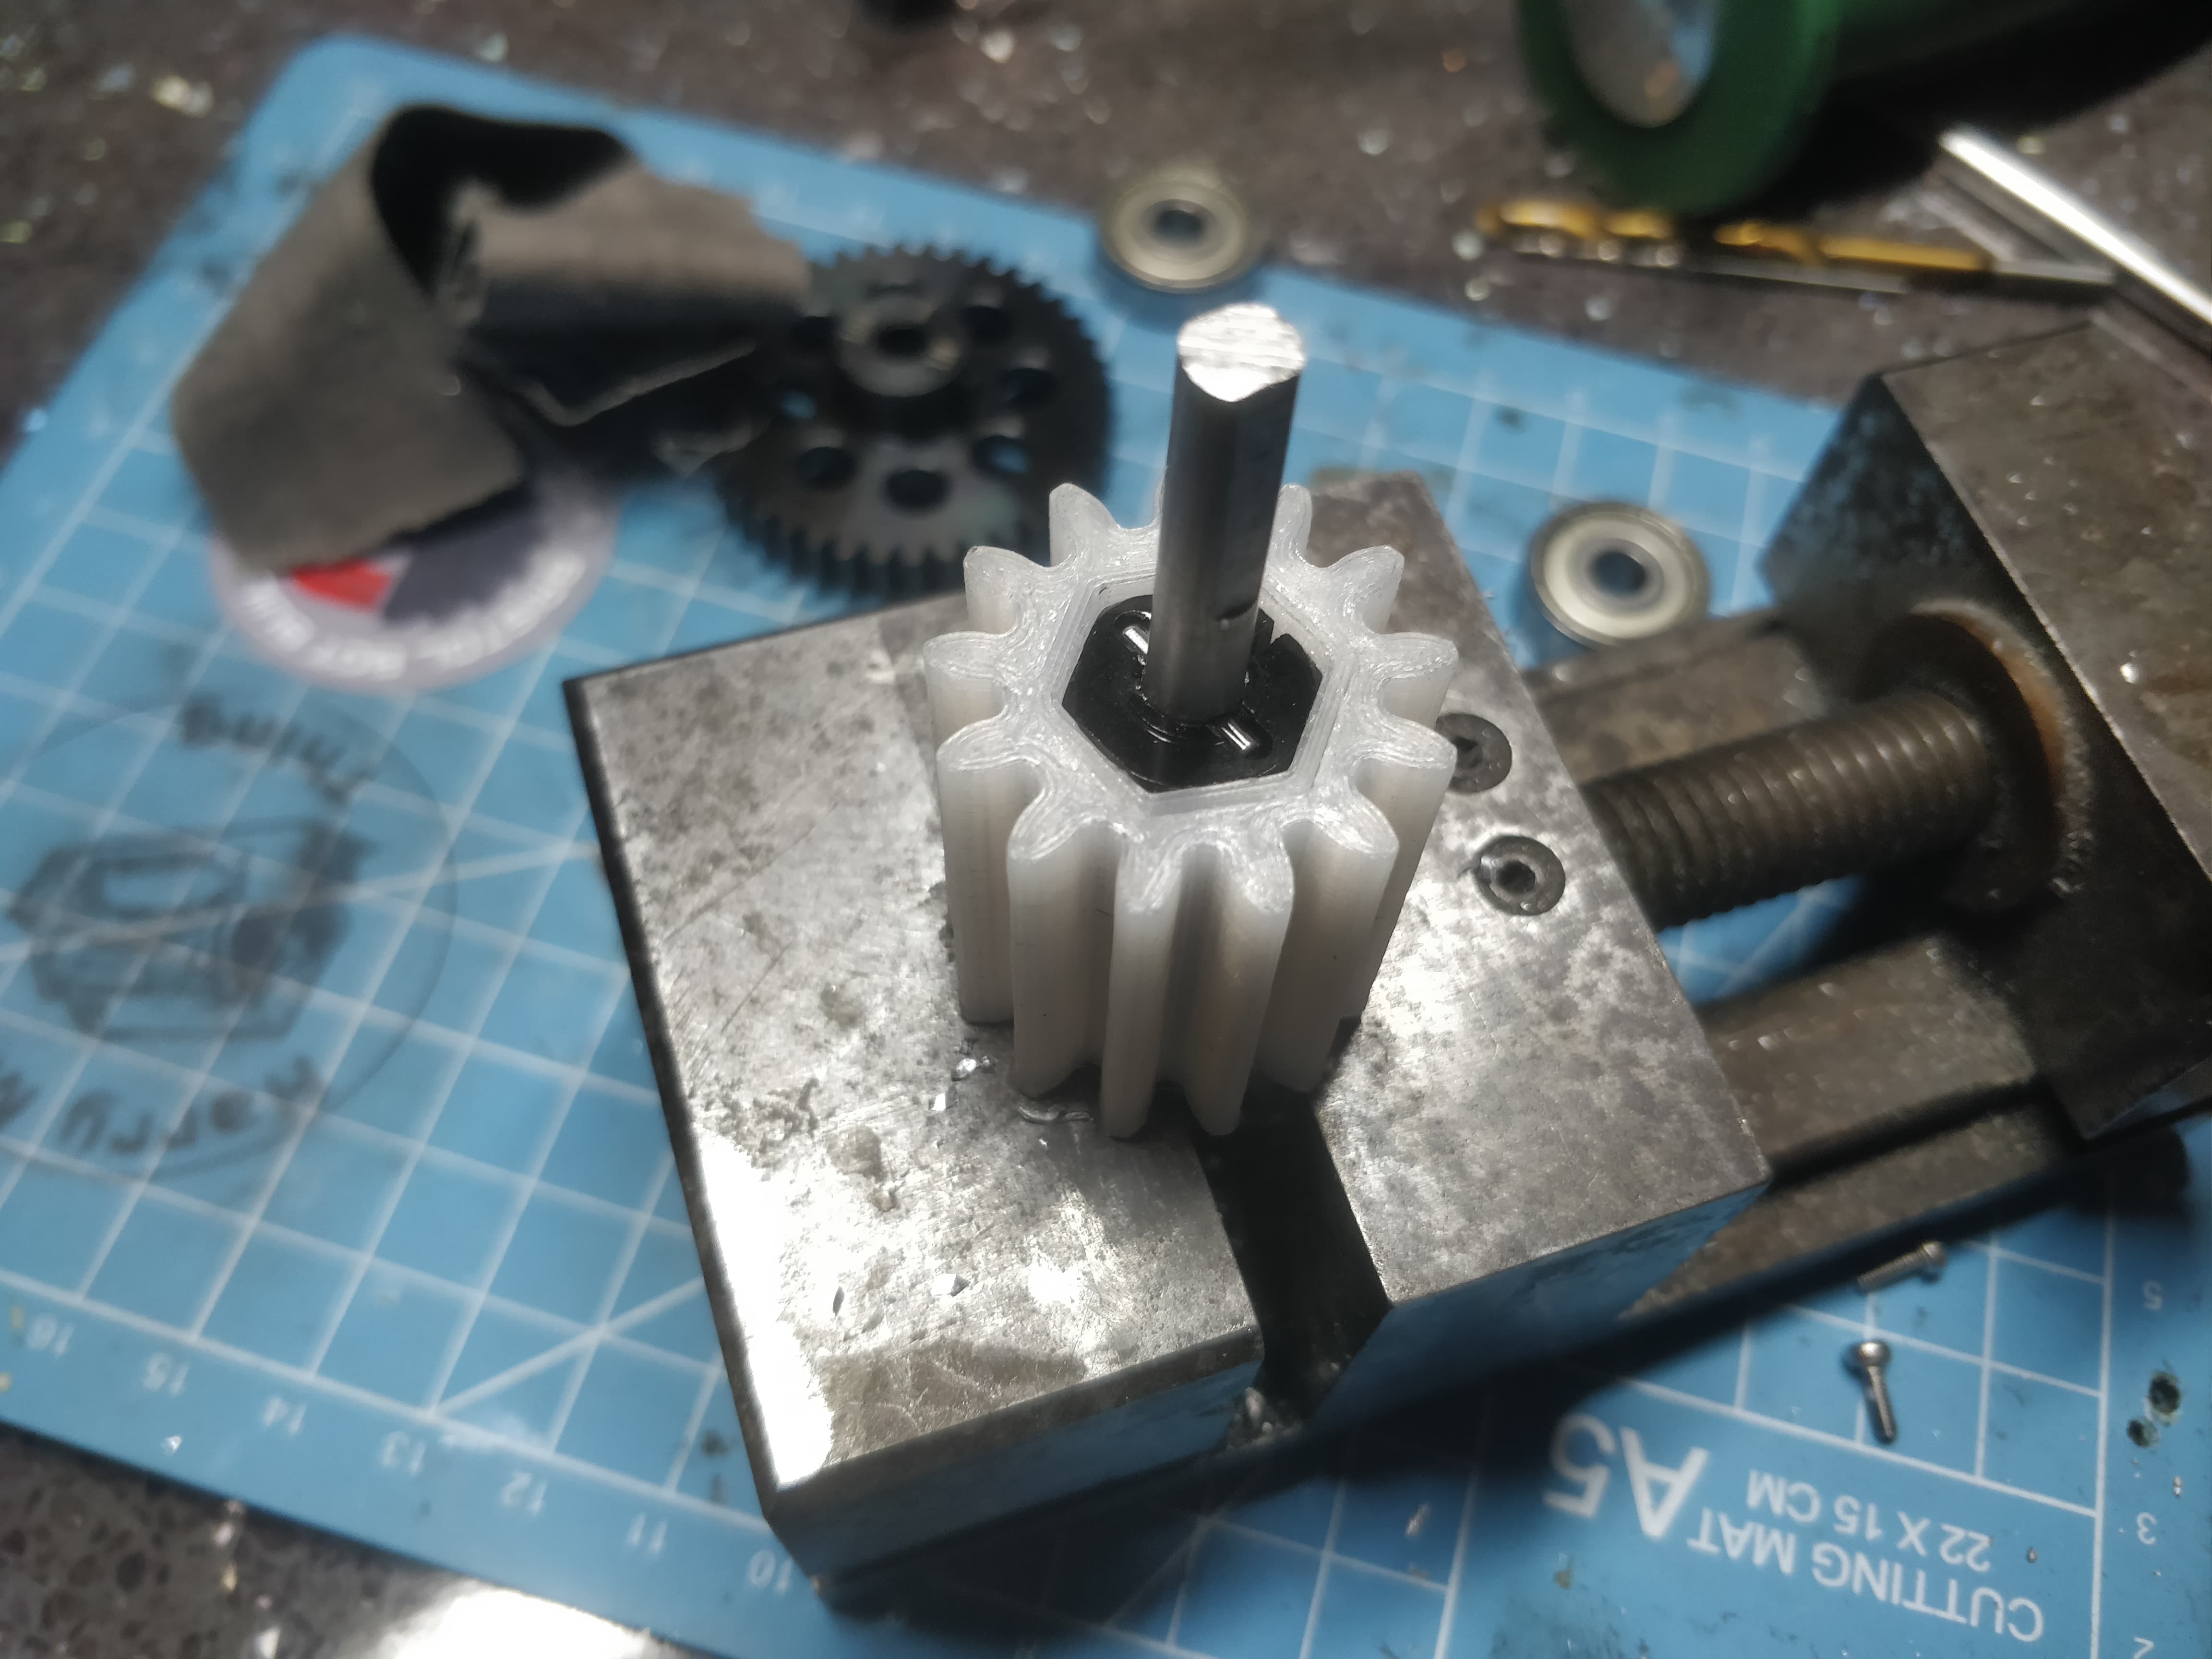
I separated church and state a little by letting any mechanical/transmission components retain their natural paleness and colouring the chassis and brace parts. Here you can see the first spur stage of the axe gearing. In an upgrade from the previous version the standoffs are now fitted with M3 heat press inserts instead of running long bolts all the way through and relying on captive nuts the other end. This means it’s a lot less of a chore to work on and brings the hardware count down. An amusingly long M4 performs the task of being a dead shaft for the gear. This is pretty sloppy but an acceptable practice for me as I have a pretty meaty pitch on the gear and there’s already some play from the % shrinkage I see from the nylon. It has to work for 3 minutes. It’ll be aight.

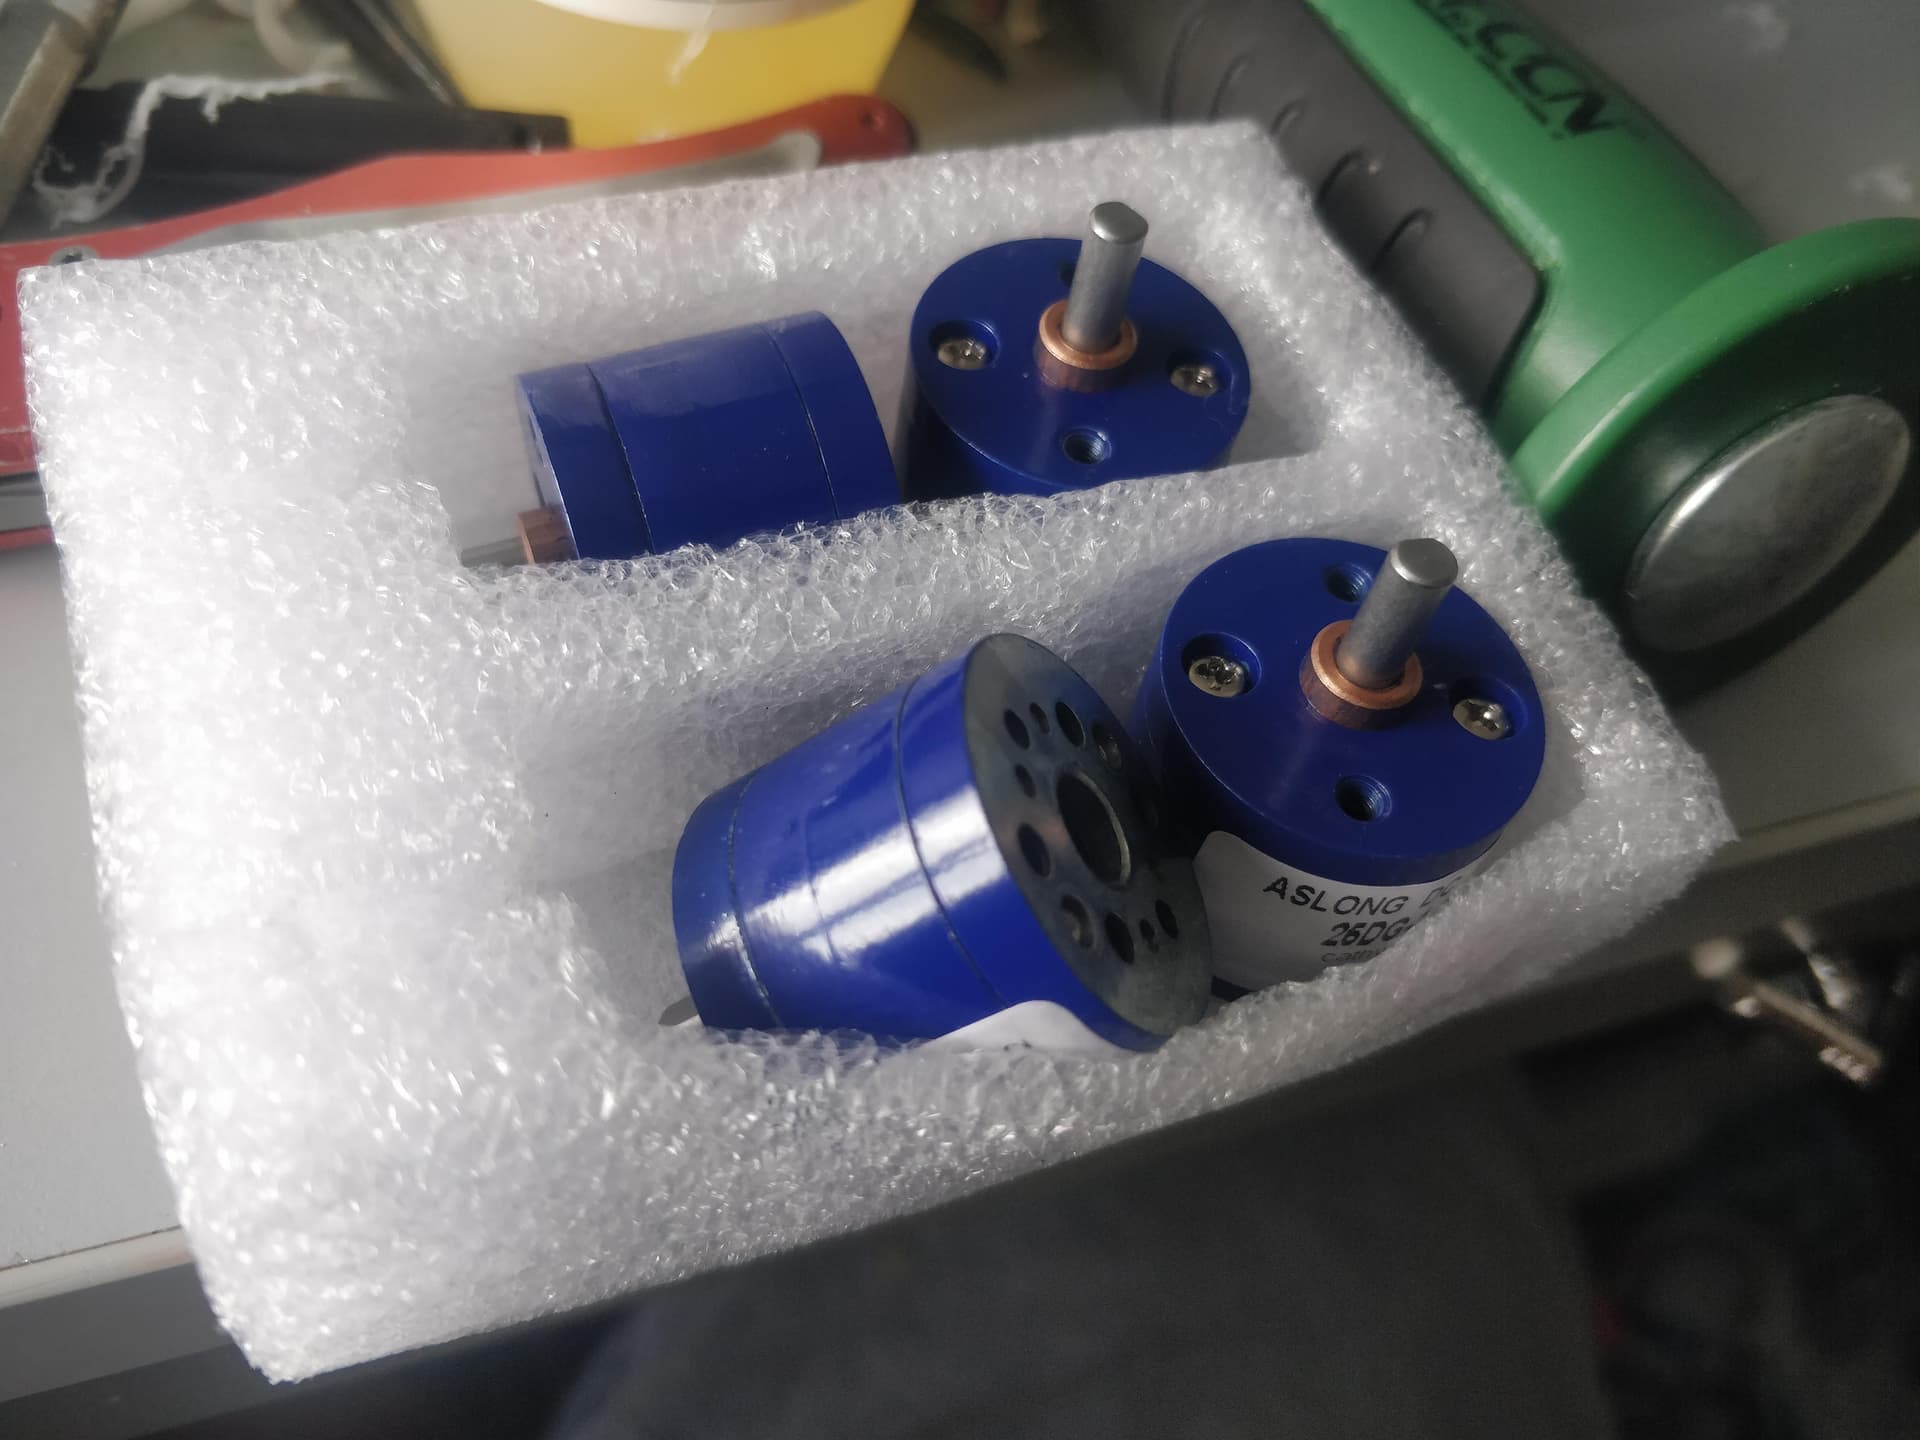
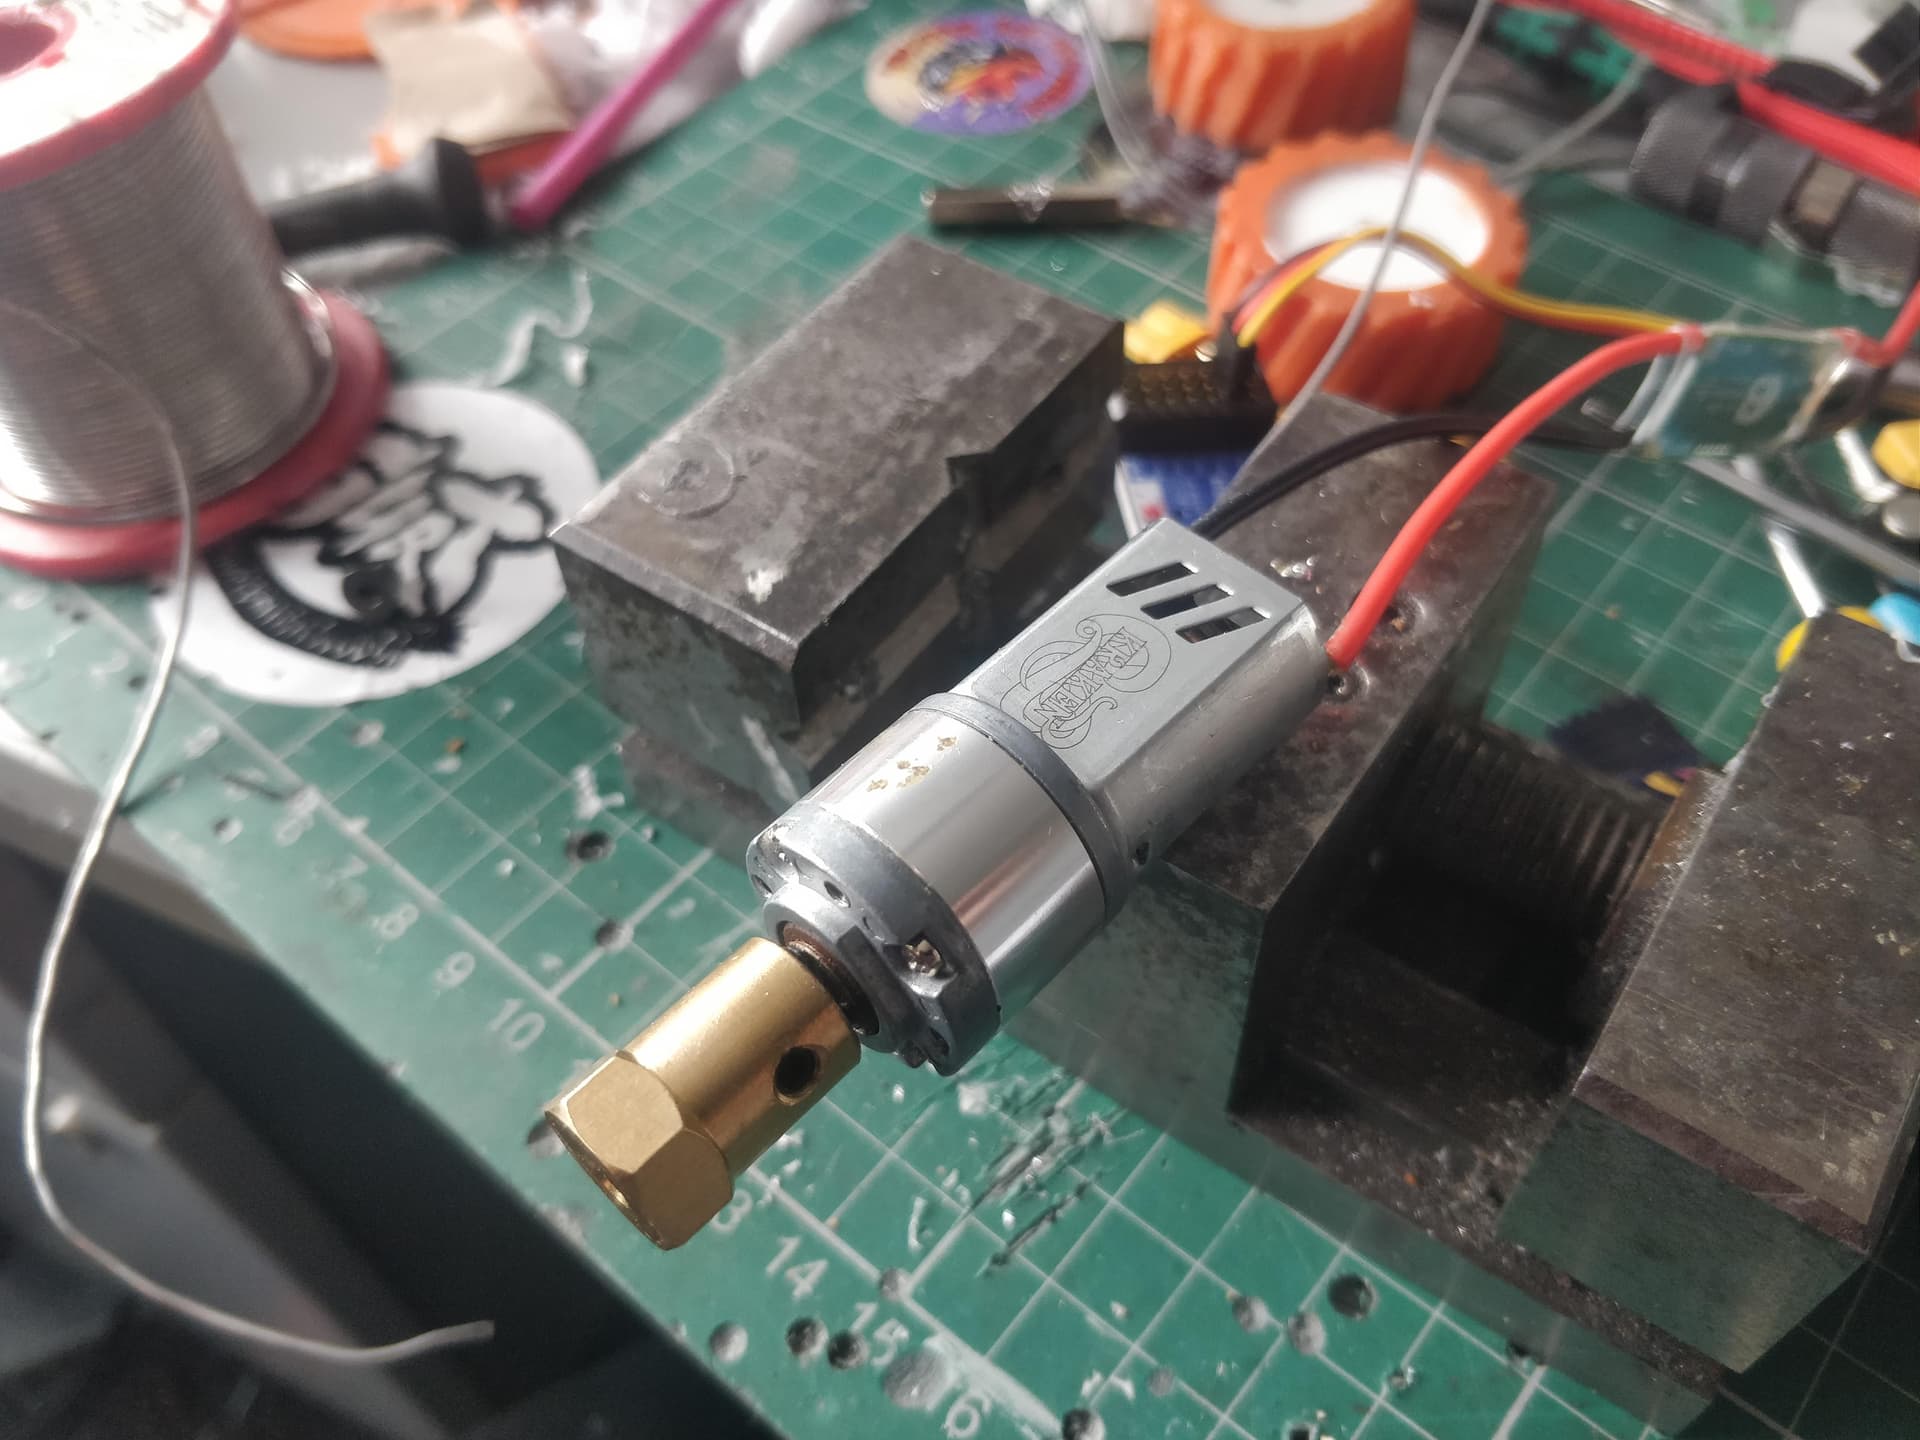
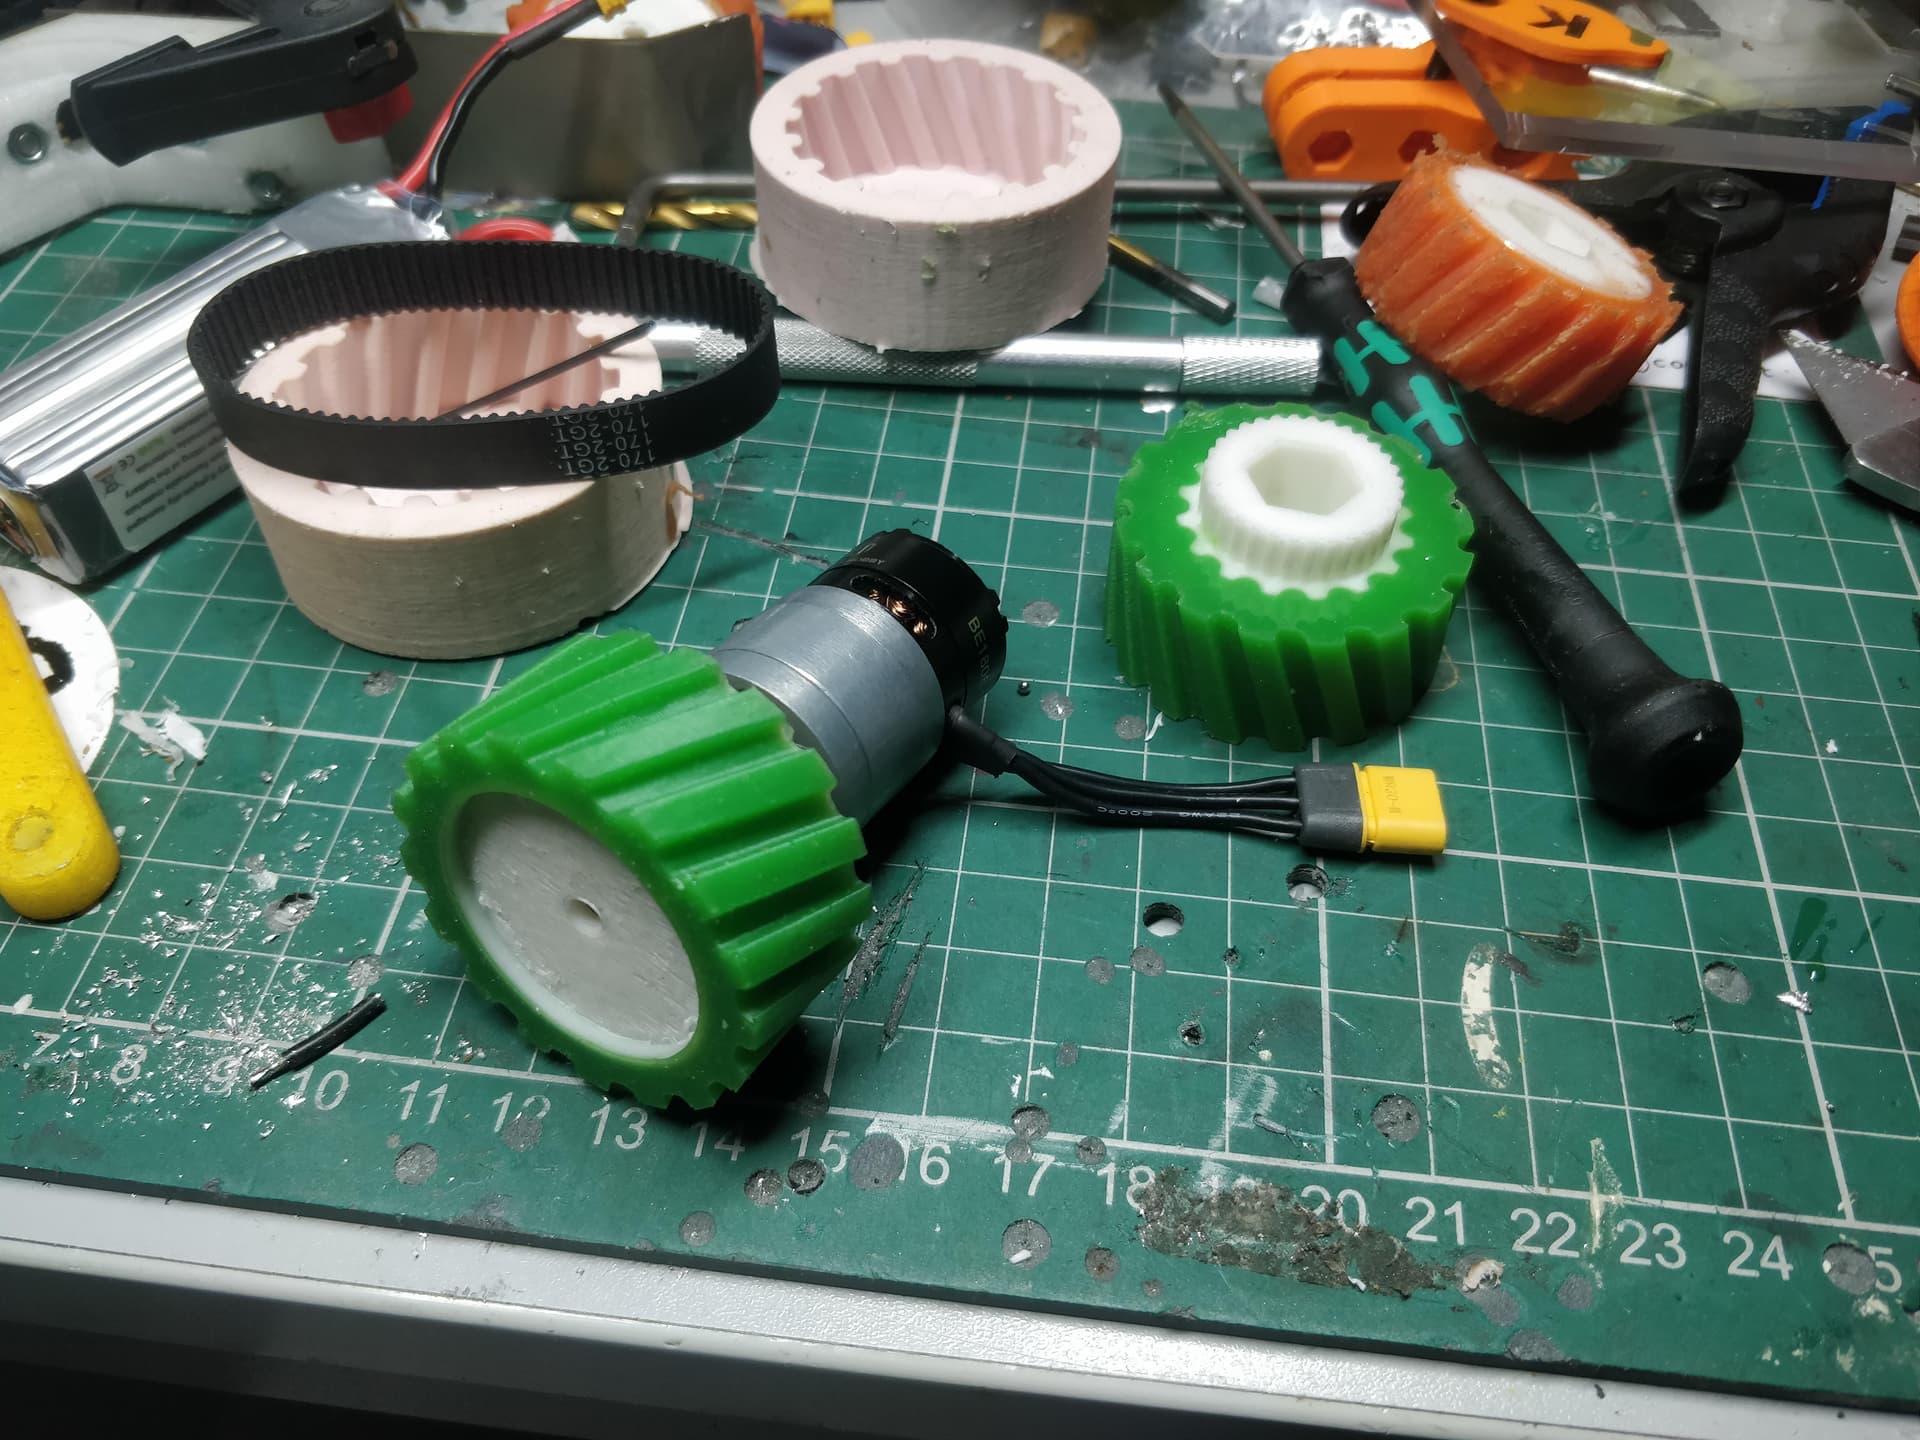
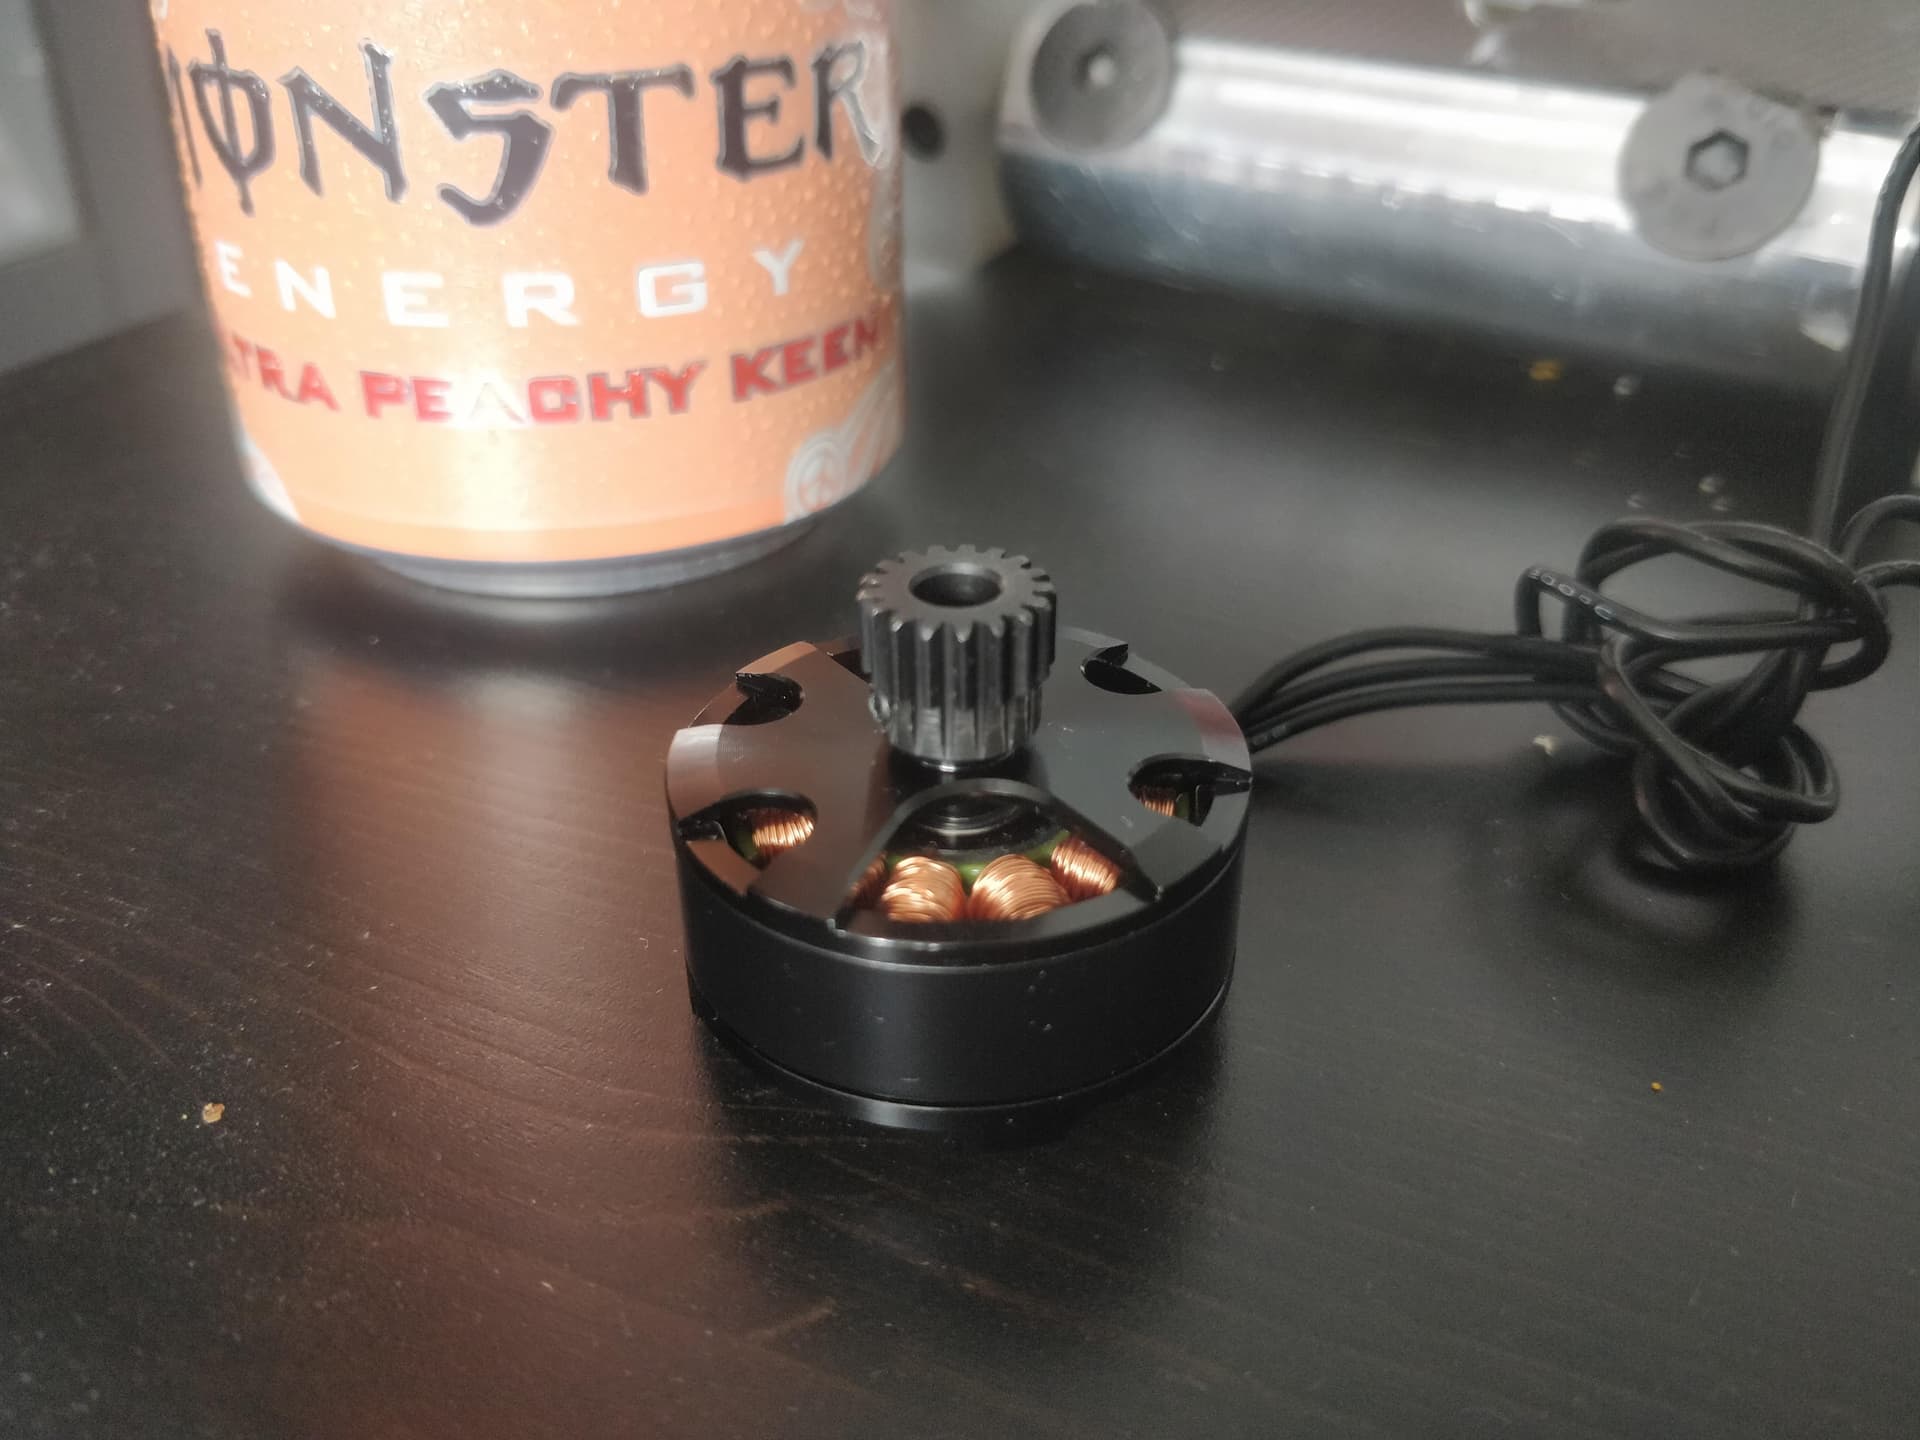
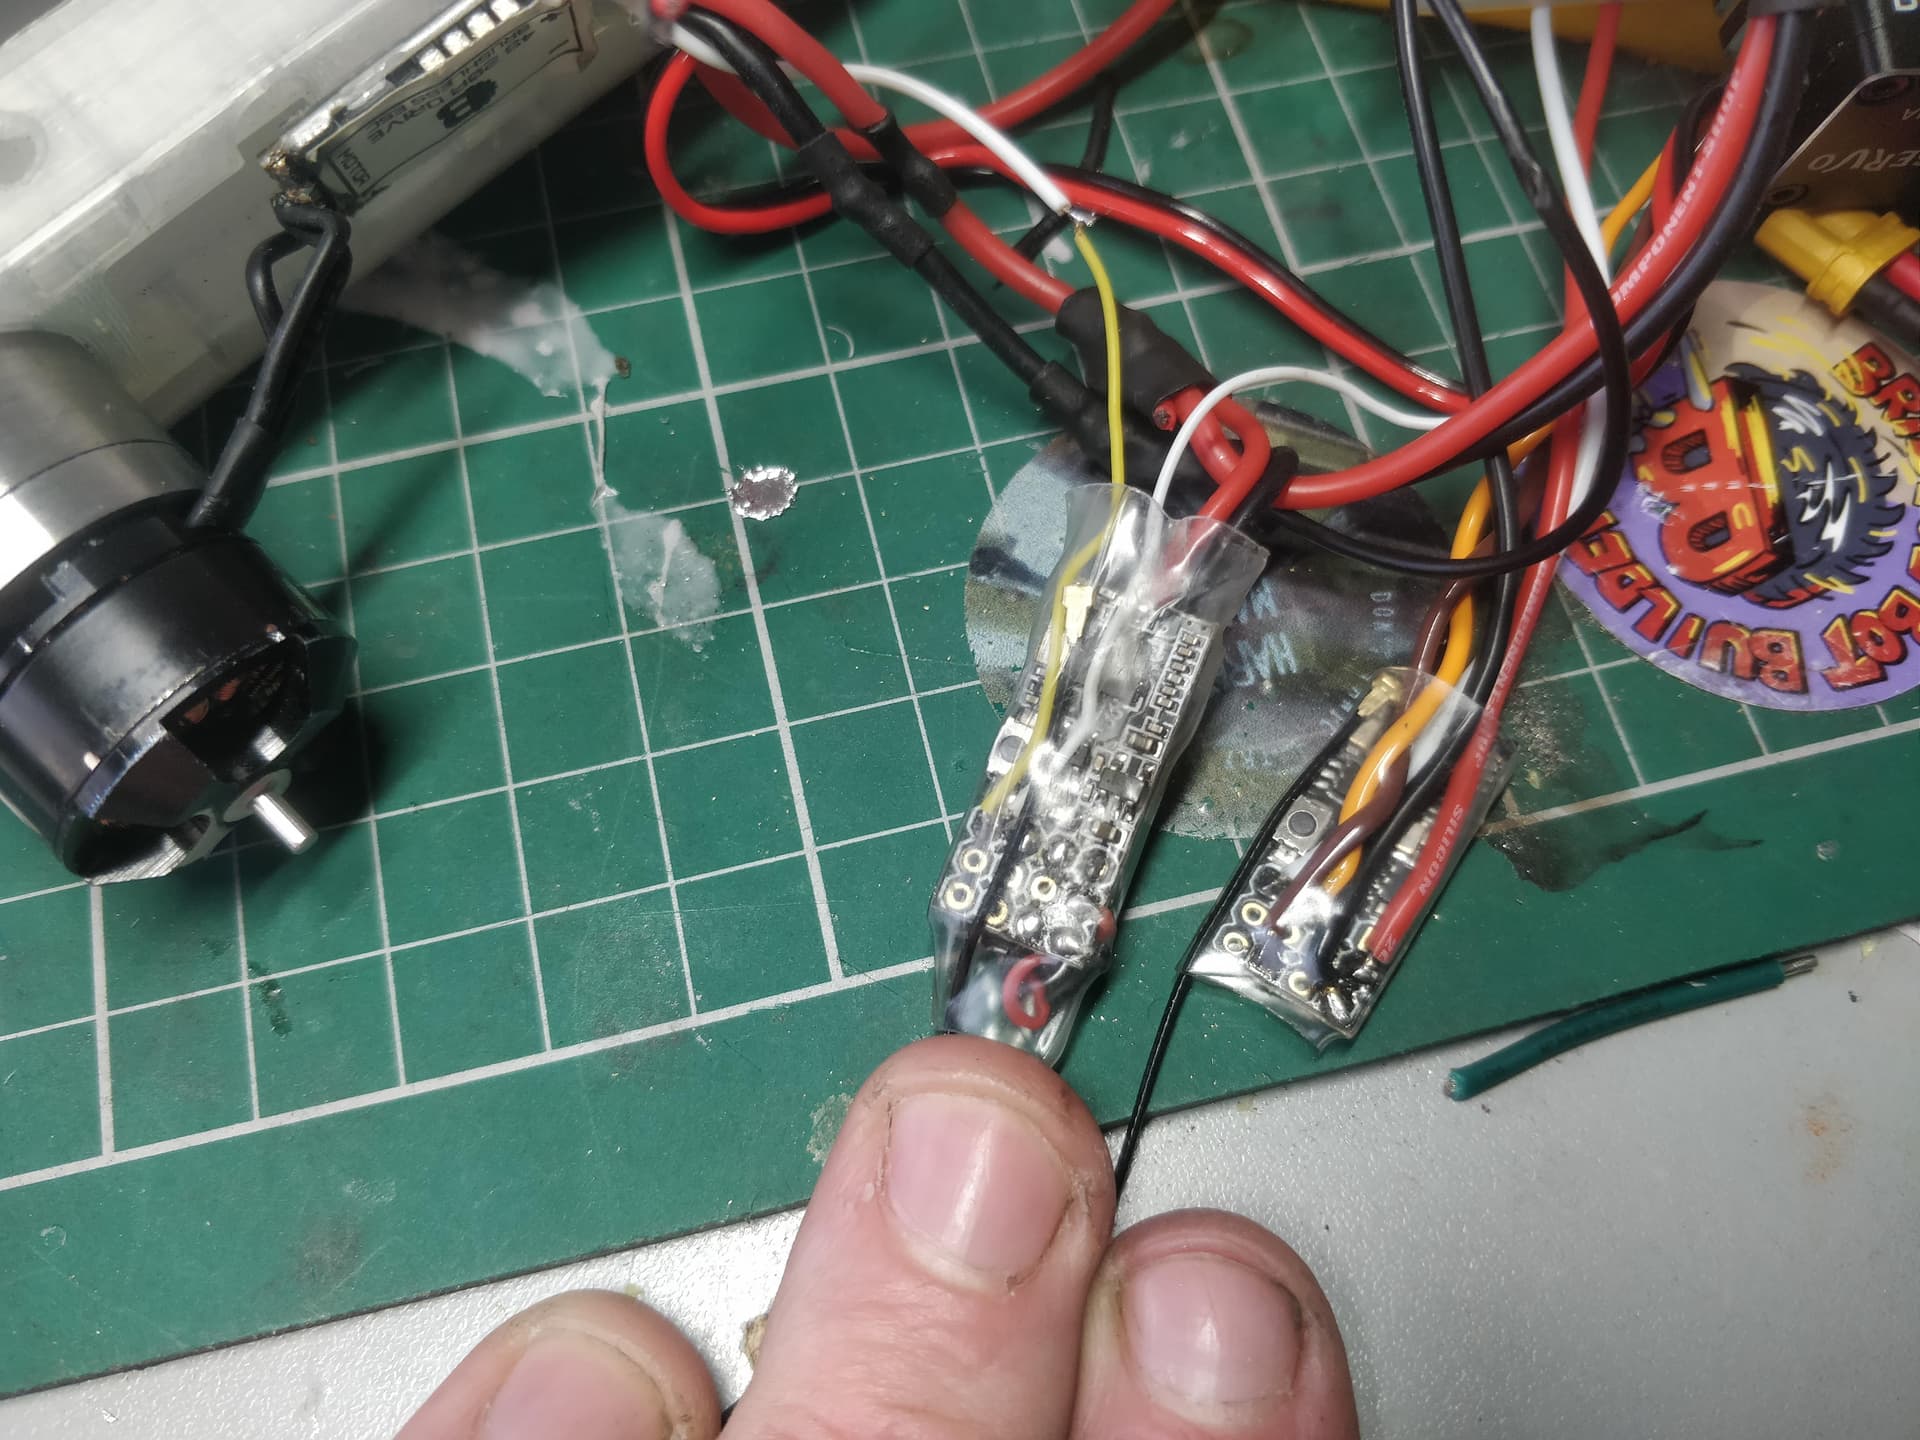
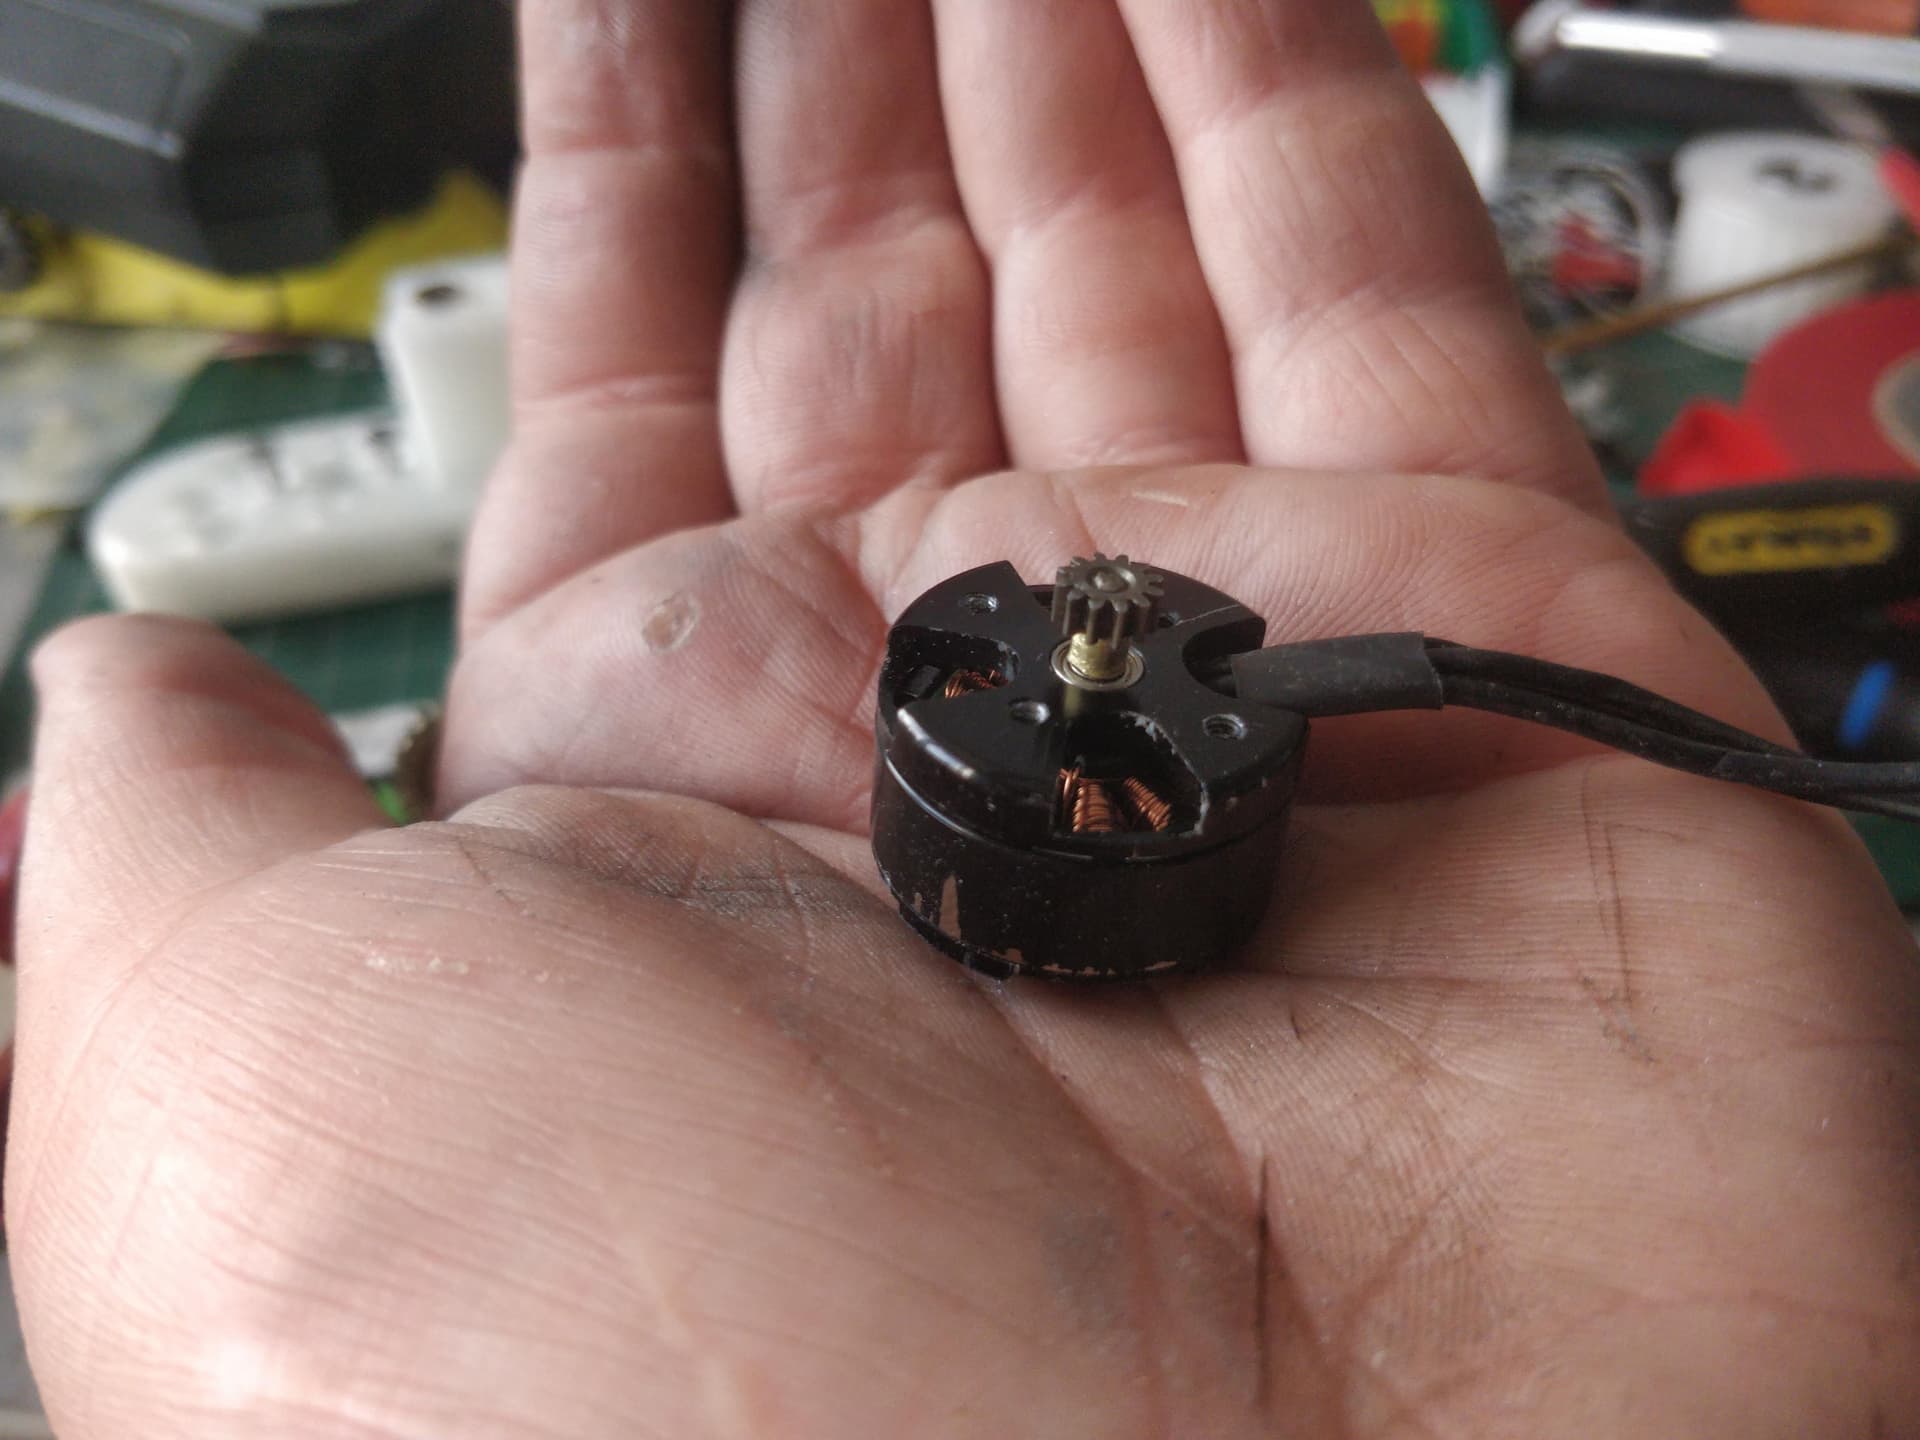
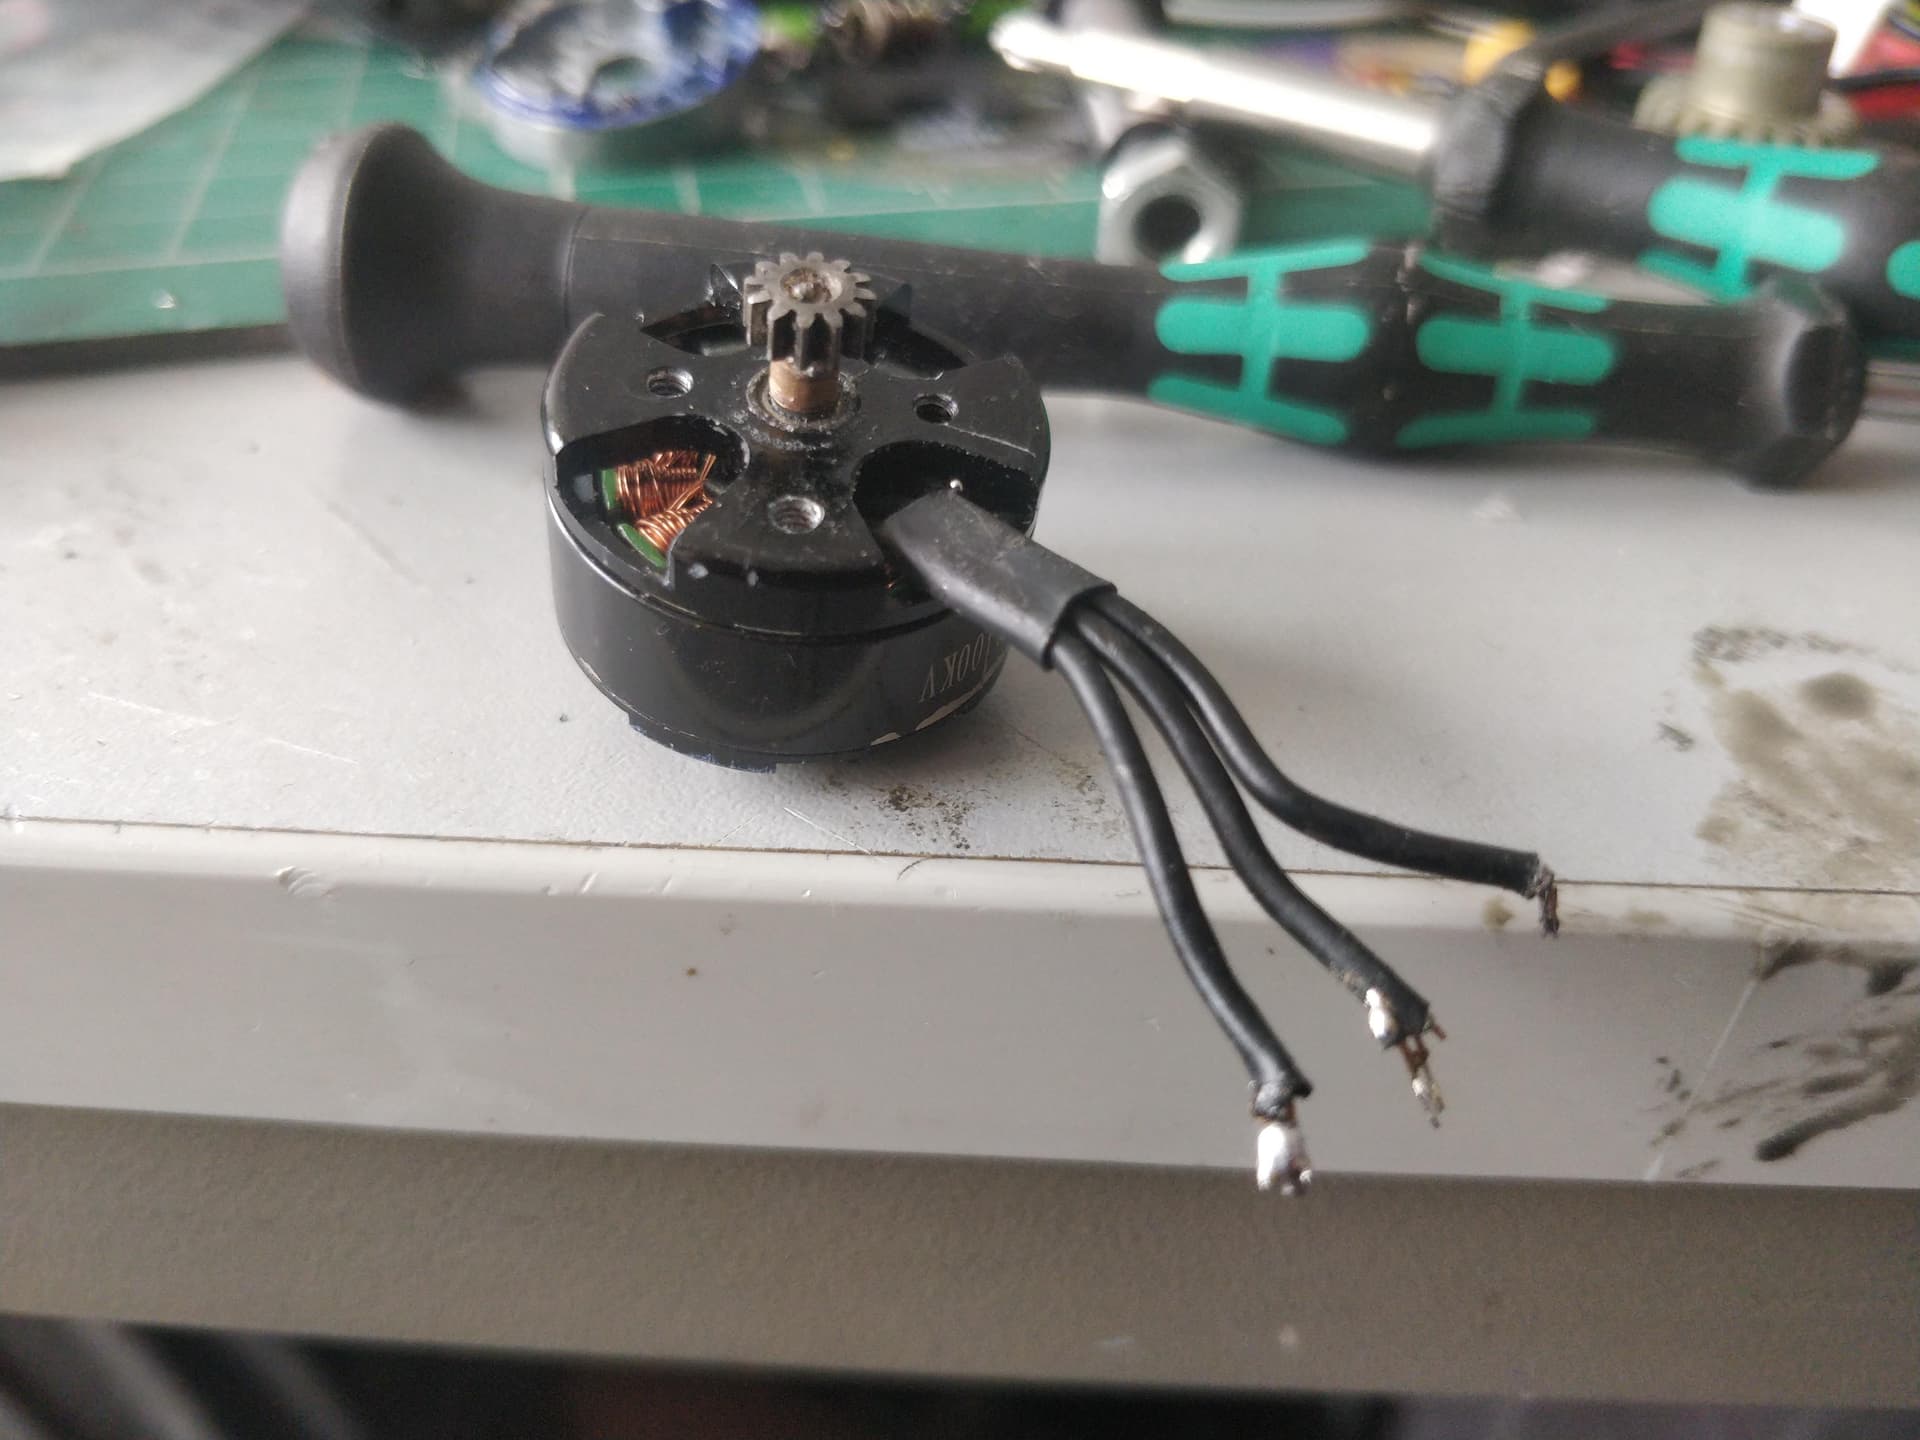
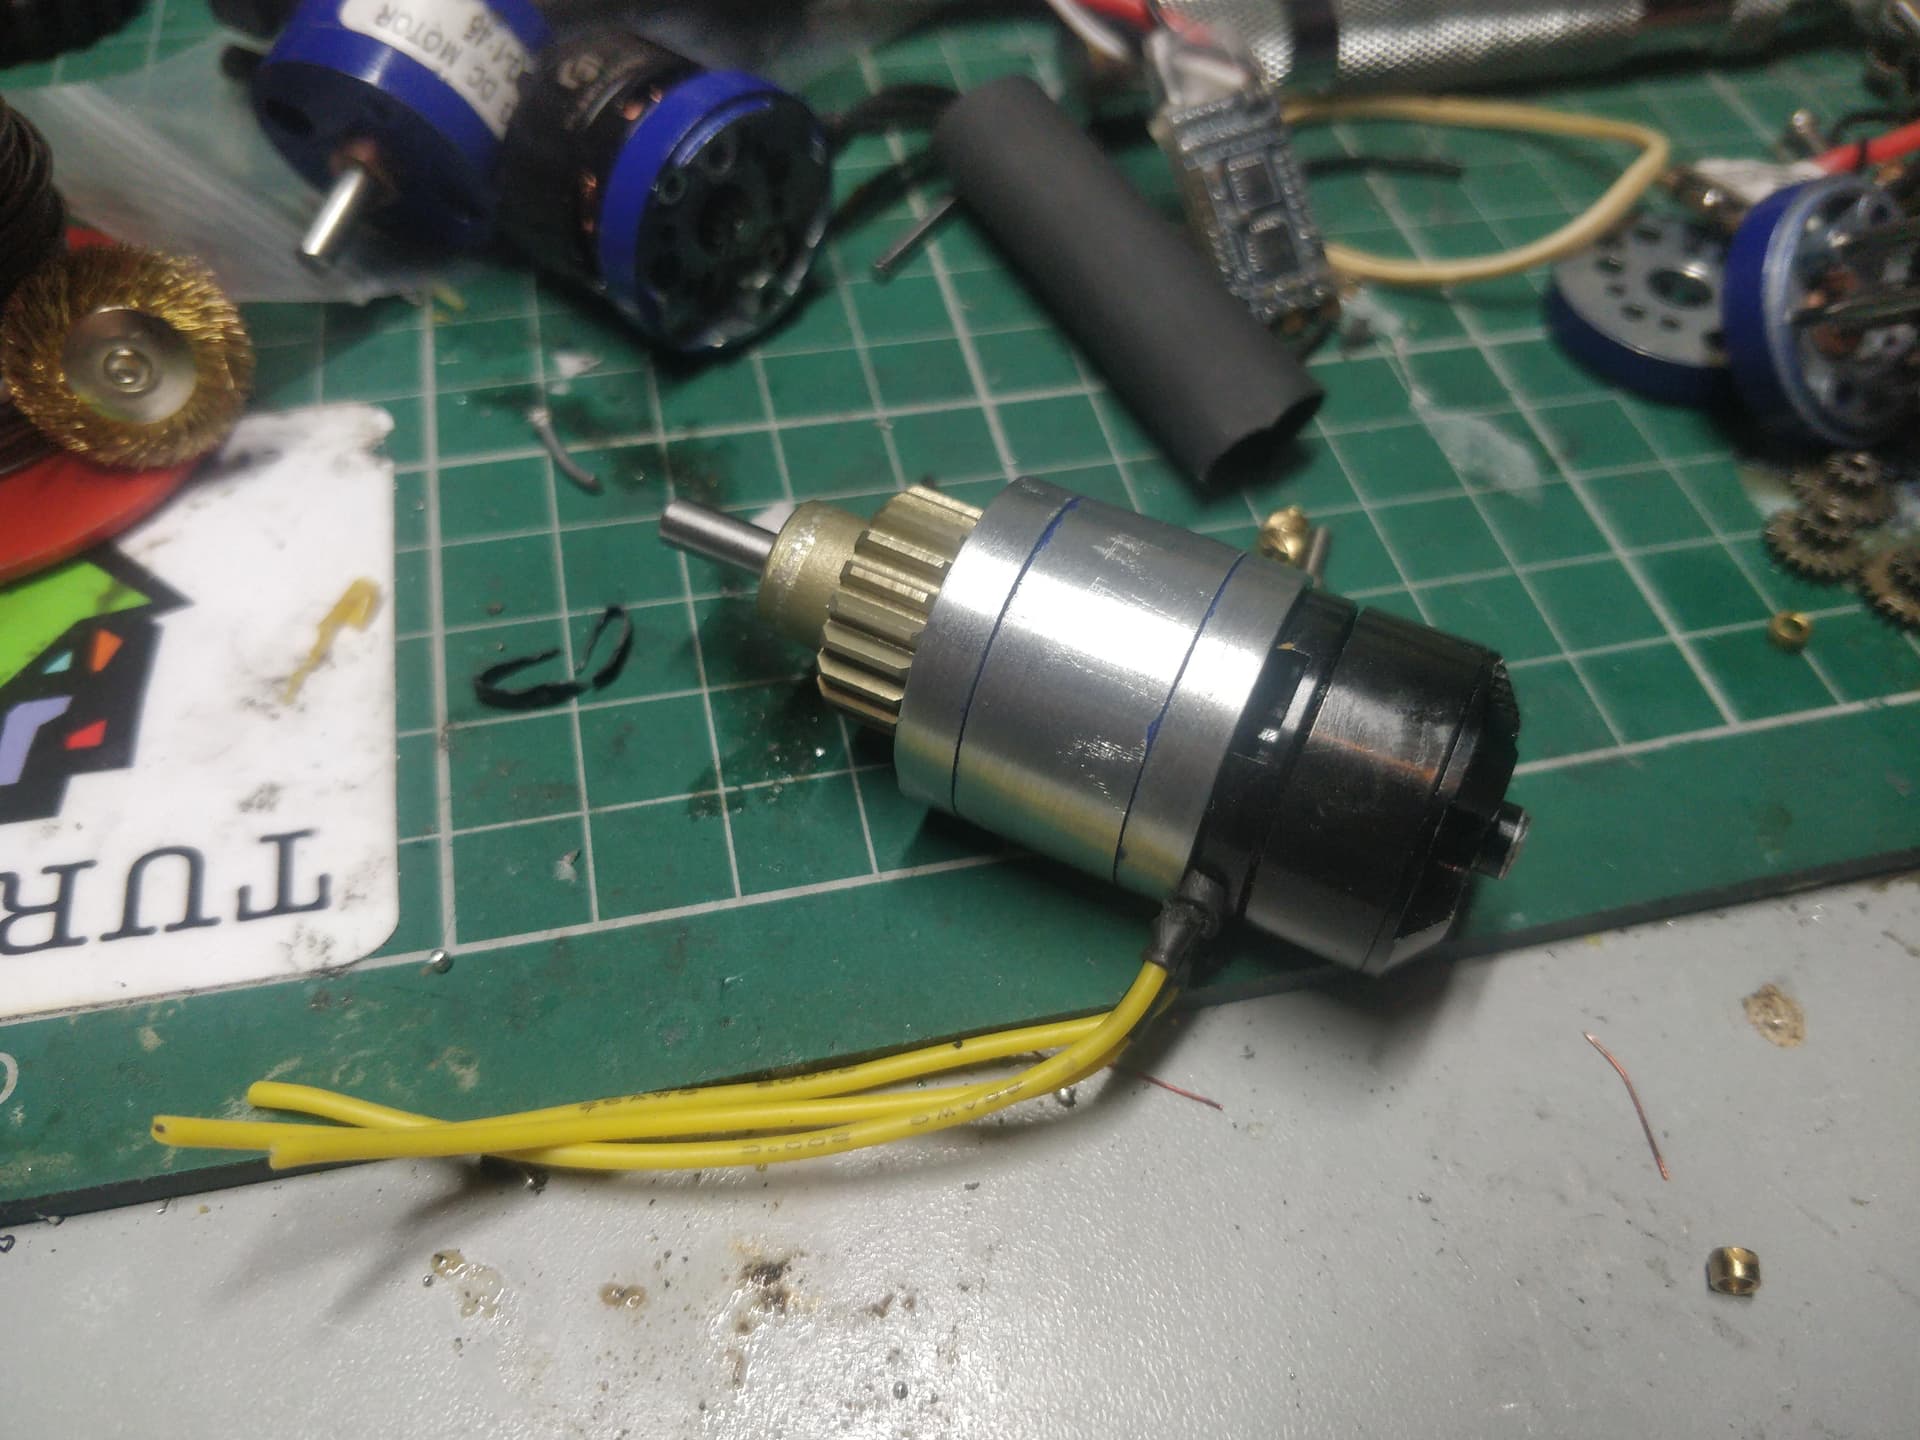
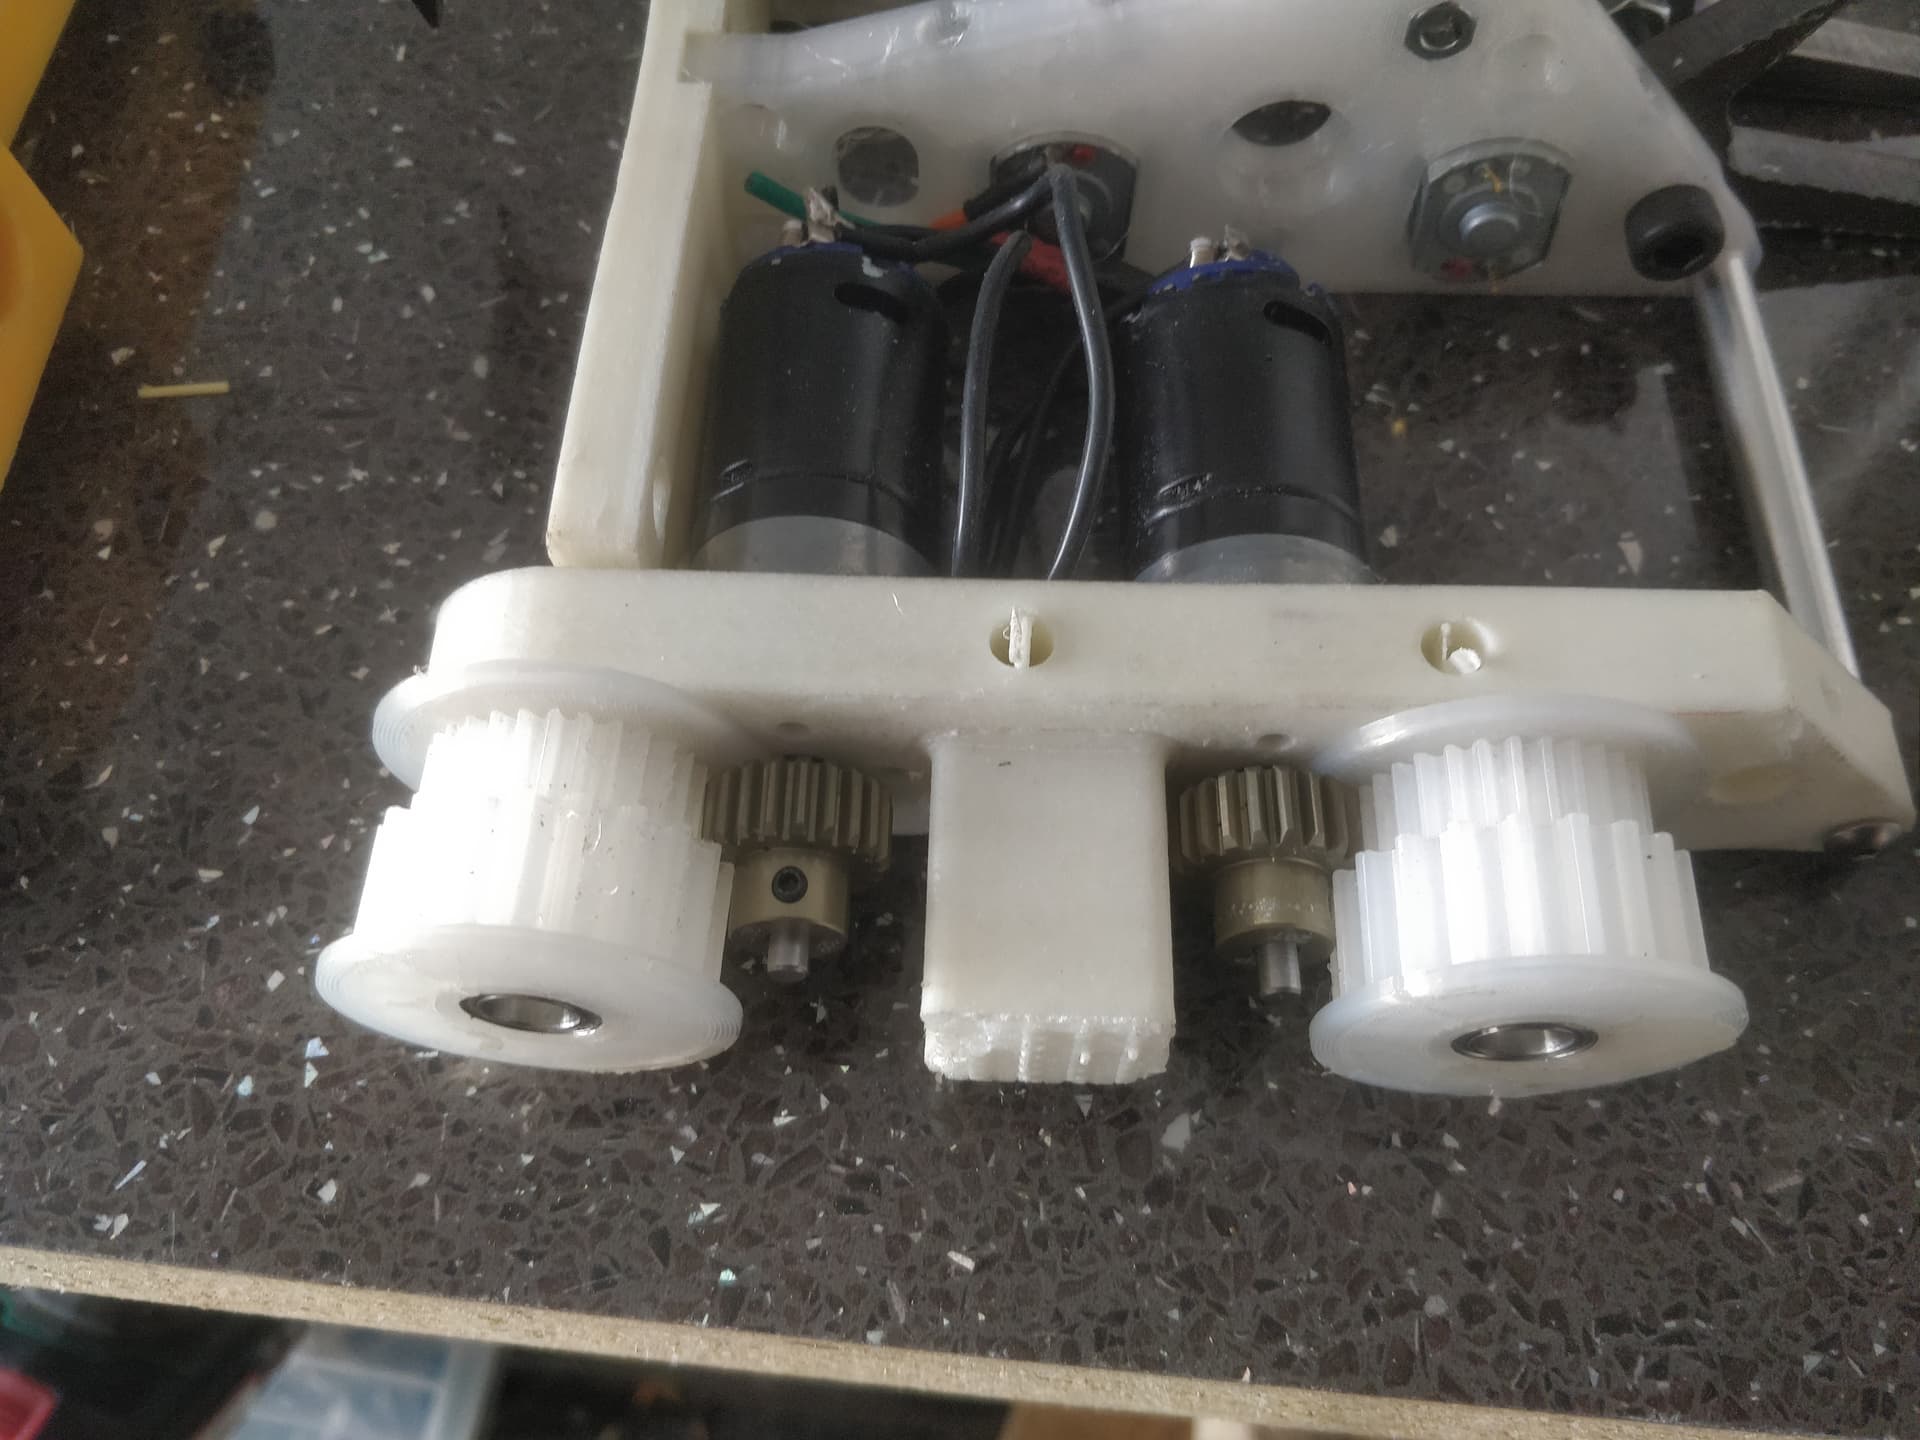
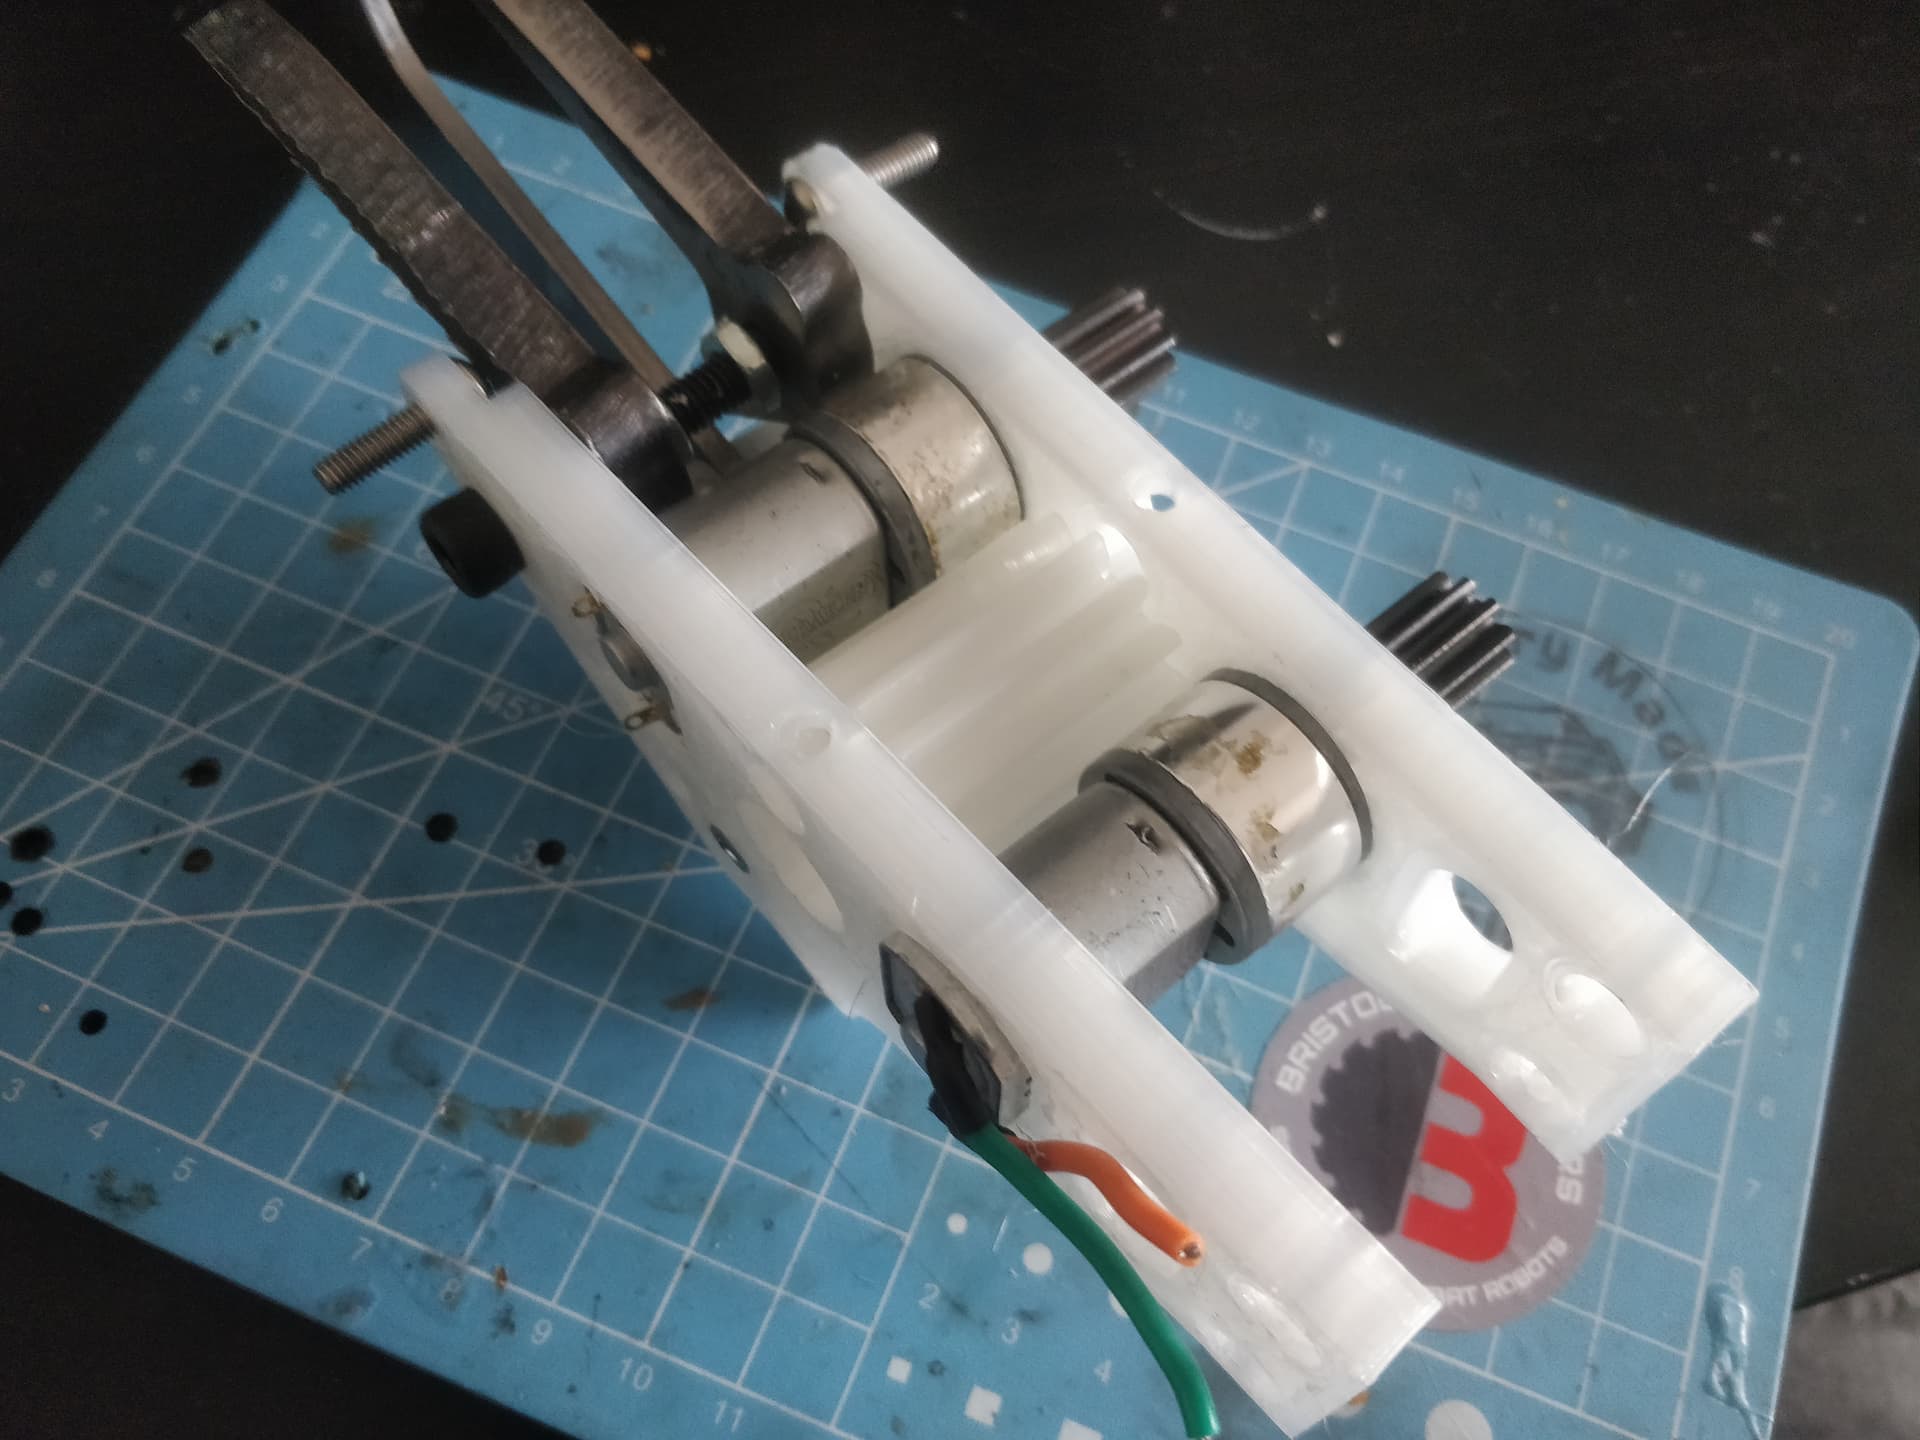
Not content with the mods I already had in place for my motors to increase robustness I also decided to dick around with the wires too. They were the horrible stiff wires used for the windings so they were also coated in this horrible insulating epoxy that’s a nightmare to solder to. I have to scrape or burn it off with brake cleaner or acid and inhaling the resulting DethCloud takes a good three years off my life. The amount of times I have had to do it I only have about six weeks left!

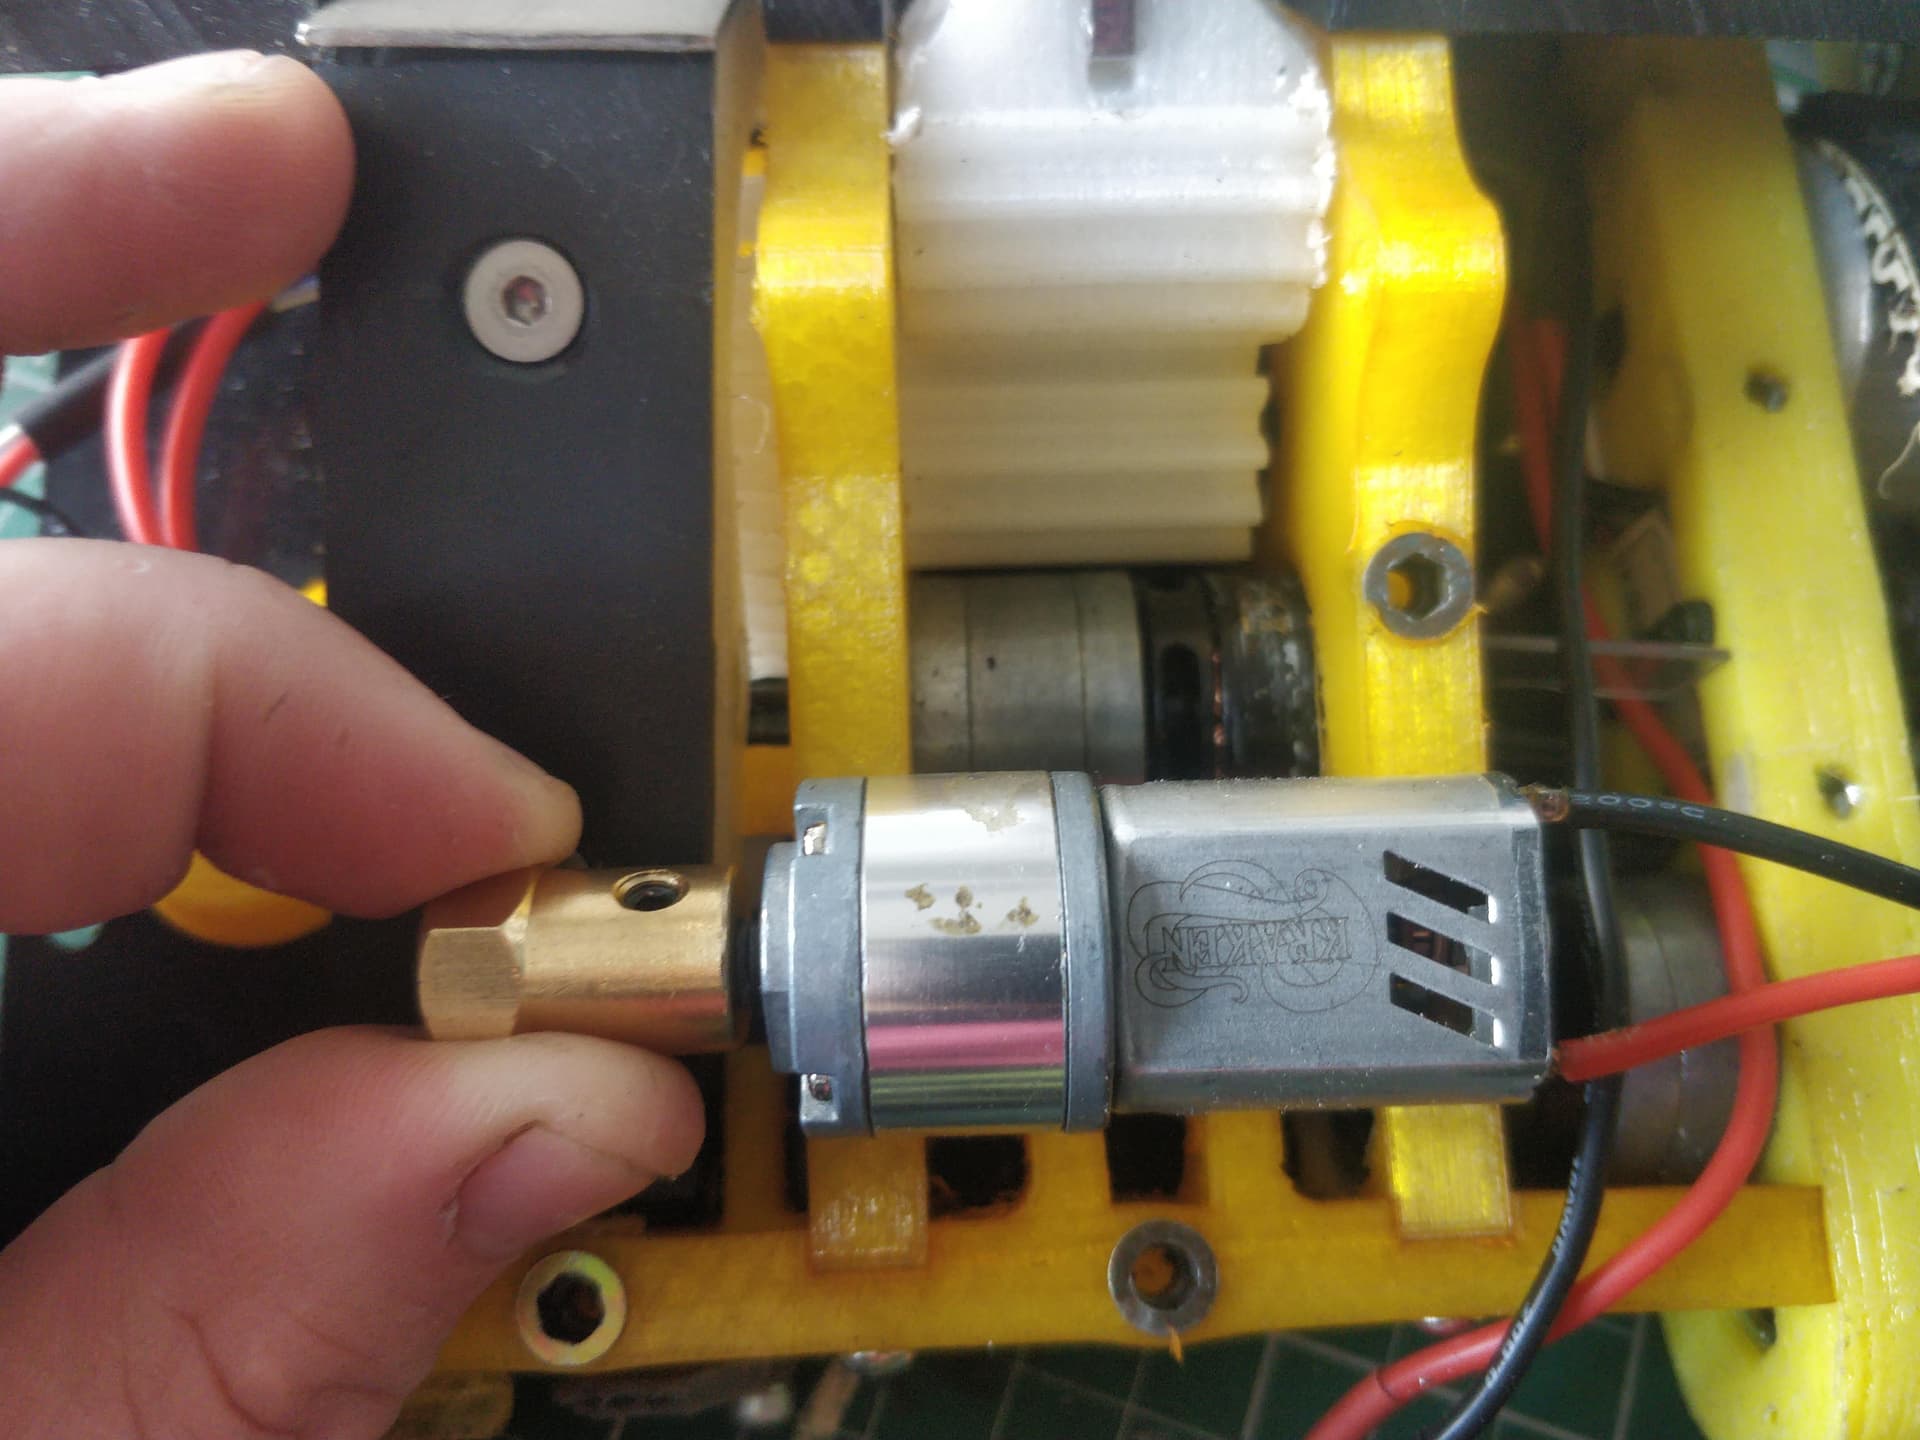
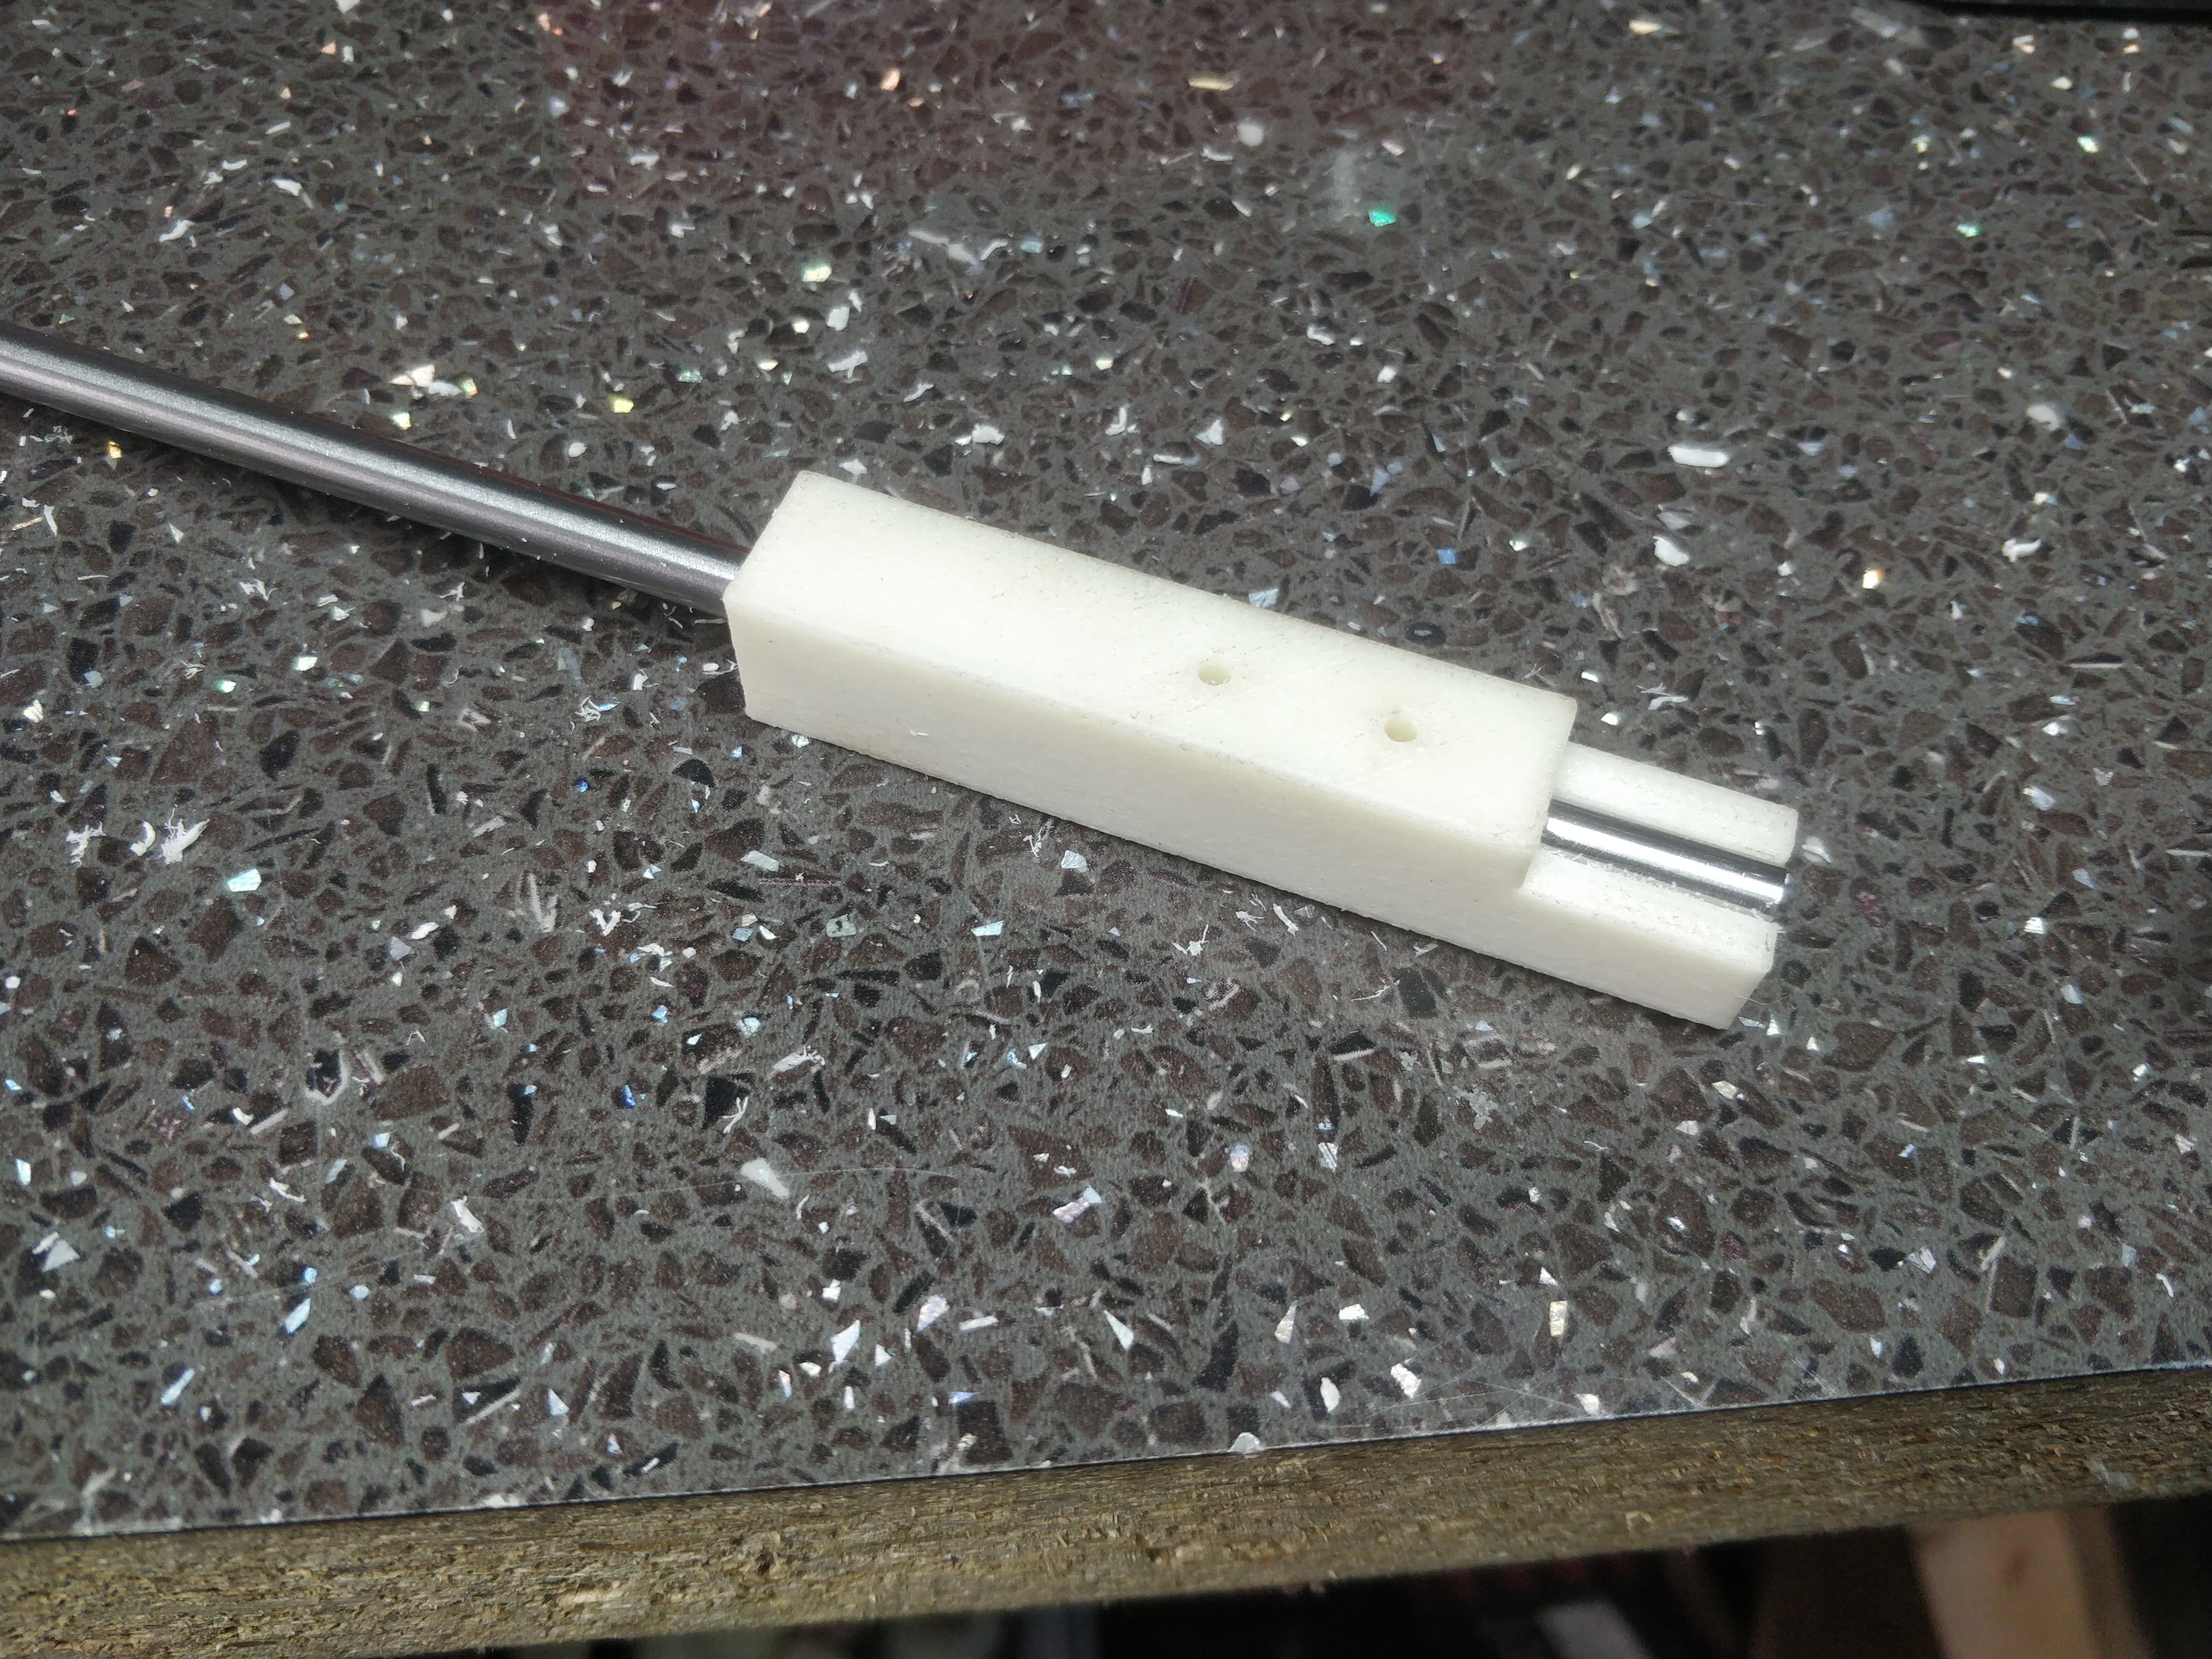
I went into the breach a final time and just stripped the wires back as far as I dared into the motor and fudged some lovely flexible silicone goodness up in there. I wrapped the joins in some adhesive heatshrink and then checked continuity. In hindsight I should have checked first but I am a Young Handsome Rebel with a Devil May Care attitude.

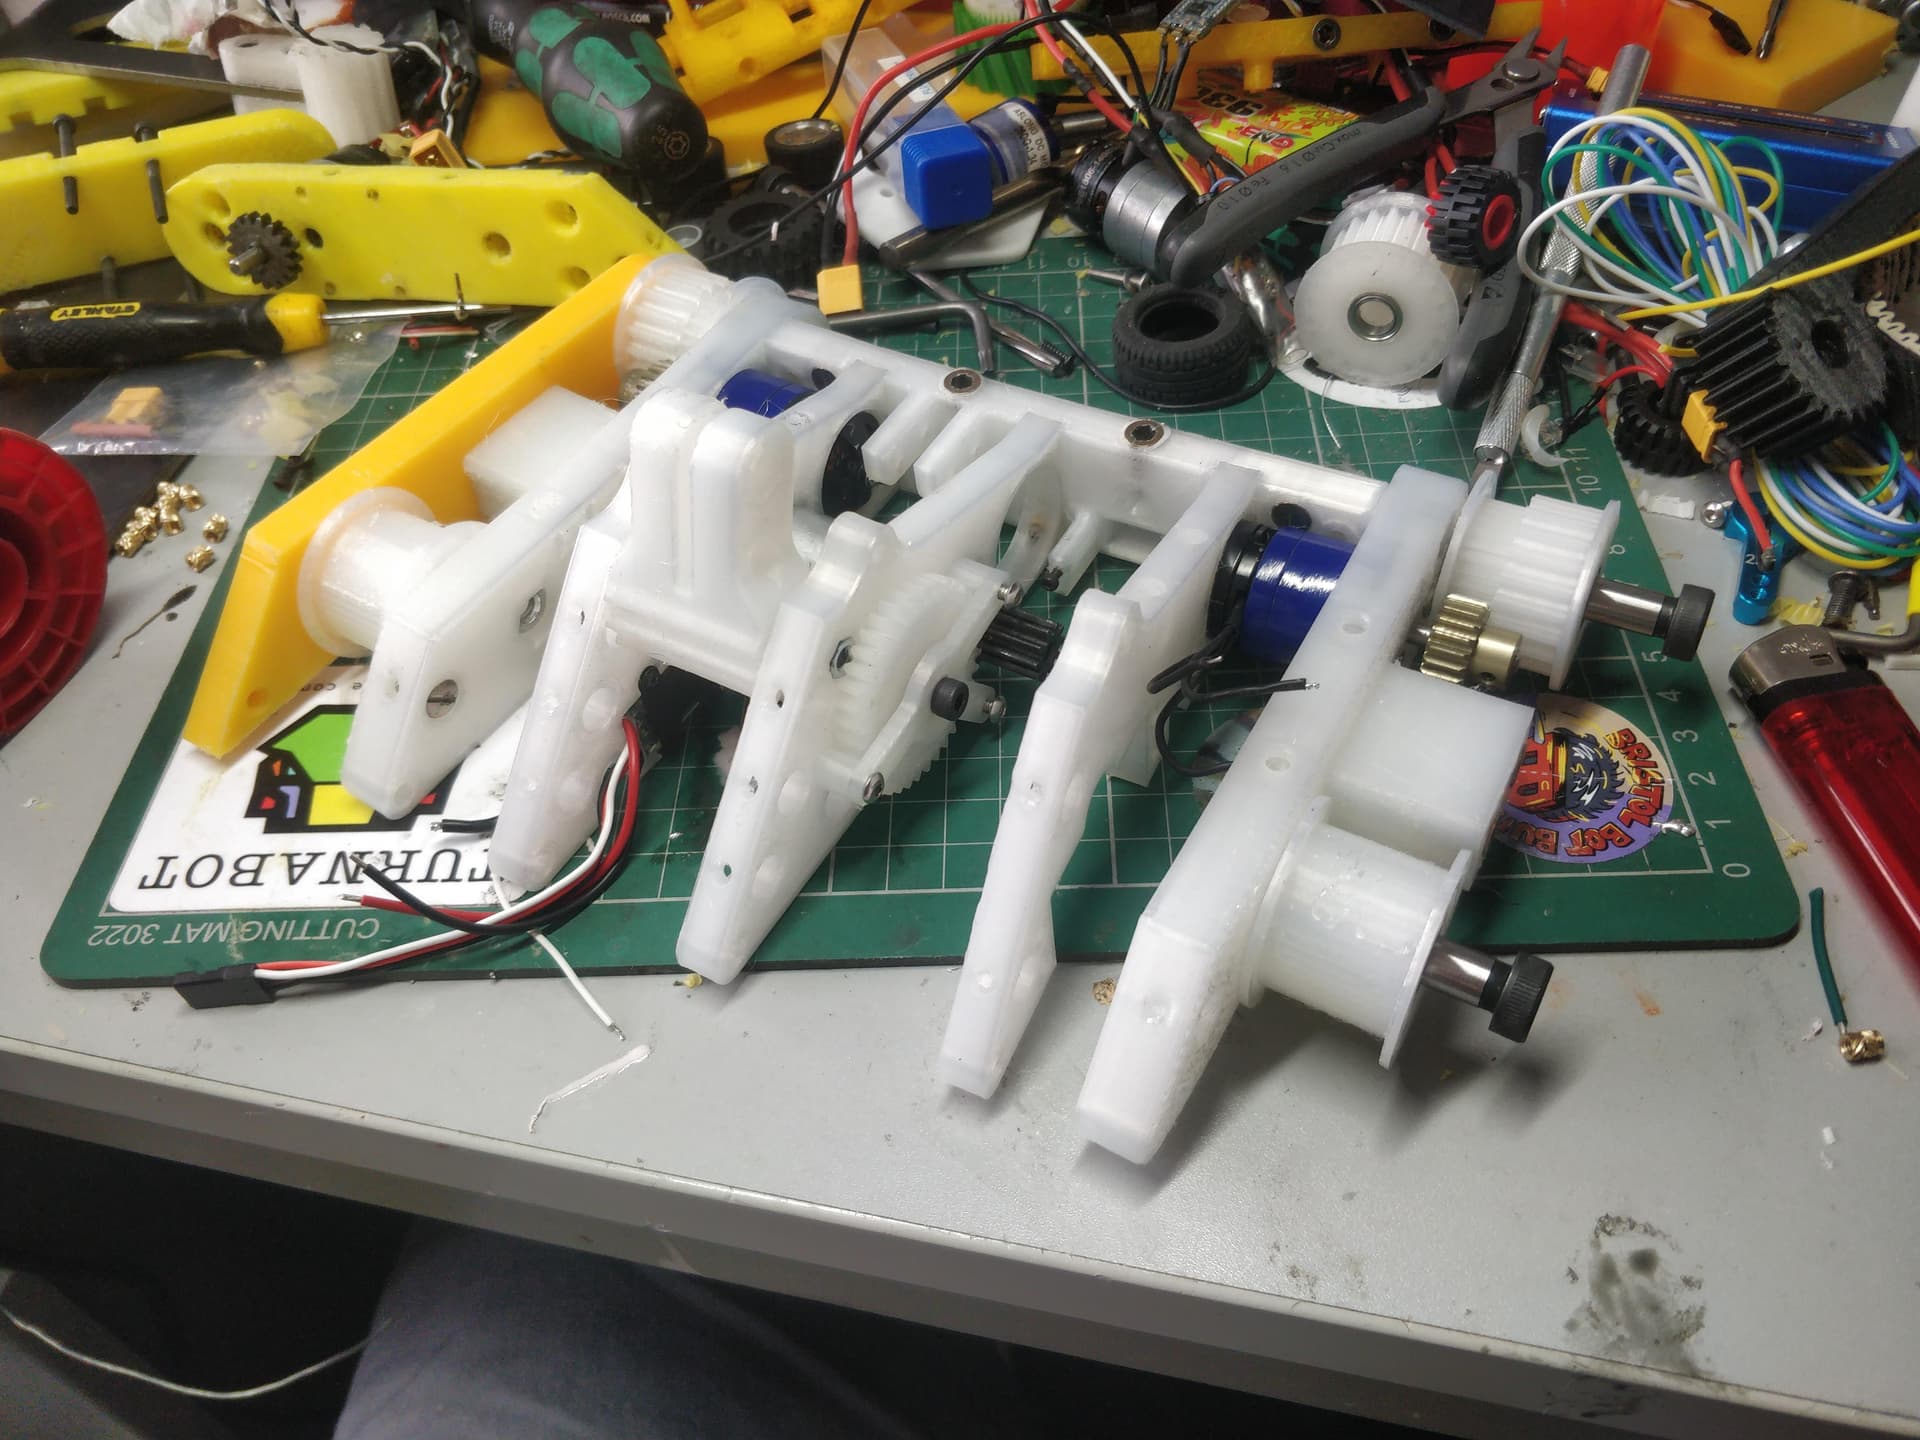
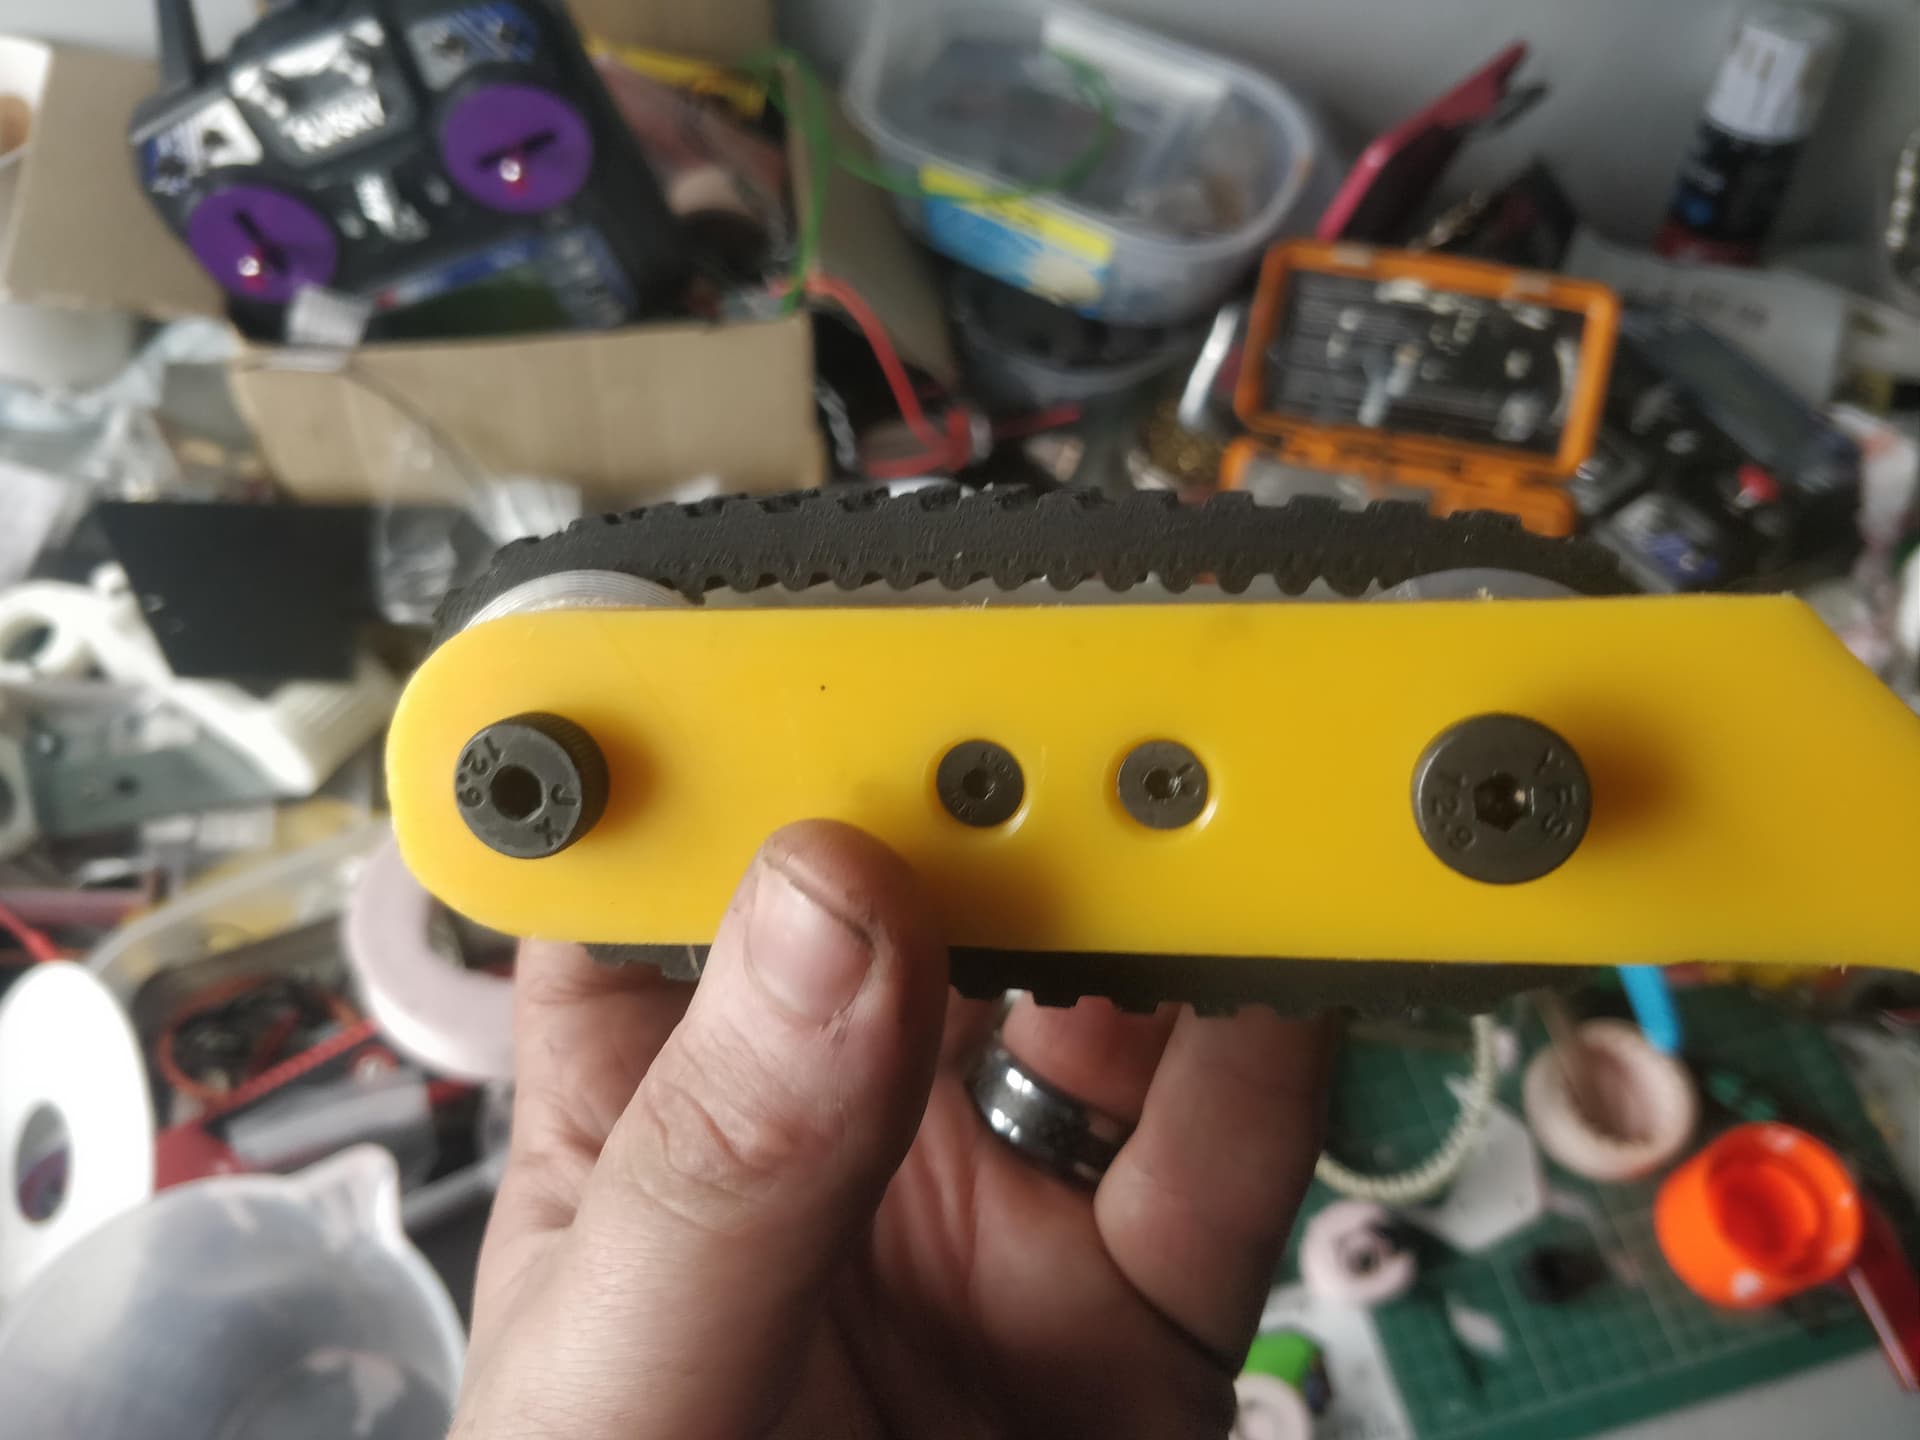
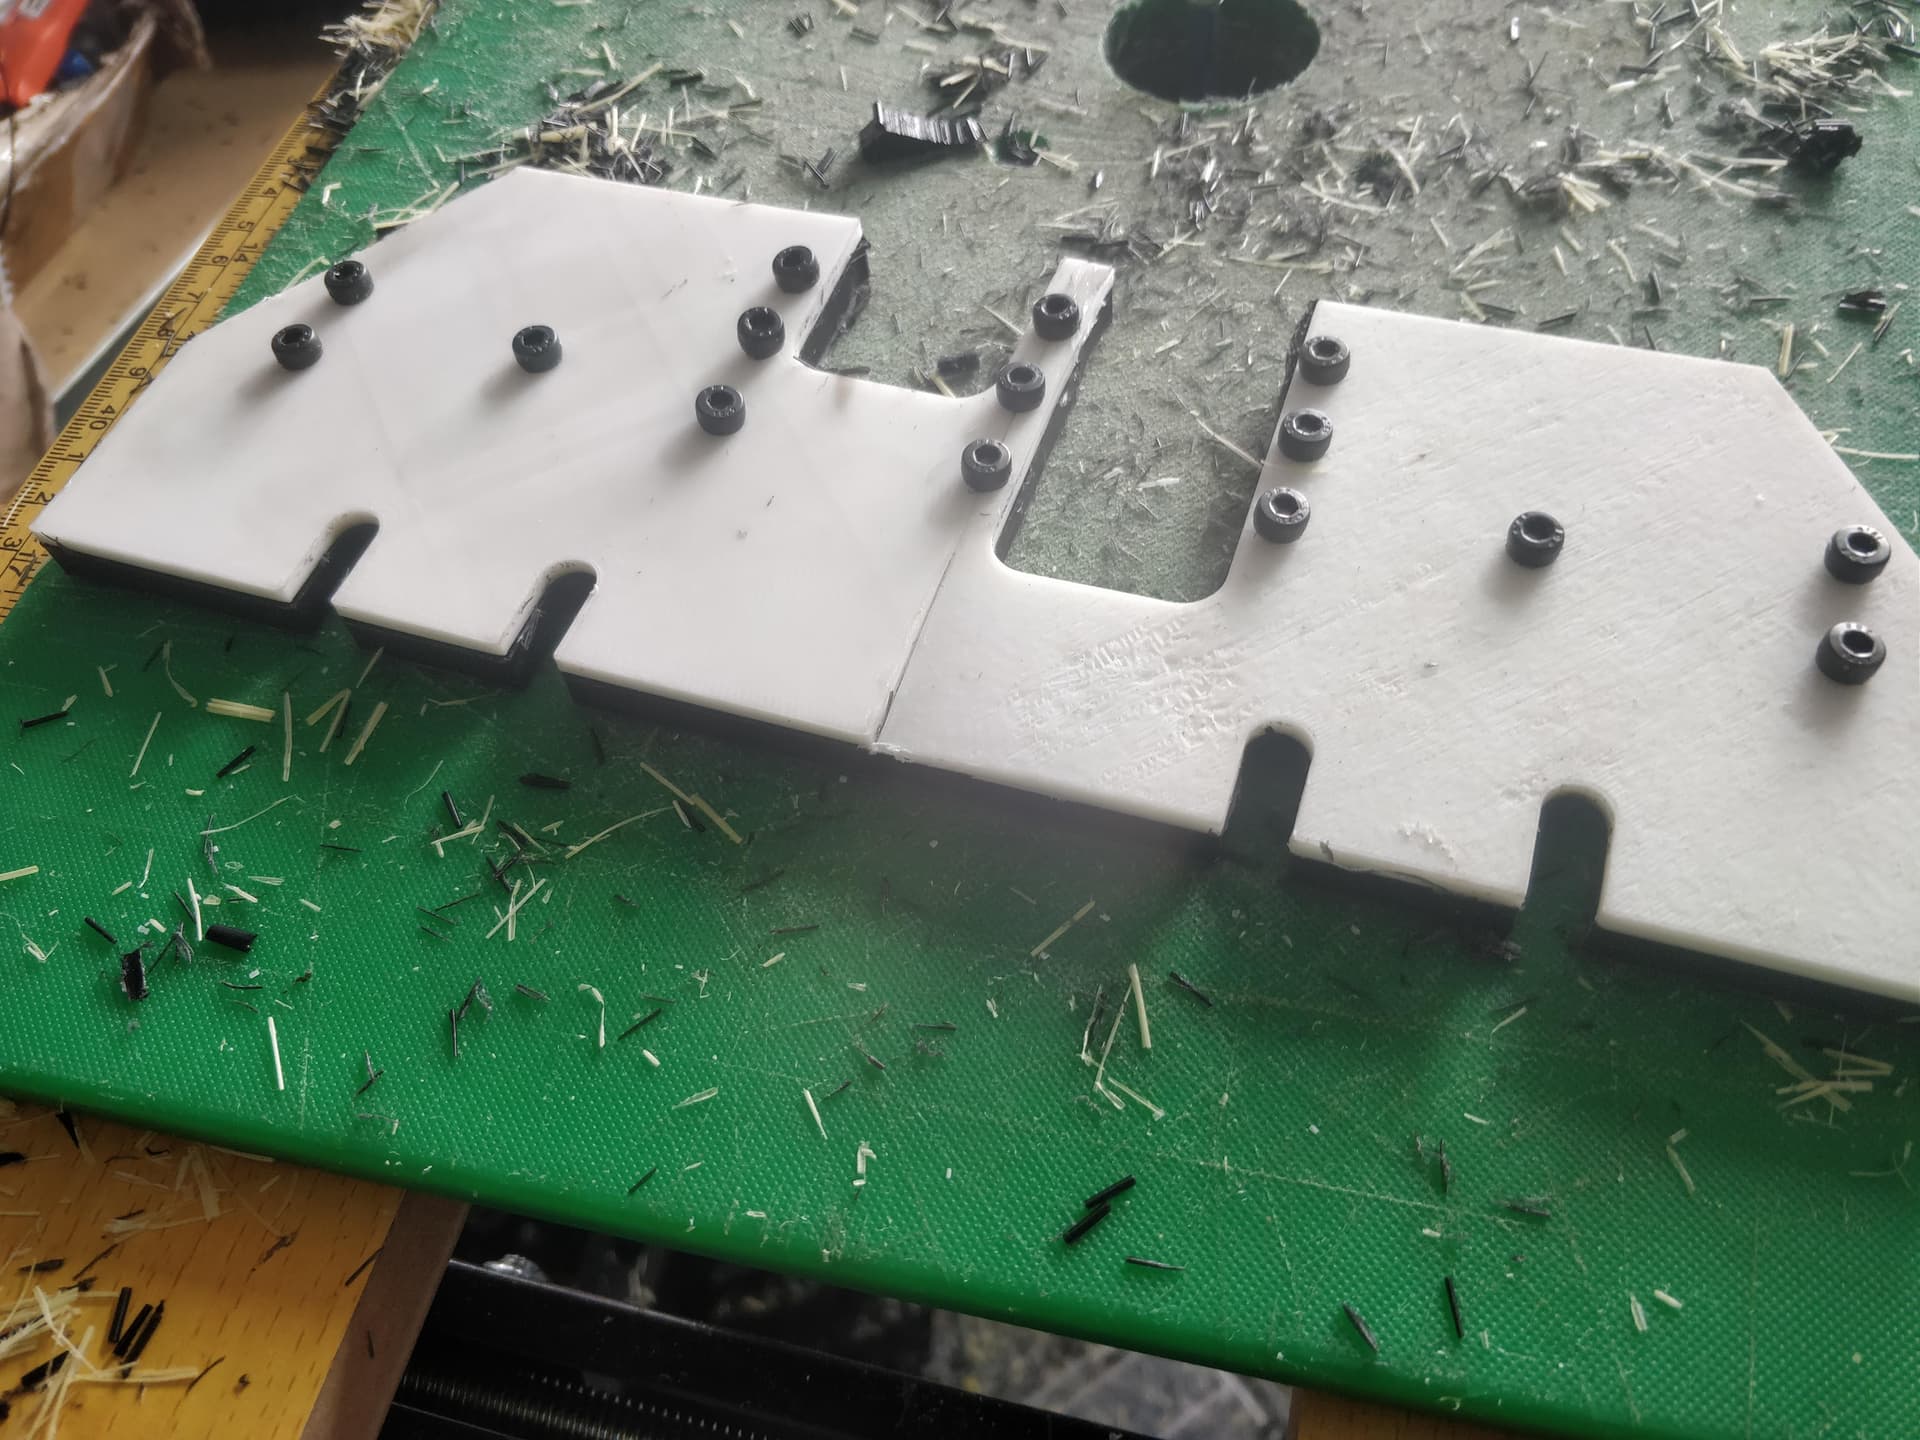
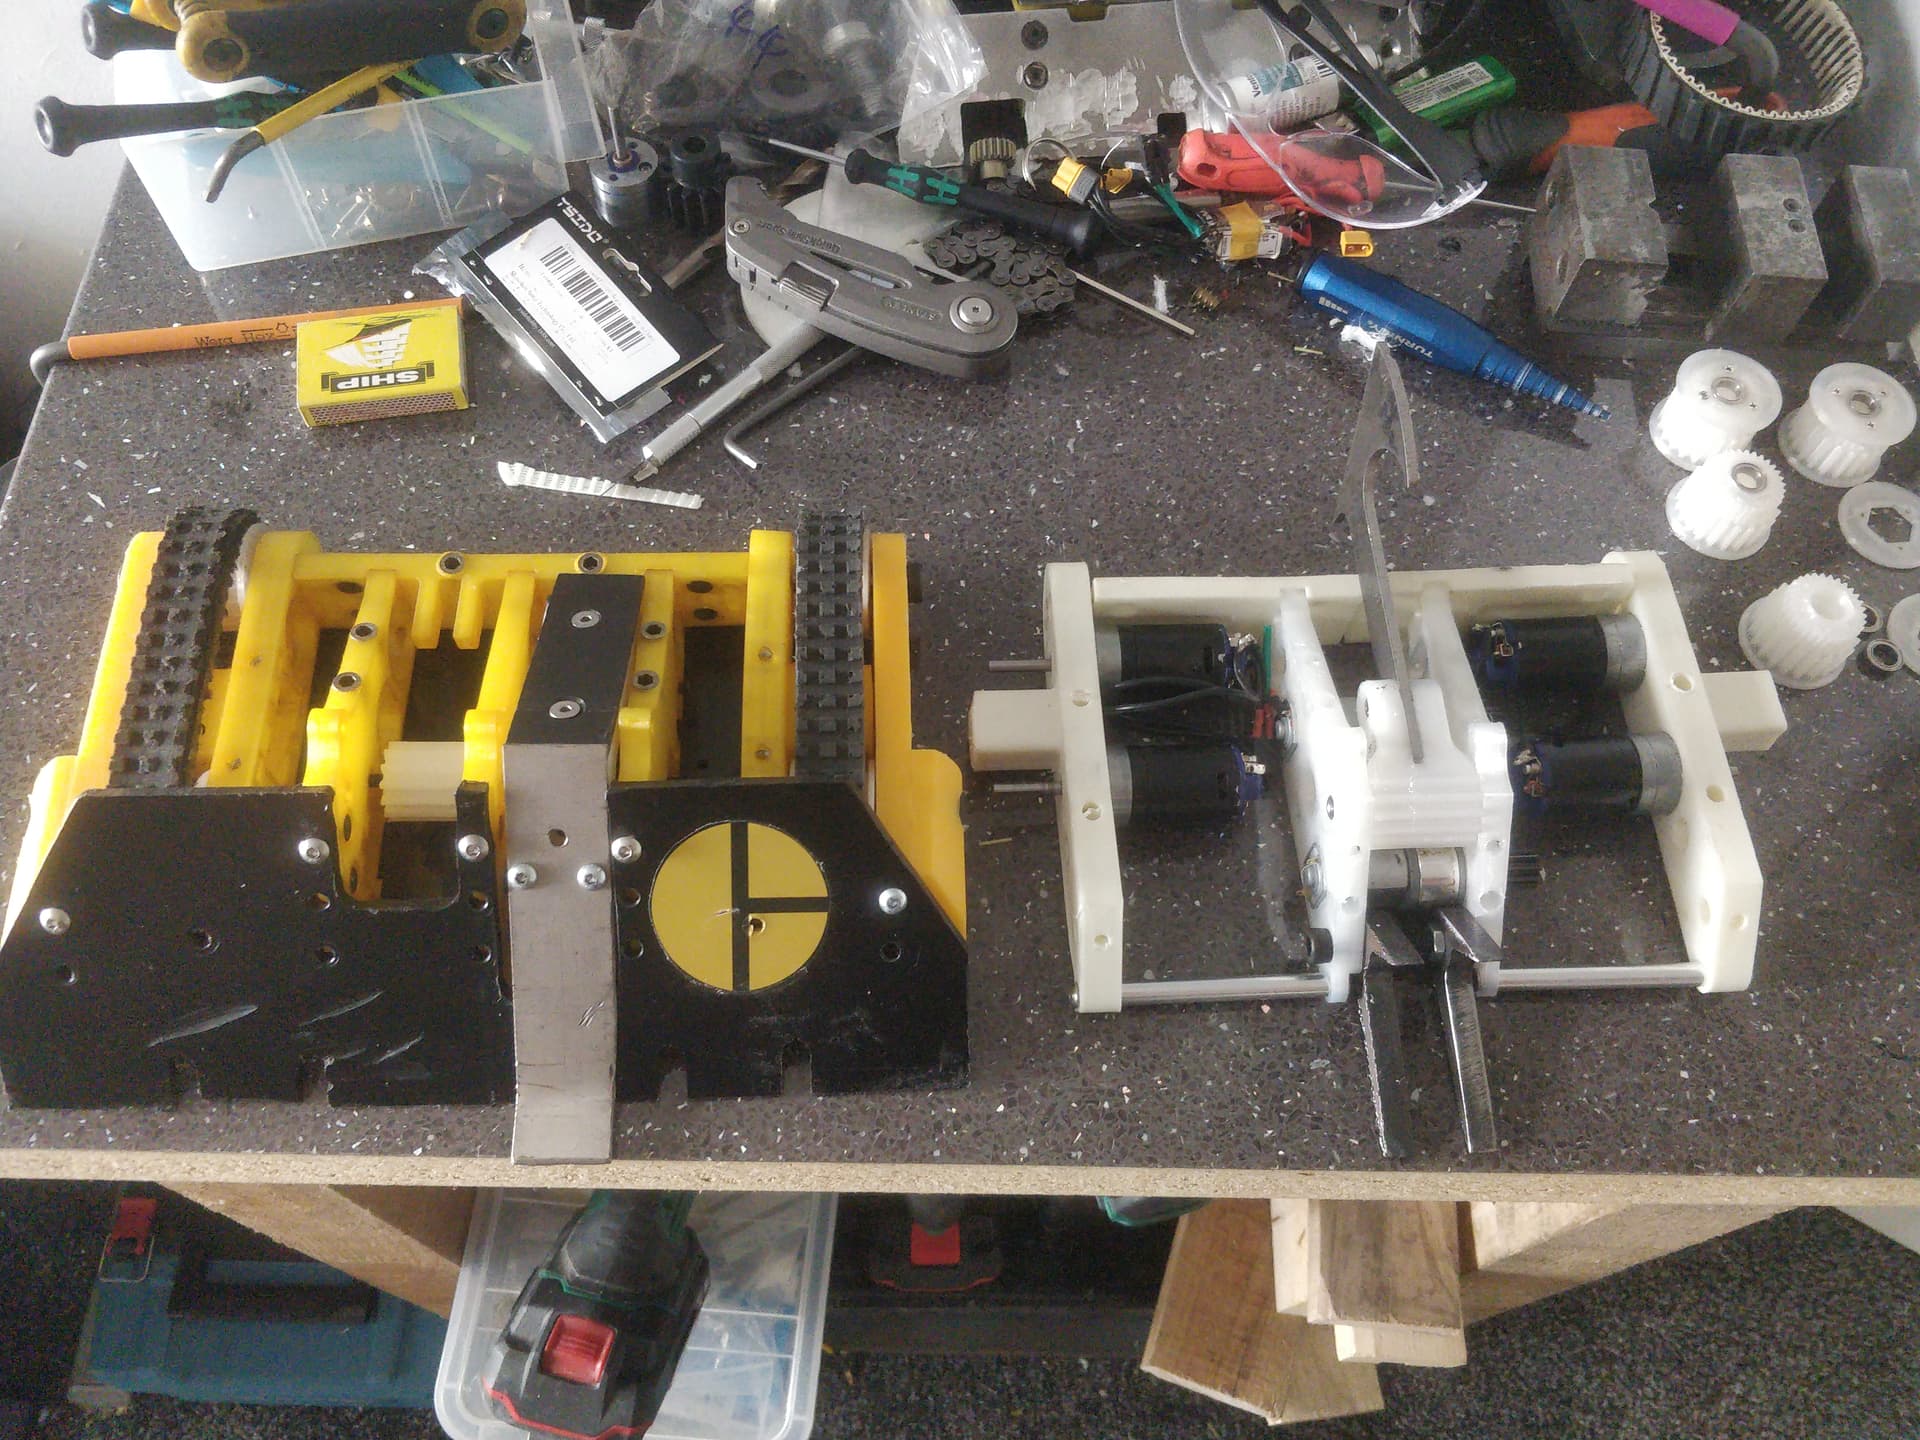
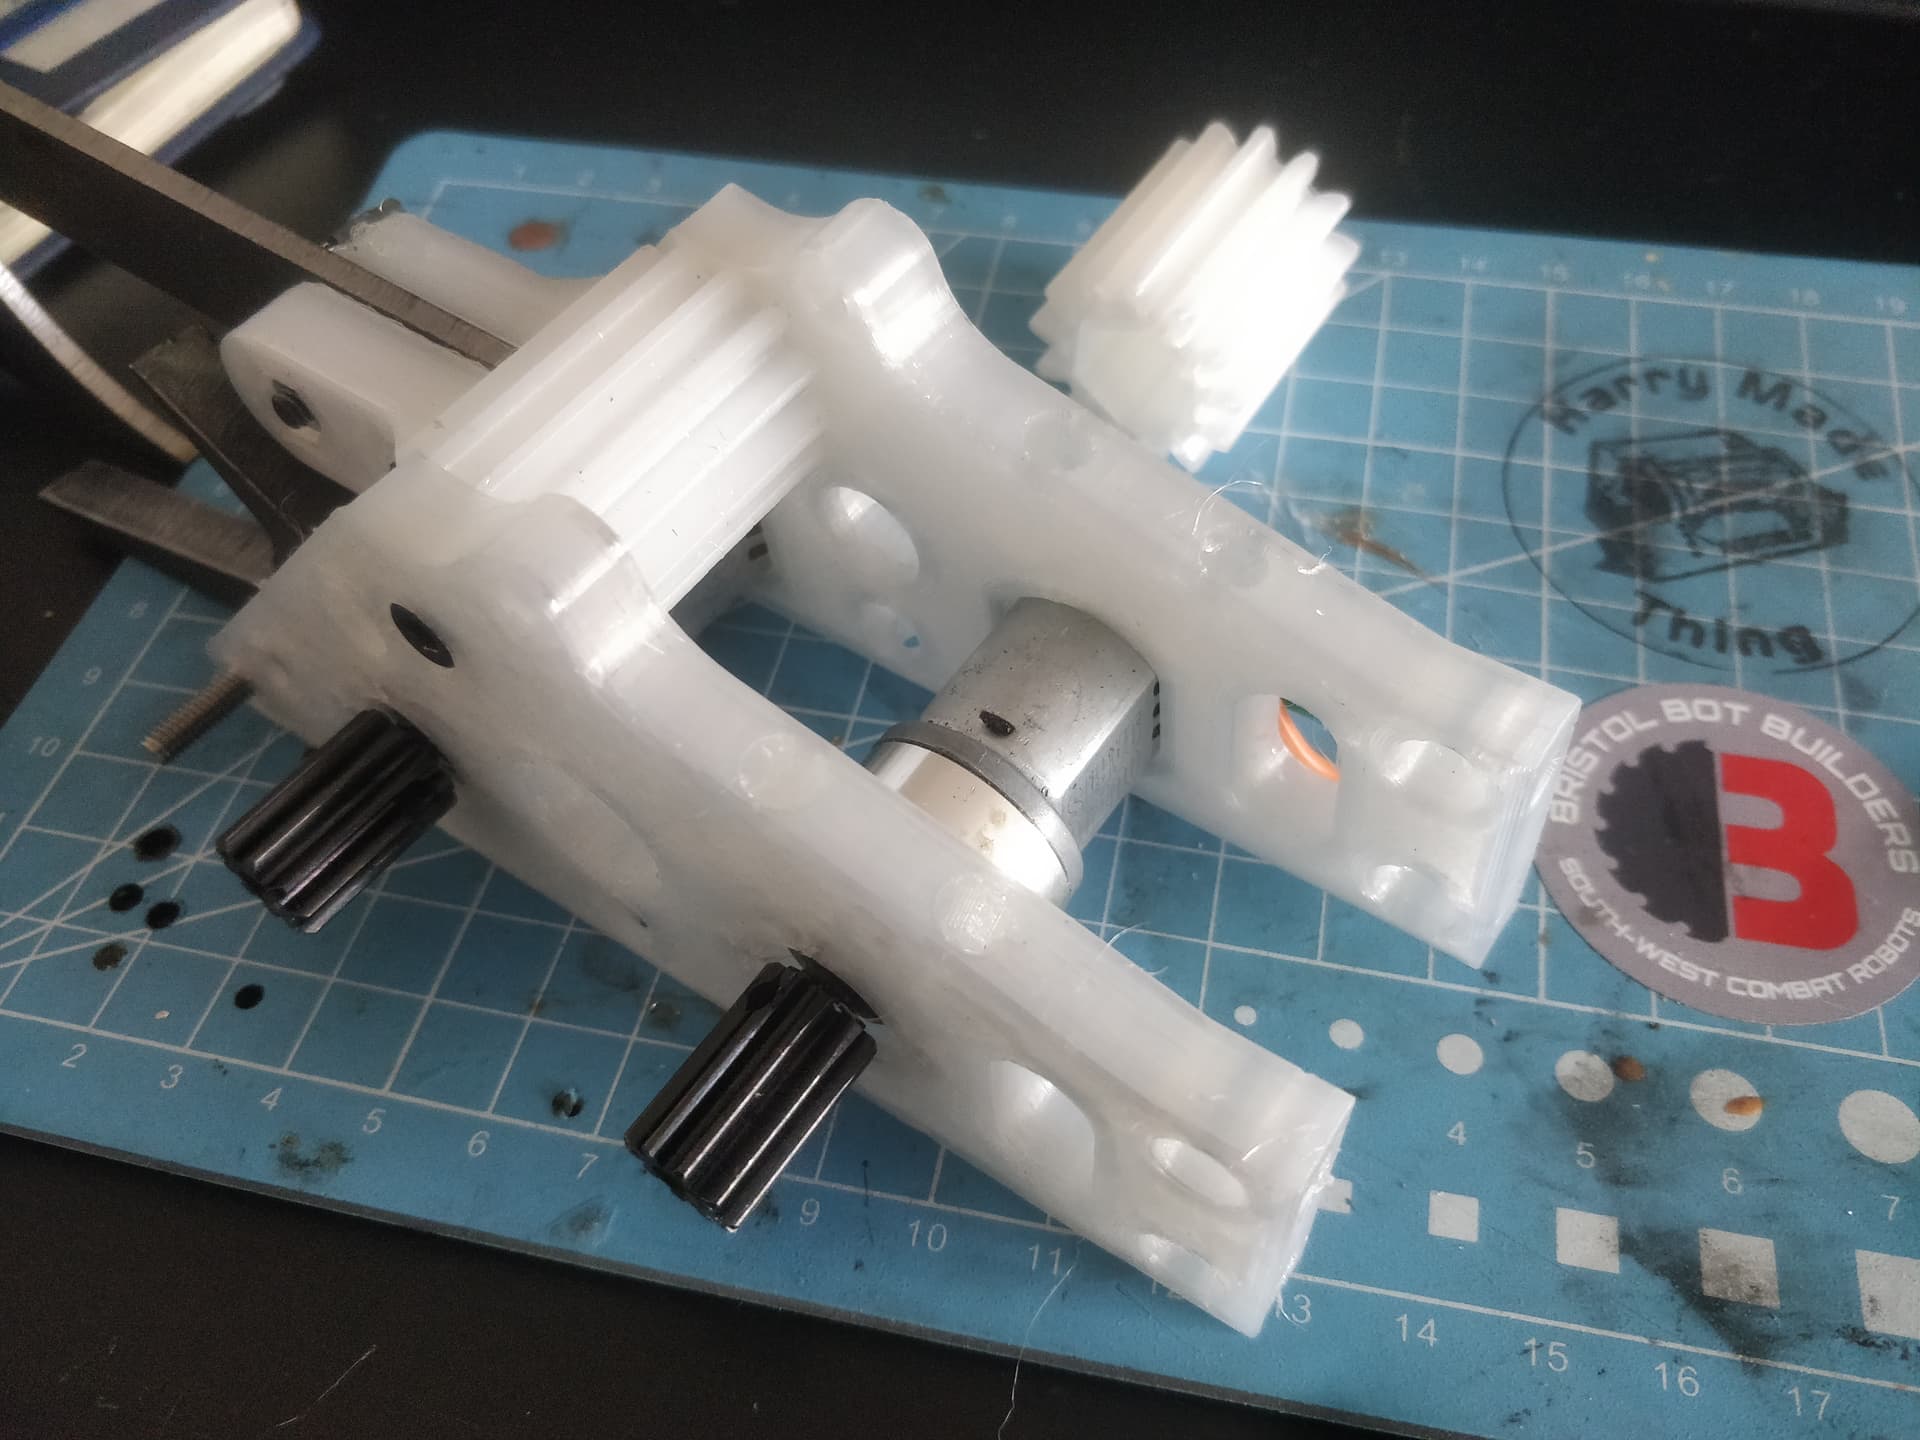
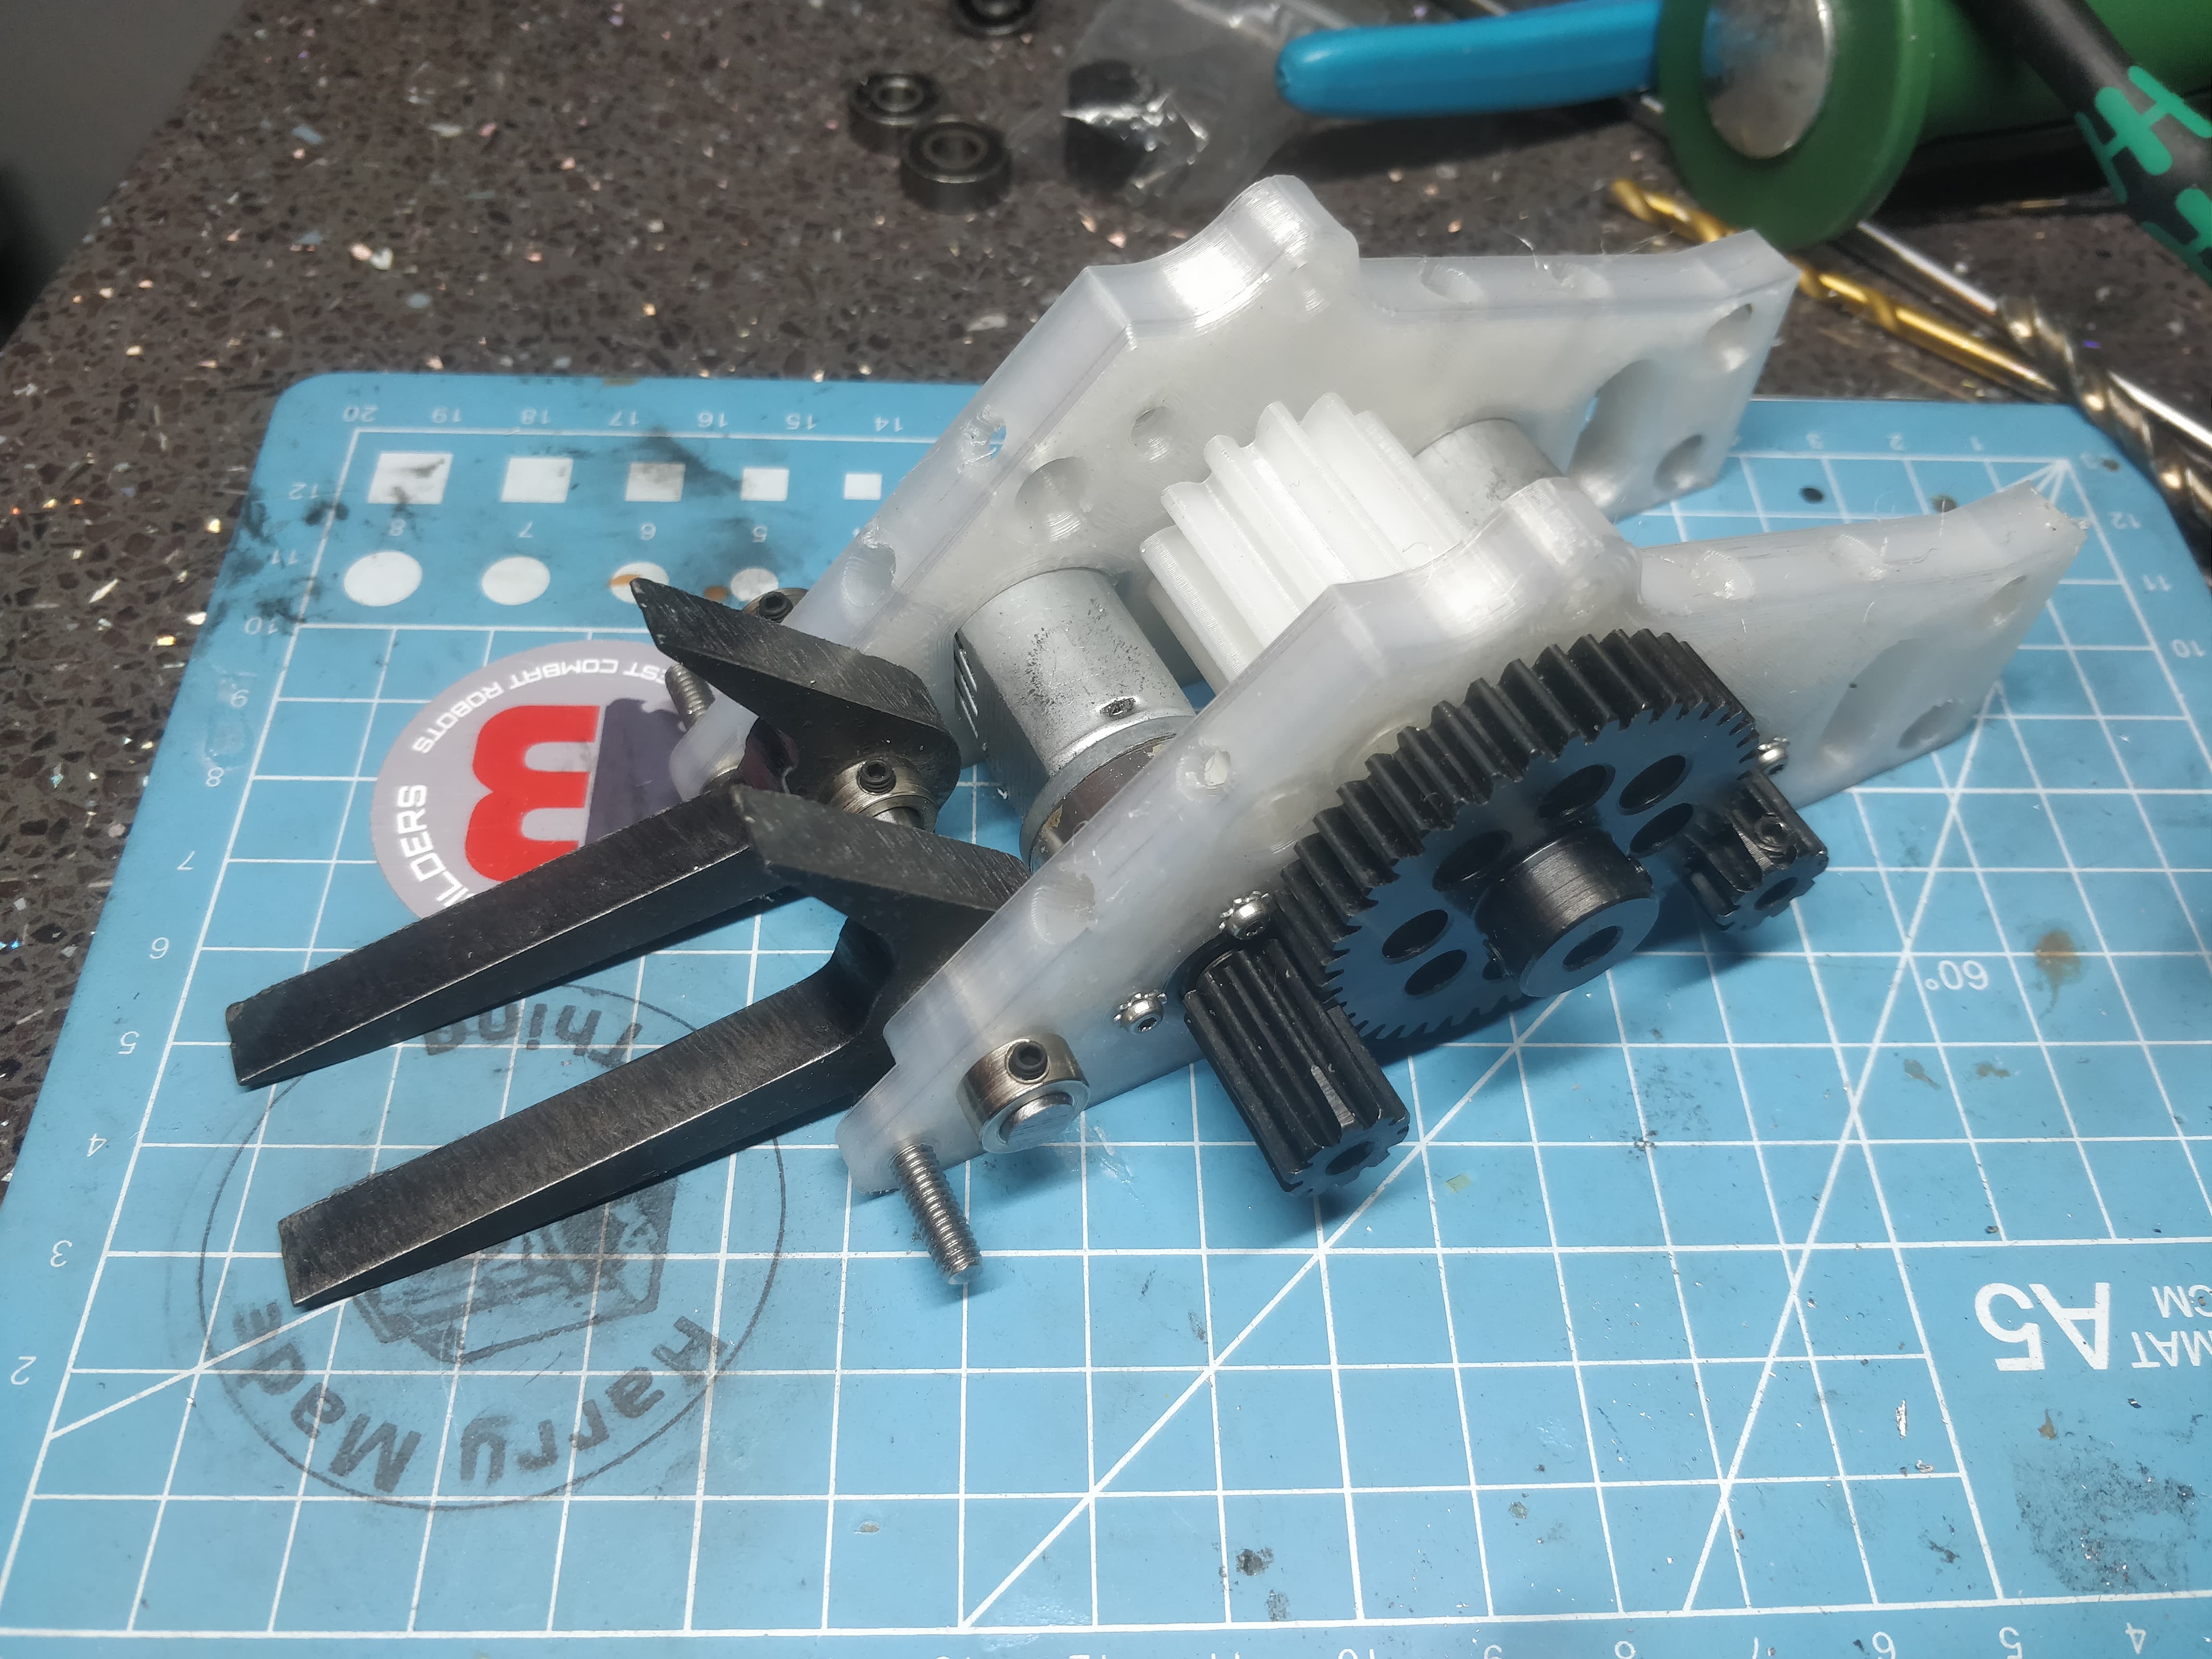
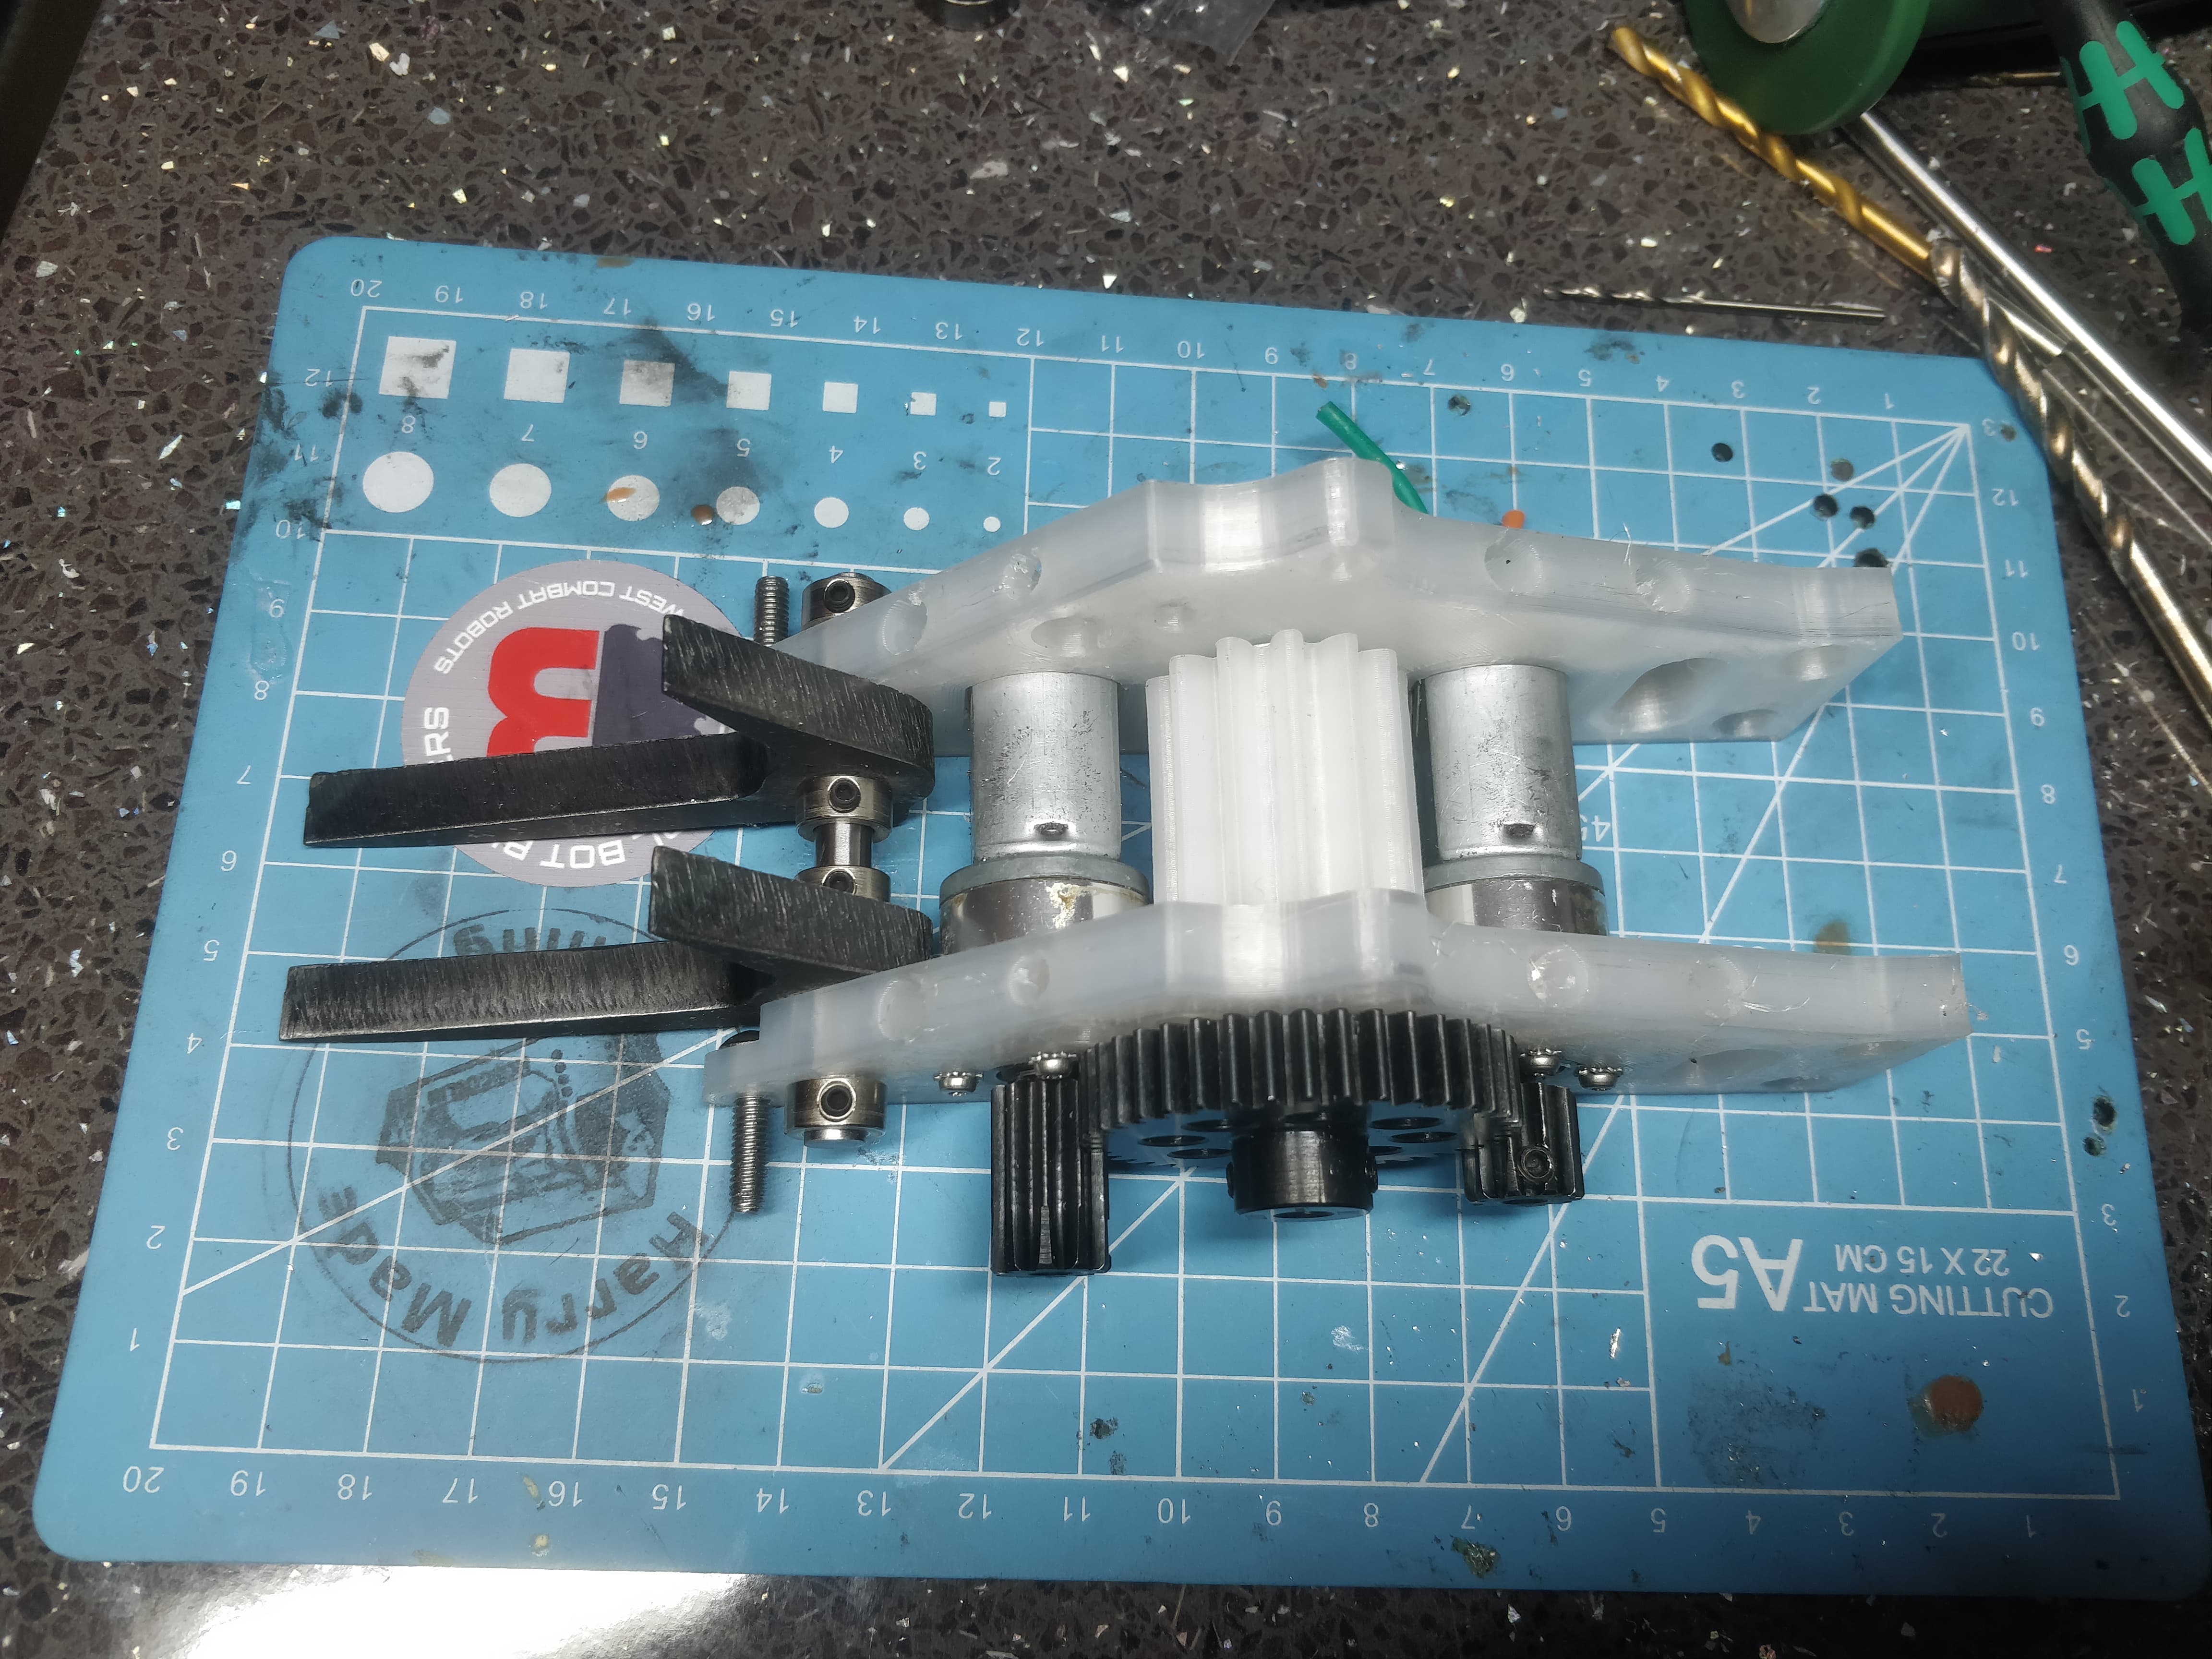
You love to see it - completed frame with all the little mechie bits slotting in and not interfering at all. Time to suck a lemon and try wiring the blasted thing.

Wiring was a semi lucid blur as it was just as piggish as last time as I hadn’t been bothered to remove any of the hurdles or tight spaces. As the unfortunate nature of the robot demands, I couldn’t transplant the existing loom into the new chassis so it was a bit of triage to see what and where in the chain I could chop and patch. Long and the short of it - It now works so I am very much leaving it alone.

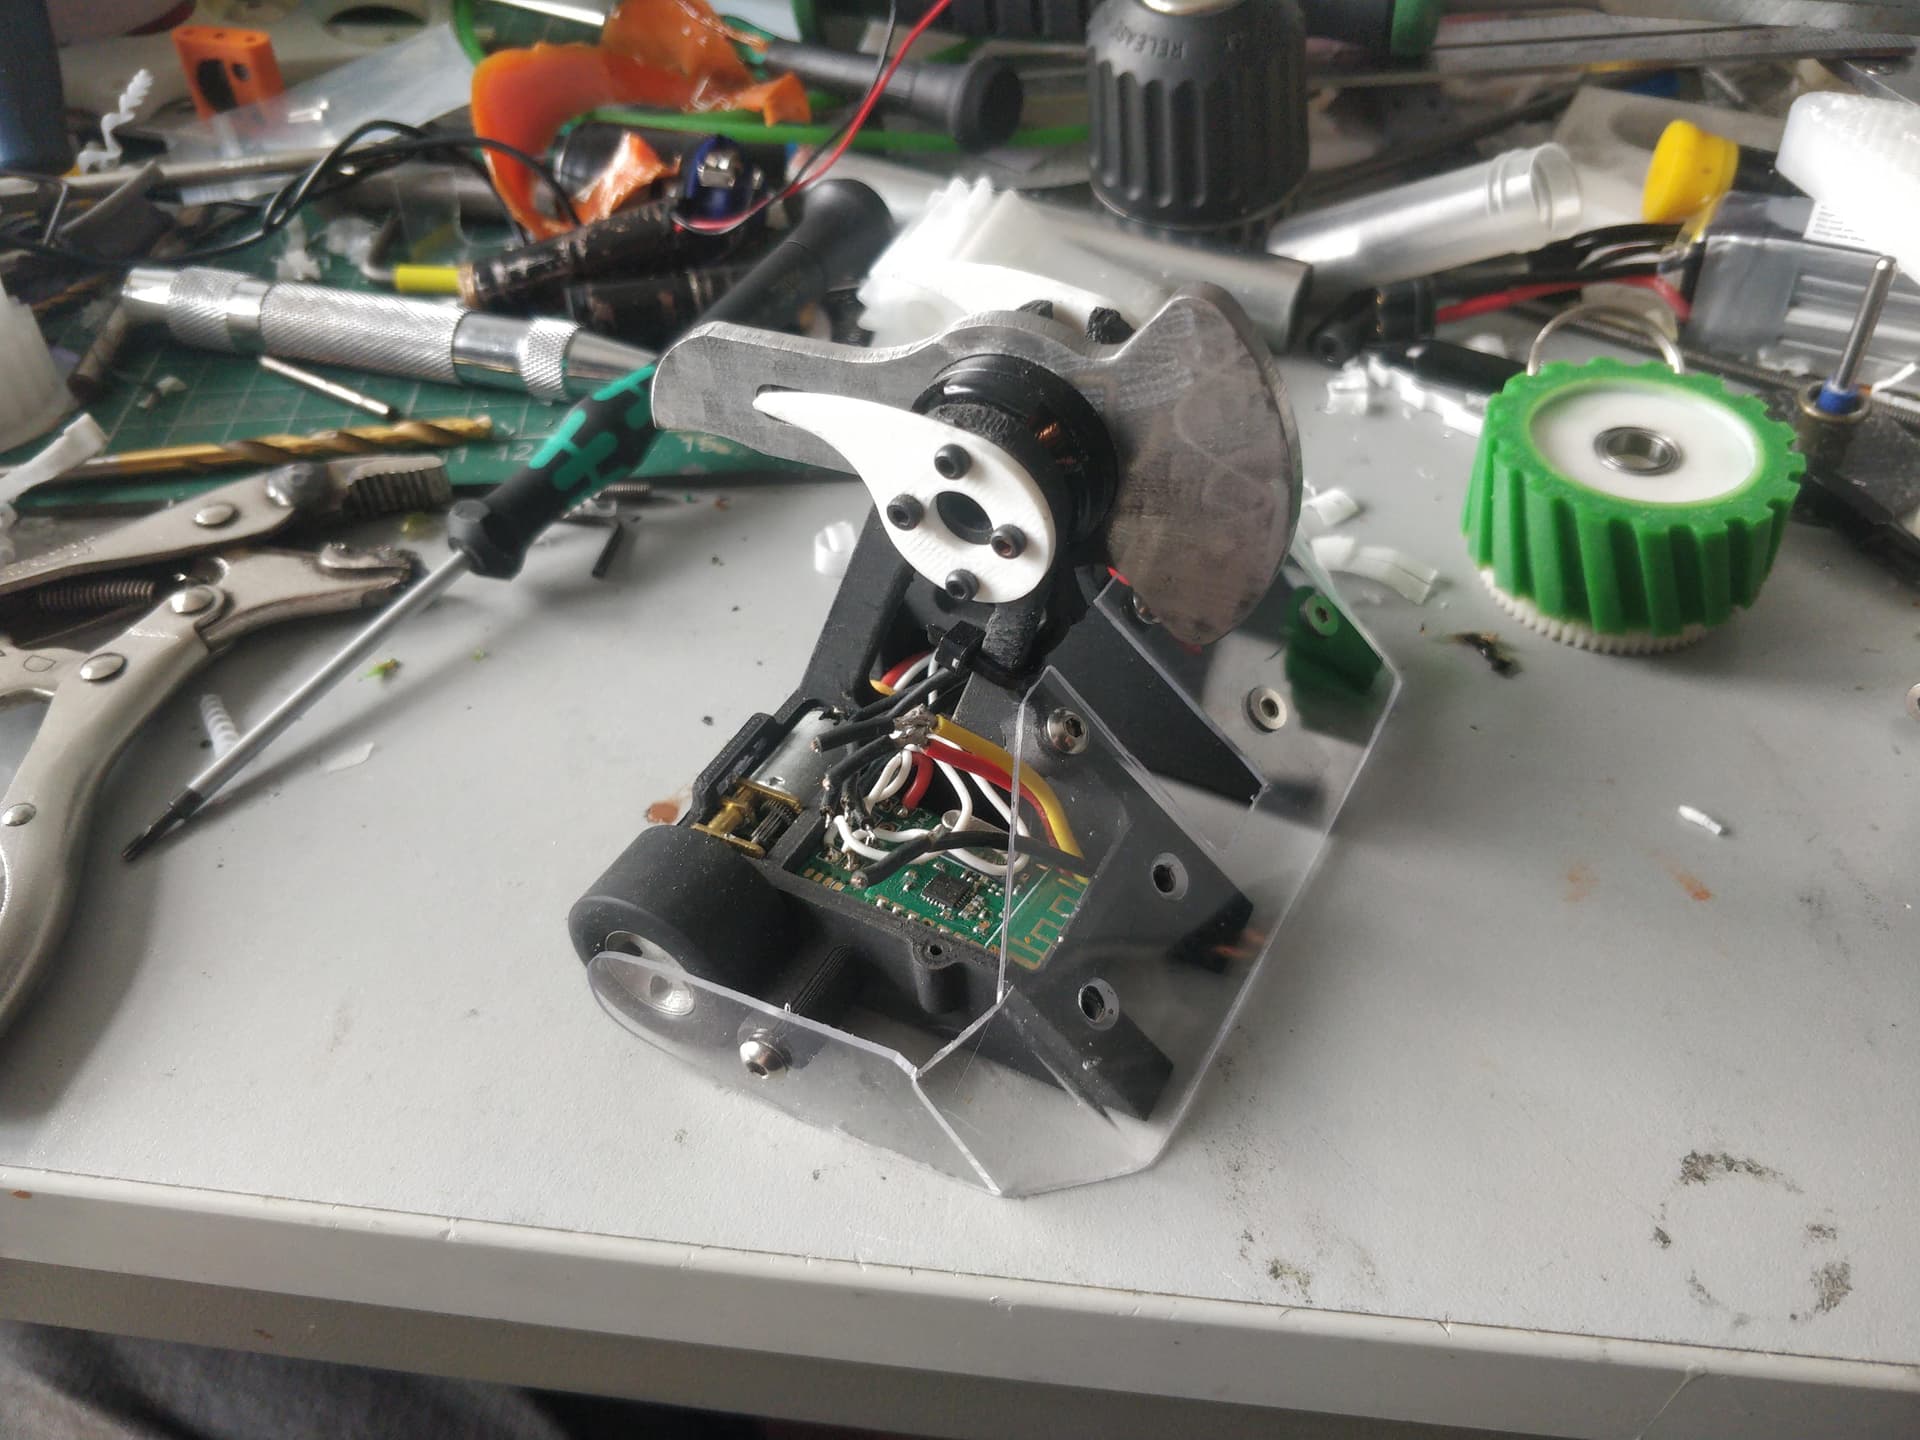
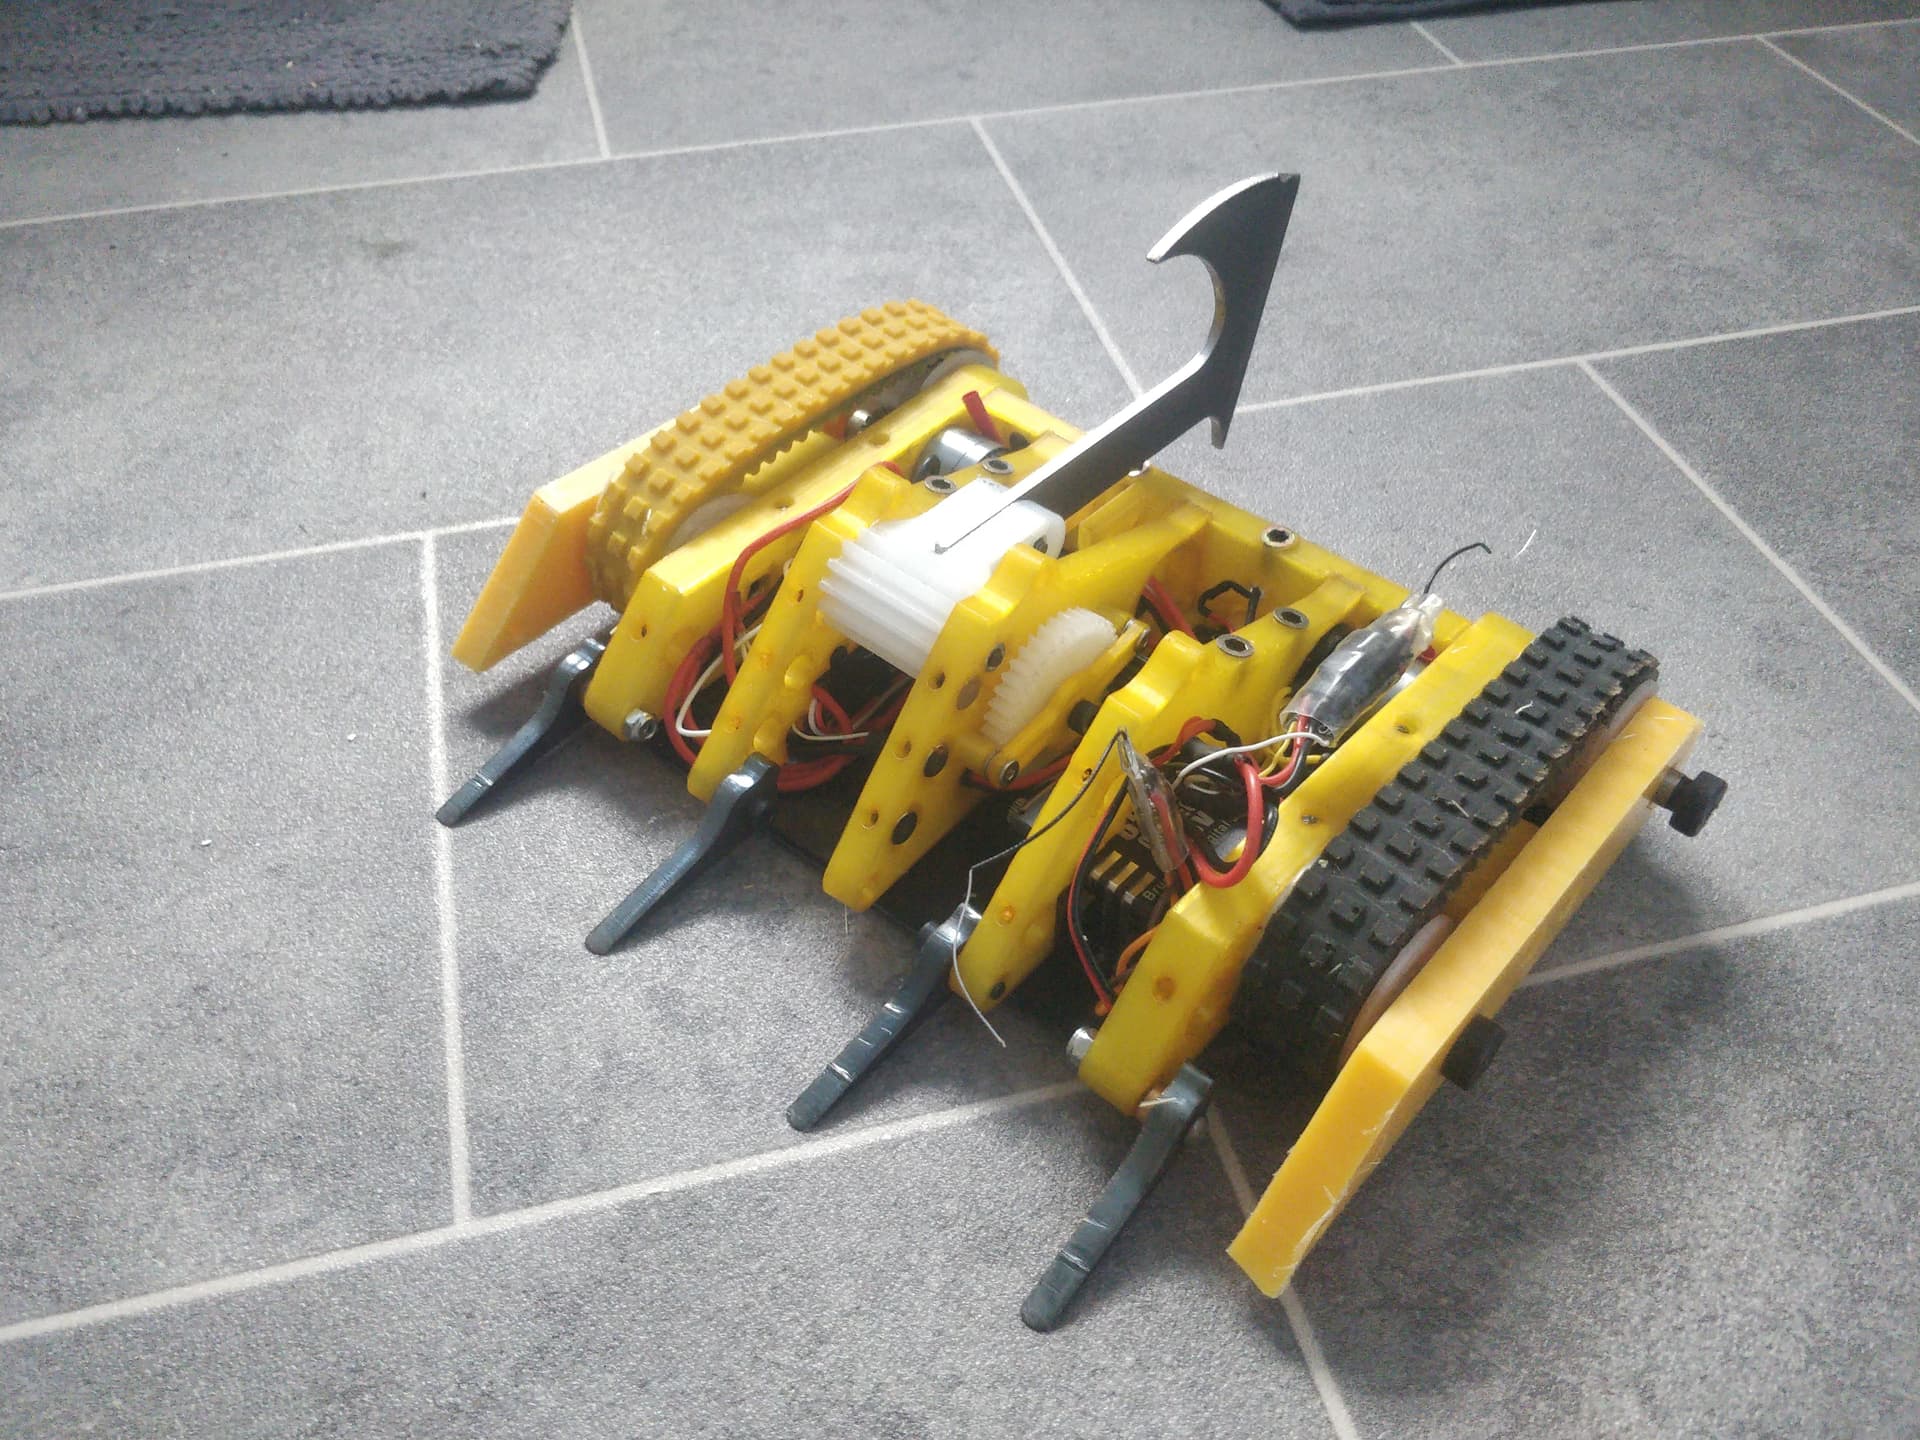
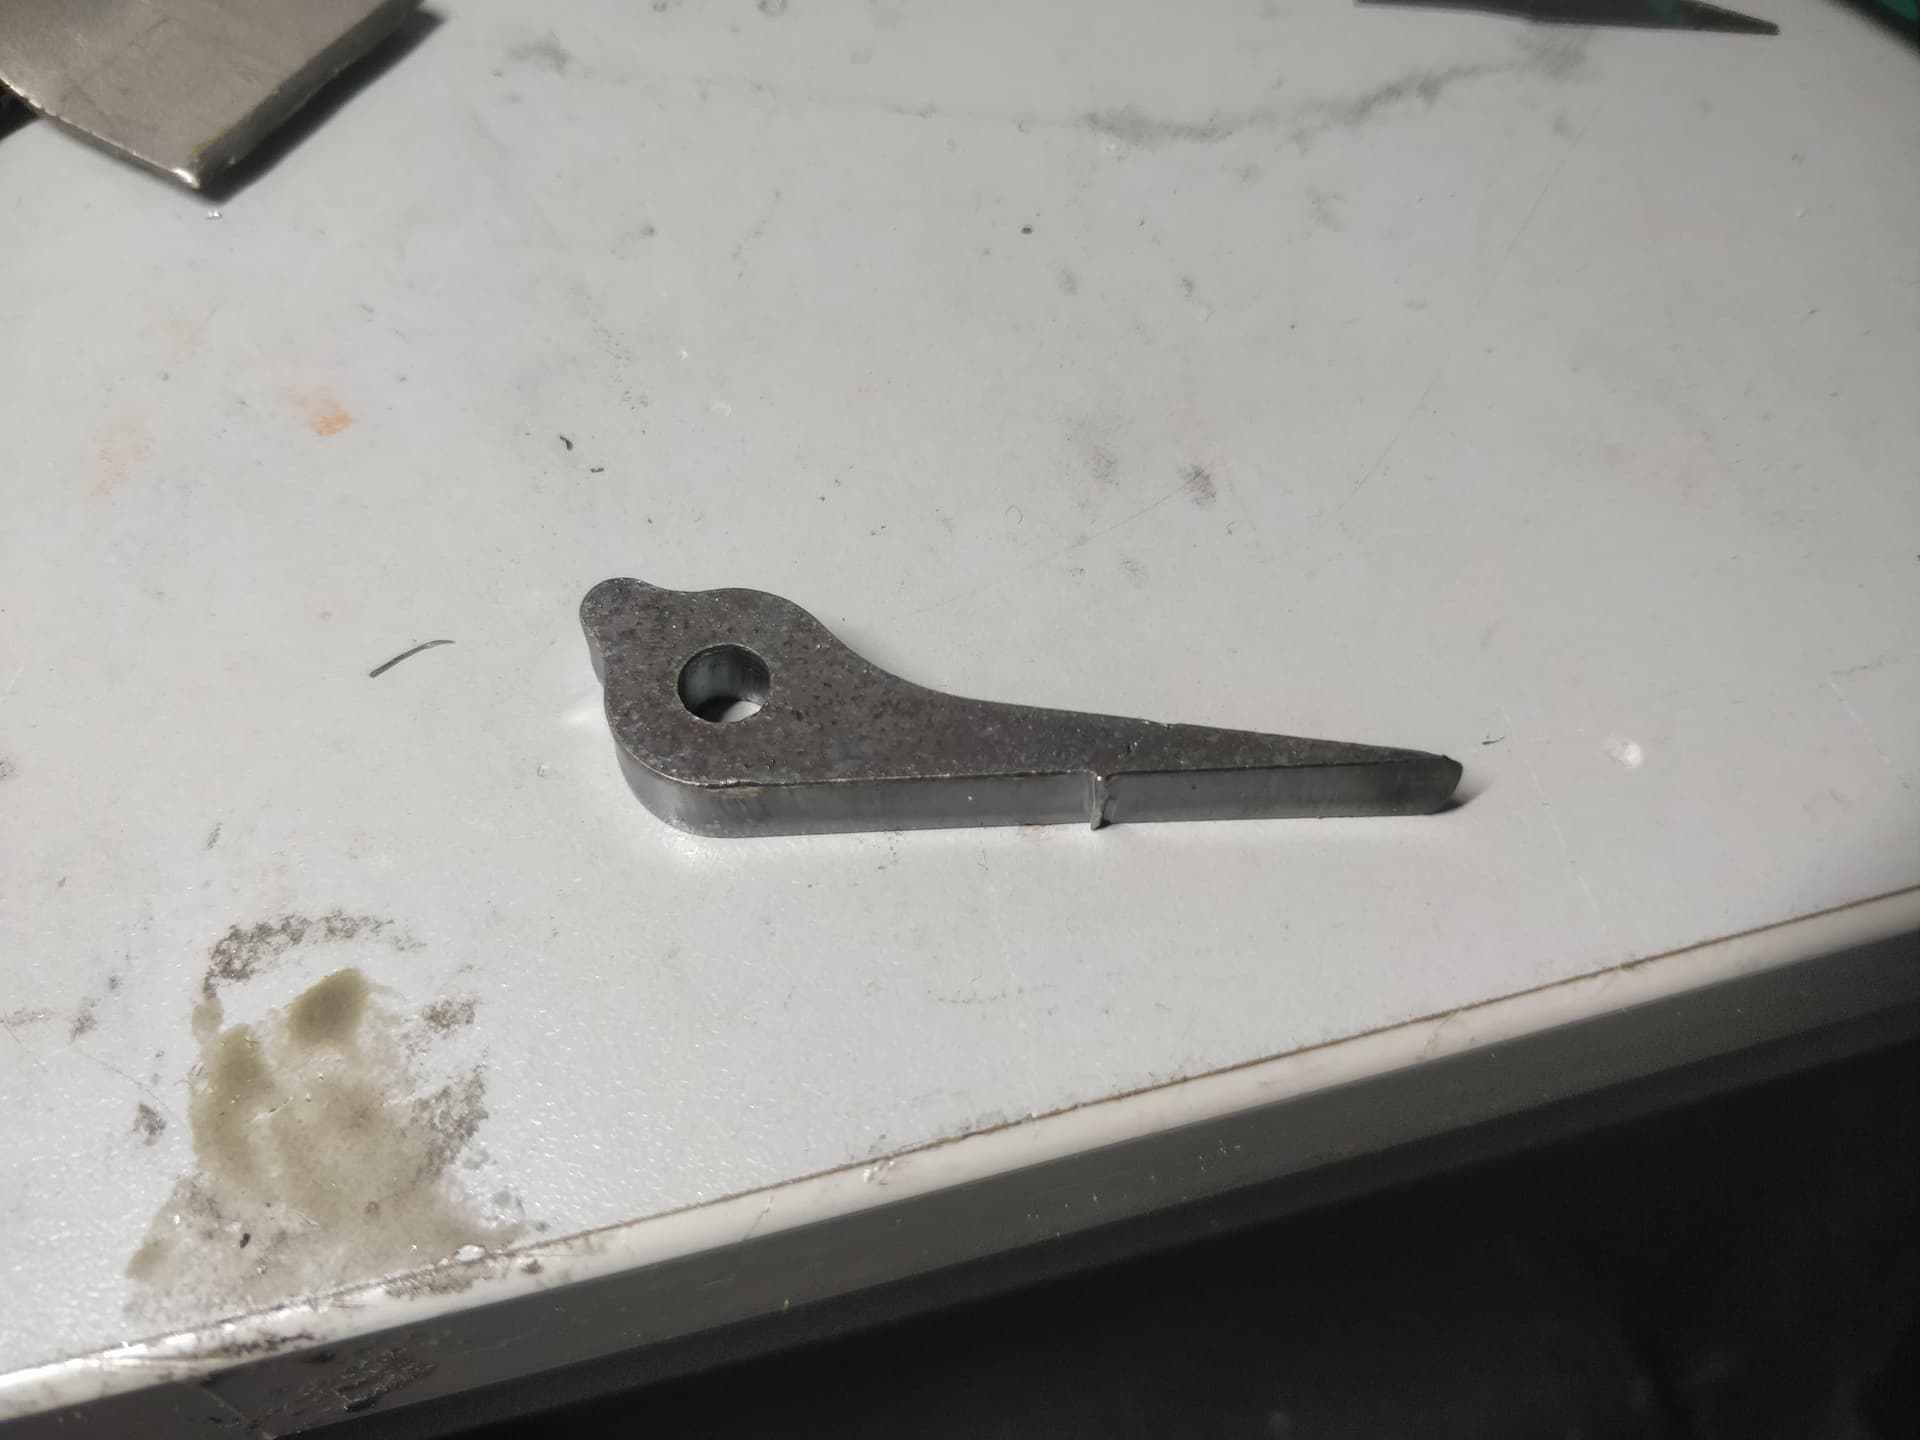
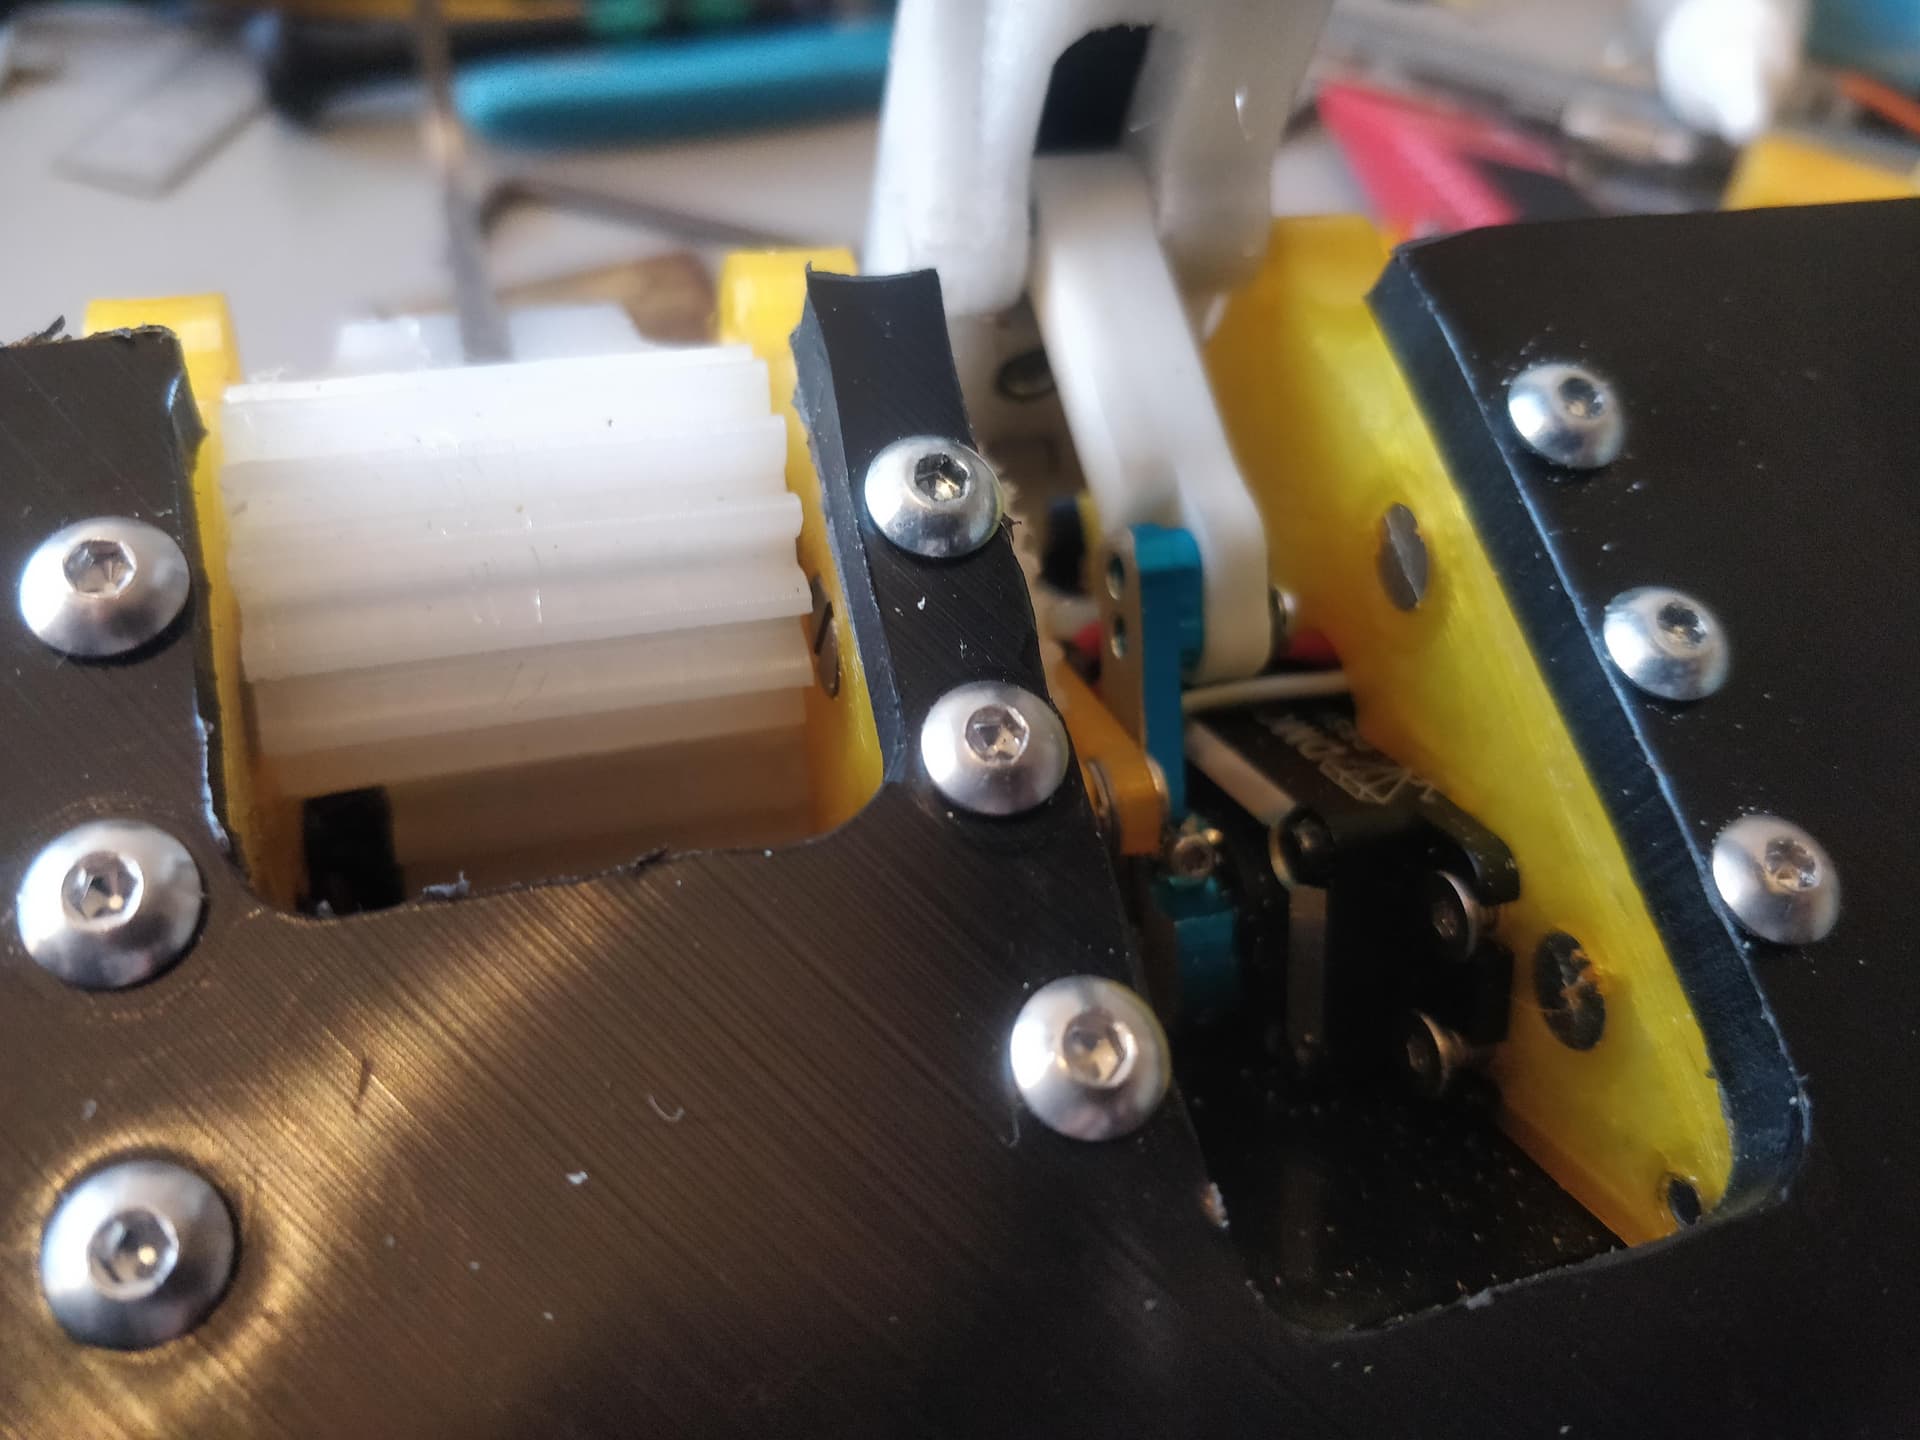
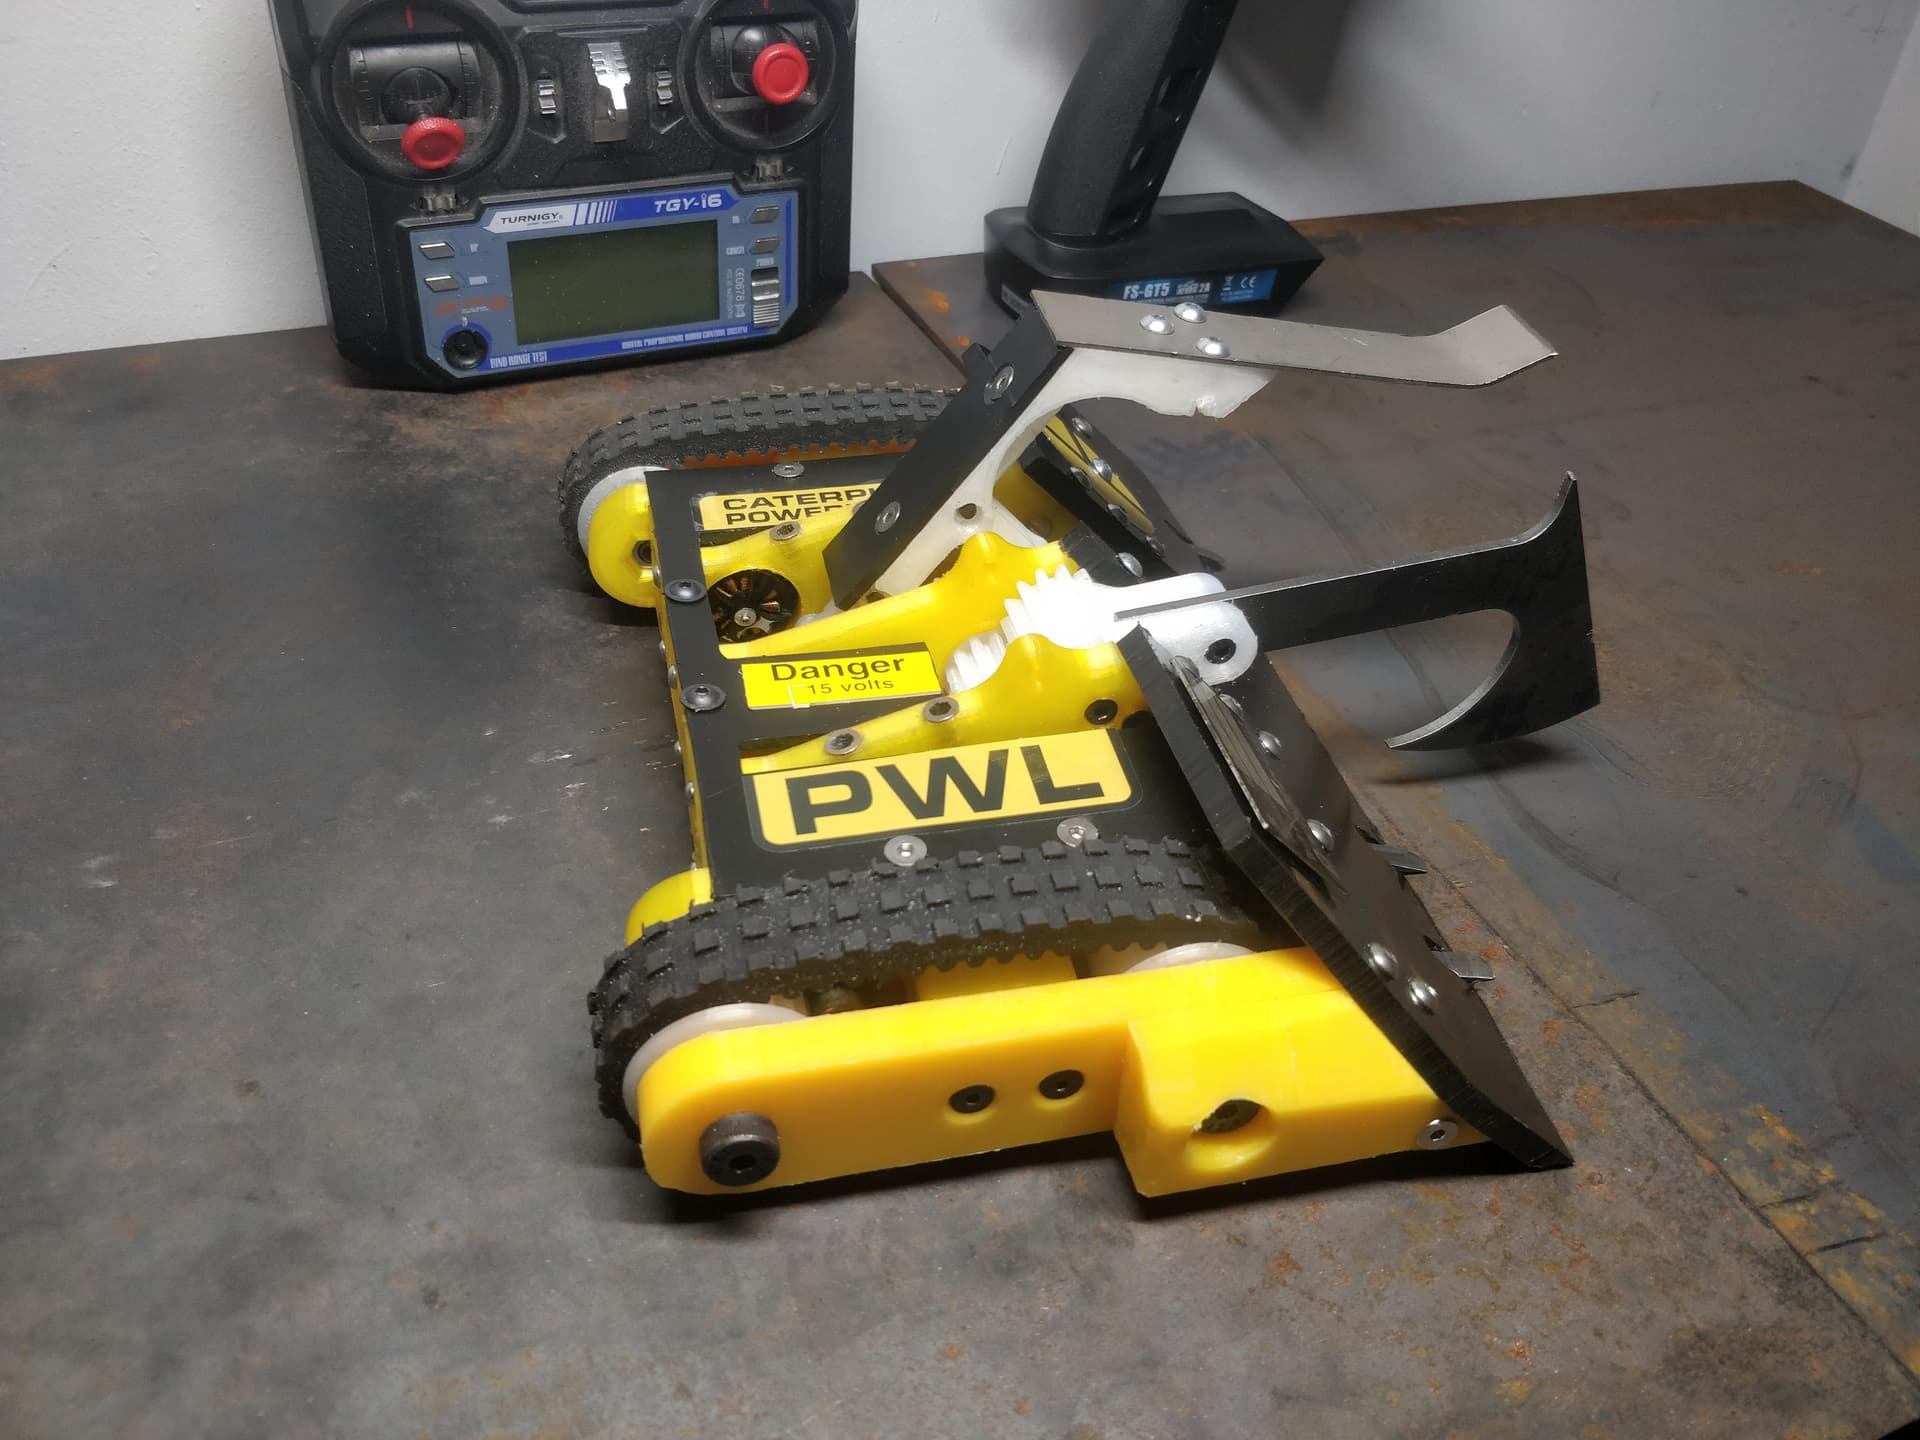
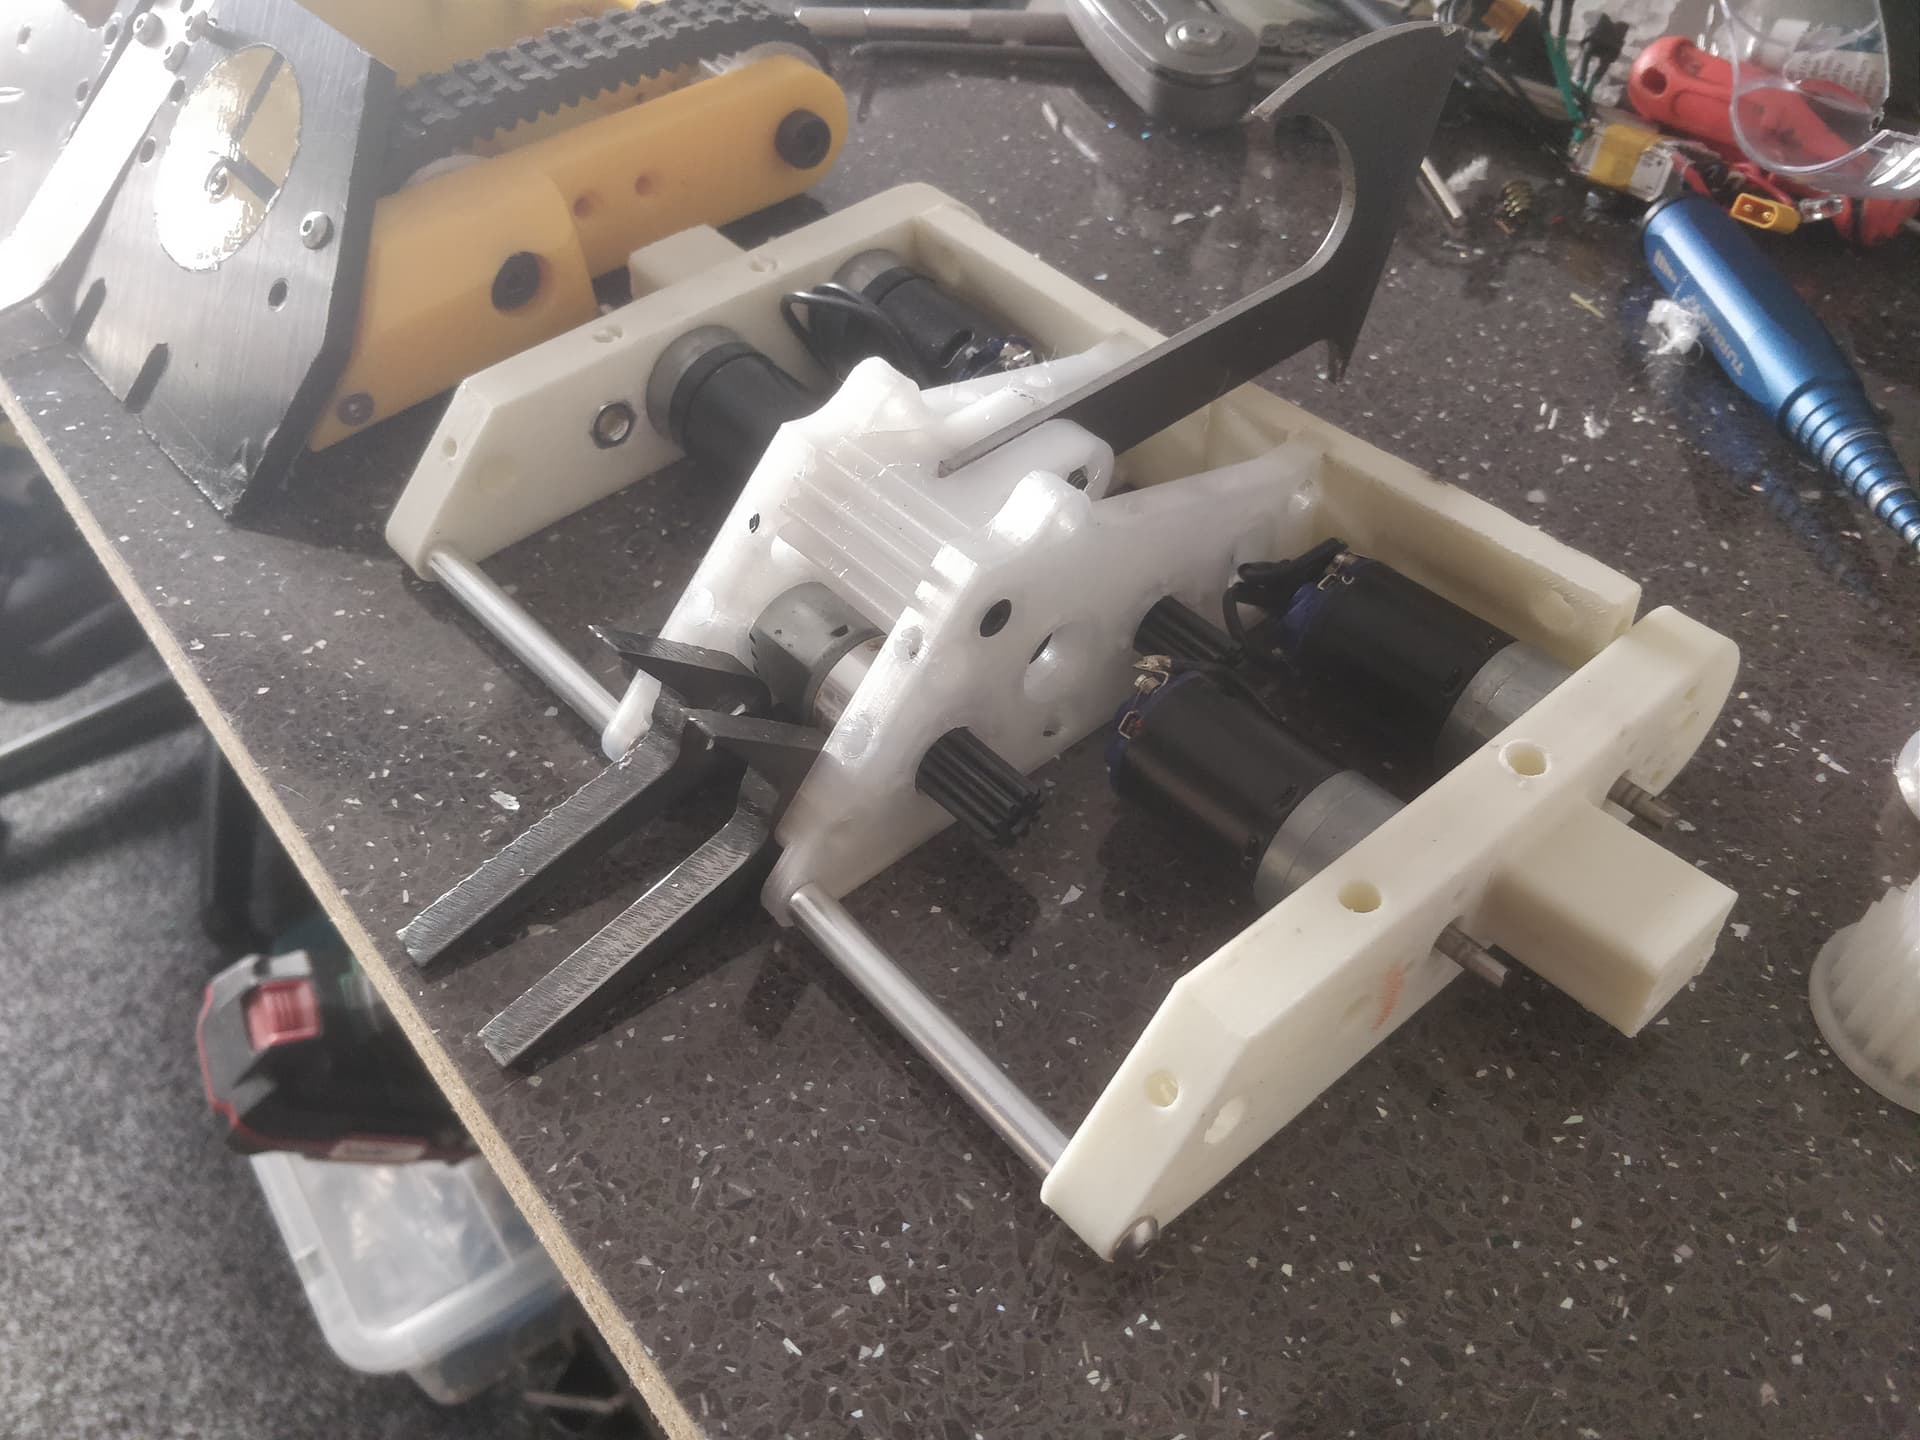
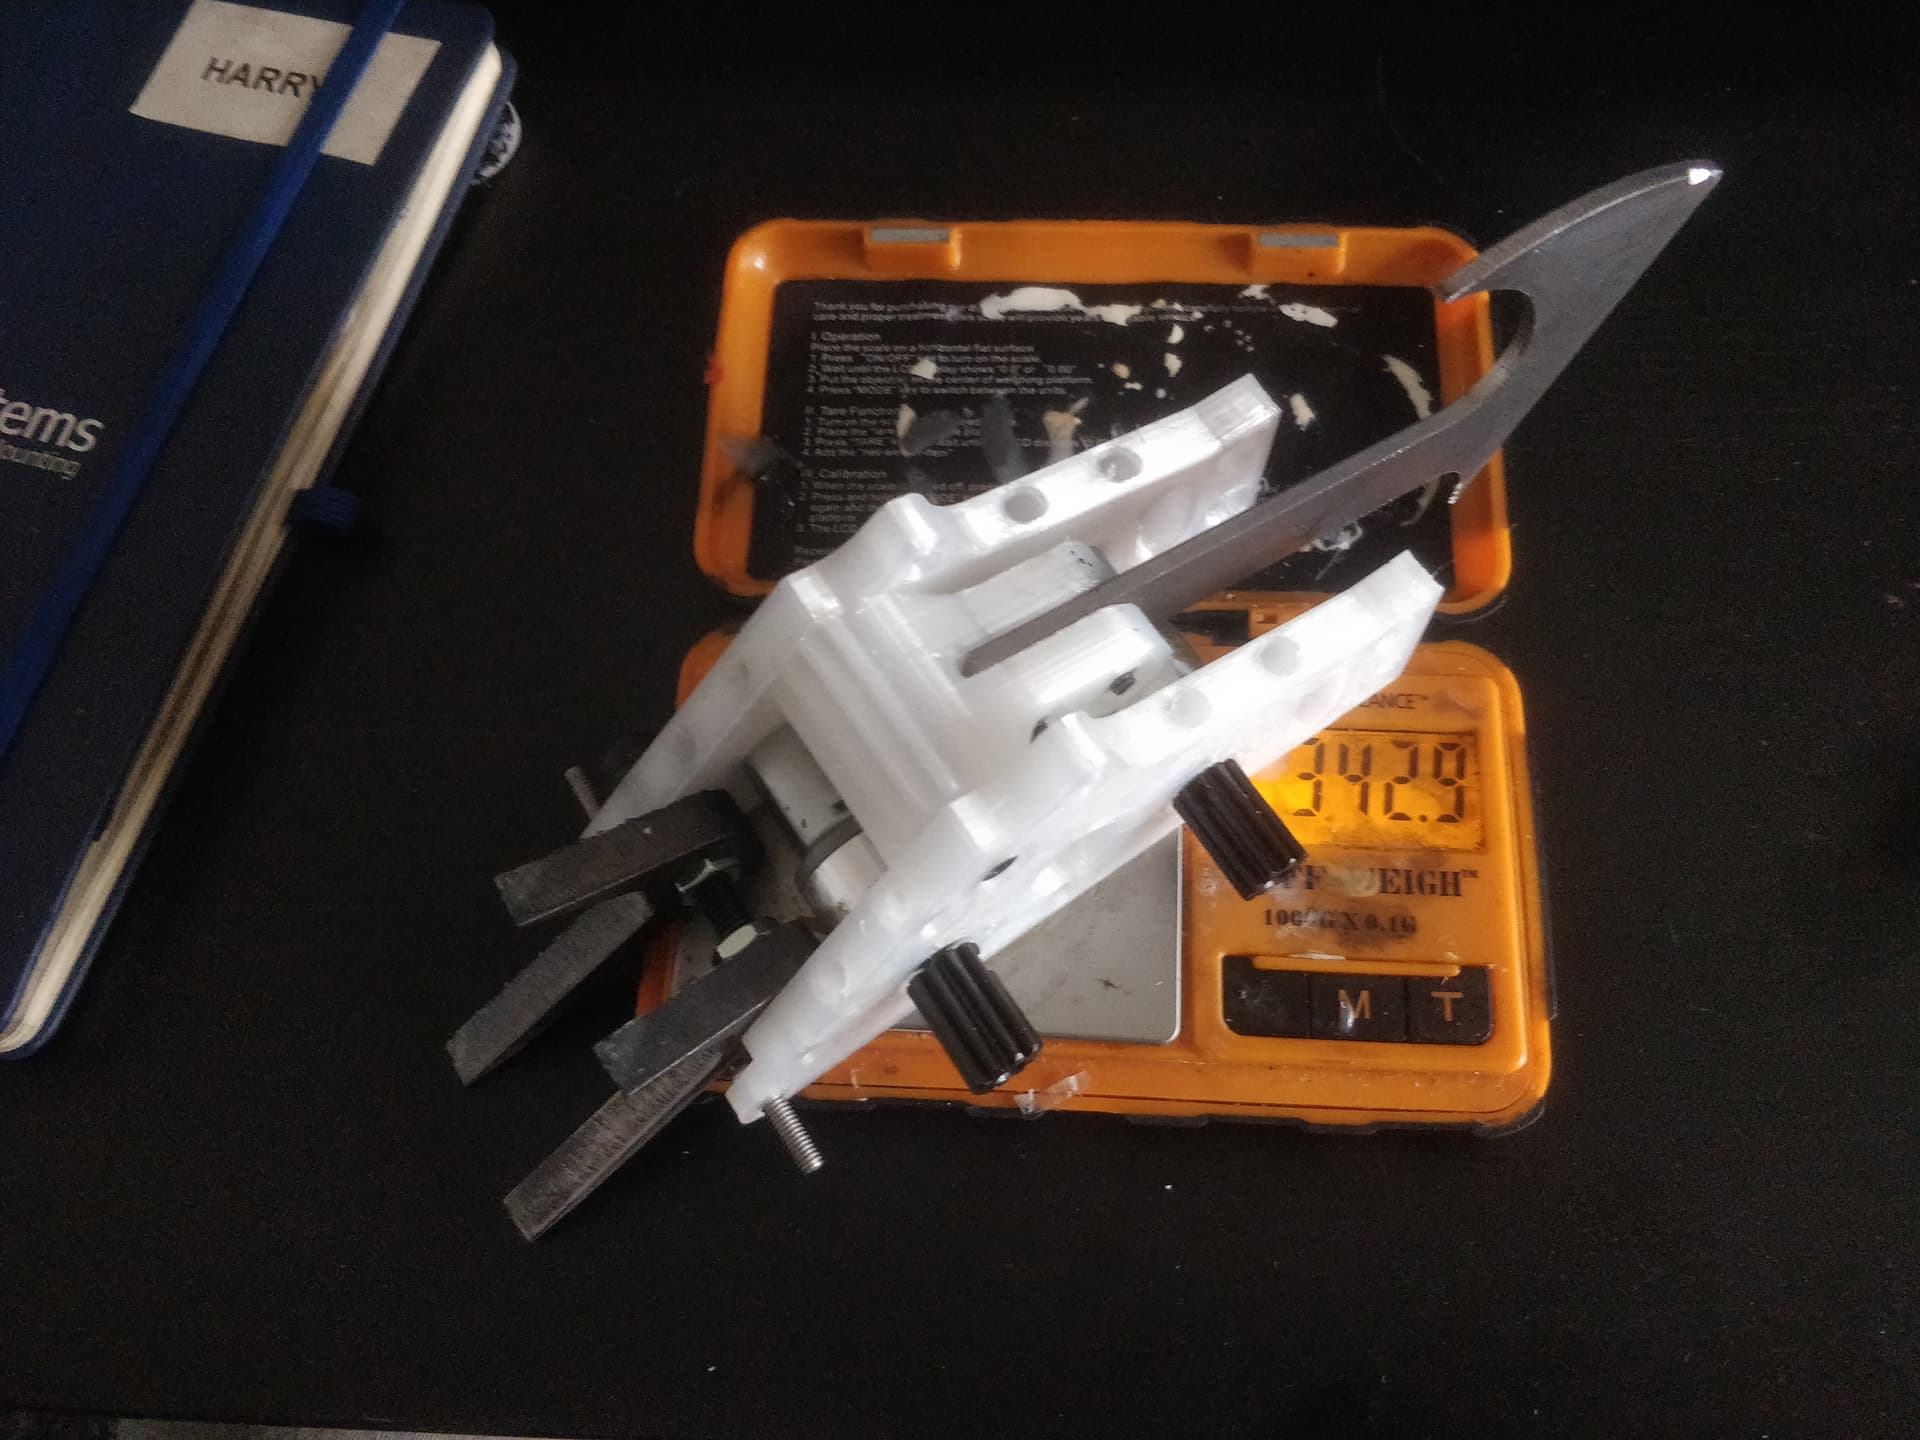
Also I have become boring and added little jabby forklets to ML to try to tryhard a little harder. They are short and stubby (comme moi) but will be better than nothing. They have a little teardrop bulge in order to prevent unintended rotation.

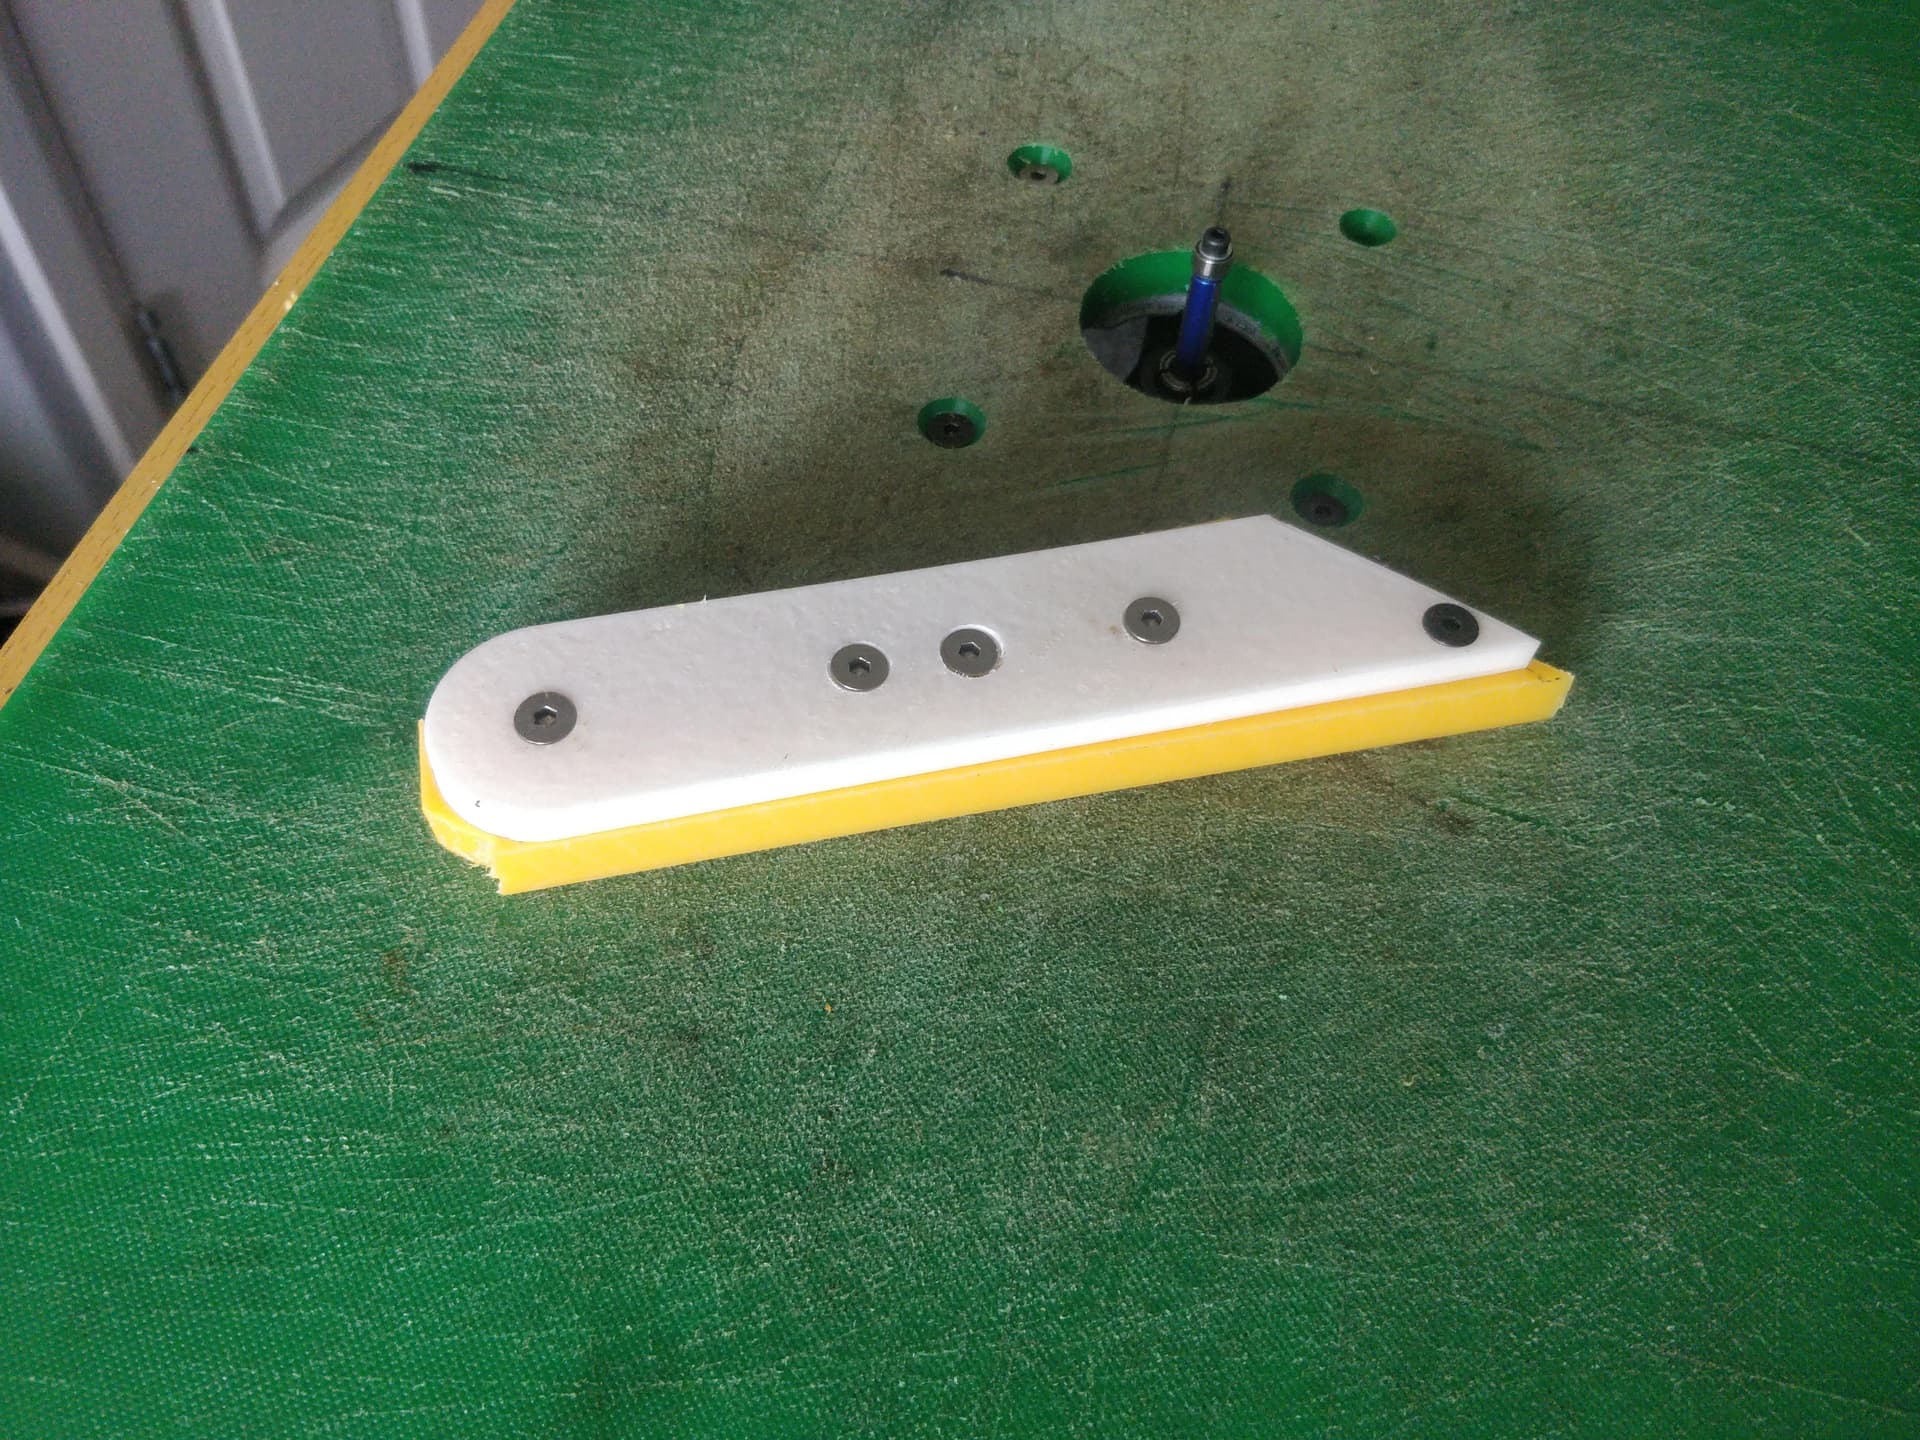
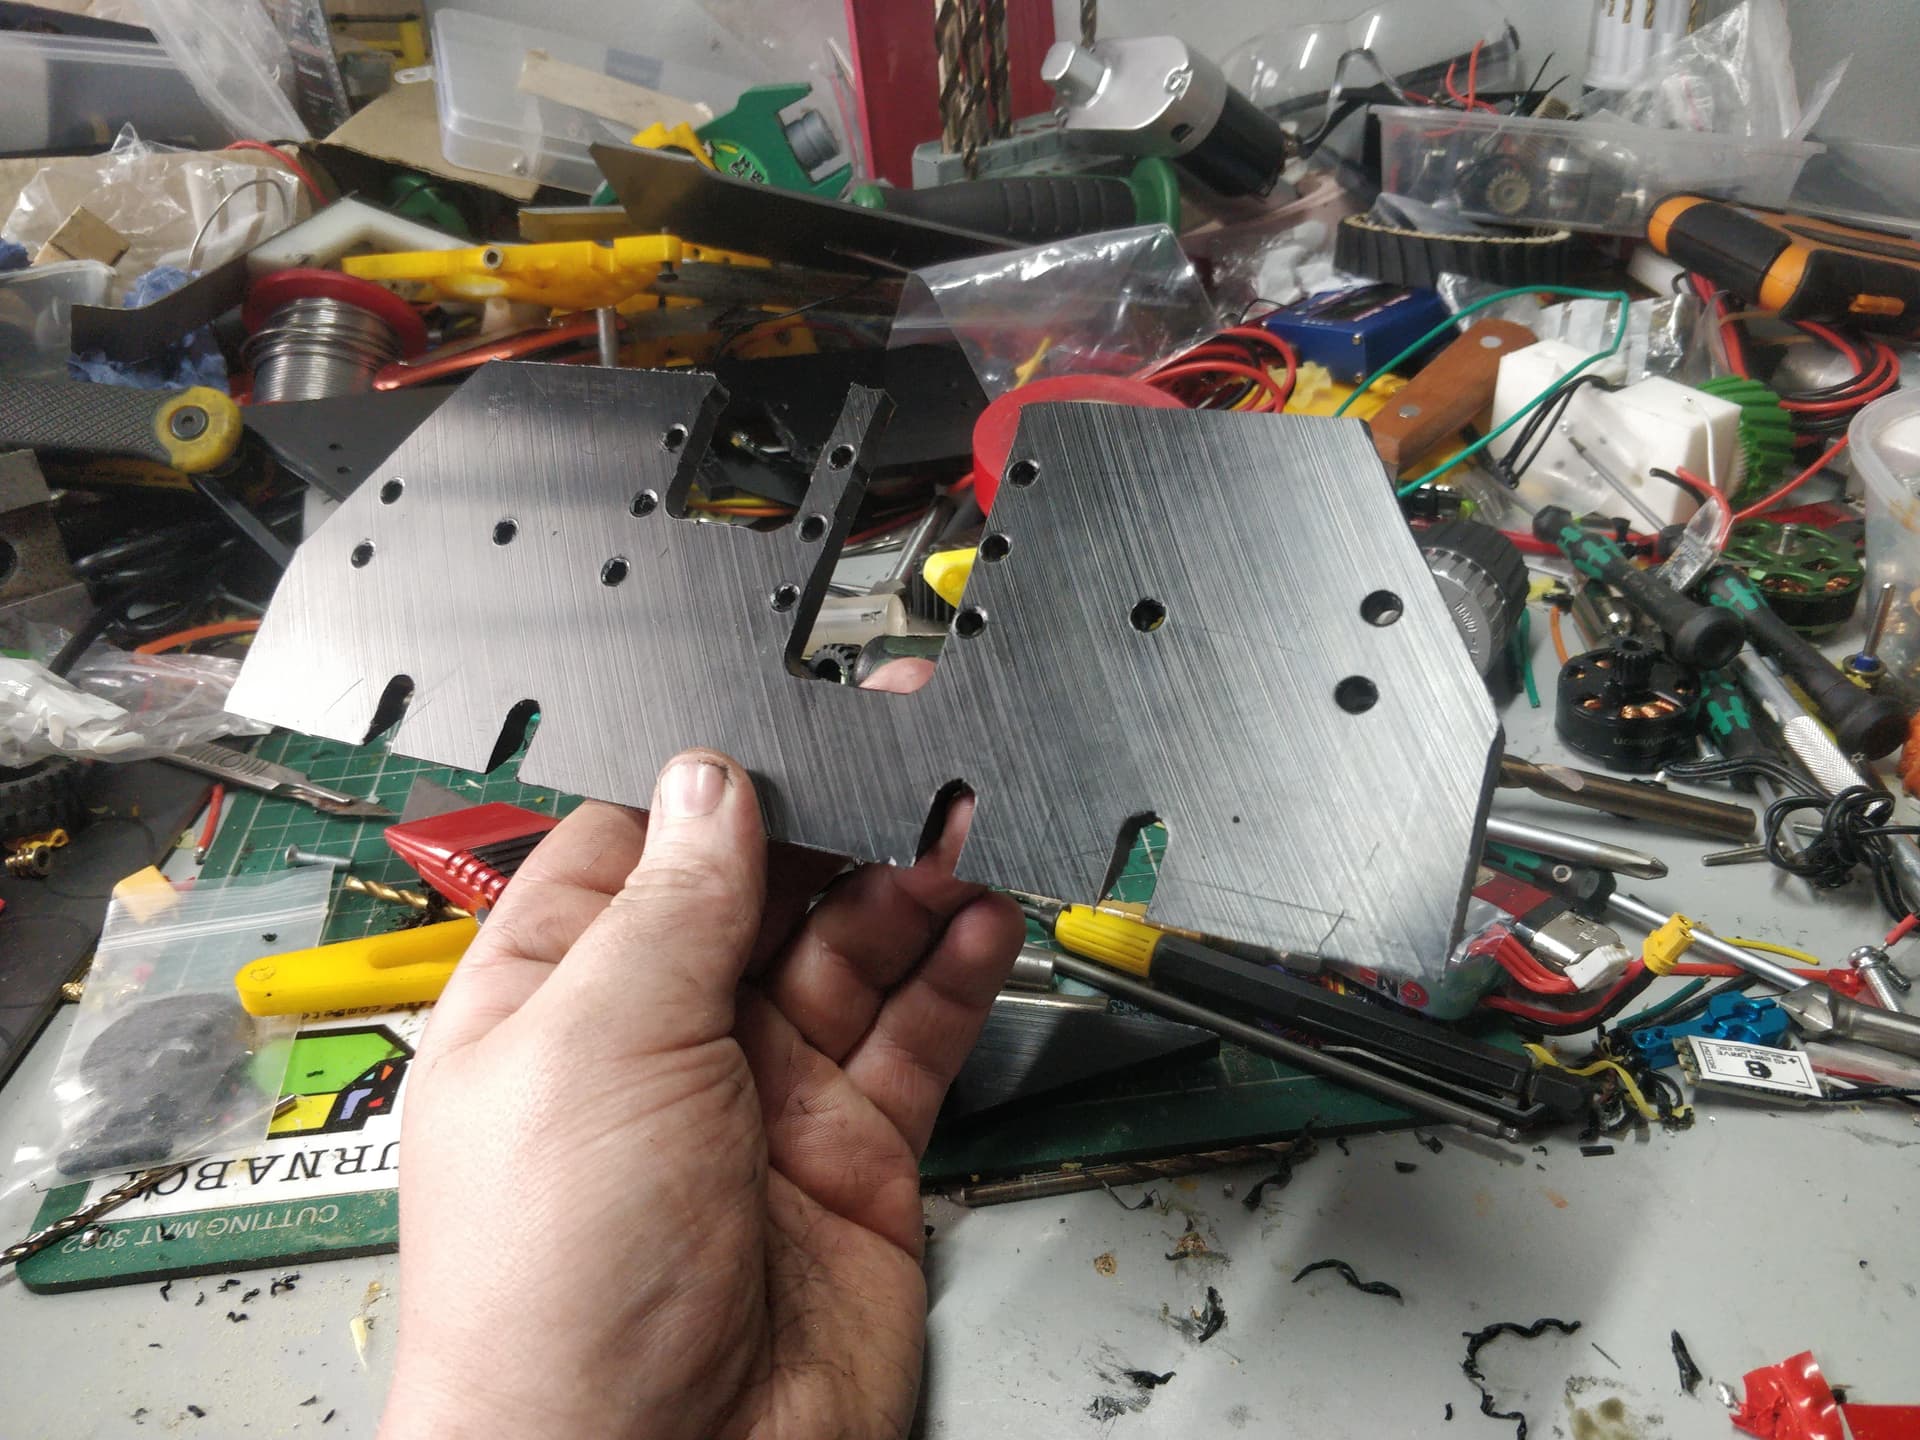
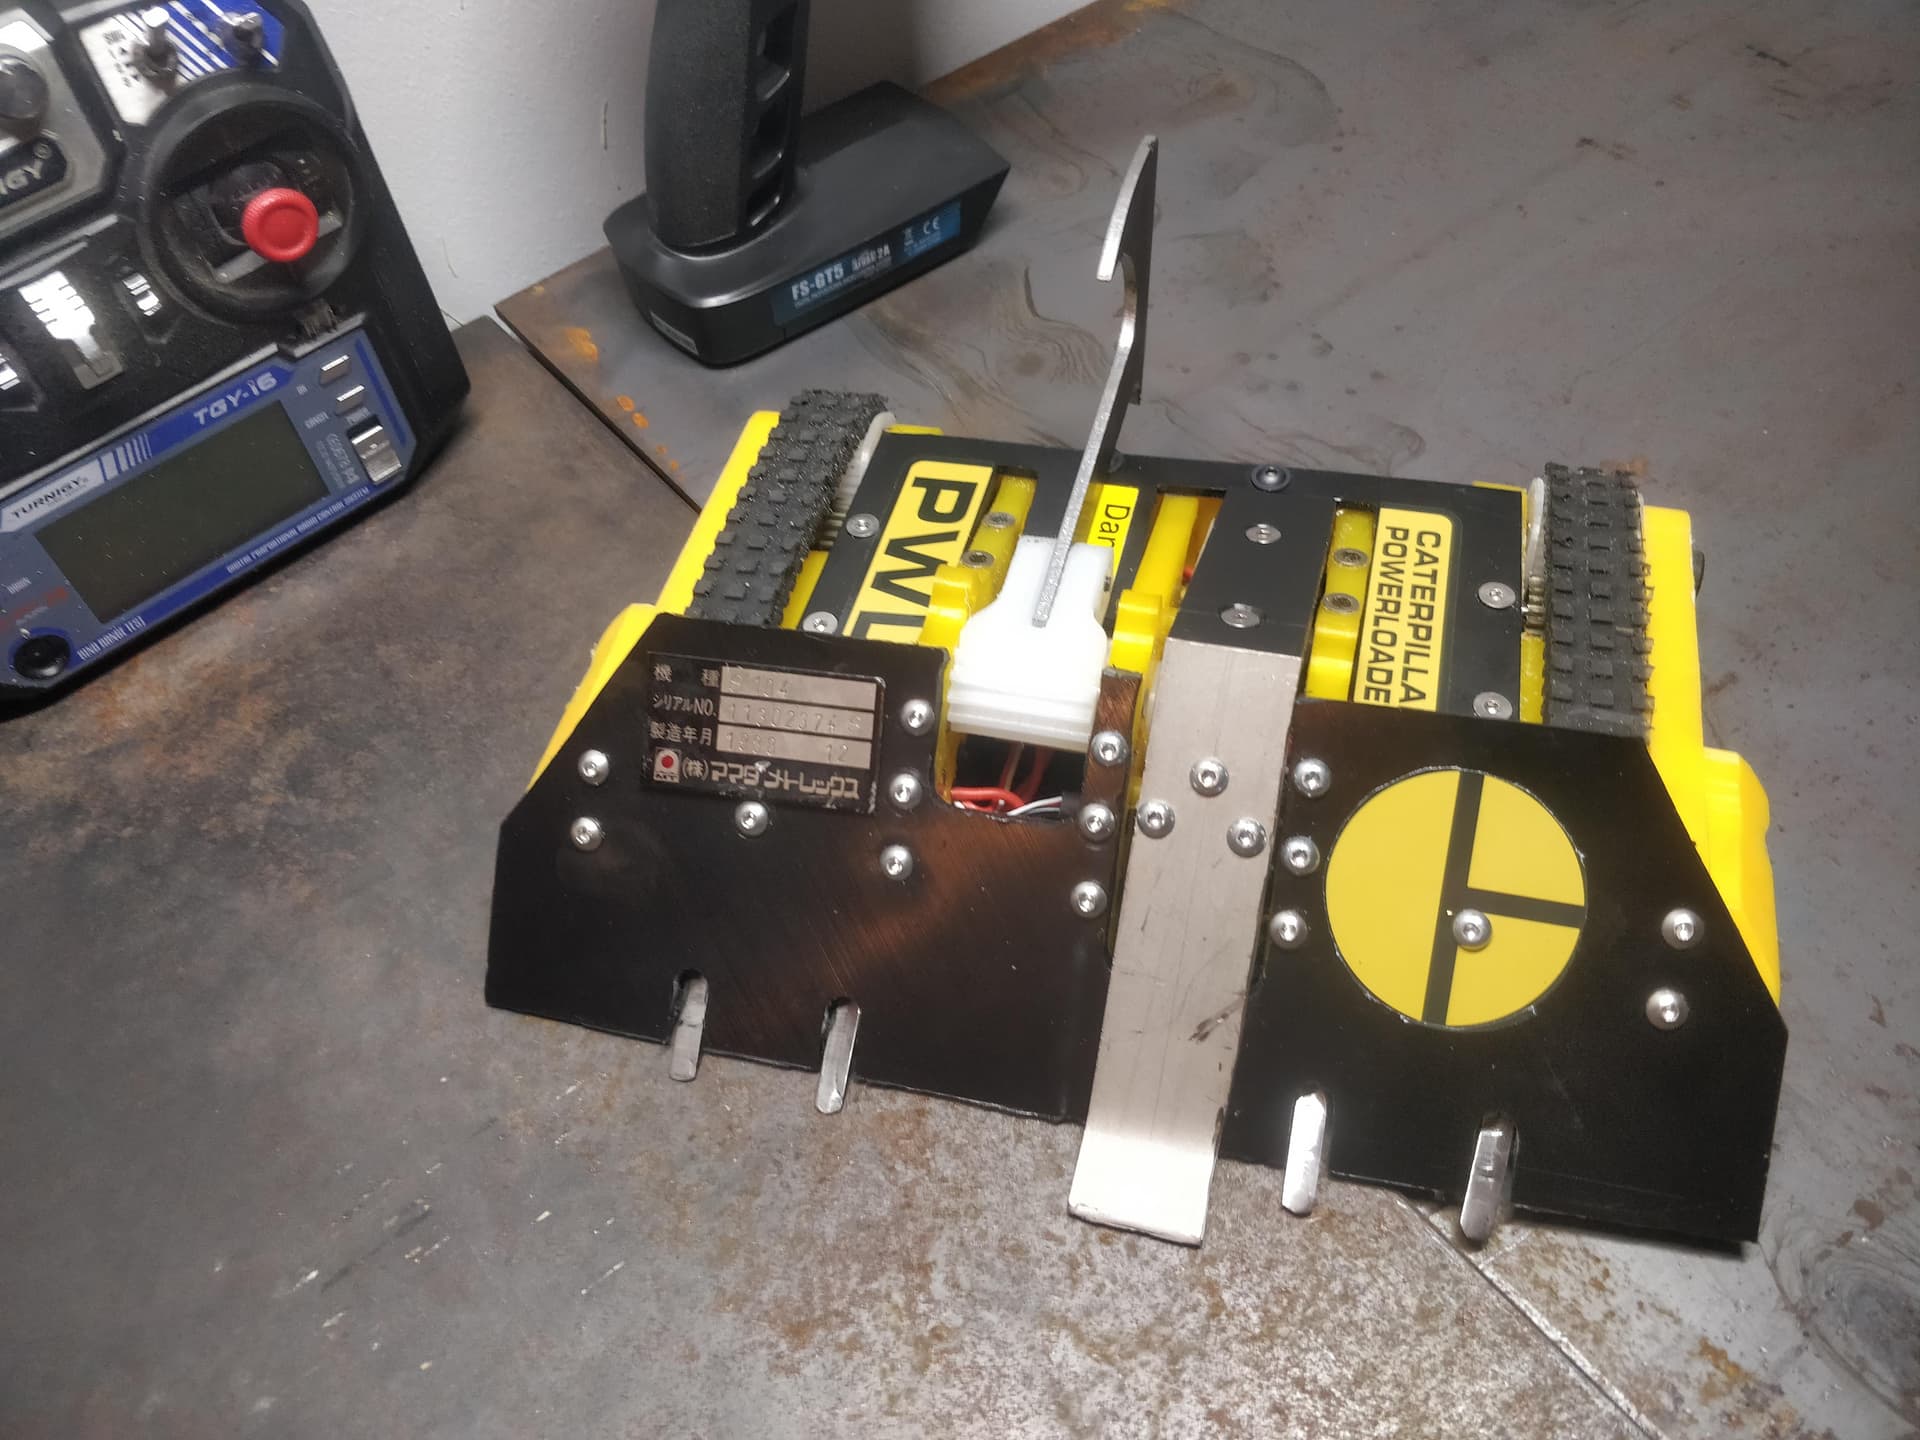
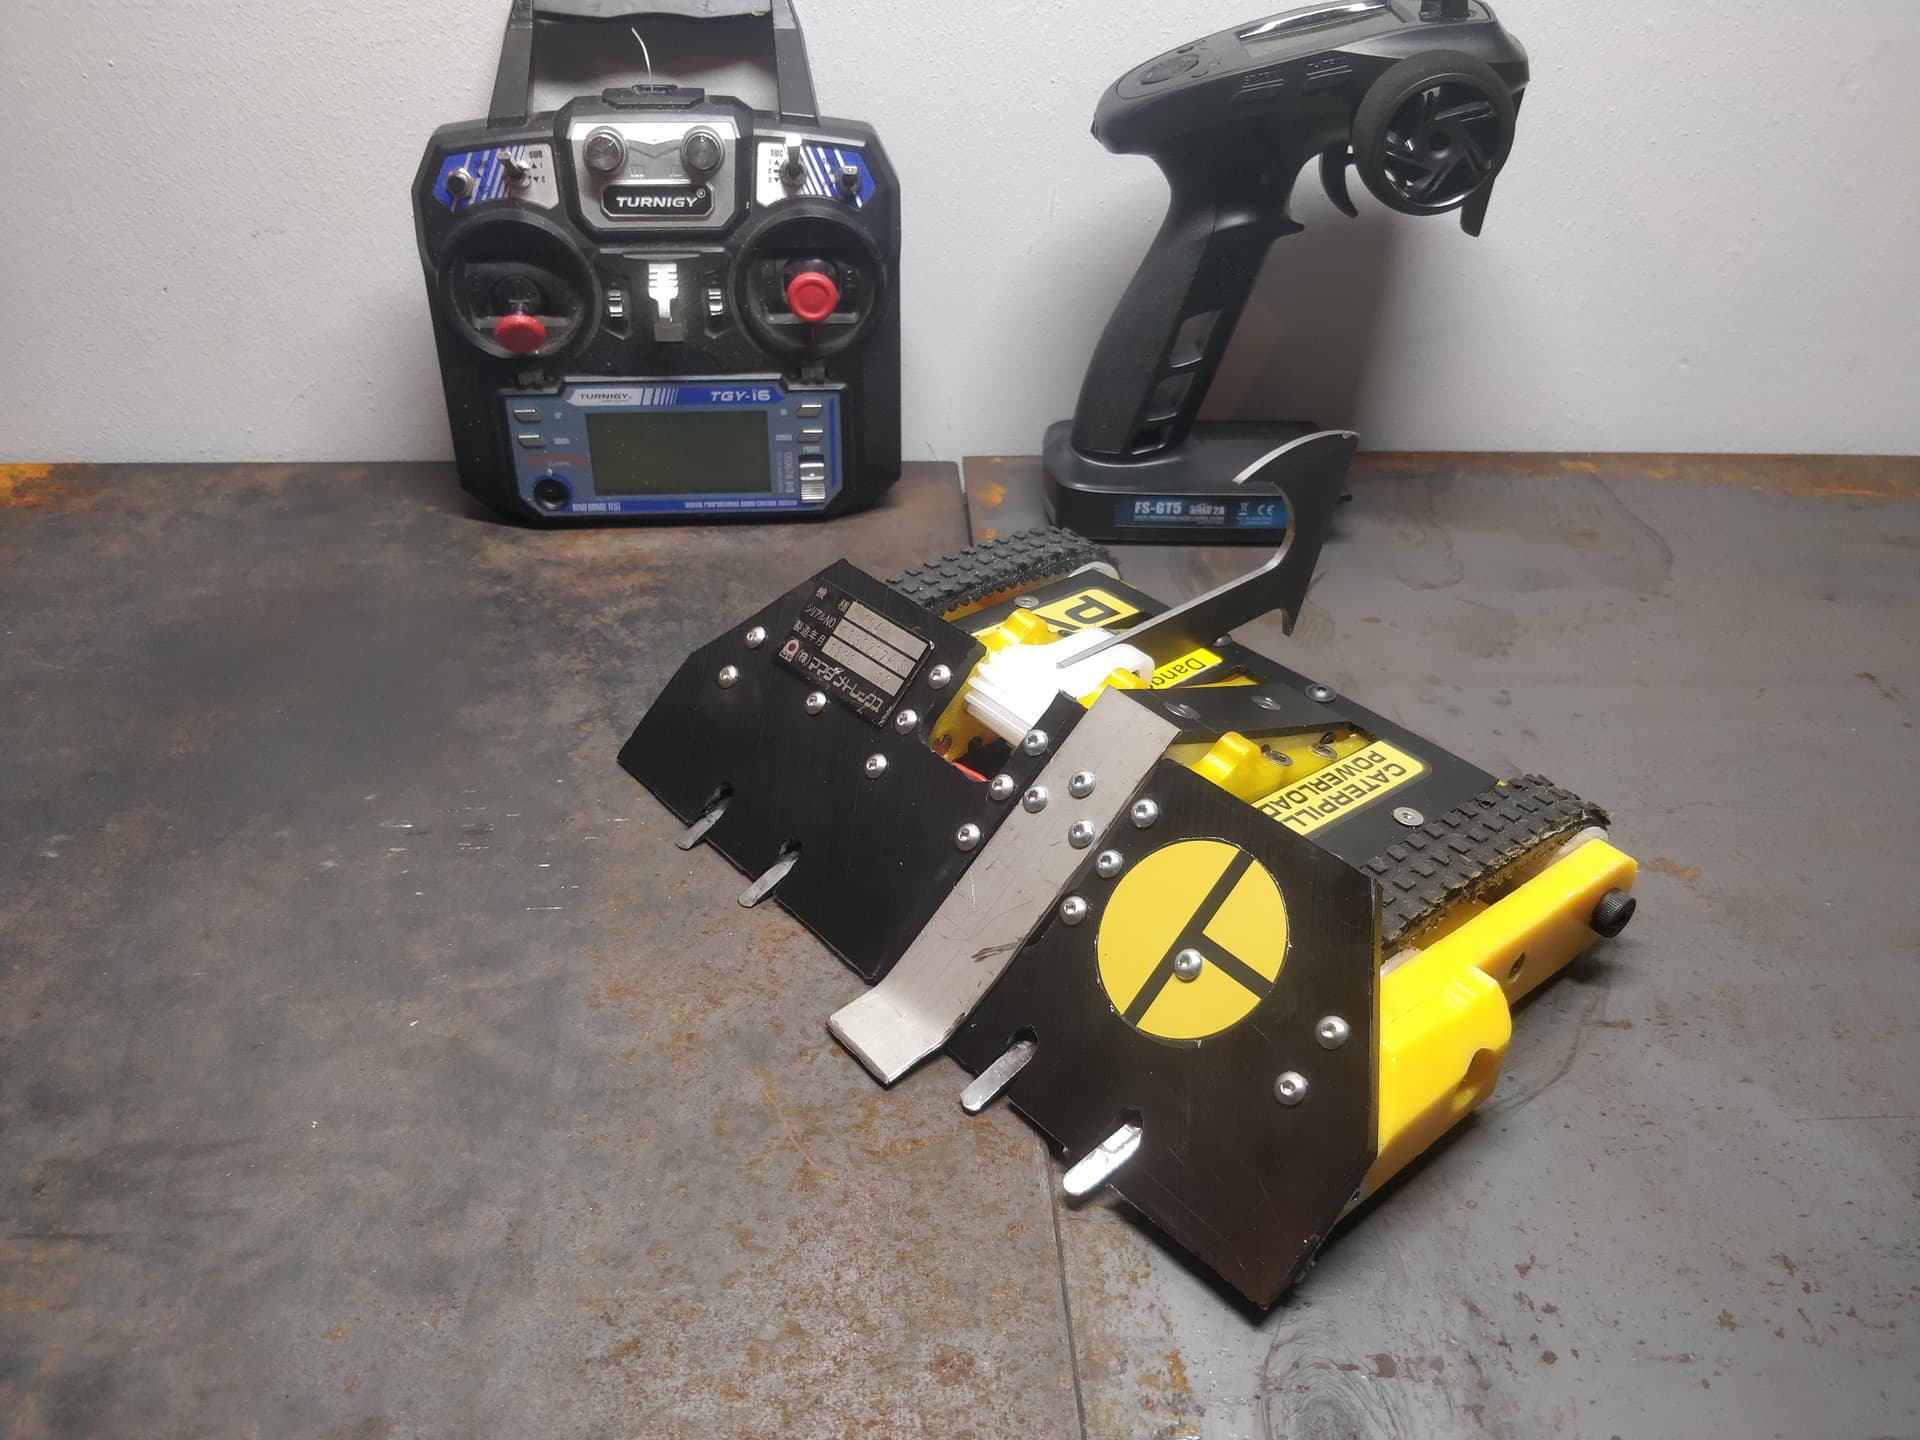
I did a very rough and ready print of a template for my wedge to make out of 6mm UHMW and routed it out. It came out rather well and I was pretty pleased. Big love to this method!

Who needs CNC? Well, me in order to make the template to then handcut the part BUT STILL.

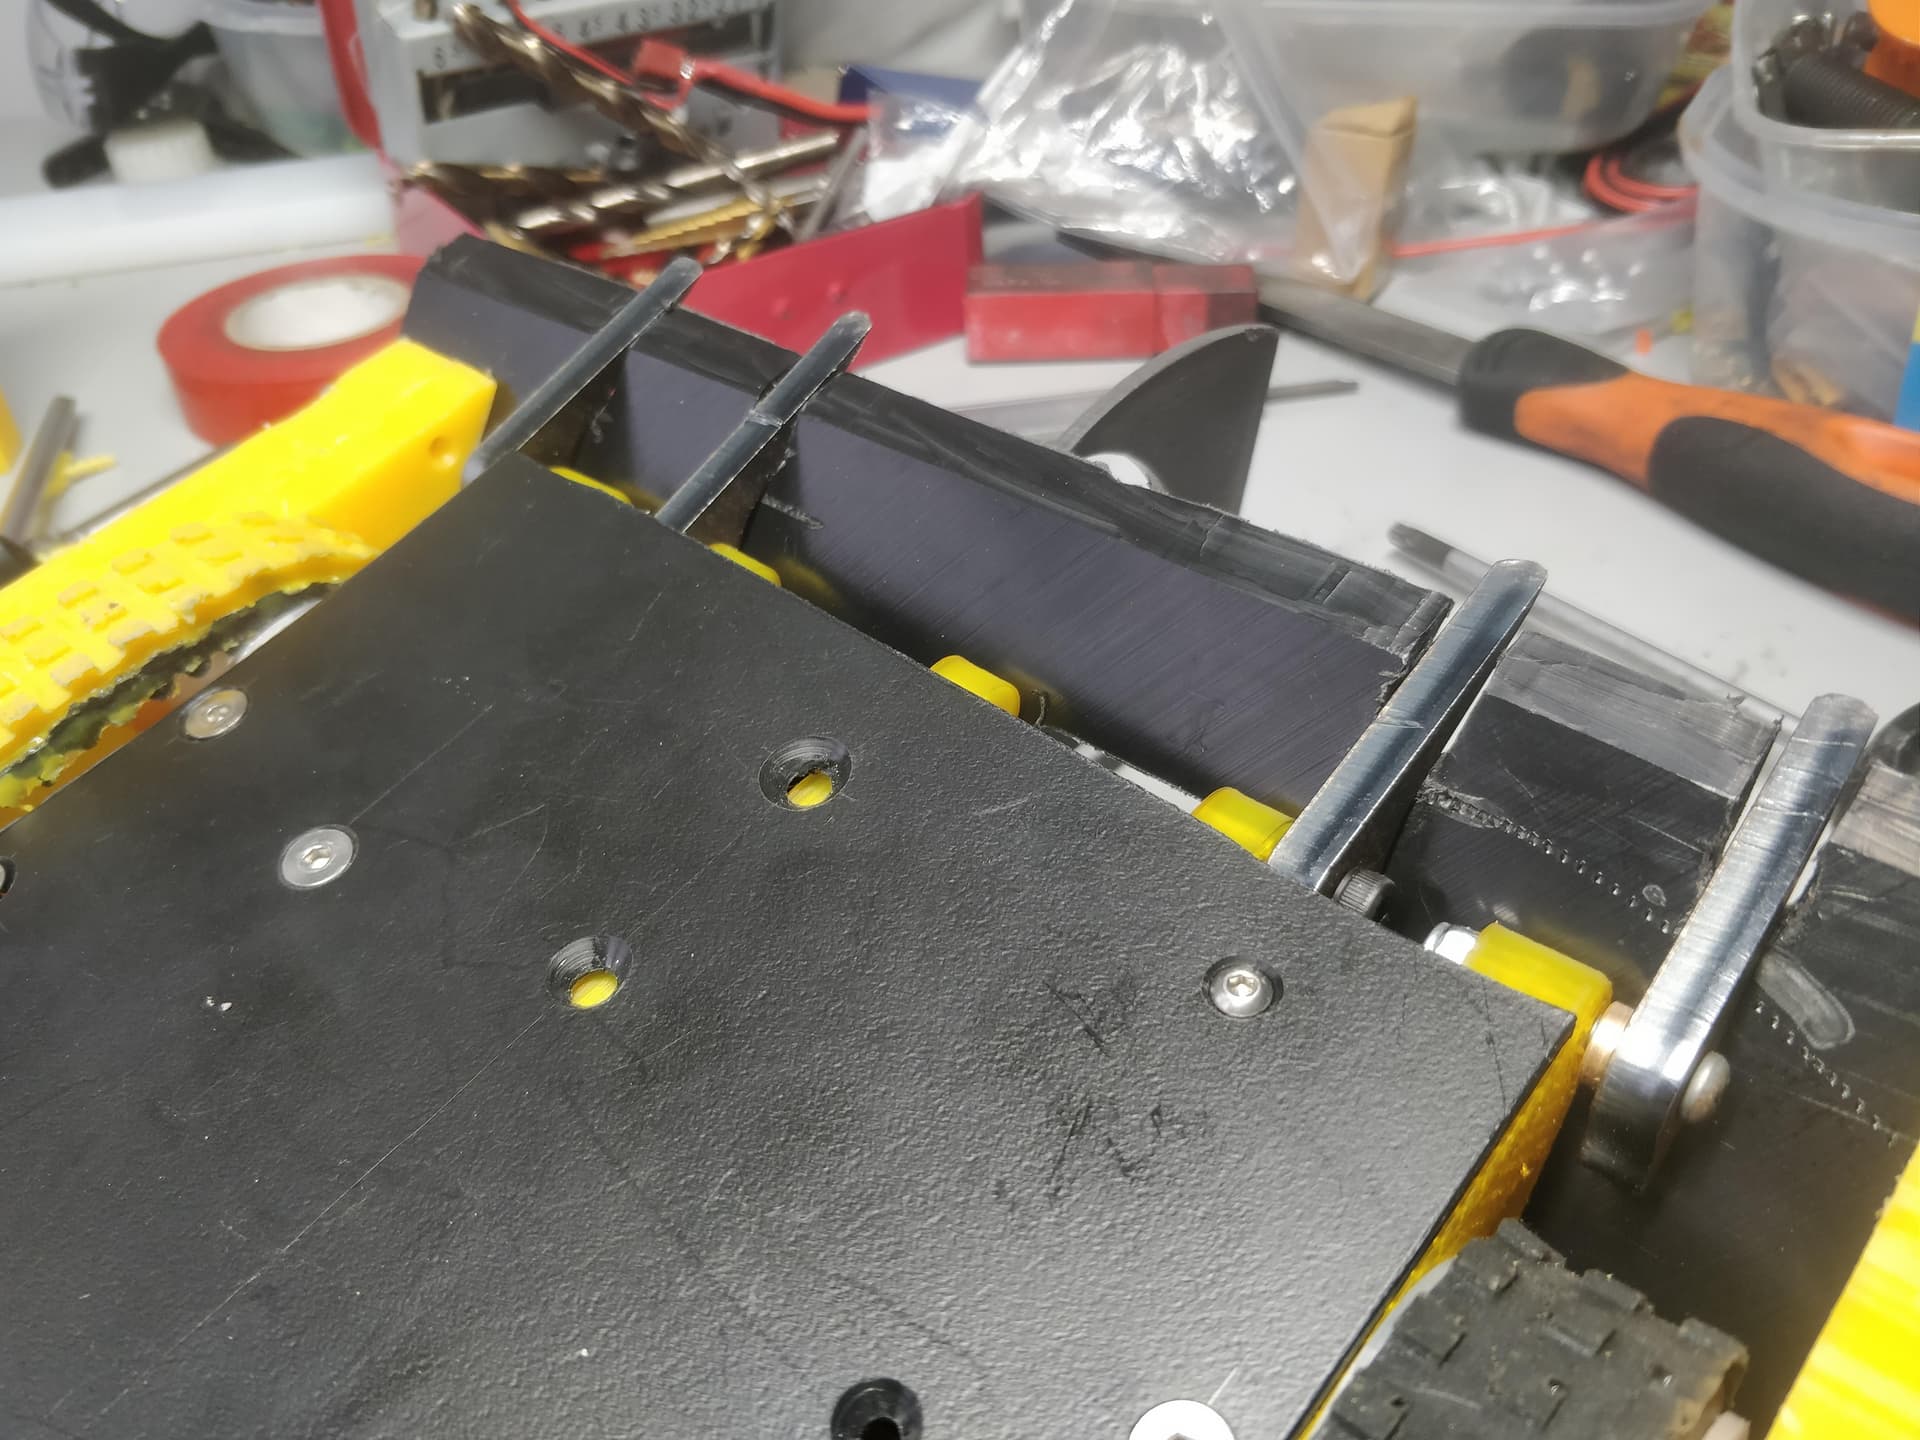
The forks sit in the gaps quite neatly too.

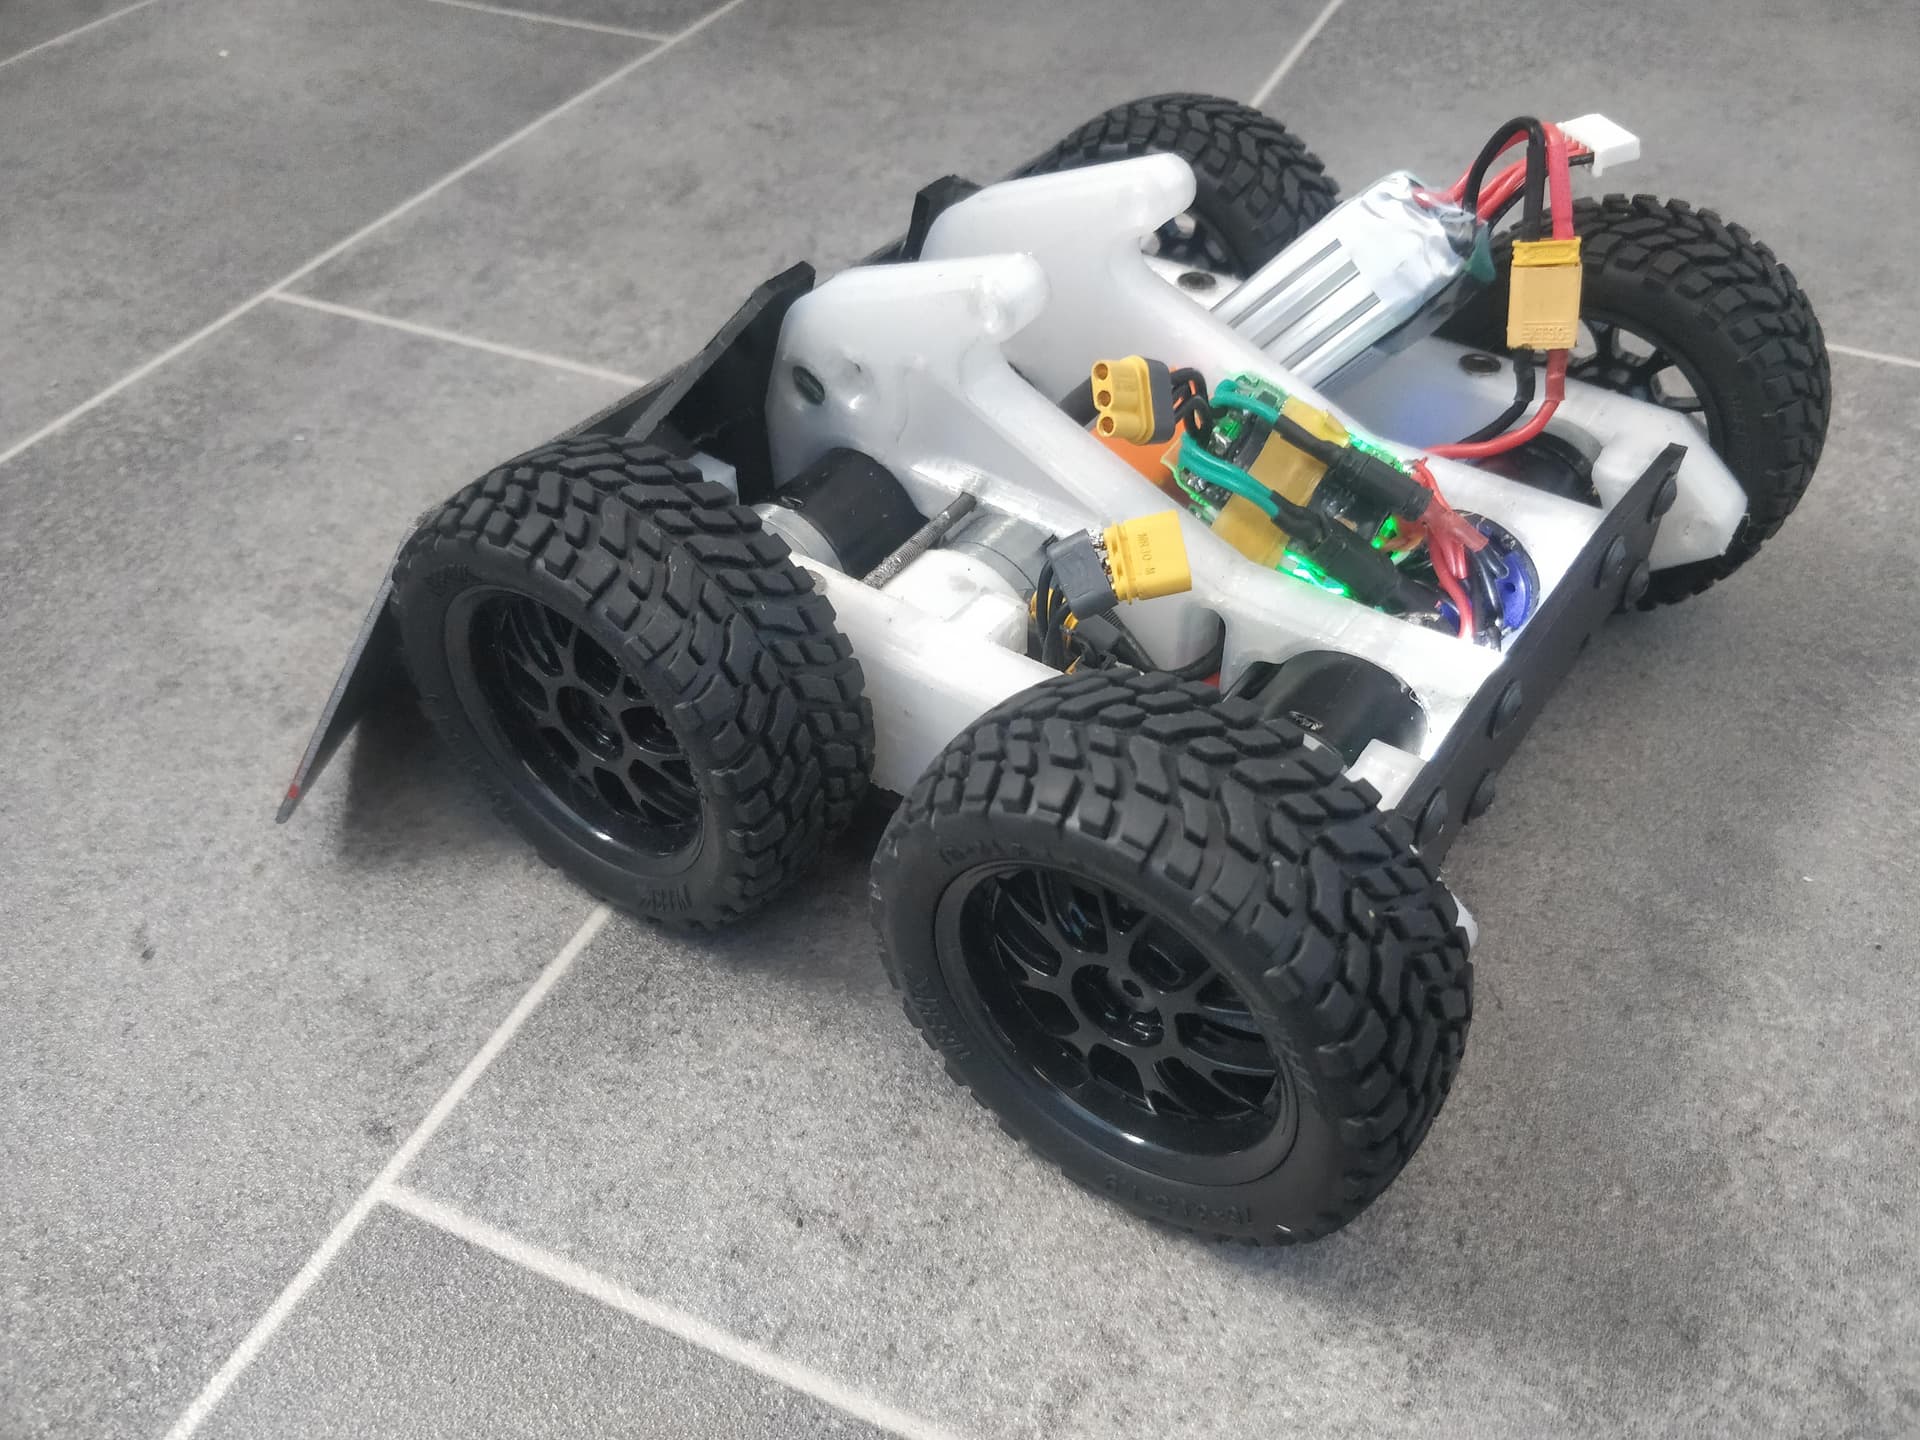
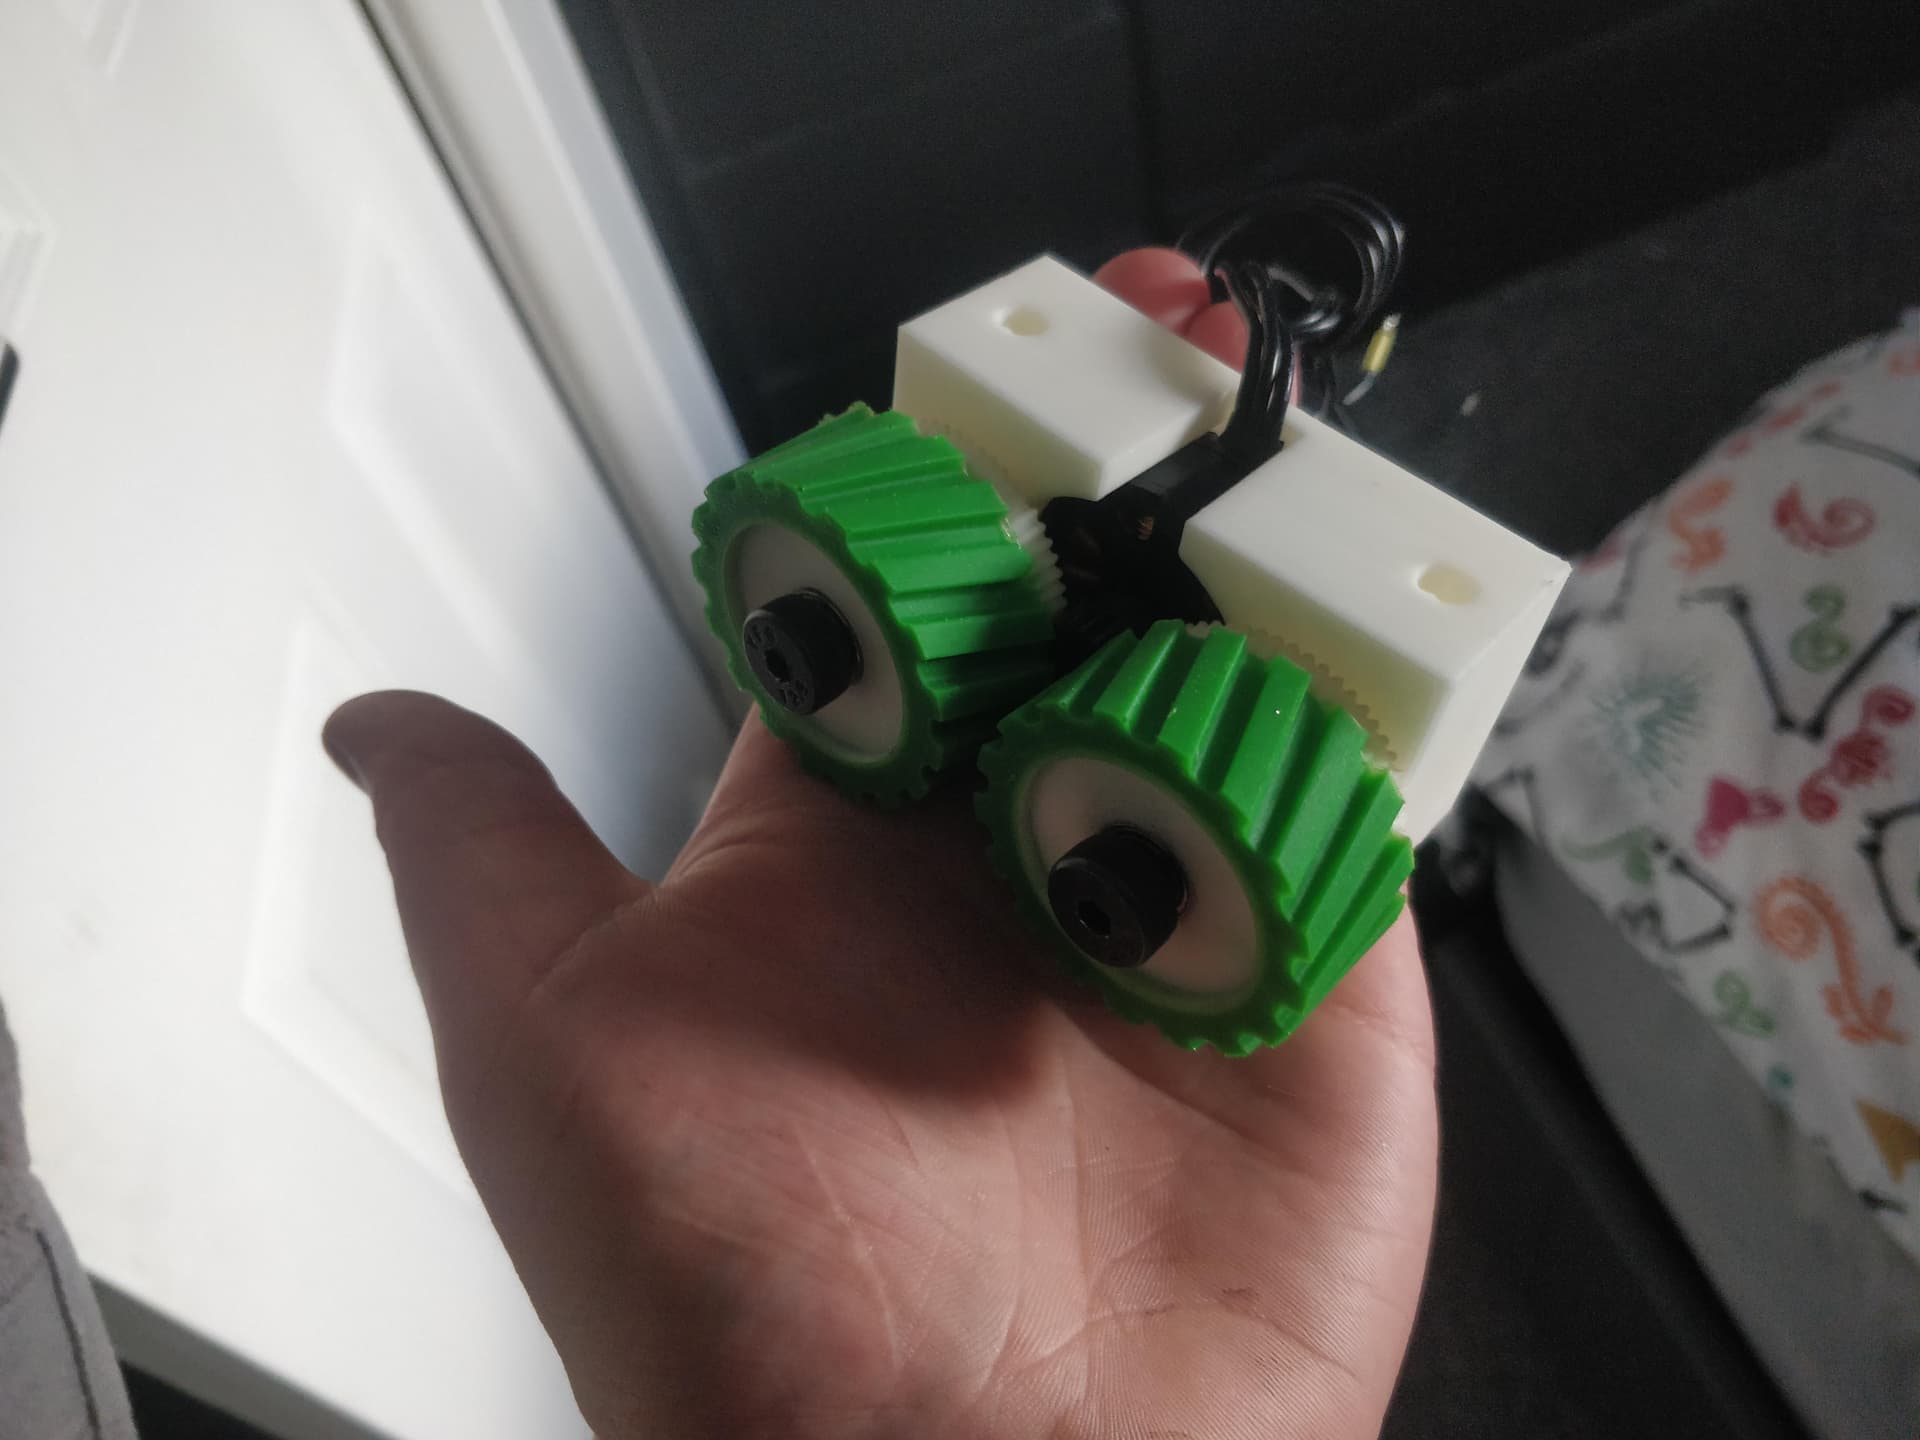
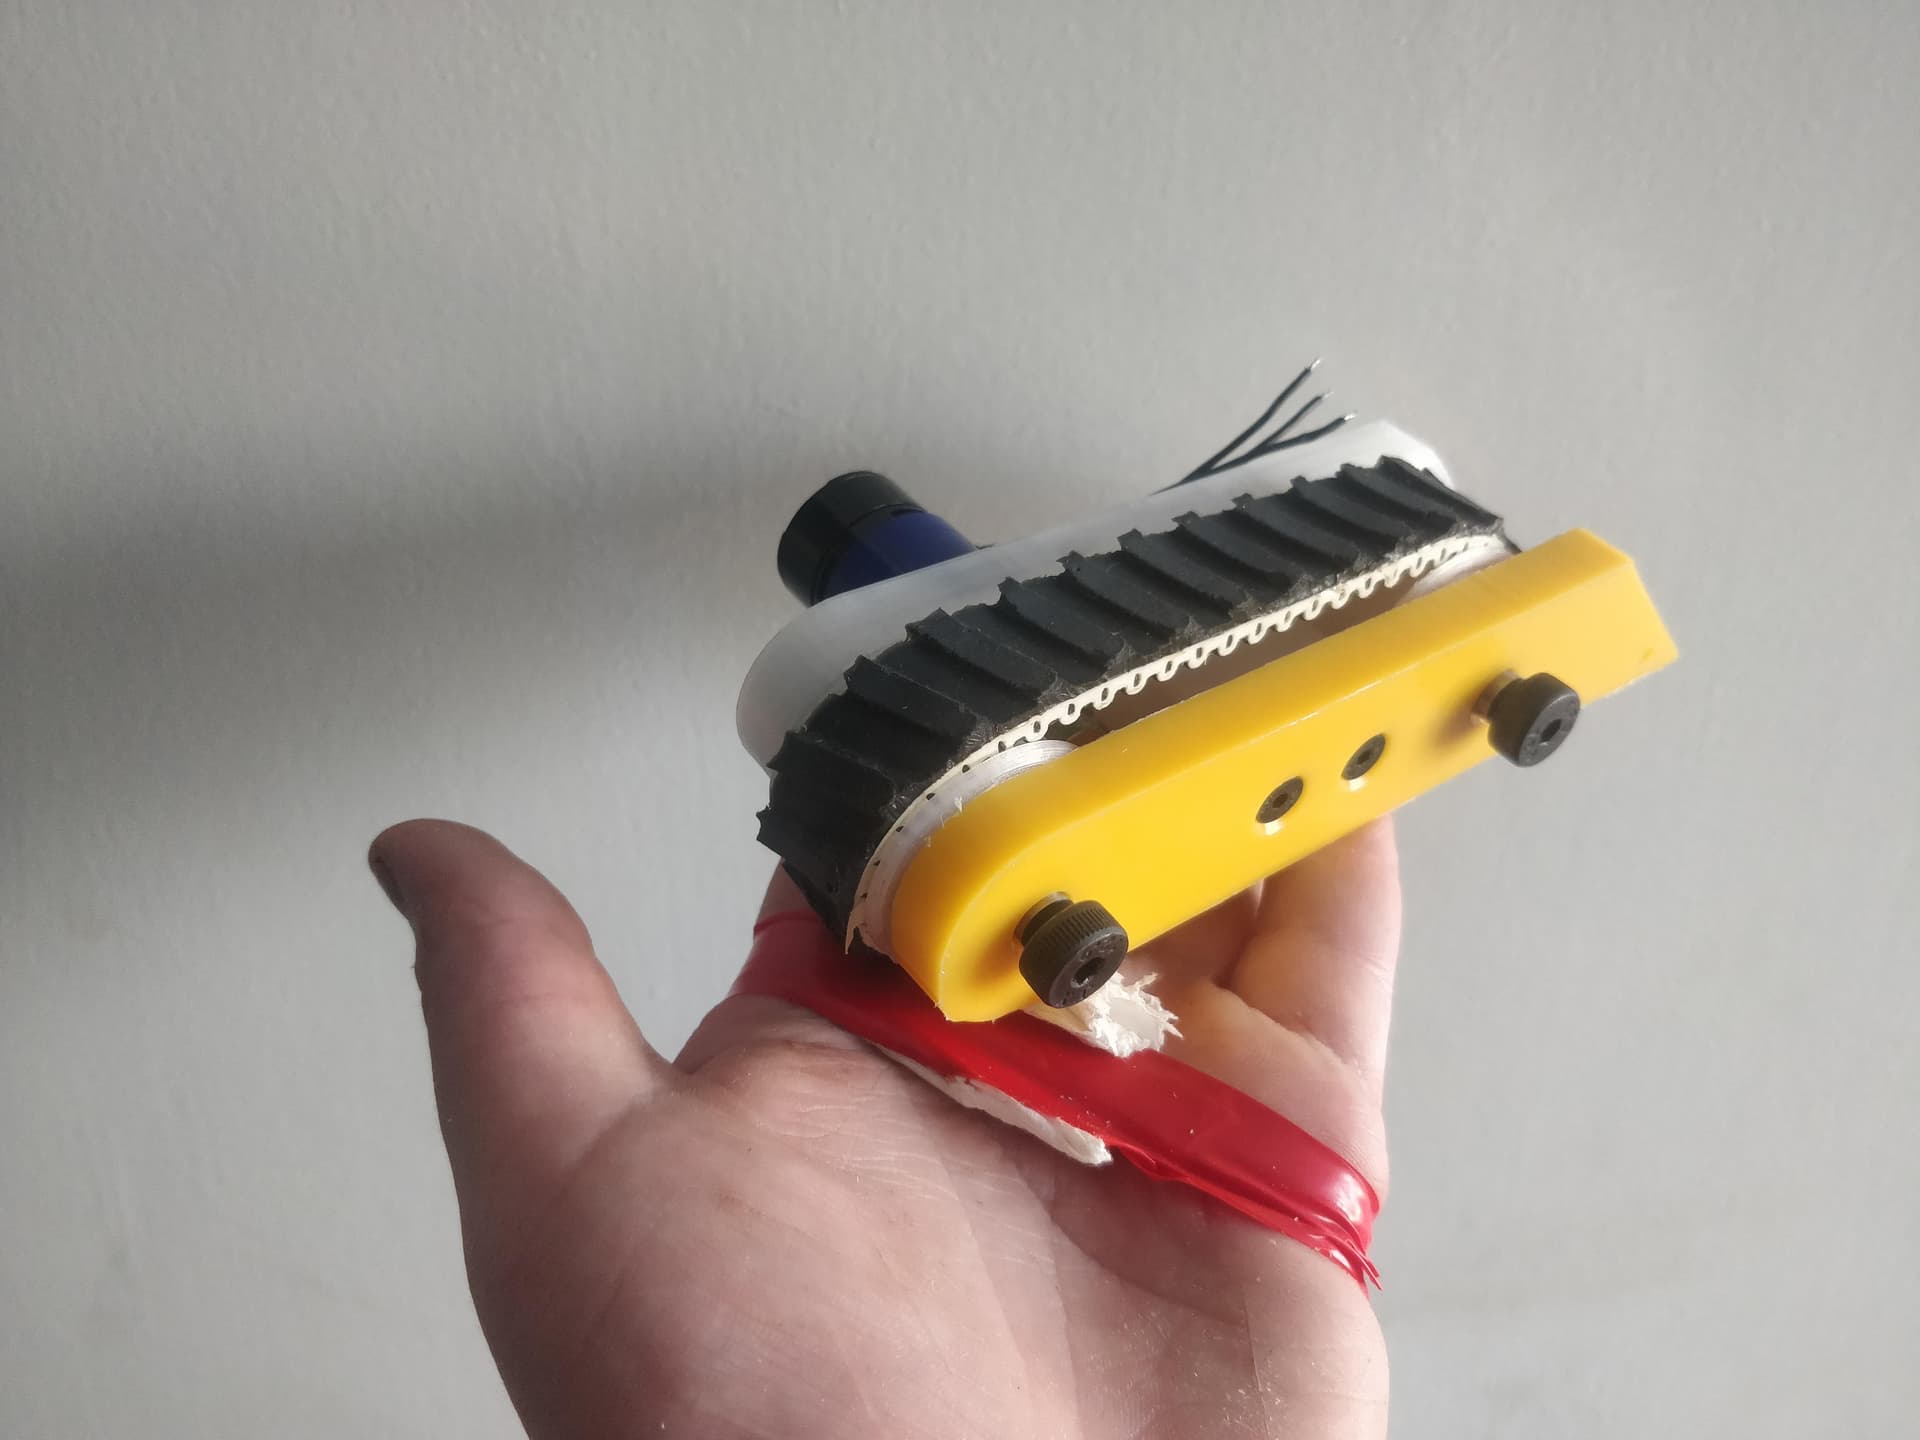
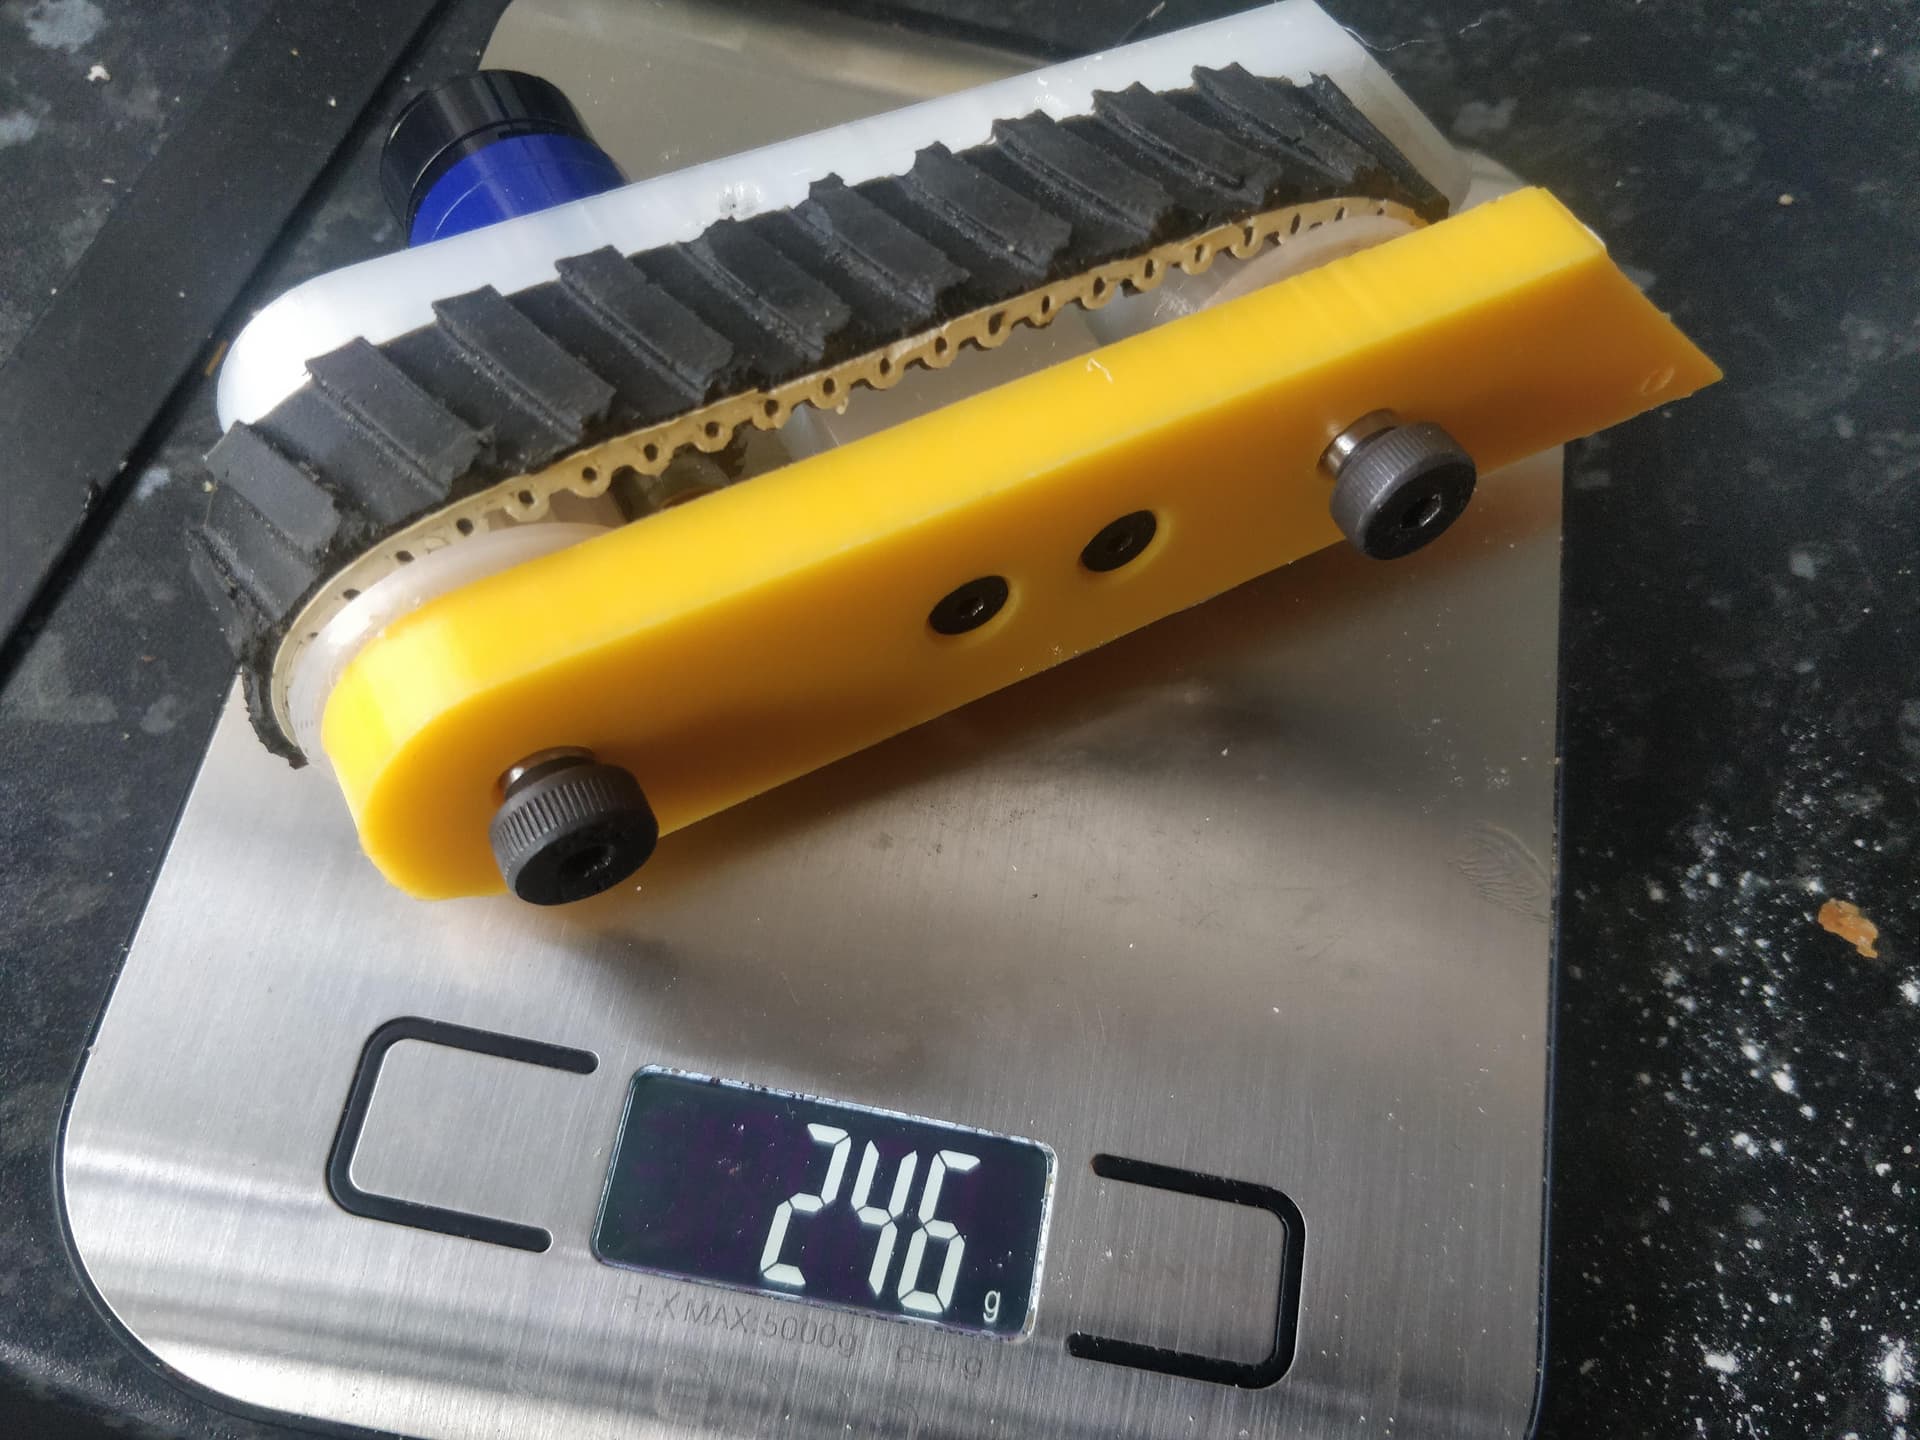
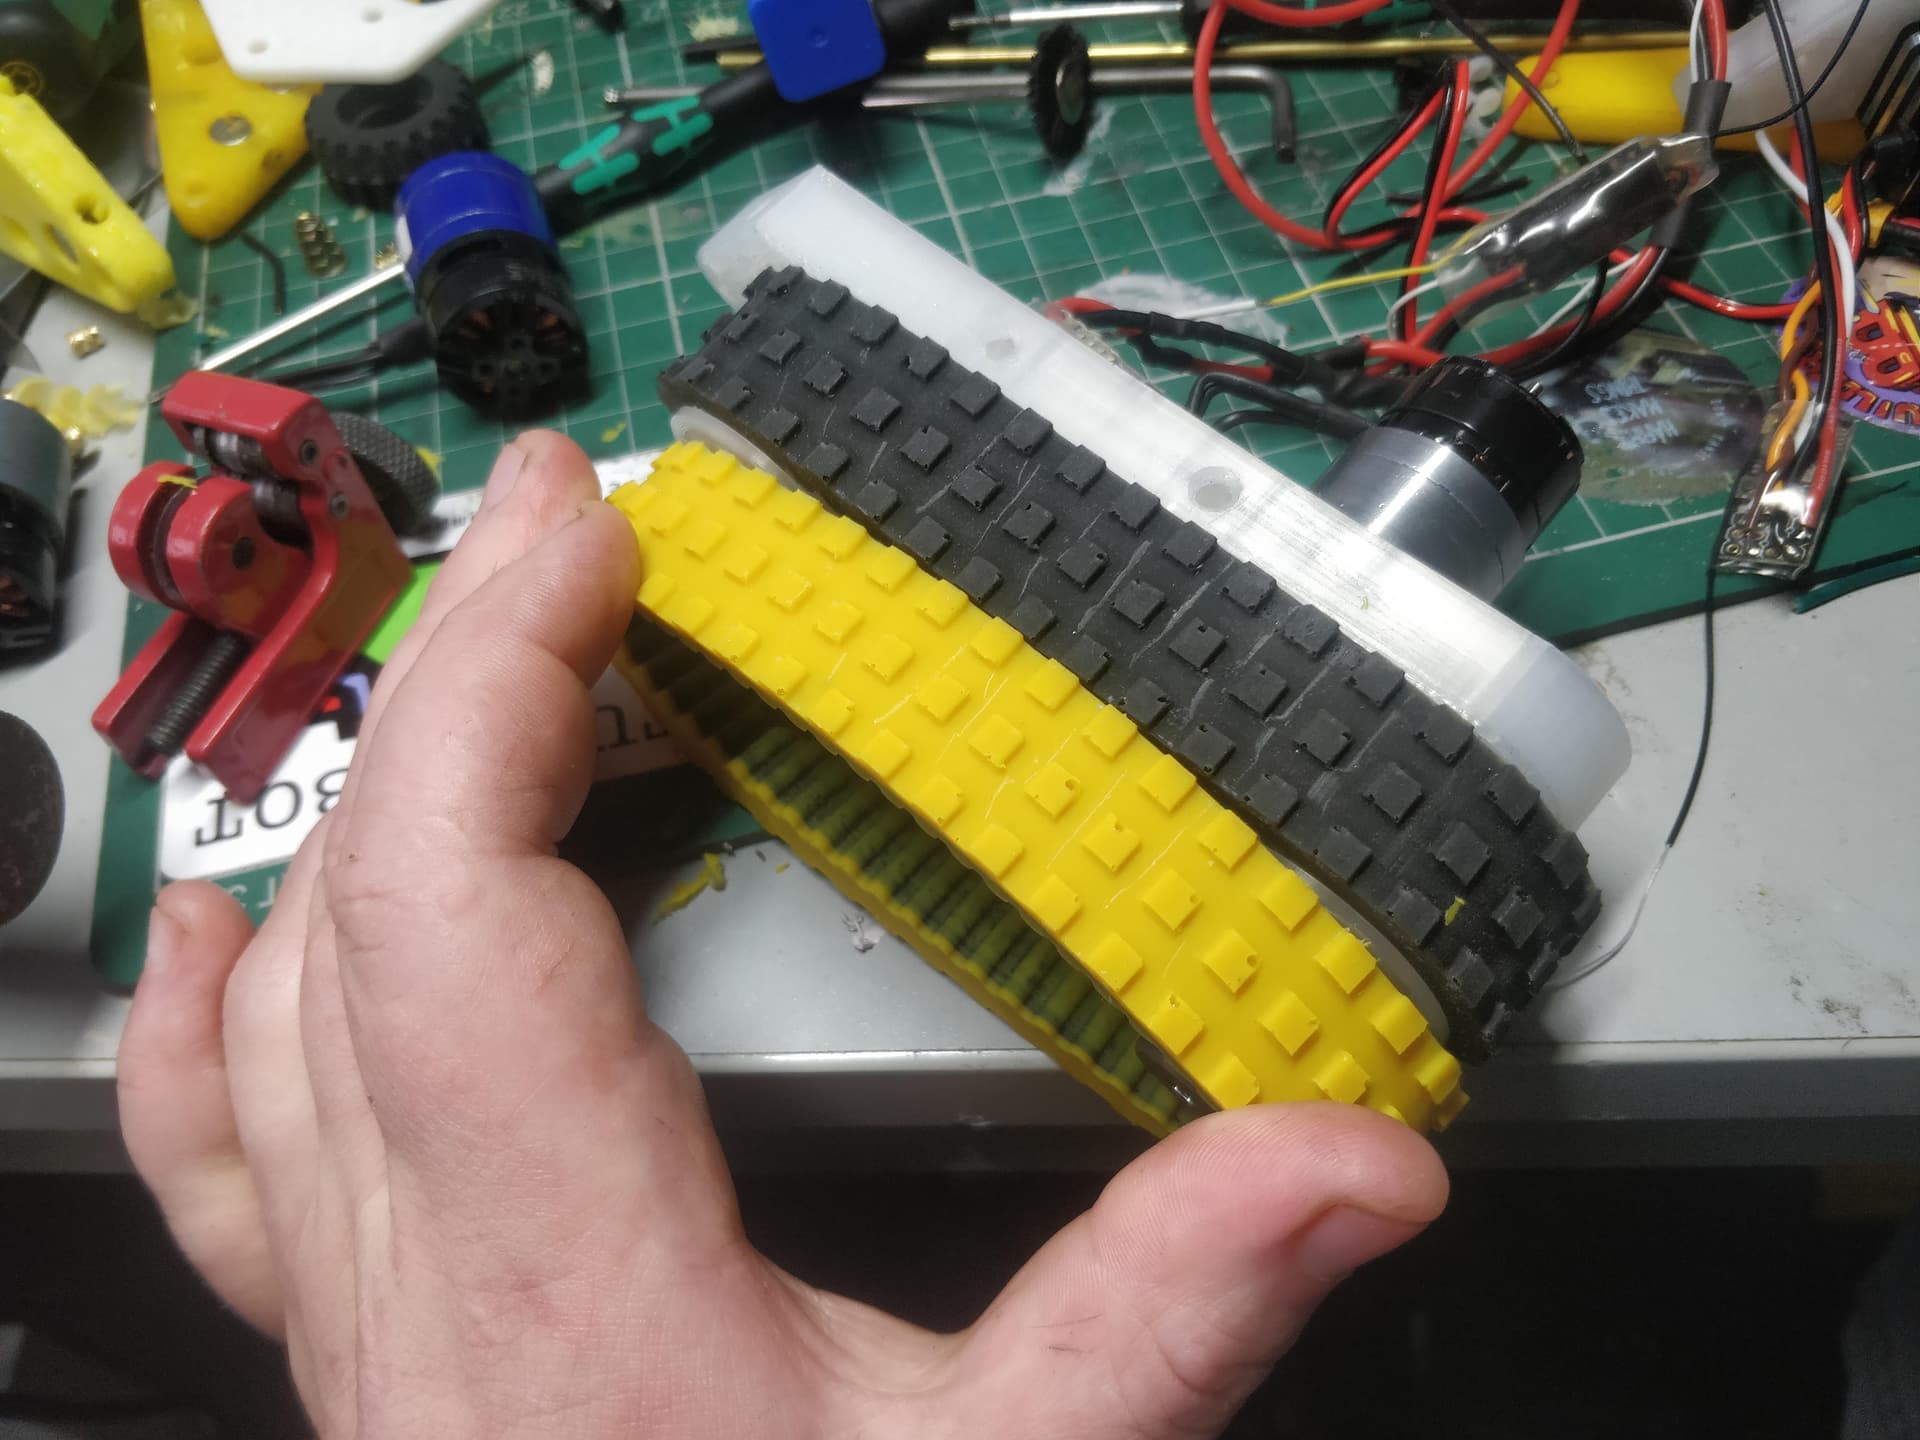
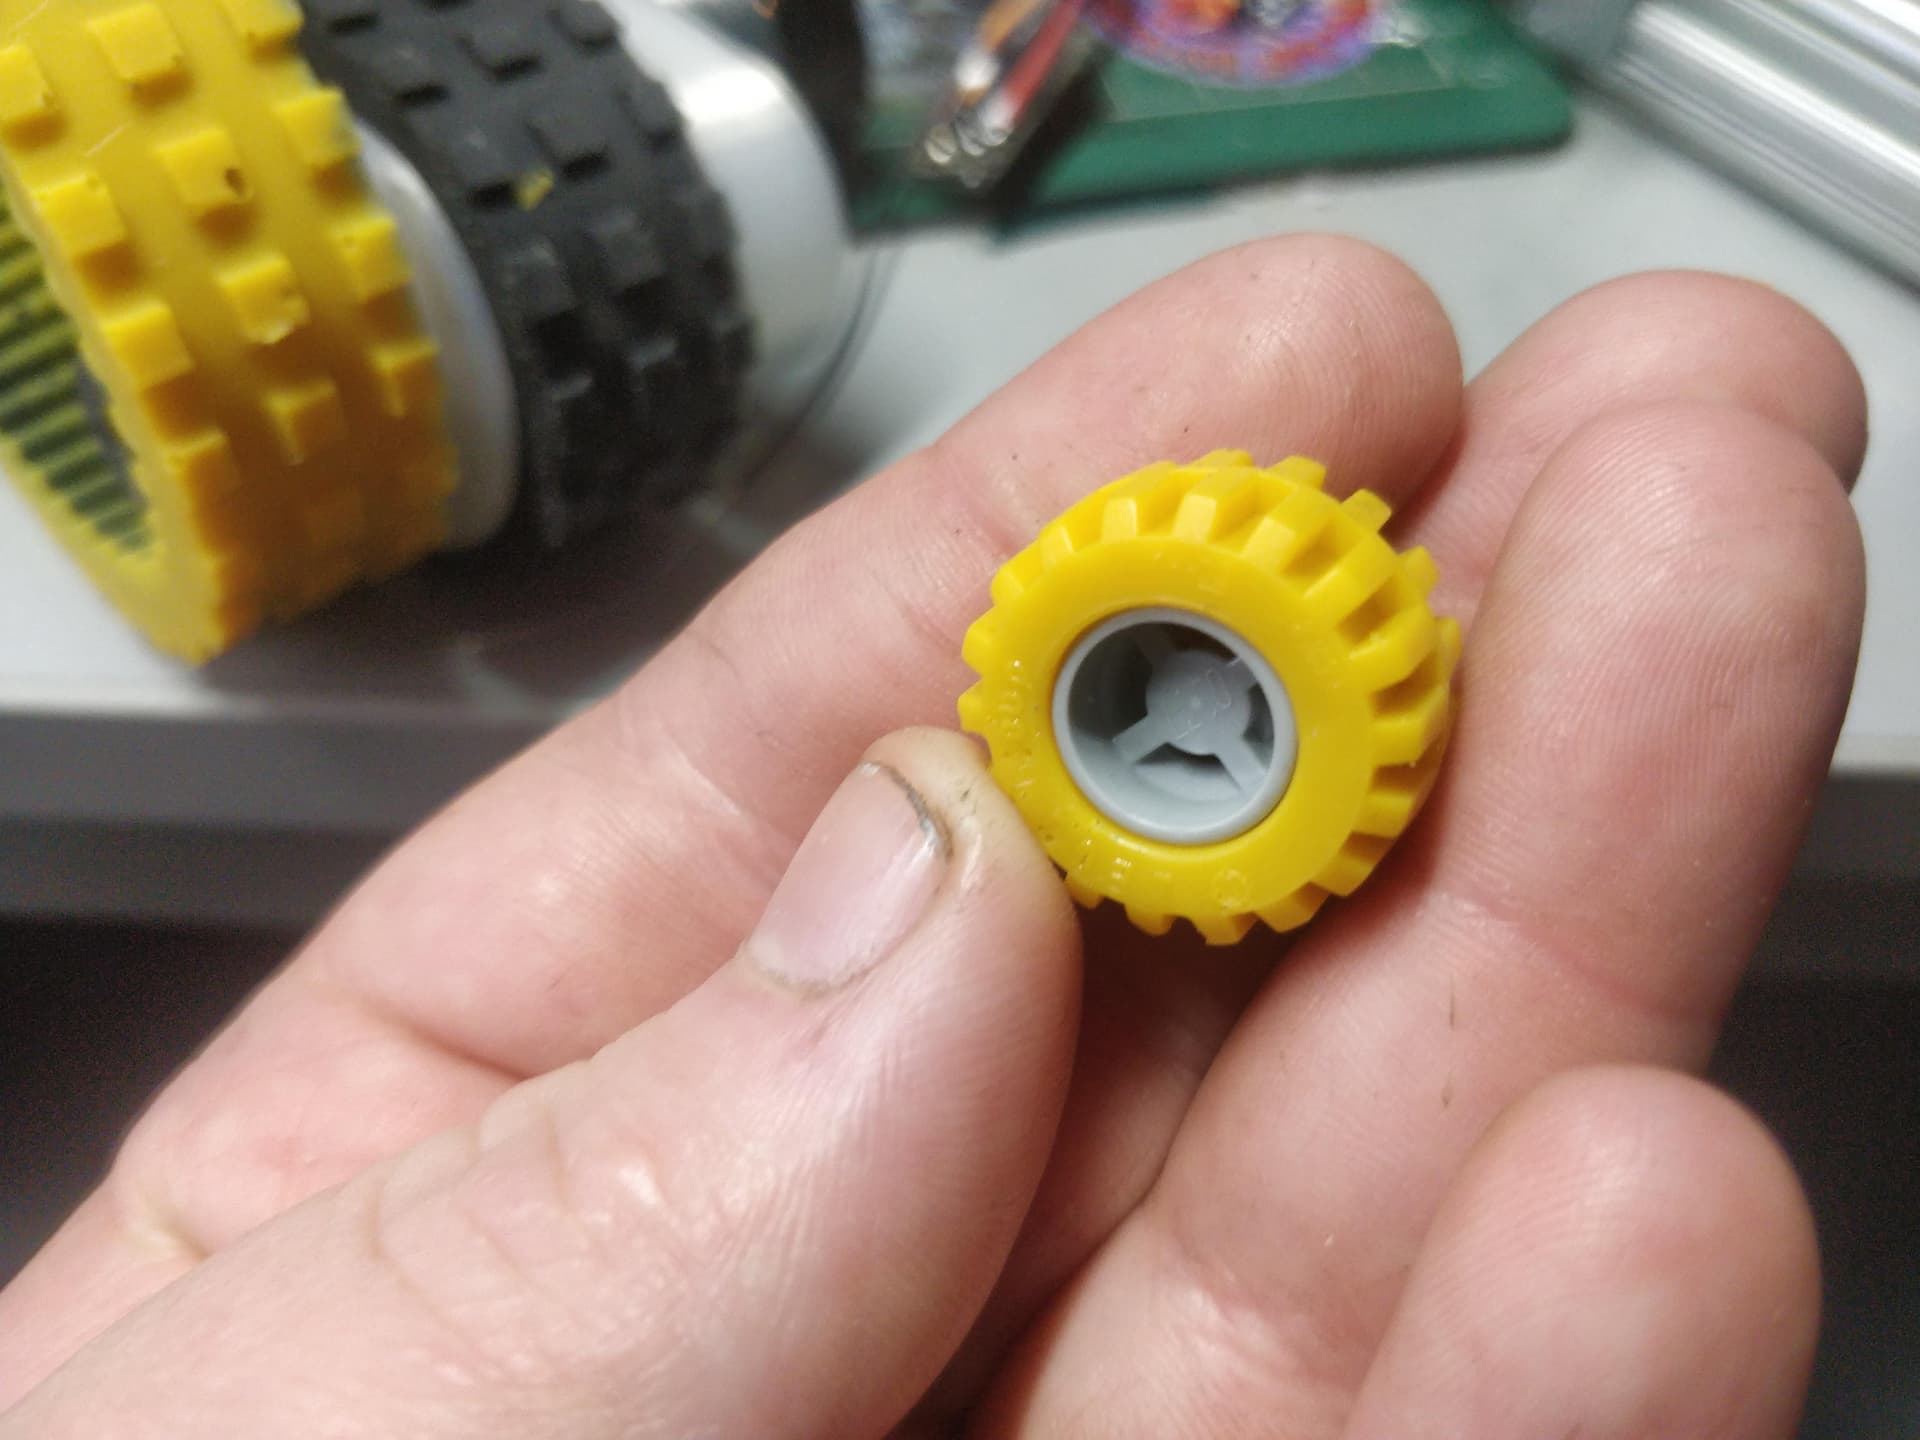
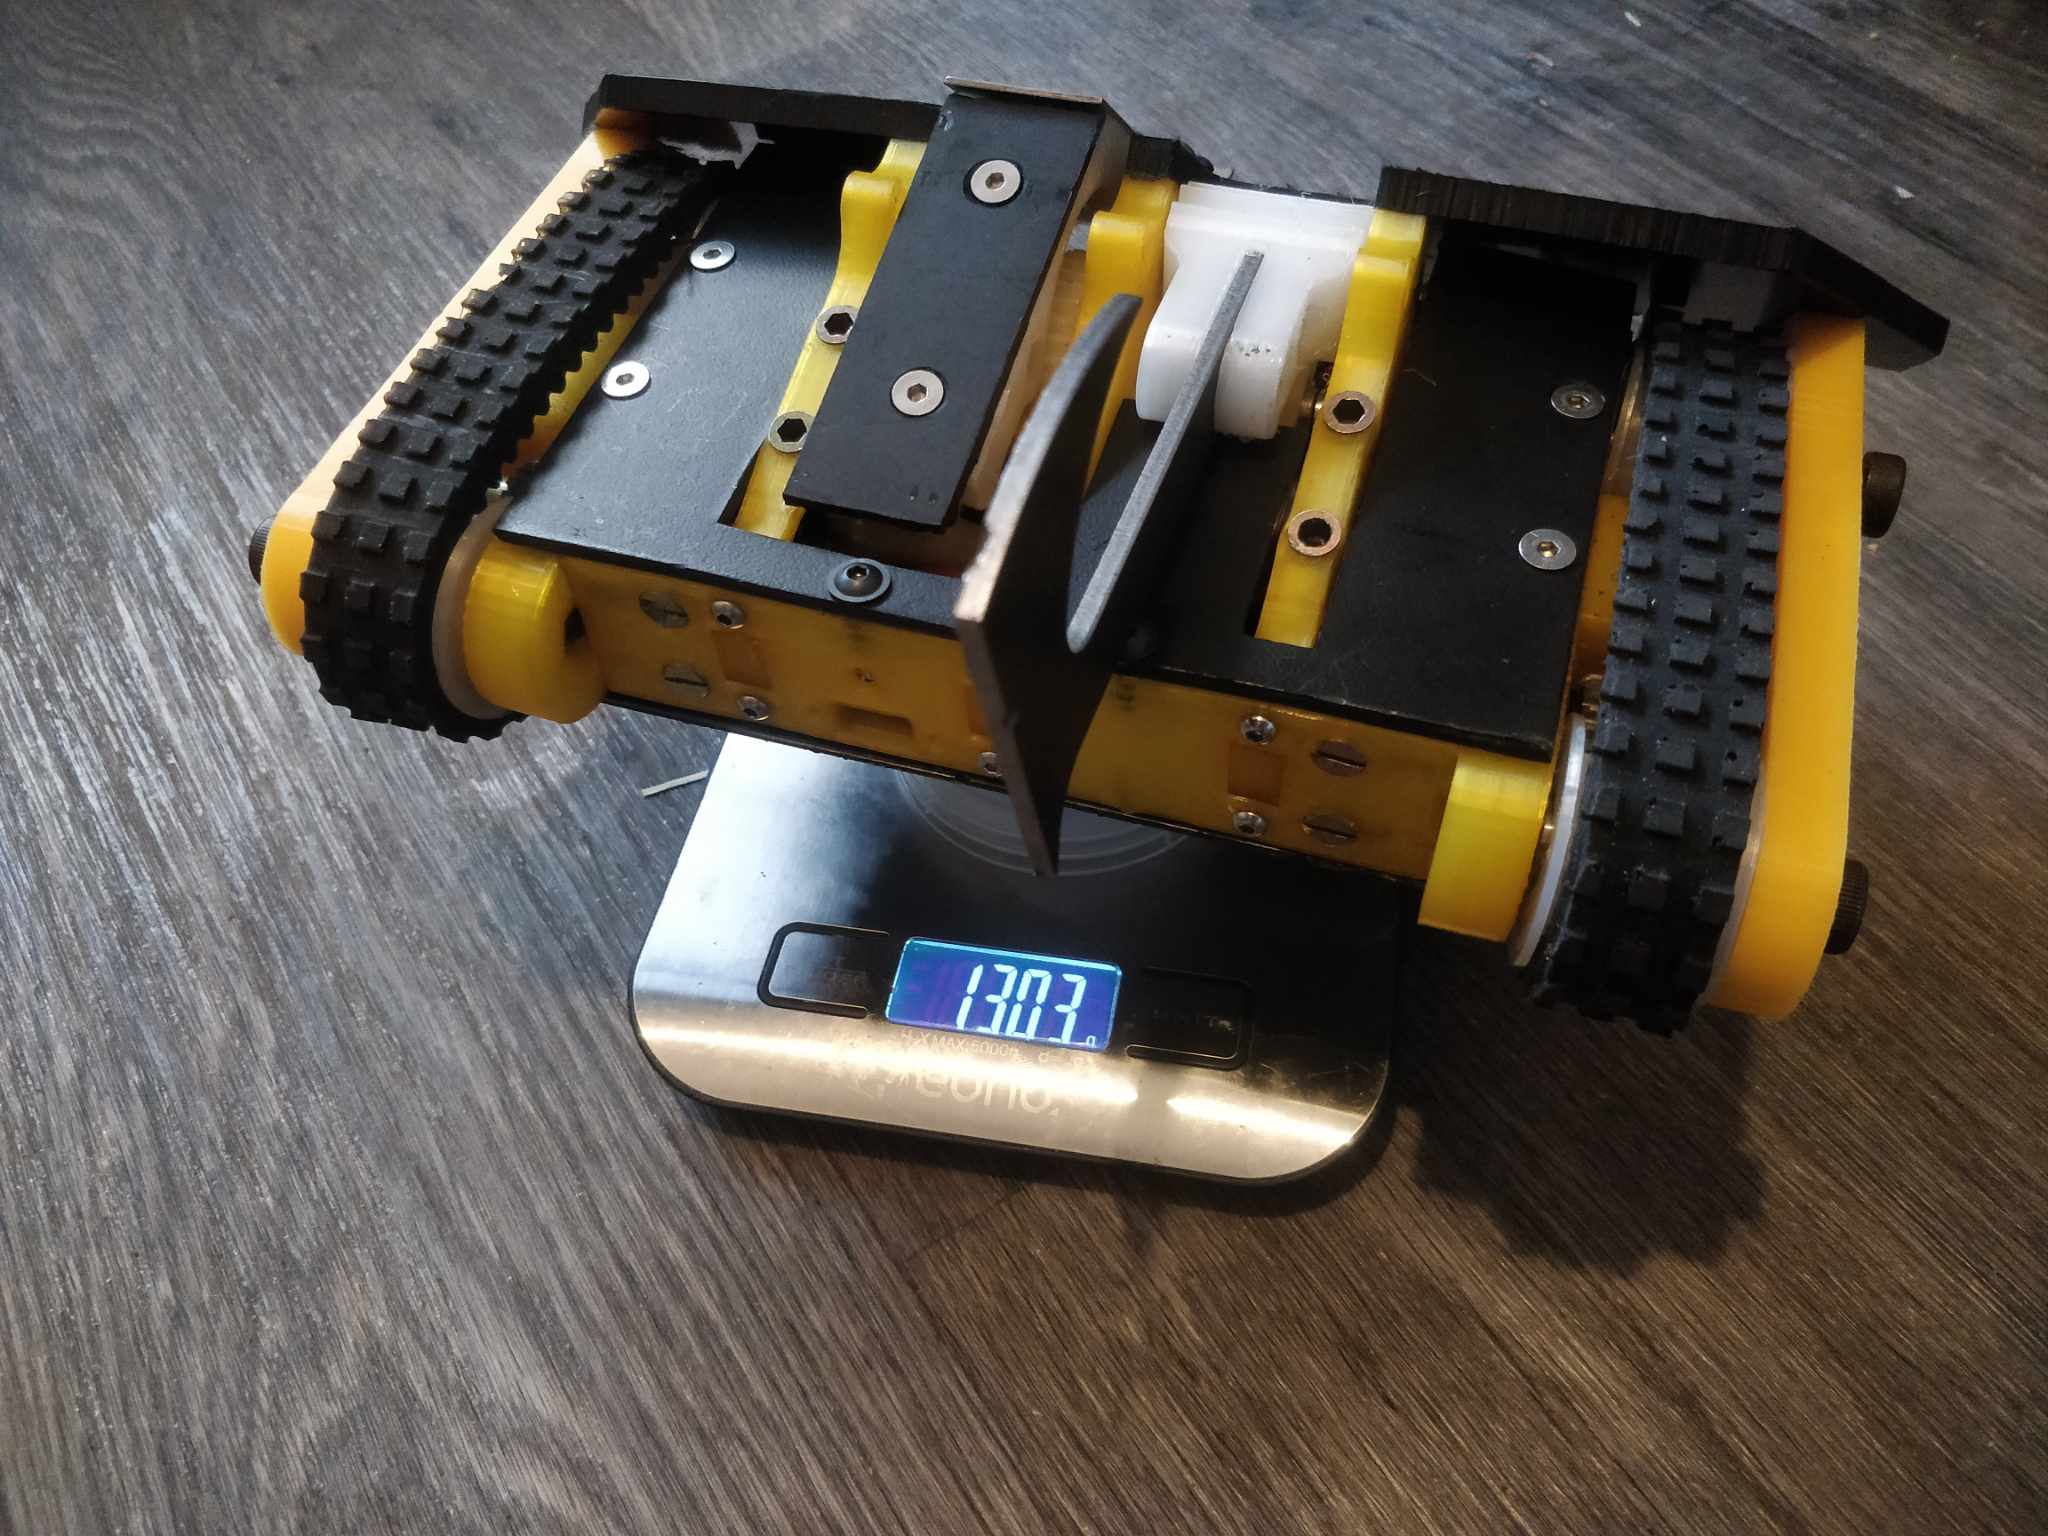
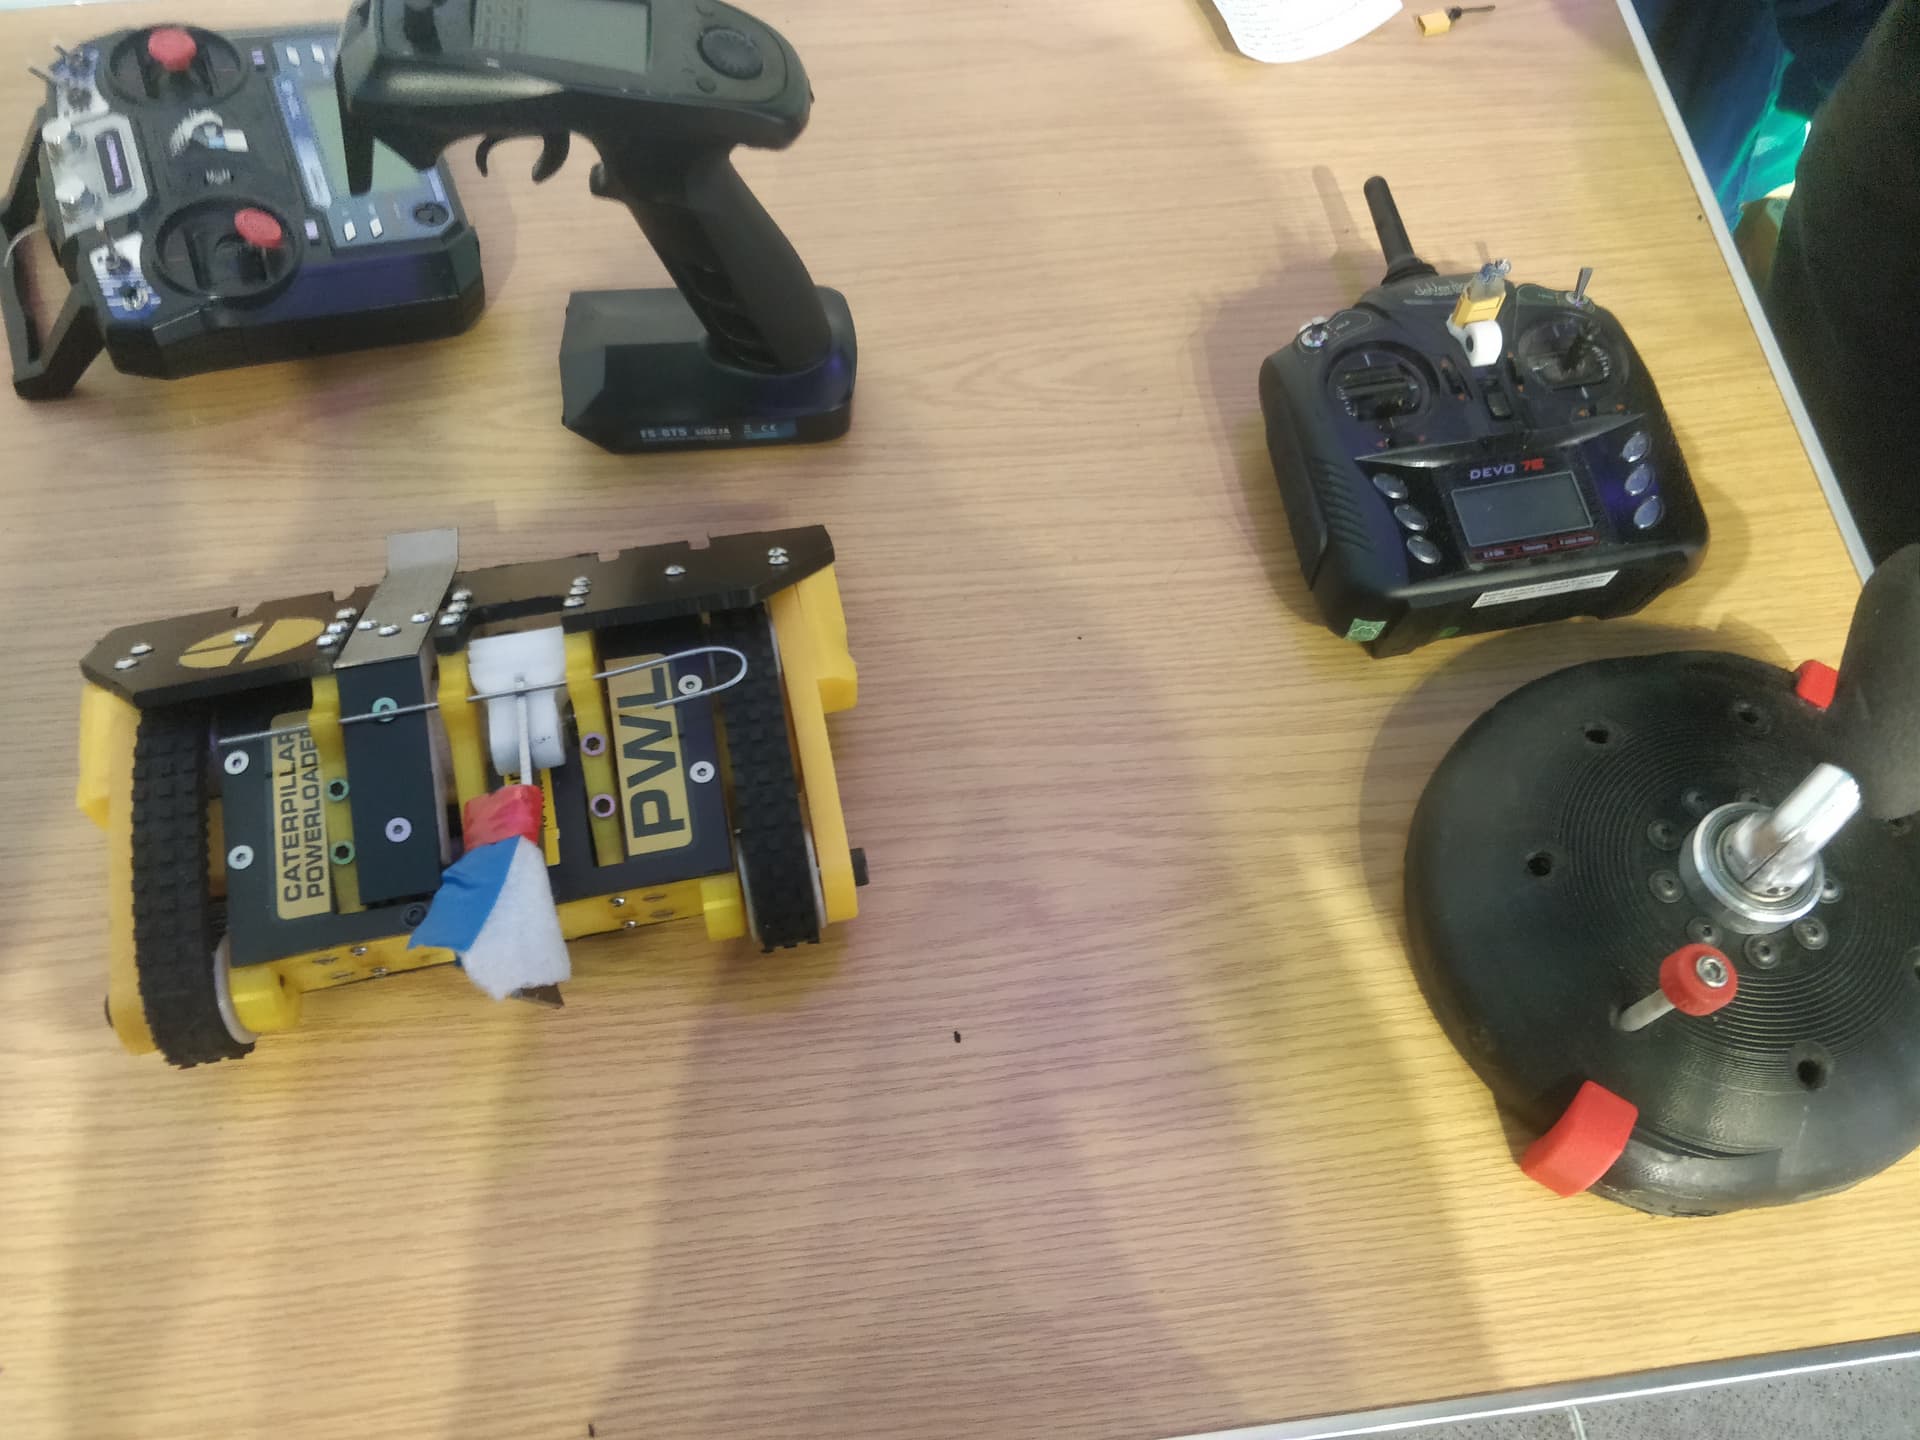
So there we have the current state of ML! Mismatched tracks and horrific hotchpotch of bolts at present but it is pretty damn close now. He moves pretty well, not going to be setting any land speed records but the increased reduction has made it quite nice to position at low speeds and I don’t have it complaining about rapid direction changes as it suffered from before. I’m not 100% satisfied with it to be honest but it’s as good as I can make it without a bit of a rejig. We’ll see how it goes. Forward, hopefully.

This chunk of beetle progress has been aided in no small part by “Peachy Keen” monster energy and the soundtrack was this bop.

  • I absolutely do need to drink more water but that is besides the point.

BYE

5 Likes

Excited to see the tweaks in action!

Looks like a nightmare to wire tho, especially if using old components and sections of loom etc :joy:

Honestly, it was okay as I don’t tend to have one termination point for the powers it’s all chained off a thicc central wire so I could just snip and tap in to the power circuit in a pretty straightforward way. It’s actually easier to work on now it’s complete as I’m not dangling half the robot while trying to guide a ~200mm long signal wire from one end to the other.

Anyway I nipped up the last few loose ends on ML as the competition date neared. Amongst other things I finally gave it a bit of a weigh just to check where I was with that. The previous version was fairly drastically under but I’ve added more odds and sods, brushed motor on the axe, slightly higher capacity battery and solid HDPE sides instead of printed TPU. No bother as it slips well under the True And Just American 3lb Limit

So here’s a little last minute jank to bring the tone down. I neglected to order a countersunk bolt that slips through the axe gear assembly to work as a shaft. This huge, unforgivable blunder meant that I couldn’t use the straight arm on the lifter as it clashed with the caphead I had to use instead. After a mild panic, some soul searching and a really respectable burrito I just decided to make a new arm which doglegs around the offending fastener but still has the correct centre distance. This was just slapped onto an aluminium servo horn which depressingly came anodised in blue.

After this was sorted I was ready to call it done and begin slapping stickers all up on this motherloader.

Function testing the ole 1-2 punch. Can’t zap em and whack em but I can gently lift opponents and crack them in the noggin with a blunt bit of hardox.

All done and ready to trundle around with it’s funky twin transmitters and bumpy tracked goodness. Roll on tomorrow where I get to chuck this custard coloured catastrophe in with everyone’s real robots and watch the fireworks. I am feeling pretty good about this in all honesty. The axe setup is pretty great - not so much as an axe but as a waggly stick I can self right and be a nuisance with it is excellent. The lifter is pretty much unchanged aside from my last minute half arsed front link so it should perform the same (underwhelming!) so that’s a known quantity. The drive works way better than it has any right to so I should be able to point at shoot around the arena and at least put up some of a fight!

See some of you tomorrow!

6 Likes

Lovely work as always mate, great to see it all compiled into one place

Cheers Andy xoxo

MotherLoader had a disappointing run out once again sadly and since it remained intact I feel obligated to keep running on up this hill to make it good (average) enough to win or at least run with no embarrassing failures through one damn fight.

First round draw was excellent, Paradigm Spin and Bop. Two tappers and a localized plastic hurricane. After a tiny tap from the fbs my rear drive pin came out. It may have been incidental to the impact but I have no real way of knowing. With the previous TPU bulkheads having holes always kinda undersized and snug they always kept the shoulder bolts locked down tightly so coming out was never an option. In the properly sized clearance holes in the nylon and HDPE parts it could (and did) work loose. I was slightly confused as instead of one standard nut or nyloc I have two halfnuts to act as low profile jiggle proofing but it was ultimately rubbish.

Interesting takeaway about unintentional material properties but a horrible way to learn a basic lesson.

Bop was unceremoniously eliminated due to a connector issue and I struggled through with one track, trying to paw my way towards the chaotic whirlwind of Spin before fairly losing a unanimous judges decision.

I got back to my bench unscathed save for a few nicks and bruises, and the robot was okay too. I replaced my pin and dumped an alarming amount of superglue in there as a dryfast hail Mary loctite. I razzed the drive back and forward to see if there was any wobble or chance of rattling loose. Nothing did so I sat back and basked in the warm glow of total ignorance and false confidence in the drive and checked no further. MISTAKE.

Almost immediately in my second fight one side of the drive decided to peace out. Totally different side to the first locked up completely. As it was seized instead of free rolling with the track hung off my mobility was frustratingly limited. Once again I limped it to a JD as best I could and subsequently lost it, as best I could.

This was very disheartening - I’ve become numb to losses but I felt these were fights I could have done well in if I had not made mistakes in my prep, design and build. One thing to be outgunned, another bitter pill when it’s down to your own complacency or laziness. These were a mix of the two!

If you’ll look here the motor is no longer attached to the gearbox. The work that I put in with the rewiring, the spacing and all the other bits of hardening prep was helpful but ultimately not enough. I have some fun ideas to stop this happening again. Looking closely it’s not even that the bolts came loose or snapped they were pulled clean out of the motor, bringing the loctite and a bit of smushed alu thread with them. I suspect this was something done by Paradigm Spin in one of the hits that battered me off the side wall. Annoyingly not noticable enough to be apparent, and missed due to laziness in not doing a thorough inspection post fight.

The takeaway is don’t let the big obvious problems detract from more hidden little ones.

Every day is a school day. I have a bunch of ideas and a few hundred grams to utilize. Like I said after the last version, the next one will be better. Less silly little problems hopefully!

7 Likes

Great write-up, love to see a thorough root-cause analysis.

The frustration is relatable but in a way it’s nice to be at the “troubleshoot minor component issue” rather than “design fundamentally unfeasible” stage!

And ML is SO PRETTY.

1 Like

Thank you Sam!

Yes I am within tweaking distance of this but I am taking a step back and rejigging a lot of things to completely eliminate the issues I face. Quite a lot of the little oddities are fairly vestigial in nature, held over from prior versions so in a pinch I have ad hoc spares. For example the wheel base is the same as the first version and the drive offset matches the best forgotten MK2.

I pulled it all apart to get a jump on the great recycling before it comes back together. I am in a place where I don’t need or want to spend any more money on this robot (I think if you total it up it’s flying dangerously close to 200 quid!)

It looks quite simple all spread out and I’m inclined to make it simpler. I’ve fallen out of love with the little forklets and will change these out for a moderately sweaty single fork in the centre of the wedge. I want to beef up the wedge to about 10mm too just to continue with the tanky theme. The lifter may be jettisoned for ease too sadly.

MotherLoader T34 will be a quick and dirty rework with the aim of getting something ready for February. Brutal and simple. And yellow.

3 Likes

MotherLoader Is Dead. Long Live MotherLoader!

Once the guts had been recycled out as best I can I slapped it back together as a rolling shell/display piece. I may try and sell it if it has any value to float some more interesting ideas.

Progress on ML-T34 is going well as it doesn’t actually need much designing. Things are mounted where is most convenient for them and I have given up the battle on trying to compact and condense as I feel it is often a detriment to function. This robot will be wide and ugly. This robot will work. Confidence! We love it.

The drive required no modification to type. It still retains the 32DP RC car pinions driving a spur gear built into the driver pulley. There are simply two of them now. Oh and they’re brushed. Klaus was phenomenal to drive and the amounts of brutal power on tap were exactly what I wanted. The speed of Klaus was a problem but this is less of an issue as I am running a smaller effective wheel diameter and there is an additional reduction slapped on there too. Torque city, Population: Me. The pulleys are nylon, the gears are 7075 alu and the bulkhead has been sloppily test printed in ABS for now before committing to nylon.

This is the finalised but unfinished weapon system. While looking super similar it has been almost completely retooled with lots of quality of life and tying up of engineering loose ends. The most obvious difference is with the weapon motors. There are simply two of them now. Still a Nerf mod motor shoehorned into a 22mm rotolink planetary gearbox but now it has a twin. I figured it adds a little more redundancy and doubles the power (funny how that works) The axe self righted wonderfully but it will be borderline lifter territory now. Maybe some hook and grab attachments are dancing, mockingly, just beyond the horizon.

There is no longer a big combo gear as it was a massive weak point. Simple but horrible to change out and work on. Also the first stage which is only MOD1 was distorting in nylon and straight up detonating in PLA-ST. Instead it is going to a metal gear - I have a hardened 40t RC car pinion which is potentially overkill and heavy. If I can’t lighten it I will change out to a 7075 aluminium one. The benefit of using an RC pinion is the 5mm bore which means I can just switch the whole transmission over to a live shaft, running a length of silversteel through bearings in the bulkhead. Hot swapping gears has just become incredibly simple.

The second stage is MOD1.25 and the gear has a 12mm hex bore through most of it. Hubs with a 5mm bore and a 12mm hex are incredibly common and cheap so one of these will be pinned to the shaft and make these gears (which are rarely damaged due to the pitch and massive face width) easily swappable too. It has cut the amount of fasteners that need to be removed to work on it by about 75%

I do plan to run both these motors off a single ESC and really stress test the BBB current limiting! Though for once I have the space to add a second should it prove necessary.

The other prominent feature of the new weapon module is the repurposing of Klausforx which are 8mm Hardox and will sit slap bang in the middle of the robot. They will ride on a 6mm pin, though they are currently just sat on a bolt while I wait for the postman. They are rotation limited so they can’t fold underneath and I hope to have the traction to pluck them out from any wall gaps I get them wedged into.

I have made an amusing (frustrating) mistake which rather boils down to forgetting that magnets are magnetic and that permanent magnet DC motors have magnets…permanently

The right hand fork, if pushed all the way up will stick fast to the can of the Nerf motor. This in turn will lock the axe from completing a full swing. This is what we in the trade call “A Bloody Silly Mistake”. I am in the process of drawing up a little TPU bump stop that will cushion the impact and restrict the upwards travel to gain back some semblance of my dignity.

Downside of doing everything properly and not cutting every corner imaginable is it turns out pretty heavy. By the time I have that steel gear and a shaft in there I will have doubled the effective weight in the weapon system - this should be okay as I had wiggle room with the limit before and I have cut a whole weapon system out of the robot already - not to be ignored.

Very positive about getting something done for February!

3 Likes

This subassembly just got a lot heavier. I had a smattering of Chinese parcels come all at once so I made really decent progress with the weapon system.

First and foremost was the 6mm silver steel shaft and collars to replace the random M6 bolt the forks ran on temporarily. It’s much nicer having something smooth and solid for them to sit on and the collars keep them nicely spaced and stop them from kinking too much and sticking or wobbling.

The gear turned up too, a chunky hardened steel 40t MOD1. It’s actually a pinion for a 1/8 RC car which affords me a usable 5mm bore and a narrow face width. I designed up a lasercut gear and had it interfacing with a cool hub then gave up and spent the six quid on two of these that do almost exactly the same thing. Downside is the weight as it top my scales at 45.5g. Meaty!

Naturally a gear with a 5mm bore needs a 5mm shaft so I printed myself a little jig to batch produce a couple easily. Just slip your rod inside (calm down) and you have a easy locator to file the flats on and bop two 2mm holes centrally through the shafts.

But Harry, I hear the masses cry, have you gone mad? Have you lost the plot with one foot out the door to go live under a bridge and eat glass bottles? Why on earth are you drilling holes through your damn shaft you handsome rebel.

Arguably the answer is yes I have, but to follow the more pressing engineering question it is to use pins to drive these 12mm hex hubs from 1/10 scale RC cars. Pins locate them axiallly as well as transmitting torque. One should be enough so in keeping with the theme of this robot I used too.

These are stacked up and pushed inside that thick printed nylon gear and it feels pretty solid.

This is the stack up of components outside of the frame to illustrate where the bearings are and how much is going on in quite a small space. One of the best parts about all of this is it’s pretty much all off the shelf. I like the challenge of not relying on a custom designed part. The hunt for something that would work and all interface together is really satisfying.

And then all together! Ready for some transmission tests. I’m also going to be doing a little bit of delicate angle grinder surgery on the small pinions and the 40t gear to nip the facewidths down.

It also weighs a tonne. This will be a fun problem to watch unfold.

5 Likes

What an absolutely lovely assembly harry. :heart_eyes:

I’ve enjoyed following your builds Harry. If you ever need anything CNC’d in Aluminium let me know.

1 Like

Awesome work Harry! Very cool to see all the details behind your builds! :heart_eyes:

FYI, the BBB single brushed escs have an un-advertised ability to connect microswitch endstops - it requires somewhat fiddly soldering, but maybe useful if you ever need to protect gears / motors from stalling in your axe mechs?

4 Likes

That’s actually super cool! And for the first version of ML that hasn’t had a micro switch mounting point for end stops hah. I might have to pop them back in.

Is that documented anywhere how to hook them up?

Cheers!

You can hook them up something like this:

5 Likes