I’ve just got started here after a while of thinking about it. I’m looking to finally follow through on my plans of building an ant weight. I have a mid to low level cad experience and a 3d printer. I’ve done RC cars before. I’m a quite confused on what charger and battery to use. Spinners are cool and I can laser cut metal. I have a budget of around 160 quid all in. I have a general idea of what to do but I’m really after some general help with parts and other stuff. I have basic electrics knowledge and tools (drill solder etc). Not to be picky but I’m not a fan of eBay. Lipos are scary. Any help would be greatly appreciated ![]() .
.
If you aren’t keen on eBay, then HobbyKing is going to be your best bet.
For a spinner (which I do not recommend for a first time bot), you’ll be wanting a 2S LiPo in the 20p-250 mAh range.
This one is 300mAh, which may be a bit overkill, but gives you the general idea.
Bristol Bot Builders do offer a USB charger for 2S LiPos
If you want future proofing for if you go to other weightclasses, I highly recommend the IMAX B6AC V2
1 Like
Thanks so much
I have a question about the bbb charger.
Does it have the ability to storage charge? I’ve always been very careful with storage with my RC battery’s and would be a bit scared to not have it. Is it as necessary as in RC or can I get away with out it?
Thanks
Hi!
Just to add I don’t think hobbyking have stock of those sort of lipos at the moment!
We keep a list of 2S lipos on our recommended parts page.
At the moment the best in stock UK option is this 250mah 2S:
The USB charger won’t do storage, something like the Imax would. Don’t forget to get a lipo bag to charge in ![]()
1 Like
I think I’ll get the IMAX charger with the Lipo from Hobbyking as they are in stock for me. Will that all work for a vert spinner? I’m looking to attend Beetle Brawl as a spectator and maybe get some inspiration. Hopefully I’ll come to an ant event in March. The robot is going to be named after a planet.
Thanks for all the advice. Will post again if I have any troubles.
1 Like
Hello again
I recently went to the BBB beetle Brawl and was well impressed.
I got back really determined to finish my antweight for the march ant event. My parts arrived a few weeks ago and they’ve kind of done nothing as I’ve been trying to come up with ideas.
I’ve designed in my head a vert spinner with one on the monsoon Robotics disks (the 60mm 2 tooth one)
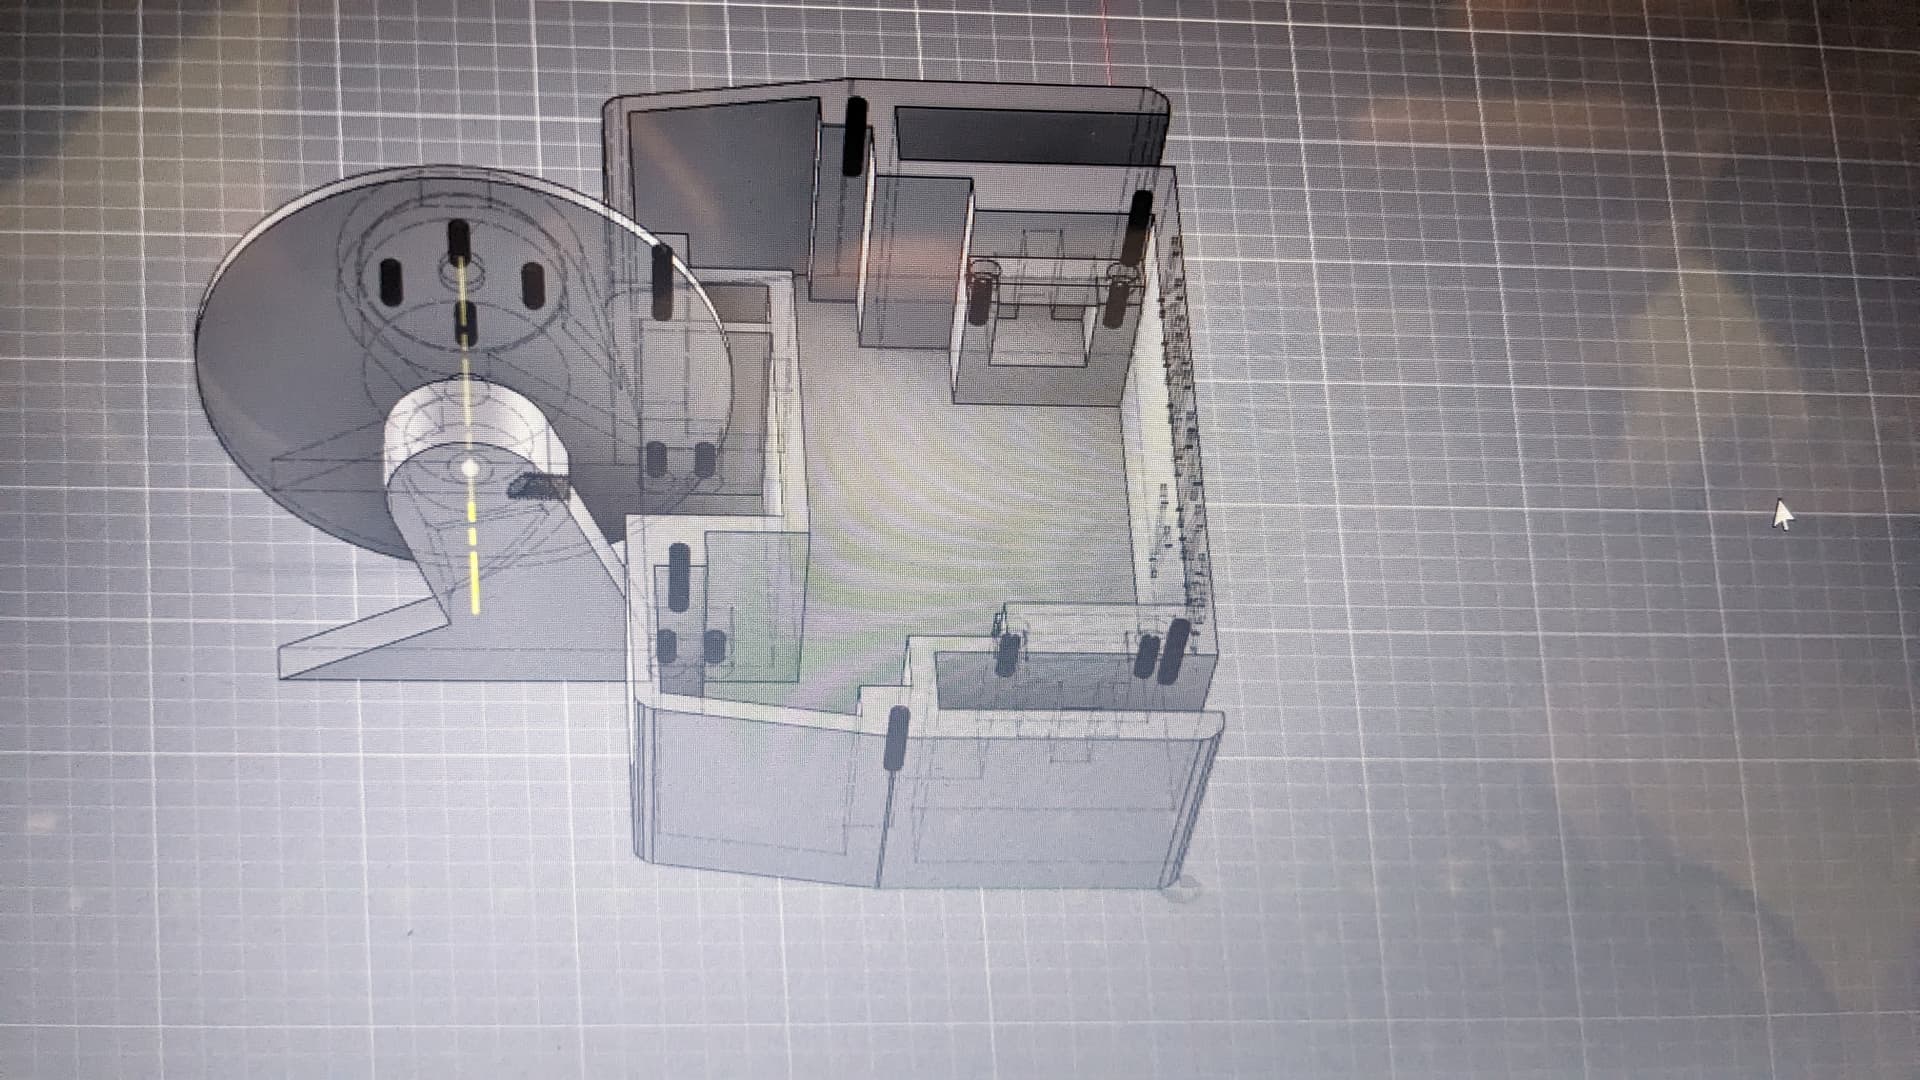
I’m having problems with chassis design. I’m at the point with my cad that it looks like a robot but probably wouldn’t work (and its definitely not printable). I’m making the lid out of polycarb and the rest 3d printed. I have a feeling that the weapon is too far off the ground? Would this be a problem? I’ve trawlled the forum for ant chassis to look at and am struggling. I really need some help on the structure of the chassis for a vert and the easiest ways of doing things.
Another thing, does the weapon need support on both sides and if so how?
I need just general help with everything with the structure and chassis
Pictures are worth a thousand words mate. Hard to know if it’s too high without seeing it.
Double supporting the motor is really good practice and pretty simple to do. You can either knock out and replace the stock shaft with a longer one and get a bearing on it or you can use the prop adaptor that likely came with the motor and sit a (normally) 5mm flanged bearing into the opposing bulkhead
Thanks
I’ll post some pictures when I get back from school
First off I’d say if it’s your first bot then a control bot might be a better shout than a spinner - you will be able to test drive it at home without a test box to get familiar with how it drives and build your skill.
Even a 150g spinner is too dangerous to run outside an enclosed test box or arena and running it without the weapon won’t teach you how it’ll handle with gyro forces when spun up.
If you’re set on making a spinner tho:
Double supporting your weapon isn’t strictly needed - plenty of people run spinners at 150g without it.
It is good practice tho as it takes some of the load off the motor shaft meaning they’re less likely to bend.
Most people do that by sandwiching the weapon disc between the motor and a bolt on prop adapter then having the prop shaft sit in a 5mm bearing in the other bulkhead.
1 Like
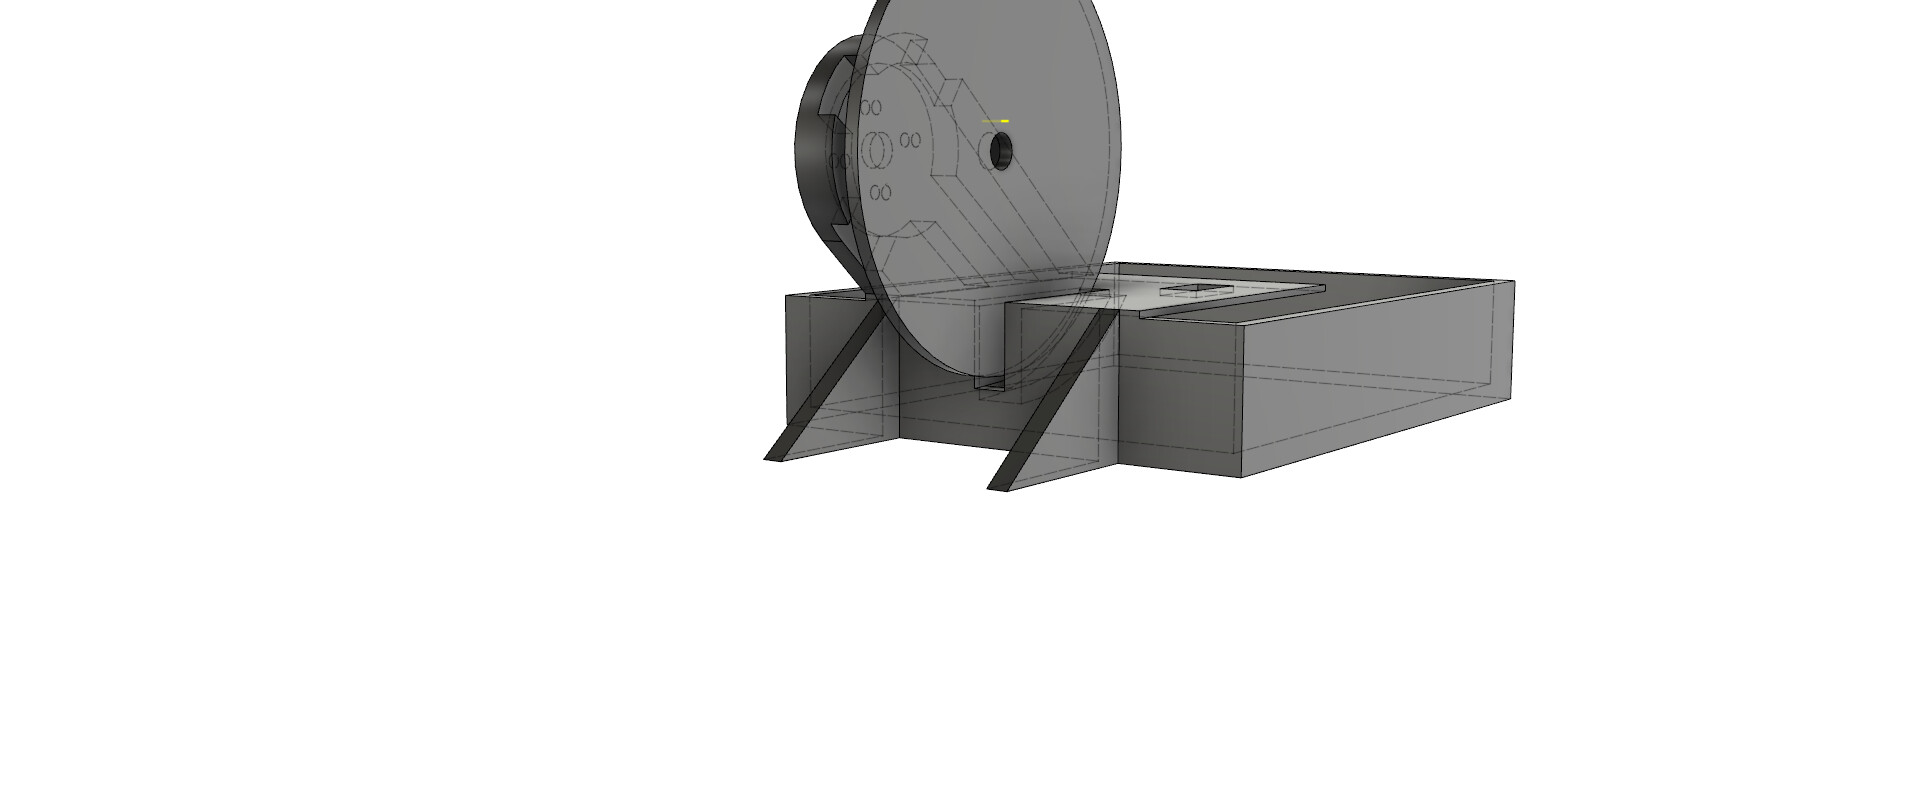
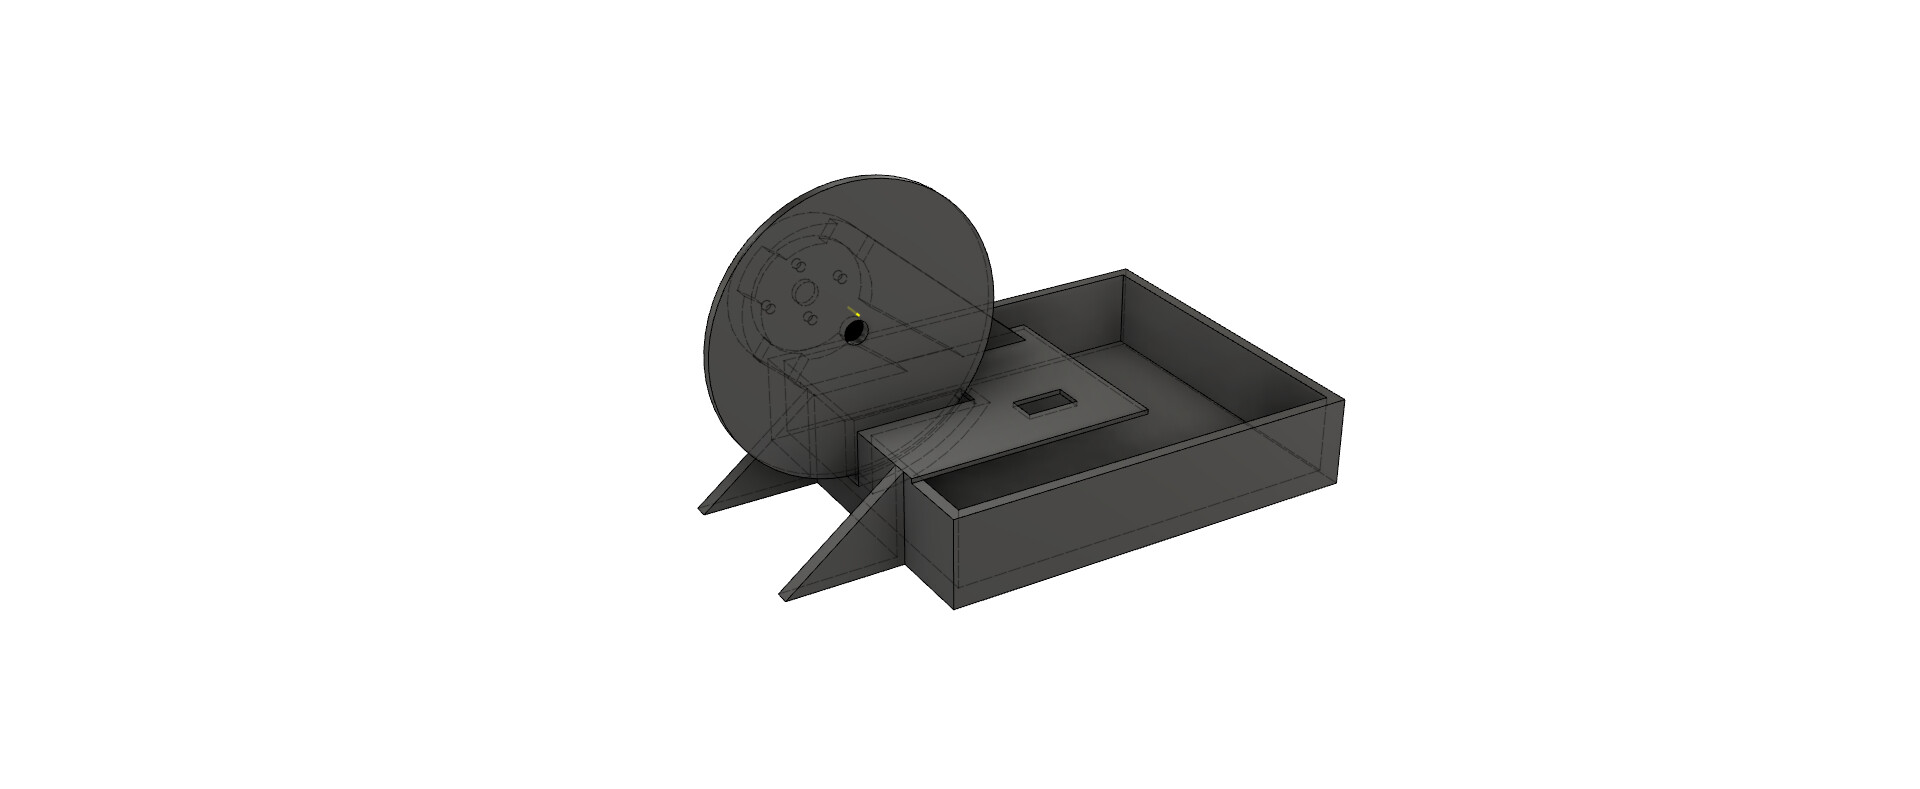
These are the model that I created with the distance between the floor and blade is 13mm. Although I think I might redesign it anyway. What distance would be good?
Any other things about the design? (it was only a basic mock up)
I think you’re right, it’s too high. I would personally have it 1-2mm from the floor, making sure that you don’t hide it too far back into the robot either.
Not much to add at this stage but I do think it can benefit from a support the other side. I don’t understand what the partial lid is supposed to be doing also? It may also need a little more clearance around the path of the blade. Things flex a surprising amount in combat and I could see that hitting itself very easily.
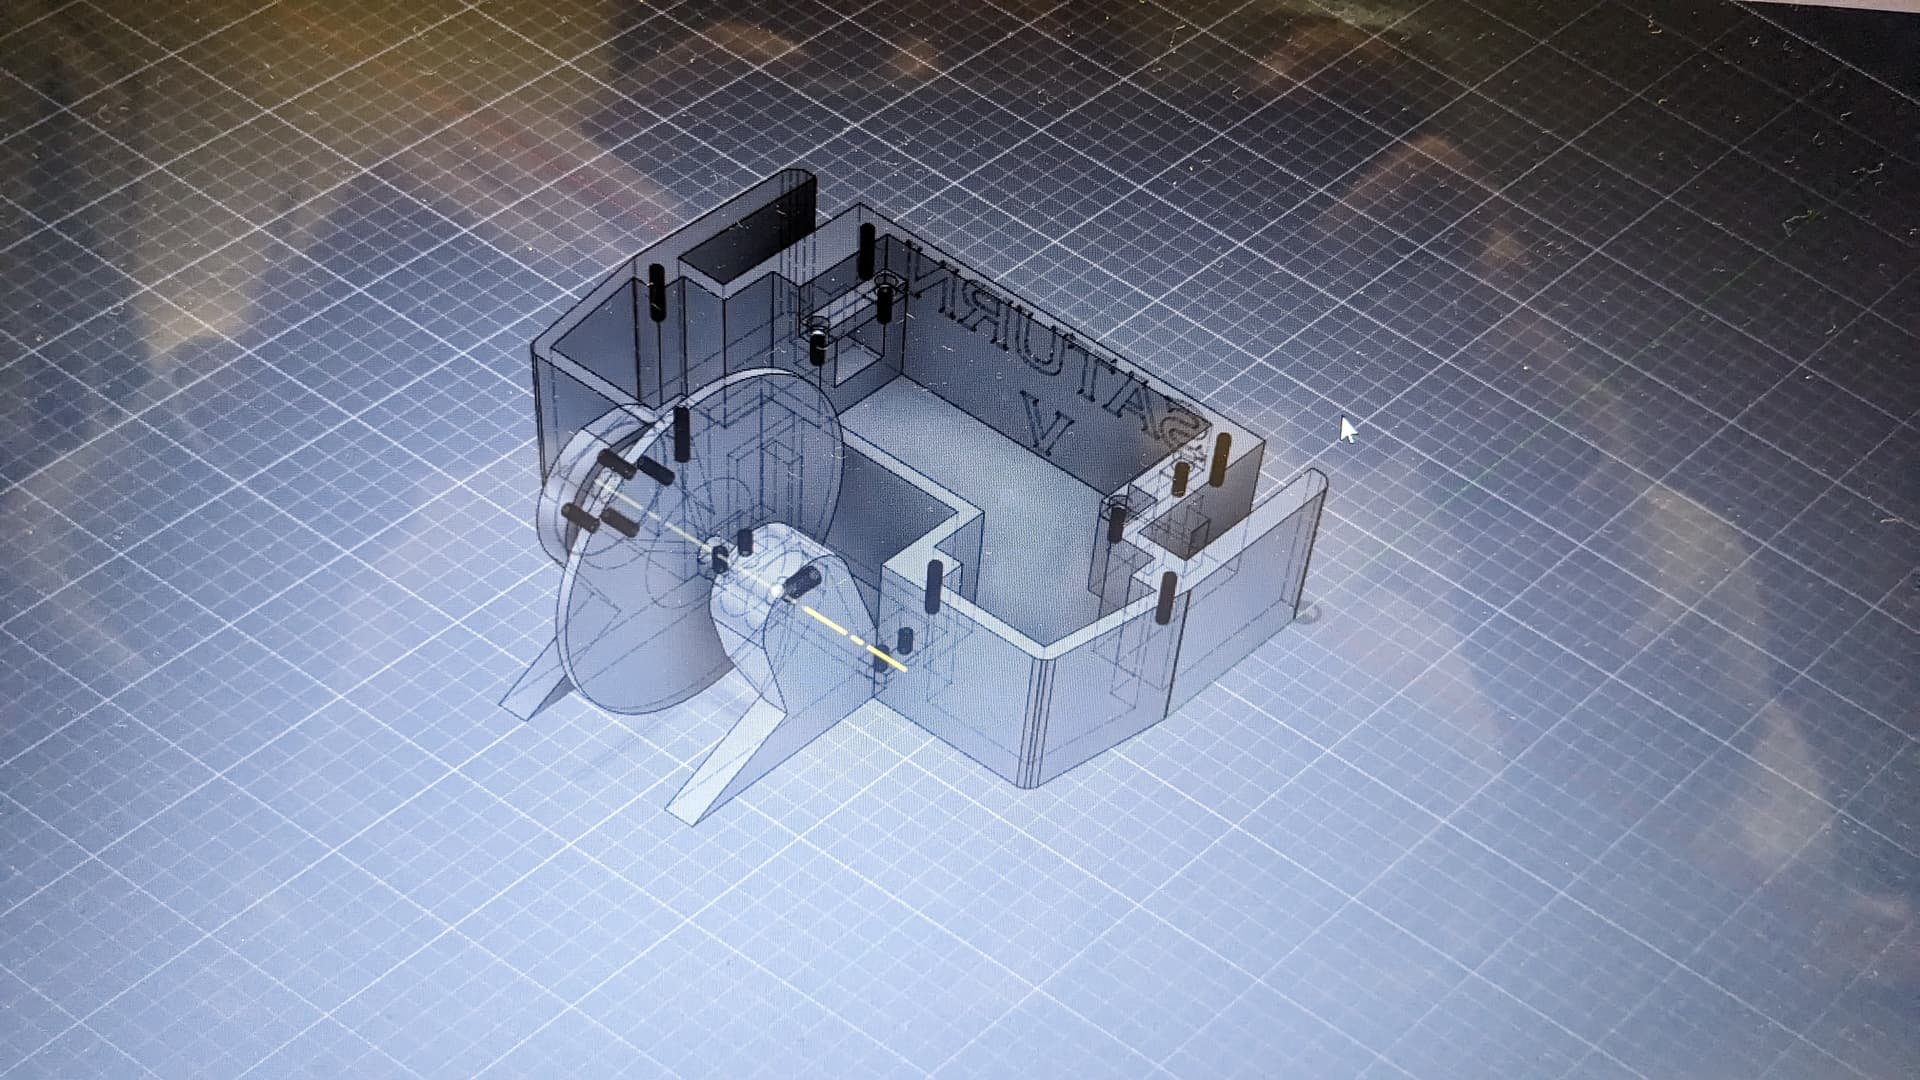
Good to hear that the things that I was thinking about changing you agreed with. I’m going for a redesign that is a bit wider and shorter and lower to the ground. Thanks for all the help and I should have a build diary coming soon.
Speed, Time Pressure and Motivation
Have been 3 things that have really hindered me in my build. Time flies and now I’m like 2 weeks away from the event and still a way off being ready. I thought I’d put this on here to see what everyone’s thoughts are in timing and pressure when building. I’m not exactly a productive person and whilst juggling school and other things I’ve been struggling to find time to sit down and work on my CAD.
I’m nearly finalised with the model and just need to sort out the last few screw holes and stuff like that. Then I need to order screws and a Battery/charger (idk why I didn’t get this a month ago). And testing, lots of test prints need to be done. And then I’ve got to put it together. Typing this all out made me realise how much I’ve still got to do in so little time. Does anyone have any thoughts on the timing and if it’s still possible to build for the event on the 23rd. I’m thinking the event in June may be a better bet to shoot for but I’m not exactly enticed by having to wait 3 months to compete. Any thoughts?
I know it sounds silly but this is something that has really been running through my head the last couple of days.
Go for it. The last two weeks is when 90% of any robot gets made
2 Likes
Any parts/test prints that you can print off now, do so. If you think you will be making changes, then gather as much data as you can now.
Don’t forget that you can also work on the internals while the final prints are happening, if you time everything right, then as soon as that print comes off the bed, you’ll be ready to drop the motors and electronics in, all soldered together and screw on the top plate.
2 Likes
Any suggestions on cutting weight
I’ve just added everything up and came out 10 grams over without screws, so probably 15 grams over. The chassis is 70g with 3 walls 15 % infill. I’m thinking of dropping to 2 walls but that seems too thin. Any tips on weight management/savings.
I’ve got pictures this time.
Update
Weighed stuff for real this time
45 grams over must have forgotten something last time.
In really stuck is it normal for the chassis to be 60 grams?
60grams on chassis is pretty heavy.
Vert chassis tend to be a little more heavy than some other designs due to the chunky uprights for the weapon, however this does seem particularly heavy.
How tall is it? - the core body of the chassis looks fairly tall, any height you can take of the design will save you a bunch of weight.
28mm tall for the main chassis
Walls are 2.5 mm
In that case I’d probably see if you can shrink down the chassis at all. That’s pretty large by antweight standards - going smaller will save you a bunch of weight
1 Like