Yet to have a bad experience with AliExpress - same stuff as local vendors just cutting out the middle man.
My normal trick is to just pull bearing sizes from what’s normally available from the skf catalogue and then go buy them from China or an eBay listing. If you’re doing things properly or you need to see pretty much everything in your set parameters go on Simplybearings. Even then I’d still nick the part number and find a cheaper one but that’s just me. They’re good for thrust bearings and such too. Technobots are good for bearings and odd transmission components but their shipping is a bit painful these days.
Deep groove ball bearings will be fine. Like a pair of 10*26*8 spaced out will likely outlast the rest of the robot.
As far as shafts are concerned I’d go for a massive hollow section of aluminum personally something like a 25mm diameter that I could shove a decent sized through hole through. Failing that a length of silver steel does well as it’ll just need a quick polish to be a bearing fit. You’ll be lucky to find tube off the shelf that’s even round enough to use as a bearing surface.
If you look in the sales section there are a couple people offering machining services or there’s always the china option.
So if I was to go through with that, how thick of a wall would it have to be to give it some sort of strength that doesn’t collapse on first hit?
Because right now, it’s either the aluminium, or I bite the bullet and order from aliexpress, which is genuinely not my favourite choice, but it’d be a means to an end.
Also, a little warning if you’re putting the switch at the bottom of the shaft, BBB asks for the access hole for the switch to be at least 5mm diameter
Only wrong by sheer ignorance! I was meaning more tube on the whole (hole?) but yes absolutely not clear at all in the context of the conversation regarding linear rails! I shall take the L on that one.
Regarding an alu shaft. In a fair grade like 7075 or 6061 I’d say minimum of a 5mm wall feels right. But it’s going to be a custom part which I don’t know if you’re looking to do right now
Aliexpress can be great. While there are safety concerns with some of the manufactured products (which you can also find on ebay or amazon btw), e.g I wouldn’t buy a no-name phone charger there, or a hairdryer, the flip side is it’s also a portal to all the weird niche manufacturers in China that make the parts that go in the machines that make the things we buy. There’s still some caveat emptor for sure (a lot of sellers don’t actually know what they’re selling and it’s on you to do some research), but if you’re buying individual mechatronics parts like bearings, motors, gears, hardware, springs etc it’s fantastic, especially for combat robotics when nuking a couple of £15 SKF bearings every fight would hurt bad.
I put the £15 SKF bearings in my mountain bike, though
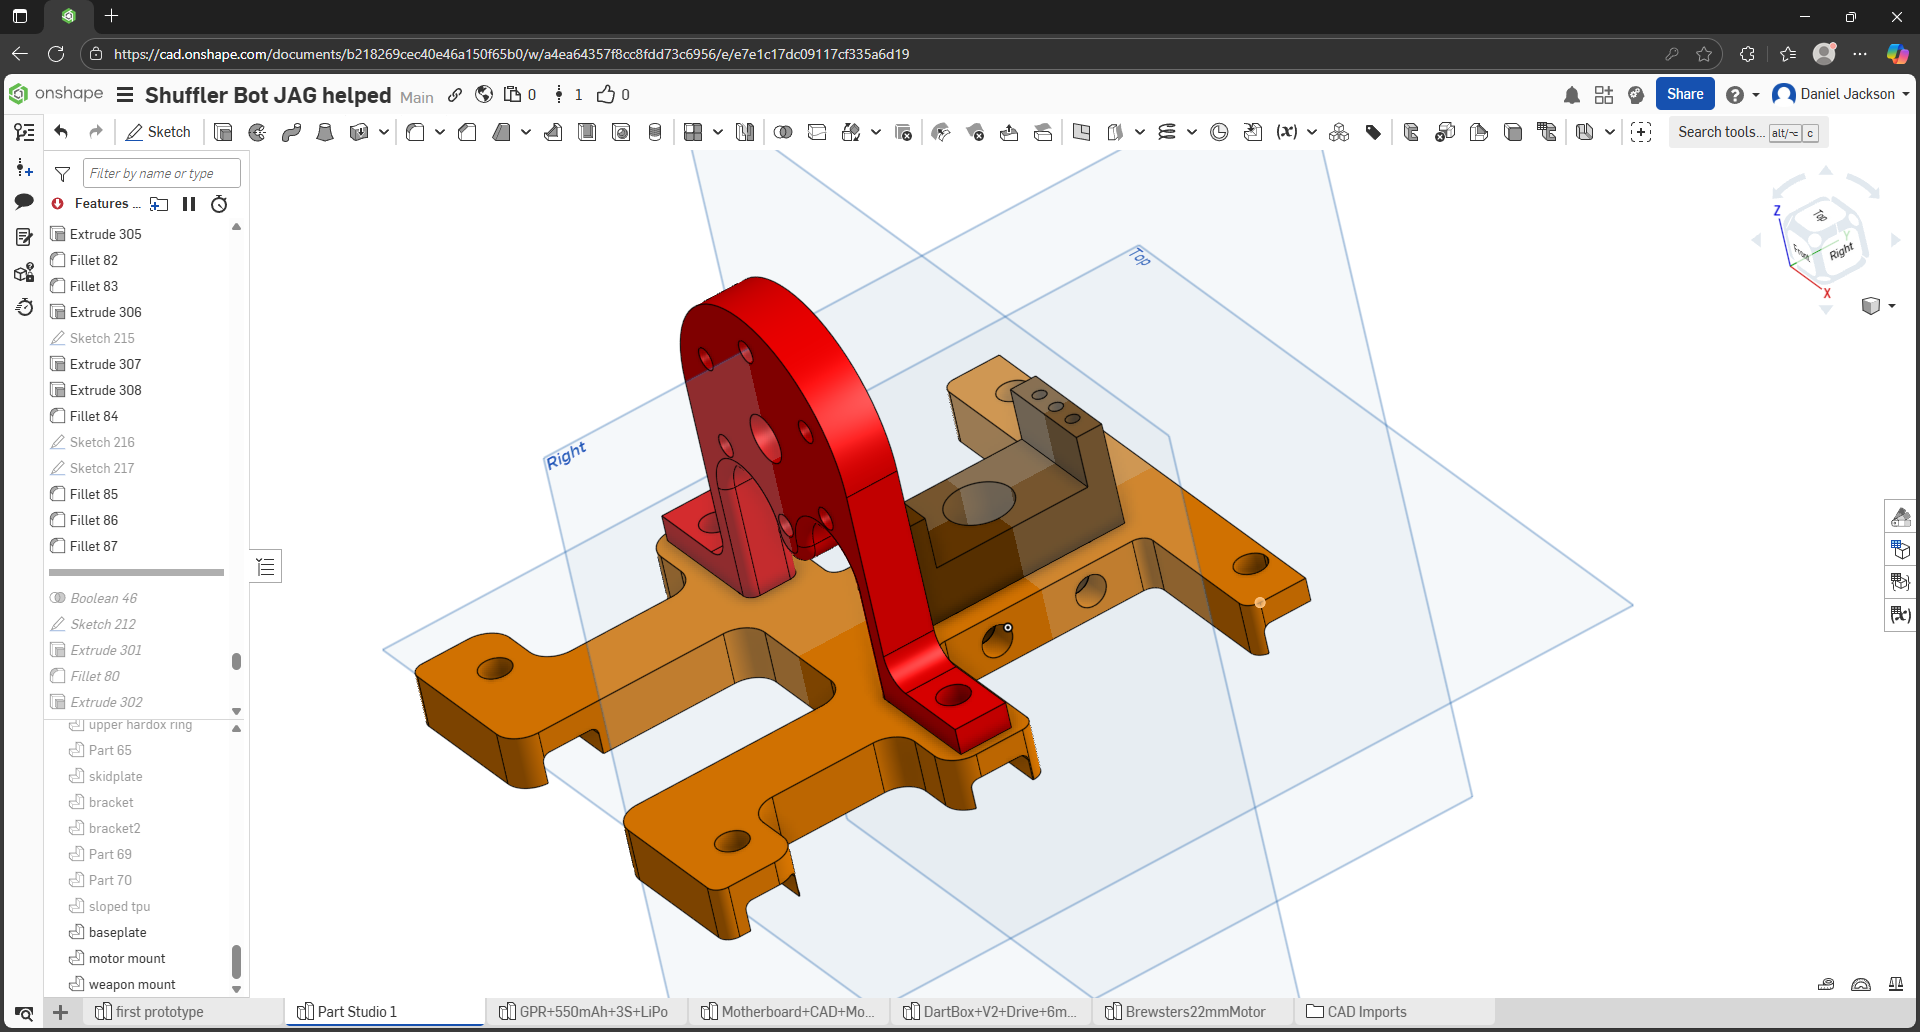
Apologies for going a little radio silent for quite a while there… damn you Autism… but I’ve been wracking my brain for quite some time to try and get a decent solution to how I was going to get the weapon mount and the motor mount to even connect to the baseplate… and the solution? Just jigsaw and bolt it together. What’s not shown is that the red motor mount and the brown weapon mount go through the orange baseplate, with each corner of both mounts and cut-outs having a 2mm chamfer to round it out. The red weapon mount will be held in place by the same bolts that hold the baseplate down, and the brown weapon mount will be held by two bolt as well, to keep things in place.
Whether this will work or not would probably have to be when things go into practice.
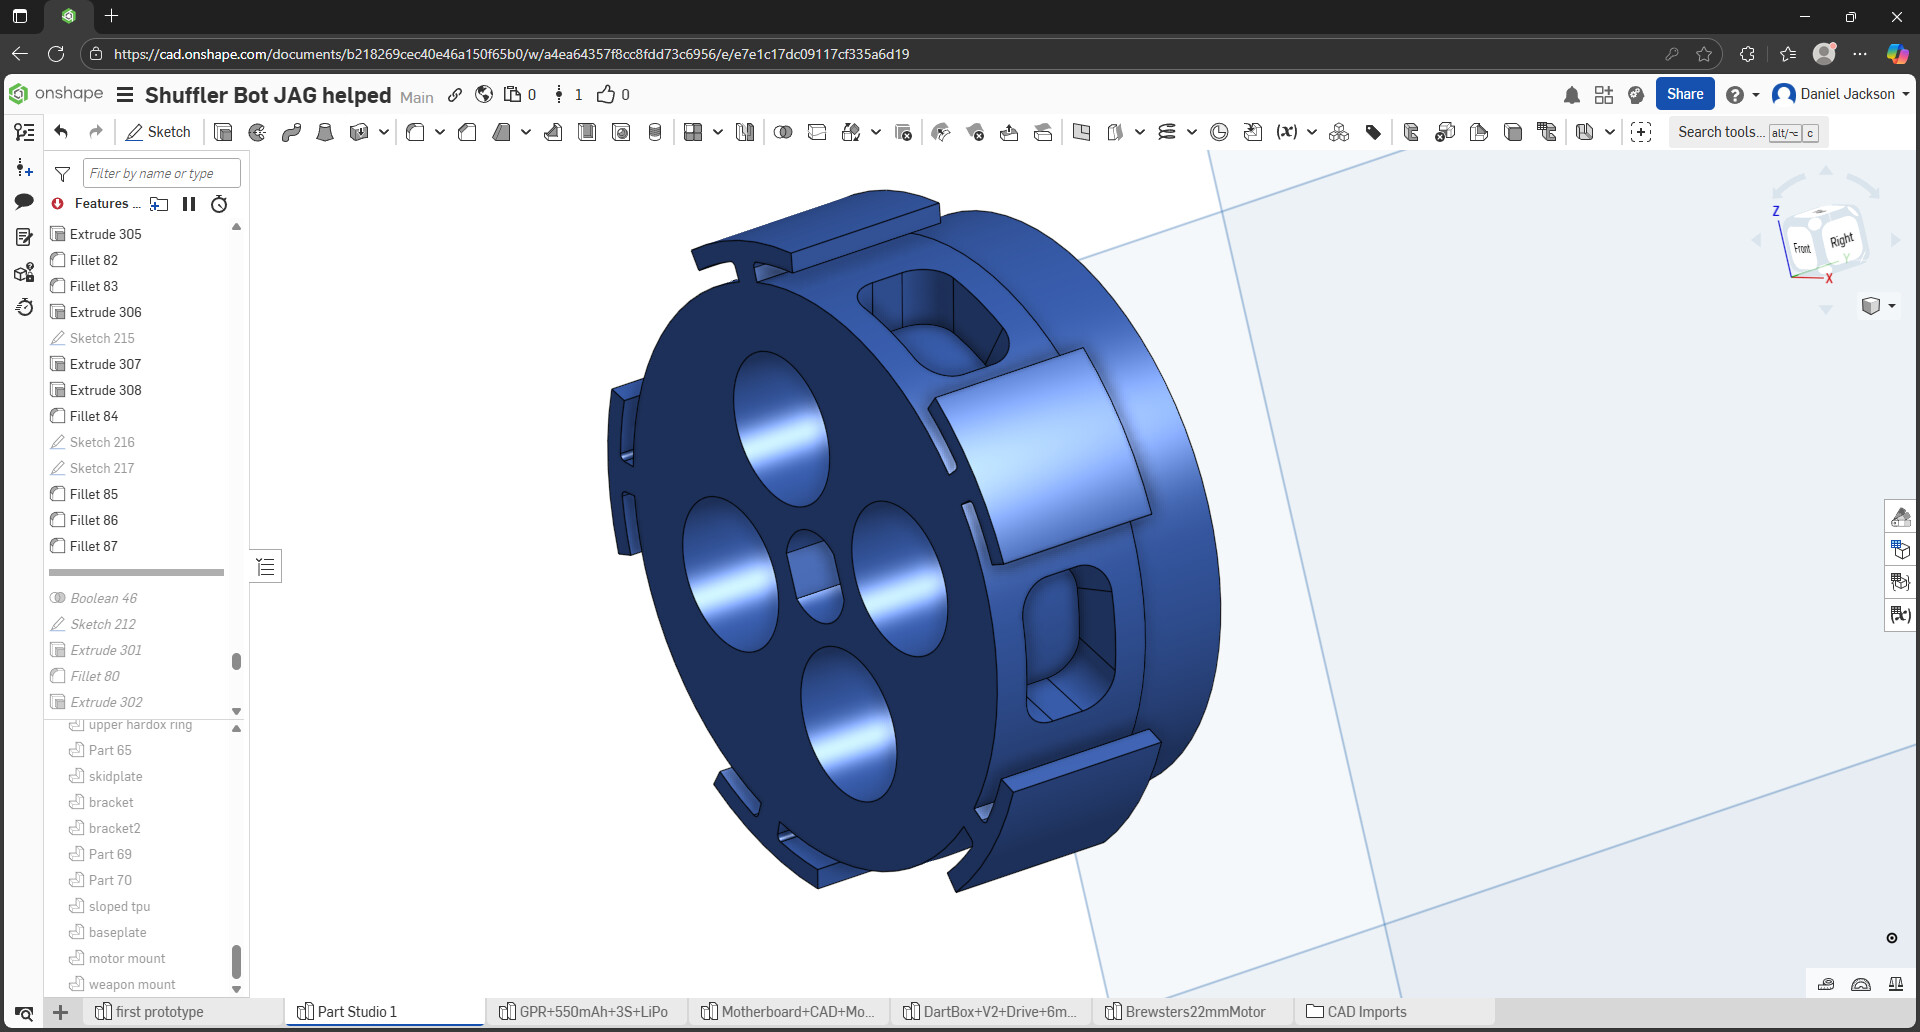
In other news, the wheel for the friction drive had a slight redesign, and by that, I mean that I added a couple of wells into the side for the polyurethane to go into to give it a bit more adhesion to the wheel itself, so it doesn’t slip to one side or the other.
I then printed two of them, along with two moulds for them to sit in, all in TPU, and now I just need to order the Polyurethane, the weapon shaft, the bearings, longer bolts for the outer parts of the shell, aaaand see what options I have in terms of cutting services for other things…
Before that though, I need to finalize the hardox pieces, and either decide to design the teeth into them, or make separate teeth to bolt between them.
I also need to add some sort of grip to the feet of the shuffler as well, so that it doesn’t end up sliding all over the place, so the shuffling feet’ll get a quick touch up too.
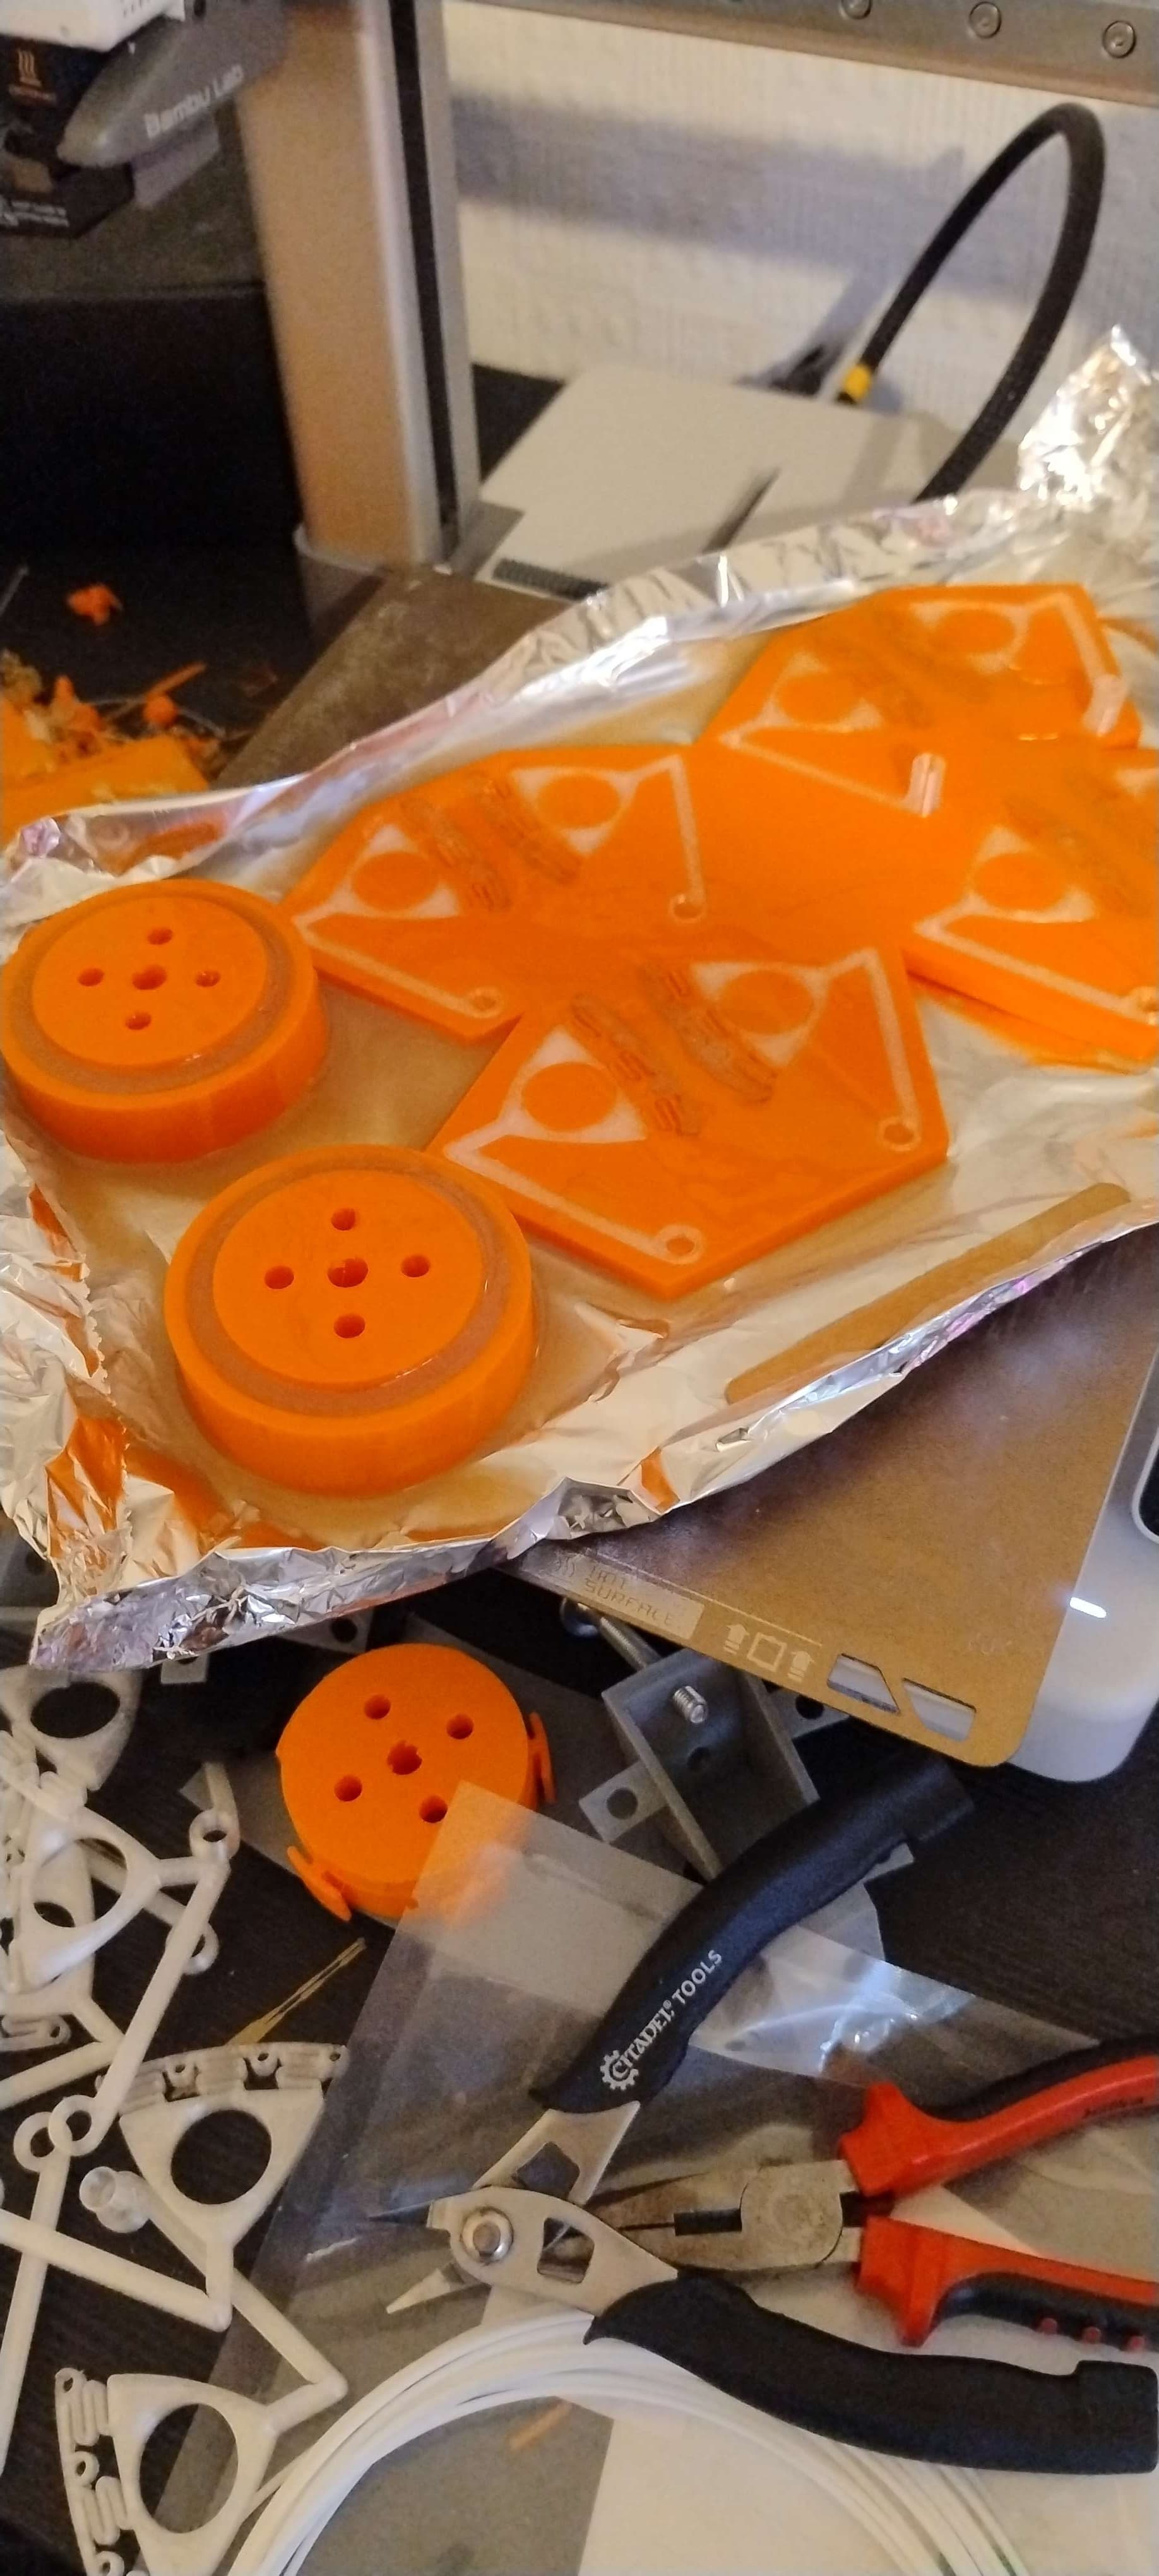
So… the polyurethane has been cast… whether or not it works or not all comes down to me not being an idiot… I just hope I can cut away any run off or… pull it off, or whatever, but as for now, we’re in business, it’s curing on the 3d printer’s hotbed at 30 degrees, because my room, and in particular, where I live is fairly cool… and I need to find a proper box of disposable gloves… never use left hand gloves on your right hand if you value your thumb.
Good news, the wheels came out, with a fight… that was f*cking painful, considering that some of the polyurethane managed to get into the bolt holes, but they’re out and cleaned up to the best of my abilities.
Bad news, the feet didn’t, no matter how much time I put into getting them out, it’d end up being a complete mess, so those’re going to get reprinted, and the mould is going to be redesigned too. But lesson learnt, and now I know what to do. Smaller and thinner moulds, and try to aim for a more controlled pour.
i dont know if you have, but a pro tip is some vasiline to get the stuff out easier. before pouring, put some of that in, also you could add some space under from where you can stick an allen key and puuuush
Oh I did. It was just me being bad with my pours. So for the future, I bought some syringes, to aim for a more controlled and easier time, as if you look closely, there’s a whole damn pool of polyurethane in the tin foil.
I’m the problem, so even if I had vaseline inside, it’s the outside that had none and made things that difficult.
So, good news, the syringes helped, and the feet came out spectacularly, so now I have rubberised feet upon my shufflers.
Now that I think about it, I have no idea how heavy all these HDPE pieces and Hardox pieces will end up, so my question is… how would one find out how heavy these things are in Onshape? Or do I have to bite the bullet and find out once everything’s assembled?
Speaking of biting bullets, if I were to get these cut out, who or what service would be the best bet to get things cut like HDPE or Hardox pieces quoted and/or cut out? Any help’d be fantastic.
Ive got no idea about onshape as i use fusion but if thats not an inbuilt feature you could find the volume of the parts you and just apply the density of the material from google and find your mass. either that or move your parts to fusion or something to find it out
if neither of those are options could move them to your slicer and set the material density in there to the same as steel or hdpe and set the part to solid. ive never done that but id imagine it would give you some idea
in regards to getting things cut, steel wise is best to go to a laser cutting company like lasered or charles day steels for reax. they will have a minimum order so if you dont have allot of parts its worth asking around to see if anyone is running a group order.
if it needs to be hardox pegasus profiles also offer laser cutting services but they can be more expensive
worth pinging them emails for quotes
in regards to hdpe lots of people offer hdpe cnc services within the community, infact im pretty sure theres some people othering hdpe cutting services in the “for sale” section on the forum
Well, going through all the weights, I think I might end up being maaaaybe 500g overweight, that’s including the 500 I get as a bonus, but I might have a good idea that might end up saving me more weight in the long run, and I’d love your guys opinion on this, if possible, before I commit.
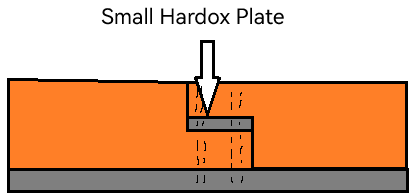
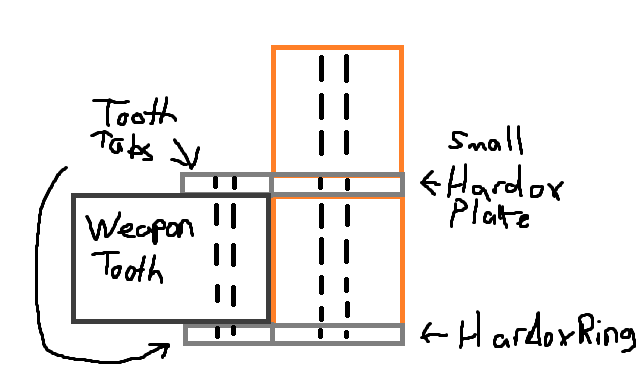
Instead of having two large circular hardox rings, which would end up weight a whole load of dead weight, and having to thin it out to even try and make it lose weight, I thought “How about just having the lower ring, and make a small plate that goes between the horizontal parts of the shell, and in turn holds the weapon tooth in place itself via bolts running all the way through?
That puts the bolts in quite a lot of shear, and unfortunately they will bend on big hits and throw everything out of whack.
Putting the weapon ring around the middle would help, so that the hardox parts clamp together, or if you’re keen on it staying an undercutter you may be better off with a plastic or aluminium ring and using that to mount hardox inserts as weapon impactors. The Greatest Danger over in the US is a meltybrain that uses a large section of aluminium pipe as its body and it’s super durable.
Yeah, that’s an inevitability I didn’t think about, that’s less than ideal. And if I were to make the ring in the middle (where the small hardox plate is in the picture), wouldn’t it more or less be the same problem with shearing the bolts?
The bolts would still be in shear, but they’ll be stronger when clamping two parts directly together than with a big long lever action on them! If you’re driving the shell at 200mph and the weapon tooth hits the wall of the arena it’s going to want to stop very quickly while the rest of the shell will want to keep going, and that’s a huge amount of force for a couple of small bolts with that much stick-out to handle.
I will caveat this by saying that I am not a spinner builder, but my beetleweight does use 5mm OD stainless shoulder bolts as axles and, even with only about 15mm stick-out from the body of the robot, and despite the shoulder being supported with two sets of bearings 25mm apart, they regularly get so bent by spinner hits that I have to hacksaw them off to remove them from the gearboxes.
I figured I’d be a little more detailed on the small plate idea, unless it’s still the same problem, because I feel like there’s been a little confusion. It’ll be sandwiching a weapon tooth, rather than the small plate being a tooth, and I’m thinking about making a ring of HDPE on top of it all so that the sandwich is packed tighter.
Ah, I think I see now! That’s definitely stronger than what I had in mind. If you can get two bolt holes in the weapon tooth and pull it all together with the hardox plates as spreaders for the bolt load that’s ideal. It’ll still be trying to stretch the bolts and go trapezoidal on big hits but having two bolts through both the tooth and the top plate will massively increase the strength (unless of course your sketch is just one half of the weapon tooth of course, then just ignore me )
That, at the moment, I don’t know. I’ll have to look at how much weight I have left overall once everything is put together, though in an ideal world, I’d love to have some sort of tool steel that can take impacts easily.