So with my annual outing of Big Roborts just drifting onto the horizon (BEV’s at the farm!) I thought I would share some of the convoluted whirlwind of progress that has lead to this. The idea of fixing the problems with Flatpack didn’t exactly spark joy in the moment as that sounded a bit too much like hard work and I am a man of leisure.
Please observe these three separate events:

Way back in the mists of time I toyed with the idea of a featherweight grabber and this was the end result of some 2020ish CAD. Nicknamed “Bin Chicken” it was a simple tube and plate frame with some neat tricks that I don’t entirely hate in hindsight.
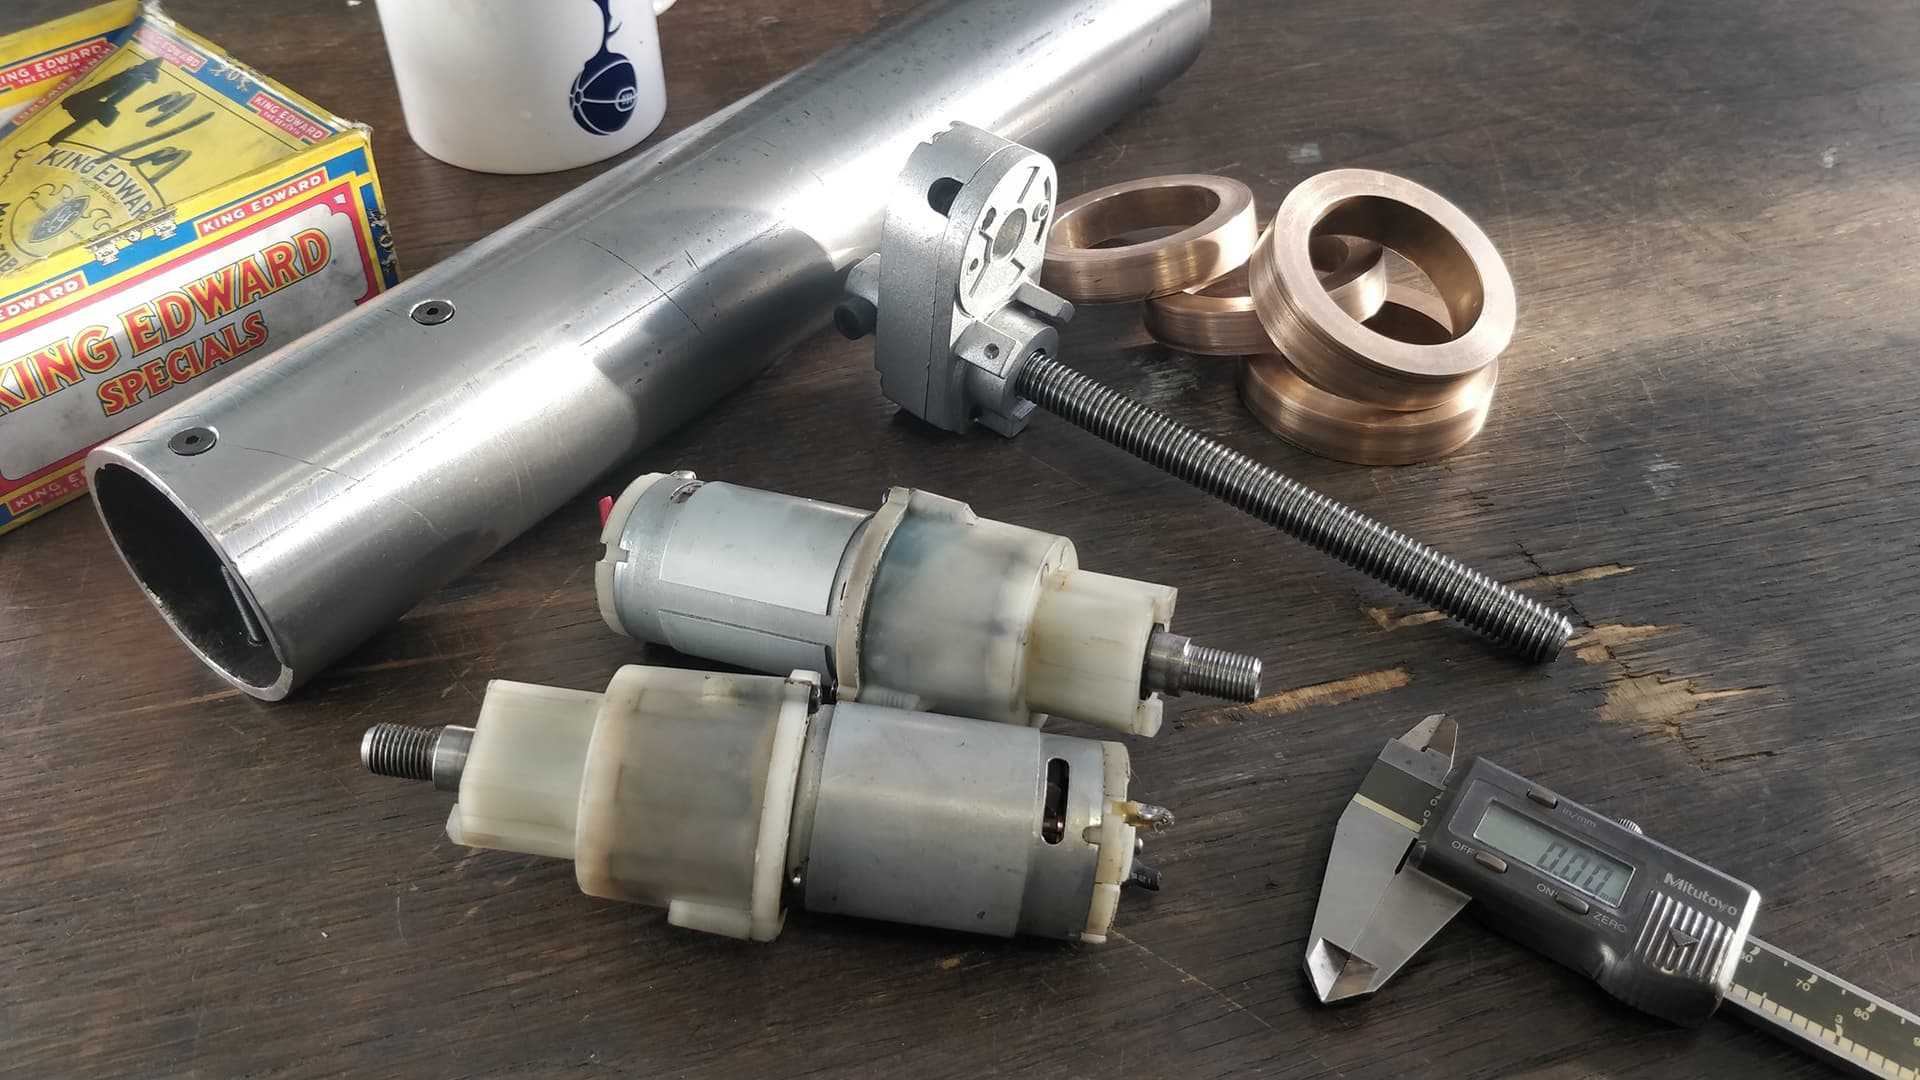
I got as far as making all the motor mounting gubbins, cutting and prepping the main body tube and machining some large bronze bushes for the jaw. Everything else threatened to cost money and part of the actuator was thrown away (intentionally) by a genuinely lovely and well liked coworker so that put the brakes on that particular thought process.
SIMILAR STORY: Here is another vestigial output from an overactive CAD imagination. This was a 12lber I designed when that class was new and engaging. It would have made a better 30lb sportsman to be quite honest.

It got about as far as a rolling chassis. Very scrappy, very thrifty little thing. Got shelved as this was when I moved from Sussex to Somerset.
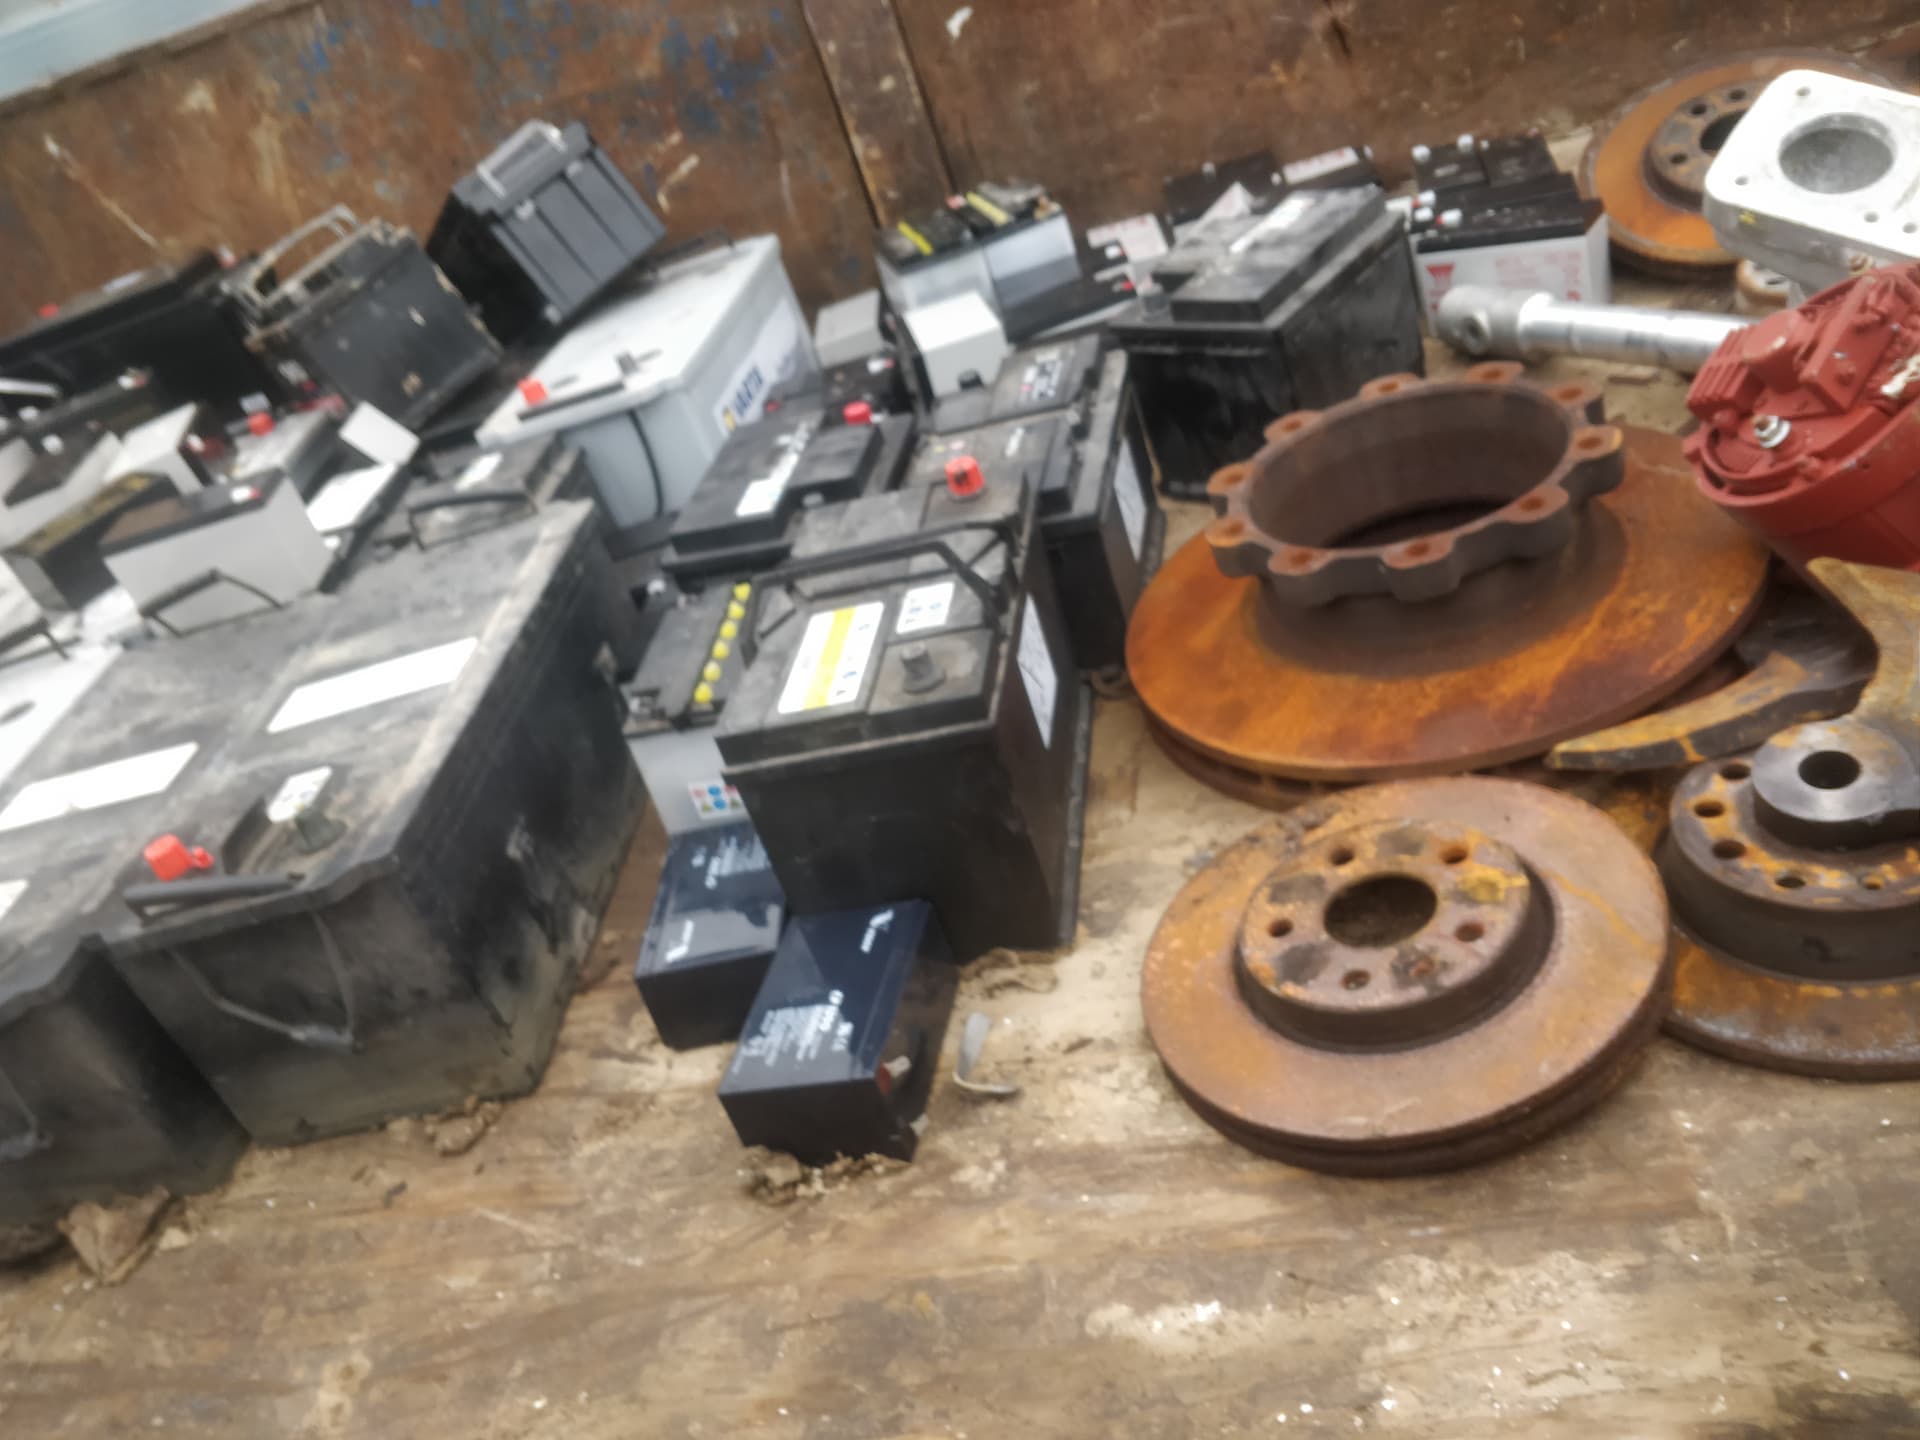
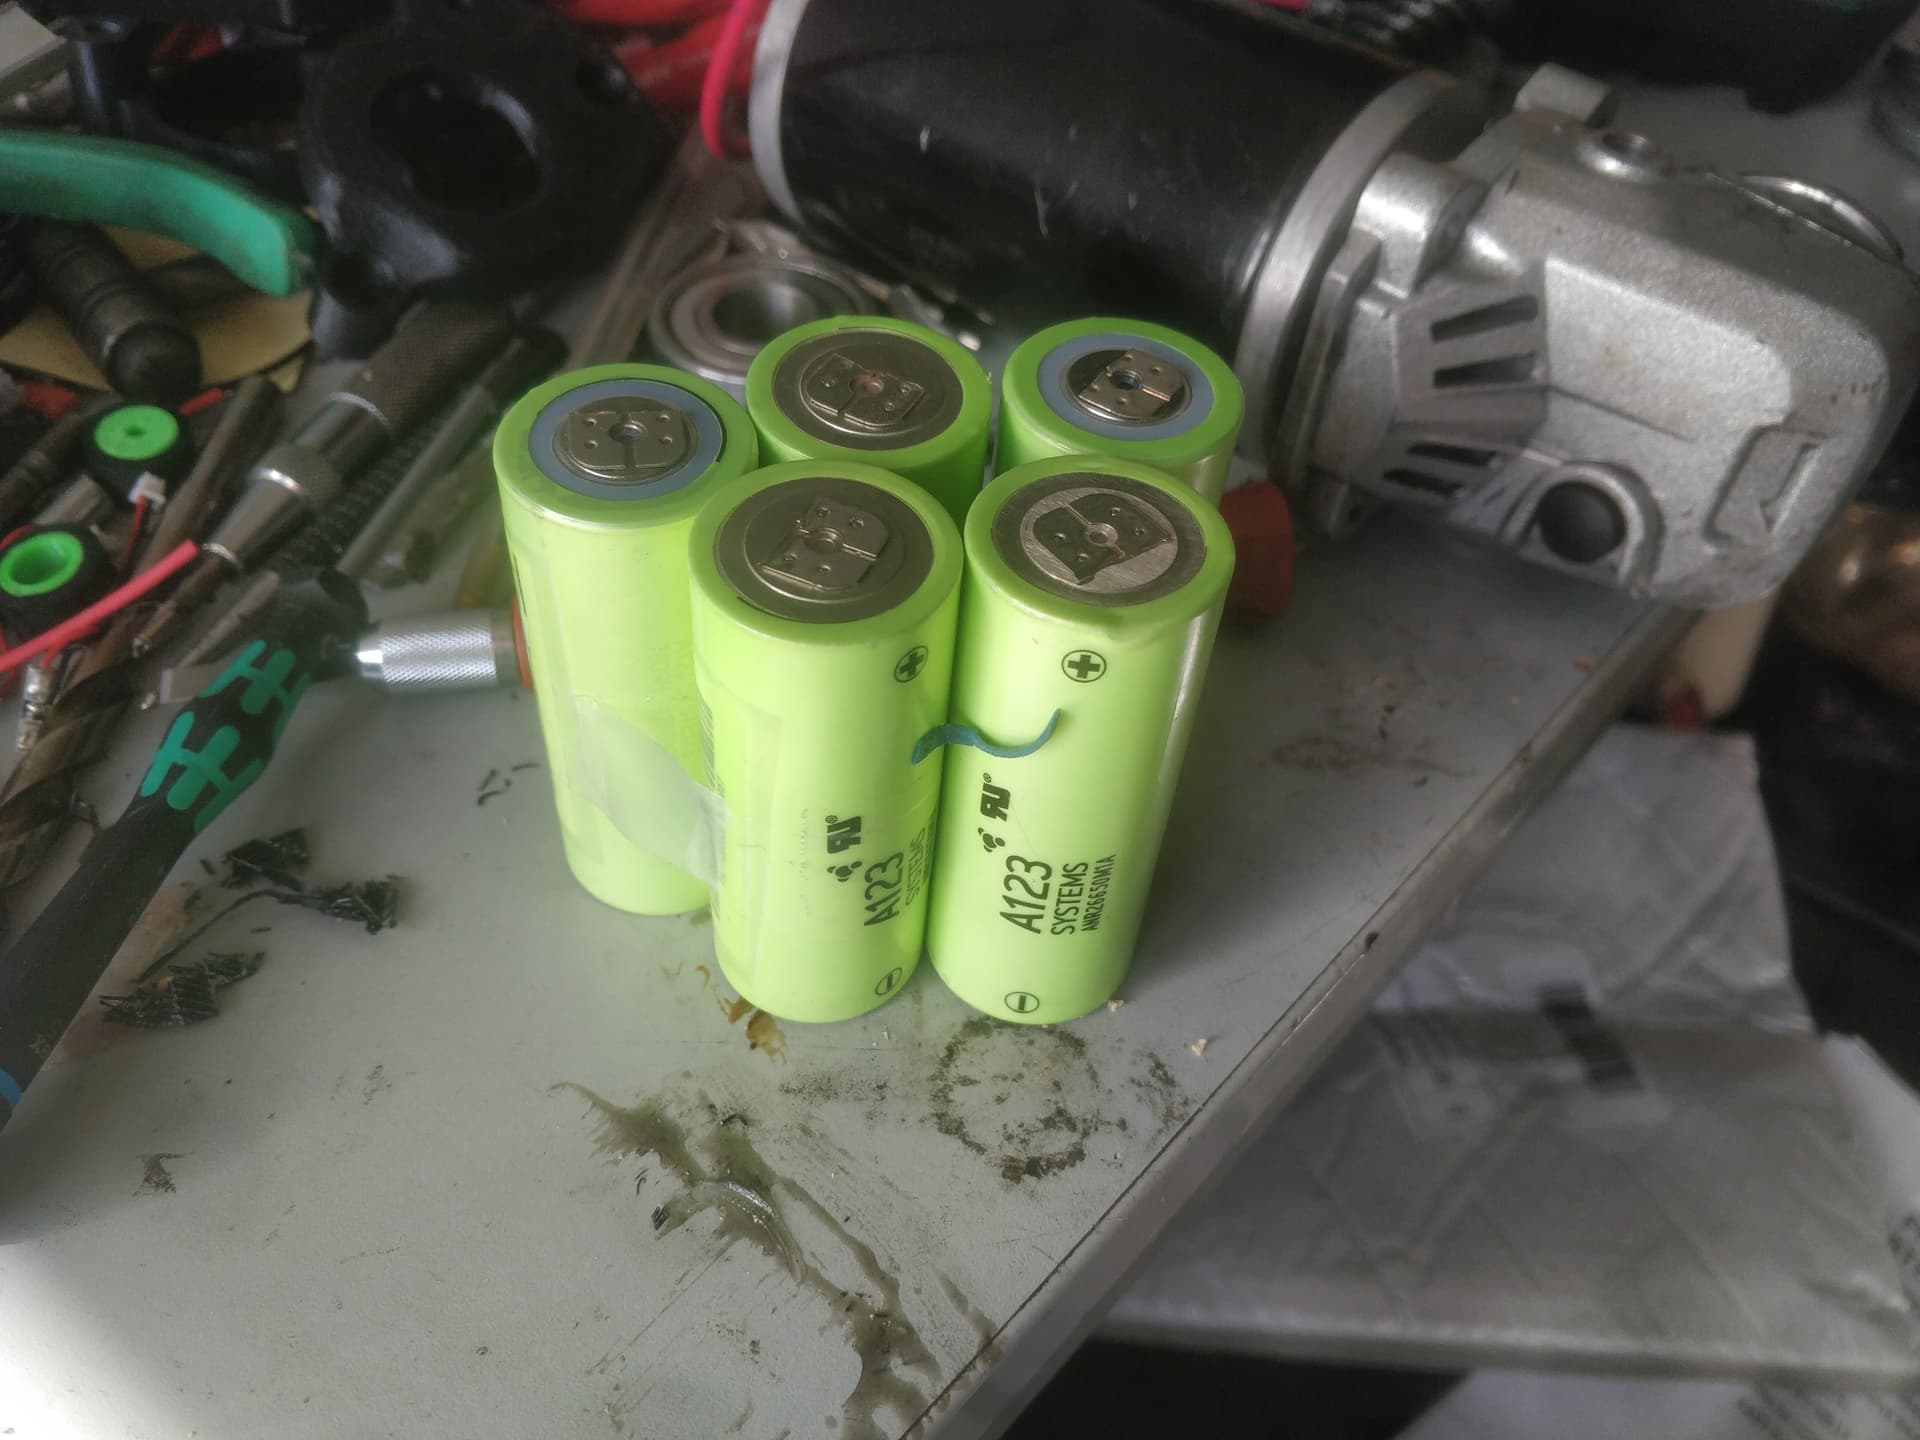
Here is the bed of the scrap man’s van from where I used to work. Obviously the batteries caught my eye. Turns out he’d just been to the local fire station and had cleaned them out. Fire station eh? Something extra special caught my eye…
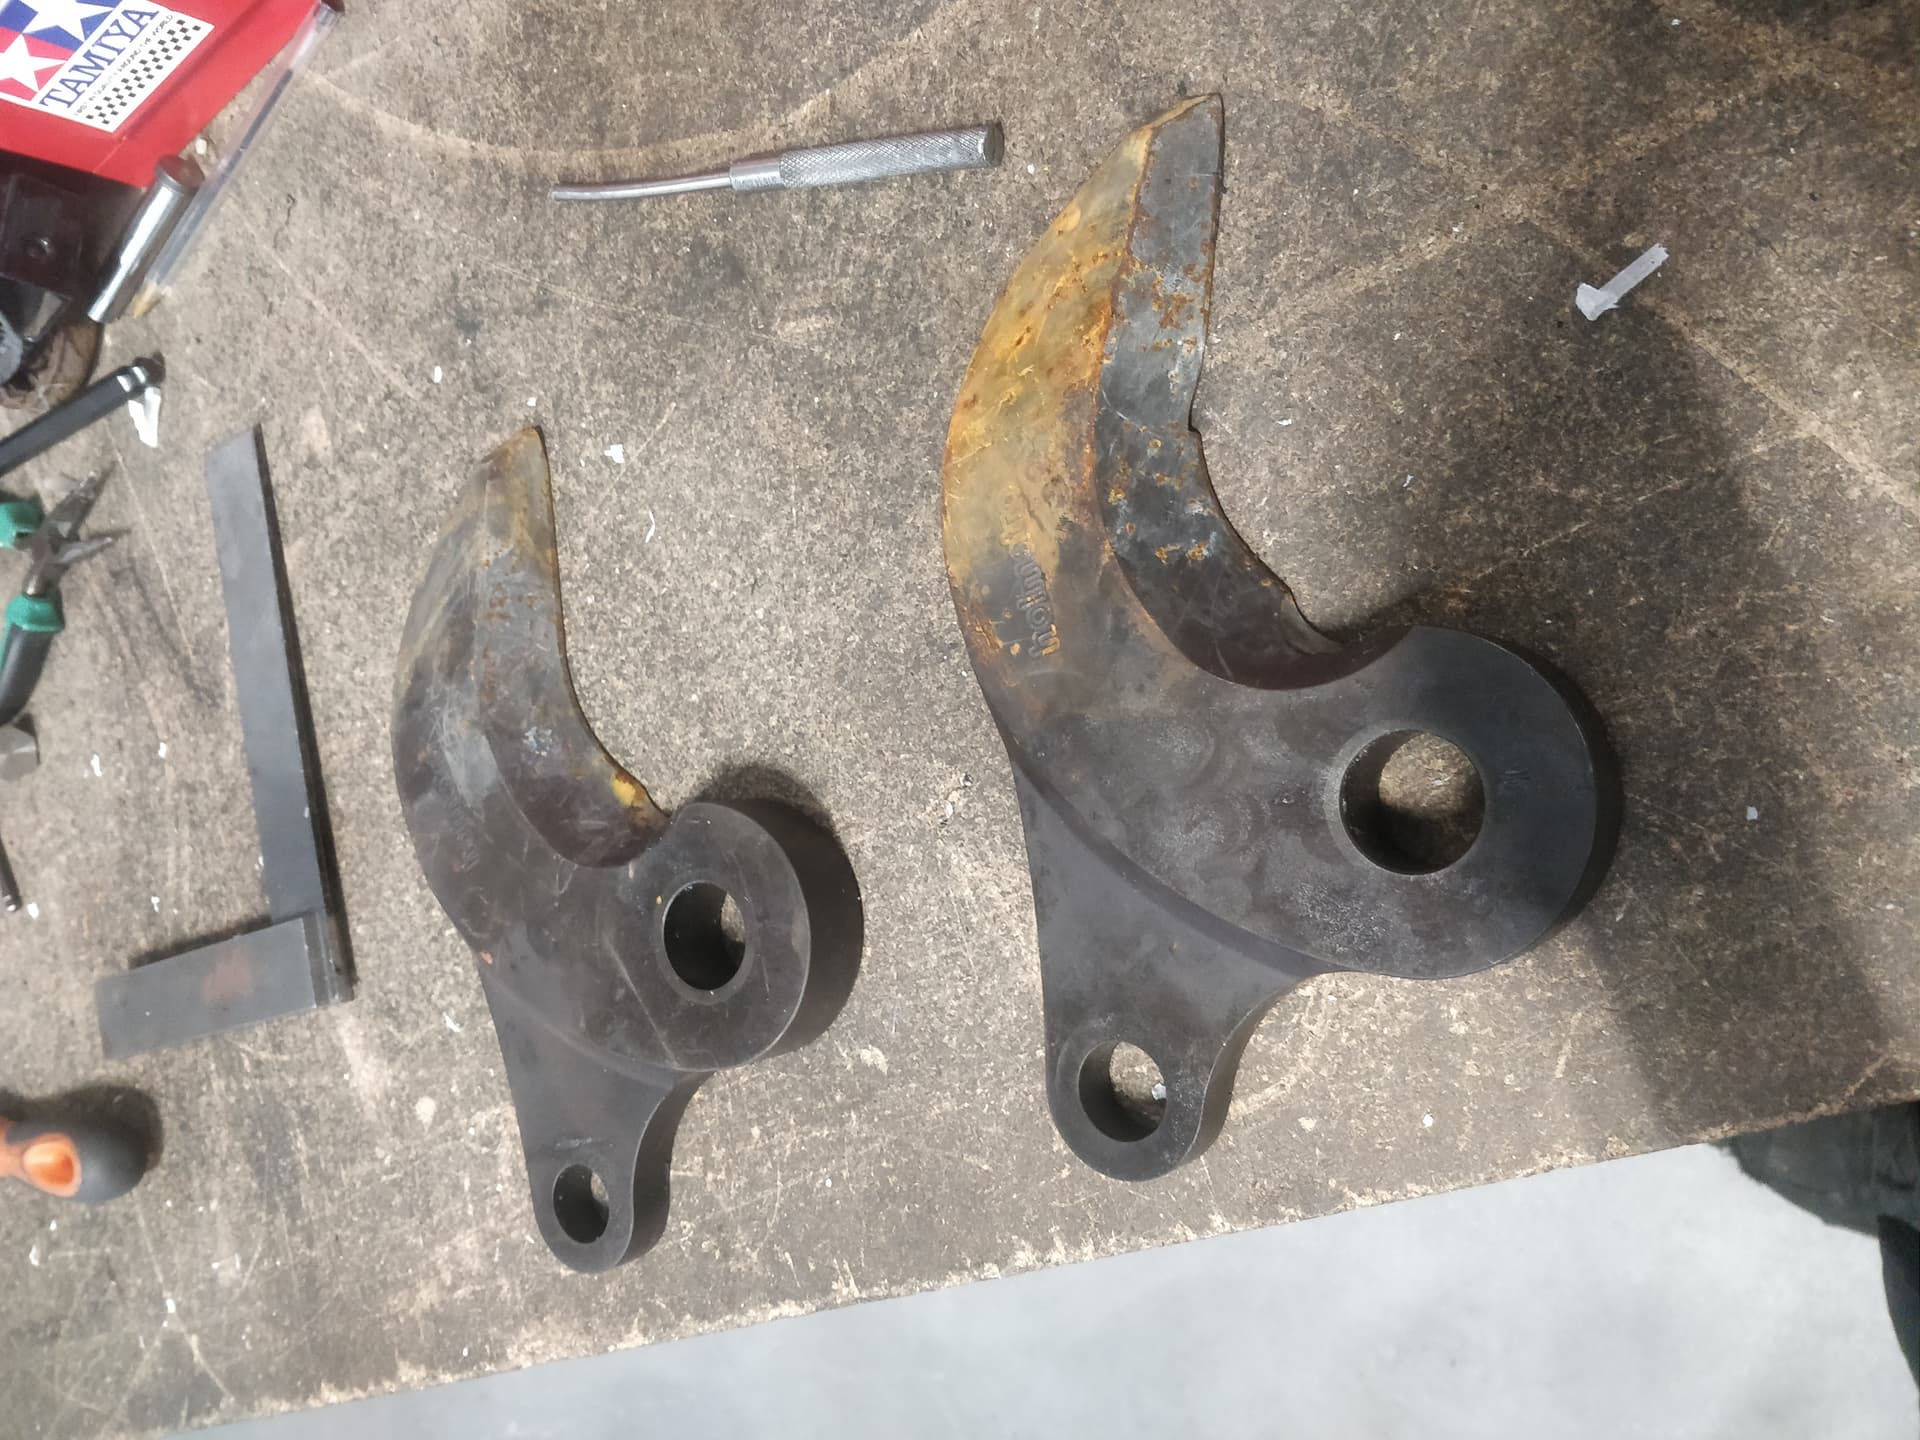
JAWS OF LIFE. Well, kinda. They’re from a hydraulic cutter for sure and they’re an immense 22mm thick slab of hardened steel! And completely free. Scrapman seemed completely unbothered by me asking if I could have them. Big ups Robin, you wonderful pirate.
ANYWAY. SO. YES. Here are the three events in my robo-life that are important to set the scene for this build. I always wanted to build a grabber, I have most of a useable chassis and as the cherry on top I have something too cool not to use.
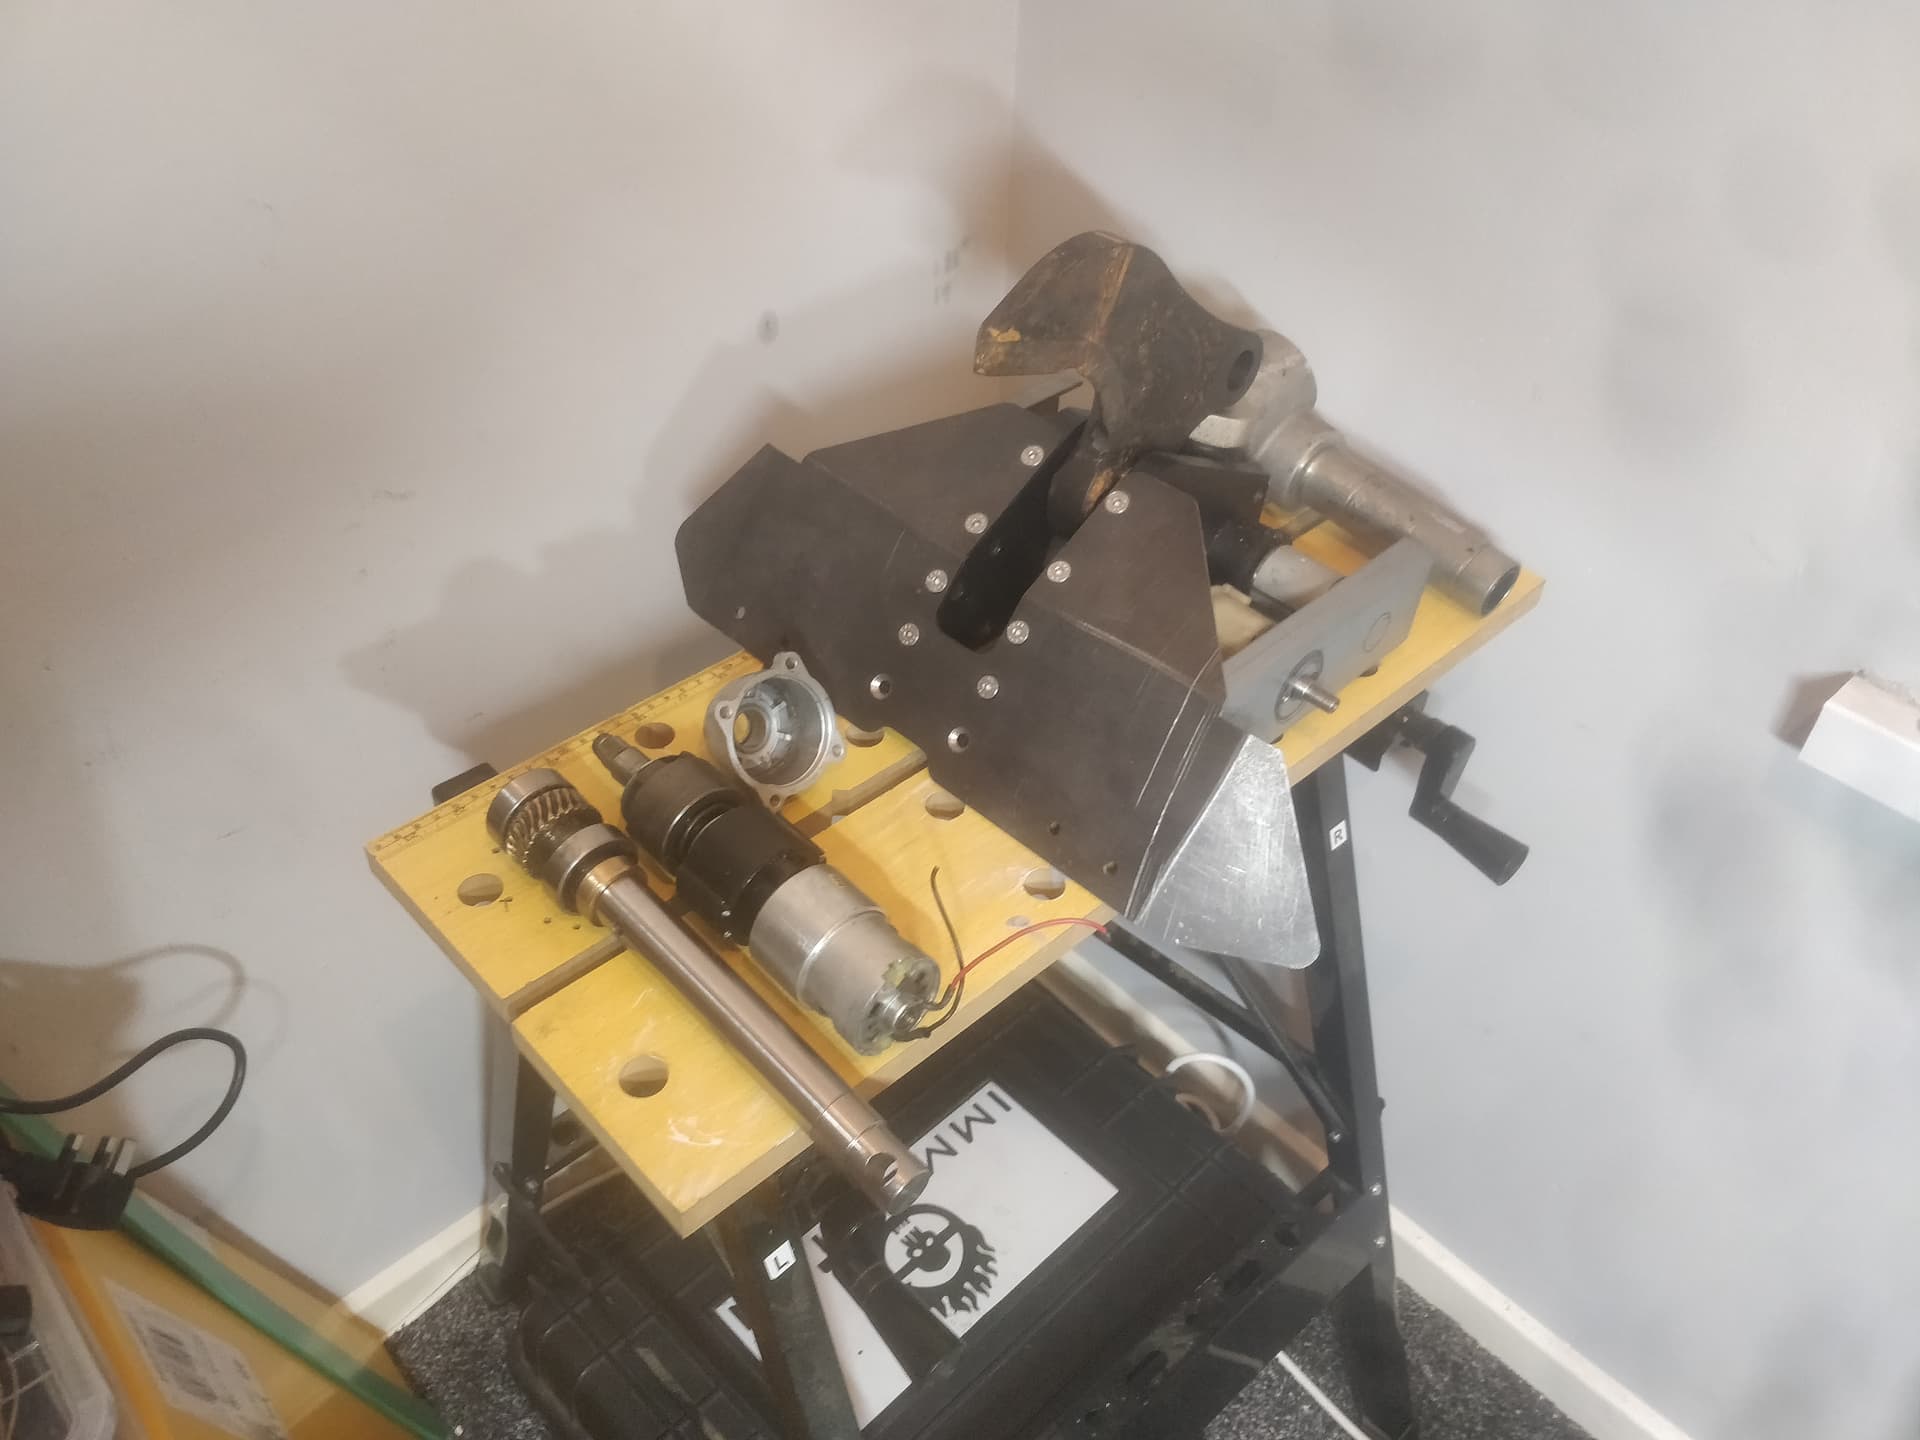
Just as a rough mock up, pushing parts together showed that it was all a little too perfect to ignore. My first plan was to retrofit a cordless impact gun (£5, eBay) into one of Coyote’s old actuators (£postage, Jamie) to make an Ugga Dugga crusher which is something I have also always wanted to do. This was very doable but looked like it was going to take a lot of custom parts and careful engineering. With Fight Fest sadly not happening I decided to simplify my life and just use the chassis that I had, cobble together a “normal” actuator from the bits I already have (and some broken ones I acquired on the side)
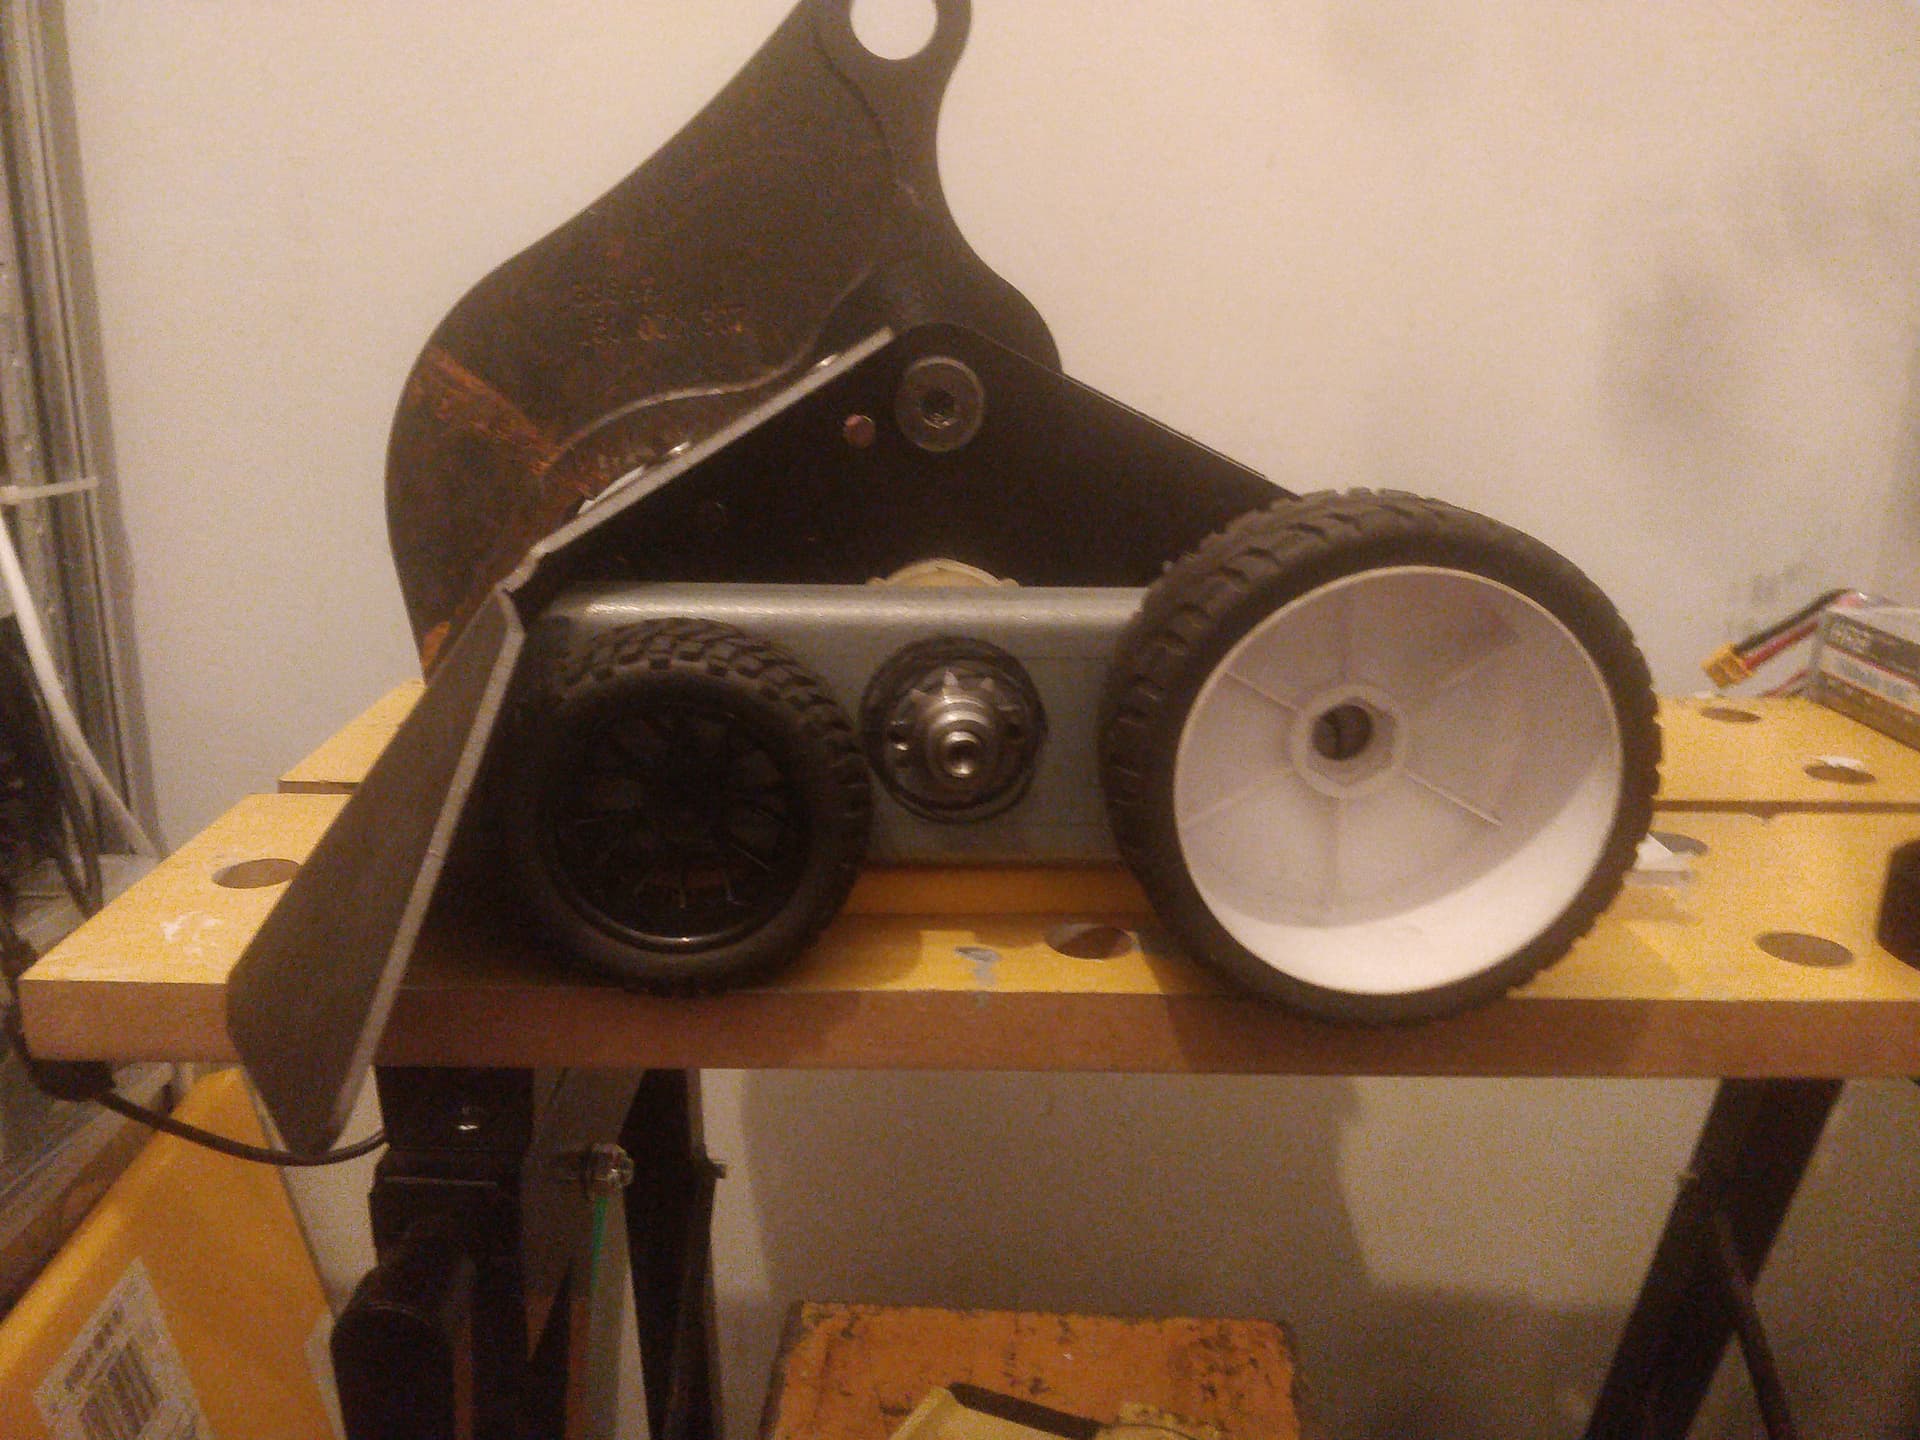
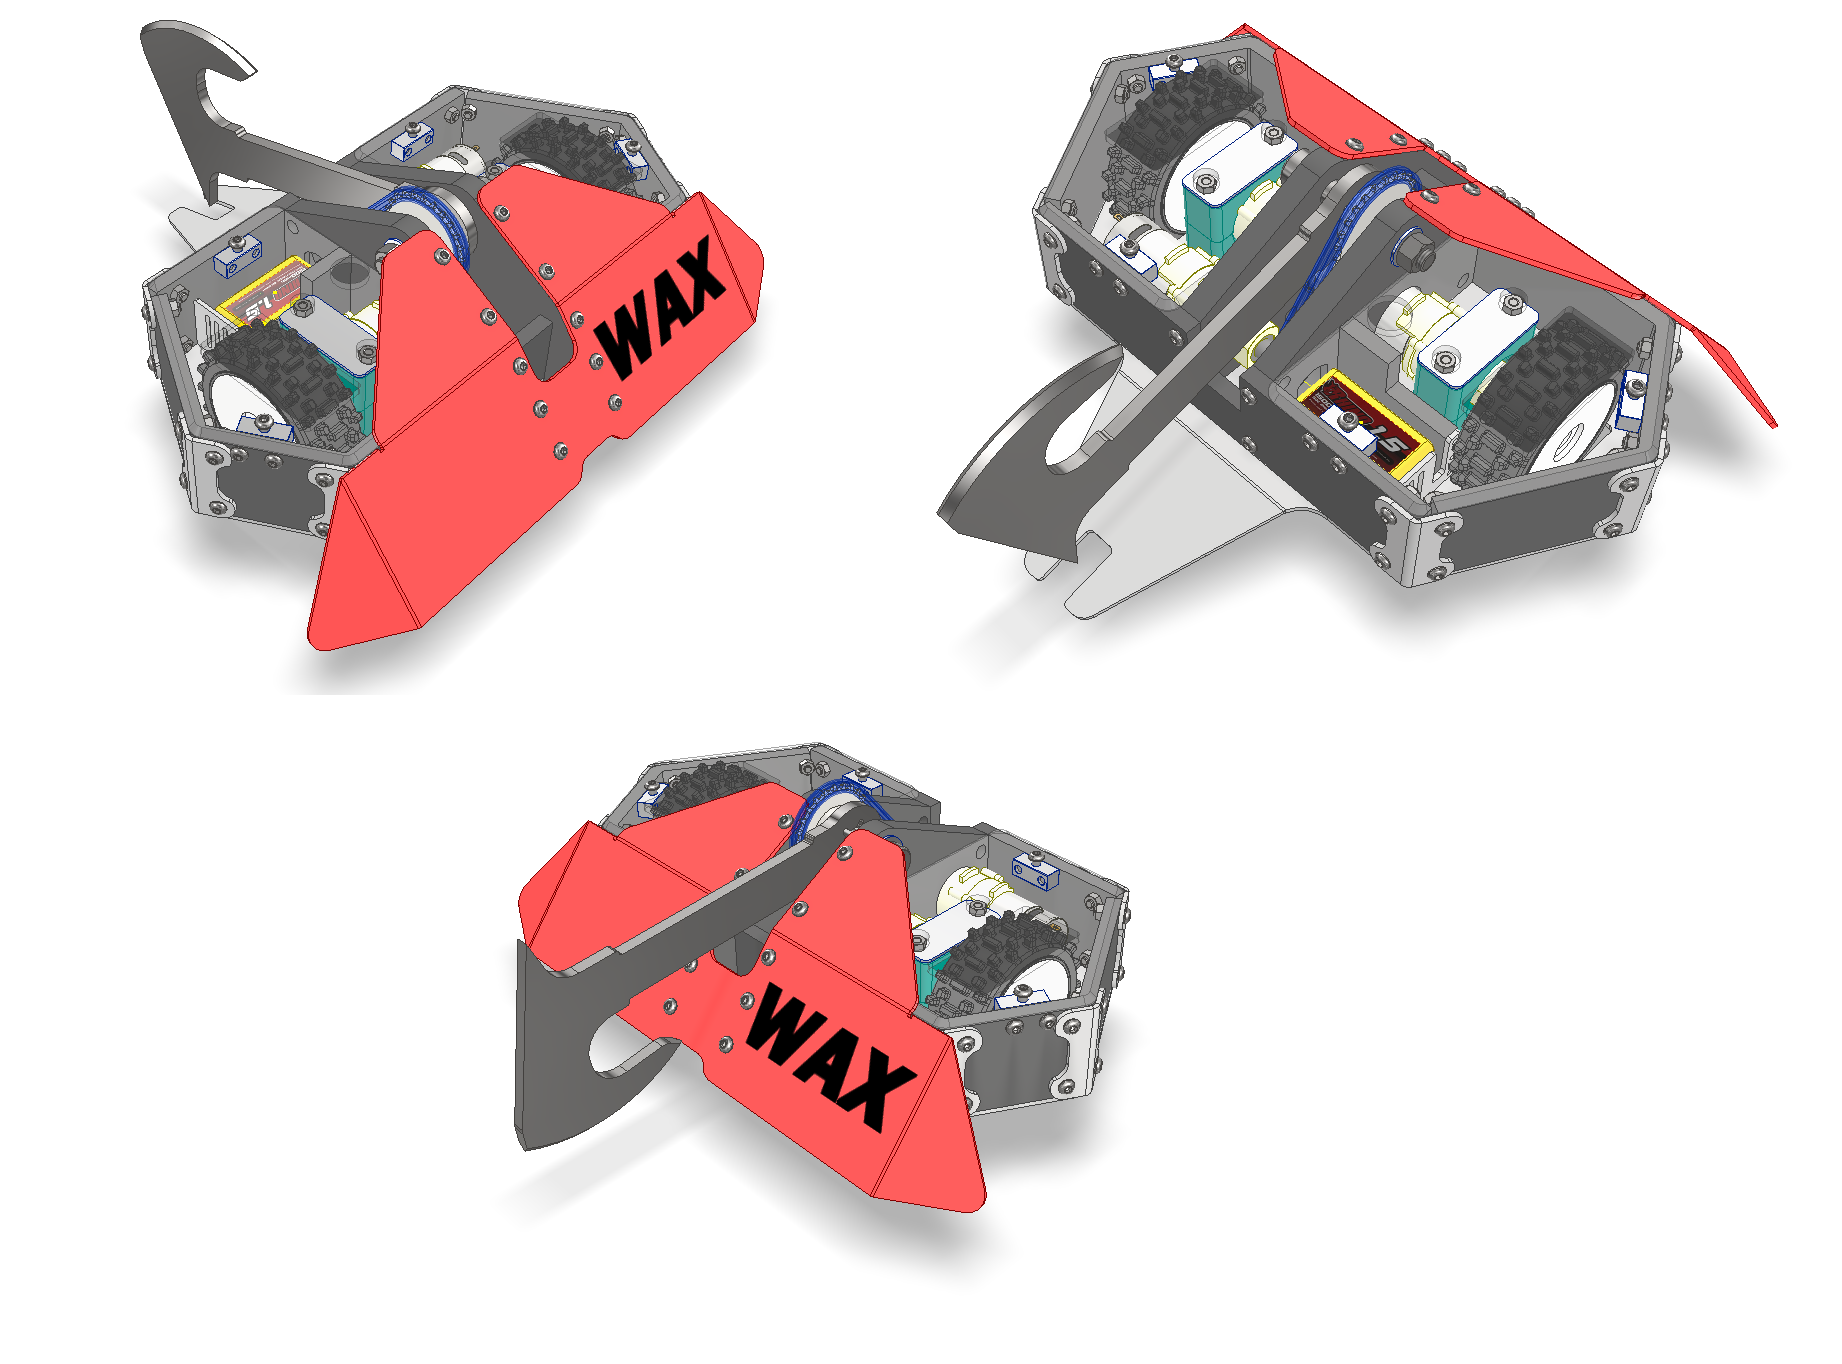
With all full combat based pressure off I decided to have as much fun building something I found neat as humanly possible. Life is too short not to have a second slice of cake, a generous helping of double cream and build a devilish featherweight out of sweat, scrap and moxie. I was enjoying how my beetle project “Hard Nips” was going with the larger rear wheels and so I kept it going for this one. Also it sort of helps to explain where the working title came from. It is just a larger version of the beetle but Big Hard Nips is a little on the nose. I scratched through the bottom of the barrel and came out comfortably in the gutter with Nibble Clamp. Descriptive.
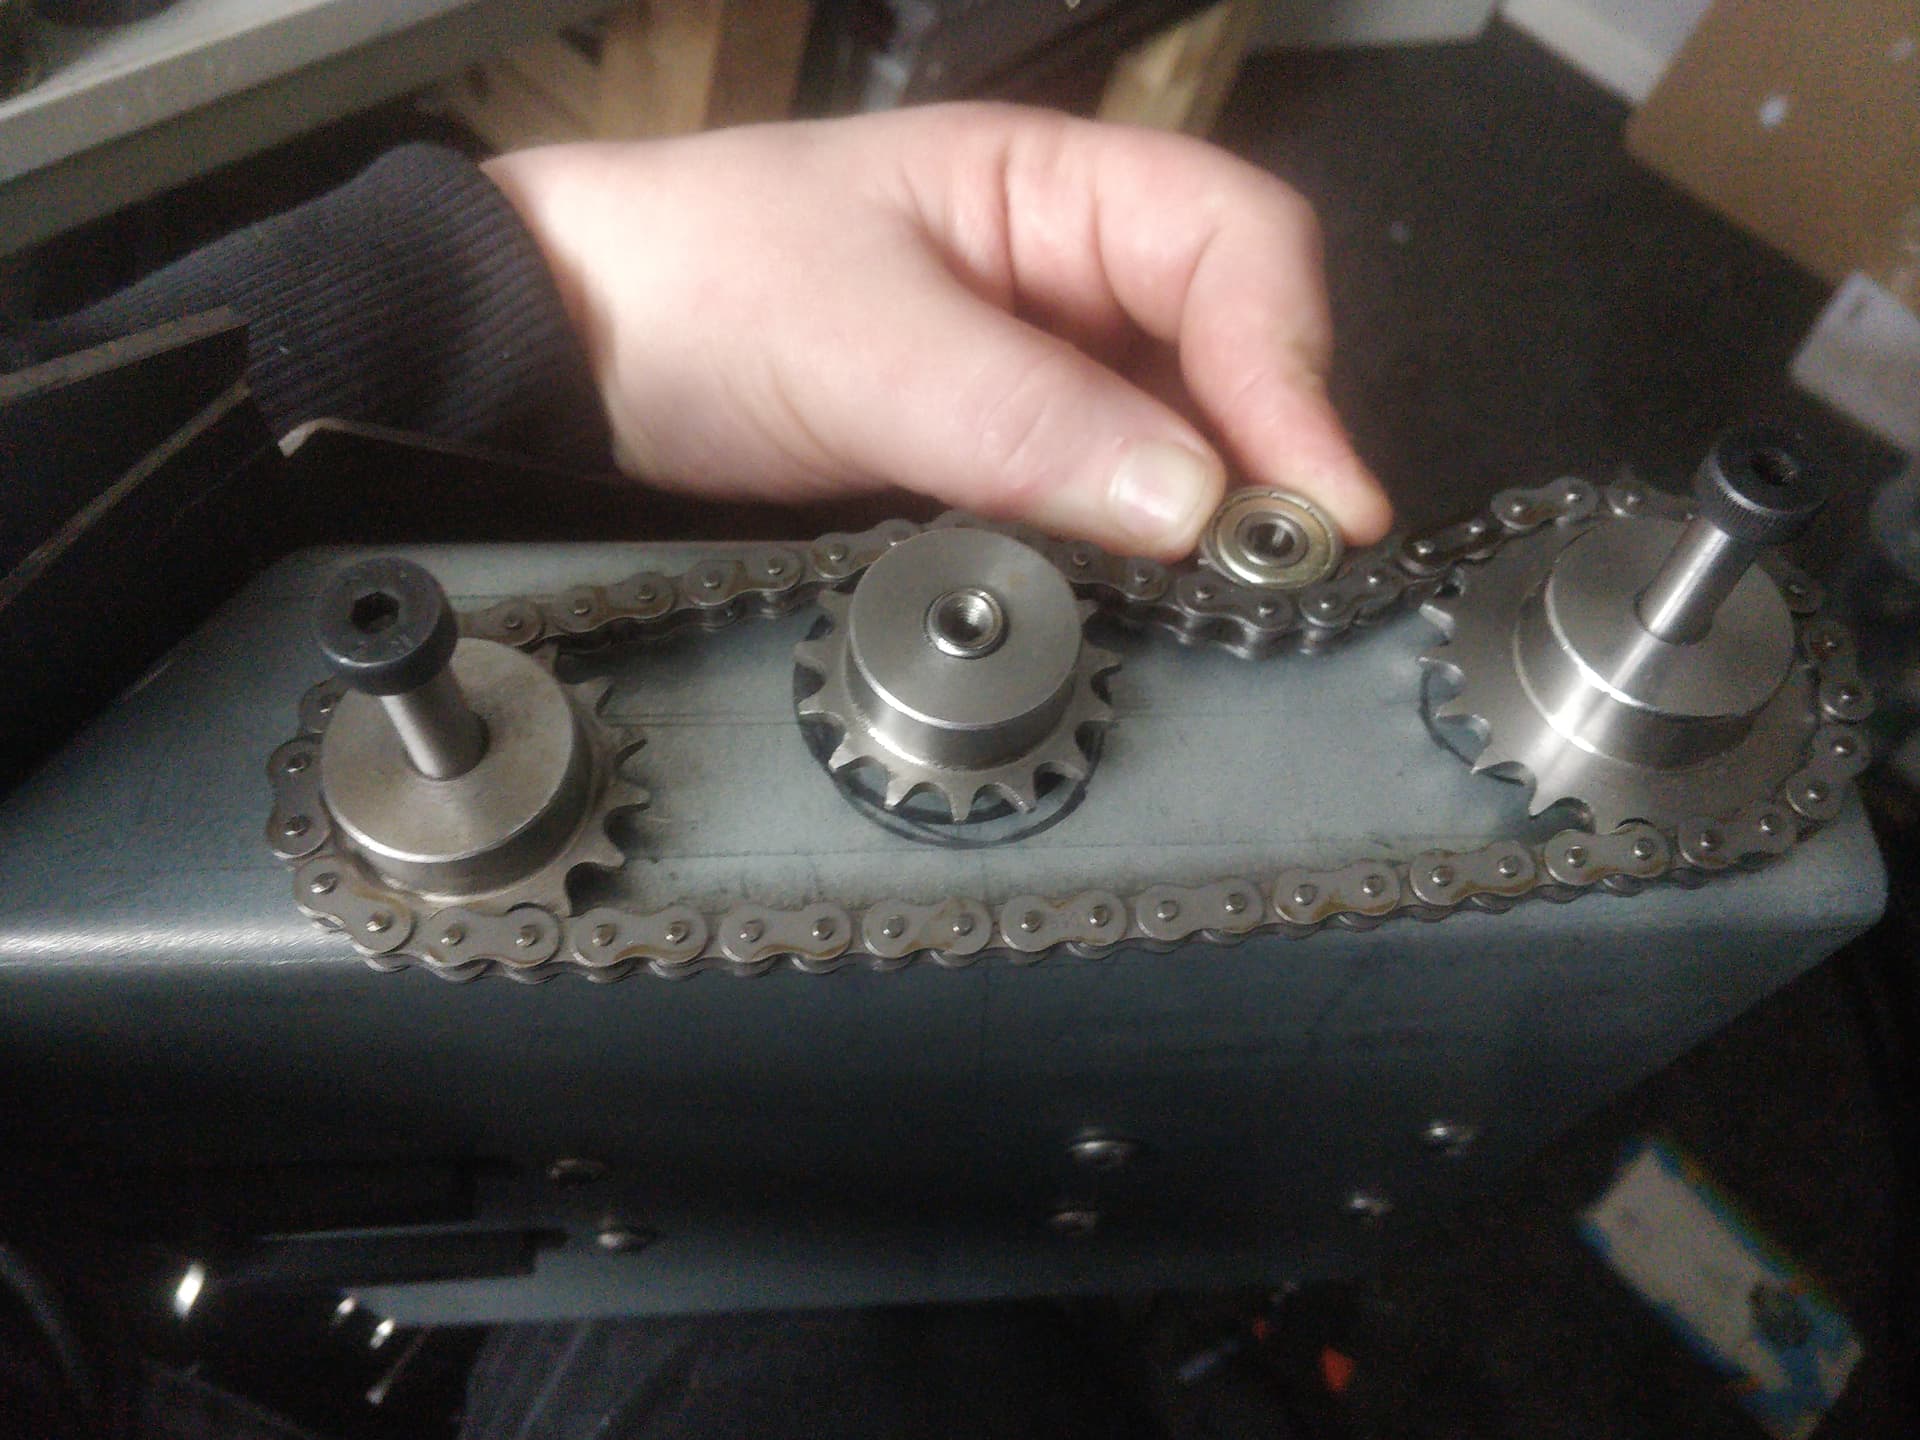
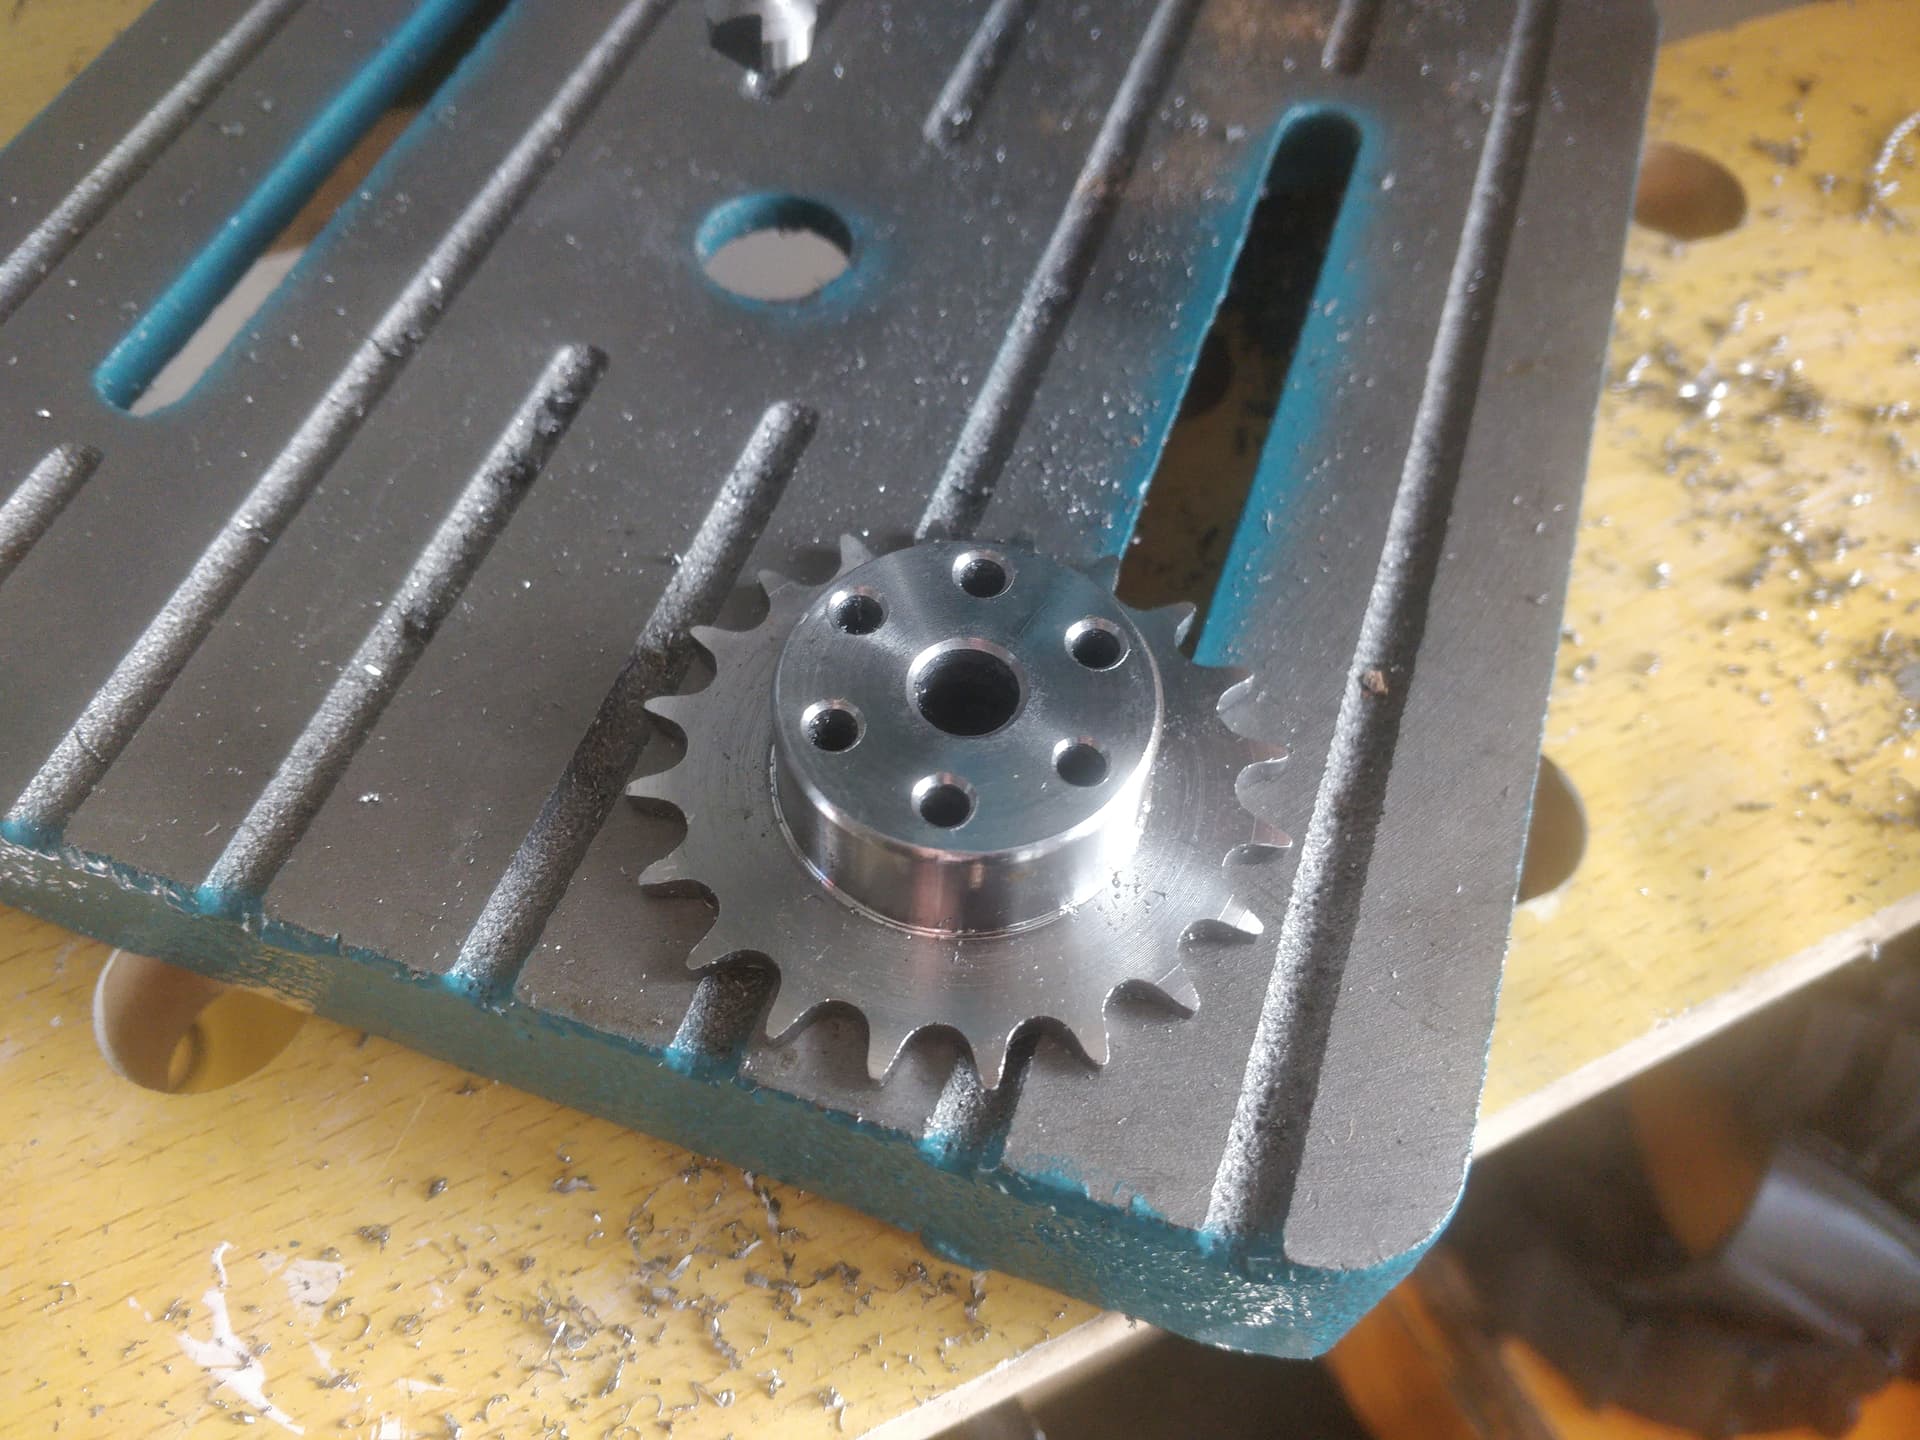
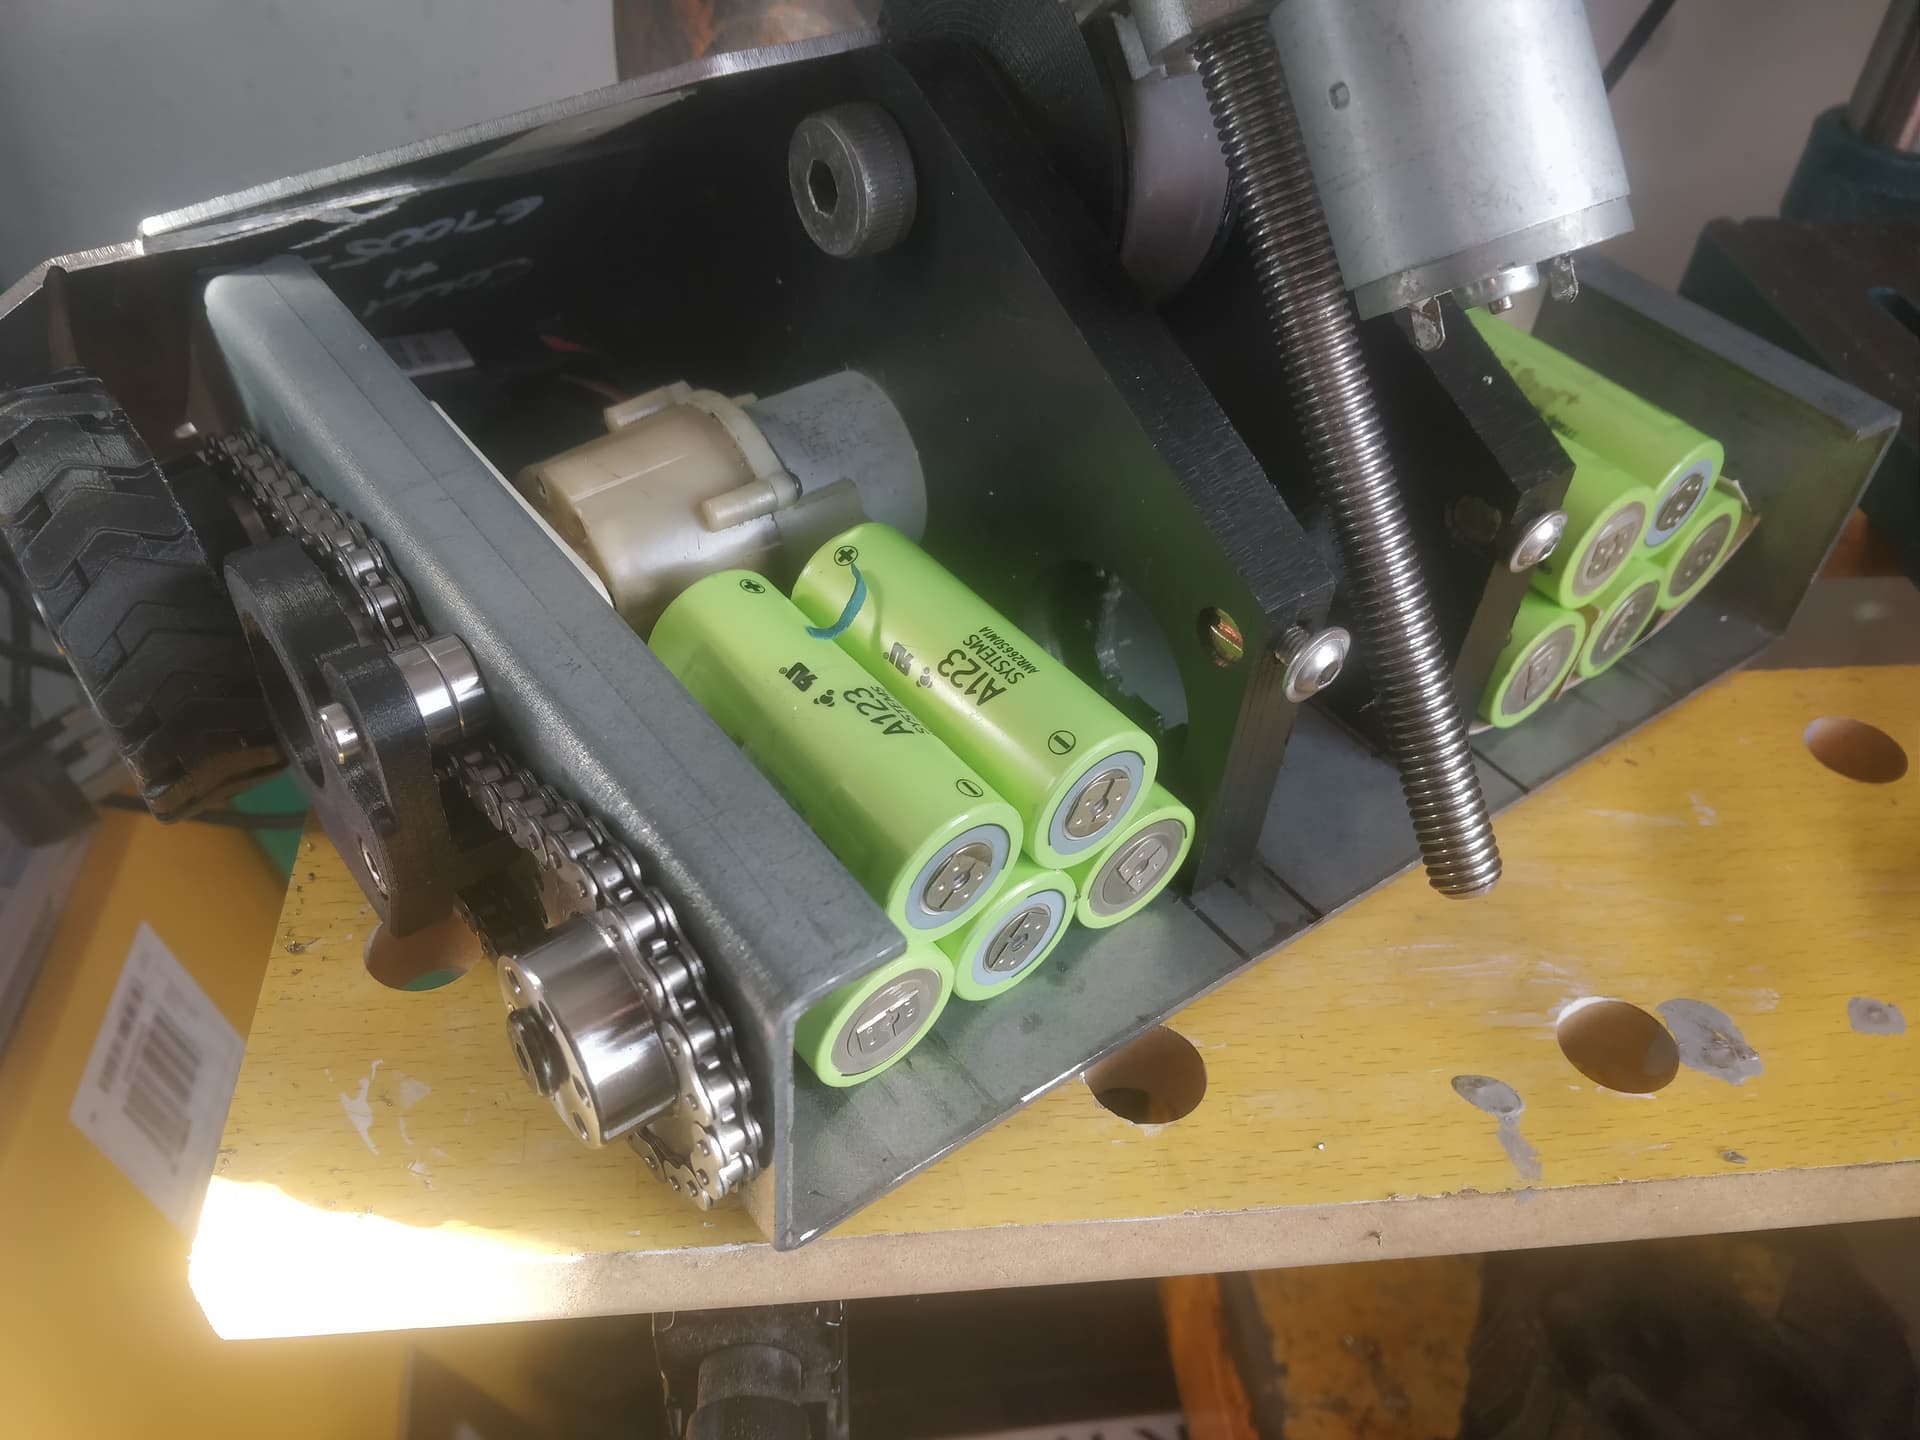
So something you may have noticed is I was a little stuck on where the drive motors ended up. They are pretty much in the centre of the robot. Great for a rapid pirouetting, Terrorhurtz imitating axebot but decidedly less fantastic for what I was trying to do here. Also I was slightly limited by using regular 550 based drills and none of my scabby, beefy DeWalt units here. As a bit of fun and to simplify my life I elected to just drive everything with a single length of 8mm chain. These sprockets are eye-wateringly cheap and they let me drive everything in a very straightforward way.
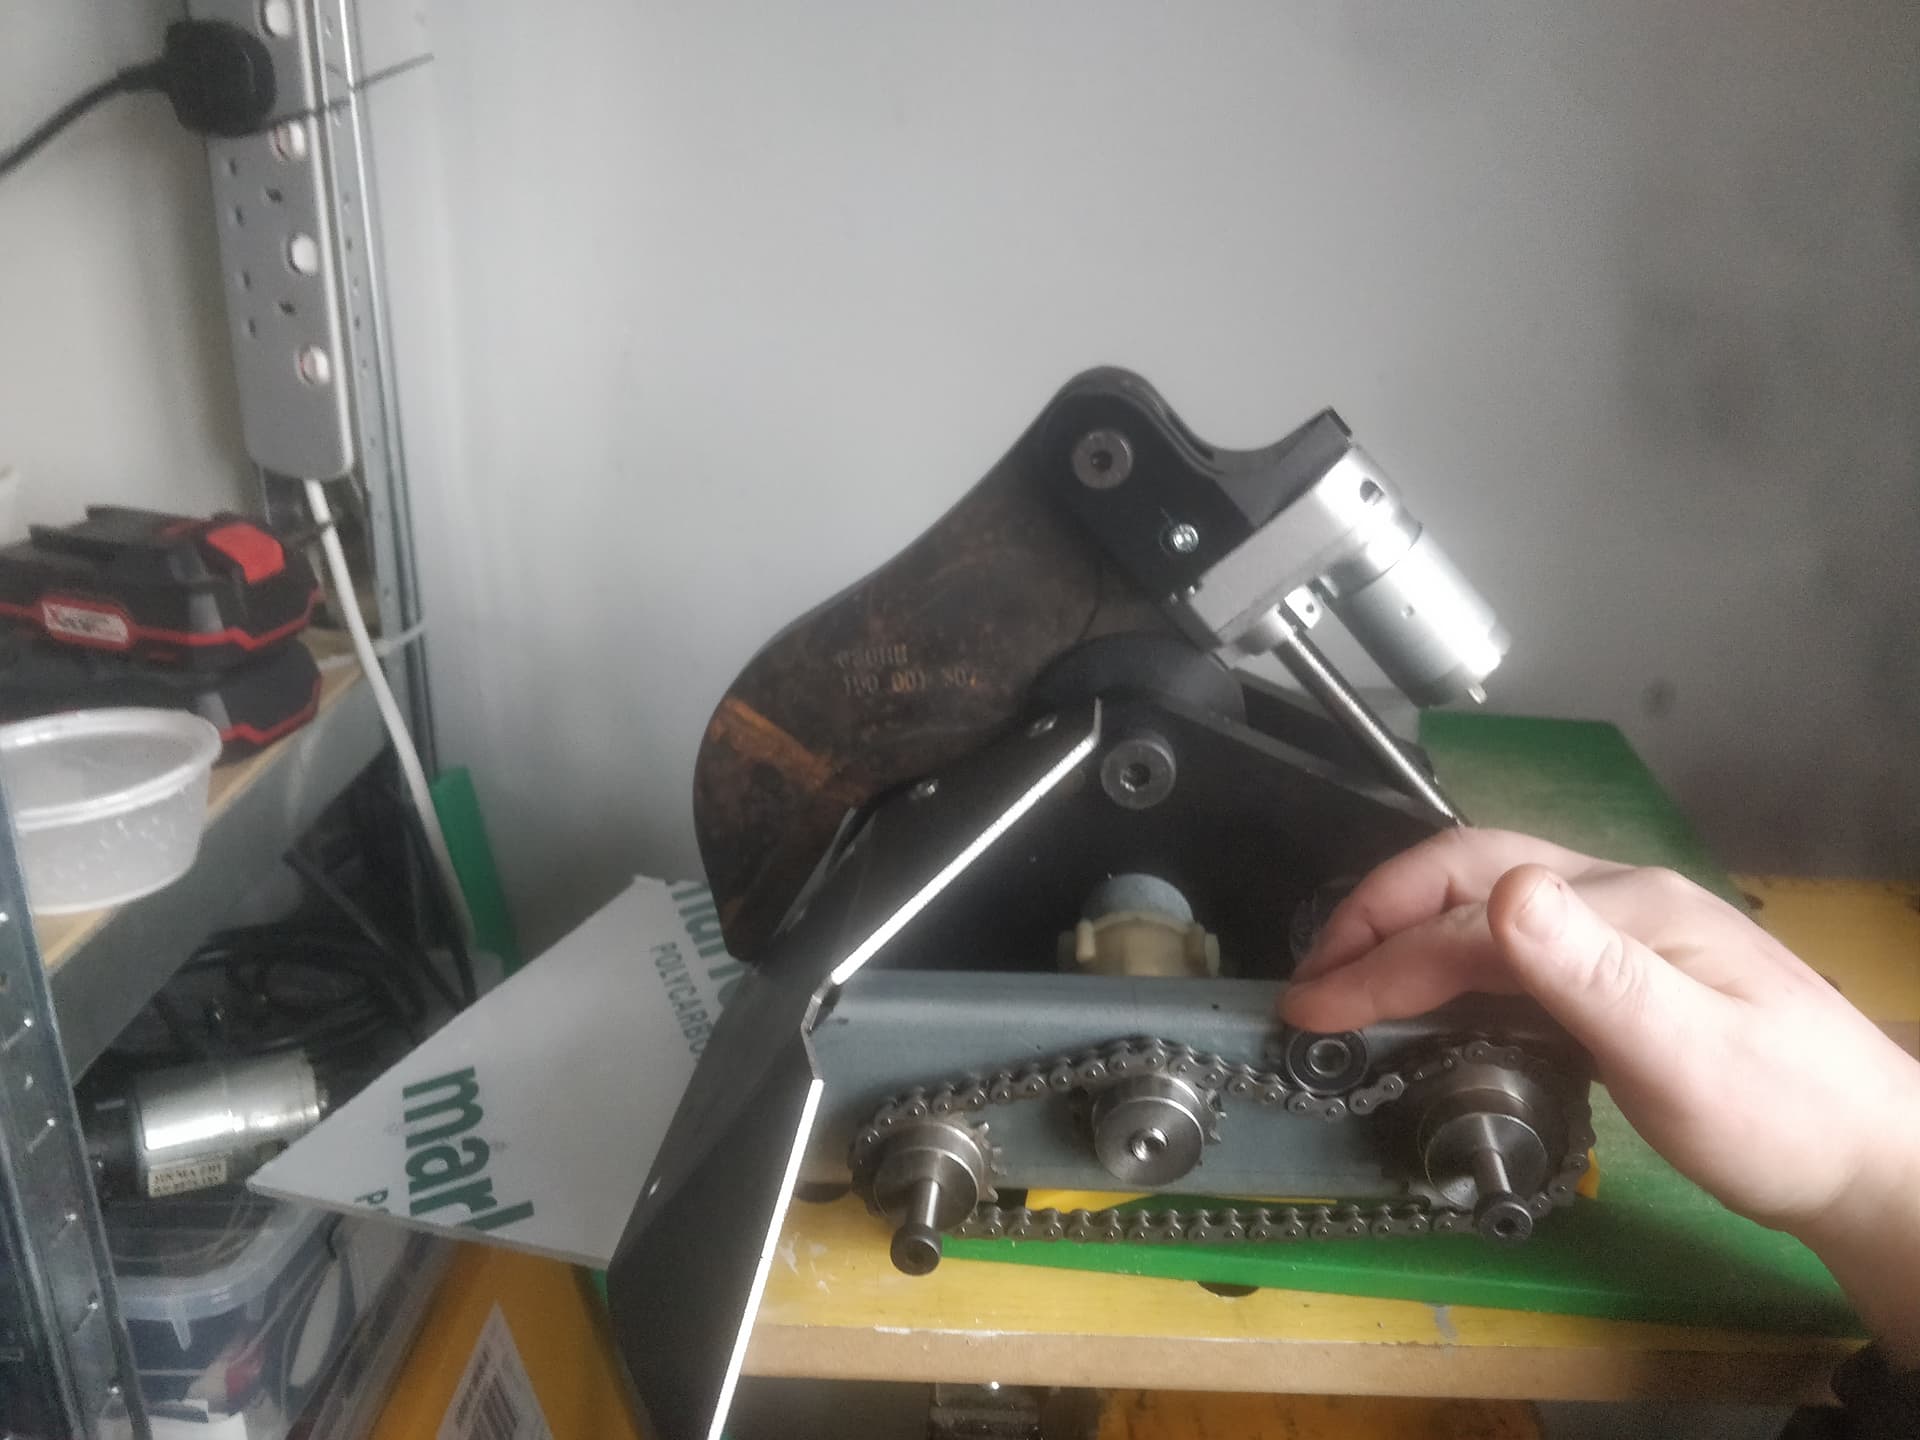
Unfortunately I don’t have a great deal of “wrap” on the driven sprocket but with a carefully placed tensioner I get a comfortable amount of teeth engaged. It’s not good but it’s good enough for BEV’s. I think its just a facsimile of a version of Uberclocker’s drive setup anyway
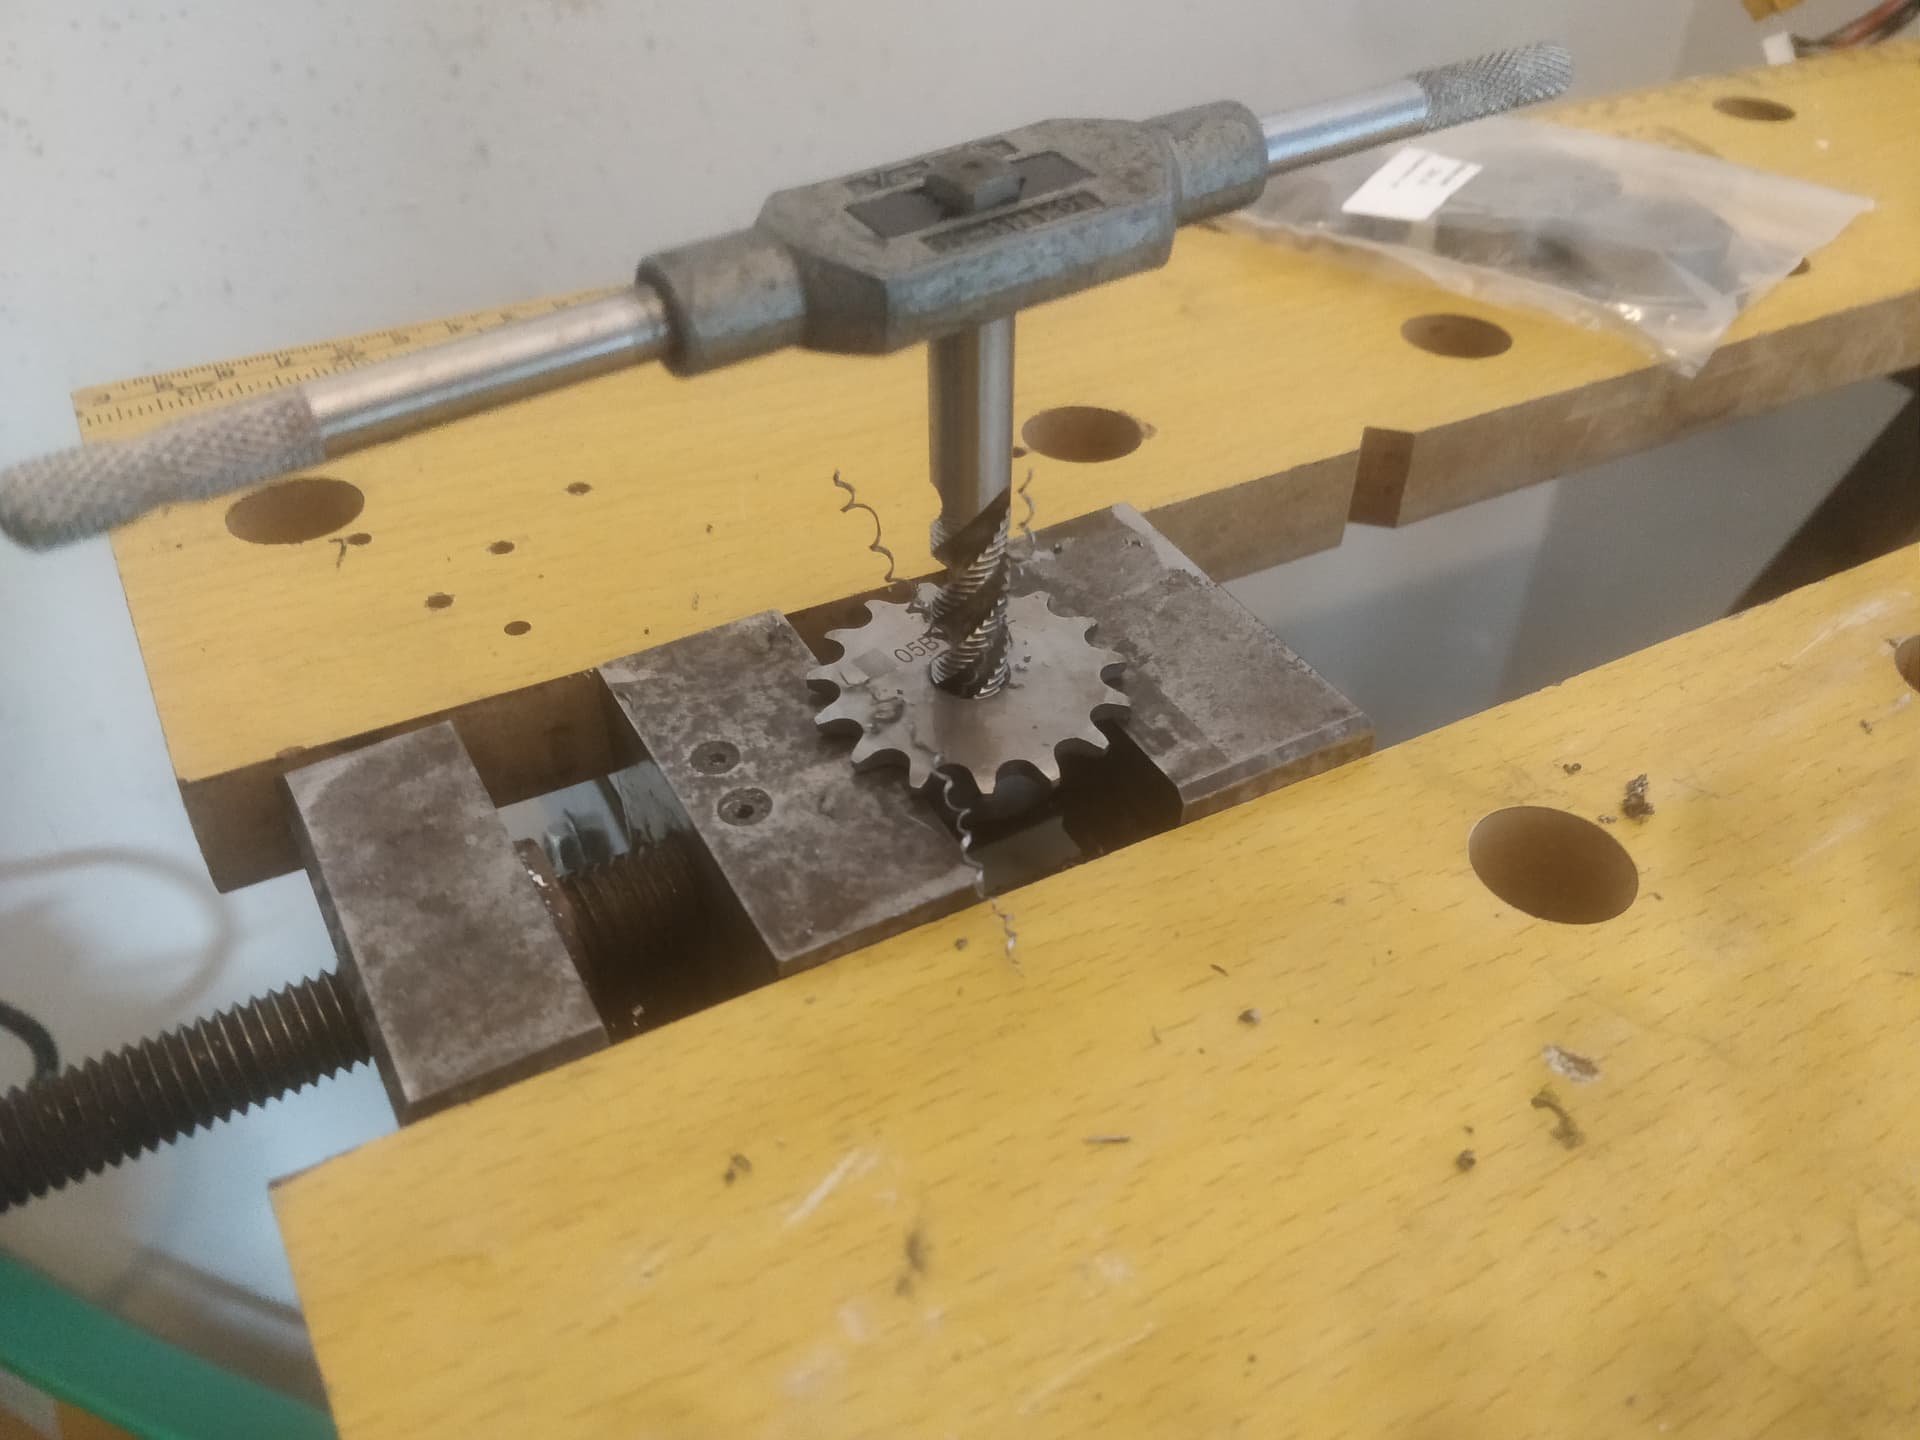
The driven sprocket was tapped out to 3/8" so it just threads onto the drill output shaft. This and the sprocket for the small font wheel are the same size while the larger wheel is 20T to get the drive speed in sync.
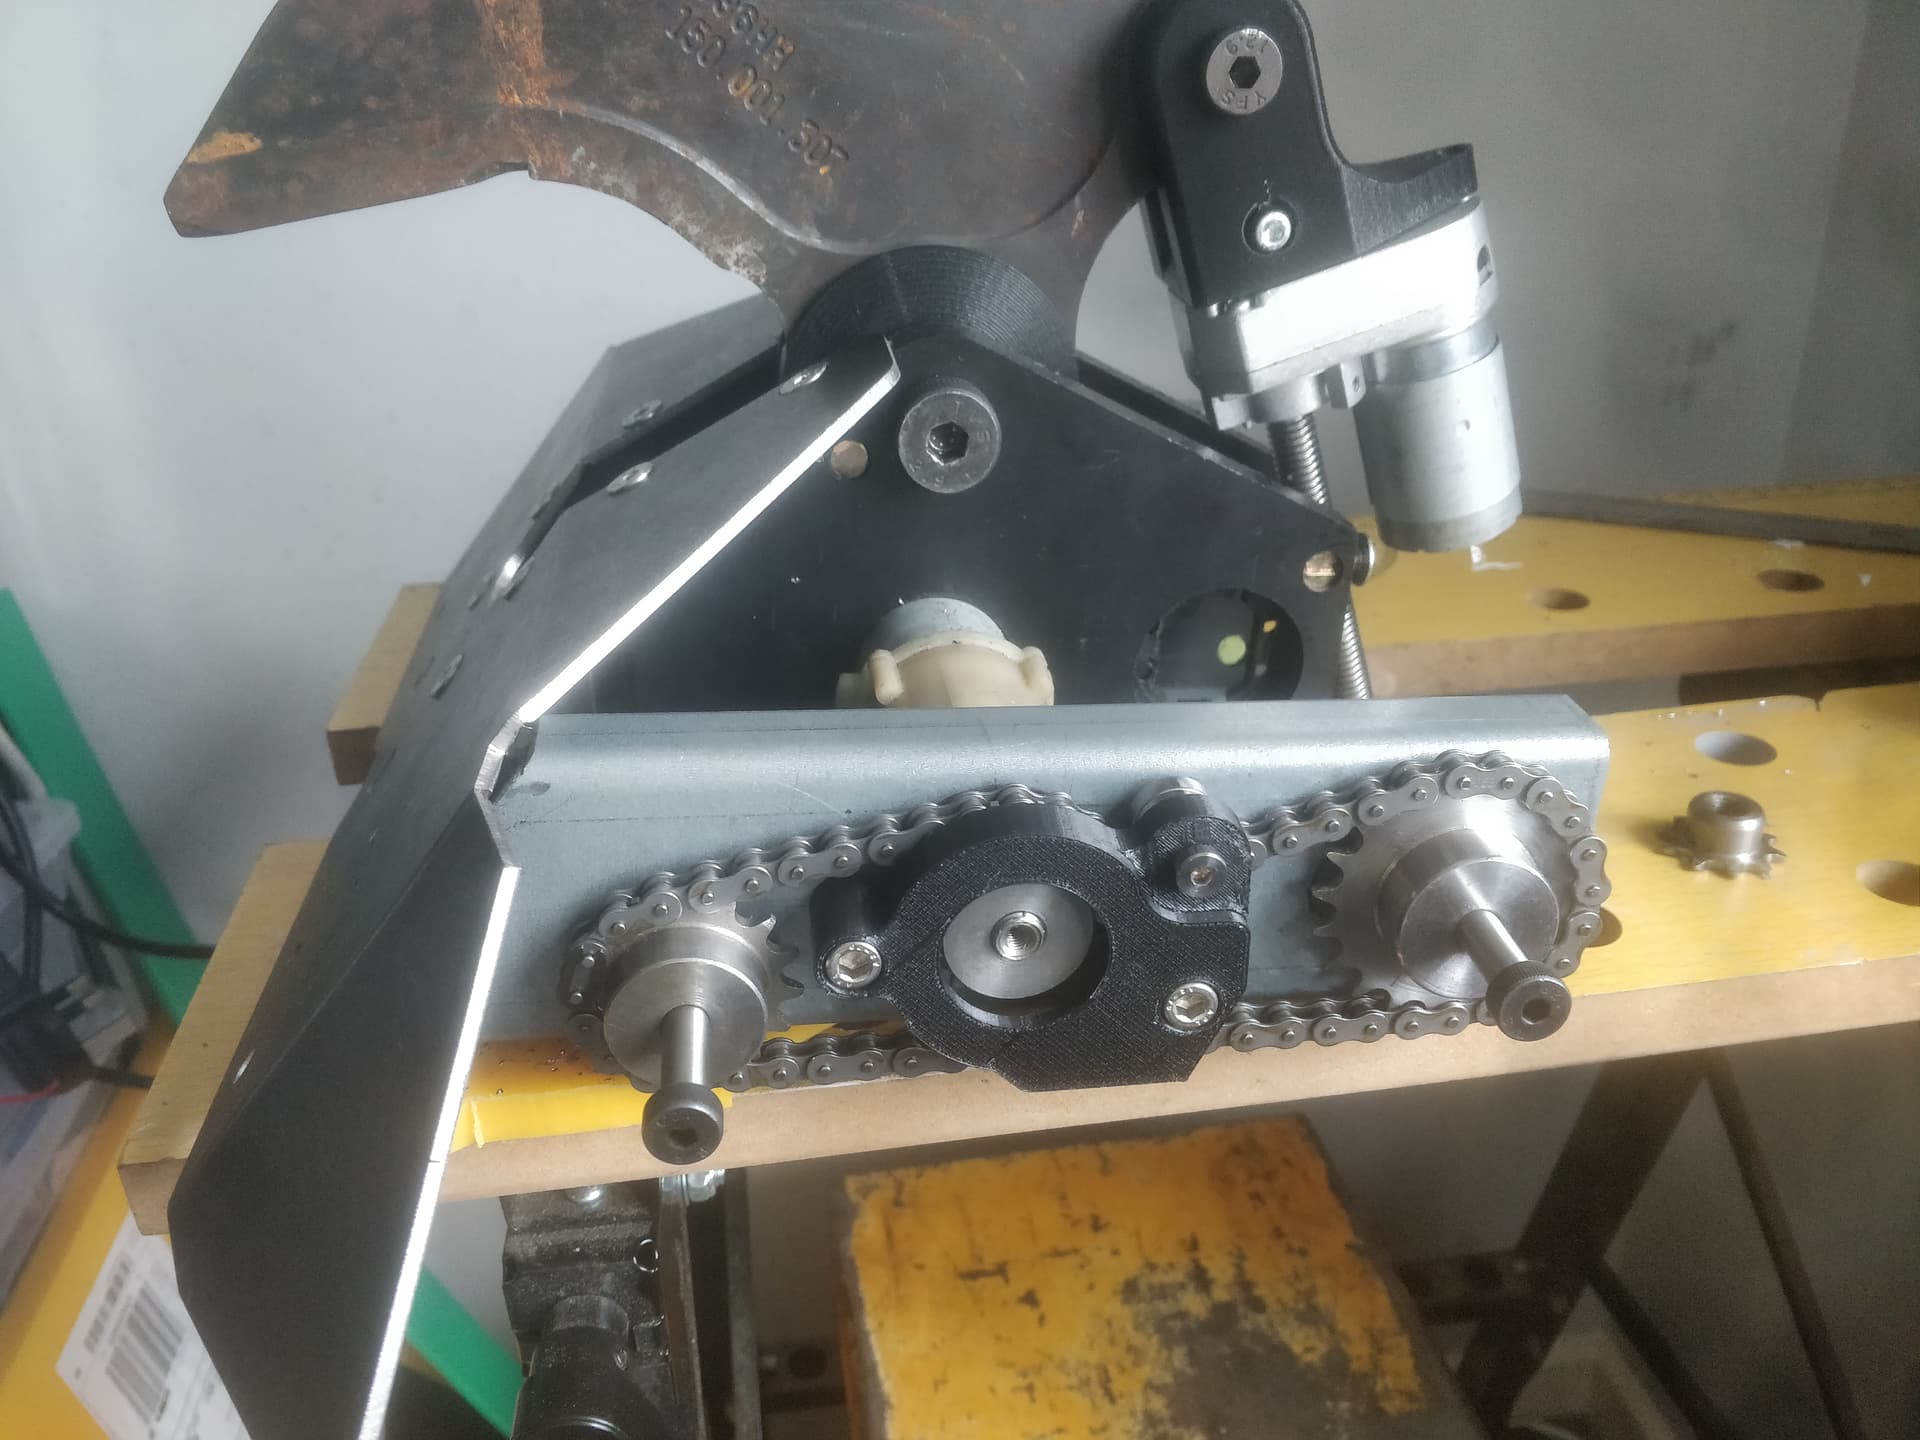
Few printed parts are coming in here. The chain guide is pretty much there, not the greatest abuse of mechanical principals I’ve committed but it’s top 5 at least. The 8mm shoulders are placeholders for the time being. They’ll be a standard M10/12mm shoulder when it’s finished. The actuator also has a printed endcap to interface with the jaw and the pivot point has two printed conical spacers to act as a bushing. Whole thing runs on a 16mm shoulder.
Printed some trial wheels here. These will be a nylon core with a polyurethane tread pattern but while I work out spacing, interface and just overall look it was nice to have a physical object to wave around and spit on. They have a bore to fit a bronze bushing and have a hole pattern to bolt up to the sprockets which will be drilled and tapped to M4.
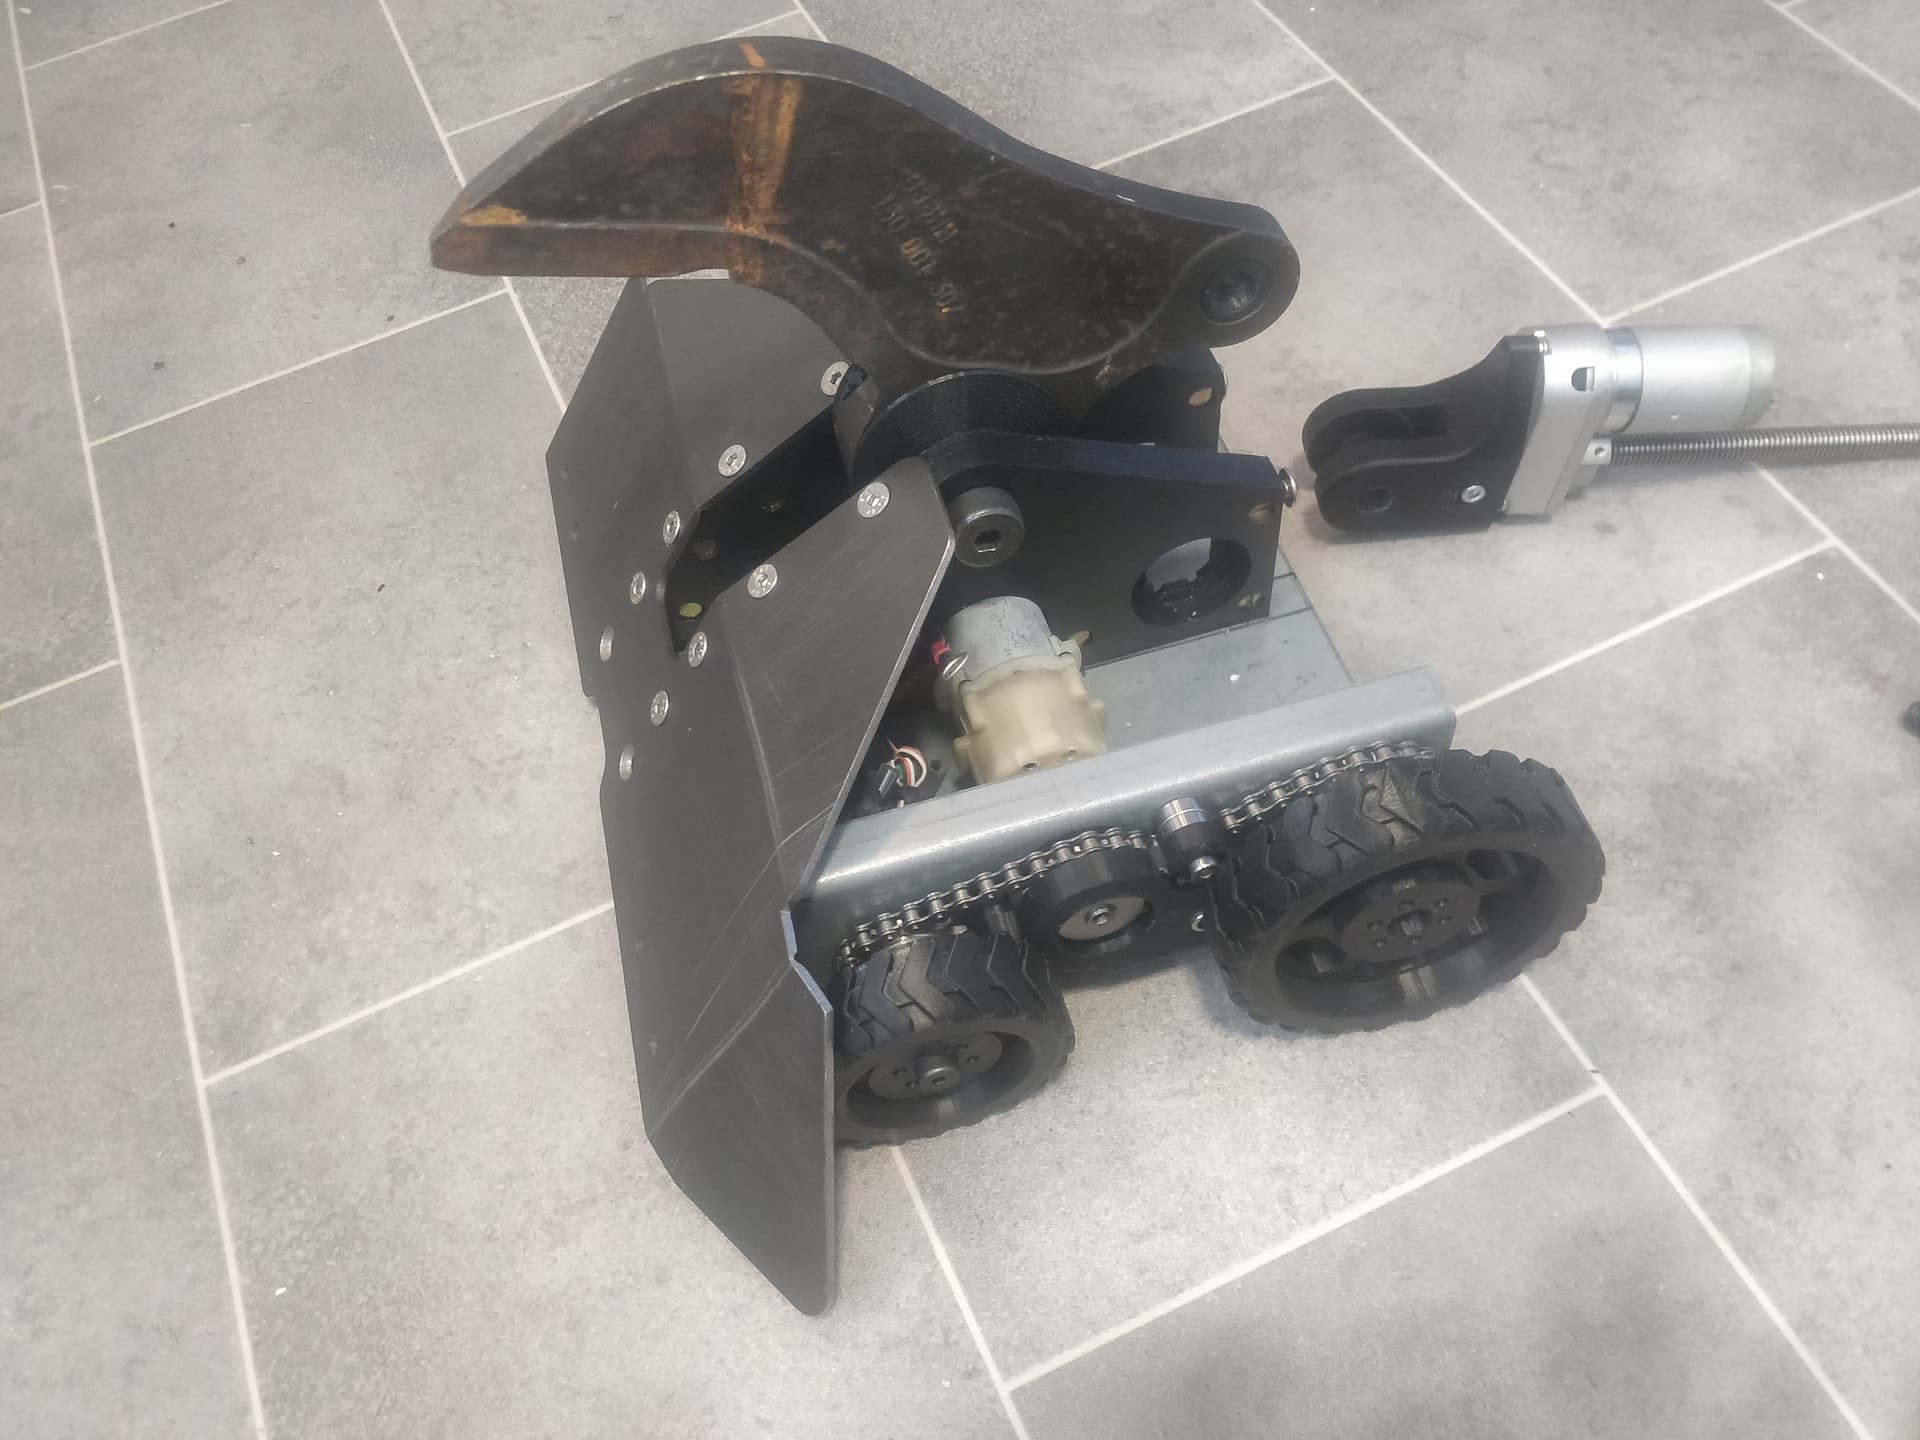
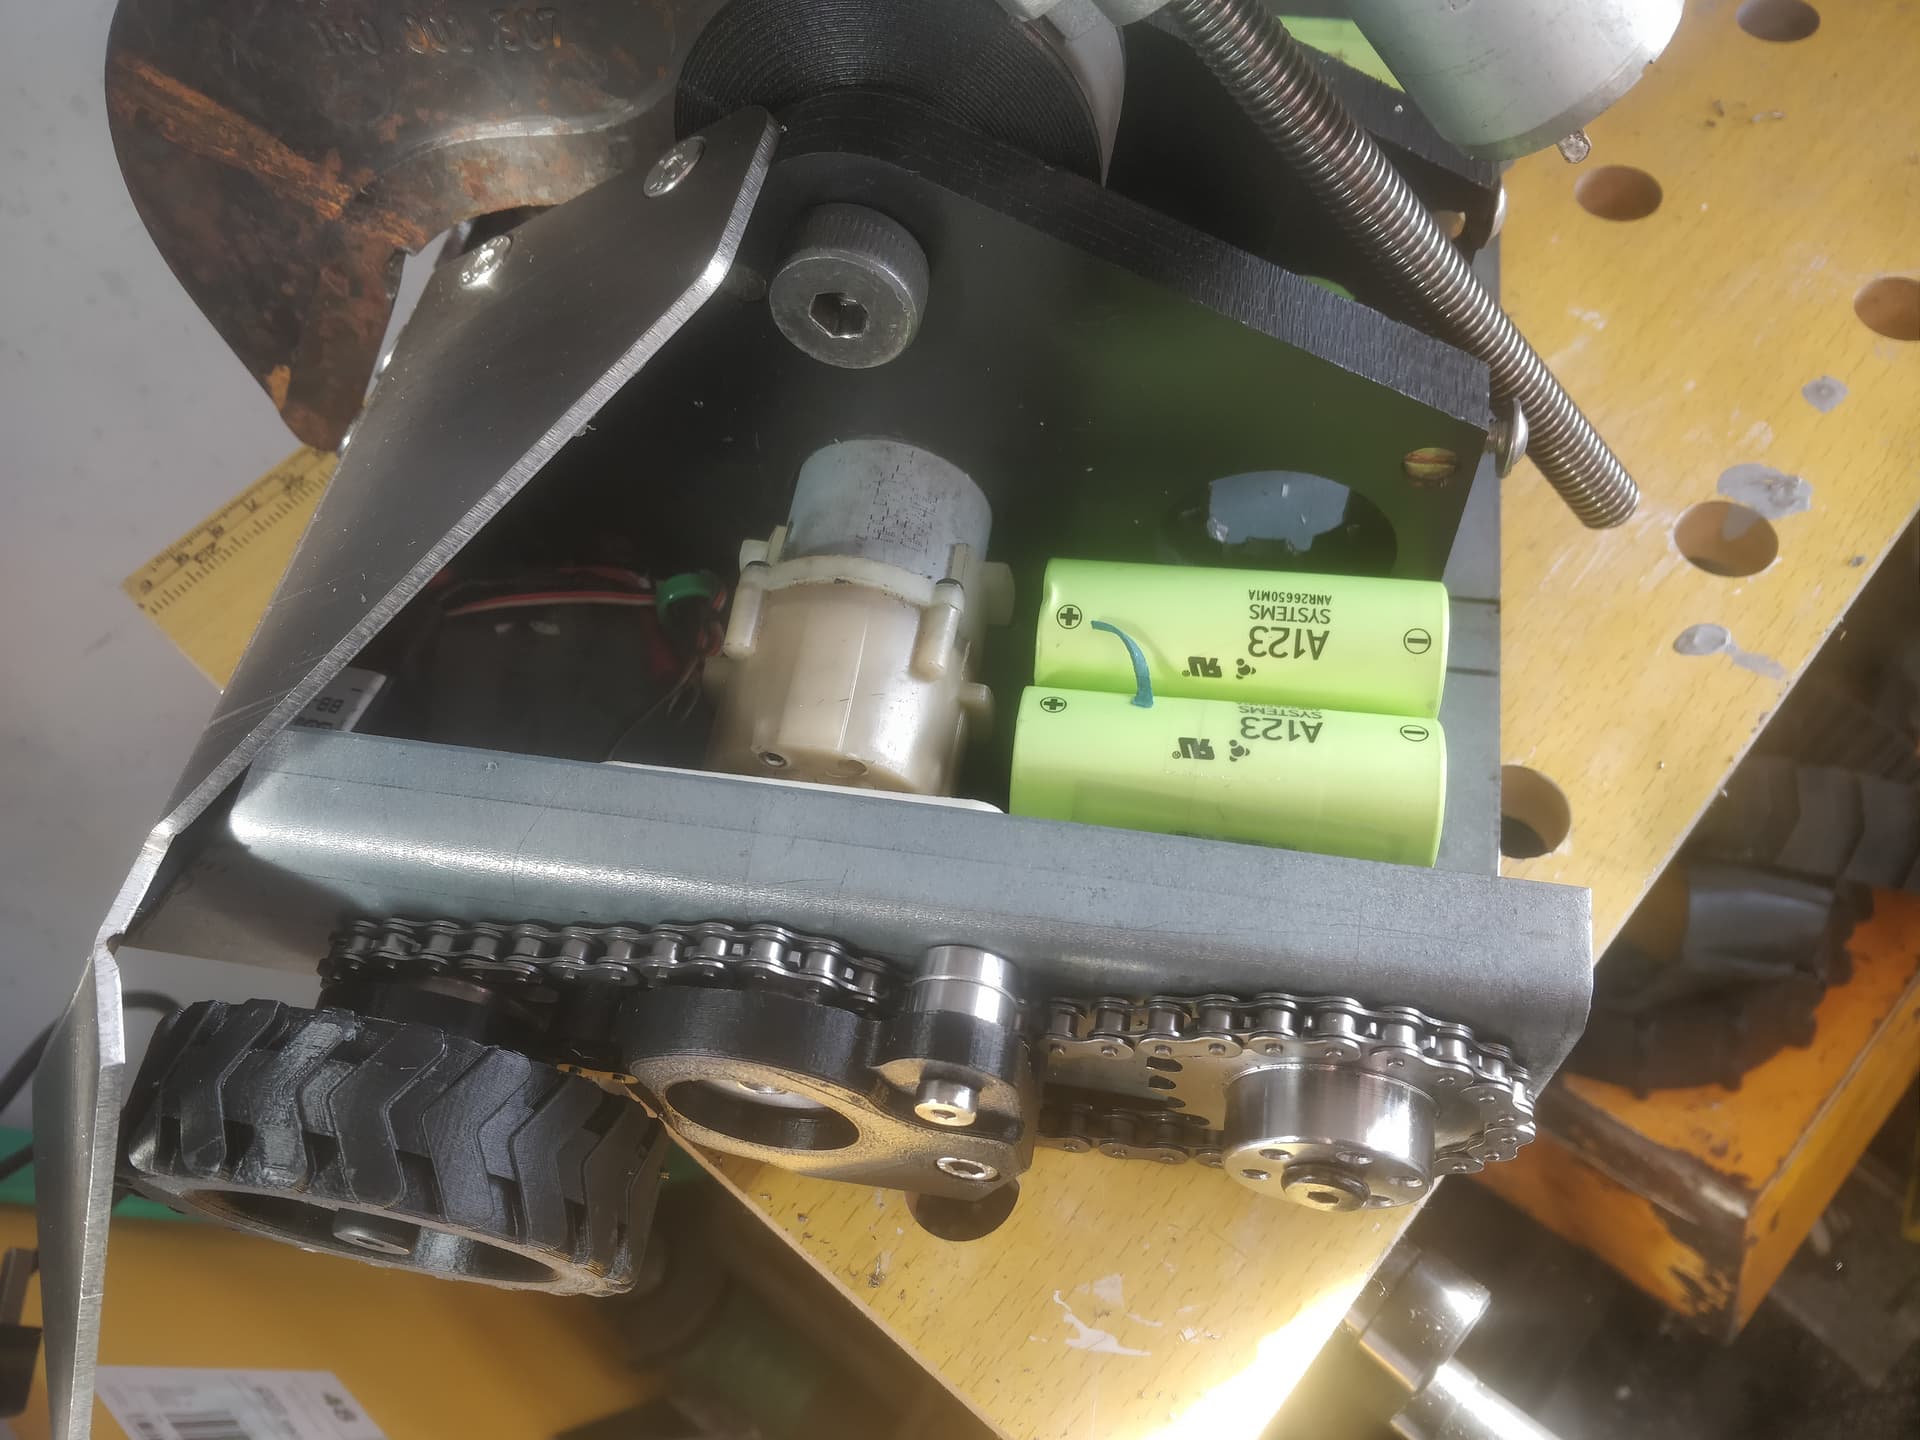
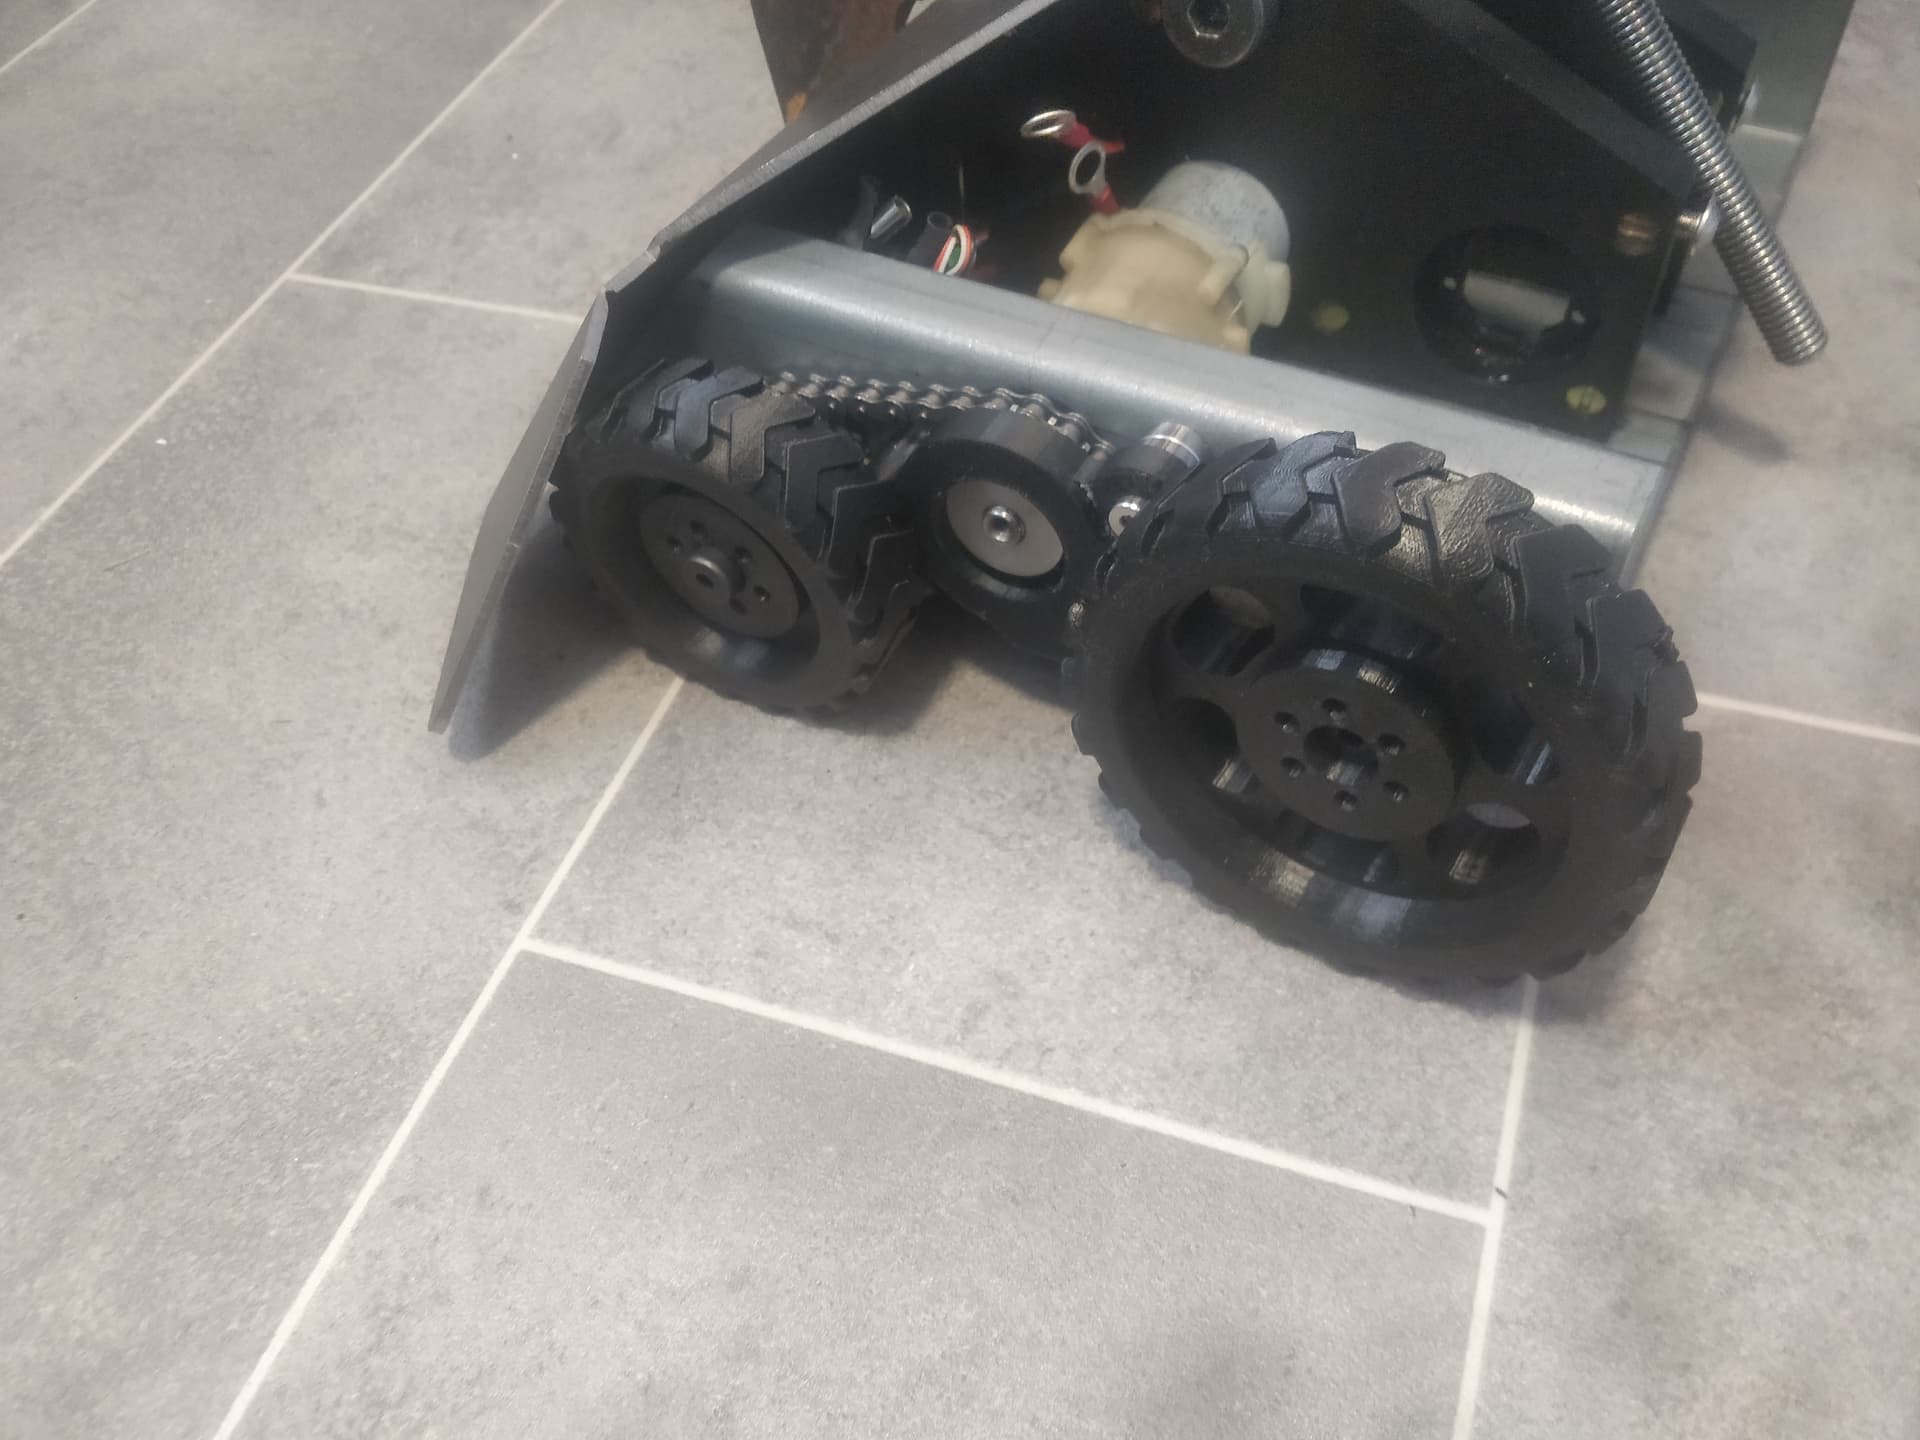
Love the kind of squat meaty stance. Because there is quite a lot of steel in quite a small footprint it is genuinely hefty and I imagine quite well planted. My plan is to nail down a length of 15mm to make a routed back panel and some ~6mm polycarbonate for lids. The 550’s I have are all 12v native so 5s is going to be a bit of a zesty push when they’re in quite a stressed system already. Cheap 1500mah 4s packs fit way nicer so ill have two of them in the rear portion of the robot. I’ll nick the drive ESC’s from the 4WD flatpack as they’re smaller than the Electronizes and jam them in the front under the wedge. Some light duty HDPE feeder forks are probably on the cards too. The actuator will probably get it’s control from a lonely BB30a I have in my empire of dirt.
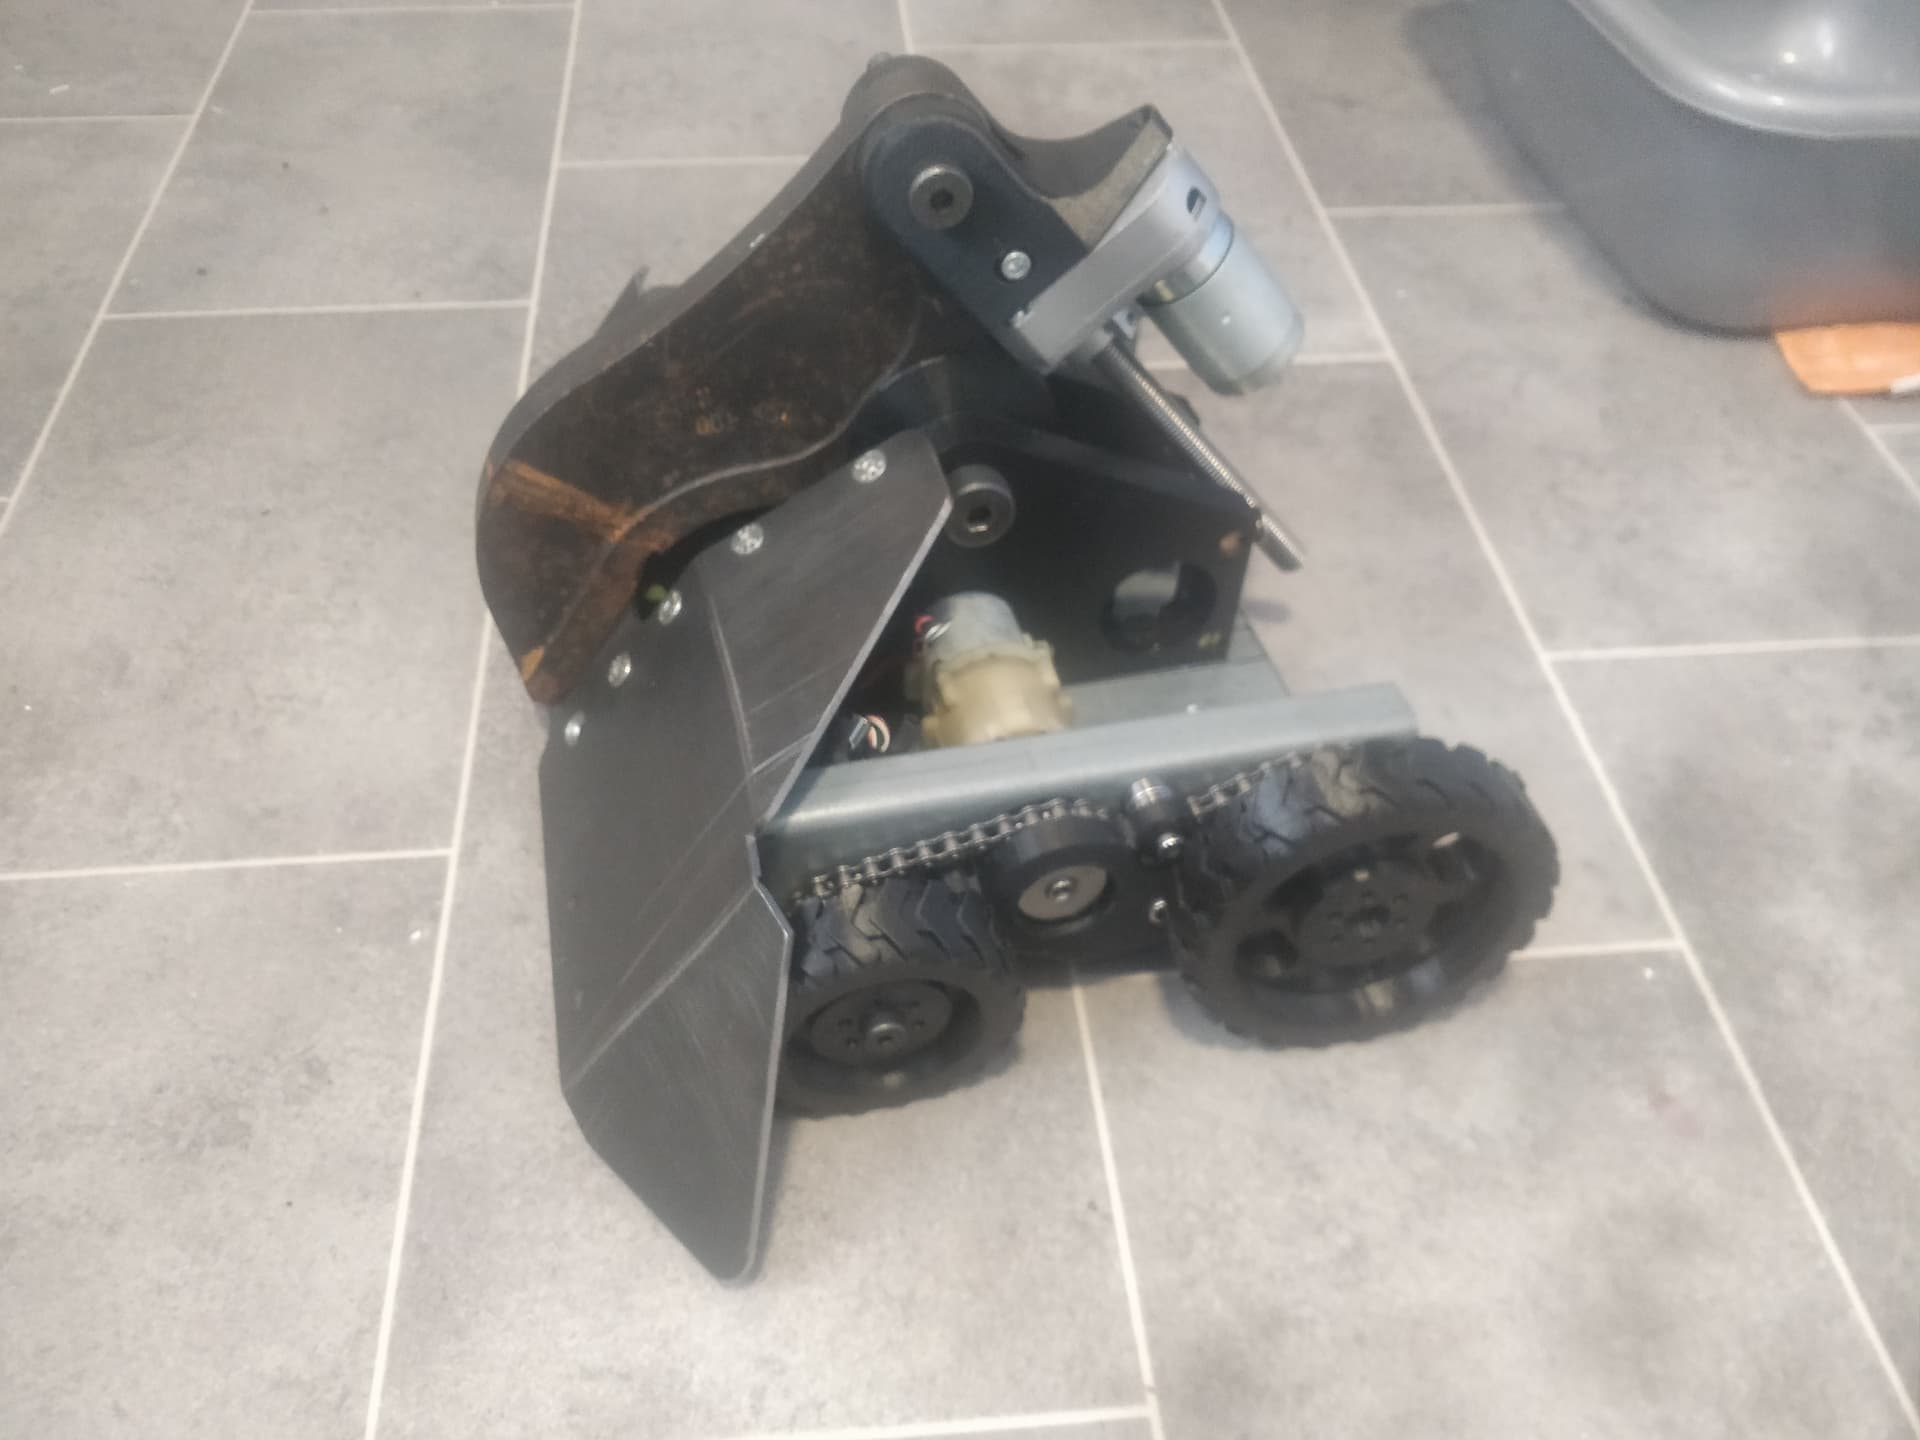
The only other way I could see myself going with the drive is trying to swap out the 36:1 gearbox out for a 24:1 if I can find a 4:1 stage and some 18v 550’s on 5s. Just thinking it’s an 83mm wheel so potentially that’s a bit too sluggish even for the BEV’s arena. Lovely to have options though.
While still very early days I figured I’d get the ball rolling with a build diary as it’ll at least sort of hold me accountable to finishing it. It’s spiritually made up of at least two abandoned projects at this point so it would be disappointing for this to become vapour too.