Flatpack - 13.6kg BEV

Thought I’d continue clogging up the forum with some build diaries!

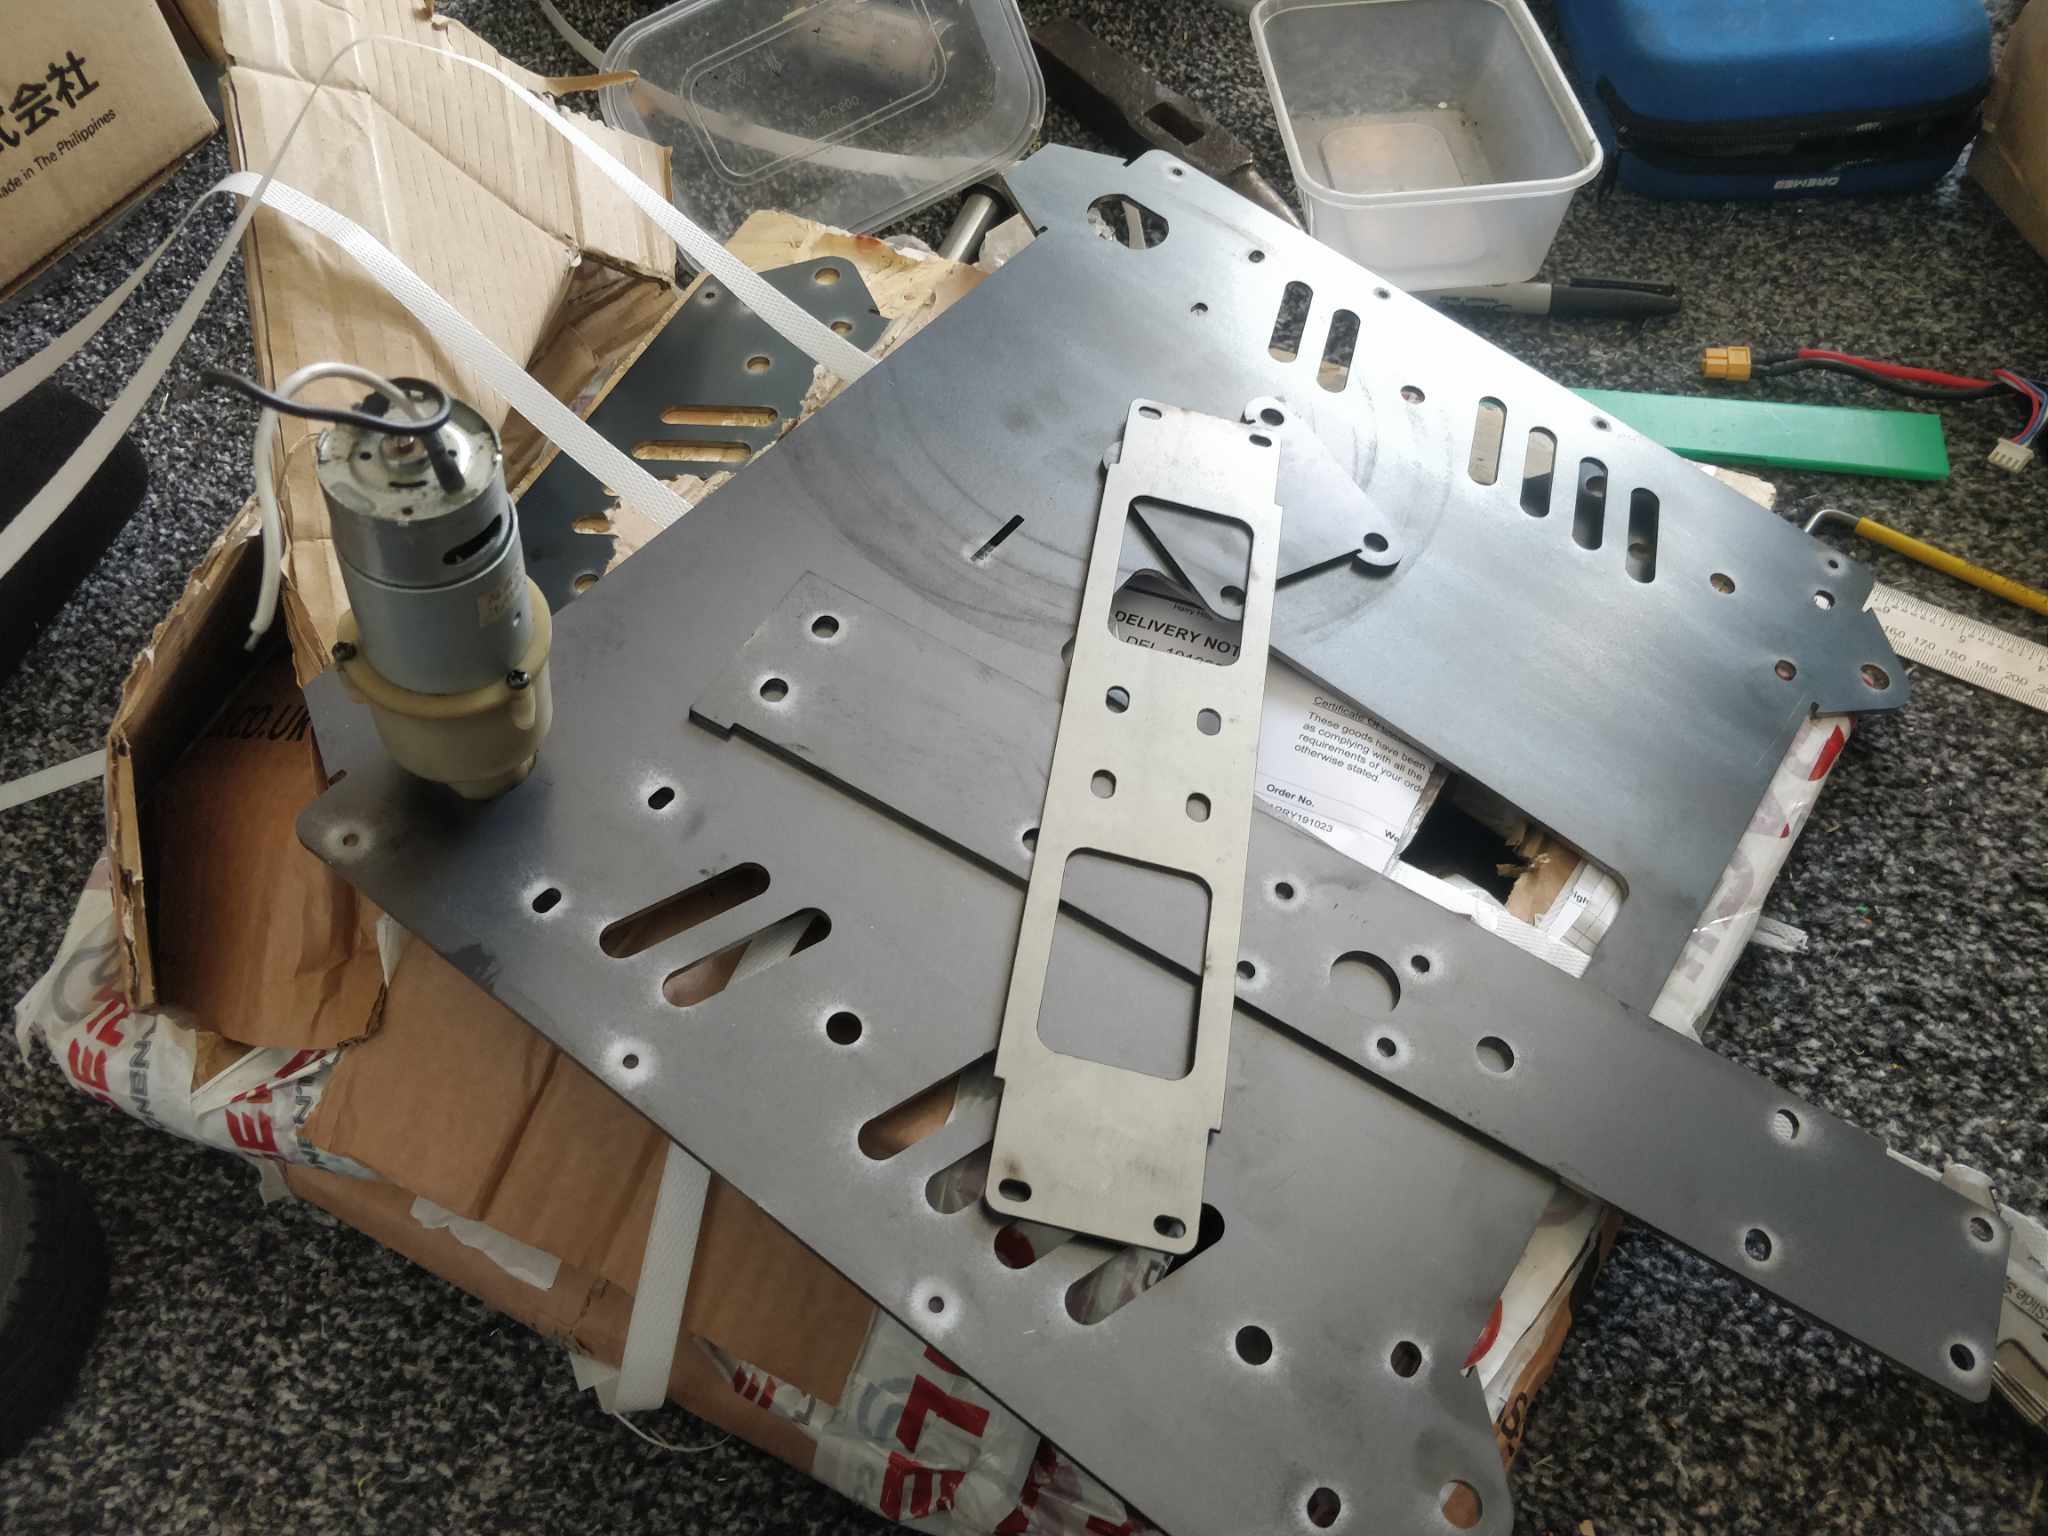
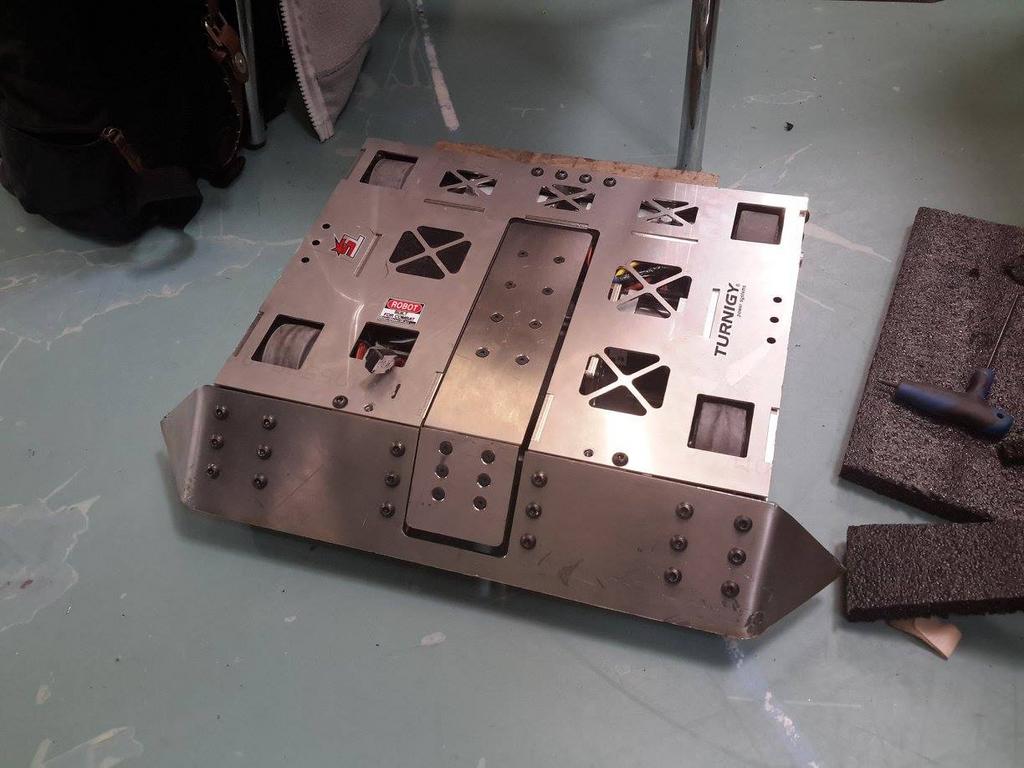
Feast your eyes on this shiny stainless specimen

Flatpack was built back in the mists of time, the far distant year of 2015. It was one of the first good robots I had made and being about 18 I was yet to find my groove with regard to design ethos. I did what any other starry eyed chronically online ro-bro would do - copy Charles Guan. Without hesitation I ran away from chunky milled aluminium to slick laser cut jigsaw puzzles. Being able to design something effectively in 2d and have it interlock together with minimal effort was great for me. By this point I was working stupid hours in a stupid job selling toasters to morons in a hardware store so time was precious.

Splatted together a fairly respectable robot though and the ole build diary for it can be found here

It ultimately had some problems. Early days of brushless, being clouted during a cease and being made out of stainless in a full combat environment being the chief ones.

A few months later seven years had passed and I had moved down the road from a very popular venue for the fun centric sportsman class of BEV’s. I had tried my hand at a couple of interim builds but getting Flatpack out of retirement and giving it a fair whack at some rough and tumble was too hard to turn down.

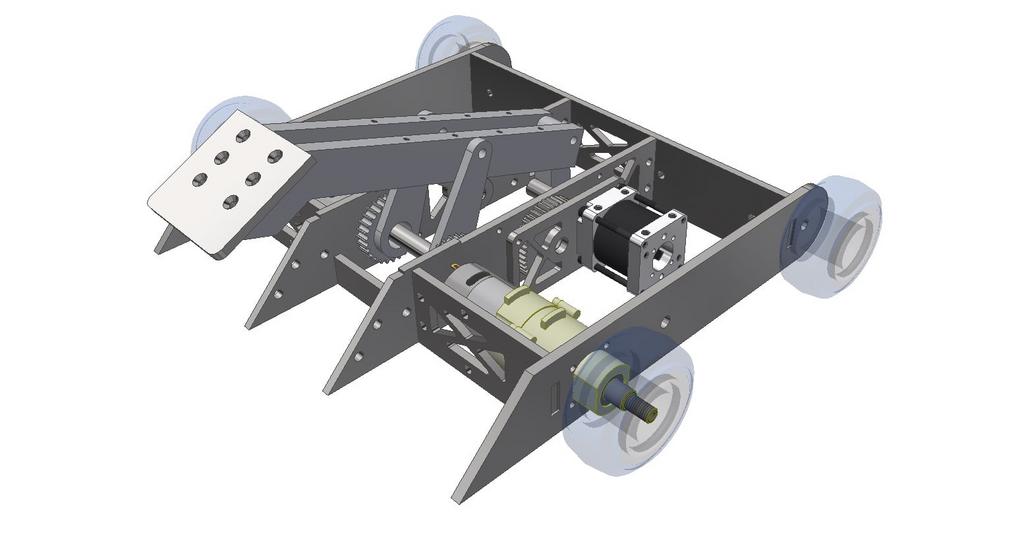
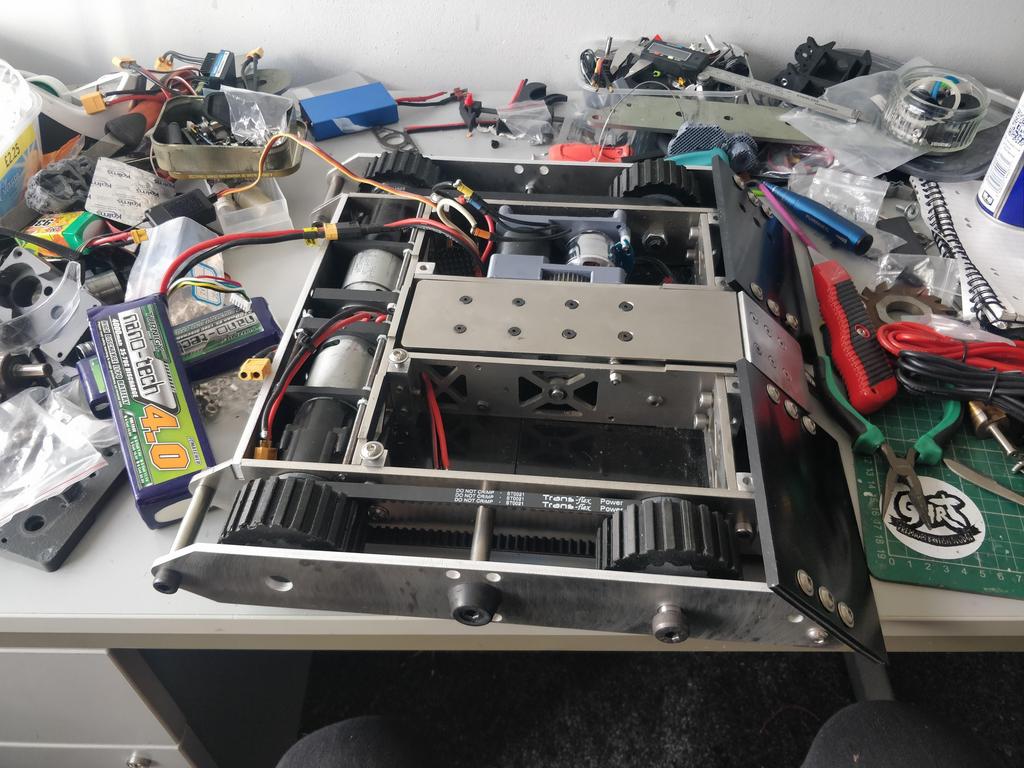
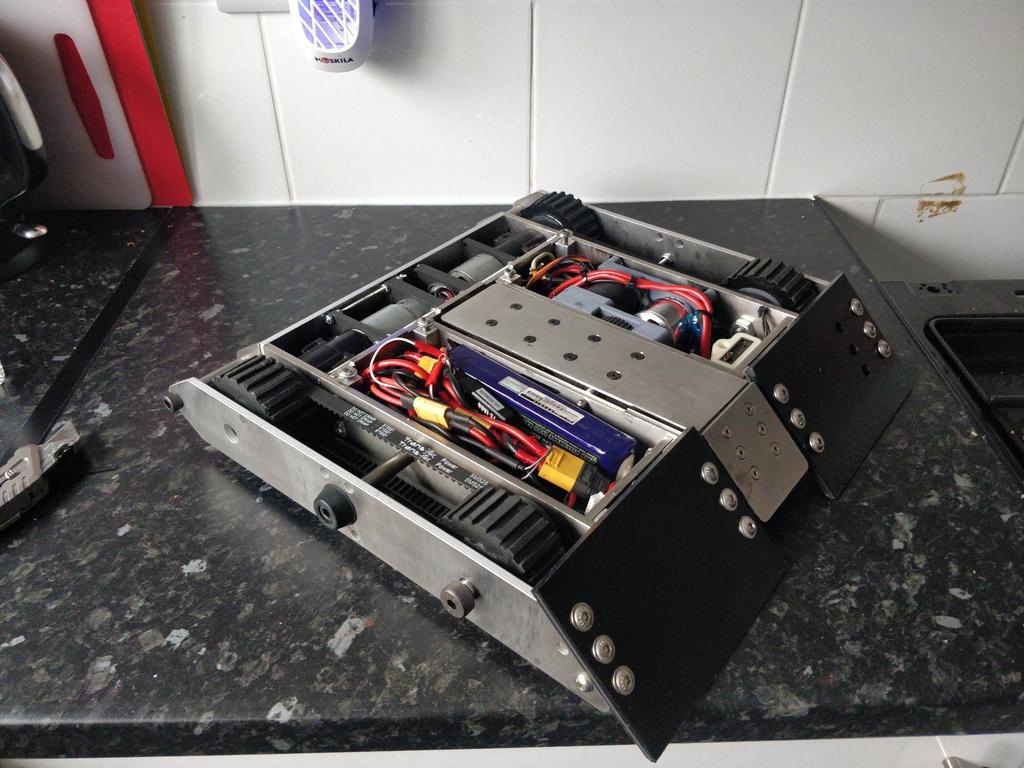
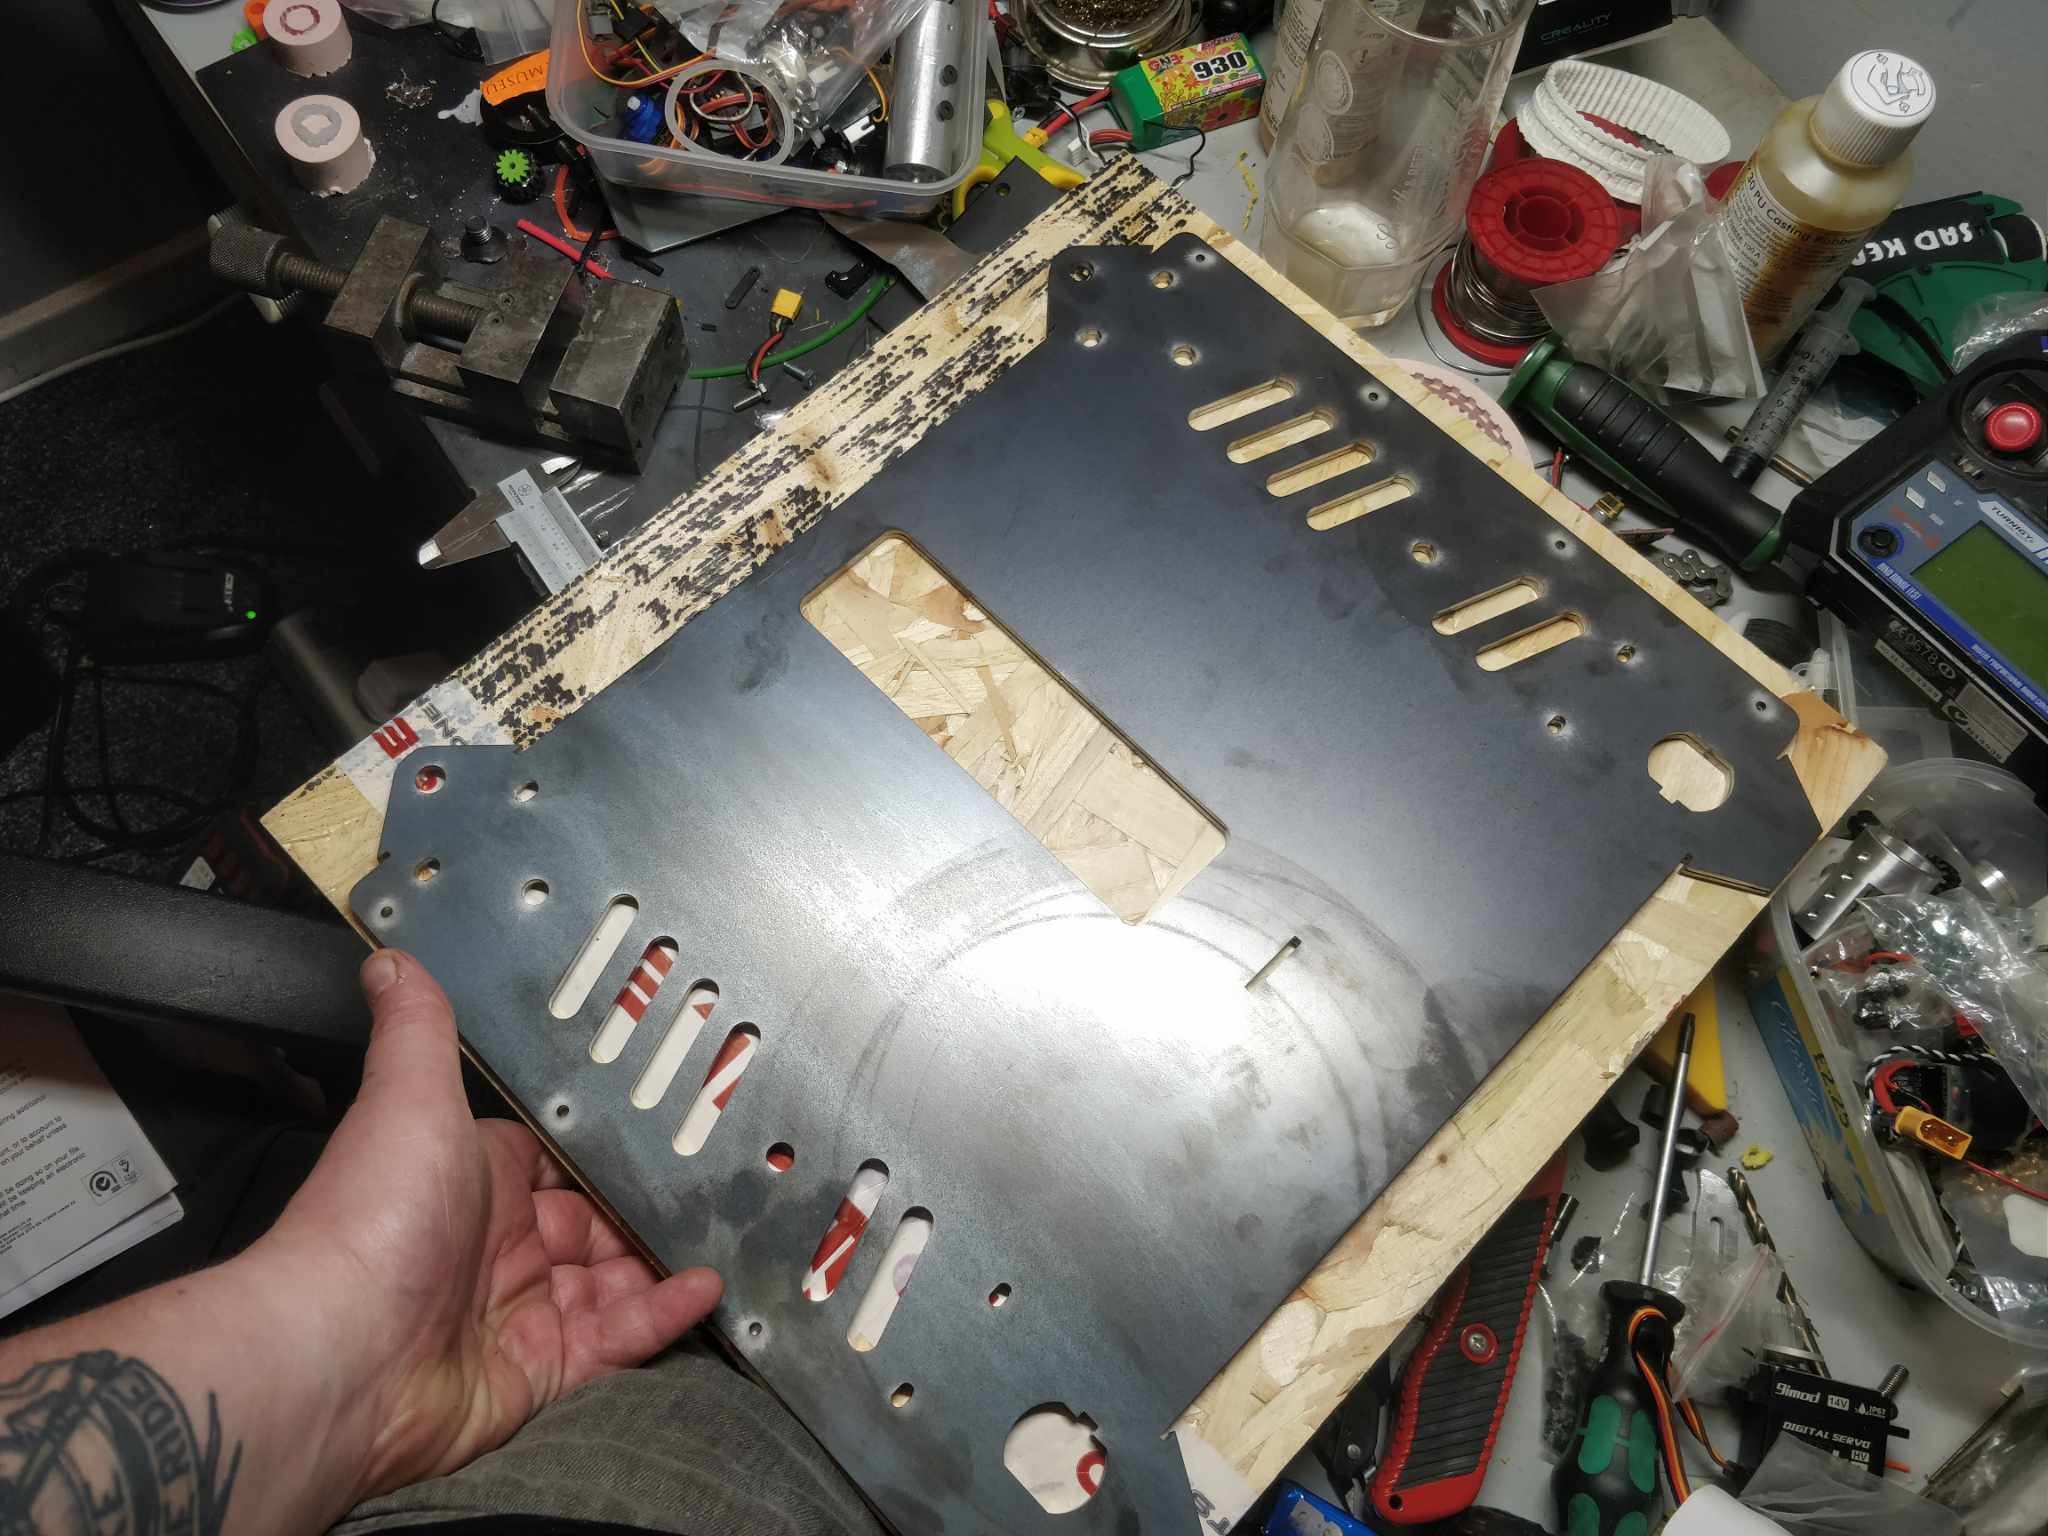
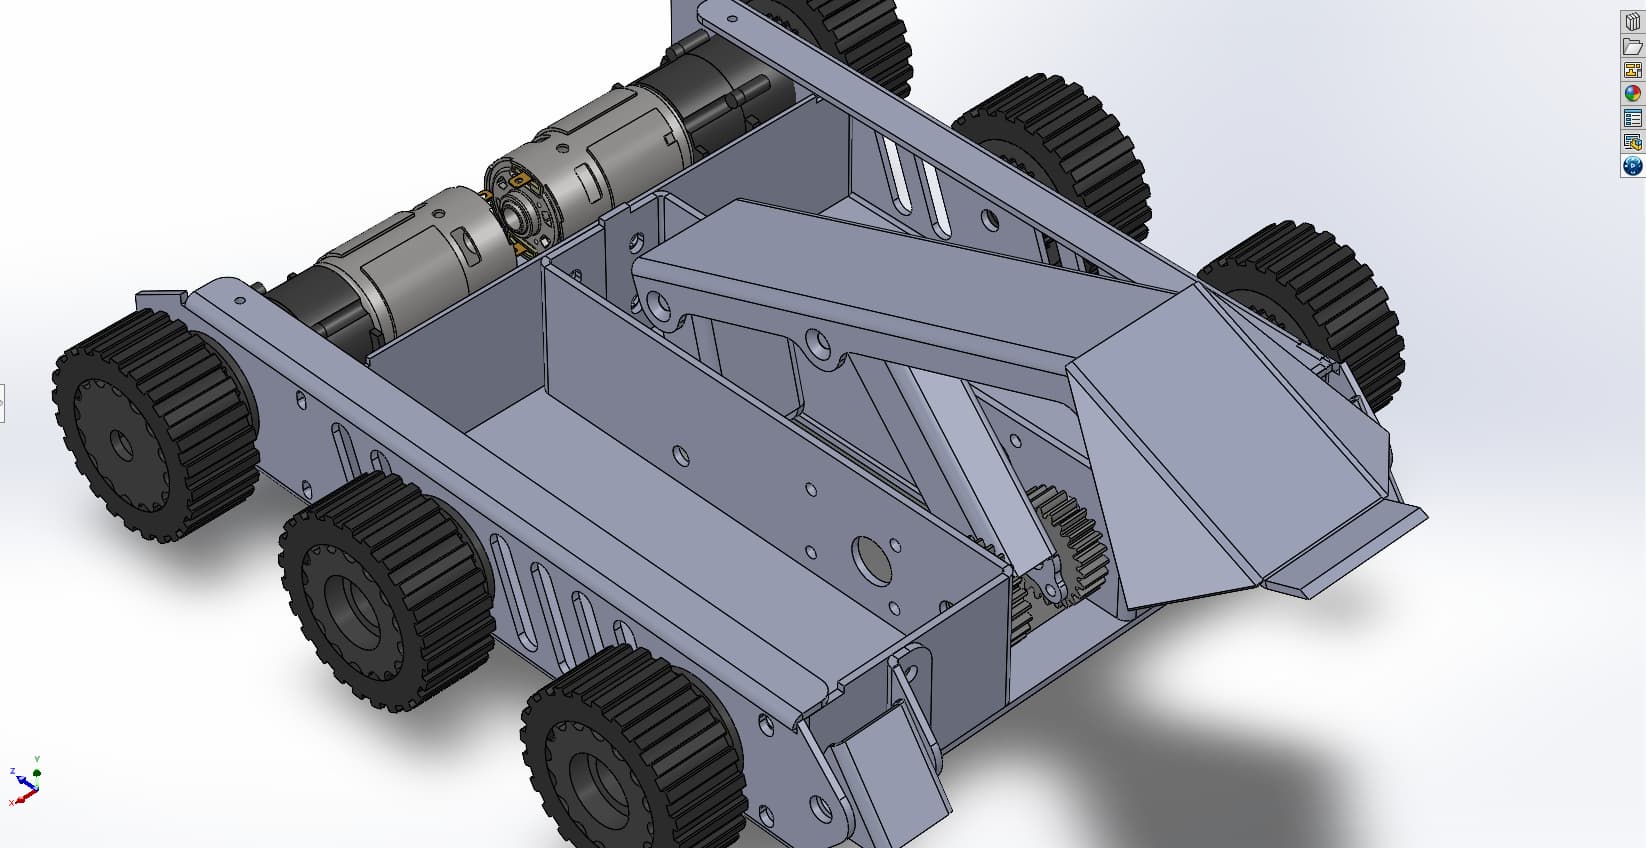
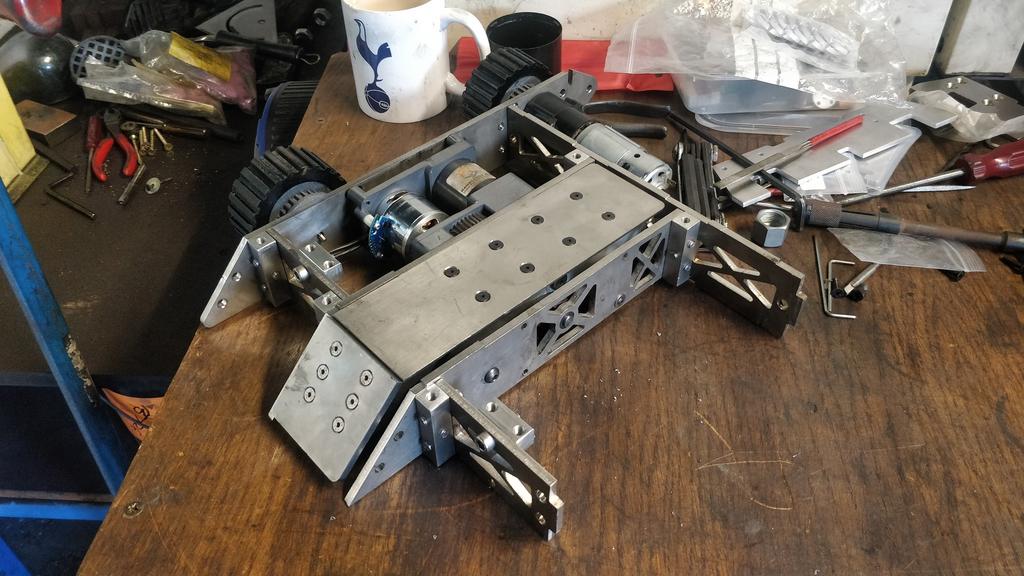
I opened up what I could salvage from the old CAD model and cursed my horrific bad habits. A lot of sketches were cleaned up and models redrawn and I could try pushing parts around. I was fairly set on keeping the core of the lifter (pretty much the only useful remaining part) and just making a minimal frame to pootle around the arena with. The rough draft just used classic old argos drills LIKE WHAT MOTHER USED TO MAKE.

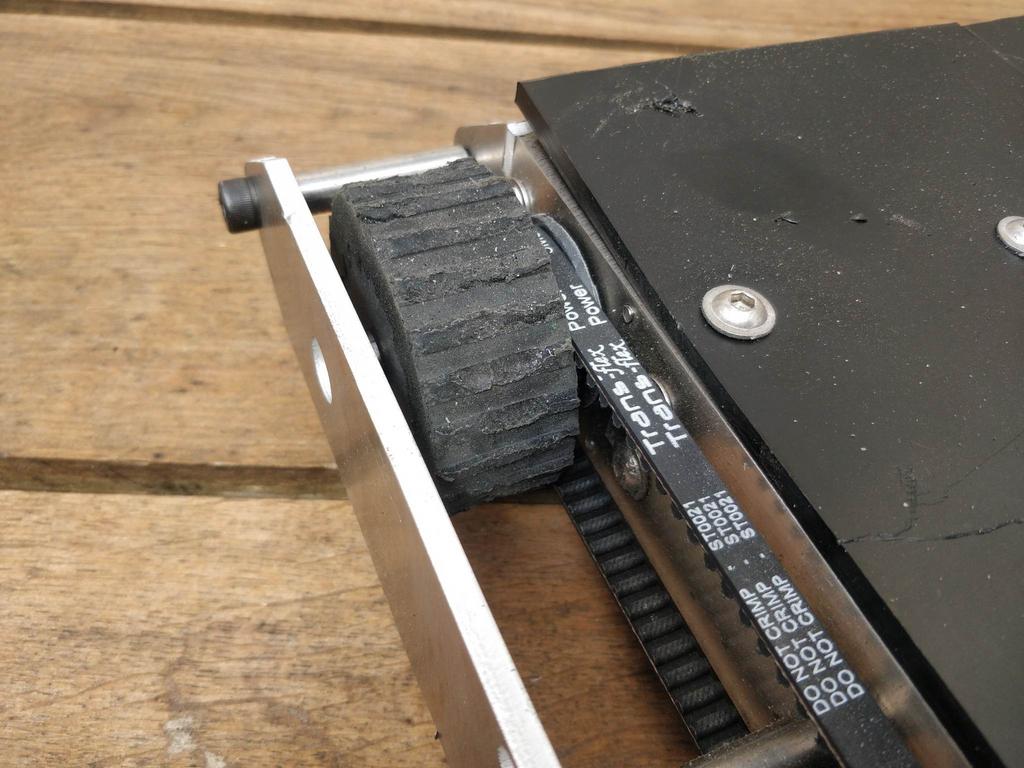
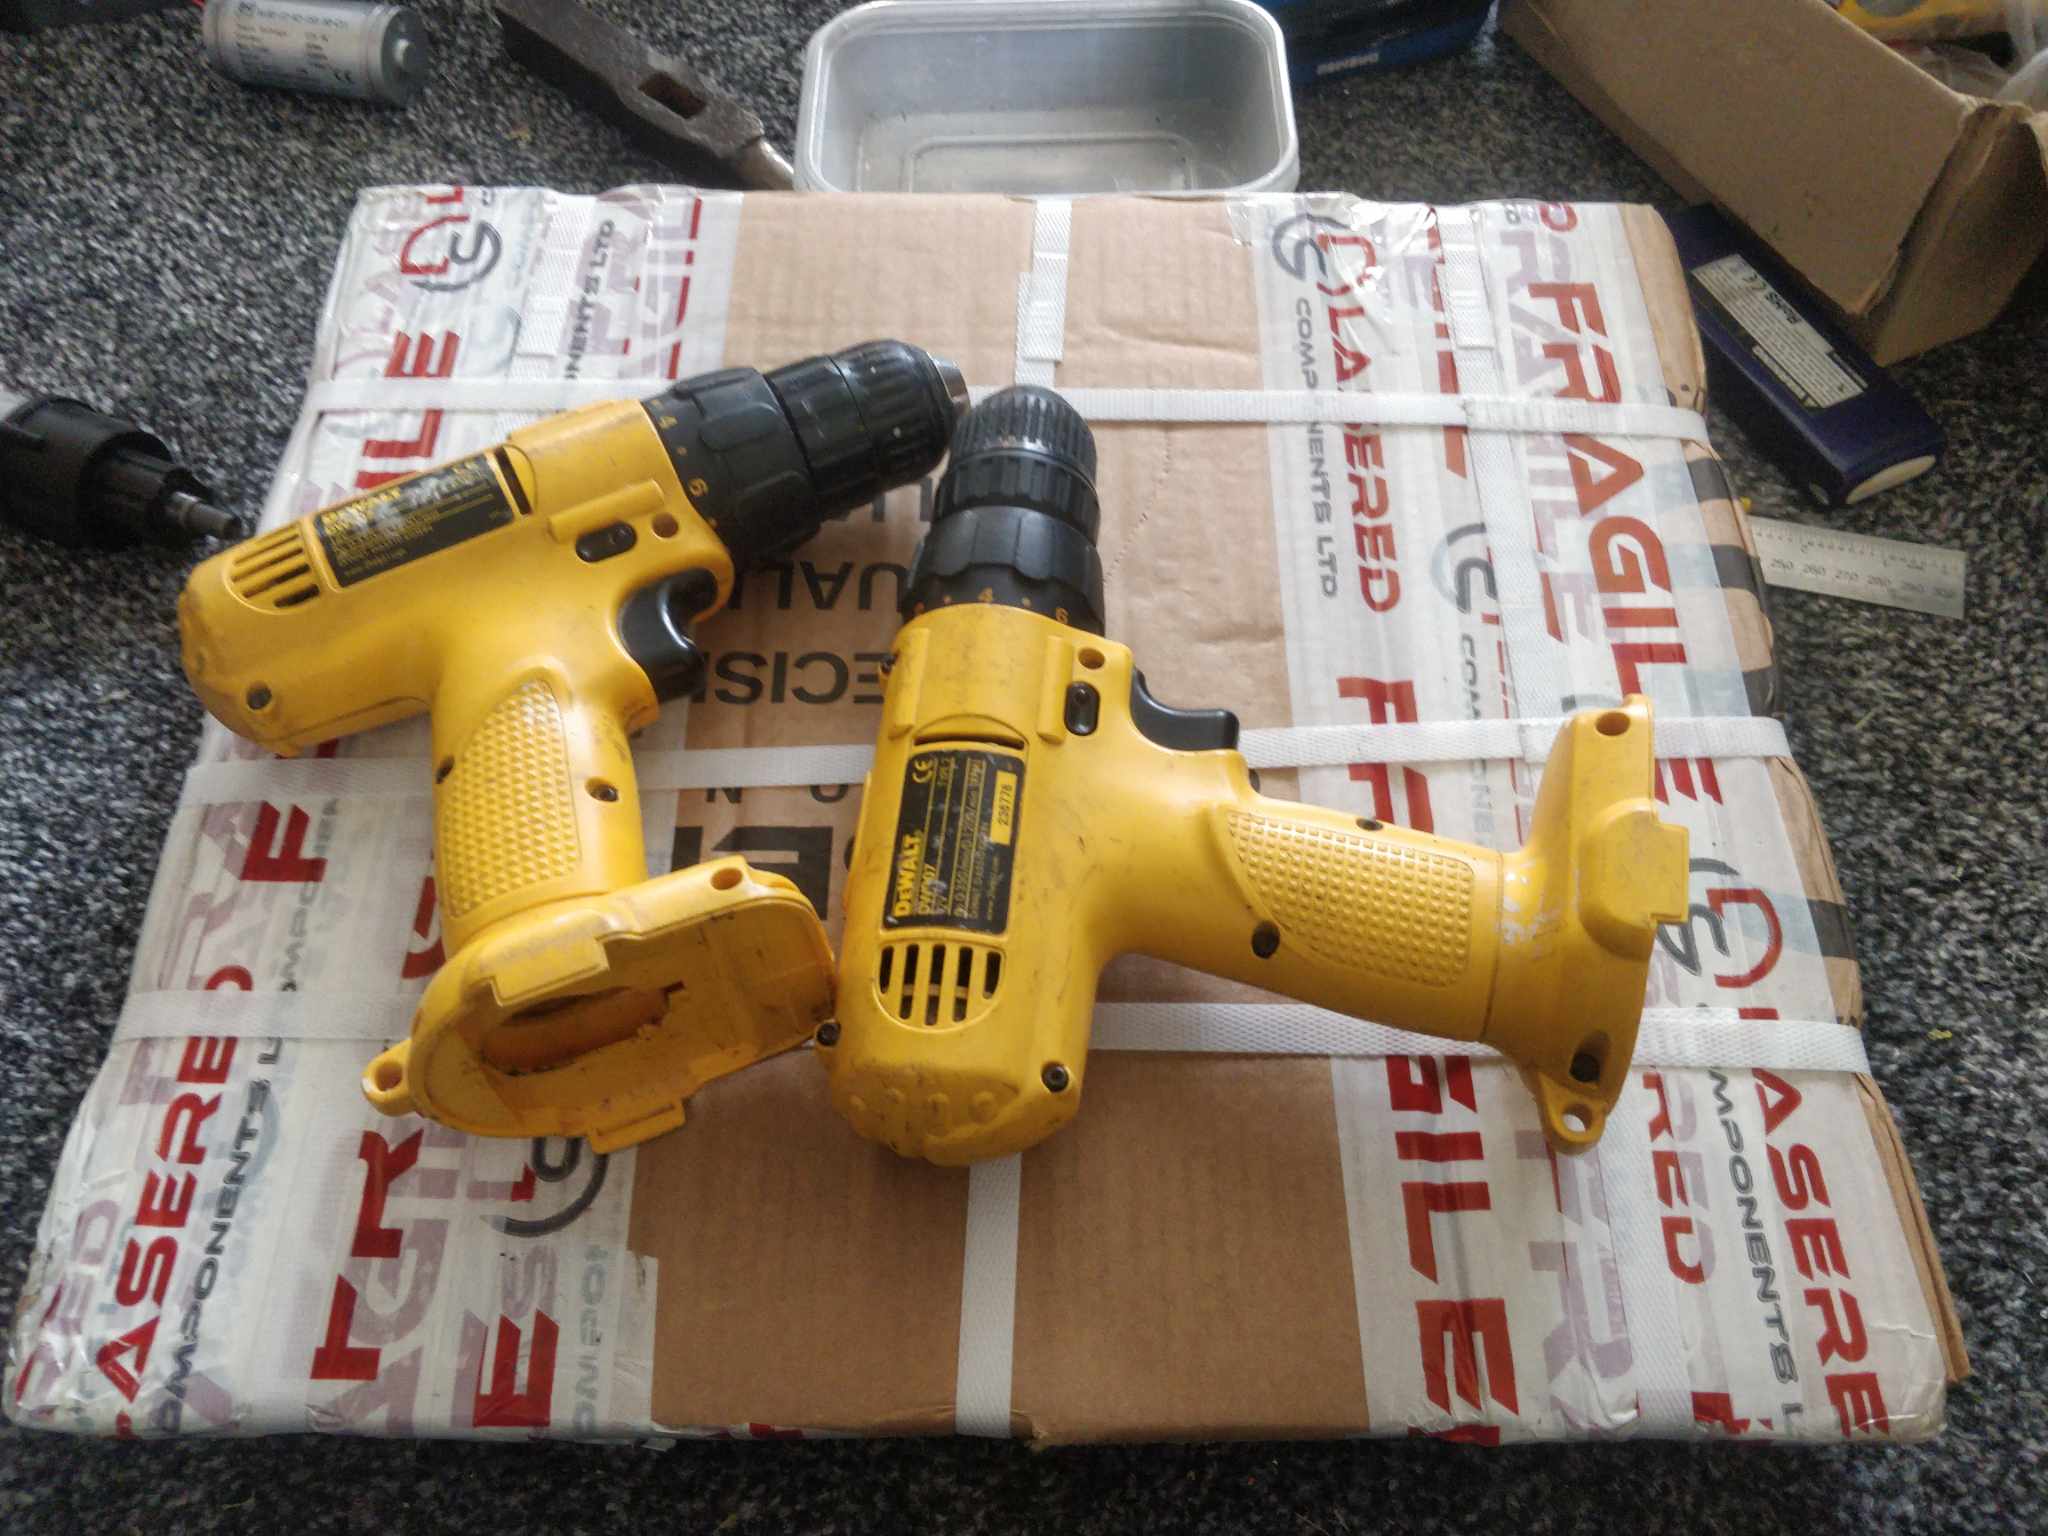
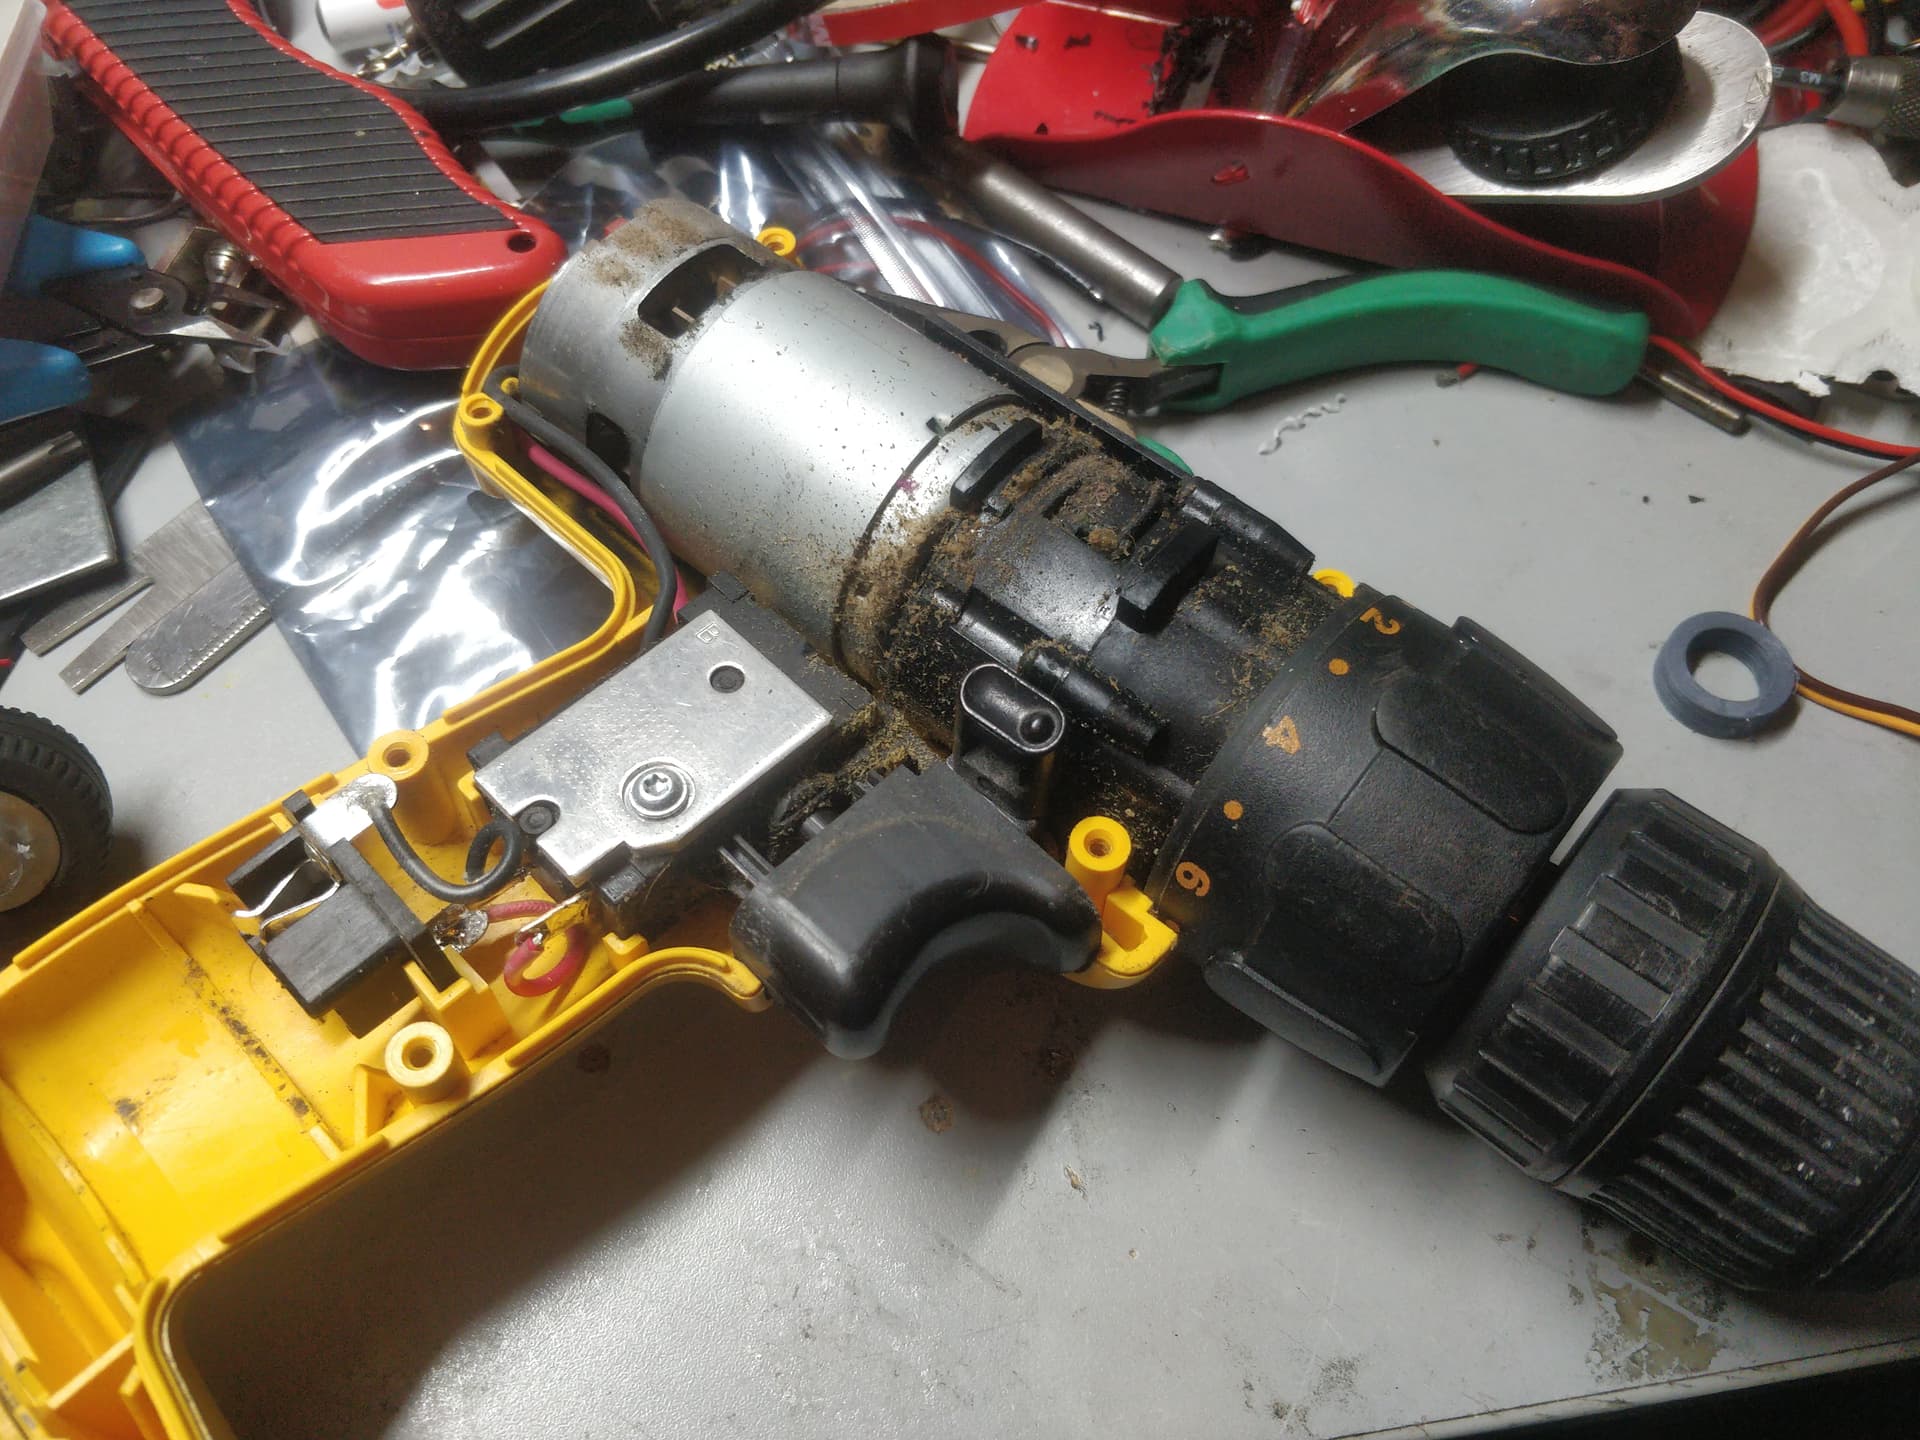
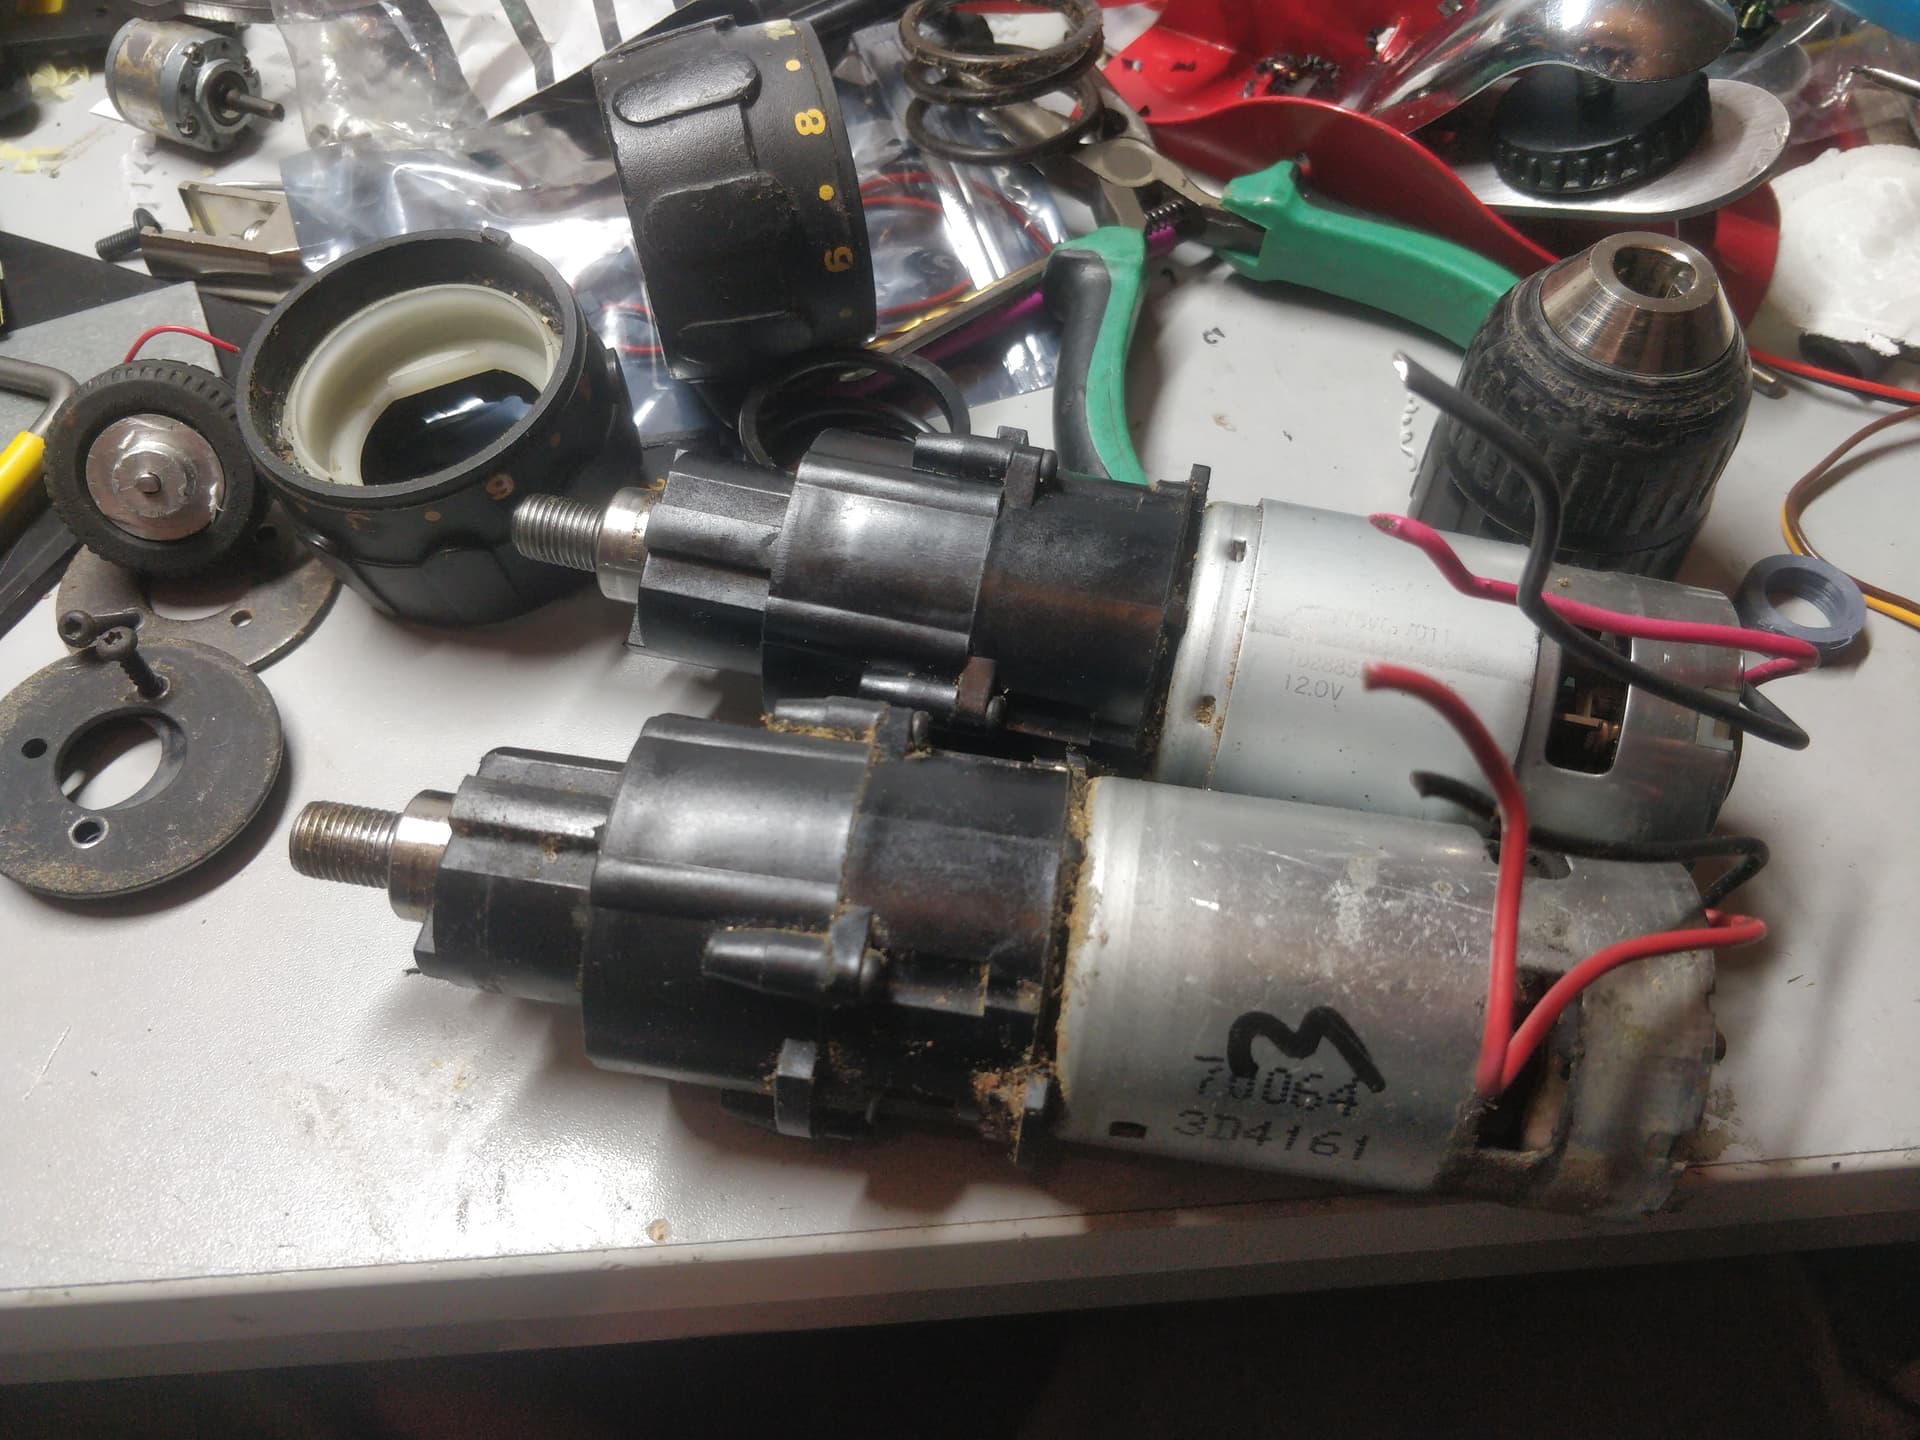
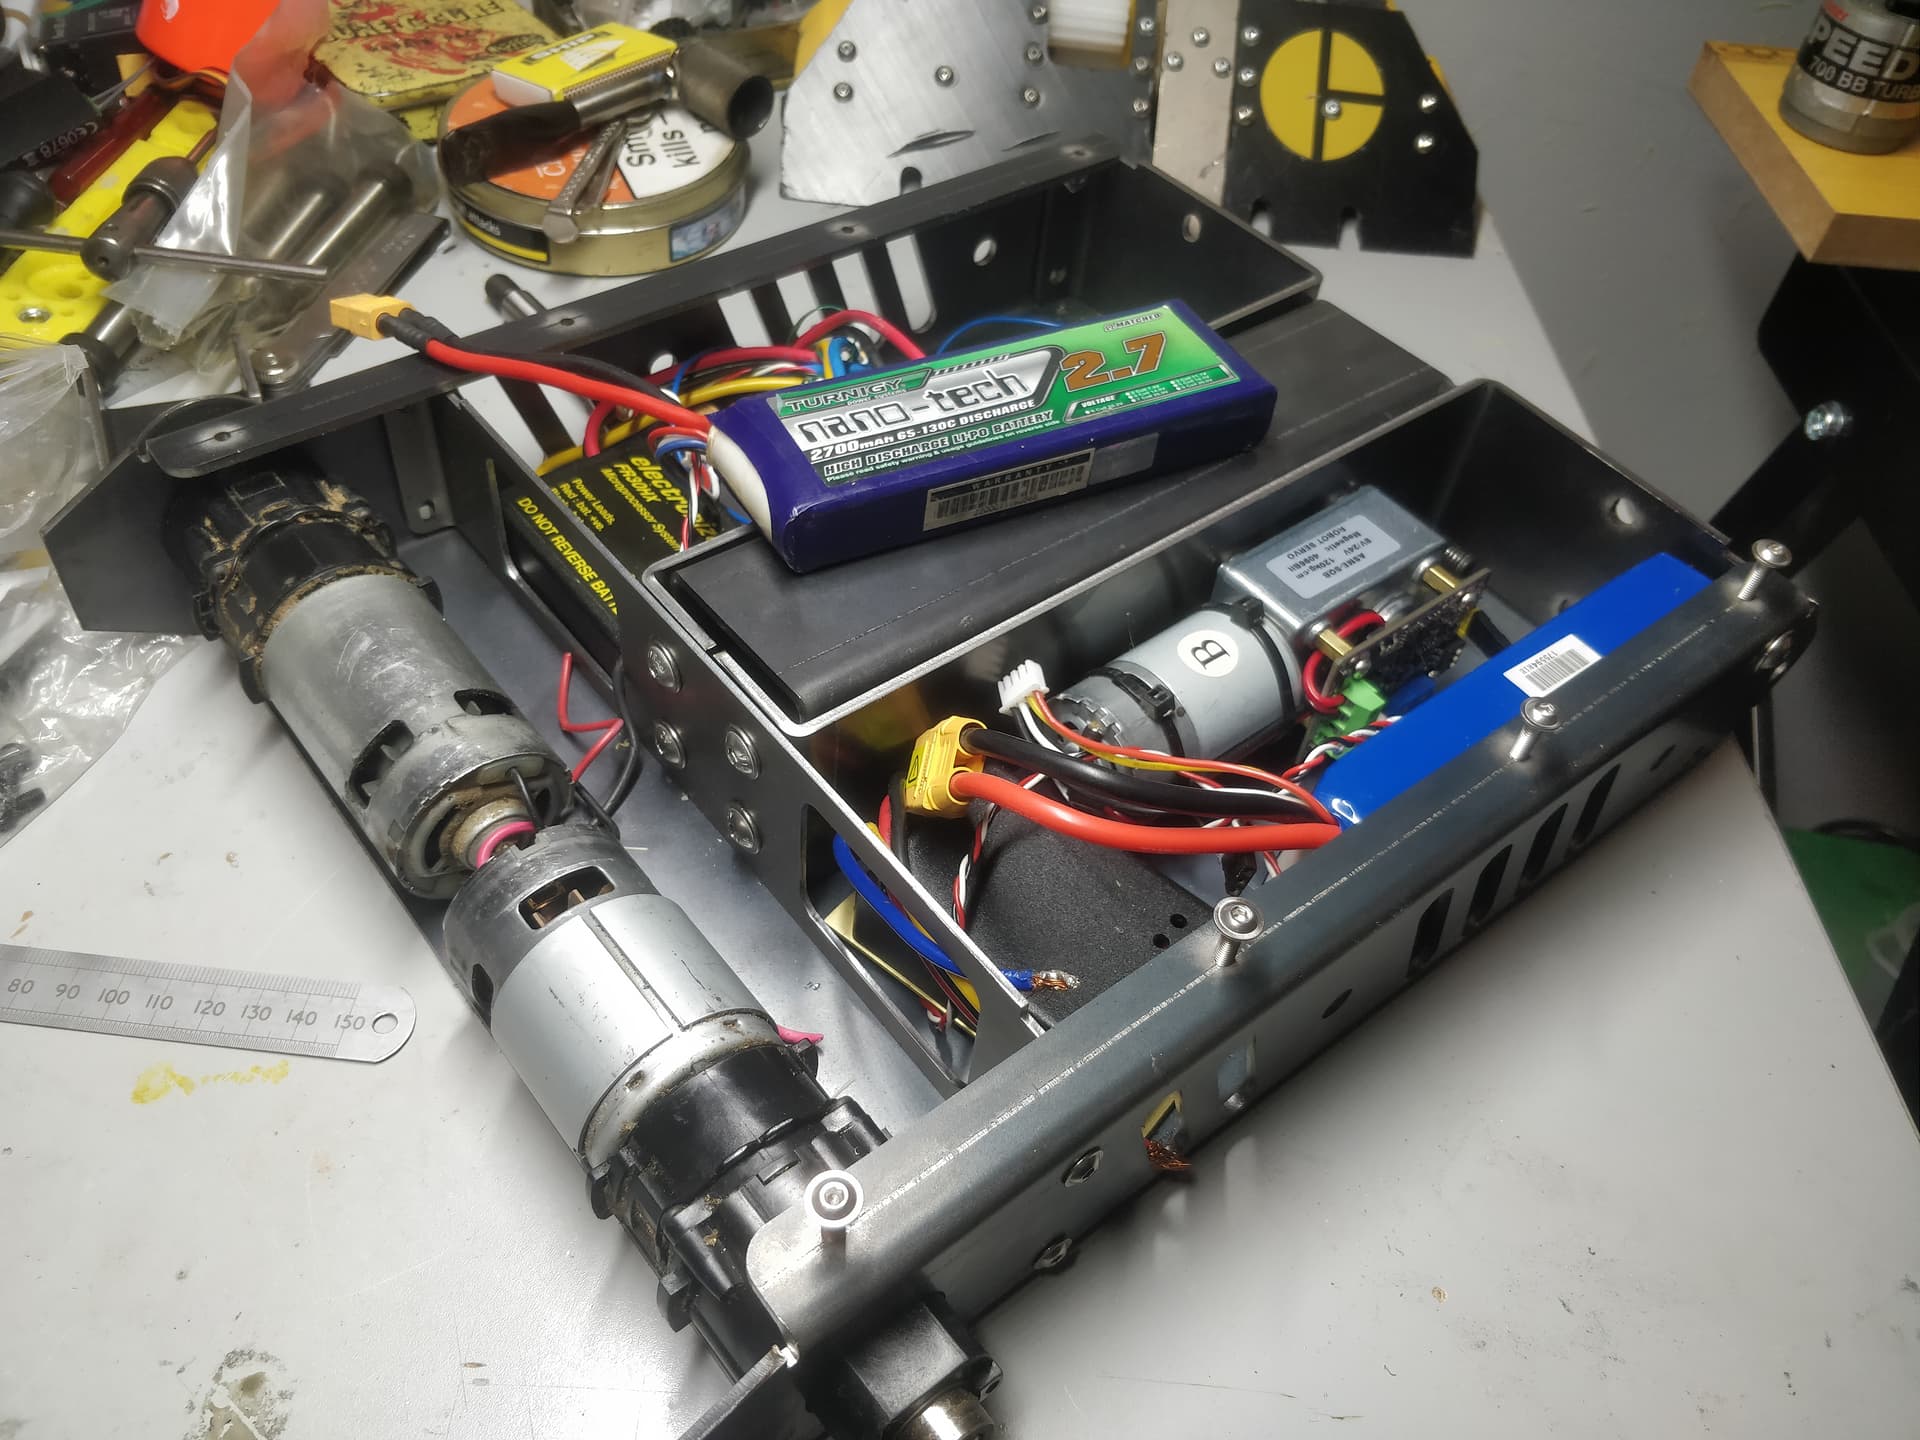
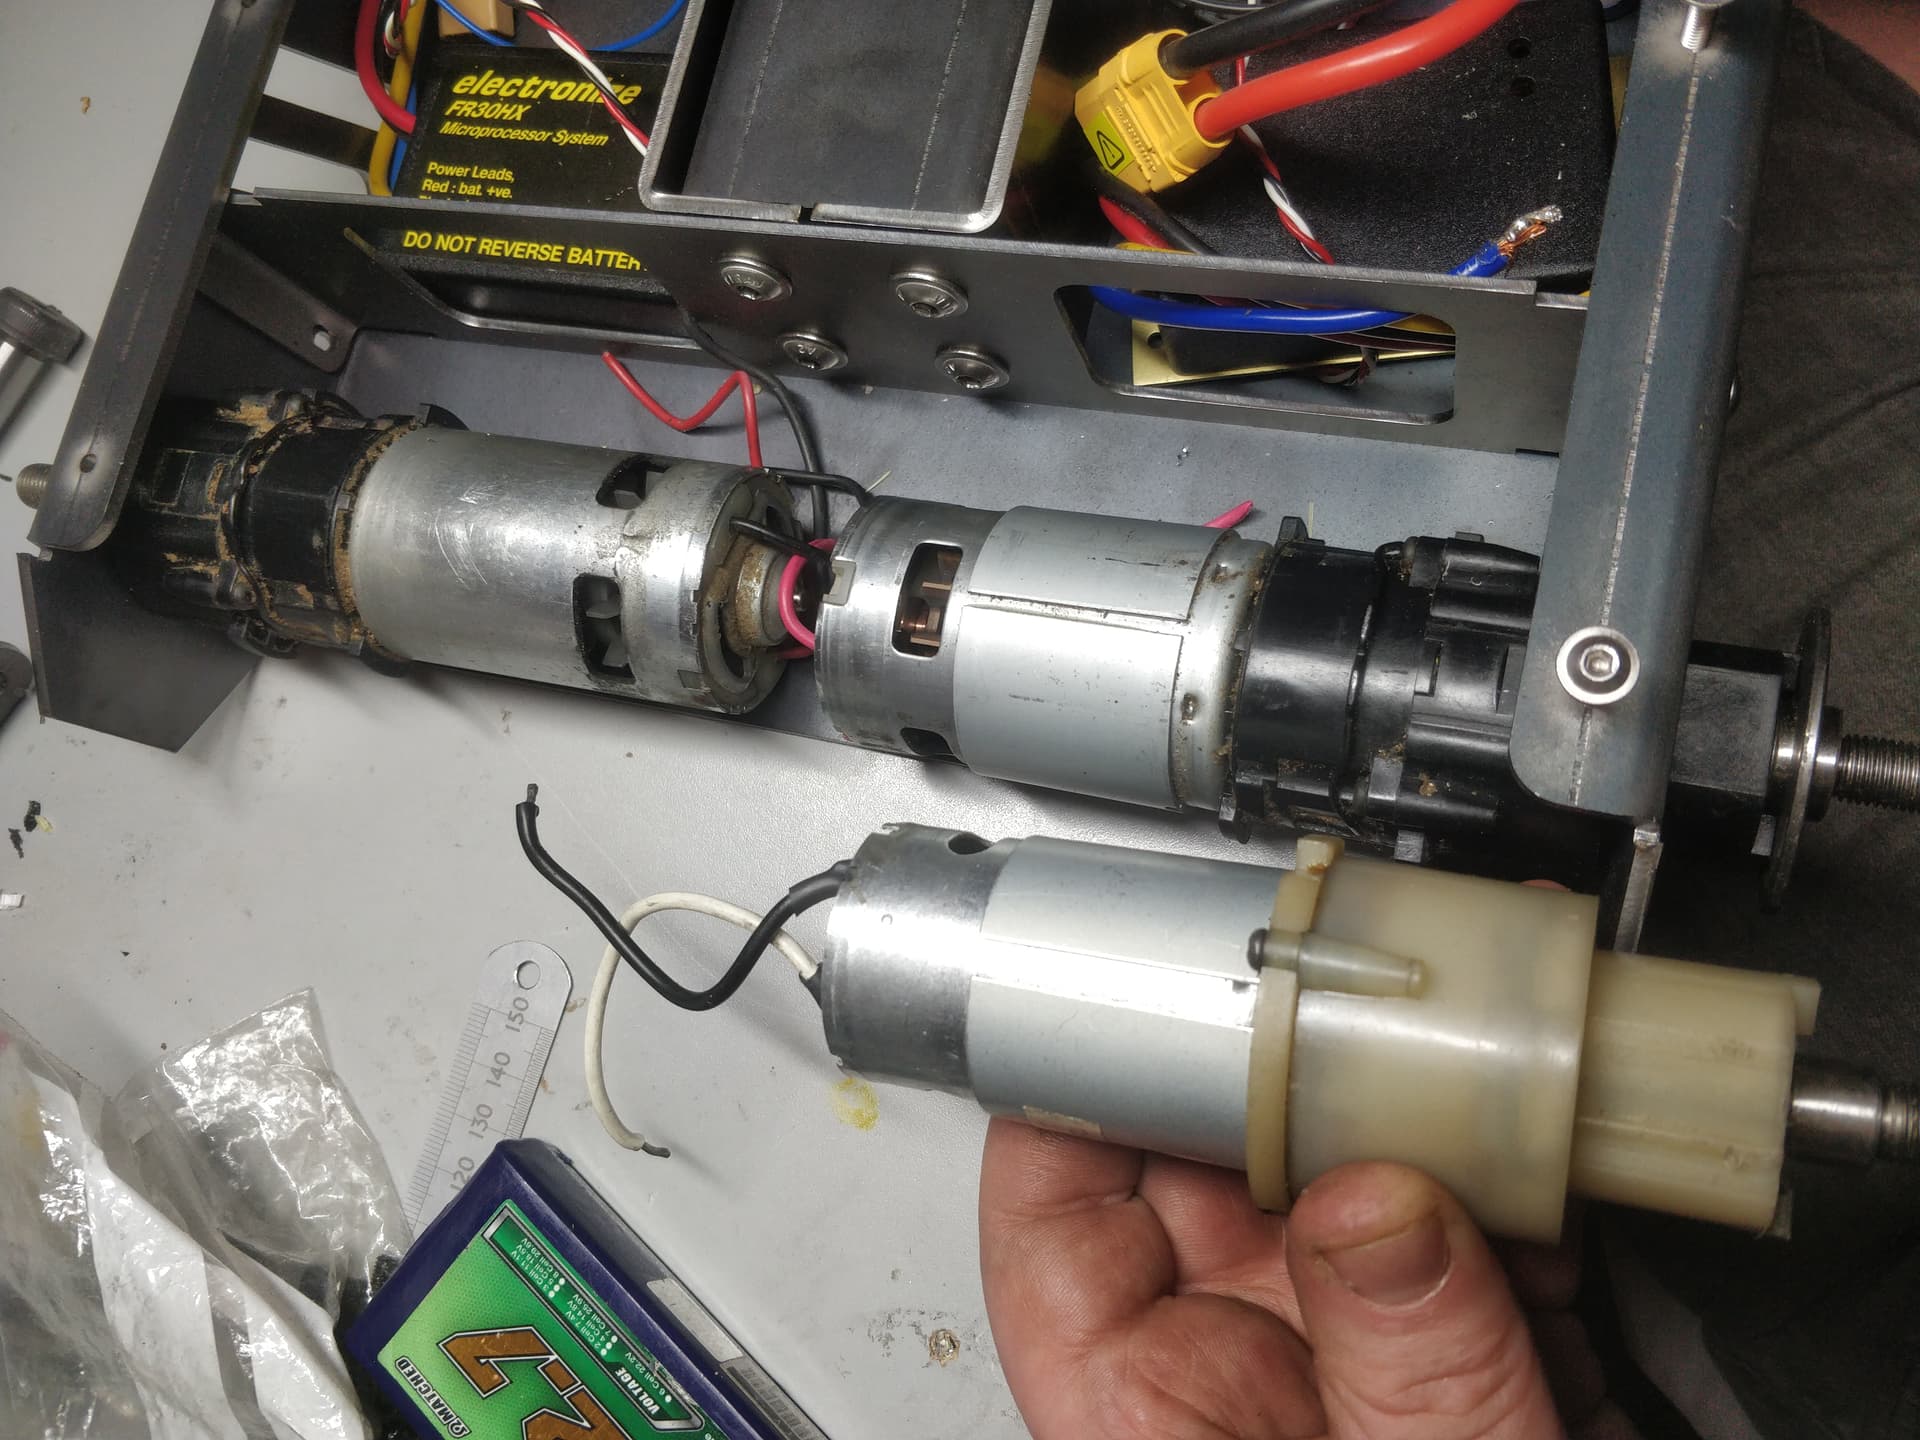
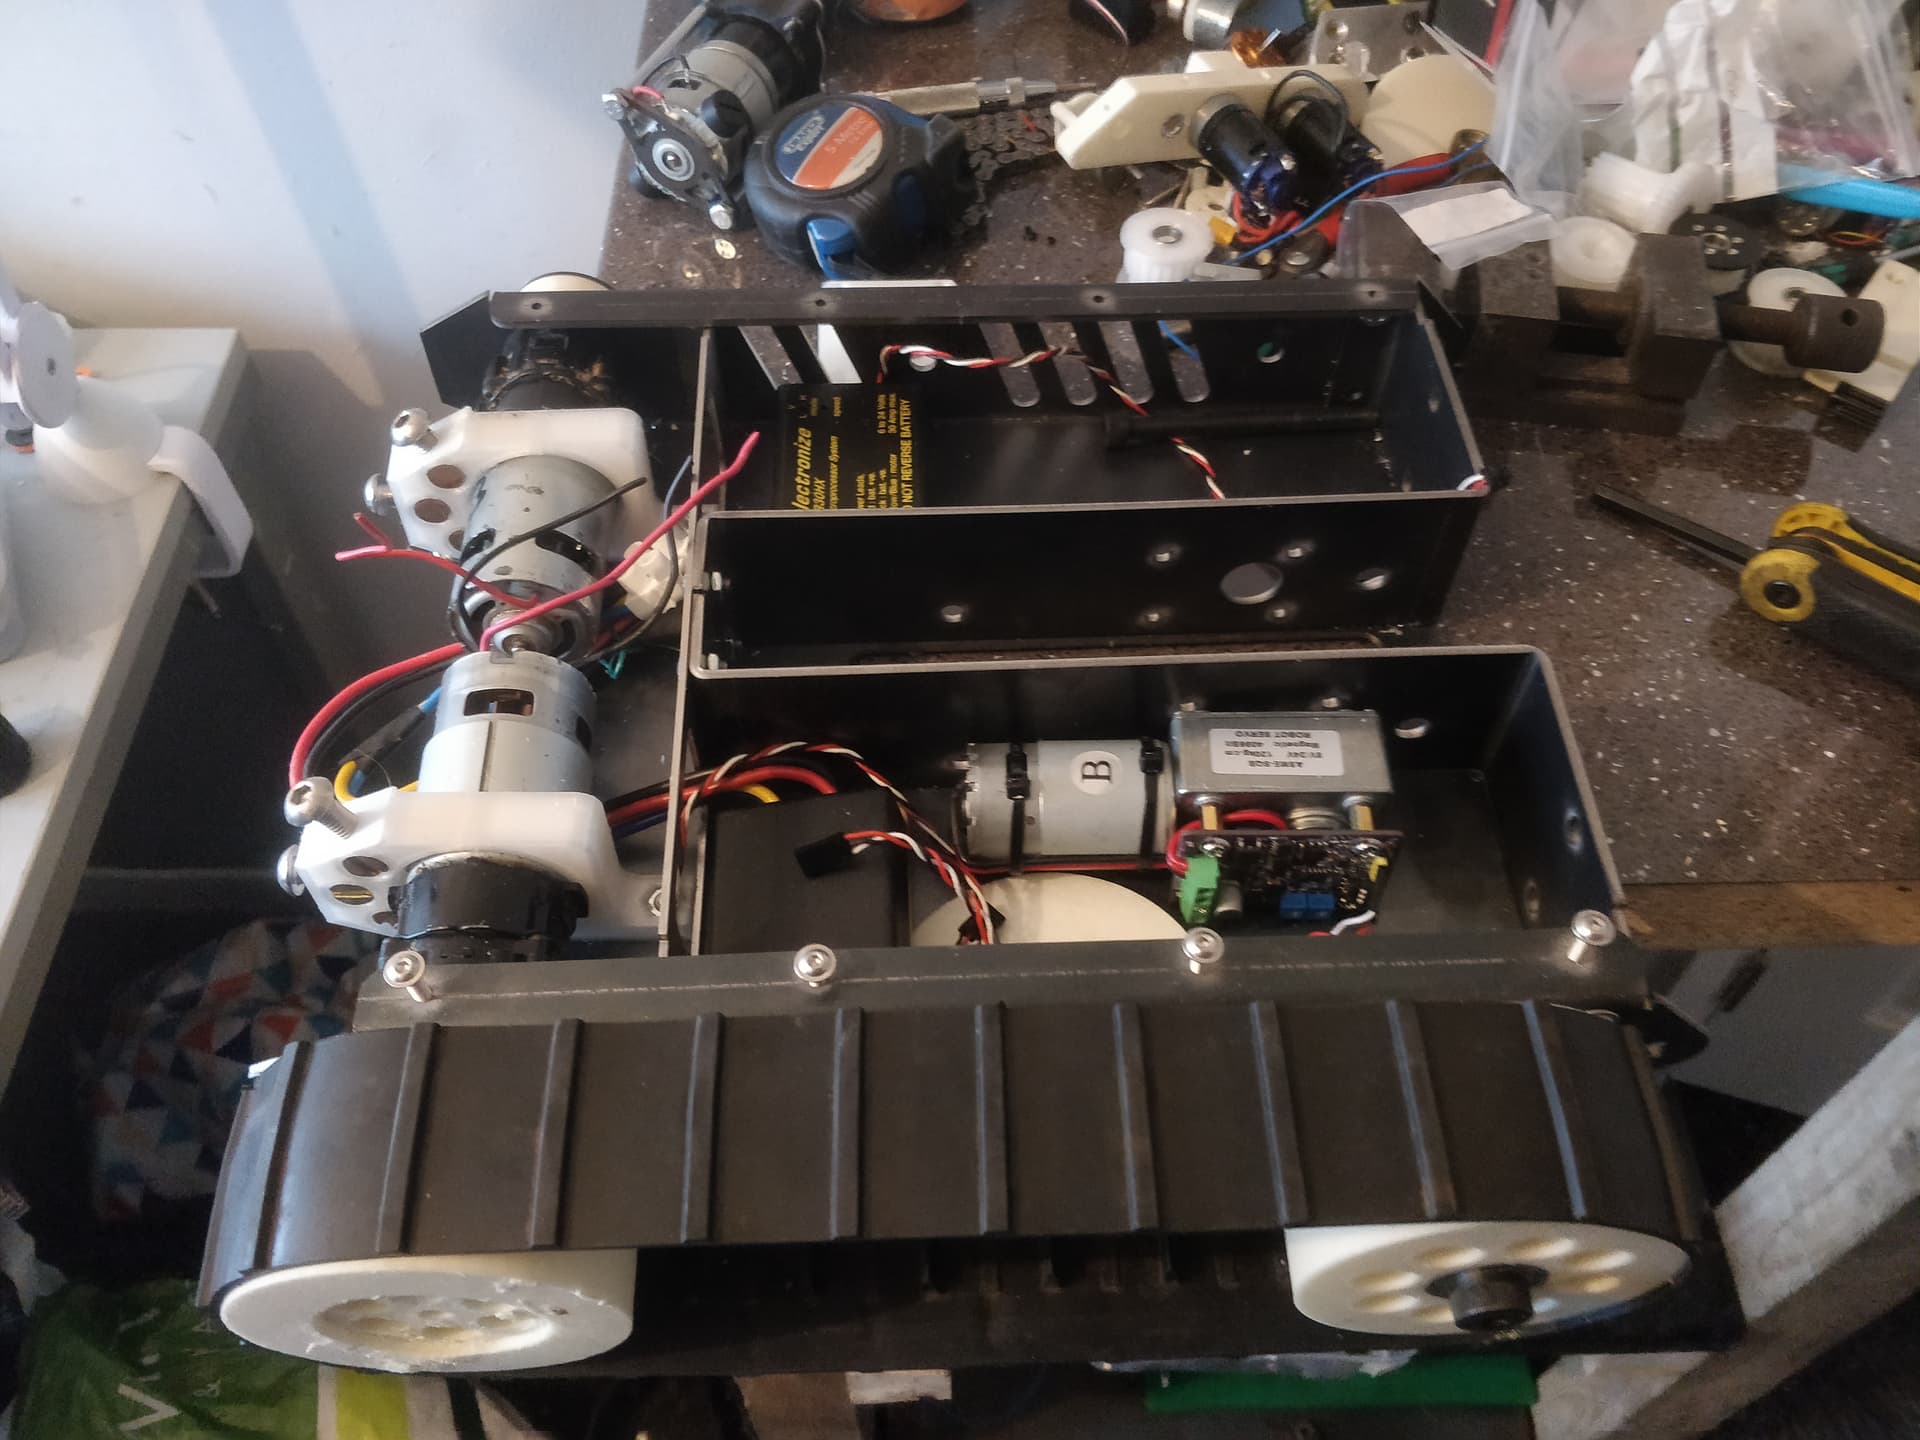
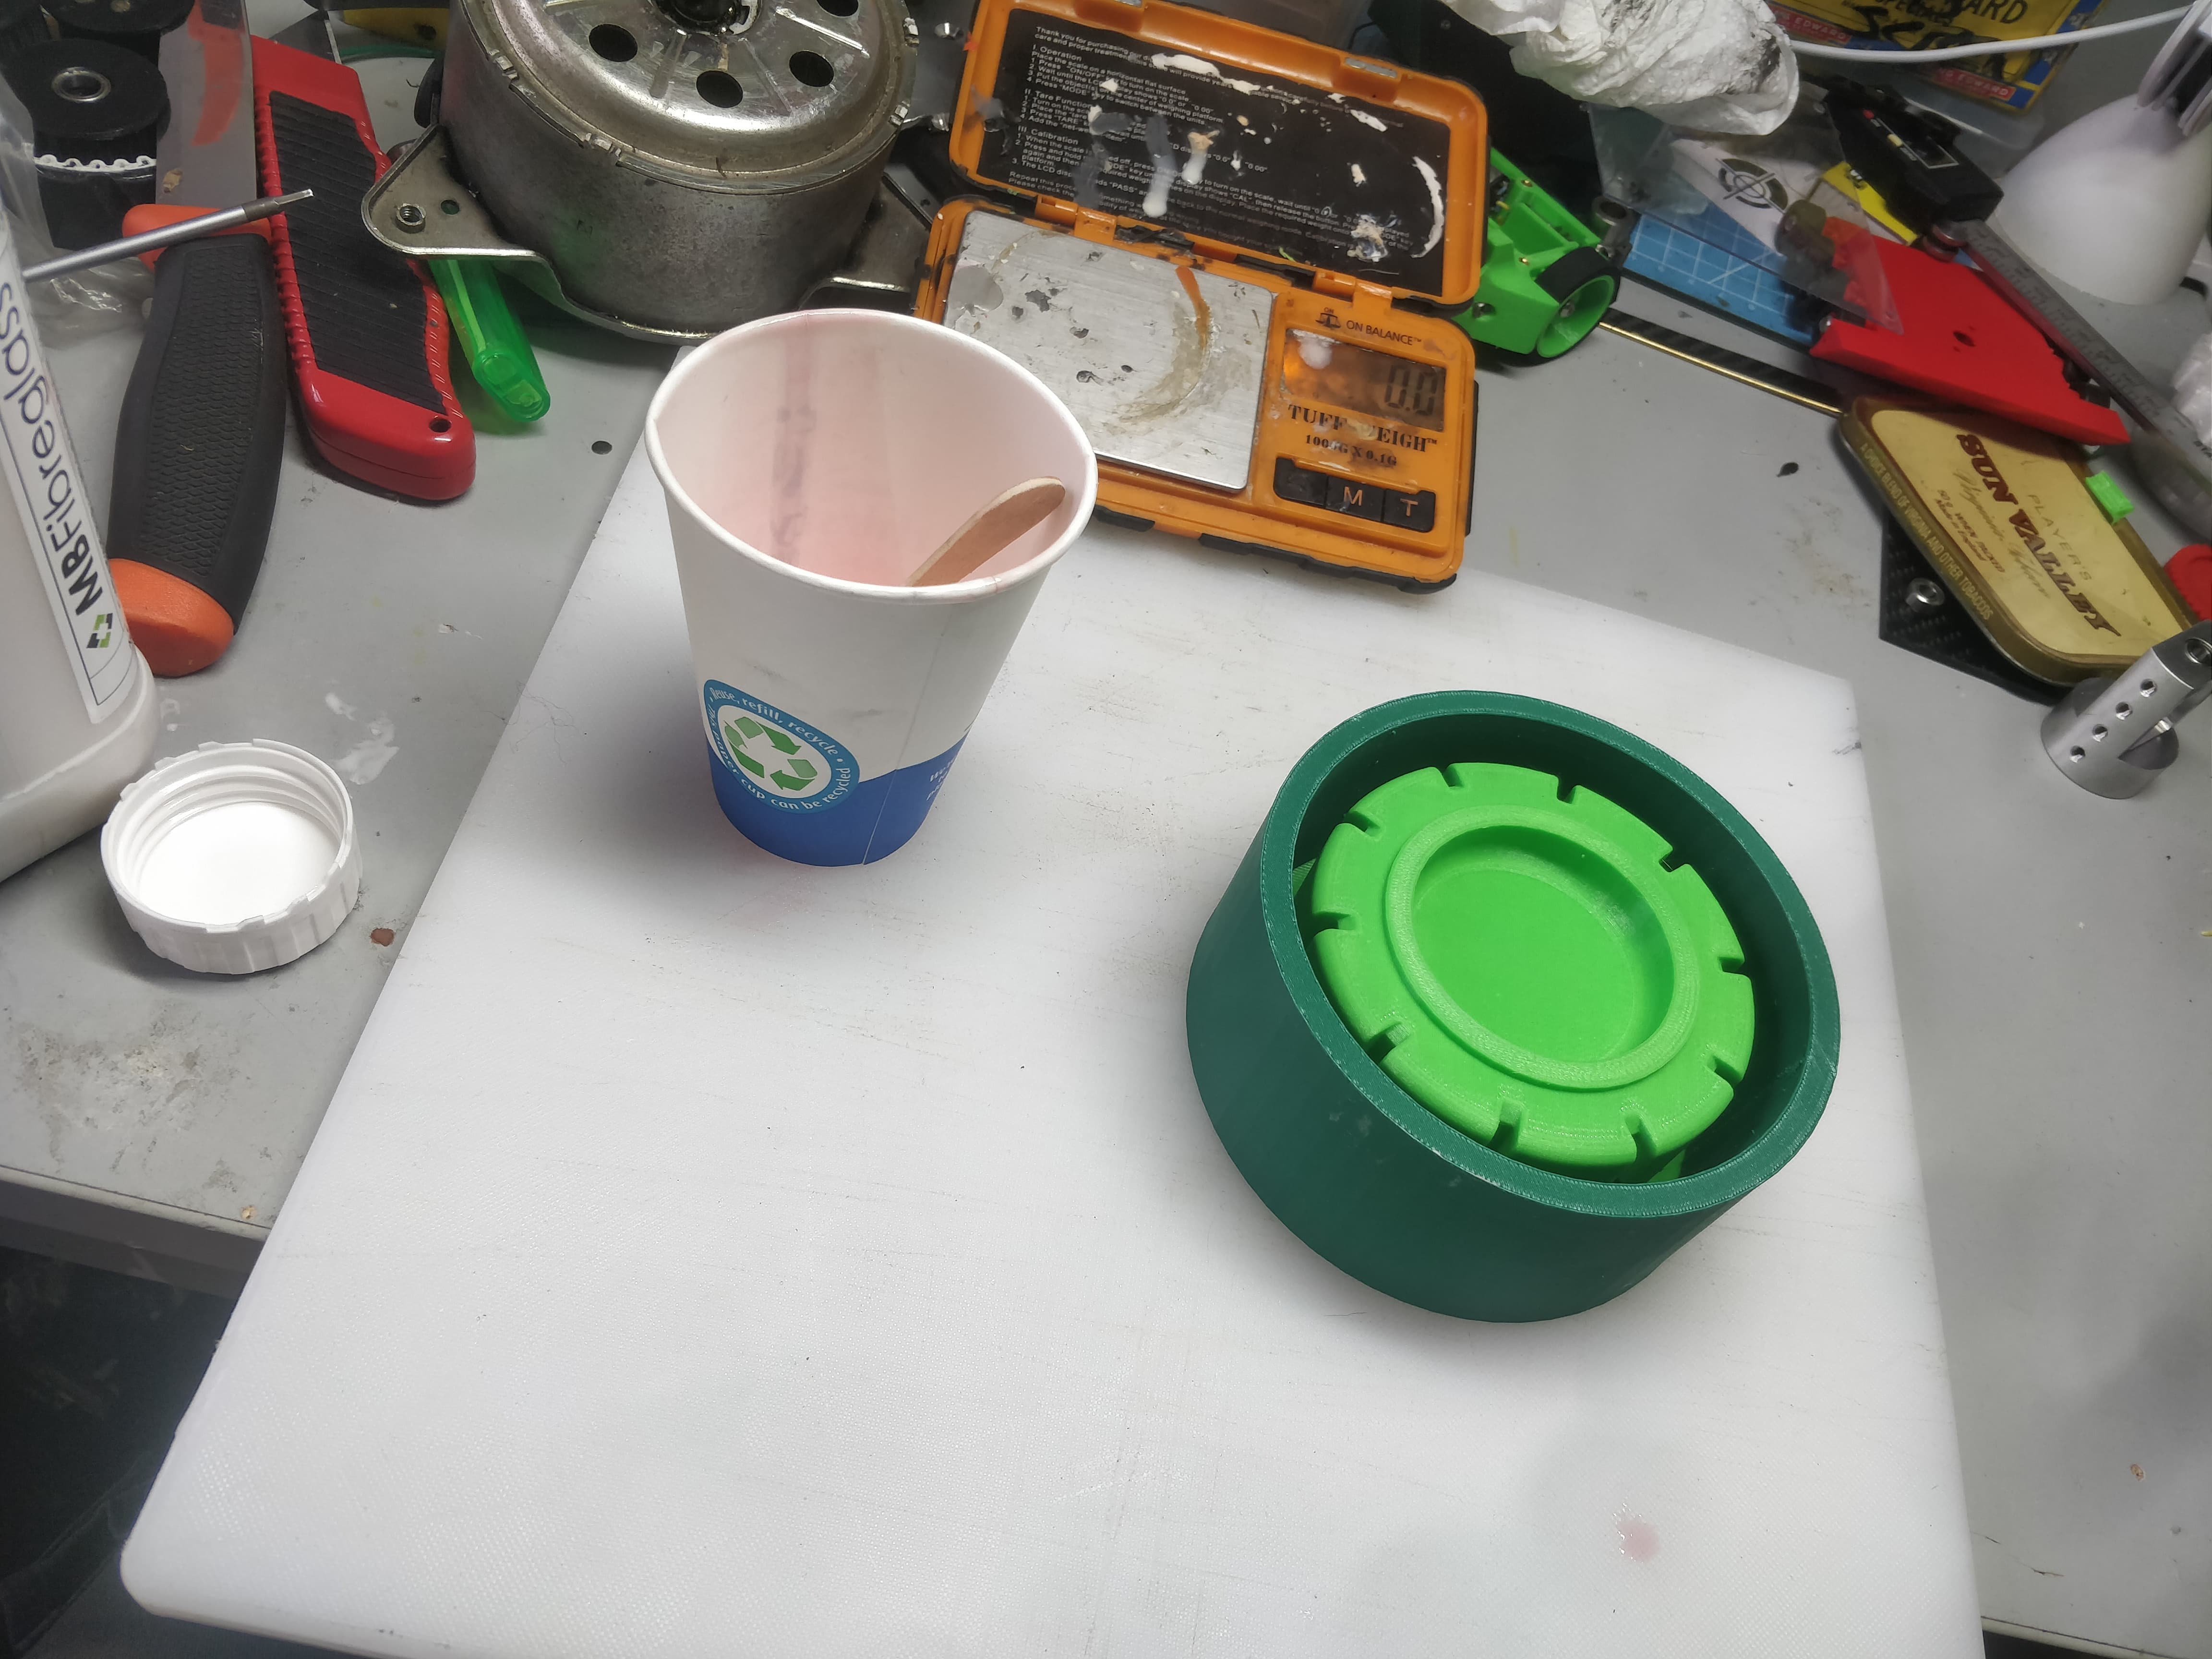
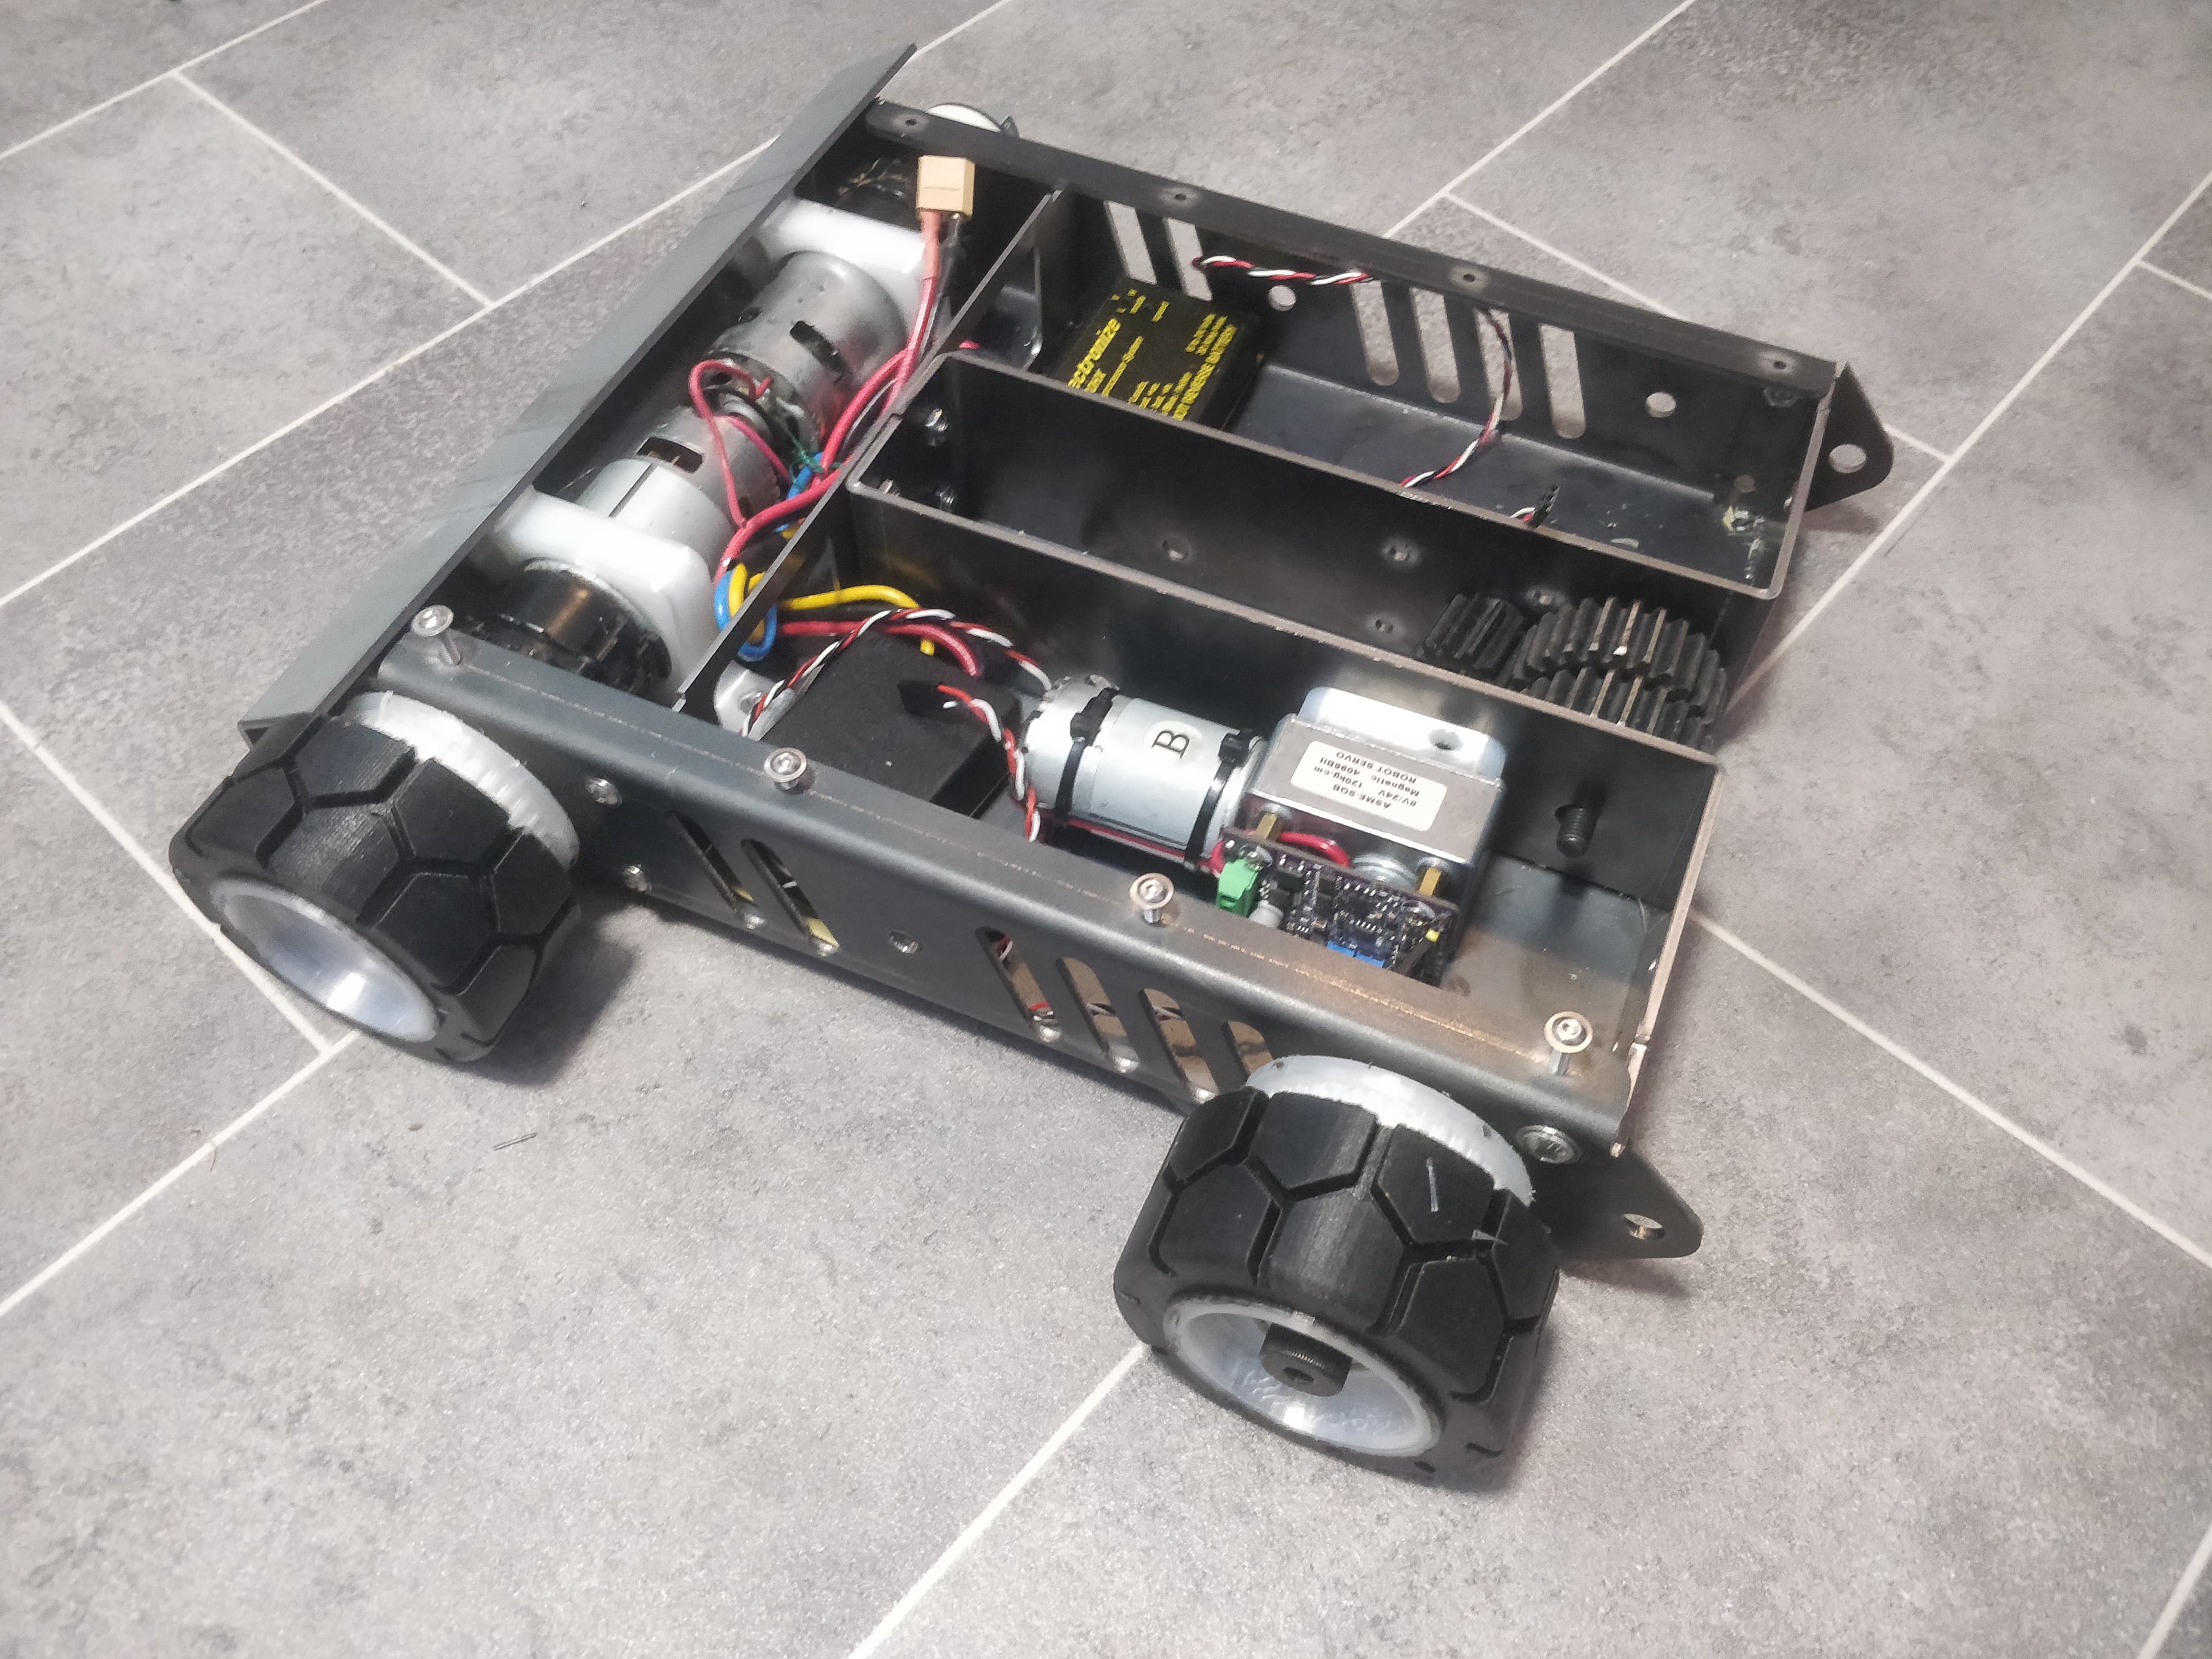
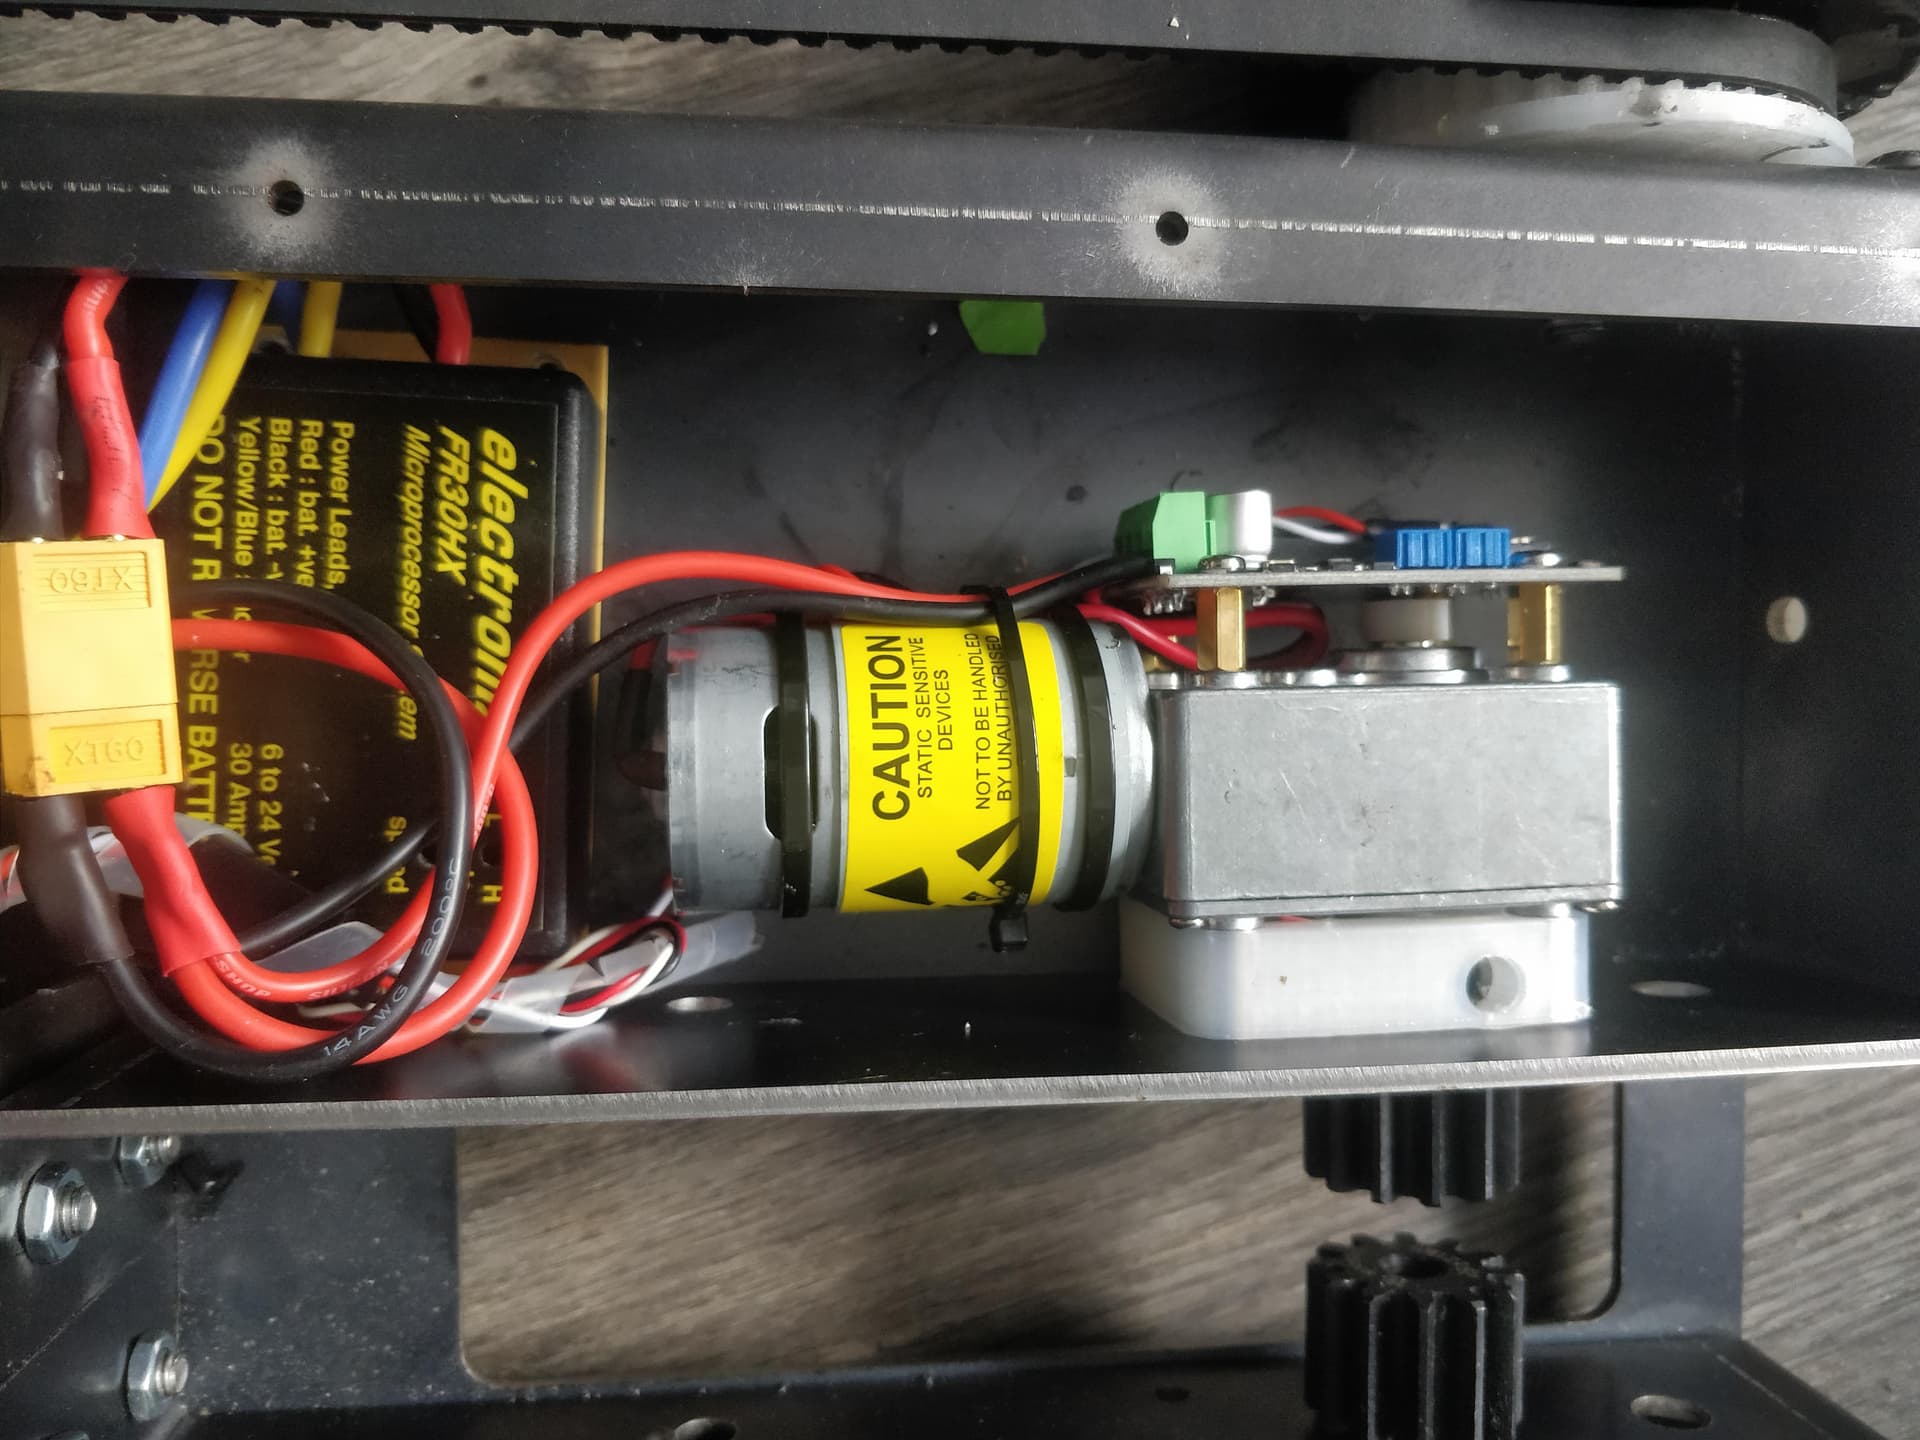
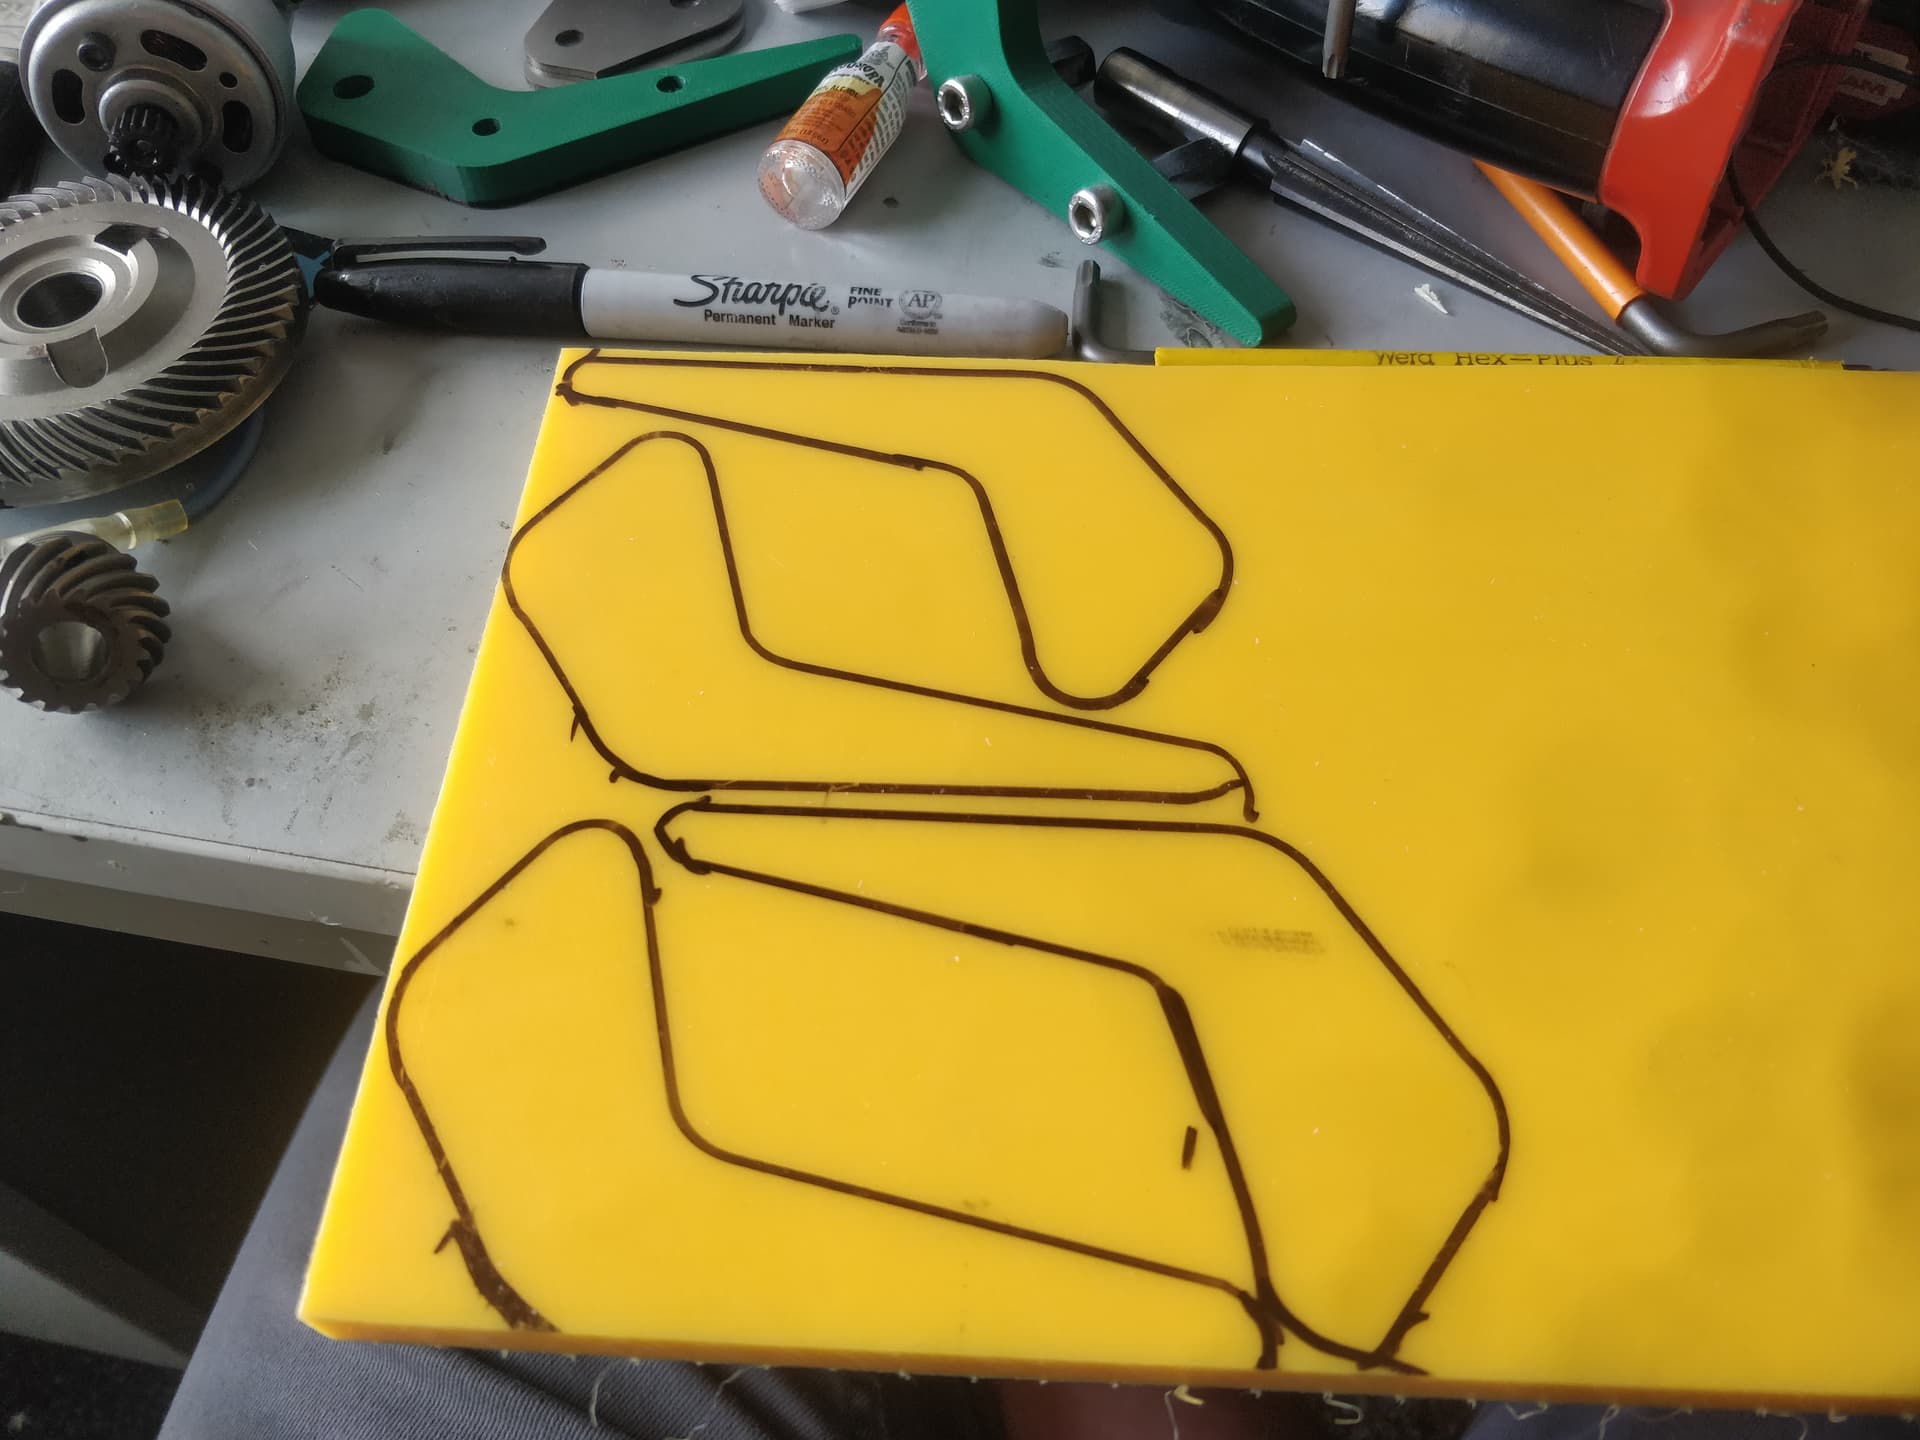
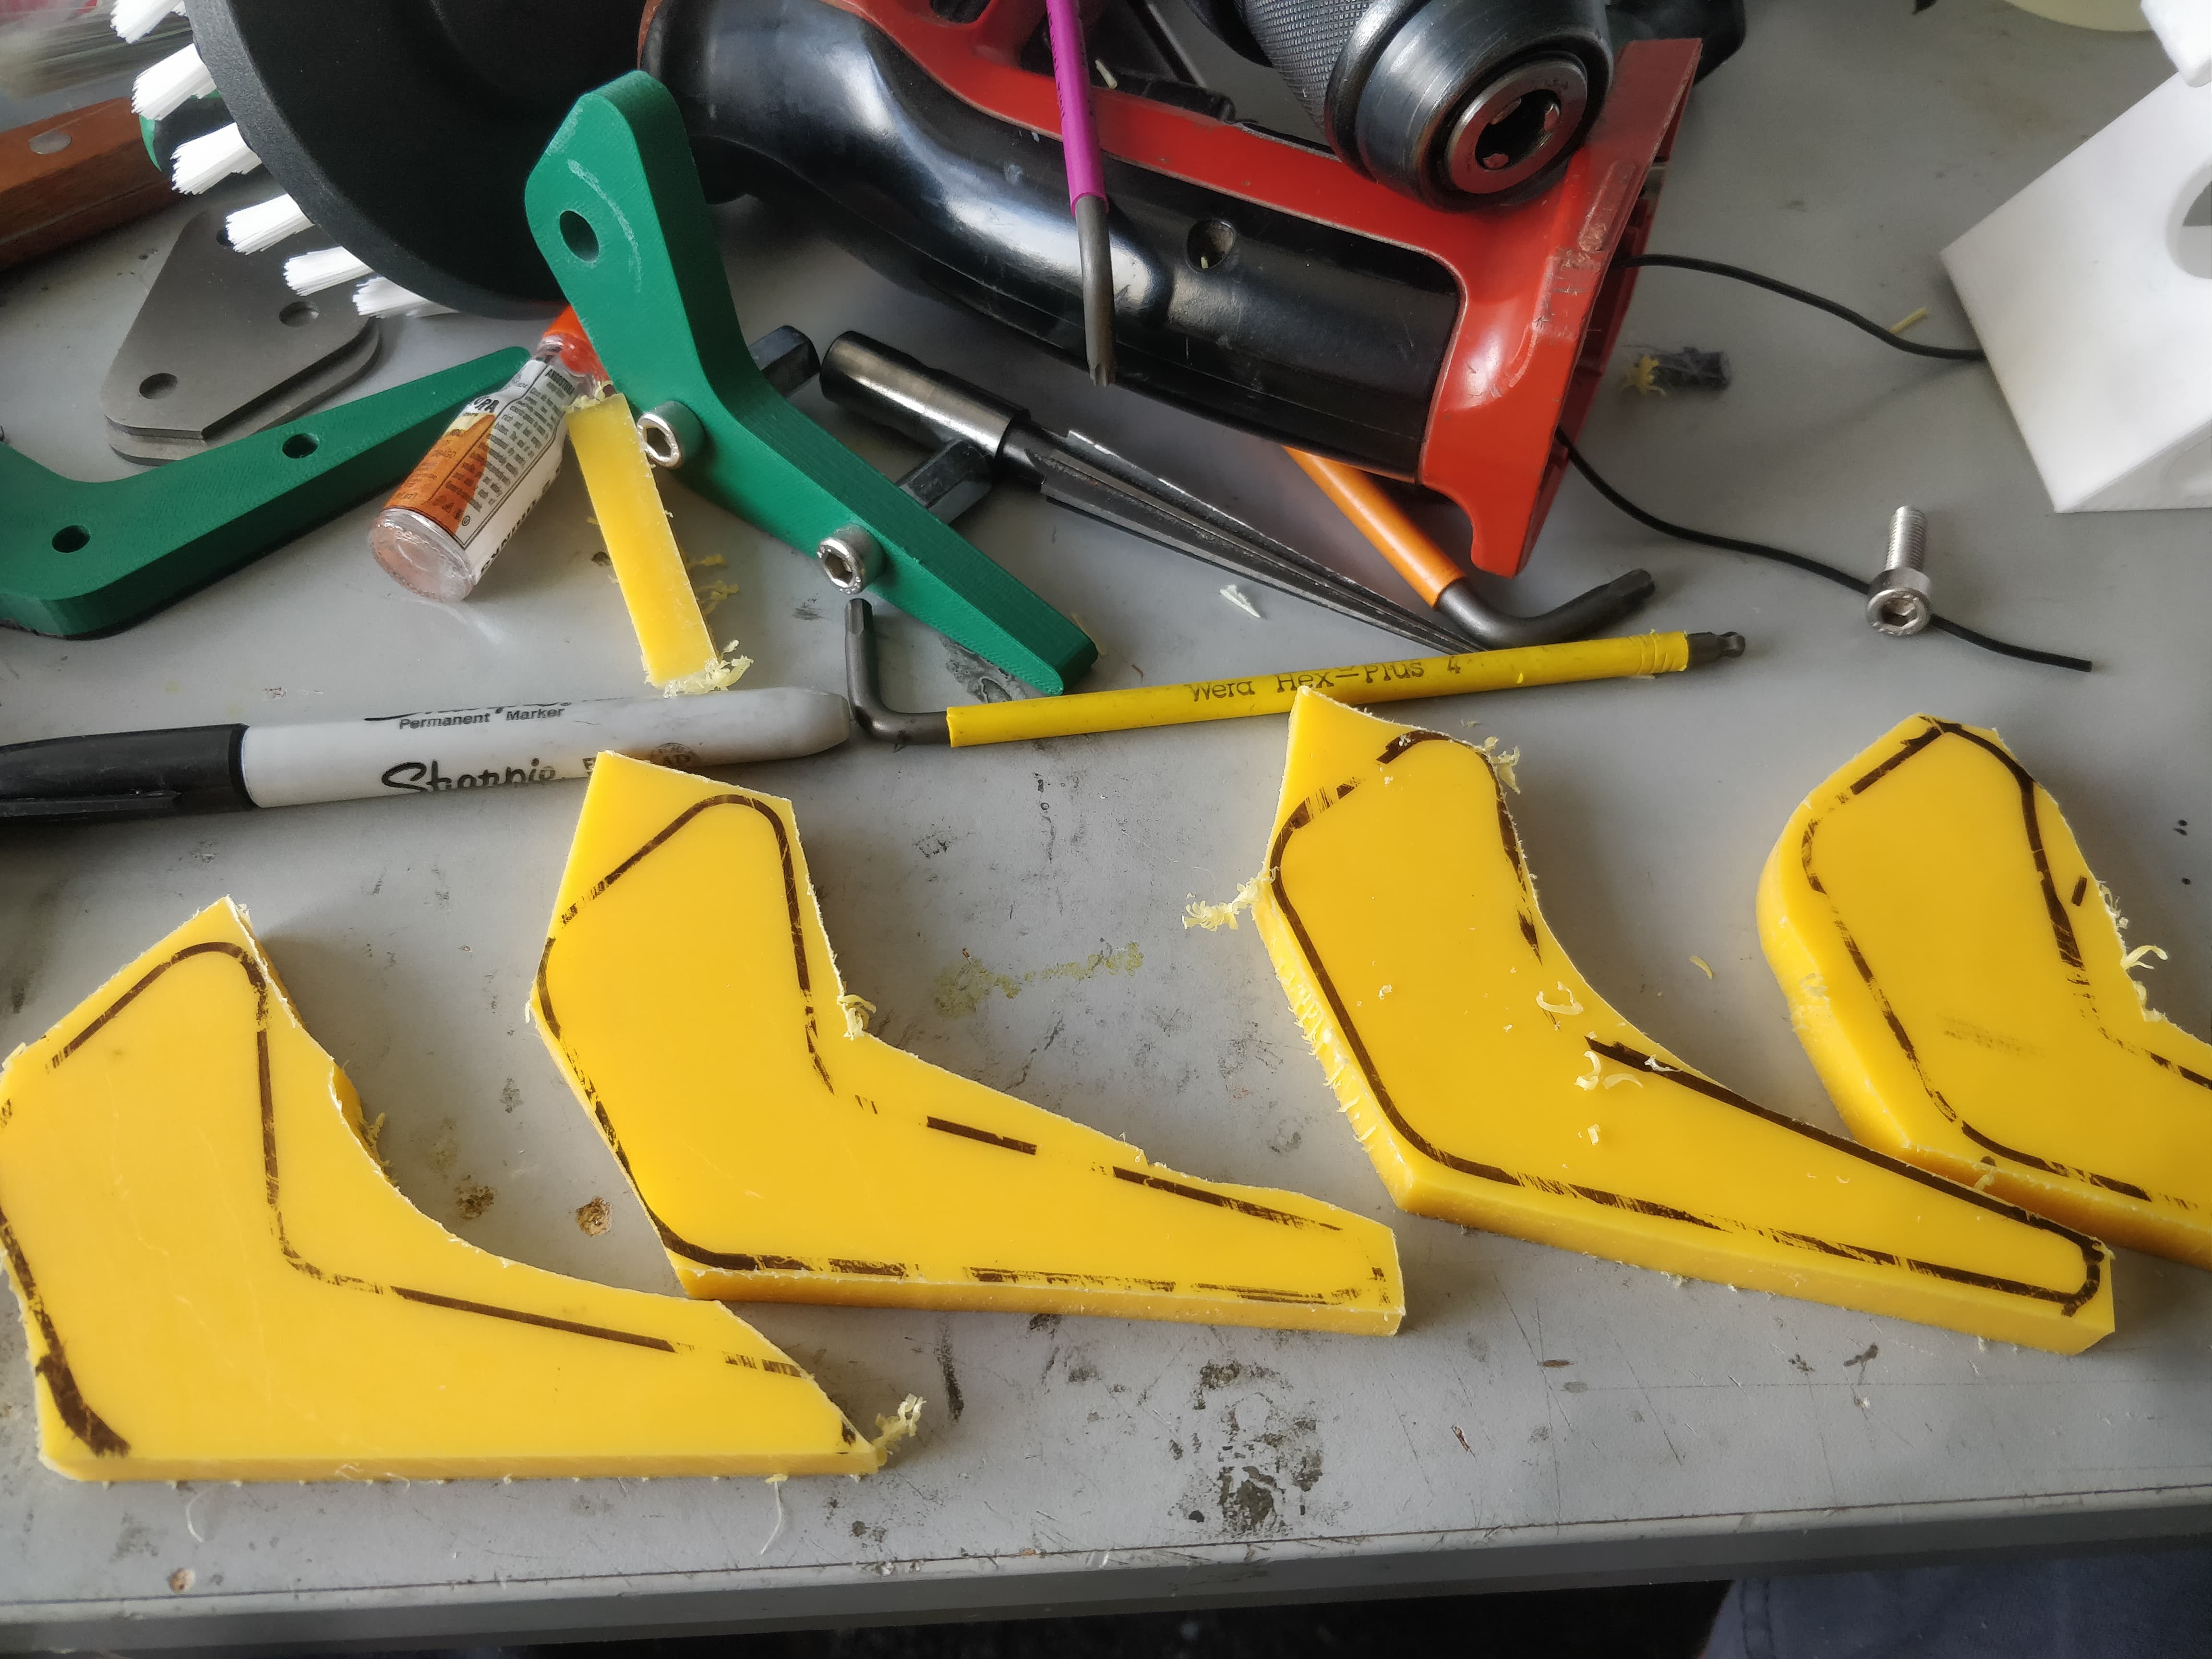
I went a little harder and switched up the drive so some more powerful 775 dewalt drills, had a cleaner sweep of components and a more reliable setup for the lifter motor. The plan was to get some HDPE cut (laser’d actually) but that fell through so I just simplified it to what was cheap on ebay and I could cut by hand.

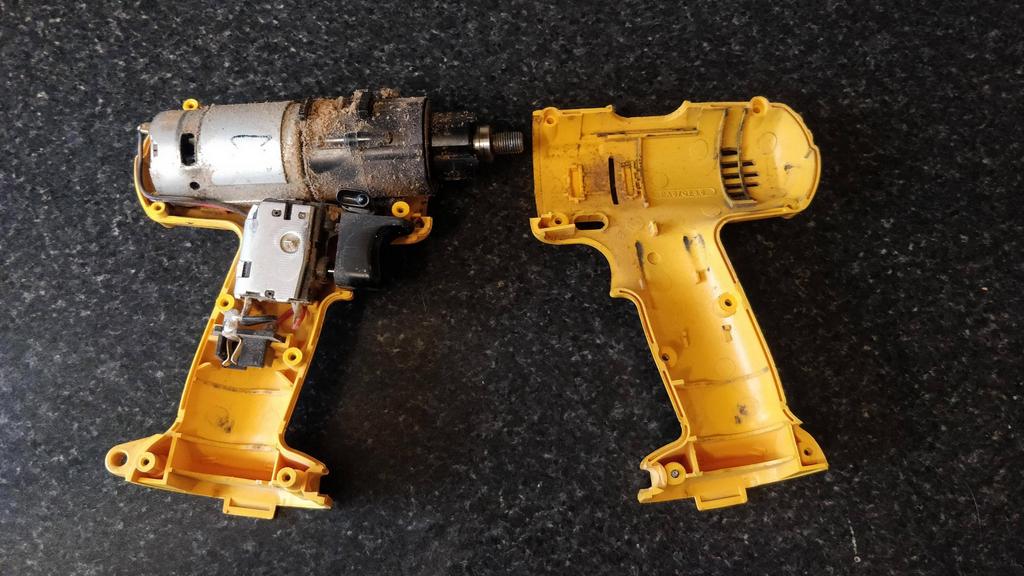
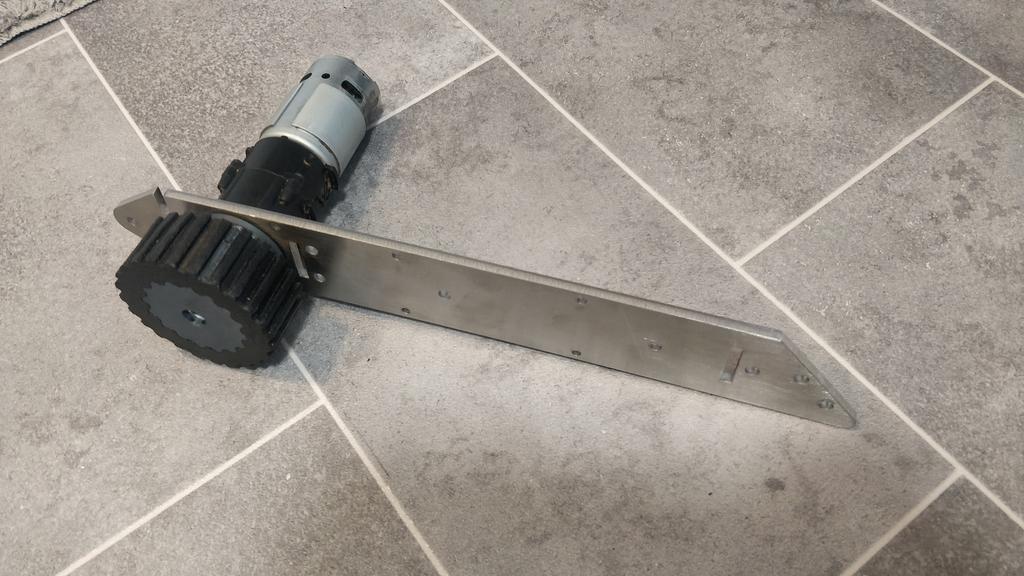
In true bargain bin BBB spirit I found a dewalt by some bins and after stripping it found it to be really pretty nice inside - like a normal drill but lärge. The speed range worked out pretty well to - topping it out to 1100rpm in high gear and 330rpm in low. This put it in the 10mph range which is pretty sedate but still may prove too much for me in a small arena.

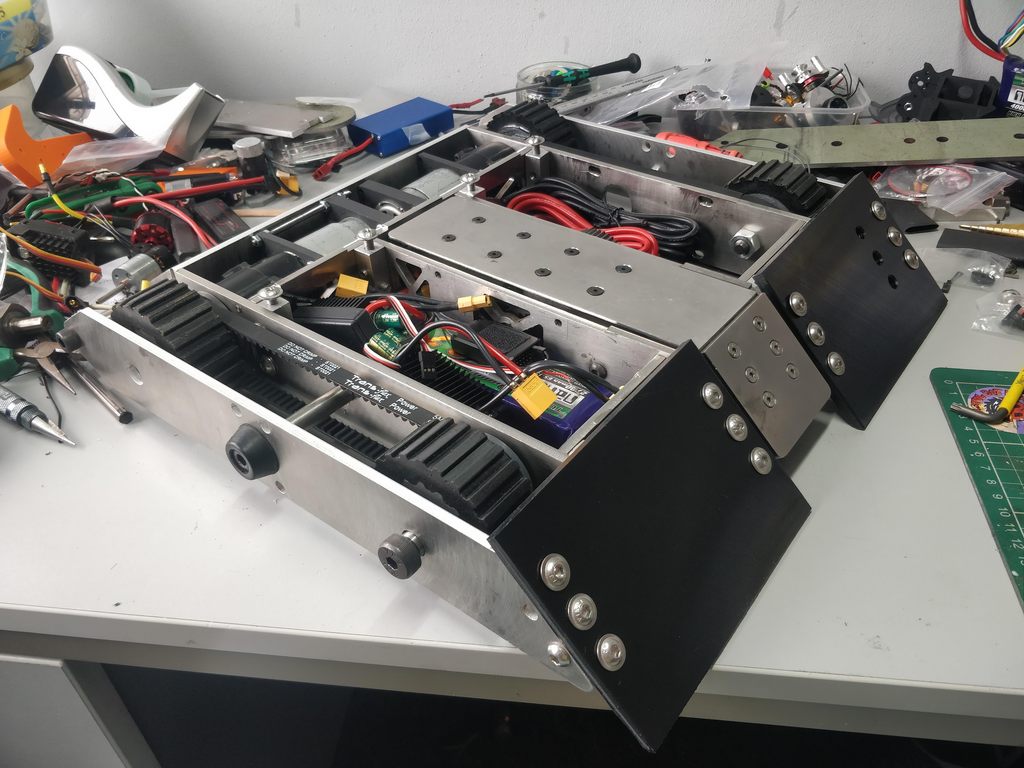
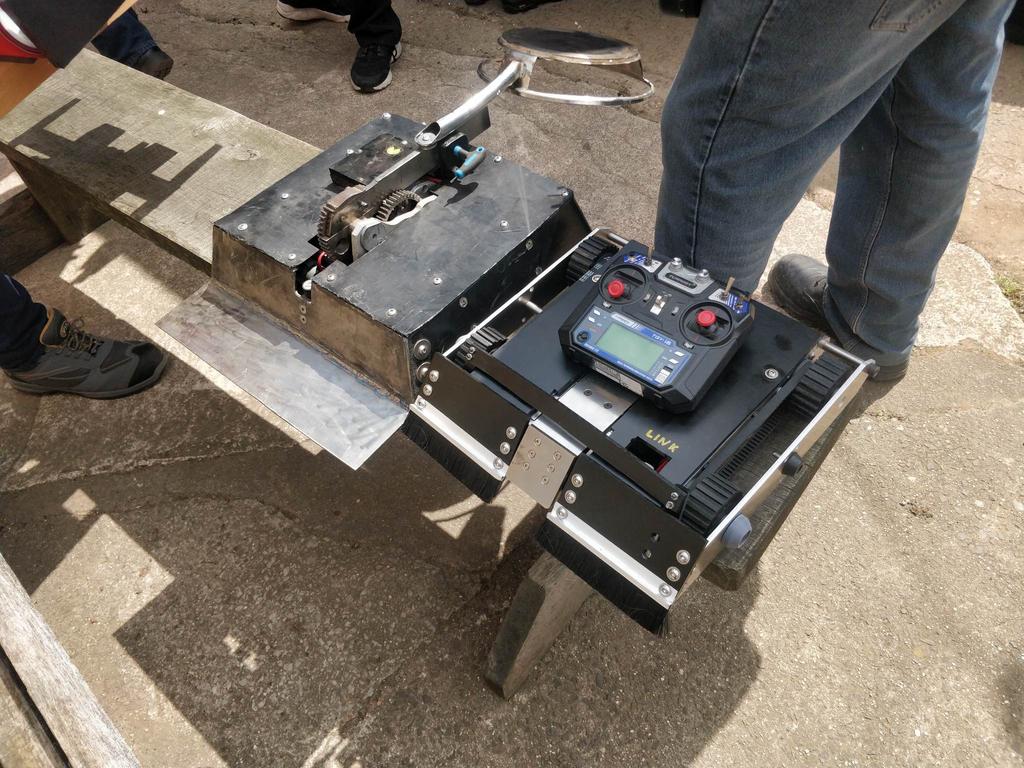
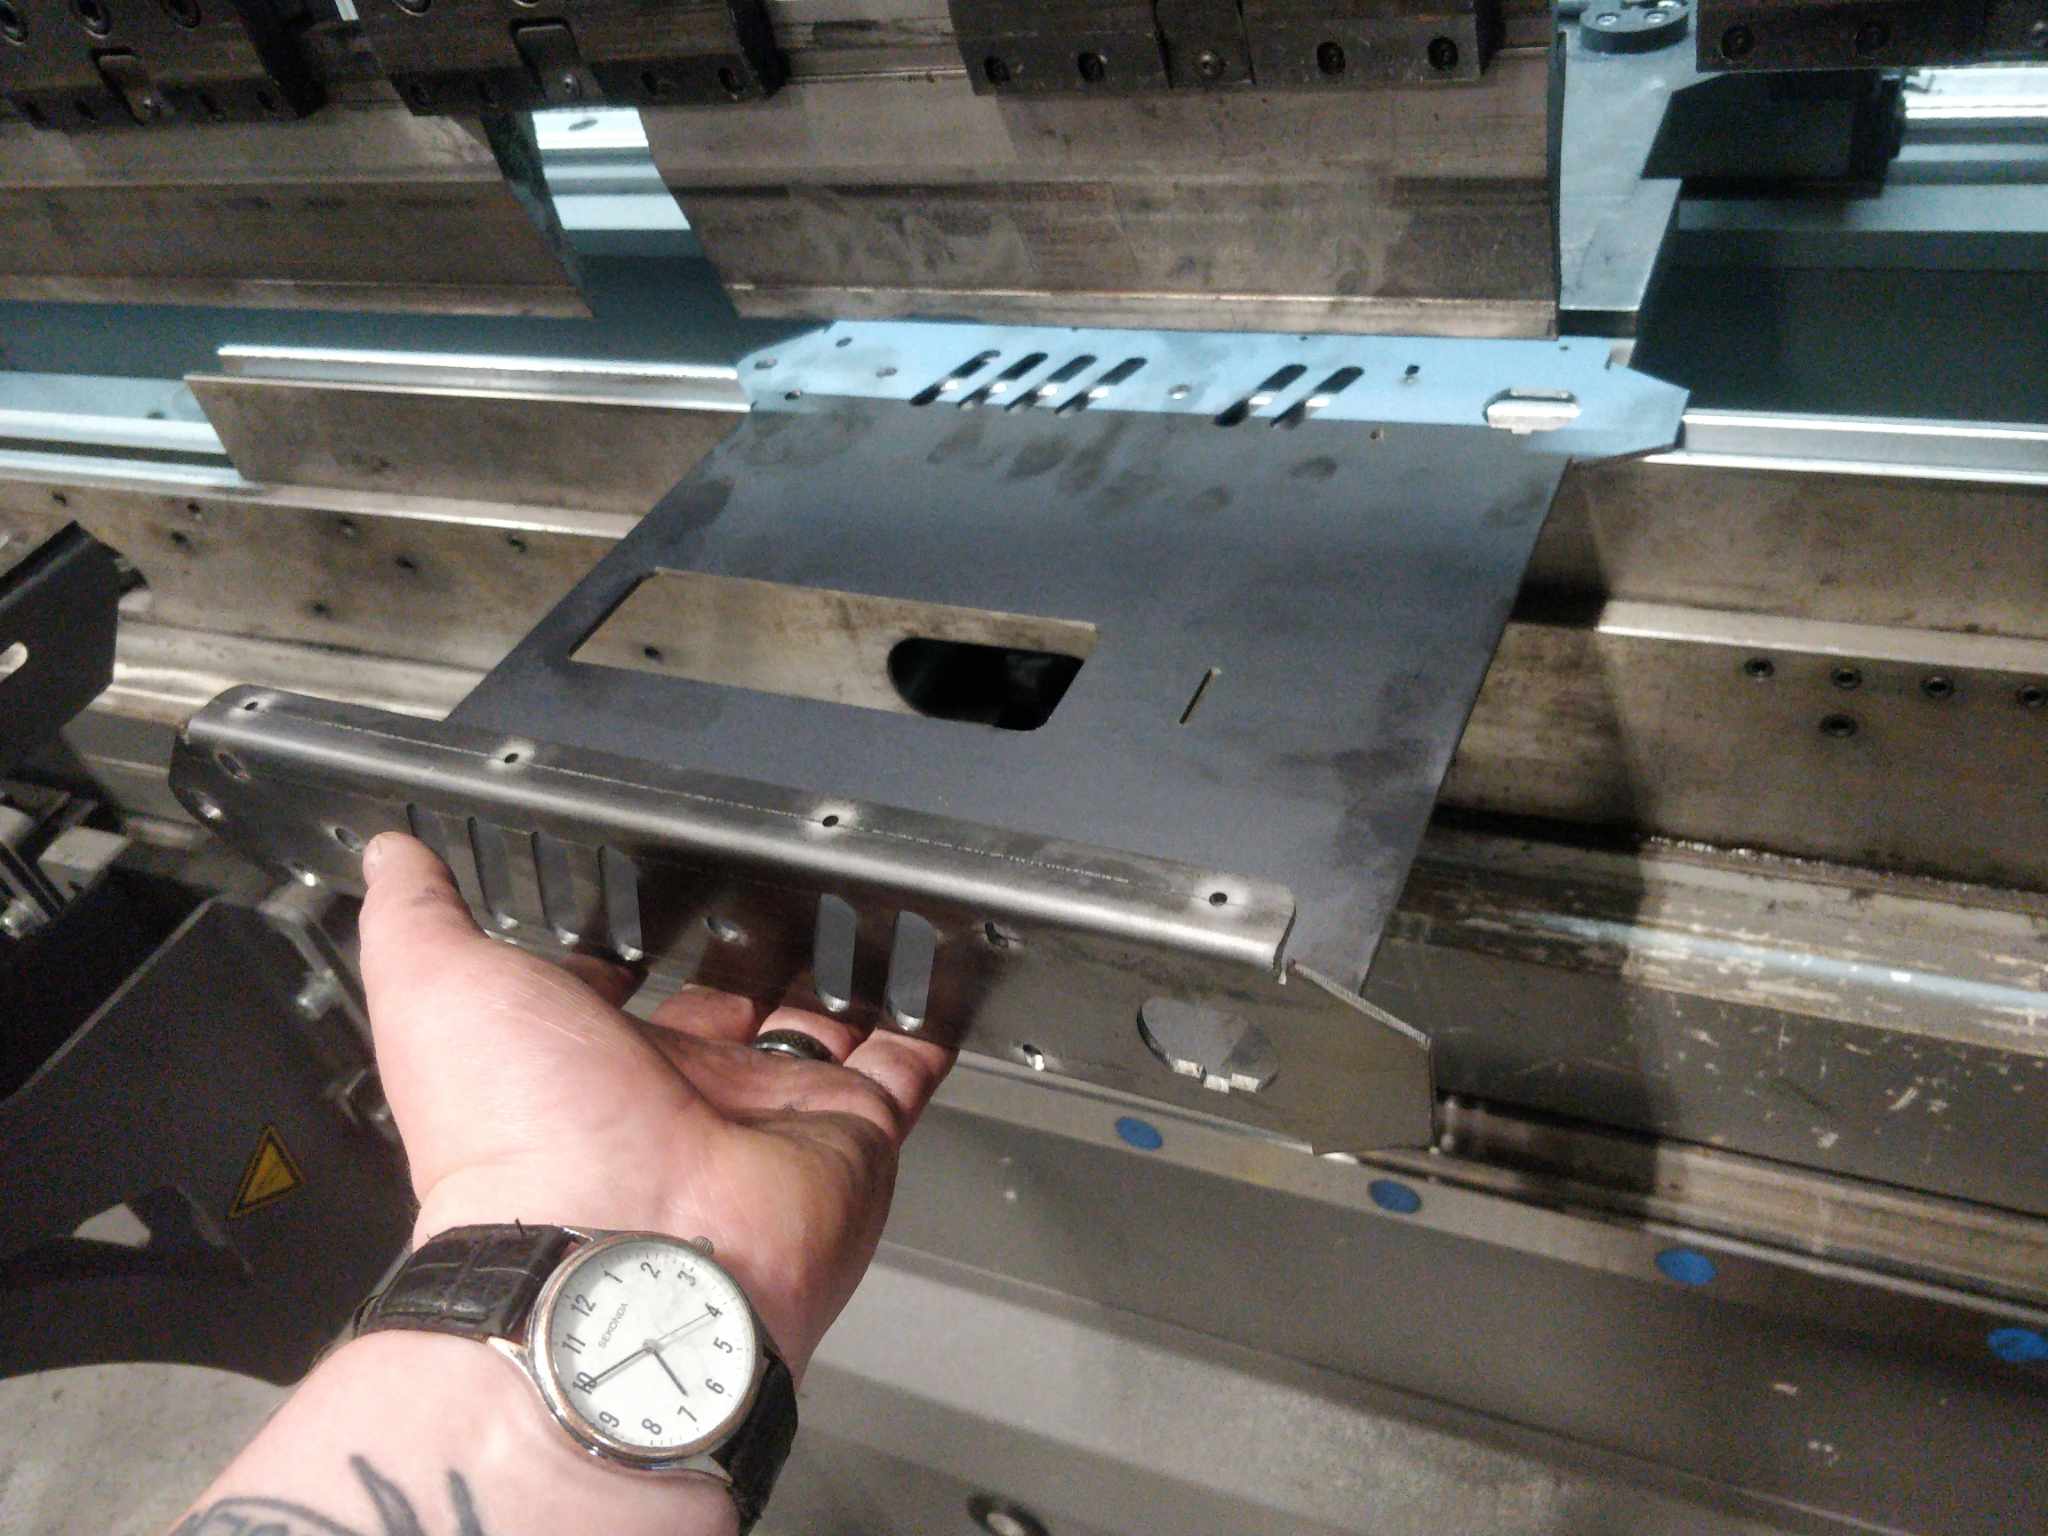
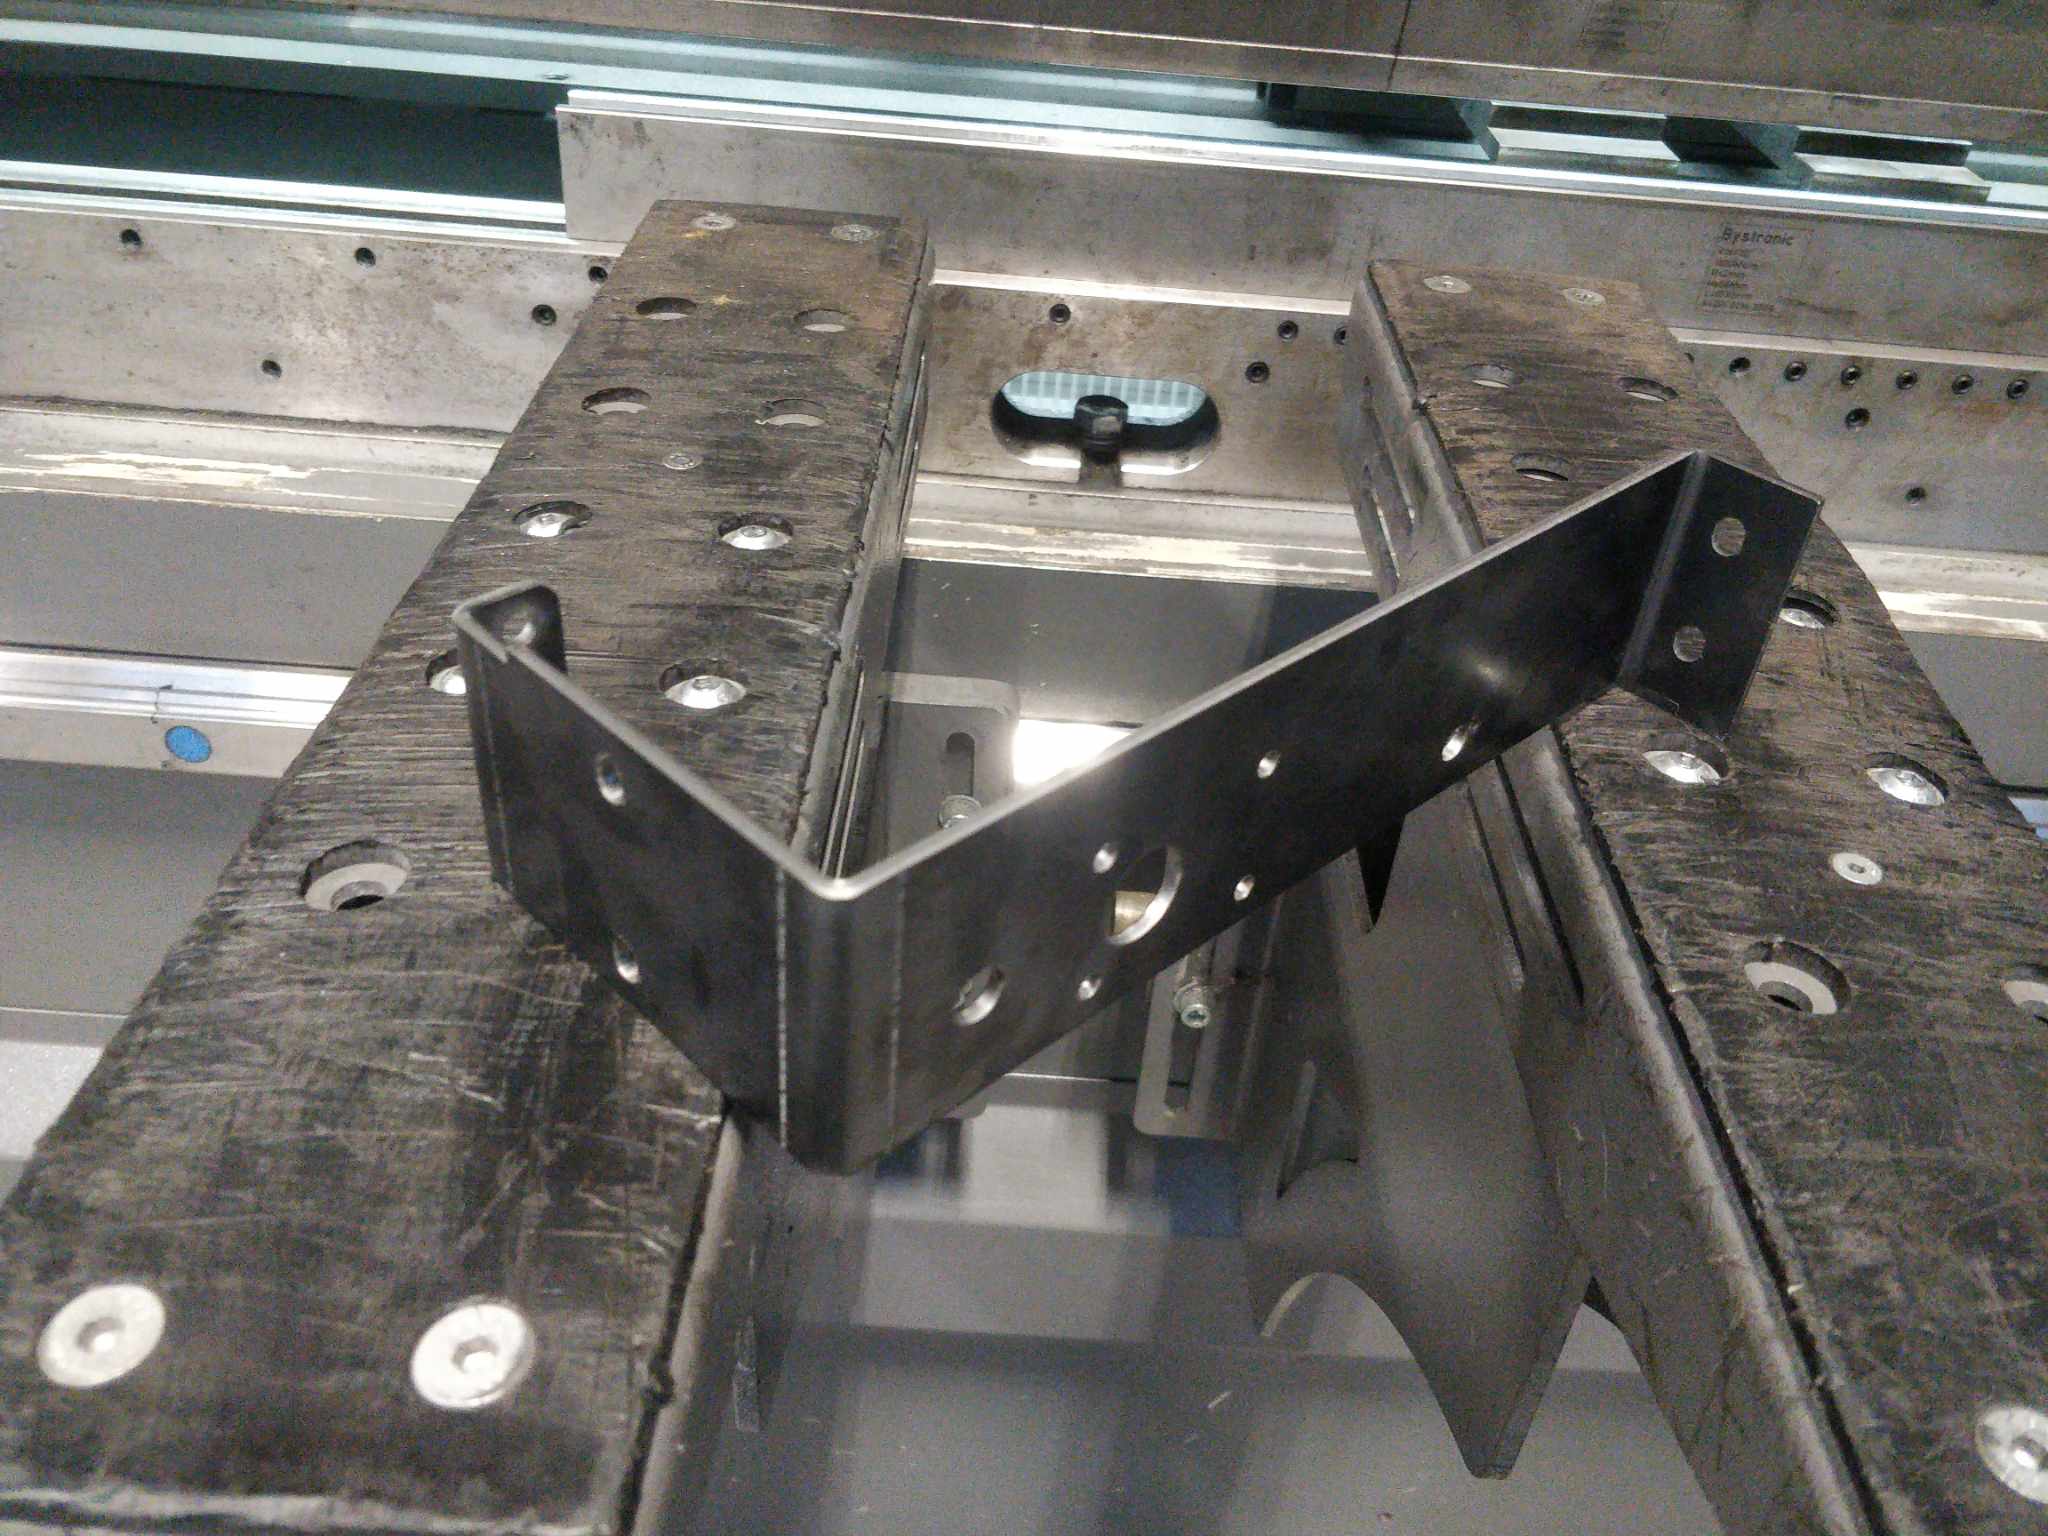
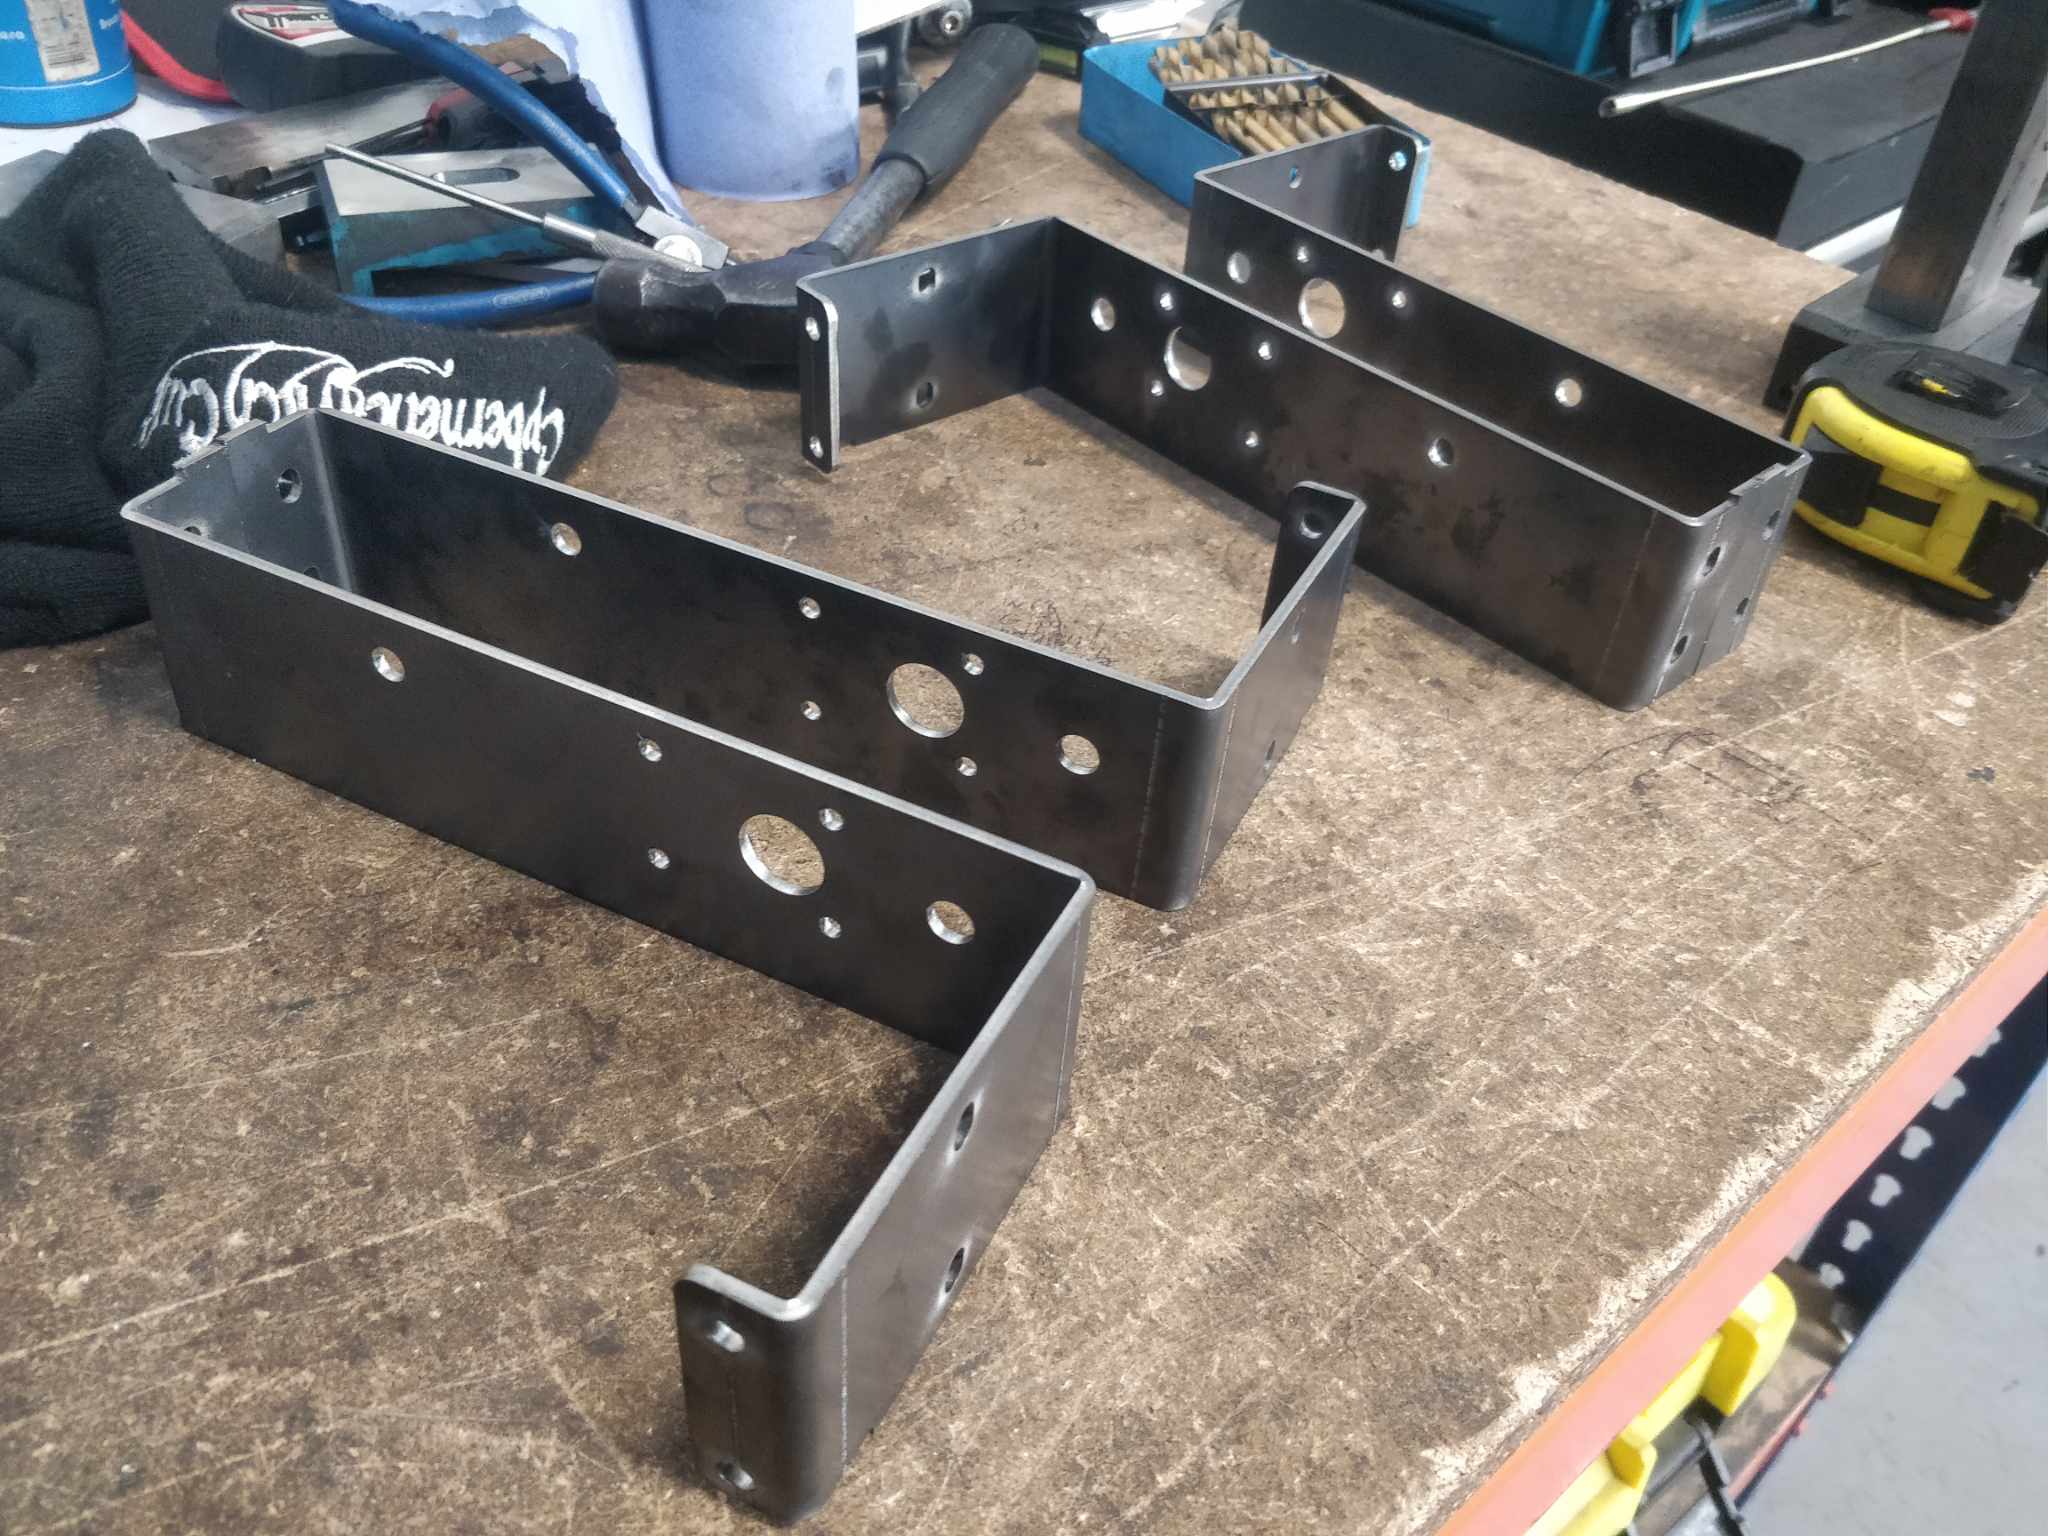
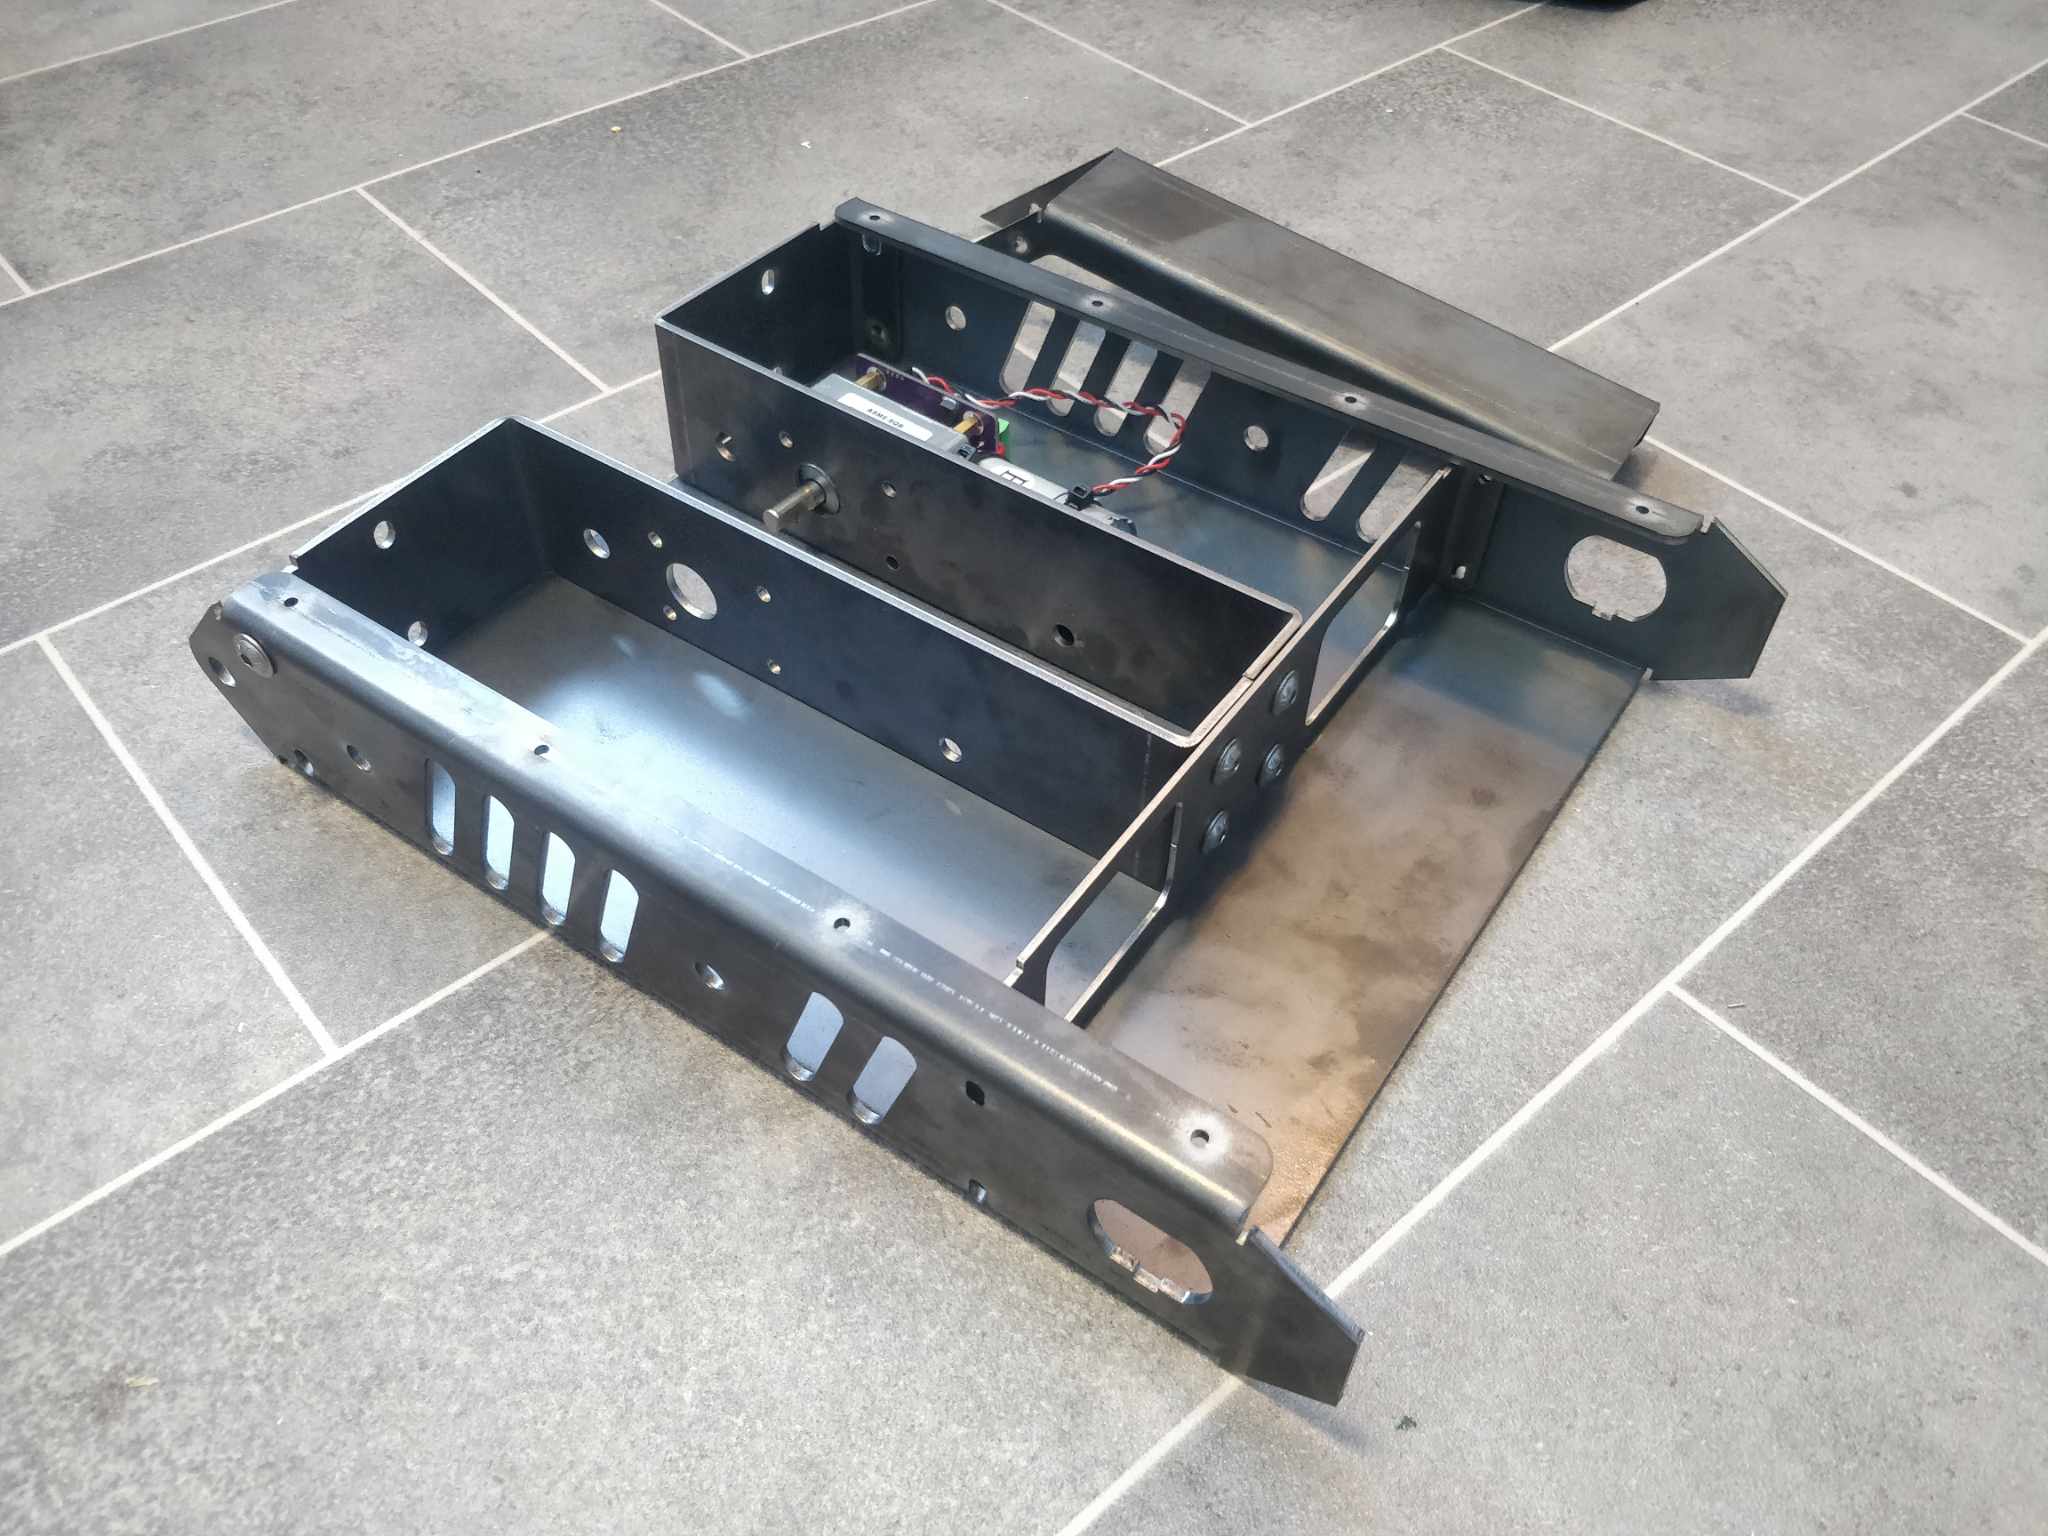
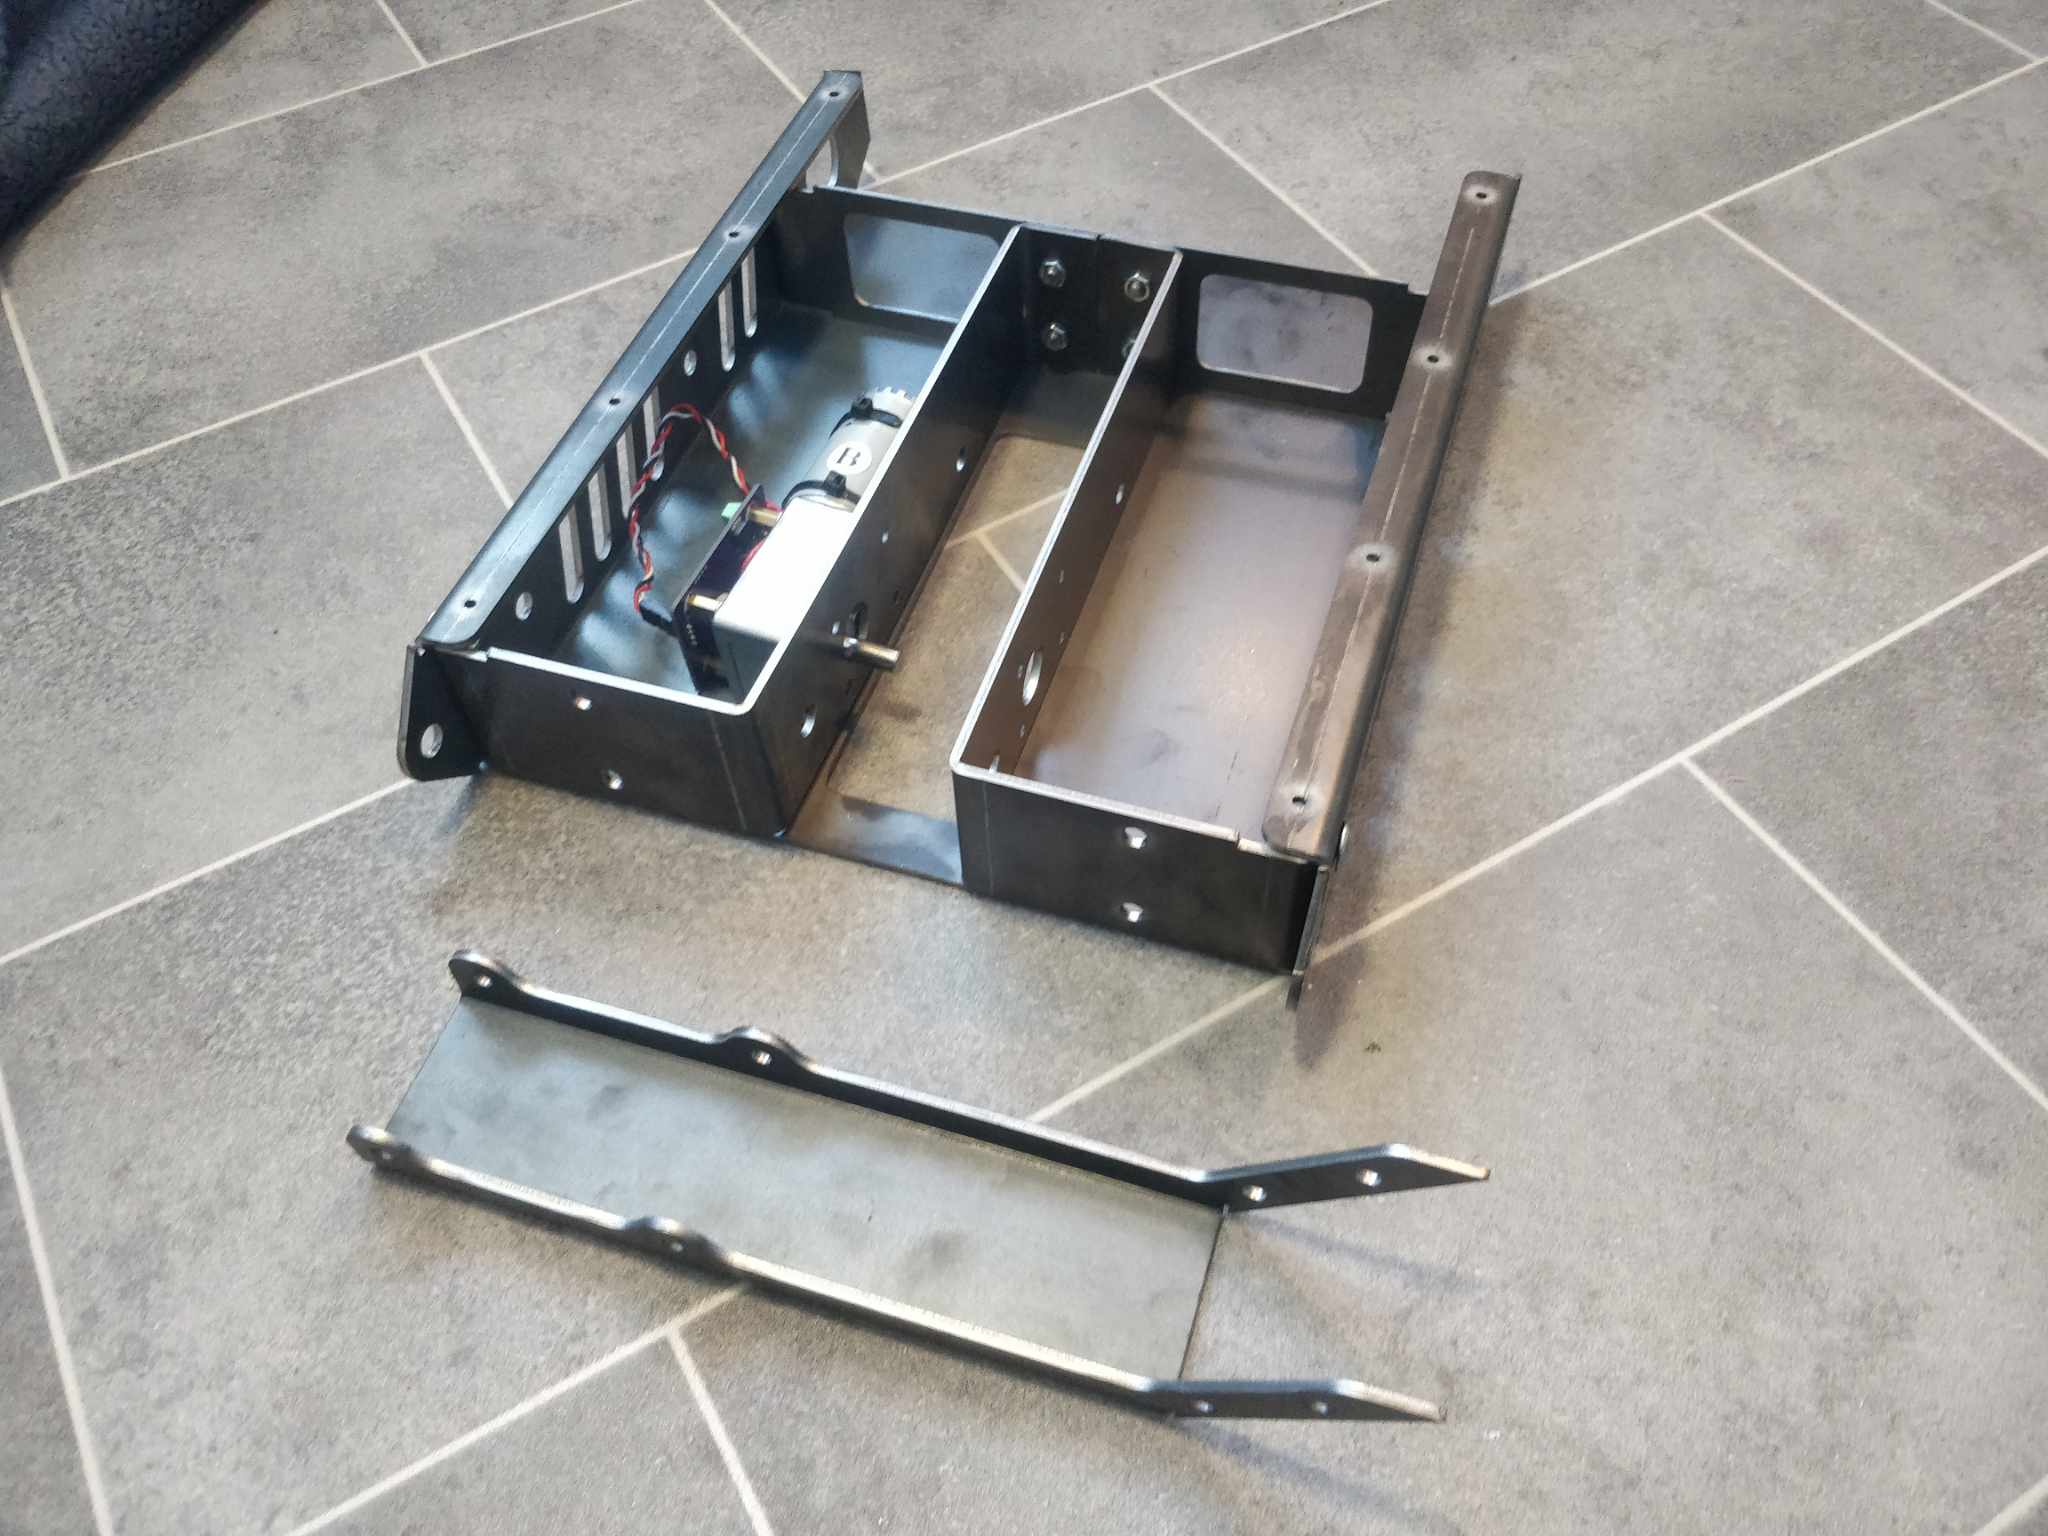
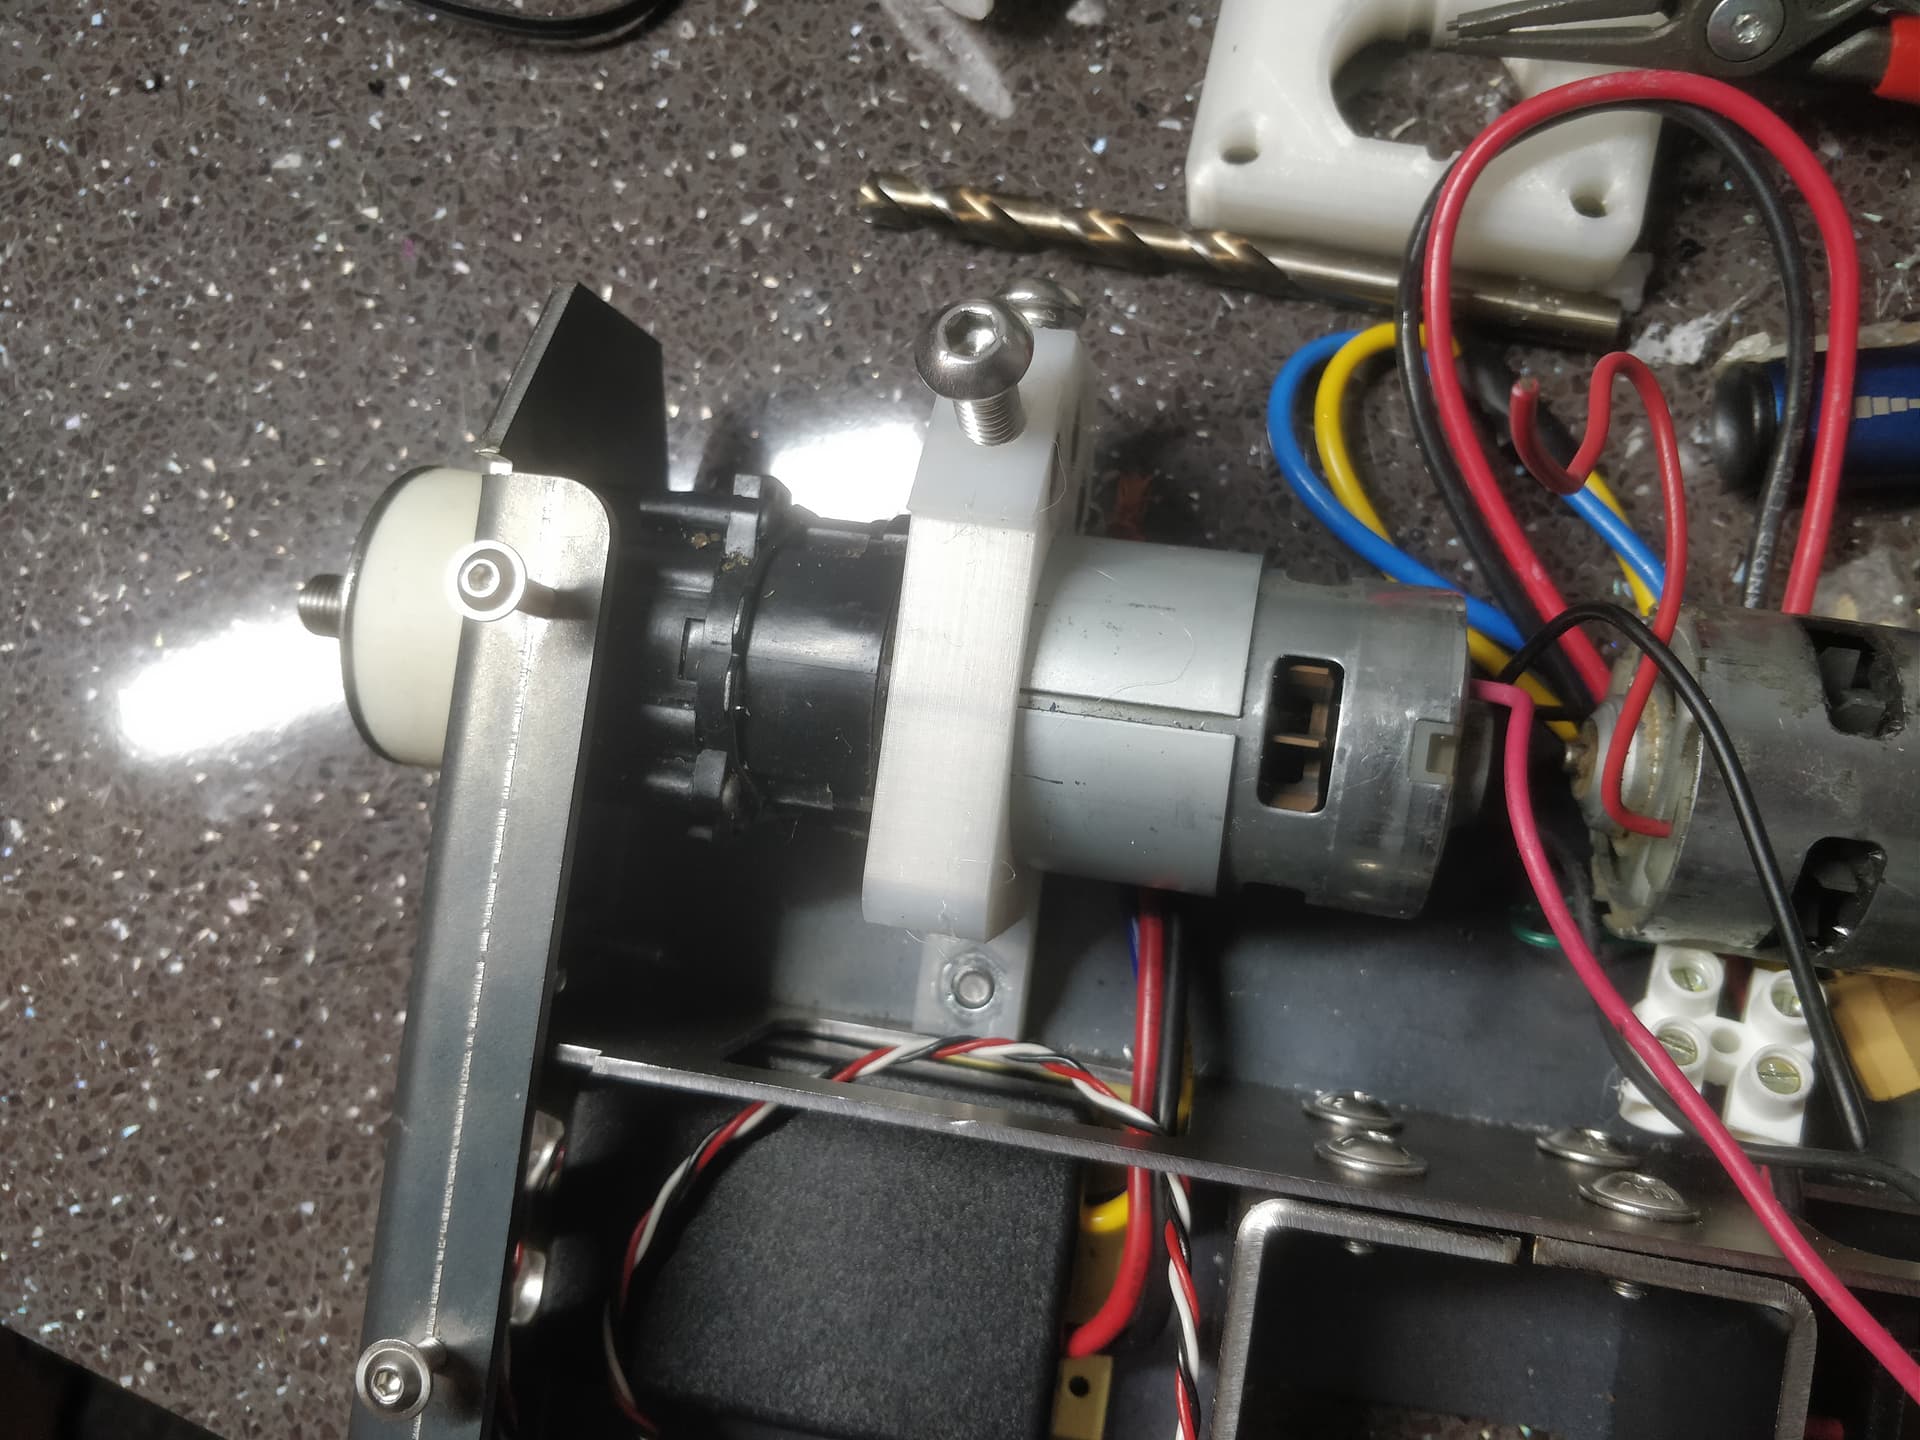
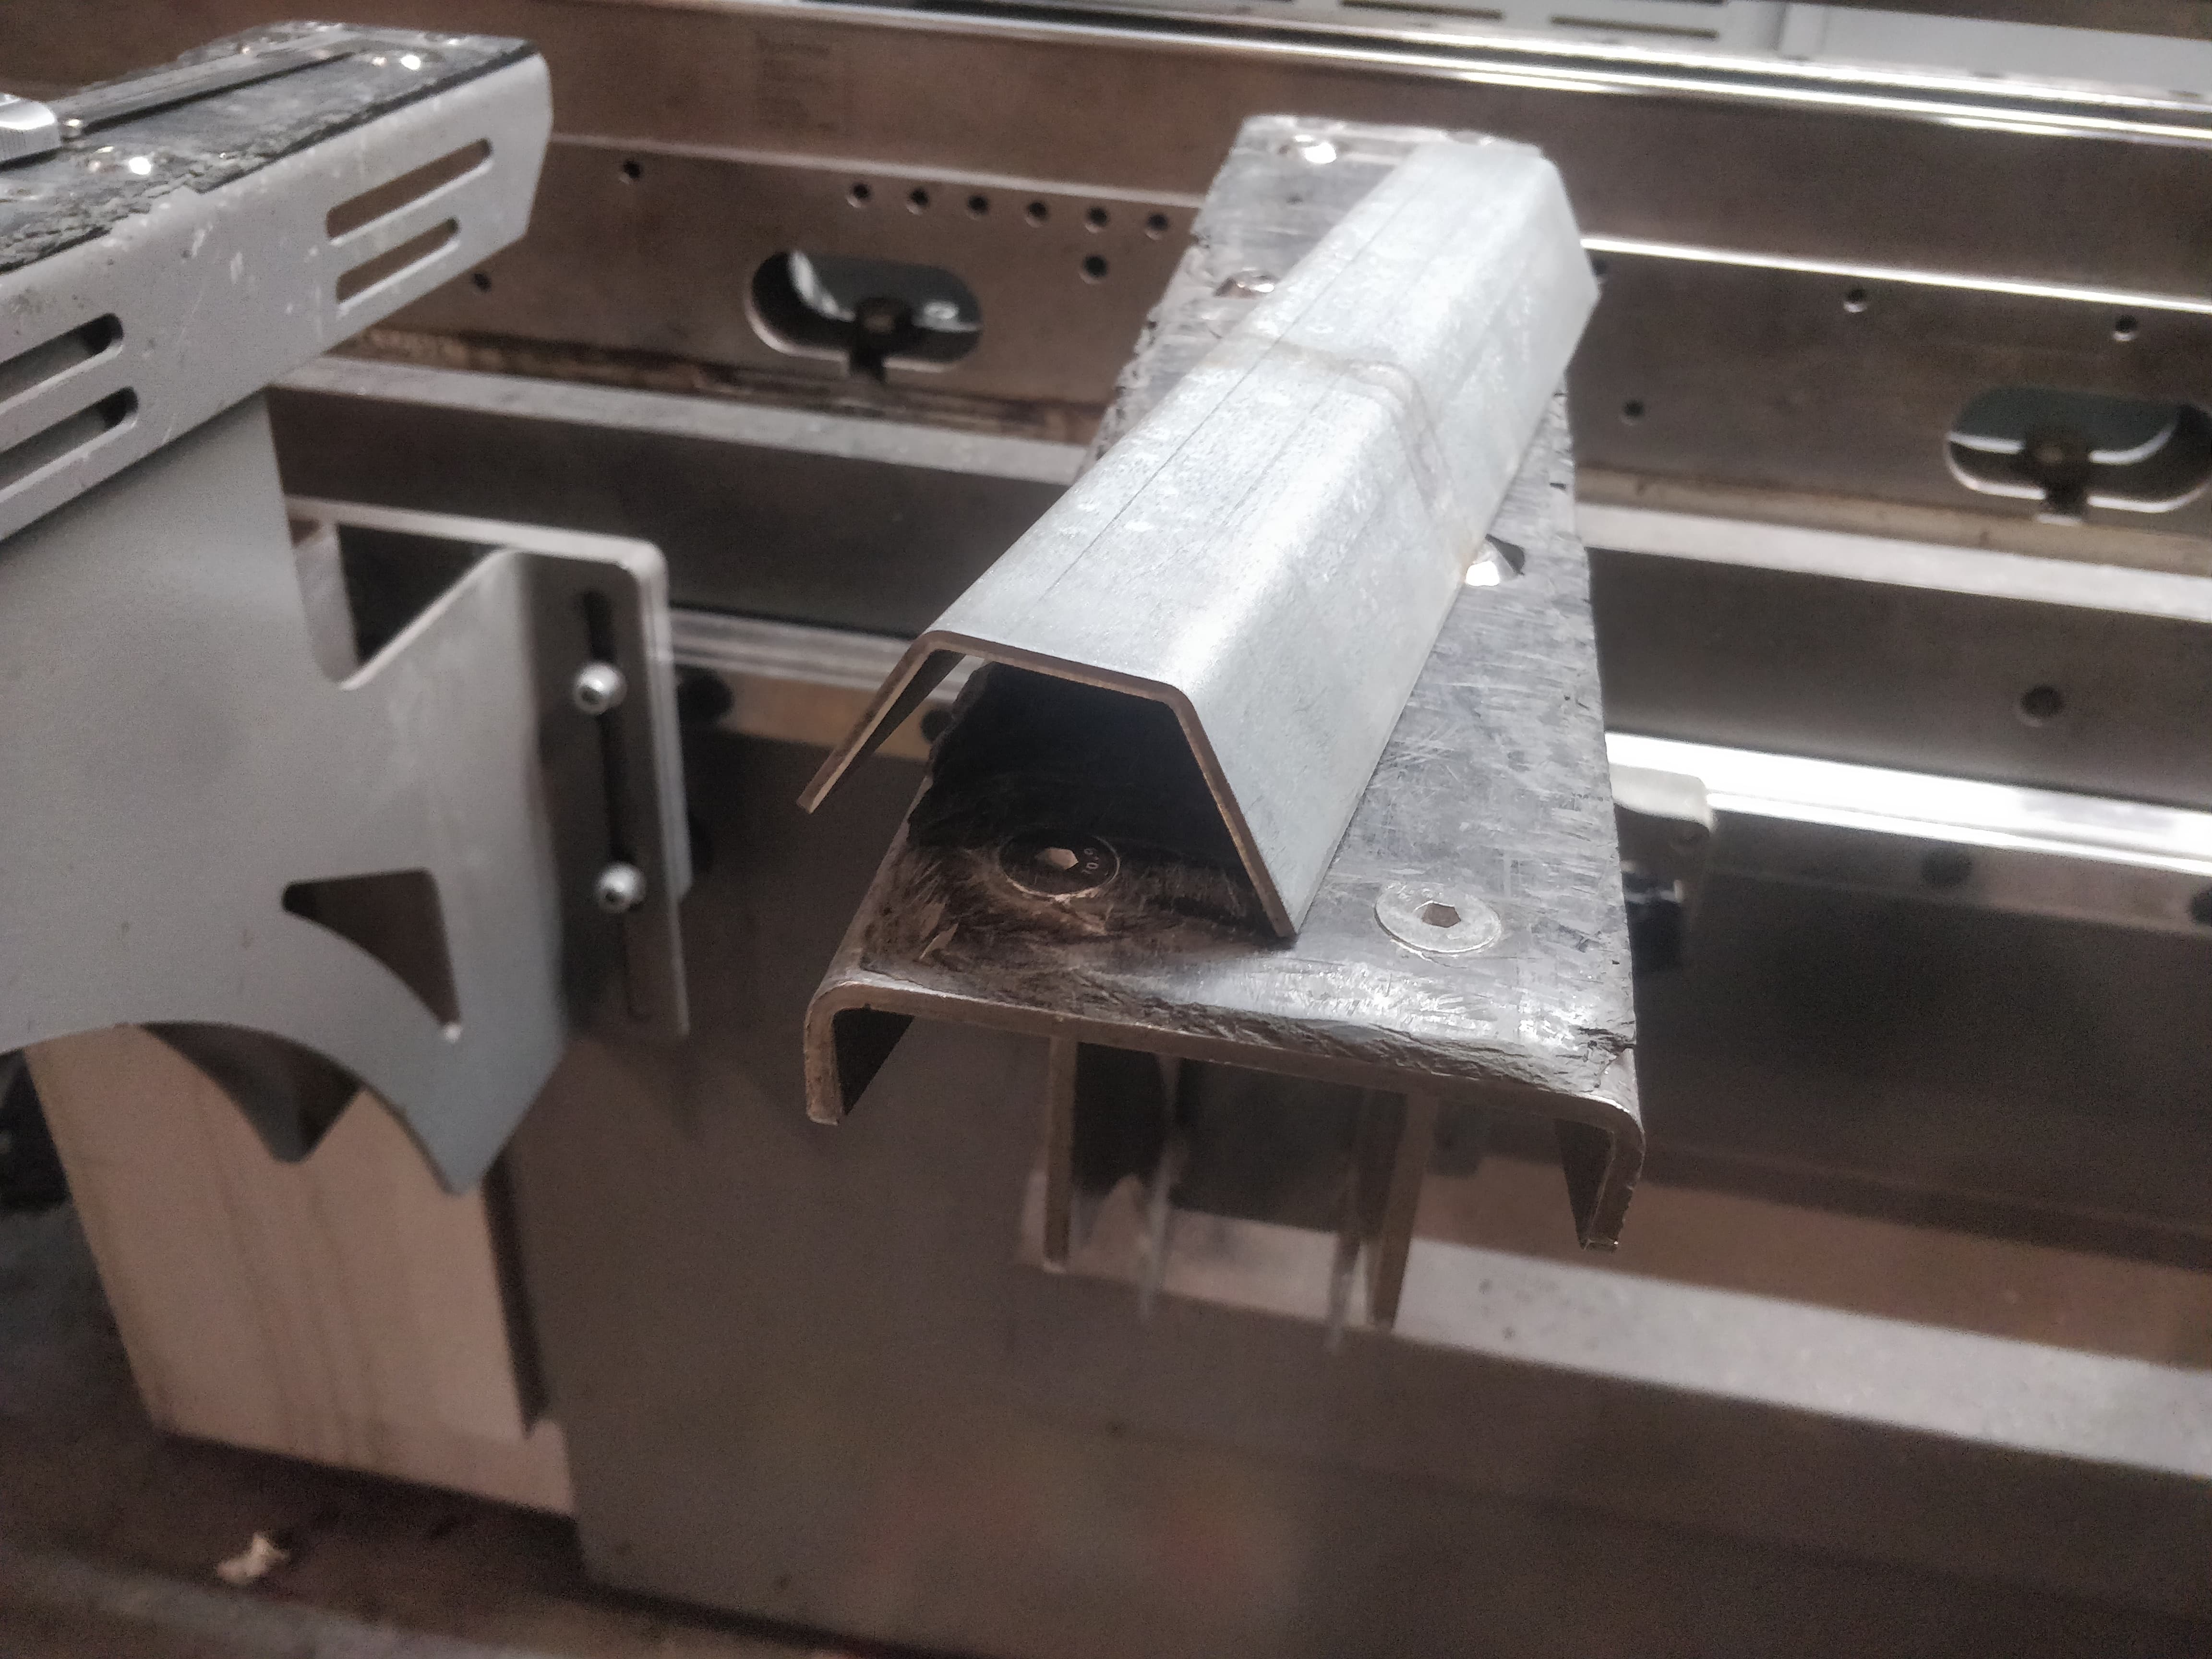
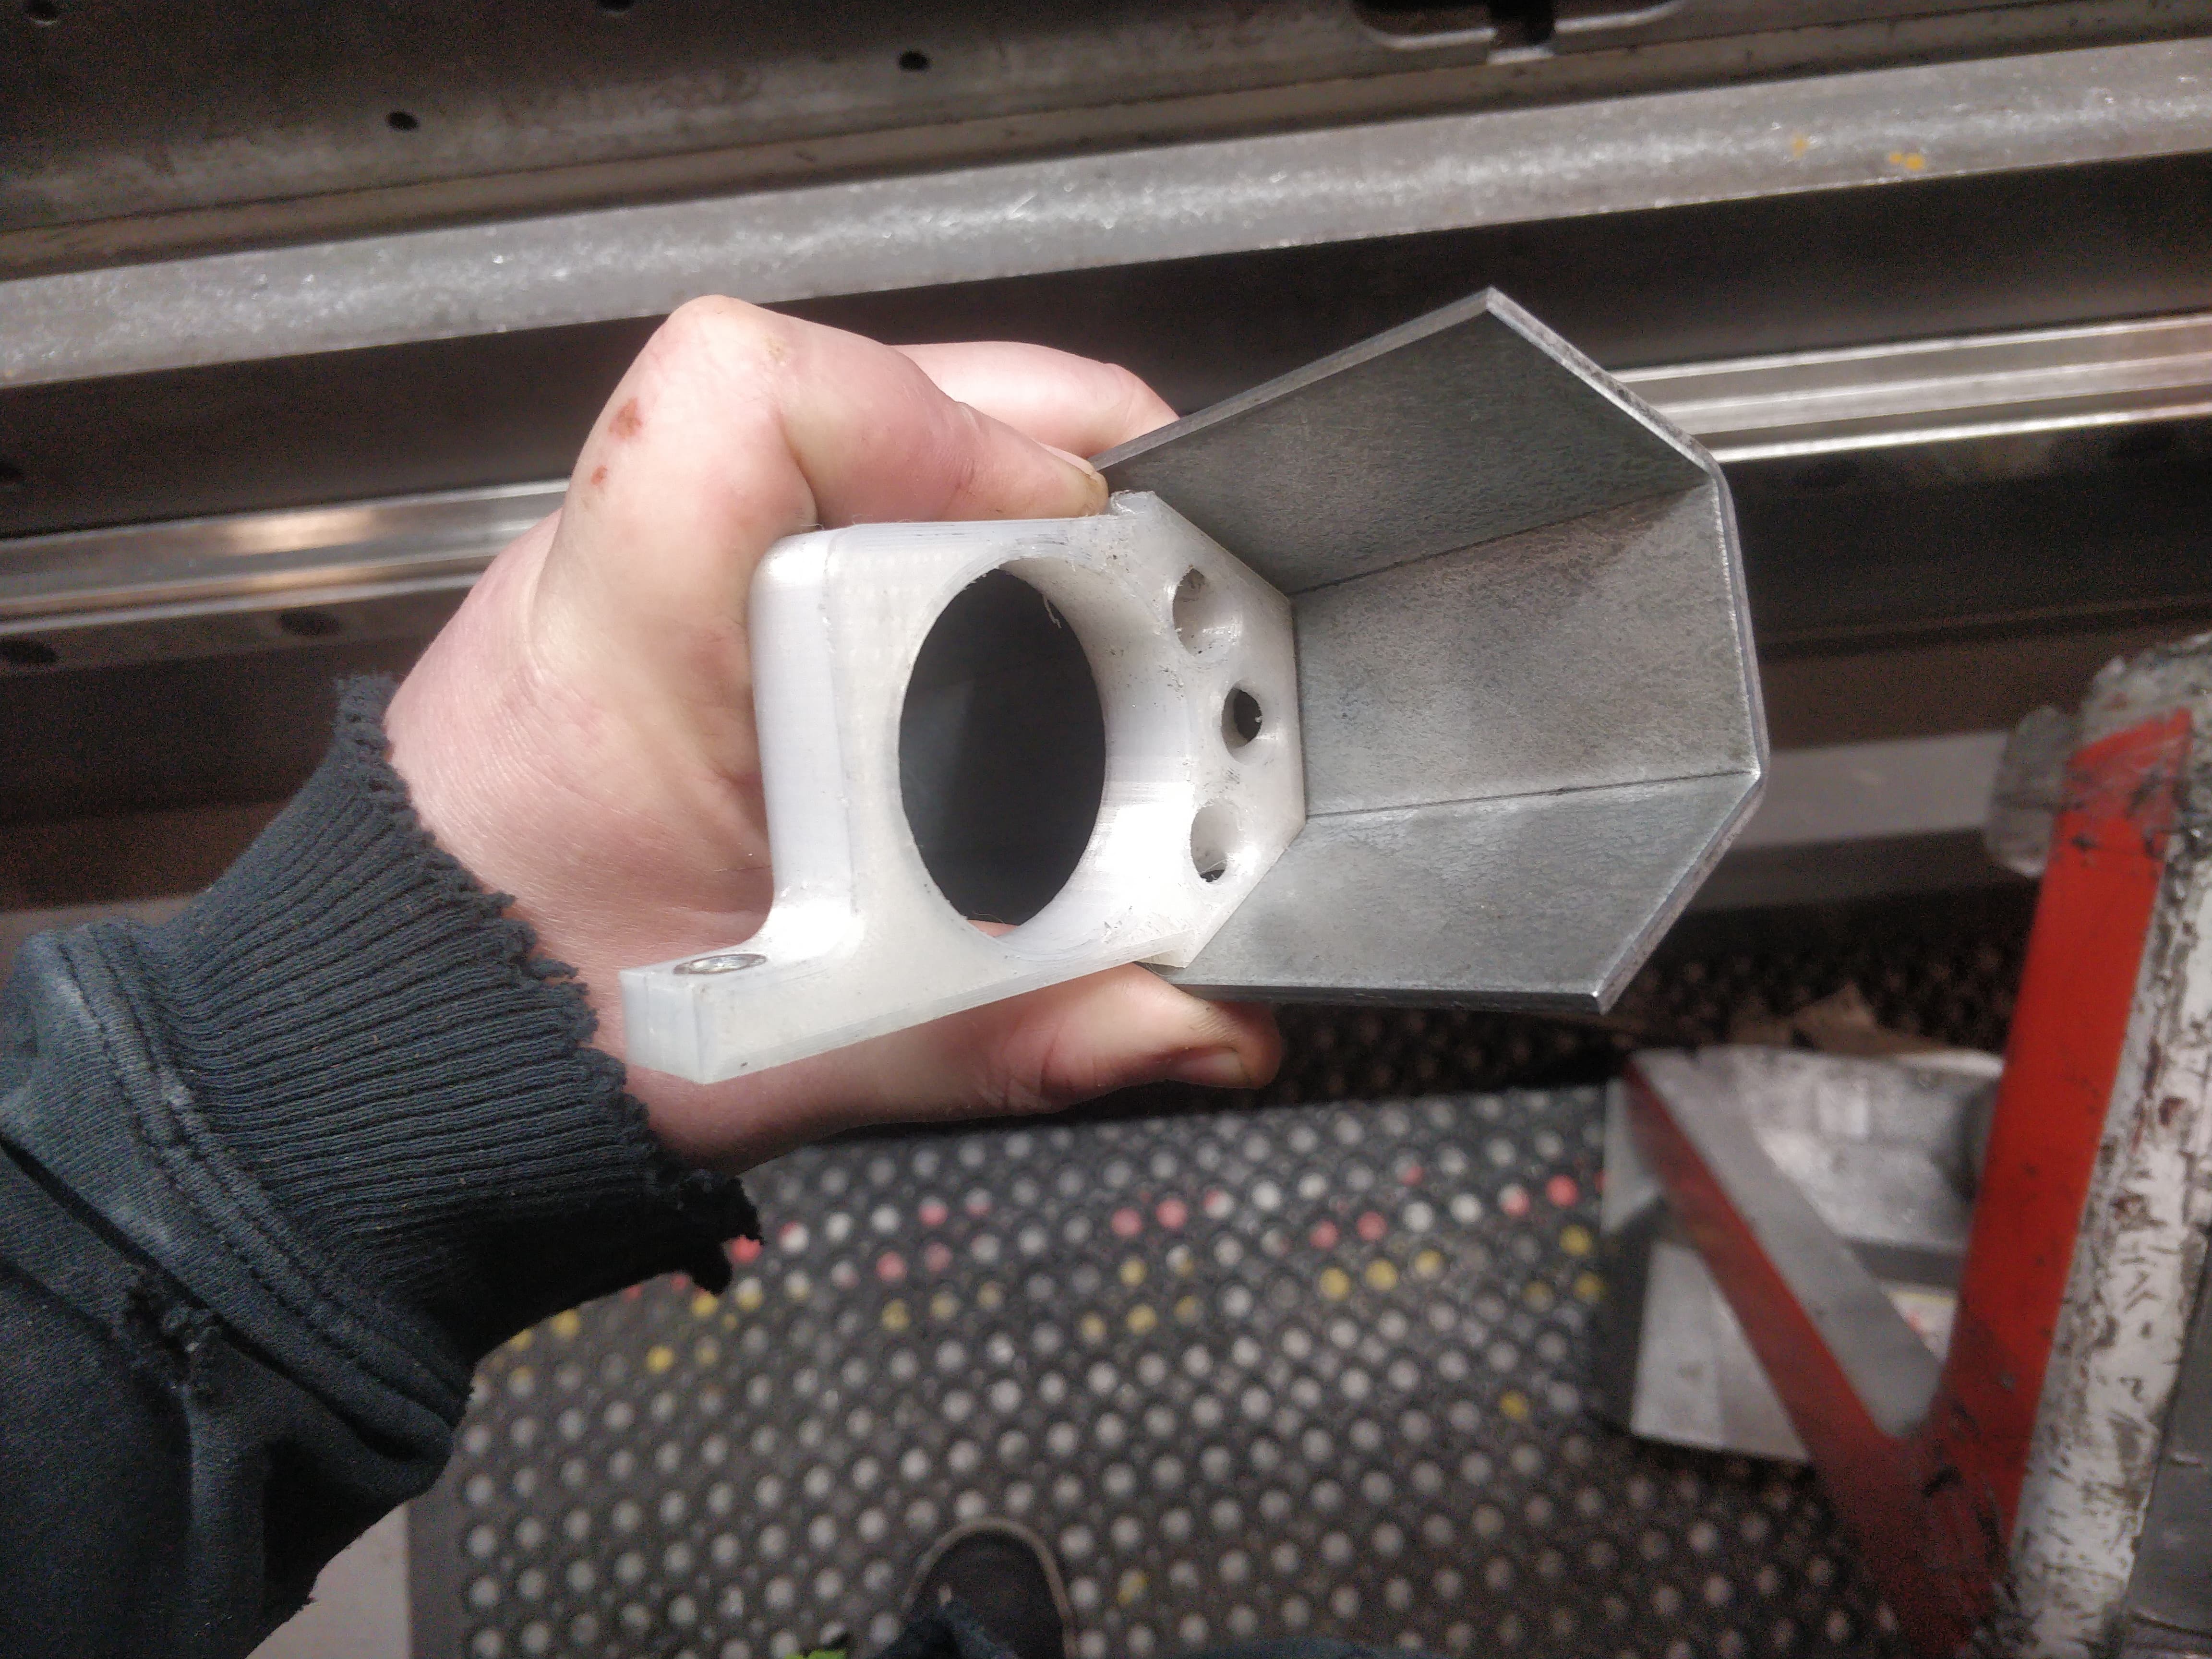
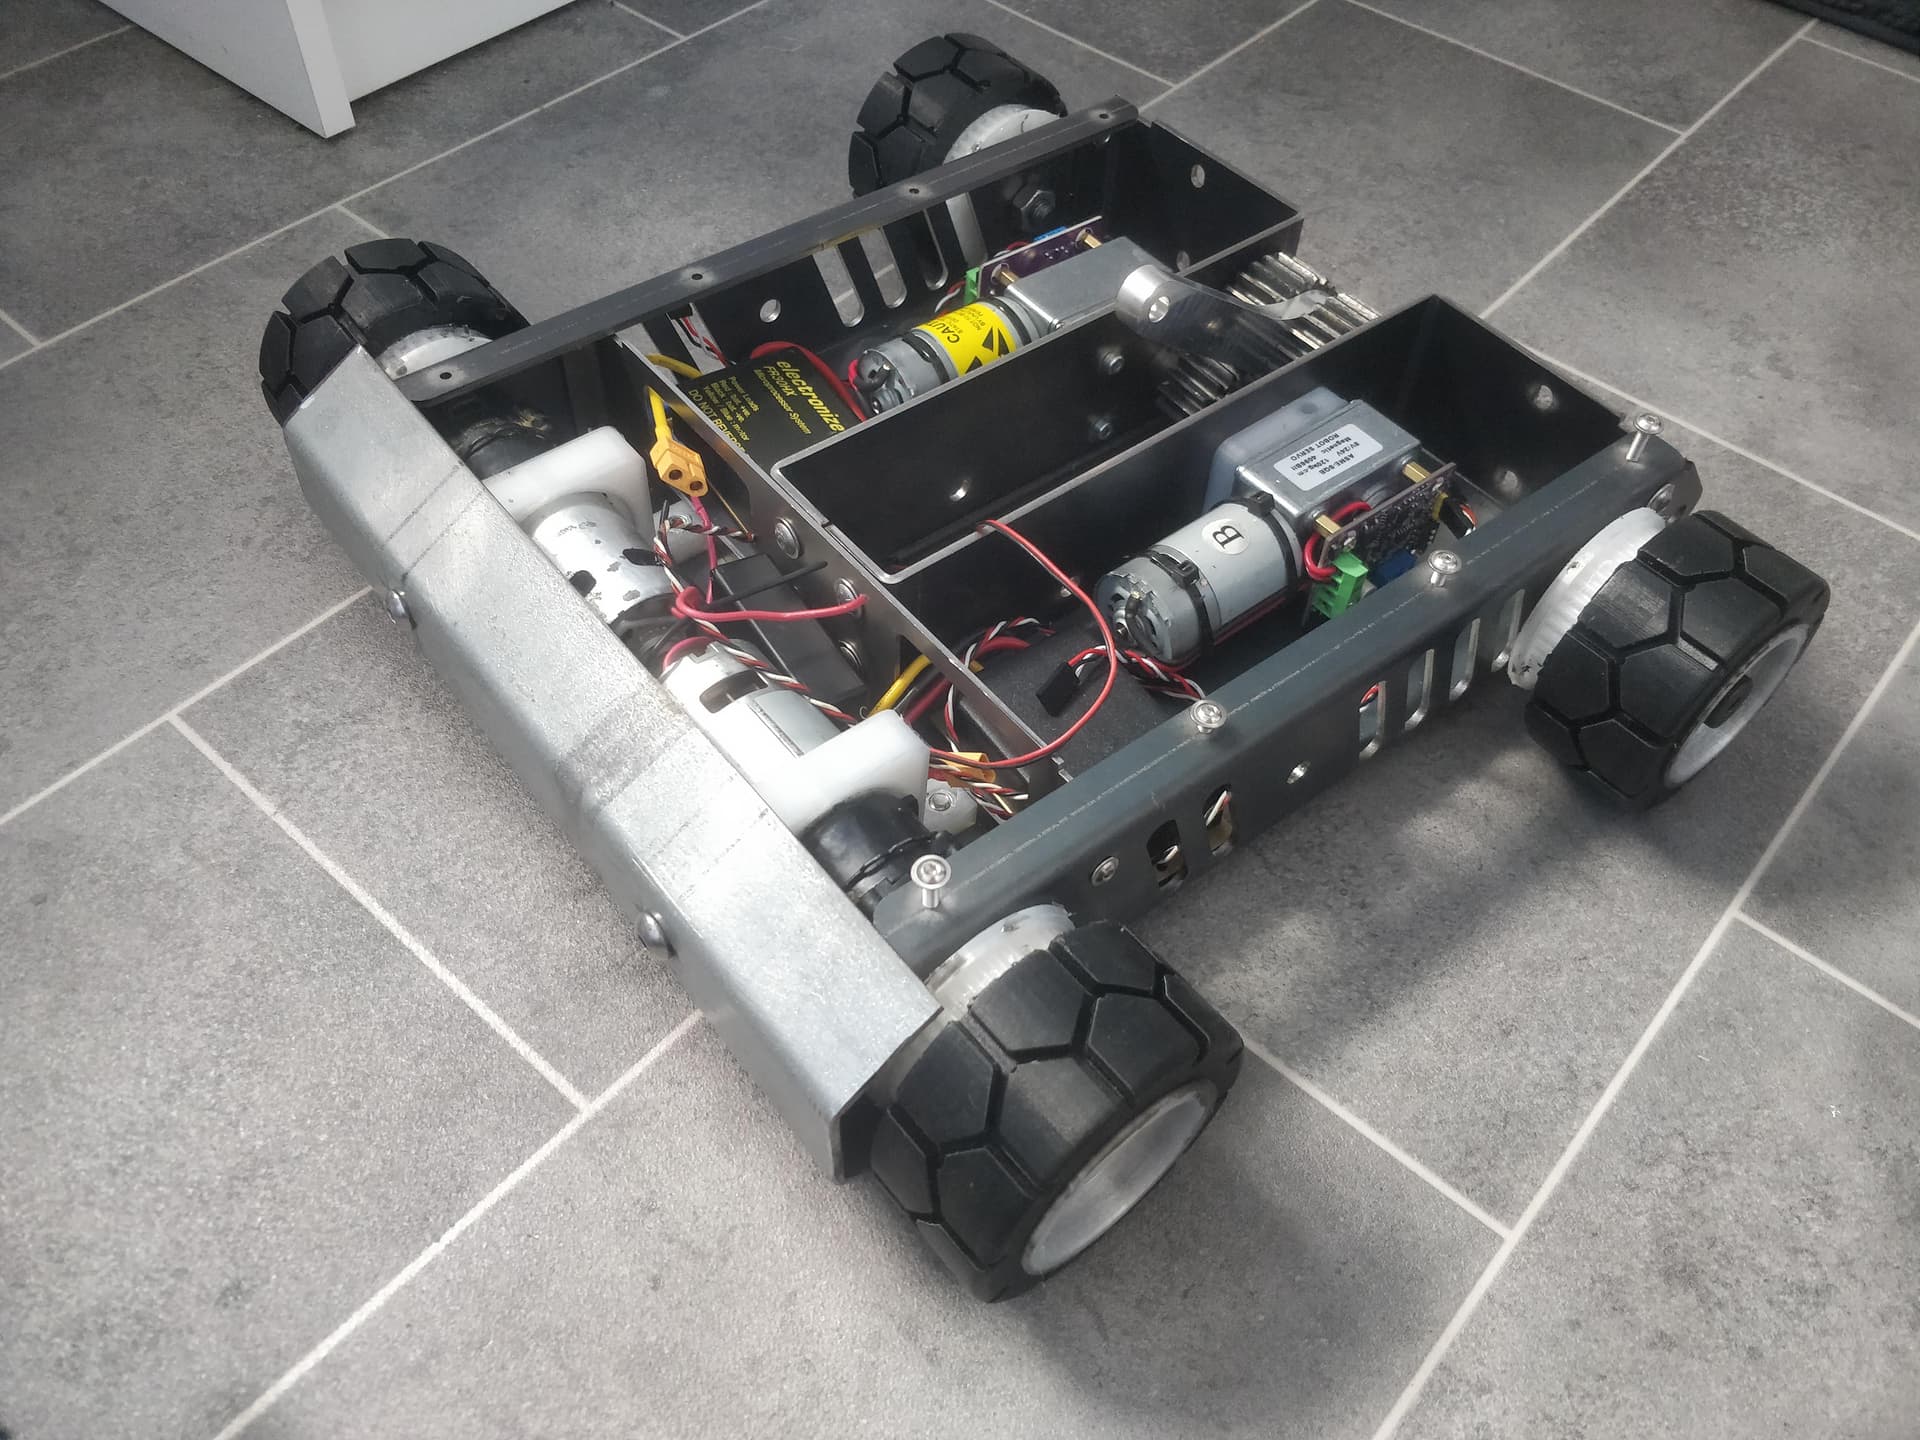
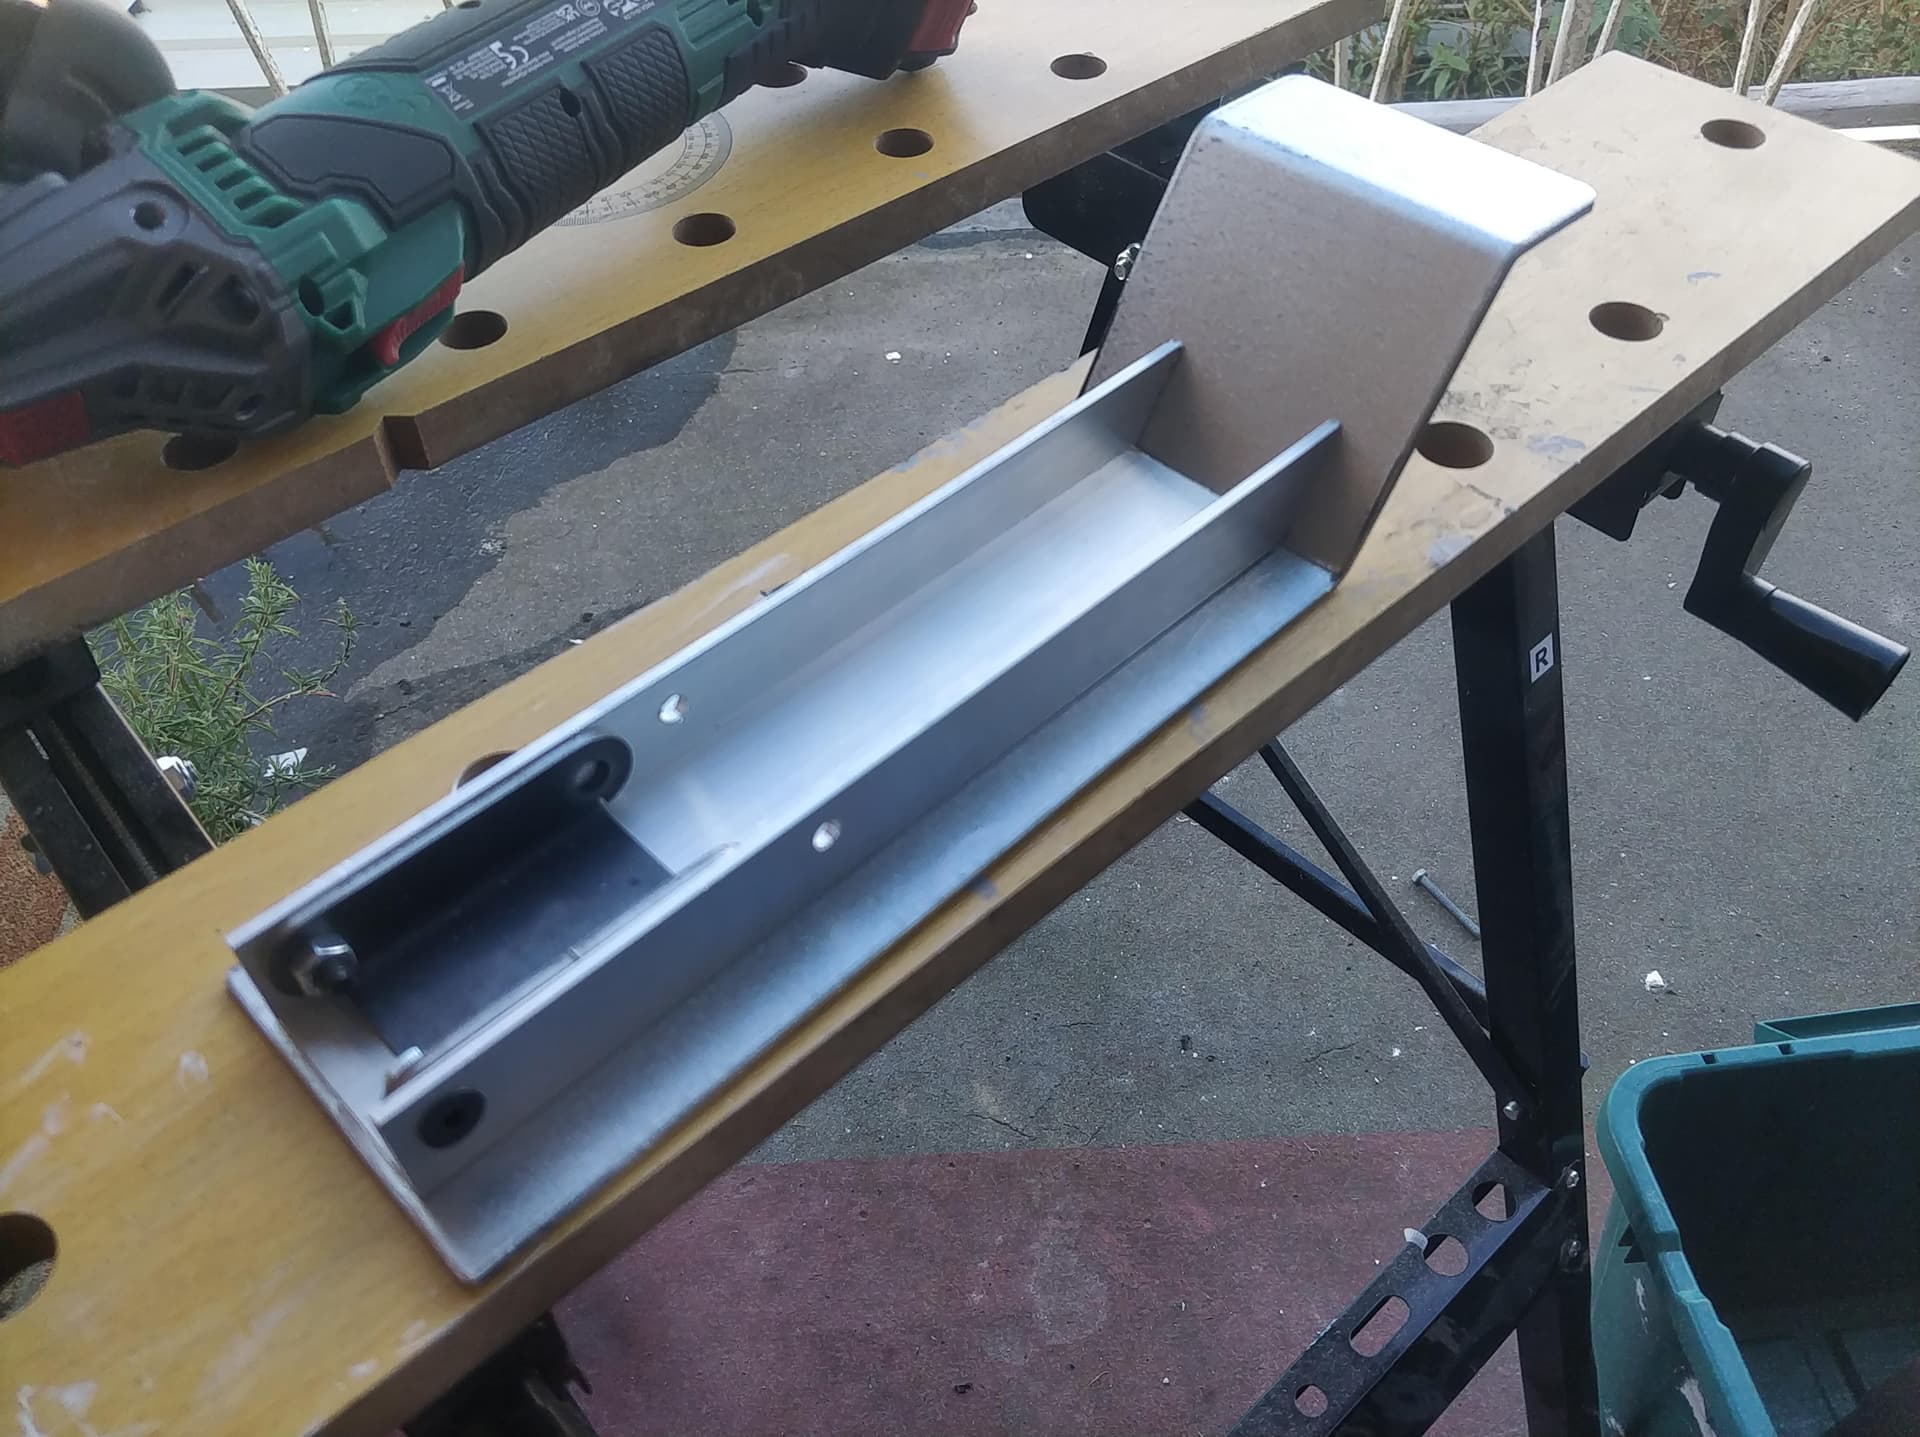
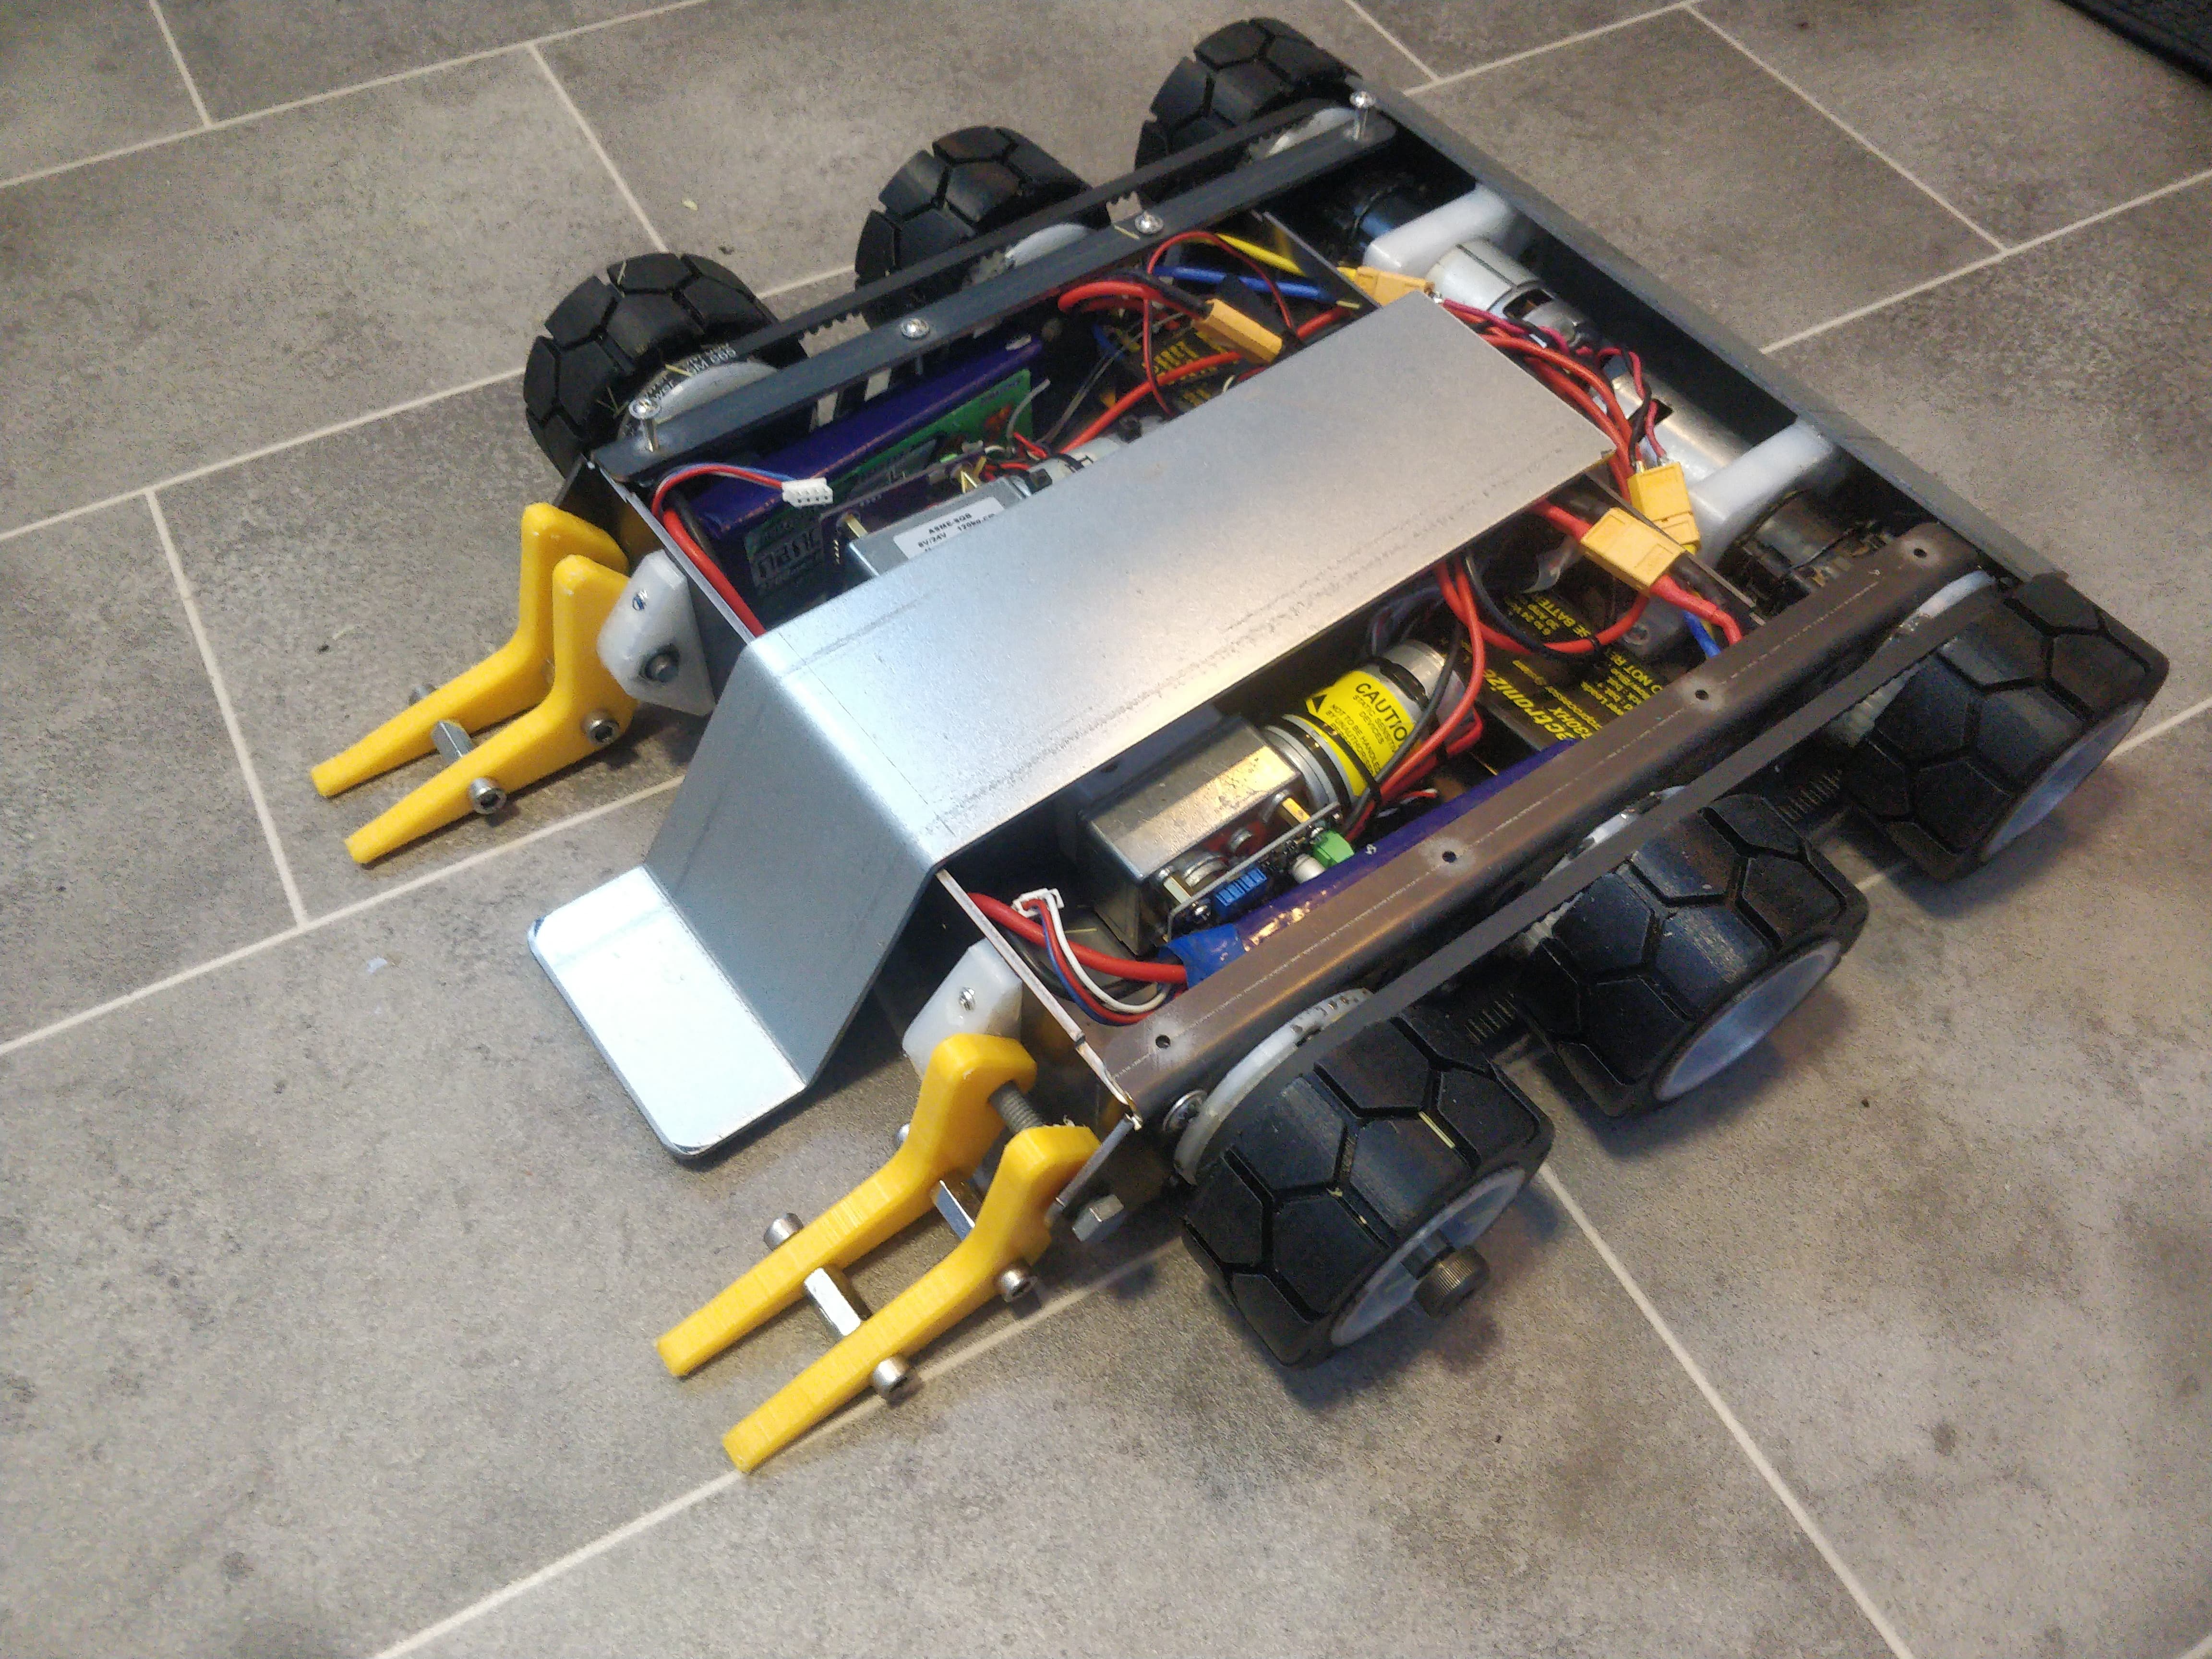
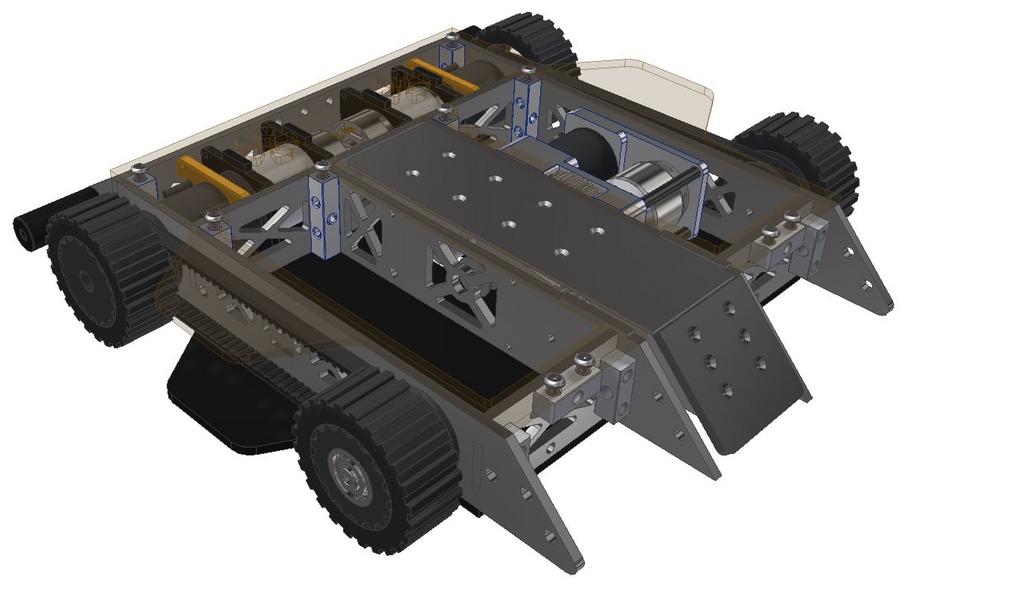
I had my bulkheads lasercut (again out of 5mm stainless for old times sake) and you can see how the drive motor interlocks. I love technology. Making a 00’s power tool fit a 2023 fighting robot is a breeze with lasers and a SW licence.

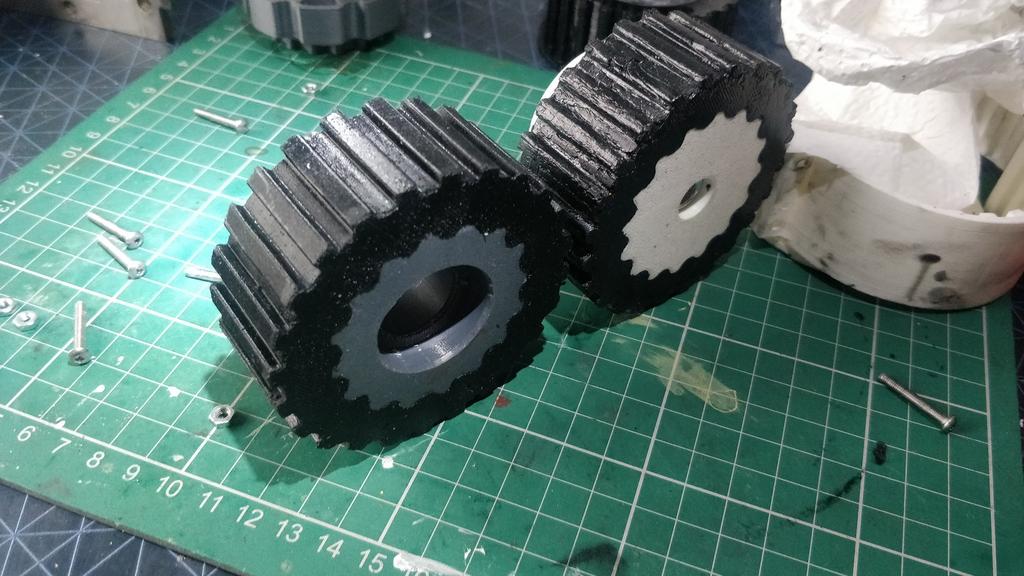
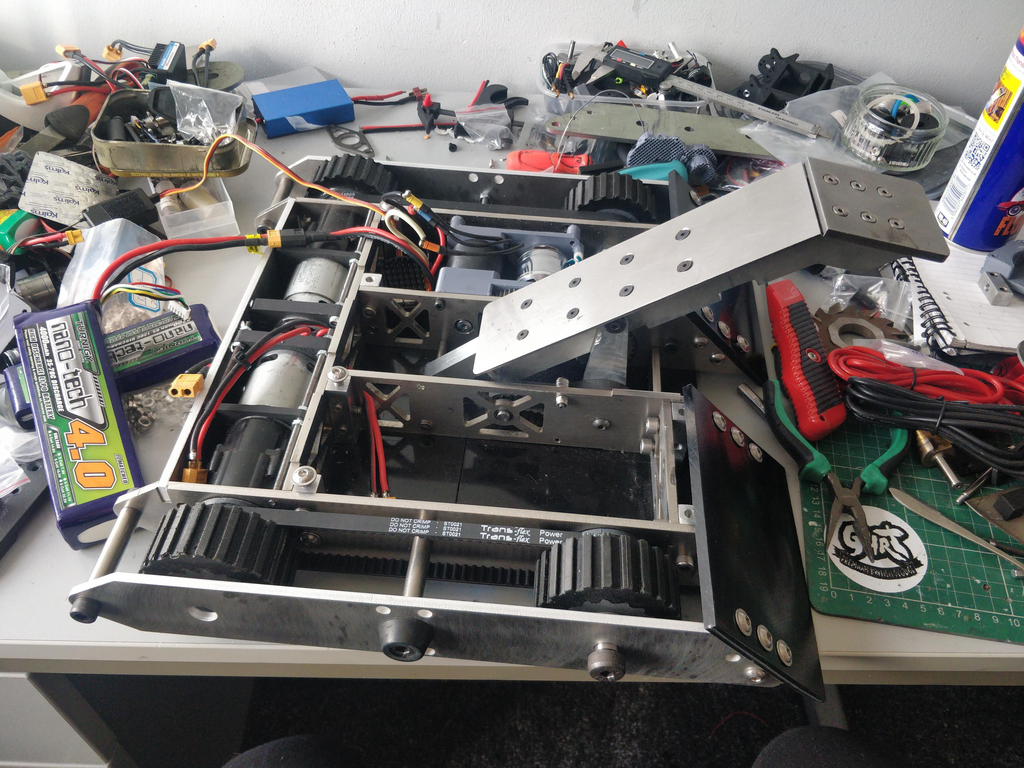
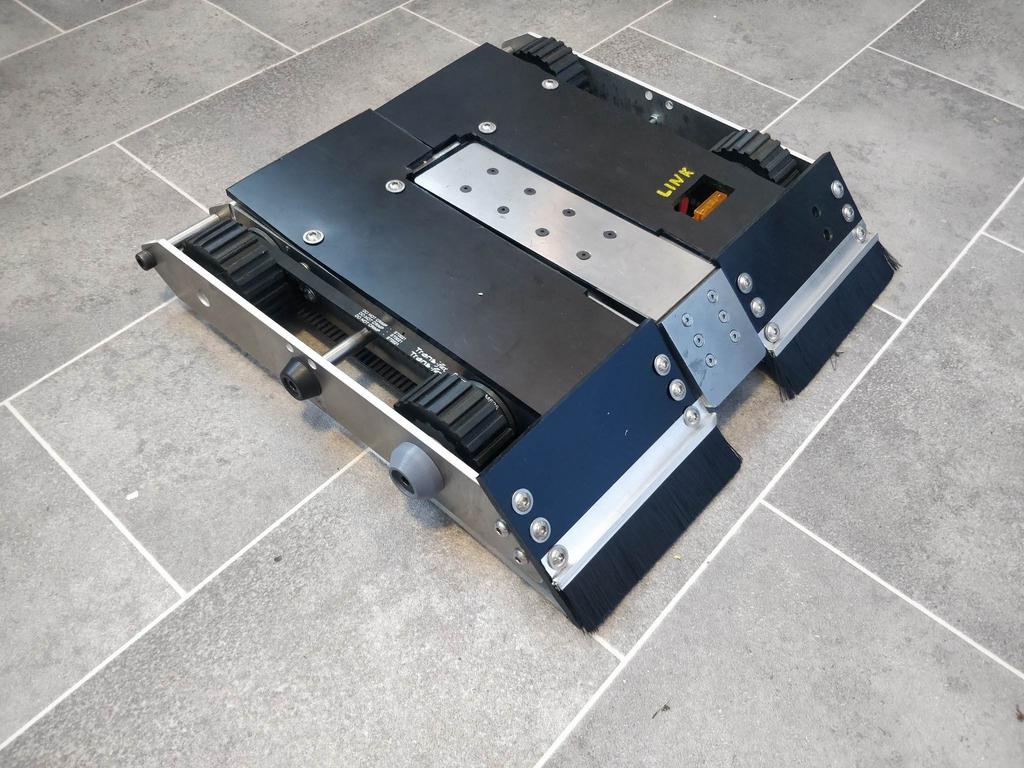
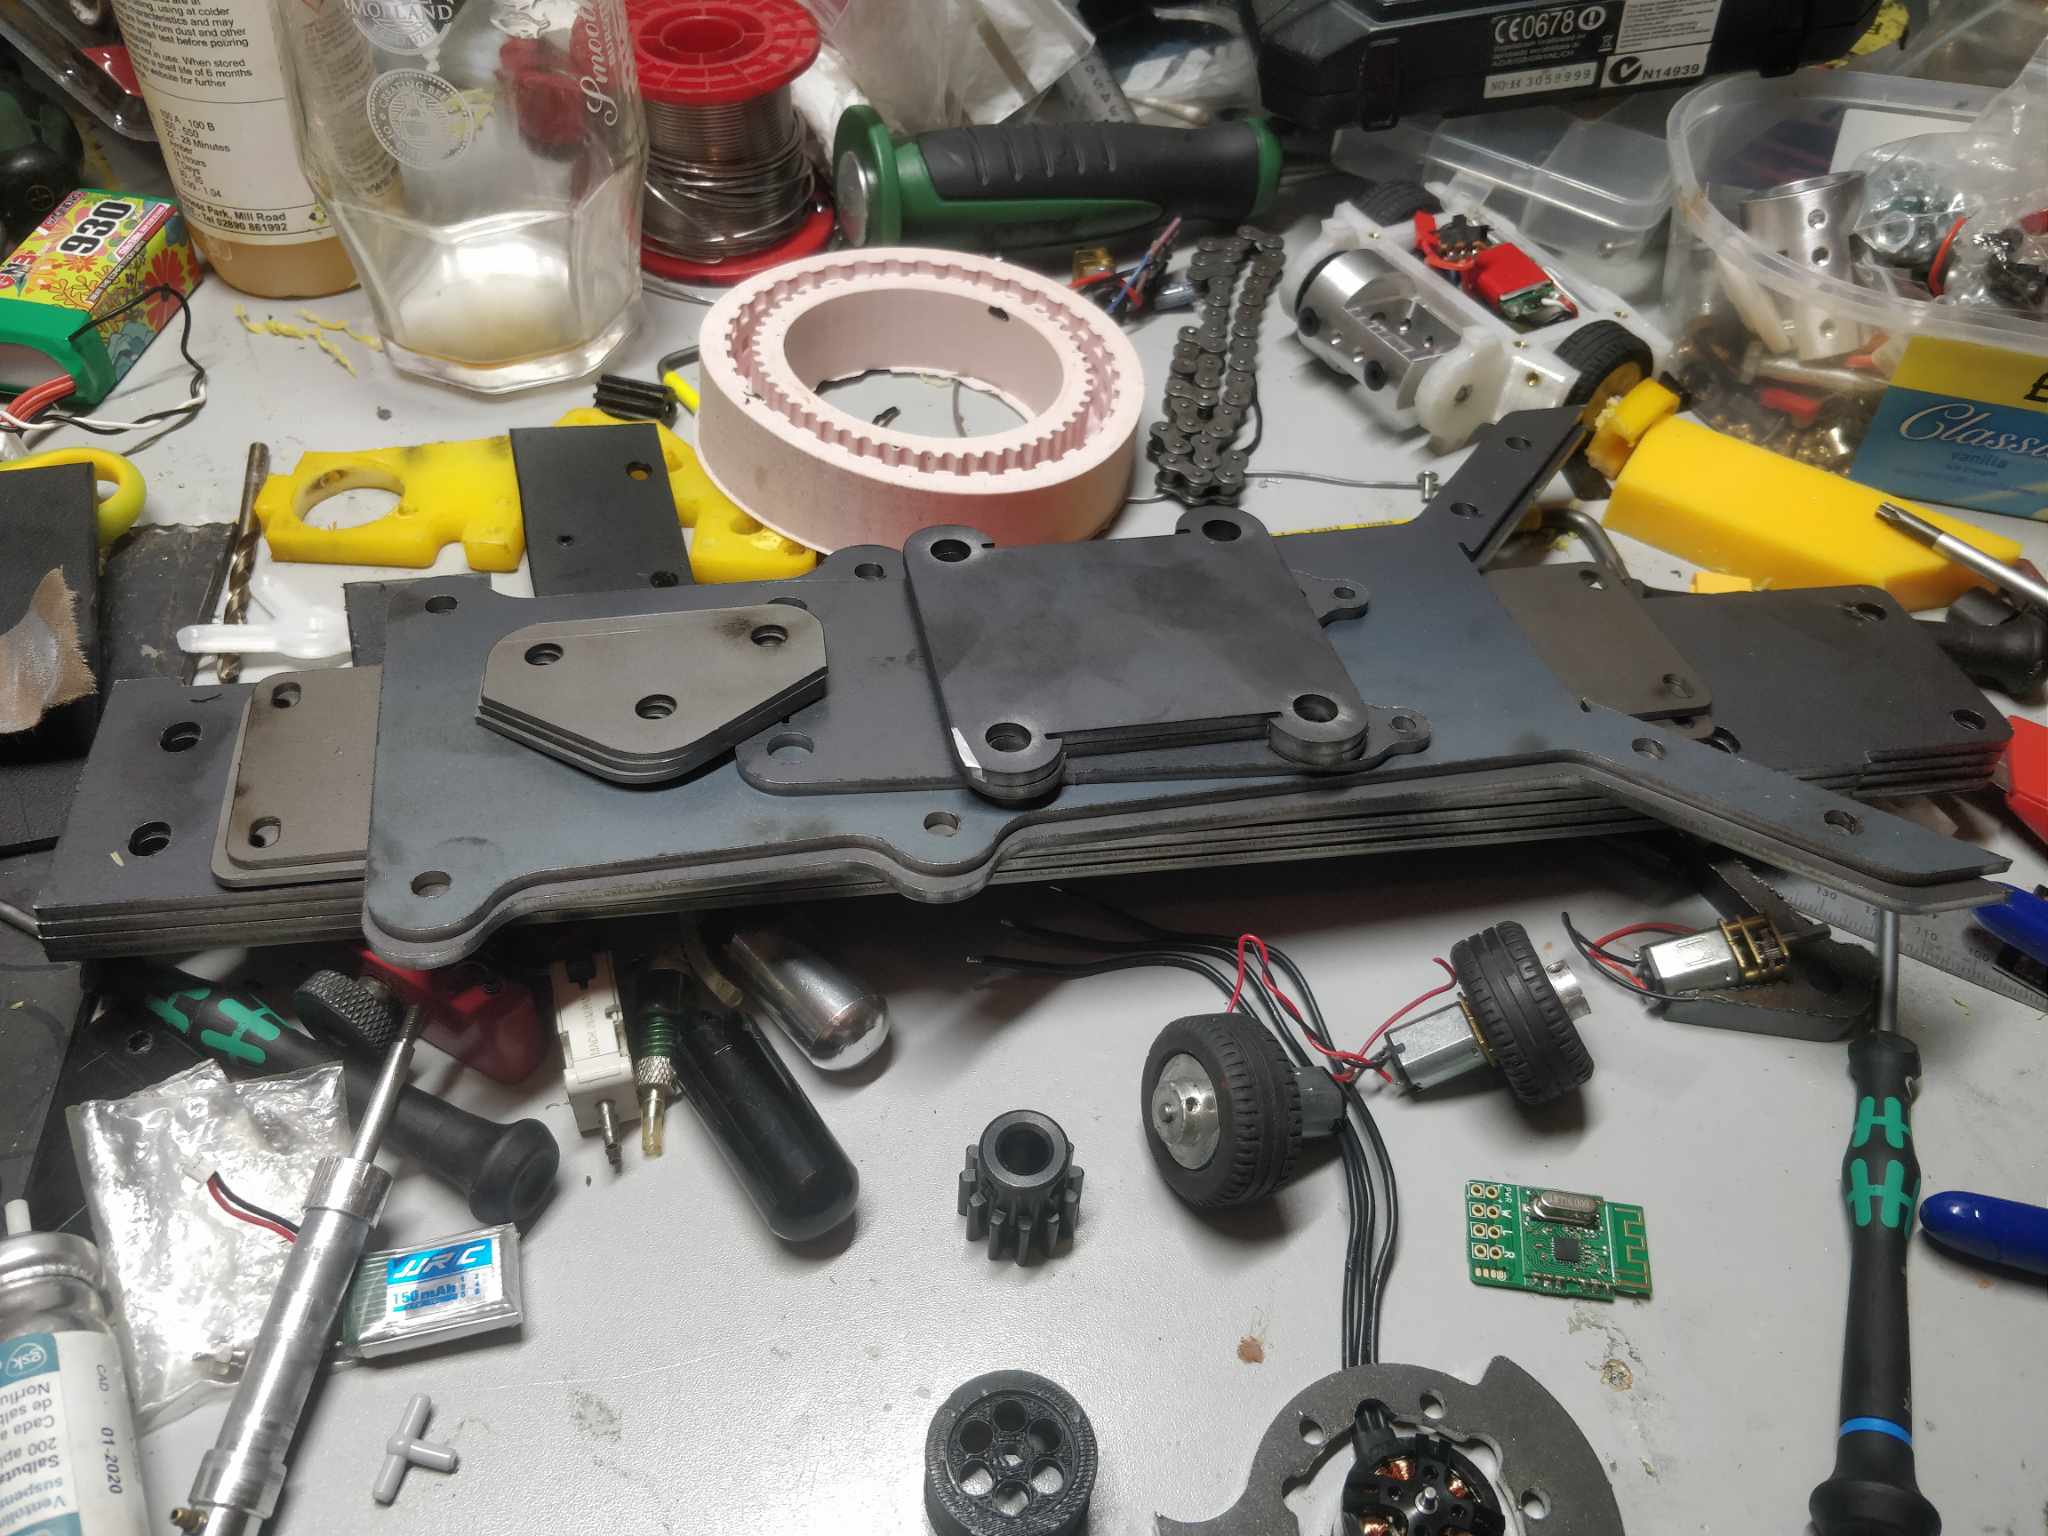
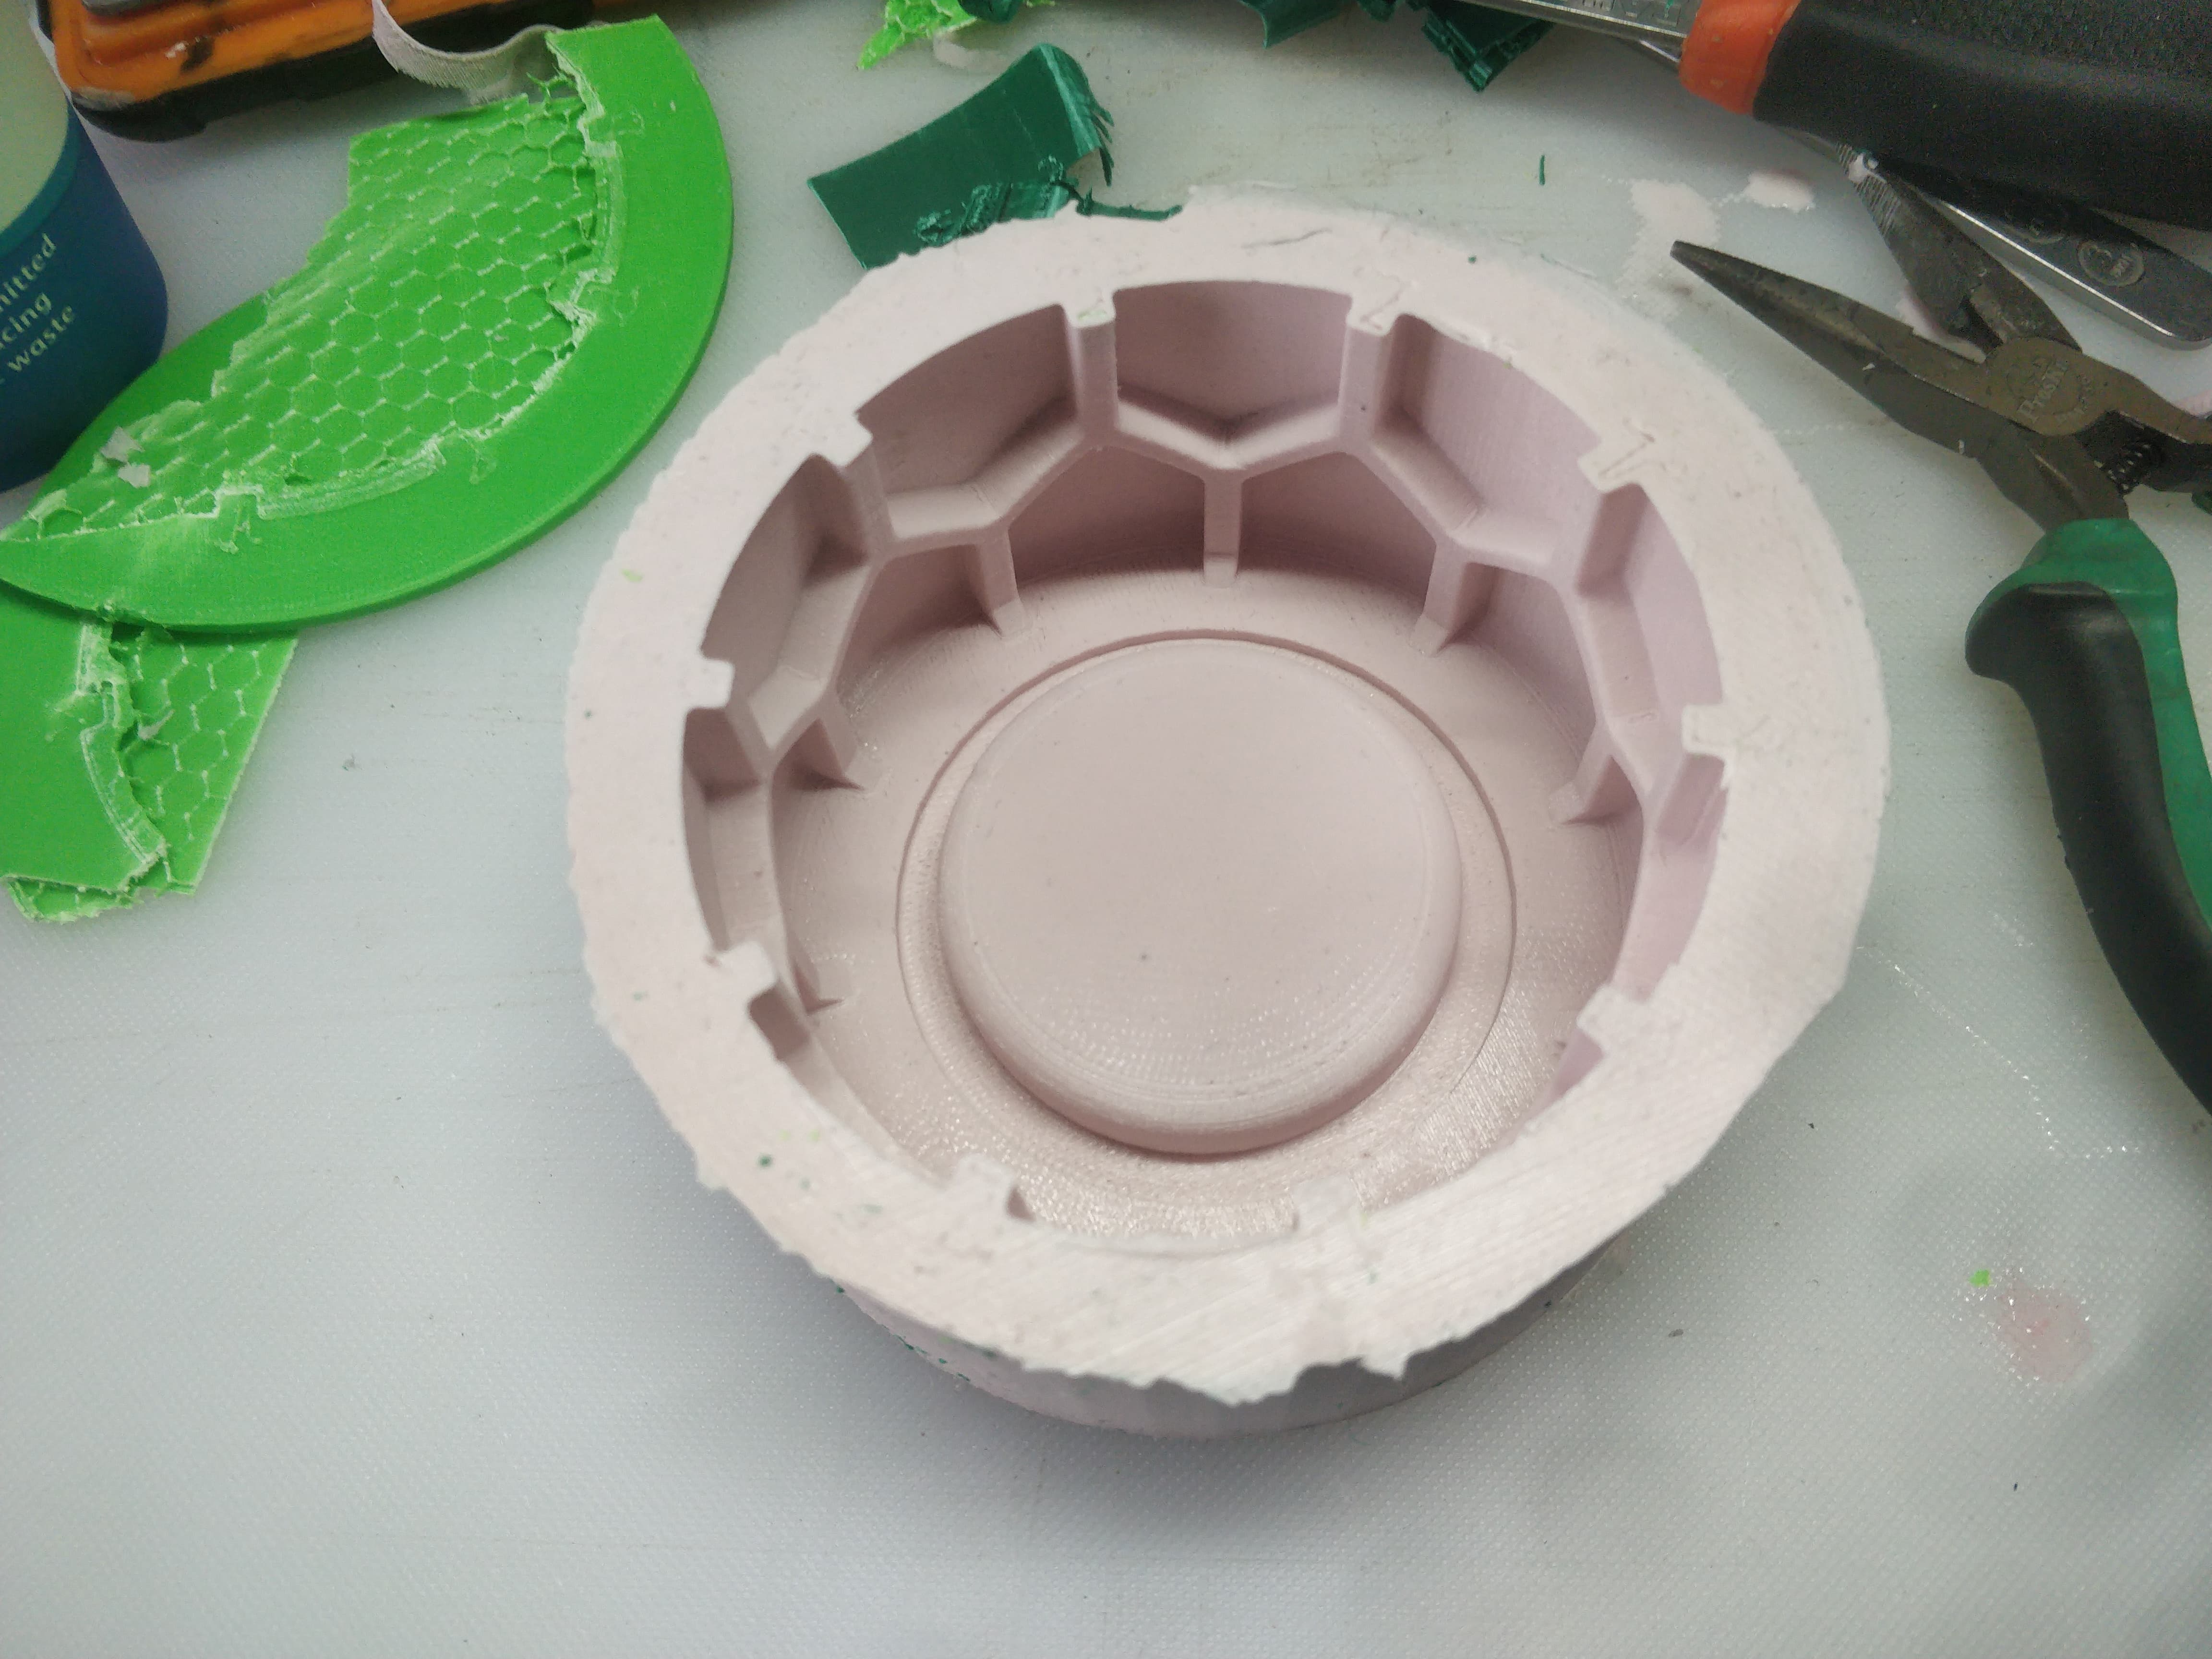
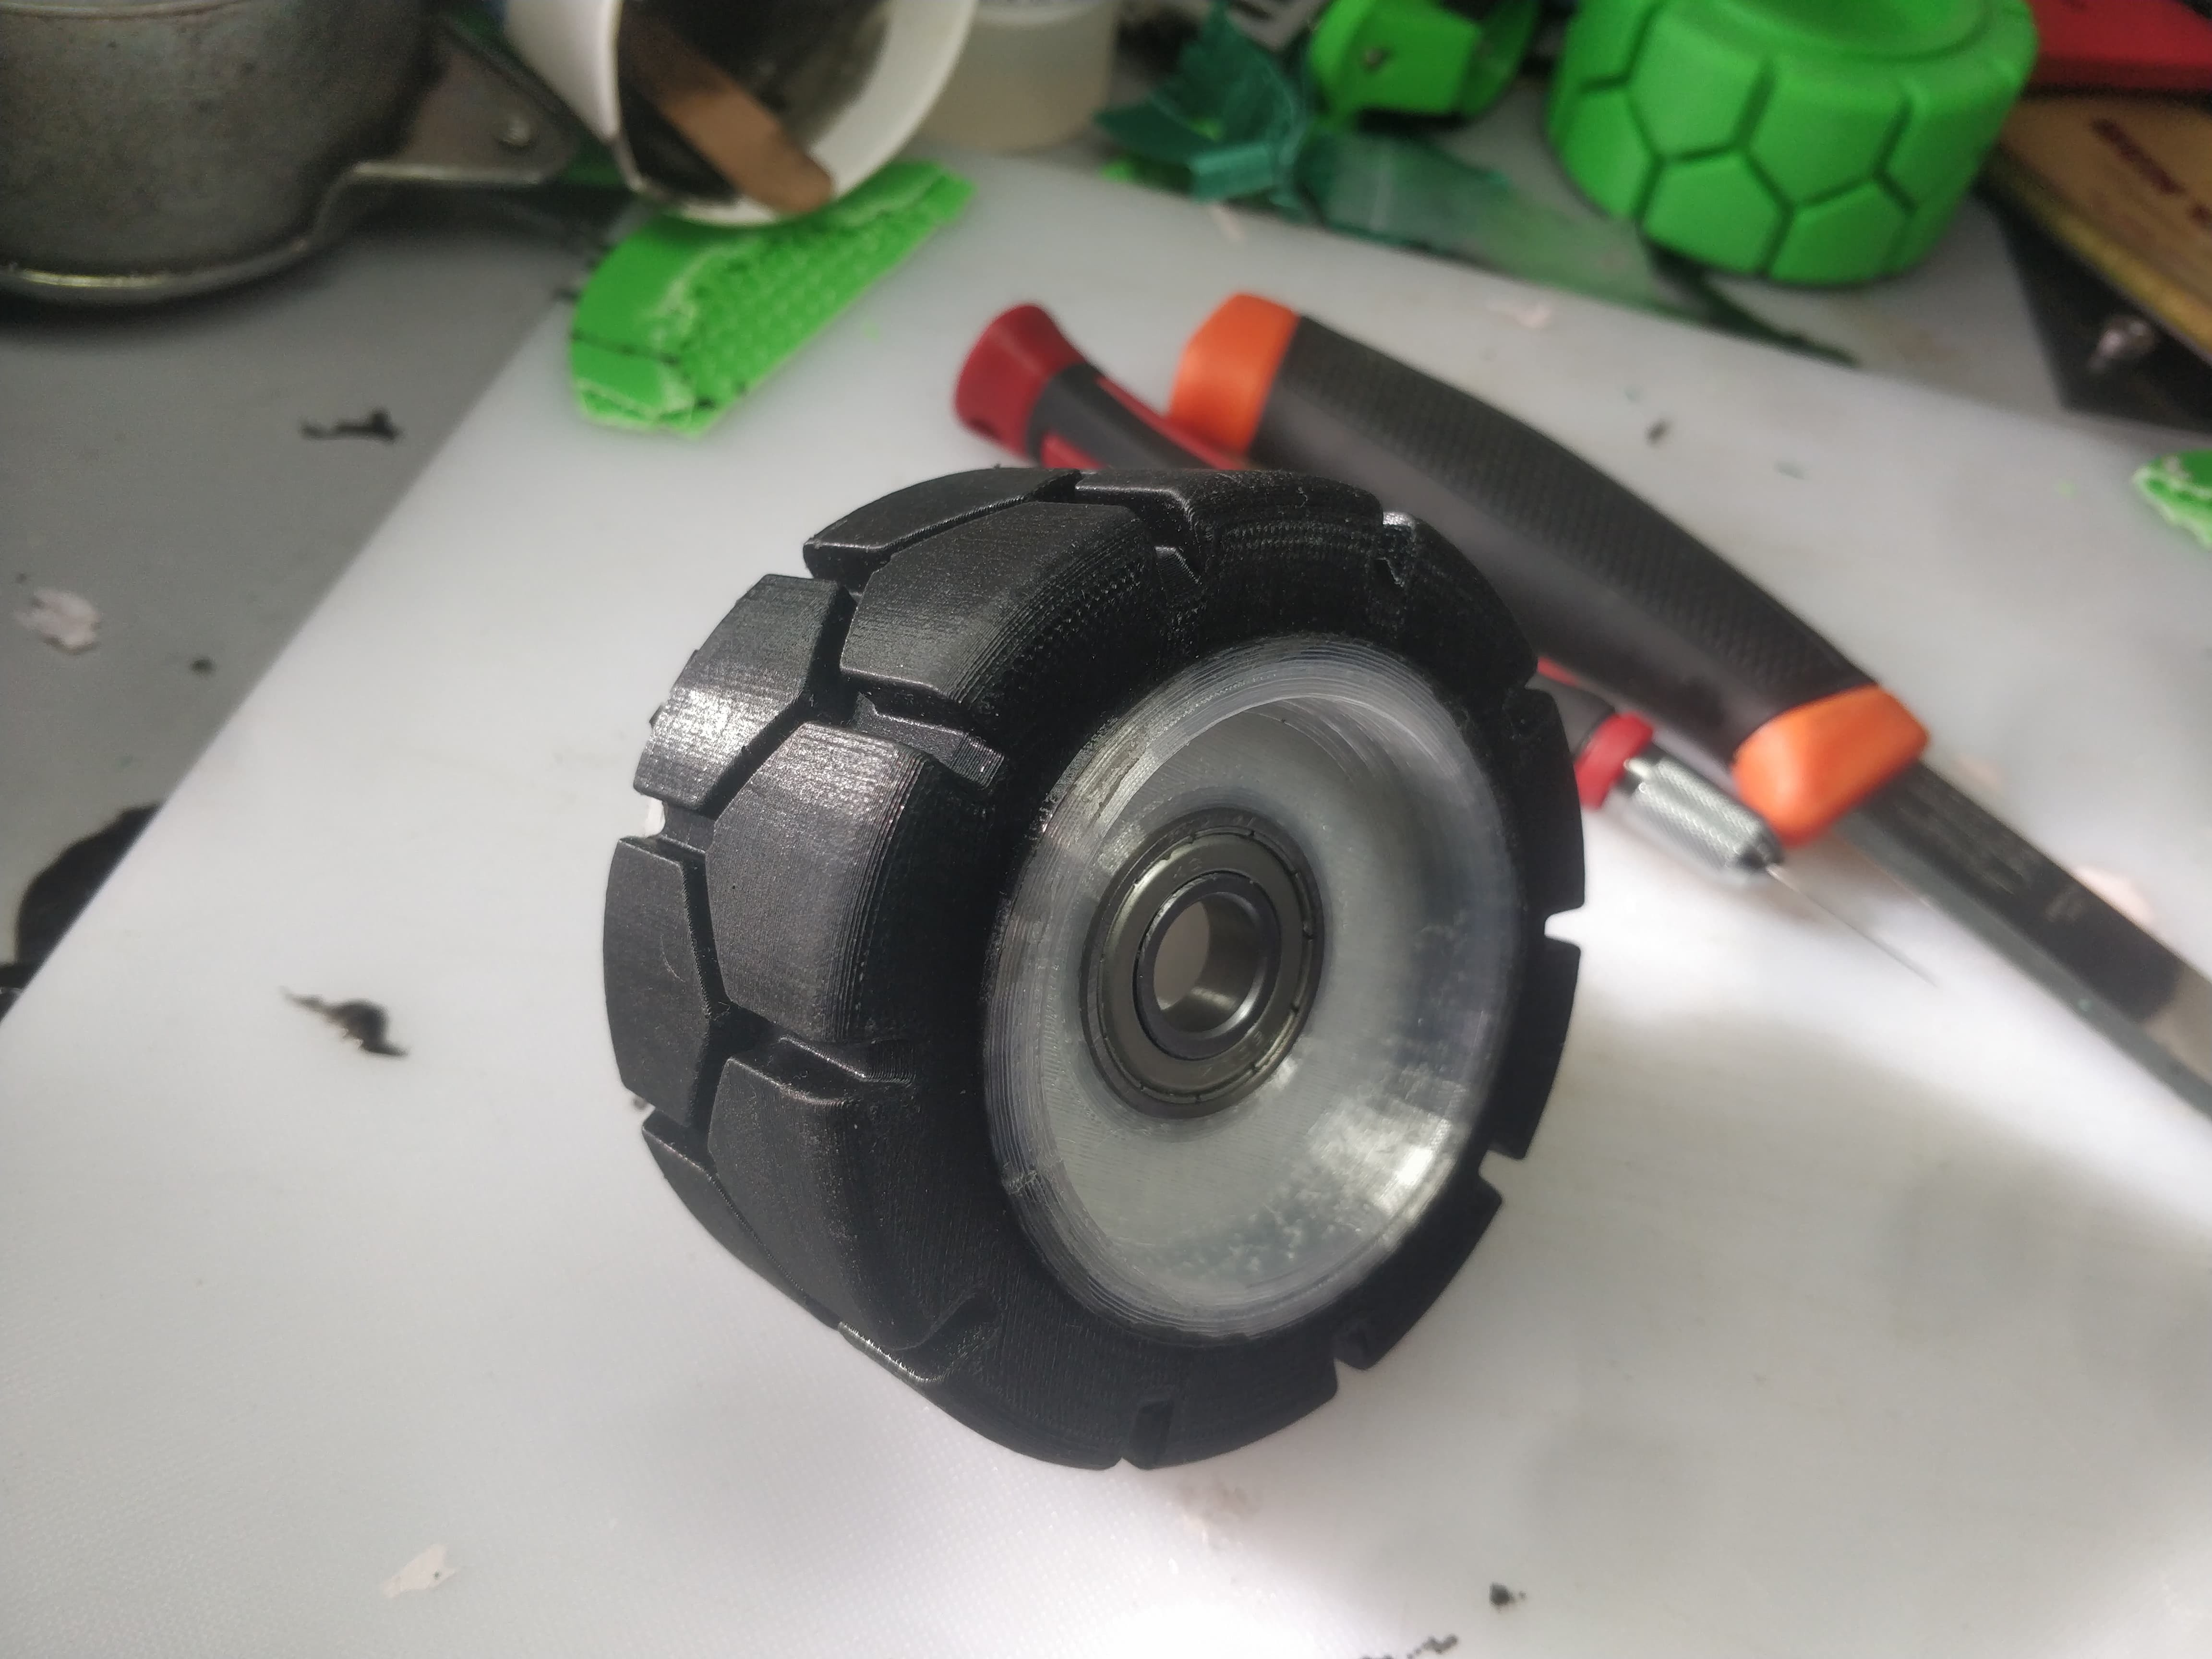
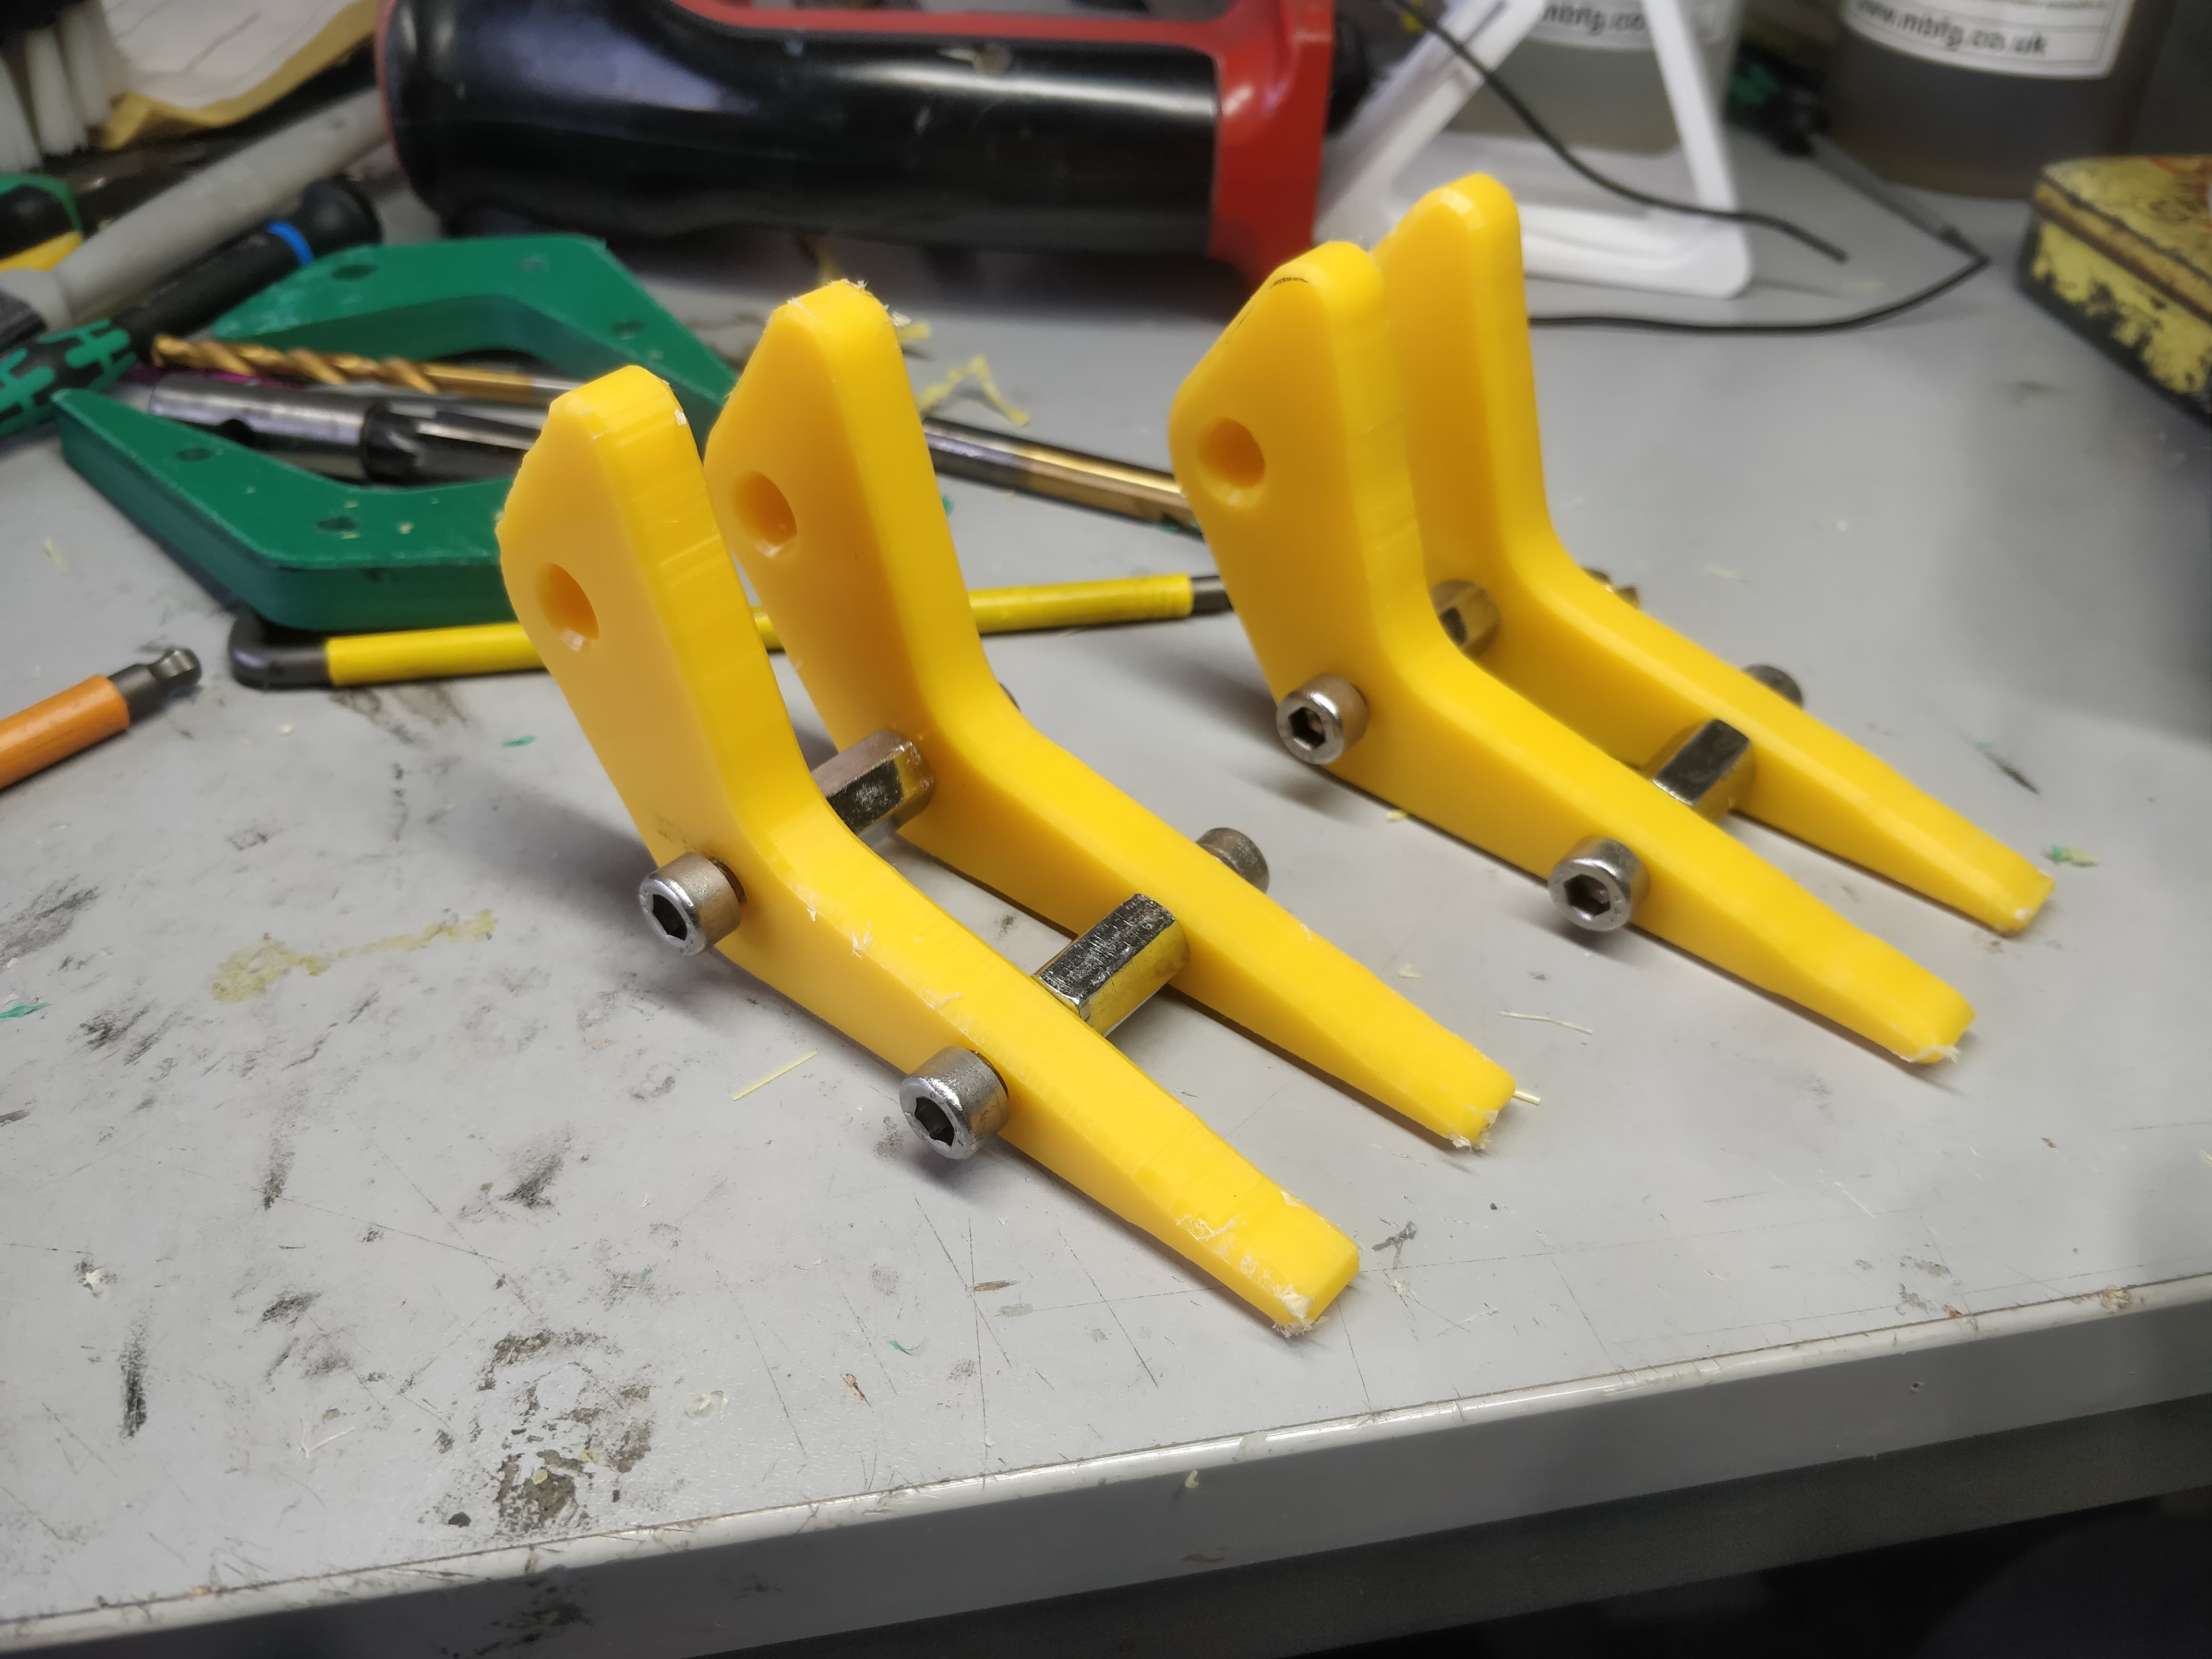
The wheels are 3d printed hubs with polyurethane tyres. The white on the right was my first slightly globby attempt and the grey is my “production” version. The front wheels have two 12*28mm ball bearings and the rears have a 17mm hex for a mini/morris wheel nut.

They each have a HTD5mm timing pulley drawn in to get that funky fresh 4wd.

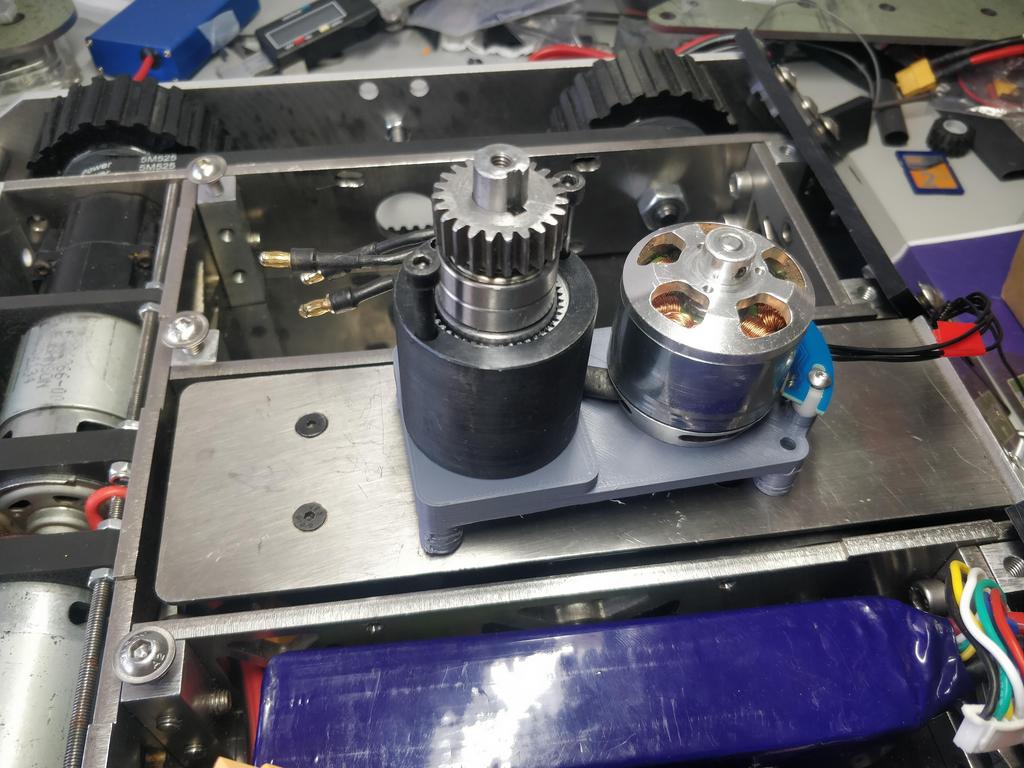
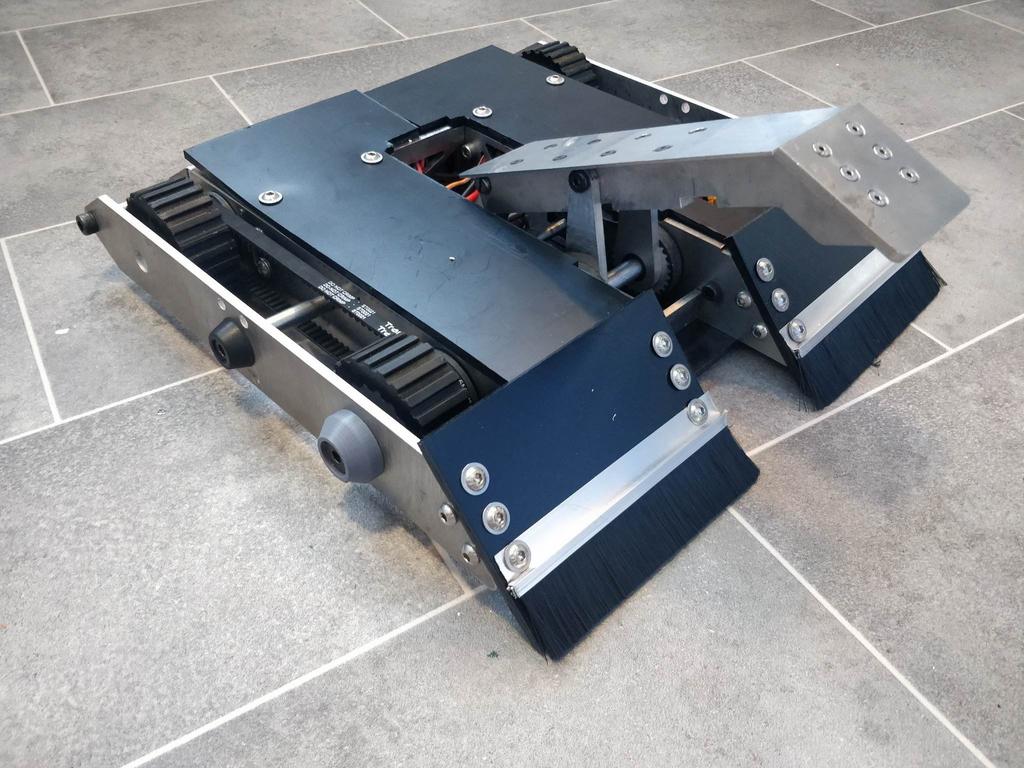
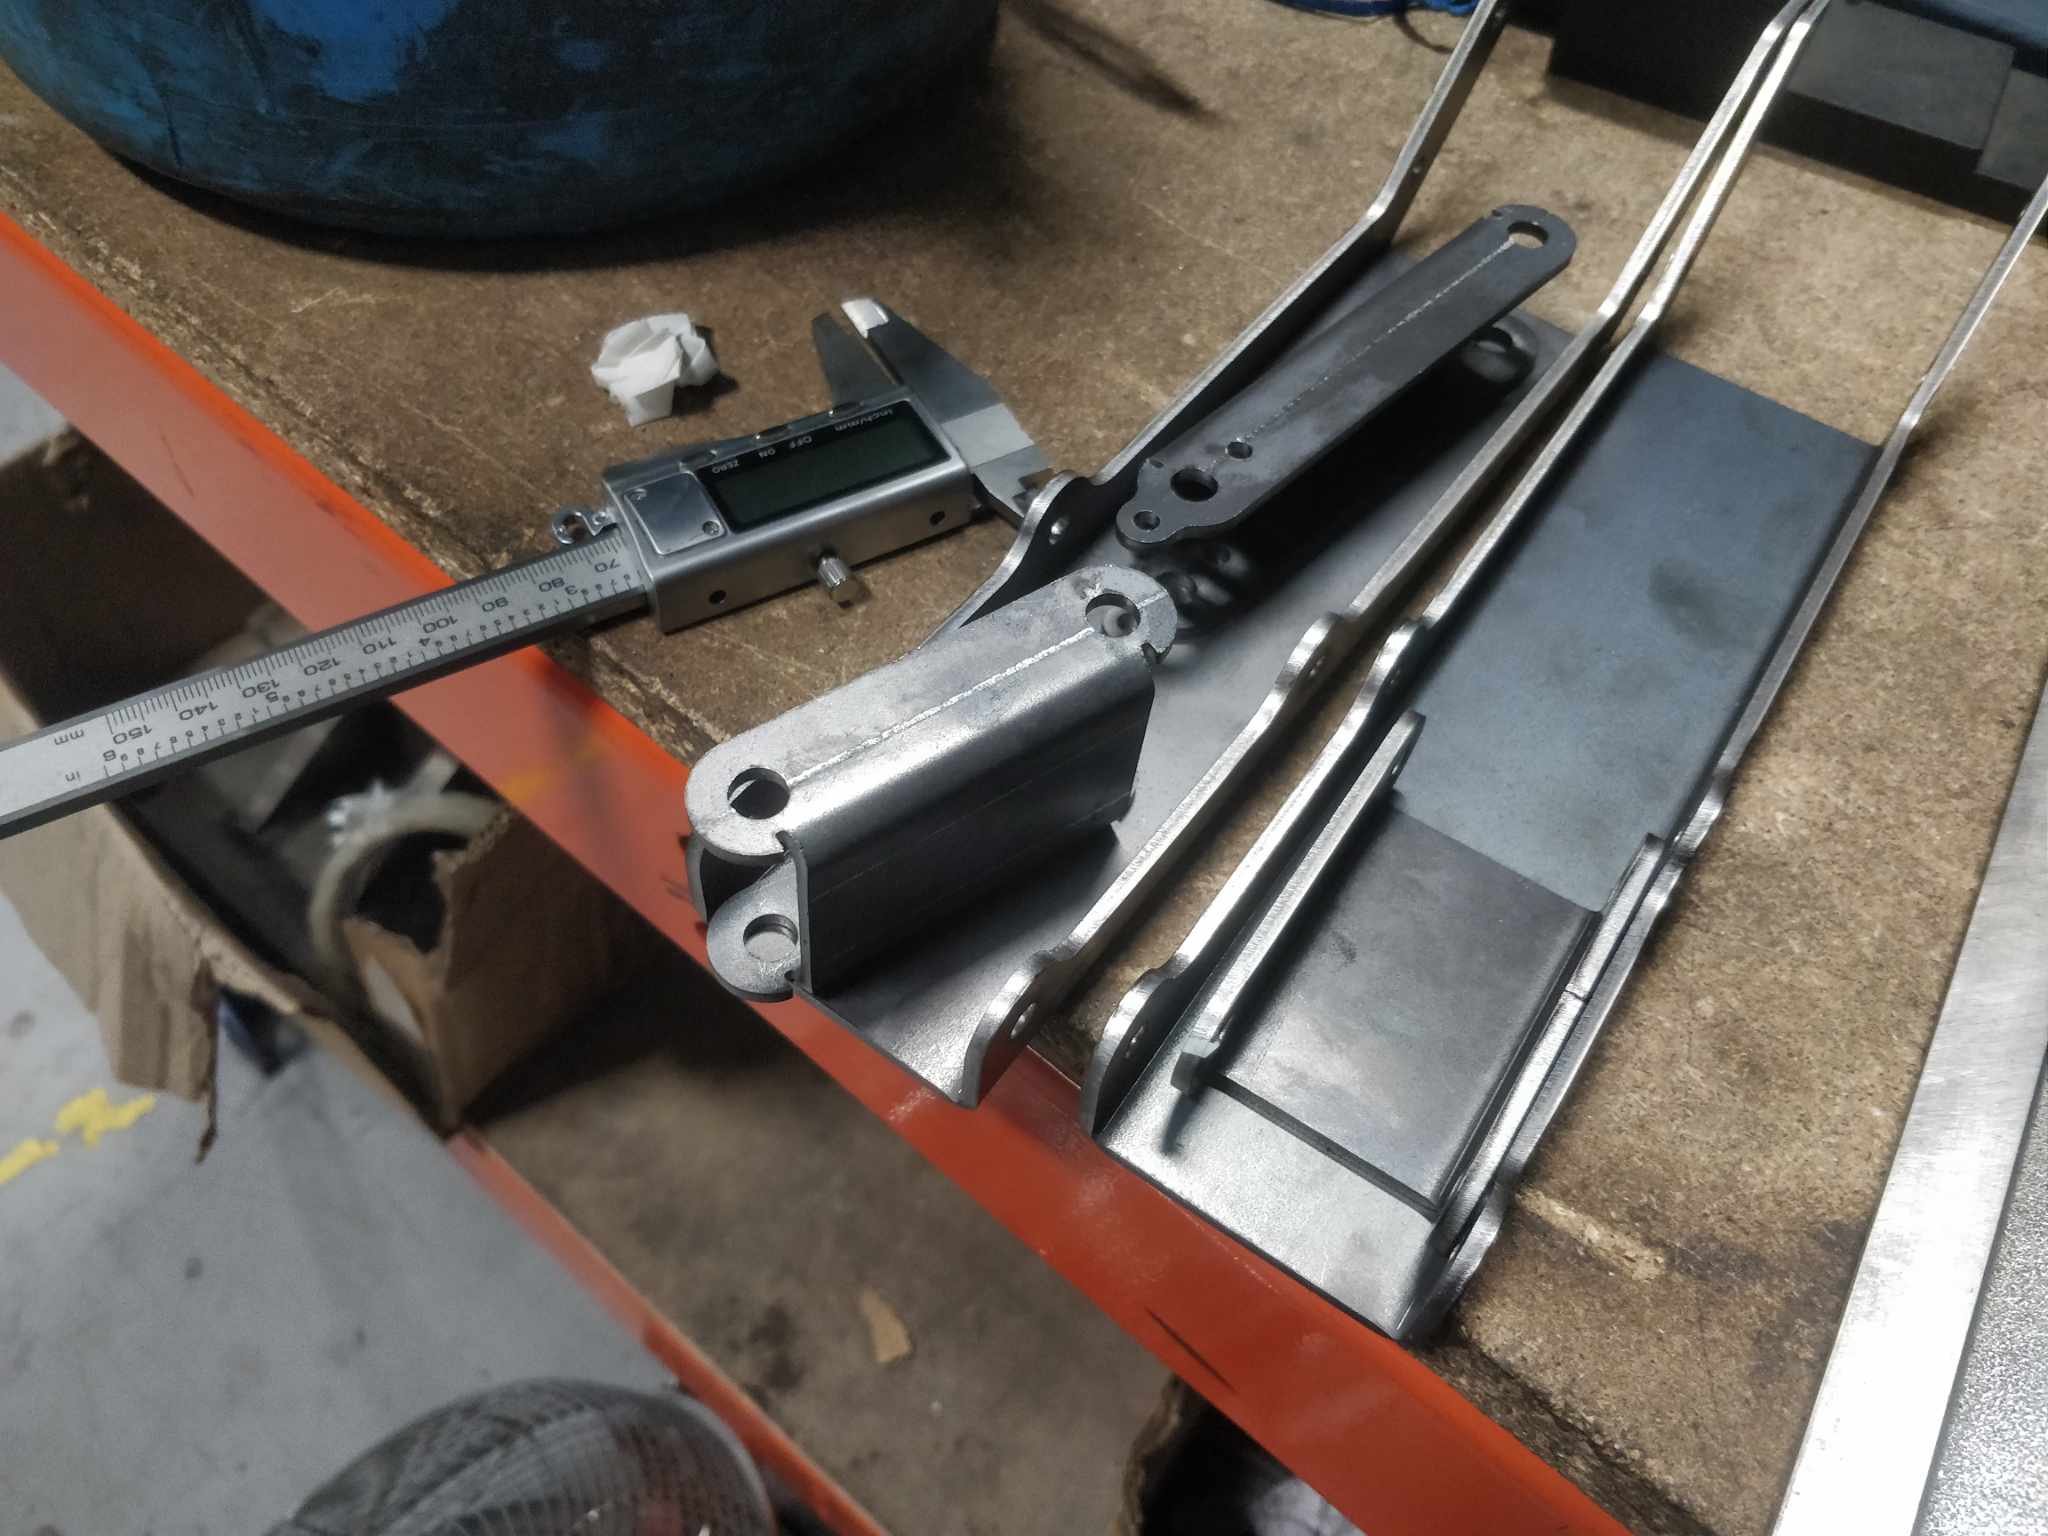
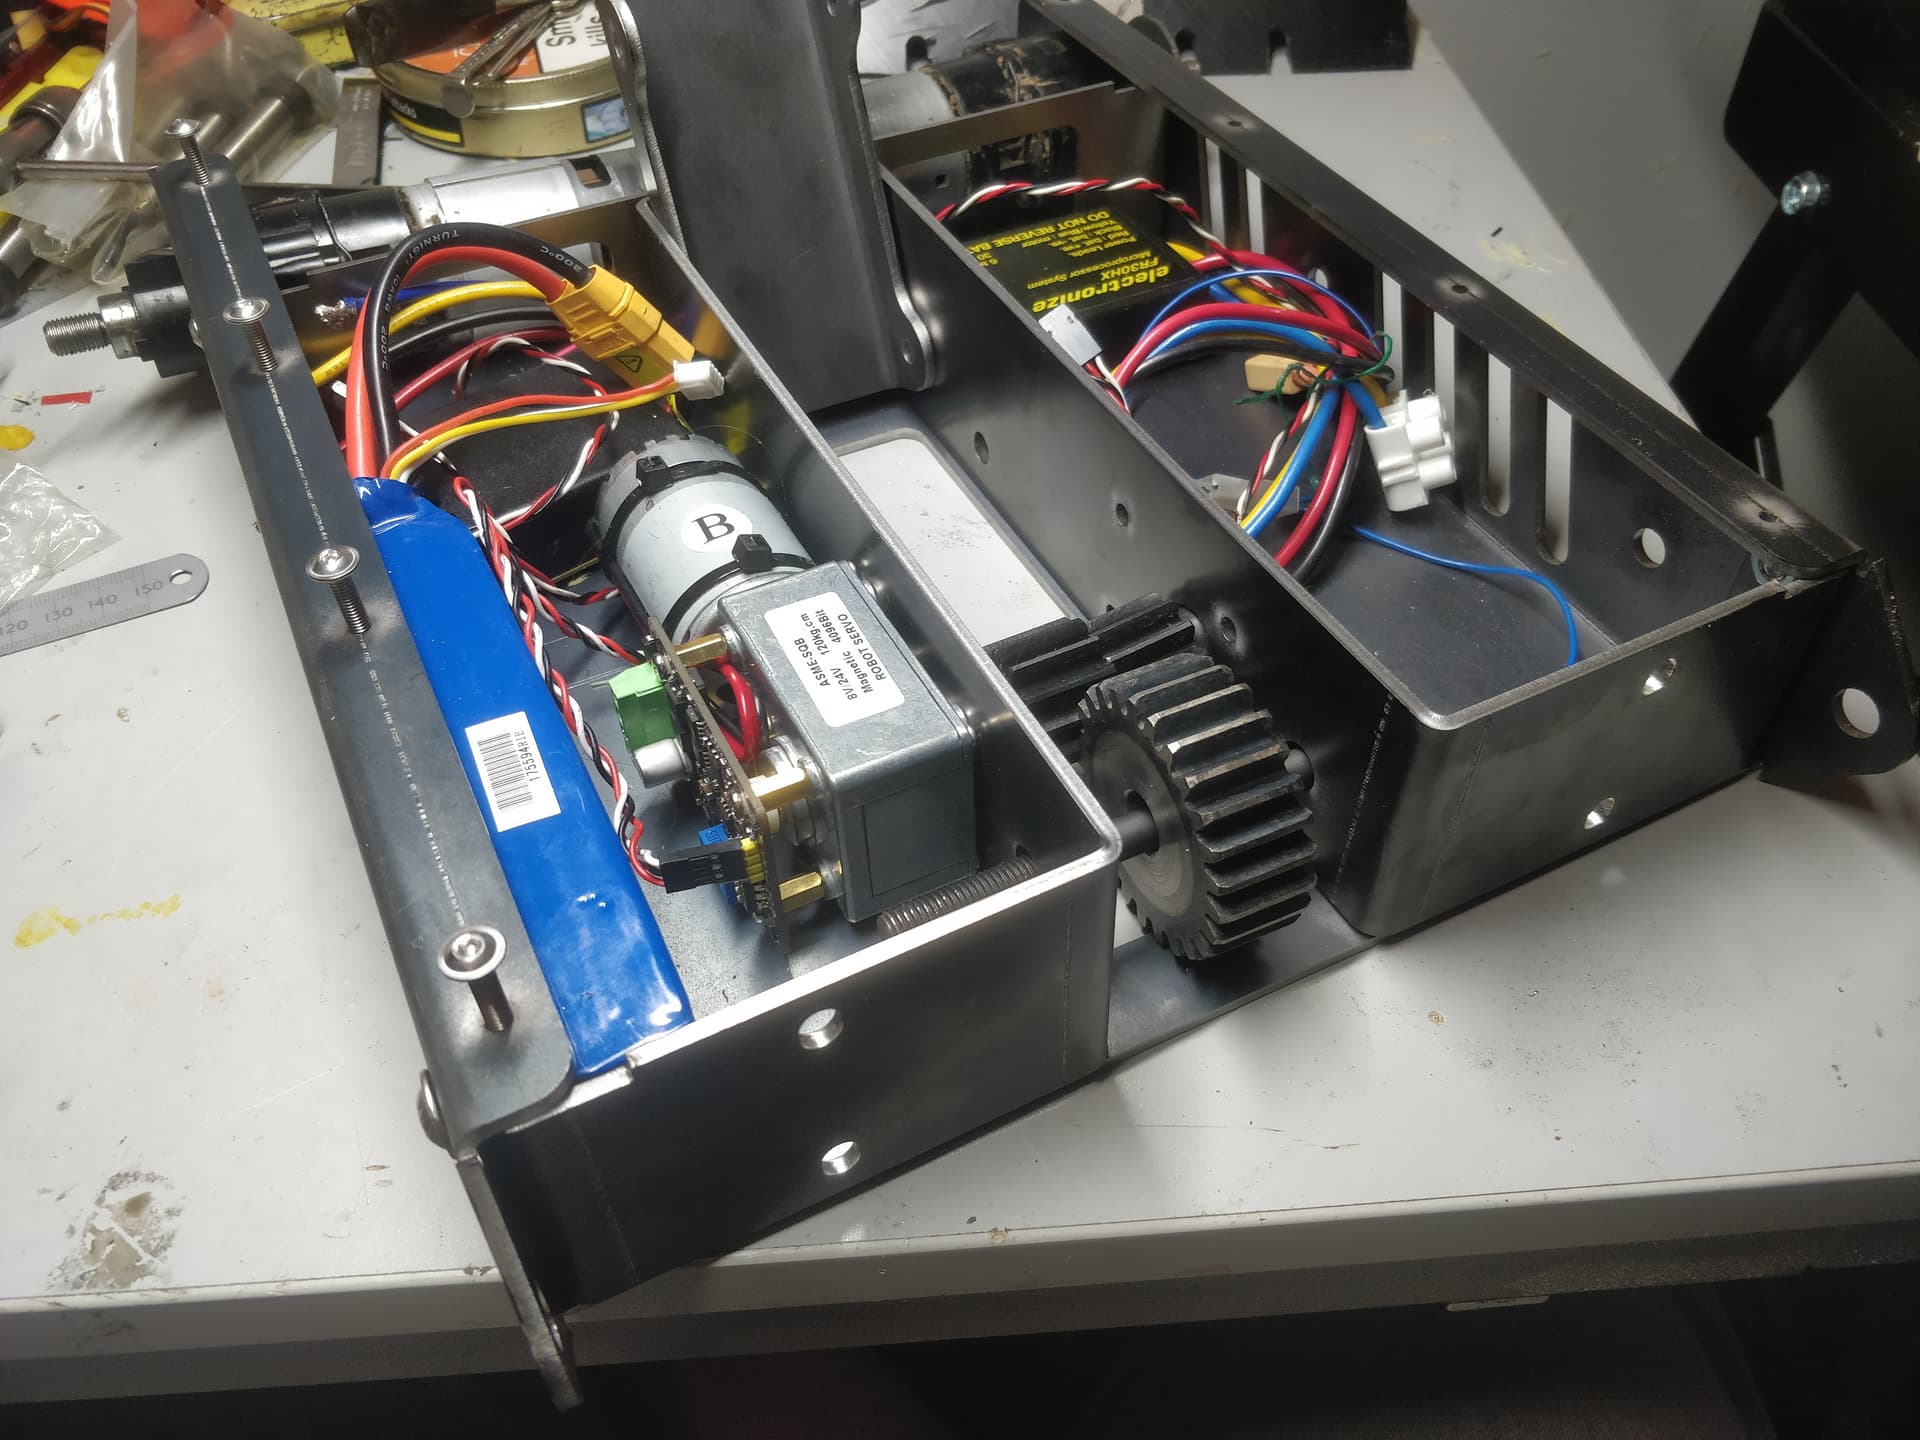
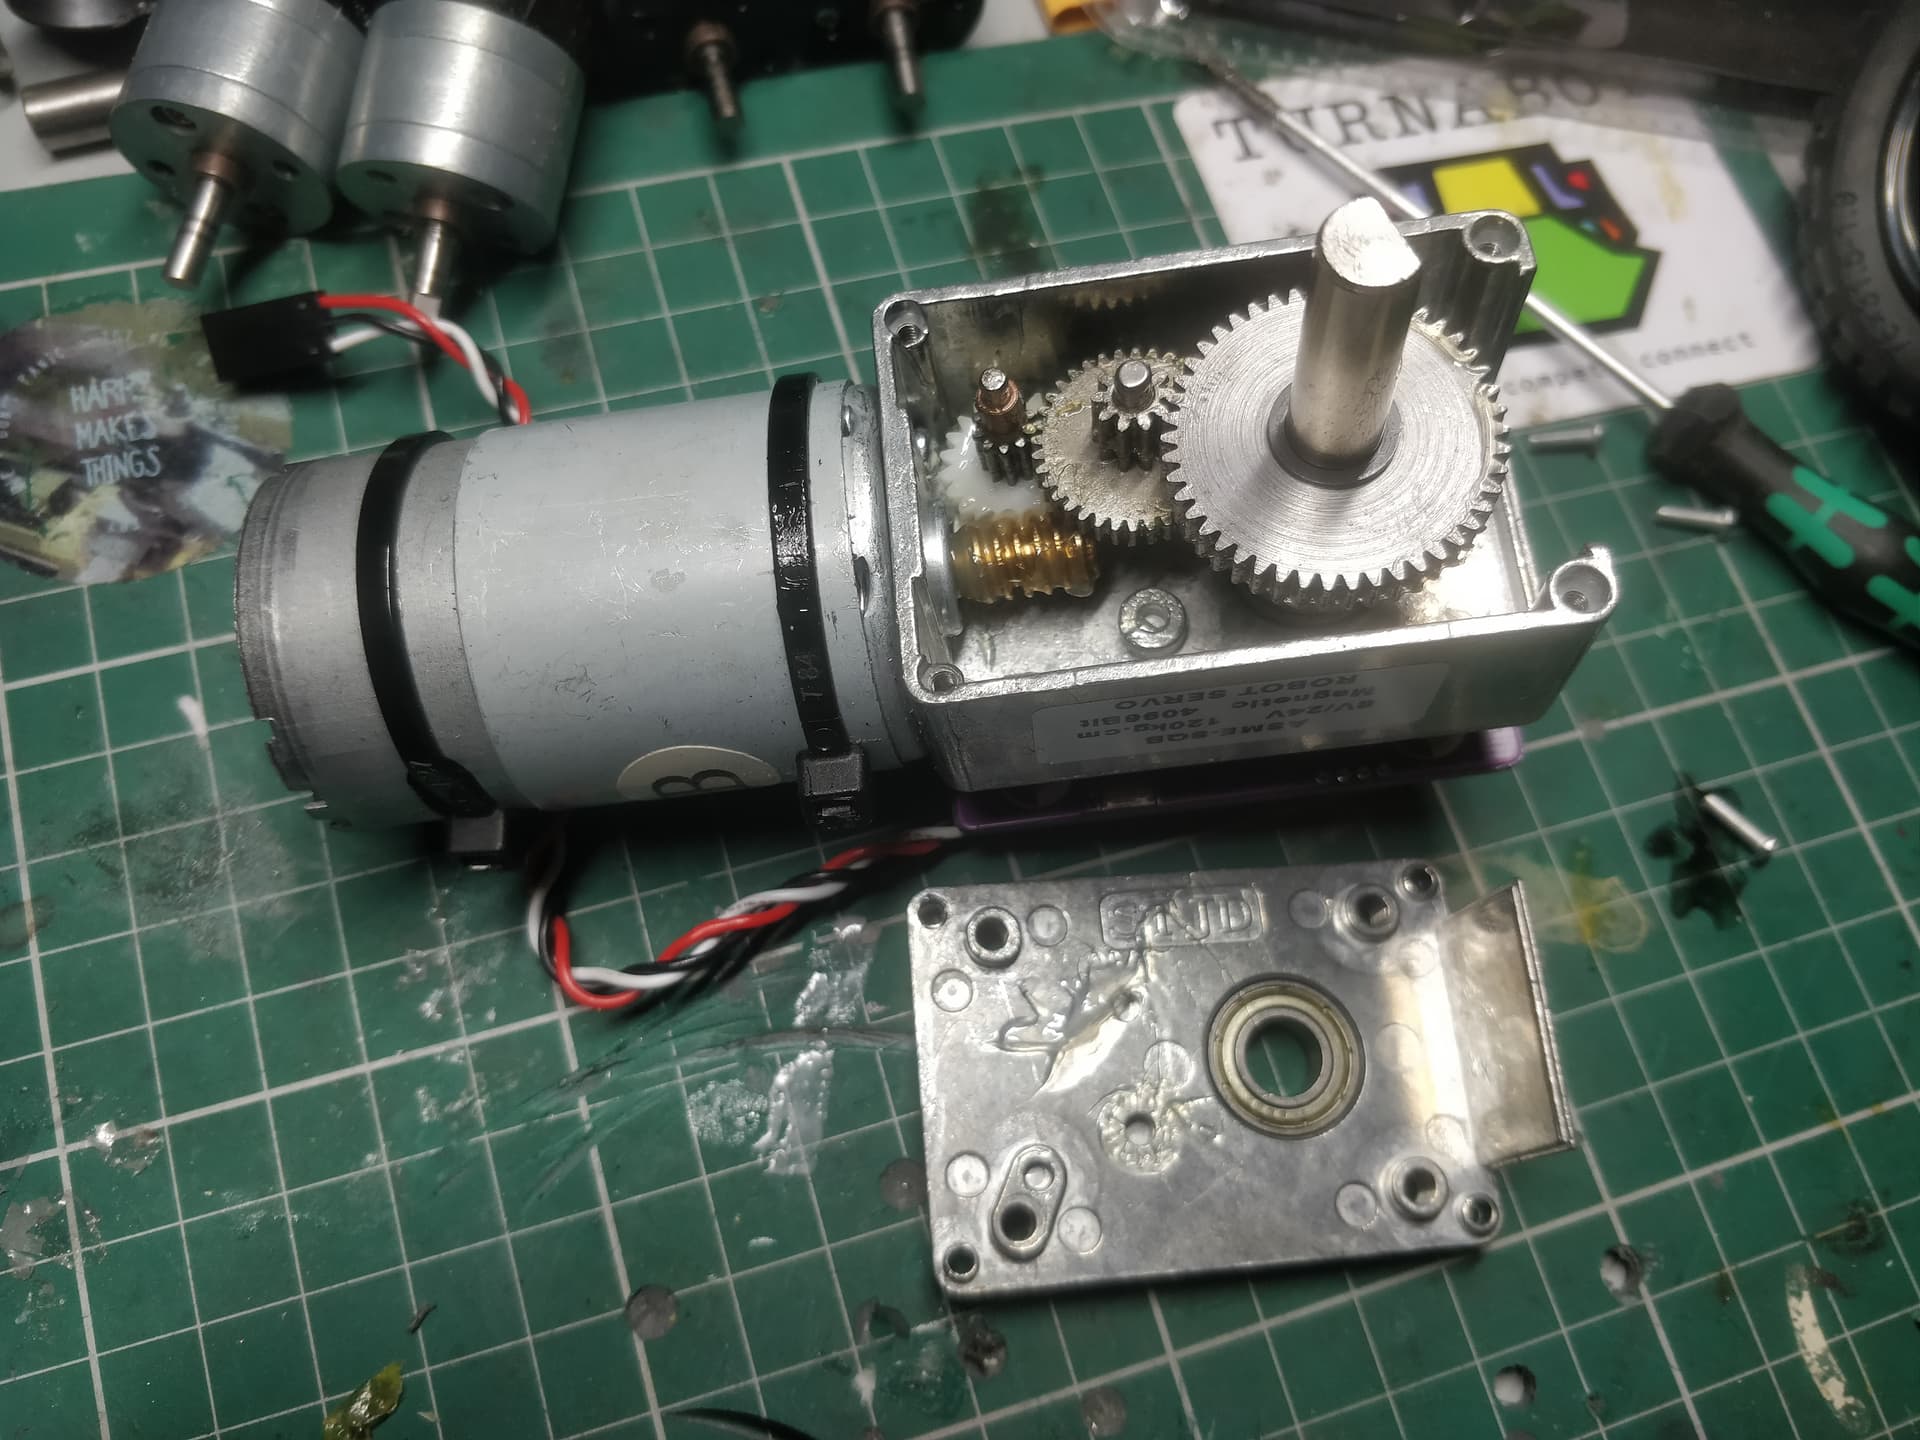
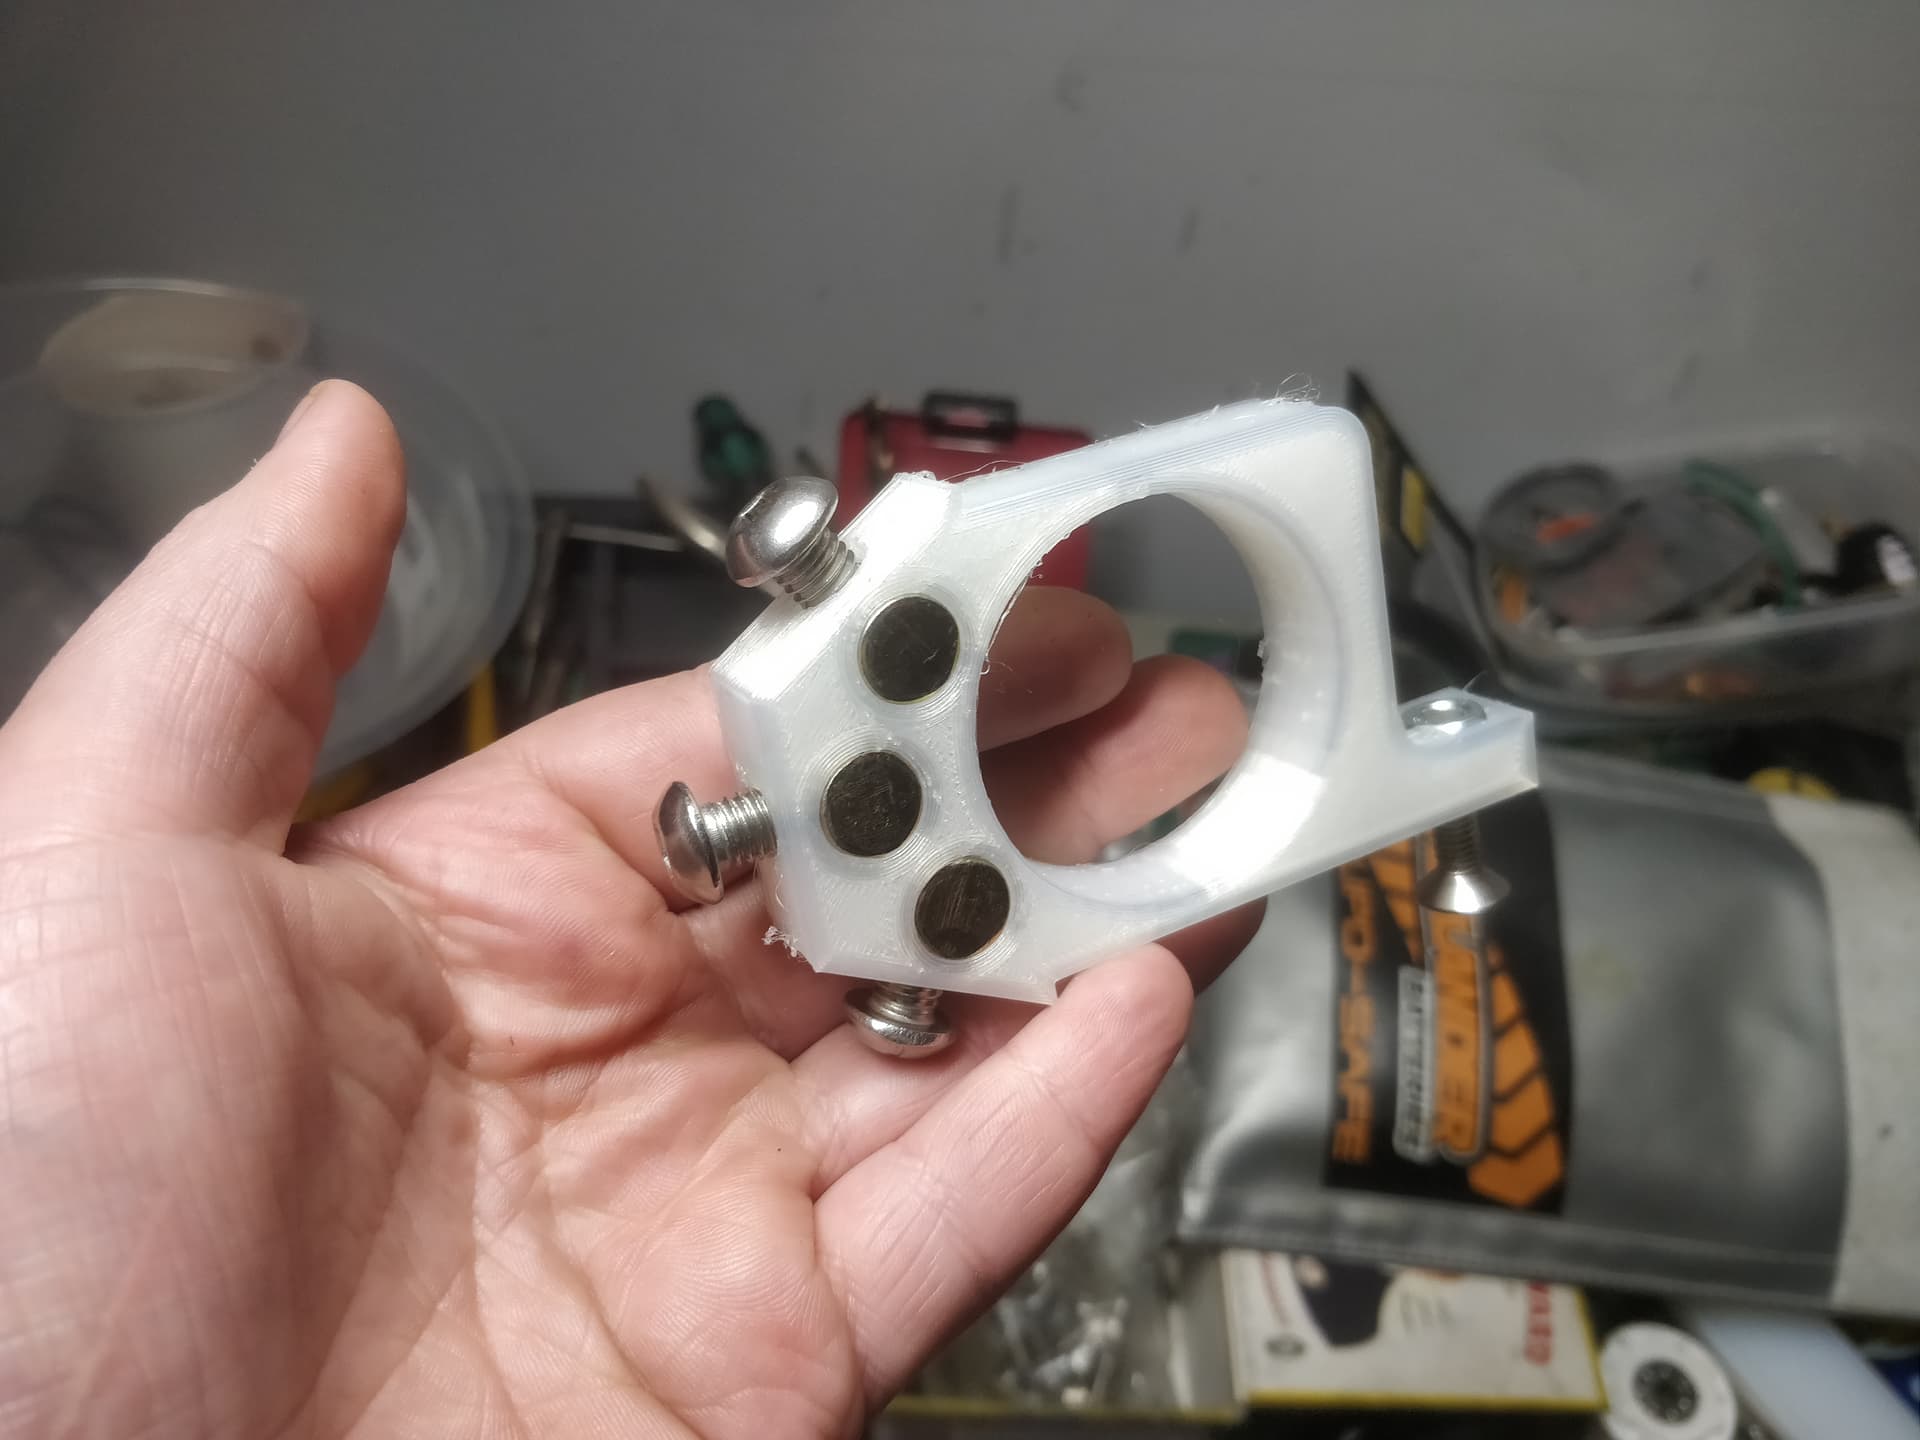
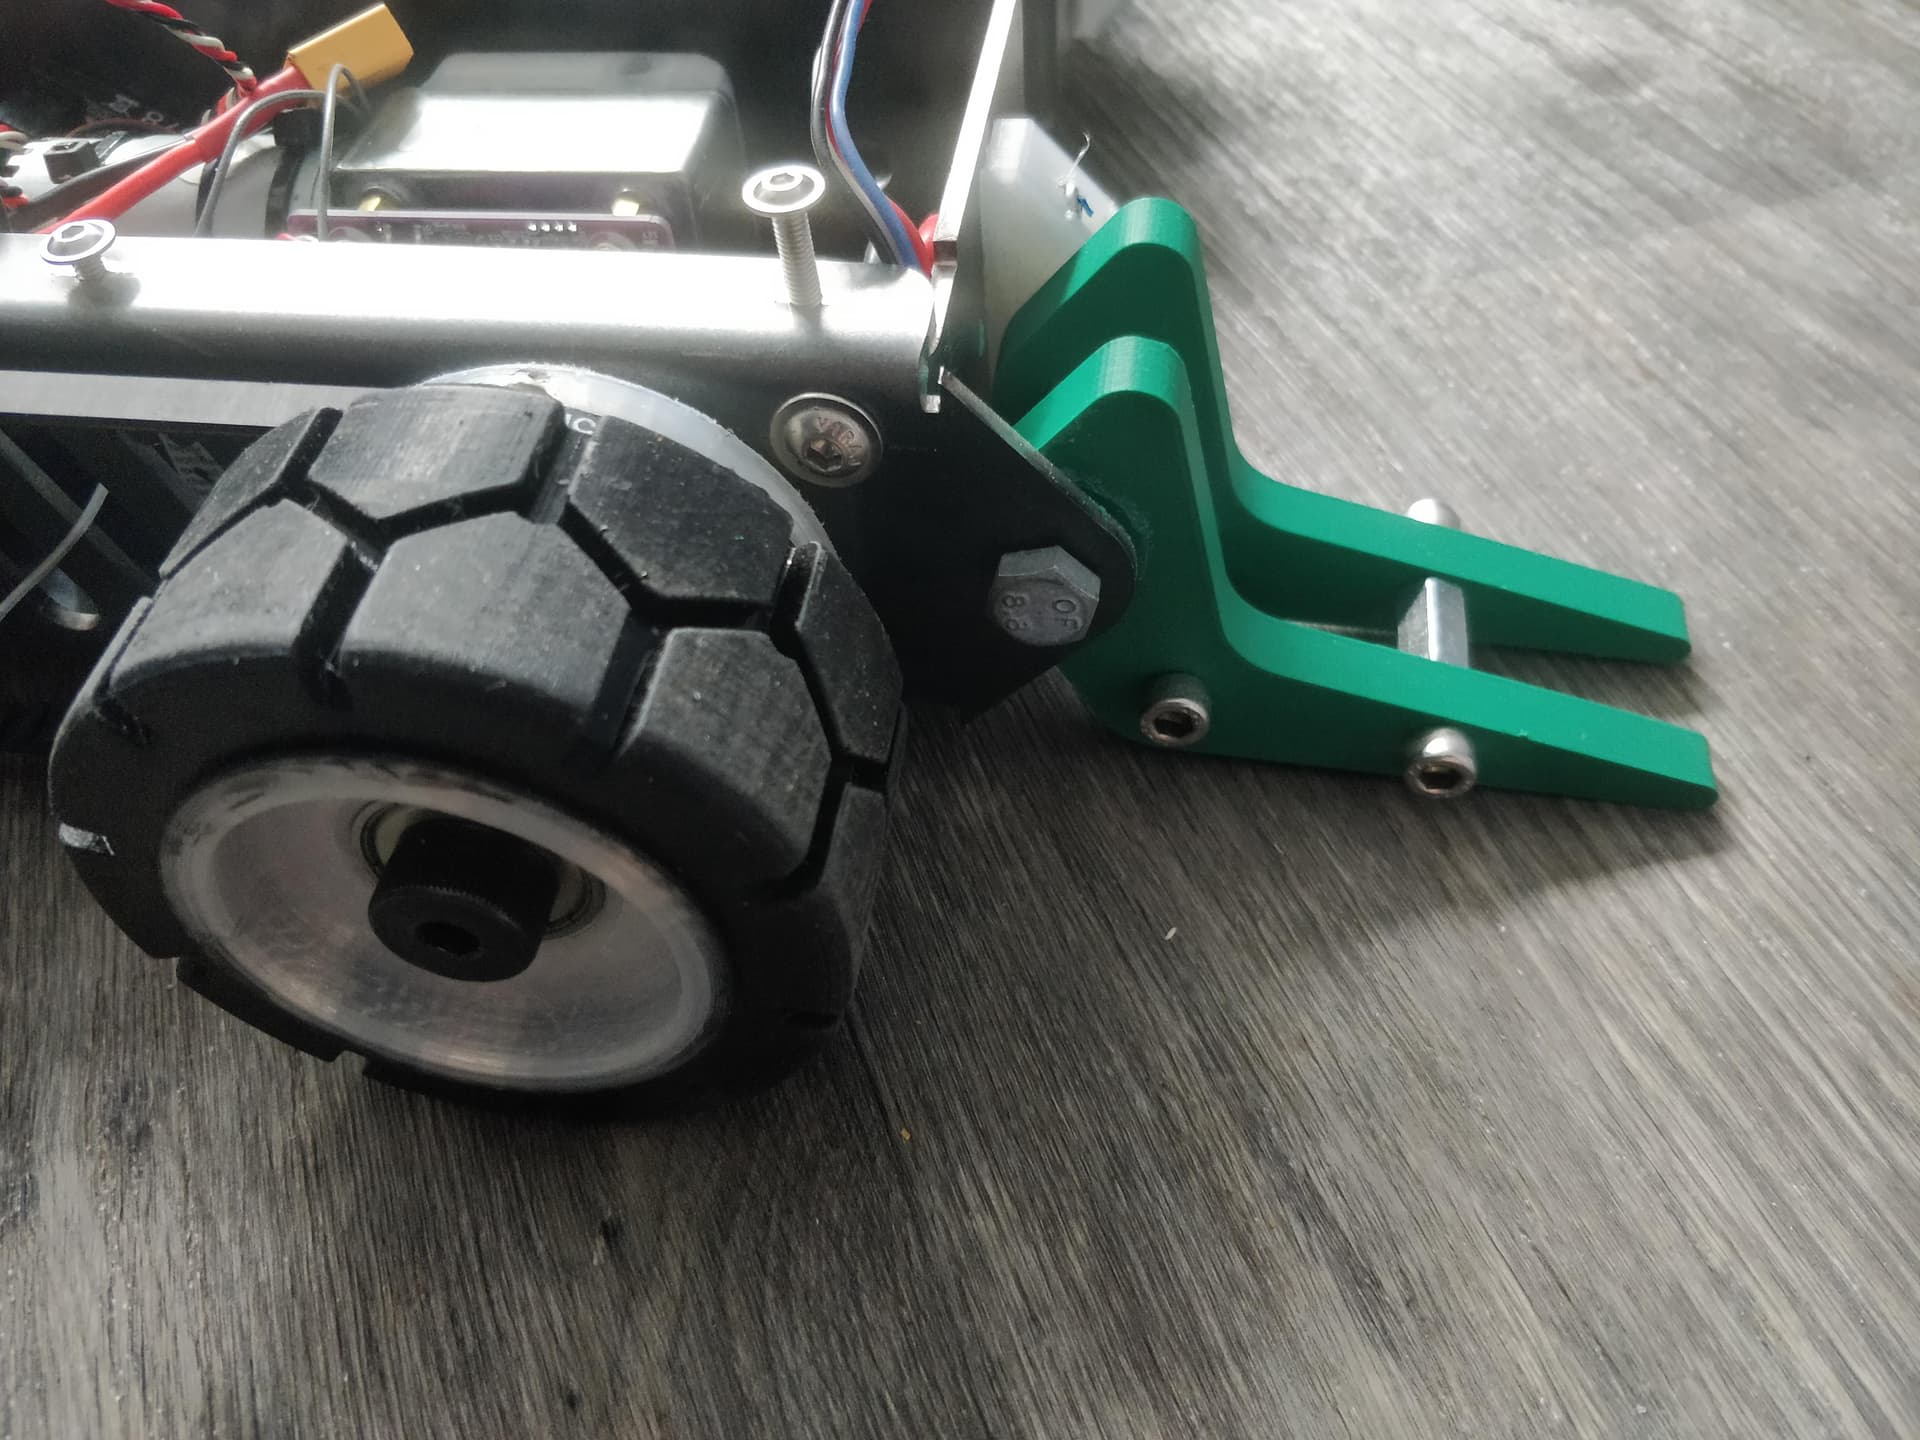
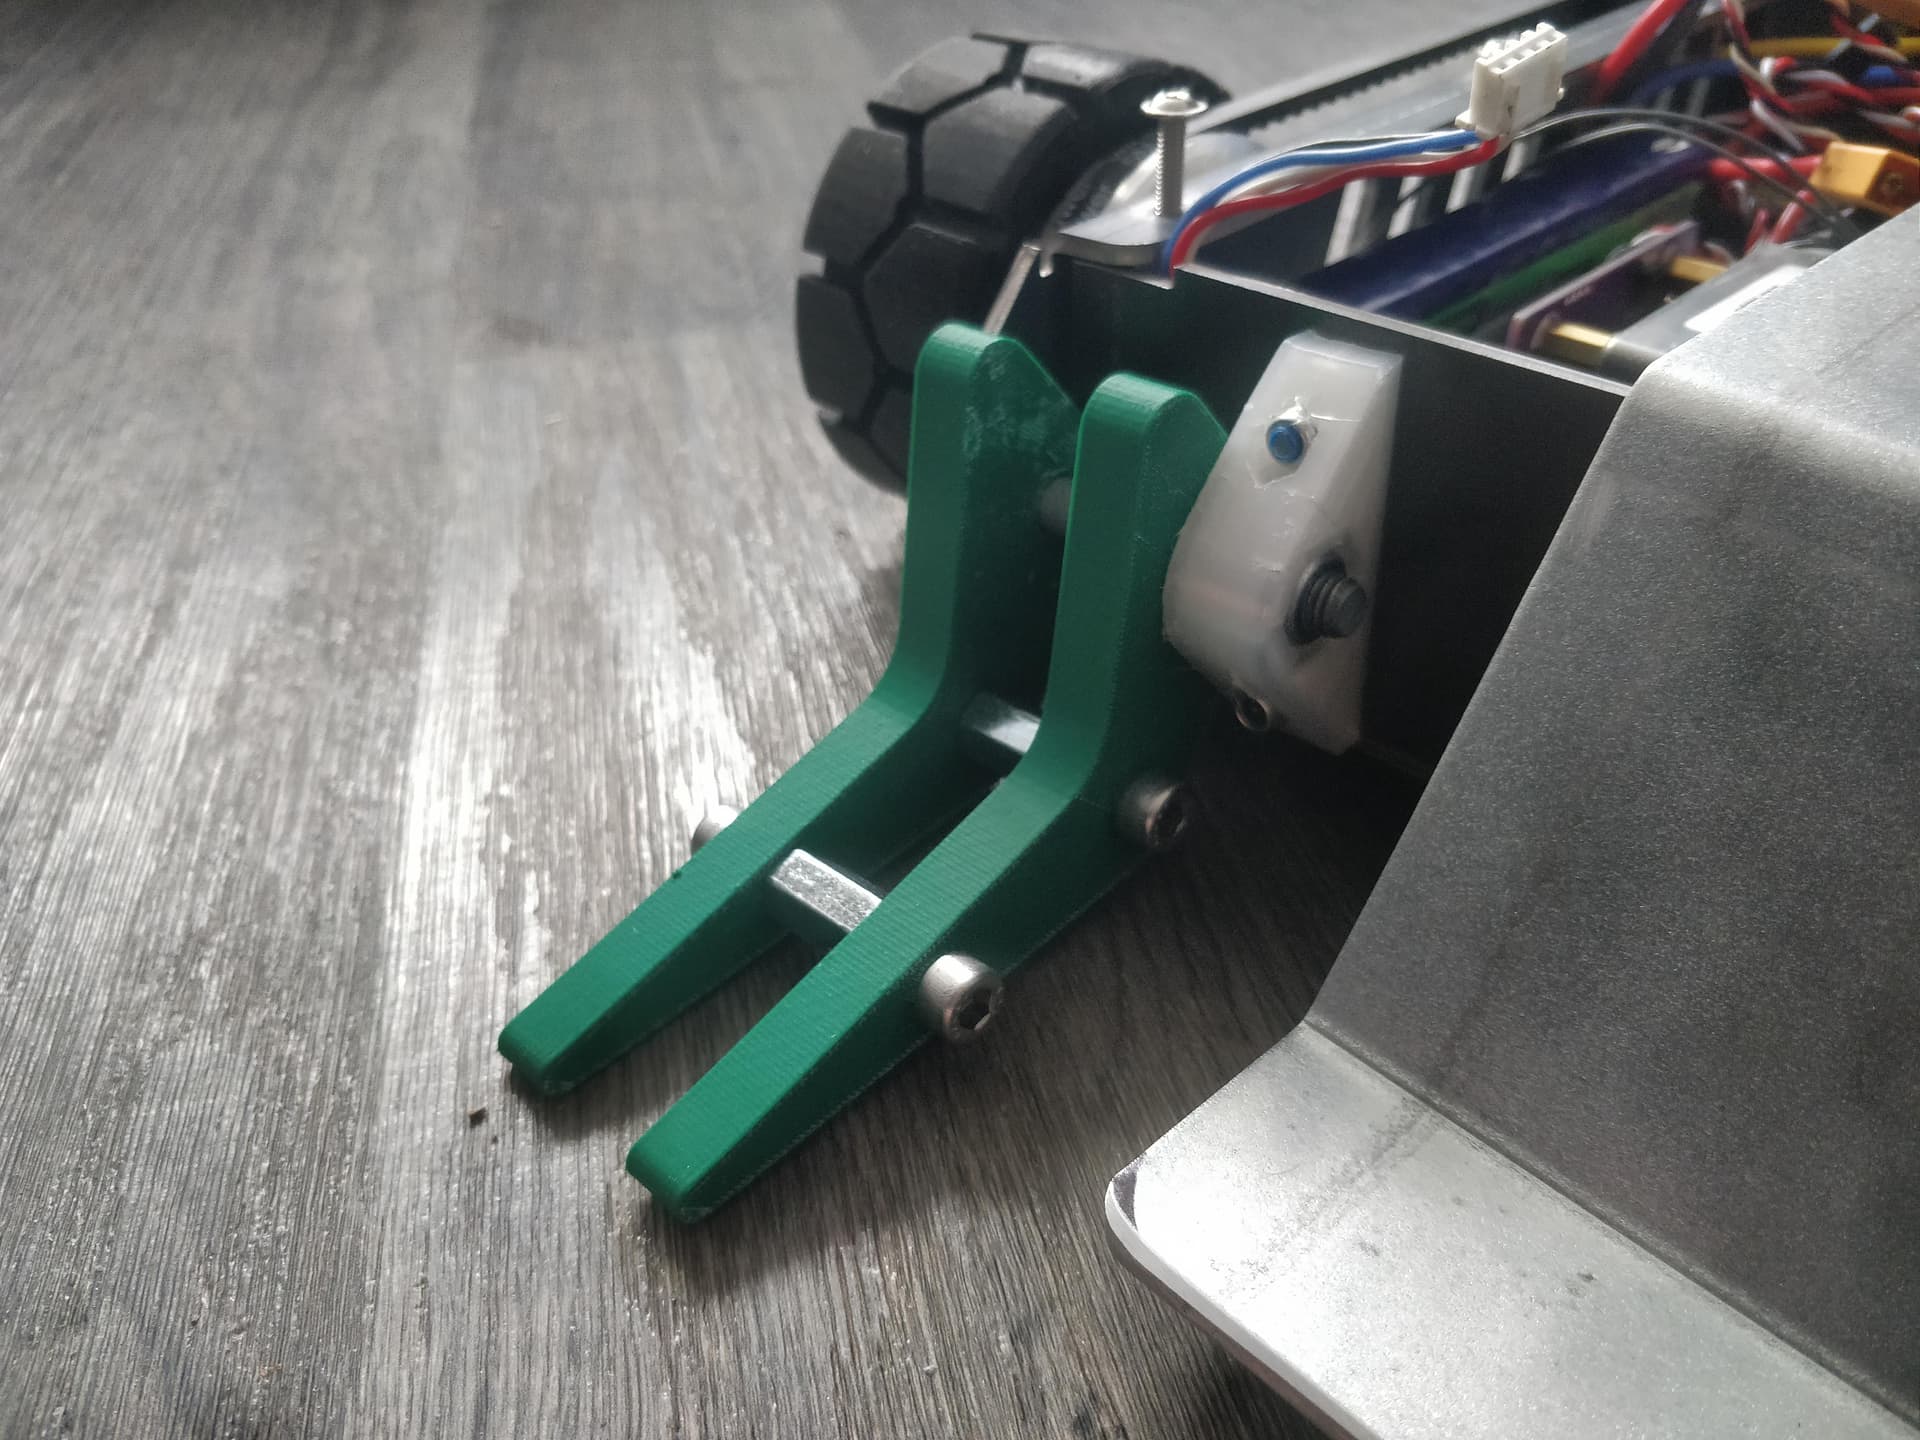
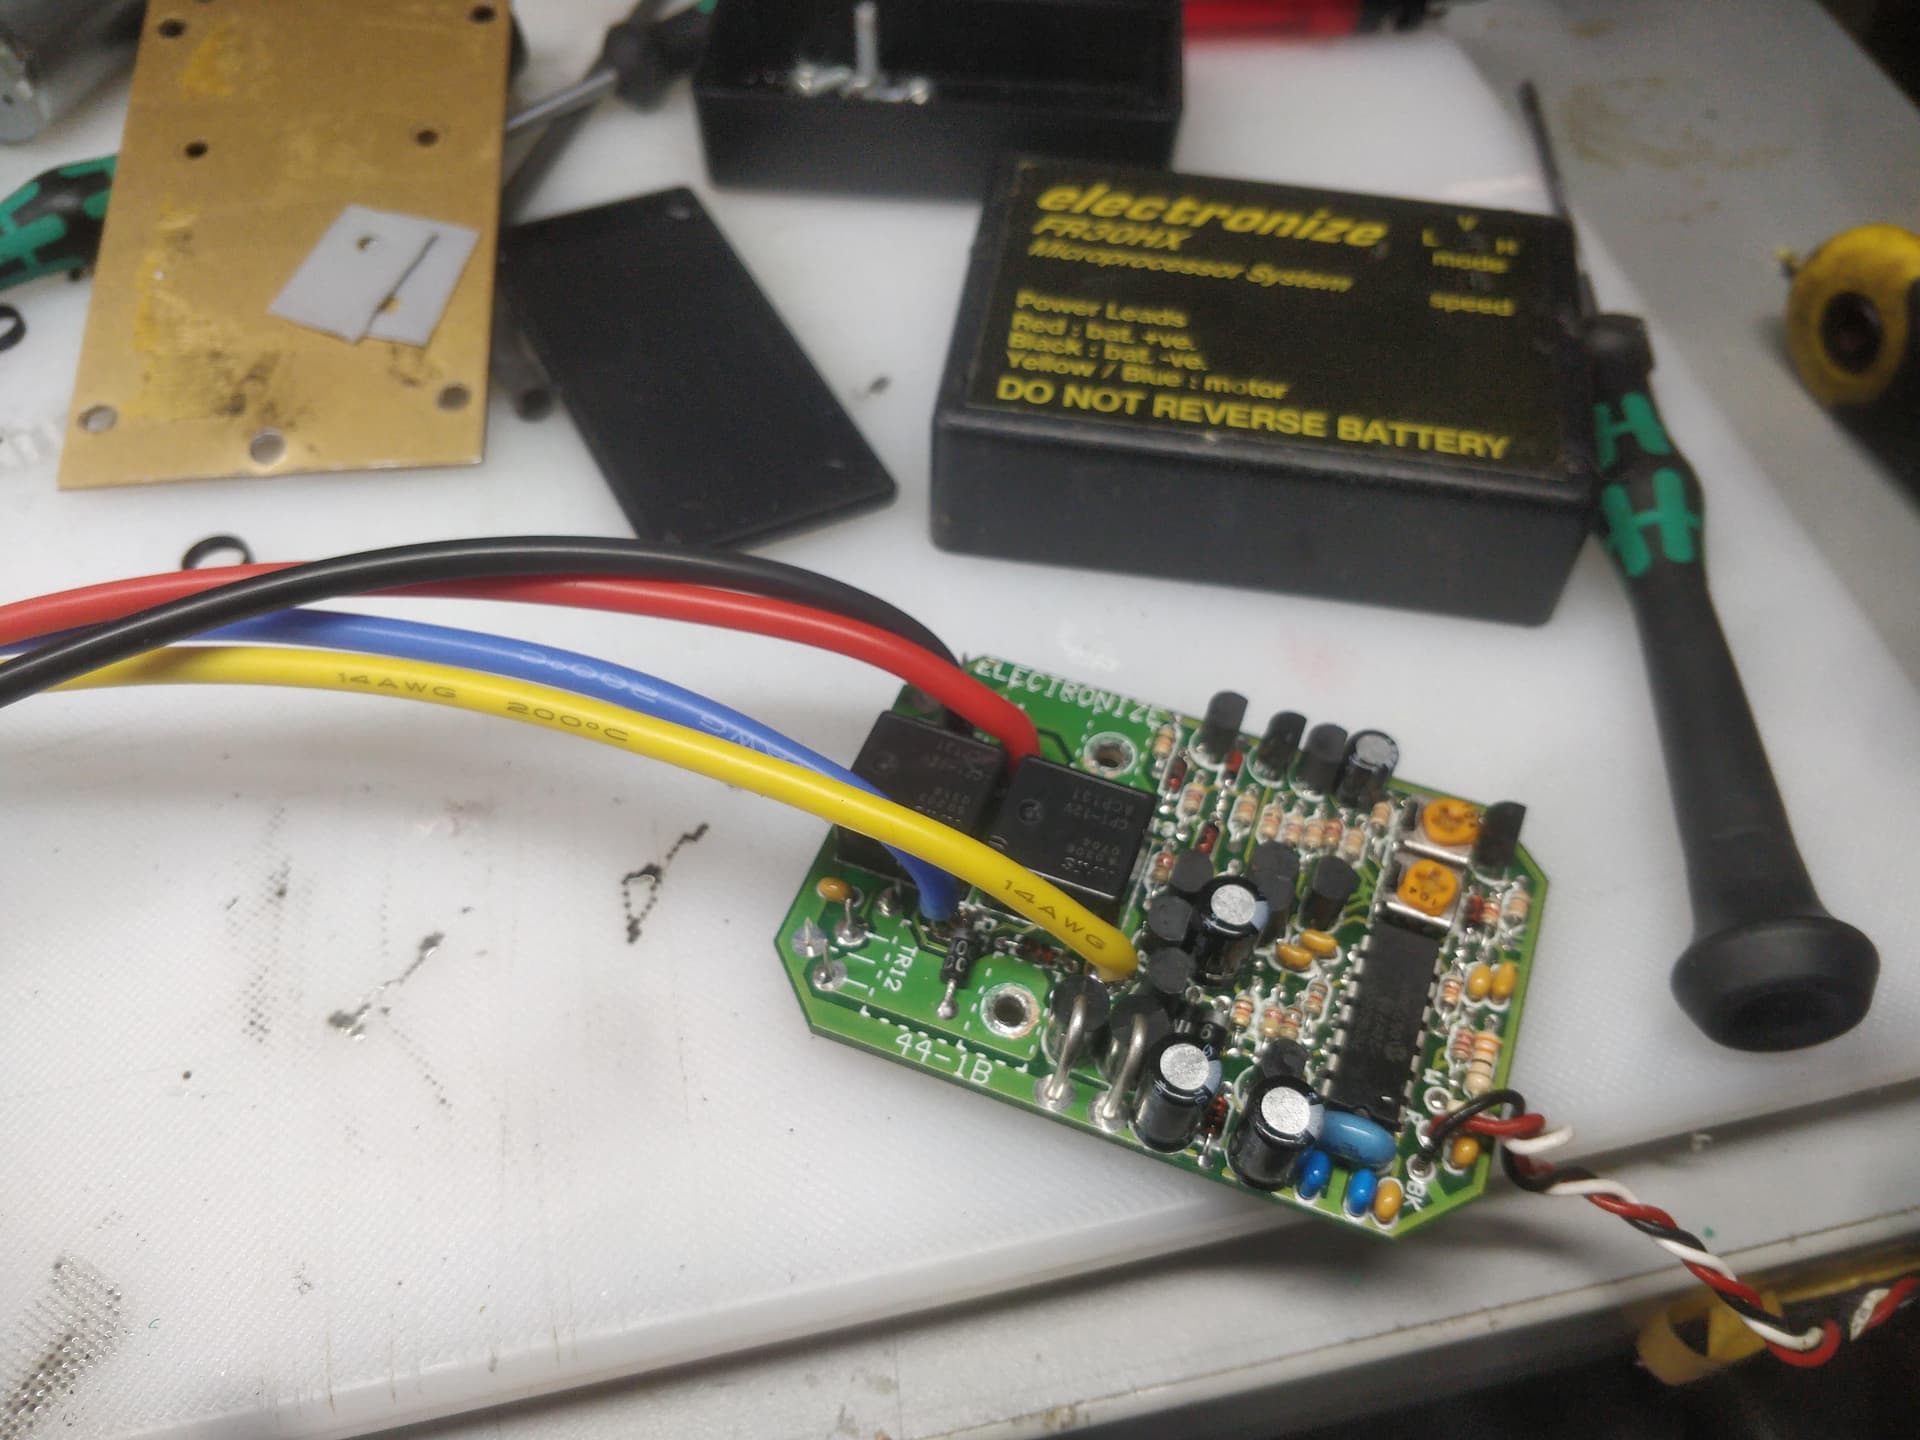
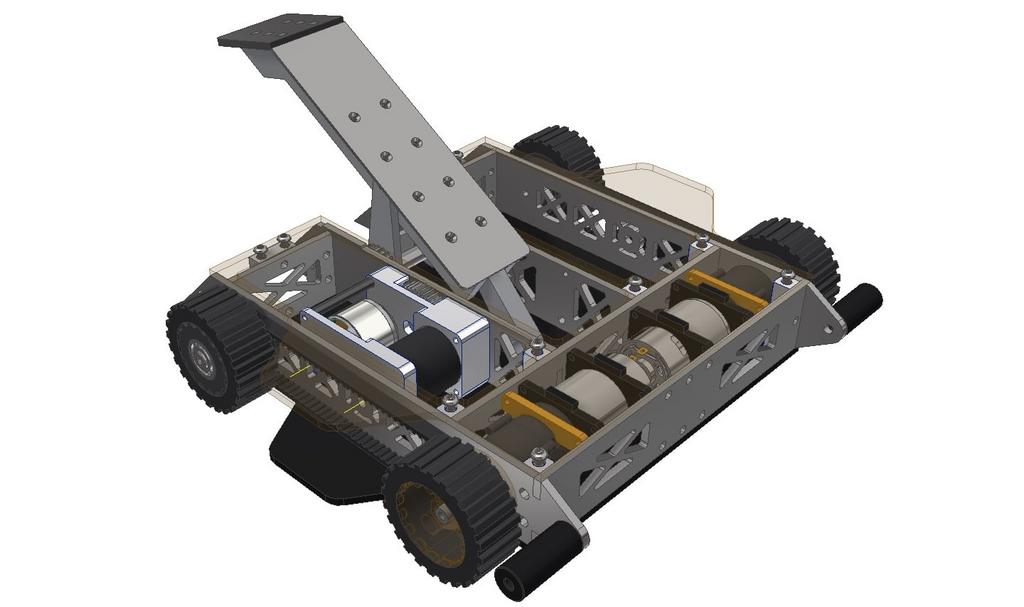
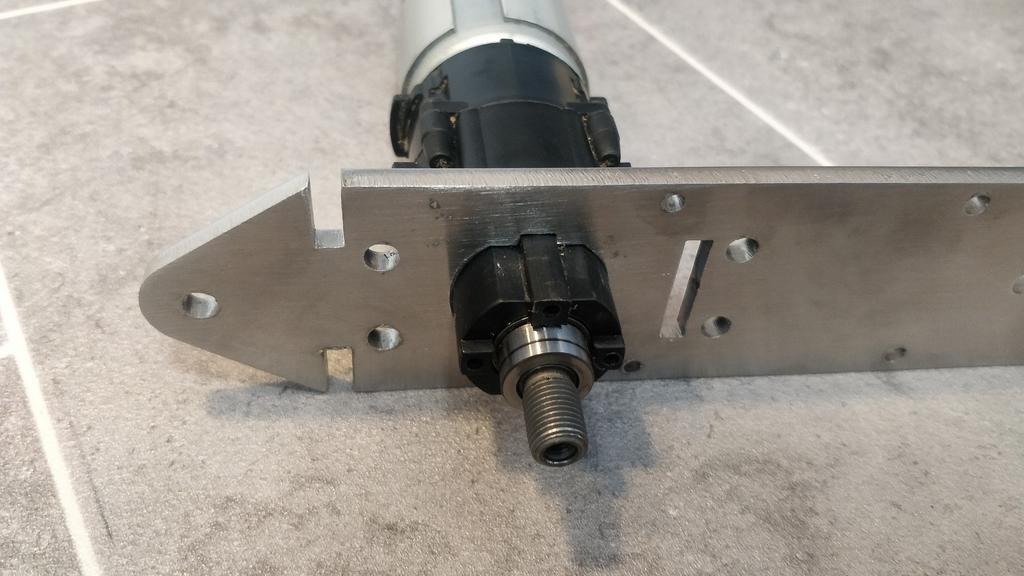
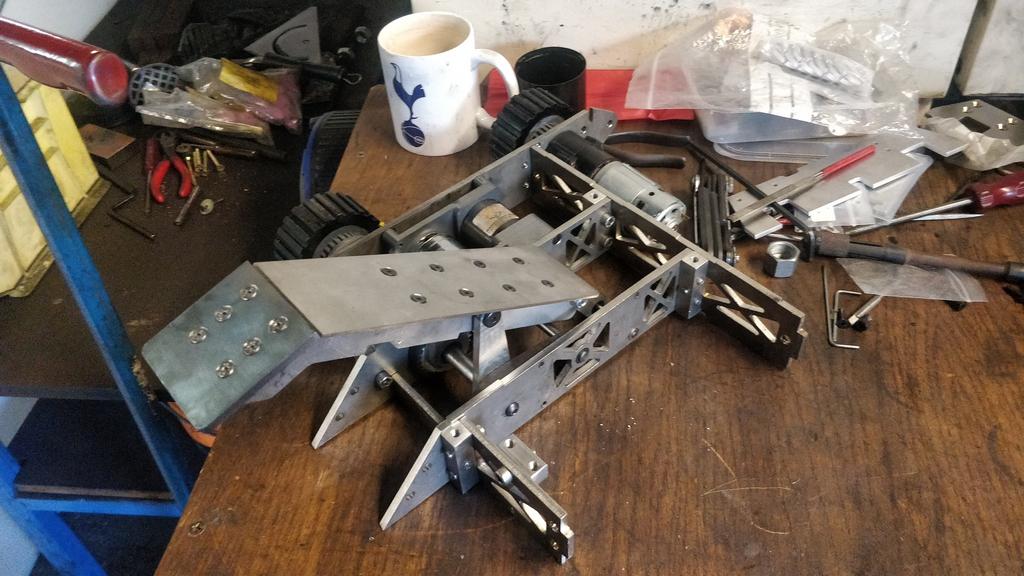
In order to fix the corner I digitally painted myself into I once again returned to the parallel mounting of the lifter motor. The gearbox is one of the mystic and illusive Saturn 64’s driven off a single chain stage by the original SK3 motor.

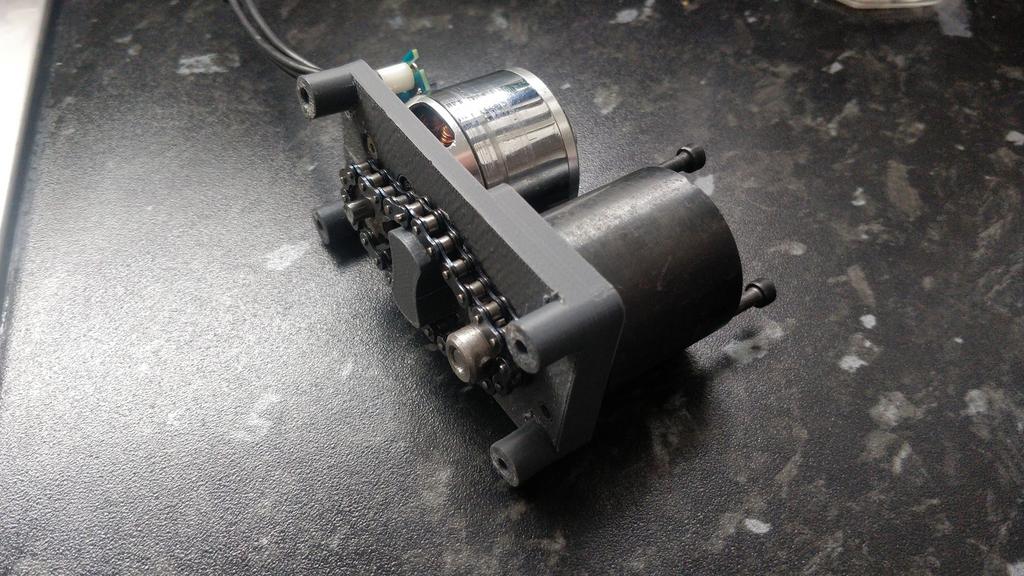
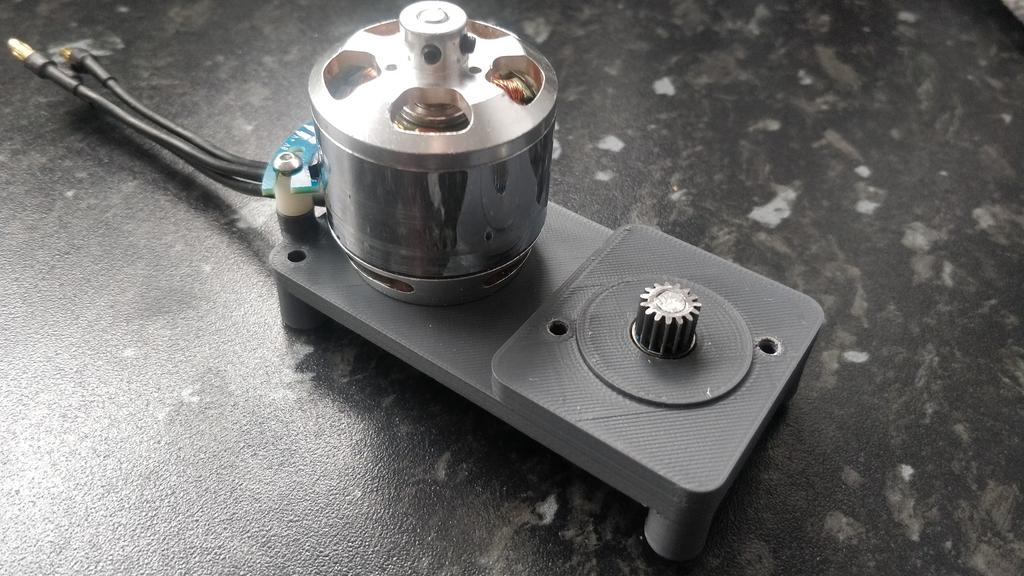
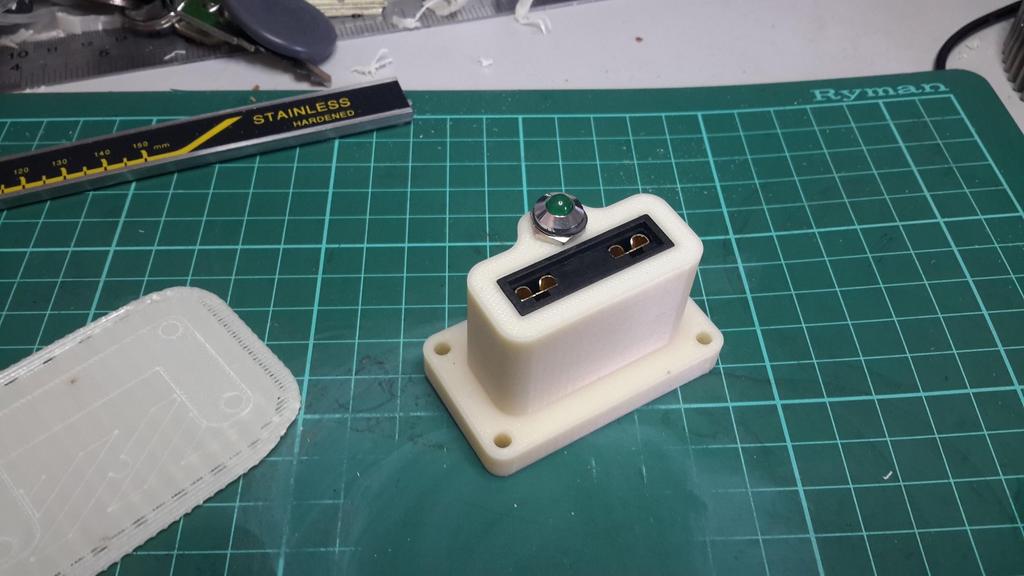
The motor has a custom sensor board which the lovely Si Harrison helped develop and manufacture. The gearbox housings are also 3d printed in a ballsy move - I had wanted machined aluminium but couldn’t quite bring myself to spring the dolla it would require. About 50 pence of filament seemed a better deal.

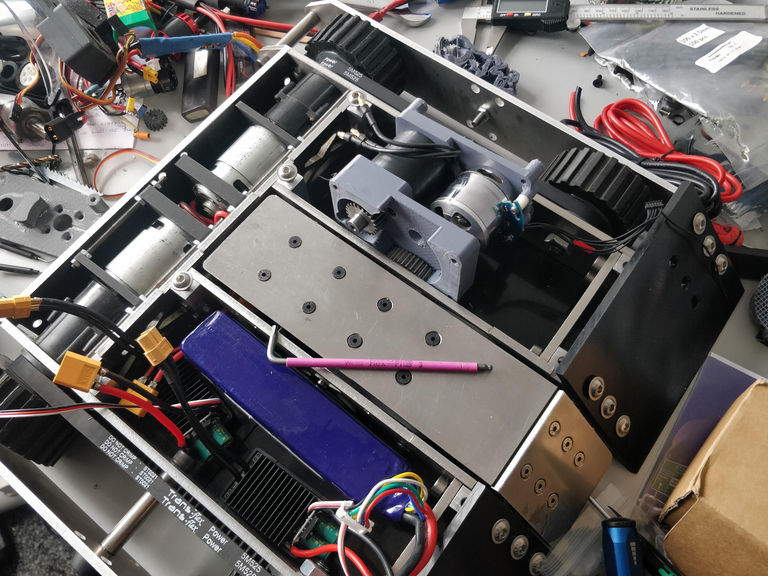
Back when I worked in the nightmare carbon factory I had a lot of time to kill and so this little lad often came with me to work for the week and I could get odds and sods done before returning home for the weekends. I was able to test the theory of the lifter mechanism pretty well here.

I was intending to get this running for last year’s farm bash but it clashed with the opportunity to see a running Tiger 1 tank so it sat in this state until December time when I could pick it up again and look at finishing it off for the event at the end of the month!

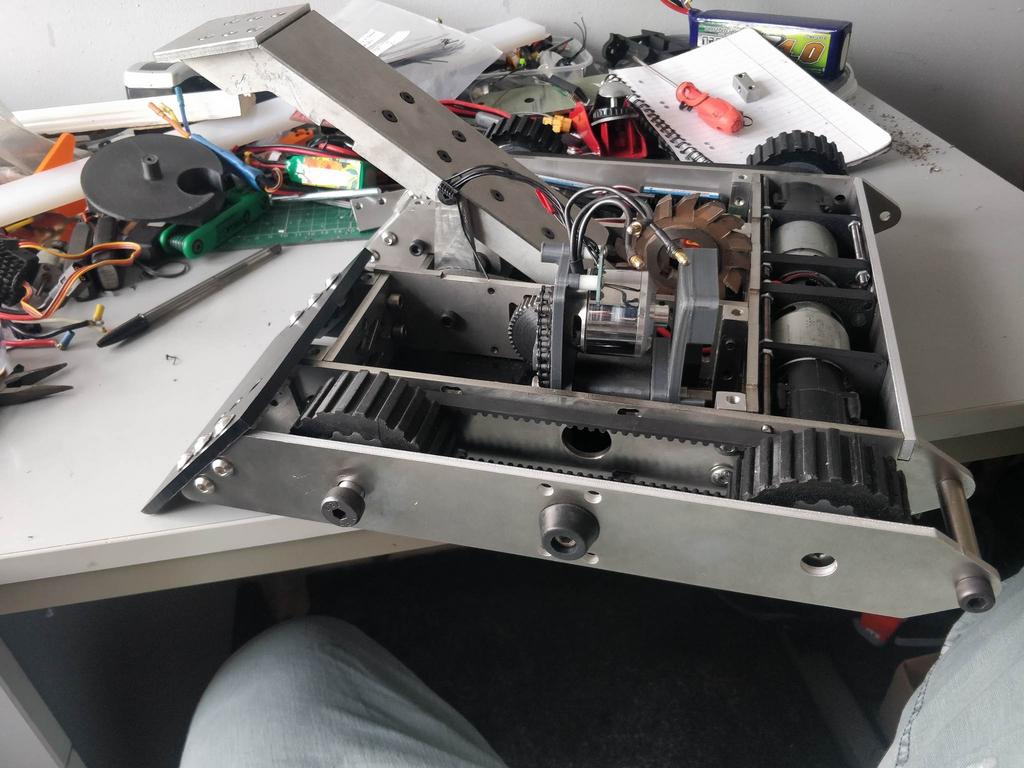
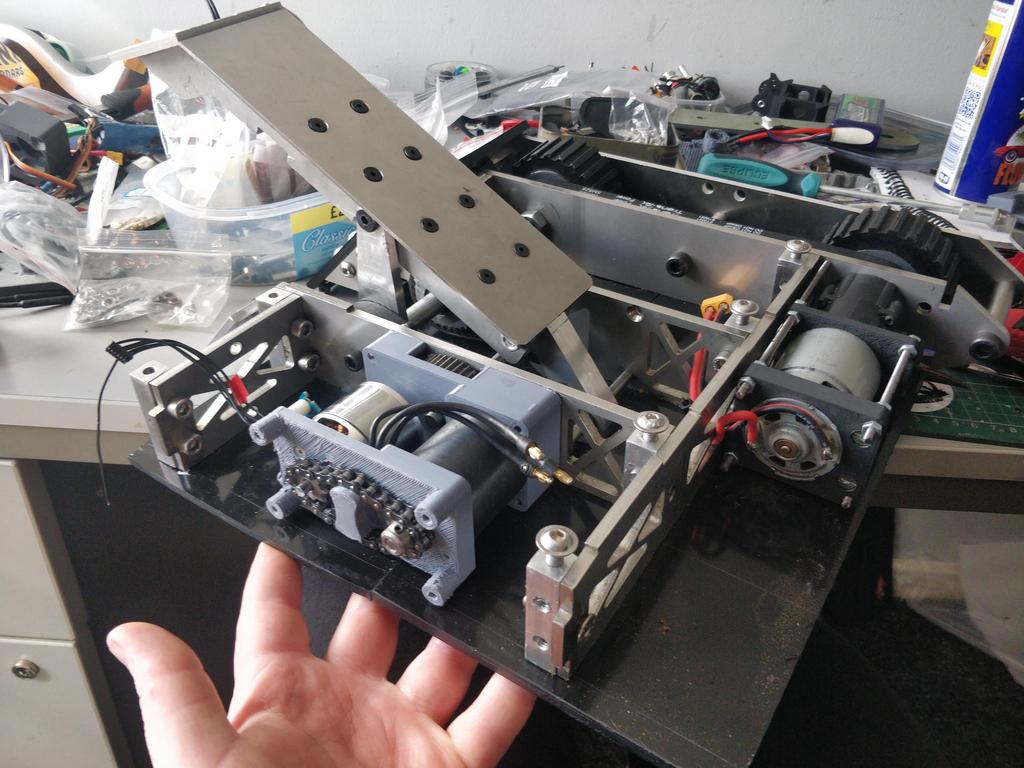
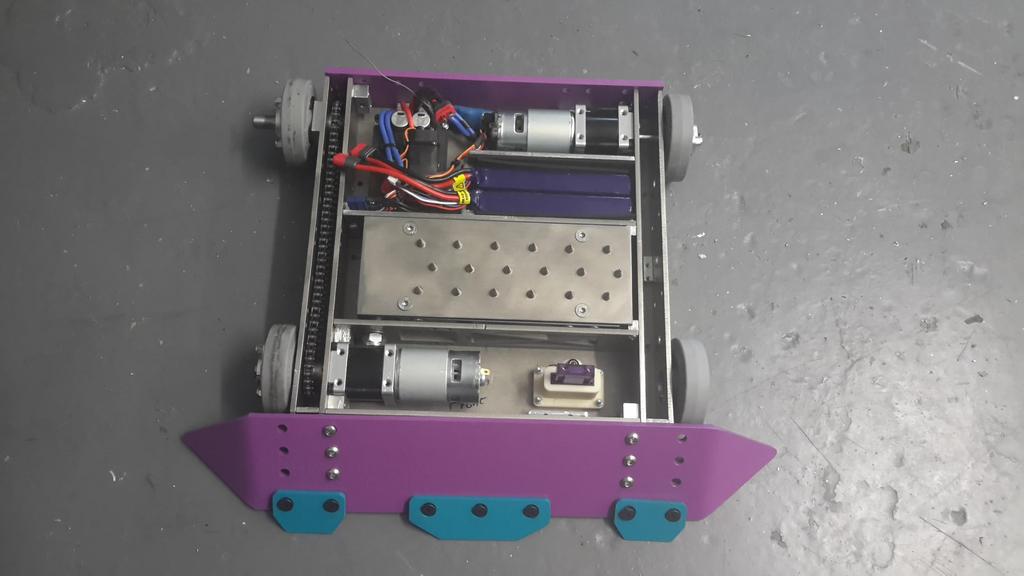
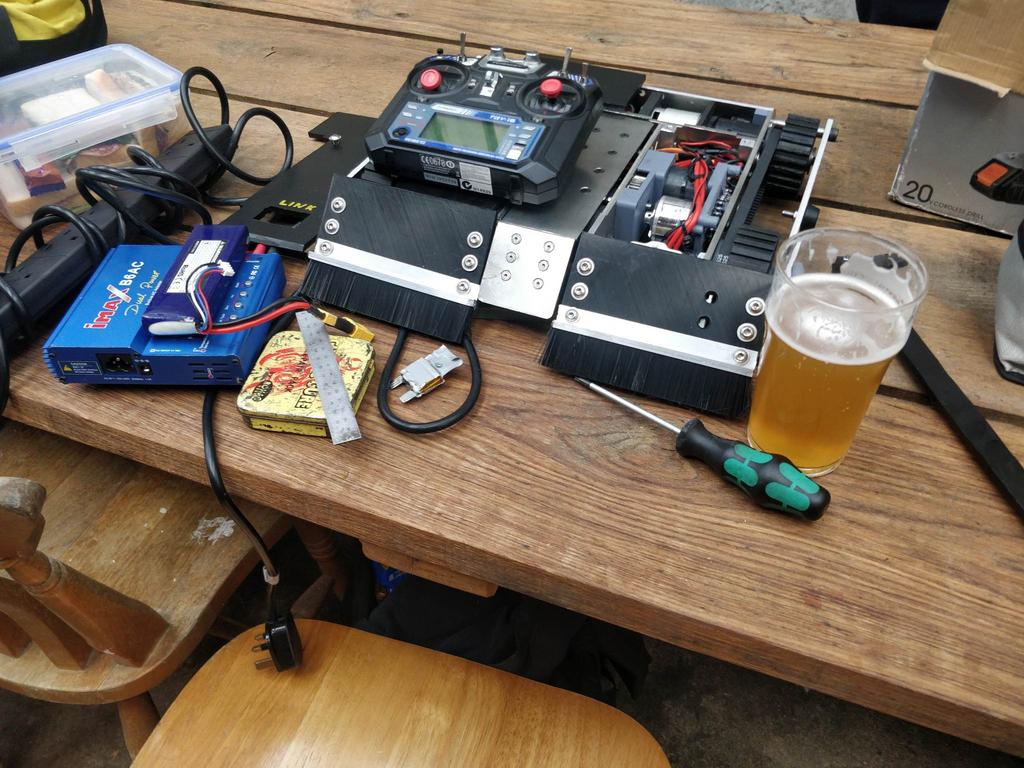
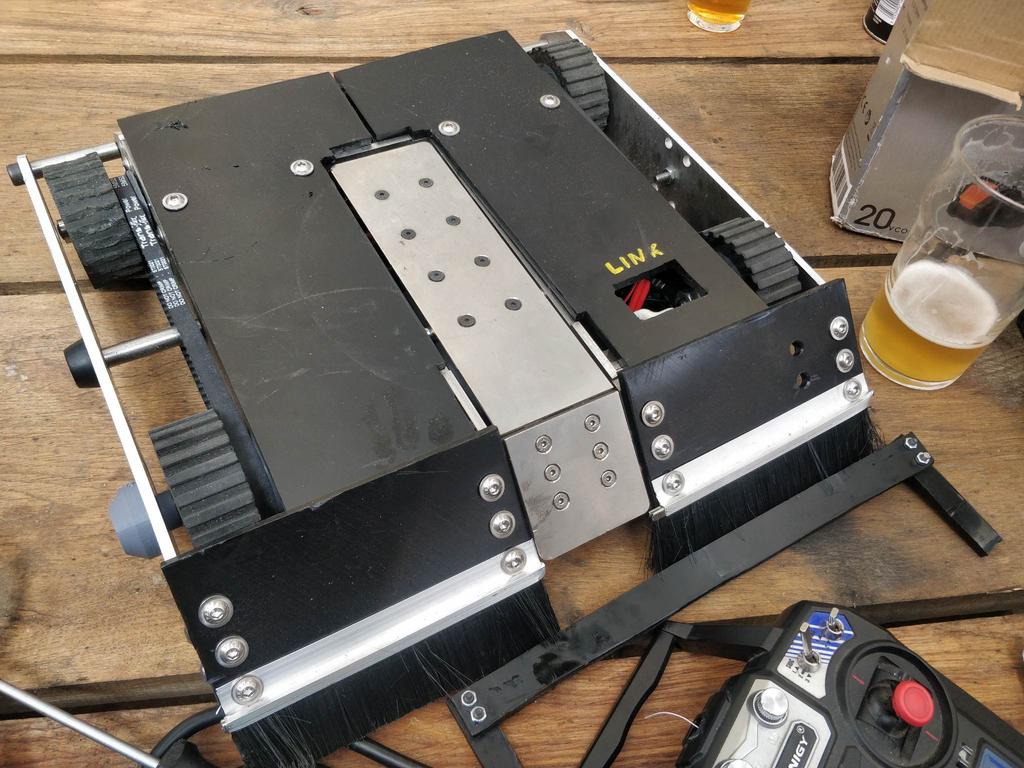
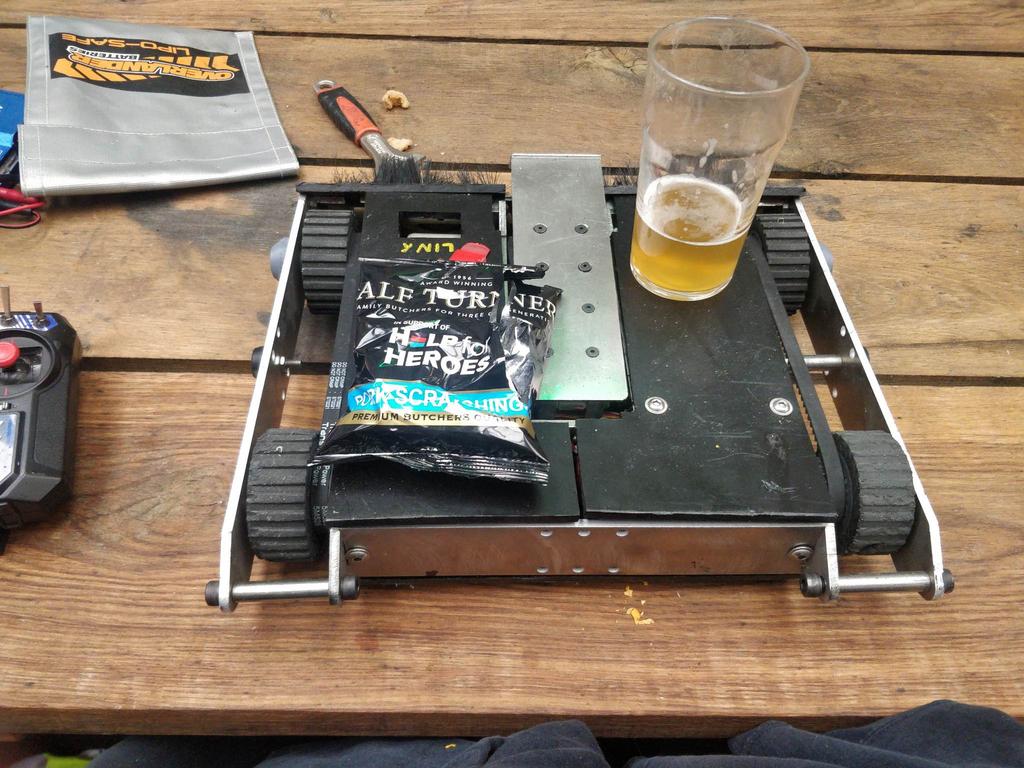
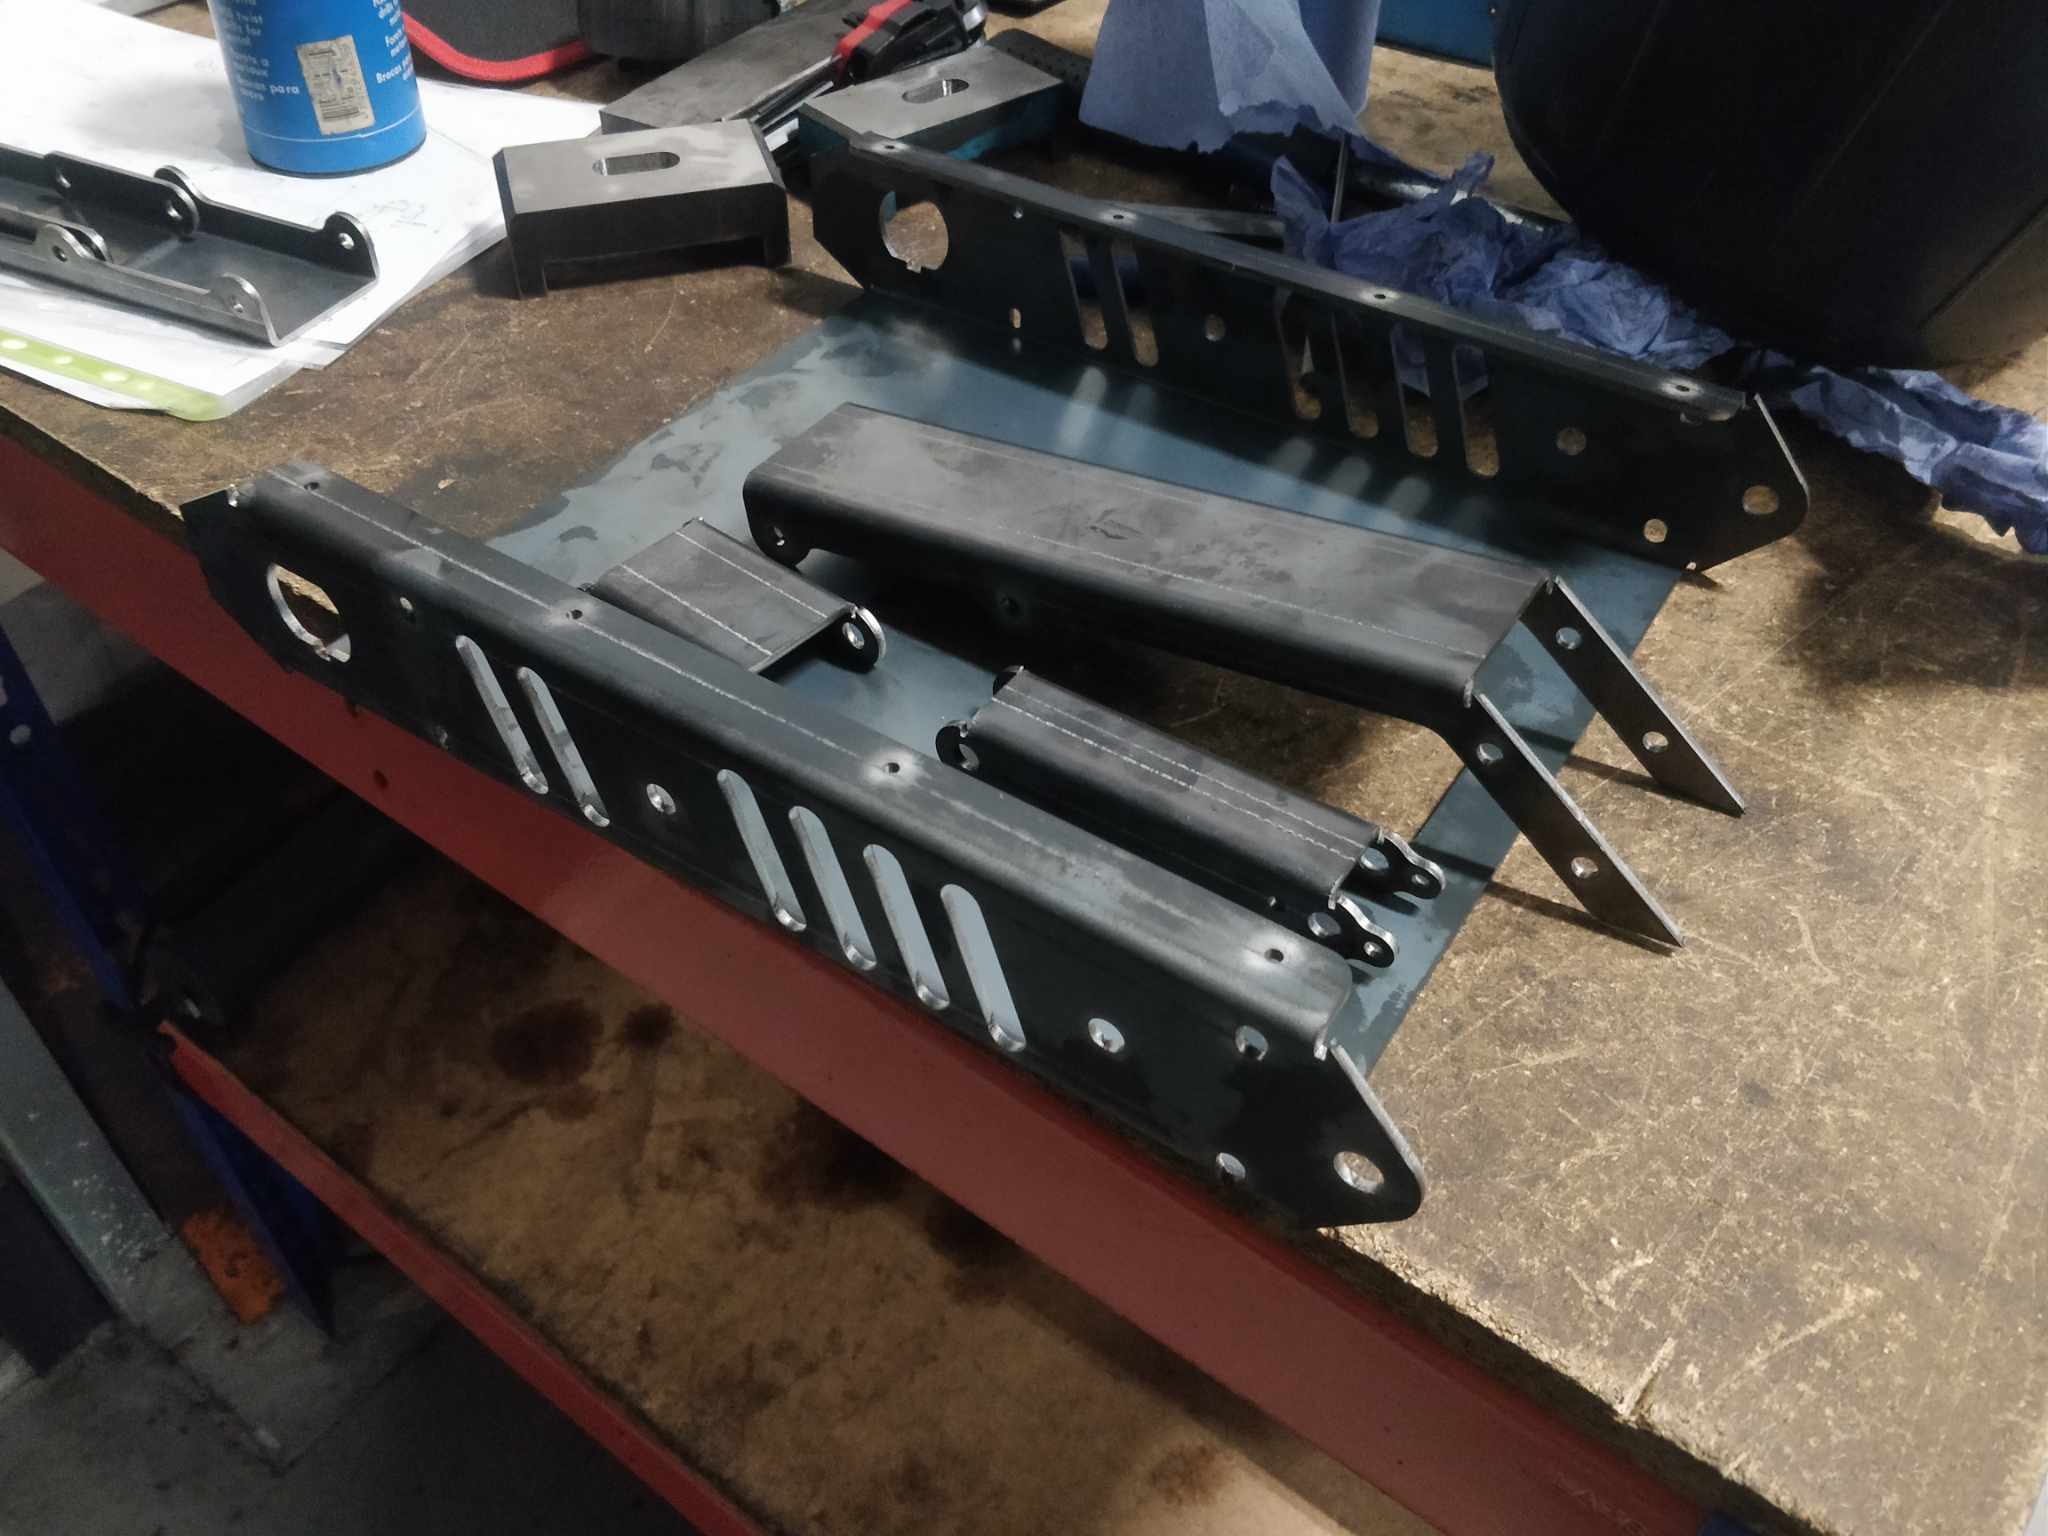
“armour” is fitted in the shape of some 5mm aluminium and 6mm UHMWPE and I have had it running under its own power which was pretty neat. The gearbox is getting a slight rejig and I need to draw up some internal braces and mounts for boring parts like ESC’s and links but it’s way more robot shaped than it has ever been. Watch this space!

9 Likes

looking like a lovely feather Harry, look foward to seeing it in action!

Cheers Jack, feeling a little outgunned compared to modern robots but should be all right for a knockaround.

Looking fairly sweet with the wedges and the side armour fitted.

Progress trundles haphazardly onward. Not quite as much got done as I hoped this week as I got bumped back to nights but I got into a decent routine of getting a few bits done in the morning before I crashed out.

I decided to reprint the weapon gearbox parts in PLA-ST as sitting over time the solid ABS had fractured at the bearing bore and it wasn’t a great print anyway as it was warped on one (non critical) corner. I’ve not touched PLA seriously in a long time as I tend to write it off as a material. I take partial blame for this as I buy the worst bargain basement filament known to man and don’t bother dialling in any settings for it. I took a little bit of time with this and while it’s not perfect I have two respectable parts out of PLA - ST and they feel robust enough to chance chucking them in a robot. Big ups to tree supports also. Love em.

Downside for maintenance is the whole bloody side has to come off to get them in or out which may prove frustrating. It did plop right into place in a pleasing manner though so it wasn’t a huge hassle.

Gear and key have been fitted on the output with a liberal application of our lord and saviour Loctite 638. The sprockets are going to get the same treatment as they’re only retained with a pair of grubscrews. I will flat or put a recess in the shaft to seat them a little better as they want to slip on retract sometimes. Potentially worth going up to an M5 too to be fair.

All slapped together and it worked pretty well on the first try! It sounds a bit rough, mostly due to the Insane Transmission Stack Up (& clown posse) but it is functional enough for the farm.

Still loving that motion! Wiring is going to be a bit interesting. I need to grab some heatshrink, some more wire (which helps for wiring I find) and something to stop any potential shorts on a metal chassis as I have to run cable over under and through everything.

3 Likes

Flatpack has finally had the wiring loom sorted and it can move and lift at the same time which is great for being a week out from the competition. It is a pretty poor showing compared to what I’d normally aspire to as I tried to hardwire as little as possible and keep spamming XT60’s to try and make my life less of a headache on the day if anything blows up.

As I clunked through my parts bin I found one of these combo link/fuse/light mounts I made a bunch of back when having a decent printer was new and exciting and I was still tentative about printing personal things during work time and with company material ( I very quickly became much more callous at that job and ended up rebuilding multiple feathers and a heavyweight in the workshop and nobody bothered me about it. I do wonder why it we went bust…)

You can see one in place here on the ill fated side flappin’ lightning style Flatpack THAT WE PROMISED NEVER TO SPEAK OF AGAIN

I elected to give it a whirl and a last outing in this Flatpack as it will be fitting to end out the era and really simple to kill 3 birds with one little PCABS stone. It takes a maxi blade fuse as the link and has a cute little technobots LED screwed in.

Running 4s in the end as I found the two surviving Hobgoblin drive packs and they took a few cycles without bursting at the seams and unleashing a lithium scented death mist. I need to cut up some foam padding (wilkos has gardening kneeling mats for a couple quid at the moment for all interested parties) I’m pretty sure the drive motors are 9.6v native so it adds a decent amount of pep. I still am in great need of a lid and have ordered some HDPE sheet to hopefully get here in time for me to pull a rush job one evening but if that fails I’ll have to make do with some chopping board or similar.

Roll on Saturday.

I for one greatly appreciate the side flapping, I don’t think I was into the hobby when you built that, it looks super cool, very fun weapon.

The final build of this Flatpack looks incredibly clean though, awesome stuff, can’t wait to see it in action on Saturday! :slight_smile:

Always loved flatpack, excited to see it revived! And yes the side flipper is very cool

Gosh, well wasn’t that fun.

I managed to nab some sheets of HDPE in time and was able to slap together a passable lid. Frustratingly they weren’t quite lined up and I had a 3mm gap where the two sides met in the middle but hey, it’s BEV spec and I was short on time and inclination so I just sent it.

The more eagle eyed among you will notice the addition of some draught excluders - which serve a number of stupid purposes. It was a funny idea (more amusing in concept than execution I admit) to give a smidge of ground game without trying too hard and it was a way of gently sweeping the arena of any debris. It also functioned as a false moustache as part of a clever disguise “well no sir, this isn’t Flatpack of old, it is An Brand New One”

It was finished up in the morning before I made the long and arduous journey to Crewkerne. Once there I stood around awkwardly for a hot minute before I remembered the broad strokes of human interaction and, more pressingly, that I had a robot to tech check. All good and it flew massively under the 11kg mark so that was handy.

I got a beer and charged batteries to wait for the first fight. My draw was first up with the super cool Hell’s Angel and the remarkably pointy Talon.

Dave ran the frying pan which made an amusing ‘Clonk’ when fired into other robots or the floor. My two opponents seemed very intent on waging war with each other so in the absence of any combat I elected to chase a balloon around the floor until a slot opened up. Flatpack was nippier than expected and was able to dart around in quite a sprightly manner. It wasn’t the most controlled I have ever been as I was fighting grip and the floor somewhat but I went the distance and lost out (deservedly so) on an audience vote to Dave and Hell’s Angel. There was some shouting of smoke at the end of this fight but it wasn’t anything electrical. Jury is out if it was a bit of MDF spraying out of my old DeWalt drills or just paint rubbed off the floor.

The one tyre that was softer than the others wore down to beyond realistically useful in that first fight - too much wheel spinning. The others showed almost zero wear after the whole event so I know what works. I had my next fight up against Chris and his wonderful axe robot ‘The Infernal Abuse of Fred’ where we both suffered from silly problems. Him, a grub screw and myself getting beached on the floor. Slightly limp wristed show - the robots too!

I had another beer and tried some critical drinking to solve the problem. The best I could come up with for the least amount of effort was bending the front wedge up at the leading edge to eek out a bit more clearance on that side. Running the robot backwards and forwards on the desk and the ground proved that I still had good wheel contact and I was more confident I could drive over every part of the arena.

Fighting Agamemnon I had a lot more control and was able to ramp off him a few times and generally prove an annoyance rather than a threat. It all ended underneath the Cat. Me trying to drive and lift with an additional 20-30kg on top proved too much for my fuse which blew leaving me dead in the water.

Flatpack did one whiteboard under the capable control of a small child. Amy did a great job and lasted for almost the full fight before twirling into the pit. Mechanically the robot is still pretty sound bar some sheared keys in the lifter output. The prints held up well and electrically it was solid too (fuse issues aside) Lots of cool notes taken for upgrades and I have a much better understanding of how 2 BEV gud.

I see much more power tool abuse and questionable Chinese electronics in my future.

2 Likes

Love a Harry Hills diary/report. When it drove well it was driven very well, but I wonder why that specific wheel wore down a lot faster than the others.

1 Like

Silly thing Nick. 3 out of the 4 wheels were 60a polyurethane and I ran out of this whilst casting the final one (too many FW track prototypes) so in a pinch I cast it in the 30a I use on my beetles.

I think I could have gotten away with it if it was one of the fronts but oh well, chalk it up to experience

Live and learn and all that. But yee, loved seeing it at the weekend. The action on the 4-bar is very smooth and excited to see it again in the future. :grin:

Thanks for letting Amy have a go at driving, she was beyond buzzing :wink: :slight_smile:

1 Like