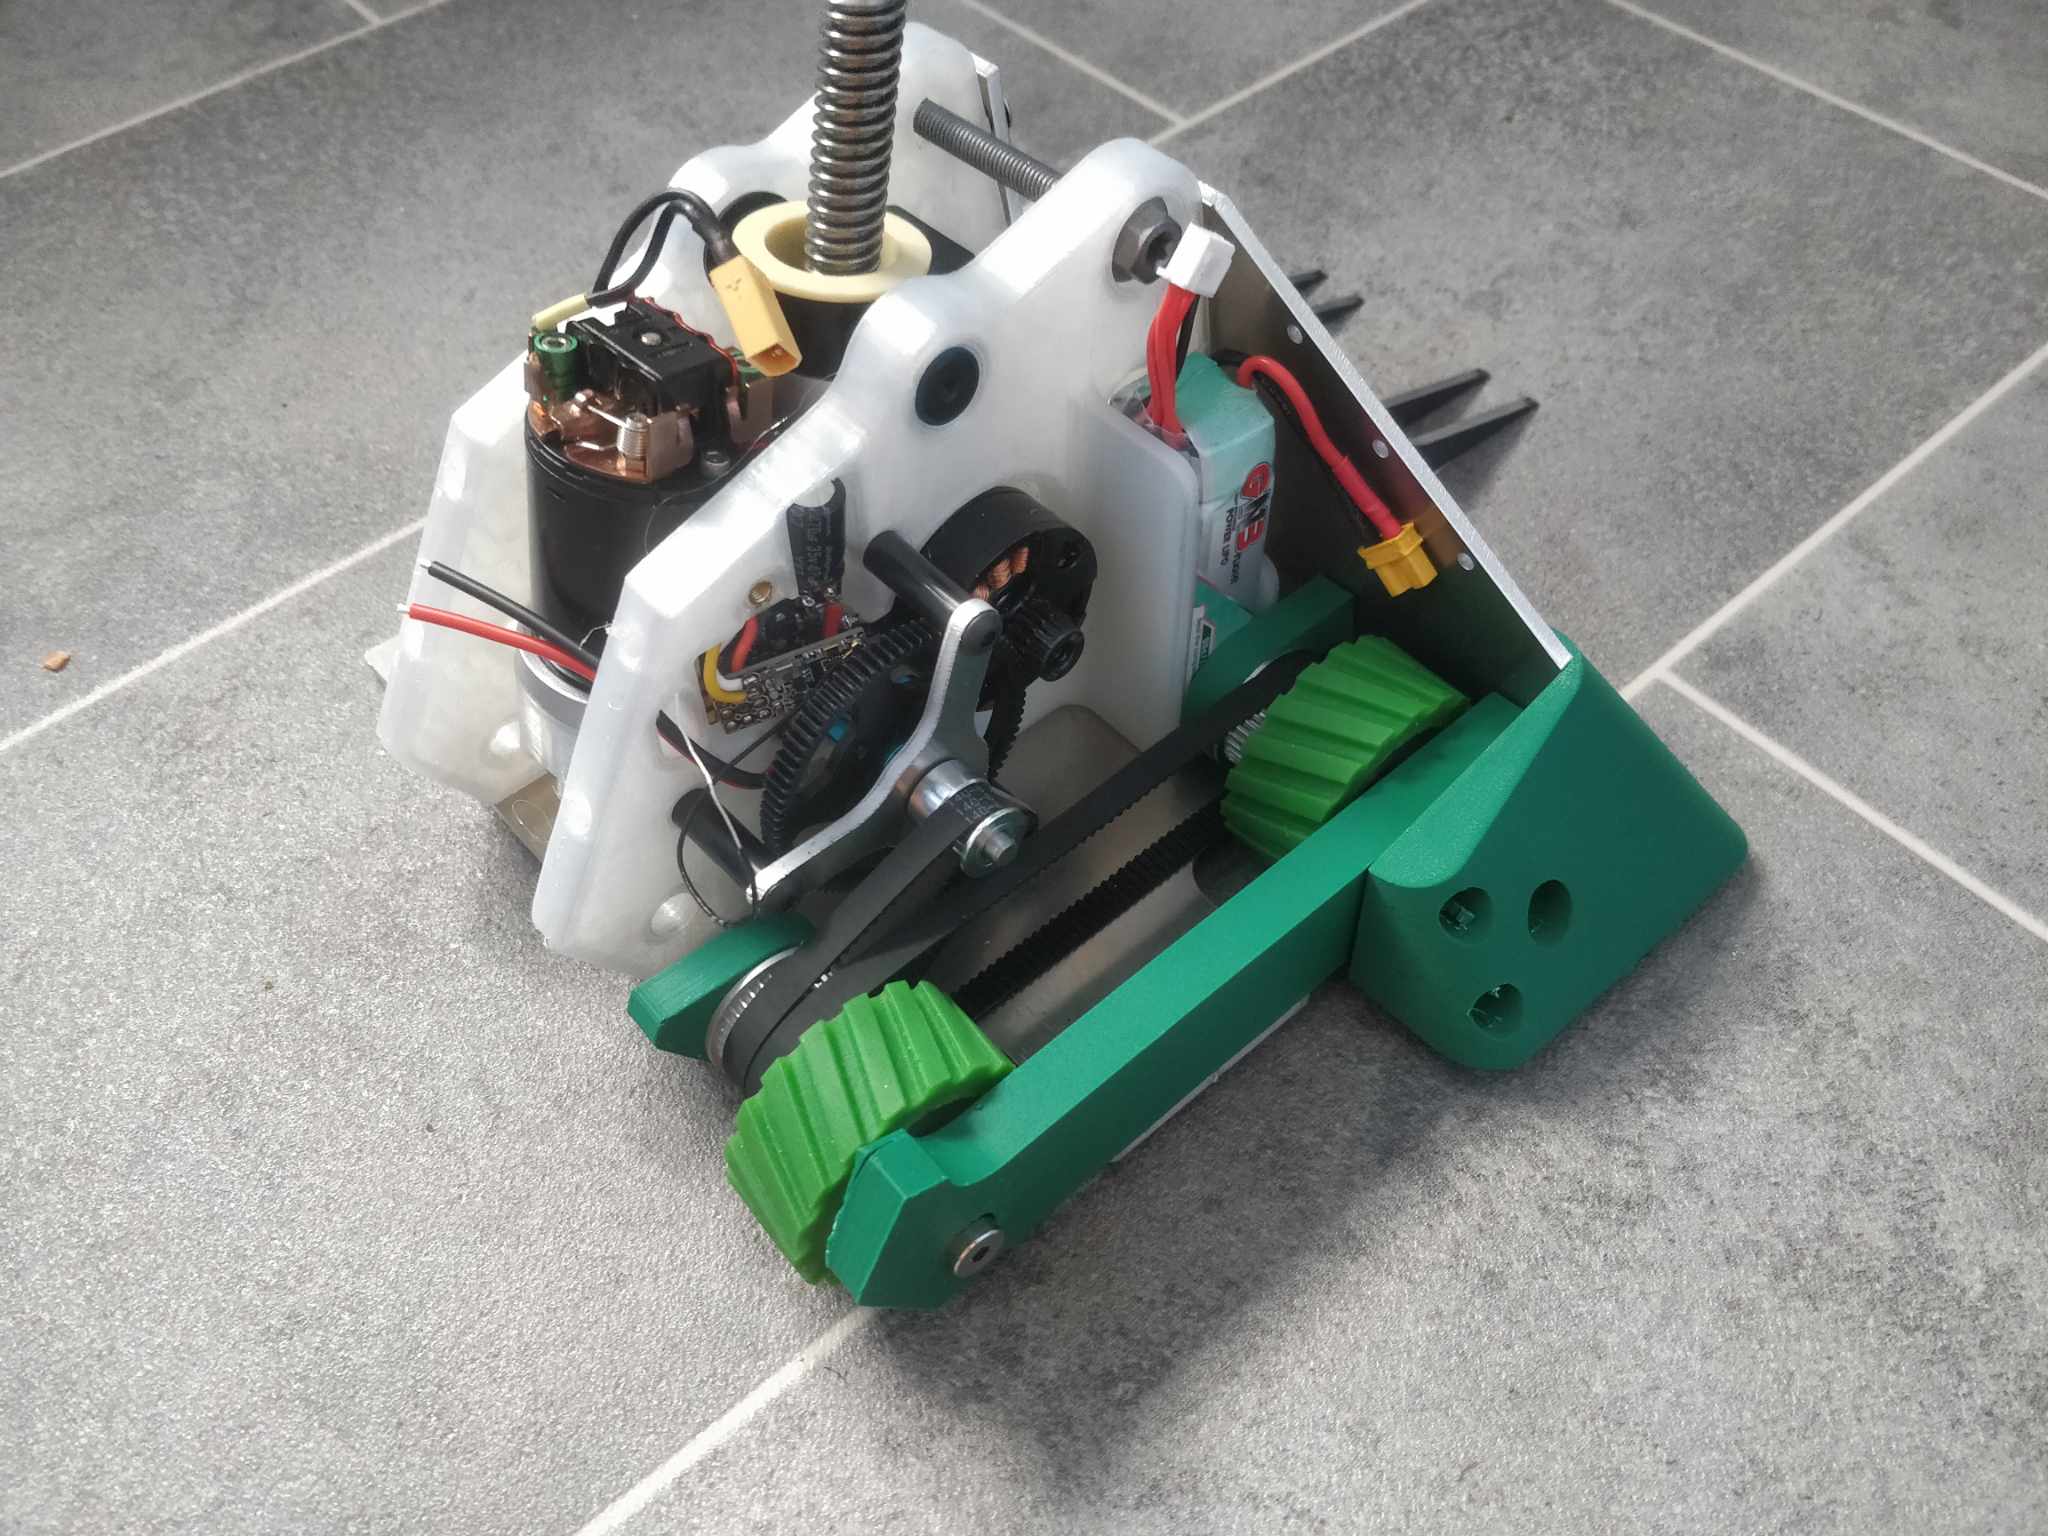
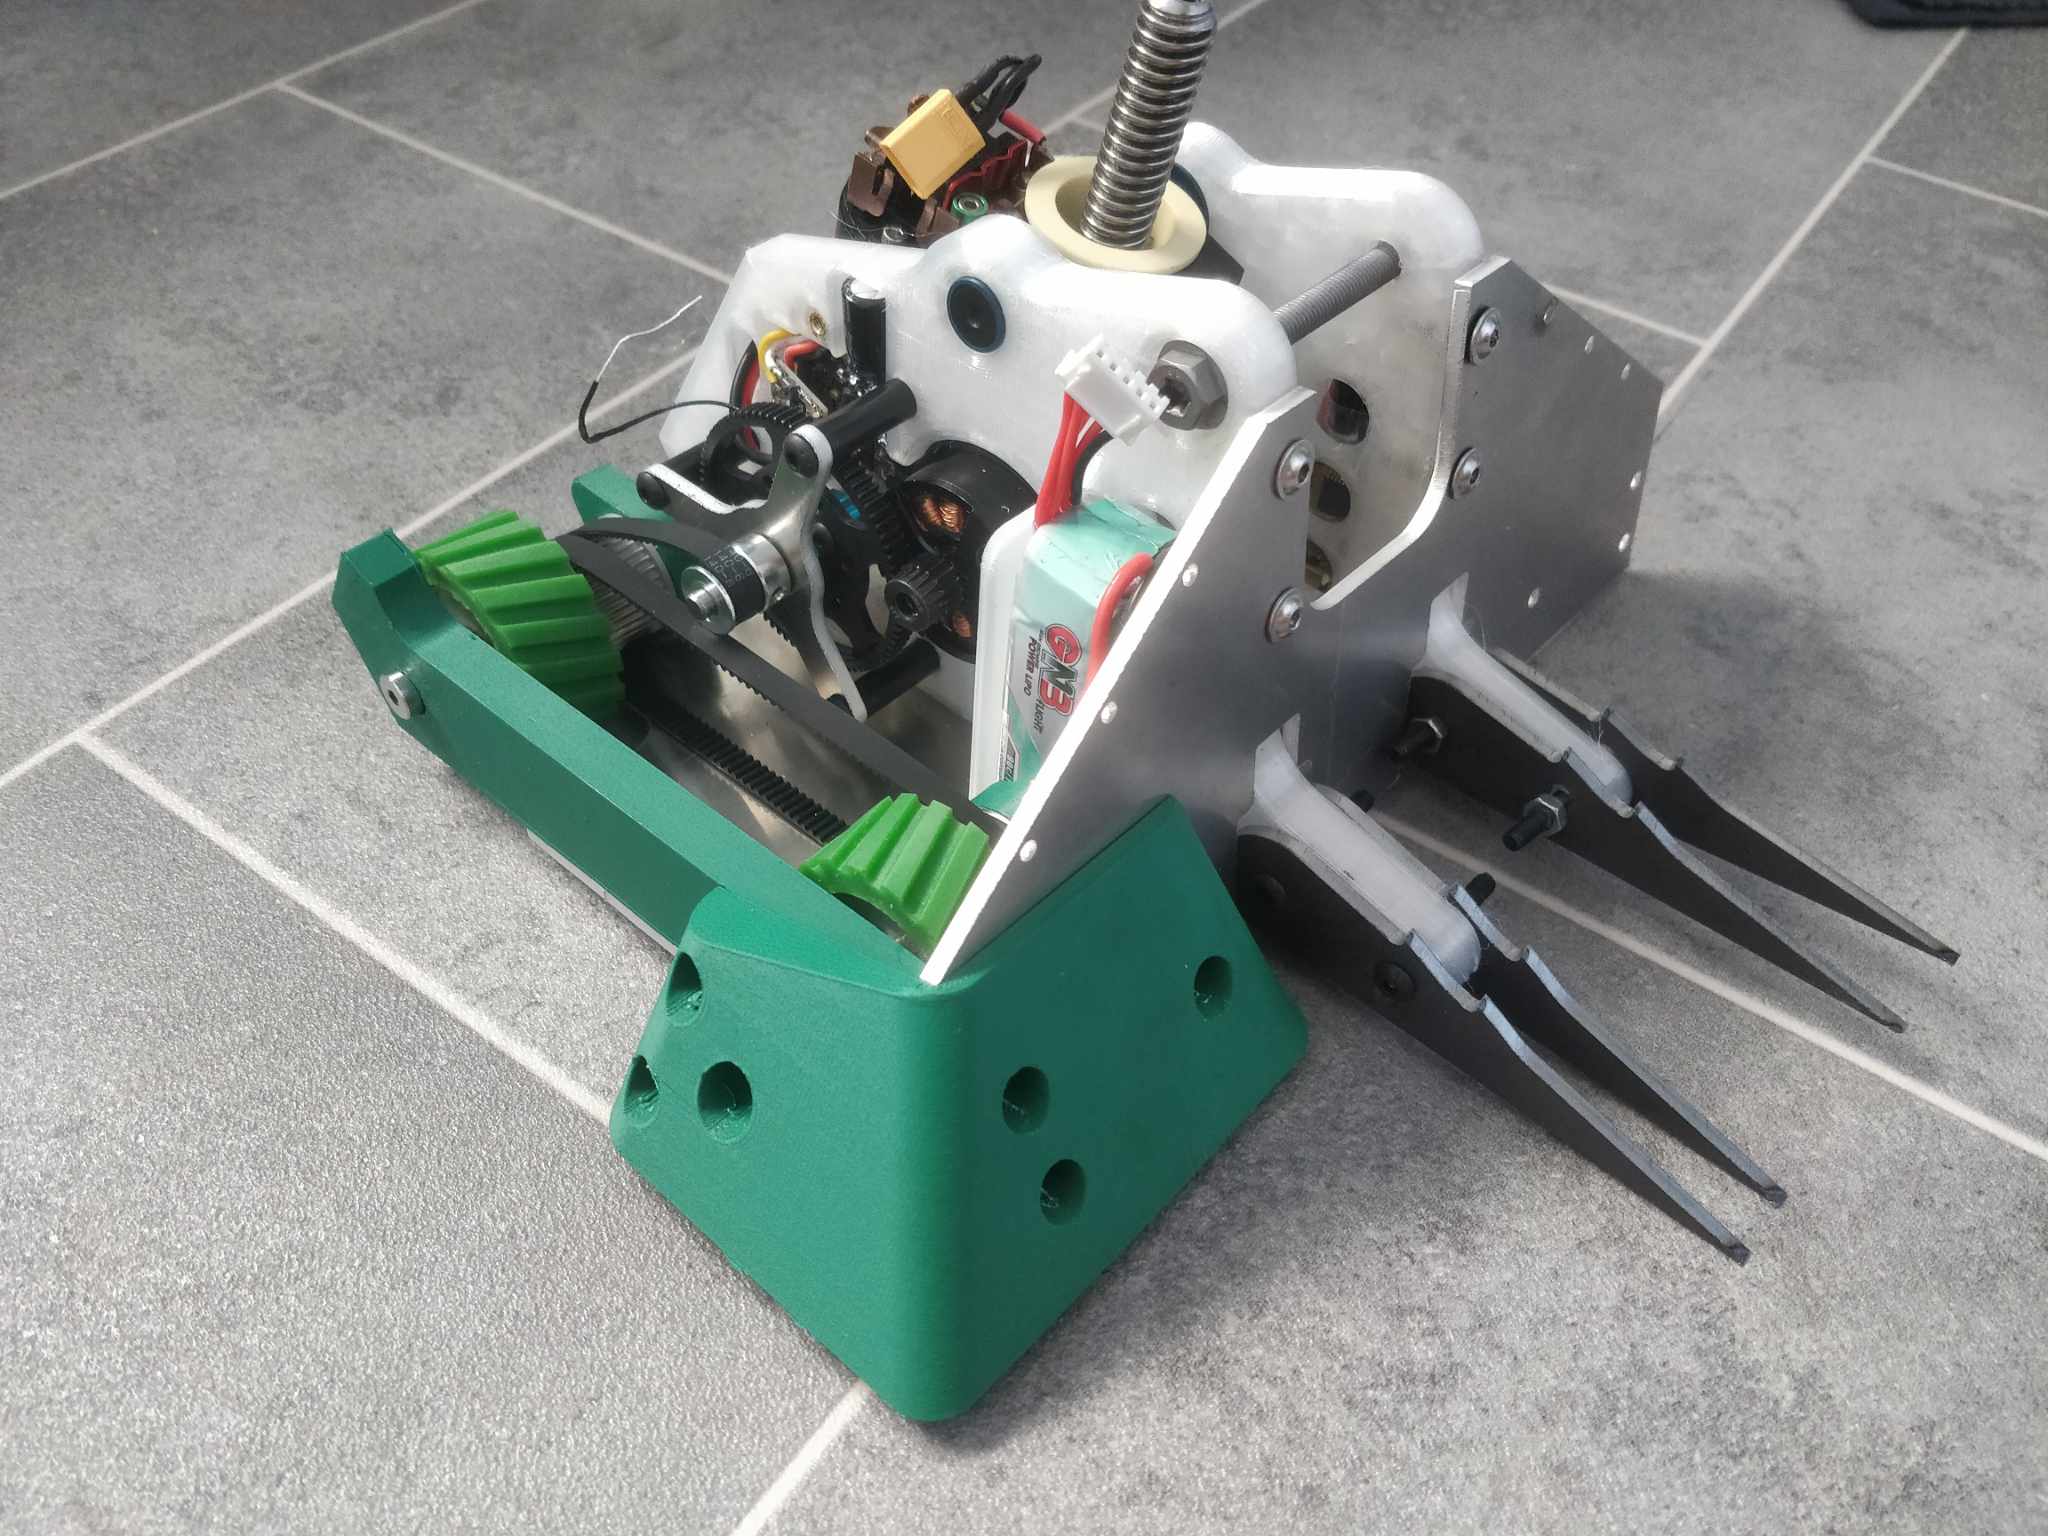
Wheel guards/side rails look great.
In addition to looking nice and losing a few grams it should also make it harder for verts to get bite.
Win win win ![]()
Wheel guards/side rails look great.
In addition to looking nice and losing a few grams it should also make it harder for verts to get bite.
Win win win ![]()
The chamfer looks so slick, how do you go about that by hand?
Missed the Q @Joe it’s just done with a 45 degree chamfer bit in my router. Forming bits open up a huge amount of possibilities for funky shapes as the bearing just follows whatever the contour is. You can leave it super shallow for a cheeky debur or edge break.
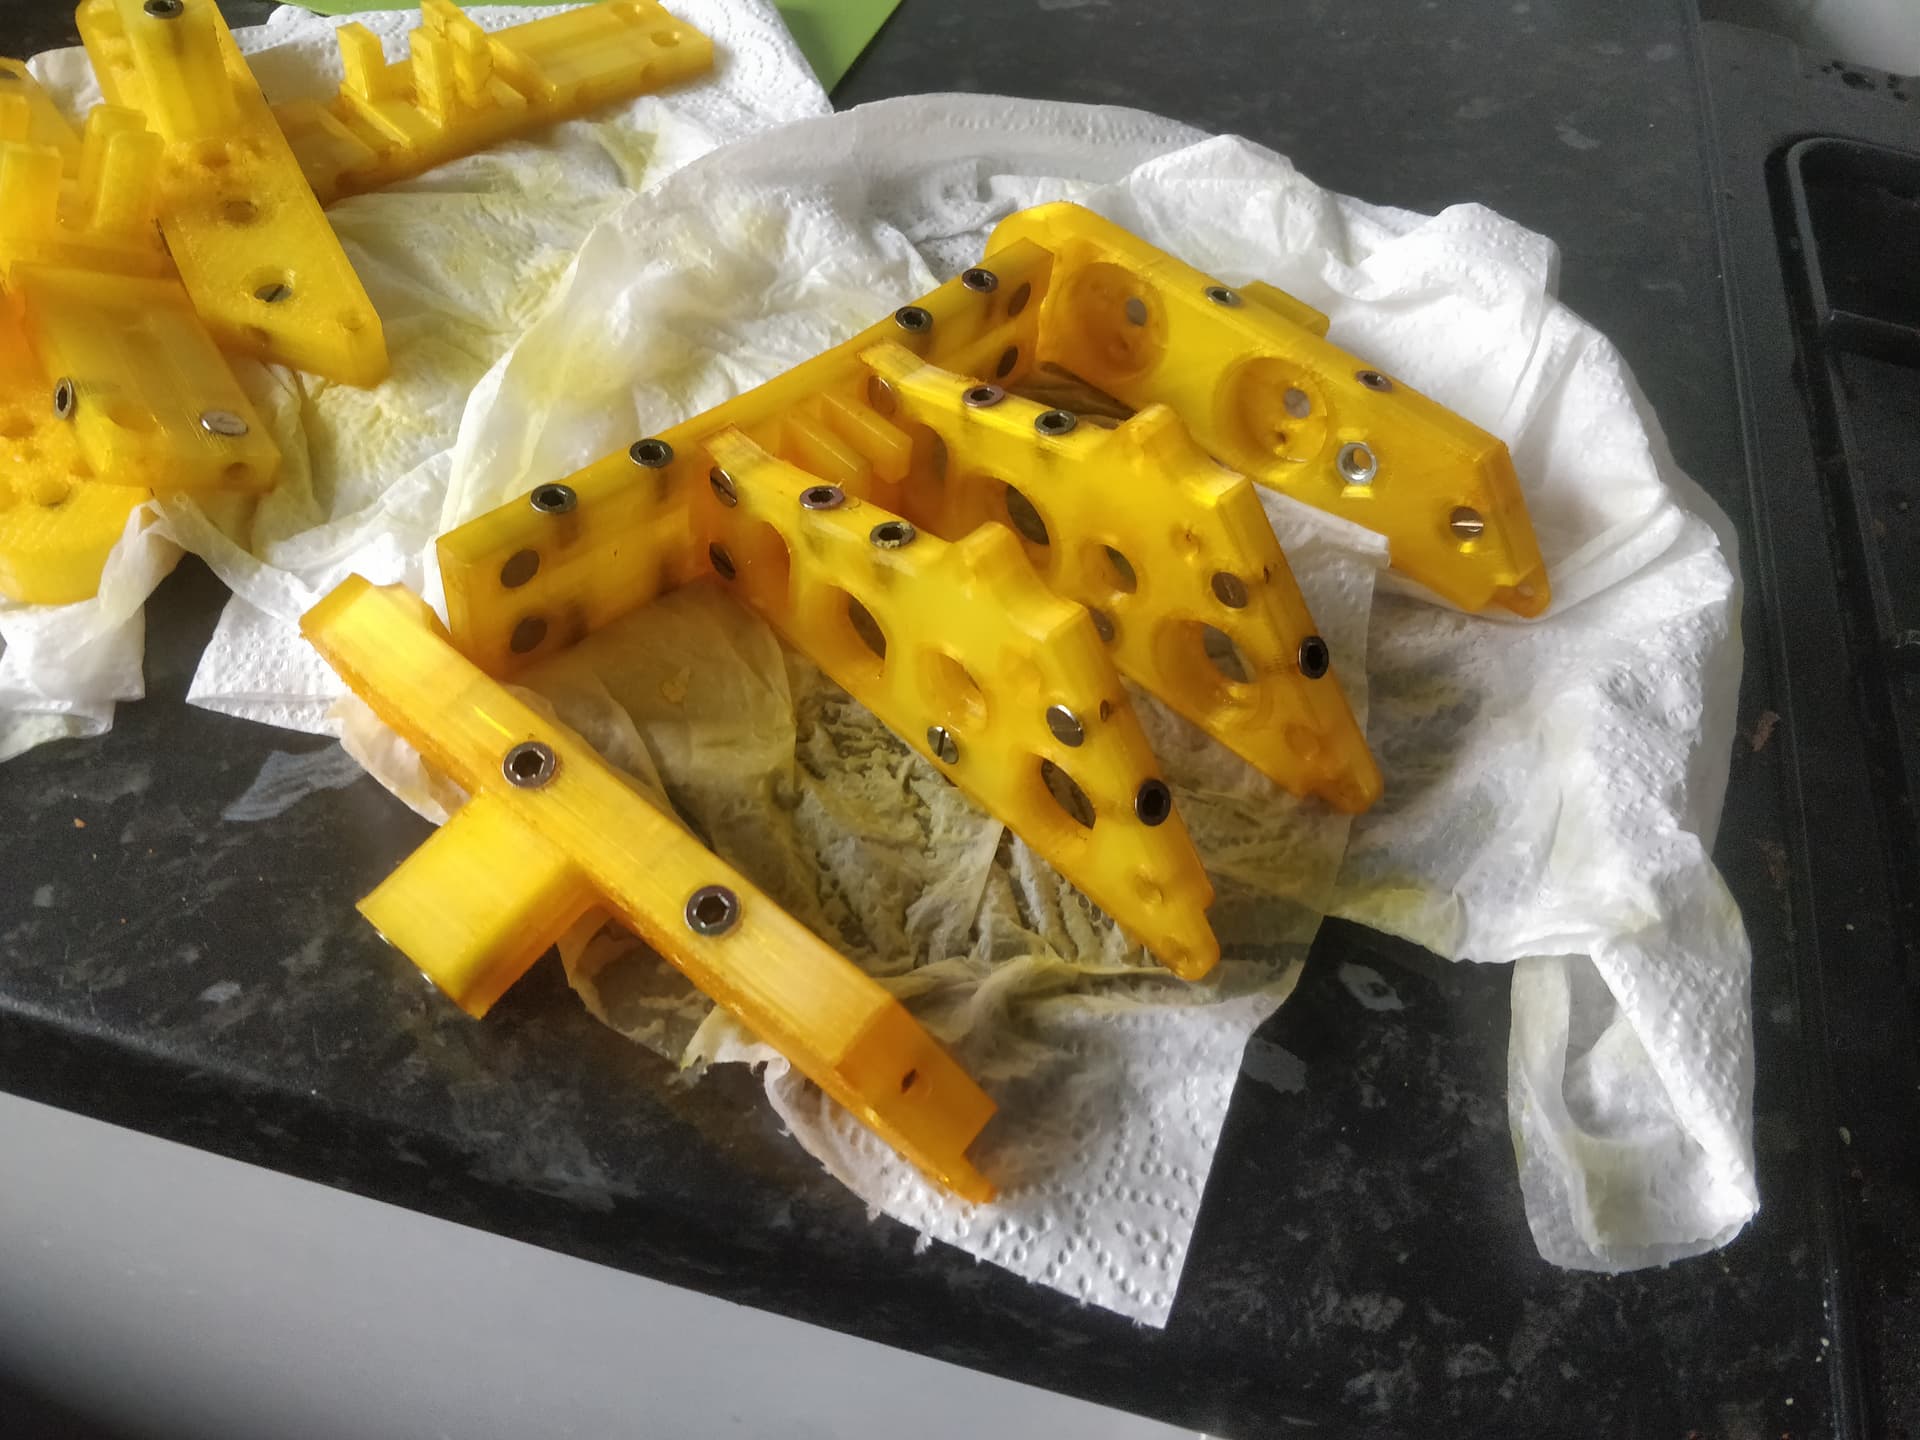
Printed templates and this is my new best friend. It’s jolly messy however and I think I have strained my marriage somewhat with the little plastic slivers making their wicked way throughout the house.
When life gives you lemons etc. I did the classic yellow dylon bath for the printed nylon parts and it came out pretty well again. I’m looking forward to doing a robot that isn’t yellow so my hands don’t look quite so jaundiced/nicotine stained after fishing them out.
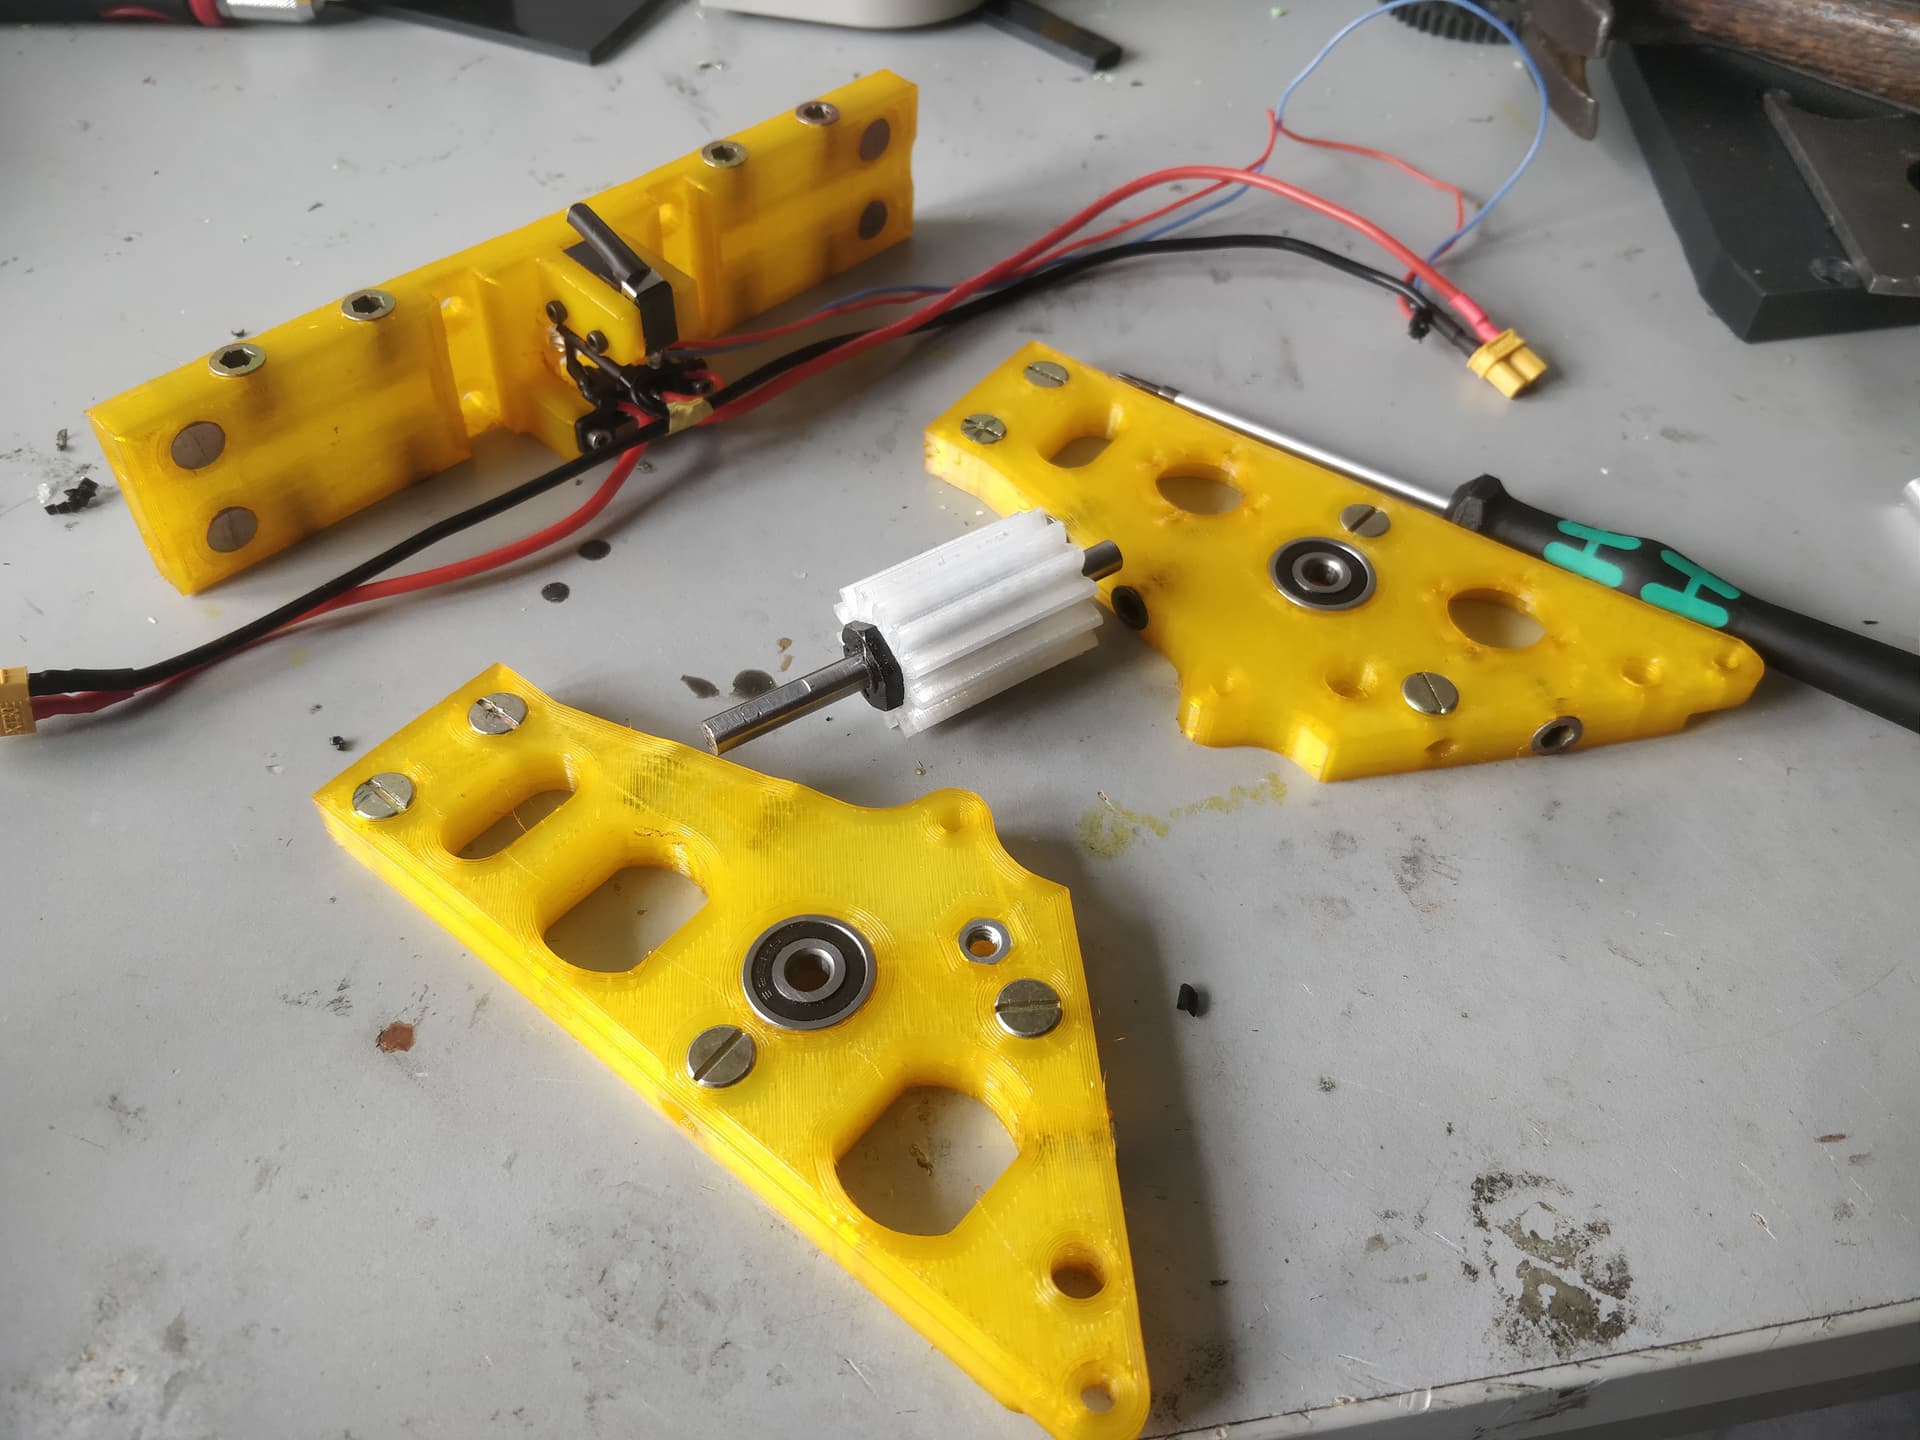
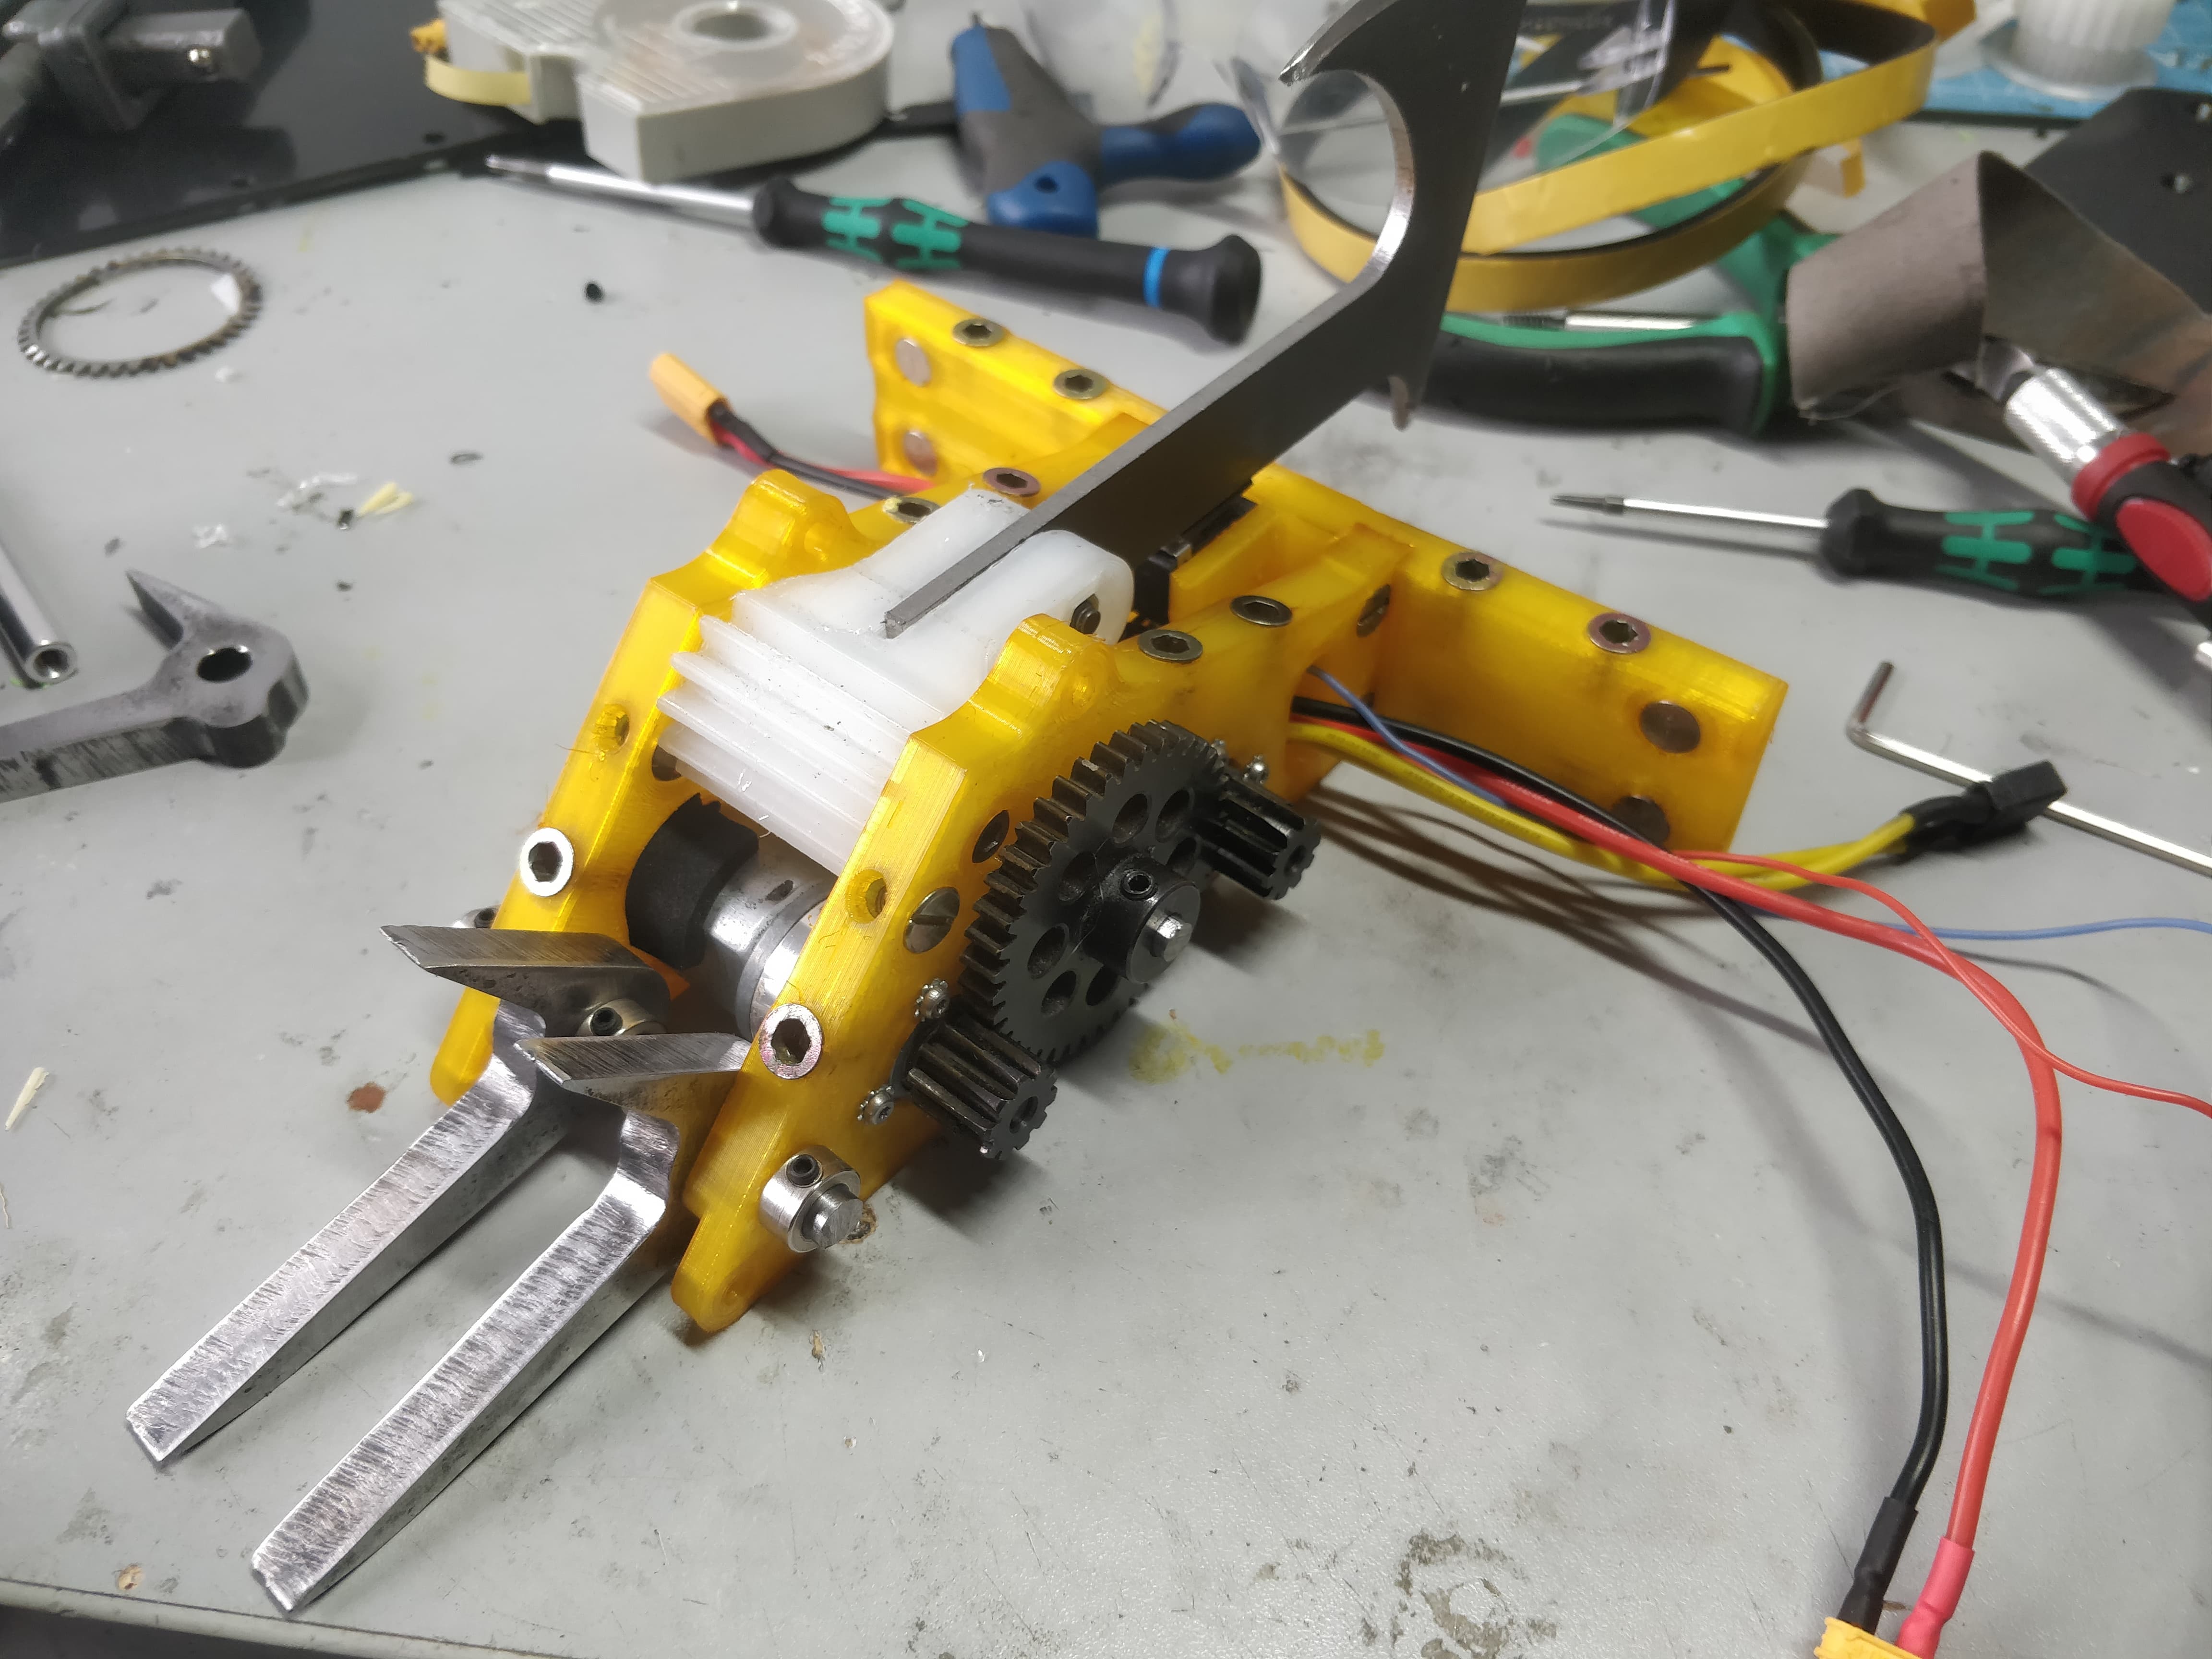
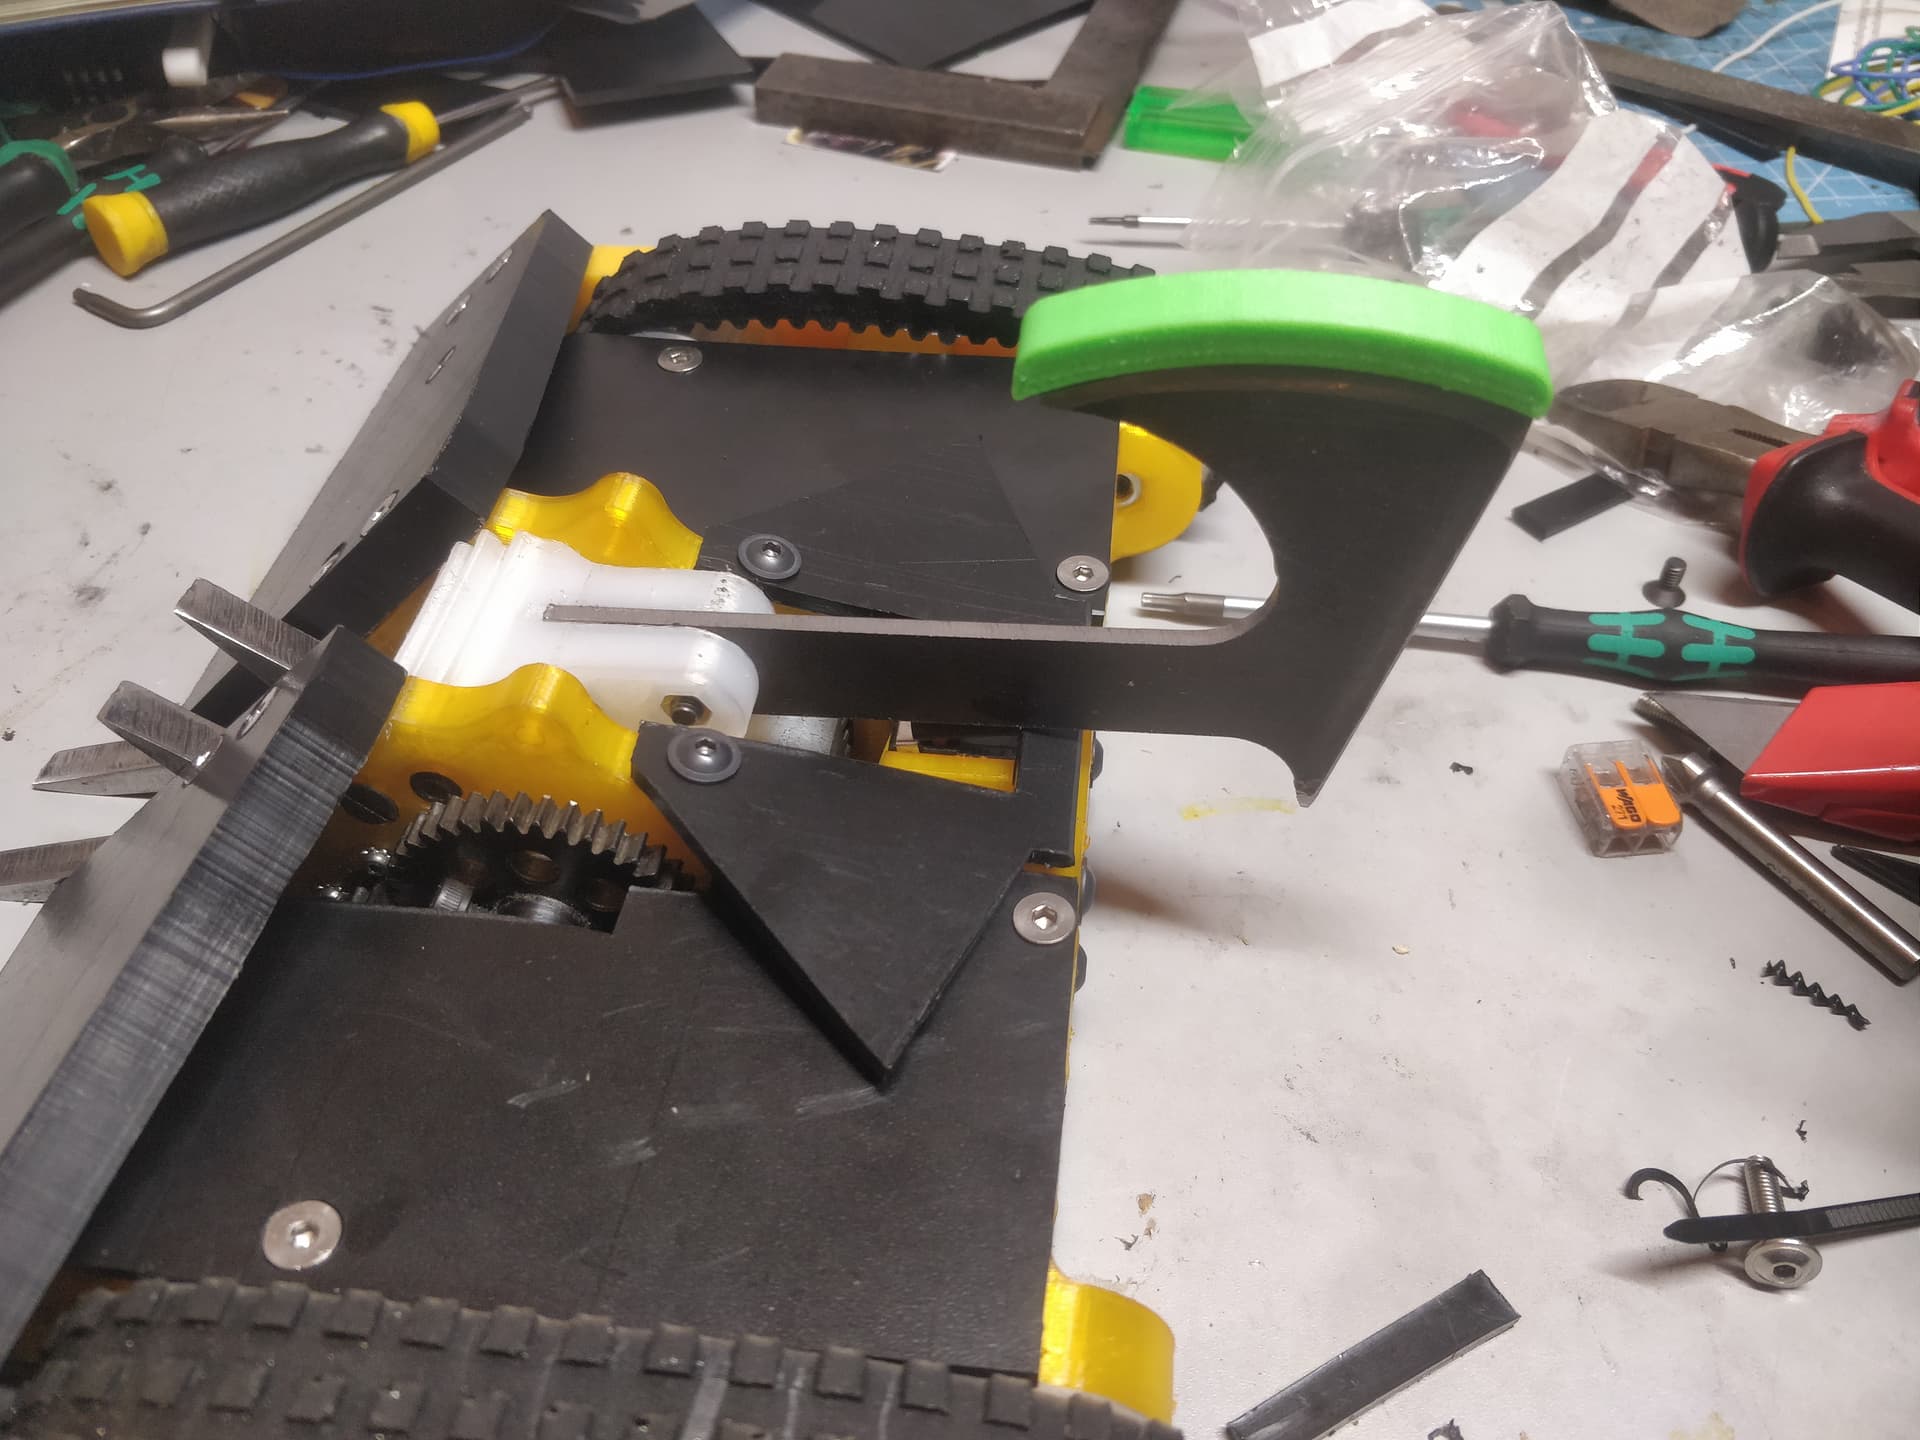
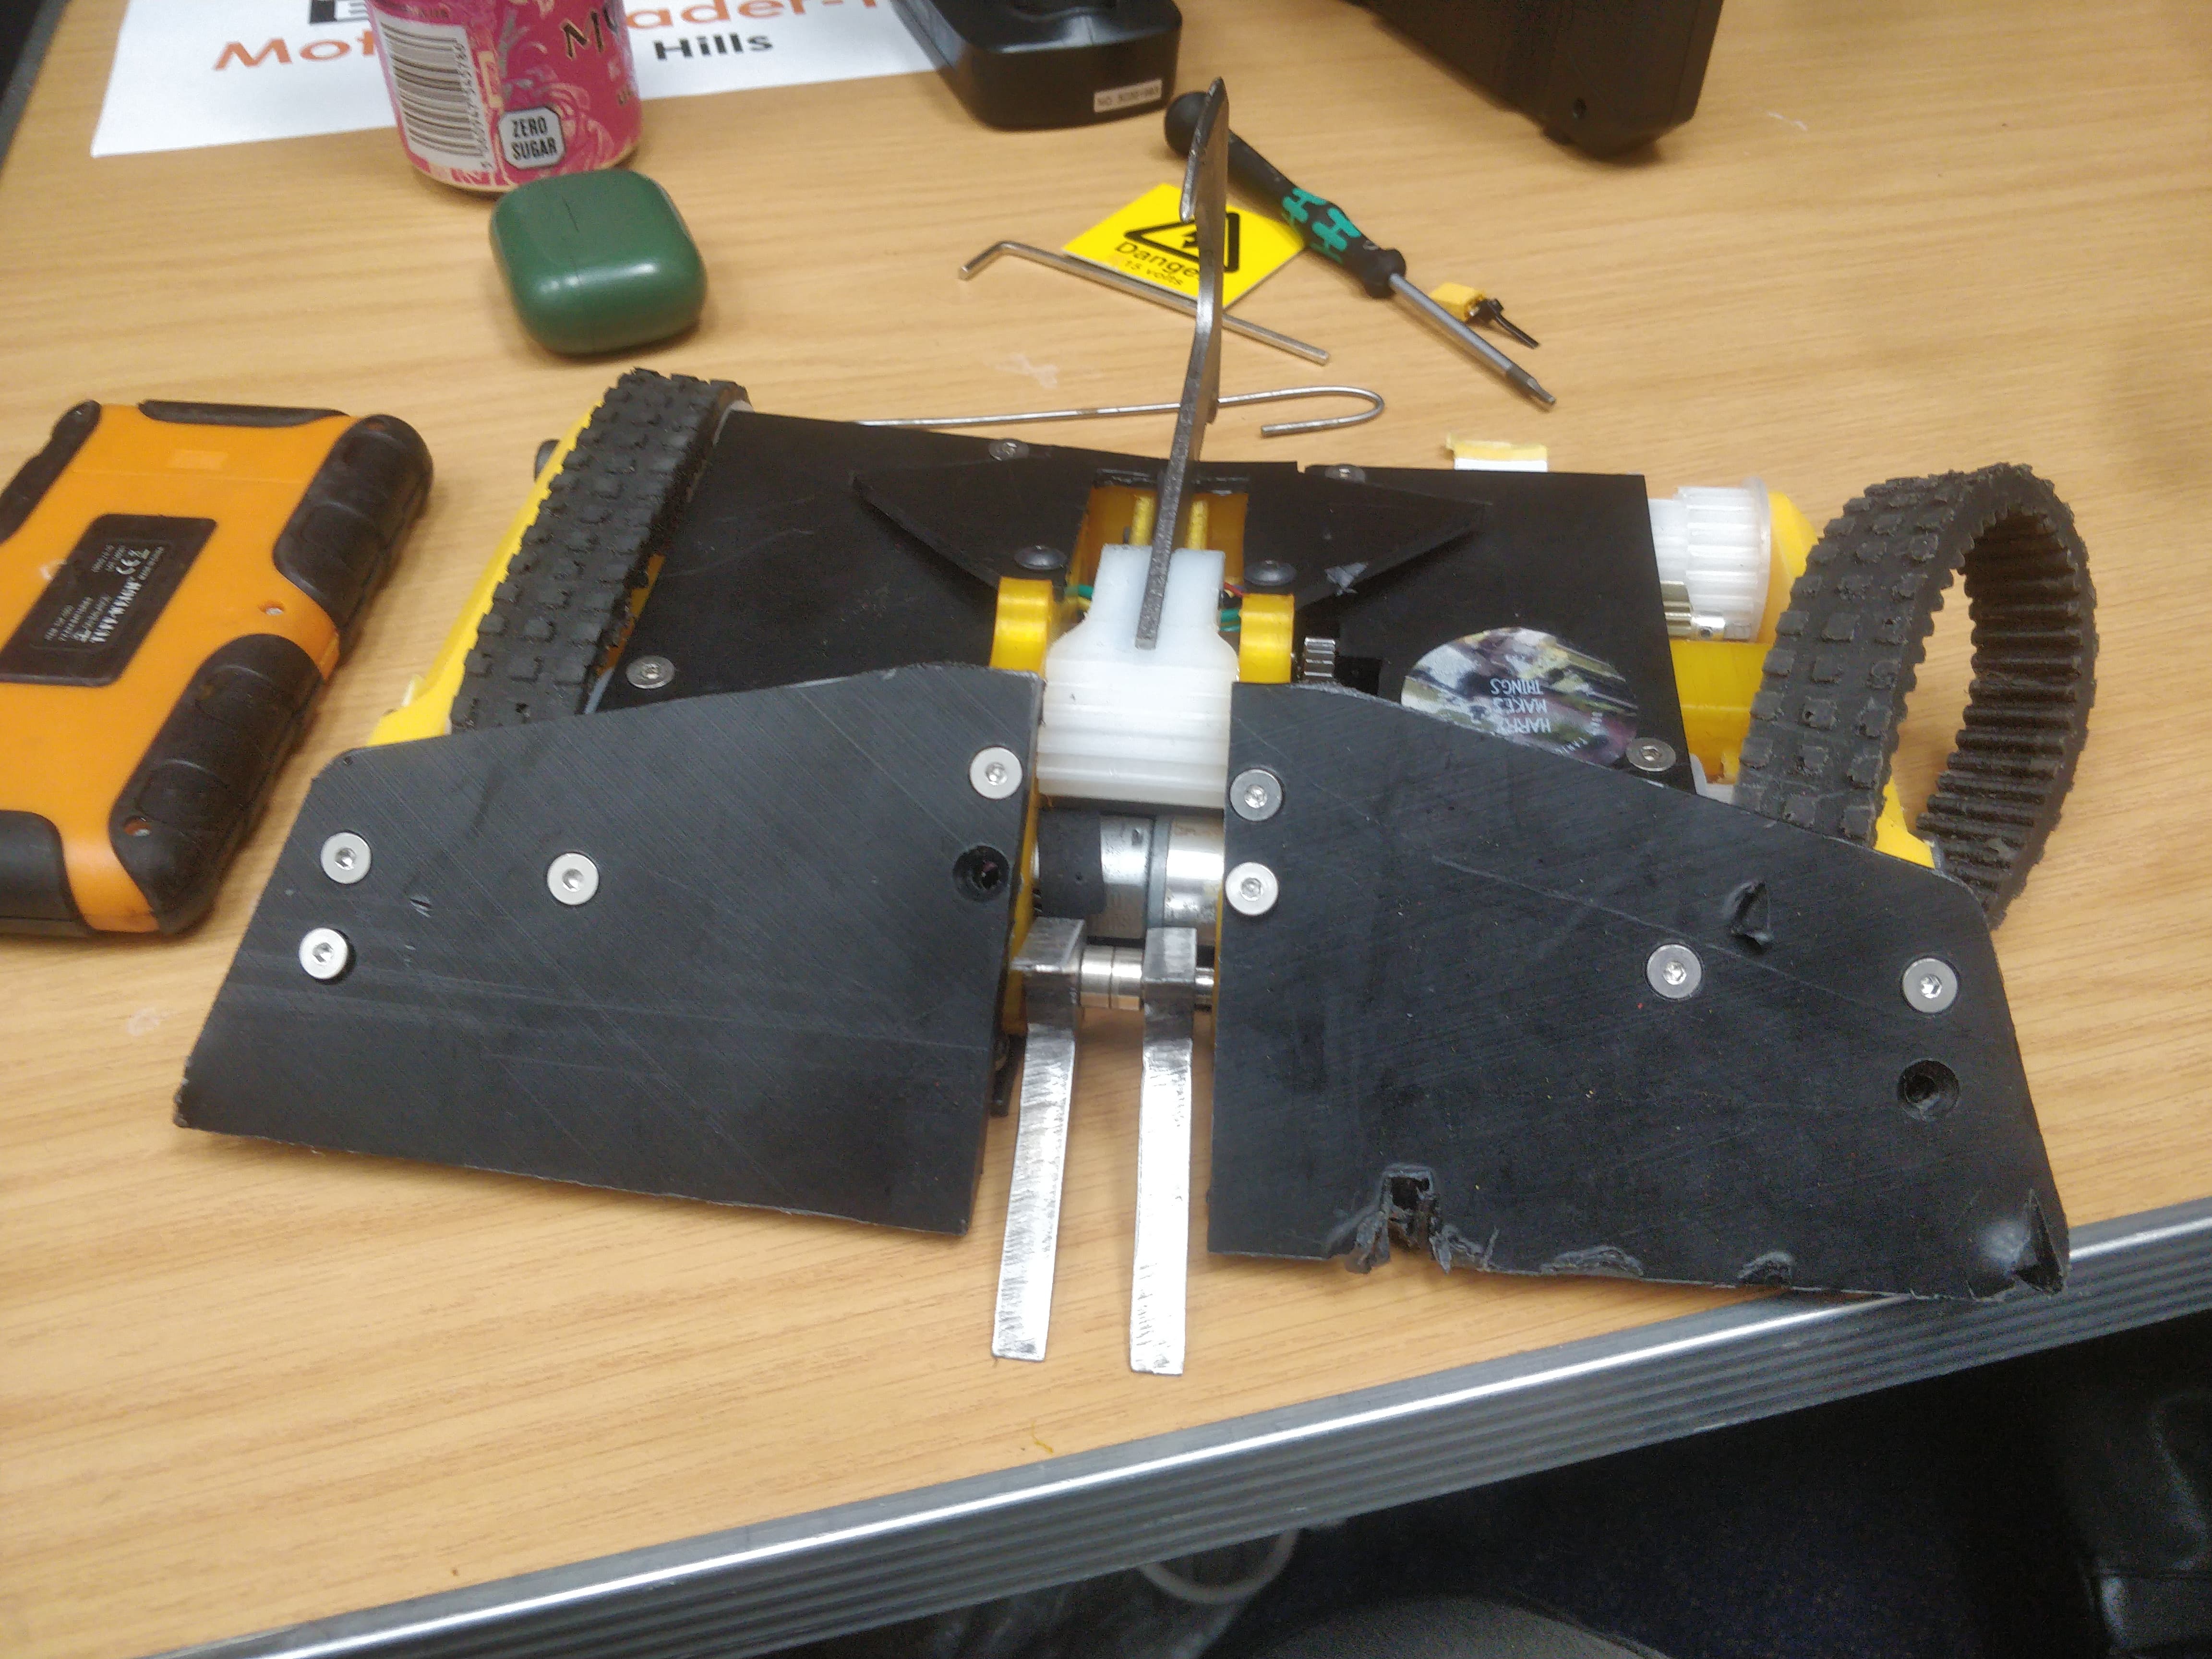
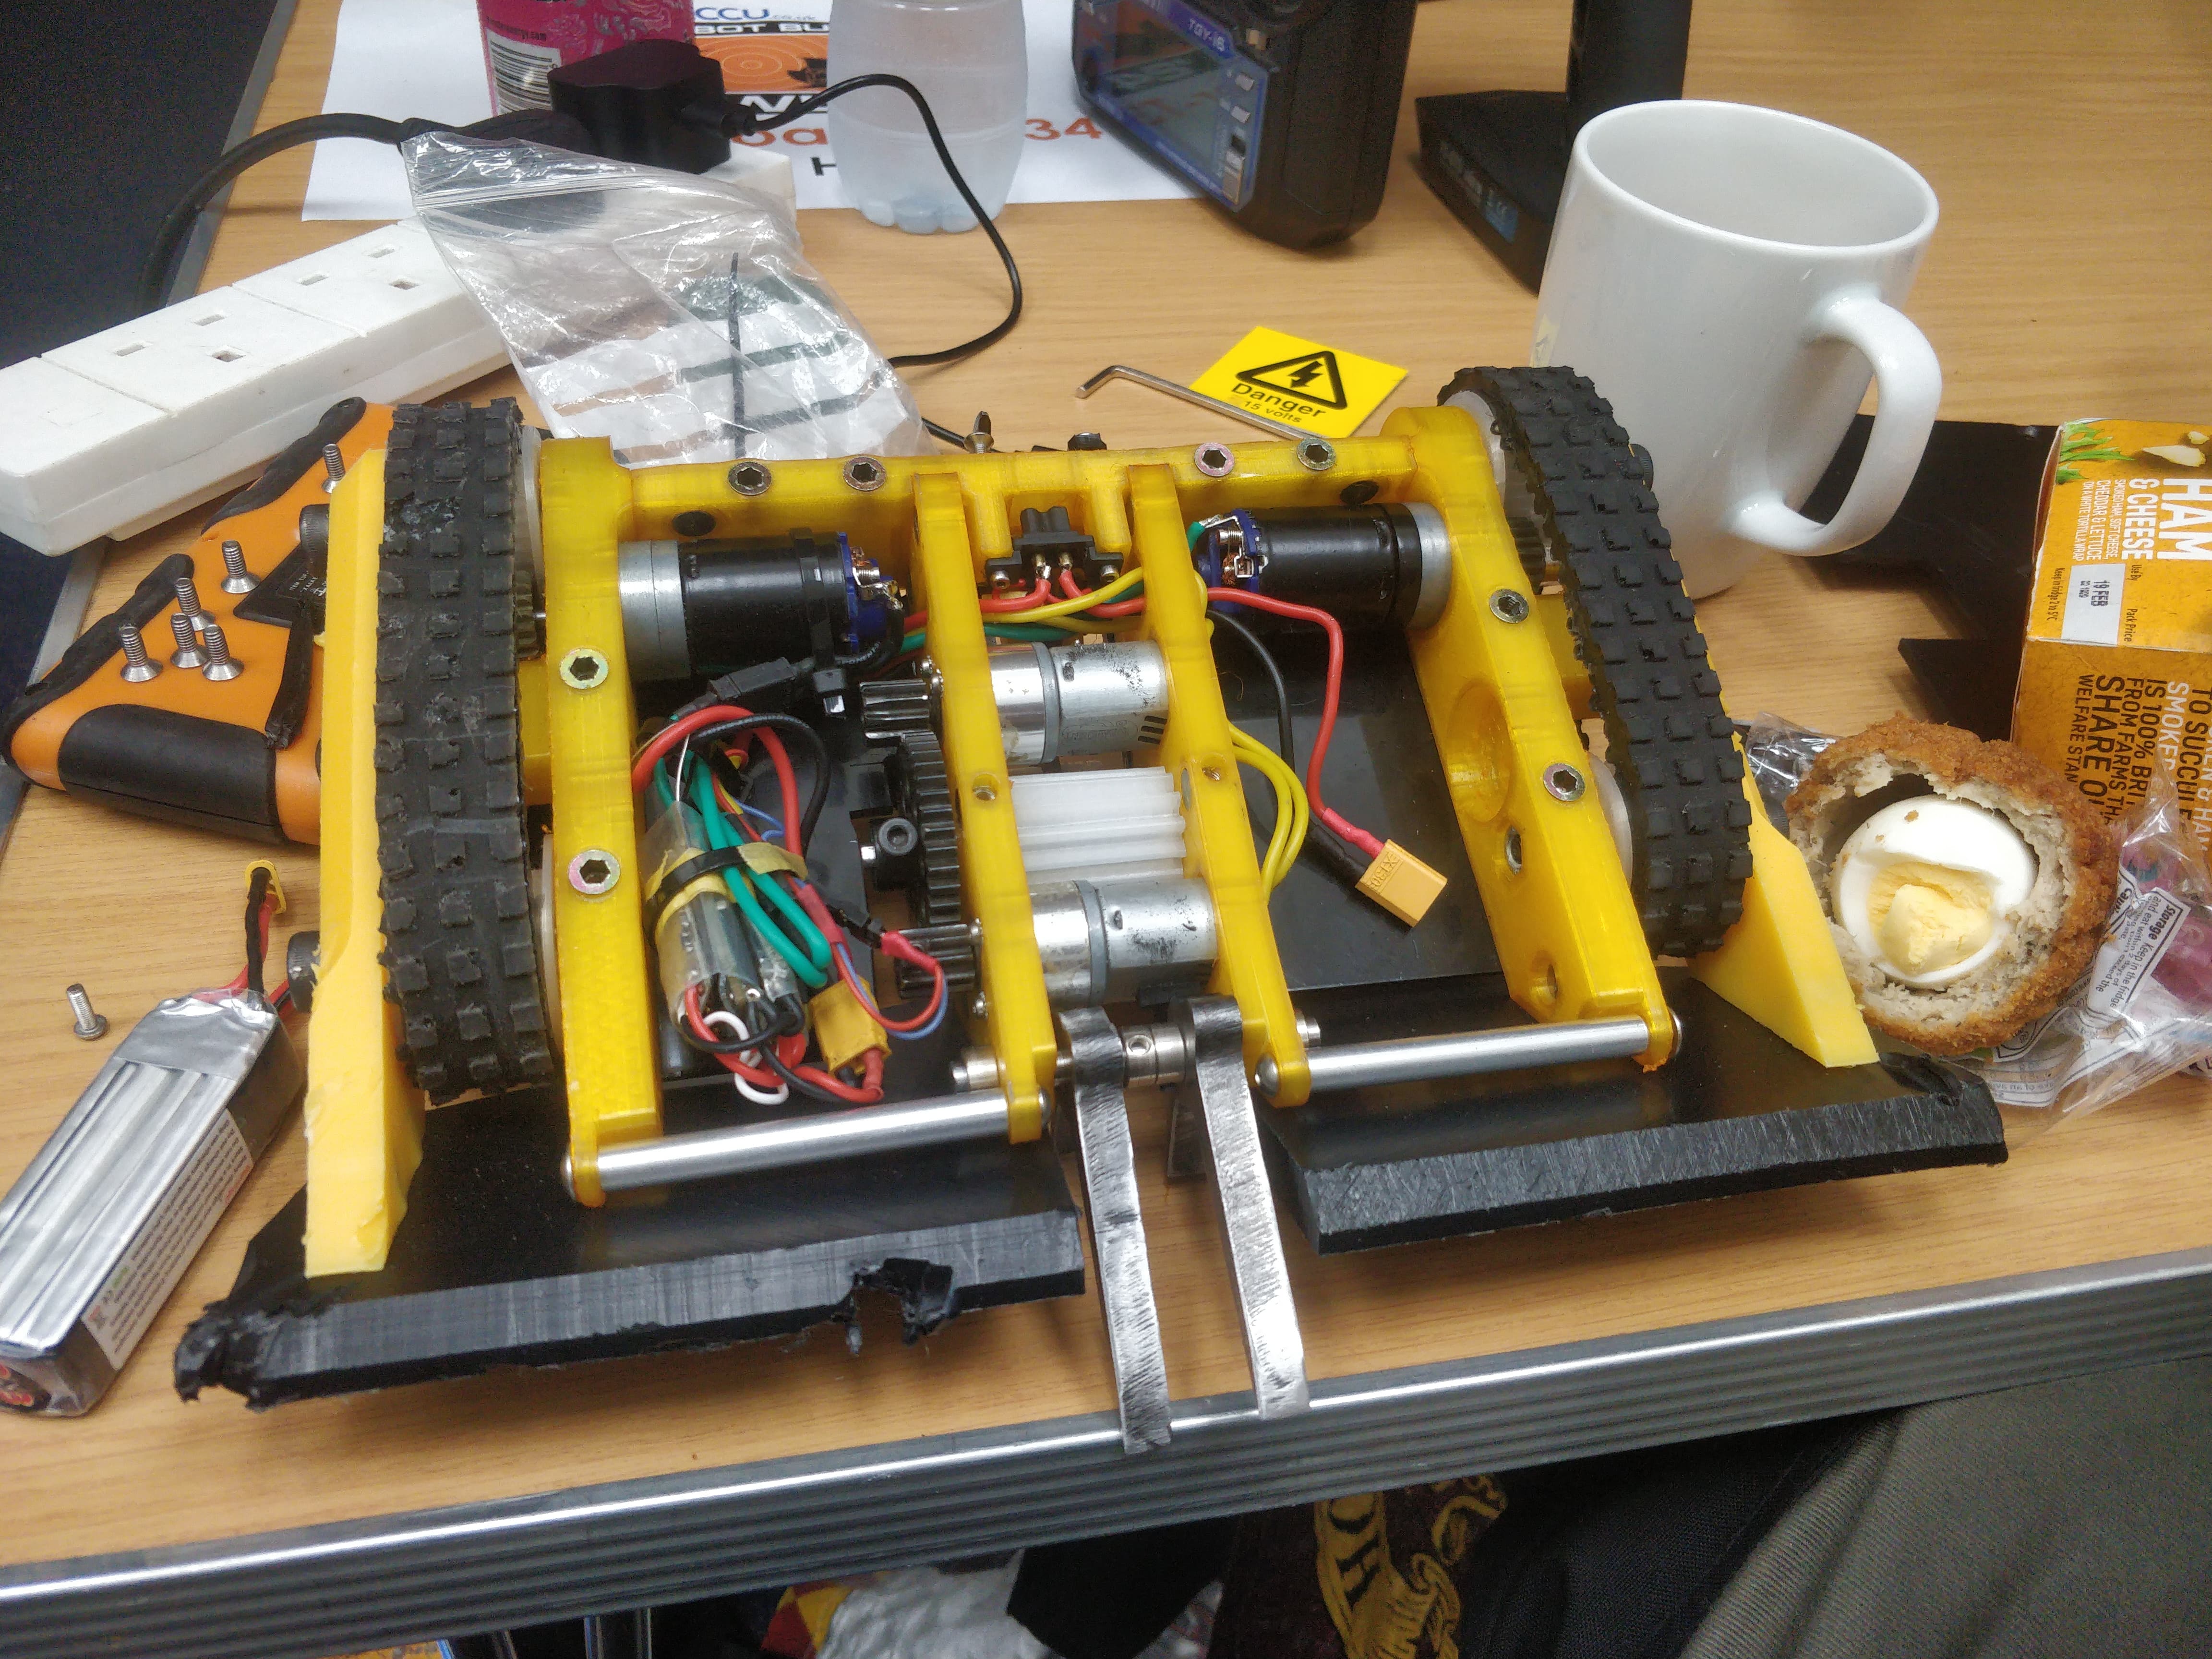
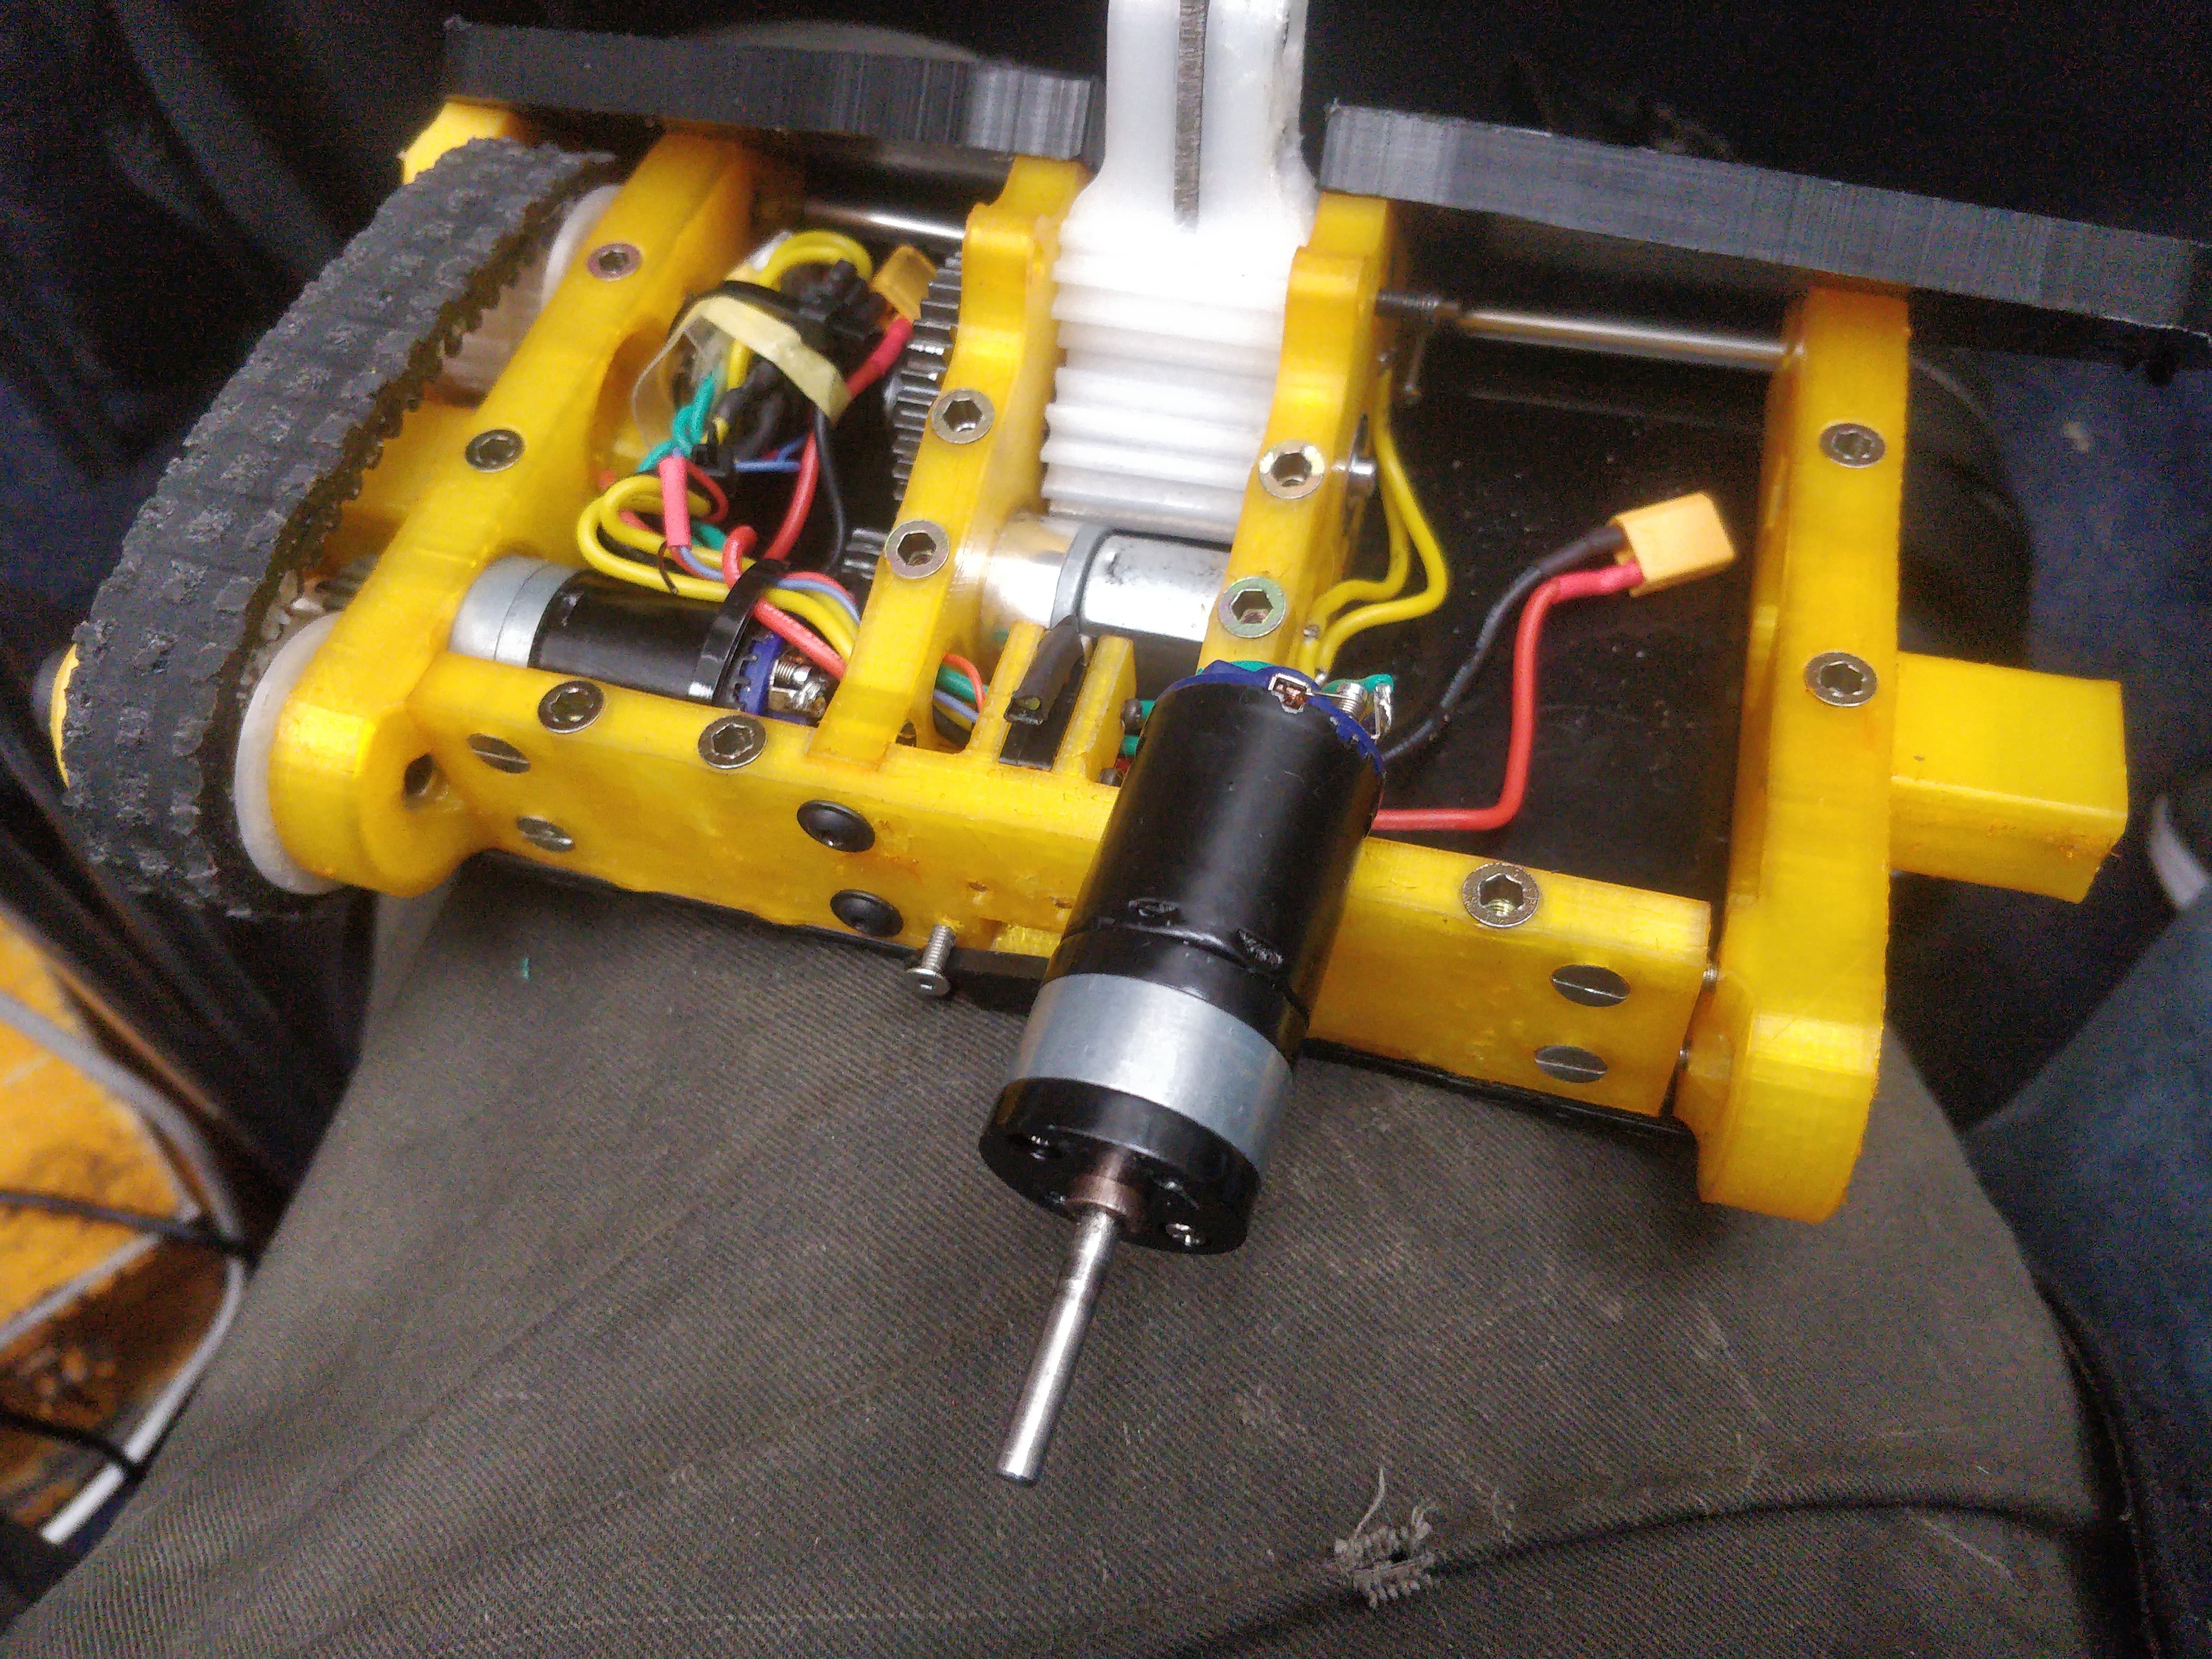
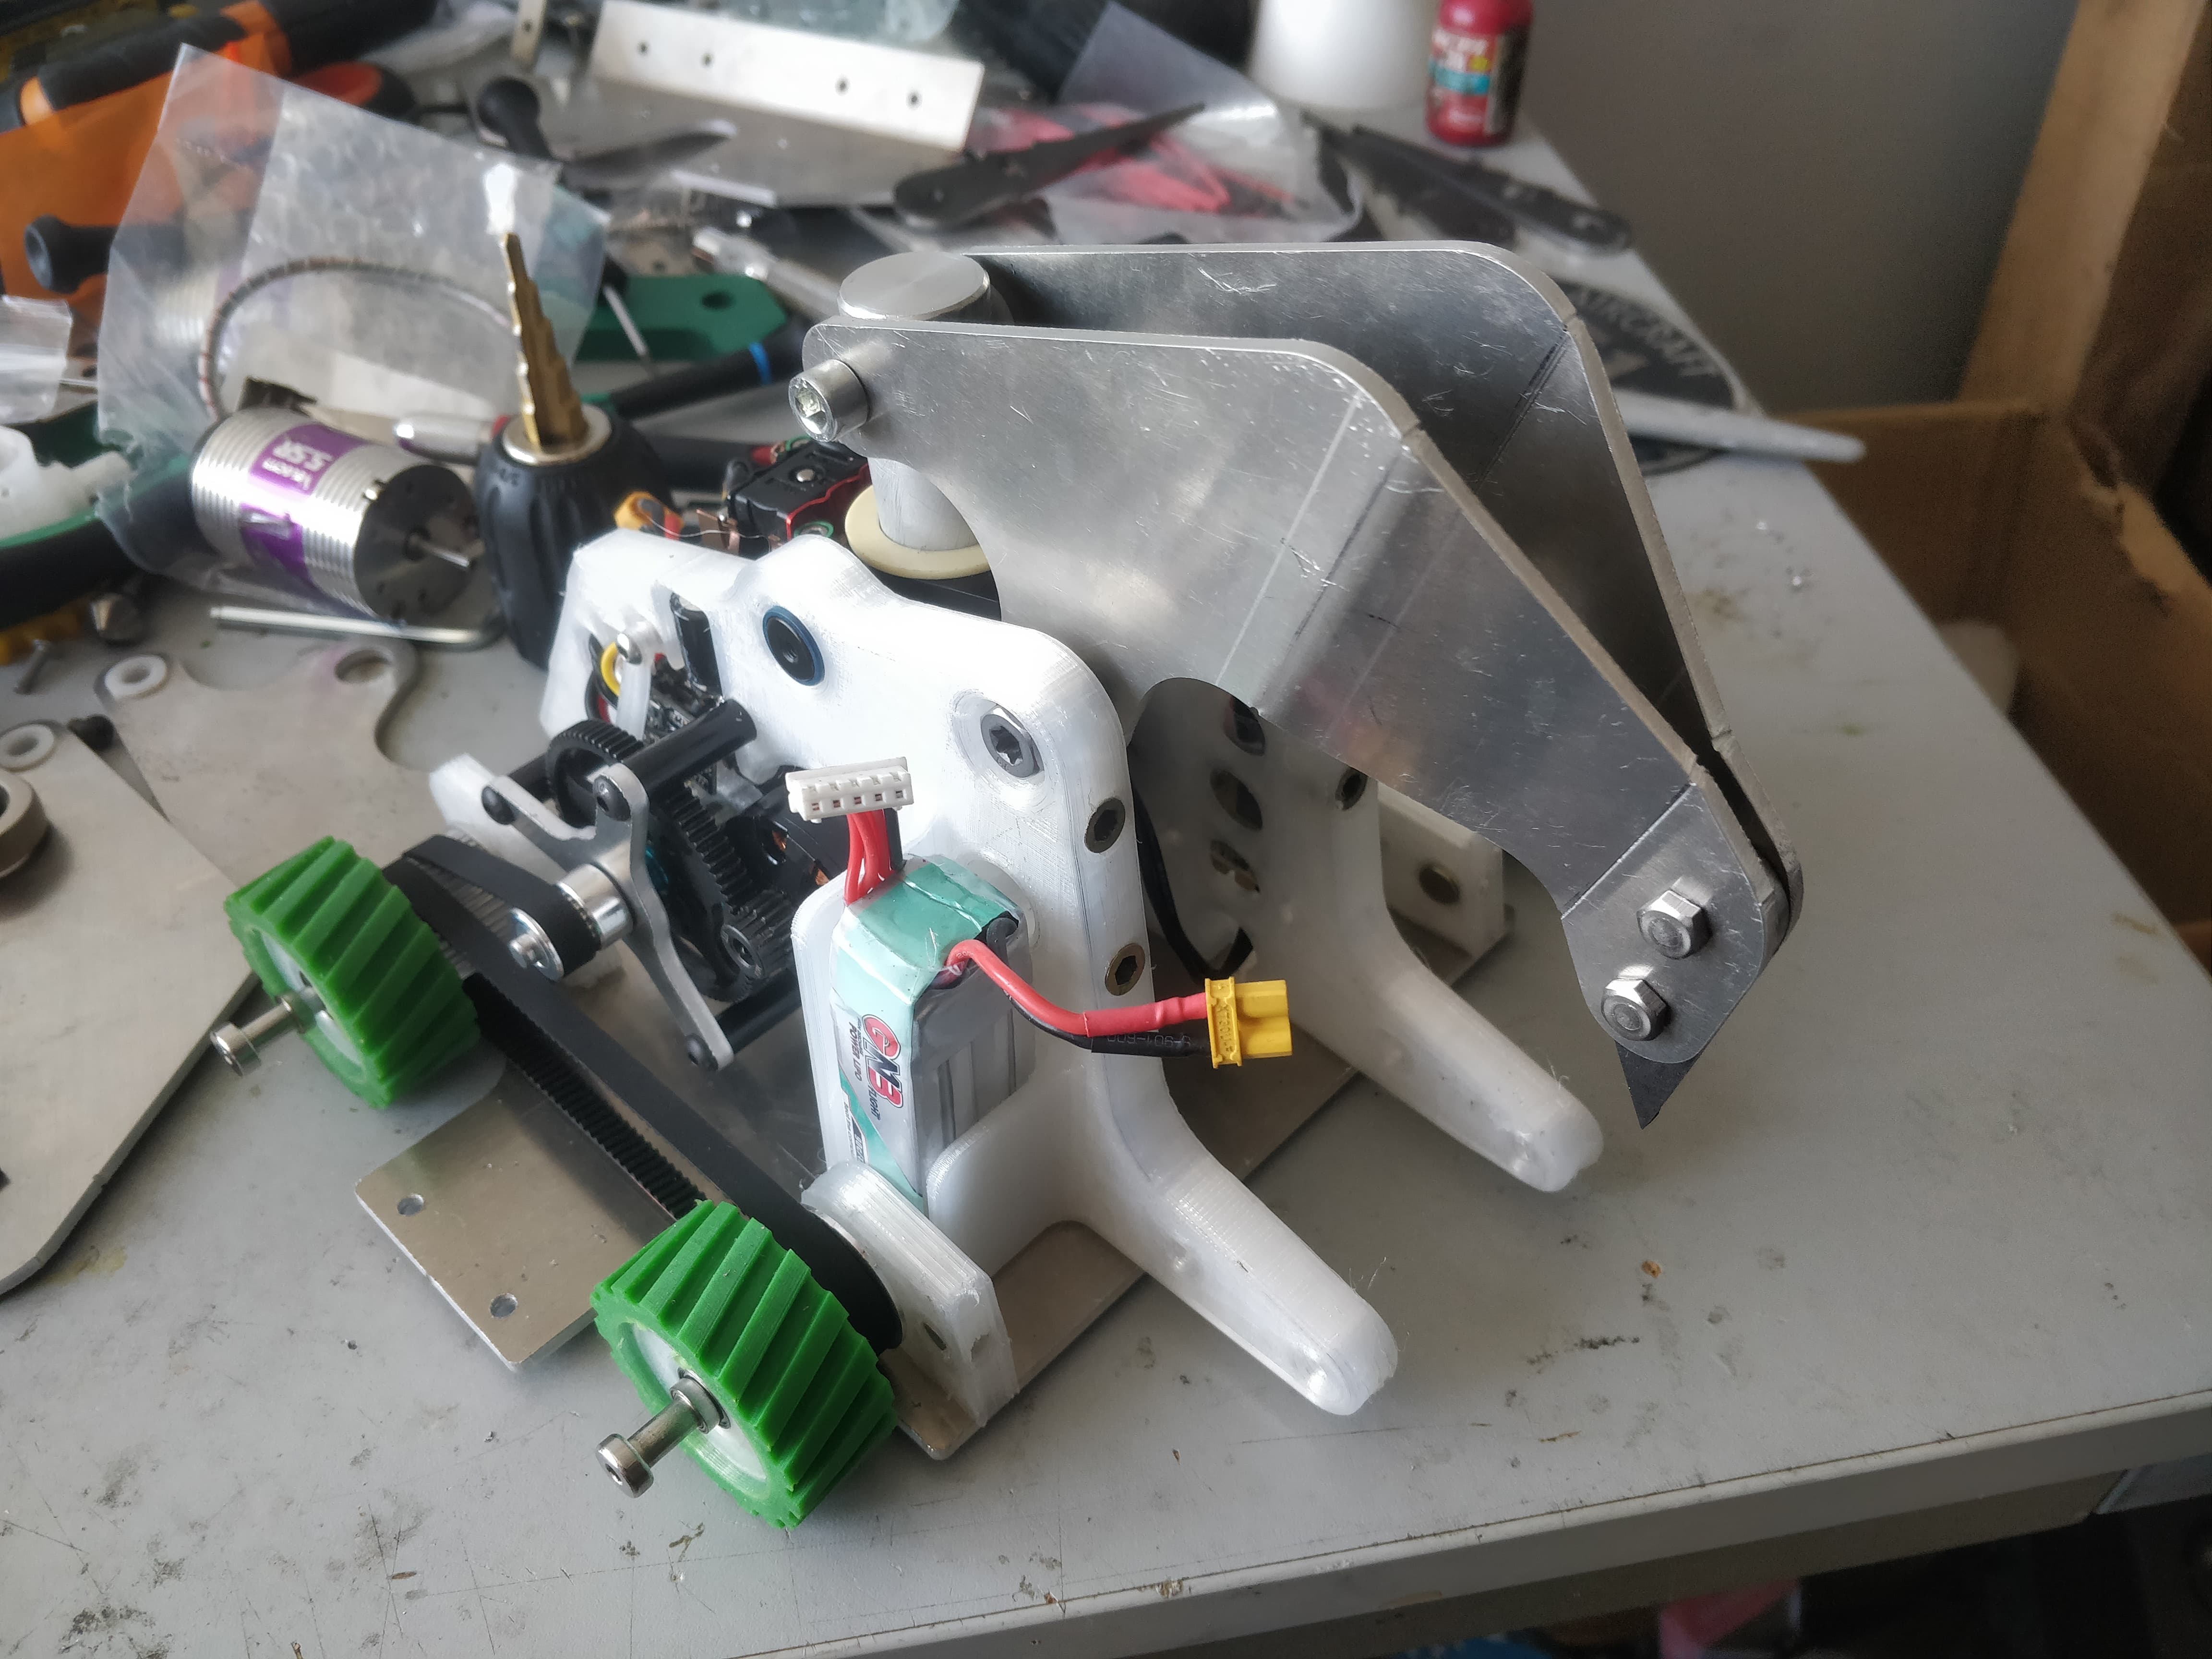
I started doing final assembly at this point, putting in the proper loom and mounting up the end stop micro switch. The axe mechanism goes together and comes apart really well. Traditionally I don’t have to touch it so by the law of sod I’ll have to strip and rebuild every fight.
Cleaned up the hardox forks as well, gave them a brush off and kissed the bore with a countersink.
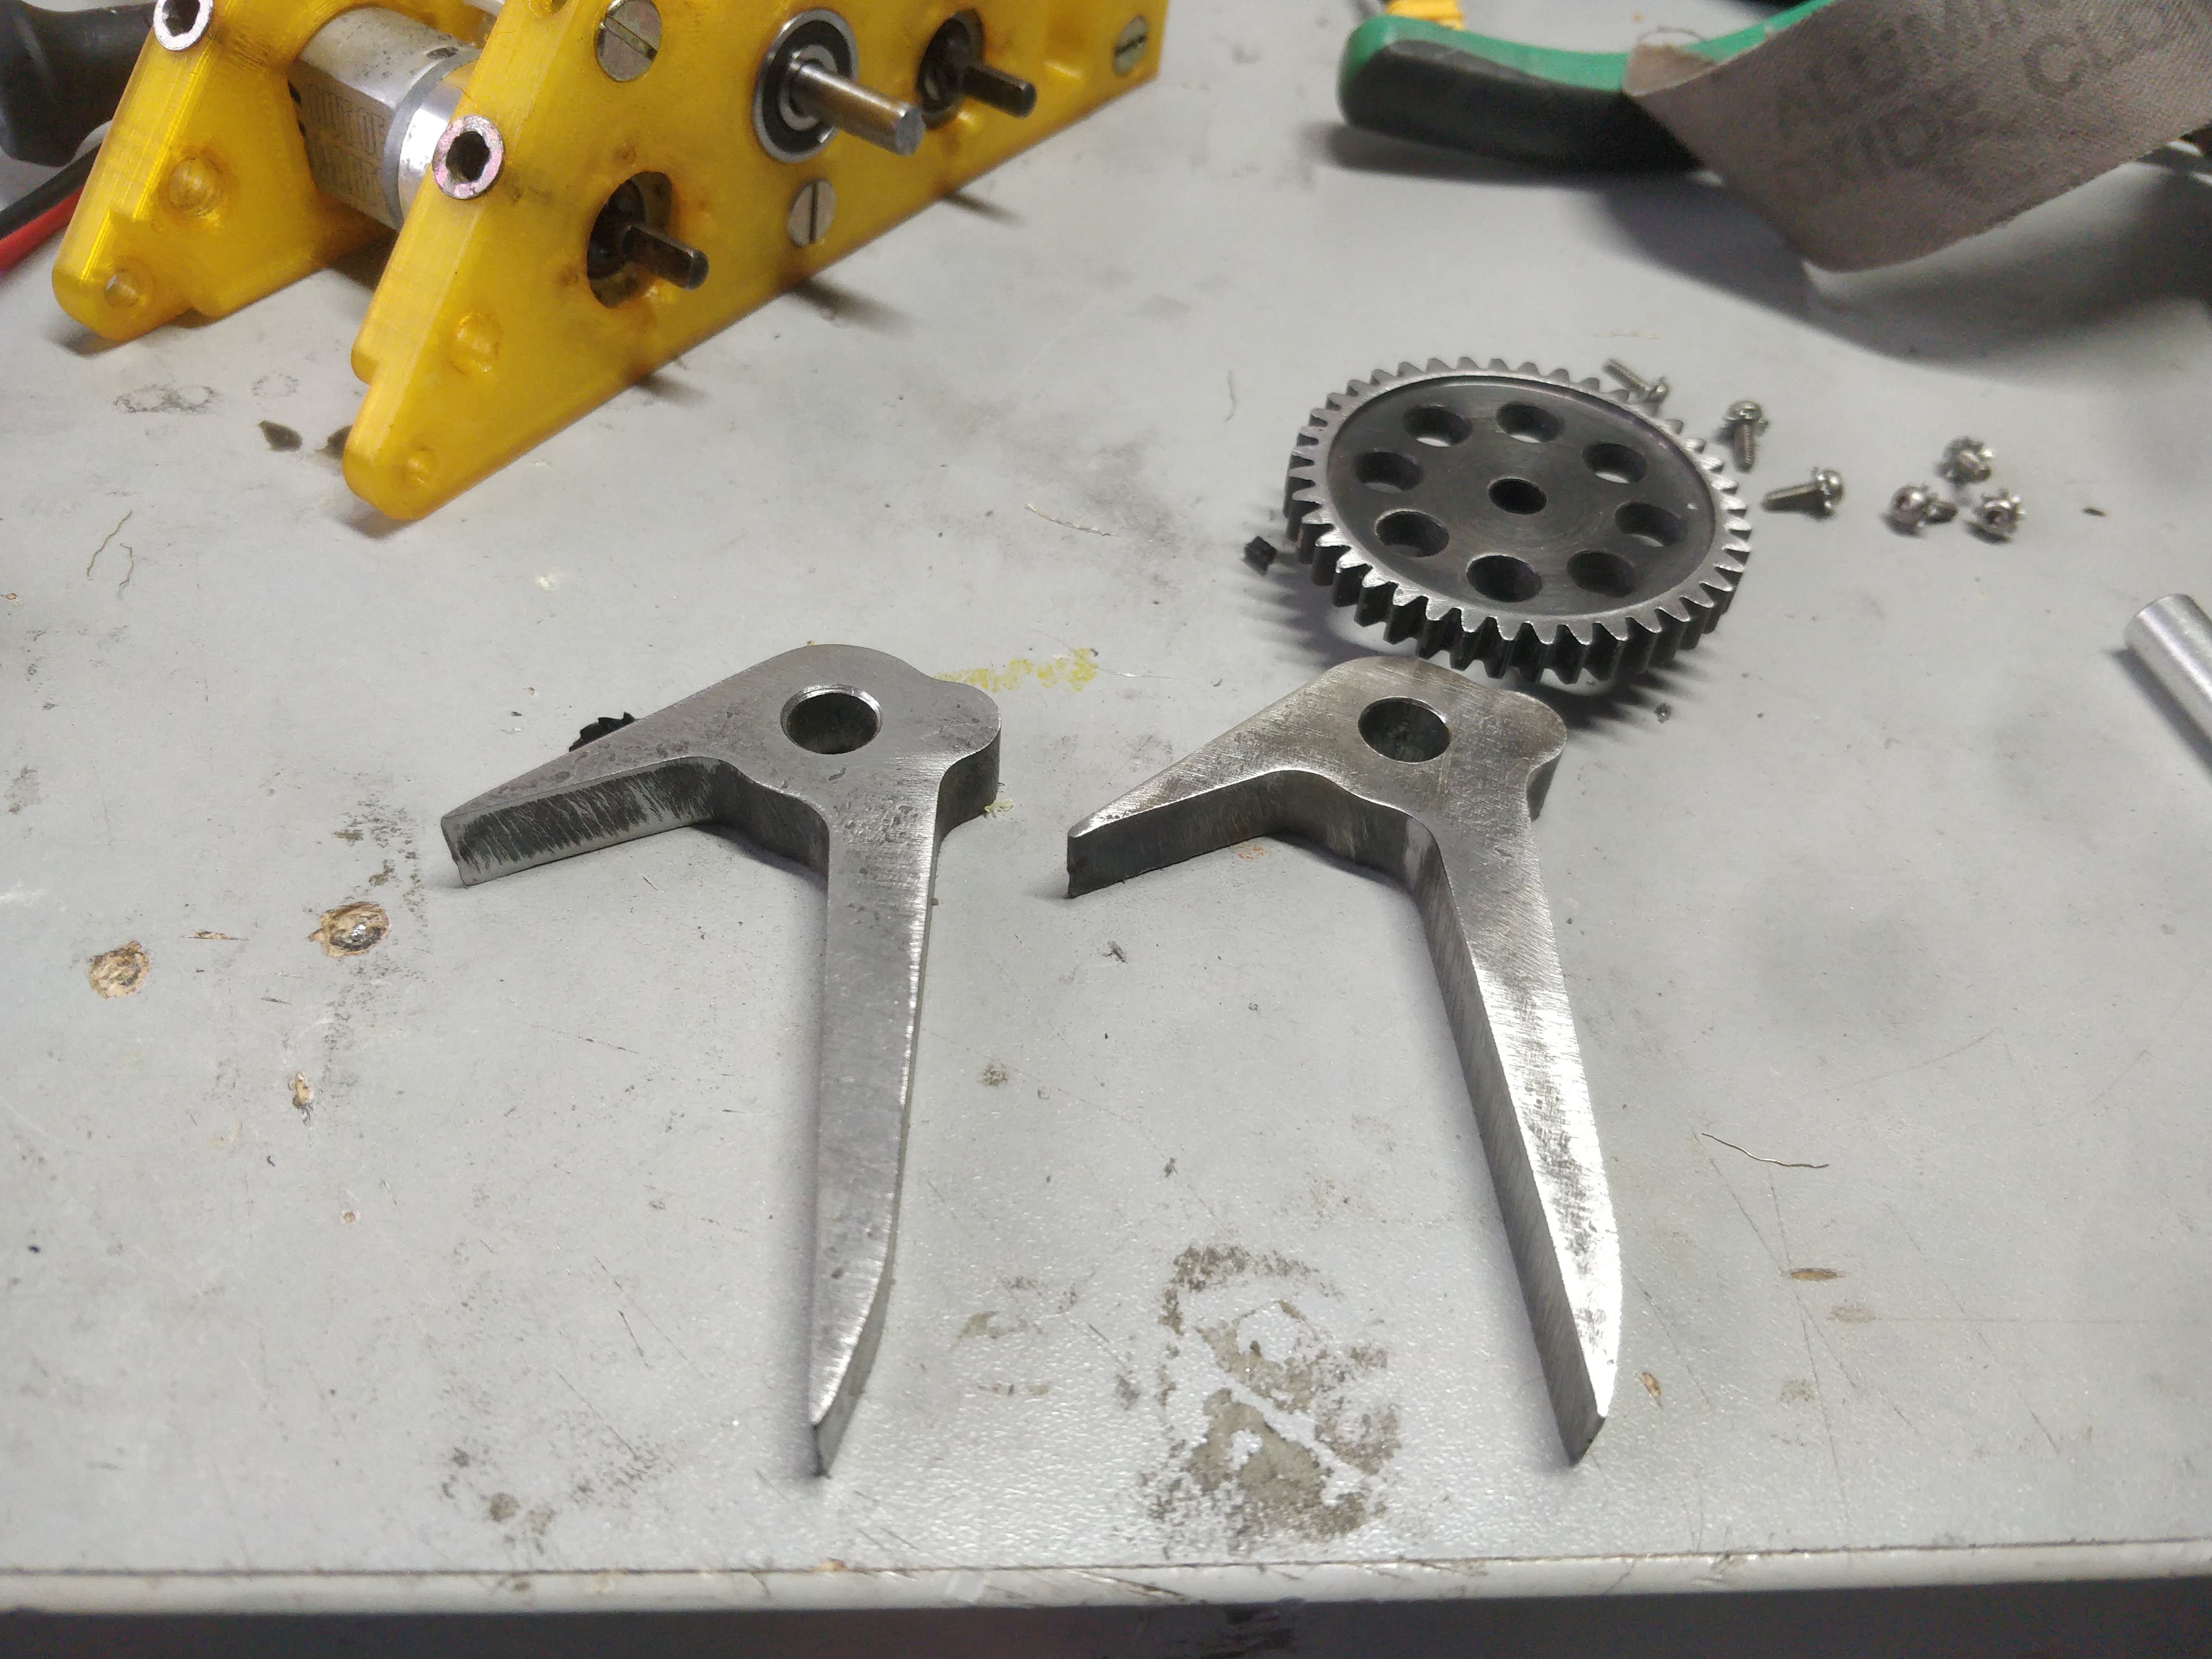
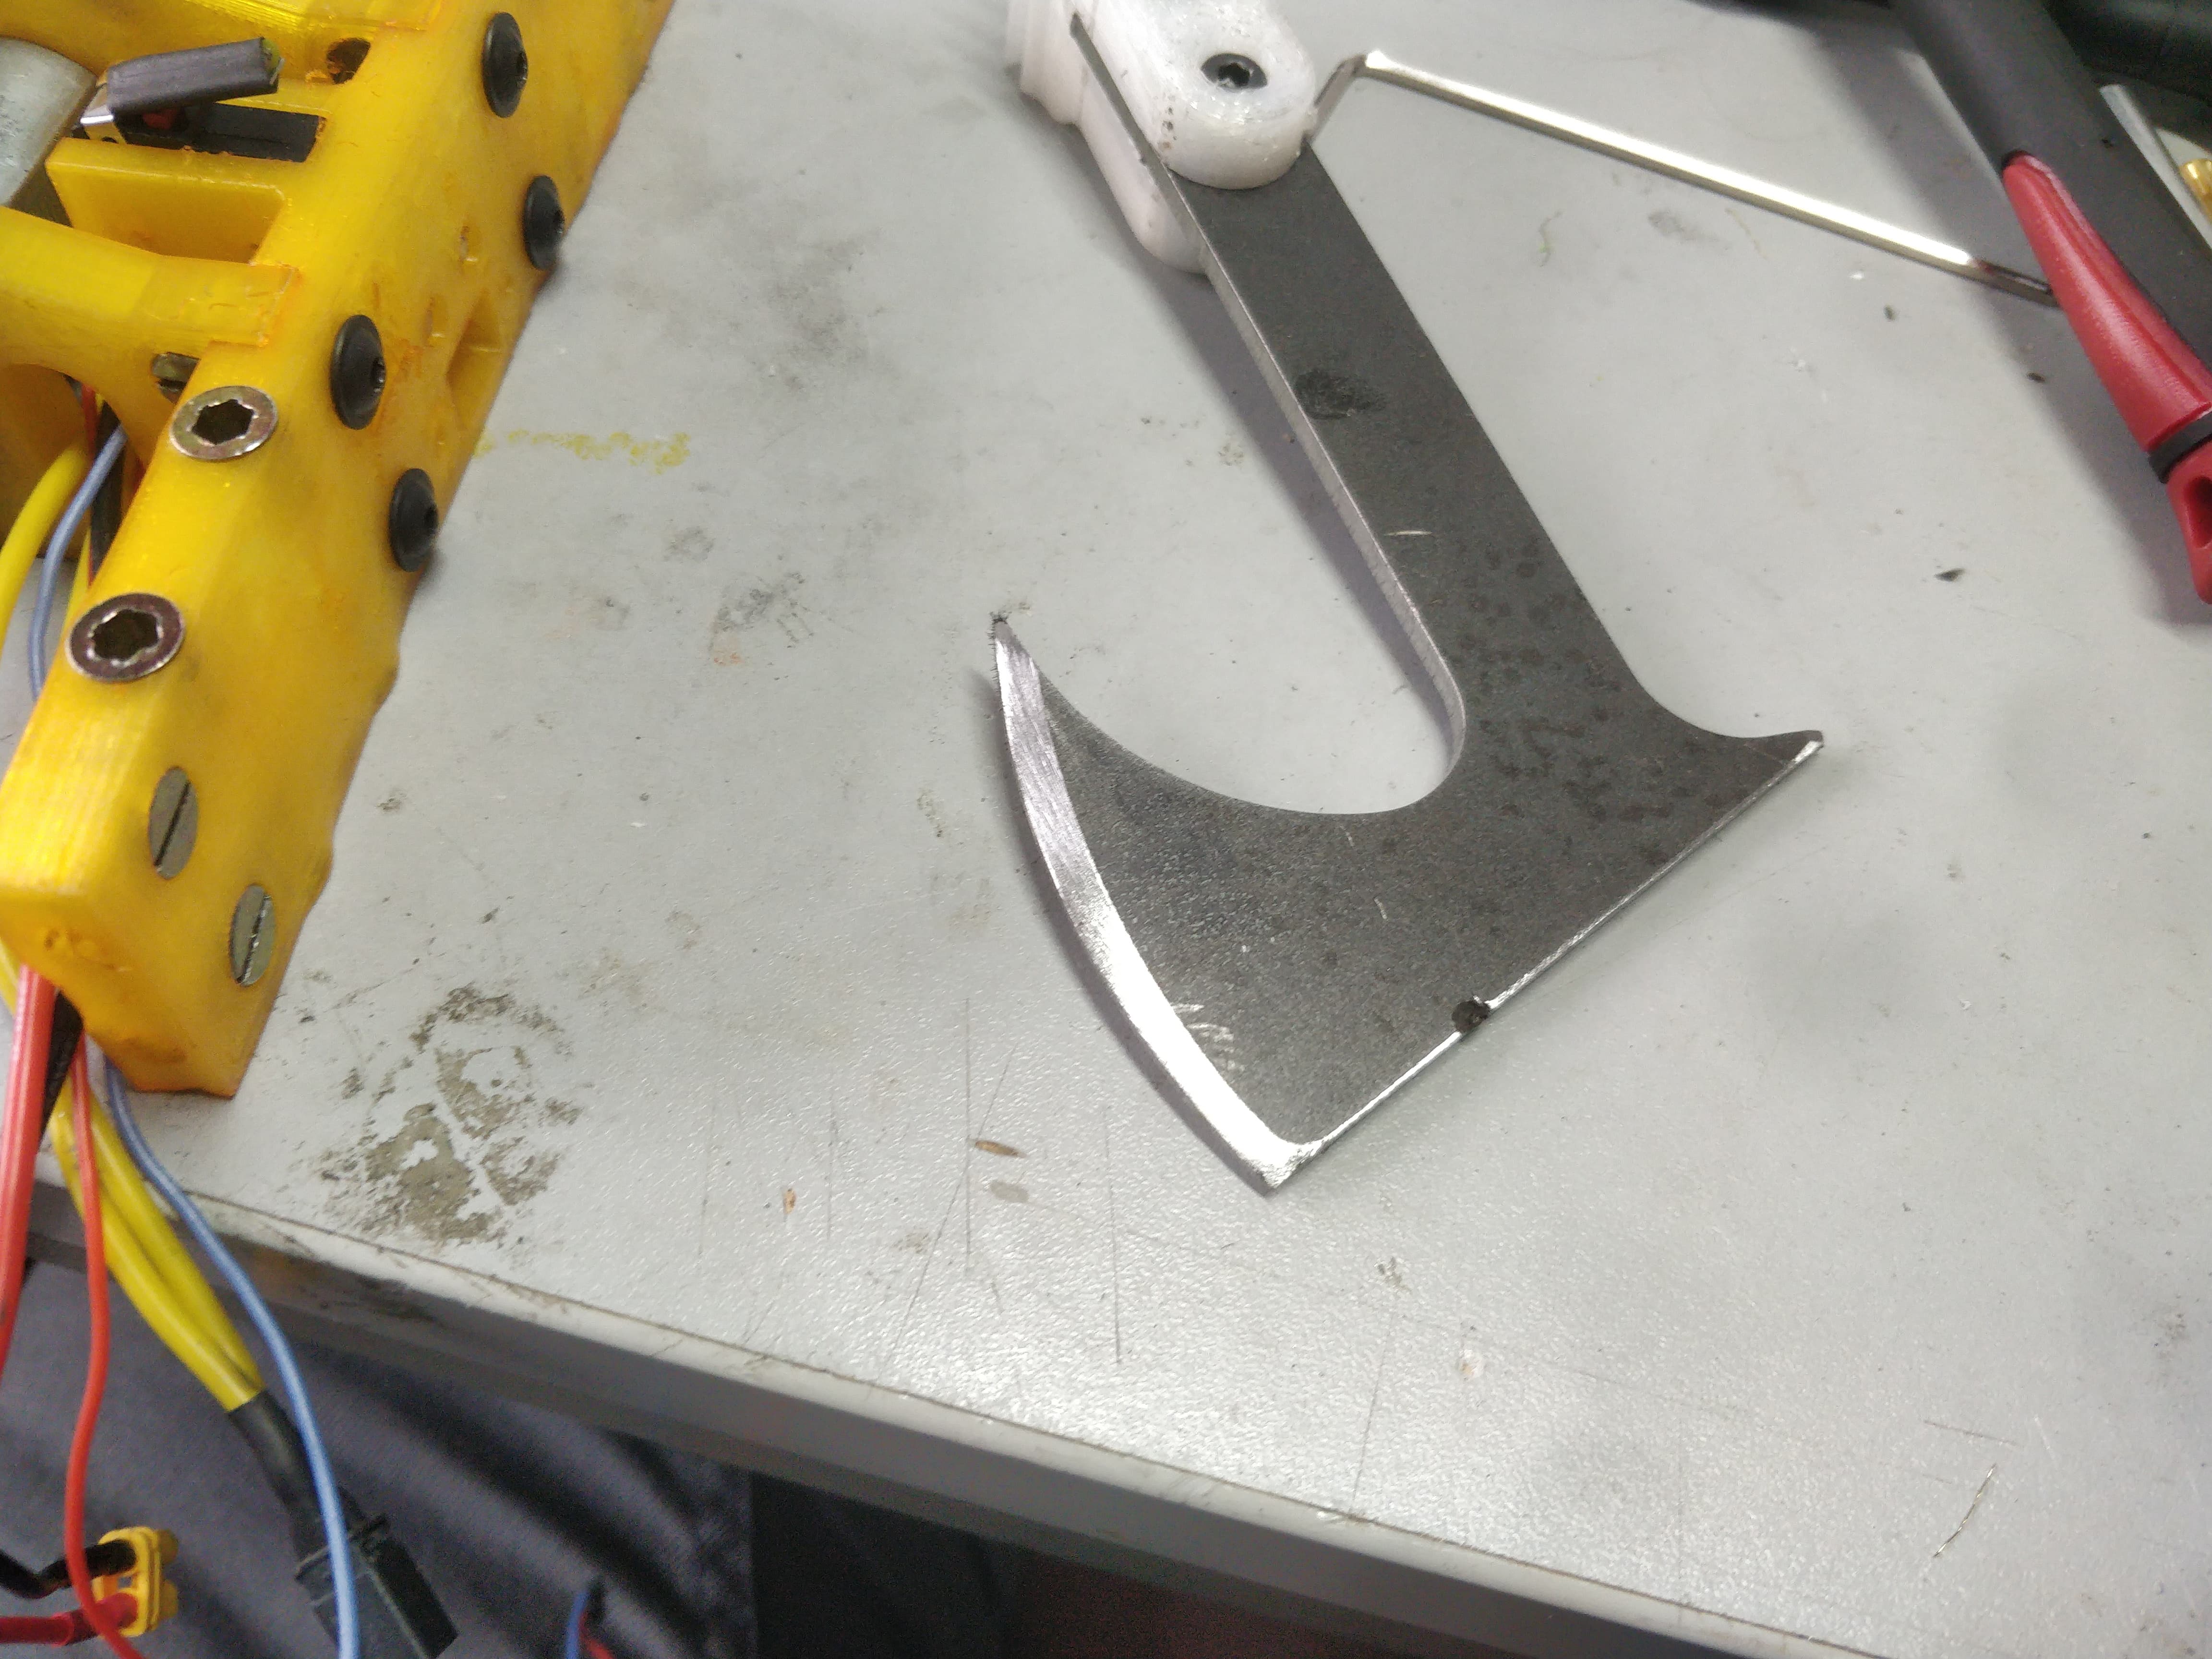
For the first time ever ML is sporting some edge. Ground the axe head so it’s at least sharp. Still not deluded enough to think it’ll do anything but it at least looks like it’s trying.
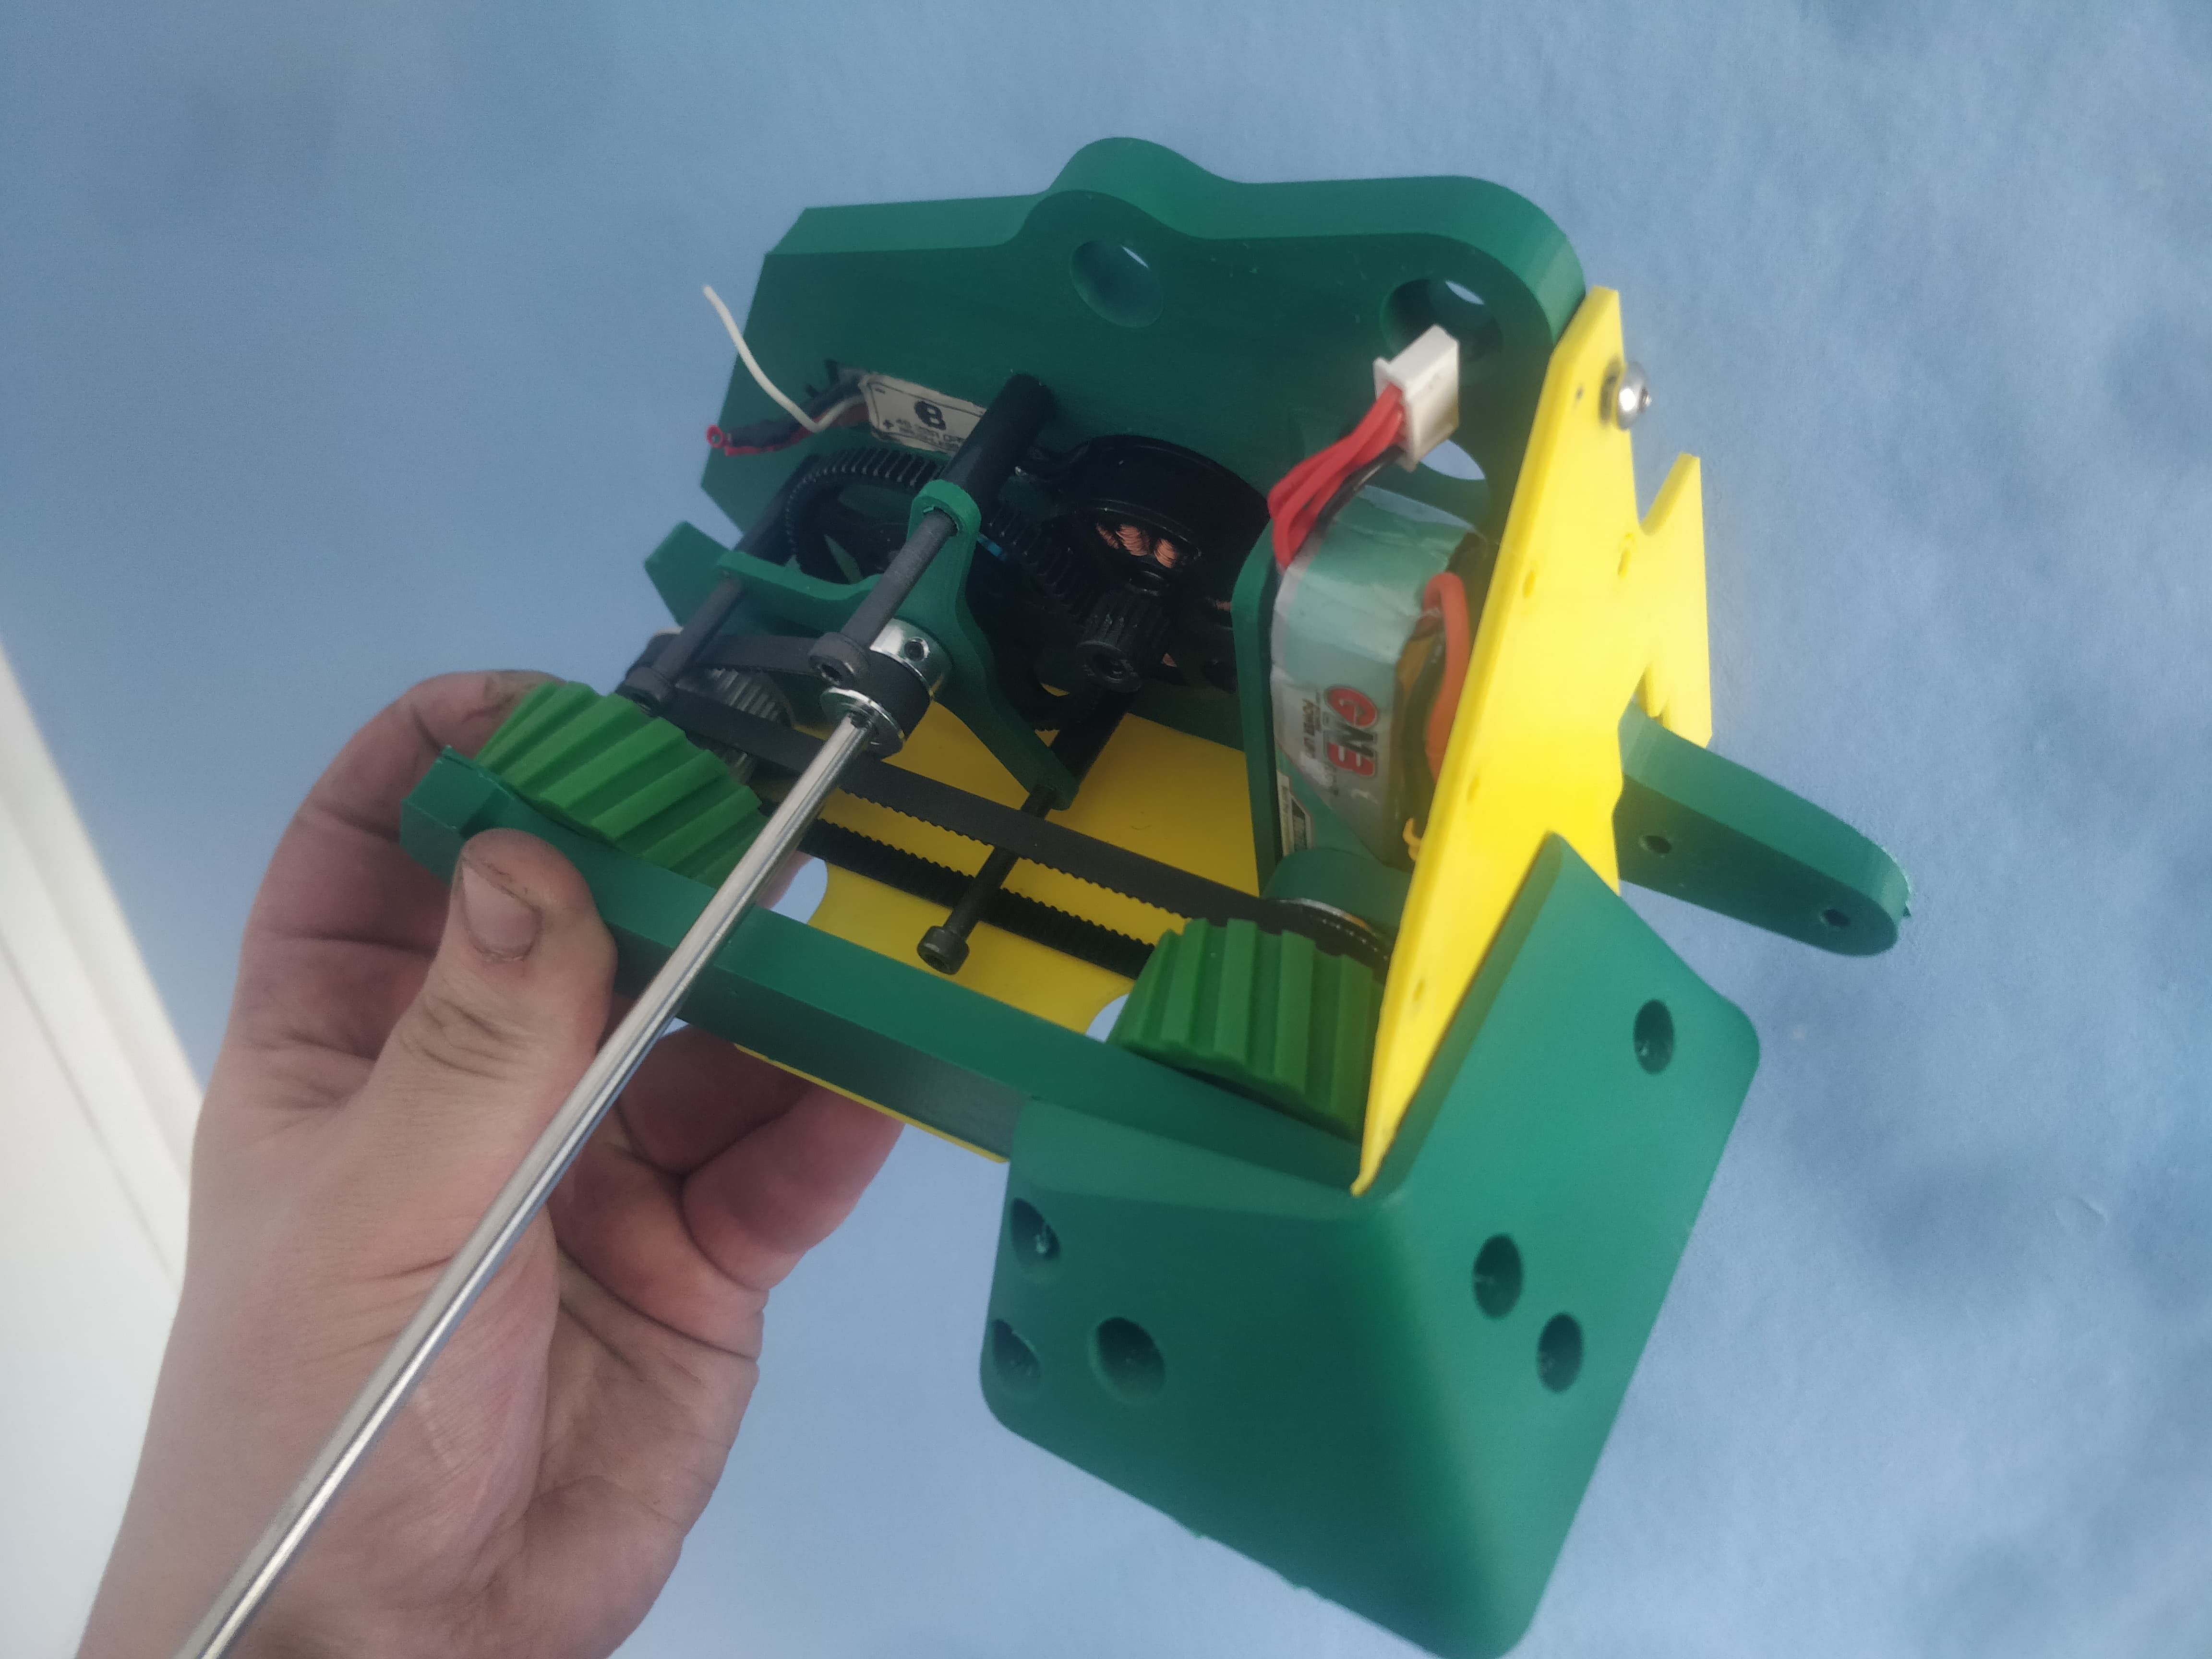
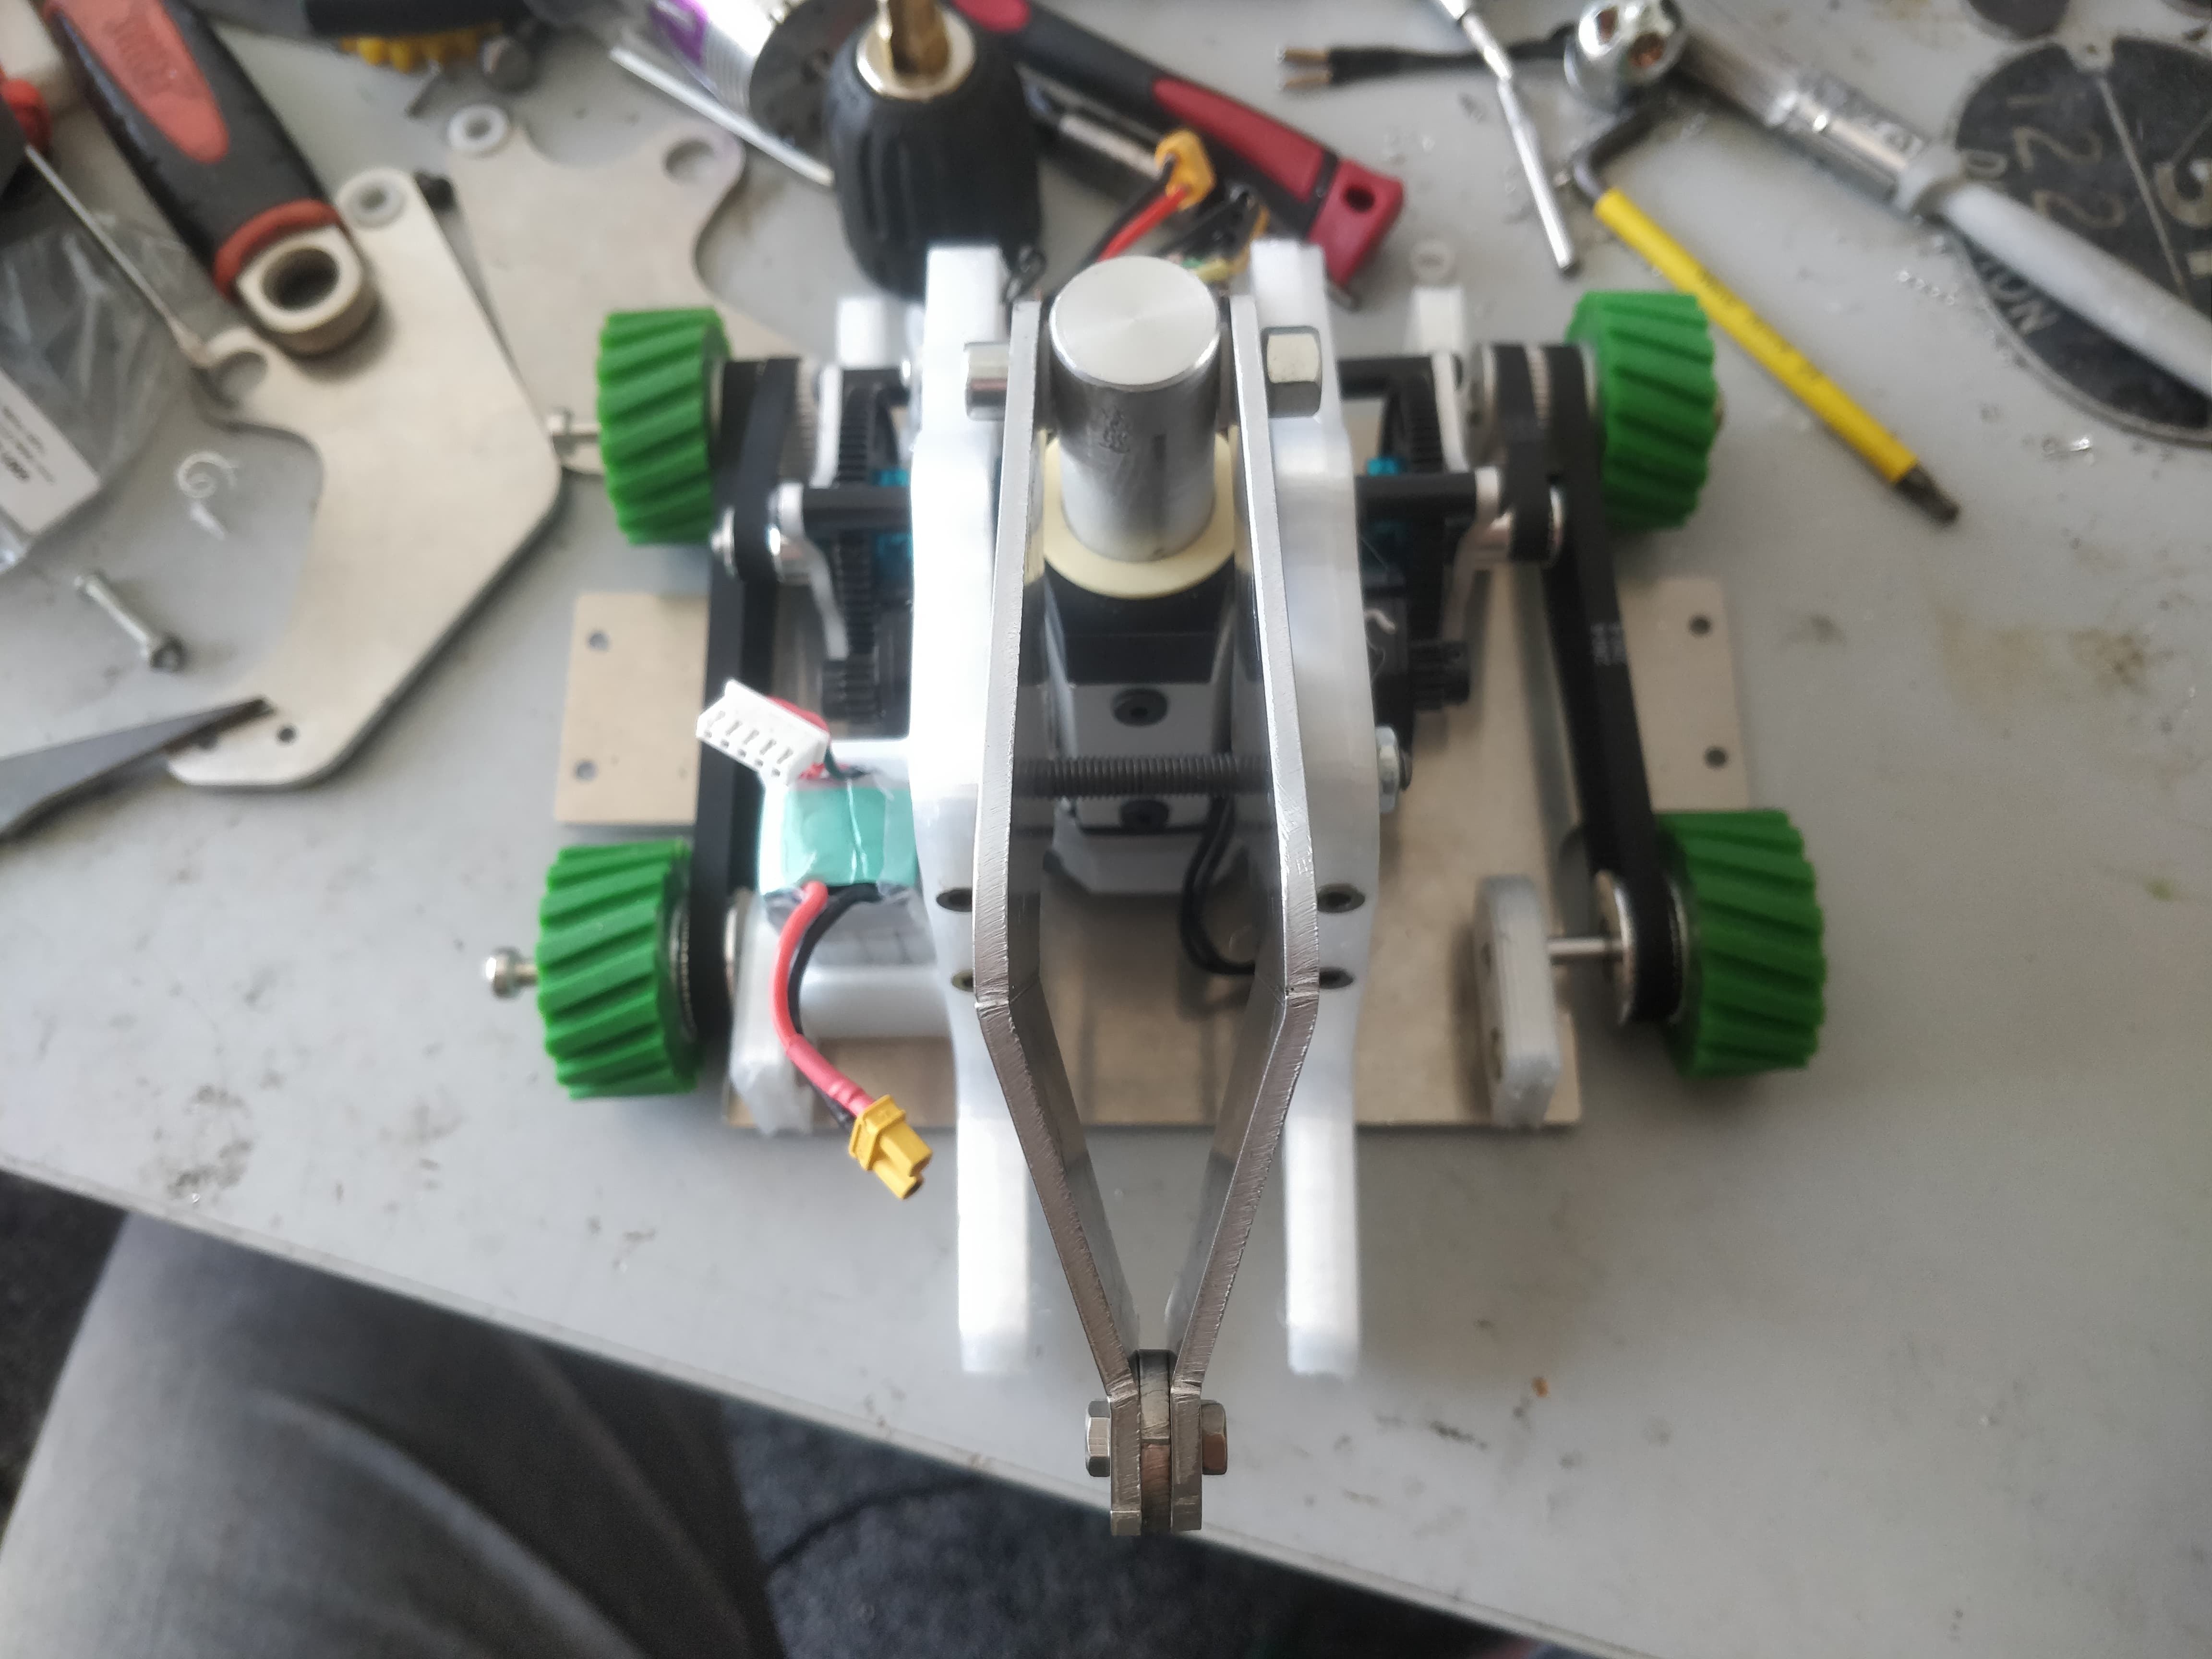
The weapon subassembly is looking mega if I do say so myself. Super bitsy and it packs a pretty impressive punch.
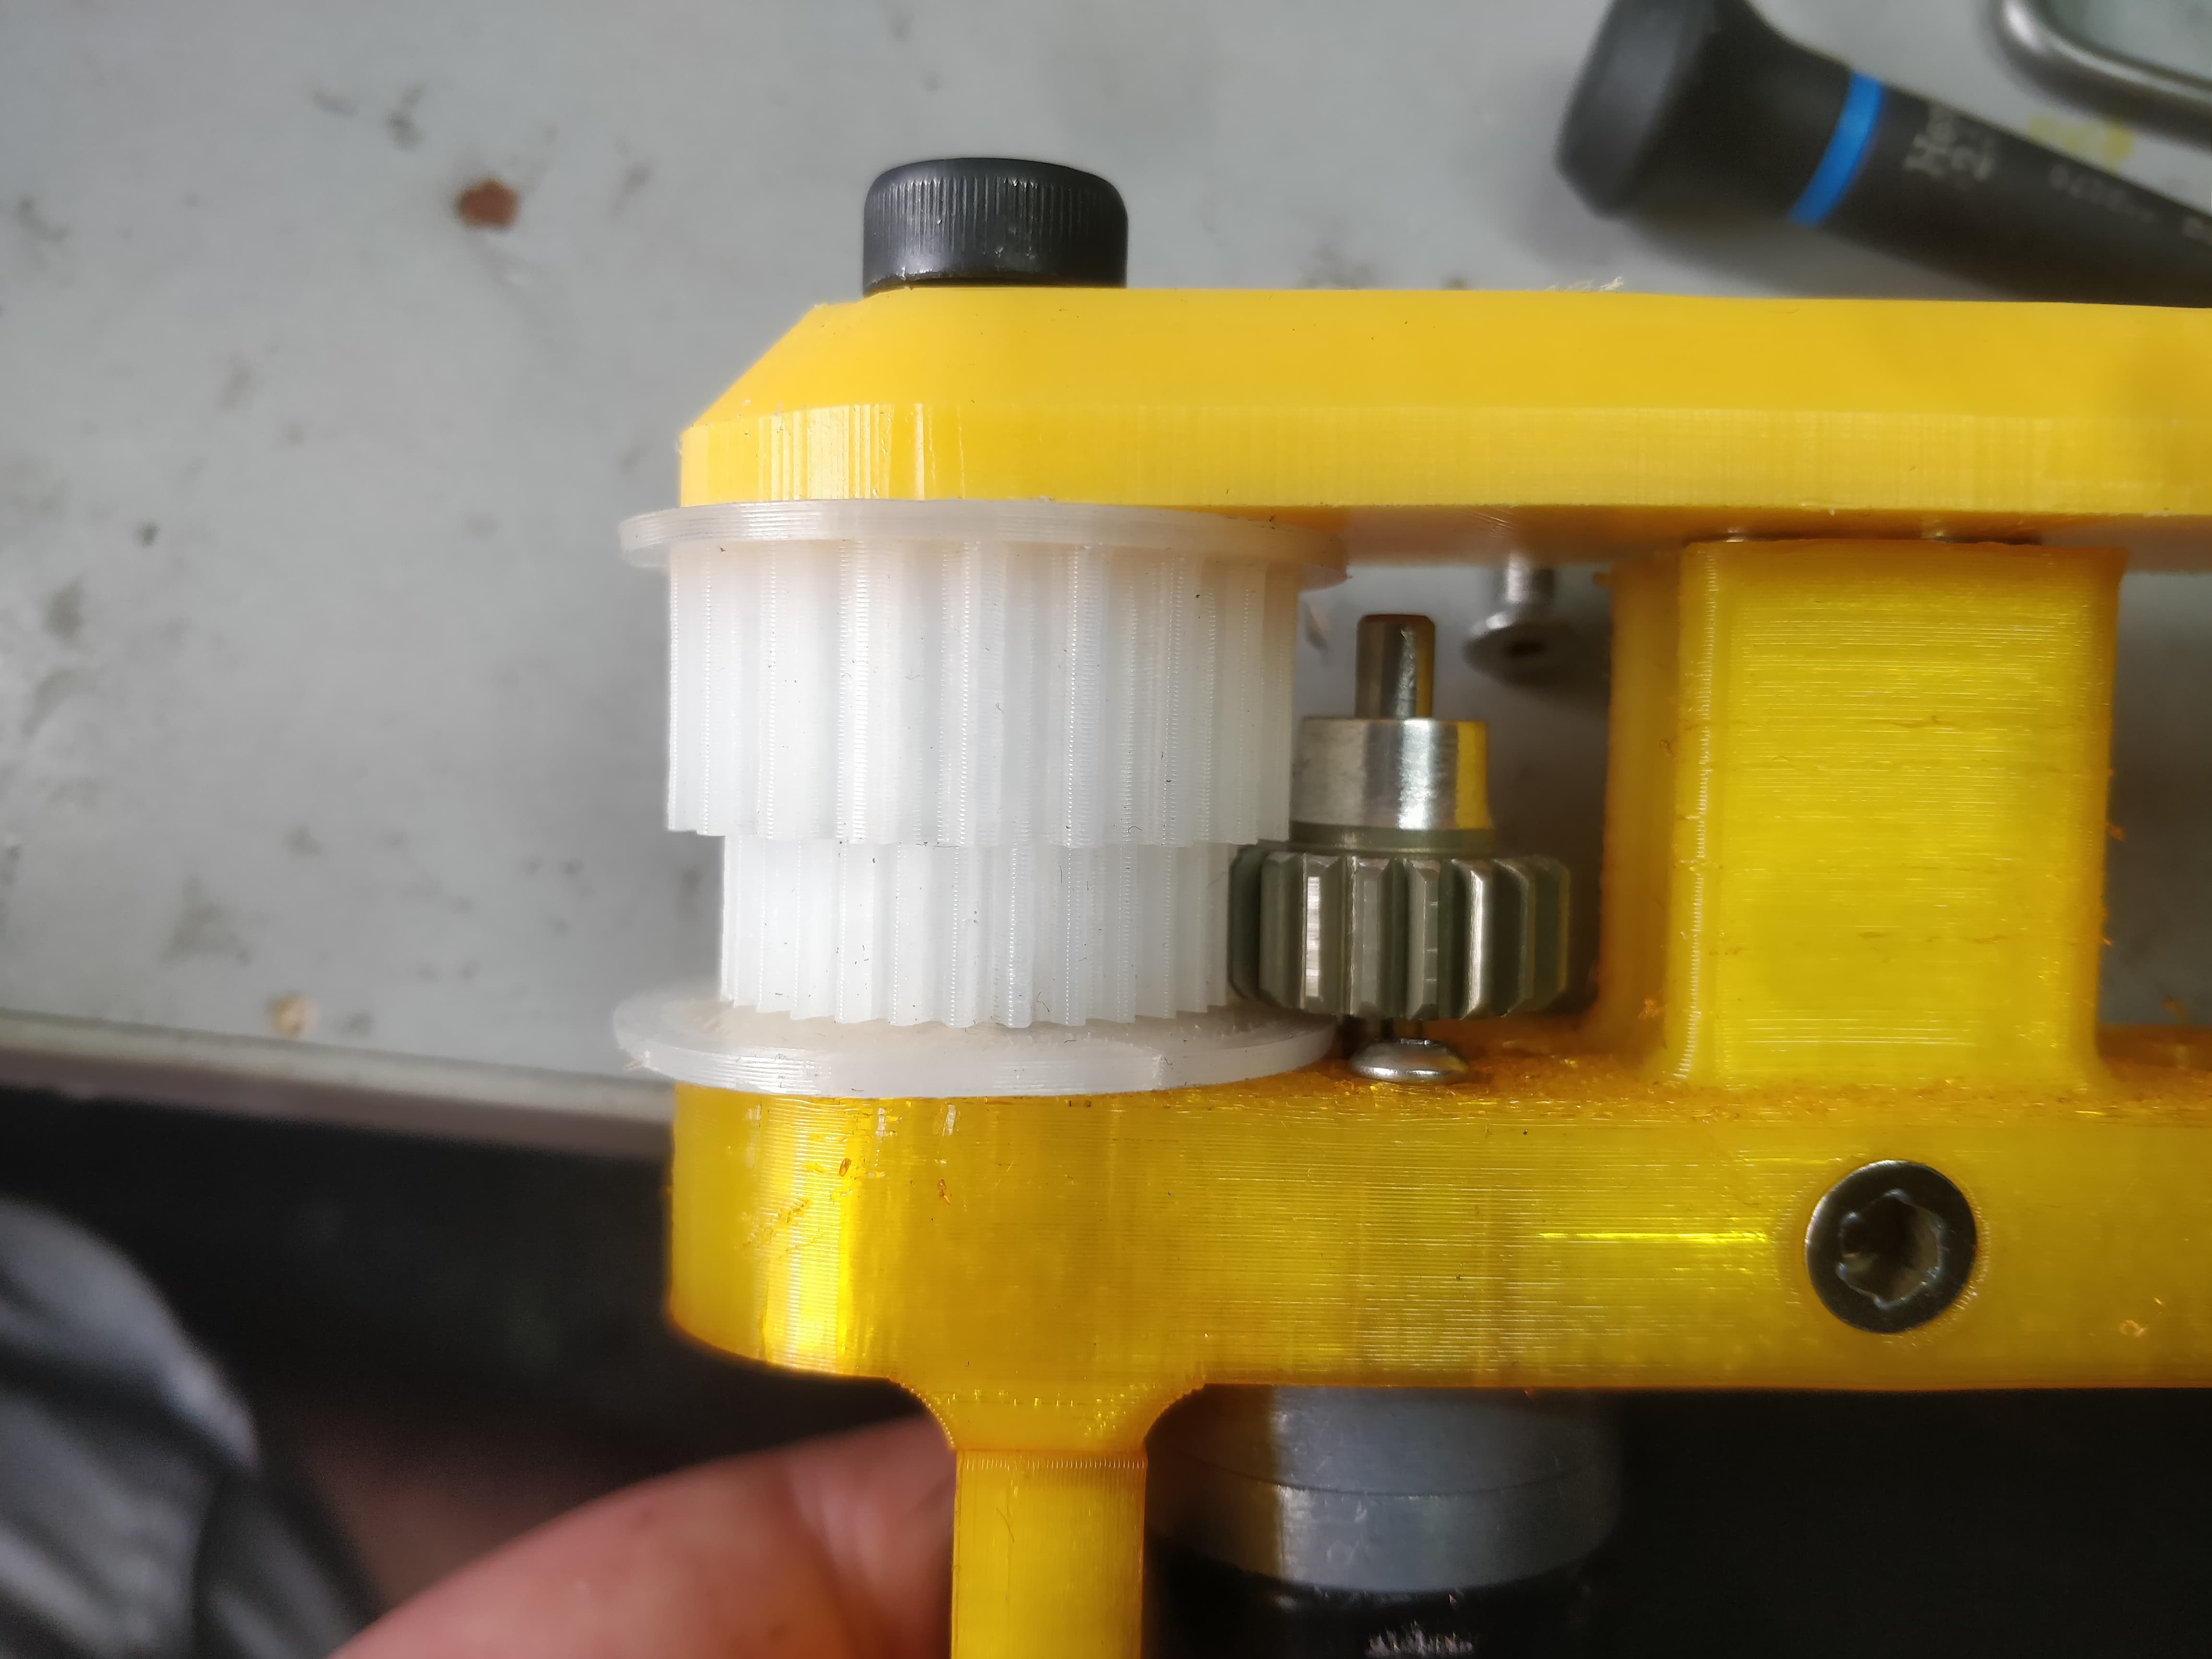
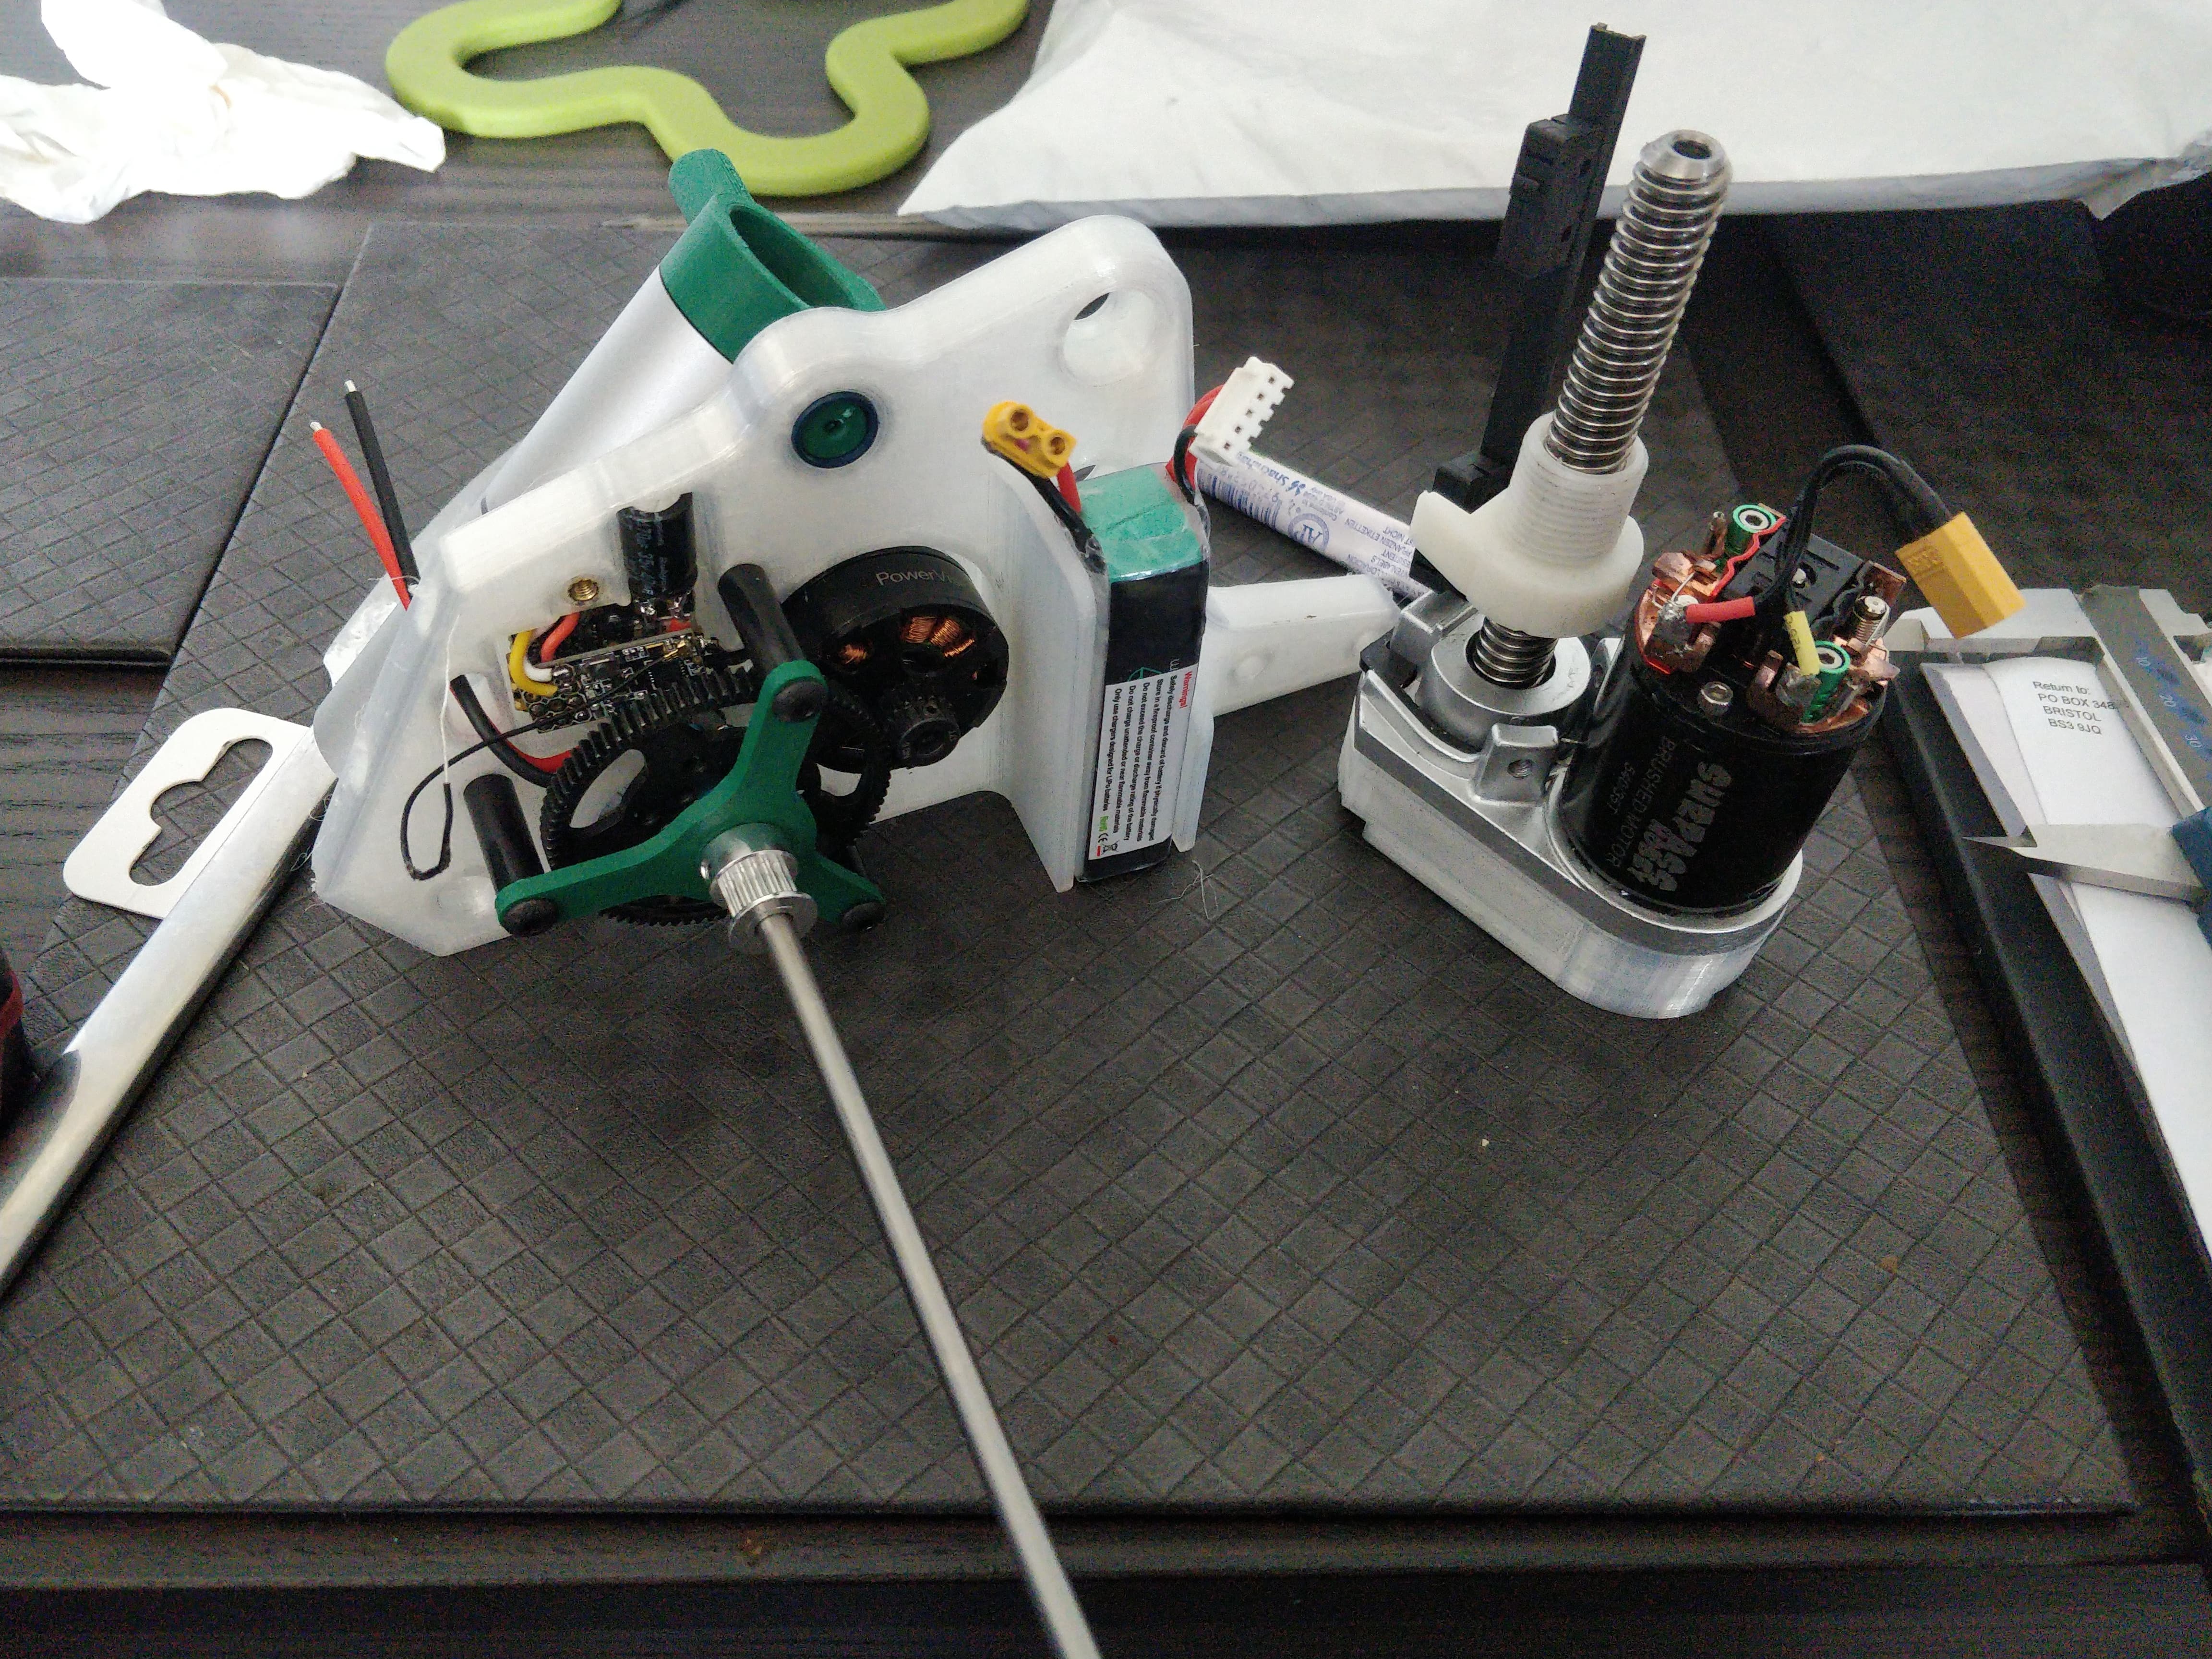
Had to skim down the boss of the pinions. I have a set being machined properly but I had to ghetto it in the interim as time is getting tight.
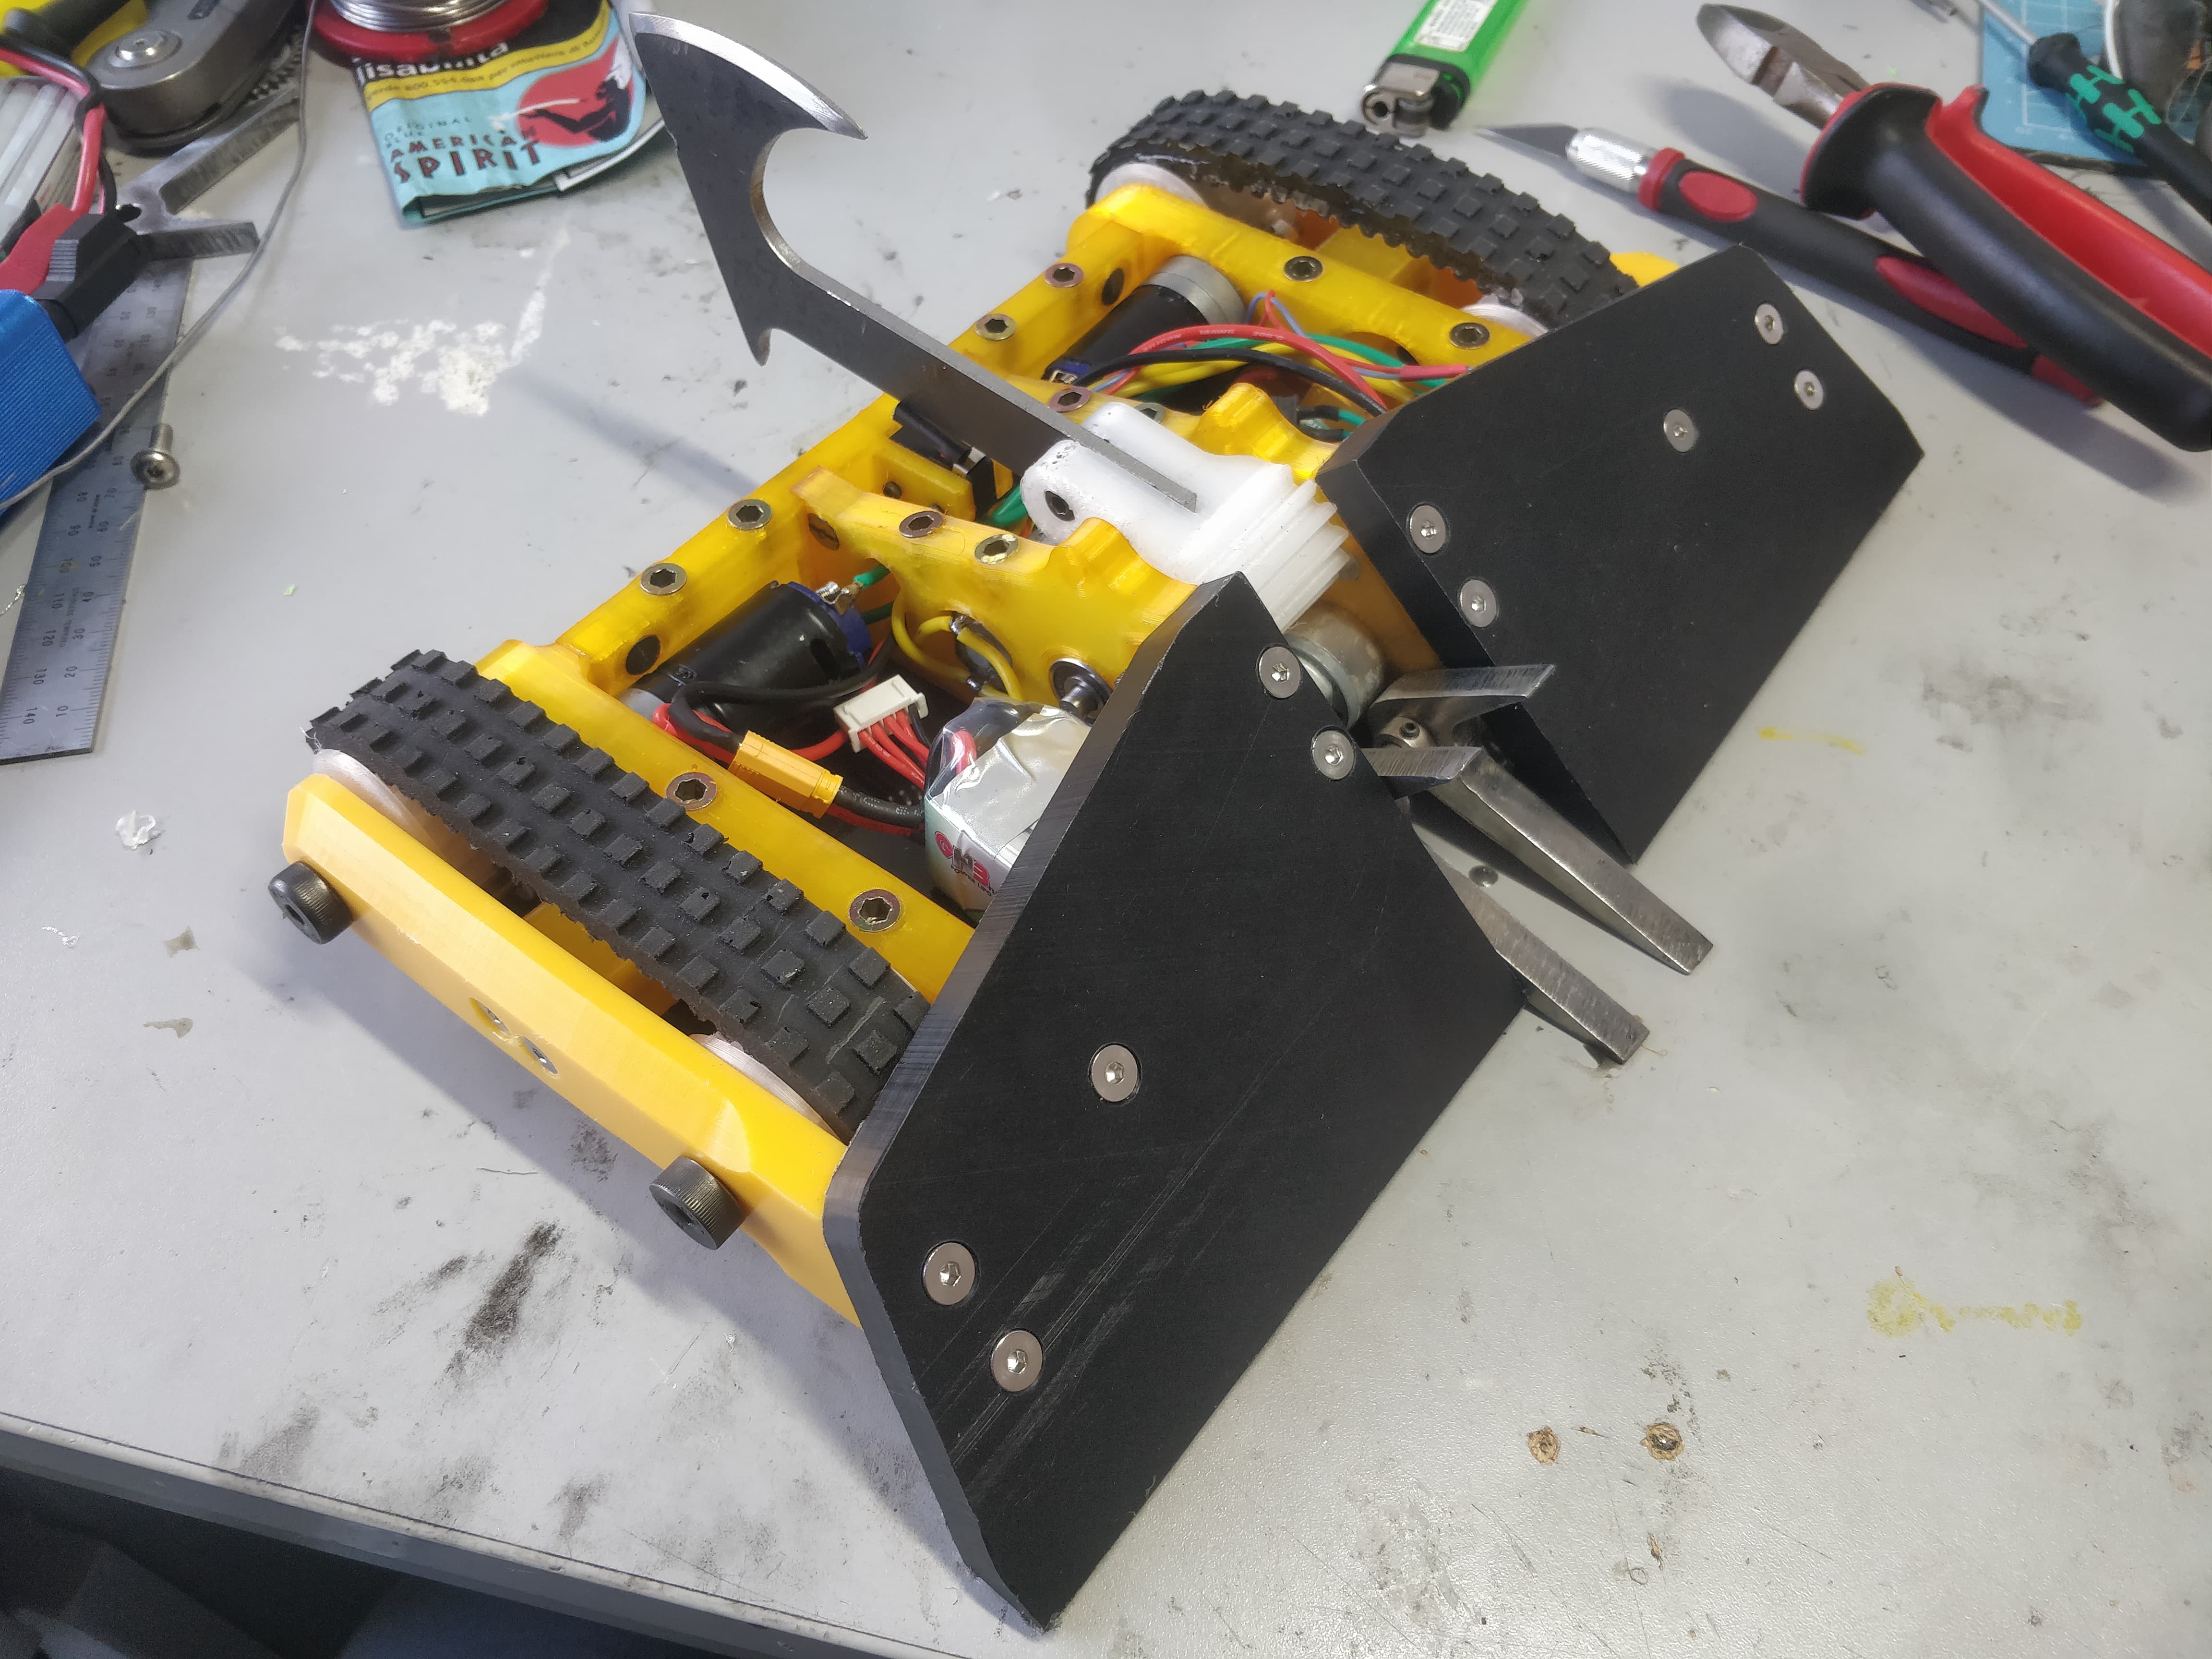
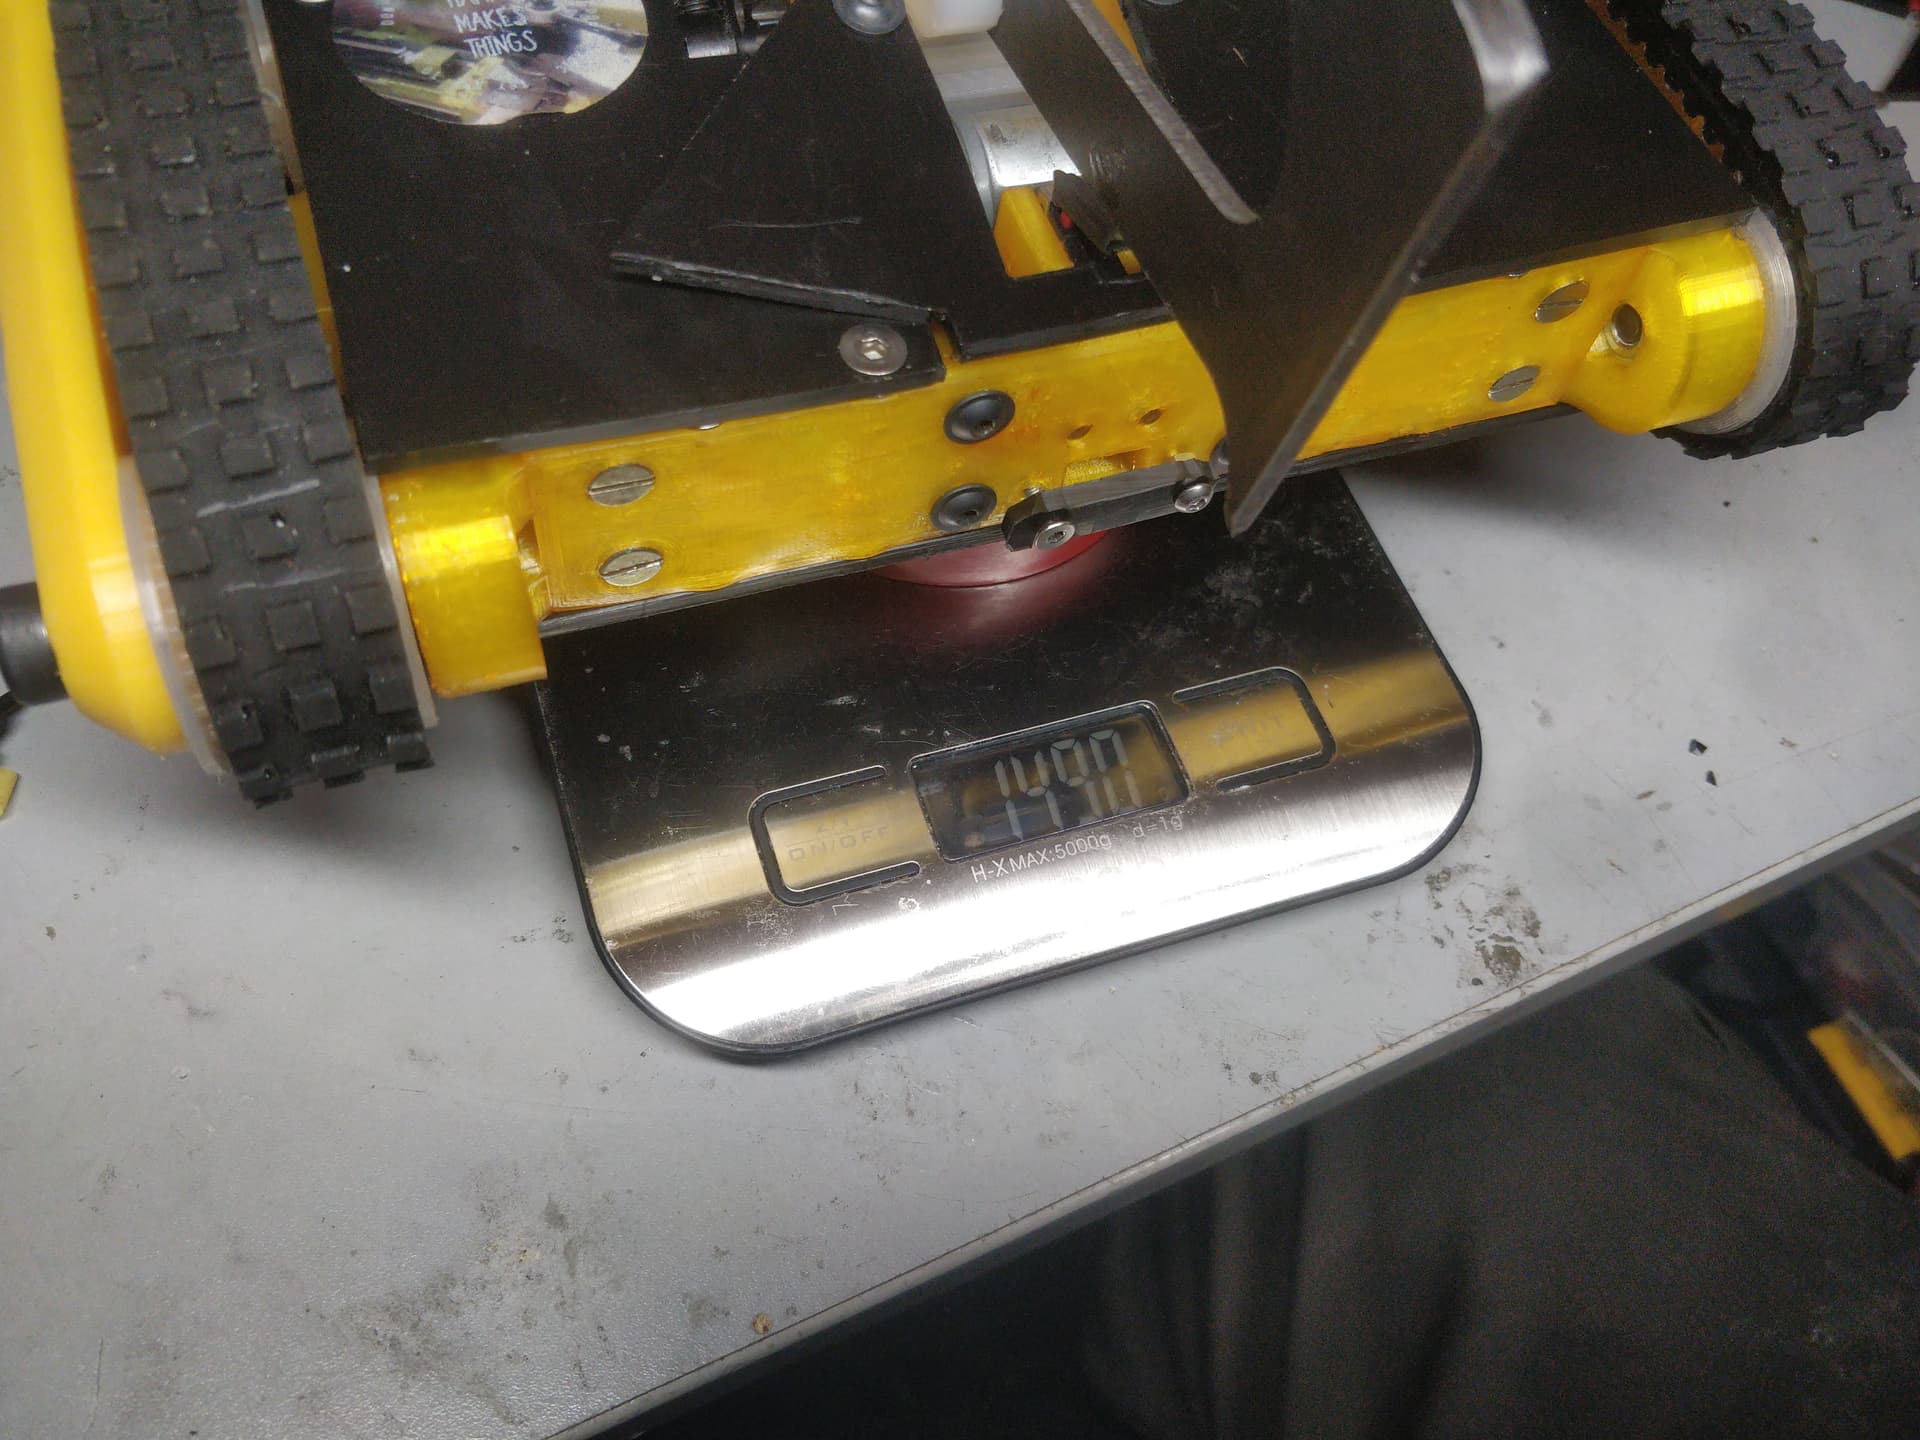
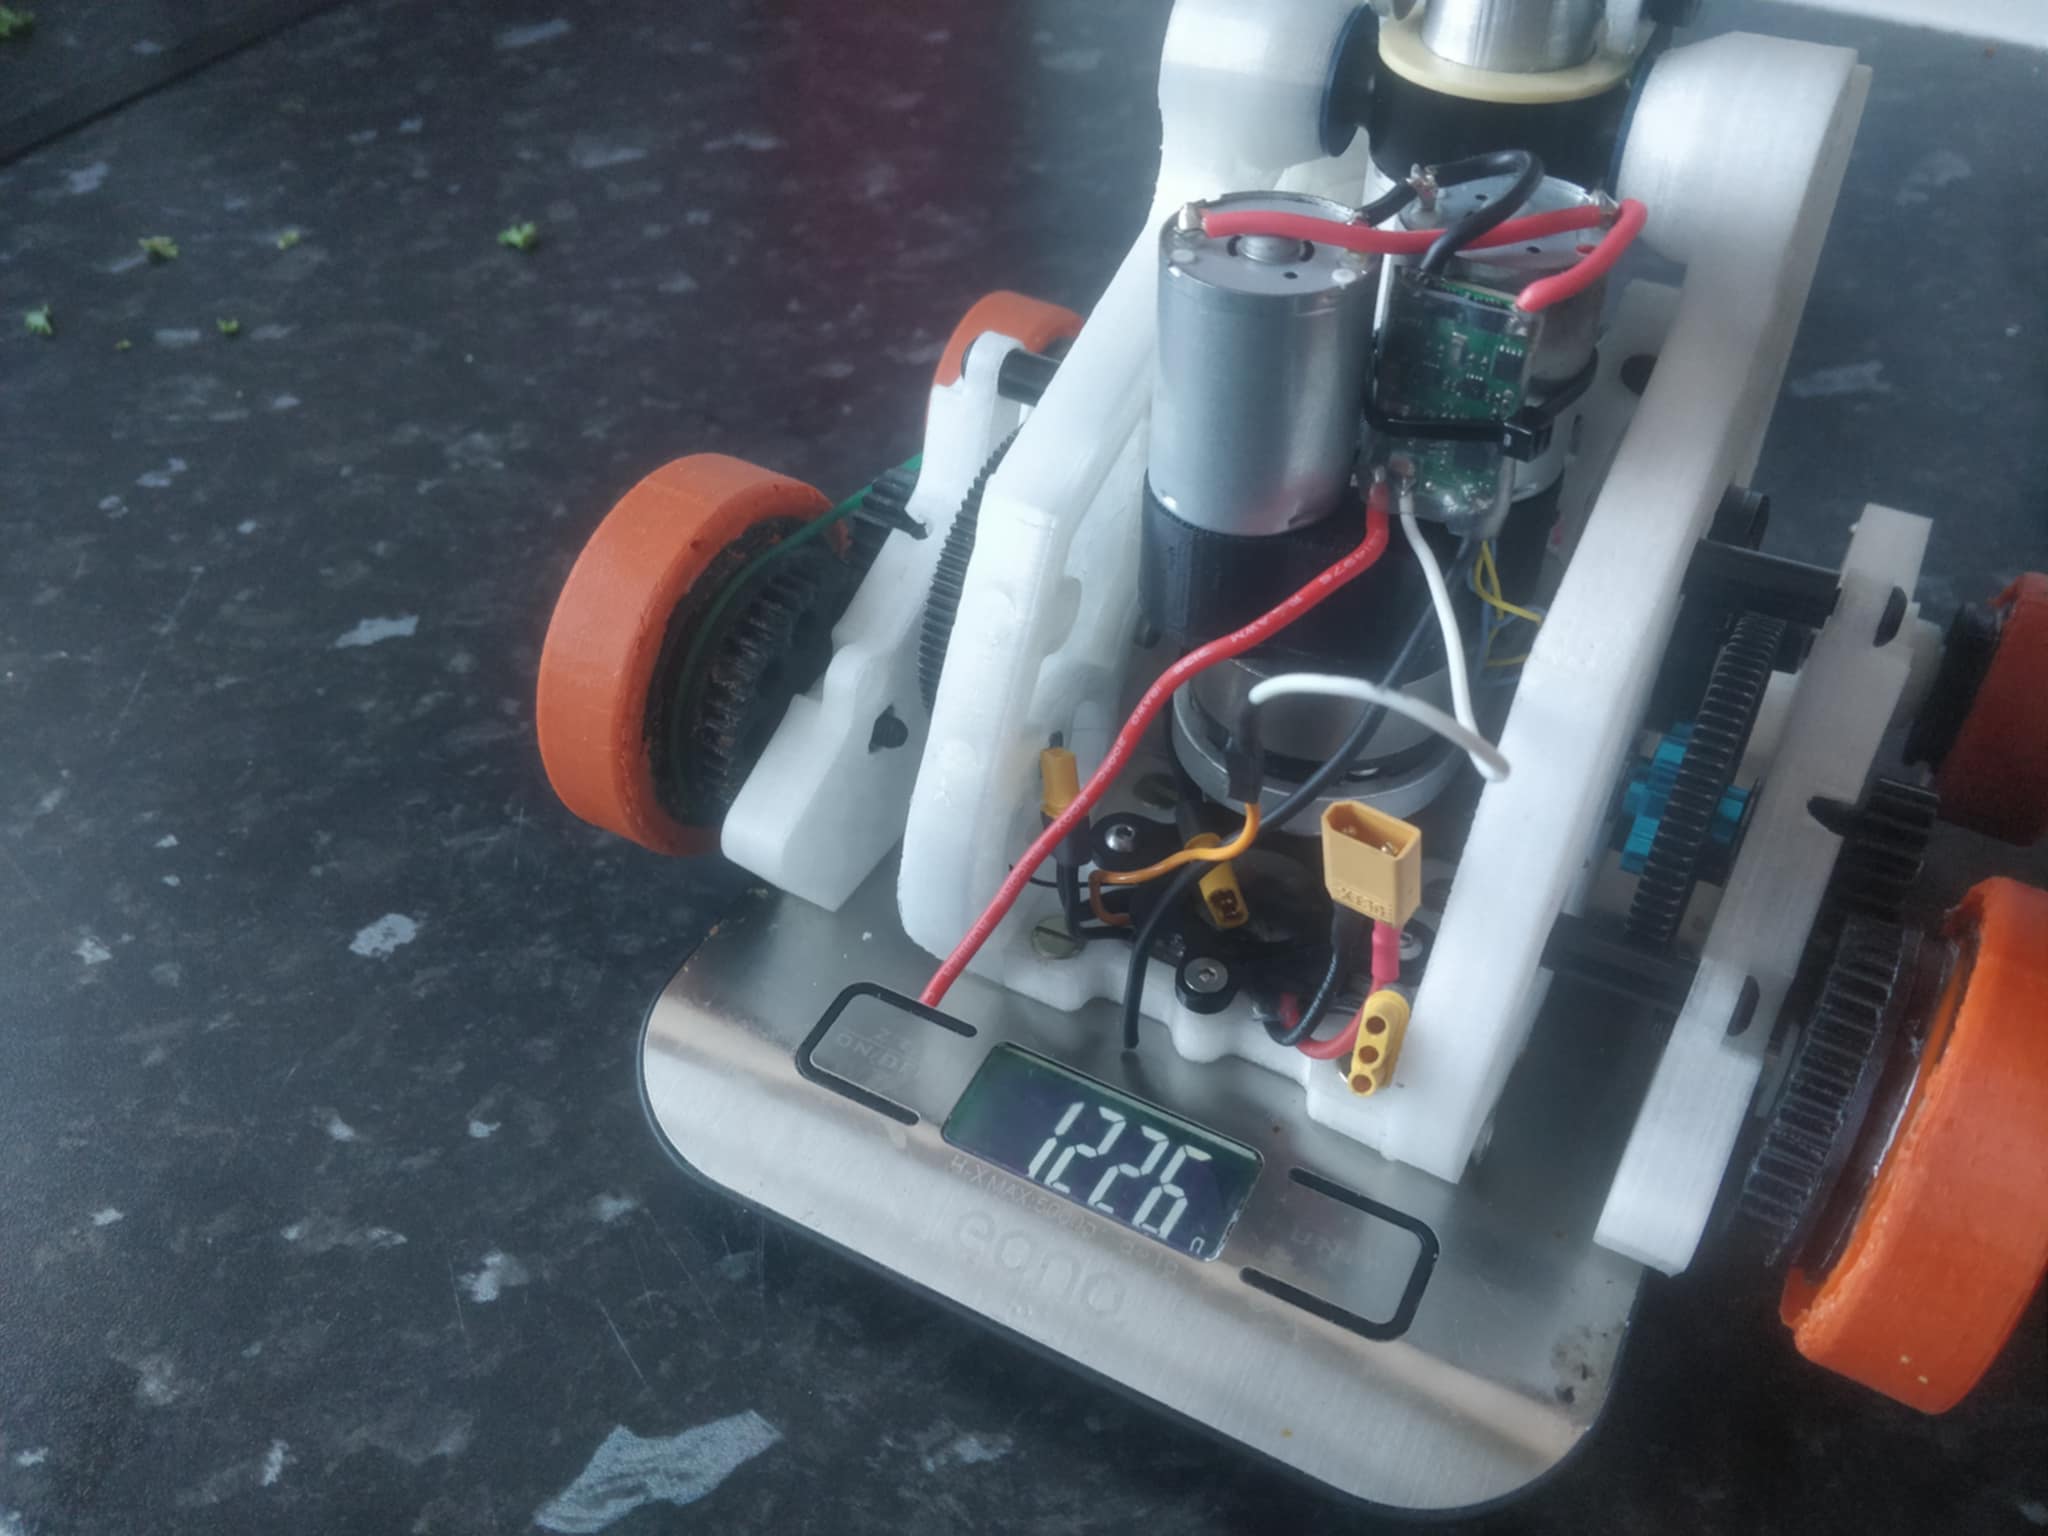
Sitting pretty at about 1400g minus lid. It’s the heaviest, widest and hopefully the best MotherLoader built to date. Roll on Brawl!

Pretty angry on the axe and the drive ain’t half bad.
Think you need longer forks haha
Brawl has come and gone and it was a super time. I know here on this forum I’m preaching to the converted but I’m always hugely impressed by BBB and the care and attention that goes into their events. Not only is it legitimate and awesome competitive scene if takes excellent care of the human element which is wonderful.
So this was it for MotherLoader(s) this was the last chance for redemption, success and warm fuzzy feelings. The big question on nobodies lips, did it achieve any of that?
Answer: Kinda!?
All (some) will become clearer (not) by the end of this ramble. So let’s start at the beginning of the end. I had a mad little dash at the last minute to get it all together. Nothing too hectic but it was a good couple hours every day in the week proceeding the event
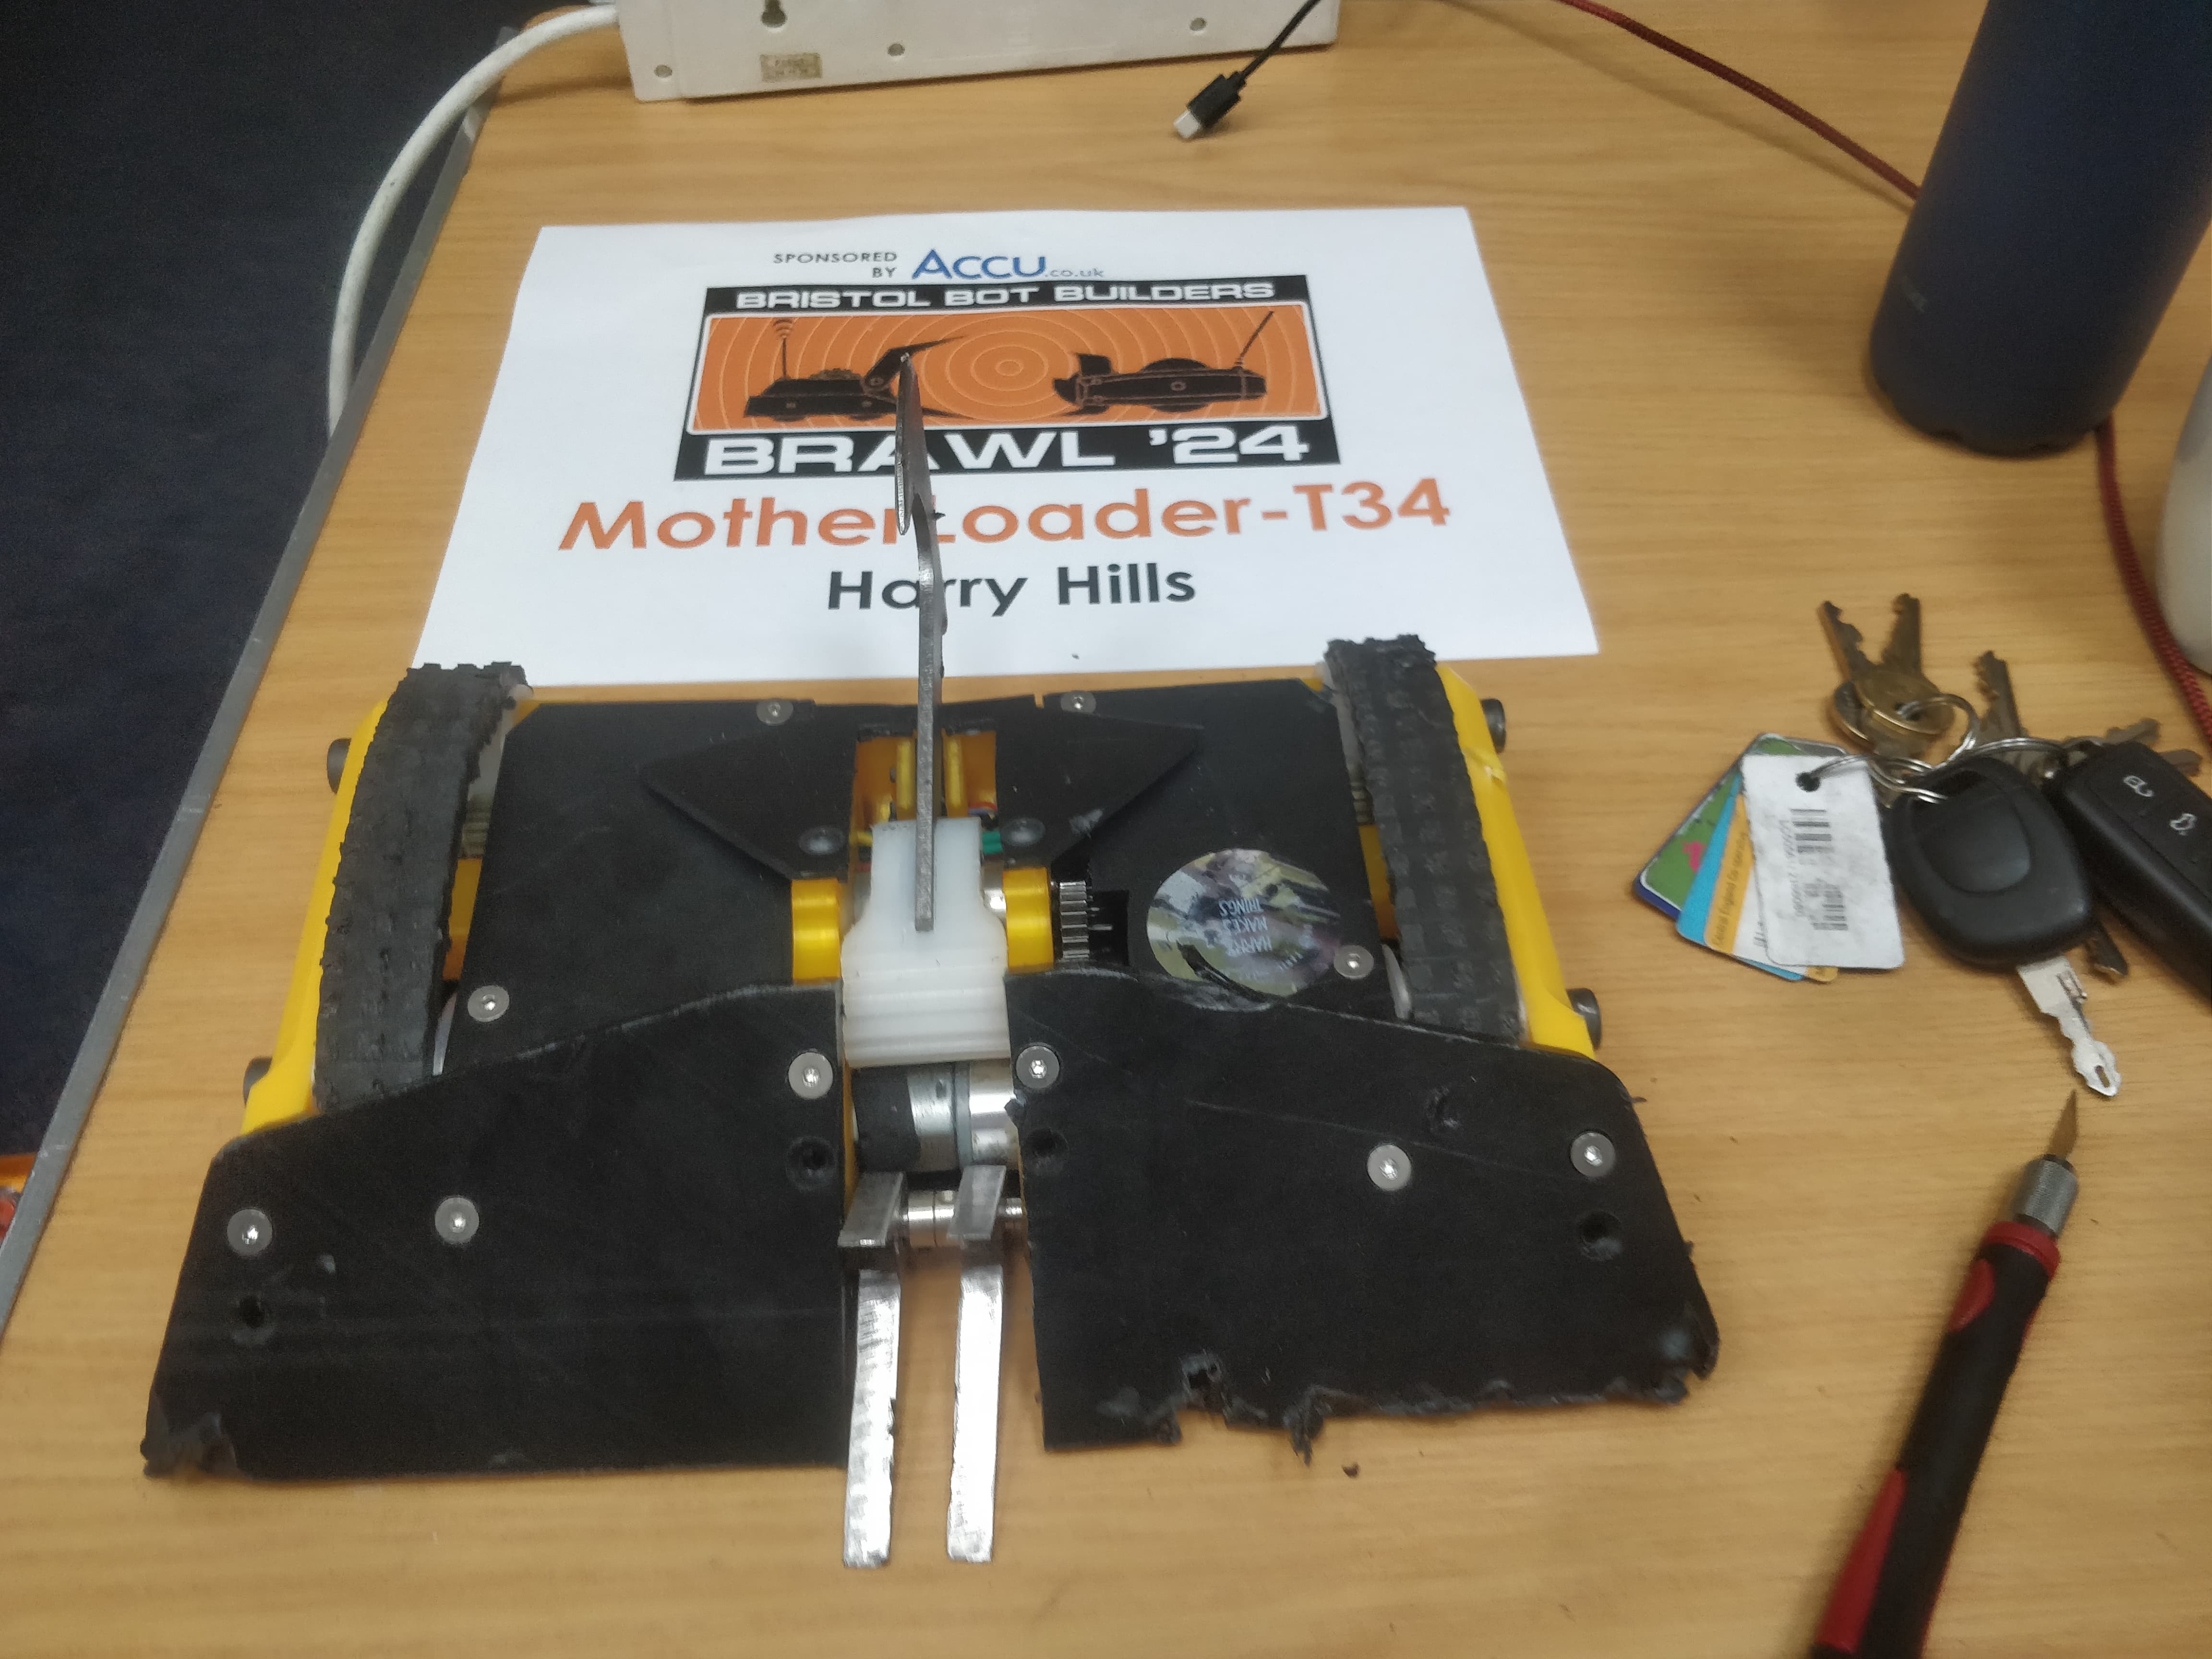
I got it slipping under the weight limit. I had a bit of a nail biting five minutes as the first weigh up it was 1503g. That was with the sharp edge and locking bar so luckily it could fall under with those items put aside.
I also decided to grow up and put a little effort into my sharp edge protection now that the axe actually has a little edge to it. It’s a contoured chunk of ABS which locks to the hardox with a couple of 6mm magnets glued into it.
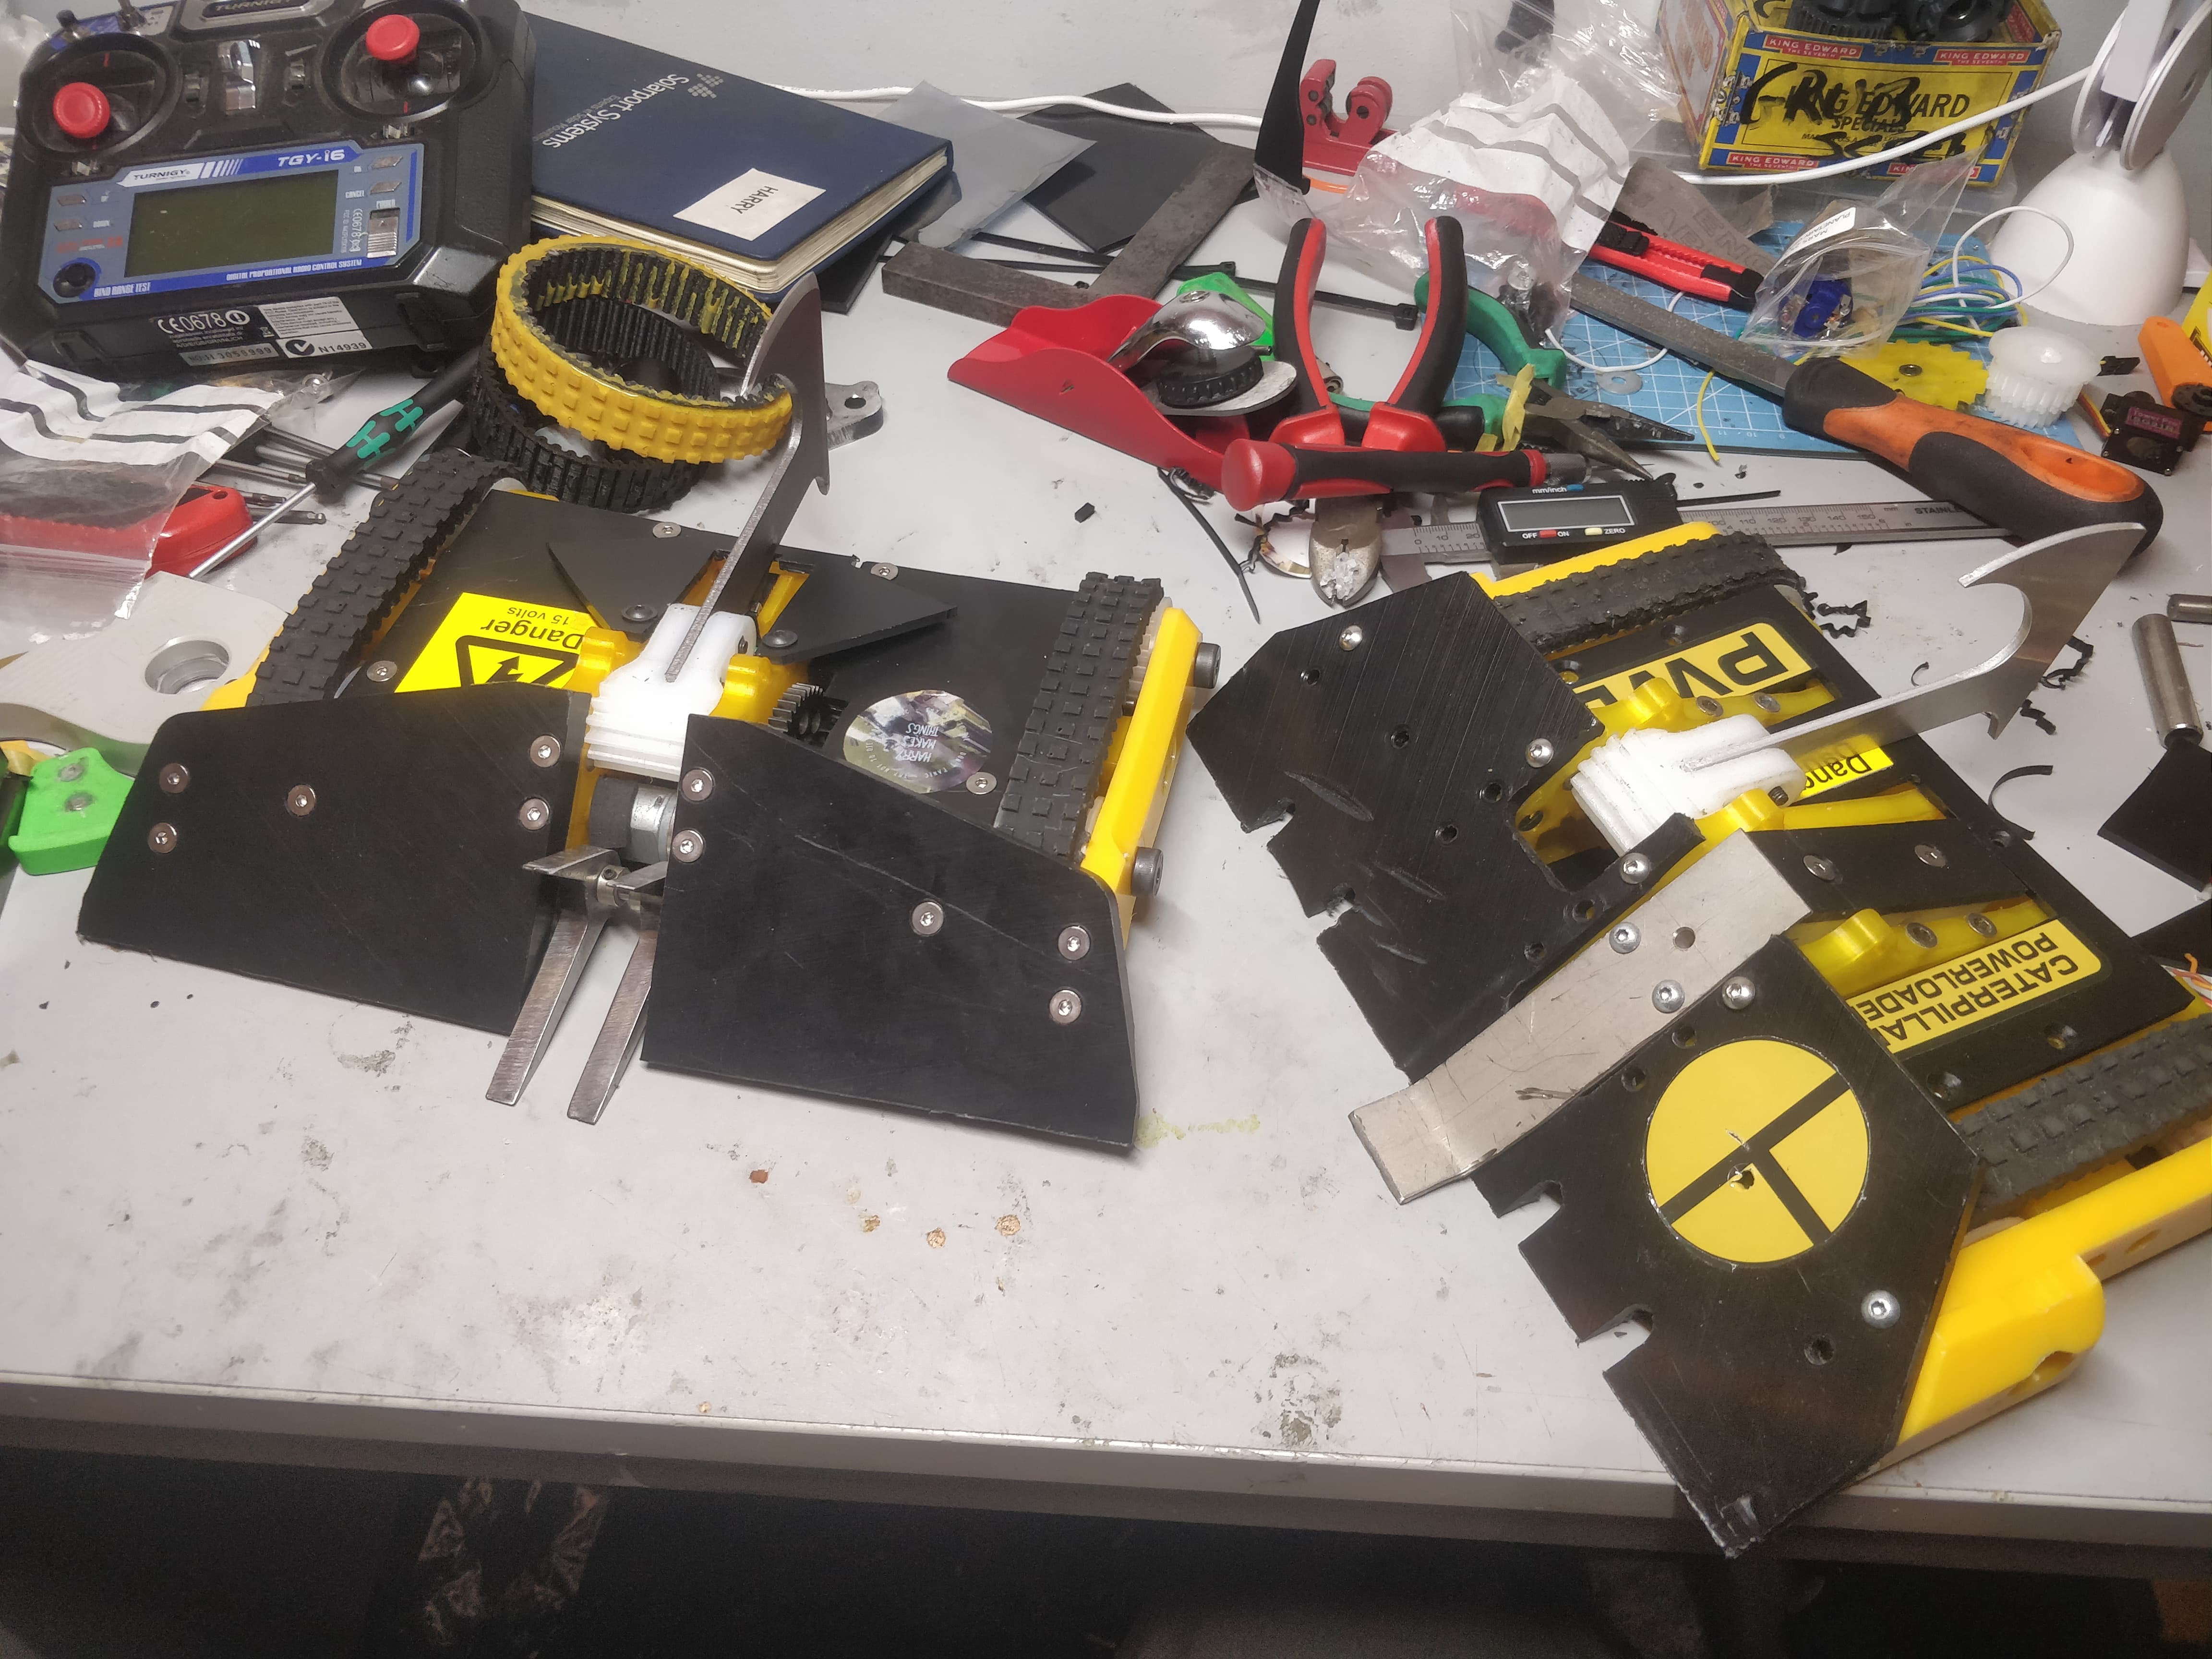
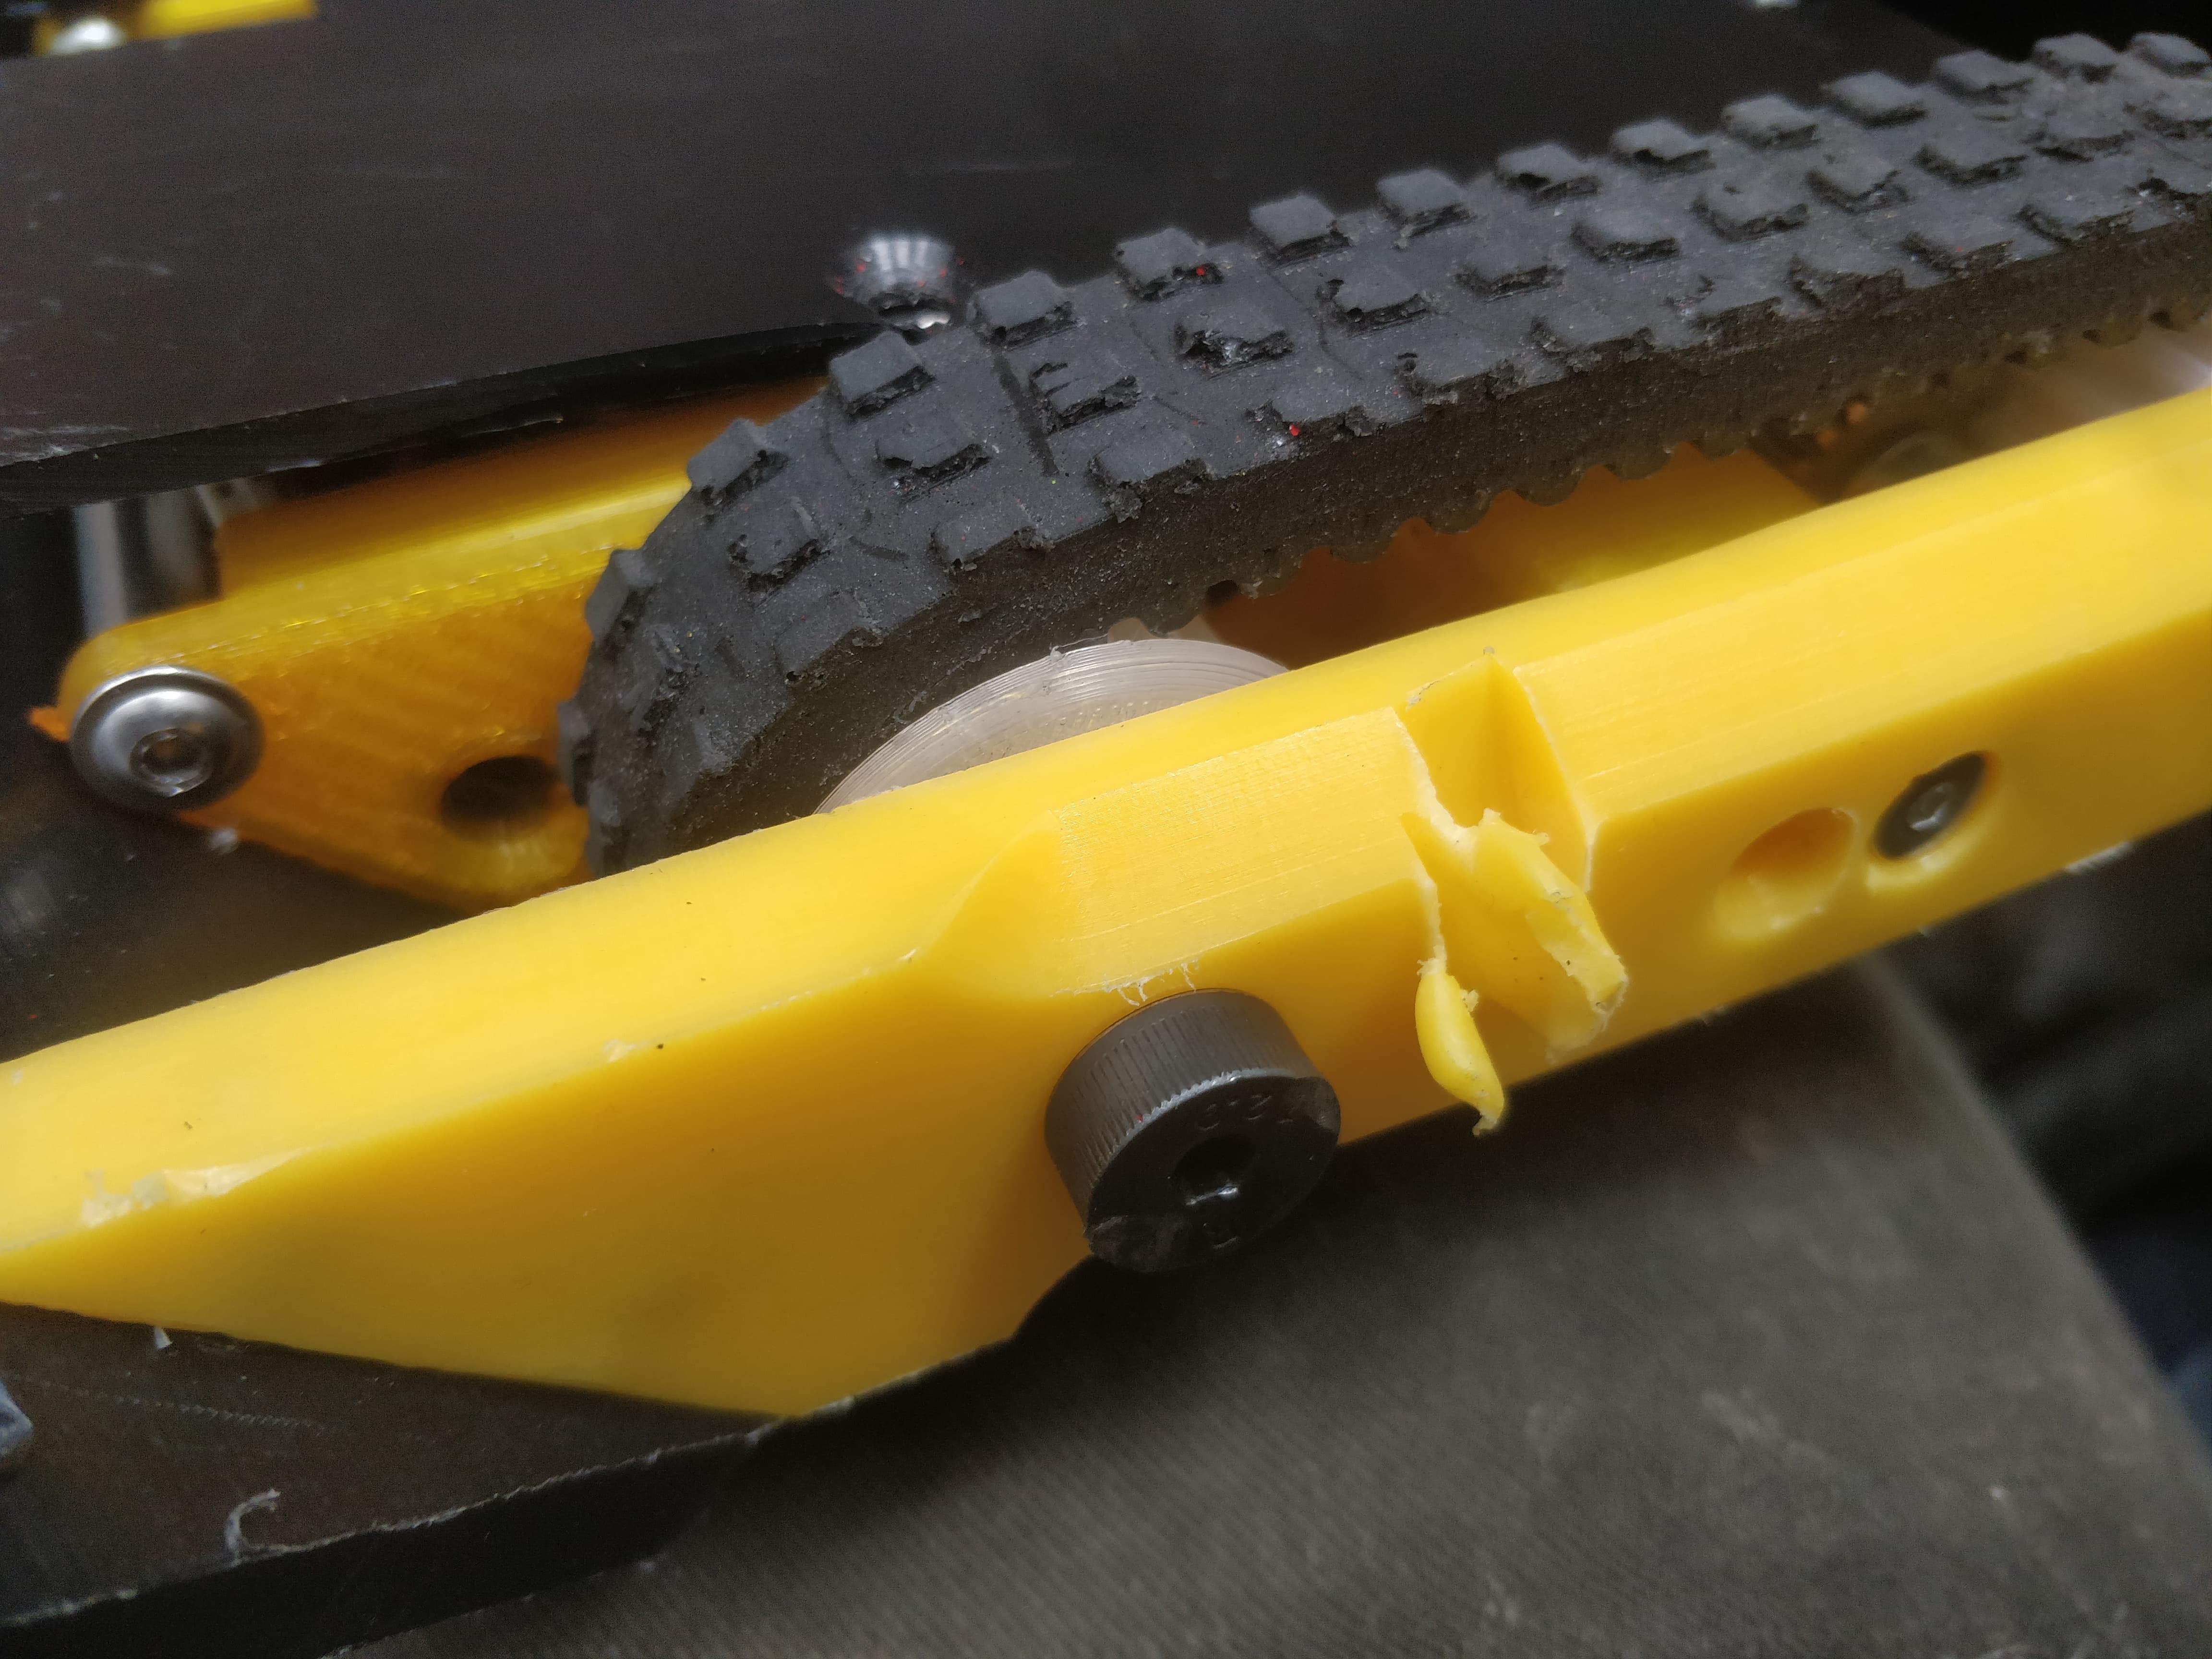
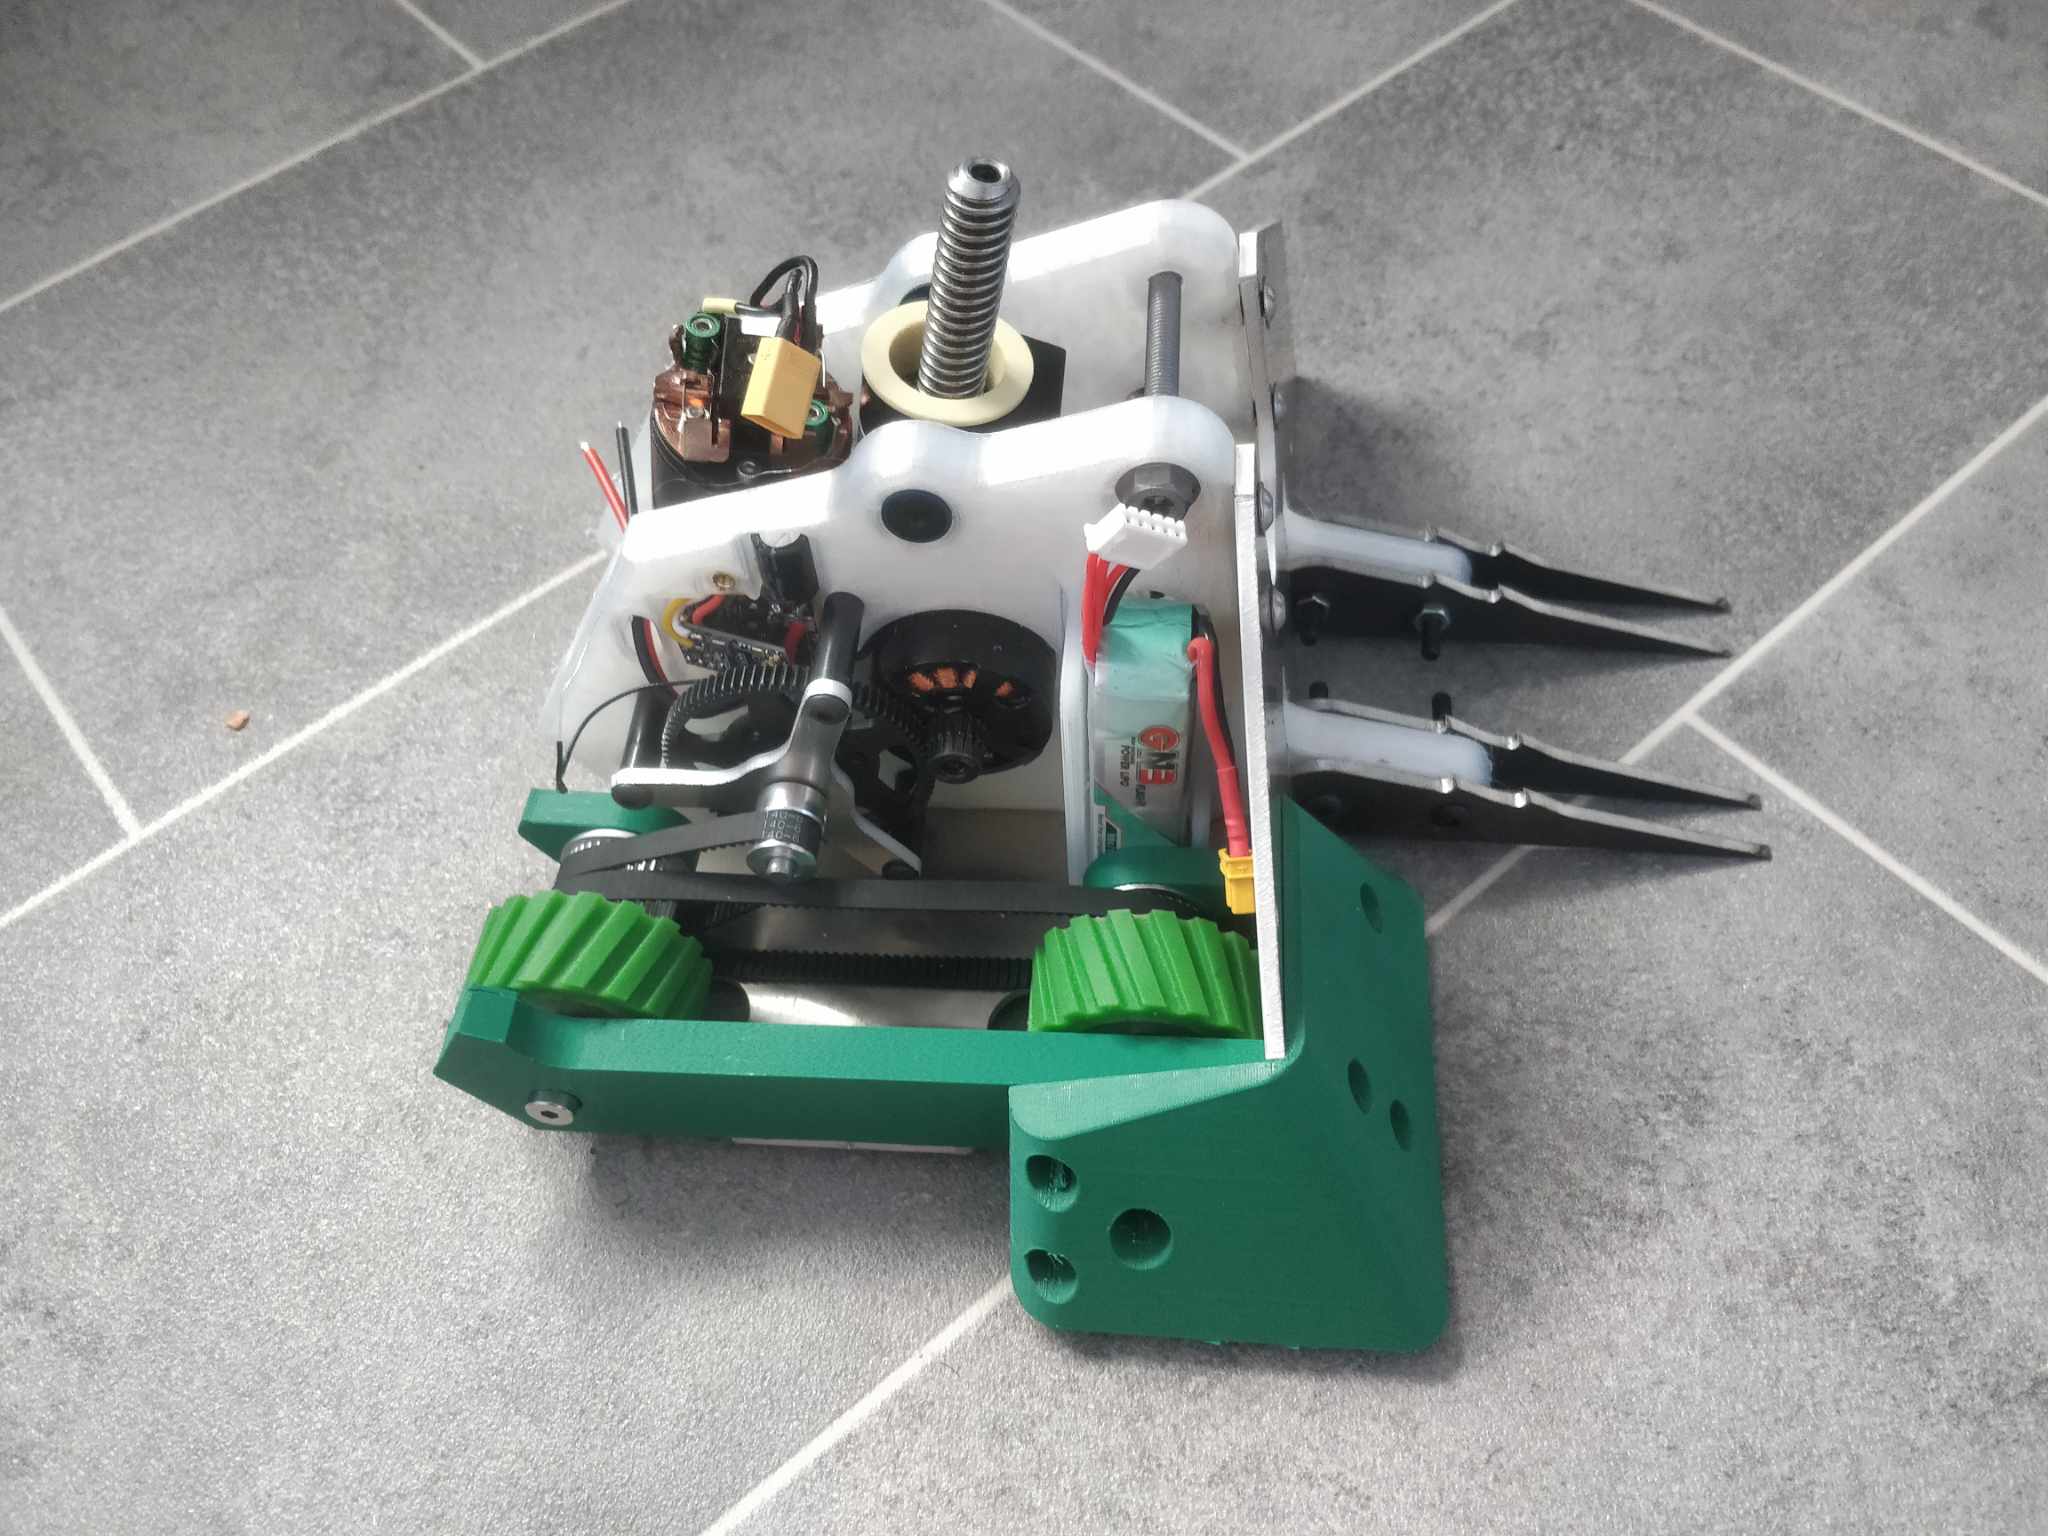
As is customary I snapped a picture with the shell of the prior version which was also coming with me to Bristol as a stop on it’s way to it’s new home. You can see T34 is a touch wider and fractionally longer thanks to the forks. The chassis profile is identical all the way back to MK1. .
My first fight was against Digestive and The Mangler. Two polar approaches for naming on show here. I was a little on the back foot to be the only non spinner but it was quite nice in a way. What a way to put the robot through it’s paces! Cards on the table, I wasn’t too worried about Mangler as while it had the potential to get to the thinnest armour I felt confident I could avoid getting into bad situations and I could overpower them from a drive point of view. Digestive was the real worry.
I was correct to be worried. Verts get a fearsome reputation and that’s one I feed into myself but not all are created equal. The speed of the drive and the sheer anger in the weapon meant I could not keep up in any meaningful way and just became a bit of a chew toy.
I take a slim moral victory in the fact that I was able to keep soaking up some really nasty hits without really suffering. The lights stayed on and everyone was most certainly still home. The HDPE stood up well and I’m glad I went for 10mm everywhere.
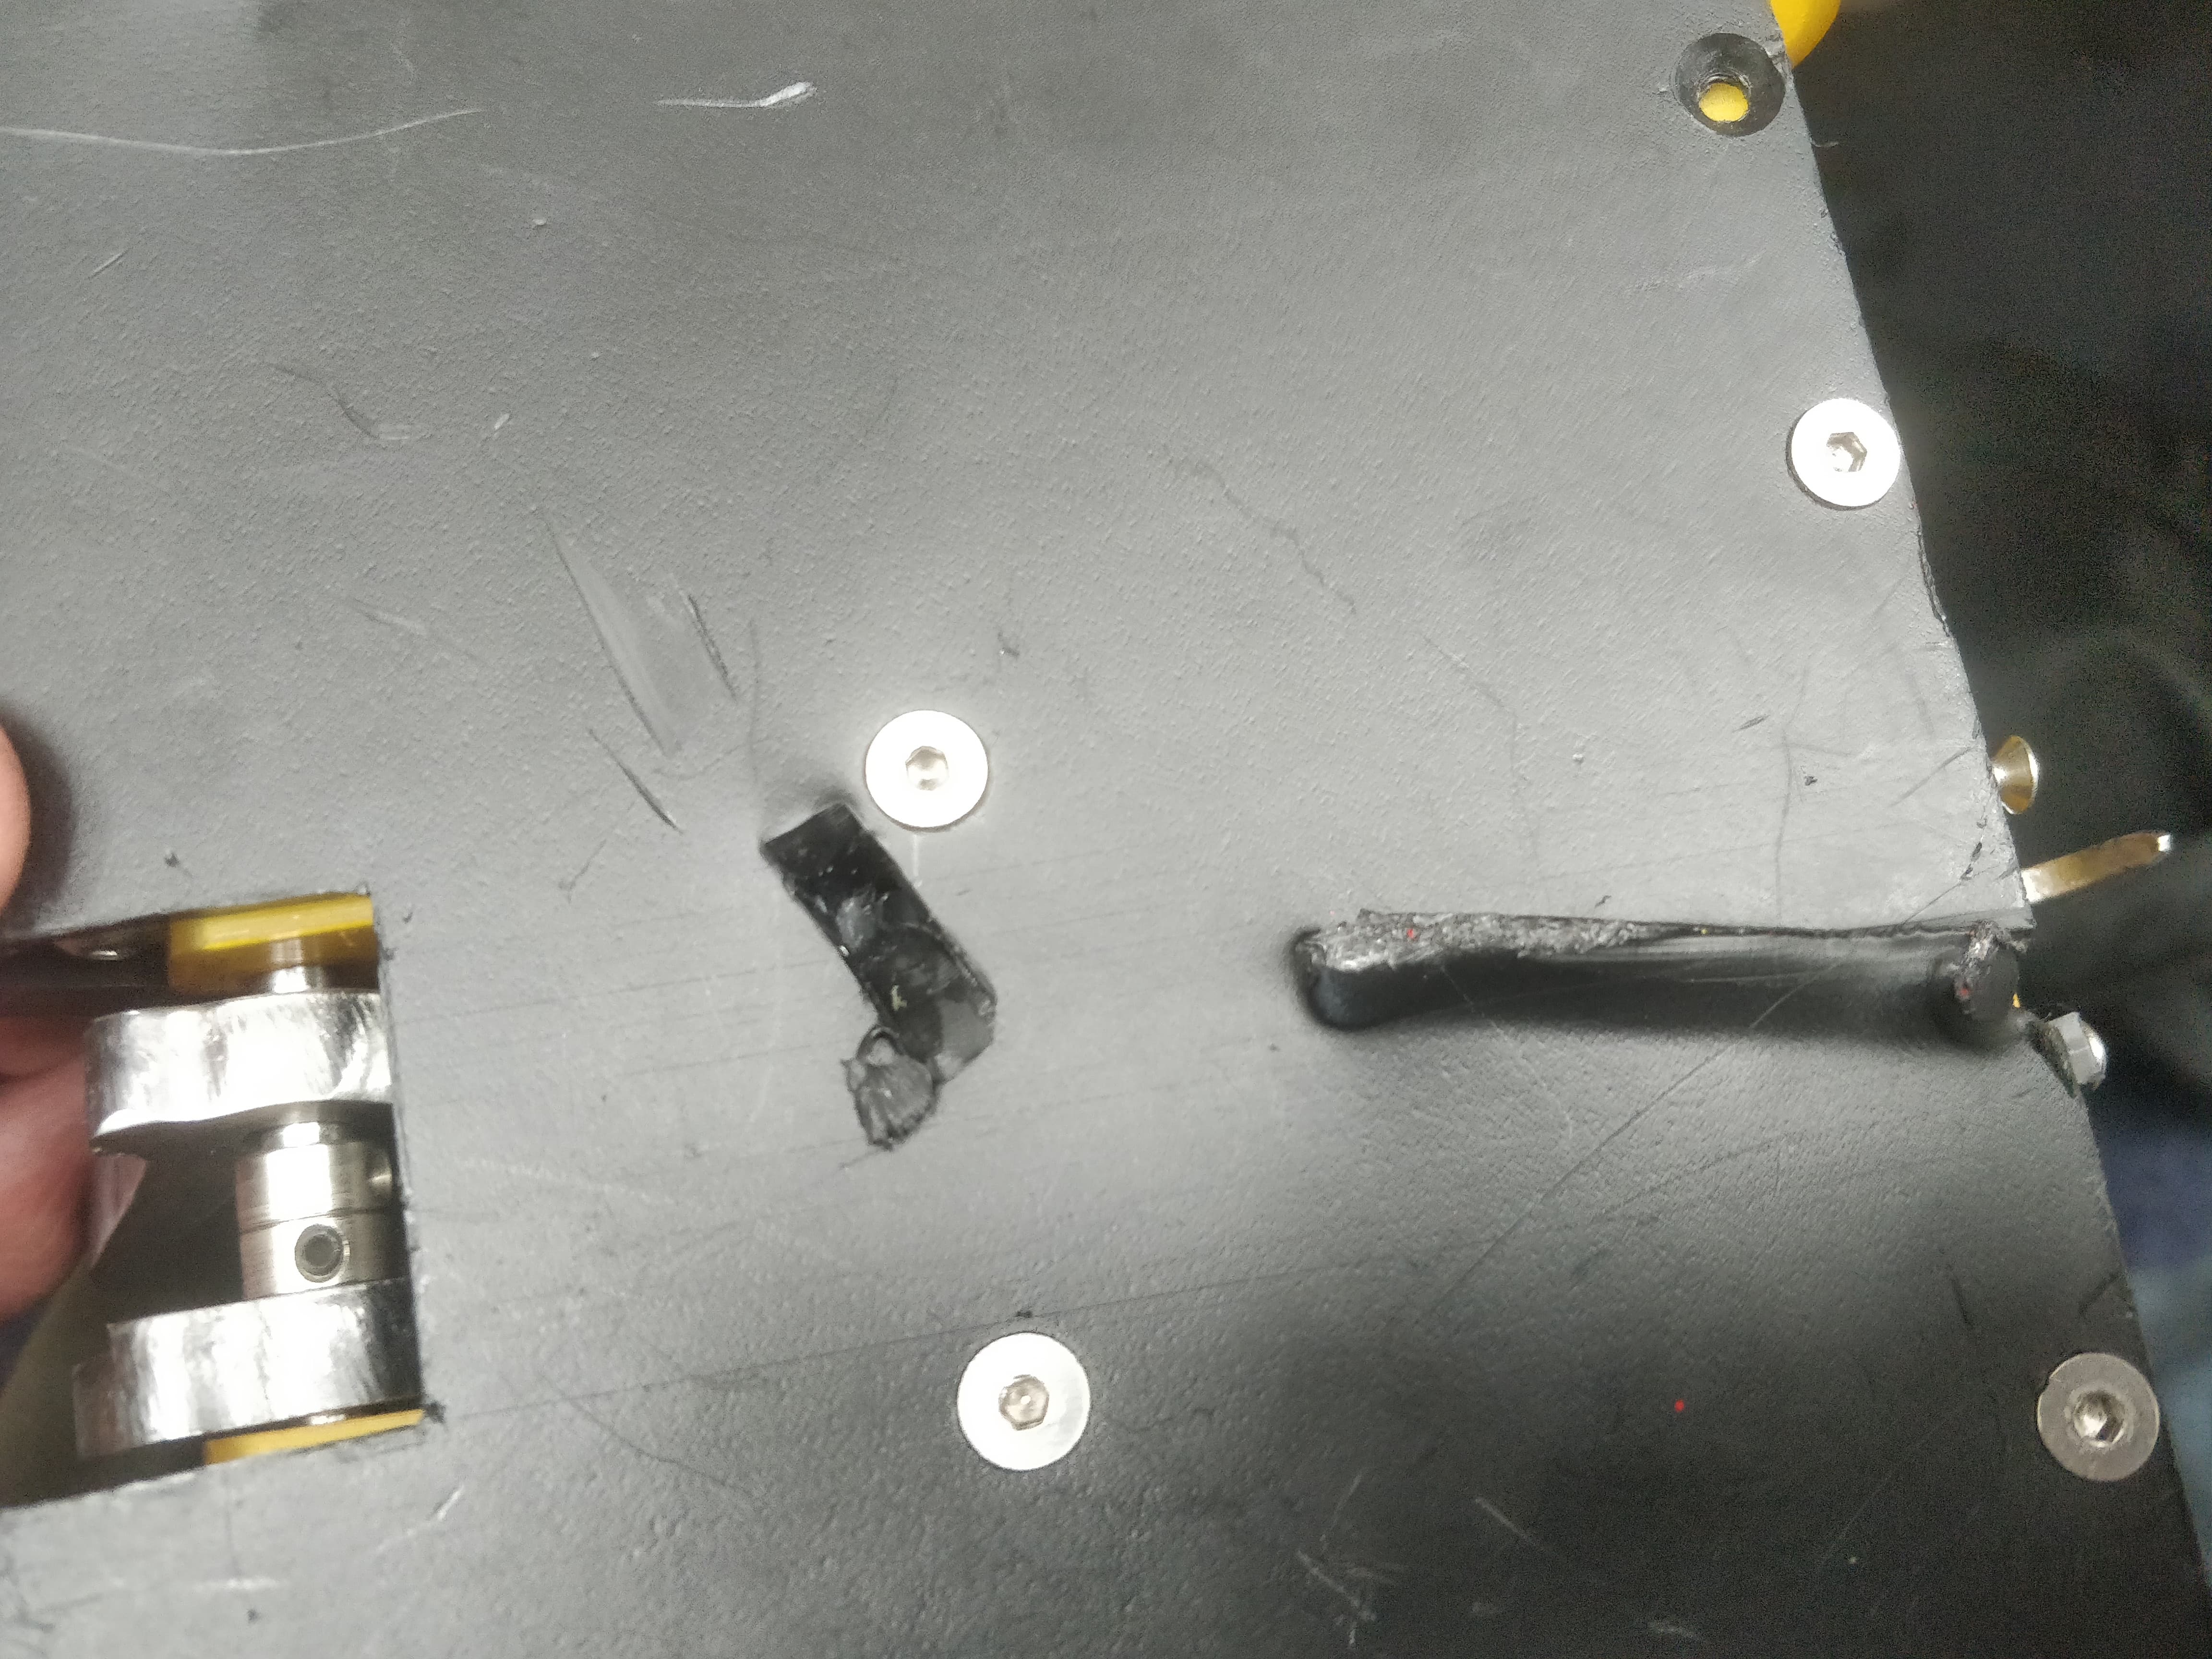
The worst but was arguably the baseplate which had been hole punched and had a substantial trench carved just shy of the important bits. Taking it off the robot I found it was badly warped. Cutting the smushed parts away seemed to remove the internal stress in the part and let it go from Pringle shaped to flat-ish. I was a little miffed at the track had come off as I was completely willing to keep going. I think it was just impact related though I’m not ruling out stretch.
I had a cup of tea and a scotch egg to steel my reserve and got on with mundane activities like charging batteries and bemoaning my now slightly wonky (ier) chassis.
I was then told I was fighting Tsukikage which was a bit of a downer for me. I do not do well with control fights. This robot was 4wd with lots of forks and pokey bits to get hung up on. I wasn’t realistically able to overpower him nor out drive him. I think potentially I had the speed advantage but not the wherewithal to make use of it.
We were a pretty even matchup with no quarter given either way in the battle for control. Meg was going absolutely buckwild with the axe which caused the front to jump a little on a miss but I think ultimately turned the tide as we landed more hits than we didn’t.
A loss and a win was a pretty good place to be, until I found out I’d drawn Andy.
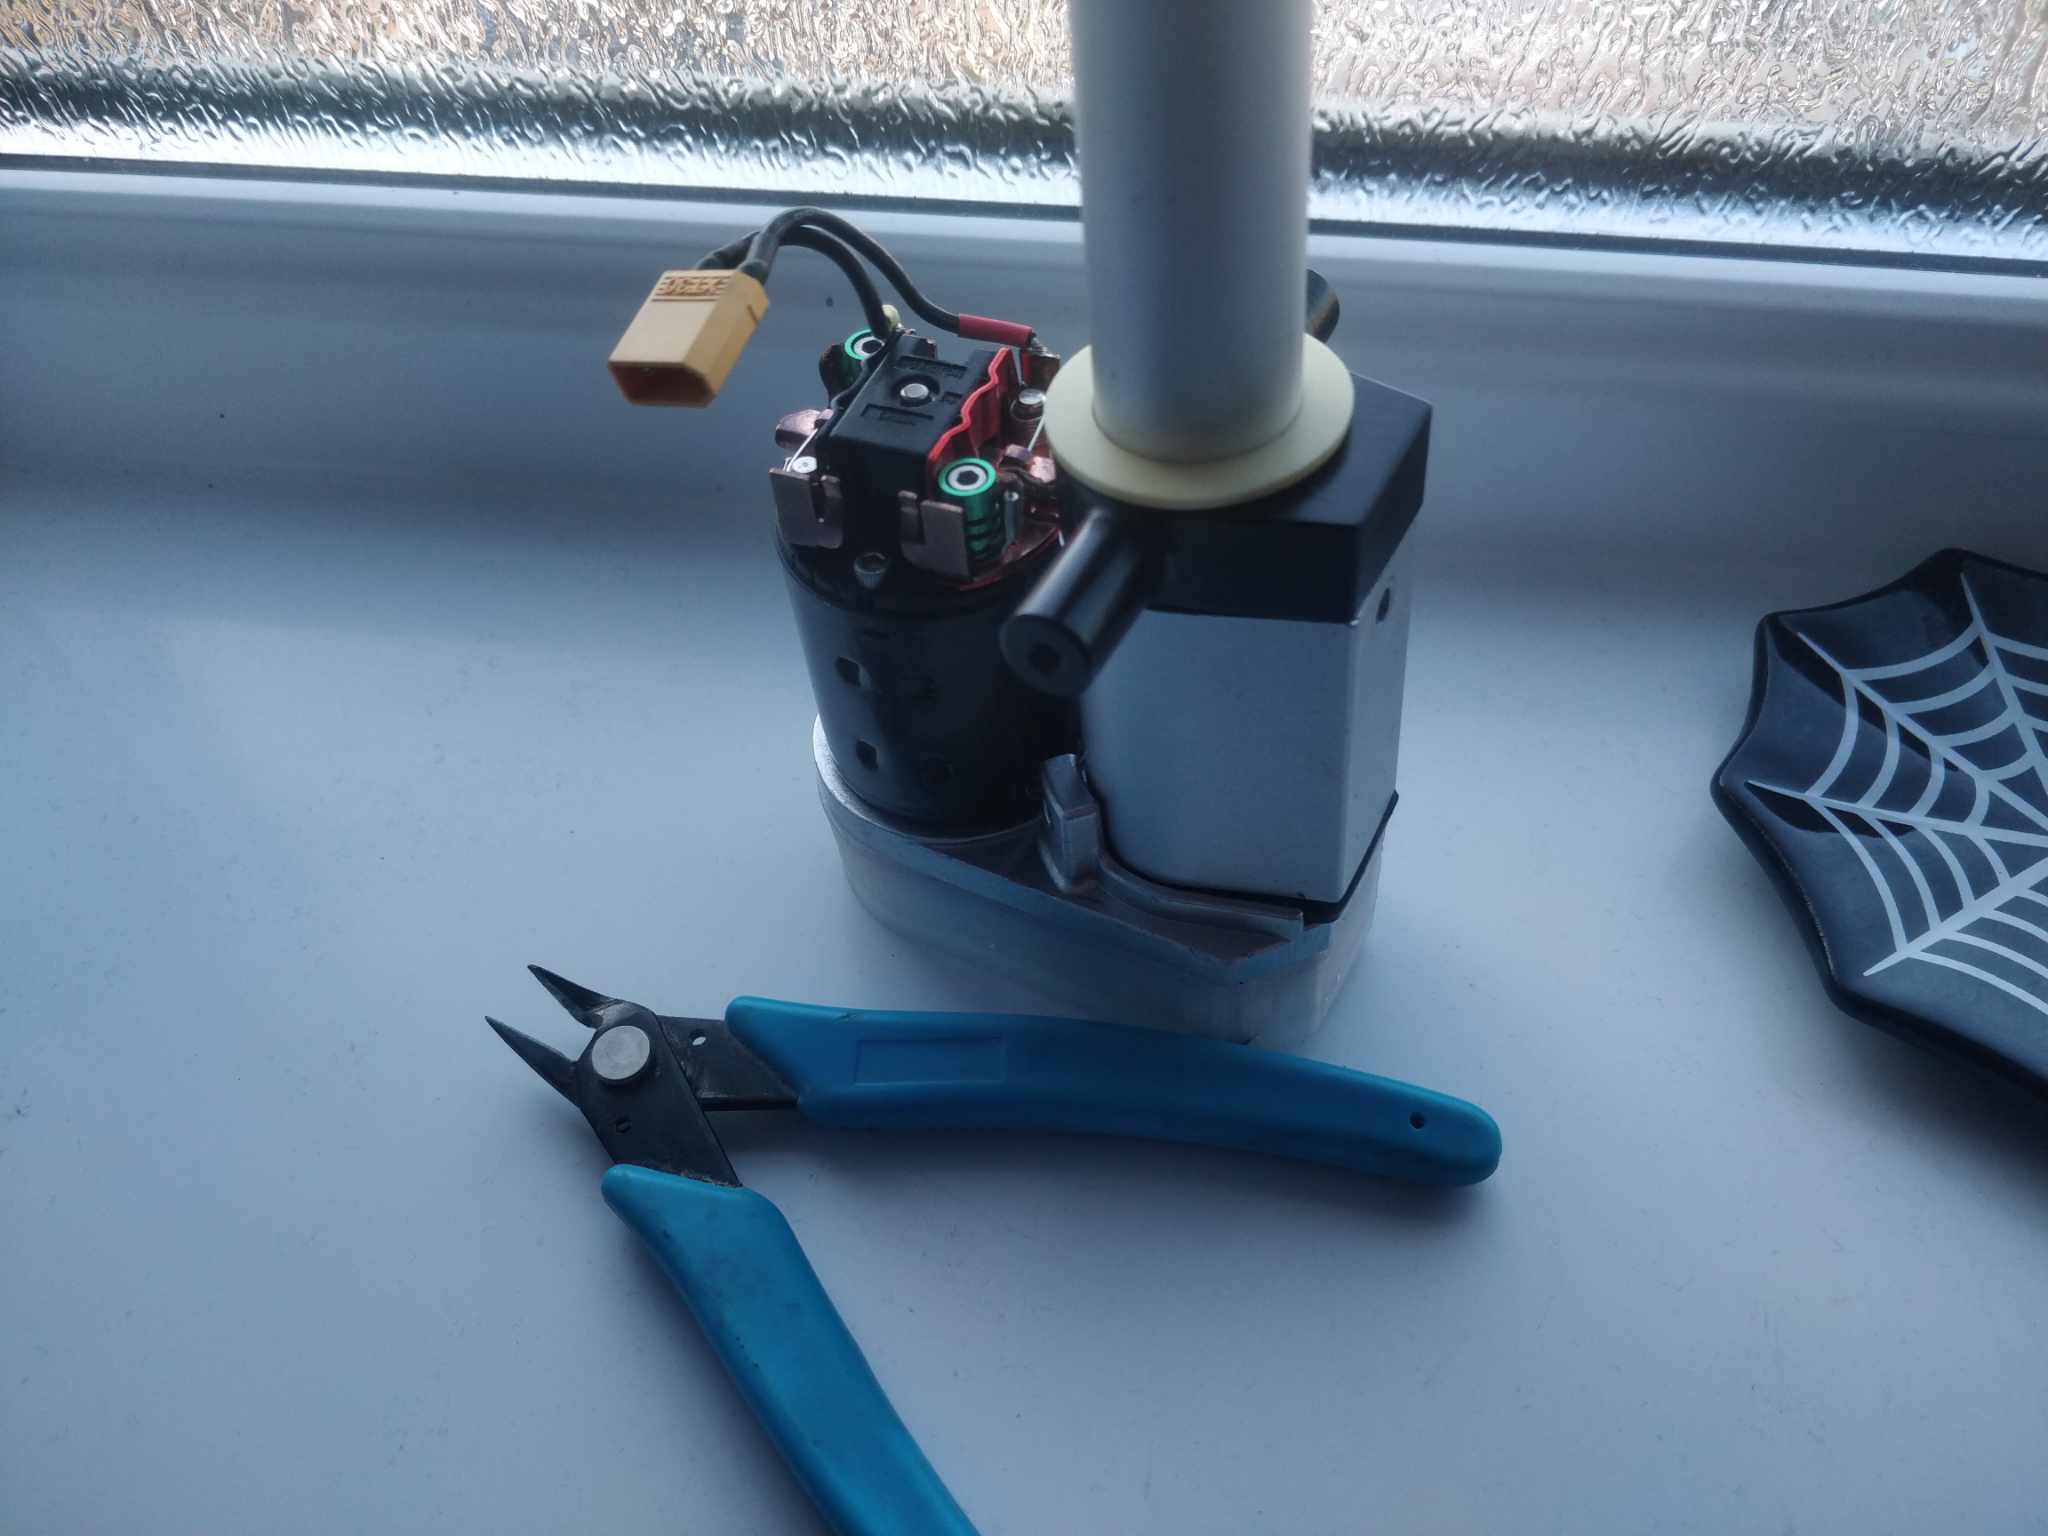
I always tend to do a quick function check when I’m back to my table after a fight. Just blipping drive backwards and forward and seeing the axe twitch is enough for me. I did this post Tsukikage and all was well so I slapped the battery on charge. A little while later I picked up the robot to show or demonstrate something and found the right hand track had locked up completely and would not be back driven. Odd. I plugged the battery in to check further and was immediately greeted by thick white smoke and an unpleasant smell. It was like being back in school.
I just went head down and swapped the whole unit out. Thankfully ML is pretty easy to chop and change out components so it was a pretty easy fix. It was only later trying to run through the steps in my head did I hammer out a working theory.
-intensive driving fight causing a bit more heat than I’m used to
-scratch that, a LOT more heat. Enough to soften the epoxy of the windings.
-when it’s still hot it works just fine. Once it has time to cool, say the time it takes to charge a battery it has cooled and the windings have now set so they’re touching with no coating left on them.
Motor locks up, just waiting for a drop of current and then boom. Toasty.
I am willing to entertain other theories but that one seems to fit. Glad I checked as I would have looked like a monumental tit. Swaggering up to the arena, turning my robot on and having it immediately let out a sad cloud of smoke and stop working. Bet that would have gone down well with the marshals.
ANYWAY,
The Propane was pretty short and brutal with me failing to get any footing once again and just resolving myself to tanking hits and trying to outlast Andy in the hope he broke his hardened fist on my wobbly yellow face. Unfortunately the repeated abuse knocked the track off but I was in a position to wiggle onward, soaking up a few more hits before a nasty hit to the rear took out the link door, power light and link. Smashing the rear panel in the process. Dead in the water, it counted as a tap out but it was lost either way I just saved having to count to ten.
So that’s it. Finished as I started. The first version was what really got me back in to robots. I made something pretty rubbish but functional which a bit of flair and I have been chasing that ever since. I made a lot of mistakes and errors trying to recreate the purity and effectiveness of a weaponless wedge.
MotherLoader-T34 was designed to work. It was supposed to be brutal and hardy and be controllable. I took every step I could to make it reliable and drivable and honestly, this was pretty successful. It wasn’t the nicest looking or the most interesting thing I have built but I figured I had to take a step back. If I keep failing to make interesting and clever work for me, dumbing down to stay in my lane is a valid strategy.
I’m happy it got one win, with my low bar for success that’s pretty good going. At least over the last two years I haven’t gone backwards and that is no mean feat.
Happily I think for all concerned I’m still set on this being the Last Guy for the foreseeable. I’m probably going to keep this in broadly fighting spec (new baseplate, cut the mushed bits off the armour) for whiteboards should the opportunity present itself.
More photos can be found here: Log in to Facebook | Facebook
I’m looking forward to making something different.
Top writeup Harry, and regardless of performance I love the robot. Looks lovely and really stands out in the sea of verts. ![]()
This is completely ready to pass POM right?
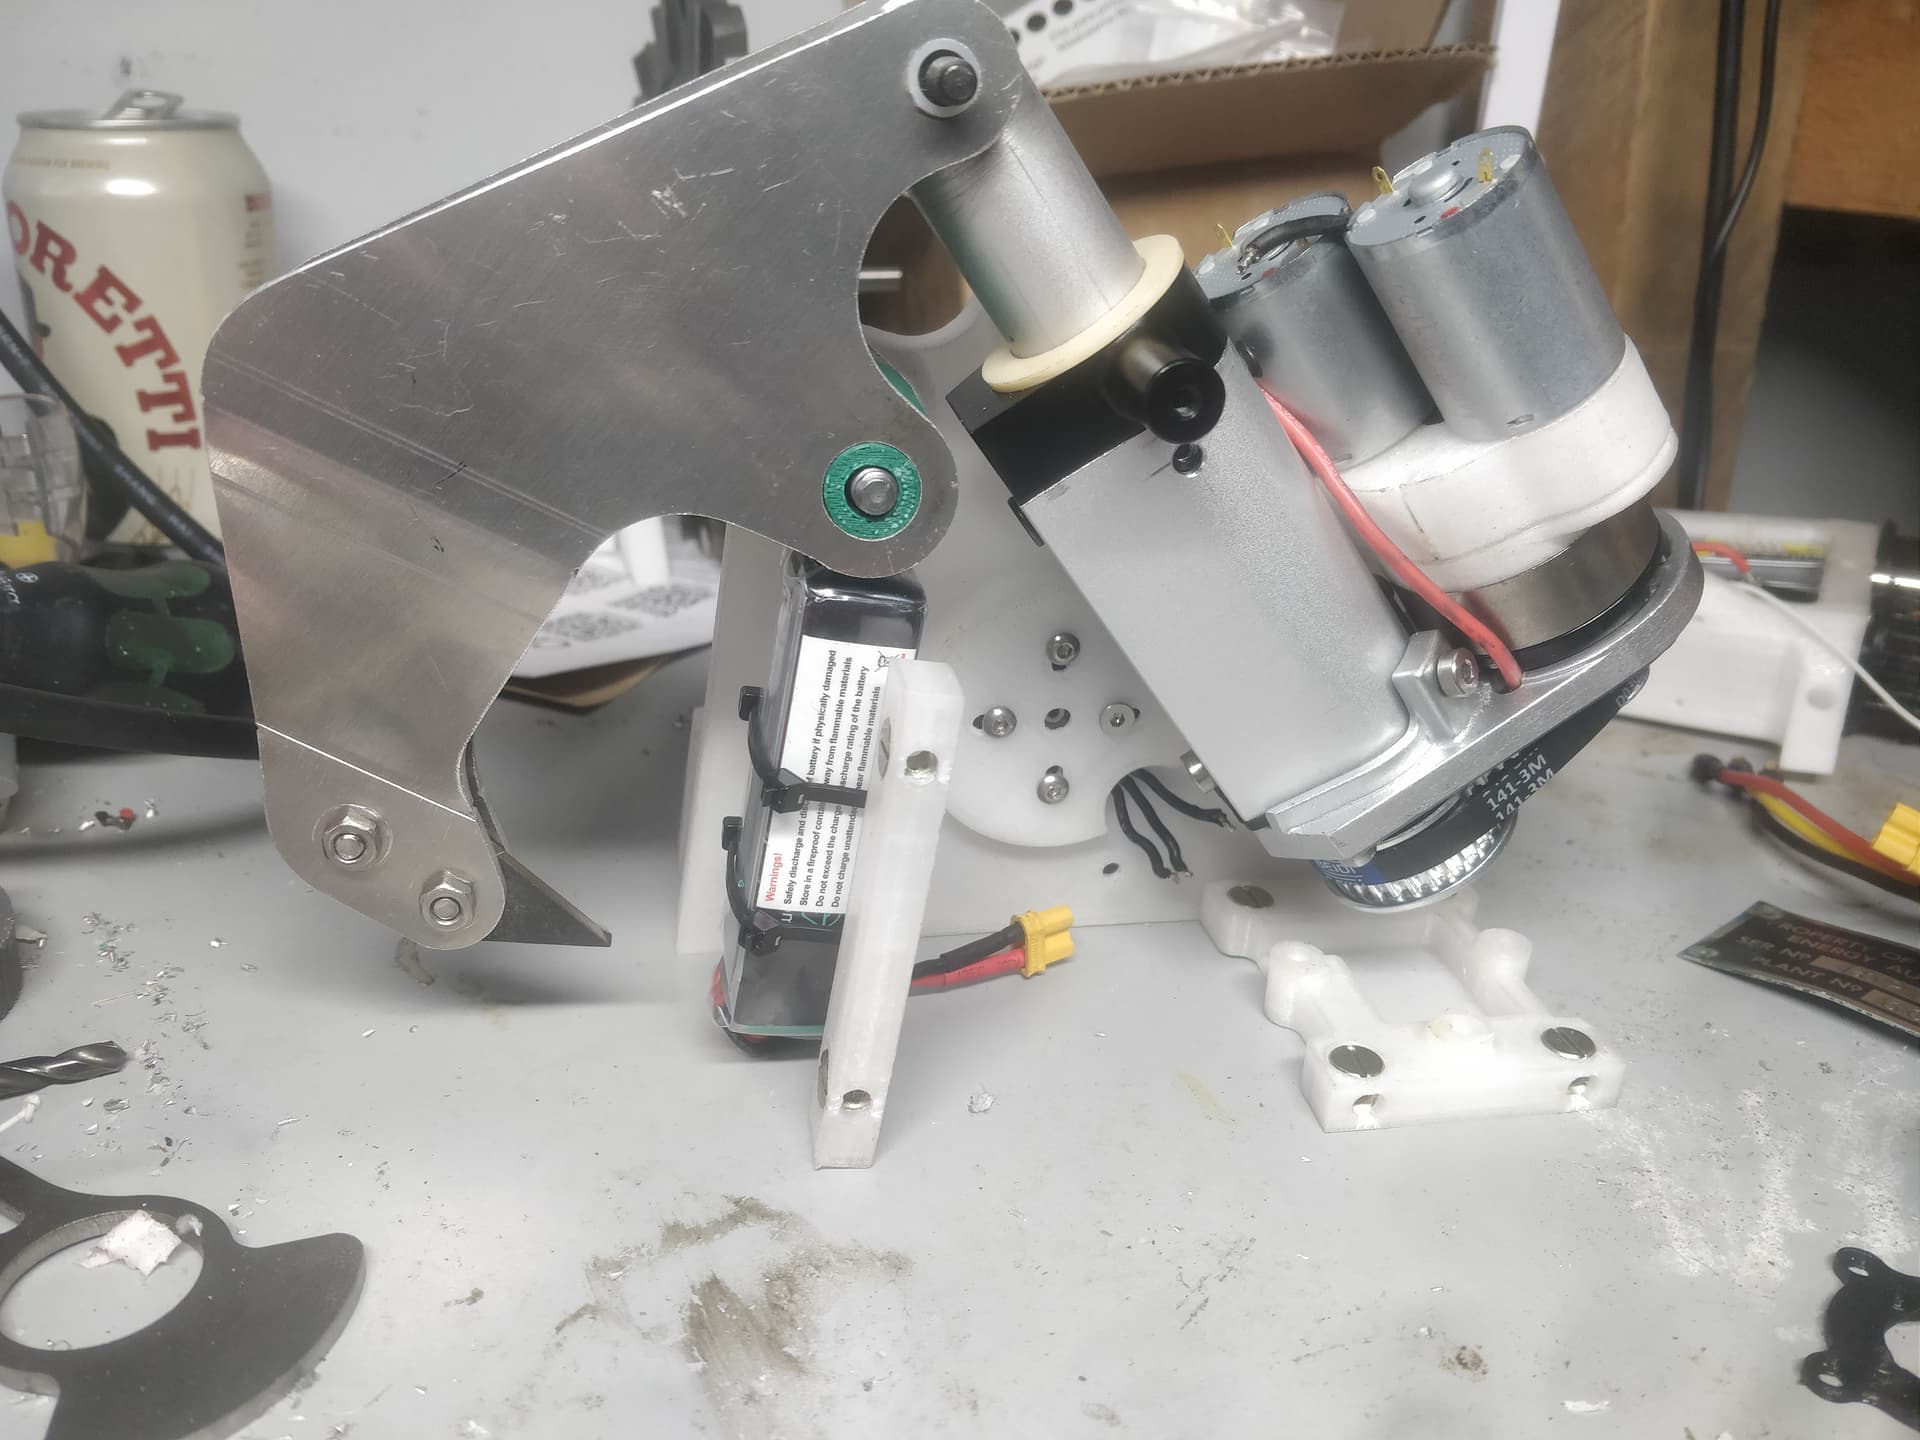
Hard Nips has been rejigged to make sense and be the best it can be. I have thrown yet more sheet metal at my problem, coupled with prints and some tenuous engineering practices.
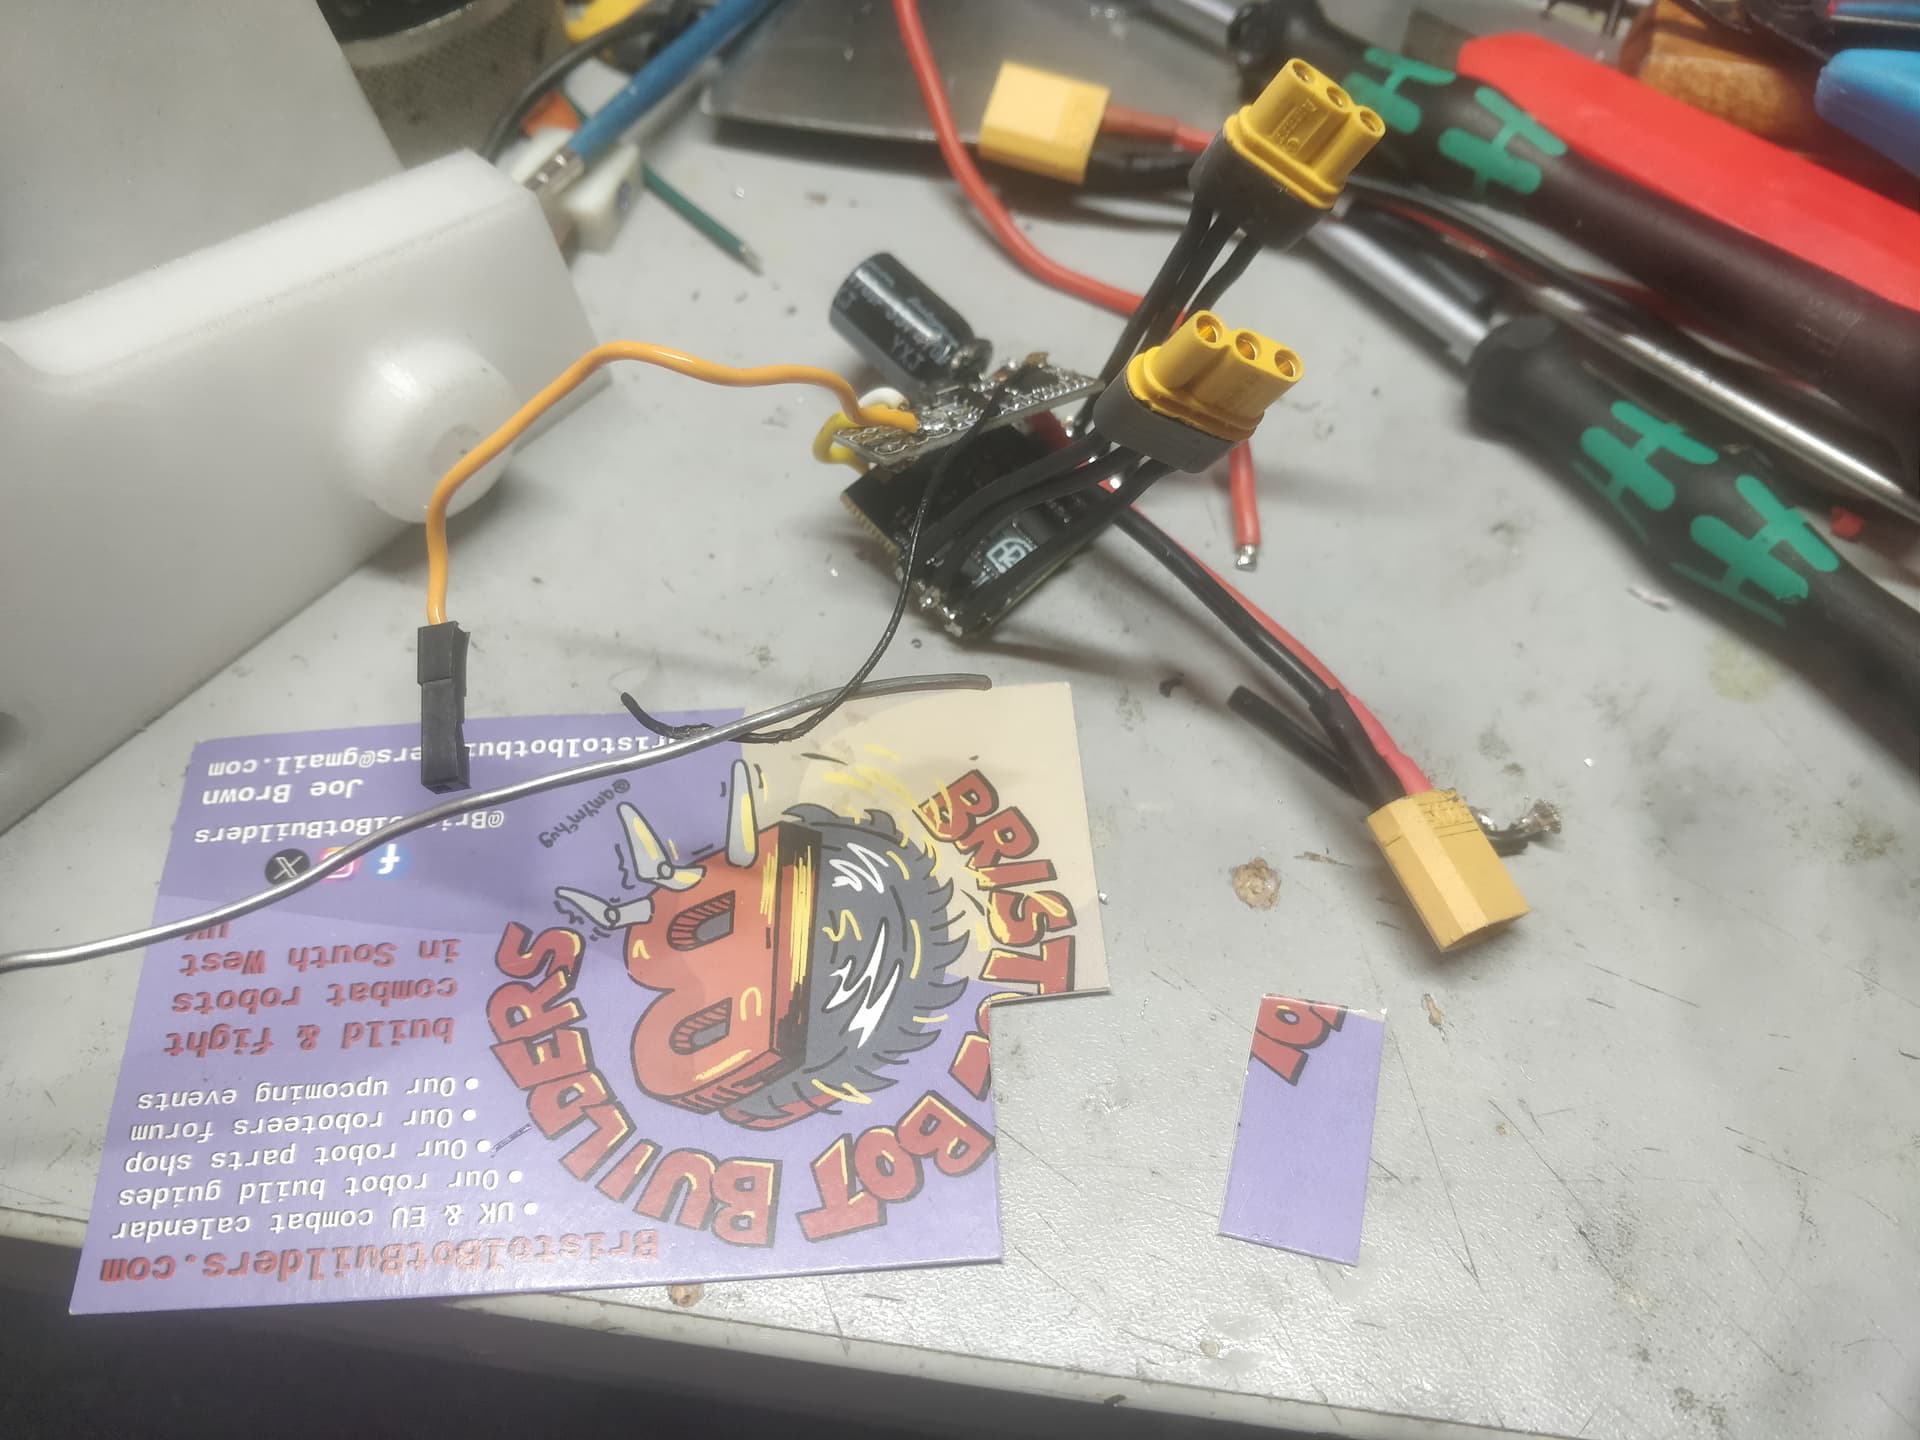
At least it’s really simple electrically now with the repeat dual esc bring 90% of the circuit done before I start.
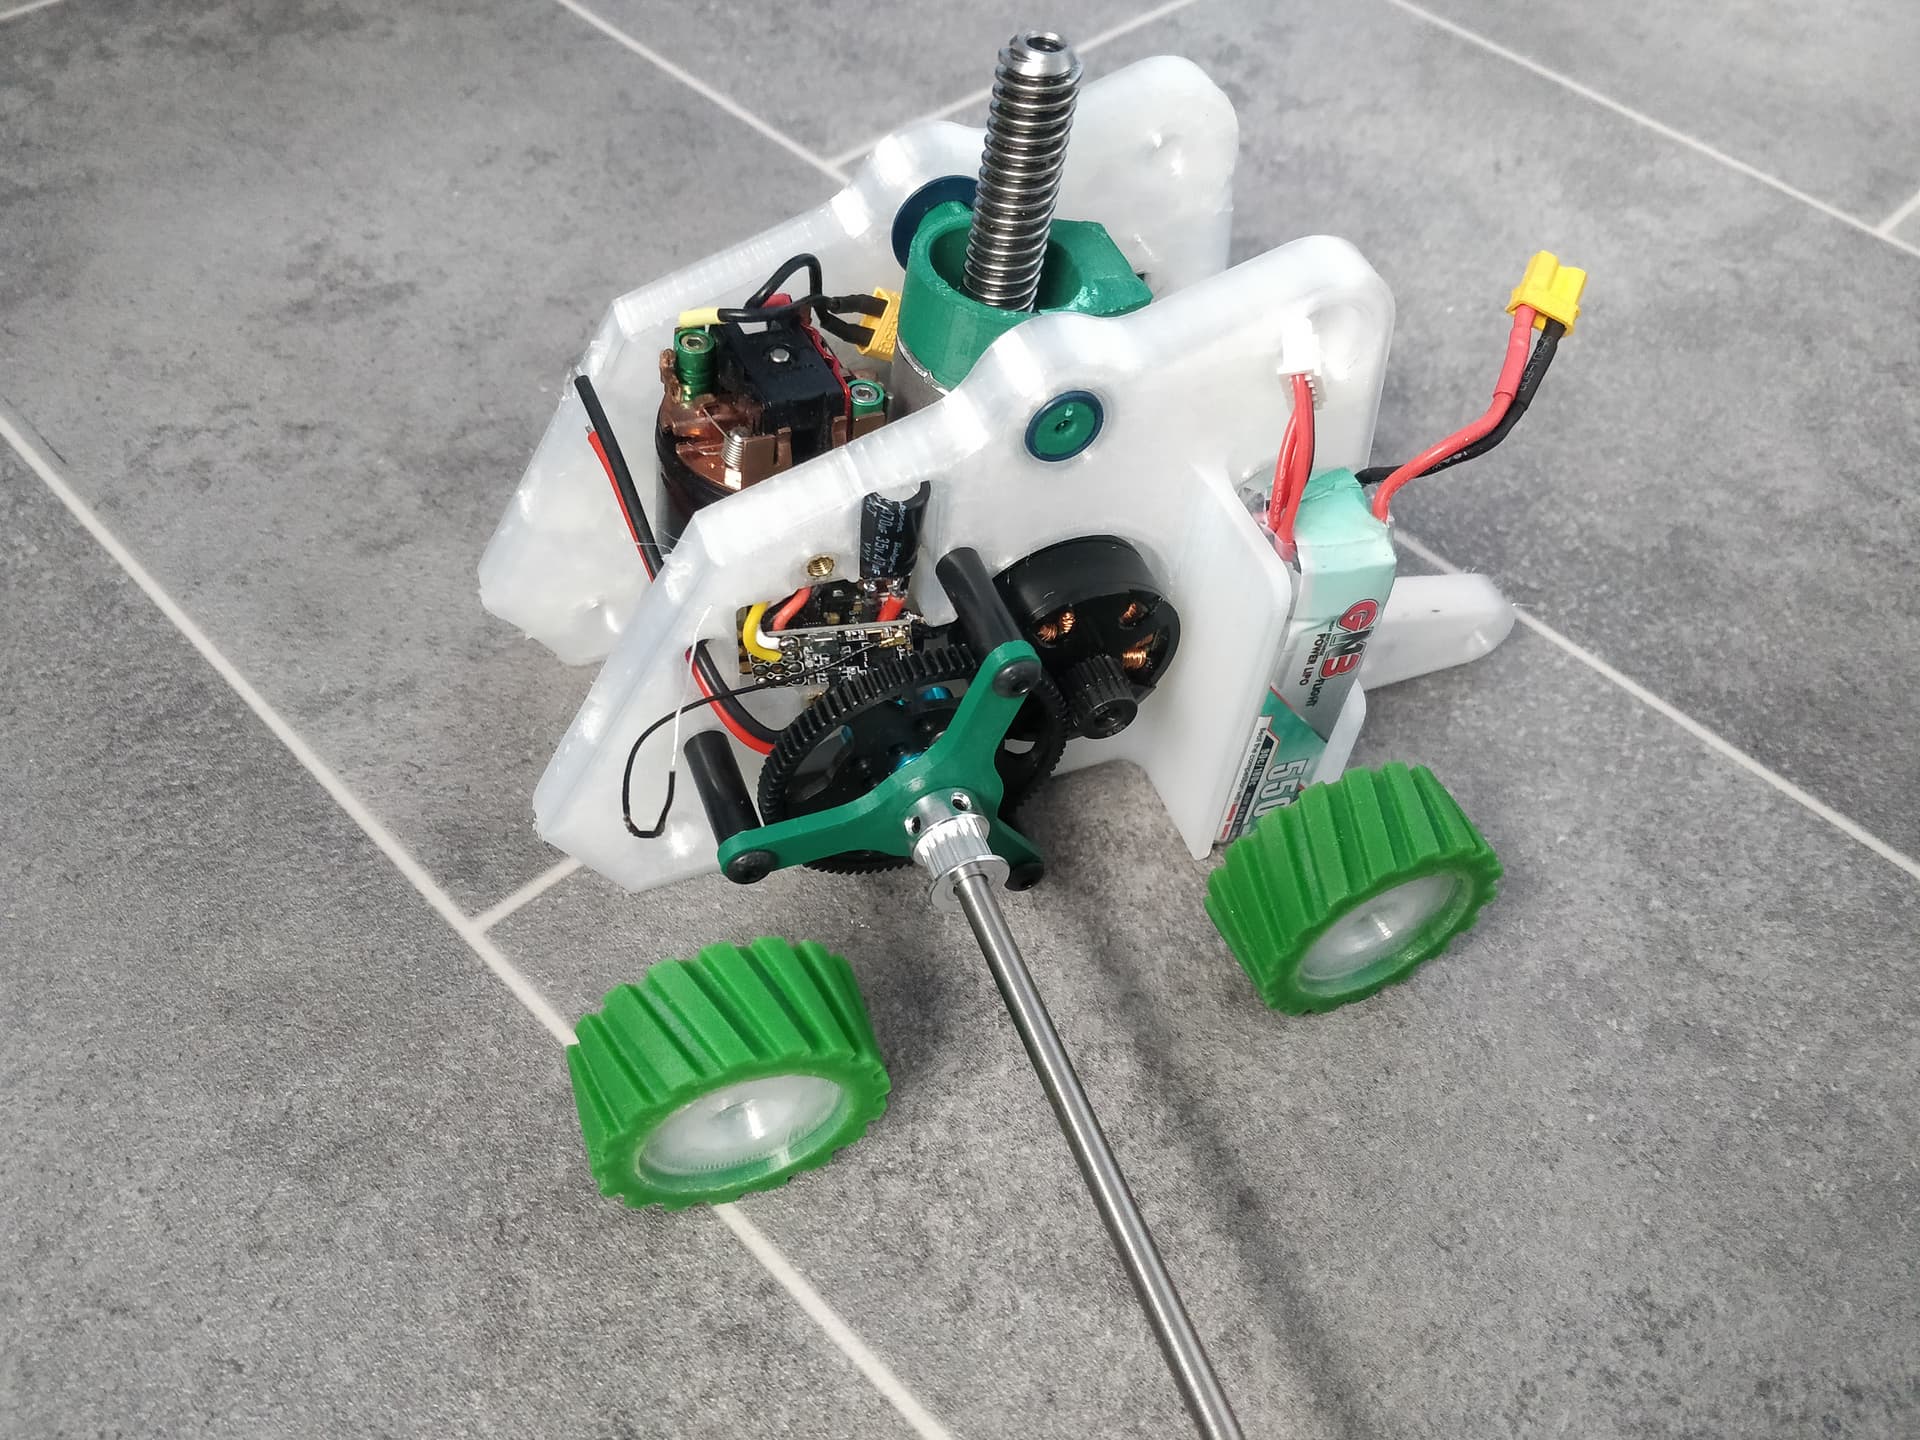
Here is the prototype sporting BZ John Deere colours (John zoom? Boom Deere?) to show what I’m working towards
Lots of bits still to do (obviously) but this shows sor of the actuator nonsense and layout.
Absolutely wild as always Harry. Your build log posts are always ones I enjoy
Fell way too short for BBB, gutting all around but clawing back some progress for next year!
My horrible part that would make any decent designer cringe was blipped out by china. It’s a redrawn actuator endcap machined from 7075 and black anodised. This rides on a flanged plastic bushes and is retained by an M3 bolt & washer. There is a phat flanged bushing making it smooth and supple in motion. Stupidly this could potentially be pushed outward with the actuator extension so a retaining screw will be added as a total afterthought. Amateur hour starts now.
My lasercutting turned up today so I have been pushing the chassis around and getting a feel for it.
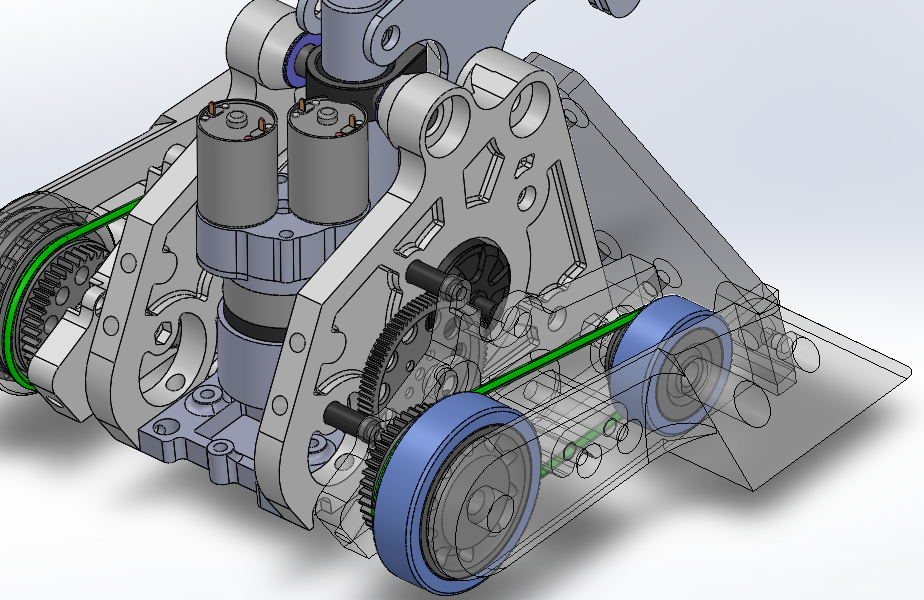
This is just a lot of the same but different angles. You can see how the drive is setup better here. There are no retaining clips on any of the bulkhead mounted electronics yet.
Seeing my forkie pokie bits in reality I am underwhelmed by them. I sort of want to go for a shallow razer-esque wedge or something thicker in TPU. The pivot works pretty well though.
Slopping my way through a little more progress.
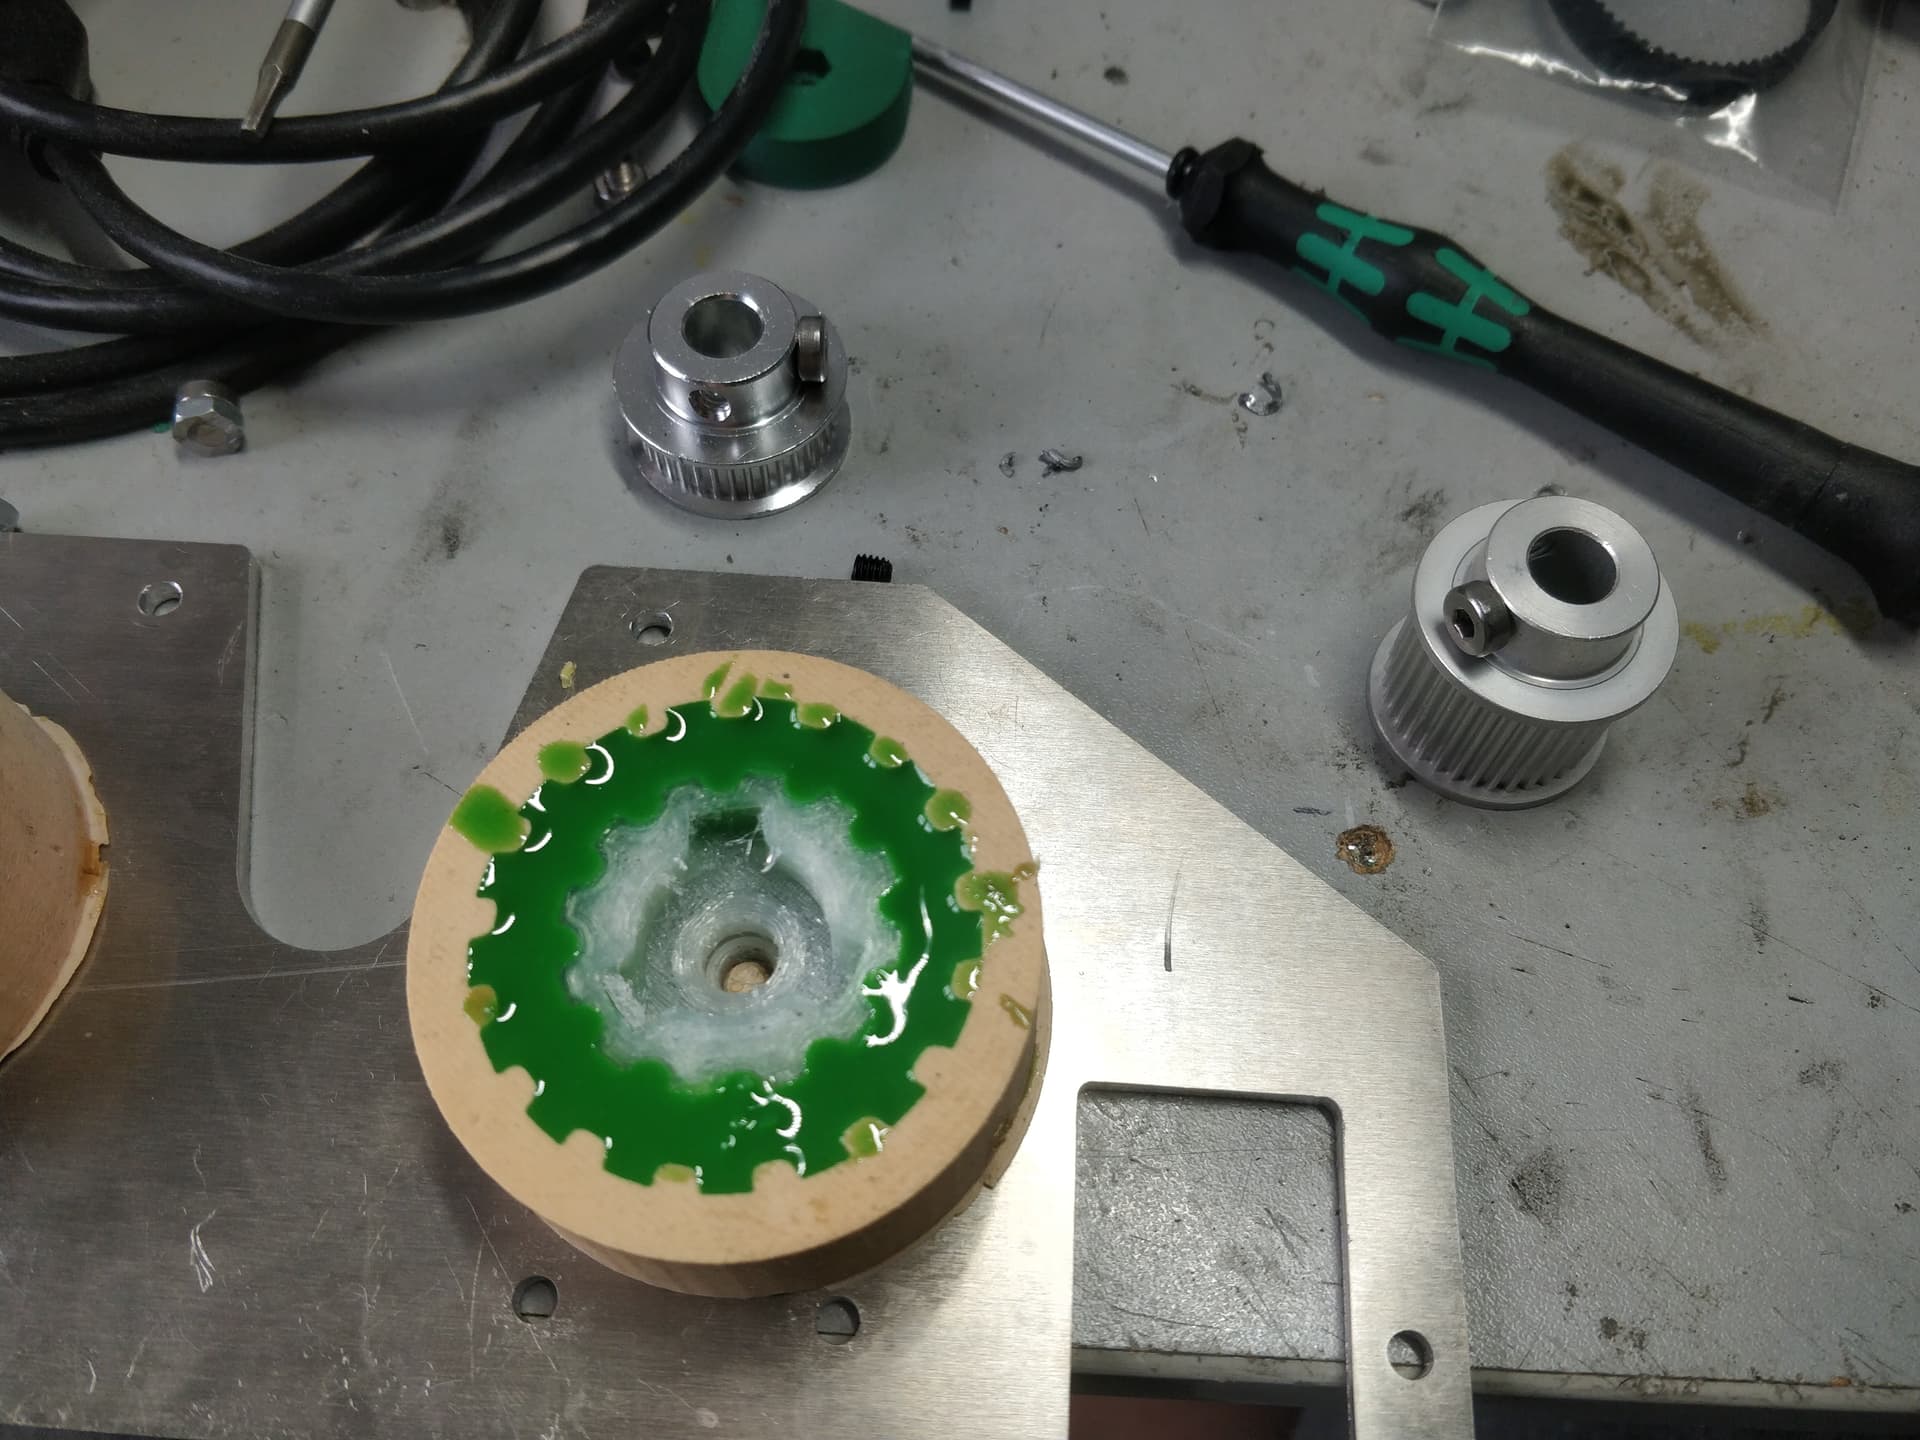
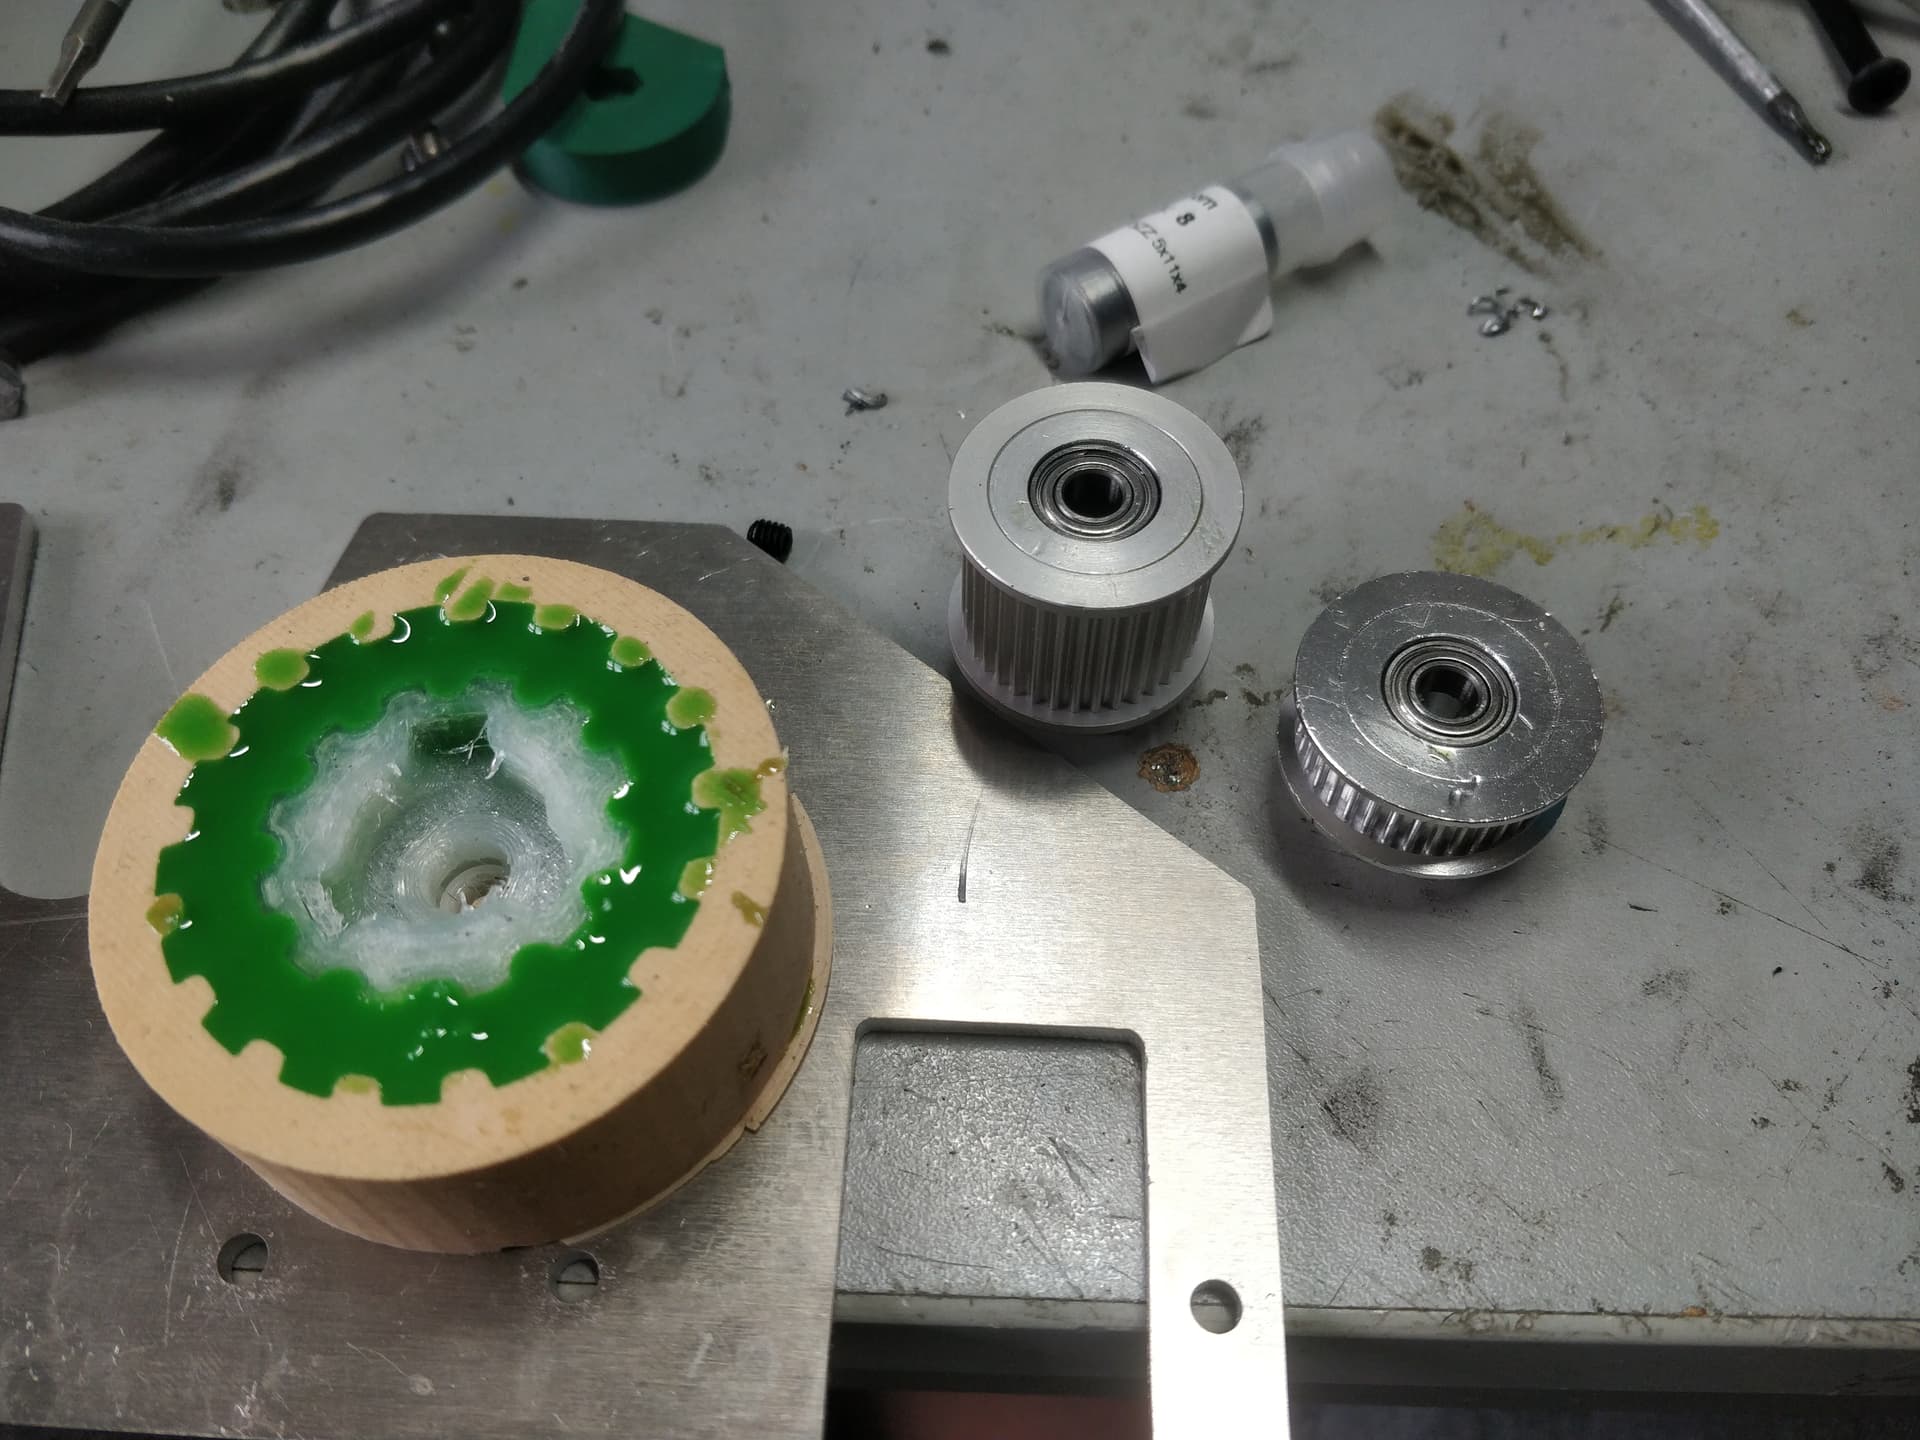
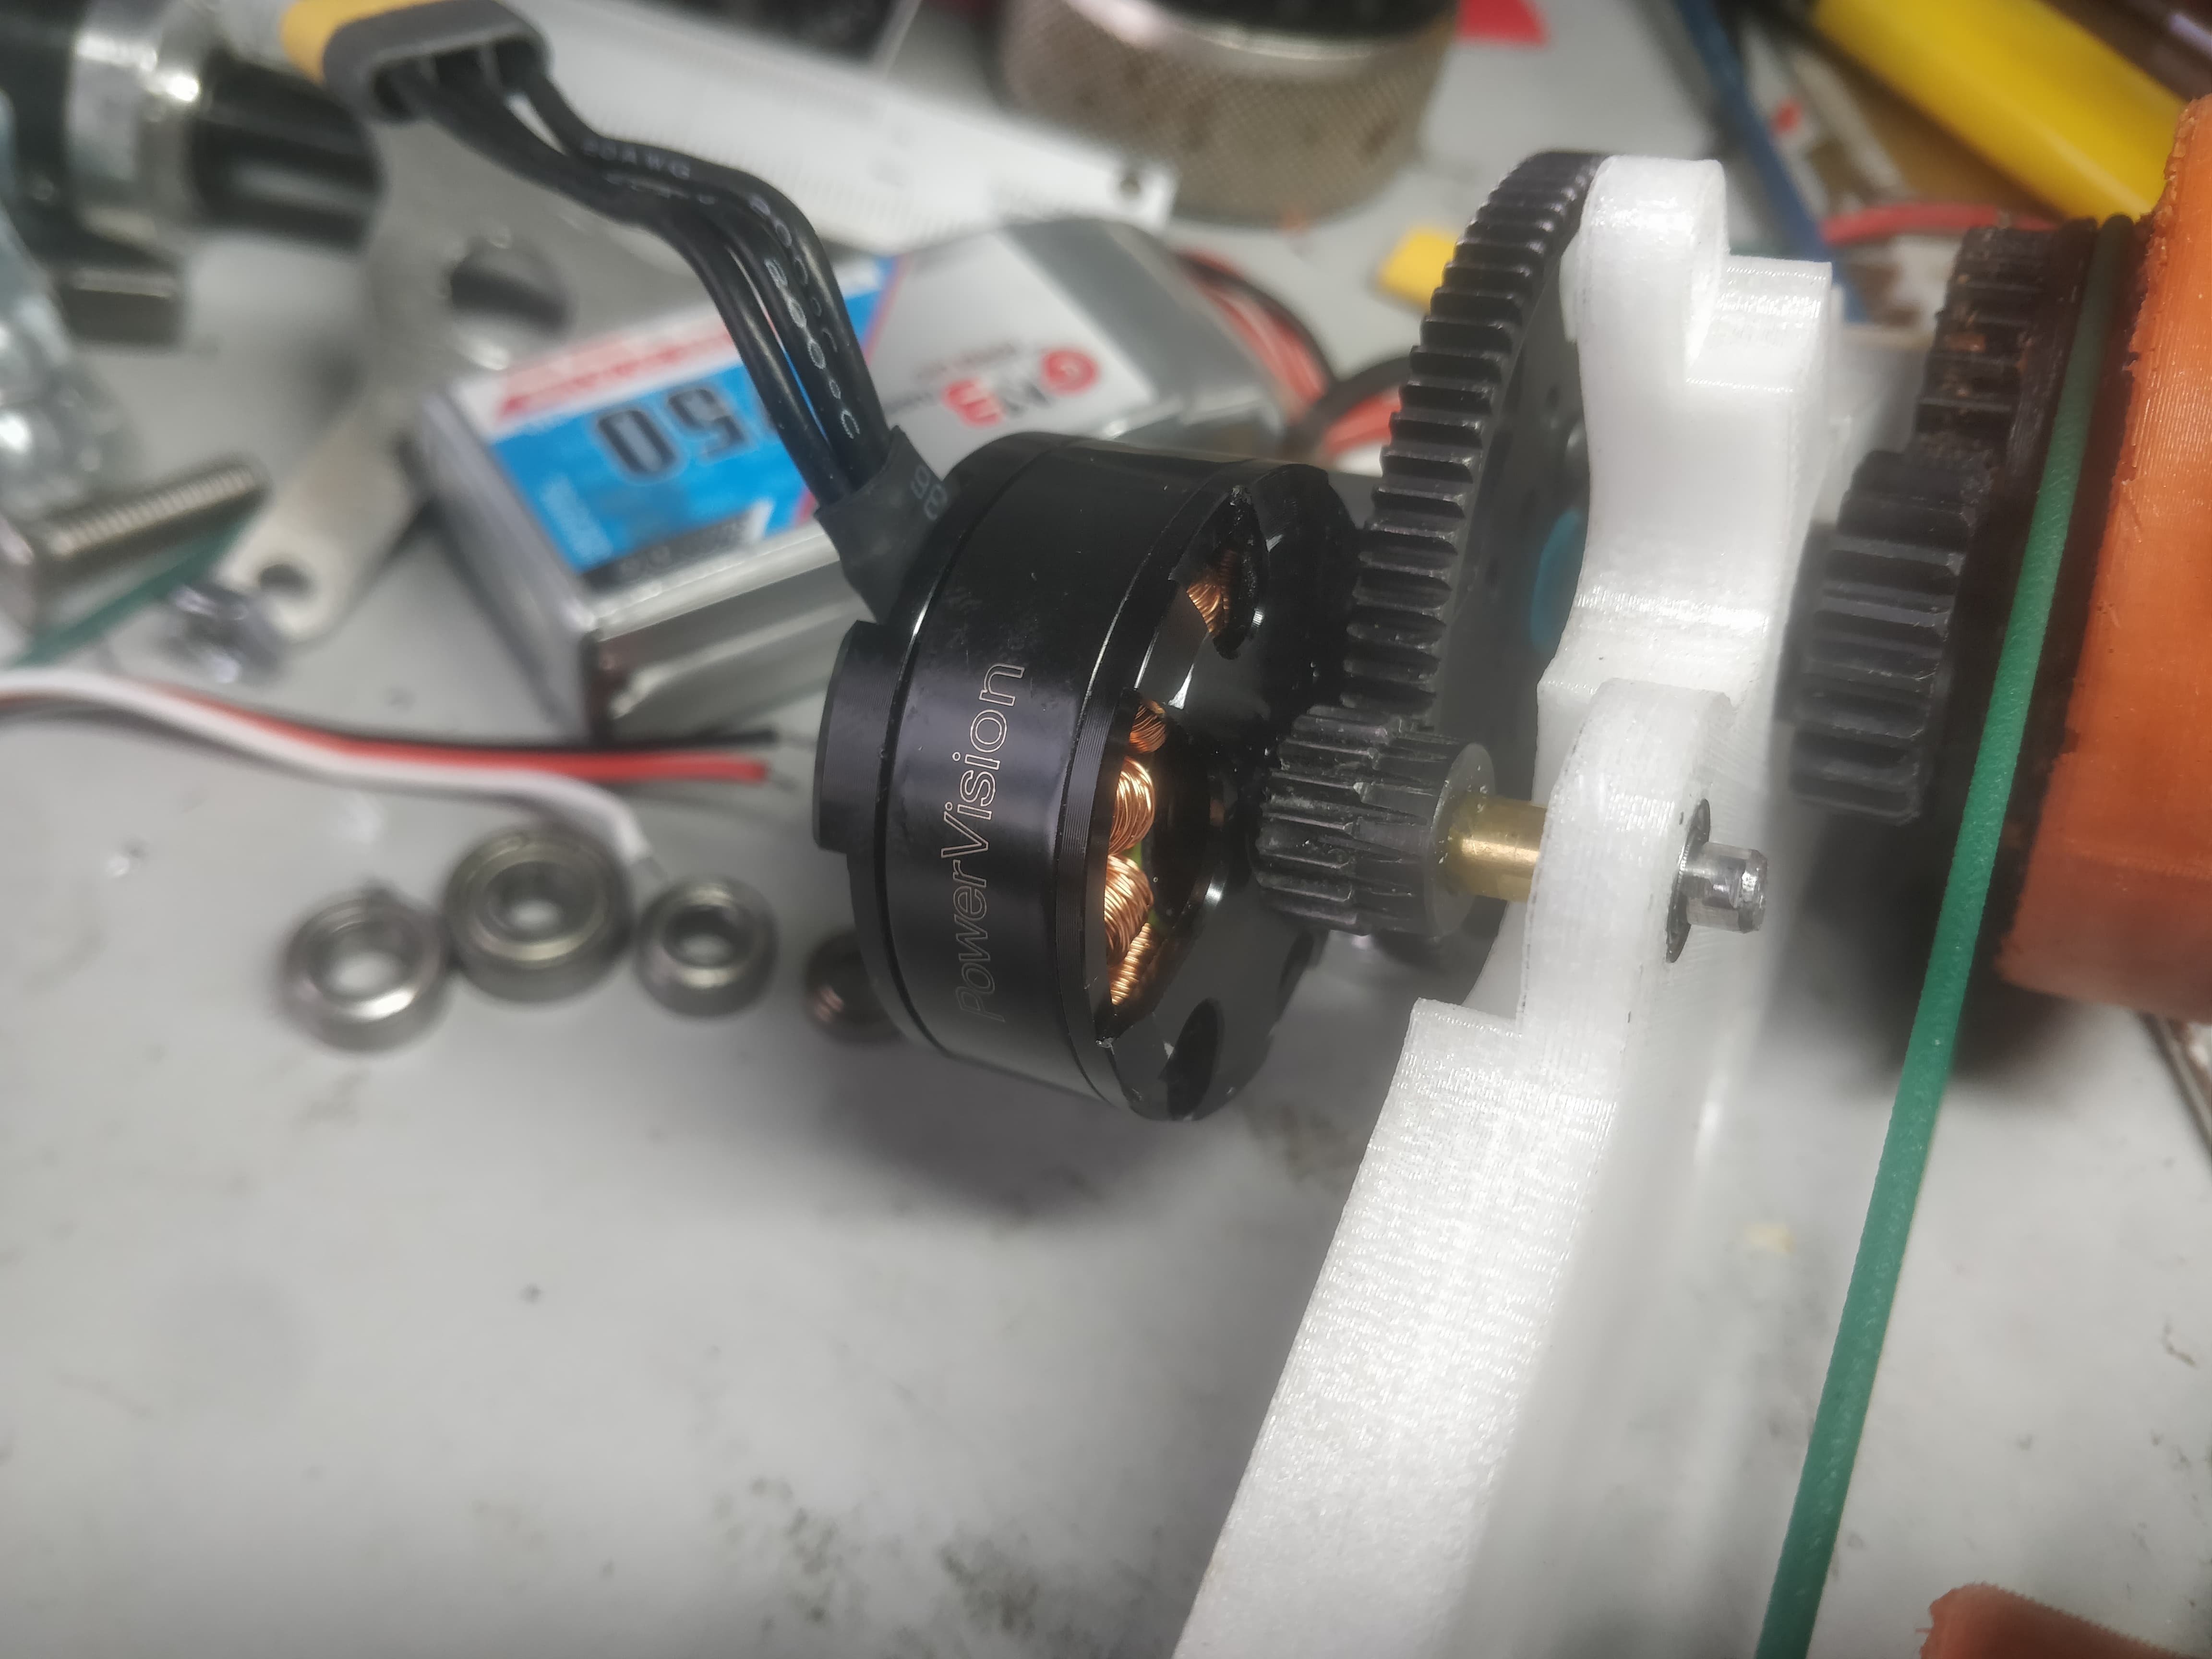
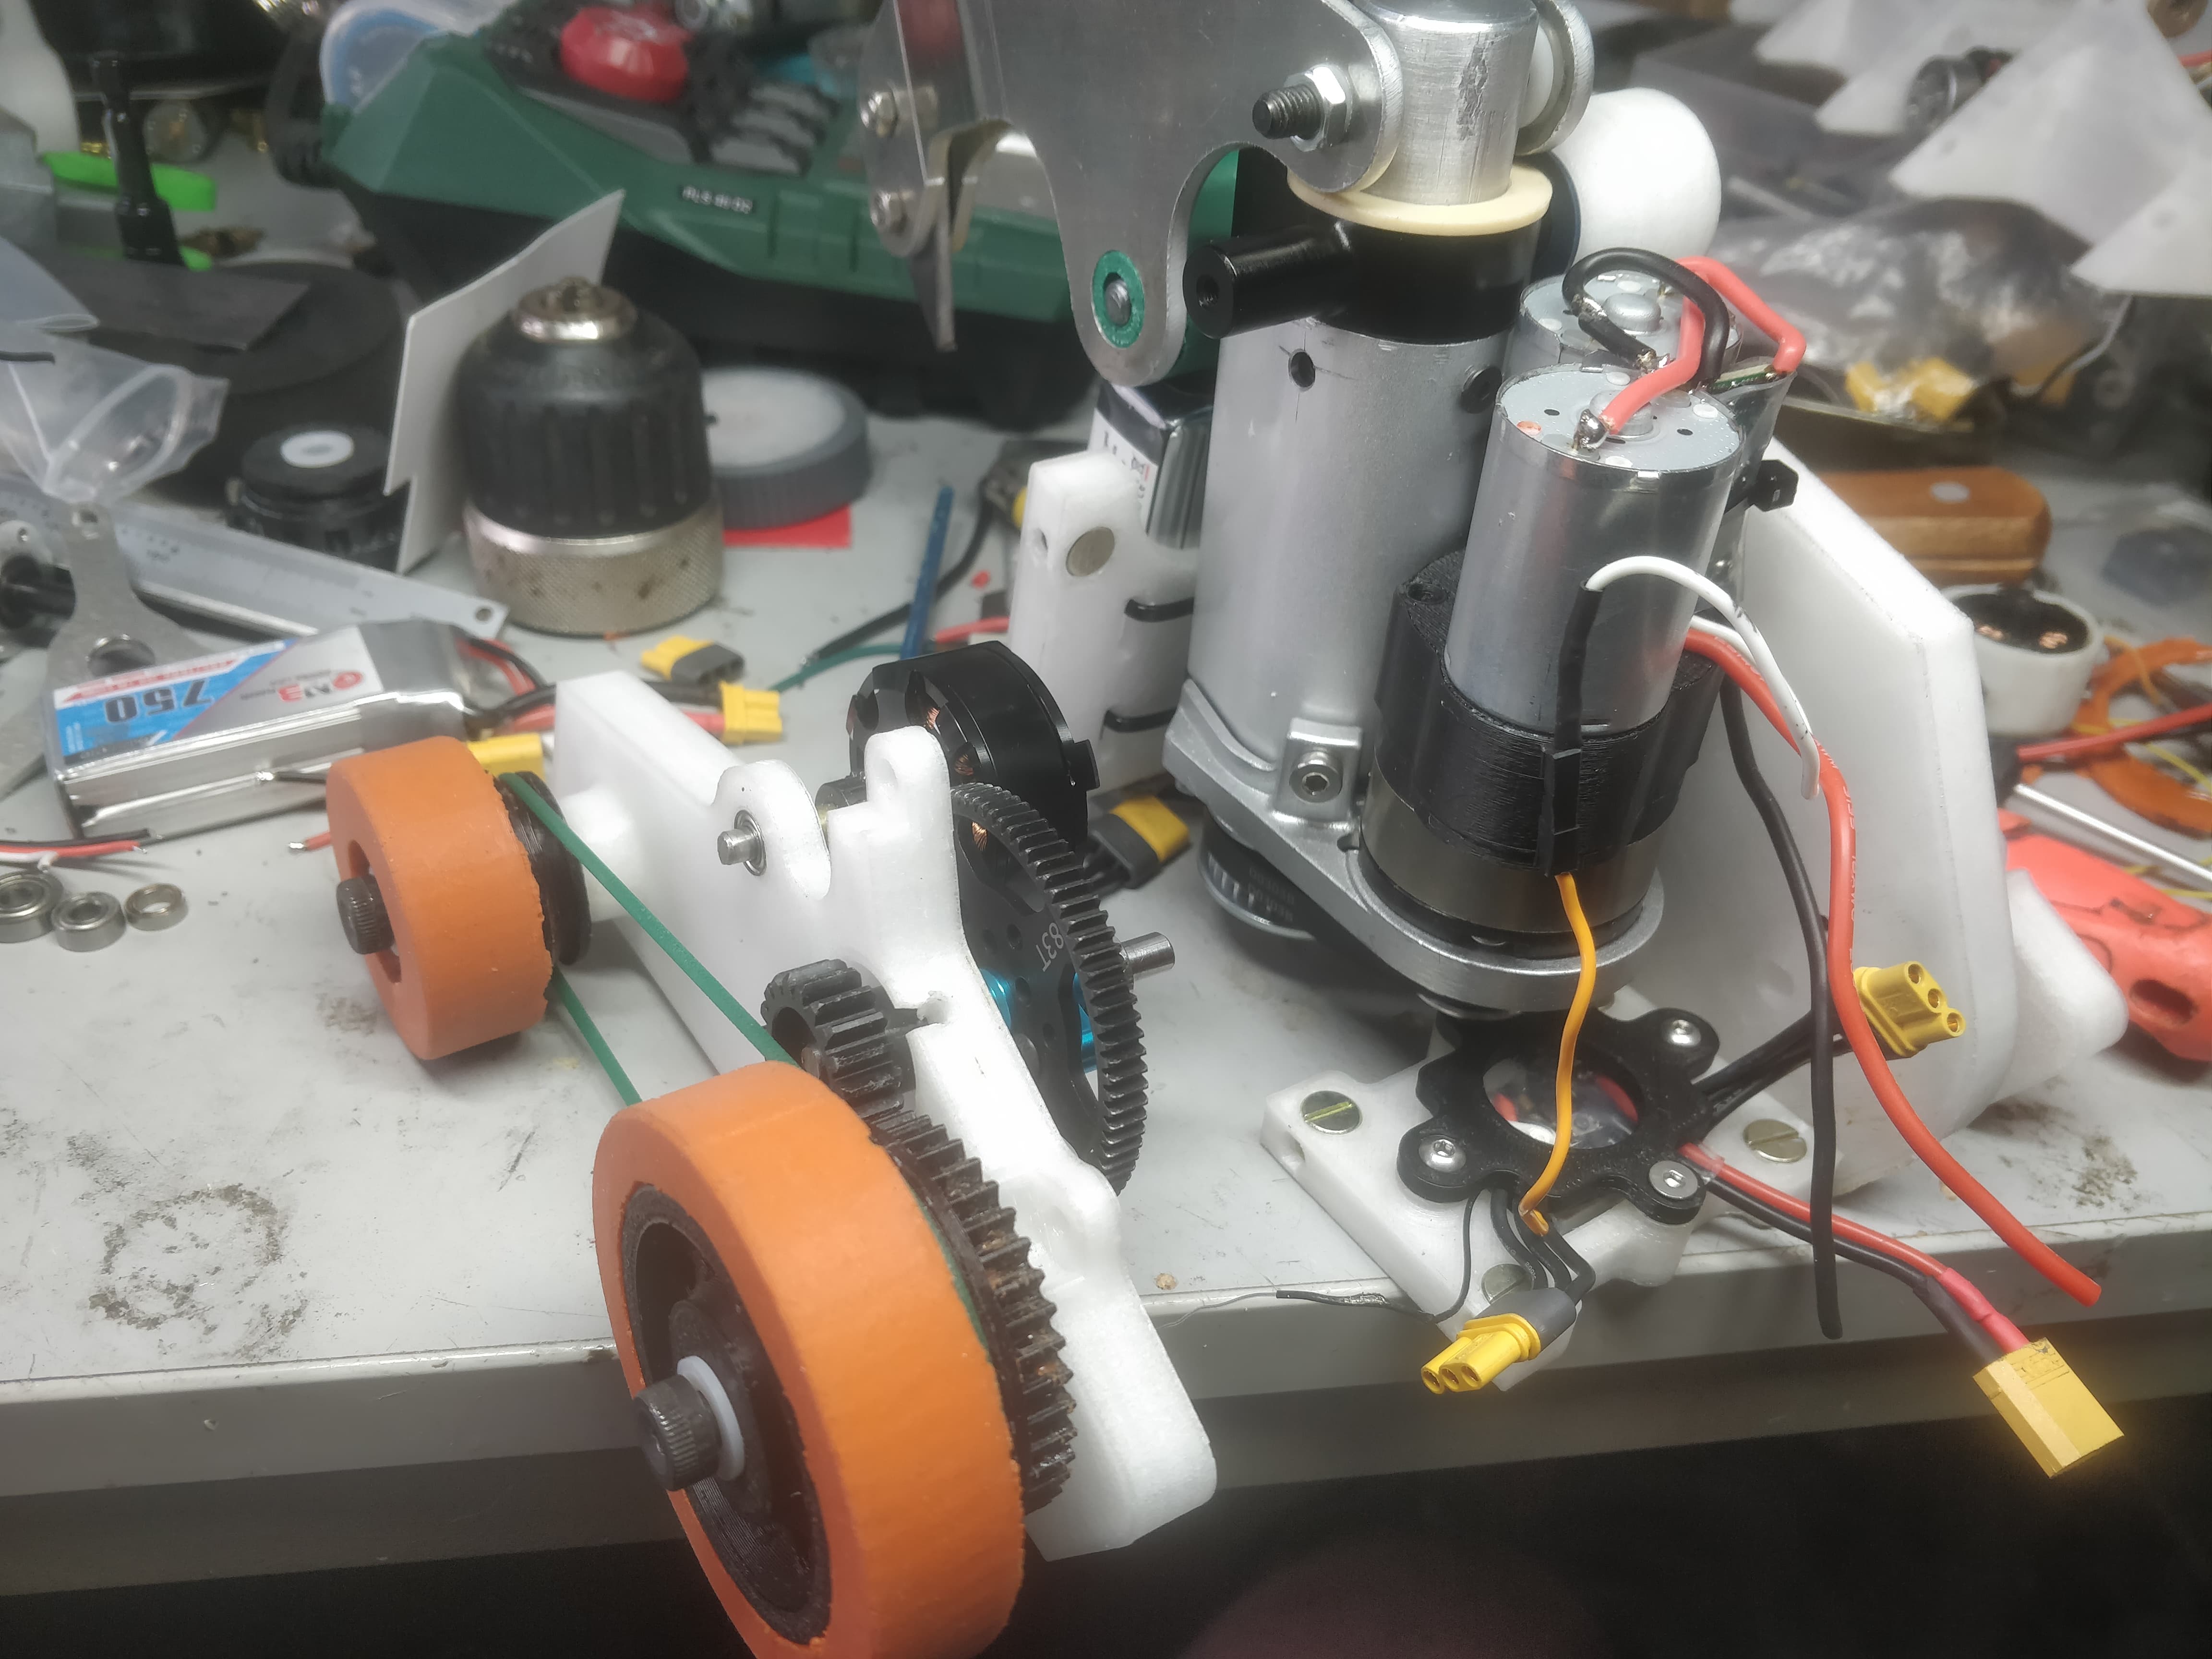
Second set of wheels had their tyres cast and I can highlight my slightly silly method of quick swapping wheels over. The hubs have notches in them to accommodate a low profile cap head jammed in the grub screw hole on the pulley boss. I could use all 3 as they’re nicely spaced 120 degrees but I don’t feel it’s necessary.
I could have just printed a GT2 pulley as part of the wheel but I never seem to get the profile quite right and these were a couple of pounds and almost completely off the shelf. John Williams bored one side for a 5*11 bearing.
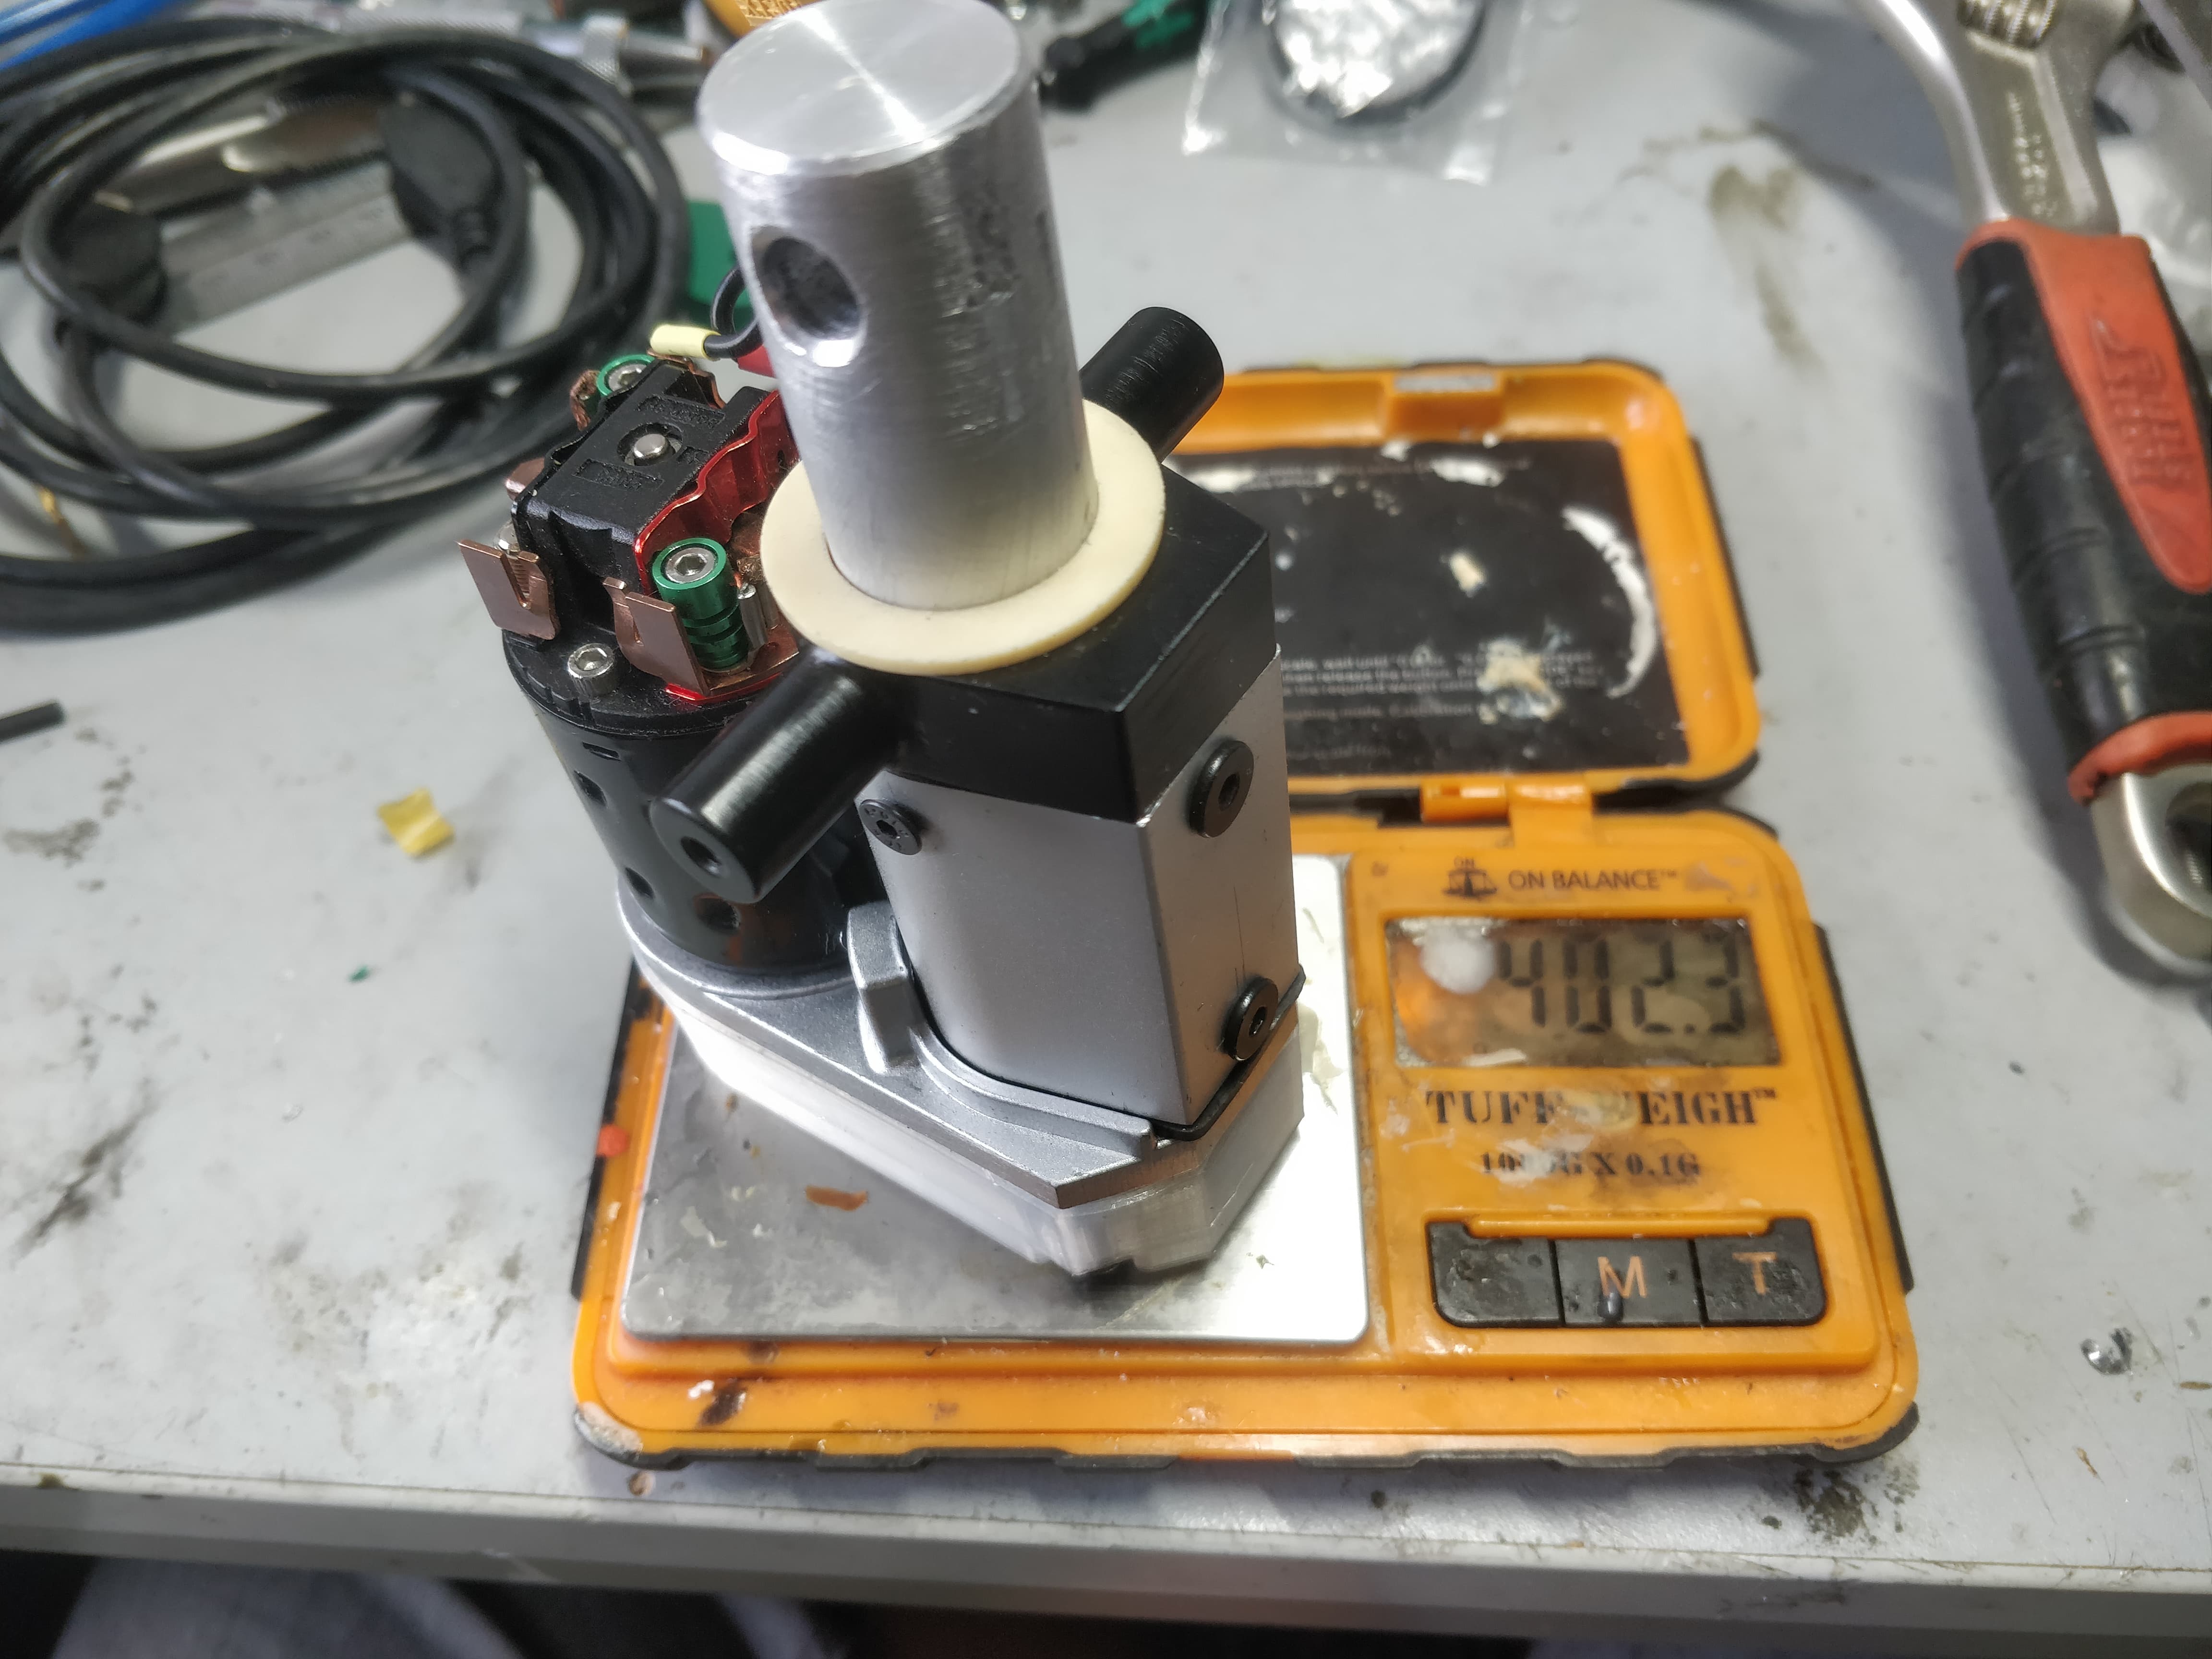
I also finished off the actuator at this point, assembled the shortened unit with custom trunnion end cap and am pretty happy with the weight of it all. Considering the stock weight was in excess of 700g it’s quite a dramatic improvement. I feel I can winkle out a few grams but will be fast approaching diminishing returns.
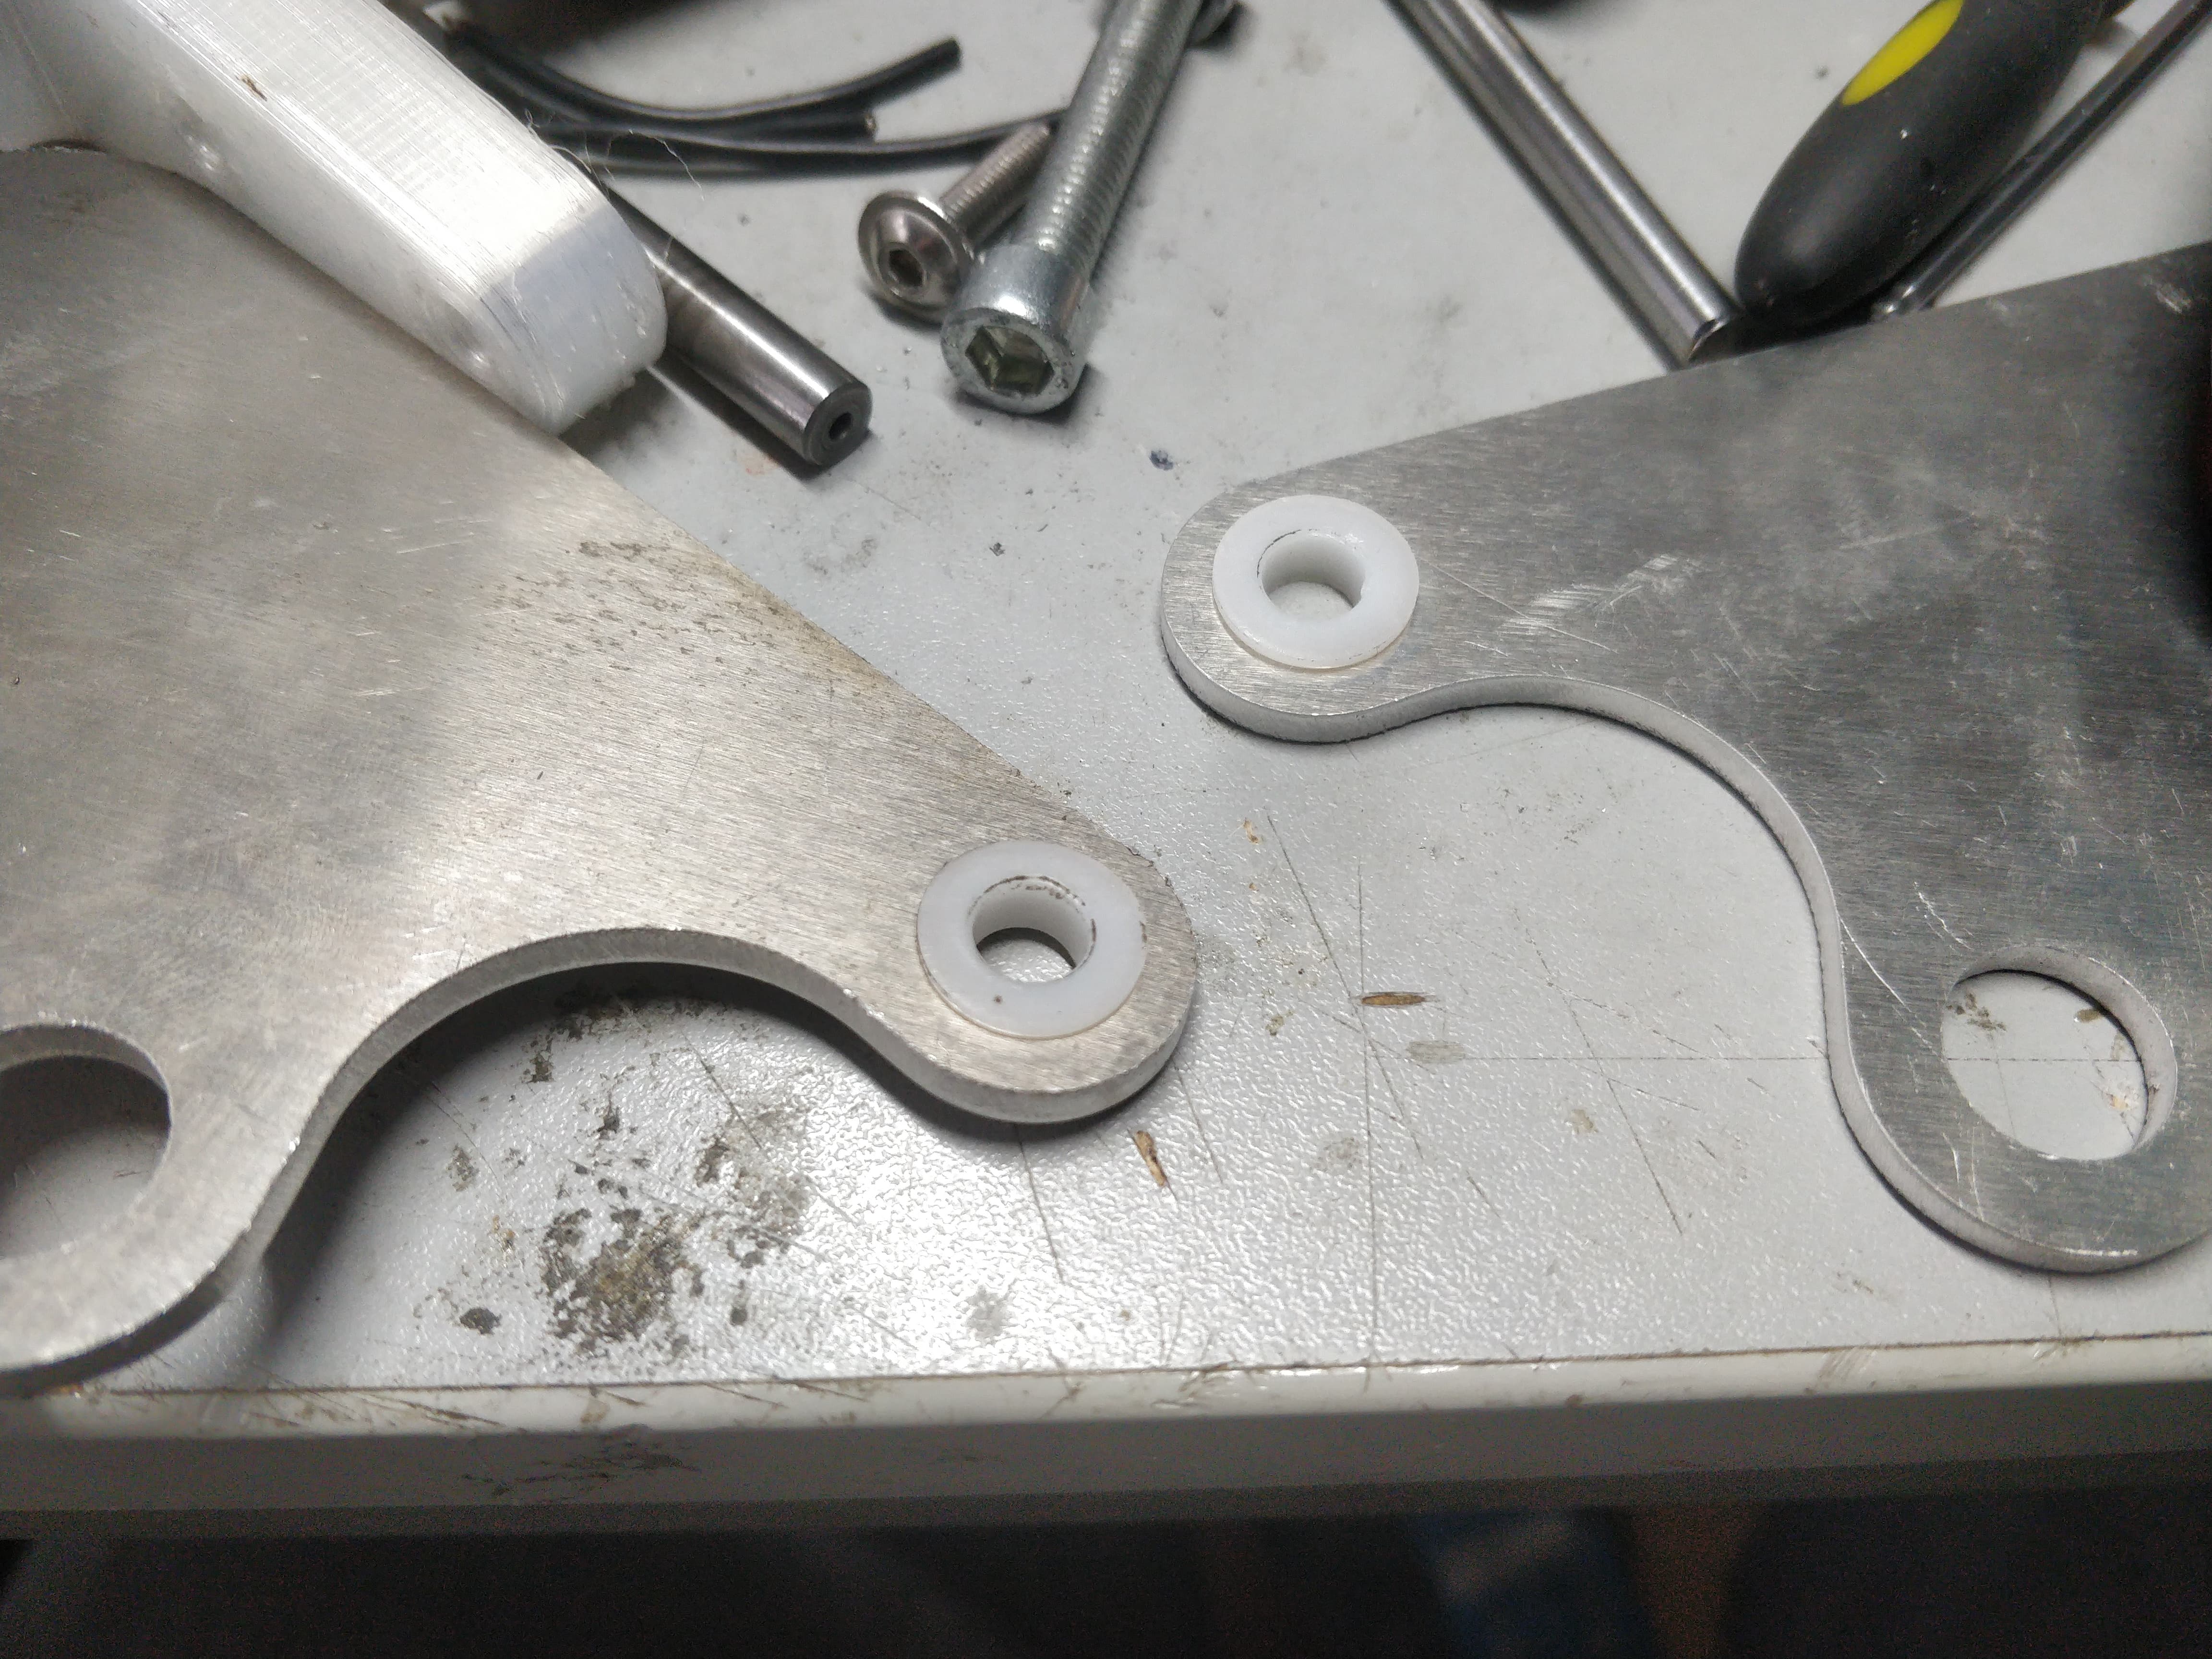
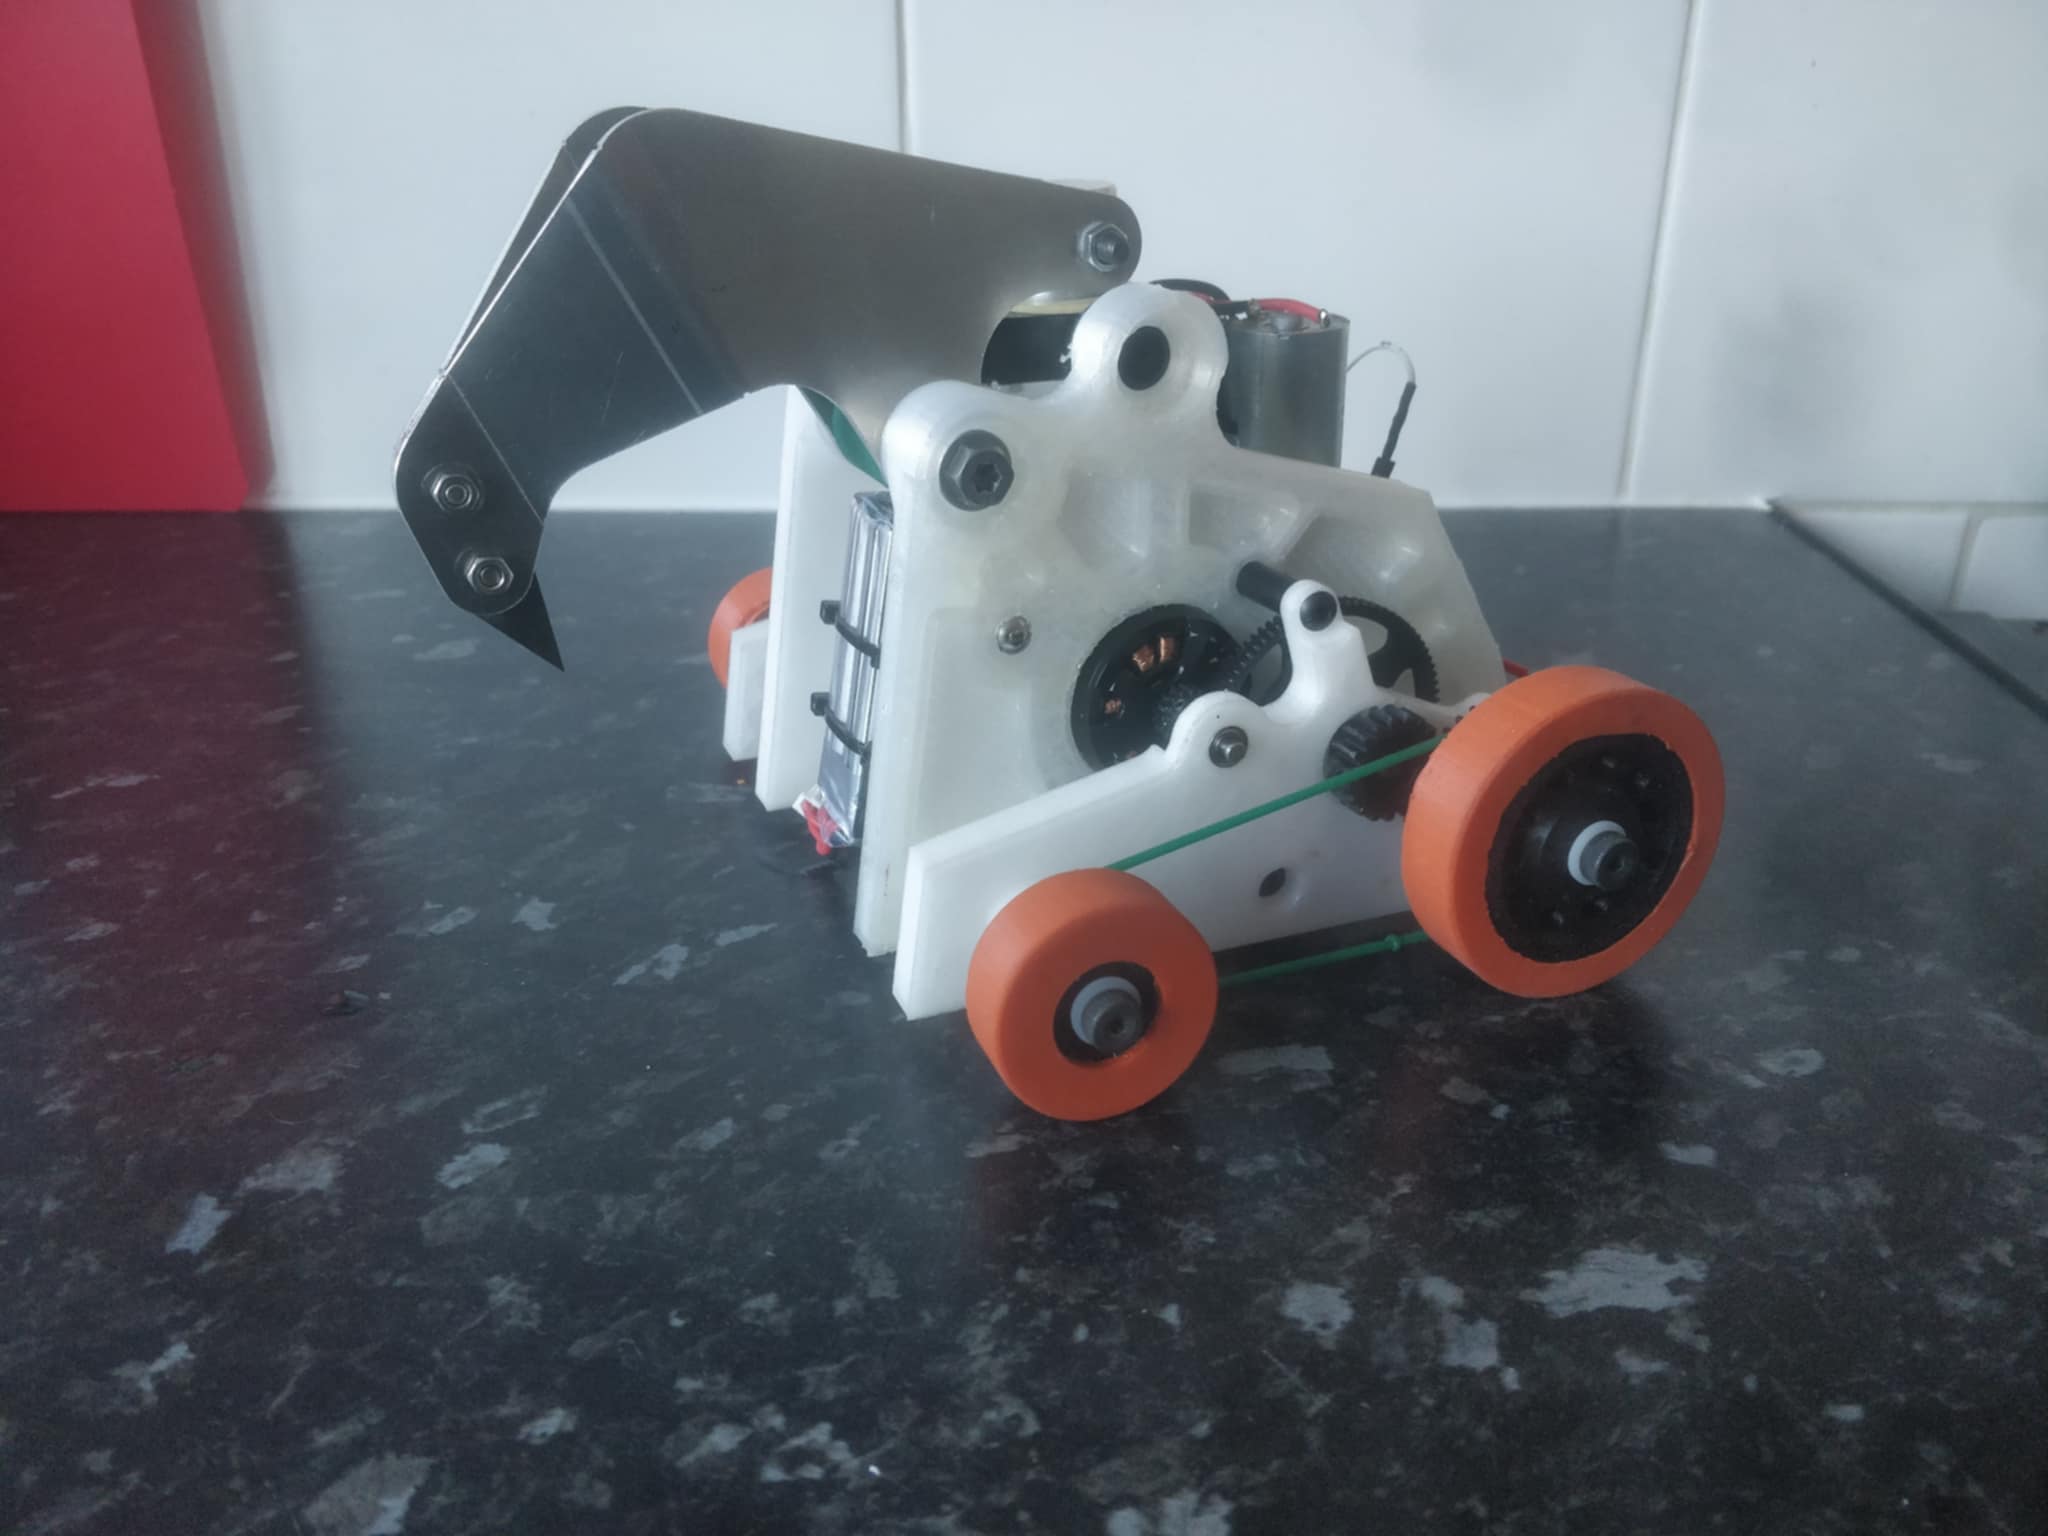
I plopped in some of the nylon bushes from ranglebox into the claw pivot so I could wang it all together and make a proper facsimile of the robot. These just push though the Alu and are trimmed to length with a Stanley knife.
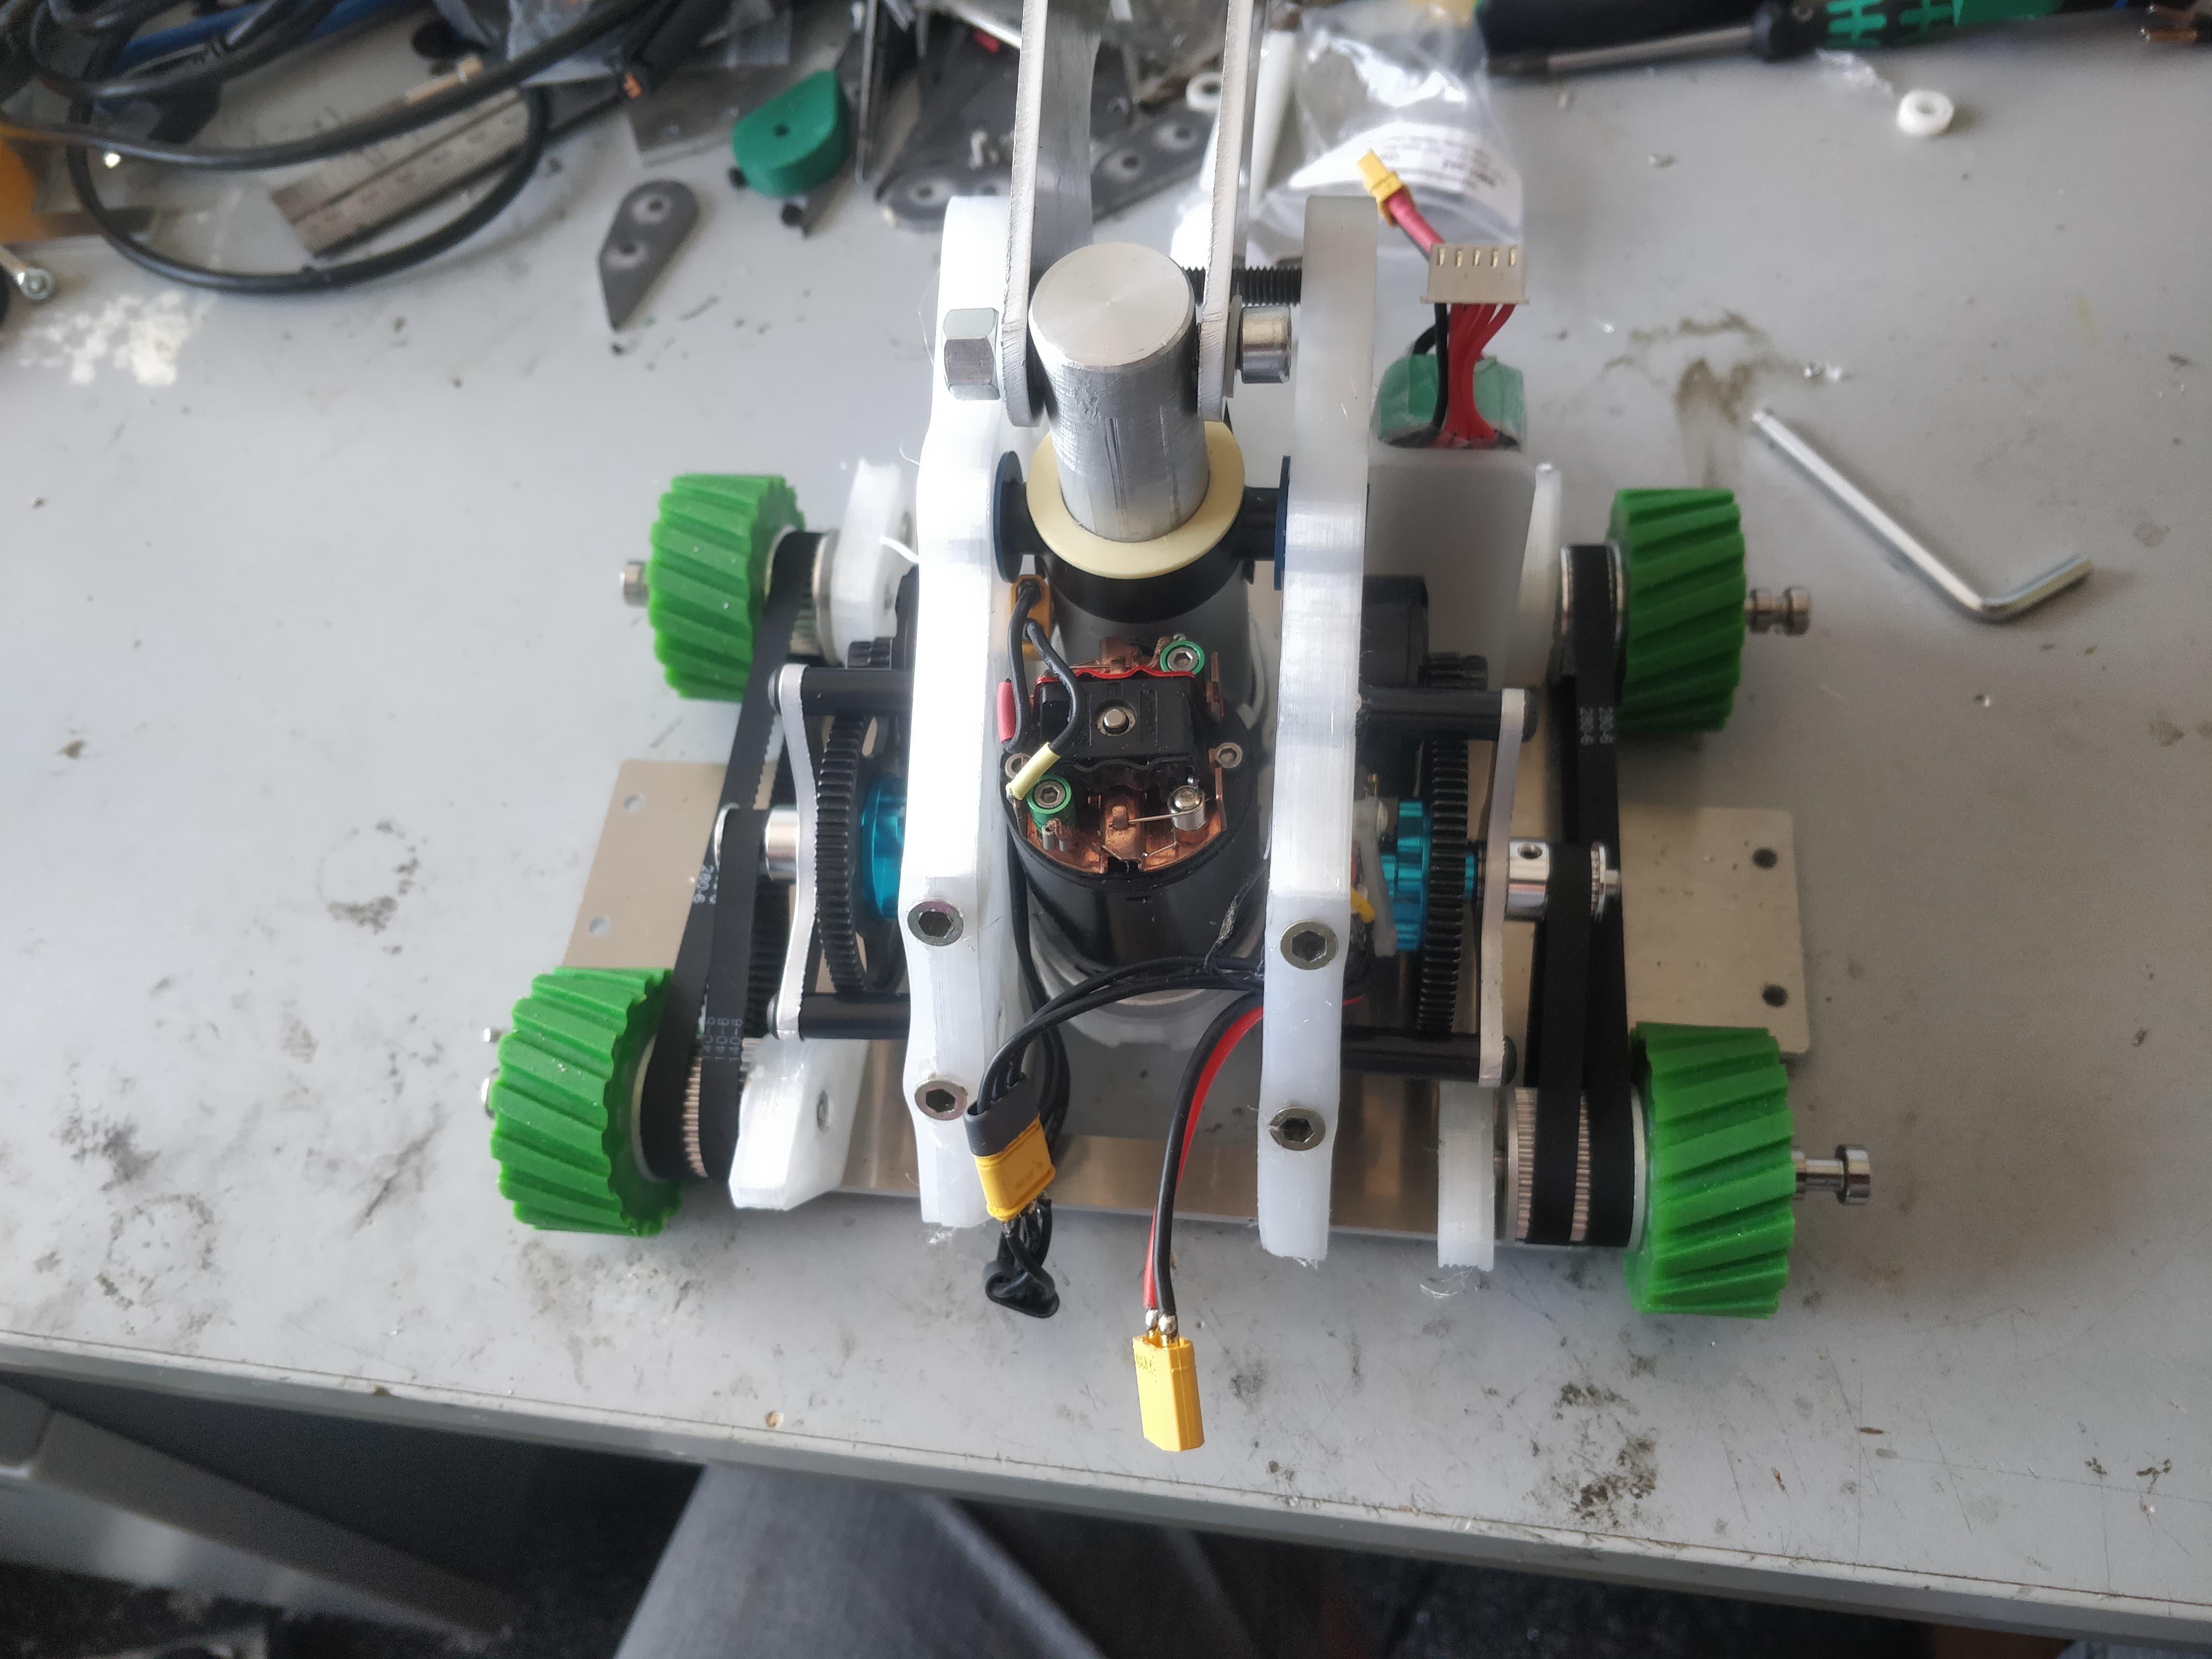
I cut and drilled my drive shafts and slopped the internal core of the robot together for a bit of a jolly. There are parts that desperately need reprinting and obviously I need to fold the arse plate and claw but it’s taking shape remarkably well.
While the outside armour is integral to the drive (singly supported pulleys are An Sad) I could just about push it towards function with the baseplate template and the printed widgets.
I was really looking forward to seeing it hobble under power and try out the Repeat Dual ESC finally.

Little bit of a damp squib because of the patched and unsupported nature of the belt stages but I’m loving the potential for low speed control! Just wish it had on board mixing!
That is coming together beautifully! It’s a shame you couldn’t make it to summer showdown, but it was definitely the right call. No sense in rushing a bot if its not ready
Yeah I mean it’s a habit I’ve become more comfortable with the longer I’m in the sport. Less inclined to turn up with patched rubbish.
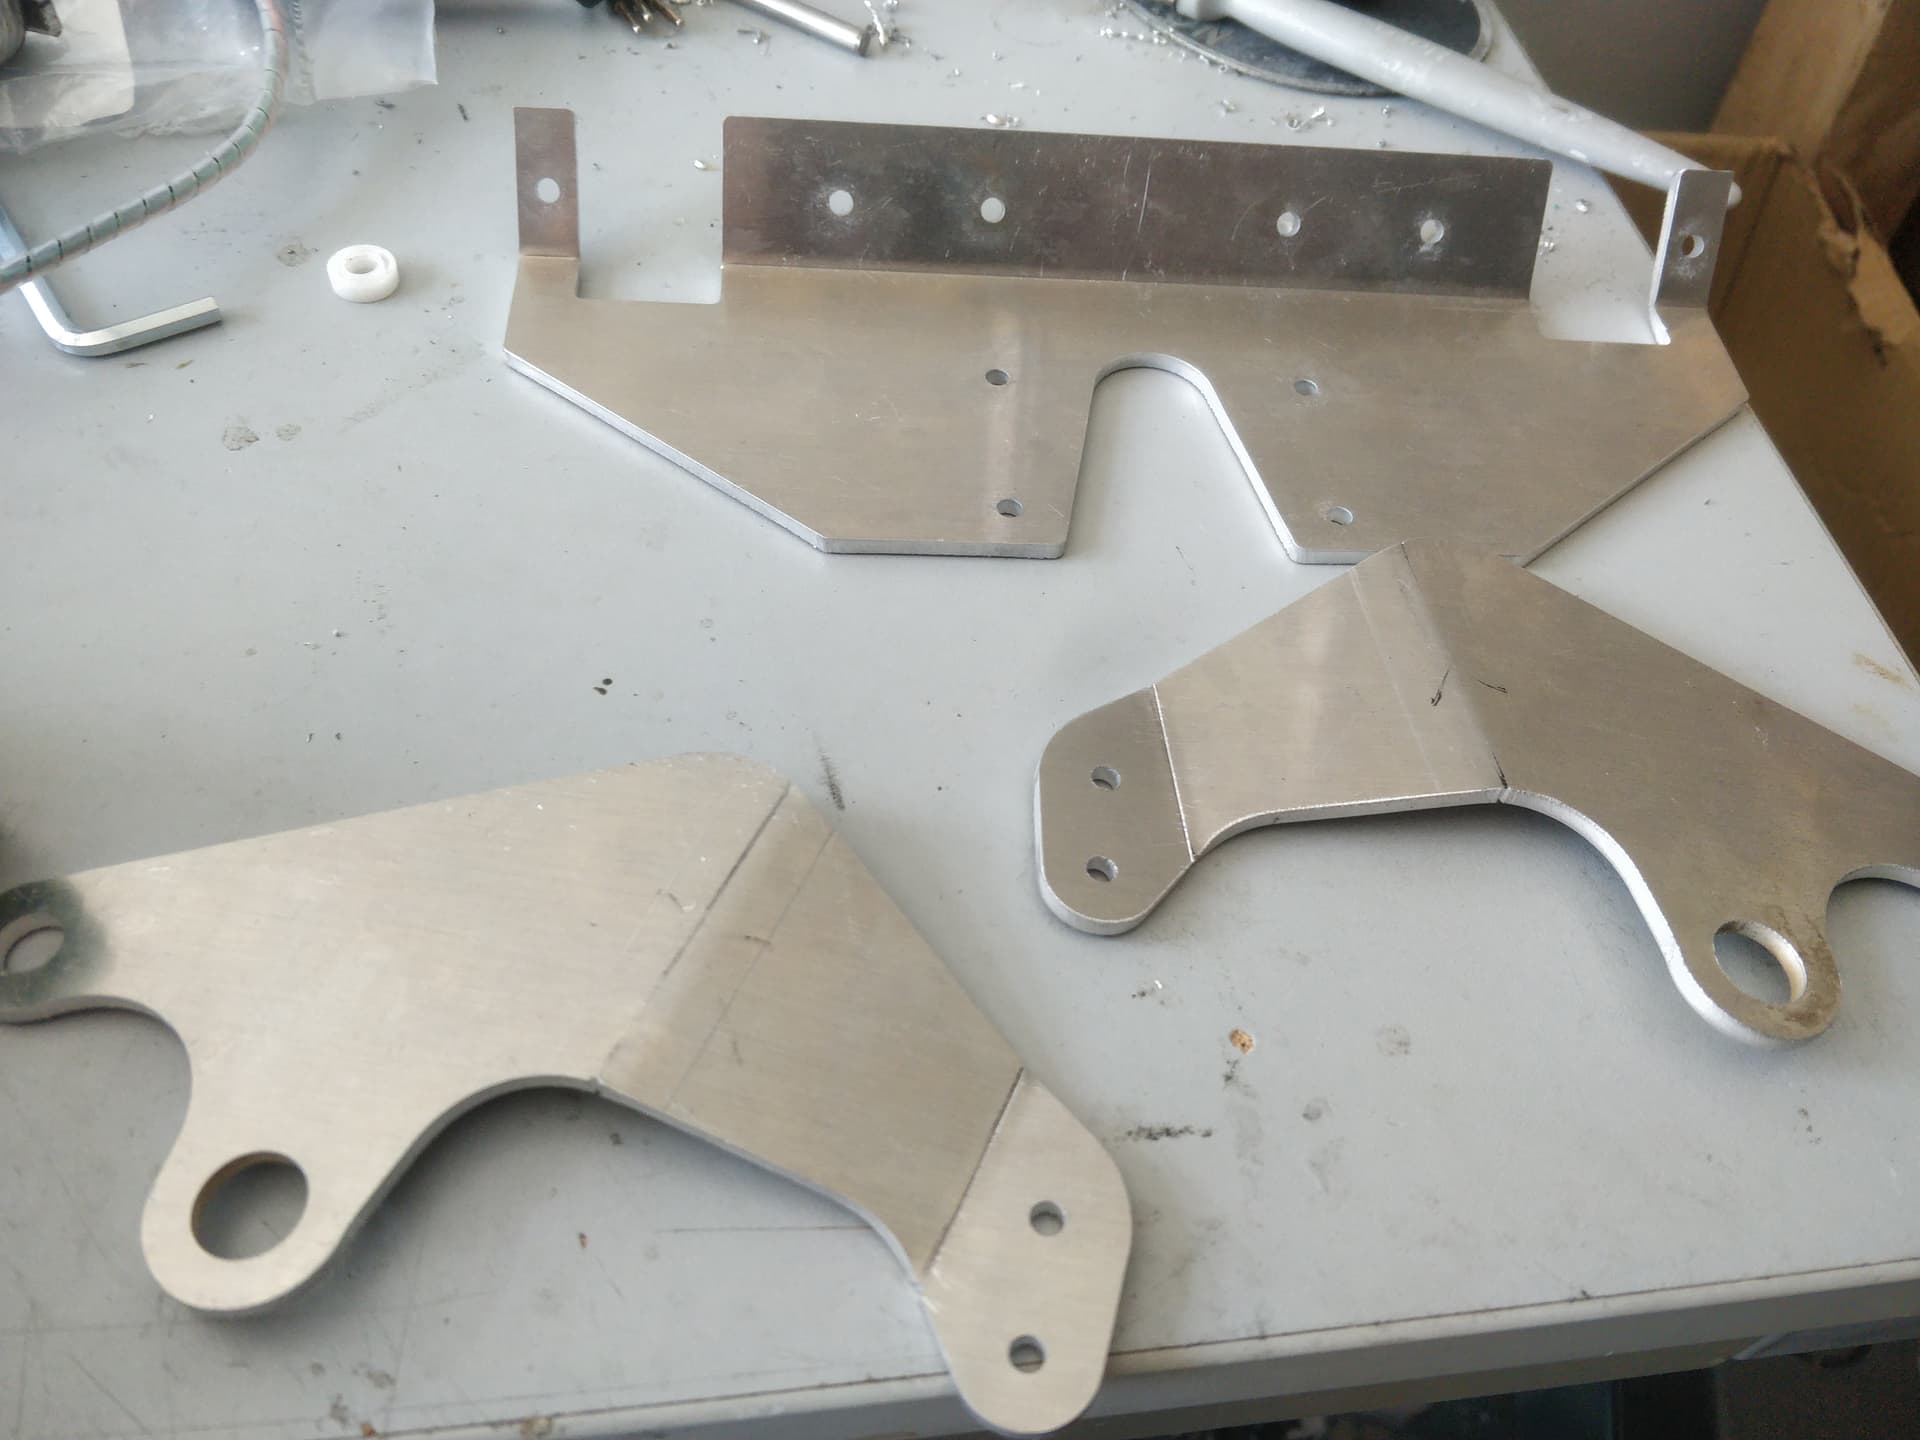
I had a spare couple of minutes at work (read: I made sure I had a spare ten minutes and a free machine) so could quietly fold a couple bits.
The beak looks pretty good all buttoned up! It has a printed bush that will sit at the pivot point or the arm and hold the ‘wide’ end together.
Shoved the lil guy on the scale and honestly it’s heavy but not impossible. I’ll likely have to get creative but I can do at least 75% of what I want which is better than nothing.
Hear you about being less inclined to turn up with rushed patched up bodges.
I hate being unprepared or turning up to an event with a bot I don’t have faith in.
Progress is looking ![]() as usual Harry! - as always this thread is one of the ones I’m always stoked to read updates on.
as usual Harry! - as always this thread is one of the ones I’m always stoked to read updates on.
Ps I’m loving the drive set up ![]()
I also hate turning up to an event with an unfinished or barely finished robot, but it’s the only way I ever finish anything so ![]()
That’s looking absolutely lush, the folded metal frame is the shizzle. ![]()
So I haven’t fixed a single one of the issues that stalled Hard Nips in the past and have instead created several more. Lovely.
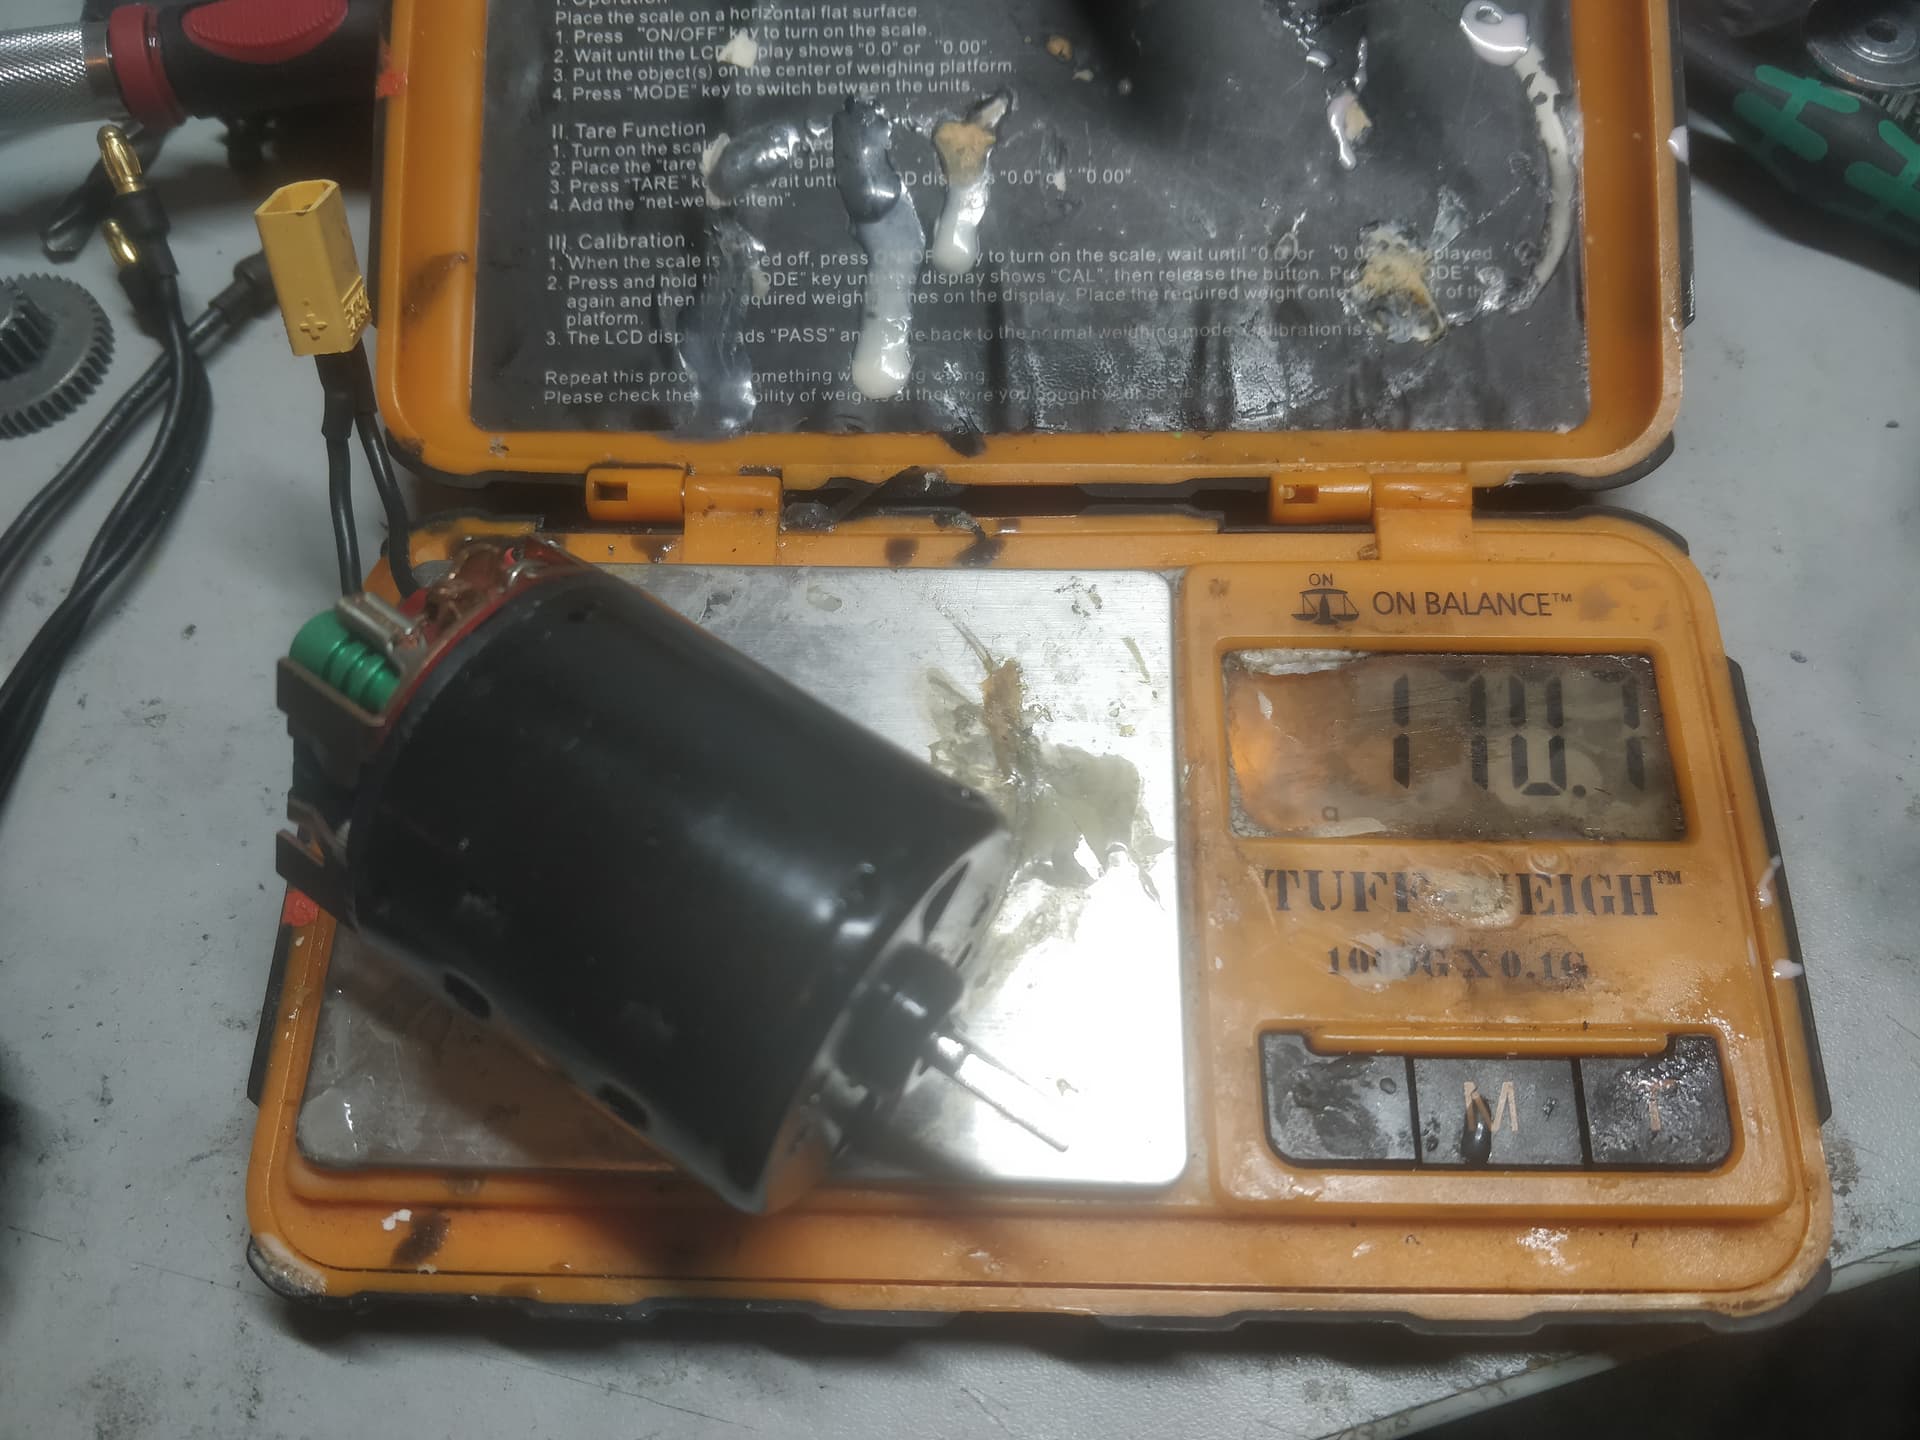
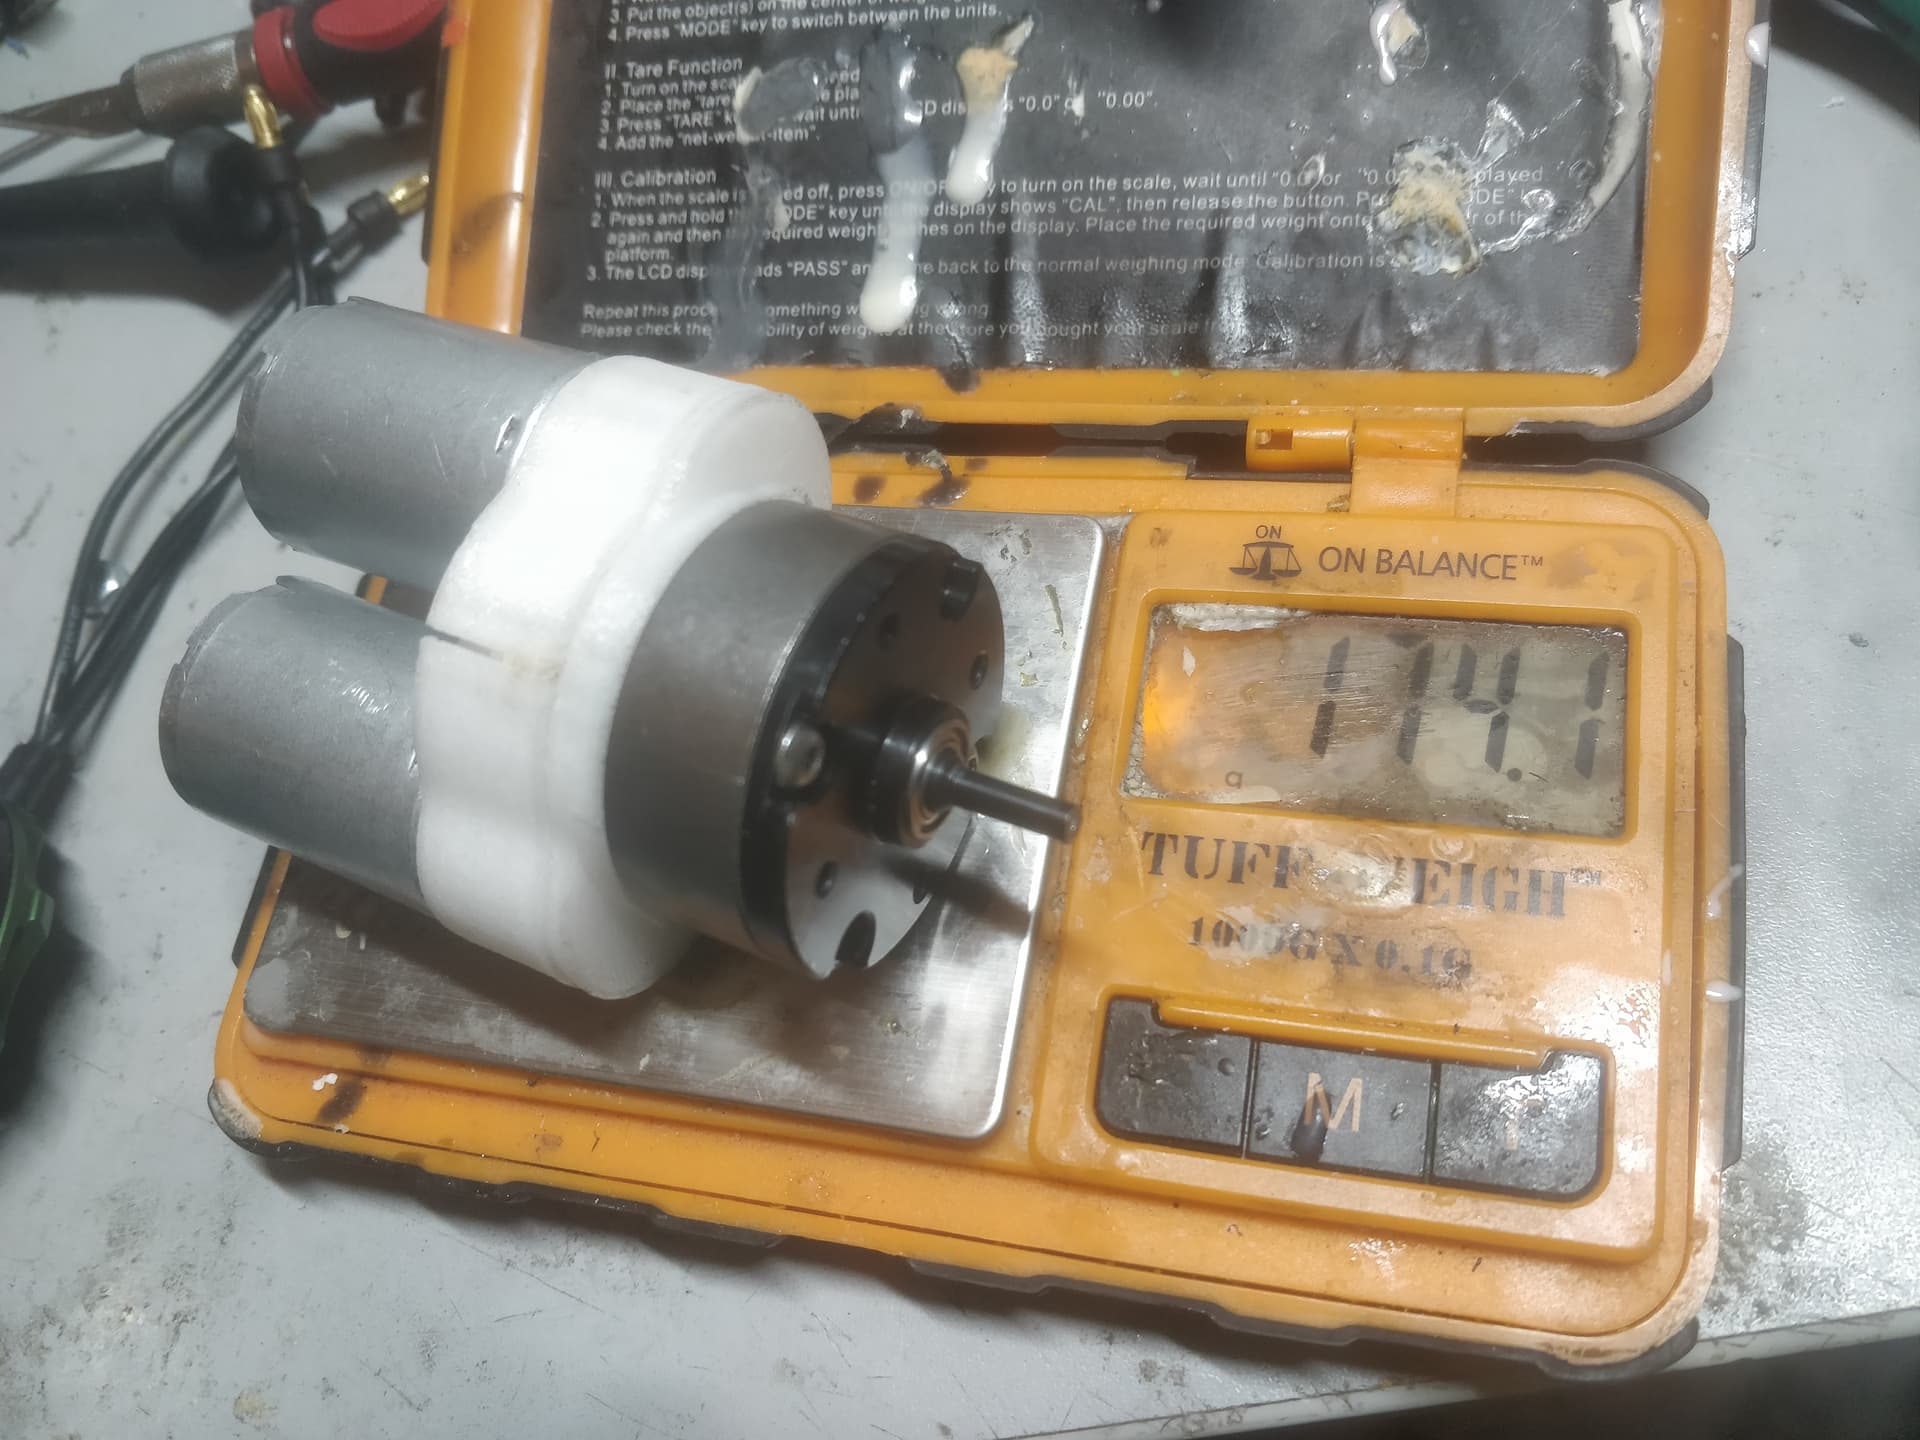
(un)Surprisingly the crush trials did not go very well. The ESC smoked and the actuator gearbox ate itself to death. Stripped gears at every stage. I lost at least one tooth on every single gear save the pinion. How utterly fantastic. I figured, in for a penny, in for a pound and if I was already going to do disguising amounts of surgery on the thing I might as well go for broke. I set out making a shopping list of sorts:
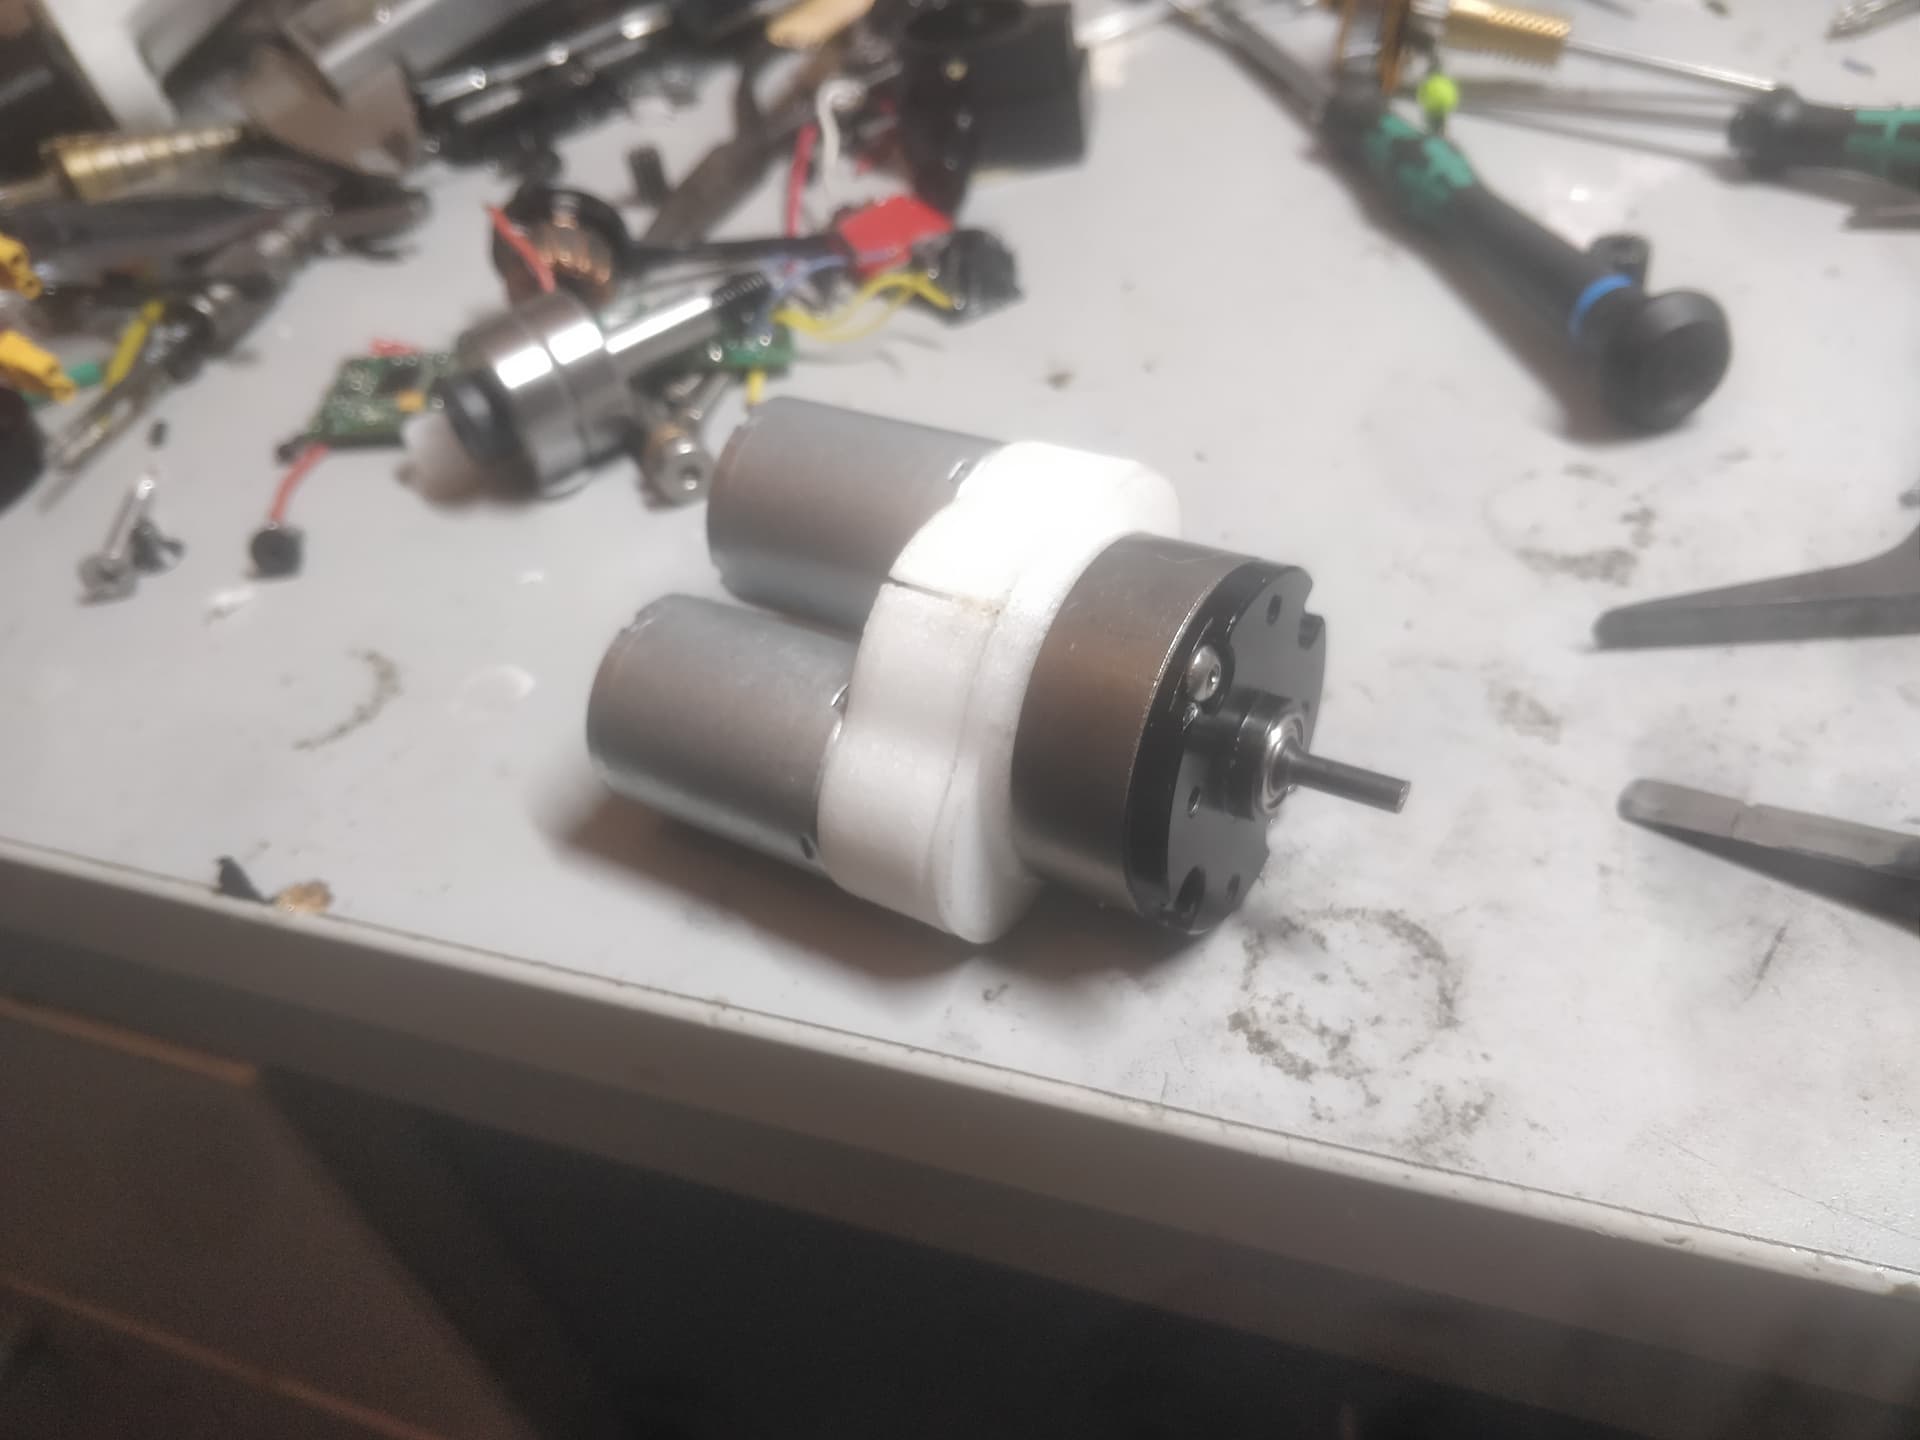
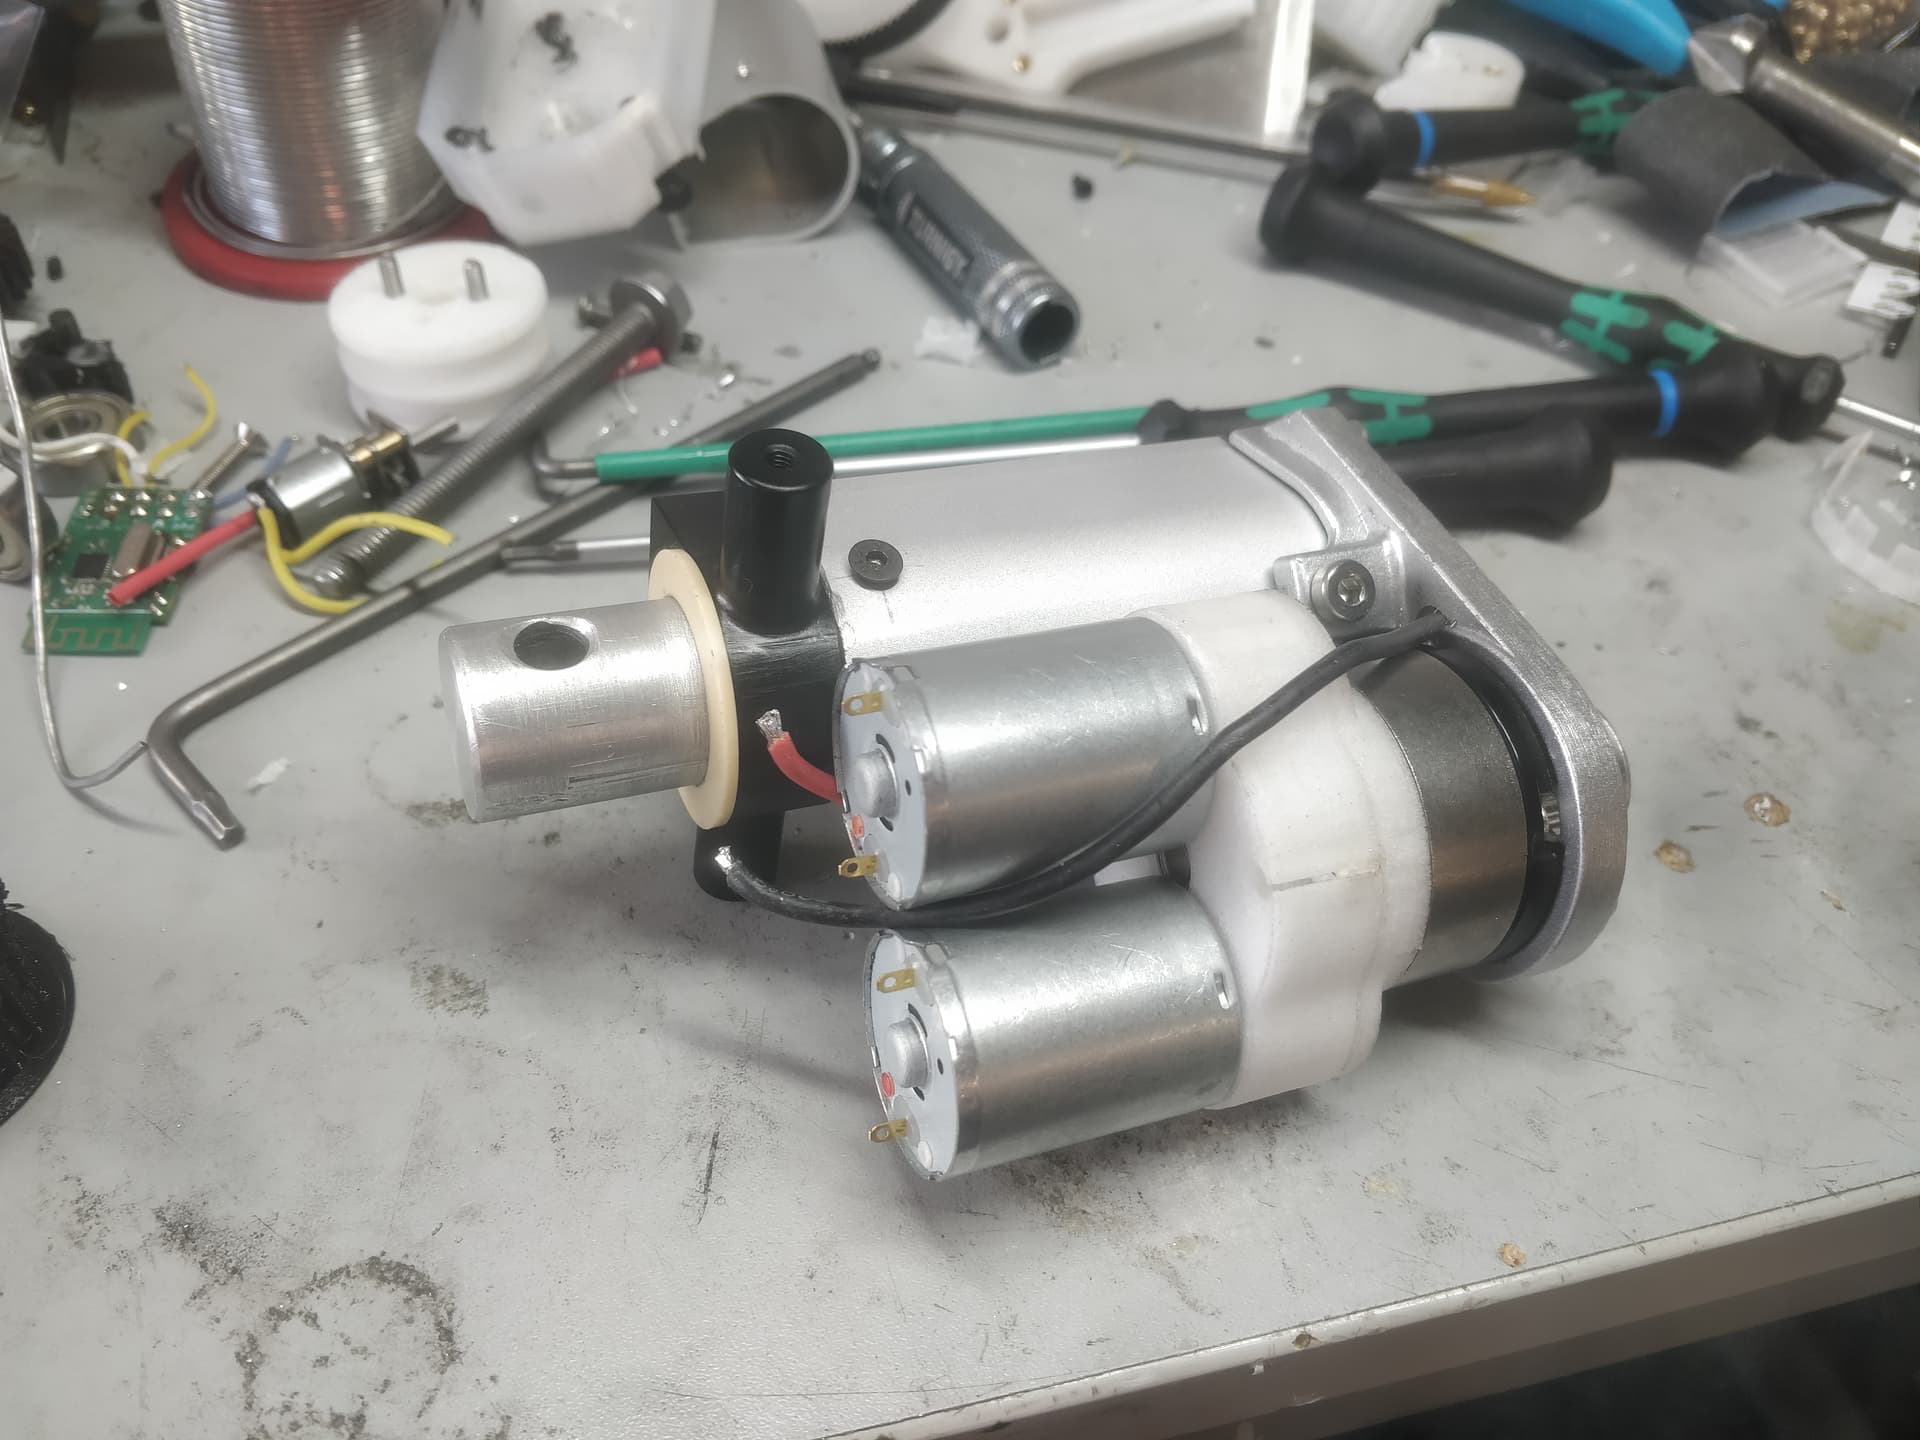
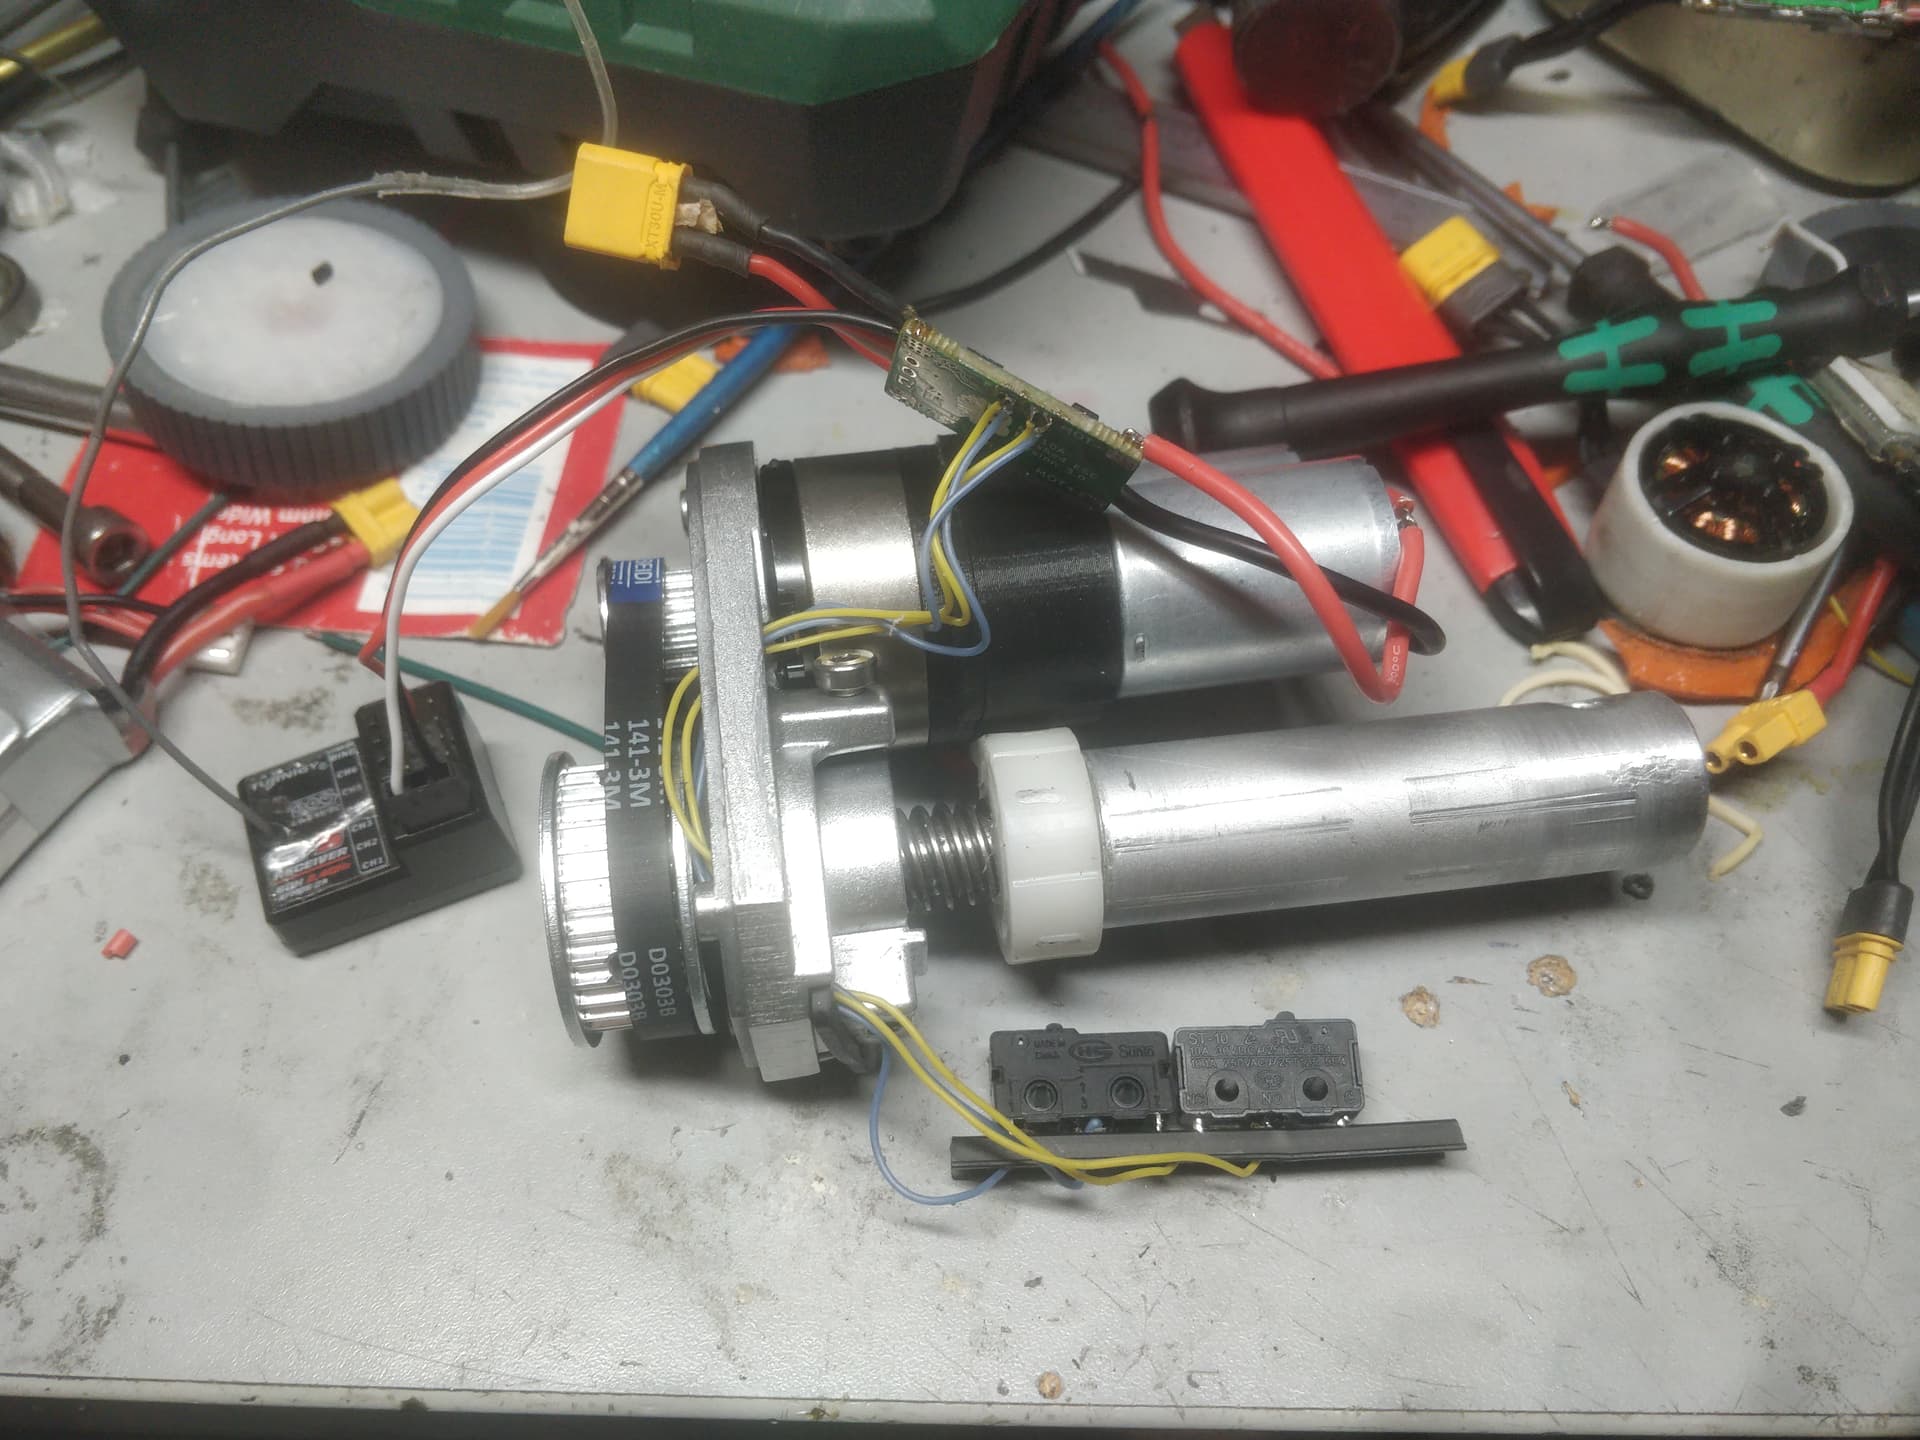
Removal of all the gears was trivial, easy swap to some HTD3 timing pulleys (one of which is still in the AliExpress ether) but this would net a lot less reduction overall, not exactly what I was after. I liked the 540 motor. I did, it was very funny. But it weighed a lot, was current hungry and ultimately left a lot to be desired. Luckily my brain spawned an idea that was even funnier.
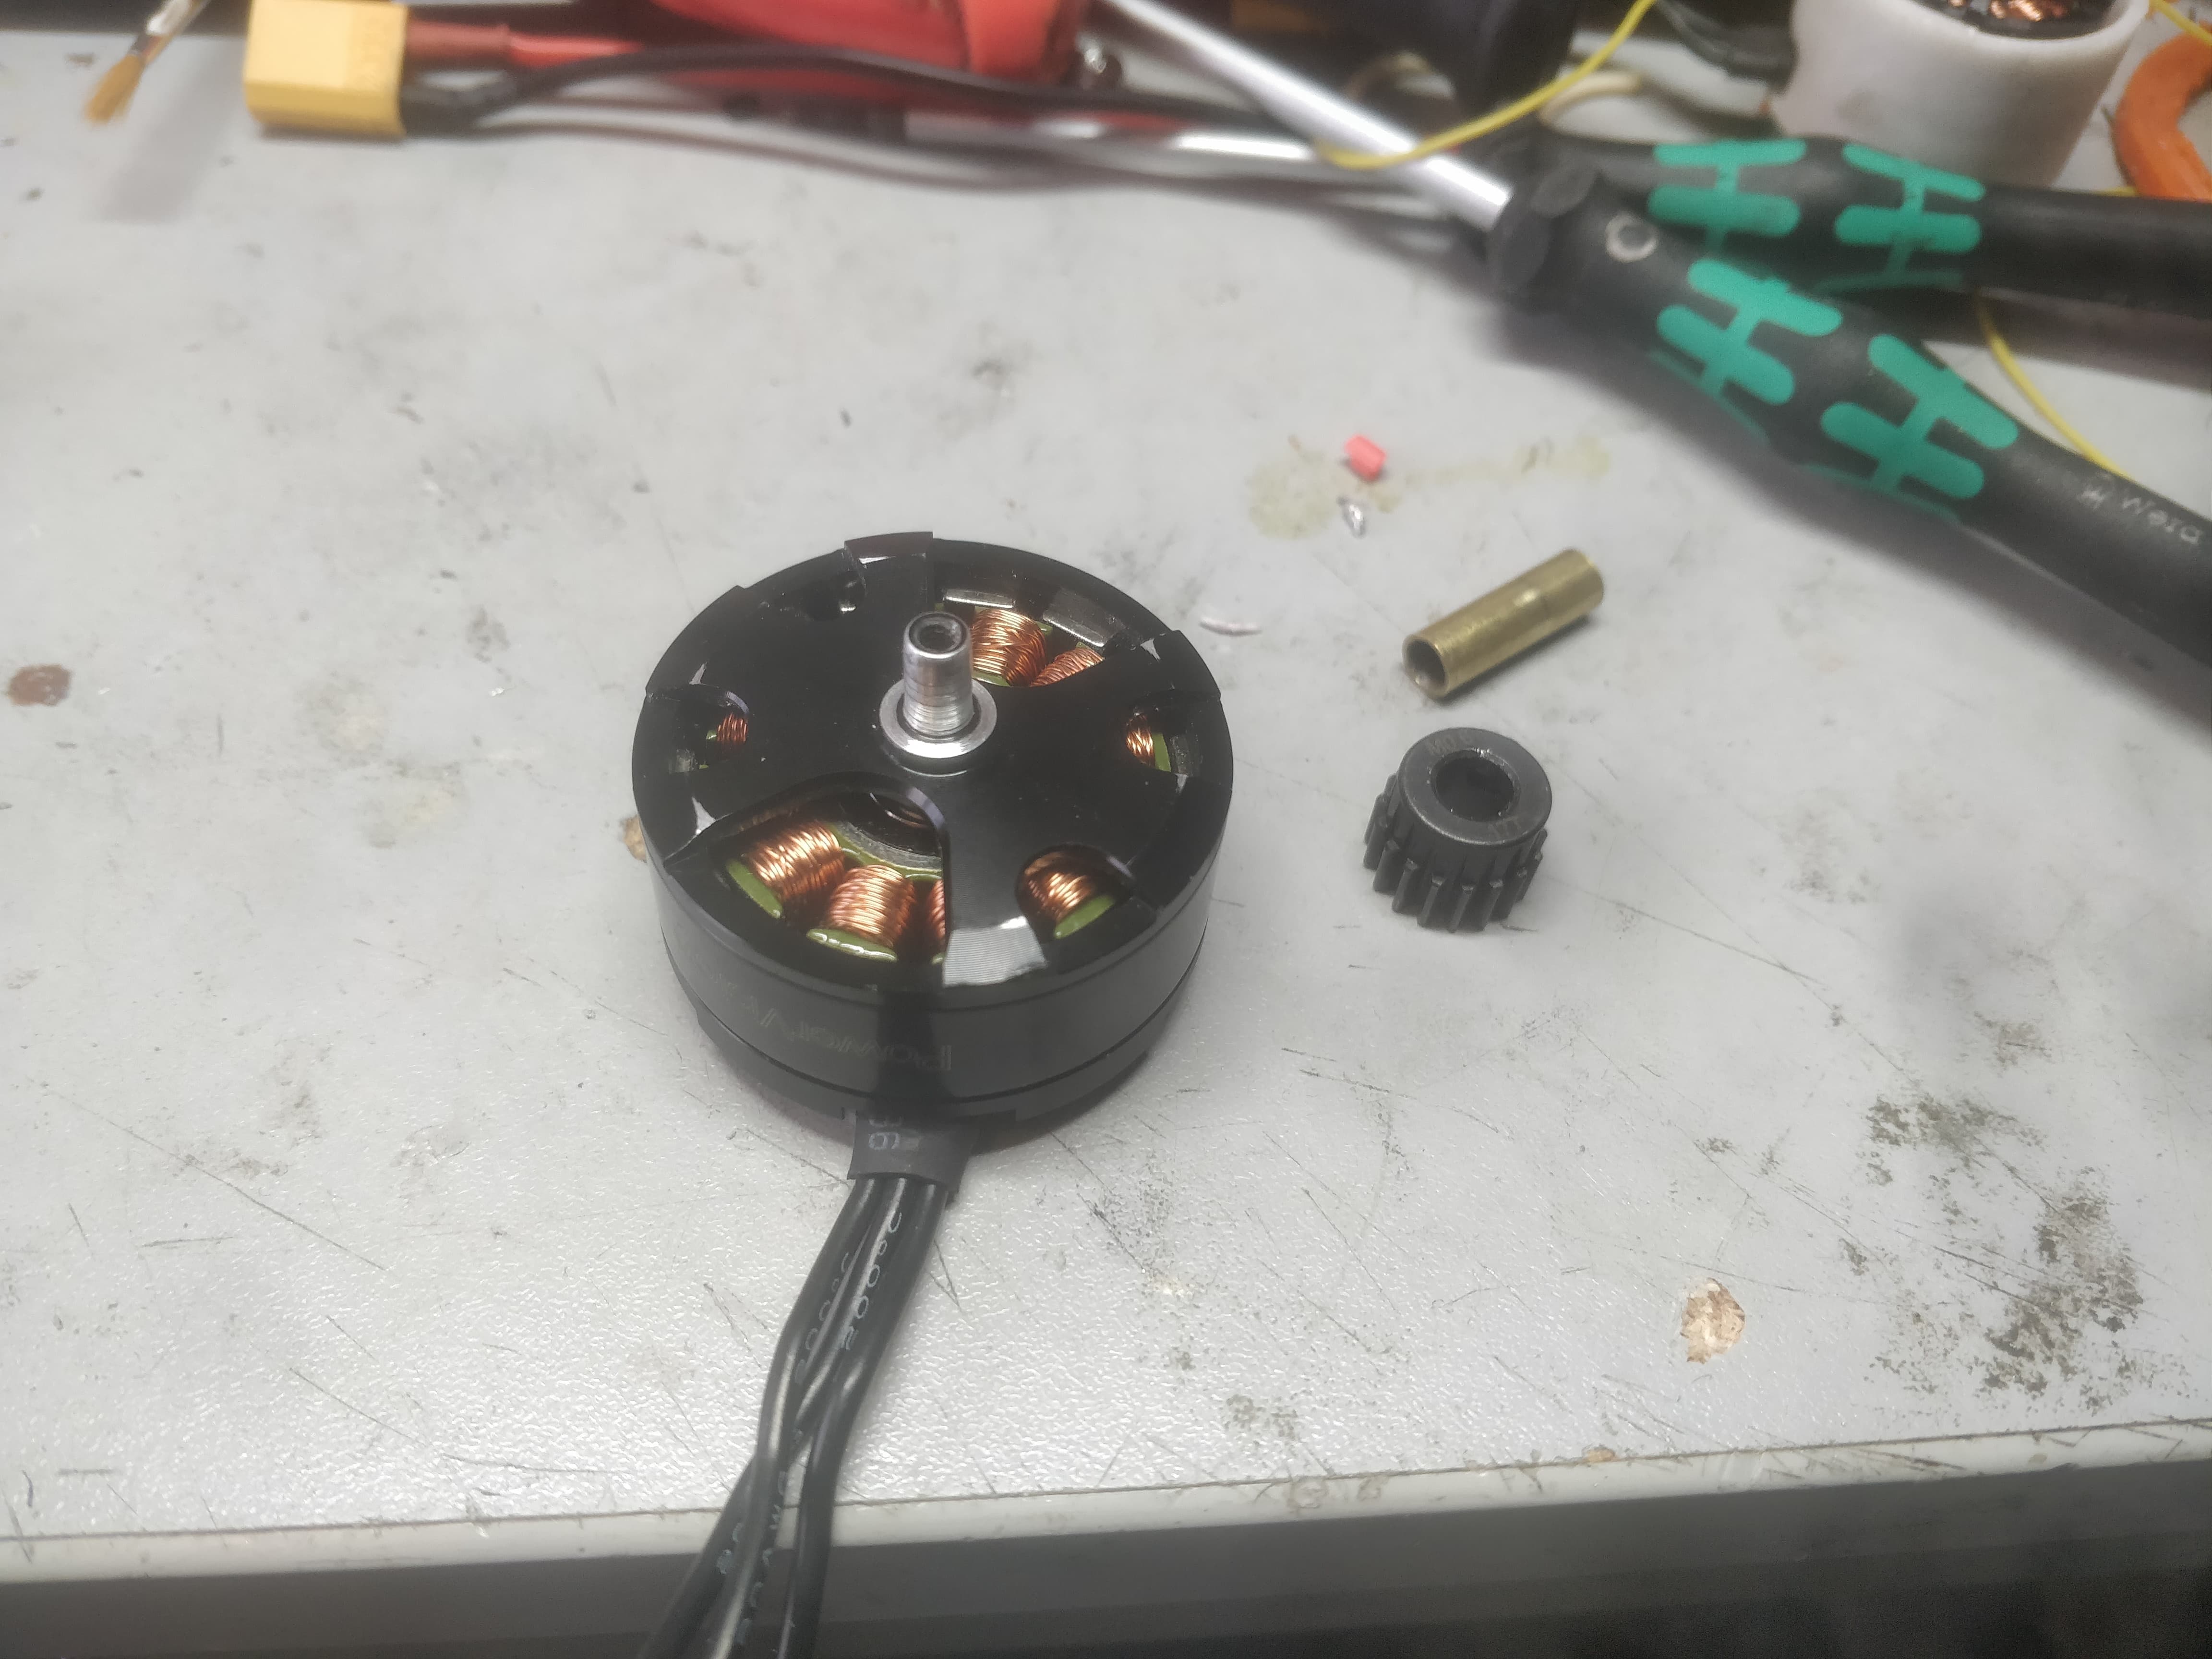
I plucked up two RB370 motors from my oceans of dirt. They’re physically smaller yes but they’re a lot less angry for the voltage (I.e. not a 7.2v native motor having 4s thrust upon it) and with two of them I am actually slightly ahead on the power front. Using the stock MARS pinions which are a handy size that let me gang them together and claw back some reduction.
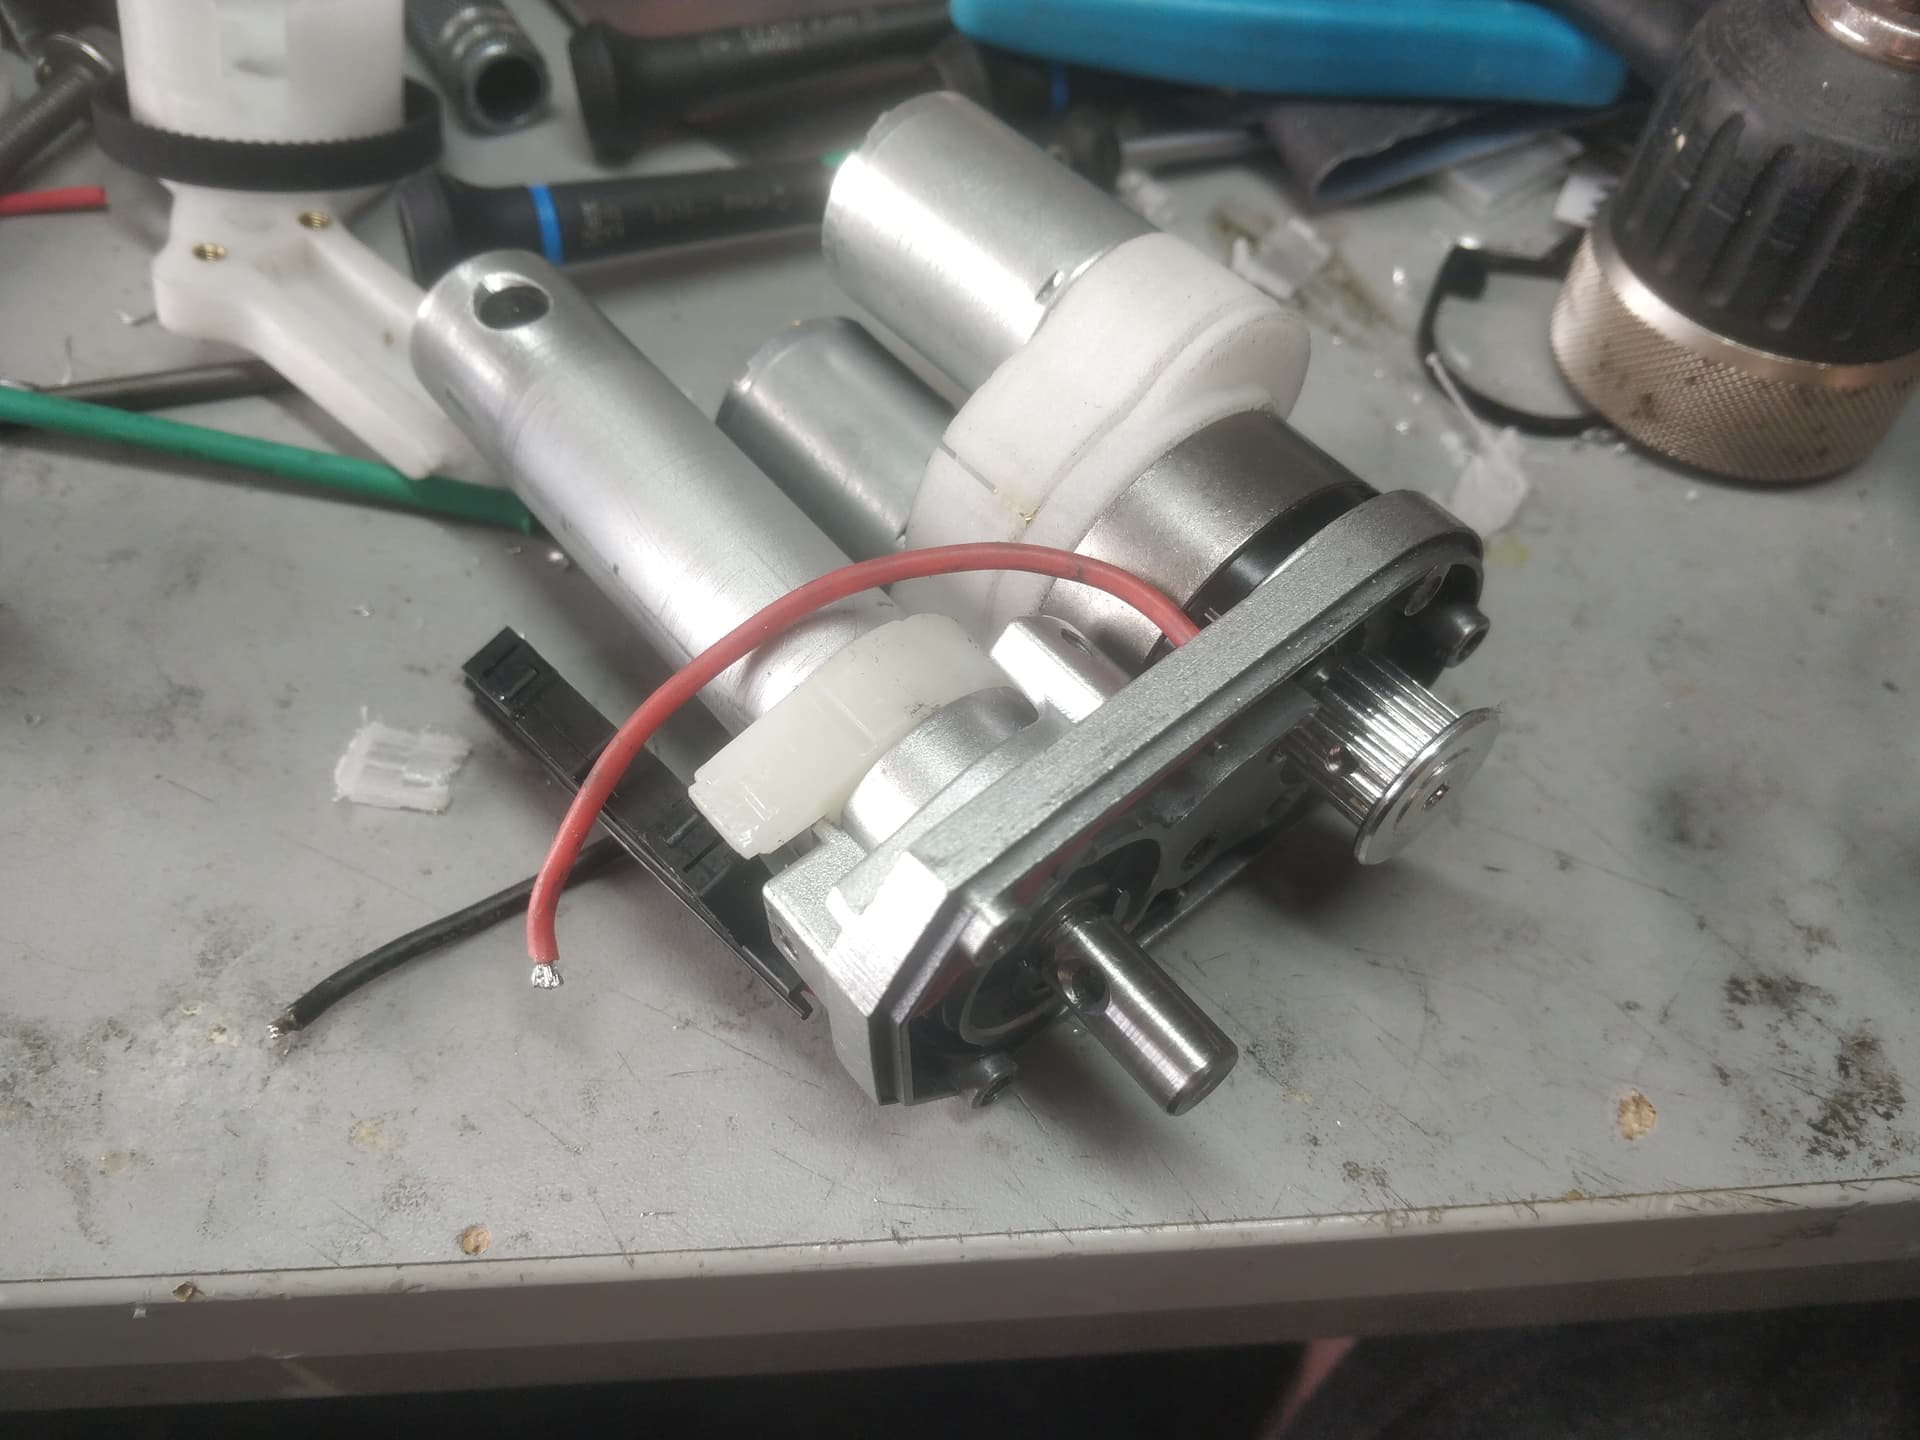
This malformed tumour is then wedged into one of those 3:1 540 extension gearboxes designed for RC crawlers trying to get more torque. This means it mounts up the same as a 540 and has the same 1/8" shaft.
So how does it compare? Considering that’s two motors and a heap of reduction (and a morbidly thick ring gear on that planetary!) Prior motor was a hair over 170 and this angry little nugget swings in at fraction more. It is a little longer so I had to recut the actuator “tube”
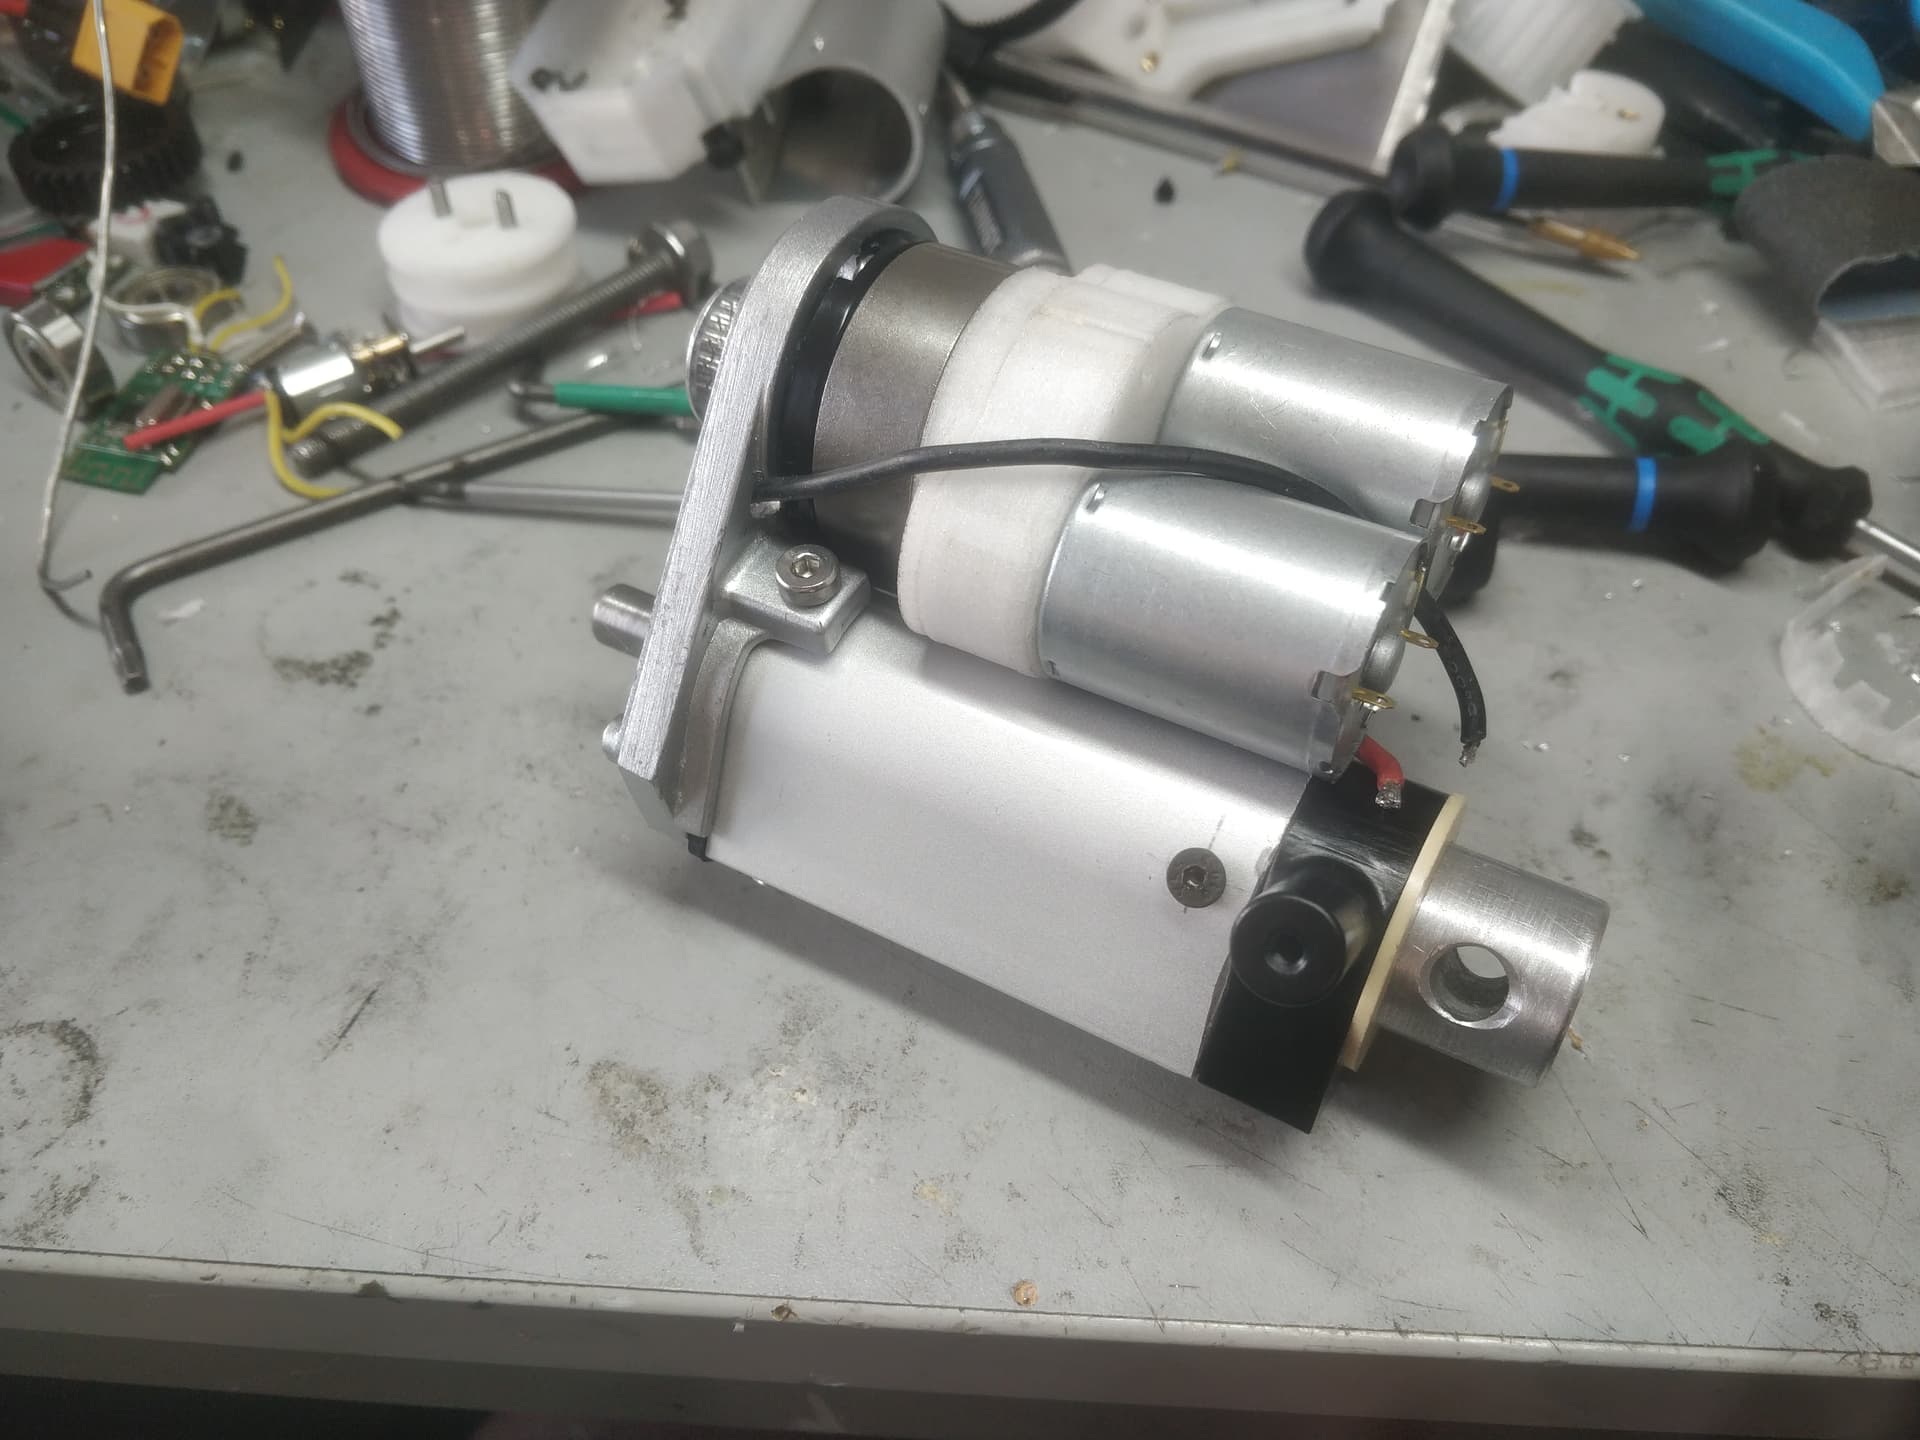
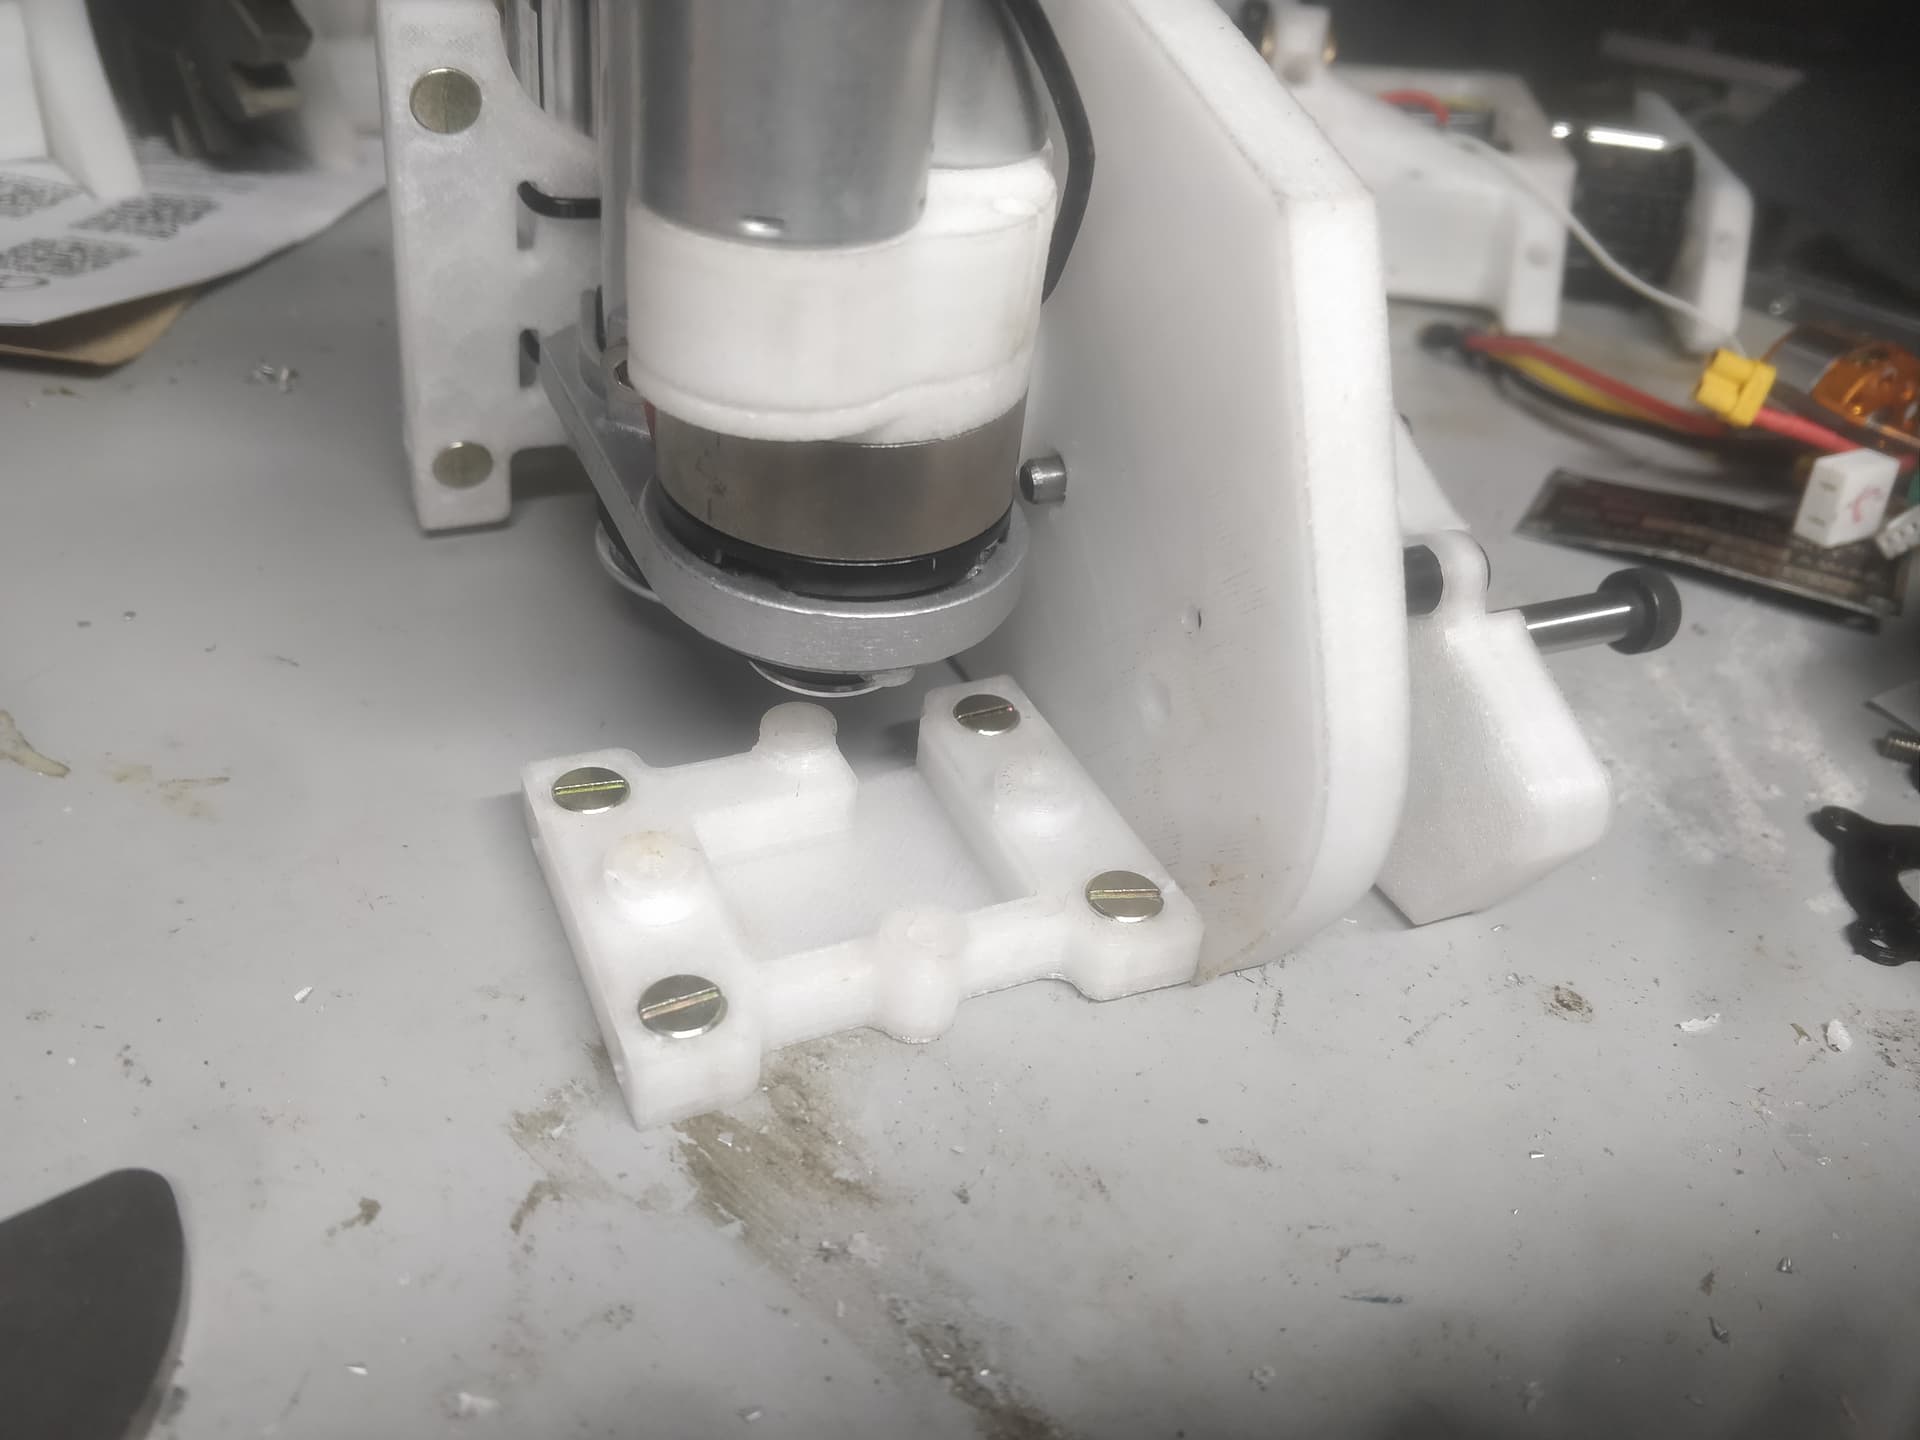
However! the tube needed to be Re-longered anyway to slot in these limit switches. These are just the stock ones just shortened to the minimal possible distance. Basically back to back. 'Ole Nipsy doesn’t need much travel anyway.
This is setup with the stock diodes and such but as I am using one of the BBB v3 ESC’s I can do away with that mess and just go straight to the switches. I don’t know if I want to trail all those wires in and around the robot so I may just make the ESC part of this unit so I can just tag a signal and power in to it.
Looks like some kind of nightmarish vape. I don’t want to know what end you’d suck.
One more Aliexpess delivery and I can put a pin in that as a component. Now it’s just a case of redesigning the rest of the robot in it’s entirety.
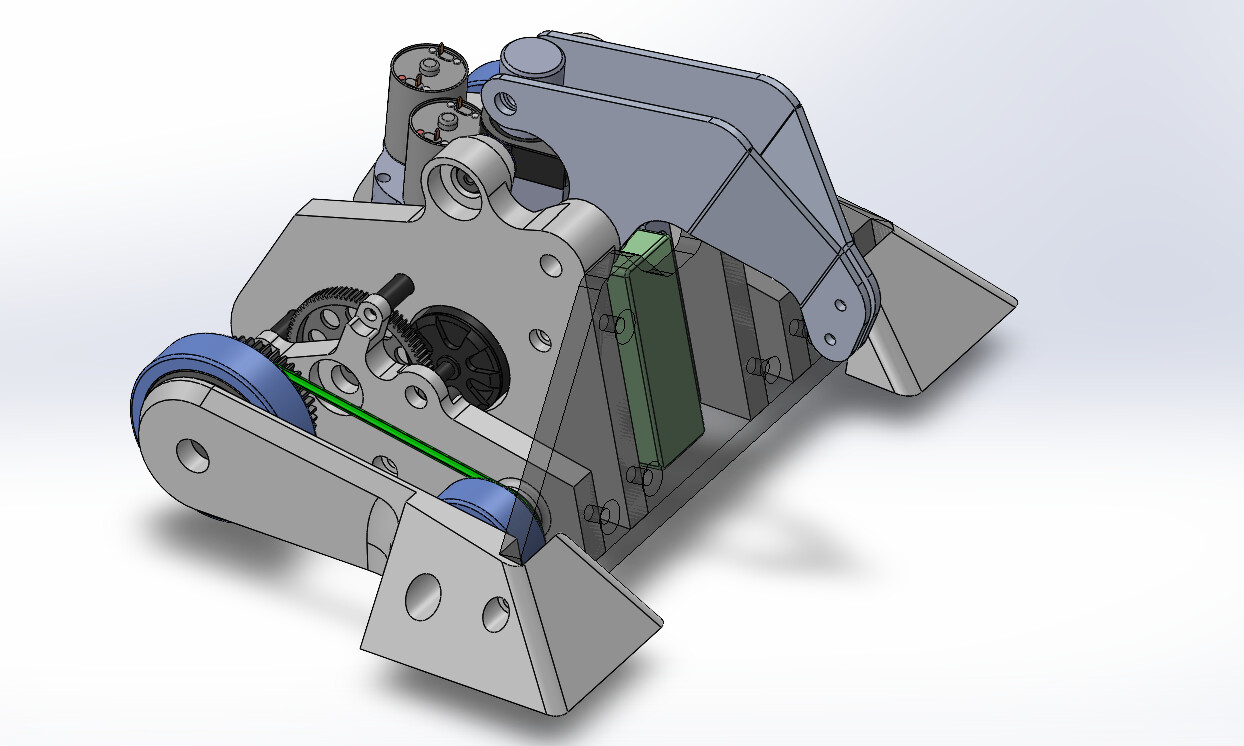
I paused the perpetual downward spiral of the real world to play around with toy robots. Since posting the last update I sat down and basically spent a whole day in CAD - something I haven’t done in years. I do not have an awful lot to show for it but I like the direction the Rev3 has taken.
Technically more refined but it is definitely a revision rather than an outright rebuild from the ground up. I have simplified the chassis massively. Not everything is load bearing and it is constructed in a much more traditional style. Stronger, boringer but way more legitimate and several thousand simpler to construct. There is also significantly more hyperbole involved in this chassis, if that was unclear. There is currently no central feeder wedge modelled because it’s something that requires careful thought and planning. I am in no mood to think - carefully or otherwise.
I won’t get too precious over the minutia of the design foibles but the broad strokes are as follows. The pivot geometry was rejigged to make it less hellish and accommodate the extra 6mm of swing from the new style actuator. it has these wonderful shoulder pads which let the bushings sit closer to the actuator endcap and give off a powerful yet feminine aura should it find its way into a 1980’s corporate job. The drive motors are sunk further back into the bulkheads with provisions made for bearing support. Timing pulleys are a thing of the past with the larger rear wheels now being driven directly by spur gears. Just planning to slave the front ones off with a length of green belting or an O ring if one should present itself. I have stiffened everything up by making them full thickness bulkhead panels instead of sheet & standoffs. Nothing important is designed to be outside of that central column of the machine so they will be mostly left hangin’ in the proverbial breeze and damaged by the literal spinners.
I vomited out a little test print and yep it sure does exist. Little tweaks but the geometry is good and other than whacking fancy lightening pockets and cut outs in it’s pretty viable.
Okay so I will finally address the lithium elephant in the plastic room. I am fully aware how dumb this feels on the face of it, to have my battery… well… right on the face. Of it. Because Nips is Tall Like The Mighty Oak it is a lot easier to stack components vertically - I did this in the last version but obviously in a more traditionally covered manor. I decided to say it with chest and just plop it in the central column of the robot. It does have 8mm HDPE and an airgap in front of it so it doesn’t feel awful. Morally grey perhaps. It’s a little bit of bait in a way beccause anyone getting close enough to try and shoot out the battery is coming right into the path of the jaw. Someone is having a bad day in that encounter and that’s all that really matters when you get down to Ass Tax.
In the way of petunia it crushes against itself so it should be well braced and only a little self destructive. That is obviously an extreme angle at the peak of travel - it is more hooky grabby before that point.
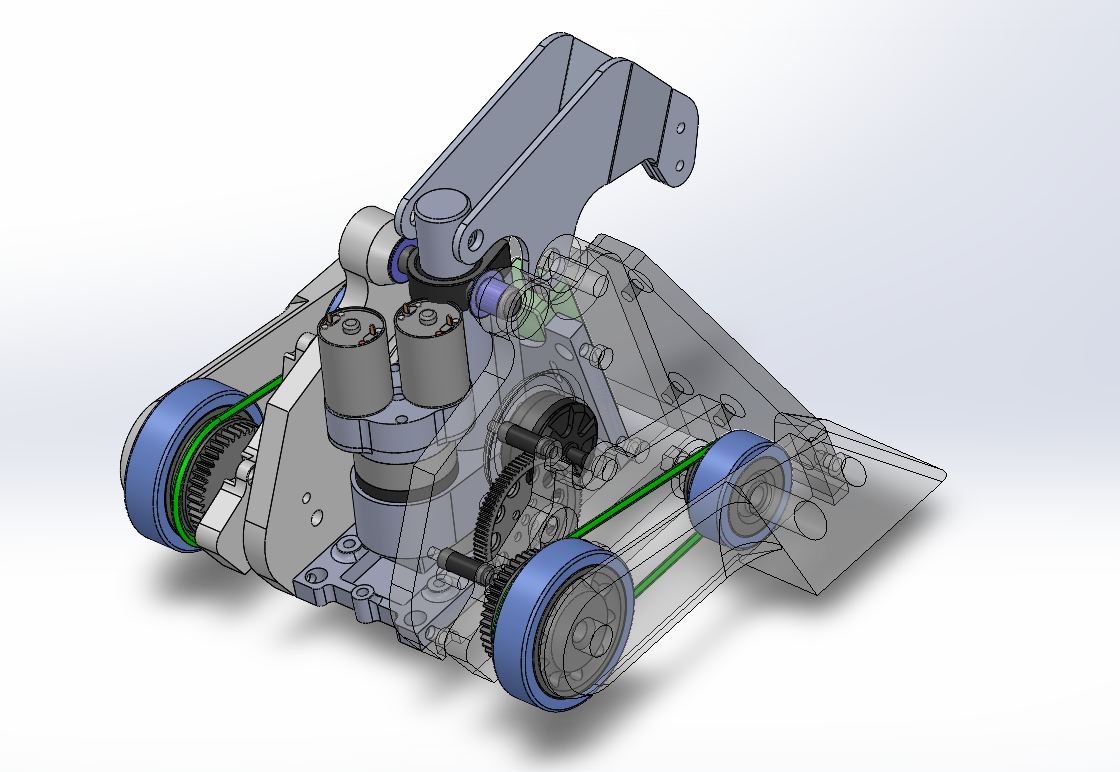
Speaking of structural mounts for delicate components the repeat dual esc is tucked in this load bearing brace slung right up the back end of Nipz. This and the battery mount are what hold the entire robot together. That is not a sentence you should be able to say about your robot. Baseplates and armour are also there but the chassis parts do all function in their absence. A fingertech switch will be jammed somewhere in this too.
Of course I left room for the cap. this has a little lid on top of it that keeps it all constrained out the way of the swinging heft of the actuator. The weapon esc will be nestled on top of this if I can’t find an amusing way to tie it into the actuator body itself. The motors route back through the bulkheads right into this and the battery just comes right from the front. It is remarkably easy to work on for once. That’s the main upgrade from the Rev2.
Love how busy the forum is at the moment. Warms the cockles of my heart so it do.
While continuing the tidal wave of personal improvement I have been making (relatively) blistering progress on Mr Nips.
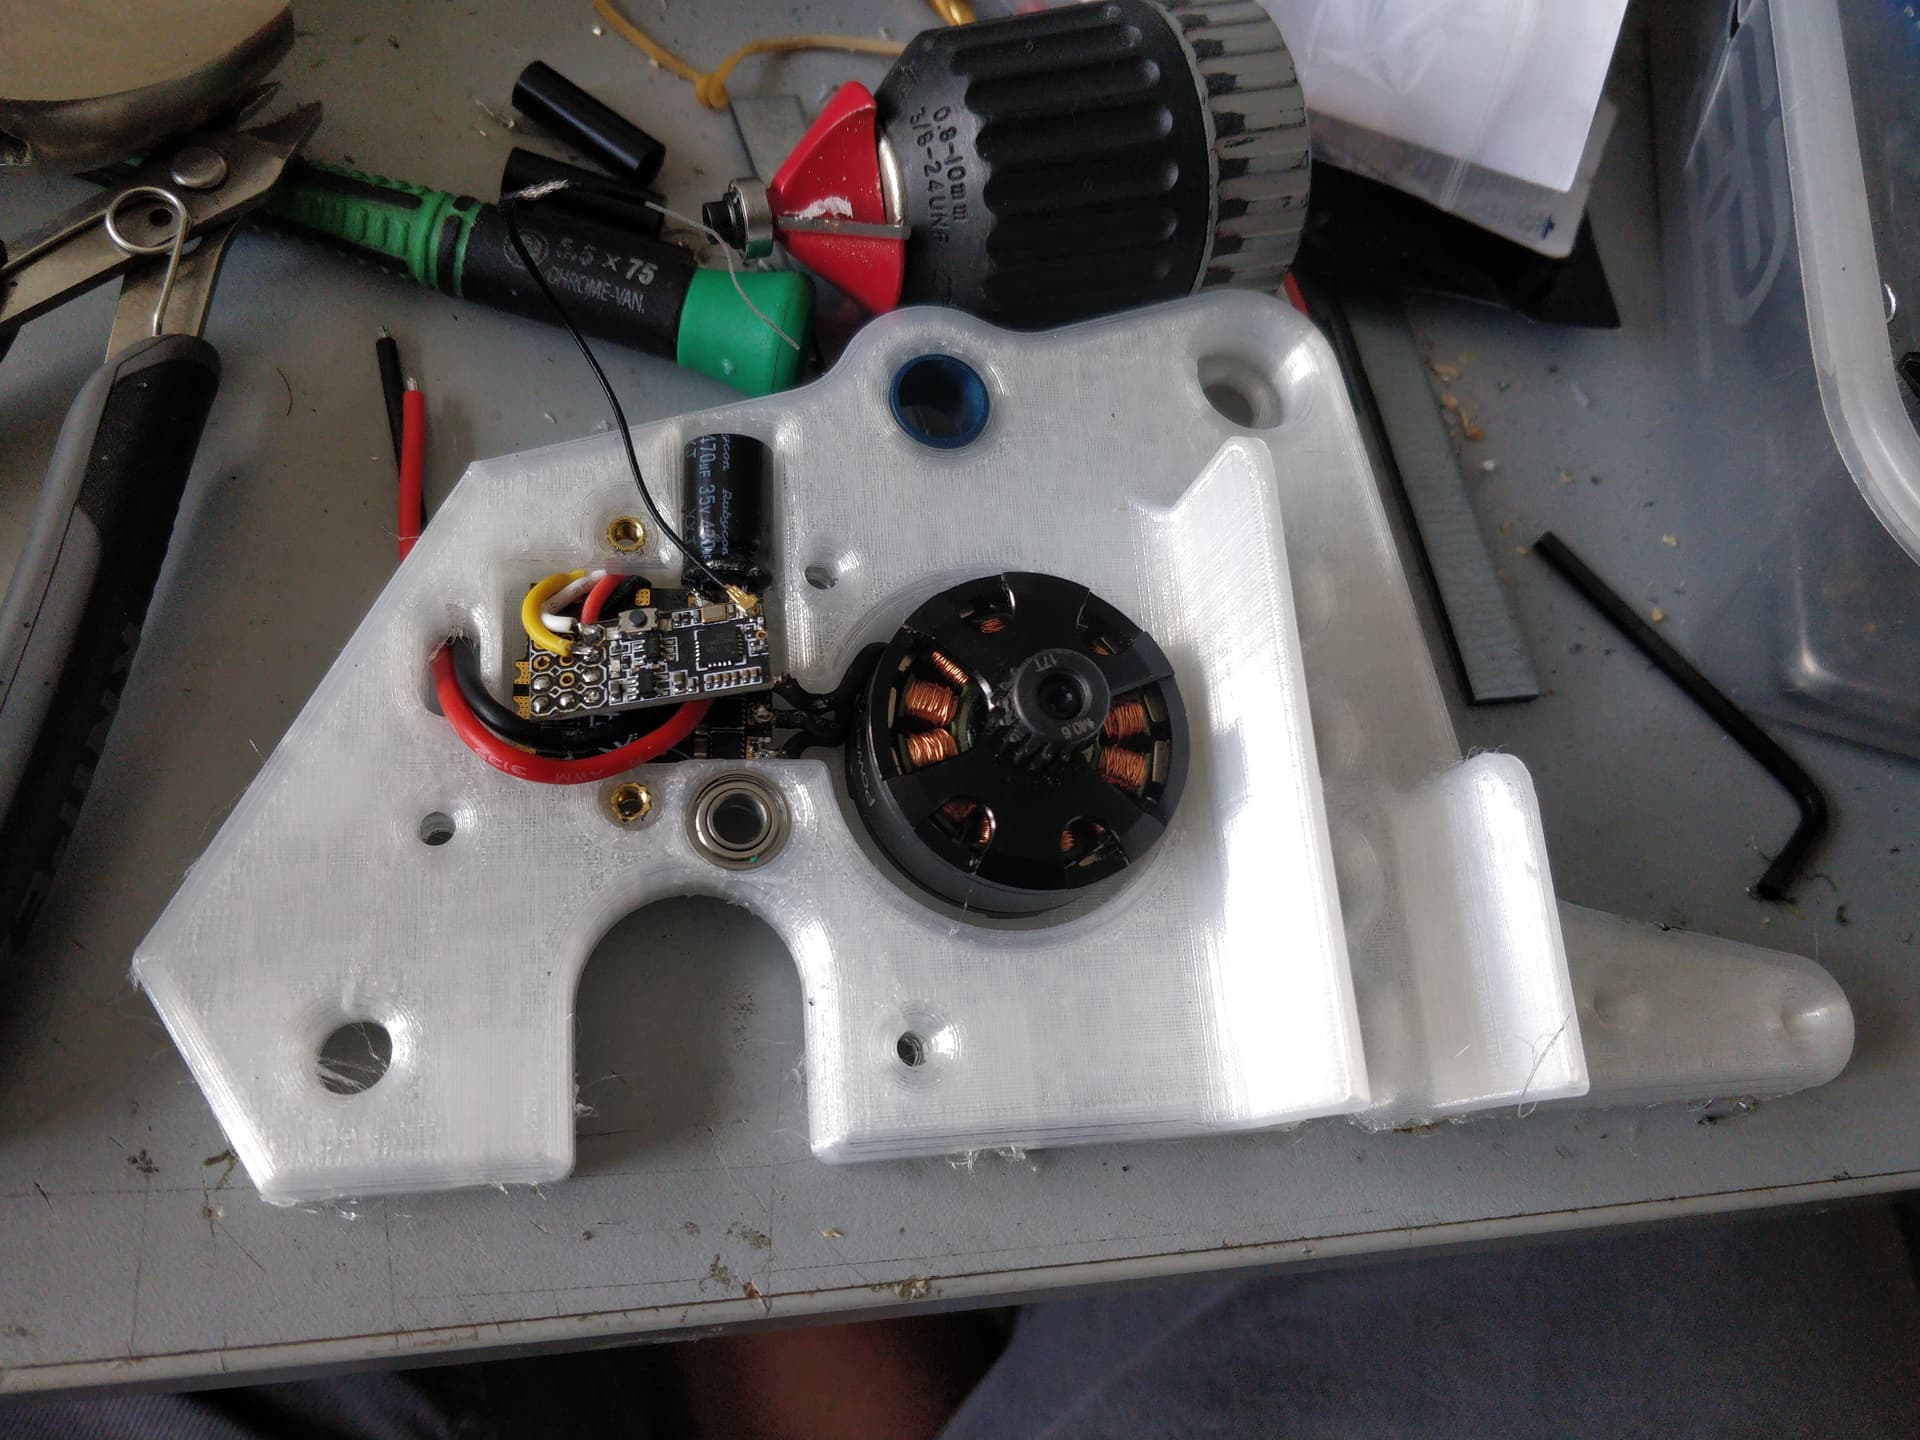
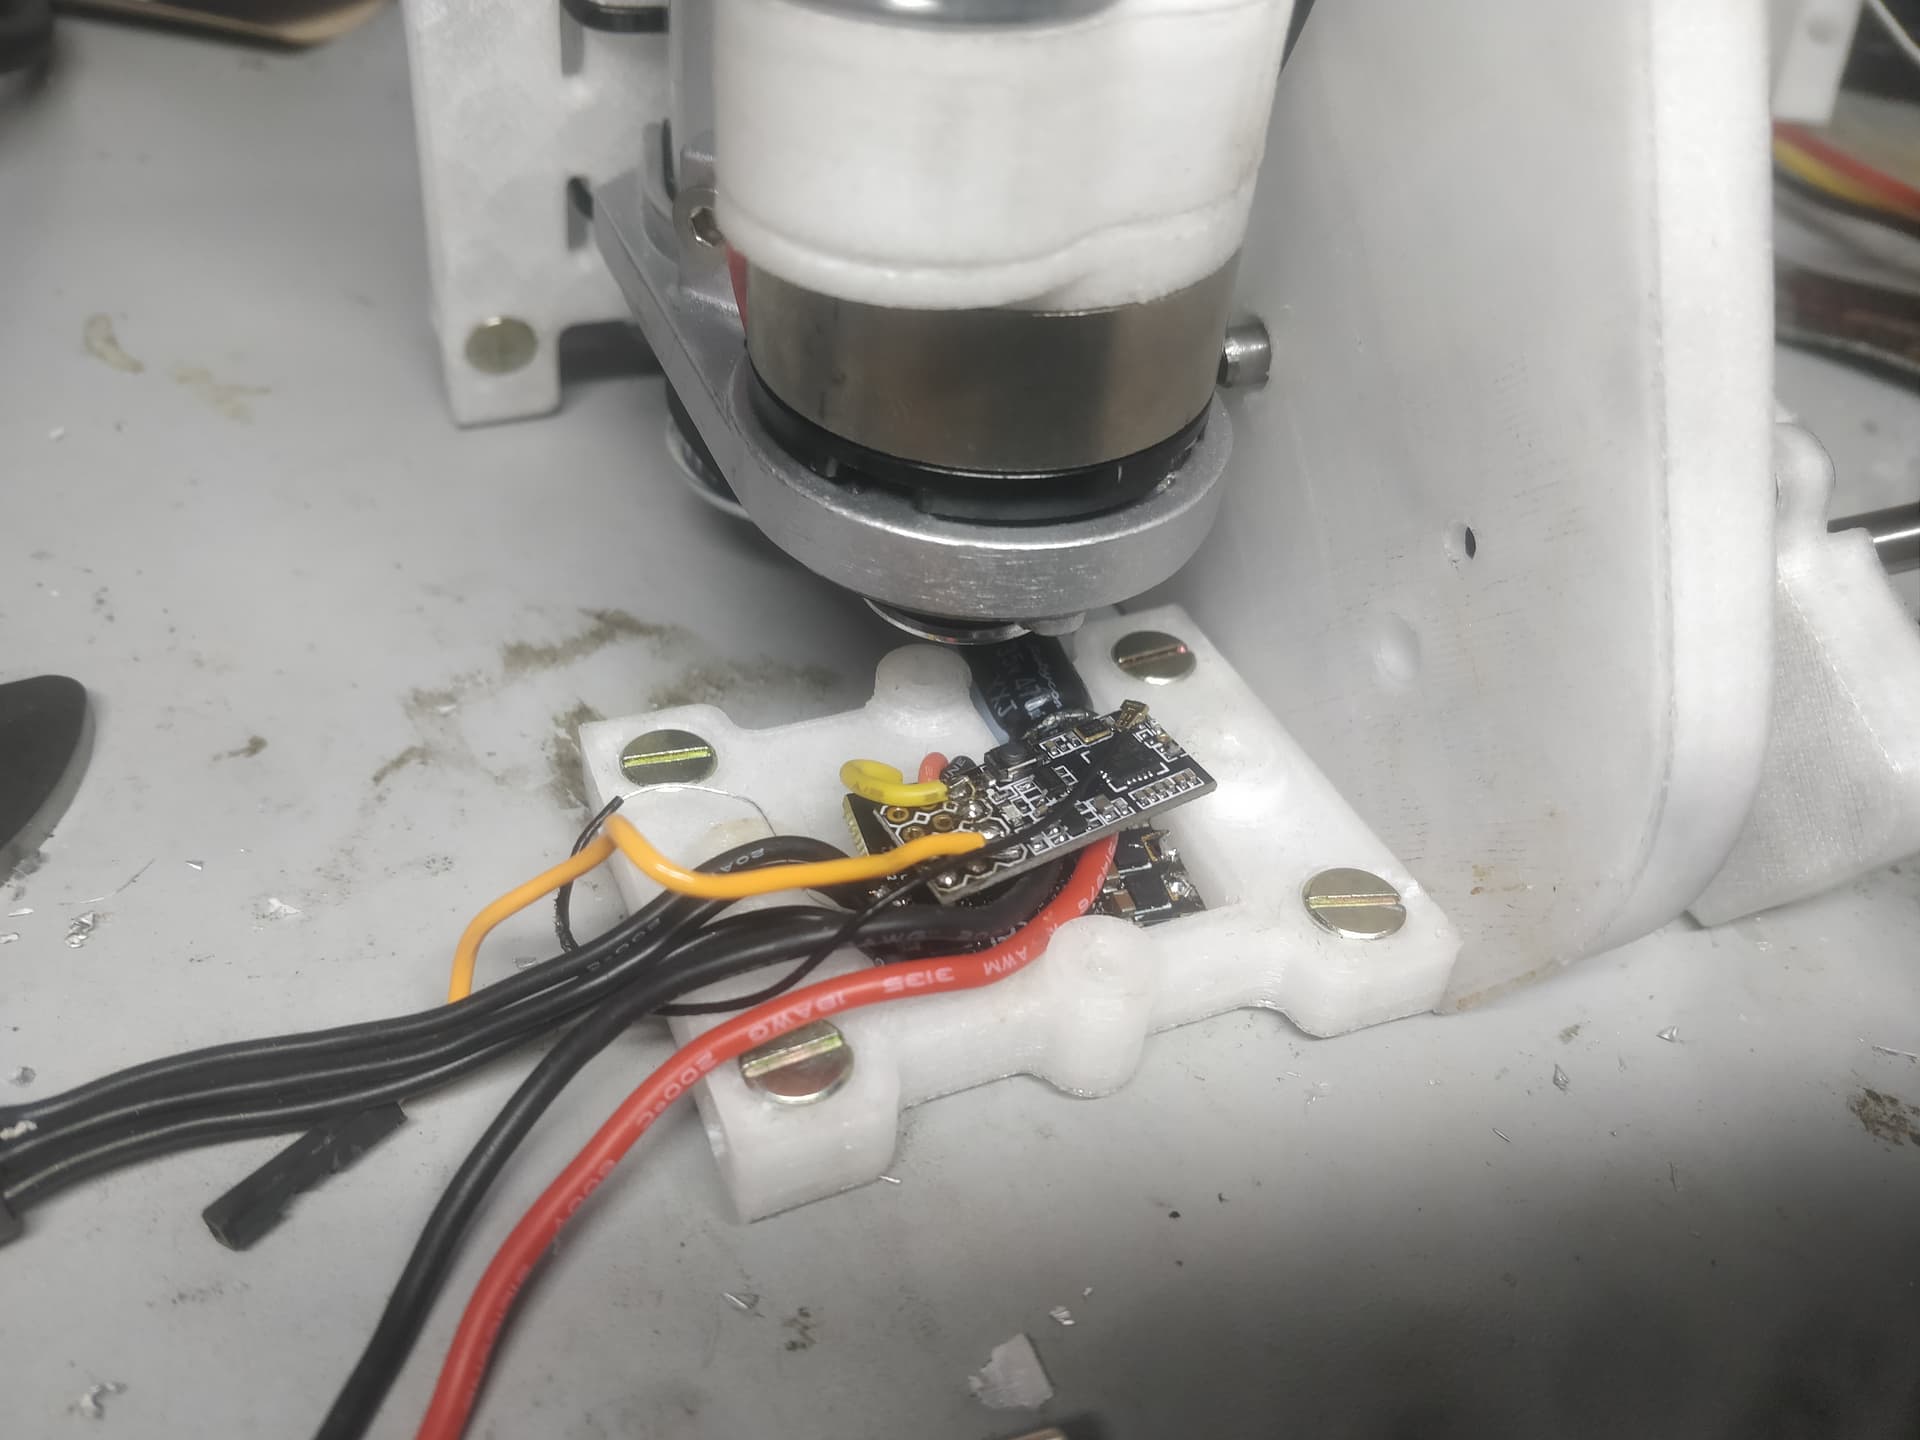
Limit switches have been hooked up on the actuator and it’s moving pretty well. I just refused the stock switches which hopefully isn’t a massive mistake. I did however hook them up properly to the BBB esc. No pissing about with diodes here, path of least resistance and all that - Hey, that’s nearly an electronics pun! Gosh I’m funny sometimes.
Continuing on that theme I neatened up the main nugget of the brain of the robot. Yet another shameless shout out to BBB for including dynamically sizable biodegradable electrical isolating pads completely free of charge with every order. This lil card tab goes under the Rx to stop it shorting when it’s heatshrunkeded into one tight tumour.
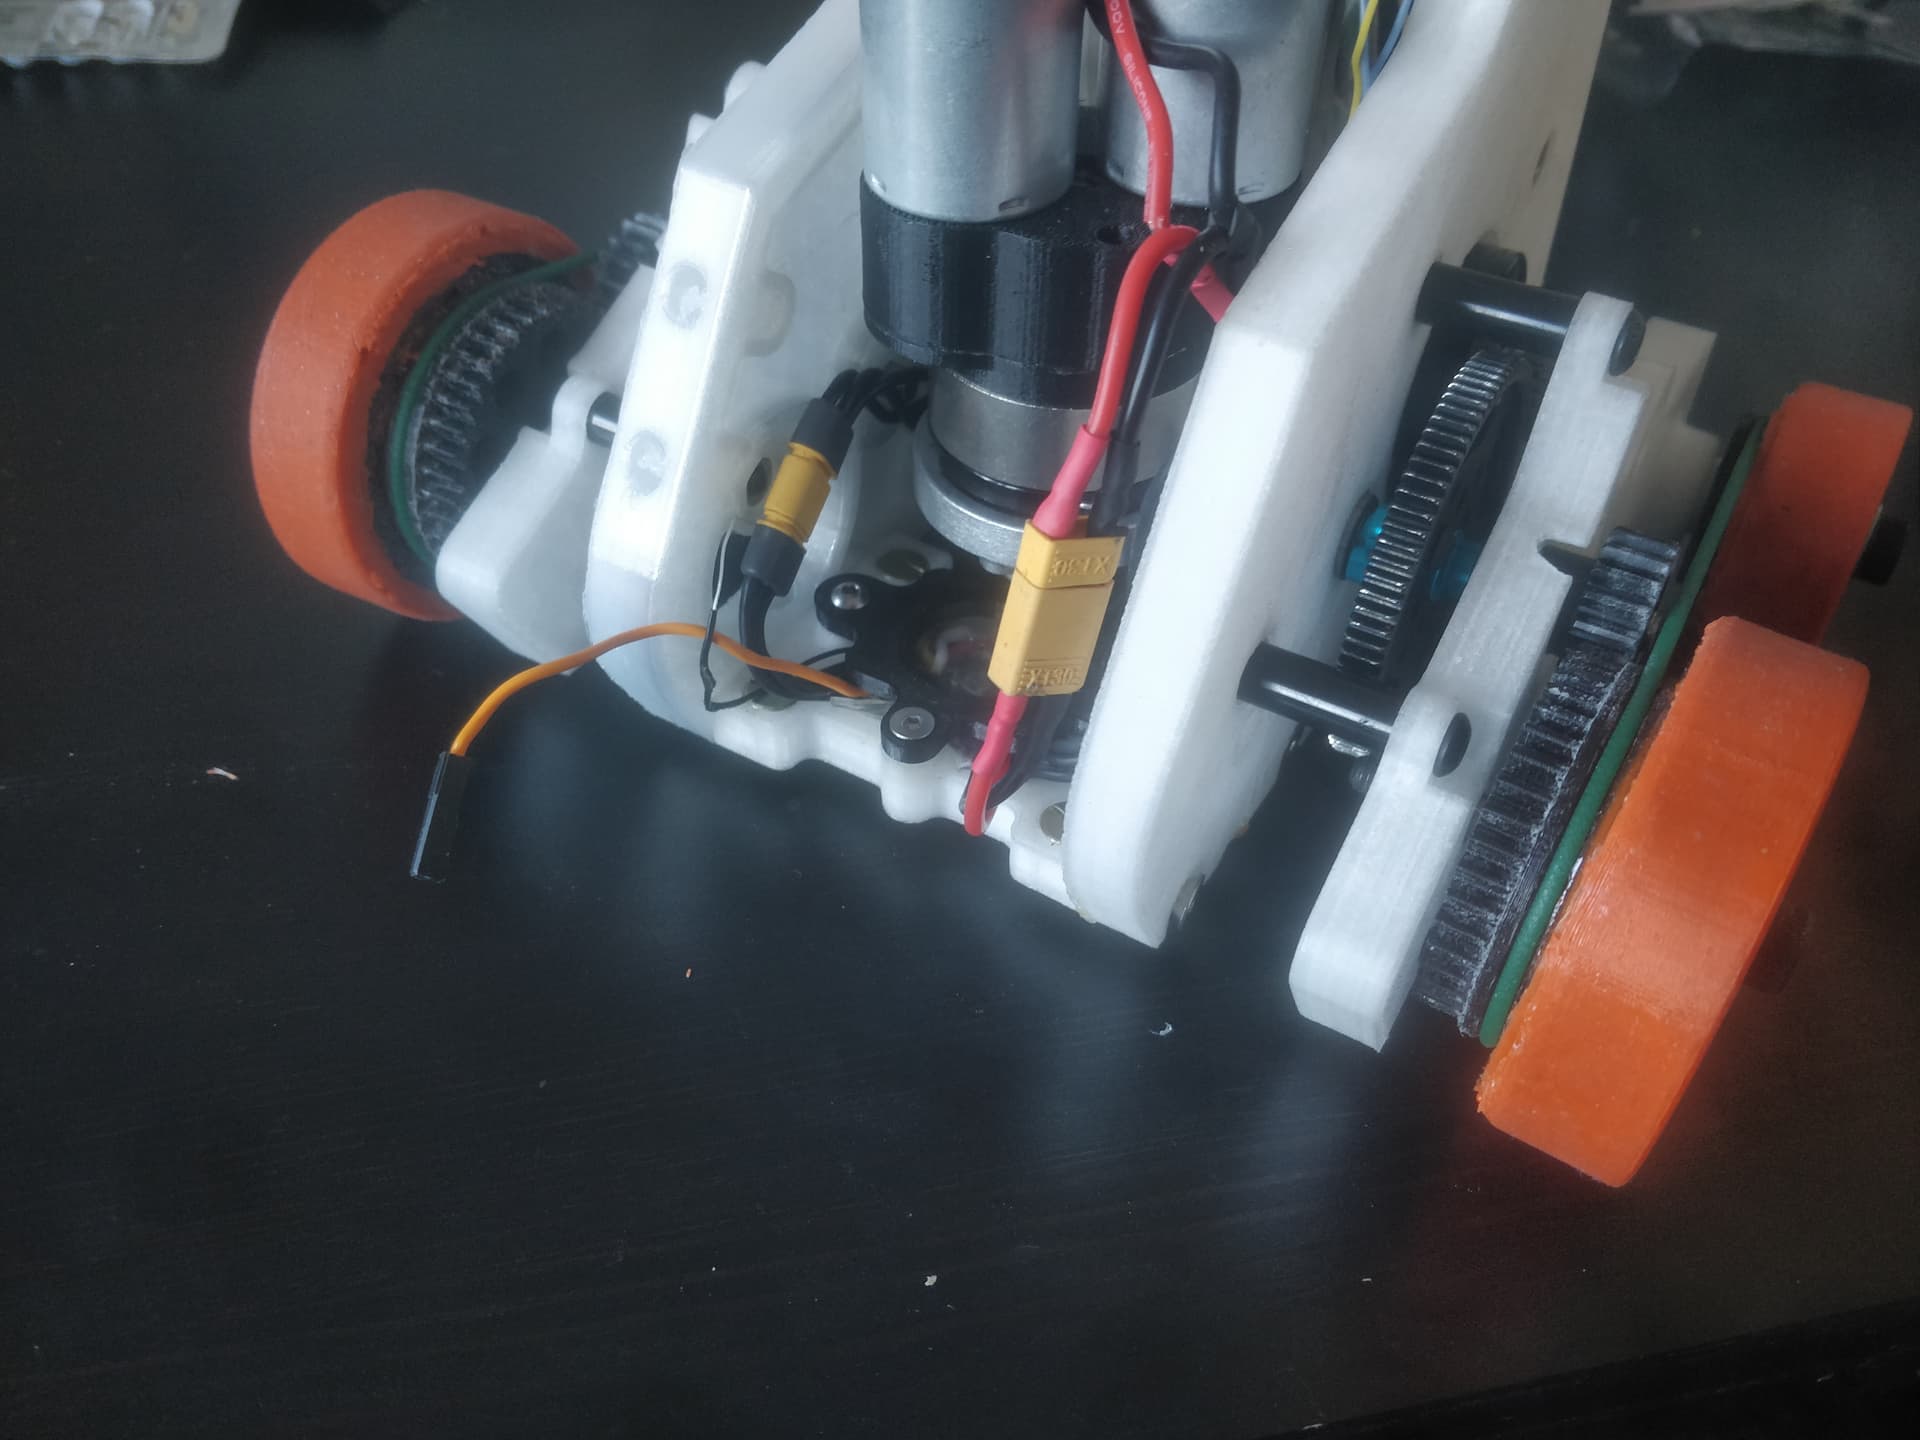
As previously mentioned it just sits in the seat of the robot’s trousers in a fairly neat little bracket. The motors just plug in down the side and the battery dodges the actuator and goes pretty much directly in, save for a gooseneck out on the positive side so I can sling the switch somewhere sensible. The actuator ESC is bravely mounted to the motor bodies with hubris and zip ties. The signal wire is just joined with a header pin but I might swap it to a bullet connector for a little more security.
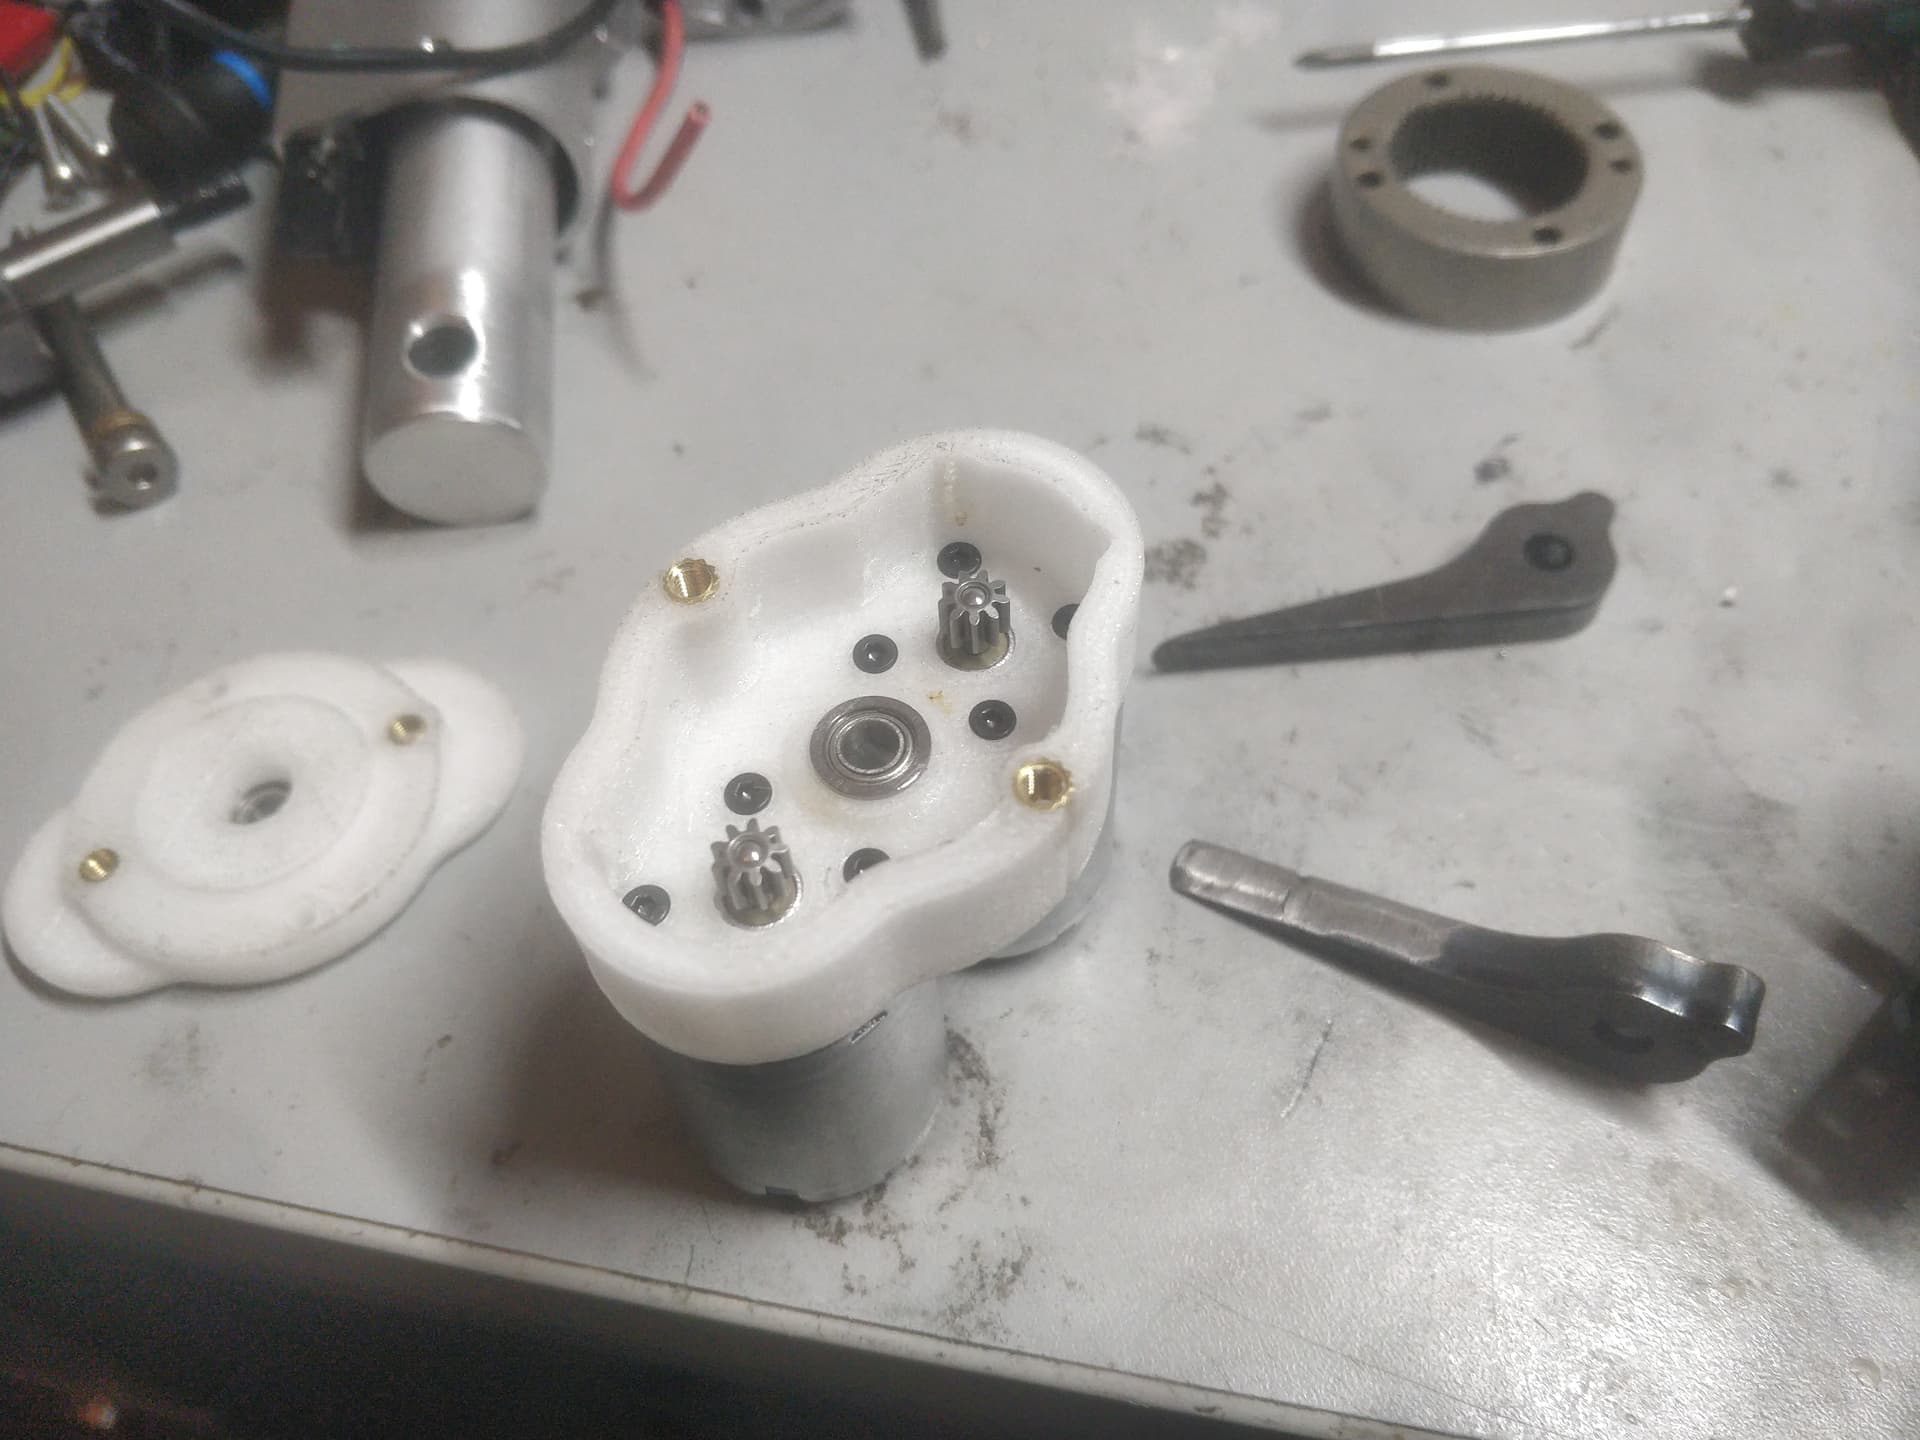
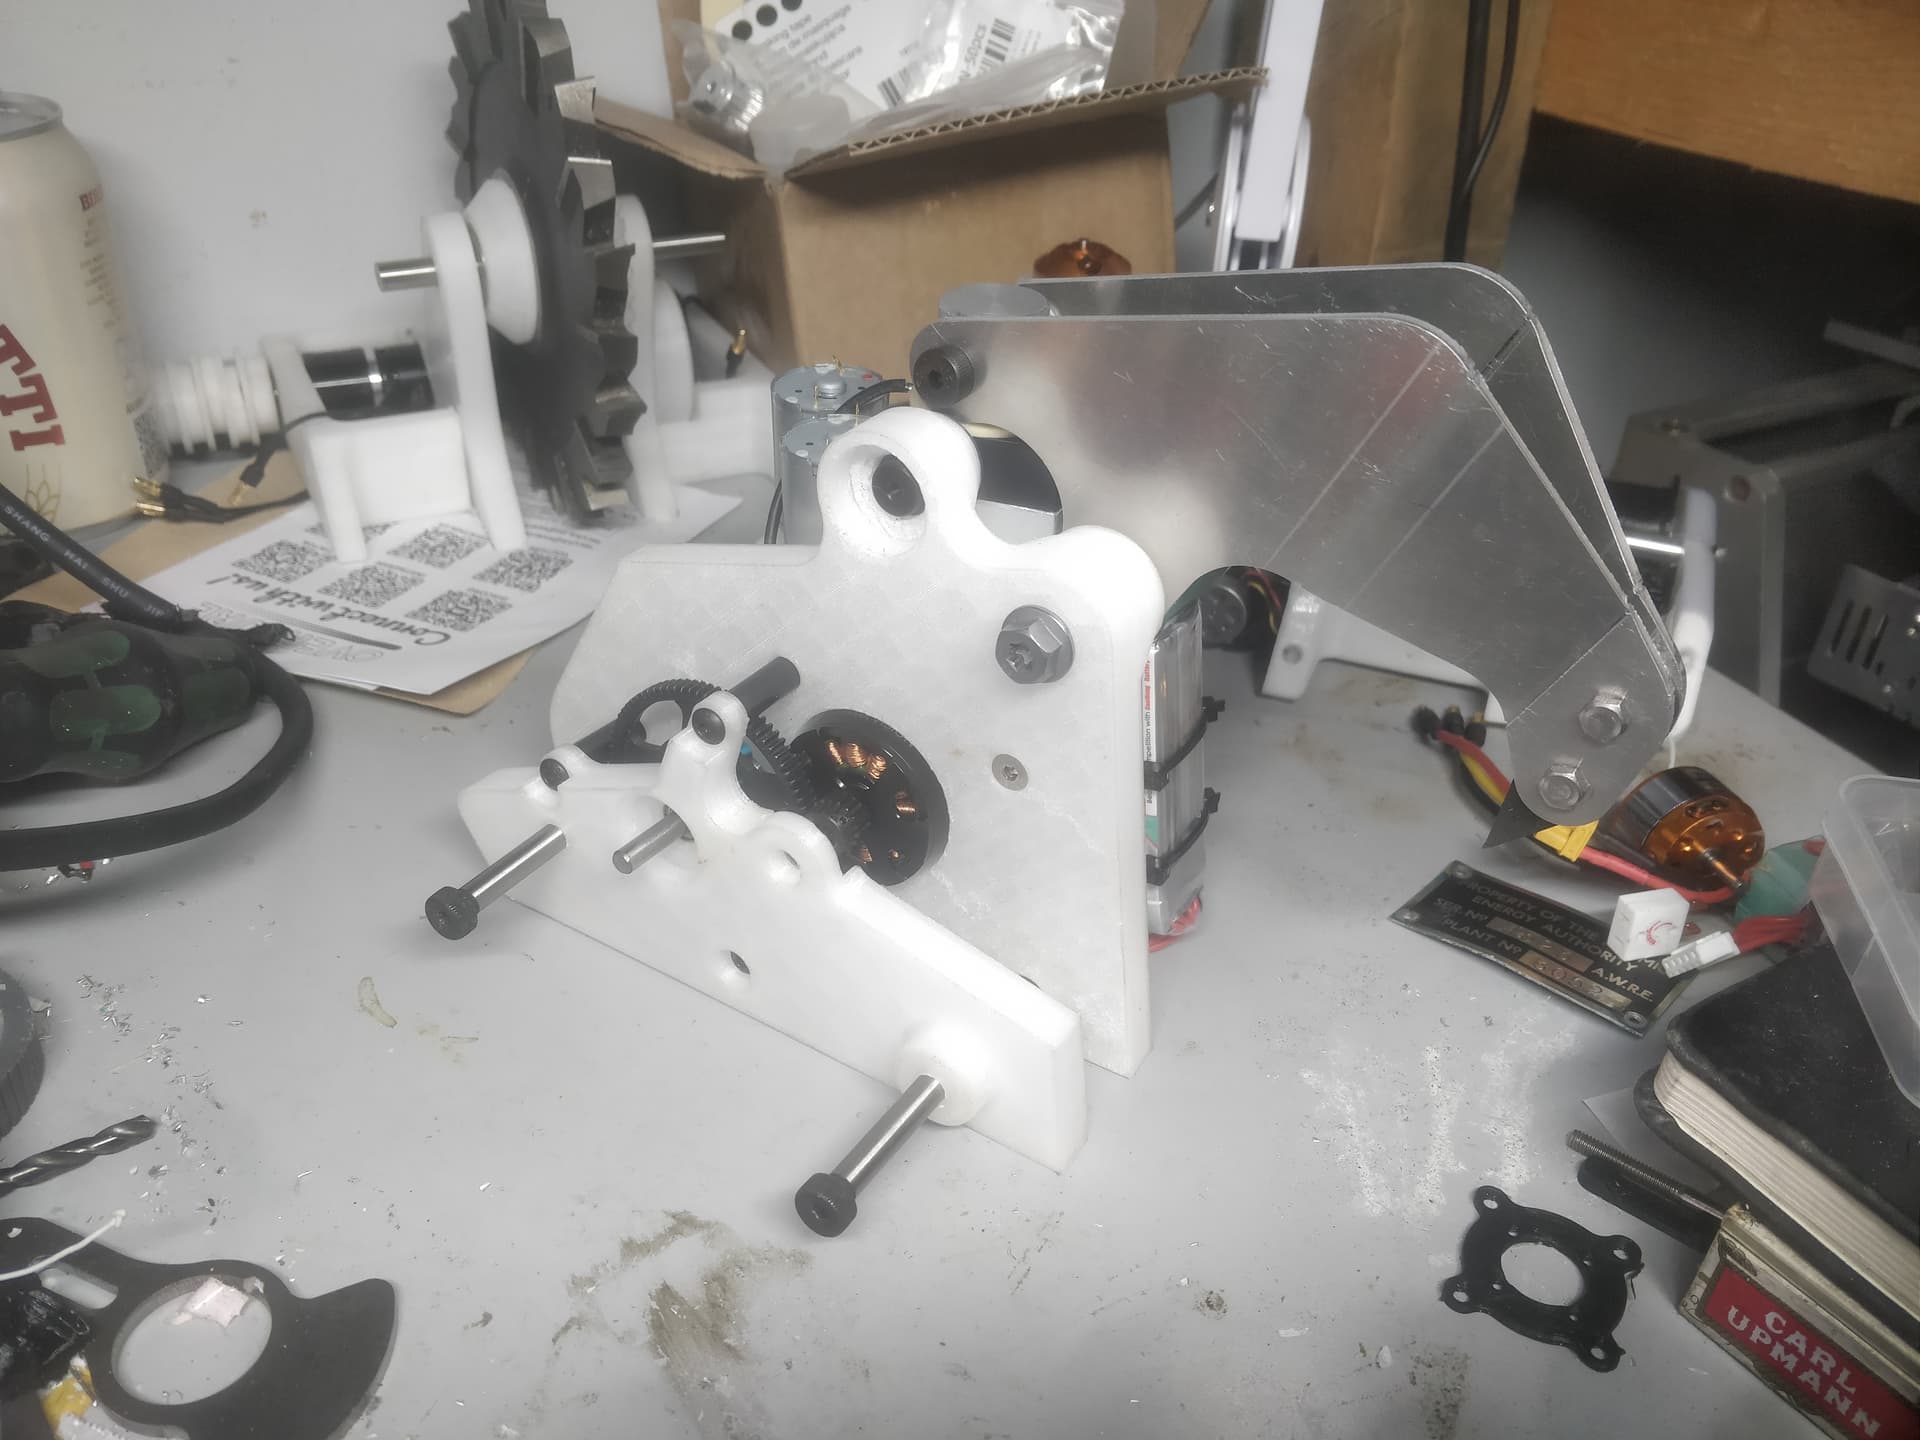
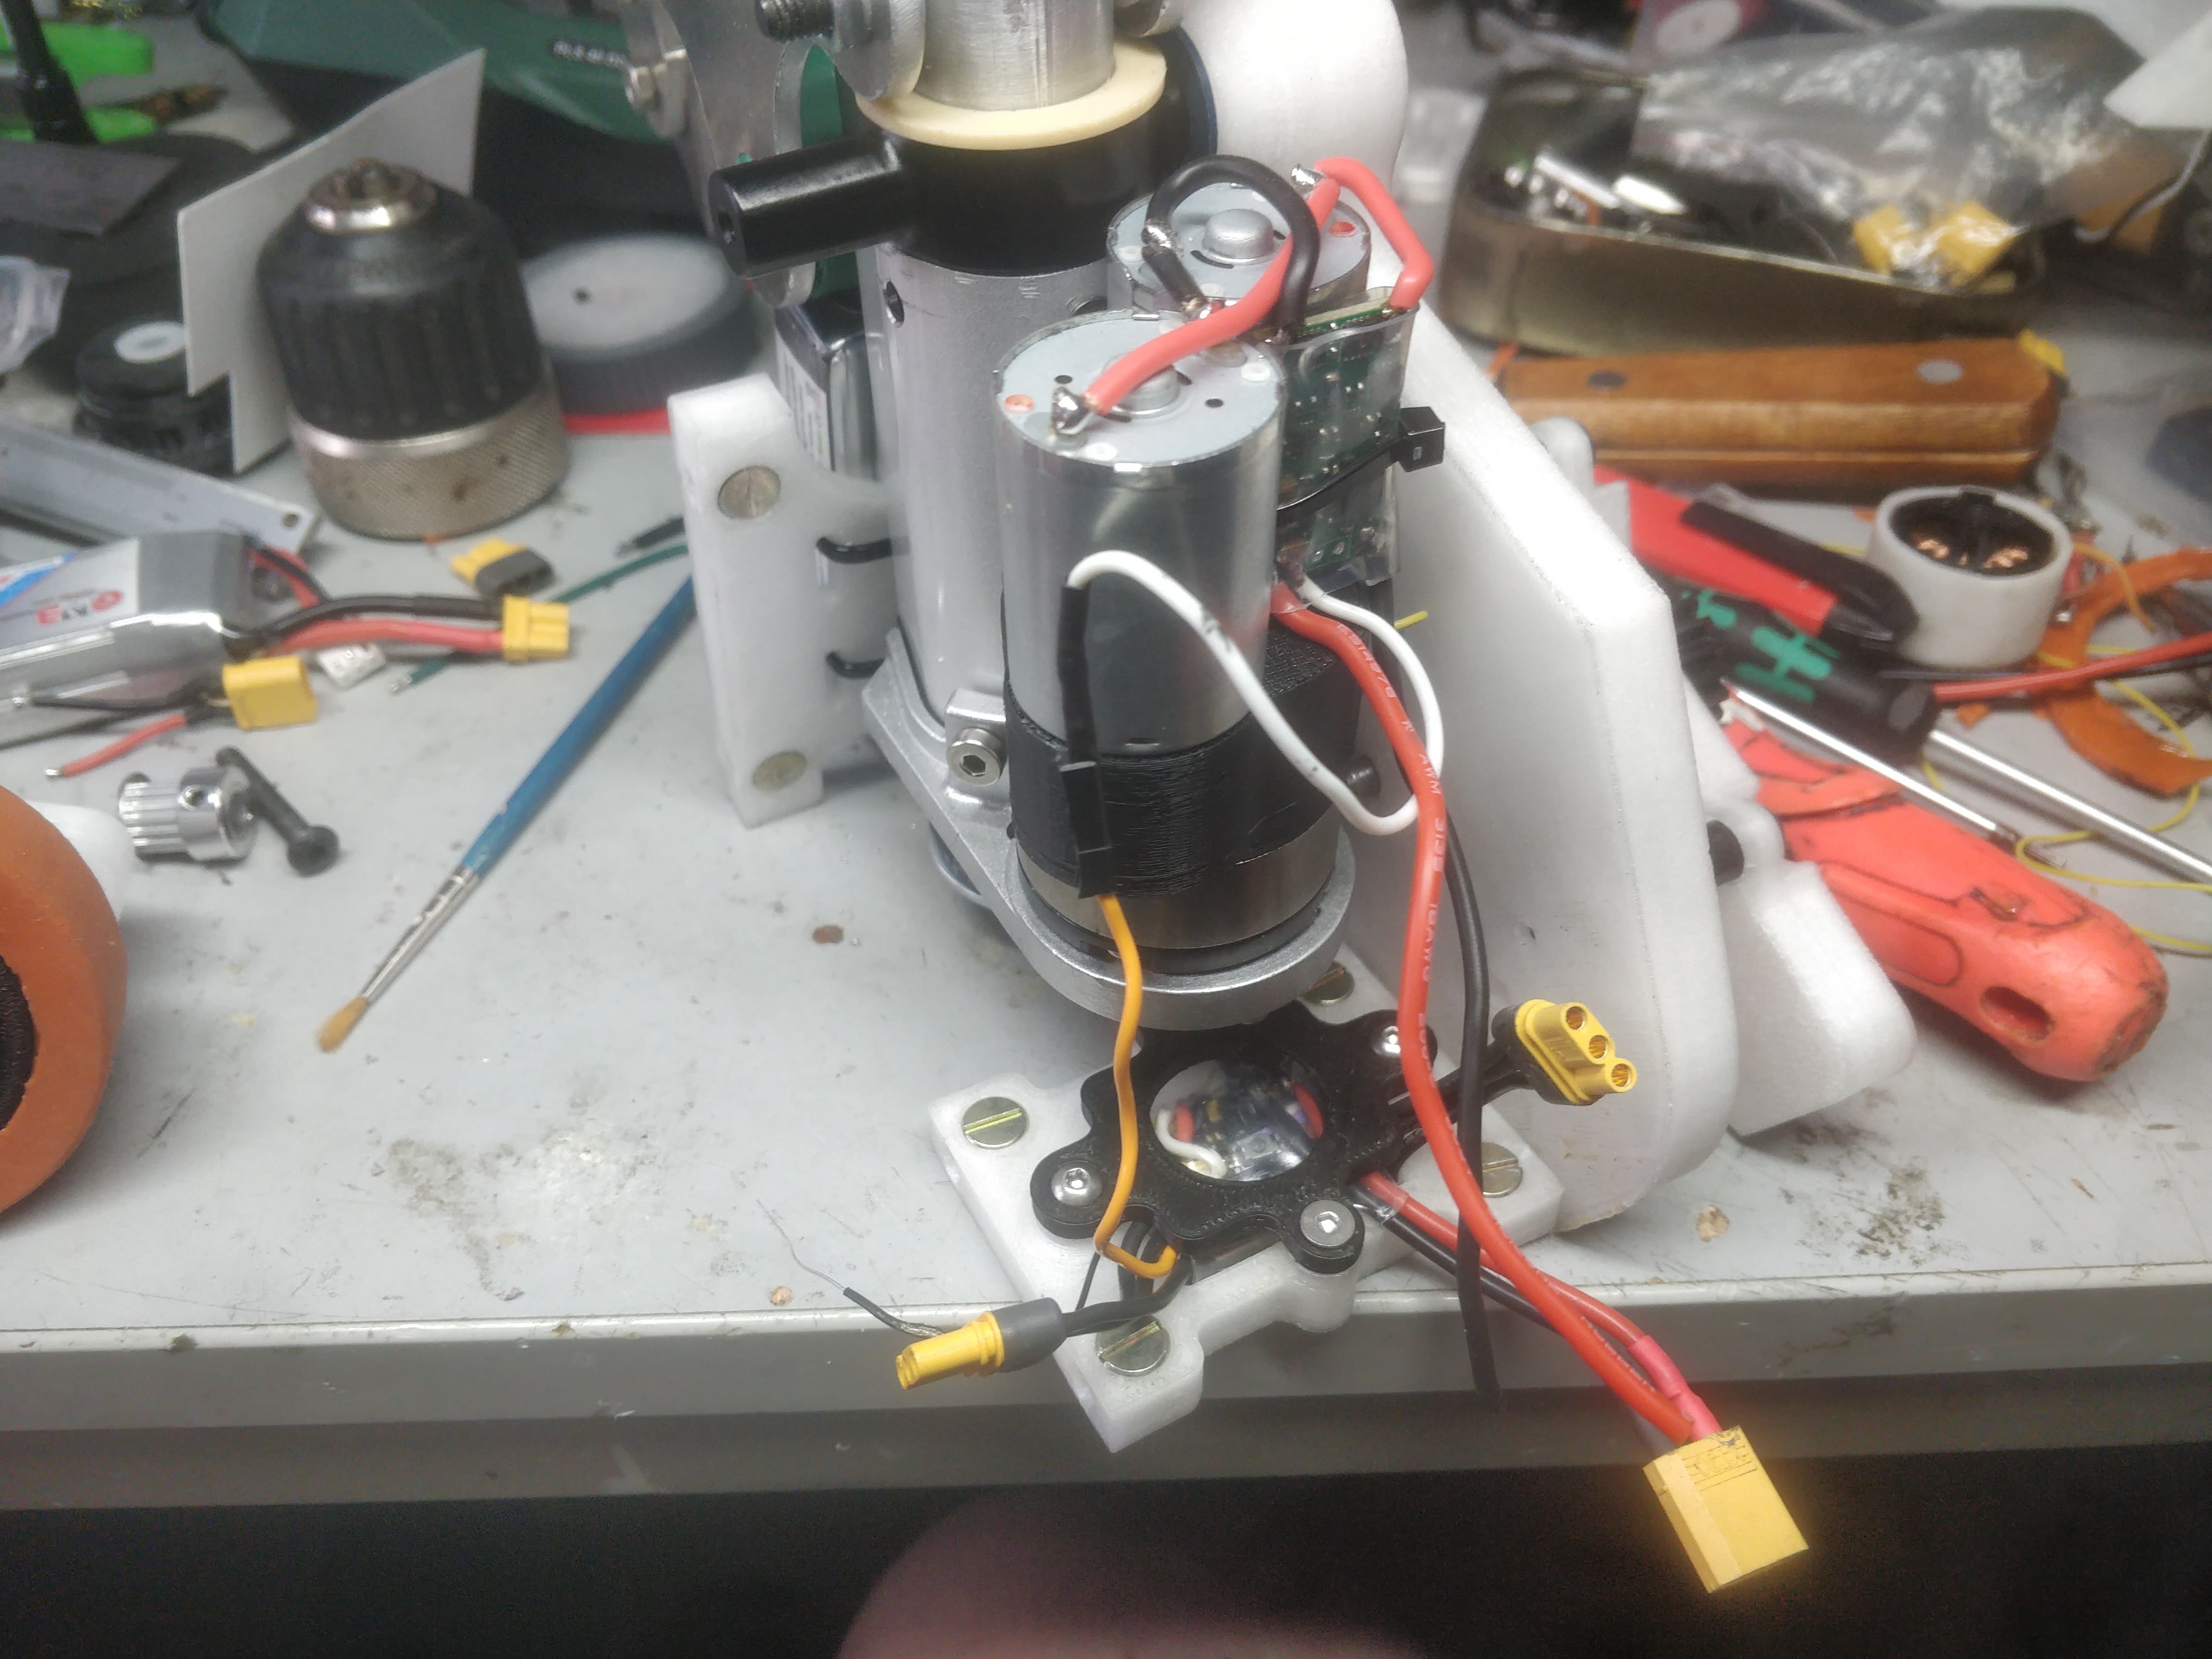
I started prepping the motors to get them as good as possible - in the last version the drive was pretty pitiful. One of the main reasons was flex causing inconsistent mesh and the pinions being on threads rather than a proper shaft. I reduced the motor output to 4mm and stuck a brass sleeve over that for them 5mm bore pinion gear. There is a stub shaft that is also put in place which gets a little bearing as a treat.
Potentially this is now an over constrained mess instead of unsupported nightmare but if you don’t go too far you’ll never go far at all.
I cooked up a pair of tyres and made myself a little belt. The other bulkhead is printing as I type and some more tyres are curing vibrantly in the corner so I’m tentatively planning to have a little drive by the end of the week.
As mentioned before I was pumping out a revised bulkhead. I’ve gotten pretty lucky (or my standards have just gotten super sloppy) that I have been able to get to this stage with a single design revision. The fitment for the RH bulkhead was pretty flawless so I just added in the geometry it was lacking - i.e end mounting screw points and some stiffening pockets.
On the face of it you would imagine they are for weight reduction but because I’m of the school of minimal infill and thick walls these could potentially add weight to a part. What I’m actually using them for is stiffening. They create a bit of a skeleton to what would otherwise be a large flat, hollow wobbly body. At 12.5% infill however they do end up being slightly lighter - though most of the “pockets” are effectively solid bracing. There is also An Hole which I can use to sling the switch out one side of and holes weigh nothing so I kept it mirrored for the other bulkhead.
Don’t look too shabby to be fair. Long print through - all dayer.
Everything nestles pretty neatly with the plugs added for motor quick swaps and making the chassis less of a pain to take apart and do anything with. It holds itself together just as it is and is now in a drivable state.
This is actually a pretty encouraging weight - it is heavy, sure but that is a functioning robot right there. It has no armour but the core elements are all there. I can see this going up by a fair % when everything is translated over to nylon but I have 200g to spend on a front armour plate (8mm HDPE in CAD which I could probably bring down to 6) and a lil wedge.
If push comes to shove I have made my peace with making a plastic jaw for Nippo as I’ll probably need one for fighting really nasty spinners anyway and that’s a good way to claw back ~150g. It will be an abject failure though.
the crusher looks fantastic, im intrested to see how the ali beak will hold up or if it will creep
those drive motors are pretty good, used something similar on my spinner for ages, very durable
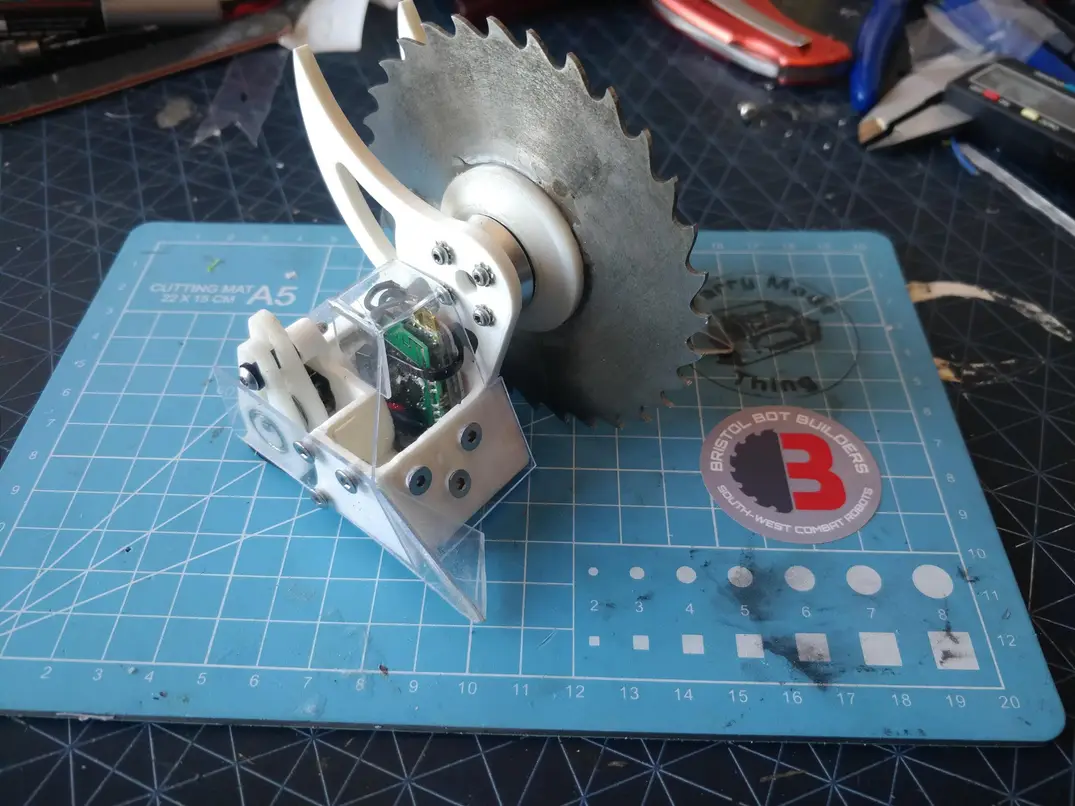
couldnt help but notice what appeared to be a vert using a horizontal milling cutter ![]()
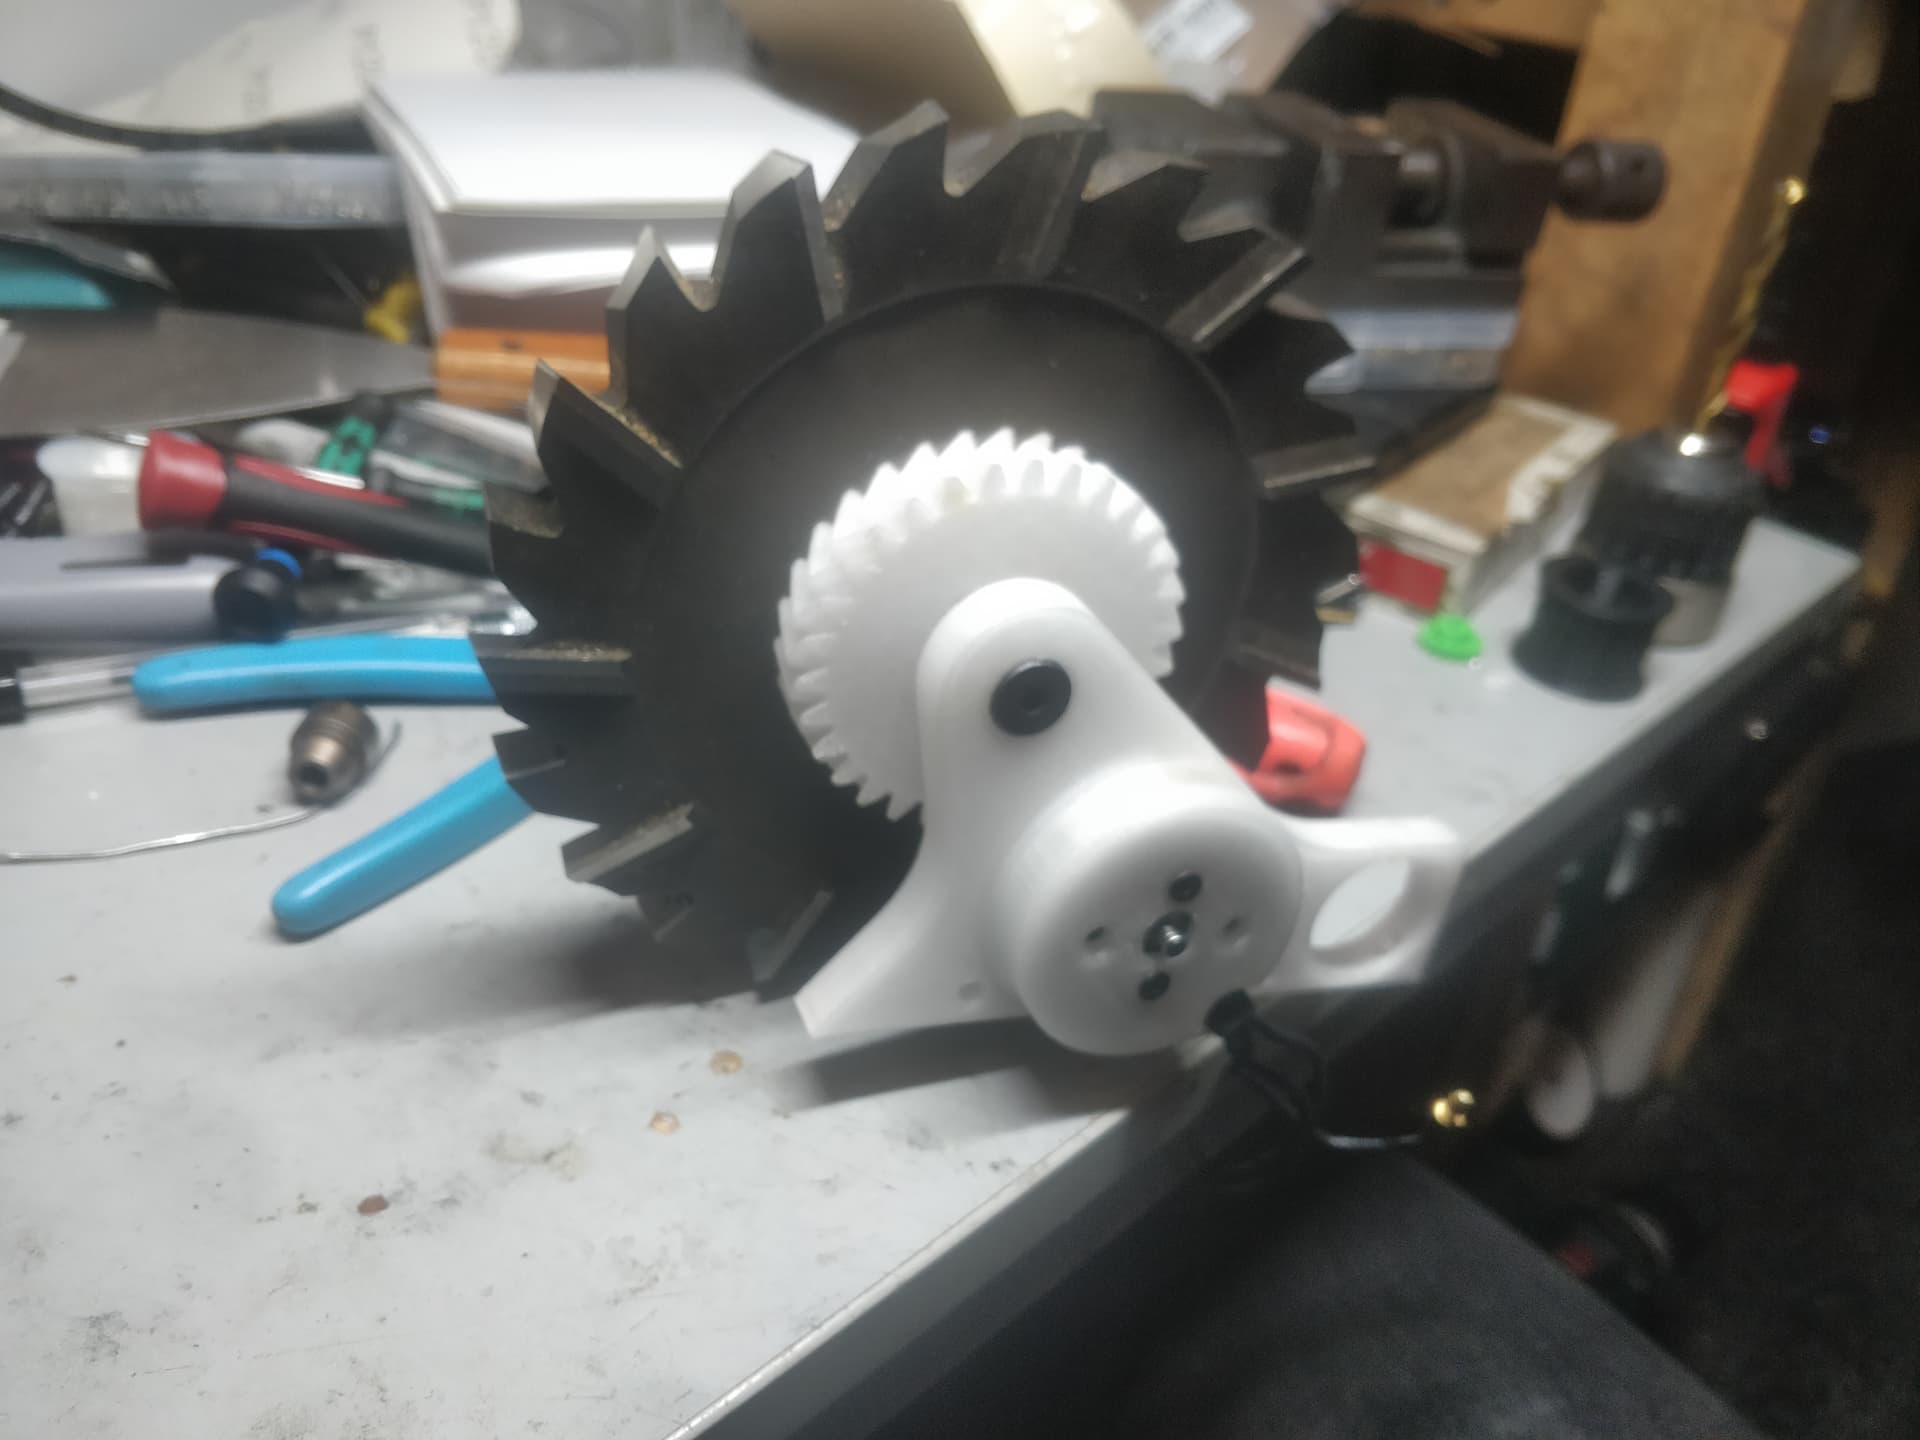
SPARES BOX beetle. I’ve been working on a spinner in the background using existing parts and what I can find. I picked up a 6" horizontal milling cutter at a tool sale for a fiver and it all grew around that. It weighs just shy of a kilo and I’m driving it with helical gears from a ~42mm multi rotor motor I’ve had for about a decade now.
Basically keeping it as a ‘new’ build so if BBB run a competition based on new robots again (like sub was) I can enter it for some casual fun. MotherLoader is done, Klaus has been rejigged into a spiritual melding of itself and Loader genes and Hard Nips is sort of the new flagship ‘Guy’ in my fleet so a walker is sort of a nice respite from regular robot problems.
I built an ant weight walker with a slitting saw for a disc and it was one of my favorite oddball children. So I figured I’d make a Shakma XL (Shakmassive?) it has a monstrous amount of energy storage at ~40% tip speed limits. I’m held up really on going much further by other projects and hours in the day. I can see it being back burnered for a long time but it might see some quiet tinkering in the background. It’s designed it just needs to be printed & revised. I might stretch to buying a new spur gear here and there if AliExpress choice has what I need when I get some overtime under my belt.